Download OS 1 OS1 - Edision
Transcript
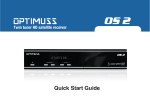
Single tuner HD satelite receiver
Quick Start Guide
OS 1
OS 1
- HD DVB-S / DVB-S2 Satellite Tuner
- LED display with IR & Recording Command.
- MPEG-4, H.264 & MPEG-2 Compliant
- Dolby Digital Plus, Dolby True HD supported
- 405MHz Dual Core Broadcom MIPS Processor
- S/PDIF Output for Digital Audio and Dolby AC-3 Bit Stream Output
- 256 MB NAND Flash /
- Firmware/ Software Upgrade: Through (Ethernet, USB Memory Stick)
8MB NOR Flash / 384 MB RAM
- Multi-Language OSD Menus
- Advanced Linux Operating System
- 256 Color OSD, Supports DVB Teletext & Subtitle
- 10/100 Mbps Full Duplex Ethernet Interface
- Automatic & Manual Service Scan supported
- 1 Smart Card Reader
- Multiple LNB control (DiSEqC) supported
- 3 USB 2.0 Port (1 x in Front & 2 x Rear)
- User Friendly EPG (Electronic Program Guide)
- Support Internal 2.5" SATA HDD
- External Power Supply
- HDMI & RCA Output
- Very Low stand-by Power Consumption (<0.5W)
OS 1
ACCESSORIES
Please check that the following contents are enclosed :
rt
ta
kS
e
id
Gu
ic
Qu
Quick Start Guide
SATA Cable
Power cord
AAA X 2 BATTERIES
Remote control unit
VIEWS
Front view
1
2
3
4
Power Button
Switch between operation and standby modes.
Up/Down Button
To move cursor up/down in menu mode or
to call up channel list in live mode.
5
6
Left/Right Button
7
OK
8
To move cursor left/right in menu mode.
To open service list or you can enter a selected menu or
function in menu mode.
Menu
Open main menu and select sub menu.
Display (LED)
To show status of RCU and Recording.
Smart card reader
To insert smart card.
USB
Connect to the External HDD or USB storage
with USB cable. (Max. 500mA)
Rear view
9
2
1
3
4
5
6
7
8
1
LNB INPUT
6
2
Audio / Video Output
7
3
S/PDIF
4
HDMI
5
Ethernet
Satellite tuner input from the LNB on a dish antenna.
Turn the receiver OFF first before connecting.
Connect to TV using RCA cable.
Connect with an appropriate optical cable to your HiFi system.
To connect HDMI cable for your HD TV.
Communication port via HTTP, FTP, NFS, Telnet and
Samba to access your Hard Drive or to upload channel lists.
This is also used to update OPTIMUSS OS 1's software.
10
8
9
10
2x USB
Connect to the External HDD or USB storage
with USB cable (Max. 500mA).
RS232
RS232C serial data port.
External Power Supply
Connect the power Supply (12V / 3A).
Power Switch
Turn AC Power On/Off.
Cooling Fan
with speed control function (on top cover)
INSTALLATION
1. Please refer to the Safety Instruction before powering on the device.
2. Connect OPTIMUSS OS 1 to your TV set using an HDMI cable or a RCA cable, etc.
Use an HDMI cable in order to view HD.
HDMI
RCA
3. Connect the coaxial cable (from the satellite dish) to the LNB INPUT of OPTIMUSS OS 1.
4. Power on the OPTIMUSS OS 1.
5. After booting up, Initial setup menu comes up for the installation according to your TV settings and
Antenna settings.
REMOTE CONTROL UNIT
MUTE : Mutes or unmutes the audio temporarily.
POWER : Switches between operation and standby.
HELP : Displays major important operation methods of OPTIMUSS OS 1.
This provides users with a quick guide of using OPTIMUSS OS 1.
HOME : Instantly moves to the top of the menu list.
END : Instantly moves to the bottom of the menu list.
TELETEXT : Switch between the teletext and TV modes.
SUBTITLE : Display the subtitle language list.
Zoom : To zoom the screen In/Out.
LIST: Open recorded file menu.
MEDIA : Open media file list.
TIMER : Start timer function.
VOL. +/- : Increase/Decrease the volume (Volume up/down).
EPG : Displays the Electronic Program Guide (EPG) information if provided.
AUDIO : select an audio track and a sound mode.
PROGRAM +/- : Move in menus. In viewing mode, you can operate CH+/- by pressing UP/DOWN button.
MENU : Open main menu & select sub menu using by navigation buttons.
EXIT : Close and return to the previous menu and screen.
Navigation Keys : Navigates up/down and left/right on the menu options. Up/down keys are used to call up the channel list.
OK : Select a menu, or confirms the selected operation. Also displays the channel list while watching a programme.
SAT : Open channel list according to satellite.
INFO : Displays the Electronic Program Guide (EPG) information if provided.
NUMERIC KEY (0~9) : Control the numerical operation and change the Channel/Service number directly.
PREV (<) : Return to the previous channel/service or move to the end of the Service List or the Play List.
NEXT (>) : Go to the next channel/service or move to the beginning of the Service List or the Play List.
COLOR BUTTONS : Activates certain menu functions. Usage instructions are shown in each OSD menu.
PVR FUNCTIONS : Control the PVR functions in PVR Mode.
TV : Switch to TV mode.
RADIO : Switch to Radio mode.
SAFETY INSTRUCTIONS
Please read the safety instructions carefully before using the OPTIMUSS OS 1.
The manufacturer takes no responsibility for incorrect handling of the OPTIMUSS OS 1.
* For sufficient ventilation,leave enough space.
* If unused for a prolonged amount of time,turn the power OFF.
* Do not cover the OPTIMUSS OS 1's ventilation openings with items such as newpapers,tablecloths, curtains etc.
* Do not expose the OPTIMUSS OS 1 to liquid,moisture,direct sunlight and extreme weather.
* Do not place open flame sources,such as lighted candles, near or on the OPTIMUSS OS 1.
* Do not place any containers with liquid,such as vases, on the OPTIMUSS OS 1.
* Do not connect or modify cables while the OPTIMUSS OS 1 is connected to the power.
* Do not remove the cover. Risk of electric shock!
* Do not touch the OPTIMUSS OS 1 with wet hands. Risk of electric shock!
* Do not put any metal items into the slots or ventilation openings.
* Please disconnect your OPTIMUSS OS 1 from the main power during thunder or heavy storms.
* Disconnect the main power cable if the power cord is damaged.
* Cleaning : Disconnect the main power cord before cleaning the cover. Use a slightly damp cloth without cleaning agents.
* Connect the OPTIMUSS OS 1 only to suitable sockets. Do not allow overloads to occur.
* The socket-outlet shall be installed near the equipment and shall be easily accessible.
WARNING!
* Modifications and changes to the OPTIMUSS OS 1 lead to loss of warranty.
* Incorrect software installation leads to loss of warranty.
* This instruction might be modified without prior notice.
DISPOSAL INSTRUCTIONS
1. When this crossed-out wheeled bin symbol is attached to a product it means the product is covered
by the European Directive 2002/96/EC.
2. All electrical and electronic products should be disposed of separately from the municipal waste stream
via designated collection facilities appointed by the government or the local authorities.
3. The correct disposal of your old appliance will help prevent potential negative consequences
for the environment and human health.
4. For more detailed information about disposal of your old appliance, please contact your city office,
waste disposal service or the shop where you purchased the product.


