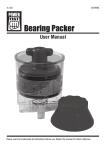
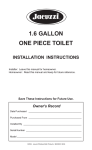
1
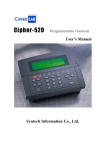
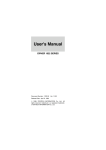
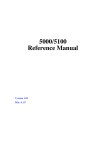
Changing your Oil By CeeAre (Filter and plug pictures by Earlbear) What oil and why? The subject of “What oil?” can be greatly shortened to what oil NOT to use: X Do NOT use Quaker State or ANY paraffin based oil. They create a “sludge” issue that is a motor killer. X Do NOT use any oil that has the legend “Energy Conserving” on the circular label found on the container. This means it contains “Moly’s” that will cause the clutch to slip in a shared sump system (motor oil is doing double duty, lubricating the engine AND bathing the wet clutch) such as the Aero and most other metric bikes. X Do NOT use Honda brand, Kawasaki brand, Harley brand or any other “Logo’d” brand of oil, regardless of what your Motorcycle Owner’s Manual might say. These oils are private labeled by Only God Knows Who, typically the lowest bidder. You do NOT know what you are really getting and you are paying a premium price. You can check the label for the API SG, SF, whatever certification if you want, but basically any name brand oil you find is going to meet and/or exceed those What weight to use. For most US climes 10W-40 is gonna fill the bill. If you live in Fargo, ND and ride year round, you might want to go to 5W-30 Warning: Many brands of oil (such as Castrol Syntech) that do not have the “Energy Conserving” logo on their 10W-40 do have that legend on their 5W-30. CHECK THE LABEL! Conversely, if Guam is your riding habitat you may want to go to 15W-50. Frankly, anywhere in those ranges is going to be just fine. When to change and to what? Ahhh, now here’s the ticklish part. When to do that first oil change and when to consider going to a synthetic depends largely on how you determine to break your bike in. If you’re conservative and want to break the bike in slow as per Honda’s recommendation, follow the manual’s advise and change the oil at the recommended 600 miles for the first change. DO NOT GO TO SYNTH AT THIS CHANGE. Read on for the “why” of this. If you’re not conservative and will ride the bike hard, things are different. For detailed technical info on why this is not the lunacy that it sounds, check out this site: http://www.mototuneusa.com/break_in_secrets.htm To boil the article down (along with some gross oversimplification), what he is saying is that your rings have high and low spots, and are being “seated” via the cross-hatchings on the cylinder walls. By breaking it in slowly, you are attacking the high spots, but as they wear down they are erasing the cross hatching. By the time you get to the lower spots the cross hatchings are largely gone, and those low spots never get totally seated. By running the bike pretty much full out from the get-go, you are seating the entire ring circumference a LOT quicker, attacking the low spots while the cross hatching is still available. Now back to the “when” issue. If you have used the “ride it hard” technique, change that original oil within the first 100 miles. Remember, this is “break-in” oil from the manufacturer and is of a thinner viscosity than “normal” oil in order to facilitate that needed break in. Now you can go to synthetic if you so desire. Remember I mentioned to not go to synth at the first oil change when using the conservative break in method? Well here’s why: using synth basically STOPS the break-in process. At 600 miles of conservative riding you are NOT ready for that process to be stopped yet. Wait for that next oil change. I recommend (meaning that I am entering that spooky area called “opinion”) that next change come at around 3500 miles and that the oil be changed every 3K miles (for dino oil) to 4K (for synth). And yes...I know...this is FAR more frequently than the manual asks for, and far more frequently than a synth oil manufacturer such as Amsoil says is necessary. As to the manual...8000 MILES? Are you kidding?? First, I wouldn’t treat a $200 Briggs and Stratton lawn mower like that...why would I do it to my pride and joy? Second, remember, the people that published your MOM are the same ones that would like very much to sell you a new bike every two years. Third, again in my humble opinion, there is ABSOLUTELY NOTHING you can do to more greatly extend an internal combustion engines longevity than have clean, fresh oil in the crankcase. Nothing. I firmly choose to err on the side of safety. Why synth at all? As mentioned before, synth oil basically stops the break-in process, thereby extending the engines life. Also, most users report a smoothing and quietening of the gears/transmission. What about the filter? Please note that I carefully avoided recommending any particular brand of oil. It’s a volatile subject with most riders having a strong loyalty to one brand or another. And, with the noted exceptions above, I’m not aware that any of those major brands constitute a danger to the bike as long as clean, fresh oil is kept pumping through its veins. Unfortunately, I cannot be quite as objective about the filter. While I would put Fram and any of its subsidiary products (which, by the way, includes the highly touted and very expensive K & N oil filter) in the same category as Quaker State and suggest avoiding those cardboard/cellulose based products, there are a multitude of good filters out there. I would also put out a caveat concerning the previously highly touted Wal-Mart Super Tech filter. Since this filter changed specs a few years ago the product was cheapened to a questionable level. But one seems to rise head and shoulders above the rest, not only in professional testing, but in intense, if not quite as scientific, testing on the Aero Forum itself. The Purolator Pure One PL14610. The MOST media of any filter available for the Aero, ZERO reports of ANY failures of the valves EVER, the top ranked filter in all SAE testing. Easily available at any auto parts store and affordable at about $6 a copy. Is the NAPA Gold filter good? Certainly. So are lots of others. But the Pure One seems to outdistance its competitors by a fairly wide margin. Finally - Changing the oil What you need 3 quarts of quality non “energy conserving” oil Oil filter Pan to catch draining oil 17mm socket to remove the drain plug Filter wrench to remove the oil filter. Suggested: Meancycles PART NO: BI4201 or a cap wrench, available at any auto parts store. Just make sure he one you buy fits the filter you are removing. New oil filter A funnel Some rags Some newpapers or a dropcloth For this part the bike should be on the kickstand – not in a vertical position. 1. Warm the bike for one minute, no longer. No need to go messing with a seriously hot bike with seriously hot oil. Just warm it enough to get the oil flowing. 2. Place the low-sided receptacle under the oil pan. Make sure you have some old newspapers or a dropcloth under the bike. Things spill. Just happens. 3. There is a drain plug on the bottom, left side of the engine case, toward the front of the engine. Use a 17mm boxed end wrench to remove it. Note that there is a “washer” or more accurately a “gasket” that will either come off still on the bolt, stay stuck on the oil pan, or fall into the draining oil. Do not lose this. You’ll need it later. Inspect it for damage or wear, replace if necessary. 4. Take a break. Let the oil thoroughly drain. 5. Once ALL draining has stopped, replace the gasket and bolt, using the “Guttentight” method, or check your Service Manual for torque specs here. Guttentight works fine. WARNING: Failure to replace the gasket can result in stripping the threads on the oil pan. 6. Place the drain receptacle under the left rear area of the motor, under the filter. Remove the filter and allow to drain. If this is the first oil change, be prepared for that filter to be on there with an INCREDIBLE amount of torque. 7. Using the funnel, discard the used oil into a proper receptacle for transport to an oil reclamation center. Most auto parts stores (Auto Zone, Pep Boys, Advance Auto, etc.) are such reclamation centers. 8. Once the filter area is thoroughly drained use a lint-free rag to clean around that area and the entire bottom of the oil pan. This will help in checking for leaks when done. 9. Open one of the containers of oil (some say to use a dab of the old oil...whatever) and apply a film of oil around the gasket of the new filter with your finger. 10. Screw the new filter on hand tight, then muscle it another 1/4 to 1/2 turn beyond that. DO NOT USE THE FILTER WRENCH TO TIGHTEN THE NEW FILTER! 11. Remove the dipstick and using the funnel (having wiped it out with the lintfree rag), install 2 1/2 quarts of oil. 12. Replace and screw in the dipstick. WARNING: NEVER REMOVE OR REPLACE THE DIPSTICK WITH THE ENGINE RUNNING! There’s moving parts down in there and no good can come of it. Also, NEVER START THE BIKE WITHOUT THE DIPSTICK SCREWED IN. That area becomes pressurized, and a heck of a mess can ensue. 13. Start the bike and let idle for one minute. Visually inspect the undercarriage for leaks during this time. 14. Shut the bike off, let it sit for one minute, sit on it, bring the bike up to level (off the kickstand), remove the dipstick (checking to insure that the gasket is still attached above the threads of the dipstick and NOT sitting on the opening or down at the bottom of the threads), wipe it with a lint-free rag, and place the dipstick back atop the oil hole. Do NOT screw it in. Remove the stick and read the level. Theoretically, you SHOULD show a little low, since the specs ask for 2.7 qts. or so, depending on a few variables. Repeat steps 12 through 14 if necessary, adding just a little oil at a time until the level shows at mid range or just a smidgen on the high portion of the flat area on your dipstick. DO NOT OVERFILL THE CRANKCASE! This can at best cause a mess in your breather, at worst blow some seals. You’re done. Go riding.