1
Disassembly Procedures
!
To avoid risk of electrical shock, personal injury or
death; disconnect power to unit before servicing.
WARNING
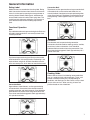
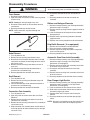
Warming Drawer Removal
1. Pull warming drawer out as far as it will go.
2. Located on each side of the track is a plastic lever
inside the track location. Push the left side down and
the right side up to release slide from track and pull
forward.
3. When installing warming drawer, align slide with track
and push warming drawer into place.
Warming Drawer Element
1. Remove warming drawer, See "Warming Drawer
Removal" procedure.
2. Remove screws securing element to bottom and
back of chassis.
3. Pull element forward until element end are through
the back of the unit.
4. Disconnect wire terminal from element.
5. Reverse procedure to reinstall element.
1. Remove oven door, see "Oven Door Removal"
procedure.
2. Place door on a protected surface.
3. Remove screws securing bottom trim to oven door.
4. Slide outer oven door glass and trim towards the
bottom of the oven door and remove.
5. Detach right and left trim pieces for outer door glass.
NOTE: Proceed with the following steps for door hinge,
door handle, and inner door disassembly.
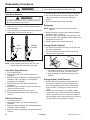
Oven Light Assembly
Oven Light Bulb/Oven Light Socket
NOTE: Requires removal of unit from cabinet to replace
oven light socket.
1.
2.
3.
4.
Frameless Door Disassembly
Turn off power to unit.
Open oven door to gain access to oven light.
Unscrew (counterclockwise) glass knurled dome.
Unscrew (counterclockwise) oven light bulb.
NOTE: To avoid damaging the new bulb and
decreasing life of the bulb, do not touch new
bulb with bare hands or fingers.
Hold with a cloth or paper towel.
NOTE: Proceed with the following steps for oven light
socket removal.
5. Remove unit from installation position, see
“Removing and Replacing Oven” procedure.
6. Disconnect or unplug the power cord leading from
unit to fuse box or junction box depending on unit.
7. Remove screws securing back cover and remove.
8. Carefully displace fiberglass insulation away from
rear of light socket.
9. Push inner assembly of light socket towards rear of
range, or twist out, depending on style of base.
10.Disconnect wires from light socket.
11. Reverse procedure to reinstall light socket.
Reposition insulation around lamp socket. Do not
overtighten.
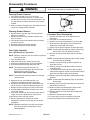
6. Remove screws securing door hinge to oven door
chassis.
NOTE: Proceed with the following steps for door handle
and inner door disassembly.
7. Remove screws securing top door handle trim to
oven door chassis.
8. Remove screws securing door handle brackets to
inner door panel.
9. Lift upward on the lower side of the door handle to
release side alignment screws and rotate towards the
top of the oven door to release and remove.
10. Remove screws securing door handle to door handle
brackets.
NOTE: Proceed with the following steps for inner door
disassembly.
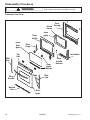
11. Remove screws securing lower door glass retainer to
door baffle and remove.
12. Slide inner door glass downward to release from
upper door glass retainers and remove.
13. Remove screws securing door baffle to door lining
and remove.
14.Remove insulation from oven door.
15. Lift inner glass and glass frame from oven door.
16. Reverse procedure to reassemble oven door.
NOTE: Reposition fiberglass insulation around oven
light socket to eliminate possibility of heat
related problems.
©2004 Maytag Services
16025644
27