1
rsit
Un
ive
ert
fH
yo
for
dsh
ire
ire
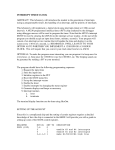
Abstract
The Motorola MC68000 family of microprocessors is now widely recognised as an industry
dsh
standard for industrial control and multi-user computer systems requiring the speed and
power of an advanced 16/32-bit microprocessor. The IDE interface is now mostly used in
personal computer. Therefore, the project, which combined the two technologies, will have
for
potential.
This project features the concept of interfacing the hard disk with the Flite FLT-68K
ert
68000 Microprocessor Training System. This includes the design of a prototype circuit,
which uses the 68230 PI/T (Parallel Interface/Timer), a general-purpose Peripheral, to
communicate between the 68000 and the hard disk. The report guides the reader through all
fH
the stages in design, from basic concept, to the I/O adapter card design.
The prototype circuit is fully supports ANSI X3.221 and the system which include flight
Un
ive
rsit
software.
yo
board and interface can adapt to any normal pc which already installed the FLT-68K
ire
dsh
for
Acknowledgements
The author wishes to thank a number of people who have contributed help and assistance
during the project. Special thanks are extended to David Meads, whom as project supervisor
ert
provided support and guidance throughout the project.
fH
The following people offered the support and advice throughout the project
development phase.
yo
Mr. Tony Crook helped and advised all the source components.
Mr. Ian Munro helped and advised on many aspect of the project from initial
problem identification to finial testing.
rsit
Mr. Stephen Passmore helped and adviced7 from initial hardware testing to
finial hardware build up.
Un
ive
Finally thanks are extended to for reading this report.
ire
dsh
for
GND
Register
Ground
fH
REG
ert
Glossary
Integrated Drive Electronics
68K
MC68000
FAT
File Allocation Table
PIO
Port Input/Output
HDD
rsit
yo
IDE
Direct Memory Access
CHS
Cylinder Head Sector
LBA
Logical Block Addressing
Un
ive
DMA
VFAT
Virtual File Allocation Table
NTFS
New Technology File System
HPFS
High Performance File System
PGCR
Port General Control Register
PADDR
Port A Data Direction Register
Hard disk
PCDDR
Port C Data Direction Register
PBCR
Port B Control Register
PADR
Port A Data Register
PBDR
Port B Data Register
PCDR
Port C Data Register
for
Port A Control Register
Un
ive
rsit
yo
fH
ert
PACR
ire
Port B Data Direction Register
dsh
PBDDR
ire
CONTENTS
Abstract.........................................................................................................................i
dsh
Acknowledgements...................................................................................................ii
Glossary…..................................................................................................................iii
for
Contents .....................................................................................................................iv
Figures.......................................................................................................................viii
ert
Tables........................................................................................................................viii
I Introduction..............................................................................................................1
fH
1.1 IDE and 68K Introductions...................................................................................1
1.2 Project Overview...................................................................................................1
1.3 Project Aims..........................................................................................................1
yo
1.4 Project Objectives..................................................................................................2
1.5 Report Layout........................................................................................................3
rsit
II IDE Background [9] and Seagate ST32122A Introduction [12]..................5
2.1 The Original IDE/ATA.........................................................................................5
2.2 ATA I/O: Dual Drives...........................................................................................6
Un
ive
2.3 ATA Types............................................................................................................6
2.3.1 ATA-2, Fast-ATA and EIDE.......................................................................6
2.3.2 ATA-3..........................................................................................................8
2.3.3 Ultra-ATA/33-66-100..................................................................................8
2.4 Cable Configuration..............................................................................................9
2.5 Jumper Settings.....................................................................................................9
2.6 Seagate ST32122A Introduction.........................................................................10
2.6.1 General Introduction...................................................................................10
2.6.2 Master/slave Configuration........................................................................11
ire
III MC68000, VME Bus and Flite 68K Introduction.....................................13
3.1 VME Introduction[10]..........................................................................................13
3.1.1 Arbitration Bus........................................................................................14
dsh
3.1.2 Data Transfer Bus………………………………………………………14
3.1.3 Priority Interrupt Bus………………………………………………...…14
3.1.4 Utility Bus ……………………………………………………………..15
for
3.2 MC68000 Introduction[1]…………………………………………………….15
3.2.1 User programming model………………………………………………15
3.2.1.1 Data Registers (D7 – D0)………………………………………16
ert
3.2.1.2 Address Registers (A7 – A0)…………………………………..16
3.2.1.3 Program Counter……………………………………………….16
fH
3.2.1.4 Condition Code Register……………………………………….17
3.2.1.5 Integer Data Formats…………………………………………...18
3.2.2 Signal Description……………………………………………………...19
yo
3.2.2.1 Address Bus (A23–A1)………………………………………...19
3.2.2.2 Data Bus (D15–D0)…………………………………………….19
3.2.2.3 Asynchronous Bus Control…………………………………….20
rsit
3.2.2.4 Bus Arbitration Control………………………………………...20
3.2.2.5 Interrupt Control (IPL0, IPL1, IPL2)…………………………..20
3.2.2.6 System Control…………………………………………………21
Un
ive
3. 2.2.7 MC68000 Peripheral Control………………………………….21
3.2.2.8 Processor Function Codes (FC0, FC1, FC2)…………………...21
3.2.2.9 Clock (CLK)……………………………………………………21
3.2.2.10 Power Supply (VCC and GND)………………………………22
3.3 Flite 68k Training System Introduction[2]…...………………………………22
IV File Allocation Table Introduction[11]..........................................................24
4.1 General Introduction………………………………………………………....24
4.2 History of FAT table…………………………………………………………24
ire
4.3 The Difference between FAT12/16 and FAT32………………………………24
4.4 Other Technologies…………………………………………………………..26
dsh
4.4.1 VFAT (Virtual File Allocation Table)…………………………………26
4.4.2 NTFS (New Technology File System)…………………………………26
for
4.4.3 HPFS (High Performance File System)………………………………..27
V Hardware Interface Design...............................................................................28
ert
5.1 General Concept …………………………………………………...……….. 28
5.2 I/O Chip Selections…………………………………………………………..29
fH
5.3 IDE Configurations…………………………………………………………..29
5.3.1 Physical Interface[7]……………………………………………………29
5.3.2 Signal Descriptions[7]…………………………………………………..30
yo
5.3.3 Pins Classifying………………………………………………………...32
5.4 MC68230 Physical Interface Configuration………………………………….33
5.4.1 General Introduction[4]…...……………………………………………33
rsit
5.4.2 Port Configuration for Project………………………………………….35
5.5 IDE I/O Adapt Manufacture……………………………………………….…35
5.5.1 Data Block ……………………………………………………………..35
Un
ive
5.5.2 Control Block…………………………………………………………..35
5.5.3 Reset Button……………………………………………………………35
VI Code Composer Programming.......................................................................37
6.1 Logical Configuration of MC68230[4].………………………………………37
6.2 Brief Overview of MC68230 Parallel I/O Registers[4]………………………37
6.3 MC68230 Mode Selection and PACR, PBCR Configuration[4]……………..40
6.4 IDE I/O Register Descriptions [7]……………………………………………41
6.5 IDE Command Routine………………………………………………………46
ire
6.5.1 PIO Data Read Commands[7]……………………………………..…...46
6.5.2 PIO Data Write Routine[7]…………………………….……………….47
dsh
6.5.3 System Running Routine………………………………………………49
VII Testing and Analysis.......................................................................................50
7.1 Introduction of Achieved Aspects in Testing………………………………50
for
7.2 Phase 1: Hardware Analysis………………………………………………..50
7.3 Phase 2: Software Test……………………………………………………..50
ert
7.4 Phase 3: Prototype Test…………………………………………………….50
VIII Further Development.....................................................................................52
fH
8.1 FAT Table Practically Introduction[3]……………………………………..52
8.2 Directory Entries[5]………………………………………………………...53
8.3 Software Implement[6]……………………………………………………..54
yo
IX Conclusions.........................................................................................................56
9.1 Research, Seminar and Project Management………………………………56
rsit
9.2 Design and Implementation………………………………………………..56
9.3 Software Code……………………………………………………………...56
9.4 Hardware Investigation/Testing……………………………………………57
Un
ive
9.5 Conclusion Summary……………………………………………………....57
References
Bibliography
Appendix
Appendix A Flite FLT-68K 68000 Microprocessor Training System……………...…A
Appendix B-1 Flite 68K Processor Architecture………………….………………......B
Appendix B-2 Flite 68K Memory Architecture……………………………………….B
Appendix B-3 Flite 68K DUART&PI/T Architecture………………………………...B
ire
Appendix B-4 MC68230 Peripheral Interface/Timer(PI/T)...………………………...B
Appendix C-1 74HC245 Data Sheet………………………………………………….C
dsh
Appendix C-2 74HC245 Data Sheet………………………………………….………C
Appendix C-3 74HC245 Data Sheet…………………………………………….……C
Appendix D Circuit Diagram……………………………………………...………….D
Appendix E-1 Source Code ……………………………………………...……..…….E
for
Appendix E-2 Source Code……………………………………………....……..…….E
Appendix E-3 Source Code ……………………………………………...……..…….E
ert
Appendix F Prototype Picture of the Project…………………………...……..……....F
Appendix G Project Time Table………………………………………………………G
fH
Figures
Figure 1.1 Project Block Diagram……………………………………………………2
Figure 2.1 IDE Block Diagram……………………………………….………………6
yo
Figure 2.2 IDE Configurations for AT Compatibles…………………………………10
Figure 2.3 Alternate Capacity Jumper and Master/Slave Jumpers…………………..12
Figure 3.1 MC68000 User Programming Model…………………………………….16
rsit
Figure 3.2 Structure of CCR …………………………………………………..…….17
Figure 3.3 MC68000 Input and Output Signals……………………………………...19
Figure 5.1 IDE Physical Interface……………………………………………………30
Un
ive
Figure 5.2 MC68230 Block Diagram………………………………………………...34
Figure 5.3 Reset Button Circuit Diagram…………………………………………….36
Figure 6.1 Structure of PCGR………………………………………………………..39
Figure 6.2 Structure of PXDDR(X=A, B, C). ……………………………………….40
Figure 6.3 PACR Configuration for Mode 0, Submode 00………………………….41
Figure 6.4 IDE PIO Data Read Routine……………………………………………...47
Figure 6.5 IDE PIO Data Write Routine……………………………………………..49
Figure 6.6 System Running Routine…………………………………………………49
Figure 8.1 Future Mode of the Project-1……………………………………………..54
ire
Figure 8.2 Future Mode of the Project-2……………………………………………..55
Tables
dsh
Table 2.1 ATA PIO Modes…………………………………………………………….7
Table 2.2 Formatted Capacity of ST32122A………………………………………...11
Table 2.3 Default Logical Geometry of ST32122A………………………………….11
for
Table 3.1 Integer Data Formats………………………………………………………18
Table 3.2 Asynchronous Bus Control………………………………………………..20
Table 3.3 Function Code Outputs…………………………………………………....21
ert
Table 5.1 Hardware Component Used In Project……………………………………28
Table 6.1 MC68230 I/O Registers…………………………………………………....38
fH
Table 6.2: I/O Port Functions/Selection Addresses…………………………………..42
Table 6.3 Structure of Status Register………………………………………………..45
Table 8.1 Cluster Values……………………………………………………………..53
yo
Table 8.2 Entry in Directory Structure……………………………………………….53
Un
ive
rsit
Table 8.3 Number of Files in Root Directory………………………………………..53
I Introduction
1.1 IDE and 68K Introductions
Integrated Drive Electronics (IDE) refers to any drive with the controller built-in. The basic
concept of IDE is that the drive's controller is integrated onto the device itself rather than
having a separate controller. This reduces cost and also makes firmware updates easier since
ire
there is no cross-manufacturer complexity. The application environment for the AT
dsh
Attachment Interface is any computer which uses an AT Bus or 40-pin ATA interface.
Most drives today are IDE. These drives have the controller built on. They plug into a
bus connector on the motherboard or an adapter card. Such drives are easy to install and
require a minimum number of cables. This is due to the fact that the controller is on the
for
drive itself. Less part is needed and the signal pathways can be much shorter.
ert
The 68K is the abbreviated name of the Motorola MC68000, which is a Low Cost 32Bit Microprocessor. The MC68000 has a 16-bit data bus and 24-bit address bus while the
1.2 Project Overview
fH
full architecture provides for 32-bit address and data buses.
yo
The purpose of this project was to design, construct and test a prototype circuit, which
interfaces the two technologies, described above. That is, to interface Flite FLT-68K 68000
Microprocessor Training System with a separated hard disk. The Project will involve much
the author.
rsit
research and investigation, to reach the targets set, and will be undertaken individually by
Un
ive
1.3 Project Aims
The aim of this project is to produce a working prototype of an interface between the Flite
FLT-68K 68000 Microprocessor Training System to a separated hard disk, which is capable
of the full IDE specification as set in ANSI X3.221.This required the comprehensive
research into the two separate technologies, technical enough to be able to produce the
prototype circuit.
1.4 Project Objectives
To achieve the project aims, an organised work schedule was required. Planning all the
ire
various stages of the project and placing them into a Gantt chart, details can be found in
Appendix G; this gave a chronological sequence of the activities that needed to take place,
dsh
which gave a good illustration of the time management required.
The project involved several research topics, these included:
M68000 Peripherals, Configuration and Programming
IDE devices and Configuration
Methods of interfacing the M68000 to the IDE
ert
for
This project was part hardware and part software. A block diagram of the prototype for the
fH
project is shown below in Figure1.1:
Flite68k
Un
ive
training board
rsit
yo
Normal PC
I/O adapter card
Hard Disk
of
Computer
Figure 1.1 Project Block Diagram
The whole system consists of three components along with a normal PC. The PC is used to
control the Flite 68K board by running source codes. It is single way. The I/O adapter card
consists of two I/O port and one button. As it can be seen the transmitter between Flite
board and the hard disk is bidirectional since it need both read and write.
1.5 Report Layout
The report is laid out in a logical order, with the first few chapters providing relevant
ire
background information on the MC68000 and IDE technology. Brief explanations of
dsh
chapter content are provided below:
Chapter II: IDE and ST32122A Introduction
In this chapter the IDE technology is briefly discussed, this includes information on the IDE
for
history and types. In this chapter the hard disk, which is Seagate ST32122A, will also be
introduced to make the read have a general idea of the hardware component used in the
ert
project.
Chapter III: VME BUS, MOTOLORA 68000 and Flite Board
This chapter explains some of the concept of the VME bus, Motorola 68000 and introduces
fH
the Flite FLT-68K 68000 Microprocessor Training System used in this project.
Chapter IV: File Allocation Table Introduction
technology.
yo
This chapter will introduce the basic concept of the FAT table and some relevant
rsit
Chapter V: Hardware Interface Design
This chapter discusses how the hard disk communicates via the MC68230 parallel
interface/timer (P1/T) on the Flite 68k board and includes relevant information on how the
Un
ive
prototype circuit operates.
Chapter VI: Code Composer Programming
The software phase of this project uses the Embed system Studio. This chapter discusses the
how the MC68230 and IDE are configured.
Chapter VII: Testing and Analysis
The prototype interface will be tested and the results and waveforms from the testing phase
ire
are discussed in this chapter. Problems encountered in the testing phase are also
dsh
documented here.
Chapter VIII: Further Development
This chapter contains details of development that may possible future enhancements in the
for
project..
Chapter IX: Conclusions
ert
This chapter, highlights the major findings in the project, and concludes the points achieved
Un
ive
rsit
yo
fH
by prototype circuit and difficulties encountered.
II IDE Background and Seagate ST32122A Introduction
In this chapter the general concept of IDE technology and the hard disk used in the project
will be introduced.
2.1 The Original IDE/ATA
ire
The first IDE interface was created by CDC, Compaq, and Western Digital. They used 40pin connector. They were large drives of the 5.25" form, but were only 40M. It is used in
dsh
the early Compaq 386 systems, using WD controllers. Later, Compaq founded Conner.
Conner produced drives for Compaq, but was later sold. In the late 1980's, the ATA IDE
was set as ANSI standard. This caused all manufacturers’ to agree with a common design
for
for the interface. But, before this was done, many companies had produced their own
variations. Some areas of the ATA standard were left open to manufacturers for their own
commands. Due to this, the standard is really loosely set. Low-level formatting drives, then,
ert
require a program tailored to drives from a certain manufacturer, one that knows that
company's commands.
fH
The first type was Non-Intelligent IDE and they were simplistic. They only responded to
the first eight commands built into the original WD1003 controller. They were actually
more like ST506.412 drives with the controller screwed on. Most of these drives could be
yo
low-level formatted, unlike today's drives. Each was low-level formatted in the factory with
a few optimizations built on. Factory defects were written as a file to the drive. This means
that, although you can low-level format the drive, it would erase the factory optimizations
rsit
and defect list. Some companies released programs to do this while saving these settings,
Un
ive
but many did not. The figure below shows the inside world of IDE:
ire
dsh
Host adapter
Microprocessor Drive con trol electronics
for
IDE inte rfa ce
Formatter Data
Data Separator
Buffer
Controller
fH
2.2 ATA I/O: Dual Drives
ert
Figure 2.1 IDE Block Diagram
ATA has the ability to operate two drives together in a chain. The primary drive is the
master, and the second drive is the slave. On most drives, a master or a slave jumper was set
yo
on the drive itself. When two drives are on the same ribbon cable, all commands are
received by both controllers. Each drive must respond only to commands meant for it. This
is done with that jumper. Setting the drive as either master or slave tells it to ignore the
rsit
commands for the other drive and to only act on ones meant for it.
Un
ive
2.3 ATA types
2.3.1 ATA-2, Fast-ATA and EIDE
ATA-2 was designed as an enhancement to the original ATA because ATA was quickly
found to be a limitation as hard drive technology evolved. ATA-2 is EIDE, or Enhanced
IDE. ATA-2 includes features such as PIO and DMA modes.
The main benefits of ATA-2 are:
Increased Capacity
This is basically due to advancement in BIOS to allow drives larger than 528 MB. This
limit was there basically because of the geometry in the drive. Newer enhanced BIOS
are capable of using translation modes, thereby using different geometry when talking
ire
with the drive than when talking with the software. The BIOS produced dated around
dsh
1994 or later probably enhanced.
Faster Data Transfer
ATA-2 offers several different modes for higher performance. Most drives today are
capable of PIO Modes 3 and 4, which are very fast. PIO (Programmed I/O) modes
for
determine the speed at which data is transferred to and from the drive. Below is a table
ert
of the PIO Modes:
Transfer Rate
ATA Ver.
0
3.3 MB/sec
ATA-1
1
fH
Ta
PIO Mode
5.2 MB/sec
ATA-1
8.3 MB/sec
ATA-1
A
11.1 MB/sec
ATA-2
PI
16.6 MB/sec
ATA-2
3
rsit
4
yo
2
ble
2.1
AT
O
Mo
des
DMA Transfer: ATA-2 drives support Direct Memory Access transfers, which means that
Un
ive
data is transferred directly from the drive to memory, bypassing the CPU.
2.3.2 ATA-3
ATA-3 is a newer implementation of ATA that uses an enhanced PIO mode 4 (used for
higher data transfer speeds). It also brought in some enhanced power management features,
the introduction of SMART technology as well as some simple password-based security.
SMART is short for Self-Monitoring Analysis and Reporting Technology. It monitors the
drive for anything that might seem out of the ordinary, documents it, and analyzes the data.
If it sees something that indicates a problem, it is capable of notifying the user (or, if
ire
applicable, system administrator).
dsh
In essence, SMART is merely a set of software tools on the drive itself, constantly
running diagnostics. They run diagnostics on the motors, the media, the electronic
components, and the mechanical components. Another set of monitoring software is often
set up on the controller, to monitor the overall reliability of the drive, taking the data given
for
it by the on drive software and checking it against predefined thresholds. The errors that the
system can detect can be predicted by a number of methods. Granted, there are some things
ert
that cannot be predicted with any accuracy. There is no reliable manner in which to predict
such a failure without highly specialized and expensive equipment, making it less cost
fH
effective.
ATA-3 is backward compatible with ATA-2, and since there was no new transfer mode
yo
between the two, EIDE is still used to refer to ATA-3 drives.
2.3.3 Ultra-ATA/33-66-100
Ultra-ATA is the type of ATA that delivers the increased speeds. It is an implementation of
rsit
ATA/ATAPI-4. It provides faster transfer by using advances in the bus mastering DMA
technology. This is the primary reason why this is usually called UltraDMA, or UDMA.
UDMA requires not only drive support, but also controller and BIOS support, in order to
Un
ive
operate. Each successive UDMA speed requires this level of support for this speed.
UltraATA/33 was the first speed using this technology. It supports a 33 Mbps transfer rate
and uses a standard 40-pin IDE cable. UltraATA/66 handles a 66 Mbps transfer speed, but
uses a 40-pin, 80-wire cable to connect to the controller. These cables are the same width,
but each individual wire is thinner. UltraATA/100 supports a 100 Mbps transfer. All of
these modes the transfer rate is the peak rate and data will not constantly travel at those
speeds. In order to use these modes, DMA must be enabled in the operating system.
2.4 Cable Configuration
Cable configuration is quite simple with the ATA IDE interface. There is a single cable with
ire
three connectors on it. One of these connectors plugs into the IDE connector on the
motherboard or I/O adapter card. The other two attach to the drives. On most setups, one
dsh
end of the cable is attached to the IDE controller. The middle connector attaches to the
secondary drive, if there is one. The other end is attached to the primary drive, or drive C:.
One of the setups has the middle connector attached to the motherboard, with the cable ends
attached to the drive: a sort of Y arrangement. This is done in many systems, but must be
for
handled with care because the master/slave relationship is then determined by position on
the cable. On the Y setup, a special signal called the CSEL, carried on pin 28, defines
ert
primary or secondary. If the CSEL circuit is closed, the drive is primary. If it is open, the
fH
drive is secondary.
2.5 Jumper Settings
Most IDE drives come in three configurations: Single drive, master, and slave. These are
yo
controlled by a small series of jumpers, usually on the rear of the drive. The single drive
setting tells the drive it is alone in the system, and it responds to all commands. If it is
configured as a master, this tells the drive there is a slave drive present, and the drive will
rsit
respond to only master commands. If the drive is configured as a slave, it responds only to
slave commands. These jumpers are usually labeled on the drive, so setting them should be
Un
ive
no problem. The figure below shows a simple configuration of two drives.
However, this project will only use one hard disk and the configuration of two hard disks
may be used in future development.
ire
HOST s yst em
dsh
Host bus
for
Host adapt er
Slave
Drive
(Drive 1)
ert
M aster
Drive
(Drive 0)
fH
Figure 2.2 IDE Configurations for AT Compatibles
2.6 Seagate ST32122A Introduction
2.6.1 General Introduction
yo
The Medalist 2122 (ST32122A), provide the following key features:
· Low power consumption
· Quiet operation
rsit
· Support for S.M.A.R.T. drive monitoring and reporting
· High instantaneous (burst) data-transfer rates (up to 33.3 Mbytes per second) using Ultra
DMA mode 2
Un
ive
· Full-track multiple-sector transfer capability without local processor intervention
· 128-Kbyte cache
· State-of-the-art caching and on-the-fly error-correction algorithms
· Support for Read Multiple and Write Multiple commands
· Support for auto detection of master/slave drives that use cable select (CSEL)
The following two tables shows some figure fact of the hard disk.
Drive Model
Guaranteed Mbytes (1 MByte = 106 bytes)
Guaranteed
Bytes per
sectors ( n)
sector
ST32122A
2,111
4,124, 736
512
ST32122A
Cylinders Read/Write
Heads
dsh
CHS Mode
ire
Table 2.2 Formatted Capacity of ST32122A
4,092
16
Sectors per
track
63
for
Table 2.3 Default Logical Geometry of ST32122A
2.6.2 Master/Slave Configuration
A master/slave relationship can be established between two drives that are attached to a
ert
single AT bus. A drive to be configured a master or slave by setting the master/slave
fH
jumpers, shown in Figure 2.3.
The drives support master/slave configuration using the cable select option. This
requires a special daisy-chain cable that grounds pin 28 (CSEL) on one of its two drive
yo
connectors. To use this option, the host system and both drives must support cable select,
and both drives must be configured for cable select. To configure this drive for cable select,
install a jumper as shown in Figure2.3. For the master drive to recognise the slave drive
rsit
using the DASP– signal, the slave drive must assert the DASP– signal at power up, and the
Un
ive
master drive must monitor DASP– at power up.
ire
dsh
for
ert
fH
yo
Figure 2.3 Alternate Capacity Jumper and Master/Slave Jumpers
rsit
Since the project will only use one drive, the jumper was set to master and the relevant pins
Un
ive
are also set. The details will be given out in chapter IV.
III MC68000, VME Bus and Flite 68K Introduction
ire
In this chapter the general concept of VME bus, MC68000 and FLT-68k will be introduced.
dsh
3.1 VME Introduction
VME bus (Versa Module Europa) is a flexible open-ended bus system which makes use of
the Eurocard standard. It was introduced by Motorola, Phillips, Thompson, and Mostek in
for
1981. VME bus was intended to be a flexible environment supporting a variety of
computing intensive tasks, and has become a very popular protocol in the computer industry.
ert
It is defined by the IEEE 1014-1987 standard.
The bus usage was developed from a computing point of view, which leads to a
fH
completely memory mapped scheme. Every device can be viewed as an address, or block of
addresses. Under VME, addresses and data are not multiplexed. A block transfer, however,
is possible for DMA style applications. The bus allows multiple masters, and contains a
yo
powerful interrupt scheme. A resource manager is required to handle the interrupts. The
VME bus is a TTL based backplane which, although the system is asynchronous, sets the
rsit
data transfer speed to approximately 20 Mbytes per second.
A typical transfer consists of an arbitration cycle (to gain bus control), an address cycle
(to select the register) and the actual data cycle. Read, write, modify and block transfers are
Un
ive
supported.
The VME bus system consists of 4 sub-buses: the Data Transfer Bus, the Arbitration
Bus, the Priority Interrupt Bus and the Utility Bus. Data transfer is asynchronous supporting
modules with a broad variety of response times.
3.1.1 Arbitration Bus
A module controlling the bus will drive the bus busy line (BBSY) low to show that it is in
ire
use. When this line is not low the arbiter module will sample the bus request lines (BR0BR3) looking for a pending action. Requests on BR3 have the highest priority. Requests of
dsh
equal priority are handled by a daisy chain using the bus grant in lines (BG0IN-BG3IN) and
the bus grant out lines (BG0OUT-BG3OUT). The arbiter module which sits in slot 1
generates the first grant signal and this is passed to modules of increasing slot number.
for
3.1.2 Data Transfer Bus
The data transfer bus is used for reading and writing data between modules. The data bus
ert
(D00-D31) holds the actual data during a transfer. The address of the register being
accessed is presented on the address bus (A01-A31). The address modifier lines (AM00AM05) indicate the length of the address, the kind of data cycle and the master identifier.
fH
The address strobe (AS) is used to signal the presence of a valid address. The data strobes
(DS0,DS1) are used by the module controlling the transfer (master) to signal the presence
and acceptance of valid data on the bus along with information on the size of the word to be
yo
transferred (together with the long word select, LWORD). The WRITE line is used to
distinguish between read and write operations. The data transfer acknowledge (DTACK) is
used by the module being accessed (slave) to signal the completion of a transfer. Errors in
rsit
this transfer are signaled using the bus error line (BERR).
3.1.3 Priority Interrupt Bus
Un
ive
Normally only one processor is dedicated to handling interrupts by monitoring the interrupt
request lines (IRQ1-IRQ7). IRQ7 has the highest priority. In response to an interrupt, an
address cycle is generated where the address indicates the request being acknowledged. The
interrupt acknowledge (IACK) is changed in the arbiter to a signal which is daisy chained
down the bus using the interrupt acknowledge in pin (IACKIN) and interrupt acknowledge
out pin (IACKOUT). A data cycle follows where the module requesting the interrupt asserts
its status and ID.
3.1.4 Utility Bus
Power is supplied to modules via pins at +5 V, -12 V and +12 V. An optional battery
ire
backup of the +5 V supply (+5STDBY) can also be present. The utility bus supports an
independent 16 MHz system clock (SYSCLK). The system failure line (SYSFAIL) and AC
dsh
failure line (ACFAIL) are bussed lines used to indicate global problems. The system reset
line (SYSRESET) is used for initialization. Additional data transfers can take place along
for
the serial data line (SERDAT) and are synchronized with the serial clock line (SERCLK).
3.2 MC68000 Introduction
The MC68000 is the first implementation of the M68000 16/-32 bit microprocessor
ert
architecture. It has three programming modes: Integer unit user programming model,
Floating-point unit user programming model and supervisor programming model. Since the
not be introduced here.
3.2.1 User Programming Model
fH
project will only use the Integer unit user programming model, the other two models will
following registers:
yo
Figure 3.2 illustrates the integer portion of the user programming model. It consists of the
• 16 General-Purpose 32-Bit Registers (D7 – D0, A7 – A0)
rsit
• 32-Bit Program Counter (PC)
Un
ive
• 8-Bit Condition Code Register (CCR)
ire
dsh
for
ert
fH
Figure 3.1 MC68000 User Programming Model
yo
3.2.1.1 Data Registers (D7 – D0)
These registers are for bit and bit field (1 – 32 bits), byte (8 bits), word (16 bits), long-word
rsit
(32 bits), and quad-word (64 bits) operations. They also can be used as index registers.
3.2.1.2 Address Registers (A7 – A0)
These registers can be used as software stack pointers, index registers, or base address
Un
ive
registers. The base address registers can be used for word and long-word operations.
Register A7 is used as a hardware stack pointer during stacking for subroutine calls and
exception handling. In the user programming model, A7 refers to the user stack pointer
(USP).
3.2.1.3 Program Counter
The PC contains the address of the instruction currently executing. During instruction
execution and exception processing, the processor automatically increments the contents or
places a new value in the PC. For some addressing modes, the PC can be used as a pointer
ire
for PC relative addressing.
dsh
3.2.1.4 Condition Code Register
Consisting of five bits, the CCR, the status register’s lower byte, is the only portion of the
status register (SR) available in the user mode. Many integer instructions affect the CCR,
indicating the instruction’s result. Program and system control instructions also use certain
for
combinations of these bits to control program and system flow. The condition codes meet
two criteria: consistency across instructions, uses, and instances and meaningful results with
ert
no change unless it provides useful information.
Consistency across instructions means that all instructions that are special cases of more
fH
general instructions affect the condition codes in the same way. Consistency across uses
means that conditional instructions test the condition codes similarly and provide the same
results whether a compare, test, or move instruction sets the condition codes. Consistency
same way.
yo
across instances means that all instances of an instruction affect the condition codes in the
rsit
The first four bits represent a condition of the result generated by an operation. The fifth
bit or the extend bit (X-bit) is an operand for multiprocessing computations. The carry bit
(C-bit) and the X-bit are separate in the M68000 family to simplify programming
Un
ive
techniques that use them. In the instruction set definitions, the CCR is illustrated as follows:
Figure 3.2 Structure of CCR
X—Extend
Set to the value of the C-bit for arithmetic operations; otherwise not affected or set to a
specified result.
Set if the most significant bit of the result is set; otherwise clear.
Z—Zero
dsh
Set if the result equals zero; otherwise clear.
ire
N—Negative
V—Overflow
Set if an arithmetic overflow occurs implying that the result cannot be represented in the
C—Carry
for
operand size; otherwise clear.
Set if a carry out of the most significant bit of the operand occurs for an addition, or if a
ert
borrow occurs in a subtraction; otherwise clear.
3.2.1.5 Integer Data Formats
fH
The operand data formats supported by the integer unit, as listed in Table 3.1, Integer unit
operands can reside in registers, memory, or instructions themselves. The operand size for
each instruction is either explicitly encoded in the instruction or implicitly defined by the
Un
ive
rsit
yo
instruction operation.
3.2.2 Signal Description
Table 3.1 Integer Data Formats
The input and output signals of MC68000 can be roughly divided into five parts: address
ire
bus, data bus, processor status block, control block and the clock part. The block diagram is
fH
ert
for
dsh
shown as below:
Figure 3.3 MC68000 Input and Output Signals
yo
3.2.2.1 Address Bus (A23–A1)
This 23-bit, unidirectional, three-state bus is capable of addressing 16 Mbytes of data. This
bus provides the address for bus operation during all cycles except interrupt acknowledge
rsit
cycles and breakpoint cycles. During interrupt acknowledge cycles, address lines A1, A2,
and A3 provide the level number of the interrupt being acknowledged, and address lines
Un
ive
A23–A4 are driven to logic high.
3.2.2.2 Data Bus (D15–D0)
This bidirectional, three-state bus is the general-purpose data path. It is 16 bits wide. The
bus can transfer and accept data of either word or byte length. During an interrupt
acknowledge cycle, the external device supplies the vector number on data lines D7–D0.
3.2.2.3 Asynchronous Bus Control
Asynchronous data transfers are controlled by the following signals: address strobe,
ire
read/write, upper and lower data strobes, and data transfer acknowledge. The detail of pins
ert
for
dsh
set is show in table 3.2
3.2.2.4 Bus Arbitration Control
fH
Table 3.2 Asynchronous Bus Control
yo
The bus request, bus grant, and bus grant acknowledge signals form a bus arbitration circuit
to determine which device becomes the bus master device.
rsit
3.2.2.5 Interrupt Control (IPL0, IPL1, IPL2)
These input signals indicate the encoded priority level of the device requesting an interrupt.
Level seven, which cannot be masked, has the highest priority; level zero indicates that no
Un
ive
interrupts are requested. IPL0 is the least significant bit of the encoded level and IPL2 is the
most significant bit. For each interrupt request, these signals must remain asserted until the
processor signals interrupt acknowledge (FC2–FC0 and A19–A16 high) for that request to
ensure that the interrupt is recognised.
3.2.2.6 System Control
The system control inputs are used to reset the processor, to halt the processor, and to signal
ire
a bus error to the processor. The outputs reset the external devices in the system and signal a
dsh
processor error halt to those devices.
3. 2.2.7 MC68000 Peripheral Control
These control signals are used to interface the asynchronous M68000 processors with the
for
synchronous MC68000 peripheral devices.
3.2.2.8 Processor Function Codes (FC0, FC1, FC2)
ert
These function code outputs indicate the mode (user or supervisor) and the address space
type currently being accessed, as shown in Table 3-3. The function code outputs are valid
Un
ive
rsit
yo
fH
whenever AS is active.
Table 3.3 Function Code Outputs
3.2.2.9 Clock (CLK)
The clock input is a TTL-compatible signal that is internally buffered for development of
the internal clocks needed by the processor. This clock signal is a constant frequency square
wave that requires no stretching or shaping.
3.2.2.10 Power Supply (VCC and GND)
Power is supplied to the processor using these connections. The positive output of the
ire
power supply is connected to the VCC pins and ground is connected to the GND pins.
dsh
3.3 Flite 68k Training System Introduction
The develop board used in the project was Flite FLT-68K 68000 Microprocessor Training
System. The original package is designed to provide the introduction to 16/32-bit
for
microprocessors by way of the very popular Motorola MC68000. The FLIGHT-68K is of
simple and efficient design and very easy to use. The FLIGHT-68K, which includes two
serial ports and several 8-bit digital I/O ports, can grow still further and expand the
ert
application. This is ensured by the on-board memory expansion capabilities and the external
expansion bus. On-board memory expansion consists of two free 32-pin sockets to which
virtually any type of static byte-wide memory may be fitted. Auxiliary RAM Scan expands
fH
the RAM program capability of the system from 16k bytes to 512k bytes. An expansion bus
expands all the 68000 signals to the outside world via a 64 way connector, allowing the user
Hardware
yo
to easily expand the system, to peripherals of his own design.
The FLIGHT-68K is based around the full 16-bit bus version of the 68000 and contains two
rsit
devices from the 68000 peripheral family. The MC68681 Dual Universal Asynchronous
Receiver/Transmitter provides two RS232 compatible serial ports, one for communication
with a PC/terminal, and the other for communication with either a host computer, or a
Un
ive
printer for producing assembler listings or hard copy printout of debug sessions etc. The
MC68230 Peripheral Interface/Timer provides 24 peripheral l/O lines plus a counter/timer.
Memory consists of three pairs of sockets. One pair is for EPROMs which contain the
monitor and assembler/disassembler firmware. Another pair of sockets is for RAM. The
FLIGHT-68K is supplied with two 8k RAM's giving a total of 16k bytes. The RAM may be
expanded to 256k bytes by using larger devices. The RAM can be used for data storage or
programs. The bottom 1k bytes are used by the monitor firmware, leaving 15k bytes (255k
bytes using larger devices) free for the user. The third pair of memory sockets is spare and
can accept various types of memory, EPROM or RAM, expanding the total system RAM-
ire
up to 512K bytes. The power requirements of the FLIGHT-68K are simply an unregulated 9
volt DC supply capable of delivering 700mA. The various voltages required by the system
dsh
are derived from this on the card. A 9 Volt 1 Amp mains adapter is supplied with the system.
A picture of Flt-68 is shown in the Appendix A.
Firmware
for
A 64k byte firmware package is provided with the FLIGHT-68K making the board into a
'mini' development system. It comprises comprehensive monitor, line-by-line assembler and
ert
disassembler. The monitor program provided with the FLIGHT-68K has been made as
simple as possible to use. Each of the 53 different commands available is invoked by a
simple two-letter code; no further information has to be provided on the command
fH
invocation line. The monitor responds by asking for any further information that is required,
in a clear and verbose manner. The monitor is user-friendly and easy to use, and does not
require many hours of learning before constructive use of the board can begin. It accepts
yo
68000 assembler language instructions and assembles them a line at a time, making
program entry simple and quick. Using the disassembler, 68000 machine code may be
Un
ive
rsit
disassembled from anywhere in memory.
IV File Allocation Table Introduction
In this chapter, the very basic concept of the FAT table will be introduced.
4.1 General Introduction
The FAT is a roadmap, or index, those points to the location where all the information in
system uses it to store and retrieve files containing information.
dsh
4.2 History of FAT Table
ire
files is stored on a floppy disk or hard drive. The FAT is extremely important because the
The existing File Allocation Table (FAT) file system was invented in 1977 as a way to store
for
data on floppy disks for Microsoft stand-alone Disk Basic. Although originally intended for
floppy disks, FAT has since been modified to be a fast and flexible system for managing
data on both removable and fixed media. In 1996 Windows 95 OSR2 came out with FAT32
ert
a new and improved FAT.
A new generation of very large hard disks will soon be shipping, and the existing FAT
fH
data structures have finally reached the limit of their ability to support ever larger media.
FAT currently can support a single disk volume up to 2 Gigabytes in size. FAT32 is an
enhancement of the FAT file system that supports larger hard drives with improved disk
yo
space efficiency.
FAT32 is an enhancement of the File Allocation Table file system that supports large
rsit
drives with improved disk space efficiency. FAT32 is only currently supported by two
operating systems:-
Un
ive
4.3 The Difference between FAT12/16 and FAT32
The file system that is used/or ordinarily designed for floppies and used by DOS, W 3.x,
W95, Windows NT and OS/2. In technical terms referred as FAT12 and FAT16 in which 12
and 16 standing for bits. A FAT directory holds info such as name, file size, date & time
stamp, the starting cluster number and the file attributes like (archive, hidden, system etc.).
Its file system can support up to 65,525 clusters and is limited to 2 GB. Works best on small
500mb drives because of the cluster size. It seems to be about 2% faster than FAT32 and
NTFS but windows is faster if confined to a small area. FAT performance drops off after
ire
400mb's on up.
FAT32 will not recognise FAT or NTFS volumes of other operating systems--so you
dsh
can't use them. It supports drives up to 2 terabytes. It uses smaller clusters (e.g. 4k clusters
up to 8 gigs).
for
Fat12/16 and Fat32 is a Partition size/cluster size issue. FAT32 solves this problem by
reducing to 4KB the default file cluster size for partitions between 260MB and 8GB.
(Drives or partitions under 260MB use .5KB clusters.) Up to 16GB, FAT32's cluster size is
ert
8KB; to 32GB, it's 16KB; and for partitions of 32GB and greater, the cluster size holds
steady at 32KB. FAT32 adds a few other improvements. The root directory on a FAT32
drive is now an ordinary cluster chain, so it can be located anywhere on the drive. This
fH
removes FAT16's previous limitation of 512 root directory entries. In addition, the boot
record on FAT32 drives has been expanded to allow a backup of critical data structures.
This makes FAT32 drives less susceptible to failure. FAT32 partitions are also invisible to
yo
other operating systems, including other versions of Windows. In the beginning, DOS and
Windows systems used FAT12/FAT16. But when drives got larger, (meaning over 2 gigb)
rsit
along came FAT32 and now FAT32x.
FAT16 was limited to 32 MB drives and it was updated over the years (by manipulated
sector translation) until it became necessary to increase its basic structure from 16 to 32.
Un
ive
FAT32 can safely handle drives up to 2 Terabytes--Err, they say--but it has this problem
over 8.4 GB.
The ("x") refers to extensions to the FAT32 specification, because with the advent of
drives exceeding 8.4 Gig, a new limitation was reached. Prior to this, all drives used some
form of CHS (Cylinder Head Sector) translation. Under this scheme every sector was given
three numbers. In anticipation of this limitation being exceeded, manufacturers developed
Logical Block Addressing (LBA). With LBA, each sector is given a unique number
depending on the BIOS.
FAT32X is a form of FAT32 created by the Windows Fdisk utility when partitions over
Allocation Table is moved to the end of the disk in these cases.
ire
8 GB in size are created, and the 1024 cylinder threshold of the disk is passed. The File
dsh
On most standard IDE drives (SCSI are different but similar rules apply) it is normal to
have 16 heads and 63 sectors per track. Cylinders increase as drive size increases. To figure
the drive's capacity, multiply the cylinder, head, and sector numbers together. Divide the
(Cylinders * heads * sectors) / 2048 = megabytes
for
product by 2048. As a formula it looks like this:
ert
This will give you a number in megabytes that are equal to the size of the drive. The system
4.4 Other Technologies
fH
uses these numbers to help it when reading and writing to the disk.
yo
4.4.1 VFAT (Virtual File Allocation Table)
A protected-mode version of the FAT file system, used by Windows 95. It is compatible
rsit
with the FAT system, the main difference being support for long filenames.
4.4.2 NTFS (New Technology File System)
This systems structure is the (MFT) or master file table. It uses too much space to use on a
Un
ive
(e.g. 400mb) hard-drive because it keeps multiple copies of files in the MFT to protect
against data loss. It also uses clusters to store data in small noncontiguous clusters and isn't
broken up resulting in good performance on large hard-drives. It also supports Hot Fixing
where
bad
sectors
are
automatically
4.4.3 HPFS (High Performance File System)
detected
and
marked.
This system sorts the directory based on names and is better organized, is faster and is a
ire
better space saver. It allocates data to sectors instead of clusters, organized into 8mb bands.
This banding improves performance because the read/write heads don't have to return to
NetWare File System: This is quick because Novell
dsh
track zero each time for access.
developed it for NetWare servers being NetWare 3.x and 4.x partitions. Linux Ext2: This is
also quick because it is a developed version of UNIX. The Linux Ex12 volume supports up
Un
ive
rsit
yo
fH
ert
for
to 2 terabytes.
V Hardware Interface Design
In this chapter first the general idea of the system will be given out. Then the two I/O chips,
IDE configuration and the MC68230 configuration will be introduced.
5.1 General Concept
At last the details of the connection of the IDE I/O adapter card will be given. The circuit
ire
diagram of the adapter is in the Appendix D.
dsh
Before the presentation in November the hard disk was thought to be connected directly
to the Flite board. However, in the presentation teachers gave the advice that the hard disk
can not connect to the Flite 68K directly, because the high volute of the hard disk will burn
up the Flite board. Thus two I/O chip were chosen to build up an I/O adapter card. The
Name
Number
Model
Seagate hard disk
1
ST32122A
Flite Training Board
1
FLT-68K
Develop board, contains 68000
I/O chip
2
74HC245
Octal transceivers
Button
1
Resistance
2
fH
for
hardware components used in the project is listed below:
Comment
ert
2Gb hard disk
Press Button
To reset the Seagate hard
10K
To protect the adapt card
yo
Table 5.1 Hardware Component Used in Project
The IDE connection will not directly connect to the MC68000 chip. The interface on the
rsit
Flite board for MC68000 is not suitable. However, there is one suitable interface: The
MC68230 Peripheral Interface/Timer (PI/T). It provides 24 parallel input/output lines plus a
counter/timer, which access to these lines is by way of a 40-pin IDC header. Therefore, the
Un
ive
prototype of the system is a two head I/O adapt card with two I/O chips and a button. One
way to the hard disk and the other way is to the MC68230 on the Flite board.
5.2 I/O Chip Selection
At first 74HC373 was used, which is an Octal D-type transparent latch; 3-state chip. The
whole circuit was designed and built it. However, before it was tried to the real system, a
big mistake was found: it is one way transfer, which thought to be bidirectional. This is the
first big mistake, which have made in the design stage and it wasted nearly one week time
to find it. At last 74HC245 was chosen, a high-speed Si-gate CMOS devices. The 74HC245
is octal transceivers featuring non-inverting 3-state bus compatible outputs in both send and
receive directions. The “245” features an output enable (OE) input for easy cascading and a
ire
send/receive (DIR) for direction control. OE controls the outputs so that the buses are
dsh
effectively isolated. The data sheet of 74HC245 is shown in Appendix C
5.3 IDE Configurations
5.3.1 Physical Interface
for
The physical interface of IDE consists of single ended TTL compatible receivers and
drivers communication through a 40-conductor flat ribbon nonshielded cable using an
asynchronous interface protocol. The pin numbers and signal names are shown in Figure 4.1.
ert
Reserved signals shall be left unconnected. Signal names are shown in all upper case letters.
Signals can be asserted (active, true) in either a high (more positive voltage) or low (less
positive voltage) state. A dash character (-) at the beginning or end of a signal name
fH
indicates it is asserted at the low level (active low). No dash or a plus character (+) at the
beginning or end of a signal name indicates it is asserted high (active high). An asserted
signal may be driven high or low by an active circuit, or it may be allowed to be pulled to
Un
ive
rsit
yo
the correct state by the bias circuitry.
ire
dsh
for
ert
fH
yo
rsit
Figure5.1 IDE Physical Interface
5.3.2 Signal Descriptions
CS1FX- (Drive Chip Select 0)
Un
ive
This is the chip select signal decoded from the host address bus used to select the Command
Block Registers.
CS3FX- (Drive Chip Select 1)
This is the chip select signal decoded from the host address bus used to select the Control
Block Registers.
DA0-2 (Drive Address Bus)
This is the 3-bit binary coded address asserted by the host to access a register or data port in
DASP- (Drive Active/Drive 1 Present)
dsh
ire
the drive.
This is a time-multiplexed signal which indicates that a drive is active, or that Drive 1 is
present. This signal shall be an open collector output and each drive shall have a 10K ohm
for
pull-up resistor.
DD0-DD15 (Drive Data Bus)
ert
This is an 8- or 16-bit bidirectional data bus between the host and the drive. The lower 8
bits are used for 8-bit transfers e.g. registers, ECC bytes and, if the drive supports the
DIOR- (Drive I/O Read)
fH
Features Register capability to enable 8-bit-only data transfers (see 9.21).
This is the Read strobe signal. The falling edge of DIOR- enables data from a register or the
yo
data port of the drive onto the host data bus, DD0-DD7 or DD0-DD15. The rising edge of
DIOR- latches data at the host.
DIOW- (Drive I/O Write)
rsit
This is the Write strobe signal. The rising edge of DIOW- clocks data from the host data bus,
Un
ive
DD0-DD7 or DD0-DD15, into a register or the data port of the drive.
INTRQ (Drive Interrupt)
This signal is used to interrupt the host system. INTRQ is asserted only when the drive has a
pending interrupt, the drive is selected, and the host has cleared nIEN in the Device Control
Register. If nIEN=1, or the drive is not selected, this output is in a high impedance state,
regardless of the presence or absence of a pending interrupt.
INTRQ shall be negated by:
- Assertion of RESET- or
- The setting of SRST of the Device Control Register, or
- The host writing the Command Register or
ire
- The host reading the Status Register
NOTE: Some drives may negate INTRQ on a PIO data transfer completion, except on a
dsh
single sector read or on the last sector of a multi-sector read. On PIO transfers, INTRQ is
asserted at the beginning of each data block to be transferred. A data block is typically a
single sector, except when declared otherwise by use of the Set multiple commands. An
exception occurs on Format Track, Write Sector(s), Write Buffer and Write Long
for
commands – INTRQ shall not be asserted at the beginning of the first data block to be
ert
transferred.
IOCS16- (Drive 16-bit I/O)
Except for DMA transfers, IOCS16- indicates to the host system that the 16-bit data port
shall be an open collector output.
fH
has been addressed and that the drive is prepared to send or receive a 16-bit data word. This
- When transferring in PIO mode, if IOCS16- is not asserted, transfers shall be 8-bit using
yo
DD0-7.
- When transferring in PIO mode, if IOCS16- is asserted, transfers shall be 16-bit using
rsit
DD0-15.
RESET- (Drive Reset)
This signal from the host system shall be asserted for at least 25 nsec after voltage levels
Un
ive
have stabilized during power on and negated thereafter unless some event requires that the
drive(s) be reset following power on.
5.3.3 Pins Classifying
The pins in the interface are roughly divided into 4 groups: control group, data transfer
group, optional group and ground group for the project.
Ground group
Pin 2, 19, 22, 24, 26, 30, 40 directly connected to ground as the ATA protocol defined.
Pin 39 connected to ground through a 10k resistance.
ire
Optional group
There are also some optional pins on the interface and the project did not use them.
dsh
They were left to high impedance state and are listed below:
Pin 29, DMACK- (DMA Acknowledge) and pin 21, DMARQ (DMA Request).
Because DMA technology was not used in the project, Pin 27 IORDY (I/O Channel
Ready), pin 34 PDIAG- (Passed Diagnostics) and pin 28 CSEL (Spindle
for
Synchronization/Cable Select), for there is only one hard disk. The pin 31 INTRQ, pin
32 IOCS16 and D8-D15 (pin 4, 6, 8, 10, 12, 14, 16, 18) were also left to high
ert
impedance state. Since this is a very simple prototype, the interrupts was not set and
only 8 bits transfer was allowed. So they did not use in this project. The introduction of
Transfer group
fH
them is still given in the above segment for giving the reader a clear conception.
D0-D7 was used to transfer data between the hard disk and the outsides. Pins 17, 15, 13,
Control group
yo
11, 9, 7, 5, 3 were connected.
addressed.
rsit
Pin 37, 38, 33, 35, 36, 23, 25 were used to control the I/O port functions and selection
Un
ive
5.4 MC68230 Physical Interface Configuration
5.4.1 General Introduction
The MC68230 parallel interface/timer (P1/T) provides versatile double buffered parallel and
a system oriented timer for M68000 systems. The parallel interfaces operate in
unidirectional or bidirectional modes, either 8 or 16 bits wide. In the unidirectional modes,
an associated data direction register determines whether each port pin is an input or output.
In the bidirectional modes the data direction registers are ignored and the direction is
determined dynamically by the state of four handshake pins. These programmable
handshake pins provide an interface flexible enough for connection to a wide variety of low,
ire
medium, or high speed peripheral or other computer systems. The PI/T ports allow use of
vectored or auto vectored interrupts, and also provide a DMA request pin for connection to
dsh
the MC68450 direct memory access controller (DMAC) or a similar circuit. The PI/T timer
contains a 24 bit wide counter and a 5-bit prescaler can be used. It can generate periodic
interrupts, a square wave, or a single interrupt after a programmed time period. It can also
for
be used for elapsed time measurement or as a device watchdog.
The PI/T consists of two logically independent sections: the ports and the timer. The
ert
port section consists of port A (pAO-PA7), port B (PBO-PB7), four handshake pins (HI, H2,
H3, and H4), two general input/output (1/0) pins, and six dual-function pins. The dualfunction pins can individually operate as a third port (port C) or an alternate function related
fH
to either port A, port B, or the timer. The four programmable handshake pins, depending on
the mode, can control data transfer to and from the ports, or can be used as interrupt
Un
ive
rsit
yo
generating inputs or I/0 pins. Refer to flowing Figure 5.2.
Figure 5.2 MC68230 Block Diagram
5.4.2 Port Configuration for Project
In this project Port A was used to transfer data, which was bidirectional. Port B was used to
ire
control the control block on the IDE interface. Port C was used to control the two I/O chips.
dsh
5.5 IDE I/O Adapt Manufacture
The details of pin connecting and function will be introduced here. However, a clearer
circuit diagram will be shown in Appendix D. The first 74HC245 was used to transfer data,
for
which is bidirectional. The second one was used to transfer the control signals, which is
unidirectional.
ert
5.5.1 Data Block
At first the pins D0-D7 connected to A0-A7 on the first 74HC245 and the output of the chip
fH
B0-B7 connected to the Port A of the MC68230. However, the D0-D7connected to A7-A0
and B7-B0 connected to PA0-PA7 after carefully consideration of the arrangement of the
5.5.2 Control Block
yo
circuit.
As mentioned before PB0-PB7 respectively connected to CS1FX, CS3FX, DA2, DA1, DA0,
rsit
DIOR, DIOW to control I/O port functions and selection addressed of IDE on the hard disk.
PC0 and PC1 connected to two I/O chip OE- pin to enable two chips. PC1 connected to the
Un
ive
first chip DIR pin to control the direction of the data transfer.
5.5.3 Reset Button
As introduced above this signal from the host system shall be asserted during power on and
negated thereafter unless some event requires that the drive(s) be reset following power on.
Thus a button switch was used to control the reset of the hard disk. A circuit diagram is
shown as below:
Switc
ire
Reset
dsh
+5vol
0
Un
ive
rsit
yo
fH
ert
for
Figure 5.3 Reset Button Circuit Diagram
VI Code Composer Programming
In this chapter the logical configuration of MC68230 will be introduced first and then the
code and details of the command of IDE is in the Appendix E.
dsh
6.1 Logical Configuration of MC68230
ire
IDE logical configuration. At last the flow of the software will be explained. The source
In the MC68230 Ports A and B can be used as I/O ports with various handshaking and
for
buffering capabilities in four different modes:
Mode 0: Unidirectional 8-bit
Mode 1: Unidirectional 16-bit
ert
Mode 2: Bidirectional 8-bit
fH
Mode 3: Bidirectional 16-bit
Port C can be used as a simple 8-bit port without handshaking or double-buffering. They
are controlled in the following way: the port general control register contains a 2-bit field
that specifies one of four operation modes. These govern the overall operation of the ports
yo
and determine their interrelationships. Some modes require additional information from
each port’s control register to further define its operation. In each port control register, there
rsit
is a 2-bit submode field that serves this purpose. Each port mode/submode combination
specifies a set of programmable characteristics that fully define the behaviour of that port
Un
ive
and two of the handshake pins.
6.2 Brief Overview of MC68230 Parallel I/O Registers
There are 23 separate registers in the device and table 5.1 list the useful ones and its
function and the address of each on the FLIGHT-68K and the offset from the base address,
$800001.
Name
Address
Offset
Function
Port General
800001
00
Selection of I/O modes (0, 1, 2 and 3) and
Control Register
(PGCR)
Port A Data
Direction
Register
(PADDR)
Port B Data
Direction
Register
(PBDDR)
Port C Data
Direction
Register
(PCDDR)
Port A Control
Register (PACR)
handshaking signals (H1, H2, H3 and H4)
04
Selection of individual port bits as inputs
or outputs
800007
06
Selection of individual port bits as inputs
or outputs
800009
08
Selection of individual port bits as inputs
or outputs
80000D
0C
Selection of port sub-modes and
handshake signals operation
Port B Control
Register (PBCR)
80000F
0E
Selection of port sub-modes and
handshake signals operation
Port A Data
Register (PADR)
800011
10
Port B Data
Register (PBDR)
Port C Data
Register (PCDR)
800013
ert
for
dsh
ire
800005
fH
Contents of the I/O ports
Contents of the I/O ports
18
Contents of the I/O ports
yo
800019
12
Table 6.1 MC68230 I/O Registers
rsit
Port General Control Register
PGCR7-PGCR
Select the operating mode of the PI/T
Un
ive
PGCR5-PGCR4
Enables the handshake pairs H3-H4 and H1-H2, these bits have to be set before the
control inputs and outputs can be made use of. Doing this avoids spurious operation
of the handshake lines before the PI/T has been fully configured
PGCR3-PGCR0
Determine the sense of the four handshake lines. These control lines can be
programmed to be active-low or active-high
Figure 6.1 shows the structure of the PGCR. In this project, the port used mode 00 and the
for
dsh
ire
H12, H34 were disabled. Therefore, the value of the PGCR register was 00h.
Figure 6.1 Structure of PCGR
Port Data Direction Registers
ert
There are three Port Data Direction Registers: PADDR, PBDDR and PCDDR, which select
the direction and buffering characteristics of each of the appropriate port pins:
fH
A logical ONE makes the corresponding pin act as an OUTPUT
A logical ZERO makes the corresponding pin act as an INPUT
Port C behaves in the same fashion and determines whether each dual-function chosen for
C).
yo
port C operation is an input or an output. Figure 6.2 shows the structure of PXDDR(X=A, B,
rsit
The PADR might be used both input and output, since it was used to transfer data. Thus
the value would be set by software. The port B as used to control the IDE, so the value of
PBDDR was FFh. On the other hands, the port C was used to control the two I/O chips. The
Un
ive
second I/O chip, which was used to transfer the value of the control signals, is
unidirectional it did not change the direction. While the first I/O chip, which was used to
transfer the data, often need to change the direction. So when the data wanted to be
transferred from A to B, which means Read, the value of PCDR was 02h and when the host
want to write, the value becomes 00h.
ire
dsh
Figure 6.2 Structure of PXDDR(X=A, B, C).
for
6.3 MC68230 Mode Selection and PACR, PBCR Configuration
The port A control register, in conjunction with the programmed mode and the port B
PACR7-PACR6
Specify the port A submode
fH
PACR5-PACR3
ert
submode, controls the operation of port A and the handshake pins H1 and H2.
Control the operation of the H2 handshake pin and the H2S status bit;
PACR2
yo
Determines whether an interrupt will be generated when the H2S status bit goes to
one.
PACR1
PACR0
rsit
Determines whether a service request (interrupt request or DMA request) will occur
Controls the operation of the HIS status bit. The PACR is always readable and
Un
ive
writable
As mentioned in above segment MC68230 has different modes: Mode 0-3. However, Mode
0, sub-mode 00 was chosen as the project transfer mode, which is Double-buffered input or
Single-buffered output. Thus the value of PACR and PBCR became 00h.
The following picture shows the configuration of PACR. (Port B behaves identically
(using H3 and H4))
ire
dsh
for
6.4 IDE I/O Register Descriptions
ert
Figure 6.3 PACR Configuration for Mode 0, Submode 00
Communication to or from the drive is through an I/O Register that routes the input or
fH
output data to or from registers (selected) by a code on signals from the host (CS1FX-,
CS3FX-, DA2, DA1, DA0, DIOR- and DIOW-). Thus the project followed the same routine.
The I/O register of the IDE interface can be divided in two groups: Command Block
yo
Registers and Control Block Registers.The Command Block Registers are used for sending
commands to the drive or posting status from the drive. The Control Block Registers are
used for drive control and to post alternate status. Table 6.2 lists these registers and the
rsit
addresses that select them. The figure also shows the Port B value.
Logic conventions are: A = signal asserted
N = signal negated
Un
ive
x = does not matter which it is
Addresses
CS1FX-
CS3FX-
DA2
Functions
DA1
DA0
READ
(DIOR-)
Value of Port B
WRITE
(DIOW-)
Read
Write
Not used
XXh
XXh
Not used
XXh
XXh
Control Block Registers
N
N
X
X
X
N
A
0
X
X
Data bus high
impe.
Data bus high
1
0
X
N
A
1
1
0
N
A
1
1
1
Not used
XXh
ire
A
Device
Control
Not used
XXh
2Eh
XXh
3Eh
XXh
Data
21h
41h
dsh
N
impe.
Data bus high
impe.
Alternate
Status
Drive Address
Command Block Registers
N
0
0
0
Data
A
N
0
0
1
Error Register
Features
31h
51h
A
N
0
1
0
Sector Count
Sector Count
29h
49h
A
N
0
1
1
59h
N
1
0
0
25h
45h
A
N
1
0
1
35h
55h
A
N
1
1
2Dh
4Dh
A
N
1
1
Sector
Number
* LBA Bits
0- 7
Cylinder Low
* LBA Bits
8-15
Cylinder High
* LBA Bits
16-23
Drive/Head
* LBA Bits
24-27
Command
39h
A
Sector
Number
* LBA Bits
0- 7
Cylinder Low
* LBA Bits
8-15
Cylinder High
* LBA Bits
16-23
Drive/Head
* LBA Bits
24-27
Status
3Dh
5Dh
A
A
X
Invalid
Address
Invalid
Address
XXh
XXh
fH
ert
for
A
0
yo
1
X
rsit
X
Table 6.2: I/O Port Functions/Selection Addresses
Un
ive
* Mapping of registers in LBA Mode
Command Register
This register contains the command code being sent to the drive. Command Execution
begins immediately after this register is written.
Sector Count Register
This register contains the number of sectors of data requested to be transferred on a read or
write operation between the host and the drive. If the value in this register is zero, a count of
256 sectors is specified.
ire
If this register is zero at command completion, the command was successful. If not
successfully completed, the register contains the number of sectors which need to be
dsh
transferred in order to complete the request.
The contents of this register may be defined otherwise on some commands e.g. Initialize
for
Drive Parameters, Format Track or Write same commands.
Sector Number Register
ert
This register contains the starting sector number for any disk data access for the subsequent
command. The sector number may be from 1 to the maximum number of sectors per track.
fH
In LBA Mode this register contains Bits 0-7. At the end of the command, this register is
updated to reflect the current LBA Bits 0-7.
yo
Cylinder Low Register
This register contains the low order 8 bits of the starting cylinder address for any disk
number.
rsit
access. At the end of the command, this register is updated to reflect the current cylinder
In LBA Mode this register contains Bits 8-15. At the end of the command, this Register
Un
ive
is updated to reflect the current LBA Bits 8-15.
Cylinder High Register
This register contains the high order bits of the starting cylinder address for any disk access.
At the end of the command, this register is updated to reflect the current cylinder number.
The most significant bits of the cylinder address shall be loaded into the cylinder high
Register.
In LBA Mode this register contains Bits 16-23. At the end of the command, this
ire
Register is updated to reflect the current LBA Bits 16-23.
Drive/Head Register
dsh
This register contains the drive and head numbers. The contents of this register define the
number of heads minus 1, when executing an Initialize Drive Parameters command. At
command completion, these bits are updated to reflect the current LBA bits 24-27.
for
Data Register
This 16-bit register is used to transfer data blocks between the device data Buffer and the
ert
host. It is also the register through which sector information is transferred on a Format
Track command. Data transfers may be either PIO or DMA.
fH
Features Register
This register is command specific and may be used to enable and disable features of the
interface e.g. by the Set Features Command to enable and disable caching. This register was
yo
ignored in this project.
Status Register
rsit
This register contains the drive status. The contents of this register are updated at the
completion of each command. When BSY is cleared, the other bits in this register shall be
valid within 400 nsec. If BSY=1, no other bits in this register are valid. If the host reads this
Un
ive
register when an interrupt is pending, it is considered to be the interrupt acknowledge. Any
pending interrupt is cleared whenever this register is read.
7
6
5
BSY
DRDY DWF
4
3
2
1
0
DSC
DRQ
CORR
IDX
ERR
Table 6.3 Structure of Status Register
- BSY (Busy) is set whenever the drive has access to the Command Block Registers. The
BSY=1. When BSY=1, a read
ire
host should not access the Command Block Register when
of any Command Block Register shall return the contents of the Status Register. This bit
dsh
is set by the drive (which may be able to respond at times when the media cannot be
accessed) under the following circumstances:
a) Within 400 nsec after the negation of RESET- or after SRST has been set
Device Control Register. Following acceptance of a reset it is
in the
recommended that
for
BSY be set for no longer than 30 seconds by Drive 1 and no longer than 31 seconds by
Drive 0.
ert
b) Within 400 nsec of a host write of the Command Register with a Read,
Read Buffer, Seek, Recalibrate, Initialize Drive Parameters,
Read Long,
Read Verify, Identify
Drive, or Execute Drive Diagnostic command.
fH
c) Within 5 usecs following transfer of 512 bytes of data during execution
Format Track, or Write Buffer command, or 512 bytes of data
and the appropriate
Long command.
yo
number of ECC bytes during the execution of a Write
of a Write,
- DRDY (Drive Ready) indicates that the drive is capable of responding to a command.
When there is an error, this bit is not changed until the Status Register is read by the host, at
rsit
which time the bit again indicates the current readiness of the drive. This bit shall be cleared
at power on and remain cleared until the drive is ready to accept a command.
- DWF (Drive Write Fault) indicates the current write fault status. When an error occurs,
Un
ive
this bit shall not be changed until the Status Register is read by the host, at which time the
bit again indicates the current write fault status.
- DSC (Drive Seek Complete) indicates that the drive heads are settled over a track.
When an error occurs, this bit shall not be changed until the Status Register is read by the
host, at which time the bit again indicates the current Seek Complete status.
- DRQ (Data Request) indicates that the drive is ready to transfer a word or byte of data
between the host and the drive.
- CORR (Corrected Data) indicates that a correctable data error was encountered and the
data has been corrected. This condition does not terminate a data transfer.
- IDX (Index) is set once per disk revolution.
ire
- ERR (Error) indicates that an error occurred during execution of the previous command.
dsh
The bits in the Error Register have additional information regarding the cause of the error.
6.5 IDE Command Routine
For all commands, the host first checks if BSY=1, and should proceed no further unless and
for
until BSY=0. For most commands, the host will also wait for DRDY=1 before proceeding.
Those commands shown with DRDY=x can be executed when DRDY=0.
ert
6.5.1 PIO Data Read Routine
This class includes:
- Identify Drive
fH
- Read Buffer
- Read Long
- Read Sector(s)
yo
Execution includes the transfer of one or more 512 byte (>512 bytes on Read Long) sectors
of data from the drive to the host.
a) The host writes any required parameters to the Features, Sector Count,
Sector Number,
rsit
Cylinder and Drive/Head registers.
b) The host writes the command code to the Command Register.
c) The drive sets BSY and prepares for data transfer.
Un
ive
d) When a sector of data is available, the drive sets DRQ and clears BSY
prior to
asserting INTRQ.
e) After detecting INTRQ, the host reads the Status Register, and then reads one
of data via the Data Register. In response to the Status Register
sector
being read, the drive
negates INTRQ.
f) The drive clears DRQ. If transfer of another sector is required, the drive
and the above sequence is repeated from d).
also sets BSY
the programmer and the drive level which interface the hard disk.
Drive Level
dsh
Program Level
ire
The following picture shows PIO Read Routine on both the program level which interface
BSY=0
Issue
Command
DRDY=1 BSY=1
for
Setup
DRQ=1 BSY=0
Assert INTRQ
ert
Read Status
Reg
Transfer data
End
fH
Negative INTRQ
DRQ=0 BSY=1
yo
Figure 6.4 IDE PIO Data Read Routine
6.5.2 PIO Data Write Routine
- Format
- Write Buffer
- Write Long
Un
ive
- Write Sector(s)
rsit
This class includes:
Execution includes the transfer of one or more 512 byte (>512 bytes on Write Long) sectors
of data from the drive to the host.
a) The host writes any required parameters to the Features, Sector Count,
Cylinder and Drive/Head registers.
b) The host writes the command code to the Command Register.
c) The drive sets DRQ when it is ready to accept the first sector of data.
d) The host writes one sector of data via the Data Register.
e) The drive clears DRQ and sets BSY.
Sector Number,
f) When the drive has completed processing of the sector, it clears BSY and
asserts
g) After detecting INTRQ, the host reads the Status Register.
dsh
h) The drive clears the interrupt.
ire
INTRQ. If transfer of another sector is required, the drive also sets DRQ.
i) If transfer of another sector is required, the above sequence is repeated from d).
The following picture shows PIO Write Routine on both the program level which
Program Level
Drive Level
rsit
Setup
yo
fH
ert
for
interface the programmer and the drive level which interface the hard disk.
Un
ive
Issue Command
Transfer data
Read Status
Reg
BSY=0
DRDY=1 BSY=1
DRQ=1 BSY=0
DRQ=0 BSY=1
DRQ=1 BSY=0
Assert INTRQ
Negative INTRQ
End
DRQ=0 BSY=1
Figure 6.5 IDE PIO Data Write Routine
6.5.3 System Running Routine
ire
The program of the project was very easy. It implemented data transfer between hard disk
and the Flite 68K in the FAT table. Port was initialised after the code ran. Then it read the
dsh
specific sector of the FAT table and writes back to another empty, which was indicated in
advance. The address of the two values was given in the program. The value of them can be
Start
ert
Read data to REG
for
modified.
fH
Write data to HDD
yo
END
Figure 6.6 System Running Routine
rsit
VII Testing and Analysis
7.1 Introduction of Achieved Aspects in Testing
Un
ive
This chapter will introduce the results found in the Hardware Test Phase 1, Software Test
Phase 2 and Prototype Test Phase 3.
7.2 Phase 1: Hardware Analysis
At first the I/O adapter card was built on a Plug board. However, the connect lines seemed
so many that it became very difficult to check the circuit. Another problem was the
connection lines on the board were easily pulled out. Therefore, it always took many times
after one connection line slip out. So the tutor suggested to use the “Vero” board. Thus the
Vero board of the adapter card was built in the following week. Fortunately, the hardware
ire
worked perfectly and all the connections did not have any short circuit. All the components
passed the test only once because every pin was carefully checked twice and the short
dsh
circuit was also carefully checked soon after each pin each finished.
7.3 Phase 2: Software Test
for
The problems came from the software testing. Nevertheless, they were small problems
except one. It was one variable defined by itself, “char *PGCR= 0x800001; #define PGCR
(*PGCR)”. The complier showed there was error in the program but it did not show which
ert
line was wrong. It did last a long time to find the problem and the problem was found out
under Mr. Ian’s help finally. After that every thing went well since the hardware circuit
7.4 Phase 3: Prototype Test
fH
connected correctly.
yo
How to verify the data transfer is a big problem for the project when the prototype was
finished. A digital oscilloscope was not used, because how to connect it to the prototype
was unknown. Thus a variable was used to show the completion of the transfer.
rsit
Furthermore, another computer, which installed MS-DOS 6.0, to show the sector value
changing. The “Debug” command was used to see the FAT table value. The hard disk was
connected to the computer firstly and then debug command was used to see the sector
Un
ive
which needed to be transfer and the empty sector. Then the hard disk was disconnected
from the computer and was connected to the adapter card. After ran the code, it was
connected back to the computer. Still used the Debug command and verify the empty sector
had been replaced by the transferred value.
ire
dsh
for
ert
fH
yo
rsit
VIII Further Development
Since the hardware works well, the future work may focus on the software of the prototype.
Un
ive
For example fully control the FAT table.
8.1 FAT Table Practically Introduction
DOS keeps track of its used, unused, and damaged sectors by using a table called the file
allocation table (FAT). The FAT is always the second and third sectors of a disk. The FAT
keeps track of all of the sectors on a disk. If the area of the disk containing the FAT
becomes corrupted, it is possible that you will be unable to access any of the information on
the disk. To prevent a single disk corruption from having such devastating impact on the
system, DOS places a second copy of the FAT in sectors 4 and 5.
ire
DOS groups disk sectors into collections of multiple sectors called clusters. The FAT
records clusters as opposed to sectors. For each cluster on the disk, DOS places one of the
dsh
values shown in Table 8.1.
DOS allocates disk space to the file a cluster at a time. By keeping track of which
clusters a file uses, DOS in essence creates a chain of sectors that you can follow one right
for
after another, to locate the contents of a file.
ert
The first byte of the FAT always contains a media descriptor byte that tells DOS about
the disk. DOS sets the second, third, and optionally the fourth (which is set for 16-bit entries)
0
Meaning
Available
2-2371
FFF
FF7
Next cluster
End-of-file
Corrupted
yo
Value
fH
bytes to the hexadecimal value FE Verify this by using DEBUG.
sector
Table 8.1 Cluster Values
rsit
Depending upon your media type, FAT entries require either 12 or 16 bits. For fixed disks
greater than 10 MB, DOS uses 16-bit entries. All smaller disks are 12-bit entries.
Un
ive
8.2 Directory Entries
Immediately following the FAT entries on each disk, DOS reserves space for directory
entries of the files in the root directory. Each file DOS stores on disk requires a 32-byte
entry that contains the information shown in Table 8.2,
Field
File
Extension
name
Attribute
Reserved
byte
for DOS
Time
Date
Starting
File size
cluster
number
Offset
0
8
11
12
22
24
26
28
ire
Table 8.2 Entry in Directory Structure
Each disk type sets aside a different amount of space for root directory entries. Table 8.3
Directory Entries
Single-sided
4
Double-sided
7
Quad-density
14
Fixed disk
32
Directory
dsh
Disk Type Sectors
64
112
for
224
512
summarizes the number of files that each disk type can place in the root directory.
ert
Table 8.3 Number of Files in Root Directory
When DOS needs to locate a file, it first searches the directory entries for an entry with a
fH
matching file name. If DOS finds a matching file, it gets the starting FAT cluster number
from the directory entry. DOS then maps the starting cluster number to a sector, as shown
here:
Sector = (cluster -- 2) * (sectors per cluster) * DataSectorOffset
yo
{DataSectorOffset = 1(Boot Record) + 4 (FAT sectors) + 7 (directory sectors)}
Since clusters contain multiple sectors, DOS reads the specific number of sectors starting
rsit
with the first sector number associated with the cluster. Then DOS locates the file's next
cluster entry from the FAT and continues retrieving sectors and decoding FAT entries until
Un
ive
it finds the end of the file.
8.3 Software Implement
The software of the project can be more detail. It can implement more function. The
following pictures show the possible modes of future software.
Read
Write
dsh
Read or Write
ire
Port Initialise
for
Read Data to REG
Write Data to HDD
ert
Read Data to REG
Figure 8.1 Future Mode of the Project-1
fH
The host can transfer the data manual and specifically.
yo
Start
rsit
What do you want to do?
Delete file
on the
slave hard
Un
ive
Copy file on
the slave hard
Copy file from
the host pc
End
Figure 8.2 Future Mode of the Project-2
The hard disk can transfer the data both form the hard disk of the host PC or from itself. It
can also delete file on the slave, ECT.
ire
dsh
for
ert
fH
yo
IX Conclusions
9.1 Research, Seminar and Project Management
The aim of the project was to develop an interfacing circuit, between the Motorola m68000
rsit
boards and the IDE controller. In the beginning, a lot of time was spent on how the VME
bus works. However, it now seemed is not very important to the project. After that
understanding the MC68000 was focused on. The Project Seminar took place in the 3rd
Un
ive
week of November, approximately week 7 of the 32-week project duration. At that time, the
study of MC68000 was just finished and the study of the Flite board was begun. The
Presentation was thought to have gone a success. However, it is obviously that the point of
the project was not gotten at that time. Thus after the presentation, the author started to
study the Flite board and the MC68230 hardly. From this stage, the author thinks the
communication to other technical staffs is as important as to the tutor and study the title
carefully is very important and essential.
9.2 Design and Implementation
ire
In this stage, several different I/O chip had been changed to meet the requirement of the
project from unidirectional to bidirectional. Although much time had been spend on weld
dsh
the Vero board and check the short circuit, it is very worth because the following hardware
testing and software did not occur any big problem cause of the design and weld.
for
9.3 Software Code
Software of the project is not as complex as the hardware. Since the time left to project was
only a little after the Vero board finished. Therefore, the FAT table was used but only a
ert
little in the project. This makes the code very simple and short. Nevertheless, a lot of
fH
working still had been put on it to ensure the following system testing went well.
9.4 Hardware Investigation/Testing
Because of the good job had been done before, in the hardware testing everything went well
yo
except of the displaying of the value. As mentioned above, debug command was used to
show the result, however, it occurred problem. It is when the second sector was read and
displayed; it sometimes displayed the value that belonged the sector, which was read last
rsit
time. The author had checked ten times and it occurred six times. At last the solution was
Un
ive
found that just after the reset and format the disk works apropos.
9.5 Conclusion Summary
The overall project has been deemed a success, due to the prototype MC68000 to IDE
interface, performing the required transmissions. Although the author had little experience
with most areas within this project, such as Embed Software Studio the understanding of
IDE, hard work and commitment lead to the completion of this project.
The MC68000 to IDE interface prototype out performed the original aims. The only set
back was the amount of time, although the Gantt chart was detailed at the start, it wasn’t
estimated that the hardware implement phase would take quite so long, this meant that time
ire
restrictions didn’t permit the programming of project goes long and less FAT technology
dsh
will used in the project.
The picture of the prototype of the MC68000-IDE Interface is shown in Appendix F.
for
Reference
ert
[1] Bacon, J (1986) The Motorola MC68000: An Introduction to Processor, Memory and
Interfacing UK: Prentice Hall.
fH
[2] Coates.R.F (1997) The Flight 68k Mkii Users Manual UK: Flight Electronics International Ltd.
[3] Duncan, R (1986) Advanced MS-DOS: The Microsoft Guide for Assembly Language
rsit
[4] MC68230 Data Sheet
yo
and C Programmers USA: Redmond, Wash.
[5] Dettmann, T.R (1988) DOS Programmer's Reference UK: Carmel, Inc.
Un
ive
[6] Mitchell, S (1992) Inside the Windows 95 Files System UK: Sebastopol, Calif.
[7] Working draft proposed American National Standard for Information Systems ATA (AT Attachment) Rev 3.2 October 16, 1992
[8] 74HC245 Data Sheet
http://www.hardwarecentral.com/hardwarecentral/tutorials/39/1/
dsh
[10]AN INTRODUCTION TO VME http://www
http://wwwesd.fnal.gov/esd/catalog/intro/introvme.htm
http://www.systweak.com/fat32/fat1.htm
ert
[12] Seagate Product Manual 1998
for
[11]Fat32 & File System Guide
ire
[9]IDE Interface Introduction
fH
Bibliography
Bramer, B (1991) MC68000 Assembly Language Programming UK: Edward Arnold.
yo
Liu, Y (1991) The M68000 Microprocessor Family: Fundamentals of Assembly Language
Programming and Interface Design London: Prentice-Hall International.
UK: M&T Publ.
rsit
Williams, Al (1991) DOS 5: A Developer's Guide: Advanced Programming Guide to DOS
Un
ive
Motorola (1982) MC68000 16-Bit Microprocessor: User's Manual London: Prentice-Hall.
Motorola (1989) M68000 Family Reference USA: Motorola Inc.
Motorola (1985) Vmebus Specification Manual Revision C.1. USA: Motorola Inc.
Hyman, M (1989) Advanced DOS: Memory-Resident Utilities, Interrupts, and Disk
Management with MS- And PC-DOS UK: Management Information Source Inc.
Motorola (1984) M68000: 16/32-BIT Microprocessor Programmer's Reference Manual UK:
ire
Prentice-Hall.
dsh
Schmidt, F (1991) SCSI Bus and IDE Interface: Protocols, Applications and Programming
UK: Carmel, Inc.
Un
ive
rsit
yo
fH
ert
for
DeVoney, C (1987) MS-DOS User's Guide Edition USA: Indianapolis, Inc.
ire
Appendix
Un
ive
rsit
yo
fH
ert
for
dsh
Appendix A Flite FLT-68K 68000 Microprocessor Training System
rsit
Un
ive
ert
fH
yo
for
dsh
ire
rsit
Un
ive
ert
fH
yo
for
dsh
ire
rsit
Un
ive
ert
fH
yo
for
dsh
ire
Un
ive
rsit
yo
fH
ert
for
dsh
ire
Appendix B-4 MC68230 Peripheral Interface/Timer(PI/T)
Un
ive
rsit
yo
fH
ert
for
dsh
ire
Appendix C-1 74HC245 Data Sheet
Un
ive
rsit
yo
fH
ert
for
dsh
ire
Appendix C-2 74HC245 Data Sheet
Appendix C-3 74HC245 Data Sheet
ire
dsh
for
ert
fH
yo
rsit
Un
ive
Appendix D Circuit Diagram
ire
+5V
DD8
DD7
DD9
DD6
DD10
DD5
DD11
DD4
DD12
DD3
DD13
DD2
DD14
DD1
DD15
DD0
Keypin
GND
GND
DMARQ
GND
DIOW-
GND
DIOR-
CSEL
IORDY
GND
DMACK-
ert
DIR Vcc
A0 OEA1 B0
A2 B1
A3 B2
A4 B3
A5 B4
A6 B5
A7 B6
GND B7
74HC245
PDIAG- DA1
DA0
DASP-
yo
CS3FX- CS1FXGND
+5v
PB0
PC0
PB1
PC1
PB2
PC3/TOUT PB3
PC4
PB4
PC5/PIPQ PB5
PA7
PB6
PA6
PB7
PA5
N.C.
PA4
GND
GND PC2/TIN
PA3
H4
PA2
H3
PA1
H2
PA0
H1
N.C. PC6/PIACK
N.C PC7/TIACK
N.C.
N.C.
N.C.
N.C.
N.C.
N.C.
fH
DIR Vcc
A0 OEA1 B0
A2 B1
A3 B2
A4 B3
A5 B4
A6 B5
A7 B6
GND B7
IOCS16- INTRQ
DA2
for
Reset
dsh
10K REG
GND
Un
ive
IDE
interface
rsit
74HC245
Appendix E-1 Source Code
#include <stdio.h>
0V
MC68230
// Port B Control Reg Address*/
char *PADDRTR = 0x800005;
// Port A Data Direction Reg Address */
char *PBCRTR = 0x80000F;
// Port B Control Reg Address*/
char *PBDDRTR = 0x800007;
ire
char *PACRTR = 0x80000D;
// Port B Data Direction Reg Address*/
// Port A Data Reg Address*/
char *PBDRTR = 0x800013;
// Port B Data Reg Address*/
char *PCDDRTR = 0x800009;
// Port C Data Direction Reg Address*/
dsh
char *PADRTR = 0x800011;
// Port C Data Reg Address*/
char *PGCRTR= 0x800001;
// Port General Control Reg Address*/
for
char *PCDRTR = 0x800019;
char D0;
char D1;
ert
char BSY;
// Port A Data Direction Reg */
#define PBDDR (*PBDDRTR)
// Port B Data Direction Reg */
#define PCDDR (*PCDDRTR)
// Port C Data Direction Reg */
#define PACR (*PACRTR )
fH
#define PADDR (*PADDRTR)
// PI/T Port A Control Reg */
// Port B Control Reg */
#define PADR (*PADRTR)
// Port A Data Reg */
#define PBDR (*PBDRTR)
#define PCDR (*PCDRTR)
Read()
{
// Port C Data Reg */
// Port General Control Reg*/
// Read Routin*/
Un
ive
char D0;
// Port B Data Reg */
rsit
#define PGCR (*PGCRTR)
yo
#define PBCR (*PBCRTR)
char D1;
char BSY;
Appendix E-2 Source Code
char test;
test=0x80;
BSY=0xFF;
PADDR=0xFF;
PCDR=0x00;
//test value//
//test variable//
//port a output//
//enable 2 chip b->a write//
PADR=0x01;
//enable 8-bit data tansfer//
PBDR=0x49;
//write to sector count//
PADR=0x01;
//sector count is 1, indicates transfer 1 sector//
PBDR=0x59;
//WRITE TO LBA bits 0-7//
PADR=0x01;
//sector 1//
PBDR=0x45;
//WRITE TO LBA bits 8-15//
PADR=0x00;
//cylinder 0//
PBDR=0x55;
//WRITE TO LBA bits 16-23//
PBDR=0x4D;
//WRITE TO LBA bits 24-27//
PADR=0x00;
//head 0//
PBDR=0x5D;
//write to command register//
PADR=0x20;
//read sector command//
PCDR=0x02;
//enable 2 chip a->b read//
//port a input//
fH
PADDR=0x00;
//read the status register//
PBDR=0x21;
//read data register//
D1=PADR;
BSY=D1&test;
}
//read data//
//read the status register//
//read status//
//monitor if finish//
rsit
PBDR=0x3D;
yo
PBDR=0x3D;
D0=PADR;
Un
ive
Appendix E-3 Source Code
Write()
{
// Write Routin //
char D0;
char D1;
char BSY;
char test;
test=0x80;
for
//cylinder 0//
ert
PADR=0x00;
//test value//
BSY1=0xFF;
//test variable//
PADDR=0xFF;
//port a output//
ire
//set feature register//
dsh
PBDR=0x51;
PBDR=0x51;
//set feature register//
PADR=0x01;
//enable 8-bit data tansfer//
PBDR=0x49;
//write to sector count//
PADR=0x01;
//sector count is 1, indicates transfer 1 sector//
PBDR=0x59;
//WRITE TO LBA bits 0-7//
PADR=0x3F;
//sector 1//
PBDR=0x45;
//WRITE TO LBA bits 8-15//
PADR=0x00;
//cylinder 0//
PBDR=0x55;
//WRITE TO LBA bits 16-23//
PADR=0x00;
//cylinder 00//
PBDR=0x4D;
//WRITE TO LBA bits 24-27//
PADR=0x00;
//head 0//
PBDR=0x5D;
//write to command register//
PADR=0x30;
//write sector command//
Appendix E-4 Source Code
PCDR=0x02;
PADDR=0x00;
D1=PADR;
BSY=D1&test;
}
for
//enable 2 chip a->b read//
//port a input//
//read the status register//
Un
ive
PBDR=0x3D;
//write data//
rsit
PADR=D0;
ert
fH
//write data register//
yo
PBDR=0x41;
//read status//
//monitor if finish//
void init()
{
PGCR=0x00;
PBDDR=0xFF;
PACR=0x00;
//enable port A & B.mode 0. disable H1,2,3,4*/
// Set Port B as output*/
//Set Port A in submode 00*/
ire
//enable 2 chip b->a write//
dsh
PCDR=0x00;
PBCR=0x00;
//Set Port B in submode 00*/
// Set Port C as output*/
ire
PCDDR=0xFF;
}
dsh
main()
{
char D0;
char BSY;
Read();
// Initialize the Ports//
//Run Read routin//
printf("%d",BSY);
Write();
// Verfiry the transfer completed//
// Run Write routin//
printf("%d",BSY);
ert
init();
for
char D1;
// Verfiry the transfer completed//
fH
}
Appendix F Prototype Picture of the Project
Un
ive
rsit
yo
Picture of I/O Adapter Card
Picture of Prototype System
ire
dsh
for
fH
ert
Un
ive
rsit
yo
Appendix G Project Time Table
rsit
Un
ive
ert
fH
yo
for
dsh
ire