1
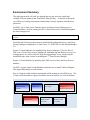
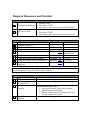
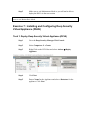
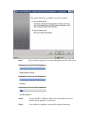
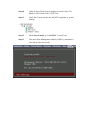
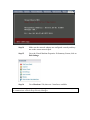
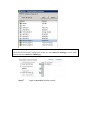
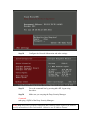
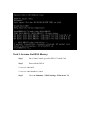
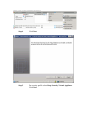
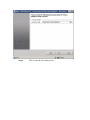
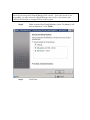
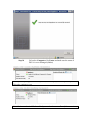
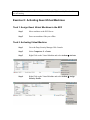
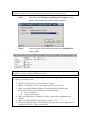
Step-by-Step Deep Security Agentless Anti-Malware Installation Environment Summary ....................................................................................................... 2 Required Resources and Checklist...................................................................................... 3 Estimated Time Requirement ............................................................................................. 4 Exercise 1: Server Preparation ........................................................................................... 4 Task 1: ESX 4.1 Setup .................................................................................................... 4 Task 2: vCenter Server 4.1 Setup ................................................................................... 4 Task 3: vShield Manager (vSM) 4.1 ............................................................................... 4 Task 4: SQL Server ......................................................................................................... 6 Task 5: Install Operating System for Deep Security Manager Node 1 ........................... 7 Task 6: Install operating System for Deep Security Manager Node 2 ........................... 7 Exercise 2: Guest OS Preparation ...................................................................................... 7 Task 1: Install Guest VM #1 ........................................................................................... 7 Task 2: Install Guest VM #2 ........................................................................................... 8 Exercise 3: ESX Server and vShield Manager Preparation ............................................... 8 Task 1: Install VMware vShield Endpoint (EPSec) to the ESX Server ......................... 8 Exercise 4: Deep Security Manager Installation .............................................................. 11 Task 1: Deep Security Manager (DSM) 7.5 (First Node) ............................................. 11 Task 2: Deep Security Manager (DSM) 7.5 (Second Node) ........................................ 12 Exercise 5: Further Configuration ................................................................................... 12 Task 1: Upload Filter Driver to DSM ........................................................................... 13 Task 2: Upload Deep Security Virtual Appliance (DSVA) to DSM ............................ 13 Task 3: Add vCenter to DSM ....................................................................................... 14 Task 4: Prepare ESXi (Installing Filter Driver on ESXi) ............................................. 19 Exercise 6: Increasing Filter Driver Virtual Machine Capacity (Optional) ..................... 25 Task 1: Enter ESX Server Maintenance Mode ............................................................. 26 Task 2: Increasing heap memory in the fast path driver ............................................... 26 Task 3: Exit ESX Server Maintenance Mode ............................................................... 26 Exercise 7: Installing and Configuring Deep Security Virtual Appliance (DSVA) ........ 27 Task 1: Deploy Deep Security Virtual Appliance (DSVA) .......................................... 27 Task 2: Increase the DSVA Memory ............................................................................ 34 Task 3: Disable DRS and HA on DSVA ...................................................................... 35 Task 4: Activating Deep Security Virtual Appliance ................................................... 35 Exercise 8: Activating Guest Virtual Machines............................................................... 41 Task 1: Assign Guest Virtual Machines to the ESX ..................................................... 41 Task 2: Activating Virtual Machine ............................................................................. 41 Appendix A: Manual Uninstall of the dvfilter-dsa driver ................................................. 44 Appendix B: Manual Install of the dvfilter-dsa driver...................................................... 44 Appendix C: VMX file changes added by the installation ............................................... 45 Environment Summary This deployment guide will walk you through step by step on how to install and configure VMware products and Trend Micro Deep Security. At the end of this guide, you will have a working environment running Deep Security Agentless Anti-Malware protection. On ESX 1, the vCenter server, Database Server and Deep Security Manager server Virtual Machines can all be running on ESX 1 which will never be rebooted throughout the entire setup process. Note: VMware vCenter Server 4.1 can only be installed on a Windows 64 bit operating system The following VMware products must be installed and configured before we start Deep Security Manager configuration: vCenter Server 4.1, ESX/ESXi 4.1 and vShield Manager 2.0. Prepare 2 Virtual Machines for installing Deep Security Manager 7.5 Service Pack 2. This is for a 2 node Deep Security Manager for load balancing and disaster recovery, for testing purposes we can use only one Deep Security Manager server, simply skip the installation steps when it comes to installing the 2nd Deep Security Manager. Prepare 1 Virtual Machine for installing SQL 2008 Server to house the Deep Security database. On ESX 2, prepare Guest Virtual Machines and make sure to install VMware Endpont Thin Agent individually on each machine. Here is a diagram of the machines running that will be running on each ESX Server. The vCenter can be installed on a physical machine, but it can also be on a Virtual Machine. Machines running on ESX Server 1 (This ESX must be running at all times throughout the setup process) vCenter Server 4.1 Windows 2003 (64 bit) vShield Manager 2.0 Microsoft SQL Server 2008 Deep Security Manager 7.5 Windows 2008 (64 bit) Machines running on ESX Server 2 Deep Security Virtual Appliance 7.5 Guest VM - 1 Windows 2003 (32/64 bit) Guest VM - 2 Windows 2008 (32/64 bit) Required Resources and Checklist Hardware Requirements Deep Security Manager SQL Server 2008 Memory: 4GB Disk Space: 25GB Operating System: Windows Server 2008 (64-bit) Memory: 4GB Disk Space: 75GB Operating System: Windows Server 2008 (64-bit) Software Requirements Name VMware vCenter 4.1 VMware ESX/ESXi 4.1 VMware Infrastructure Client VMware vShield Endpoint Thin Agent VMware vShield Manager 4.1 Trend Micro Deep Security Manager Trend Micro Deep Security Filter Driver Trend Micro Deep Security Virtual Appliance Source Version Download: URL 1.0.0 Update 2 Build 402356 4.1 Build 310451 7.5.6323 7.5.0.5435 7.5.0-5554 Download: URL Download: URL Download: URL Note: We recommend using the latest Deep Security product build number especially for the DSVA module when a new build is made available. License Requirements Name VMware vCenter 4.1 VMware vSphere (ESX/ESXi) 4.1 VMware vShield Endpoint Trend Micro AntiMalware Procedure License is required during product installation. License is required during product installation. Add the license into vCenter 1. On vCenter Console, select View Home 2. Administration Licensing 3. Manage vSphere Licenses Enter the license key and complete the wizard License is required during product installation. Estimated Time Requirement 1 to 3 days depending on initial preparation that has been done. Exercise 1: Server Preparation Task 1: ESX 4.1 Setup Step 1 Make sure ESX 4.1 is installed and configured properly. Task 2: vCenter Server 4.1 Setup Step 1 Make sure vCenter 4.1 is installed and configured properly. Step 2 ESX servers are added and managed by the vCenter Server. Task 3: vShield Manager (vSM) 4.1 Step 1 On vCenter Console, select File Deploy OVF Template. Step 2 Browse and select the vShield Manager OVA file Step 3 Deploy vSM on an ESX host to be used by Deep Security Manager installation Step 4 Once vSM is deployed, power on vSM and login as admin/default from console Step 5 Type enable to turn on privileged mode command with default as password. Step 6 Type setup and follow the steps to finish vSM network configuration Step 7 Login to vSM using an Internet Browser using this URL https://<vSM-ip> Step 8 Make sure vSM web console is displayed Task 4: SQL Server Step 1 Install SQL Server to a Virtual Machine. Step 2 Apply the latest Microsoft patches onto the server. Step 3 Launch the SQL Management Studio. Step 4 Login using an SQL Account that will also be used as our DSM SQL Account. Step 5 Create a new database using this SQL account. Note: The SQL Account must be granted DB_Creator Server Roles and DB_Owner of the DSM database. Step 6 Write down the database name we just created. Task 5: Install Operating System for Deep Security Manager Node 1 Step 1 Install the Virtual Machine with a 64-bit Windows 2008 operating system. Task 6: Install operating System for Deep Security Manager Node 2 Step 1 Install the Virtual Machine with a 64-bit Windows 2008 operating system Exercise 2: Guest OS Preparation Task 1: Install Guest VM #1 Step 1 Install Windows 2003 Server (32/64 bit) as guest OS. Step 2 Make sure you install Service Pack 2. Step 3 Make sure the guest VM is using LSI Logic Parallel, LSI Logic SAS or VMware Paravirtual SCSI controller. Note: "Bus Logic" SCSI controller is not supported. Step 4 Make sure the guest VM has a basic disk volume. Note: Dynamic disk is not supported. Step 5 Copy the VMware vShield Endpoint thin agent installation package to this machine. Step 6 Install the vShield Endpoint thin agent package. Step 7 Ignore the driver warning and Continue with the installation. Step 8 Click "No" and do not restart machine Step 9 Shutdown the machine. Task 2: Install Guest VM #2 Step 1 Install more than one supported guest VM Exercise 3: ESX Server and vShield Manager Preparation Task 1: Install VMware vShield Endpoint (EPSec) to the ESX Server Step 1 Login to vShield Manager using an Internet Browser to https://<vSM-ip> Step 2 Input admin/default as login account Step 3 On the right side Configuration tab, enter your vCenter Server Information Note: Depending on the number of machines reporting to the ESX vCenter, on an environment with 3000+ machines, this process may take 10 to 20 minutes to complete. Step 4 Select Host & Cluster in the left navigation pane Step 5 Select an ESX Server to be protected by Deep Security. Step 6 On the right pane, click Install link under the Service item vShield Endpoint Step 7 After the installation, please make sure the Service vShield Endpoint has version number displayed. The Install link has now changed to Uninstall. Note: If you have an ESX Cluster, all ESX Servers must have vShield Endpoint installed. Otherwise vMotion task may fail when other ESX servers is missing the VFILE driver. Step 8 On vCenter Console, go to the vSM Console tab. Step 9 Login as admin/default from console Step 10 Type enable to turn on privileged mode command with default as password Step 11 Type reboot to reboot vSM Step 12 Login to vSM with Internet Browser with URL https://<vSM-ip> Step 13 Make sure vSM web console is displayed Step 14 Log into the vSM web console and verify that status of the ESX Server. Click on the ESX Server and make sure vShield Endpoint is still displaying the correct version information. Note: If the status displays wrong information, click on the refresh link on the top right corner. A lot of times the refresh fixes the problem. Otherwise there might be problem with the vShield Endpoint driver installation. (Contact VMware for more information). Exercise 4: Deep Security Manager Installation Task 1: Deep Security Manager (DSM) 7.5 (First Node) Step 1 Install DSM 7.5 (please follow the Installation wizard to complete the installation) Step 2 Start the installation by clicking on "Manager-Windows7.5.6323.x64.exe". Note: Check and make sure you are using the latest Deep Security Manager version and build number. Step 3 Select Next for the Welcome Screen Step 4 Accept the License. Click Next Step 5 Specify the installation path. Click Next Step 6 Specify the SQL Server, database name and SQL Account. Click Next Step 7 Enter the Anti-Malware activation code. Step 8 In the Address and Port Screen, we recommend using FQDN of the machine. Click Next. Note: Make sure DNS is properly configured and is able to resolve FQDN to IP Address used by all machines in this environment. Otherwise use IP Address instead. Step 9 On the credentials screen, enter a password for MasterAdmin. Click Next Step 10 Keep Automatic Updates box selected. Click Next Step 11 Confirm Settings. Click Finish Step 12 Once the installation is done make sure you can login to DSM using the MasterAdmin account. Task 2: Deep Security Manager (DSM) 7.5 (Second Node) Step 1 Install the second DSM 7.5 on the other Virtual Machine. Step 2 Select Next for the Welcome Screen Step 3 Accept the License. Click Next Step 4 Specify the installation path. Click Next Step 5 Specify the same SQL Server, database name and SQL Account. Click Next Step 6 The installer will detect this is the 2nd DSM Node and add itself to the existing installation. Step 7 Click Finish and wait for the installation to complete. Exercise 5: Further Configuration Note: If the Filter Driver and Virtual Appliance files are in the same folder as the Deep Security Manager installer. When you install Deep Security Manager from this folder, it automatically imports the Filter Driver and Virtual Appliance files. If this is the case, you may skip Task 1 and Task 2. Task 1: Upload Filter Driver to DSM Step 1 Go to the Deep Security Manager Web Console Step 2 From the left navigation panel select System Updates Step 3 Scroll down and select Import Software… from Software Package section. Step 4 Browse and Select FilterDriver-ESX-7.5.0-5435.x86-64.zip. Click Next. Note: Check and make sure you are using the latest Deep Security Filter Driver version and build number. Step 5 Click Finish on the next screen. Task 2: Upload Deep Security Virtual Appliance (DSVA) to DSM Step 1 Go to the Deep Security Manager Web Console Step 2 From the left navigation panel select System Updates Step 3 Scroll down and select Import Software… from Software Package section. Step 4 Browse and Select Appliance-ESX-7.5.0-5554.x86-64.zip. Note: Check and make sure you are using the latest Deep Security Virtual Appliance version and build number. Step 5 Click Next and wait for Software Properties window. Click Finish. Note: The package upload may take 5-10 minutes depending on network connection speed. Step 6 Click on View Imported Software… button and make sure both the filter driver and appliance package are uploaded Note: Sometimes the upload process timed out, but if you check the “View Imported Software”, the files will still be uploaded. You can delete files and re-upload them if necessary. Task 3: Add vCenter to DSM Step 1 Go to the Deep Security Manager Web Console Step 2 From the left navigation panel select Computers Add VMware vCenter… Step 3 Enter vCenter Server FQDN (we recommend using FQDN instead of IP Address), specify Username and Password, Click Next Note: Make sure DNS is properly configured and is able to resolve FQDN to IP Address used by all machines in this environment. Otherwise use IP Address instead. Step 4 Enter vShield Manager Server Address, Username and Password, Click Next Note: Unless you have manually assigned an FQDN for the vShield Manager, it is more convenient to just use IP Address of vShield Manager you provided during the setup process. Step 5 Under “Deep Security Virtual Appliance global network” configuration. Use recommended default configuration. Click Next Note: The VM Kernel VNIC IP by default uses 169.254.50.1. It is possible some other vShield products are already installed on the ESX Server. If that is the case, we will reuse the existing configuration. Note: If there is already an existing product that created the vmservice-vmknic-pg and assigned an IP Address 169.254.1.1, make sure the IP Address is configured the same in VM Kernel VNIC IP Step 6 Accept the vShield Zones Manager SSL certificate. Step 7 Accept the VMware default certificate. Step 8 Review vCenter information and then Click Finish. Step 9 “The VMware vCenter has been successfully added” message will be displayed, Click Close. Step 10 Click on Computers vCenter to make sure the vCenter is listed Note: On a very large environment with more than 3000 machines reporting to a vCenter server, this import process may take 20 to 30 minutes to complete. You can check the vCenter Recent Task section to verify if there are query activities running. Task 4: Prepare ESXi (Installing Filter Driver on ESXi) Note: The ESX/ESXi server will be placed in maintenance mode for this task. It is advisable that running virtual machines on the box either be shut down or vMotioned to another ESX server (make sure a cluster server with vmotion support is set up so this can be done automatically). Step 1 Go to the Deep Security Manager Web Console Step 2 Select Computers vCenter Hosts and Clusters Step 3 The ESX Servers will be listed. Right click on the ESX Server and select Actions Prepare ESX Step 4 Click Next Step 5 Select YES to automatically bring the ESX in and out of maintenance mode. Click Finish Step 6 The ESX Server preparation process will complete all activities with no further user input necessary. Step 7 Once the process is complete. Select “No thanks, I will deploy later.” Click Close. We will install the Deep Security Virtual Appliance later. Step 8 This completes the ESX preparation. Wait for few minutes. Step 9 You can look at the vCenter Console tasks to see how the ESX preparation is progressing. Going into maintenance mode and exiting maintenance mode once it completed. Note: The ESX Server is rebooted automatically during the prepare process. At the start the ESX Server will enter maintenance mode. After the reboot it will exit out of maintenance mode automatically. Step 10 Go back to Computers vCenter and make sure the status of ESX is set to “Prepared”. Note: Make sure that Anti-Malware Ready status has been set to Yes. If the status is no, you may try rebooting the vShield Manager and then perform a re-synchronize with vCenter in the Deep Security Manager web console. Step 11 Go to the vCenter Console. Select the ESX Server Configuration Tab Networking. Check if the vSwitch has been created. Step 12 SSH into the ESX Server and run the following commands to confirm the VMware and Trend Micro drivers are installed properly. Command: vmkload_mod -l | grep dvfilter Command: vmkload_mod -l | grep vfile Note: dvfilter comes with the ESX Server installation. The vfile is installed by VMware vShield Manager to the ESX Server. Dvfilter-dsa is the Trend Micro driver installed to the ESX Server after we completed the preparation process. Command: esxupdate --vib-view query Note: dvfilter-dsa must be displayed using the correct version and status must be installed. Exercise 6: Increasing Filter Driver Virtual Machine Capacity (Optional) Note: The DSVA by default has enough resources to protect up to 25 Virtual Machines per ESX, if you have more than 25 machines running on an ESX Server. You may have to increase the resources allocated to the DSVA machine. Task 1: Enter ESX Server Maintenance Mode Step 1 Go to the vCenter console. Step 2 Configure ESX Server to enter Maintenance Mode Task 2: Increasing heap memory in the fast path driver Step 1 The formula is: <number of VMs> * <1048576 Bytes (1 MB)> + 8388608 Bytes (8MB) e.g. 350 * 1MB + 8MB = 375390208 Bytes Step 2 SSH into the ESX Console and run this command. Command: % esxcfg-module -s DSAFILTER_HEAP_MAX_SIZE=375390208 dvfilter-dsa Step 3 To verify the setting, you can execute: Command: % esxcfg-module -g dvfilter-dsa Step 4 The setting will not take effect until the driver is reloaded. Note: It is highly recommended to reboot the ESX server after making the configuration change. Step 5 We recommend rebooting the ESX server or you may execute the following commands to restart the driver: Command: % esxcfg-module -u dvfilter-dsa % esxcfg-module dvfilter-dsa Task 3: Exit ESX Server Maintenance Mode Step 1 If you enter ESX into Maintenance Mode Step 2 Make sure to exit Maintenance Mode or you will not be able to deploy the DSVA in the next section Note: You cannot deploy DSVA while the ESX Server is in maintenance mode. Make sure to exit Maintenance Mode. Exercise 7: Installing and Configuring Deep Security Virtual Appliance (DSVA) Task 1: Deploy Deep Security Virtual Appliance (DSVA) Step 1 Go to the Deep Security Manager Web Console Step 2 Select Computers vCenter Step 3 Right Click on the ESX Host and select Actions Deploy Appliance Step 4 Click Next Step 5 Enter a Name for the Appliance and select a Datastore for the appliance. Click Next. Step 6 Select “Thick Provisioned format”, Click Finish and wait for few minutes Step 7 Wait for the package to be created and deployed to the ESX Server. Step 8 Accept the SSL Certificate in the next screen and wait for few minutes till the appliance is deployed. Step 9 You should see Appliance successfully deployed message. Step 10 Under Activate Deep Security Appliance section, select "No thanks, I will activate it later. Click Close. Step 11 Check the vCenter to make sure the DSVA appliance is up and running. Step 12 On vCenter Console, go to the DSVA "Console" tab Step 13 Take note of the Management Address of DSVA, sometimes it uses eth0 at times it uses eth1. Step 14 Make sure the network adapters are configured correctly and they are on the correct network pool. Step 15 Go to the Virtual Machine Properties Summary Screen, click on Edit Settings. Step 16 Go to Hardware Tab, there are 3 interfaces available. Note: Network Adapter 1 is always the management network. DSVA uses this interface to communicate with the Deep Security Manager. Note: Network Adapter 2 is used by DSVA to communicate with the VM Kernel VNIC IP. Check the ESX Network Configuration, make sure that vmservice-trend-pg is on the same virtual switch as vmservice-vmknic-pg Step 17 Login as dsva/dsva from the console Step 18 Configure the Network Information and other settings. Step 19 Go to the command line by pressing Alt + F2, logon using dsva/dsva. Step 20 Make sure you can ping the Deep Security Manager. Command: sudo ping <FQDN of the Deep Security Manager> Note: Make sure DNS is properly configured and is able to resolve FQDN to IP Address used by all machines in this environment. Otherwise use IP Address instead. Task 2: Increase the DSVA Memory Step 1 On vCenter Console, go to the DSVA "Console" tab. Step 2 Power-off the DSVA Command: sudo init 0 Command: sudo shutdown –h now Step 3 Go to the Summary Edit Settings Hardware Tab Step 4 Allocate 8GB of memory to the virtual appliance. Note: 1GB of memory is assigned to DSVA by default. Increase the memory to 4GB for DSVA protecting 50 Virtual Machines. Increase the memory to 8GB for DSVA protecting 100+ Virtual Machines. Step 5 Power-on the DSVA Task 3: Disable DRS and HA on DSVA Step 1 On vCenter Console, turn off HA and DRS on the DSVA machine. Task 4: Activating Deep Security Virtual Appliance Step 1 Go to the Deep Security Manager Web Console Step 2 Select Computers vCenter Step 3 Right Click on the DSVA appliance machine and select Actions Activate Appliance Step 4 Click Next Step 5 For security profile select Deep Security Virtual Appliance. Click Next Step 6 DSVA starts the activation process. Note: The DSVA activation requires vShield Manager to configure the VMX file of each machine that is on the ESX Server. Depending on the number of Virtual Machines, sometimes it may take hours to complete the DSVA activation. Step 7 DSVA will register itself into vShield Manager. You will see multiple tasks being executed in vCenter Console. It needs to go through all machines’ VMX file and update it with the correct vfile parameters. vCenter Tasks: Reconfigure virtual machine vCenter Tasks: XXX VirtualMachine.invokeFSR.label not found XXX Note: If the vShield Manager is experiencing problems, DSVA will fail to activate. Check if you can open the vShield Manager web console. If the web console is not responding, you may reboot the vShield Manager and wait for a few minutes after vShield is back online to attempt DSVA activation again. Step 8 Under Activate Host Virtual Machines, select "No thanks, I will activate them later". Click Finish. Step 9 Click Close. Step 10 Go back to Computers vCenter and make sure the status of DSVA is set to Managed (Online) Note: After completing the activation process, the DSVA performs a component update. This takes a minute or two. Note: Make sure that Anti-Malware Ready status has been set to Yes. If the status is no, check the ESX Anti-Malware Status. Make sure the vfile, dvfilter and dvfilter-dsa drivers are all running. Exercise 8: Activating Guest Virtual Machines Task 1: Assign Guest Virtual Machines to the ESX Step 1 Move machines to the ESX Server. Step 2 Power on machines if they are offline Task 2: Activating Virtual Machine Step 1 Go to the Deep Security Manager Web Console Step 2 Select Computers vCenter Step 3 Right Click on the Virtual Machine and select Action Activate Step 4 Right Click on the Virtual Machine and select Action Assign Security Profile Note: After a machine is activated. You need to assign a Security Profile with AntiMalware enabled. This will activate anti-malware on the virtual machine. Step 5 You can use the Windows Anti-Malware Protection security profile. This only has anti-malware feature enabled. Step 6 Check the status of the machine and make sure Anti-Malware status is “On”. Note: If anti-malware is active, you will notice the Green ball status displayed under Appliance column in the Anti-Malware section. Note: If anti-malware status is displaying “Anti-Malware Engine offline”. There are a few things you need to check: 1. SCSI Controller Type the virtual machine is using. 2. Make sure VMWare tools are up-to-date on the virtual machine 3. Make sure vShield Endpoint Agent is installed and both vfilefilter and vfilescsifilter drivers are running on the virtual machine. a. sc query vfilefilter b. sc query vfilescsifilter 4. Make sure Deep Security Manager is able to synchronize information with vCenter 5. Make sure ESX and DSVA Anti-Malware status is “Yes” 6. Check the VMX file of the virtual machine and make sure it has all parameters configured correctly. Refer to Appendix C. Document Revision History Date 06/03/2011 06/09/2011 06/10/2011 Revision Document created Minor changes (Jill Maceda, Marion Mora) Minor changes Editor Alwin Yu Alwin Yu Alwin Yu Appendix A: Manual Uninstall of the dvfilter-dsa driver Step 1 SSH into the ESX server and login using root account. Step 2 Run this command to get the dvfilter-dsa driver complete name. Command: # esxupdate --vib-view query | grep dvfilter-dsa Output: --------------VIB ID------------- Package State -----------Timestamp-----------cross_dvfilter-dsa_400.7.0.0-894 installed 2009-10-30T11:24:05.487757-04:00 Step 3 Run this command to uninstall the dvfilter-dsa driver Command: # esxupdate –b cross_dvfilter-dsa_400.7.0.0-894 –maintenancemode remove Note: The version might be different on customer’s ESX server. (e.g. cross_dvfilterdsa_410.7.5.0-5435) Appendix B: Manual Install of the dvfilter-dsa driver Step 1 Copy the filter driver .zip package (FilterDriver-ESX-7.5.05435.x86_64.zip) to the ESX host using scp. Copy the file under /tmp folder. Step 2 Make sure all the Virtual Machines are powered off or migrated to another ESX host. Step 3 Put the ESX server in maintenance mode. Step 4 SSH into the ESX server and login using root account. Step 5 Install the filter driver. Command: esxupdate --bundle=FilterDriver-ESX-7.5.0-5435.x86_64.zip –maintenancemode update Step 6 Reboot the ESX server by typing "reboot" Step 7 Exit ESX maintenance mode. Step 8 The ESX Server should automatically show up as prepared on the Deep Security Manager console. Step 9 Then verify the status of the filter driver Command: esxupdate --vib-view query Command: vmkload_mod -l | grep dvfilter Appendix C: VMX file changes added by the installation VMware vShield Manager: These are additional lines added by vShield Manager into the VMX file on a particular ESX Server the moment a Security VM is registered into vShield Manager running on the ESX Server, the Security VM we are referring to here is the Deep Security Virtual Appliance (DSVA). Security VM is registered: scsi0:0.filters = "VFILE" VFILE.globaloptions = "svmip=169.254.50.39 svmport=8888" Deep Security Manager: Activated Client: ethernet0.filter0.name = "dvfilter-dsa" ethernet0.filter0.onFailure = "failOpen" ethernet0.filter0.param0 = "564dd0c7-aae7-ba5a-42d0-c50e8b78b013" ethernet0.filter0.param2 = "1" ethernet0.filter0.param1 = "00:50:56:93:00:05" Deactivated Client: ethernet0.filter0.name = "" ethernet0.filter0.onFailure = "failOpen" ethernet0.filter0.param0 = "" ethernet0.filter0.param2 = "" ethernet0.filter0.param1 = ""