1
W O L F WA R M I N G D R AW E R
I N T E G R AT E D F R O N T P A N E L
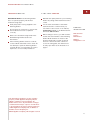
I N S TA L L F R O N T P A N E L T O D R A W E R
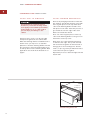
Remove the front panel that came attached to
the warming drawer. Save the six screws used
to attach the panel.
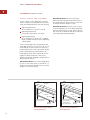
Using the six screws, install the metal panel
from the integrated drawer front kit onto the
warming drawer front. Make sure the brushed
side of the metal panel is facing the warming
drawer interior.
Temporarily place the decorative front panel
against the metal panel and make sure it is in
its correct final position.
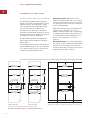
Open the drawer. Trace the holes in the metal
panel onto the back of the decorative panel.
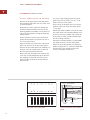
Remove the decorative panel. The markings on
the back of the decorative panel should look
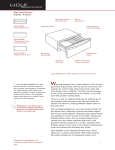
like the top panel illustration below.
For every round marking on the decorative
panel (12 locations), drill a 1/2" hole, 1/4" (6)
deep in the back of the panel.
Route out the rectangular areas (8 locations)
marked on the back of the decorative panel
1/4" (6) deep.
Attach the handle hardware to the front of the
decorative panel. The integrated drawer front
kit does not include a handle. This allows the
homeowner to match handle hardware with
the surrounding cabinetry.
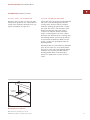
Install the six rubber bumpers, provided with
the drawer front kit, onto the metal panel.
Attach the decorative panel to the warming
drawer using the six 1/2" screws provided with
the kit. Refer to the illustration below for
location of bumpers and screws.
Draw a line from the edge of the oblong holes
to the the corresponding oblong hole below it.
The markings on the back of the decorative
panel should look like the bottom panel illustration below.
Screw
Rubber Bumper
Decorative
Panel
Back view of decorative panel
18
Metal
Panel
Location of bumpers and mounting
screws