1
Technical Manual
Motorola C370, C450, and
C550 Series of Handsets
J2ME™ Developer Guide
Version 1.1
Table of Contents
TABLE OF CONTENTS.......................................................................................................................... 2
1 INTRODUCTION................................................................................................................................. 5
PURPOSE ............................................................................................................................................... 5
AUDIENCE.............................................................................................................................................. 5
DISCLAIMER .......................................................................................................................................... 5
REFERENCES .......................................................................................................................................... 6
REVISION HISTORY............................................................................................................................... 7
DEFINITIONS, ABBREVIATIONS, ACRONYMS ........................................................................................ 7
DOCUMENT OVERVIEW ............................................................................................................................. 8
2 J2ME INTRODUCTION ................................................................................................................... 10
THE JAVA 2 PLATFORM, MICRO EDITION (J2ME) ......................................................................... 10
THE MOTOROLA J2ME PLATFORM ........................................................................................................ 11
RESOURCES AVAILABLE ....................................................................................................................... 11
3 DEVELOPING AND PACKAGING J2ME APPLICATIONS .......................................................... 13
GUIDE
TO
DEVELOPMENT
IN
J2ME ..................................................................................................... 13
4 DOWNLOADING APPLICATIONS ................................................................................................... 15
OTA PROCEDURE ................................................................................................................................. 15
INSTALLATION .................................................................................................................................... 15
STARTING APPLICATIONS.................................................................................................................... 17
EXITING APPLICATIONS ..................................................................................................................... 17
LAUNCHING WEB SESSION FOR HTTP DOWNLOAD................................................................................ 18
DOWNLOADING MIDLETS ...................................................................................................................... 18
ERROR CHECKS .................................................................................................................................... 18
XML SCREEN RENDERINGS .................................................................................................................. 19
5 APPLICATION MANAGEMENT........................................................................................................ 22
MIDLET LIFECYCLE ............................................................................................................................ 22
MIDLET SUITE INSTALLATION ........................................................................................................... 23
MIDLET SUITE DE-INSTALLATION ..................................................................................................... 24
MIDLET SUITE UPDATING .................................................................................................................. 25
STARTING, PAUSING, AND EXITING: AMS CONTROL OF MIDLET STATE TRANSITIONS ................. 25
MIDlet Control of MIDlet State Transitions ....................................................... 29
JAVA SYSTEM ...................................................................................................................................... 29
6 NETWORK API................................................................................................................................. 31
NETWORK CONNECTIONS ....................................................................................................................... 31
CLASS DESCRIPTIONS ......................................................................................................................... 32
Table of Contents
HTTP.................................................................................................................................................. 33
TCP SOCKETS .................................................................................................................................... 34
UDP SOCKETS .................................................................................................................................... 34
IMPLEMENTATION NOTES ..................................................................................................................... 34
NOTES ................................................................................................................................................. 35
7 LCDUI............................................................................................................................................... 36
LCDUI API ...................................................................................................................................... 36
8 GAMING API AND SOUND ............................................................................................................ 38
FUNCTIONAL DESCRIPTION .................................................................................................................. 38
CLASS HIERARCHY .............................................................................................................................. 38
BACKGROUNDMUSIC CLASS ................................................................................................................... 39
BackgroundMusic Methods................................................................................................... 39
Using BackgroundMusic ....................................................................................................... 39
GAMESCREEN CLASS ............................................................................................................................ 40
GameScreen Fields ................................................................................................................ 40
GameScreen Methods .............................................................................................................. 41
Using GameScreen................................................................................................................... 43
IMAGEUTIL CLASS .............................................................................................................................. 44
ImageUtil Fields................................................................................................................... 44
ImageUtil Methods ................................................................................................................ 44
Using ImageUtil..................................................................................................................... 45
PALLETEIMAGE CLASS......................................................................................................................... 46
PalleteImage Constructor ................................................................................................ 46
PalleteImage Methods ......................................................................................................... 46
Using PalleteImage .............................................................................................................. 47
PLAYFIELD CLASS .............................................................................................................................. 48
Using Static and Animated Tiles ................................................................................ 48
Using Sprites ......................................................................................................................... 49
Defining View Windows ....................................................................................................... 49
PlayField Constructor ....................................................................................................... 49
PlayField Methods ................................................................................................................ 51
Using PlayField..................................................................................................................... 54
SOUNDEFFECT CLASS .......................................................................................................................... 55
SoundEffect Methods............................................................................................................ 55
Using SoundEffect ................................................................................................................ 55
SPRITE CLASS .................................................................................................................................... 55
Animation Frames................................................................................................................... 56
Sprite Drawing ....................................................................................................................... 56
Sprite Constructor .............................................................................................................. 56
Sprite Methods ....................................................................................................................... 57
Using Sprite............................................................................................................................ 60
FILEFORMATNOTSUPPORTEDEXCEPTION ................................................................................................ 60
FileFormatNotSupportedException Constructors................................................... 61
JAVA GAMING SOUND API.................................................................................................................. 61
MAX MIDI EXTENSION SUPPORT ........................................................................................................ 61
9 VIBE AND BACKLIGHT ................................................................................................................. 62
VIBE
AND
BACKLIGHT API ................................................................................................................ 62
10 SMS MO .......................................................................................................................................... 63
3
OVERVIEW............................................................................................................................................ 63
CREATING A MESSAGE ......................................................................................................................... 63
SENDING A MESSAGE ........................................................................................................................... 64
PERMISSIONS ...................................................................................................................................... 64
11 JAD ATTRIBUTES........................................................................................................................ 65
JAD ATTRIBUTES ............................................................................................................................... 65
12 RECORD MANAGEMENT SYSTEM ................................................................................................. 67
OVERVIEW............................................................................................................................................ 67
CLASS DESCRIPTION ........................................................................................................................... 67
CODE EXAMPLES .................................................................................................................................. 67
TIPS ................................................................................................................................................... 68
CAVEATS ............................................................................................................................................. 68
13 PHONEBOOK ACCESS ................................................................................................................... 69
PHONEBOOK ACCESS API .................................................................................................................... 69
PHONEBOOK ACCESS API PERMISSIONS ............................................................................................. 70
14 ITAP............................................................................................................................................... 78
INTELLIGENT KEYPAD TEXT ENTRY API ........................................................................................... 78
APPENDIX A: KEY MAPPING .......................................................................................................... 79
KEY MAPPING
FOR THE
C370, C450,
AND
C550.......................................................................... 79
APPENDIX B: MEMORY MANAGEMENT CALCULATION ................................................................. 81
AVAILABLE MEMORY............................................................................................................................. 81
APPENDIX C: FAQ ............................................................................................................................ 82
ONLINE FAQ....................................................................................................................................... 82
APPENDIX D: SPEC SHEETS .......................................................................................................... 83
C370, C450,
AND
C550 SPEC SHEETS ........................................................................................ 83
1
Introduction
1
Introduction
Purpose
This document describes the application program interfaces used to develop Motorola
compliant Java™ 2 Platform, Micro Edition (J2ME™) applications for the Motorola C370,
C450, and C550 series of handsets.
Audience
This document is intended for developers involved with the development of J2ME
applications for the C370, C450, and C550 series of handsets.
Disclaimer
Motorola reserves the right to make changes without notice to any products or services
described herein. “Typical” parameters, which may be provided in Motorola Data sheets
and/or specifications can and do vary in different applications and actual performance
may vary. Customer’s technical experts will validate all “Typicals” for each customer
application.
Motorola makes no warranty with regard to the products or services contained herein.
Implied warranties, including without limitation, the implied warranties of merchantability
and fitness for a particular purpose, are given only if specifically required by applicable
law. Otherwise, they are specifically excluded.
No warranty is made as to coverage, availability, or grade of service provided by the
products or services, whether through a service provider or otherwise.
No warranty is made that the software will meet your requirements or will work in
combination with any hardware or applications software products provided by third
parties, that the operation of the software products will be uninterrupted or error free, or
that all defects in the software products will be corrected.
5
In no event shall Motorola be liable, whether in contract or tort (including negligence), for
any damages resulting form use of a product or service described herein, or for any
indirect, incidental, special or consequential damages of any kind, or loss of revenue or
profits, loss of business, loss of information or data, or other financial loss arising out of or
in connection with the ability or inability to use the Products, to the full extent these
damages may be disclaimed by law.
Some states and other jurisdictions do not allow the exclusion or limitation of incidental or
consequential damages, or limitation on the length of an implied warranty, so the above
limitations or exclusions may not apply to you.
This warranty gives you specific legal rights, and you may also have other rights, which
vary from jurisdiction to jurisdiction.
Motorola products or services are not designed, intended, or authorized for use as
components in systems intended for surgical implant into the body, or other applications
intended to support or sustain life, or for any other application in which the failure of the
Motorola product or service could create a situation where personal injury or death may
occur.
Should the buyer purchase or use Motorola products or services for any such unintended
or unauthorized application, buyer shall release, indemnify and hold Motorola and its
officers, employees, subsidiaries, affiliates, and distributors harmless against all claims,
costs, damages, and expenses, and reasonable attorney fees arising out of, directly or
indirectly, any claim of personal injury or death associated with such unintended or
unauthorized use, even if such claim alleges that Motorola was negligent regarding the
designing or manufacture of the product or service.
References
Reference
Link
Sun™ J2ME Documentation,
http://java.sun.com/j2me/
Sun™ MIDP Specification,
http://java.sun.com/products/midp/
1
Introduction
Revision History
Version
Date
Name
Reason
0.1
Novemeber 24,
2003
Motocoder
Initial Draft
1.0
December 15,
2003
Motocoder
Baseline
1.1
December 29,
2003
Motocoder
Update
Definitions, Abbreviations, Acronyms
Acronym
Description
AMS
Application Management Software
API
Application Program Interface.
CLDC
Connected Limited Device Configuration
FDI
Flash Data Integrator. The memory used to store the applications.
GPS
Global Positioning System
IDE
Integrated Development Environment
ITU
International Telecommunication Union
JAD
Java Application Descriptor
JAID
Java Application Installer/De-Installer
JAL
Java Application Loader
JAR
Java Archive. Used by J2ME applications for compression and packaging.
J2ME
Java 2 Micro Edition
JSR 120
Java Specification Request 120 defines a set of optional APIs that provides
standard access to wireless communication resources.
JVM
Java Virtual Machine
KVM
KJava Virtual Machine
LCC
Licensee Close Classes
LWT
Lightweight Window Toolkit
MDP
Motorola Developers Program
7
MIDP
Mobile Information Device Profile
OEM
Original Equipment Manufacturer
OTA
Over The Air
RMS
Record Management System
RTOS
Real Time Operating System
SC
Service Center
SDK
Software Development Kit
SMS
Short Message Service
SU
Subscribe Unit
UI
User Interface
URI
Location Services Unified Resource Identifier
VM
Virtual Machine
Document Overview
This developer’s guide is organized into the following chapters and appendixes:
Chapter 1 – Introduction: this chapter has general information about this document,
including purpose, scope, references, and definitions.
Chapter 2 – J2ME Introduction: this chapter describes the J2ME platform and the
available resources on the C370, C450, and C550 series of handsets.
Chapter 3 – Developing and Packaging J2ME Applications: this chapter describes
important features to look for when selecting tools and emulation environments. It also
describes how to package a J2ME application, how to package a MIDlet, and generate
JAR and JAD files properly.
Chapter 4 – Downloading Applications: this chapter describes the process for
downloading applications.
Chapter 5 – Application Management: this chapter describes the lifecycle,
installation/de-installation, and updating process for a MIDlet suite.
Chapter 6 – Networking APIs: this chapter describes the Java Networking API.
Chapter 7 – LCDUI: this chapter describes the Limited Connection Device User Interface
API.
Chapter 8 – Gaming and Sound API: this chapter describes the Gaming API and Sound
API.
Chapter 9 – Vibe and Backlight API: this chapter describes the Vibe and Backlight API.
Chapter 10 – SMS MO: this chapter describes SMS MO.
1
Introduction
Chapter 11 – JAD Attributes: this chapter describes what attributes are supported.
Chapter 12 – Record Management System: this chapter describes the Record
Management System API.
Chapter 13 – Phonebook Access: this chapter describes the Phonebook Access API.
Chapter 14 – iTAP: this chapter describes iTAP support.
Appendix A – Key Mapping for the C370, C450, and C550 series of handsets: this
appendix describes the key mapping of the Motorola C370, C450, and C550 series of
handsets, including key name, key code, and game action of all Motorola keys.
Appendix B – Memory Management Calculation: this appendix describes the memory
management calculations.
Appendix C – FAQ: this appendix provides a link to the dynamic online FAQ.
Appendix D – Spec Sheet: this appendix provides the Motorola C370, C450, and C550
spec sheets
9
2
J2ME Introduction
The C370, C450, and C550 series of handsets includes the Java™ 2 Platform, Micro
Edition, also known as the J2ME platform. The J2ME platform enables developers to
easily create a variety of Java applications ranging from business applications to games.
Prior to its inclusion, services or applications residing on small consumer devices like cell
phones could not be upgraded or added to without significant effort. By implementing the
J2ME platform on devices like the C370, C450, and C550 series of handsets, service
providers, as well as customers, can easily add and remove applications allowing for
quick and easy personalization of each device. This chapter of the guide presents a quick
overview of the J2ME environment and the tools that can be used to develop applications
for the C370, C450, and C550.
The Java 2 Platform, Micro Edition (J2ME)
The J2ME platform is a new, very small application environment. It is a framework for the
deployment and use of Java technology in small devices such as cell phones and pagers.
It includes a set of APIs and a virtual machine that is designed in a modular fashion
allowing for scalability among a wide range of devices.
The J2ME architecture contains three layers consisting of the Java Virtual Machine, a
Configuration Layer, and a Profile Layer. The Virtual Machine (VM) supports the
Configuration Layer by providing an interface to the host operating system. Above the VM
is the Configuration Layer, which can be thought of as the lowest common denominator of
the Java Platform available across devices of the same “horizontal market.” Built upon this
Configuration Layer is the Profile Layer, typically encompassing the presentation layer of
the Java Platform.
2
J2ME Introduction
MIDP-Compliant
Apps
MIDP
OEM
Apps
Native
Apps
OEM
Classes
CLDC
Native System Software
Mobile Information Device
The Configuration Layer used in the C370, C450, and C550 series of handsets is the
Connected Limited Device Configuration 1.0 (CLDC 1.0) and the Profile Layer used is the
Mobile Information Device Profile 1.0 (MIDP 1.0). Together, the CLDC and MIDP provide
common APIs for I/O, simple math functionality, UI, and more.
For more information on J2ME, see the Sun™ J2ME documentation
(http://java.sun.com/j2me/).
The Motorola J2ME Platform
Functionality not covered by the CLDC and MIDP APIs is left for individual OEMs to
implement and support. By adding to the standard APIs, manufacturers can allow
developers to access and take advantage of the unique functionality of their series of
handsetss.
The C370, C450, and C550 series of handsets contain OEM APIs for extended
functionality ranging from enhanced UI to advanced data security. While the C370, C450,
and C550 series of handsets can run any application written in standard MIDP, it can also
run applications that take advantage of the unique functionality provided by these APIs.
These OEM APIs are described in this guide.
Resources Available
The C370, C450, and C550 series of handsets allows access to a richer set of resources
than our previous Java™ capable phones. The changes range from a larger heap for
Java applications to the presence of a color display. All of the enhancements allow for
more compelling and advanced Java applications to be created. In addition to increasing
resources present on the device, new APIs to access other device resources were added.
These new APIs allow a Java application to leverage other capabilities of the device that
are currently not accessible through standard MIDP and CLDC APIs.
11
Resource
Description
Display
Resolution
96 x 64
Color Depth
12 bit color (4096 colors)
Networking
Max HTTP, UDP and TCP Socket connections*
4 with any combinations
File & RMS
Max number of Files/RMS*
500
Java VM
Heap Size
512 KB
Program Space
1.2 MB
Max Resource Space*
450 KB
Recommended Maximum JAR Size
100 KB
*: These resources are shared with the rest of the phone and there could be less available to Java at any
given time.
3
Developing and Packaging J2ME Applications
3
Developing and Packaging
J2ME Applications
Guide to Development in J2ME
Introduction to Development
This appendix assumes the reader has previous experience in J2ME development and
can appreciate the development process for Java MIDlets. This appendix will provide
some information that a beginner in development can use to gain an understanding of
MIDlets for J2ME series of handsetss.
There is a wealth of material on this subject on websites maintained by Motorola, Sun
Microsystems and others. Please refer to the following URLs for more information:
!
http://www.motocoder.com
!
http://www.java.sun.com/j2me
!
http://www.corej2me.com/
!
http://www.javaworld.com/
As an introduction, brief details of J2ME are explained below.
The MIDlet will consist of two core specifications, namely Connected, Limited Device
Configuration(CLDC) and Mobile Information Device Profile (MIDP). Both of these
specifications (Java Specification Requests) can be located at the http://www.jcp.org/ site
for reading.
!
For MIDP 1.0; JSR 37 should be reviewed.
!
For CLDC 1.0.4; JSR 30 should be reviewed.
!
For CLDC 1.1; JSR 139 should be reviewed.
To determine what implementation is on Motorola series of handsets, review the “Java
System” details through the menu on the Motorola series of handsets (located under Java
Settings).
13
For beginning development, key points to remember are memory size, processing power,
screen capabilities and wireless network characteristics. These all play an important part
in development of a MIDlet. The specifications listed above are designed to work upon
devices that have these characteristics.
Network conditions would only apply for networked applications such as streaming tickers,
email clients, etc.
In addition to the specifications, an array of tools are available to assist the development
cycle. These range from the command line tools provided with Software Development Kits
(SDK) from Sun (as of writing 1.4.1_04) to Integrated Development Environments (IDEs)
which can be free or purchased. These IDEs come from a range of sources such as Sun,
IBM, Metrowerks and Borland to name a few.
In addition to the IDEs and Sun SDK for development, Motorola offers access to our own
SDK which contains Motorola device emulators. From here, a MIDlet can be built and
then deployed onto an emulated target series of handsets. This will enable debugging and
validation of the MIDlet before deployment to a real, physical series of handsets. The
latest Motorola SDK can be downloaded from the MOTOCODER website.
Please refer to the product specifications at the back of this guide for detailed information
on each series of handsets.
4
Downloading Applications
4
Downloading Applications
OTA Procedure
There is no need of additional software tools, or cables, to downloaded MIDlet suites
through WAP browser. The application developer just has to use the C370, C450, and
C550 browser and connect to a WAP server site that contains the desired MIDlet suite to
be downloaded. The application developer should follow the WAP server site instructions
to download the MIDlet properly.
After loading the JAR and JAD file on the Motorola C370, C450, and C550 series of
handsets, the friendly name specified in the MANIFEST.MF file for the MIDlets should
appear on the Games & Apps menu.
Installation
The following checklist should be covered before attempting to install a MIDlet Suite.
Failure to verify this checklist could lead to an installation failure.
•
Applications supports CLDC-1.0 and MIDP-1.0 (the configuration and profile
supported by the Motorola C370, C450, and C550 series of handsets)
•
JAD file has been created.
•
JAR file contains META-INF/MANIFEST.MF.
•
Verify the MIDlet-Name, MIDlet-Version, and MIDlet-Vendor attributes are duplicated
in both the MANIFEST.MF and the JAD file.
•
File names (JAR and JAD) are less than 32 characters (not including extension).
•
Less than 20 MIDlet suites are currently installed.
•
Maximum number of MIDlets in a suite is 5
•
Maximum length of class path inside JAR file must be 64 characters.
•
Maximum length of URL path must be 256 characters.
15
•
No more than ~500 files are used by installed MIDlet suites.
•
JAR size listed in JAD matches actual JAR size.
•
MIDlet suite name and MIDlet vendor are 32 bytes max
•
MIDlet suite version must be higher than an already installed one.
Even though the Data and Program Space in Java System indicate more available space
than the size of a particular JAR file, it doesn't necessarily mean the JAR will install.
Moreover, if it is able to install, there’s no guarantee the MIDlet will execute because on
occasion, more RAM is required for execution than installation. In addition, MIDlets that
will not install or execute on the phone because of lack of memory will most certainly
execute on the Sun Wireless Toolkit since the PC has virtually unlimited memory with
respect to the size of MIDlets.
The memory requirements for MIDlet suite installation are the following:
First, there must be enough Data Space (file system space) to temporarily store the JAR.
If there's not enough Data Space, the browser (in the OTA mechanism) will display the
error "Insufficient Memory".
Secondly, there must be enough heap memory to uncompress the JAR file. The JAR size
should be a predefined safe proportion of the heap size. The JAR maximum size
recommended is 100K. This means that MIDlet typically will not install if the JAR is greater
than 100K. There are exceptions to this and it depends on how many class files vs.
resource files are contained within the JAR. If there's not enough heap, the device will
typically display the message "Memory Full".
Third, there must be enough Data Space to store not only the temporary JAR but also all
the resource files needed by the MIDlet. The JAR is essentially a zip file that must be
uncompressed. It contains class files (the actual application) and resource files that are
used by the MIDlet. These resources typically include, png images, database files and
any other data the MIDlet needs. These resource files are stored in the Data Space during
installation. The JAR is deleted after the installation phase completes. If there's not
enough Data Space, the device will typically display the message "Memory Full". Also,
note that total size of the uncompressed resources in the JAR doesn't necessarily equal
the Data Space occupied by that MIDlet once installed.
Fourth, there needs to be enough Program Space to store the actual MIDlet. The class
files in the JAR are the application files and are converted into a native format and stored
in the Program Space during installation. This native format size will be greater than the
total of the uncompressed class files in the JAR. Once stored in the Program Space, the
MIDlets are referred to as DAV Objects. DAV reserves additional Program Space equal to
the largest DAV Object. This reserved space cannot be used for additional MIDlets. Its
purpose is to provide power loss protection during a DAV reclaim of the flash memory.
The allocation of this reserved Program Space is often a point of confusion with users.
When the largest DAV object is installed, the Program Space in Java System will be
reduced by more than the size of Program Space in Suite Details. Java System shows the
free Program Space. Suite Details shows the amount of Program Space occupied by that
MIDlet.
Program and Data space notes:
To check Program and Data space from the Java menu, select “Java System” and press
the “Select” soft key.
4
Downloading Applications
Program space is used to store class files.
Data space is used to store the JAR files before installation and resource files after
installation. After installation, the JAR file is destroyed.
Then to install the MIDlet Suite, select the “Java Application Loader” option and press the
SELECT soft key. A dialogue will be displayed indicating the serial cable is connected to
the device. Execute the MIDway tool on PC, select and send the desired MIDlet to be
installed. The MIDway tool indicates exactly which steps are being executed.
Java Application Installer/De-Installer (JAID)
JAID is a component built into the Motorola KVM to handle installation and de-installation
of Java applications to a device. The process of installing an application is time intensive
involving loading of the class files from the JAR file and writing the image, in a platformspecific manner, to memory. By installing Java applications, class files do not have to be
stored in RAM, allowing more runtime memory for the application at hand. Additionally,
the time required to launch Java applications is decreased dramatically.
After successful installation, the class files are placed in the Program space and the
resource files are placed in the Data space. The original JAR file is then destroyed.
Applications only need to be JAID installed once. If the Motorola C370, C450, and C550
series of handsets’s software is upgraded, Java applications must be re-installed.
Once the application is done the user can launch the MIDlet right after installation using
the Autorun After Install Feature.
If you cancel the installation progress screen while the MIDlet Suite is still being installed,
the installation will fail, and you must repeat all installation procedures again.
Starting Applications
Often times a MIDlet Suite only contains one MIDlet. If so, then that MIDlet can be
launched from the Games & Apps menu simply by highlighting that MIDlet Suite and
pressing the “SELECT” soft key.
If there are multiple MIDlets in the Suite, then a suite content menu will be displayed, and
one of the individual MIDlets can be highlighted. From there, pressing the “RUN” soft key
will launch the selected MIDlet.
Exiting Applications
During the development process, chances are a MIDlet may not exit properly via the
“correct” and “elegant” method. The Motorola C370, C450, and C550 series of handsets’s
policy on Java applications is to allow the user to exit an application at anytime, either
forcefully or via a menu option. If an application, during the development process,
becomes unstable or fails to respond, the user/developer may end the application by
pressing the END key.
17
Launching Web Session for HTTP Download
The Web Sessions implementation will be modified to allow the user to download Java
content using an HTTP server instead of a WAP gateway. The user will then need to enter
a Web Session from the Web Sessions menu.
Downloading MIDlets
The Browser must be connected before the series of handsets is able to download any
MIDlets. The user may access the Browser application by any of the following methods:
•
Selecting “Browser” from the Main Menu
•
Selecting a URL from a message
Once the series of handsets is connected to the WAP browser, different locations may be
visited where J2ME Applications can be downloaded. From here, a MIDlet can be
selected to download to the series of handsets.
The series of handsets initially receives information from the Java Application Descriptor
(JAD) file. The JAD includes information about MIDlet-name, version, vendor, MIDlet-JarURL, MIDlet-Jar-size, and MIDlet-Data-size. Two additional JAD attributes will be MotData-Space-Requirements and Mot-Program-Space-Requirements. These two attributes
will help the KVM determine whether there is enough memory to download and install the
selected MIDlet suite. If there is not enough memory, the series of handsets will display a
“Memory Full” dialog prior to beginning the download.
Error Checks
There are two distinct cases when a Memory Full error can occur during the download
process. Memory Full will be displayed when the series of handsets does not have
enough memory to completely download the MIDlet. If the Mot-Data-Space-Requirement
and Mot-Program-Space-Requirements attributes are added to the JAD of the MIDlet, a
Motorola series of handsets can determine if enough memory exists on the phone before
the MIDlet is downloaded. These attributes may or may not be provided in all MIDlets.
Two separate prompts will be displayed depending on the existence of these attributes.
If there is not enough memory to download the application, the user will be given a
message to delete existing applications in order to free additional memory.
Once the MIDlet is successfully downloaded, the installation process begins. During the
installation of the MIDlet, the phone may determine there is insufficient memory to
complete the installation. This error can occur whether the Mot-Data-Space-Requirements
and Mot-Program-Space-Requirements JAD attributes are present or not.
In some instances, an application being downloaded may already appear on the series of
handsets. If this case exists, the series of handsets compares the version number of the
4
Downloading Applications
application being downloaded with the version on the series of handsets. One of the
following instances will occur:
•
Same version exists – user is prompted with a dialog stating application already
exists and is prompted to cancel or read details of the download.
•
Older version of application exists – user is prompted with a dialog stating a
different version exists and is prompted to update or cancel the download.
•
Newer version of application exists – user is prompted with a dialong stating the
application already exists and is prompted to cancel the download.
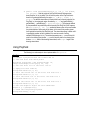
XML Screen Renderings
The following are XML Screen Renderings based on the code sample below:
<?xml version="1.0"?>
<!DOCTYPE wml PUBLIC "-//WAPFORUM//DTD WML 1.1//EN"
"http://www.wapforum.org/DTD/wml_1.1.xml">
<wml>
<card title="J2ME Tests">
<p>
The case scenario's below tests J2ME Midlets.
</p>
<p>
<a href="http://www.drawbridge.ca/wml/mid/HelloWorld1/bin/HelloWorld1.jad">HelloWorld1
1k</a><br/>
<!-- <a href="http://www.drawbridge.ca/wml/mid/games/bin/games.jad">Games 39k</a><br/>
>
<!-- <a
href="http://www.drawbridge.ca/wml/mid/HelloMidletServlet/bin/HelloMidletServlet.jad">o
test</a><br/> -->
<a href="http://www.drawbridge.ca/wml/mid/PhoneBook/bin/PhoneBook.jad">Phone Book
3k</a><br/>
<a href="http://www.drawbridge.ca/wml/mid/Pizza/bin/Pizza.jad">Pizza Order 2k</a><br/>
<a href="http://www.drawbridge.ca/wml/mid/CurStcQue/bin/CurStcQue.jad">Remote HTTP Sto
Chk</a><br/>
<a href="http://www.drawbridge.ca/wml/mid/stockMidlet/bin/stockMidlet.jad">Stock from
MySQL</a><br/>
<a href="http://www.drawbridge.ca/wml/mid/CurExcQue/bin/CurExcQue.jad">Currency
Exchange</a><br/>
<a href="http://www.drawbridge.ca/wml/mid/UIDemo/bin/UIDemo.jad">User Interface Test
21k</a><br/>
<a
href="http://www.drawbridge.ca/wml/mid/licenseValidate/bin/licenseValidate.jad">Licence
Validation</a><br/>
</p>
</card>
</wml>
<file name="Jad Test" href="AppPropertyTests.jar" type="jar" size="4000"
19
vendor="Motorola" version="1.0" date="20010101" adf="DESC.jad" >
<file name="Digital Clock" href="clock.jar" type="jar" size="10000" vendor="Motorola"
version="1.0" date="20010101" adf="DESC.jad" >
This is a digital clock running on your series of handsets.
</file>
<file name="Bouncing Ball" href="bounce.jar" type="jar" size="6000" vendor="Sun"
version="1.0" date="20010101" adf="Bounce.jad" >
An example illustrating a bouncing ball on your screen.
</file>
<file name="Bomb Man" href="bombman.jar" type="jar" size="21645" vendor="Motorola"
version="1.0" date="20010101" adf="DESC.jad" >
BombMan is back, now on your Taichi series of handsets.
</file>
<dir name=”New Games” href=”games/index.xml”>
This is a directory full of games.
</dir>
<a href=”index2.xml”>
Next page.
</a>
</index>
Screen Renderings
•
<notice>
No rendering will be done based on this tag and the notice will be displayed as its own screen. This notice shall be displayed and acted on before
the rest of the page is rendered. The Caption attribute of the <notice> tag will be displayed as the title of the page. The type attribute will determ
which softkeys are displayed.
Example:
Type=okcancel will display the left softkey as OK and the right softkey as CANCEL
--Term
--This is the
legal term. The
end user must
agree
OK
CANCEL
•
<dir>
The text between the open and close of the <dir> tag will be rendered as plain text on the page.
4
Downloading Applications
Example:
Taichi handset.
New Games
This is a directory
full of games
•
<a>
The text between the open and close of the <a> tag will be rendered as hyperlink on the page.
Example:
This is a
directory full of
games
Next page
SELECT
•
<file>
The Name attribute of the <file> tag will be rendered as a hyperlink and will be selectable. A space will appear between <file> elements on the
page. The text between the open and close of the <file> tag will be rendered as plain text on the page.
Example:
on your handset.
Bouncing Ball
An example illusSELECT
21
5
Application Management
MIDlet Lifecycle
A MIDlet’s lifecycle begins once its MIDlet Suite is downloaded to the device. From that
point, the Application Management Software (AMS) manages the MIDlet Suite and its
MIDlets. The user’s primary user interface for the AMS is the Java Apps feature built into
the device’s firmware.
From the Games & Apps feature, the user can see each MIDlet Suite on the device. If a
MIDlet Suite has only a single MIDlet, then the MIDlet’s name is displayed in the Games &
Apps menu for that MIDlet Suite. Otherwise, the MIDlet Suite name is displayed. Then
when that MIDlet Suite is highlighted, the user has the option of opening the MIDlet Suite
and viewing the MIDlets in that MIDlet Suite.
Note: This image reflects a 176 x 220 display for document readability purposes only. The
C370, C450, and C550 maintain a 96 x 64 display.
From the Games & Apps menu, the user can highlight a MIDlet Suite, selecting the Menu
soft key, and bring up the Details dialog for that MIDlet Suite. The Details dialog contains:
•
MIDlet Suite Name
•
MIDlet Suite Vendor
5
Application Management
•
MIDlet Suite Version
•
The number of MIDlets in the MIDlet Suite
•
The Data Space (MIDlet suite resources).
•
Program Space (Unpacked JAR)
Note: This image reflects a 176 x 220 display for document readability purposes only. The
C370, C450, and C550 maintain a 96 x 64 display.
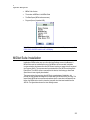
MIDlet Suite Installation
Installation of MIDlet suites can occur from the Java Settings menu or the Browser. A
MIDlet Suite must be installed before any of its MIDlets can be executed. Installation
involves extracting the classes from the JAR file and creating an image that will be placed
into Program Space. The resources are then extracted from the JAR file and placed into
Data Space. The JAR file is then removed from the device, thus freeing up some Data
Space where it was originally downloaded.
The space savings from removing the JAR file is one advantage of installation, but
perhaps an even greater advantage is that class loading is not done during run time. This
means that a MIDlet will not experience slow-down when a new class is accessed. Even
further, the MIDlet will not have to share the heap with what has been loaded from the
JAR file. The figure below shows the Java Settings screen.
23
Note: This image reflects a 176 x 220 display for document readability purposes only. The
C370, C450, and C550 maintain a 96 x 64 display. Additionally, the items that may appear
on the actual device may differ from those displayed in the image above
MIDlet Suite De-installation
An installed MIDlet can only be removed from the device by de-installing it from the Java
Apps menu. De-installing a MIDlet Suite will remove the installed image from Program
Space. The resources are then removed from Data Space along with the JAD file.
From the Games & Apps menu, the user can highlight a MIDlet Suite, selecting the menu
soft key, and bring up the Delete dialog for that MIDlet Suite.
Note: These images reflect 176 x 220 displays for document readability purposes only.
The C370, C450, and C550 maintain a 96 x 64 display.
5
Application Management
MIDlet Suite Updating
When a MIDlet Suite is de-installed, all of its resources are removed including any
resources that were created by the MIDlets in the suite, such as RMS databases. If a user
gets a new version of a MIDlet Suite, then the user can simply download that new version
to the device that has the older version installed. Once the new version is downloaded,
the user will have the option to update the MIDlet Suite, causing the old version to be deinstalled, followed by the immediate installation of the new MIDlet Suite.
A newer version of the MIDlet Suite should know how to use, upgrade, or remove the data
in the RMS databases created by older versions. This idea of forward compatibility should
not be extended to backward compatibility, because the C370, C450, and C550 device
will not allow a user to update a version of a MIDlet Suite with an older or equal version of
that MIDlet Suite. If an older or equal version attempts to be installed, the C370, C450,
and C550 will ignore the installation and launch the current version of the MIDlet suite.
Starting, Pausing, and Exiting: AMS Control of MIDlet
State Transitions
A MIDlet has three different states: Destroyed, Active, and Paused. A MIDlet’s natural
state is destroyed. The AMS typically controls the transition through these states. When a
user decides to launch a MIDlet, the device puts up a screen indicating that the MIDlet is
transitioning through these states. The AMS notifies MIDlets about state transitions by
calling the MIDlet’s methods, startApp(), pauseApp(), and
destroyApp().
The figure below shows the MIDlet starting screen.
Note: This image reflects a 176 x 220 display for document readability purposes only. The
C370, C450, and C550 maintain a 96 x 64 display.
The constructor of the MIDlet’s class that extends MIDlet is first invoked. Then its
startApp() method is called to indicate that it’s being started. The MIDlet will have
focus when its startApp() method finishes execution. If a MIDlet takes too long
25
initializing state variables and preparing to be run in its constructor or startApp()
methods, it may appear to be stalled to users.
The flow below depicts MIDlet State Transitions.
Starting
Application
Constructor
startApp()
Running
Application
Paused
Application
pauseApp()
destroyApp()
notifyDestroyed()
Exit
Application
The following table shows MIDlet State Transition methods.
Method
Caller
Purpose
Constructor
AMS
Initializes the MIDlet – should return quickly
startApp()
AMS
The startApp() method is called to start the
application either from a newly constructed state or from a
paused state.
If the startApp() is called from a paused state, the
MIDlet should not re-initialize the instance variables(unless
it is the desired behavior).
The startApp() method may be called multiple times
during the lifespan of the MIDlet.
The MIDlet may set the current display to its own
Displayable from the startApp() method, but is shown
only after the startApp() returns.
When exiting a paused application, the KVM calls
startApp() first followed by a call to
destroyApp()
5
Application Management
AMS, MIDlet
pauseApp()
The pauseApp() method is called from either AMS or
from within the MIDlet.
The pauseApp() should pause active threads, and
prepare for startApp() to be called.
If the application is to be resumed with a screen other than
the present, then the Displayable should be set current in
the startApp() or the pauseApp().
destroyApp()
AMS
The destroyApp() method is called from AMS and
signals the MIDlet to clean up any resources to prepare for
termination. For example, open RMS records should be
closed, threads should be stopped, and any other
housekeeping chores should be performed.
The MIDlet should not call destroyApp().
notifyDestroy
ed()
MIDlet
The notifyDestroyed() method is called by the
MIDlet to exit and terminate itself.
All housekeeping such as stopping active threads and
closing RMS records should be performed before calling
notifyDestroyed().
notifyDestroyed() notifies AMS to terminate the
calling MIDlet.
On a device without a windowing system, only one application can have focus at a time.
When an application has focus, it receives keypad input, and has access to the display,
speakers, LED lights, vibrator, etc. The C370, C450, and C550 device can only run one
MIDlet at a time, but that MIDlet has to share focus with the system user interface. That
user interface is a higher priority than the MIDlet, so the MIDlet will immediately lose focus
when the system needs to handle a phone call or some other interrupt.
The concept of focus correlates directly with the MIDlet state. i.e. when a MIDlet loses
focus because of a phone call, the MIDlet is immediately paused. Conversely to the
example of starting the MIDlet, the MIDlet loses focus immediately, then its
pauseApp() method is called.
The paused state is not clearly defined by MIDP. The only requirement placed on the
device manufacturer is that a paused MIDlet must be able to respond to network events
and timer events. On Motorola devices, the paused state simply implies that the MIDlet is
in the background as mentioned above, but it doesn’t force any of the threads to stop
execution. Essentially, a paused MIDlet is a MIDlet without focus whose pauseApp()
method has been called. It’s up to the developer to control their threads, such as making
them sleep for longer periods, completely pausing game threads, or terminating threads
that can be restarted when the MIDlet is made active again.
Similarly, a MIDlet’s focus is also lost immediately before its destroyApp() method
is called.
The MIDlet must be written properly (as described above) to implement all methods in the
javax.microedition.midlet package, especially startApp( ) and pauseApp( ). A
27
common error is to implement startApp( ) to execute instructions that are only
intended to be executed once during MIDlet execution. The correct implementation is to
include in startApp( ) those instructions which can and should be executed each time
the MIDlet changes from the Paused state to the Active state. The same logic should be
applied to pauseApp( ).
The code sample below shows implementation of using startApp( ). startApp( )
performs operations for the initial launch of the MIDlet as well as any operations that need
to take place each time the MIDlet changes state from Paused to Active. Booleans are
used to determine whether the MIDlet has started and whether it’s in the Active state.
These Booleans can also be used by other MIDlet threads to determine state.
Using startApp()
package midp.demo;
import javax.microedition.midlet.MIDlet;
public class Demo extends MIDlet {
// The MIDlet has been started already
private boolean isStarted = false;
// The MIDlet is in active state
public boolean isActive
= false;
// (in most cases these booleans are used by other threads)
protected void destroyApp(boolean unconditional){
isActive = false;
}
protected void pauseApp(){
isActive = false;
}
protected void startApp(){
isActive = true;
if (!isStarted){
//...Use getDisplay(), setCurrent(),
// and other initial actions
isStarted = true;
}
}
The MIDP specification of javax.microedition.midlet allows for some
latitude in the implementation, therefore, it cannot be assumed that all MIDlets are
perfectly compatible with all devices. Some MIDlets may execute flawlessly on desktop
simulators such as Sun’s Wireless Toolkit and contain a gain/loose focus mechanism
such that the MIDlet transitions between the Paused and Active states and
startApp() and pauseApp() are called.
5
Application Management
MIDlet Control of MIDlet State Transitions
MIDlets have a lot of flexibility to control their own state. A MIDlet can call its own
startApp(), pauseApp(), and destroyApp() methods, however those
are the methods that the AMS uses to indicate a state transition to the MIDlet. The MIDlet
can call those methods if it wishes to perform the work that it would typically do during that
state transition.
Other sets of methods the MIDlet can use to cause state transitions are
resumeRequest(), notifyPaused(), and notifyDestroyed().
Since the system user interface has priority, a MIDlet cannot force itself into the active
state, but it can request that it be resumed via a resumeRequest(). If the system
is not busy, it will automatically grant the request. However, if the device is not in the idle
screen, then it displays an alert dialog to the user to resume or end the MIDlet. If the user
denies the request, the MIDlet is not notified, however if the user grants the request, the
MIDlet’s startApp() method is called, and it gains focus when that finishes.
The MIDlet has more control when it decides it wants to be paused or destroyed. The
MIDlet performs the necessary work by calling its own pauseApp() or
destroyApp() method, then notifies the AMS of its intentions by calling
notifyPaused() and notifyDestroyed() appropriately. Once notified, the
AMS transition the MIDlet’s state and revoke focus.
Java System
The Java Settings Menu allows management of MIDlet suites, as well as system
maintainance. The Java System feature gives statistics about the system such as:
•
CLDC Version
•
MIDP Version
•
Data Space and Program Space (Free space)
•
Total Heap Size
•
The figure below depicts the Java System Menu.
29
Note: This image reflects a 176 x 220 display for document readability purposes only. The
C370, C450, and C550 maintain a 96 x 64 display.
6
Network API
6
Network API
Network Connections
The J2ME platform on the Motorola C370, C450, and C550 series of handsets provides a
variety of networking functionalities beyond those specified in MIDP. The additional
networking protocols are added through the Generic Connection Interface in order to
simplify the interface to the application as well as to reduce the need for additional
classes. Most of the additional network connections are invoked using a runtime
parameter similar to HTTP, reducing the learning curve for developers as well as the
reducing potential application porting efforts. The following is a list of networking features
for the Motorola C370, C450, and C550 series of handsets:
•
HTTP
•
TCP Sockets
•
UDP Sockets
The standard networking protocol specified in MIDP 1.0 is HTTP. Although HTTP is
useful and flexible for most data exchanges, many of the applications fall outside the
standard request/response models of most browsers. Applications such as games and
stock tickers require networking protocols with different characteristics. In order to
accommodate these types of applications with reasonable efficiency, additional protocol
stacks including UDP and TCP Sockets, have been added. These added networking
functionalities not only provide the application developer with more communication
options, it alleviates the need to perform inefficient workarounds for a strict HTTP
environment. Other applications may also choose to take advantage of the bottom
connector on the devices.
31
Class Descriptions
<<Interface>>
StreamConnectionNotifier
<<Interface>>
DatagramConnection
<<Interface>>
Connection
<<Interface>>
InputConnection
<<Inte rface>>
OutputConnection
<<Interface>>
StreamConnection
<<Interface>>
Content Co nnection
<<Interface>>
HttpConnection
Since all the additional communication protocols have been added to the Generic
Connection Framework, the access methods and parameters are very similar. The main
calls are to the Connector class, which provides three static methods that accept
different compile time parameters. The commonality between the three static methods is
the first parameter in their signatures. This particular runtime parameter accepts
Strings formatted in the standard Uniform Resource Locator format. The following is
the list of method signatures:
Connector.open(String URL) - default READ_WRITE, no timeout.
Connector.open(String URL, int mode) - defaults to no timeout.
Connector.open(String URL, int mode, Boolean timeout)
- String URL – parameter string describing the target conforms to the URL format
as described in RFC 2396 for all networking protocols.
- int mode – READ/WRITE/READ_WRITE
6
Network API
An optional third parameter, protocol may throw an
IOException when it detects a time-out condition.
- boolean timeout –
The time-out period for the TCP implementation on the Motorola C370, C450, and C550
series of handsets is 20 seconds on read operation and about 45 seconds on write
operation if the time-out flag is set to true. If the time-out flag is set to false, the time-out
time is indefinite. The lingering time for closing sockets is 0 second (if the socket closed
by the server the lingering time will be less than 100 ms). If a new socket is requested
within this time frame and the maximum number of sockets opened has been reached (5
sockets), then an IOException is thrown.
Applications requesting a network resource for any protocol must use one of the three
methods above. The URL is the distinguishing argument that determines the difference
between HTTP, etc. The following chart details the prefixes that should be used for the
supported protocols.
Protocol
URL Format
HTTP
http://
TCP Sockets
socket://
UDP Sockets
datagram://
HTTP
The HTTP implementation follows the MIDP 1.0 standard. The Connector.open()
methods return a HttpConnection object that is then used to open streams for
reading and writing. The following is a code example to show implementation of HTTP:
HttpConnection hc = (HttpConnection)Connector.open(
“http://www.motorola.com”);
In this particular example, the standard port 80 is used, but this parameter can be
specified as shown in the following example:
HttpConnection hc = (HttpConnection)Connector.open(
“http://www.motorola.com:8080”);
The other static Connector methods work in the same manner, but they provide the
application additional control in dealing with the properties of the connection. By default,
HTTP 1.1 persistency is used to increase efficiency while requesting multiple pieces of
data from the same server. In order to disable persistency, set the “Connection” property
of the HTTP header to “close”.
33
TCP Sockets
The low-level socket used to implement the higher-level HTTP protocol is exposed to
applications via the Generic Connection Framework. The usage is similar to the
examples above, however, a StreamConnection is returned by the
Connection.open() method, as shown in the following example:
StreamConnection sc =
(StreamConnection)Connector.open(
“socket://www.motorola.com:8000”);
Although similar to HTTP, notice the required port number at the end of the remote
address. In the previous protocols, those ports are well known and registered so they are
not required, but in the case of low level sockets, this value is not defined. The port
number is a required parameter for this protocol stack.
UDP Sockets
If networking efficiency is of greater importance than reliability, datagrams (UDP) sockets
are also available to the application in much the same manner as other networking
protocols. The Connector object in this case returns a DatagramConnection
object, as is shown in the following example:
DatagramConnection dc = (DatagramConnection)Connector.open(
“datagram://170.169.168.167:8000”);
Much like low-level sockets, accessing UDP requires both a target address and a port
number. The Motorola C370, C450, and C550 series of handsets supports a maximum
outgoing and incoming payload of 1472 bytes and 2944 bytes, respectively.
Implementation Notes
As stated in the previous sections, the Motorola C370, C450, and C550 series of
handsets supports some networking options. The networking options however are limited
by both memory and bandwidth, which place hard restrictions on the applications. These
limitations manifest themselves mainly in the number of simultaneous connections that
can be opened.
Maximum number of sockets is 5 of any combinations of HTTP and UDP. Due to memory
constraints, the C370, C450, and C550 can support only one secure session (i.e. if other
application like Browser already opened a secure socket, a KJava midlet will get an
IOException when it tries to open only one connection which is HTTP connection). If the
maximum number of sockets is concurrently opened by the application and a sixth socket
is requested, an exception is thrown to the calling application.
6
Network API
Notes
It is important to take into consideration the blocking nature of many javax.microedition.io
and java.io object methods with regards to networking applications. It is advisable to
spawn another thread specifically dedicated to retrieving data in order to keep the user
interface interactive. If a single thread is used to retrieve data on a blocking call, the user
interface becomes inactive with the end-user perceiving the application as “dead”.
Reading from an InputStream using an array is faster then reading byte by byte, when
the length of the data is known. For example, if the content length is provided in the
header of the HttpConnection, then an array of the specified size can be used to
read the data.
The InputStream and OutputStream as well as the Connection object need to
be completely closed.
An application in the paused state can still continue to actively use the networking
facilities of the Motorola C370, C450, and C550 series of handsets.
The platform does not support simultaneous voice and data transmissions.
35
7
LCDUI
LCDUI API
The following table lists the specific interfaces supported by Motorola implementation:
Interface
Description
Choice
Choice defines an API for user interface components implementing
selection from a predefined number of choices.
CommandListener
This interface is used by applications which need to receive high-level
events from implementation
ItemCommandListener
A listener type for receiving notification of commands that have been
invoked on Item286 objects
ItemStateListener
This interface is used by applications which need to receive events that
indicate changes in the internal state of the interactive items within a
Form231 screen.
The following table lists the specific classes supported by Motorola implementation:
Classes
Description
Alert
An alert is a screen that shows data to the user and waits for a certain
period of time before proceeding to the next Displayable.
AlertType
The AlertType provides an indication of the nature of alerts.
Canvas
The Canvas class is a base class for writing applications that need to
handle low-level events and to issue graphics calls for drawing to the
display.
ChoiceGroup
A ChoiceGroup is a group of selectable elements intended to be placed
within a Form.
Command
The Command class is a construct that encapsulates the semantic
information of an action
7
LCDUI
information of an action.
CustomItem
A CustemItem is customizable by sub classing to introduce new visual
and interactive elements into Forms.
DateField
A DateField is an editable component for presenting date and time
(calendar) information that will be placed into a Form.
Display
Display represents the manager of the display and input devices of the
system.
Displayable
An object that has the capability of being placed on the display.
Font
The Font class represents fonts and font metrics.
Form
A Form is a Screen that contains an arbitrary mixture of items: images,
read-only text fields, editable text fields, editable date fields, gauges,
choice groups, and custom items.
Gauge
Implements a graphical display, such as a bar graph of an integer value.
Graphics
Provides simple 2D geometric rendering capability.
Image
The Image class is used to hold graphical image data.
ImageItem
An item that can contain an image.
Item
A superclass for components that car be added to a Form231.
List
A Screen containing a list of choices.
Screen
The common superclass of all high-level user interface classes.
Spacer
A blank, non-interactive item that has a settable minimum size.
StringItem
An item that can contain a string.
TextBox
The TextBox class is a Screen that allows the user to enter and edit data.
TextField
A TextField is an editable text component that will be placed into a Form.
Ticker
Implements a “ticker-tape”, a piece of text that runs continuously across
the display.
37
8
Gaming API and Sound
Functional Description
The Gaming API provides gaming related functionality to J2ME MIDlet writers. This
functionality includes the ability and support for transparent images, the ability to play
simple sounds and sound effects during a game, the ability to detect simultaneous key
presses, support for sprites, and support for dynamically changing the palette color
associated with an image.
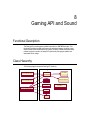
Class Hierarchy
The following diagram shows the Gaming API hierarchy.
javax.microedition.lcdui
Graphics
(from javax.microedition.lcdui)
Canvas
com.motorola.game
GameScreen
ImageUtil
SoundEffect
BackGroundMusic
(from javax.microedition.lcdui)
PaletteImage
Image
(from javax.microedition.lcdui)
PlayField
Sprite
FileFormatNotSupported
Exception
8
Gaming API and Sound
BackgroundMusic Class
The BackgroundMusic class encapsulates the data for a game's background music.
A game may create several BackgroundMusic objects, but only one can be playing at
any one time. The sound data can be stored on the device as a named resource in the
application JAR file, or it can be stored on a server and retrieved via the network.
BackgroundMusic is played by a GameScreen.
BackgroundMusic Methods
The BackgroundMusic class defines the following methods:
•
public static BackgroundMusic
createBackgroundMusic(java.lang.String name) throws
FileFormatNotSupportedException – Creates a BackgroundMusic for
the sound data stored in the specified named resource or URL. This method currently
supports the use of MIDI format 0 and format 1 only.
Using BackgroundMusic
The following code sample shows implementation of BackgroundMusic:
Using BackgroundMusic
BackgroundMusic bgm1 = BackgroundMusic.createBackgroundMusic("/FunkyTunes.mid");
BackgroundMusic bgm2 =
BackgroundMusic.createBackgroundMusic("http://www.motorola.com/sounds/JazzyTunes.mid");
The following code sample shows implementation of the Gaming API that contains a
sound API:
Gaming API containing a sound API
import com.motorola.game.*;
public class GS extends GameScreen {
public BackgroundMusic bgm;
public GS()
{
bgm = BackgroundMusic.createBackgroundMusic("vinovata.mid");
playBackgroundMusic(bgm, true);
}
}
39
GameScreen Class
The GameScreen class provides the basis for a game user interface. In addition to the
features inherited from MIDP's Canvas (commands, input events, etc.) The GameScreen
class provides game-specific capabilities such as an off-screen buffer with synchronized
flushing and key status polling. A game can provide its own thread to run the game loop.
A typical loop will check for input, implement the game logic, and then render the updated
user interface.
GameScreen Fields
The GameScreen class defines the following fields:
•
public static final int DOWN_KEY - The bit representing the DOWN
•
public static final int FIRE_KEY - The bit representing the FIRE key.
•
public static final int GAME_A_KEY - The bit representing the
GAME_A key (may not be supported on all devices). This constant has a value of
0x20.
•
public static final int GAME_B_KEY - The bit representing the
GAME_B key (may not be supported on all devices). This constant has a value of
0x40.
•
public static final int GAME_C_KEY - The bit representing the
key. This constant has a value of 0x02.
This constant has a value of 0x10.
GAME_C key (may not be supported on all devices). This constant has a value of
0x80.
•
public static final int GAME_D_KEY - The bit representing the
GAME_D key (may not be supported on all devices). This constant has a value of
0x100.
•
public static final int LEFT_KEY - The bit representing the LEFT key.
•
This constant has a value of 0x04.
public static final int RIGHT_KEY - The bit representing the RIGHT
key. This constant has a value of 0x08.
•
public static final int UP_KEY - The bit representing the UP key. This
•
public static final int PRIORITY_MAX - The maximum priority for
•
public static final int PRIORITY_MIN - The minimum priority for
•
public static final int VOLUME_MAX - The maximum volume for
playing sound effects. This constant has a value of 100.
constant has a value of 0x01.
playing sound effects. This constant has a value of 100.
playing sound effects. This constant has a value of 0.
8
Gaming API and Sound
•
public static final int VOLUME_MIN - The minimum volume for
playing sound effects. This constant has a value of 0.
GameScreen Methods
The GameScreen class defines the following methods:
•
protected Graphics getGraphics() - Obtains the Graphics object for
•
public int getKeyStates() - Gets the states of the physical keys. Each bit
in the returned integer represents a specific key on the device. A key's bit will be set if
the key is currently pressed or was pressed at least once since the last time this
method was called. The bit will be 0 if the key is not currently pressed and was not
pressed at all since the last time this method was called. This latching behavior
ensures that a rapid key press and release will always be caught by the game loop,
regardless of how slowly the loop runs. This method may be called twice to check if a
key is currently pressed; that is, calling this method twice effectively disables the
latching behavior. The lower bits are defined by UP_KEY, DOWN_KEY, LEFT_KEY,
etc.; the remaining bits may be mapped to device-specific keys.
rendering GameScreens. The Graphics object renders to an off-screen buffer whose
size is equal to that of the GameScreen (use getWidth() and getHeight() to determine
the size of the GameScreen). The buffer is initially filled with white pixels. Rendering
operations do not appear on the display until flushGraphics() is called; flushing the
buffer does not change its contents (that is, the pixels are not cleared as a result of
the flushing operation). Only one image buffer is supported because without a
vertical sync blanking period or its equivalent, there is little or no benefit from having
multiple image buffers. Only one Graphics object exists for each GameScreen
instance.
The following is a code sample to show implementation of public int
getKeyStates():
Public int getKeyStates ()
// Get the key state and store it
int keyState = gameScreenObject.getKeyStates();
if ((keyState & LEFT_KEY) != 0) {
positionX--;
} else if ((keyState & RIGHT_KEY) != 0) {
positionX++;
}
•
public void enableKeyEvents(boolean enabled) - Enables or
disables key event calls to this GameScreen. If disabled, the Canvas key event
methods (keyPressed, keyRepeated, keyReleased) are not called when keys are
pressed or released; however, the developer can still call getKeyStates to query the
state of the keys. For games that poll key state and do not need event-driven key
41
information, disabling key events can improve performance.
Note that this setting is unique to each GameScreen instance; other GameScreens,
when shown, are subject to their own setting for key events.
•
public void paint(javax.microedition.lcdui.Graphics g) -
•
public void flushGraphics(int x, int y, int width,
int height) – Waits until the end of the current screen refresh cycle and then
Paints this GameScreen. By default, this method does nothing. It can be overridden
according to application needs.
flushes the specified region of the off-screen buffer to the display driver. This method
does not return until that region of the buffer has been completely flushed. The pixels
of the off-screen buffer are not changed as a result of the flush operation. Upon
returning from this method, the application may immediately begin to render the next
frame using the same buffer.
•
public void flushGraphics() - Waits until the end of the current screen
•
public static int getDisplayColor(int color) throws
IllegalArgumentException – Gets the color that will be displayed if the
refresh cycle and then flushes all of the off-screen buffer to the display driver. This
method does not return until the entire buffer has been completely flushed. The pixels
of the off-screen buffer are not changed as a result of the flush operation. Upon
returning from this method, the app may immediately begin to render the next frame
using the same buffer.
specified color is requested. This method enables the developer to check the manner
in which RGB values are mapped to the set of distinct colors that the device can
actually display. For example, with a monochrome device, this method will return
either 0xFFFFFF (white) or 0x000000 (black) depending on the brightness of the
specified color.
•
public void playSoundEffect(SoundEffect se, int volume,
int priority) - Plays the specified SoundEffect. A GameScreen's sound
effects are heard only while it is the visible screen. A device capability of playing
SoundEffects can be found by using the method soundEffectsSupported(). The
platform's ability to play several SoundEffects simultaneously can be found by using
the method getMaxSoundsSupported(). The priority specified for each request
determines which sound(s) are heard when the number of simultaneous sound
requests exceeds the capabilities of the device.
•
public boolean soundEffectsSupported() - Checks whether the
underlying platform supports SoundEffects. It returns true if SoundEffects are
supported.
•
public boolean backgroundMusicSupported() - Checks
whether the underlying platform supports BackgroundMusic. It returns true if
BackgroundMusic is supported.
•
public int getMaxSoundsSupported() - Queries the underlying
platform's capability to play multiple SoundEffects simultaneously.
•
public void stopAllSoundEffects() - Stops all the SoundEffects
that are playing. Note that this method does not affect background music.
8
Gaming API and Sound
•
public void playBackgroundMusic (BackgroundMusic bgm,
boolean loop) - Plays the specified BackgroundMusic object from the beginning.
This method first stops the current BackgroundMusic if any. Thus, this method may
be used to start background music (by specifying a non-null BackgroundMusic
object), restart the current background music (by specifying the same
BackgroundMusic object), change the background music, or end the background
music (by specifying null). The loop parameter is set to true if the BackgroundMusic
is to repeat indefinitely. Otherwise, set to false.
Using GameScreen
The GameDemoScreen class uses the GameScreen class to provide a UI screen for a
hypothetic game. GameDemoScreen is a subclass of GameScreen that implements
runnable for running the main game loop thread.
The following code sample shows implementation of using GameScreen.
GameScreen
class GameDemoScreen extends GameScreen implements Runnable{
// ...
public void run() {
// Get the Graphics object for the
// off-screen buffer
Graphics g = getGraphics();
while (true) {
// Check user input and update
// positions if necessary
int keyState = getKeyStates();
if ((keyState & LEFT_KEY) != 0) {
sprite.move(-1, 0);
}
else if ((keyState & RIGHT_KEY) != 0) {
sprite.move(1, 0);
}
// Draw the background
g.drawImage(backgroundImage,0,0, Graphics.TOP
+ Graphics.LEFT);
// Draw the sprite on top of the background
sprite.draw(g);
// Flush the off-screen buffer
flushGraphics();
}
}
// ...
}
43
ImageUtil Class
ImageUtil provides static methods useful to the manipulation of Image objects.
Specifically, it provides methods for setting and getting RGB values, and also provides the
ability to create a scaled instance of an existing Image.
ImageUtil Fields
The ImageUtil class defines the following fields:
•
public static final int SCALE_AREA - Area scaling method.
•
public static final int SCALE_REPLICATE - Replicate scaling method.
•
public static final int SCALE_SMOOTH - Smooth scaling method.
ImageUtil Methods
The ImageUtil class defines the following methods:
•
public static void getPixels(Image src, int x, int
y, int width, int height, int[] rgbData) throws
ArrayIndexOutOfBoundsException – Gets RGB pixel data from the
specified region of the source image. The data is stored in the provided int array in
row-major order using the standard 24-bit color format (0xRRGGBB). Note that the
color information stored in the image may be subject to the capabilities of the device's
display. The rgbData must be instantiated previously calling this method, according
to pixel amount that the user is requiring to the method. The parameters are the
following: src - the source Image to retrieve the pixel data from; x - the horizontal
location of left edge of the region; y - the vertical location of the top edge of the
region; width - the width of the region; height - the height of the region; height
- the height of the region; and rgbData - the array in which the pixel data is to be
stored.
•
public static void getPixels(Image src,
int[] rgbData) throws ArrayIndexOutOfBoundsException –
Gets RGB pixel data from the entirety of the source image. The data is stored in the
provided int array in row-major order using the standard 24-bit color format
(0xRRGGBB). Note that the color information stored in the image may be subject to
the capabilities of the device's display. The rgbData must be instantiated previously
calling this method, according to pixel amount that the user is requiring to the
method. The parameters are the following: src - the source Image to retrieve the
pixel data from; and rgbData - the array in which the pixel data is to be stored.
•
public static void setPixels(javax.microedition.lcdui.Image dest, int x, int y, int width,
int height, int[] rgbData) throws ArrayIndexOutOfBoundsException,
IllegalArgumentException – Sets RGB pixel data in specified region of the destination
image. The data must be stored in the int array in row-major order using the standard
8
Gaming API and Sound
24-bit color format (0xRRGGBB). The method parameters are the following: dest The mutable destination Image whose pixels will be set; x - The horizontal location of
left edge of the region; y - The vertical location of the top edge of the region; width
- The width of the region; height - The height of the region; and rgbData - The
array of RGB pixel values.
•
public static void setPixels(javax.microedition.lcdui.Image dest, int[] rgbData) throws
ArrayIndexOutOfBoundsException, IllegalArgumentException – Sets RGB pixel data
in the entirety of the destination image. The data must be stored in the int array in
row-major order using the standard 24-bit color format (0xRRGGBB). The method
parameters are dest - The mutable destination Image whose pixels will be set, and
rgbData - The array of RGB pixel values.
•
public static Image getScaleImage(javax.microedition.lcdui.Image src, int width,
int height, int method) throws IllegalArgumentException – Creates a scaled version of
the source image using the desired scaling method. All platforms must implement the
SCALE_REPLICATE scaling method; other scaling methods may be optionally
supported. SCALE_REPLICATE is used if the requested scaling method is not
supported by the device. The method parameters are the following: src - the source
Image; width - the width, in pixels, of the new Image, height - the height, in
pixels, of the new Image, and method - The desired method to be used to scale the
image data (see the item 0).
Using ImageUtil
The following code sample uses an image (tank.png) to create a data structure
(rgbData) to stores the RGB pixel data. The rgbData is used to draw the same
image.
The following is a code sample to show implementation of rgbData:
rgbData
try {
Image tank = Image.createImage("tank.png");
} catch(Exception e) {
// The image can't be loaded
}
// creates a data structure to stores the RGB pixel data from Image
int rgbData[] = new int[tank.getHeight()*tank.getWidth()];
// Stores the RGB pixel data from Image
ImageUtil.getPixels(tank,rgbData);
// Draws the image pixel by pixel with the respective RGB pixel
data
for (i=0;i<tank.getHeight();i++) {
for (j=0;j<tank.getWidth();j++) {
g.setColor(rgbData[i*tank.getWidth() + j]);
g.fillRect(j,i,1,1);
45
}
}
PalleteImage Class
PaletteImage provides methods for manipulating the color palette data of an image.
PaletteImages can only be created with palette-based image data (PNG color type 3,
or other palette image formats that a particular device may support).
A single palette entry or the entire palette can be retrieved as a series of RGB values in
0xRRGGBB format (MIDP color format). The effects of the palette changes will be visible
in the next Image that is generated.
The following will be supported:
•
Single color transparency: the entire palette may be fully opaque, or a single
palette entry may be designated as being fully transparent. Alpha channels are
not supported.
Once the palette entries have been set to the desired values, a MIDP Image object is
retrieved that reflects the new palette settings.
PalleteImage Constructor
The PalleteImage class defines the following constructors:
•
PalleteImage(byte[] data, int offset, int length)
throws IOException - Creates a new PalleteImage using the provided image
data.
•
PalleteImage (java.lang.String name) throws IOException -
Creates a new PaletteImage using the provided image data in a named
resource.
PalleteImage Methods
The PalleteImage class defines the following methods:
•
public Image getImage() - Creates and returns a new Image object
using this PaletteImage. The Image returned will reflect the PaletteImage’s original
pixel data and current palette data. This method enables the developer to easily
generate a series of differently colored images by adjusting palette data.
•
public int getTransparentIndex() – Gets the current transparent
index. Pixels that reference the transparent index in the palette are not drawn when
the image is rendered. By default, the transparent index is -1 even if a transparent
color is specified in the original image data.
8
Gaming API and Sound
•
public void setTransparentIndex(int index) throws
IndexOutOfBoundsException – Sets the current transparent index. Pixels
that reference the transparent index in the palette are not drawn when the image is
rendered. The effects of the new transparent index will be reflected in the next Image
object that is created by calling getImage().
•
public int getPaletteSize() - Gets the number of entries in the
palette.
•
public int getPaletteEntry(int index) throws
IndexOutOfBoundsException - Gets the specified entry in the palette. The
method returns the current color value of the entry (0xRRGGBB format).
•
public void setPaletteEntry(int index, int color)
throws IndexOutOfBoundsException – Sets the specified entry in the
palette. The color must be specified using the MIDP color format (0xRRGGBB, the
upper 8 bits are ignored). The effects of the new palette will be reflected in the next
Image object that is created by calling getImage().
•
public int[] getPalette() – Gets the entire palette as an array of
ints, each one representing a 24-bit RGB value. The method returns a new int array
each time it is called, so this method should be used sparingly to avoid creating
excessive garbage.
•
public void setPalette(int[] newPalette) throws
ArrayIndexOutOfBoundsException, NullPointerException,
IllegalArgumentException - Sets the palette data for this image. The palette
data must be specified using MIDP color format (0xRRGGBB, the upper 8 bits are
ignored). The size of the new palette must be at least as large as the value returned
by getPaletteSize(); additional palette entries, if present, are ignored. The
effects of the new palette will be reflected in the next Image object that is created by
calling getImage().
Using PalleteImage
PalleteImage enables a developer to adjust the colors of an image to match the
capabilities of the device. It also enables reuse of image data by allowing the developer to
change the color scheme. For example, a racing game may use a single
PaletteImage of a car; the developer may then tweak the palette and generate a
series of Images of differently colored cars, as seen below:
PaletteImage raceCar = new PaletteImage("car.png");
// Set the car color to red and retrieve the Image
raceCar.setPaletteEntry(0, 0xFF0000);
Image redRaceCar = raceCar.getImage();
// Set the car color to blue and retrieve the Image
47
raceCar.setPaletteEntry(0, 0x0000FF);
Image blueRaceCar = raceCar.getImage();
// Set the car color to green and retrieve the Image
raceCar.setPaletteEntry(0, 0x00FF00);
Image greenRaceCar = raceCar.getImage();
// The PaletteImage can now be discarded since we have the
// Image objects that we need
raceCar = null;
PlayField Class
A PlayField is a rectangular grid of cells with a set of available tiles to place in those
cells and a set of associated Sprites.
The PlayField grid is made up of (rows * columns) cells, where the number of rows
and columns are defined by parameters to the constructor. The cells are equally sized.
The size of the cells is defined by the size of the tiles, or if the PlayField has no tiles,
by arguments to the constructor. Each cell is either empty or contains a single tile whose
image will be drawn in that cell. An empty cell is fully transparent - Nothing will be drawn
in that area by the PlayField.
The tiles used to fill the PlayField cells can be either static tiles or animated tiles. Tiles
are referred to using index numbers. Tile 0 (tile with index 0) refers to the special empty
tile. Any cell assigned the tile 0 will be considered empty and will be effectively
transparent.
The static tile indices are non-negative (>=0) and the animated tiles indices are negative
(<0).
Using Static and Animated Tiles
Static tiles are called static because their image does not often change, i.e., any cell that
contains the static Tile 1 will always be drawn as the unchanging image of Tile 1. Tile 0 is
a special static tile. It represents an empty cell. Any cell containing tile 0 will be
transparent, it will not have a tile image drawn in it.
Animated tiles are called animated because their appearance changes easily over time.
At any given time, each animated tile is associated with a particular static tile. When a cell
containing an animated tile is drawn, the image of the static tile currently referenced by
that animated tile will be drawn in that cell. In effect, the animated tiles provide indirect
references to the set of static tiles, and therefore allow many cells to be animated
simultaneously. For example, cells (0,0) and (0,1) both contain animated Tile -2. Animated
Tile -2 currently references static Tile 1. Cells (0,0) and (0,1) will then be drawn with the
image of static Tile 1. If animated Tile -2 is subsequently set to reference static Tile 2 by
8
Gaming API and Sound
calling setAnimatedTileImage(-2, 2);, cells (0,0) and (0,1) will then be drawn
with the image of static Tile 2.
Using Sprites
In addition to being a grid of cells, a Playfield can have a set of associated Sprites
(see 0 item). When the PlayField is drawn, the grid is considered to have depth 0.
Therefore, Sprites below the grid (Sprites with Sprite.getDepth() < 0)
are drawn first. Then all cells in the grid are drawn. Then all the Sprites above the grid
(Sprite.getDepth() >= 0) are drawn. The Sprites are drawn according to
their location and visibility status as defined in the Sprite class. The location of
Sprites is relative to the top-left corner of the PlayField.
Defining View Windows
A view window onto the PlayField can be defined using the method
setViewWindow(). This defines the area of the PlayField that will be drawn by
the draw() method. The default viewing window onto a PlayField (at construction
time) is the entire area of the PlayField.
PlayField Constructor
The PlayField class defines the following constructors:
PlayField (int columns, int rows, Image img, int tWidth, int tHeight) throws
NullPointerException, IllegalArgumentException - Creates a new PlayField with a tile
set. The parameter are the following:
− columns - width of the PlayField in number of cells;
−
rows - height of the PlayField in number of cells;
−
img - Image to use for creating tiles;
−
tWidth - width, in pixels, of the individual tiles;
−
tHeight - height, in pixels, of the individual tiles.
It creates a new PlayField, rows cells high and columns cells wide. The static
tile set for the PlayField will be created from subsections of the image passed in. The
PlayField grid is initially filled with empty cells (tile 0 - a reserved tile and
represents an empty square) and laying out tiles must be accomplished through the
use of other methods in the class. The creation of the static tile set follows these
standards:
Tiles must be equally sized, all being of the tile width (tWidth) and height
(tHeight) defined in the constructor parameters. They may be laid out in the image
horizontally, vertically, or as a grid. The width of the source image must be an integer
49
multiple of the tile width. The height of the source image must be an integer multiple
of the tile height.
The tiles in the source image will have indices as follows:
The static tiles are indexed like words are read on a page; left-to-right, then top-tobottom. The top-left tile is assigned index 1. If there is a tile to its right, this tile is
assigned index 2, and so on, across the first row of tiles. If there is a second row of
tiles, the index of the left-most tile in this row is one greater than the right-most tile in
the preceding row. The table below is a diagrammatic depiction:
1
2
. . .
N
N+1
N + 2
. . .
2N
2N+1
2N + 2
. . .
. . .
. . .
. . .
. . .
[(M – 1) *
N]+1
[(M-1) * N )] + 2
. . .
(M * N )
So the total number of tiles is M * N, where:
−
N = (image width) / (tile width);
−
M = (image height) / (tile height).
The indices for the static tile set will be non-negative (>=0) and the indices for
animated tiles will be negative (<0). The index sets do not overlap and therefore
indices for static and animated tiles can be used interchangeably in the methods that
set or move the contents of the PlayField cells. The static Tile set shall behave as
if the image used in creation were cached. If a mutable image is used to create the
tiles, the tiles' appearances should not reflect changes to the mutable source image.
The appearance of individual static tiles can be changed with
setStaticTileImage(). The entire static tile set can be changed using
setStaticTileSet(). These methods should be used sparingly since they
are both memory and time consuming.
PlayField (int columns, int rows, int cellWidth,
int cellHeight) throws IllegalArgumentException - Creates a new
PlayField without a tile set. The parameter are the following:
−
columns - width of the PlayField in number of cells;
−
rows - height of the PlayField in number of cells;
−
cellWidth - Pixel width of each cell;
−
cellHeight - Pixel height of each cell.
It creates a new PlayField, rows cells high and columns cells wide. A
PlayField created with this constructor will not have any tiles (animated or static)
associated with it. The primary use of a PlayField without tiles is expected to be
as a container for managing sprites. The on-screen pixel dimensions of cells is
defined by the parameters cellWidth and cellHeight. The cells in the
8
Gaming API and Sound
PlayField are all empty (tile 0 - a reserved tile and represents an empty square). A tile
set can later be added using setStaticTileSet().
PlayField Methods
The PlayField class defines the following methods:
•
public void addSprite(Sprite s) throws
NullPointerException – Add a Sprite to the PlayField. Ignores the request
if the Sprite is already associated with the PlayField.
•
public void removeSprite(Sprite s) throws
RuntimeException, NullPointerException – Remove a Sprite from PlayField.
•
public void removeAllSprites() – Remove all Sprites from
PlayField.
•
public int createAnimatedTile(int staticTileIdx)
throws IndexOutOfBoundsException – Creates a new animated tile and
initializes it with a static tile index. Returns the index to use when referring to this
animated tile. The indices for animated tiles will be negative (<0) and the indices for
the static tile set will be positive (>=0). The index sets do not overlap and therefore
indices for static and animated tiles can be used interchangeably in the methods that
set or move the contents of the PlayField cells. The first animated tile shall have the
index -1, the second, -2, etc.
•
public void setAnimatedTileImage(int animTileIdx,
int staticTileIdx) throws IndexOutOfBoundsException –
Sets the static tile that will be displayed in any cell that contains the animated tile.
The method parameters are animTileIdx - index of the animated tile, and
staticTileIdx - index of a static tile to be referenced by the animated tile.
•
public int getAnimatedTileImage(int animTileIdx)
throws IndexOutOfBoundsException – Get the static tile referenced by an
animated tile, and returns the index of the static tile that is currently referenced by an
animated tile.
•
public void setCell(int celCol, int celRow,
int tileIdx) throws IndexOutOfBoundsException,
ArrayIndexOutOfBoundsException – Sets the tile to be displayed in a
cell. The tile can be either a static or an animated tile. The method parameters are
celCol - column of cell to set, celRow - row of cell to set, and tileIdx - index
of tile to place in cell.
•
public int getCell(int celCol, int celRow)
throws.ArrayIndexOutOfBoundsException – Gets the index of the
static or animated tile currently displayed in a cell.
•
public void moveTiles(int dstCol, int dstRow,
int srcCol, int srcRow, int width, int height) throws
ArrayIndexOutOfBoundsException – Move a rectangular set of tiles
from a source location to a destination location. Source cells are left empty. If the
51
source and destination cells overlap, the method shall behave as if the source cells
are first copied to a separate array, the source cells are cleared, and the tiles are
then copied back to the destination cells. The method parameters are the following:
dstCol - column of top-left destination cell; dstRow - row of top-left destination
cell; srcCol - column of top-left source cell; srcRow - row of top-left source cell;
width - width, in rows, of area of tiles to move; and height - height, in rows, of
area of tiles to move.
•
public void fillCells(int col, int row, int width, int height, int tileIdx) throws
IndexOutOfBoundsException, ArrayIndexOutOfBoundsException – Fill each cell in a
rectangular area with a given animated or static tile. The method parameters are the
following: col - column of top-left cell; row - row of top-left cell; width - width, in
rows, of area of cells to fill; height - height, in rows, of area of cells to fill; and
tileIdx - index of tile to place in fill region.
•
public void
draw(javax.microedition.lcdui.Graphics g, int x,
int y) throws NullPointerException – Draw the PlayField to a
Graphics instance, anchoring the top left corner of the PlayField view window at the
position (x, y) on the Graphics instance. The method parameters are the
following: g - Graphics instance on which to draw the PlayField; x - the x coordinate
of the top left corner of the PlayField; and y - the y coordinate of the top left corner of
the PlayField. The PlayField will be drawn as follows:
•
Draw all the Sprites with depth < 0 in increasing order of depth (depth -2 drawn
before or below depth -1);
•
Draw the tiles for all cells. Empty cells, those with Tile 0, are considered fully
transparent, so nothing is drawn for them.
•
Draw the all the Sprites with depth >= 0 in increasing order of depth (depth 1
drawn before or below depth 2). The location of the Sprites is defined by the
Sprite instance and is relative to the top left corner of the PlayField grid.
•
public int getCellWidth() – Get width of a cell, in pixels.
•
public int getCellHeight() – Get height of a cell, in pixels.
•
public int getGridWidth() – Get width of the PlayField grid, in cells.
•
public int getGridHeight() – Get height of the PlayField grid, in cells.
•
public boolean anyCollisions() – This method checks whether any
of the PlayField's Sprites collide with any of the PlayField's tiles or other Sprites on
the PlayField. It will return true if any Sprite on the PlayField collides with a tile or
any other Sprite. Like collidesWithSprites(Sprite) and collidesWithAnyTile(Sprite), this
method reports collisions only at a boundary level granularity, not pixel level
granularity.
•
public boolean collidesWithSprites(Sprite s) throws
NullPointerException – Check for Sprite collision with any other Sprites
on the PlayField. This method is complemented by Sprite.collidesWith(Sprite,
boolean); If collidesWithSprites(Sprite) returns true, the developer can find the exact
Sprite collision(s) by using Sprite.collidesWith(Sprite, boolean). This is similar to how
8
Gaming API and Sound
collidesWithAnyTile(Sprite) and collidesWithTiles(int, int, int, int, Sprite, boolean)
complement each other. Sprite s does not have to have been added to the PlayField.
The collision detection will proceed as if the Sprite is on the PlayField. That is, its
location will be treated as relative to the origin of the PlayField's coordinate system.
•
public boolean collidesWithAnyTile(Sprite s) throws
NullPointerException – Check for Sprite collision with PlayField tiles.
Return true if the Sprite overlaps with a cell that contains a tile (i.e. a cell containing a
non-zero tile index). Sprite s does not have to have been added to the PlayField. The
collision detection will proceed as if the Sprite is on the PlayField. That is, its location
will be treated as relative to the origin of the PlayField's coordinate system.
•
public boolean collidesWithTiles(int col, int row, int width, int height, Sprite s,
boolean pixelLevel) throws NullPointerException, ArrayIndexOutOfBoundsException
– Check for Sprite collision with a region of PlayField tiles. It returns true if the Sprite
overlaps with a cell in the defined region that contains a tile (i.e. a cell containing a
non-zero tile index). If pixelLevel is true, this method will report a collision only
when opaque Sprite pixels overlap opaque tile pixels. This method complements the
collidesWithAnyTile(Sprite) method by letting the programmer focus their search and
find specific tiles or regions of collision. This is similar to how
Sprite.collidesWith(Sprite, boolean) complements collidesWithSprites(Sprite). The
method parameters are the following: row - Row of top-left cell for collision check
region; col - Column of top-left cell for collision check region; height - Height, in
rows, of area for collision check; width - Width, in rows, of area for collision check;
s - Sprite to check for collision; and pixelLevel - Boolean indicating whether
collision detection should be done at a pixel level instead of simply as boundary
checks.
•
public void setStaticTileImage(int staticTileIdx,
Image img, int x, int y) throws NullPointerException,
ArrayIndexOutOfBoundsException – Modify the image associated with
a static tile. Replace the image currently associated with a static tile with a new image
of the same size. New static tile image will be extracted from the image passed in,
starting from pixel (x, y) in the new source image and extending for getCellWidth()
pixels horizontally and getCellHeight() pixels vertically. As at tile set creation time, if a
mutable source image is used, behavior of the tile set should be as if the new image
were cached. Updates to the mutable source image will not cause a change in the
appearance of the tile image.
•
public void setStaticTileSet(Image img, int tWidth,
int tHeight) throws NullPointerException,
IllegalArgumentException – Replaces the current static tile set with a
new static tile set. See the constructor PlayField(int, int, Image, int, int) for information
on how the tiles are created from the image. If the new static tiles have the same
dimensions as the previous static tiles, the view window will be unchanged. If the new
static tiles have different dimensions than the previous static tiles, the view window
will be reset to the construction default, i.e. the entire grid dimension. If the new static
tile set has as many or more tiles than the previous static tile set, then the animated
tiles will be unchanged, and the contents of the PlayField grid will be unchanged. If
the new static tile set has less tiles than the previous static tile set, then the PlayField
grid will be reset to completely empty, and All animated tiles will be deleted.
53
•
public void setViewWindow(int x, int y, int width,
int height) – Sets the portion of the PlayField that will be drawn when
draw(Graphics, int, int) is called. This will limit the portion of the PlayField that is
drawn to the rectangle defined by the region (x, y) to (x + width, y +
height). The default view window (at construction time) is the entire area of the
PlayField, i.e. the rectangular region bounded by (0, 0) and (getGridWidth() *
getCellWidth(), getGridHeight() * getCellHeight()).The rectangle defined
by the parameters may extend beyond the bounds of the PlayField. If this happens,
the draw(graphics, int, int) method will draw no tiles in the area outside
the grid boundaries. Sprites may still be drawn in this area if their position places
them outside the bounds of the PlayField grid. The view window stays in effect until it
is modified by another call to this method or is reset as a result of calling
setStaticTileSet(Image, int, int). The method parameters are x - x coord of top-left
pixel for the drawing view window, y - y coord of top-left pixel for the drawing view
window, width - width of the drawing view window, and height - height of the
drawing view window.
Using PlayField
The following is a code sample to show implementation of PlayField:
PlayField
// Creates a playField with 100 columns and 10
// rows and tiles with 24x16 pixels
PlayField foreground = new PlayField(100, 10,
Image.createImage("tiles.png"), 24, 16);
// Sets the first cell in the first line to
// empty(tile with index 0)
foreground.setCell(0, 0, 0);
// Fills the second cell in the first line with tile 1
foreground.setCell(1, 0, 1);
// Fills the third cell in the first line with tile 2
foreground.setCell(2, 0, 2);
// Fills the fourth cell in the first line with tile 3
foreground.setCell(3, 0, 3);
// Gets the Graphics object for this GameScreen
Graphics g = getGraphics();
// Draws the foreground playfield
foreground.draw(g, 0, 0);
8
Gaming API and Sound
SoundEffect Class
The SoundEffect class encapsulates the data for a game sound effect. A game may
create several SoundEffect objects, one for each of the sounds that it needs to play.
The sound data may be stored on the device as a named resource in the application JAR
file, or it can be stored on a server and retrieved via the network. SoundEffect
instances are played by a GameScreen.
SoundEffect Methods
The SoundEffect class implements the following method:
•
public static SoundEffect
createSoundEffect(String resource) throws
FileFormatNotSupportedException – Creates a SoundEffect for
the sound data stored in the specified named resource or URL. The data must be in a
sound format that is supported by the device. Though additional formats may be
supported, all devices must support some format yet to be determined.
Using SoundEffect
As described above, a game can need several different sound effects. The code below
exemplifies the creation of some SoundEffect objects:
The following is a code sample to show the creation of SoundEffect objects:
SoundEffect Objects
try{
// Create a SoundEffect using a wave file inside the JAR
SoundEffect s1 = createSoundEffect("/jump.wav");
// Create a SoundEffect using a wave located
// on a web site
SoundEffect s2=
createSoundEffect("http://www.motorola.com/sound/mp.wav");
}catch(FileFormatNotSupportedException fe){}
Sprite Class
The Sprite class is used to create graphic images, animated or non-animated, that a
user can interact with and move around.
55
Animation Frames
An animated sprite is created from an image divided into sections as described in the
constructor Sprite(Image, int, int). The individual sections of the image are considered the
raw frames of the Sprite. The method getNumRawFrames returns the number of raw
frames.
Sprite Drawing
Sprites can be drawn at anytime using the draw(Graphics) method. The sprite
will be drawn on the Graphics object, according to the current state information
maintained by the Sprite (i.e. position, frame, visibility). Some potential uses of Sprites
include:
•
Arbitrarily draw the Sprite on a GameScreen.
•
A Sprite can be added to a PlayField. Then PlayField.draw(Graphics, int, int) will
automatically draw all the Sprites associated with the PlayField.
•
draw(Graphics) could be called from the paint() method in a subclass of
Canvas.
•
draw(Graphics) could be called at any time to draw the Sprite on a MIDP mutable
image. This is virtually identical to the first bullet, drawing on a GameScreen.
Only in the case where a set of Sprites are a part of a container object (i.e. where the
Sprite is associated with a PlayField) is the depth information automatically
handled by the system. In other situations, managing the drawing order is the
responsibility of the developer.
Sprite Constructor
The Sprite class defines the following constructors:
•
public Sprite(Image img) – Creates a new non-animated Sprite
from an Image object. All animation operations on a non-animated Sprite behave as
if there is a single raw frame. At construction time, the Sprite's position will be set
to (0,0), the depth will be set to 0, and the Sprite will be visible. The Sprite shall
behave as if the image used in creation were cached. If a mutable image is used to
create the Sprite, the Sprite's appearance should not reflect changes to mutable
source image.
•
public Sprite(Image img, int fWidth, int fHeight) –
Creates a new animated Sprite from an Image. The constructor parameters are
the following:
−
img - Image to use for Sprite;
−
fWidth - width, in pixels, of the individual raw frames;
−
fHeight - height, in pixels, of the individual raw frames.
8
Gaming API and Sound
The creation of the raw frames follows these standards:
−
Frames must be equally sized, all being of the frame width (fWidth) and height
(fHeight) defined in the constructor parameters. They may be laid out in the
image horizontally, vertically, or as a grid. The width of the source image must be
an integer multiple of the frame width. The height of the source image must be
an integer multiple of the frame height.
The frames in the source image will have raw frame numbers as follows:
−
The frames are numbered like words are read on a page; left-to-right, then topto-bottom. The top-left frame is numbered 0. If there is a frame to its right, this
frame is numbered 1, and so on, across the first row of frames. If there is a
second row of frames, the number of the left-most frame in this row is one
greater than the right-most frame in the preceding row. The table below is a
diagrammatic depiction:
0
1
. . .
N – 1
N
N + 1
. . .
2N – 1
2N
2N + 1
. . .
. . .
. . .
. . .
. . .
(M – 1) * N
((M-1)* N ) + 1
. . .
(M * N ) – 1
So the total number of frames is M * N, where:
−
N = (image width) / (frame width)
−
M = (image height) / (frame height)
At the time of creation, all Sprites have a default frame sequence corresponding to
the raw frame numbers. This can be modified with setFrameSequence(). At
construction time, the Sprite's position will be set to (0,0), the depth will be set to 0,
and the Sprite will be visible. The Sprite shall behave as if the image used in creation
were cached. If a mutable image is used to create the Sprite, the Sprite's appearance
should not reflect changes to mutable source image.
public Sprite(Sprite s) – Creates a new Sprite from another Sprite.
Create a copy of a Sprite. All attributes (raw frames, position, frame sequence,
current frame, visibility) of the source Sprite should be reflected in the new
Sprite. Any subsequent updates to the source Sprite after the creation of the
second Sprite should not be reflected in the second Sprite.
Sprite Methods
The Sprite class implements the following methods:
•
public void setPosition(int x, int y) – Set Sprite's x,y
position. The x, y position is relative to whatever object the sprite is associated with or
drawn on.
57
•
public void setDepth(int d) – Set Sprite's depth order. The depth
order is relative to other Sprites when multiple Sprites are contained in a container
object, i.e. a PlayField. When Sprites are drawn explicitly instead of implicitly through
the use of a container object, the management of drawing order is the responsibility
of the developer. Integer.MIN_VALUE is the lowest depth, Integer.MAX_VALUE is
the highest depth. So items with depth Integer.MIN_VALUE would be drawn first, or
at the bottom, and items with depth Integer.MAX_VALUE would be drawn last or on
top.
•
public void move(int dx, int dy) – Move Sprite. The method
parameters are dx - pixels to move Sprite along horizontal axis, and dy - pixels to
move Sprite along vertical axis.
•
public int getX() – Get Sprite's x position.
•
public int getY() – Get Sprite's y position.
•
public int getDepth() – Get Sprite's depth order.
•
public int getHeight() – Get Sprite's height order.
•
public int getWidth() – Get Sprite's width in pixels.
•
public boolean collidesWith(Sprite s,
boolean pixelLevel) throws NullPointerException – Check for
collision between two Sprites. If pixelLevel is false, check for overlap in the
rectangular areas of the two Sprites, using positions (x, y) and extents (width, height).
The two Sprites are treated as if they are in the same coordinate system. For
example, if the two Sprites are on different PlayFields that are drawn at different
locations, this method still behaves as if they are on the same PlayField. If
pixelLevel is true, check for overlap in opaque pixels of the two Sprites.
Overlapping in transparent regions of either Sprite will not be considered a collision.
•
public void setFrame(int frame) – Set Sprite's animation frame.
Sets which frame from the frame sequence to draw when draw(Graphics) is called.
All Sprites have a default frame sequence as described in the constructor.
•
public int getFrame() – Get Sprite's current animation frame. All Sprites
have a default frame sequence as described in the constructor.
•
public int getNumRawFrames() – Get the number of raw frames in
the original frame set for this Sprite.
•
public void nextFrame() – Set current animation frame to the next
frame. Advance to next frame in the frame sequence. All Sprites have a default frame
sequence as described in the constructor. Frame list is considered to be circular, i.e.
if nextFrame() is called when the last frame is the current frame, this will advance
to the first frame.
•
public void prevFrame() – Set current animation frame to the previous
frame. Advance to previous frame in the frame sequence. All Sprites have a default
frame sequence as described in the constructor. Frame list is considered to be
circular, i.e. if prevFrame() is called when the first frame is the current frame, this
will advance to the last frame.
8
Gaming API and Sound
•
public void setVisible(boolean visible) – Set visibility
status. If setVisible(false) is called, the Sprite will not be drawn by
draw(Graphics) until setVisible(true) is called.
•
public boolean isVisible() – Get visibility status. The method returns
boolean indicating whether the Sprite will be drawn by draw(Graphics).
•
public final void draw(Graphics g) throws
NullPointerException – Draw the Sprite. Draw current frame of Sprite to
Graphics instance g at location currently set in Sprite. Sprite will be drawn only if
isVisible()= true.
•
public void setFrameSequence(int[] seq) throws
ArrayIndexOutOfBoundsException – Set the sequence of frames to
cycle through with next/prevFrame. All Sprites have a default sequence as described
in the constructor. This method allows for the creation of an arbitrary sequence from
the original frameset. The methods nextFrame(), prevFrame(), getFrame(), and
setFrame(int) all operate on the frame sequence. Passing in null causes the
sequence to revert to the default sequence defined in the constructor. The parameter
seq is an array of integers, where each integer is a reference to a frame in the
original raw frameset, that is, the frames from left to right on the original image.
•
public int[] getFrameSequence() – Get the current frame
sequence. Returns the frame sequence set with
setFrameSequence(int[]) or, if none has been set, return the default
frame sequence for this Sprite. Each entry in the array is an index to the original raw
frameset, that is, the frame numbering as described in the constructor.
•
public void
setImage(javax.microedition.lcdui.Image img,
int fWidth, int fHeight) throws NullPointerException,
IllegalArgumentException – Change the image used for the Sprite.
Replaces the current raw frames of the Sprite with a new set of raw frames. See the
constructor Sprite(Image, int, int) for information on how the frames are created from
the image. Changing the image for the Sprite could change the number of raw
frames. If the new frame set has as many or more raw frames than the previous
frame set, then:
−
The current frame will be unchanged;
−
If a custom frame sequence has been defined (using setFrameSequence(int[])),
it will remain unchanged. If no custom frame sequence is defined (i.e. the default
frame sequence is in use), the default frame sequence will be updated to be the
default frame sequence for the new frame set. In other words, the new default
frame sequence will include all of the frames from the new raw frame set, as if
this new image had been used in the constructor.
If the new frame set have less frames than the previous frame set, then:
−
The current frame will be reset to frame 0;
59
−
Any custom frame sequence will be deleted and the frame sequence will revert
to the default frame sequence for the new frame set (all frames in the frame set,
left-to-right then top-to-bottom).
Using Sprite
The example below creates two Sprites (bullet and tank) and tests collisions between
them. When there are no lives left, the game finishes.
The following is a code sample to show implementation of using sprites:
Sprites
try {
Sprite bullet = new Sprite(Image.createImage("bullet.png");
Sprite tank = new Sprite(Image.createImage("tank.png");
} catch (Exception e) {
// any image can't be loaded
}
Boolean isGameOver= False;
int lifes= 3; // The number of lives is 3
while(!isGameOver) {
// verifies the collision between the two sprites
if(tank.collidesWith(bullet,false)) {
lifes--;
// If there are no more lifes, the game is over
if(lifes == -1) {
isGameOver = true;
}
}
}
FileFormatNotSupportedException
The FileFormatNotSupportedException is an exception which will be thrown
when a SoundEffect or BackgroundMusic format is not supported by the platform
or the size of the data is larger than the size of the internal buffers. The
FileFormatNotSupportedException extends the
java.lang.RuntimeException class.
8
Gaming API and Sound
FileFormatNotSupportedException Constructors
The FileFormatNotSupportedException class defines the following
constructors:
•
public FileFormatNotSupportedException(
java.lang.Exception e) – The parameter e is the underlying exception
that caused the failure.
•
public FileFormatNotSupportedException(
java.lang.String info) – The parameter info is a String containing
information about the failure
•
public FileFormatNotSupportedException(
java.lang.String info, Exception e) – The parameters are
info a String containing information about the failure, and e - The underlying
exception that caused the failure.
Java Gaming Sound API
BackgroundMusic class objects (from .mid resource file or from bytes array) can be
played by using GameScreen.playBackgroundMusic () method.
The following is a code sample to show implementation of the Java Gaming Sound API:
Java Gaming Sound API
import com.motorola.game.*;
public class GS extends GameScreen {
public BackgroundMusic bgm;
public GS()
{
bgm = BackgroundMusic.createBackgroundMusic("vinovata.mid");
playBackgroundMusic(bgm, true);
}
}
Max MIDI Extension Support
Max MIDI Extension Support is an extension of the Gaming API and allows Java
Applications the ability to read Max MIDI file types, specifically for the Karaoke
application.
61
9
Vibe and Backlight
Vibe and Backlight API
The Vibe and Backlight API allows J2ME applications access to vibrator, backlight, and
keypad control. This access gives a MIDlet the ability to turn on/off these features based
on the application’s needs. The MIDlet will use the Vibe and Backlight API to enhance the
activity being performed by the application. Examples of these enhancements are the
following:
•
When in a driving game application, the vibrator is turned on during a crash
scenario.
•
An alarm clock application will have access to turn the vibrator on and off.
•
A stock ticker application turns the backlight on/off when a specified stock hits a
target price.
In future releases of the Vibe and Backlight API, keypad and backlight control must
function separately. Currently, these functions are dependant on the hardware
implementation and which additional drivers are needed to control the keypad and lights
separately from the display’s backlight.
Native constraints must be in place to protect the battery life of the product. A time-out
feature will be created to limit the duration of the vibrator and backlight features. This
time-out will protect against a corrupt MIDlet or unattended MIDlet. These native
constraints will be flexible to the operator.
10
SMS MO
10
SMS MO
Overview
Motorola has implemented certain features that are defined in the Wireless Messaging
API (WMA) 1.0. The complete specification document is defined in JSR 120.
The JSR 120 specification states that developers can be provided access to send (MO –
mobile originated) and receive (MT – mobile terminated) SMS (Short Message Service)
on the target device.
A simple example of the WMA is the ability of two J2ME applications using SMS to
communicate game moves running on the series of handsetss. This can take the form of
chess moves being passed between two players via the WMA.
Motorola in this implementation of the specification supports the following features.
!
Creating an SMS
!
Sending an SMS
The SMS MO API will support the following content to be sent over SMS:
•
Text
Creating a Message
The SMS MO API will enable the creation of SMS messages. The addressing of these
messages will be compliant with the standard SMS addressing as specified in the GSM
standards. The content of the message can be constructed using any one or combination
of the content types specified in the overview.
63
Sending a Message
The SMS MO API will provide an avenue to send a message to the appropriate SMS
address.
Permissions
Prior to the series of handsets sending a SMS message, the series of handsets will check
the SMS Access Setting under the Java Settings menu. The SMS access setting gives
the user the option to perform the following:
•
Always ask the user for authorization on all MO SMS messages
•
Ask the user for authorization once per application (default setting)
•
Never ask the user for authorization
11
JAD Attributes
11
JAD Attributes
JAD Attributes
Motorola has implemented the following support for MIDP 1.0 Java Application Descriptor
attributes:
Mandatory attributes for JAD files
MIDlet-Name
MIDlet-Version
MIDlet-Vendor
MIDlet-Jar-URL
MIDlet-Jar-Size
MIDlet-<n>
MIDlet-MicroEdition-Profile
MIDlet-MicroEdition-Configuration
MIDlet-Description
MIDlet-Icon
MIDlet-Info-URL
MIDlet-Data-Size
MIDlet-Permissions
MIDlet-Permissions-Opt
MIDlet-Push-<n>
MIDlet-Install-Notify
MIDlet-Delete-Notify
MIDlet-Deleter-Confirm
65
Mandatory attributes for manifest files
MIDlet-Name
MIDlet-Version
MIDlet-Vendor
MIDlet-<n>
MIDlet-MicroEdition-Profile
MIDlet-Install-Notify
MIDlet-Delete-Confirm
MIDlet-MicroEdition-Configuration
MIDlet-Description
MIDlet-Icon
MIDlet-Info-URL
MIDlet-Data-Size
MIDlet-Permissions
MIDlet-Permissions-Opt
MIDlet-Push-<n>
MIDlet-Install-Notify
MIDlet-Delete-Notify
MIDlet-Delete-Confirm
12
Record Management System
12
Record Management System
Overview
The most common mechanism for persistently storing data on a MIDP device is through
RMS. RMS provides the capability to store variable length records on the device. Those
records are accessible to any MIDlet in the MIDlet Suite, but not to MIDlets outside of the
MIDlet Suite. The RMS implementation of the Motorola C370, C450, and C550 series of
handsets is MIDP compliant, so there are no significant additions or changes to the MIDP
specification.
Class Description
The API for the RecordStore is located in the package javax.microedition.rms.
Code Examples
The following is a code example to show implementation of opening the RecordStore.
If any exception occurs it will be caught.
RecordStore
try {
System.out.println("Opening RecordStore " + rsName + " ...");
//try to open a record Store
recordStore = RecordStore.openRecordStore(rsName, true);
//keep a note for the last modified time for record store
Date d = new Date(recordStore.getLastModified());
System.out.println(recordStore.getName()+"modified last time: " +
d.toString());
}
catch (RecordStoreException rse) {
67
//process the IOException
}
Tips
It is much faster to read and write in big chunks than it is to do so in small chunks.
Whenever you close a RecordStore, the close command will not return until all the
pending writes have been written. A successful call to close a RecordStore
guarantees that the data got written. It is then safe to power off the phone; a side effect to
this is that the close command may take a while to return. Therefore, if a RecordStore
is opened and closed for every write performance will be greatly affected.
Caveats
The maximum number of RecordStores that the Motorola C370, C450, and C550
series of handsets supports depends on the number of files installed. Once the phone has
500 RecordStores (that includes resource files, wall papers, ring tones, and other files),
then it will not be able to make more.
Therefore, if a MIDlet is to have many images, such as sprites used in animations, it may
be advantageous to have them all in one image file and use clipping to display only what
you need.
RecordStore can be of any size as long as there is file space available. A zero byte
RecordStore is also allowed.
13
Phonebook Access
13
Phonebook Access
Phonebook Access API
Using the Phonebook Access API, an application will be able to locate and update contact
information on the series of handsets. This contact information includes phone numbers,
email addresses, and any other directory information related to individuals, groups, or
organizations. The database used to store phonebook information will be unique and
integrated for native phonebook, SIM card, and other applications using Phonebook API.
The primary goal of the Phonebook Access API is to be simple and thin to fit in resourcelimited devices like the Motorola C370, C450, and C550 series of handsets series. This
API will specify a base storage class for all types of contacts items presented in the vCard
specification (RFC2426 –vCard MIME Directory Profile – vCard 3.0 Specification). In
addition, schema strings used in querying and storing contact information are those
specified in the RFC2426 specification.
The Phonebook Access API will perform the following functions:
•
Support multiple phonebook categories
•
Allow multiple phone numbers and email addresses for each contact
•
Store new entries
•
Retrieve entries
•
Edit existing entries
•
Delete entries
•
Check memory status
•
Order and sort contact parameters
•
Support standard schema strings
•
Support recent calls information
69
Phonebook Access API Permissions
Prior to a MIDlet accessing the Phonebook API for all Phonebook operations, the
implementation will check the Phonebook permissions under the Java Settings Menu. The
phonebook permissions menu gives the user the following options:
•
Always ask the user for authorization on all Phonebook access requests
•
Ask the user for authorization once per application (Default setting)
•
Never ask the user for authorization
The following are code samples to show implementation of the Phonebook API:
Sample of code to create object of PhoneBookRecord class:
PhoneBookRecord phbkRecEmpty = new PhoneBookRecord();
String name = “Name”;
String telNo = “9999999”;
int type = PhoneBookRecord.MAIN;
int categoryId = PhoneBookRecord.CATEGORY_GENERAL;
PhoneBookRecord phbkRec = new PhoneBookRecord(name, telNo, type,
categoryId);
Sample of code for calling of ‘add(int sortOrder)’ method:
int index = phbkRec.add(PhoneBookRecord.SORT_BY_NAME);
Sample of code for calling of ‘update(int index, int sortOrder)’ method:
phbkRec.type = PhoneBookRecord.HOME;
int newIndex = phbkRec.update(index, PhoneBookRecord.SORT_BY_NAME);
Sample of code for calling of ‘delete(int index, int sortOrder)’ method:
PhoneBookRecord.delete(index, PhoneBookRecord.SORT_BY_NAME);
Sample of code for calling of ‘deleteAll()’ method:
PhoneBookRecord.deleteAll();
Sample of code for calling of ‘getRecord(int index, int sortOrder)’ method:
phbkRec.getRecord(index, PhoneBookRecord.SORT_BY_NAME);
Sample of code for calling of ‘findRecordByTelNo(String tel, int sortOrder)’ method:
index = phbkRec.findRecordByTelNo(telNo, PhoneBookRecord.SORT_BY_NAME);
13
Phonebook Access
Sample of code for calling of ‘findRecordByName(char firstChar, int sortOrder)’ method:
index = PhoneBookRecord.findRecordByName('N',
PhoneBookRecord.SORT_BY_NAME);
Sample of code for calling of ‘findRecordByEmail(String email, int sortOrder)’ method:
String email = “[email protected]”;
index = phbkRec.findRecordByEmail(email, PhoneBookRecord.SORT_BY_NAME);
Sample of code for calling of ‘getNumberRecords(int device)’ method:
// get total number of records
int numberRecsInPhone =
PhoneBookRecord.getNumberRecords(PhoneBookRecord.PHONE_MEMORY);
int numberRecsInSim = PhoneBookRecord.getNumberRecords(PhoneBookRecord
.SIM_MEMORY);
int numberRecsAll =
PhoneBookRecord.getNumberRecords(PhoneBookRecord.ALL_MEMORY);
Sample of code for calling of ‘getAvailableRecords(int device)’ method:
// get number of available records
int numberRecsAvalPhone =
PhoneBookRecord.getAvailableRecords(PhoneBookRecord.PHONE_MEMORY);
int numberRecsAvalSim =
PhoneBookRecord.getAvailableRecords(PhoneBookRecord.SIM_MEMORY);
int numberRecsAvalAll =
PhoneBookRecord.getAvailableRecords(PhoneBookRecord.ALL_MEMORY);
Sample of code for calling of ‘getUsedRecords(int device, int sortOrder)’ method:
// get number of used records
int numberRecsUsedPhone =
PhoneBookRecord.getUsedRecords(PhoneBookRecord.PHONE_MEMORY,
PhoneBookRecord.SORT_BY_NAME);
int numberRecsUsedSim =
PhoneBookRecord.getUsedRecords(PhoneBookRecord.SIM_MEMORY,
PhoneBookRecord.SORT_BY_NAME);
int numberRecsUsedAll =
PhoneBookRecord.getUsedRecords(PhoneBookRecord.ALL_MEMORY,
PhoneBookRecord.SORT_BY_NAME);
Sample of code for calling of ‘getNumberRecordsByName(String name)’ method:
int num = PhoneBookRecord.getNumberRecordsByName(name);
Sample of code for calling of ‘getMaxNameLength(int device)’ method:
71
int maxNameLengthPhone =
PhoneBookRecord.getMaxNameLength(PhoneBookRecord.PHONE_MEMORY);
int maxNameLengthSim =
PhoneBookRecord.getMaxNameLength(PhoneBookRecord.SIM_MEMORY);
int maxNameLengthAll =
PhoneBookRecord.getMaxNameLength(PhoneBookRecord.ALL_MEMORY);
Sample of code for calling of ‘getMaxTelNoLength (int device)’ method:
int maxTelNoLengthPhone =
PhoneBookRecord.getMaxTelNoLength(PhoneBookRecord.PHONE_MEMORY);
int maxTelNoLengthSim =
PhoneBookRecord.getMaxTelNoLength(PhoneBookRecord.SIM_MEMORY);
int maxTelNoLengthAll =
PhoneBookRecord.getMaxTelNoLength(PhoneBookRecord.ALL_MEMORY);
Sample of code for calling of ‘getMaxEmailLength ()’ method:
int maxEmailLength =
PhoneBookRecord.getMaxEmailLength();
Sample of code for calling of ‘getIndexBySpeedNo(int speedNo, int sortOrder)’ method:
int speedNo = 1;
index = PhoneBookRecord.getIndexBySpeedNo(speedNo,
PhoneBookRecord.SORT_BY_NAME);
Sample of code for calling of ‘getNewSpeedNo(int num, int device)’ method:
int speedNo = 1;
int speedNo_phone =
PhoneBookRecord.getNewSpeedNo(speedNo,
PhoneBookRecord.PHONE_MEMORY);
int speedNo_sim =
PhoneBookRecord.getNewSpeedNo(speedNo,
PhoneBookRecord.PHONE_MEMORY);
int speedNo_all =
PhoneBookRecord.getNewSpeedNo(speedNo,
PhoneBookRecord.PHONE_MEMORY);
Sample of code for calling of ‘getDeviceType(int speedNo)’ method:
int speedNo = 1;
int type = PhoneBookRecord.getDeviceType(speedNo);
Sample of code for calling of ‘setPrimary(int index, int sortOrder)’ method:
int index = 1;
PhoneBookRecord.setPrimary(index, PhoneBookRecord.SORT_BY_NAME);
13
Phonebook Access
Sample of code for calling of ‘resetPrimary(int index, int sortOrder)’ method:
int index = 1;
PhoneBookRecord.resetPrimary(index, PhoneBookRecord.SORT_BY_NAME);
Sample of code for calling of ‘isPrimary(int speedNo)’ method:
int speedNo = 1;
boolean res = PhoneBookRecord.isPrimary(speedNo);
Sample of code for calling of ‘fromVFormat(InputStream in, int device)’ method:
buffer = new String("BEGIN:VCARD\r\nN:;" + new String(name) +
"\r\nTEL;TYPE=WORK:1\r\nEND:VCARD\r\n");
int num =
PhoneBookRecord.fromVFormat((InputStream)(new
ByteArrayInputStream(buffer.getBytes())),
PhoneBookRecord.PHONE_MEMORY);
Sample of code for calling of ‘toVFormat(OutputStream out, int index, int outFormat, int sortOrder)’ method:
int index = 1;
ByteArrayOutputStream outStream = new ByteArrayOutputStream();
PhoneBookRecord.toVFormat(outStream, index, PhoneBookRecord.VCARD_3_0,
PhoneBookRecord.SORT_BY_NAME);
System.out.println("***** Contents of the output stream: *****");
System.out.print(new String(outStream.toByteArray()));
Sample of code for calling of ‘createMailingList(int[] members, int sortOrder)’ method:
PhoneBookRecord mailingList = new PhoneBookRecord();
int mlSpeedNumbers[] = new int[2];
mlSpeedNumbers[0] = 1;
mlSpeedNumbers[1] = 2;
mailingList.name = “MList”;
mailingList.type = PhoneBookRecord.MAILING_LIST;
mailingList.speedNo =
PhoneBookRecord.getNewSpeedNo(1, PhoneBookRecord.PHONE_MEMORY);
index = mailingList.createMailingList(mlSpeedNumbers,
PhoneBookRecord.SORT_BY_NAME);
Sample of code for calling of ‘addMailingListMember(int mlSpeedNo, int mbSpeedNo)’ method:
int mlspeedNo = 3, mbspeedNo = 4;
PhoneBookRecord.addMailingListMember(mlspeedNo, mbspeedNo);
Sample of code for calling of ‘deleteMailingListMember(int mlSpeedNo, int mbSpeedNo)’ method:
73
int mlspeedNo = 3, mbspeedNo = 4;
PhoneBookRecord.deleteMailingListMember(mlspeedNo, mbspeedNo);
Sample of code for calling of ‘getMailingListMembers(int speedNo)’ method:
int mlspeedNo = 3;
int[] returnArray = PhoneBookRecord.getMailingListMembers(mlspeedNo);
Sample of code for calling of ‘isMailingListMember(int mlSpeedNo, int mbSpeedNo)’ method:
boolean returnValue = false;
int mlspeedNo = 3, mbspeedNo = 4;
returnValue = PhoneBookRecord.isMailingListMember(mlspeedNo, mbspeedNo);
Sample of code for calling of ‘getNumberMailingListMembers(int speedNo)’ method:
int numberMembers, mlspeedNo = 3;
numberMembers = PhoneBookRecord.getNumberMailingListMembers(mlspeedNo);
Sample of code for calling of ‘addCategory(String name)’ method:
String categoryName = “CatName”;
int categoryId = PhoneBookRecord.addCategory(categoryName);
Sample of code for calling of ‘deleteCategory(int categoryId)’ method:
PhoneBookRecord.deleteCategory(categoryId);
Sample of code for calling of ‘getCategoryName(int categoryId)’ method:
String categoryName = PhoneBookRecord.getCategoryName(categoryId);
Sample of code for calling of ‘getCategoryMembers(int categoryId)’ method:
int SpeedNumbersArray[] = null;
SpeedNumbersArray = PhoneBookRecord.getCategoryMembers(categoryId);
Sample of code for calling of ‘getNumberCategoryMembers (int categoryId)’ method:
int numberMembers =
PhoneBookRecord.getNumberCategoryMembers(categoryId);
Sample of code for calling of ‘getNumberCategories()’ method:
int numberCategories = PhoneBookRecord.getNumberCategories();
Sample of code for calling of ‘getCategoryIdByIndex(int index)’ method:
int index = 1;
int categoryId = PhoneBookRecord.getCategoryIdByIndex(index);
Sample of code for calling of ‘getMaxCategoryNameLength()’ method:
13
Phonebook Access
int maxCategoryNameLength = PhoneBookRecord.getMaxCategoryNameLength();
Sample of code for calling of ‘getCurrentCategoryView()’ method:
int categoryView = PhoneBookRecord.getCurrentCategoryView();
Sample of code for calling of ‘setCategoryView()’ method:
int oldCategoryView = PhoneBookRecord.setCategoryView(categoryId);
Sample of code to create object of RecentCallDialed class:
String name = “Name”;
String telNo = “9999999”;
int type = RecentCallRecord.VOICE;
int attribute = RecentCallRecord.CALL_CONNECTED;
long time = 10000;
int duration = 3000;
boolean show_id = true;
RecentCallDialed dialedRecentCall = new RecentCallDialed(name, telNo,
type, attribute, time, duration, show_id);
Sample of code for calling of ‘add()’ method:
String name = “Name”;
String telNo = “9999999”;
int type = RecentCallRecord.VOICE;
int attribute = RecentCallRecord.CALL_CONNECTED;
long time = 10000;
int duration = 3000;
boolean show_id = true;
RecentCallDialed dialedRecord = new RecentCallDialed(name, telNo, type,
attribute, time, duration, show_id);
dialedRecord.add();
Sample of code for calling of ‘delete(int index)’ method:
int index = 1;
RecentCallDialed.delete(1);
Sample of code for calling of ‘deleteAll()’ method:
RecentCallDialed.deleteAll();
Sample of code for calling of ‘getRecord(int index)’ method:
int index = 1;
dialedRecord.getRecord(1);
75
Sample of code for calling of ‘getUsedRecords()’ method:
int usedRecs = RecentCallDialed.getUsedRecords();
Sample of code for calling of ‘getNumberRecords()’ method:
int numberRecs = RecentCallDialed.getNumberRecords();
Sample of code for calling of ‘getMaxNameLength()’ method:
int maxNameLength = RecentCallDialed.getMaxNameLength();
Sample of code for calling of ‘getMaxTelNoLength()’ method:
int maxTelNoLength = RecentCallDialed.getMaxTelNoLength();
Sample of code to create object of RecentCallReceived class:
String name = “Name”;
String telNo = “9999999”;
int type = RecentCallRecord.VOICE;
int attribute = RecentCallRecord.CALL_CONNECTED;
long time = 10000;
int duration = 3000;
int cli_type = RecentCallReceived.CALLER_ID_NAME;
RecentCallReceived receivedRecentCall = new RecentCallReceived (name,
telNo, type, attribute, time, duration, cli_type);
Sample of code for calling of ‘add()’ method:
String name = “Name”;
String telNo = “9999999”;
int type = RecentCallRecord.VOICE;
int attribute = RecentCallRecord.CALL_CONNECTED;
long time = 10000;
int duration = 3000;
int cli_type = RecentCallReceived.CALLER_ID_NAME;
RecentCallReceived receivedRecord = new RecentCallReceived(name, telNo,
type, attribute, time, duration, show_id);
receivedRecord.add();
Sample of code for calling of ‘delete(int index)’ method:
int index = 1;
RecentCallReceived.delete(1);
Sample of code for calling of ‘deleteAll()’ method:
RecentCallReceived.deleteAll();
13
Phonebook Access
Sample of code for calling of ‘getRecord(int index)’ method:
int index = 1;
receivedRecord.getRecord(1);
Sample of code for calling of ‘getUsedRecords()’ method:
int usedRecs = RecentCallReceived.getUsedRecords();
Sample of code for calling of ‘getNumberRecords()’ method:
int numberRecs = RecentCallReceived.getNumberRecords();
Sample of code for calling of ‘getMaxNameLength()’ method:
int maxNameLength = RecentCallReceived.getMaxNameLength();
Sample of code for calling of ‘getMaxTelNoLength()’ method:
int maxTelNoLength = RecentCallReceived.getMaxTelNoLength();
77
14
iTAP
Intelligent Keypad Text Entry API
When users are using features such as SMS (short message service), or “Text
Messaging”, they can opt for a predictive text entry method from the series of handsets.
The J2ME environment has the ability to use SMS in its API listing. The use of a
predictive entry method is a compelling feature to the MIDlet.
This API will enable a developer to access iTAP, Numeric, Symbol and Browse text entry
methods. With previous J2ME products, the only method available was the standard use
of TAP.
Predictive text entry allows a user to simply type in the letters of a word using only one
key press per letter, as apposed to the TAP method that can require as many as four or
more key presses. The use of the iTAP method can greatly decrease text-entry time. Its
use extends beyond SMS text messaging, but into other functions such as phonebook
entries.
The following J2ME text input components will support iTAP.
!
javax.microedition.lcdui.TextBox
The TextBox class is a Screen that allows the user to edit and enter text.
!
javax.microedition.lcdui.TextField
A TextField is an editable text component that will be placed into a Form. It is
given a piece of text that is used as the initial value.
Appendix A:
Key Mapping
Appendix A:
Key Mapping
Key Mapping for the C370, C450, and C550
The table below identifies key names and corresponding Java assignments. All other keys
are not processed by Java.
Key
0
1
2
3
4
5
6
7
8
9
STAR (*)
POUND (#)
JOYSTICK LEFT
JOYSTICK RIGHT
JOYSTICK UP
JOYSTICK DOWN
SCROLL UP
SCROLL DOWN
SOFTKEY 1
SOFTKEY 2
MENU
SEND
Assignment
NUM0
NUM1
NUM2
NUM3
NUM4
SELECT, followed by NUM5
NUM6
NUM7
NUM8
NUM9
ASTERISK
POUND
LEFT
RIGHT
UP
DOWN
UP
DOWN
SOFT1
SOFT2
SOFT3 (MENU)
SELECT
Also, handled according to VSCL specification: incoming call
accepted, if Java has high priority
Also, call placed if pressed on lcdui.TextField or lcdui.TextBox
with PHONENUMBER constraint set.
79
CENTER SELECT
END
SELECT
Handled according to VSCL specification:
Pause/End/Resume/Background menu invoked.
Appendix B:
Memory Management Calculation
Appendix B:
Memory Management
Calculation
Available Memory
The available memory on the Motorola C370, C450, and C550 series of handsets is the
following:
•
1M shared memory for MIDlet storage
•
512 Kb Heap size
•
Recommended maximum MIDlet size is 100K
81
Appendix C:
FAQ
Online FAQ
The MOTOCODER developer program is online and able to provide access to Frequently
Asked Questions around enabling technologies on Motorola products.
Access to dynamic content based on questions from the Motorola J2ME developer
community is available at the URL listed below.
http://www.motocoder.com
Appendix D:
Spec Sheets
Appendix D:
Spec Sheets
C370, C450, and C550 Spec Sheets
Listed below are the spec sheets for the Motorola C370, C450, and C550 handsets. The
spec sheets contain information regarding the following areas:
•
Technical Specifications
•
Key Features
•
J2ME Information
•
Motorola Developer Information
•
Tools
•
Other Related Information
83
Motorola C370/C450
Developer Reference Sheet
Band Frequency
Region
Technology
Connectivity
Dimensions
Weight
Display
Operating System
Chipset
•
•
•
•
•
•
•
Color display
J2ME™ games (downloadable)
Messaging: MMS; EMS 5.0
WAP 2.0
Downloadable themes (ring tones, images, sounds)
MIDI ring tones
Mini USB connectivity
GSM 900/1800 GPRS
GSM 850/1900 GPRS
Global
WAP 2.0, J2ME, SMS, EMS,
MMS, AOL/OICQ IM
USB
99.5x44x20.6
89 g
96 x 65
Motorola
i250S1
CLDC v1.0 and MIDP v2.0 compliant
Maximum MIDlet suite size
100k
Heap size
1Mb
Maximum record store size
64Kb
MIDlet storage available
1Mb
Interface connections
HTTP, Socket, UDP
Maximum number of sockets
4
Supported image formats
.PNG, .JPEG
Double buffering
Supported
Encoding schemes
ISO8859_1, ISO10646
Input methods
Multi tap, iTAP
Extension API’s
Gaming, SMS
Motorola Developer Information:
References:
Developer Resources at http://www.motocoder.com
Documentation:
J2ME™ specifications: http://www.java.sun.com/j2me
MIDP v2.0 specifications:
http://www.java.sun.com/products/midp
CLDC v1.0 specifications:
http://www.java.sun.com/products/cldc
WAP forum: http://www.wap.org
MMS standards: http://www.3GPP.org
Creating Media for the Motorola C370/C450/C550 Series
of Handsets
Purchase:
Tools:
CodeWarrior® Wireless Studio v7.0
J2ME™ SDK version v4.0
Motorola Messaging Suite v1.1
Visit the Motocoder Shop at http://www.motocoder.com/
Accessories: http://www.motorola.com/consumer
Motorola C550
Developer Reference Sheet
Appendix D:
Spec Sheets
Band Frequency
Region
Technology
Connectivity
Dimensions
Weight
Display
Operating System
Chipset
•
•
•
•
•
•
•
•
Integrated VGA Camera
Color display
J2ME™ games (downloadable)
Messaging: MMS; EMS 5.0
WAP 2.0
Downloadable themes (ring tones, images, sounds)
MIDI ring tones
Mini USB connectivity
GSM 900/1800 GPRS
EMEA/Asia
WAP 2.0, J2ME, SMS, EMS,
MMS, AOL/OICQ IM
USB
99.5x44x20.6
89 g
96 x 65
Motorola
i250S1
CLDC v1.0 and MIDP v2.0 compliant
Maximum MIDlet suite size
100k
Heap size
1Mb
Maximum record store size
64Kb
MIDlet storage available
1Mb
Interface connections
HTTP, Socket, UDP
Maximum number of sockets
4
Supported image formats
.PNG, .JPEG
Double buffering
Supported
Encoding schemes
ISO8859_1, ISO10646
Input methods
Multi tap, iTAP
Extension API’s
Gaming, SMS
Motorola Developer Information:
References:
Developer Resources at http://www.motocoder.com
Documentation:
J2ME™ specifications: http://www.java.sun.com/j2me
MIDP v2.0 specifications:
http://www.java.sun.com/products/midp
CLDC v1.0 specifications:
http://www.java.sun.com/products/cldc
WAP forum: http://www.wap.org
MMS standards: http://www.3GPP.org
Creating Media for the Motorola C370/C450/C550 Series
of Handsets
Purchase:
Tools:
CodeWarrior® Wireless Studio v7.0
J2ME™ SDK version v4.0
Motorola Messaging Suite v1.1
Visit the Motocoder Shop at http://www.motocoder.com/
Accessories: http://www.motorola.com/consumer
85
MOTOROLA and the Stylized M Logo are registered in the U.S. Patent & Trademark Office. All other product or
service names are the property of their respective owners. Java and all other Java-based marks are trademarks or
registered trademarks of Sun Microsystems, Inc. in the U.S. and other countries.
© Motorola, Inc. 2002.