1
Setting up the Projector Using RS-232C or Telnet
Connect the projector to a computer using RS-232C or Telnet, and open the SETUP MENU on
the computer to carry out various settings for the projector.
When Connecting Using
RS-232C
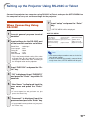
1
2
Launch general purpose terminal
emulator.
Input settings for the RS-232C port
of the terminal emulator as follows.
Baud Rate
Data Length
Parity Bit
Stop Bit
Flow Control
: 9600 bps*
: 8 bit
: None
: 1 bit
: None
* This is the factory default setting. If the value
of Baud Rate for the projector has been
changed, set Baud Rate here according to
the changed value on the projector.
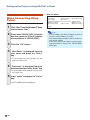
3
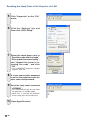
Input “PJS11234” and press the “Enter” key.
4
“OK” is displayed. Input “PJS25678”
and press the “Enter” key within 10
seconds.
5
“User Name:” is displayed. Input the
user name and press the “Enter”
key.
7
Input “setup” and press the “Enter”
key.
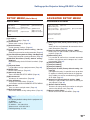
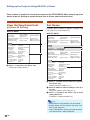
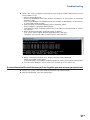
• SETUP MENU will be displayed.
▼SETUP MENU
---------------------------------SETUP MENU-------------------------------[1]IP Address
[2]Subnet Mask
[3]Default Gateway
[4]User Name
[5]Password
[6]RS-232C Baud Rate [7]Projector Name [8]DHCP Client
[A]Advanced Setup
[D]Disconnect All
[V]View All Setting
[S]Save & Quit
[Q]Quit Unchanged
setup>
Note
• User name and password are not set in the factory default settings.
• If the user name or password is entered incorrectly three times, SETUP MENU will be quit.
• If a user name has not yet been set, just
press the “Enter” key.
6
“Password:” is displayed. Input the
password and press the “Enter” key.
• If a password has not yet been set, just press
the “Enter” key.
-29