1
Setting up the Projector Using RS-232C or Telnet
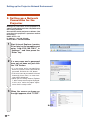
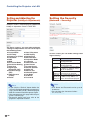
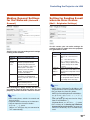
Carrying out Network Ping
Test
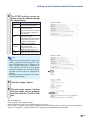
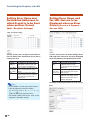
Setting of Accept IP Address (ADVANCED[6]Accept IP
(ADVANCED[5]Network Ping Test)
Addr(1) - [8]Accept IP Addr(3))
It is possible to confirm that a network connection
between the projector and a computer etc. is working normally.
It is possible to improve security of the projector by
allowing connection from only a prescribed IP address. It is possible to set up to three IP addresses
allowing connection to the projector.
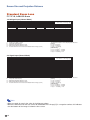
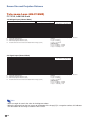
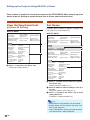
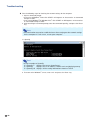
advanced>5
Ping Test IP addr :192.168.150.1
Please Enter
:192.168.150.152
(change)
—> 192.168.150.152
32 bytes from 192.168.150.152: icmp_seq = 1, time = 0 ms
32 bytes from 192.168.150.152: icmp_seq = 2, time = 0 ms
32 bytes from 192.168.150.152: icmp_seq = 3, time = 0 ms
32 bytes from 192.168.150.152: icmp_seq = 4, time = 0 ms
1
2
*1
*2
1 Enter “5” and press the “Enter” key.
2 Enter IP address of device to be tested and
press the “Enter” key.
Display entered IP address (*1).
Display test result (*2).
Note
• If the “Enter” key is pressed without entering an
IP address, the Ping Test IP address used previously is entered.
• If there is a fault with the connection, “Error: No
answer” is displayed after a 5 second retry. In this
case, please confirm the settings for the projector
and the computer, and contact your network administrator.
1
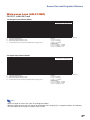
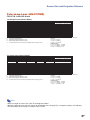
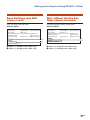
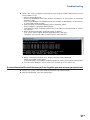
advanced>6
Accept IP Addr(1) : 0.0.0.0
Please Enter
: 192.168.150.152
(change)
—> 192.168.150.152
2
*
1 Enter “6”, “7” or “8” and press the “Enter” key.
2 Enter numerical value and press the “Enter” key.
Display set numerical value (*).
Note
• To invalidate the Accept IP Address being currently set, enter “0.0.0.0”.
• If there is one or more Accept IP Addr being set,
no connections are allowed from IP addresses
that are not yet set. They can be cancelled using
[9]Accept All IP Addr.
Accepting All IP Addresses
(ADVANCED[9]Accept All IP Addr)
Removes IP addresses set with “Accept IP Addr”.
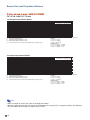
advanced>9
Accept All IP Addresses(y/n)? y
1
2
1 Enter “9” and press the “Enter” key.
2 Enter “y” and press the “Enter” key.
Note
• At the point in time where “y” was entered, the
numerical values for Accept IP Addr(1)-(3) are
reset to “0.0.0.0”.
• If “n” is entered, setting is not altered.
-37