1
www.vscom.de
OnRISC
OnRISC
User Manual
Manual
User
Edition:
Edition: May
May 2014
2014
Vision Systems GmbH
Tel: +49 40 528 401 0
Fax: +49 40 528 401 99
Web: www.visionsystems.de
Support: faq.visionsystems.de
The software described in this manual is furnished under a license agreement and may be used
only in accordance with the terms of that agreement.
Copyright Notice
Copyright © 2009-2014 Vision Systems. All rights reserved. Reproduction without permission is
prohibited.
Trademarks
VScom is a registered trademark of Vision Systems GmbH. All other trademarks and brands are
property of their rightful owners.
Disclaimer
Vision Systems reserves the right to make changes and improvements to its product without providing notice.
Vision Systems provides this document “as is”, without warranty of any kind, either expressed or
implied, including, but not limited to, its particular purpose. Vision Systems reserves the right
to make improvements and/or changes to this manual, or to the products and/or the programs
described in this manual, at any time.
Information provided in this manual is intended to be accurate and reliable. However, Vision
Systems assumes no responsibility for its use, or for any infringements on the rights of third parties
that may result from its use.
This product might include unintentional technical or typographical errors. Changes are periodically made to the information herein to correct such errors, and these changes are incorporated
into new editions of the publication.
May 2014
OnRISC User Manual
2
Contents
Contents
1. Introduction
1.1. OnRISC Family . . . . . . . . . . . . . . . . . . . . . . . . . . . . . . . . . . . . . . .
1.2. How to Read the Manual? . . . . . . . . . . . . . . . . . . . . . . . . . . . . . . . . .
9
9
9
2. Getting Started
2.1. Connect to OnRISC via Serial Link .
2.2. Terminal Type . . . . . . . . . . . .
2.3. Configure Network . . . . . . . . . .
2.4. Start Programming . . . . . . . . . .
2.4.1. KS8695 based Devices . . . .
2.4.2. OMAP3 based Devices . . . .
.
.
.
.
.
.
.
.
.
.
.
.
.
.
.
.
.
.
.
.
.
.
.
.
.
.
.
.
.
.
.
.
.
.
.
.
.
.
.
.
.
.
.
.
.
.
.
.
.
.
.
.
.
.
.
.
.
.
.
.
.
.
.
.
.
.
.
.
.
.
.
.
.
.
.
.
.
.
.
.
.
.
.
.
.
.
.
.
.
.
.
.
.
.
.
.
.
.
.
.
.
.
.
.
.
.
.
.
.
.
.
.
.
.
.
.
.
.
.
.
.
.
.
.
.
.
.
.
.
.
.
.
.
.
.
.
.
.
.
.
.
.
.
.
.
.
.
.
.
.
.
.
.
.
.
.
.
.
.
.
.
.
12
12
12
13
14
14
14
3. Software Configuration
3.1. Booting from CF/microSD . . . . .
3.1.1. KS8695 based Devices . . . .
3.1.2. OMAP3 based Devices . . . .
3.2. Swapping and Logging . . . . . . . .
3.3. Activating and Deactivating Services
3.4. udev . . . . . . . . . . . . . . . . . .
3.5. Time Zone . . . . . . . . . . . . . . .
3.6. Create Swap File . . . . . . . . . . .
3.7. Complete System Image . . . . . . .
3.7.1. Program Overview . . . . . .
3.7.2. GCC . . . . . . . . . . . . . .
3.7.3. Netcat . . . . . . . . . . . . .
3.7.4. Socat . . . . . . . . . . . . .
3.7.5. Samba . . . . . . . . . . . . .
3.7.6. Web Server (Apache2.2) . . .
3.7.7. Mail Server (courier) . . . . .
3.7.8. NTP . . . . . . . . . . . . .
3.7.9. WindowMaker . . . . . . . .
3.7.10. Connecting to X-Window . .
3.7.11. AbiWord . . . . . . . . . . .
.
.
.
.
.
.
.
.
.
.
.
.
.
.
.
.
.
.
.
.
.
.
.
.
.
.
.
.
.
.
.
.
.
.
.
.
.
.
.
.
.
.
.
.
.
.
.
.
.
.
.
.
.
.
.
.
.
.
.
.
.
.
.
.
.
.
.
.
.
.
.
.
.
.
.
.
.
.
.
.
.
.
.
.
.
.
.
.
.
.
.
.
.
.
.
.
.
.
.
.
.
.
.
.
.
.
.
.
.
.
.
.
.
.
.
.
.
.
.
.
.
.
.
.
.
.
.
.
.
.
.
.
.
.
.
.
.
.
.
.
.
.
.
.
.
.
.
.
.
.
.
.
.
.
.
.
.
.
.
.
.
.
.
.
.
.
.
.
.
.
.
.
.
.
.
.
.
.
.
.
.
.
.
.
.
.
.
.
.
.
.
.
.
.
.
.
.
.
.
.
.
.
.
.
.
.
.
.
.
.
.
.
.
.
.
.
.
.
.
.
.
.
.
.
.
.
.
.
.
.
.
.
.
.
.
.
.
.
.
.
.
.
.
.
.
.
.
.
.
.
.
.
.
.
.
.
.
.
.
.
.
.
.
.
.
.
.
.
.
.
.
.
.
.
.
.
.
.
.
.
.
.
.
.
.
.
.
.
.
.
.
.
.
.
.
.
.
.
.
.
.
.
.
.
.
.
.
.
.
.
.
.
.
.
.
.
.
.
.
.
.
.
.
.
.
.
.
.
.
.
.
.
.
.
.
.
.
.
.
.
.
.
.
.
.
.
.
.
.
.
.
.
.
.
.
.
.
.
.
.
.
.
.
.
.
.
.
.
.
.
.
.
.
.
.
.
.
.
.
.
.
.
.
.
.
.
.
.
.
.
.
.
.
.
.
.
.
.
.
.
.
.
.
.
.
.
.
.
.
.
.
.
.
.
.
.
.
.
.
.
.
.
.
.
.
.
.
.
.
.
.
.
.
.
.
.
.
.
.
.
.
.
.
.
.
.
.
.
.
.
.
.
.
.
.
.
.
.
.
.
.
.
.
.
.
.
.
.
.
.
.
.
.
.
.
.
.
.
.
.
.
.
.
.
.
.
.
.
.
.
.
.
.
.
.
.
.
.
.
.
.
.
.
.
.
.
.
.
.
.
.
.
.
.
.
.
.
.
.
.
.
.
.
.
.
.
.
.
.
.
.
.
.
.
.
.
.
.
.
.
16
16
16
17
17
18
18
19
19
19
19
20
20
20
21
21
22
22
23
24
24
4. Network Services and Tools Provided by OnRISC
4.1. WLAN Configuration . . . . . . . . . . . . . . . . . .
4.1.1. Managed Wireless Network (Wpa_supplicant)
4.1.2. Ad-hoc Wireless Network (wireless-tools) . . .
4.1.3. WLAN On/Off Button (Alekto LAN only) . .
4.2. GSM Support . . . . . . . . . . . . . . . . . . . . . . .
4.3. Bluetooth Support . . . . . . . . . . . . . . . . . . . .
4.4. Telnet . . . . . . . . . . . . . . . . . . . . . . . . . . .
4.5. SSH . . . . . . . . . . . . . . . . . . . . . . . . . . . .
4.6. FTP . . . . . . . . . . . . . . . . . . . . . . . . . . . .
4.7. RFC2217 . . . . . . . . . . . . . . . . . . . . . . . . .
4.8. Socketcand . . . . . . . . . . . . . . . . . . . . . . . .
4.9. Other Possible Services . . . . . . . . . . . . . . . . .
.
.
.
.
.
.
.
.
.
.
.
.
.
.
.
.
.
.
.
.
.
.
.
.
.
.
.
.
.
.
.
.
.
.
.
.
.
.
.
.
.
.
.
.
.
.
.
.
.
.
.
.
.
.
.
.
.
.
.
.
.
.
.
.
.
.
.
.
.
.
.
.
.
.
.
.
.
.
.
.
.
.
.
.
.
.
.
.
.
.
.
.
.
.
.
.
.
.
.
.
.
.
.
.
.
.
.
.
.
.
.
.
.
.
.
.
.
.
.
.
.
.
.
.
.
.
.
.
.
.
.
.
.
.
.
.
.
.
.
.
.
.
.
.
.
.
.
.
.
.
.
.
.
.
.
.
.
.
.
.
.
.
.
.
.
.
.
.
.
.
.
.
.
.
.
.
.
.
.
.
.
.
.
.
.
.
.
.
.
.
.
.
.
.
.
.
.
.
.
.
.
.
.
.
25
25
25
26
26
26
27
28
28
28
29
30
30
May 2014
OnRISC User Manual
3
Contents
4.9.1. Samba . . . . . . . . . . . . . . . . . . . . . . . . . . . . . . . . . . . . . . . . 30
4.9.2. NFS . . . . . . . . . . . . . . . . . . . . . . . . . . . . . . . . . . . . . . . . . 30
5. Software Development
5.1. Environment . . . . . . . . . . . . . . . . . . . . . . . . . .
5.1.1. Compile your software directly on the OnRISC . . .
5.1.2. Cross-compile your software on the PC . . . . . . .
5.1.3. Integrated Development Environment . . . . . . . .
5.2. Linux Kernel . . . . . . . . . . . . . . . . . . . . . . . . . .
5.2.1. From Subversion Repository or Archive (old kernels)
5.2.2. From Buildroot Repository . . . . . . . . . . . . . .
5.2.3. Installation on OnRISC . . . . . . . . . . . . . . . .
5.2.4. Install Kernel Modules . . . . . . . . . . . . . . . . .
5.3. Programming Examples Repository . . . . . . . . . . . . . .
5.4. Setup Shared Source Directory . . . . . . . . . . . . . . . .
5.5. Debugging . . . . . . . . . . . . . . . . . . . . . . . . . . . .
5.6. Recommended Books . . . . . . . . . . . . . . . . . . . . . .
.
.
.
.
.
.
.
.
.
.
.
.
.
.
.
.
.
.
.
.
.
.
.
.
.
.
.
.
.
.
.
.
.
.
.
.
.
.
.
.
.
.
.
.
.
.
.
.
.
.
.
.
6. OnRISC Hardware API
6.1. Digital I/O . . . . . . . . . . . . . . . . . . . . . . . . . . . . . . .
6.1.1. KS8695 based Devices . . . . . . . . . . . . . . . . . . . . .
6.1.2. Alekto2 . . . . . . . . . . . . . . . . . . . . . . . . . . . . .
6.2. Buzzer for KS8695 based Devices . . . . . . . . . . . . . . . . . . .
6.3. LEDs for KS8695 based Devices . . . . . . . . . . . . . . . . . . . .
6.4. Serial Interfaces . . . . . . . . . . . . . . . . . . . . . . . . . . . . .
6.4.1. KS8695 based Devices . . . . . . . . . . . . . . . . . . . . .
6.4.2. OMAP3 based Devices . . . . . . . . . . . . . . . . . . . . .
6.5. CAN . . . . . . . . . . . . . . . . . . . . . . . . . . . . . . . . . . .
6.5.1. CAN Interface Configuration . . . . . . . . . . . . . . . . .
6.5.2. CAN Usage Examples . . . . . . . . . . . . . . . . . . . . .
6.5.3. CANopen . . . . . . . . . . . . . . . . . . . . . . . . . . . .
6.6. I2C . . . . . . . . . . . . . . . . . . . . . . . . . . . . . . . . . . . .
6.7. WLAN Button (Alekto LAN Only) . . . . . . . . . . . . . . . . . .
6.8. Watchdog Timer . . . . . . . . . . . . . . . . . . . . . . . . . . . .
6.9. Read Hardware Parameters like MAC Address, Serial Number etc.
6.9.1. KS8695 based Devices . . . . . . . . . . . . . . . . . . . . .
6.9.2. OMAP3 based Devices . . . . . . . . . . . . . . . . . . . . .
6.10. Change Screen Resolution (Alekto 2 Only) . . . . . . . . . . . . . .
6.11. Built-in Touchscreen Calibration (VS-860 Only) . . . . . . . . . . .
.
.
.
.
.
.
.
.
.
.
.
.
.
.
.
.
.
.
.
.
.
.
.
.
.
.
.
.
.
.
.
.
.
.
.
.
.
.
.
.
.
.
.
.
.
.
.
.
.
.
.
.
.
.
.
.
.
.
.
.
.
.
.
.
.
.
.
.
.
.
.
.
.
.
.
.
.
.
.
.
.
.
.
.
.
.
.
.
.
.
.
.
.
.
.
.
.
.
.
.
.
.
.
.
.
.
.
.
.
.
.
.
.
.
.
.
.
.
.
.
.
.
.
.
.
.
.
.
.
.
.
.
.
.
.
.
.
.
.
.
.
.
.
.
.
.
.
.
.
.
.
.
.
.
.
.
.
.
.
.
.
.
.
.
.
.
.
.
.
.
.
.
.
.
.
.
.
.
.
.
.
.
.
.
.
.
.
.
.
.
.
.
.
.
.
.
.
.
.
.
.
.
.
.
.
.
.
.
.
.
.
.
.
.
.
.
.
.
.
.
.
.
.
.
.
.
.
.
.
.
.
.
.
.
.
.
.
.
.
.
.
.
.
.
.
.
.
.
.
.
.
.
.
.
.
.
.
.
.
.
.
.
.
.
.
.
.
.
.
.
.
.
.
.
.
.
.
.
.
.
.
.
.
.
.
.
.
.
.
.
.
.
.
.
.
.
.
.
.
.
.
.
.
.
.
.
.
.
.
.
31
31
31
31
32
33
33
34
34
35
36
36
37
38
.
.
.
.
.
.
.
.
.
.
.
.
.
.
.
.
.
.
.
.
39
39
39
40
41
41
42
42
45
46
46
46
46
47
47
47
48
48
48
49
49
7. /proc-Extensions for the KS8695 based Devices
50
8. BIOS for KS8695 based Devices
8.1. System Console . . . . . . . . . . .
8.2. Boot Priority . . . . . . . . . . . .
8.3. Configure Network Shares . . . . .
8.4. Configure Network Parameter . . .
8.5. Configure Miscellaneous Parameter
8.6. Edit Bootscript . . . . . . . . . . .
8.7. BIOS Update . . . . . . . . . . . .
51
52
52
53
54
55
56
57
May 2014
.
.
.
.
.
.
.
.
.
.
.
.
.
.
.
.
.
.
.
.
.
.
.
.
.
.
.
.
.
.
.
.
.
.
.
.
.
.
.
.
.
.
.
.
.
.
.
.
.
.
.
.
.
.
.
.
.
.
.
.
.
.
.
OnRISC User Manual
.
.
.
.
.
.
.
.
.
.
.
.
.
.
.
.
.
.
.
.
.
.
.
.
.
.
.
.
.
.
.
.
.
.
.
.
.
.
.
.
.
.
.
.
.
.
.
.
.
.
.
.
.
.
.
.
.
.
.
.
.
.
.
.
.
.
.
.
.
.
.
.
.
.
.
.
.
.
.
.
.
.
.
.
.
.
.
.
.
.
.
.
.
.
.
.
.
.
.
.
.
.
.
.
.
.
.
.
.
.
.
.
.
.
.
.
.
.
.
.
.
.
.
.
.
.
.
.
.
.
.
.
.
4
Contents
8.8. View Board Information
8.9. Hardware Test . . . . .
8.10. Default Parameter . . .
8.11. Exit . . . . . . . . . . .
.
.
.
.
.
.
.
.
.
.
.
.
.
.
.
.
.
.
.
.
.
.
.
.
.
.
.
.
.
.
.
.
.
.
.
.
.
.
.
.
.
.
.
.
.
.
.
.
.
.
.
.
.
.
.
.
.
.
.
.
.
.
.
.
.
.
.
.
.
.
.
.
.
.
.
.
.
.
.
.
.
.
.
.
.
.
.
.
.
.
.
.
.
.
.
.
.
.
.
.
.
.
.
.
.
.
.
.
.
.
.
.
.
.
.
.
.
.
.
.
.
.
.
.
.
.
.
.
.
.
.
.
.
.
.
.
59
59
59
59
9. Debian Installation
9.1. Preparing Boot Image Files . . . . .
9.2. Starting Debian Installer . . . . . . .
9.3. Choosing CD-ROM . . . . . . . . . .
9.4. Load Installer Components from CD
9.5. Network Configuration . . . . . . . .
9.6. Partition Disks . . . . . . . . . . . .
9.7. Setting Passwords . . . . . . . . . .
9.8. Install the Base System . . . . . . .
9.9. Configure the Package Manager . . .
9.10. Software Selection . . . . . . . . . .
9.11. Finish the Installation . . . . . . . .
.
.
.
.
.
.
.
.
.
.
.
.
.
.
.
.
.
.
.
.
.
.
.
.
.
.
.
.
.
.
.
.
.
.
.
.
.
.
.
.
.
.
.
.
.
.
.
.
.
.
.
.
.
.
.
.
.
.
.
.
.
.
.
.
.
.
.
.
.
.
.
.
.
.
.
.
.
.
.
.
.
.
.
.
.
.
.
.
.
.
.
.
.
.
.
.
.
.
.
.
.
.
.
.
.
.
.
.
.
.
.
.
.
.
.
.
.
.
.
.
.
.
.
.
.
.
.
.
.
.
.
.
.
.
.
.
.
.
.
.
.
.
.
.
.
.
.
.
.
.
.
.
.
.
.
.
.
.
.
.
.
.
.
.
.
.
.
.
.
.
.
.
.
.
.
.
.
.
.
.
.
.
.
.
.
.
.
.
.
.
.
.
.
.
.
.
.
.
.
.
.
.
.
.
.
.
.
.
.
.
.
.
.
.
.
.
.
.
.
.
.
.
.
.
.
.
.
.
.
.
.
.
.
.
.
.
.
.
.
.
.
.
.
.
.
.
.
.
.
.
.
.
.
.
.
.
.
.
.
.
.
.
.
.
.
.
.
.
.
.
.
.
.
.
.
.
.
.
.
.
.
.
.
.
.
.
.
.
.
.
.
.
.
.
.
.
.
60
60
61
62
62
62
64
66
66
66
66
67
.
.
.
.
.
.
.
.
68
68
68
69
69
70
70
70
70
10.Buildroot
10.1. Downloading . . . . . . . . . . . . . . . .
10.2. Building the Image . . . . . . . . . . . . .
10.3. Copying the Created Image to the System
10.4. Customizing the Image . . . . . . . . . . .
10.5. Compiling Your Own Software . . . . . .
10.6. Using Your Own Kernel . . . . . . . . . .
10.7. Setup SSH Server . . . . . . . . . . . . . .
10.8. Getting Help . . . . . . . . . . . . . . . .
.
.
.
.
.
.
.
.
.
.
.
.
.
.
.
.
.
.
.
.
.
.
.
.
.
.
.
.
.
.
.
.
.
.
.
.
.
.
.
.
.
.
.
.
.
.
.
.
.
.
.
.
.
.
.
.
.
.
.
.
.
.
.
.
.
.
.
.
.
.
.
.
.
.
.
.
.
.
.
.
.
.
.
.
.
.
.
.
.
.
.
.
.
.
.
.
.
.
.
.
.
.
.
.
.
.
.
.
.
.
.
.
.
.
.
.
.
.
.
.
.
.
.
.
.
.
.
.
.
.
.
.
.
.
.
.
.
.
.
.
.
.
.
.
.
.
.
.
.
.
.
.
.
.
.
.
.
.
.
.
.
.
.
.
.
.
.
.
.
.
.
.
.
.
.
.
.
.
.
.
.
.
.
.
A. Debian Maintenance Notes
71
A.1. Debian Package Management . . . . . . . . . . . . . . . . . . . . . . . . . . . . . . . 71
A.2. Keep a Track on Disk Usage . . . . . . . . . . . . . . . . . . . . . . . . . . . . . . . . 72
B. onrisctool.py
B.1. Configure Serial Interfaces . . . . . .
B.2. Configure OTG/CFast . . . . . . . .
B.3. Configure RTC . . . . . . . . . . . .
B.4. Configuring Digital I/O . . . . . . .
B.5. Get EEPROM Info . . . . . . . . . .
B.6. Setting LAN MACs from EEPROM
.
.
.
.
.
.
.
.
.
.
.
.
.
.
.
.
.
.
.
.
.
.
.
.
.
.
.
.
.
.
.
.
.
.
.
.
.
.
.
.
.
.
.
.
.
.
.
.
.
.
.
.
.
.
.
.
.
.
.
.
.
.
.
.
.
.
.
.
.
.
.
.
.
.
.
.
.
.
.
.
.
.
.
.
.
.
.
.
.
.
.
.
.
.
.
.
.
.
.
.
.
.
.
.
.
.
.
.
.
.
.
.
.
.
.
.
.
.
.
.
.
.
.
.
.
.
.
.
.
.
.
.
.
.
.
.
.
.
.
.
.
.
.
.
.
.
.
.
.
.
.
.
.
.
.
.
.
.
.
.
.
.
73
73
74
74
74
75
75
C. hwtest
C.1. Network Test . . .
C.2. MiniPCI Test . . .
C.3. Serial Test . . . . .
C.4. GPIO Test . . . .
C.5. CompactFlash Test
C.6. I2C and RTC Test
C.7. EPLD Test . . . .
C.8. USB Test . . . . .
C.9. CAN Test . . . . .
.
.
.
.
.
.
.
.
.
.
.
.
.
.
.
.
.
.
.
.
.
.
.
.
.
.
.
.
.
.
.
.
.
.
.
.
.
.
.
.
.
.
.
.
.
.
.
.
.
.
.
.
.
.
.
.
.
.
.
.
.
.
.
.
.
.
.
.
.
.
.
.
.
.
.
.
.
.
.
.
.
.
.
.
.
.
.
.
.
.
.
.
.
.
.
.
.
.
.
.
.
.
.
.
.
.
.
.
.
.
.
.
.
.
.
.
.
.
.
.
.
.
.
.
.
.
.
.
.
.
.
.
.
.
.
.
.
.
.
.
.
.
.
.
.
.
.
.
.
.
.
.
.
.
.
.
.
.
.
.
.
.
.
.
.
.
.
.
.
.
.
.
.
.
.
.
.
.
.
.
.
.
.
.
.
.
.
.
.
.
.
.
.
.
.
.
.
.
.
.
.
.
.
.
.
.
.
.
.
.
.
.
.
.
.
.
.
.
.
.
.
.
.
.
.
.
.
.
.
.
.
.
.
.
.
.
.
.
.
.
.
.
.
76
77
77
77
78
79
79
80
80
80
May 2014
.
.
.
.
.
.
.
.
.
.
.
.
.
.
.
.
.
.
.
.
.
.
.
.
.
.
.
.
.
.
.
.
.
.
.
.
.
.
.
.
.
.
.
.
.
.
.
.
.
.
.
.
.
.
.
.
.
.
.
.
.
.
.
.
.
.
.
.
.
.
.
.
.
.
.
.
.
.
.
.
.
.
.
.
.
.
.
.
.
.
OnRISC User Manual
5
Contents
C.10.WLAN Button Test . . . . . . . . . . . . . . . . . . . . . . . . . . . . . . . . . . . . 80
C.11.All-in-one Test for Alena . . . . . . . . . . . . . . . . . . . . . . . . . . . . . . . . . . 81
C.12.Build Notes . . . . . . . . . . . . . . . . . . . . . . . . . . . . . . . . . . . . . . . . . 82
D. hwtest-qt
D.1. Controller Area
D.2. UART Test . .
D.3. Network Test .
D.4. RTC Test . . .
D.5. WLAN Test . .
D.6. Bluetooth Test
D.7. Disk Test . . .
D.8. Touch Test . .
D.9. SIM-card Test .
D.10.Button Test . .
D.11.Audio Test . .
.
.
.
.
.
.
.
.
.
.
.
.
.
.
.
.
.
.
.
.
.
.
.
.
.
.
.
.
.
.
.
.
.
.
.
.
.
.
.
.
.
.
.
.
.
.
.
.
.
.
.
.
.
.
.
.
.
.
.
.
.
.
.
.
.
.
.
.
.
.
.
.
.
.
.
.
.
.
.
.
.
.
.
.
.
.
.
.
.
.
.
.
.
.
.
.
.
.
.
.
.
.
.
.
.
.
.
.
.
.
.
.
.
.
.
.
.
.
.
.
.
.
.
.
.
.
.
.
.
.
.
.
.
.
.
.
.
.
.
.
.
.
.
.
.
.
.
.
.
.
.
.
.
.
.
.
.
.
.
.
.
.
.
.
.
.
.
.
.
.
.
.
.
.
.
.
.
.
.
.
.
.
.
.
.
.
.
83
83
83
83
83
83
84
84
84
84
84
84
E. Managing System Images
E.1. VS Image Tool: VSImgTool . . . . . . . . . . . . . . . .
E.1.1. Burn System Image to CF/microSD Card . . . .
E.1.2. Make An Image From CF/microSD Card . . . .
E.2. dd . . . . . . . . . . . . . . . . . . . . . . . . . . . . . .
E.2.1. From Host PC . . . . . . . . . . . . . . . . . . .
E.2.2. Directly From OnRISC (KS8695 based Devices)
E.3. Working with Partitions . . . . . . . . . . . . . . . . . .
.
.
.
.
.
.
.
.
.
.
.
.
.
.
.
.
.
.
.
.
.
.
.
.
.
.
.
.
.
.
.
.
.
.
.
.
.
.
.
.
.
.
.
.
.
.
.
.
.
.
.
.
.
.
.
.
.
.
.
.
.
.
.
.
.
.
.
.
.
.
.
.
.
.
.
.
.
.
.
.
.
.
.
.
.
.
.
.
.
.
.
.
.
.
.
.
.
.
.
.
.
.
.
.
.
.
.
.
.
.
.
.
85
85
86
87
87
87
87
87
Network
. . . . .
. . . . .
. . . . .
. . . . .
. . . . .
. . . . .
. . . . .
. . . . .
. . . . .
. . . . .
Test
. . .
. . .
. . .
. . .
. . .
. . .
. . .
. . .
. . .
. . .
.
.
.
.
.
.
.
.
.
.
.
.
.
.
.
.
.
.
.
.
.
.
.
.
.
.
.
.
.
.
.
.
.
.
.
.
.
.
.
.
.
.
.
.
.
.
.
.
.
.
.
.
.
.
.
.
.
.
.
.
.
.
.
.
.
.
.
.
.
.
.
.
.
.
.
.
.
.
.
.
.
.
.
.
.
.
.
.
.
.
.
.
.
.
.
.
.
.
.
.
.
.
.
.
.
.
.
.
.
.
.
.
.
.
.
.
.
.
.
.
.
.
.
.
.
.
.
.
.
.
.
.
.
.
.
.
.
.
.
.
.
.
.
.
.
.
.
.
.
.
.
.
.
.
F. Eclipse
88
F.1. Installation Notes . . . . . . . . . . . . . . . . . . . . . . . . . . . . . . . . . . . . . . 88
F.2. Debugging . . . . . . . . . . . . . . . . . . . . . . . . . . . . . . . . . . . . . . . . . . 89
G. Cross-Compiler Tools
91
H. Frequently Asked Questions (FAQ)
91
Index
92
May 2014
OnRISC User Manual
6
List of Figures
List of Figures
1.
2.
3.
4.
5.
6.
7.
8.
9.
10.
11.
12.
13.
14.
15.
16.
17.
18.
19.
20.
21.
22.
23.
24.
25.
26.
27.
28.
29.
30.
31.
32.
33.
34.
35.
36.
37.
38.
39.
40.
Compilation example . . . . . . . . . . . .
Kernel Configuration Menu . . . . . . . .
Insight: target selection . . . . . . . . . .
Watchdog Timer Support . . . . . . . . .
BIOS: main menu . . . . . . . . . . . . .
BIOS Prompt for Bootlist . . . . . . . . .
BIOS: System Console . . . . . . . . . . .
BIOS: Boot Priority . . . . . . . . . . . .
BIOS: Configure Network Shares . . . . .
BIOS: Configure Network Parameter . . .
BIOS: Configure Miscellaneous Parameter
BIOS: Edit Bootscript . . . . . . . . . . .
BIOS: Update . . . . . . . . . . . . . . . .
BIOS: Update (Images) . . . . . . . . . .
BIOS: Update (Reboot System) . . . . . .
BIOS: Update via Network . . . . . . . .
BIOS: View Board Information . . . . . .
Windows Share . . . . . . . . . . . . . . .
Bootlist . . . . . . . . . . . . . . . . . . .
Low Memory Mode . . . . . . . . . . . . .
Detect and mount CD-ROM . . . . . . . .
No Modules Found Warning . . . . . . . .
Network configuration . . . . . . . . . . .
Proxy Configuration . . . . . . . . . . . .
Mirror Configuration . . . . . . . . . . . .
Partition Disks . . . . . . . . . . . . . . .
Partitioning Method . . . . . . . . . . . .
Partitioning Scheme . . . . . . . . . . . .
Partition Table Type . . . . . . . . . . . .
Partition Table . . . . . . . . . . . . . . .
Software Selection . . . . . . . . . . . . .
Continue without Boot Loader . . . . . .
Serial Test Cable Wiring . . . . . . . . . .
Modified USB cable . . . . . . . . . . . .
Special Board for GPIO Tests . . . . . . .
Expand Root Partition . . . . . . . . . . .
Win32 Disk Imager . . . . . . . . . . . . .
Eclipse debug: Main tab . . . . . . . . . .
Eclipse debug: Debugger tab . . . . . . .
Eclipse debug: Commands tab . . . . . .
May 2014
.
.
.
.
.
.
.
.
.
.
.
.
.
.
.
.
.
.
.
.
.
.
.
.
.
.
.
.
.
.
.
.
.
.
.
.
.
.
.
.
.
.
.
.
.
.
.
.
.
.
.
.
.
.
.
.
.
.
.
.
.
.
.
.
.
.
.
.
.
.
.
.
.
.
.
.
.
.
.
.
.
.
.
.
.
.
.
.
.
.
.
.
.
.
.
.
.
.
.
.
.
.
.
.
.
.
.
.
.
.
.
.
.
.
.
.
.
.
.
.
.
.
.
.
.
.
.
.
.
.
.
.
.
.
.
.
.
.
.
.
.
.
.
.
.
.
.
.
.
.
.
.
.
.
.
.
.
.
.
.
.
.
.
.
.
.
.
.
.
.
.
.
.
.
.
.
.
.
.
.
.
.
.
.
.
.
.
.
.
.
.
.
.
.
.
.
.
.
.
.
OnRISC User Manual
.
.
.
.
.
.
.
.
.
.
.
.
.
.
.
.
.
.
.
.
.
.
.
.
.
.
.
.
.
.
.
.
.
.
.
.
.
.
.
.
.
.
.
.
.
.
.
.
.
.
.
.
.
.
.
.
.
.
.
.
.
.
.
.
.
.
.
.
.
.
.
.
.
.
.
.
.
.
.
.
.
.
.
.
.
.
.
.
.
.
.
.
.
.
.
.
.
.
.
.
.
.
.
.
.
.
.
.
.
.
.
.
.
.
.
.
.
.
.
.
.
.
.
.
.
.
.
.
.
.
.
.
.
.
.
.
.
.
.
.
.
.
.
.
.
.
.
.
.
.
.
.
.
.
.
.
.
.
.
.
.
.
.
.
.
.
.
.
.
.
.
.
.
.
.
.
.
.
.
.
.
.
.
.
.
.
.
.
.
.
.
.
.
.
.
.
.
.
.
.
.
.
.
.
.
.
.
.
.
.
.
.
.
.
.
.
.
.
.
.
.
.
.
.
.
.
.
.
.
.
.
.
.
.
.
.
.
.
.
.
.
.
.
.
.
.
.
.
.
.
.
.
.
.
.
.
.
.
.
.
.
.
.
.
.
.
.
.
.
.
.
.
.
.
.
.
.
.
.
.
.
.
.
.
.
.
.
.
.
.
.
.
.
.
.
.
.
.
.
.
.
.
.
.
.
.
.
.
.
.
.
.
.
.
.
.
.
.
.
.
.
.
.
.
.
.
.
.
.
.
.
.
.
.
.
.
.
.
.
.
.
.
.
.
.
.
.
.
.
.
.
.
.
.
.
.
.
.
.
.
.
.
.
.
.
.
.
.
.
.
.
.
.
.
.
.
.
.
.
.
.
.
.
.
.
.
.
.
.
.
.
.
.
.
.
.
.
.
.
.
.
.
.
.
.
.
.
.
.
.
.
.
.
.
.
.
.
.
.
.
.
.
.
.
.
.
.
.
.
.
.
.
.
.
.
.
.
.
.
.
.
.
.
.
.
.
.
.
.
.
.
.
.
.
.
.
.
.
.
.
.
.
.
.
.
.
.
.
.
.
.
.
.
.
.
.
.
.
.
.
.
.
.
.
.
.
.
.
.
.
.
.
.
.
.
.
.
.
.
.
.
.
.
.
.
.
.
.
.
.
.
.
.
.
.
.
.
.
.
.
.
.
.
.
.
.
.
.
.
.
.
.
.
.
.
.
.
.
.
.
.
.
.
.
.
.
.
.
.
.
.
.
.
.
.
.
.
.
.
.
.
.
.
.
.
.
.
.
.
.
.
.
.
.
.
.
.
.
.
.
.
.
.
.
.
.
.
.
.
.
.
.
.
.
.
.
.
.
.
.
.
.
.
.
.
.
.
.
.
.
.
.
.
.
.
.
.
.
.
.
.
.
.
.
.
.
.
.
.
.
.
.
.
.
.
.
.
.
.
.
.
.
.
.
.
.
.
.
.
.
.
.
.
.
.
.
.
.
.
.
.
.
.
.
.
.
.
.
.
.
.
.
.
.
.
.
.
.
.
.
.
.
.
.
.
.
.
.
.
.
.
.
.
.
.
.
.
.
.
.
.
.
.
.
.
.
.
.
.
.
.
.
.
.
.
.
.
.
.
.
.
.
.
.
.
.
.
.
.
.
.
.
.
.
.
.
.
.
.
.
.
.
.
.
.
.
.
.
.
.
.
.
.
.
.
.
.
.
.
.
15
34
37
48
51
51
52
52
53
54
55
56
57
57
57
58
59
61
61
62
62
62
63
63
63
64
64
65
65
65
66
67
78
81
81
85
86
89
90
90
7
List of Tables
List of Tables
1.
2.
3.
4.
5.
6.
7.
8.
9.
10.
11.
12.
13.
14.
OnRISC Products Based on ARM9 KS8695 SoC . . . .
OnRISC Products Based on OMAP3 SoC . . . . . . . .
Enable/disable services . . . . . . . . . . . . . . . . . . .
Digital I/O Groups . . . . . . . . . . . . . . . . . . . . .
Serial Modes (hardware switching) . . . . . . . . . . . .
Watchdog Timer IOCTLs . . . . . . . . . . . . . . . . .
BIOS: hwtest parameters . . . . . . . . . . . . . . . . .
Serial Modes (Software switching) . . . . . . . . . . . .
Common parameters and test modules . . . . . . . . . .
Serial Test Cable Wiring . . . . . . . . . . . . . . . . . .
I/O Pin Connections for Alekto (left) and Alena (right)
Optically Isolated Input Channels and Relays . . . . . .
VSImgTool call parameters . . . . . . . . . . . . . . . .
Toolchain items . . . . . . . . . . . . . . . . . . . . . . .
May 2014
OnRISC User Manual
.
.
.
.
.
.
.
.
.
.
.
.
.
.
.
.
.
.
.
.
.
.
.
.
.
.
.
.
.
.
.
.
.
.
.
.
.
.
.
.
.
.
.
.
.
.
.
.
.
.
.
.
.
.
.
.
.
.
.
.
.
.
.
.
.
.
.
.
.
.
.
.
.
.
.
.
.
.
.
.
.
.
.
.
.
.
.
.
.
.
.
.
.
.
.
.
.
.
.
.
.
.
.
.
.
.
.
.
.
.
.
.
.
.
.
.
.
.
.
.
.
.
.
.
.
.
.
.
.
.
.
.
.
.
.
.
.
.
.
.
.
.
.
.
.
.
.
.
.
.
.
.
.
.
.
.
.
.
.
.
.
.
.
.
.
.
.
.
.
.
.
.
.
.
.
.
.
.
.
.
.
.
.
.
.
.
.
.
.
.
.
.
.
.
.
.
.
.
.
.
.
.
.
.
.
.
.
.
.
.
.
.
.
.
.
.
.
.
.
.
.
.
.
.
10
11
18
41
45
47
59
73
77
78
79
79
85
91
8
1
Introduction
1. Introduction
1.1. OnRISC Family
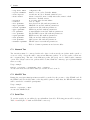
The OnRISC is an ARM-based RISC industrial embedded computer family. The great variety of
interfaces like LAN, CF, microSD, USB, CAN1 , I2C, serial interface and digital I/O makes it easy
to connect various industrial devices to the OnRISC. New OnRISC device provide graphical display
(VS-860 has built-in 8” LCD display and Alekto2 provides HDMI interface to attach an external
monitor).
Compact dimensions and DIN Rail mounting capability make the OnRISC to a space saving and
flexible mounting industrial computer. It is feasible to be installed even in space limited environments.
Due to RISC based architecture the OnRISC has very small power consumption, so fanless heat
dissipation is possible. Working in an extended temperature range the OnRISC can be used under
harsh industrial conditions. Therefore the OnRISC is downright designed for industrial automation.
Refer to the Hardware Manual for exact characteristics.
The embedded computer runs full-featured Debian GNU/Linux on ARM operating system. With
Debian’s repository database it is easy to install and update the free software on the OnRISC. The
OnRISC is capable to act directly as software development host, Web, Mail, Print and Database
server or as desktop computer with X11 window manager and many more.
1.2. How to Read the Manual?
First of all the manual describes two different hardware architectures KS8695 based devices (Alekto,
Alekto LAN, Alena) and OMAP3 based devises (VS-860, Alekto 2). For example the first group
uses BIOS stored in a NOR flash, the second group uses in CPU built-in Boot ROM to boot from
MMC card directly and so on. Hence you’ll find Sections marked for KS8695 based devices or
OMAP3 to highlight the differences.
Hardware Manual should be consulted first to understand, how the device is going to be powered.
Section “Getting Started” will get you from power on till log on and basic network configuration.
Section “Debian Maintenance Notes” describes how to search/install/remove Debian packages.
Section “Network Services and Tools Provided by OnRISC” shows how to setup various network
services like SSH, Apache, mail server etc.
Software development related sections are spread over the manual and touching different aspects
of embedded software development for OnRISC devices. Section “Software Development” gives
step-by-step instructions, how to setup development environment, get source code for the Linux
kernel and programming examples. Section “Hardware API” gives overview of hardware interfaces
and how they can be accessed in software. Sections “hwtest” and “hwtest-qt” describe test utilities.
The source code of these utilities is a good starting point to see the topics described in “Hardware
API” being used in practice. Section “Recommended Books” provides a list of books about Linux
administration and programming.
Section “Buildroot” introduces another embedded Linux distribution built from scratch, that can
be used instead of Debian.
1
OnRISC Alena, Alekto2 and VS-860 devices
May 2014
OnRISC User Manual
9
Alekto LAN
Alena
CPU
RAM
Flash Memory on Board
Serial Interfaces
ARM9 32-bit RISC CPU,
166MHz
64MB SDRAM
4MB
2 x RS232/RS422/RS485
ARM9 32-bit RISC CPU,
166MHz
64MB SDRAM
4MB
1 x RS232/RS422/RS485
CAN Interface on board
Digital I/O channels
8 x I/O channels
-
CF-Slot (True IDE mode)
1 x (also accepts MicroDrives)
1 x (also accepts MicroDrives)
ARM9 32-bit RISC CPU,
166MHz
64MB SDRAM
4MB
2 x RS232/RS422/RS485
2 x RS232 only
1x
4 x I/O channels
2 x Relays
2 x optically isolated inputs
1 x (also accepts MicroDrives)
Introduction
OnRISC User Manual
Alekto
1
May 2014
OnRISC Model
microSD-Slot
1 x internal slot
1 x internal slot
1 x internal slot
USB
Expansion Slot
Ethernet
I2C bus
RTC
2 x USB 2.0 as Host
MiniPCI-slot
2x
1x
1x
Watchdog Timer
WLAN On/Off Button
1x
-
2 x USB 2.0 as Host
MiniPCI-slot
5 x (WAN and 4 x LAN switch)
1x
1x
1x
2 x USB 2.0 as Host
MiniPCI-slot
2x
1x
1x
1x
1x
-
8 x I/O channels
Table 1: OnRISC Products Based on ARM9 KS8695 SoC
10
Alekto 2
CPU
RAM
Flash Memory on Board
Serial Interfaces
CAN Interface on board
Digital I/O channels
CFast slot
AM3517 (ARM Cortex-A8)
256MB DDR2
AM335x (ARM Cortex-A8)
256MB DDR2
N.A.
N.A.
2 x RS232/RS422/RS485
1x
N.A.
1x
2
1
8
1
Introduction
OnRISC User Manual
VS-860
1
May 2014
OnRISC Model
microSD-Slot
1 x internal slot
1 x internal slot
USB
Expansion Slot
Ethernet
I2C bus
RTC
2 x USB 2.0 as Host, 1 x as
OTG
Mini PCI Express
2x
N.A.
1x
Watchdog Timer
Display
1x
built in LCD
2 x USB 2.0 as Host, 1 x as
OTG
Mini PCI Express
2x
1x
1x
1x
x RS232/RS422/RS485
x
x I/O channels
x
HDMI connector
Table 2: OnRISC Products Based on OMAP3 SoC
11
2
Getting Started
2. Getting Started
2.1. Connect to OnRISC via Serial Link
Connect the OnRISC to the serial port of your PC and start a terminal software (HyperTerminal,
ZOC2 , minicom etc) with 115200,8,n,1 settings (no hardware/software handshake is needed. Set
the terminal type according to Section 2.2). Insert a CF/microSD-card with one of the preinstalled
systems (refer to Section 3). Power your OnRISC according to the Hardware Manual. You’ll see
Linux booting. After the boot procedure you’ll be asked to log in. Two users are already added to
the system: a super user (root) and an ordinary user (user). For the super user enter:
Debian login: root
Password: linux
For the ordinary user enter:
Debian login: user
Password: user
2.2. Terminal Type
Terminal type is defined in the environment variable TERM and is set to TERM=linux by default.
The terminal type of your terminal application (HyperTerminal, ZOC, minicom etc.) should be
set to the same type to interact correctly with the OnRISC console. If linux terminal type is
not available in your software, vt100 can be used instead. To do this add following line to the
~/.bashrc:
export TERM=vt100
2
www.emtec.com
May 2014
OnRISC User Manual
12
2
Getting Started
2.3. Configure Network
Now you can configure network interfaces by editing /etc/network/interfaces. The IP addresses
for eth0, eth1 and wlan03 are statically assigned by default(see the Listing below).
# This f i l e d e s c r i b e s t h e network i n t e r f a c e s a v a i l a b l e on your system
# and how t o a c t i v a t e them . For more i n f o r m a t i o n , s e e i n t e r f a c e s ( 5 ) .
# The l o o p b a c k network i n t e r f a c e
auto l o
i f a c e l o i n e t loopback
# The primary network i n t e r f a c e
auto e t h 0
i f a c e eth0 i n e t s t a t i c
address 192.168.254.254
netmask 2 5 5 . 2 5 5 . 2 5 5 . 0
# The s e c o n d a r y
auto e t h 1
i f a c e eth1 i n e t
address
netmask
network i n t e r f a c e
static
192.168.253.254
255.255.255.0
# The w i r e l e s s i n t e r f a c e
#auto wlan0
i f a c e wlan0 i n e t s t a t i c
address 192.168.127.254
netmask 2 5 5 . 2 5 5 . 2 5 5 . 0
wpa−d r i v e r wext
wpa−c o n f / e t c / wpa_supplicant . c o n f
post −up echo BLUE > / p r o c / v s o p e n r i s c / l e d s
post −down echo b l u e > / p r o c / v s o p e n r i s c / l e d s
Listing 1: /etc/network/interfaces
post-up and post-down directives switch blue LED on and off signaling that wireless interface is
up or down (KS8695 based devices only). The wireless interface wlan0 will be configured with the
wpa_supplicant utility (see Section 4.1).
Setup gateway and DNS server Assuming your router has IP address 192.168.254.1 the OnRISC
will be configured in the following way:
1. change eth0 section of /etc/network/interfaces file
auto eth0
iface eth0 inet static
address 192.168.254.254
netmask 255.255.255.0
gateway 192.168.254.1
2. insert following line to the /etc/resolv.conf4
nameserver 192.168.254.1
3
4
to activate wlan0 uncomment the #auto wlan0 line in /etc/networking/interfaces
see man resolv.conf for explanations
May 2014
OnRISC User Manual
13
2
Getting Started
3. execute /etc/init.d/networking restart
2.4. Start Programming
2.4.1. KS8695 based Devices
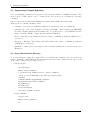
Connect to the OnRISC either via serial link or network and login as user. For the introduction some examples were prepared and placed under /home/user/examples. This folder contains
following files:
• ioctls.c - LEDs, buzzer, reset push button and digital IO usage examples
• ioctls2.c - UART and network usage examples
• rawsrv.c - raw server application that transfers data from network to serial interface and
vice versa
• wdtimer.c - Watchdog Timer example
• onrisc.h - OnRISC hardware API header file
• Makefile - the makefile to produce examples. Following targets can be created:
– all - creates ioctls, ioctls2 and rawsrv executables
– doc - creates doxygen documentation in doc folder
– clean - deletes executables
– distclean - executes clean and in addition removes doc folder
• onrisc.doxyfile - doxygen configuration file
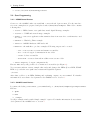
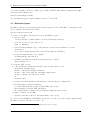
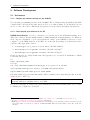
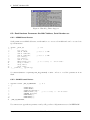
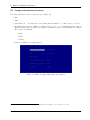
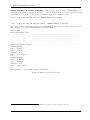
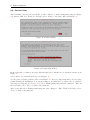
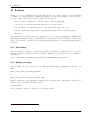
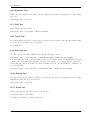
Execute make and you’ll get three above mentioned executables (see Figure 1).
You can start with an ioctls example that reads and changes the LEDs (Power LED, WLAN
LED etc.), reads the reset push button status and digital IO registers:
./ioctls
After that you’ll see your LEDs blinking and explaining outputs on your terminal. For further
information about software development for the OnRISC refer to Section 5.
2.4.2. OMAP3 based Devices
Log in into the desktop environment, open terminal and go to /home/user/examples/qt-simple-window.
Execute:
1. qmake
2. make
3. ./simple
You’ll get a simple window with “Simple example” caption. For further information about software
development for the OnRISC refer to Section 5.
May 2014
OnRISC User Manual
14
2
Getting Started
user@debian:~/examples$ make
gcc -O0 -g3 -Wall ioctls.c -o ioctls
gcc -O0 -g3 -Wall ioctls2.c -o ioctls2
gcc -O0 -g3 -Wall rawsrv.c -o rawsrv
gcc -O0 -g3 -Wall wdtimer.c -o wdtimer
user@debian:~/examples$ ls -l
total 350
-rw-r--r-- 1 user user 349 Aug 27 14:32 CMakeLists.txt
-rw-r--r-- 1 user user 392 Aug 27 14:57 Makefile
-rwxr-xr-x 1 user user 68577 Aug 27 17:12 ioctls
-rw-r--r-- 1 user user 8865 Aug 27 14:54 ioctls.c
-rwxr-xr-x 1 user user 8568 Aug 27 17:12 ioctls.strip
-rwxr-xr-x 1 user user 91036 Aug 27 17:12 ioctls2
-rw-r--r-- 1 user user 3097 Aug 14 14:01 ioctls2.c
-rwxr-xr-x 1 user user 5352 Aug 27 17:12 ioctls2.strip
-rwxr-xr-x 1 user user 93286 Aug 27 17:12 rawsrv
-rw-r--r-- 1 user user 5682 Aug 14 14:01 rawsrv.c
-rwxr-xr-x 1 user user 8720 Aug 27 17:12 rawsrv.strip
-rw-r--r-- 1 user user 50619 Aug 14 14:01 onrisc.doxyfile
-rw-r--r-- 1 user user 2243 Aug 27 14:50 onrisc.h
-rwxr-xr-x 1 user user 61988 Jul 24 05:44 wdtimer
-rw-r--r-- 1 user user 1042 Aug 14 2008 wdtimer.c
-rwxr-xr-x 1 user user 3868 Jul 24 05:44 wdtimer.strip
user@debian:~/examples$
Figure 1: Compilation example
May 2014
OnRISC User Manual
15
3
Software Configuration
3. Software Configuration
The OnRISC comes with a preinstalled Debian GNU/Linux on ARM5 operating system. The complete system image (see Section 3.7) provides necessary tools and services to start with application
development, various services such as web and mail server, Samba server, etc. For office tasks it
provides an X-Server with graphical desktop manager and some office software.
This image can be downloaded from our FTP server and can be copied to the CF/microSD card
via vsimgtool utility or Win32 Disk Imager (see Appendix E.1) under MS Windows or via dd (see
Appendix E.2).
Alternatively Buildroot (Section Section 10) can be used to create the root file system.
3.1. Booting from CF/microSD
3.1.1. KS8695 based Devices
There are two files placed under /boot directory on the complete image:
• zImage - kernel to boot
• kparam - kernel parameter
The OnRISC BIOS (refer to Section 8) is searching for these files to boot the system from an
external medium (Mass storage devices, network etc.). Due to the fact that USB devices need
more time to be detected it is recommended to increase the Start-Timeout value to at least 5
seconds (refer to 8.5). The kernel parameter will be described below:
root= parameter tells kernel from where to take the root filesystem. If this parameter is not
supplied BIOS6 defines it using the device name containing zImage. So if root filesystem is on the
same device/partition as the kernel it is recommended not to define root= parameter.
Example:
Specifying root=/dev/hda1 will mount /dev/hda1 as root filesystem
Specifying root=/dev/sda1 will mount /dev/sda1 as root filesystem
If CF card is inserted into the internal CF-Slot and kparam doesn’t supply root= parameter,
/dev/hda1 will be mounted as root filesystem
rootwait parameter tells kernel to wait till root device appears. This is important for booting
from USB devices, because they will be detected much later than CF. This parameter is integrated
into BIOS since version 2.0.
mem= parameter defines the amount of RAM that kernel can use. This parameter is integrated
into BIOS since version 2.1, but it can be overridden in the kparam.
5
6
http://www.debian.org/ports/arm/
since BIOS version 2.1
May 2014
OnRISC User Manual
16
3
Software Configuration
3.1.2. OMAP3 based Devices
The system images for OMAP3 based devices have two partitions:
1. FAT partition having files need to initialize and boot the system (MLO, u-boot.img, uEnv.txt
and uImage)
2. ext4 partition having Debian root file system
The OMAP CPU automatically loads x-loader (MLO) from the FAT partition and then the code
in x-loader takes over and loads U-Boot7 (u-boot.img), that takes care of Linux kernel (uImage).
Please refer to this wiki for detailed information about OMAP boot process Bootloader Project.
3.2. Swapping and Logging
Due to the fact that the flash memory has a finite number of erase-write cycles it is very important
to reduce them. Many applications use logging for information, recovery and debugging purposes,
this can lead to frequent flash usage. There are several possibilities to avoid this:
1. use external HDD attached via USB and redirect swapping and logging to it
2. disable swapping8 (remove swap entry in the /etc/fstab) and logging where it is possible
3. redirect the log stream via network
To redirect logged messages that need syslog edit /etc/syslog.conf and change all file destinations
to network destinations (see the example). Change
*.=info;*.=notice;*.=warn;\
auth,authpriv.none;\
cron,daemon.none;\
mail,news.none -/var/log/messages
to
*.=info;*.=notice;*.=warn;\
auth,authpriv.none;\
cron,daemon.none;\
mail,news.none @192.168.254.84
for further information refer to the syslog.conf manpage. To receive the log messages under
Linux you can use your existing syslog utility, for Windows you can use Kiwi Syslog Daemon9 or
any other Syslog daemon.
7
http://www.denx.de/wiki/U-Boot
To list swapping devices execute cat /proc/swaps
9
www.kiwisyslog.com
8
May 2014
OnRISC User Manual
17
3
Software Configuration
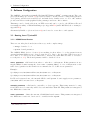
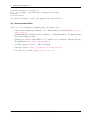
3.3. Activating and Deactivating Services
Some services will be started as daemons at system startup and hence reduce the amount of free
memory and increase the boot time. You can use one of the following options to deactivate the
unused services at startup or start them only on demand:
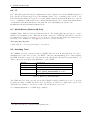
• rename links under /etc/rc2.d10 (see Table 3).
• use sysv-rc-conf11 as graphical console program for the first method
• start the service over inetd12
• start manually via /etc/init.d
Disabled name
K09apache2
K77ntp
K80courier-authdaemon
K80courier-mta
K80courier-pop
K80samba
K80sqwebmail
K84openvpn
Enabled name
S91apache2
S23ntp
S20courier-authdaemon
S20courier-mta
S20courier-pop
S20samba
S20sqwebmail
S16openvpn
Table 3: Enable/disable services
3.4. udev
Since kernel 2.6.26.5 Complete Image uses udev13 to create devices in /dev directory. The network
interfaces are not bound to their MACs in order to be able to use only one system image on various
devices14 . To change this behavior in Debian 4.0 Etch uncomment following line in
/etc/udev/rules.d/z45_persistent-net-generator.rules:
#KERNEL=="eth*|ath*|wlan*|ra*|sta*", DRIVERS=="?*",\
# IMPORT{program}="write_net_rules $attr{address}"
To change this behavior in Debian 5.0 Lenny change following line in
/etc/udev/rules.d/75-persistent-net-generator.rules:
KERNEL!="eth*|ath*|wlan*[0-9]|msh*|ra*|sta*|ctc*|lcs*|hsi*",
\ GOTO="persistent_net_generator_end”
to
KERNEL!="ath*|msh*|ra*|sta*|ctc*|lcs*|hsi*",
\ GOTO="persistent_net_generator_end"
/etc/udev/rules.d/custom.rules has rules to create symlinks to I2C and RTC devices:
10
For detailed information about filenames see /etc/rc2.d/README file
http://sysv-rc-conf.sourceforge.net/
12
see man inetd
13
http://en.wikipedia.org/wiki/Udev
14
All relevant settings were removed from /etc/udev/rules.d/z25_persistent-net.rules for Debain 4.0 Etch and
from /etc/udev/rules.d/70-persistent-net.rules for Debian 5.0 Lenny
11
May 2014
OnRISC User Manual
18
3
Software Configuration
KERNEL=="rtc0", SYMLINK+="rtc"
KERNEL=="i2c-0", SYMLINK+="i2c"
3.5. Time Zone
The default time zone configured on the system image is Europe/London (GMT+0). BIOS operates
with UTC time. So in summer time Debian’s clock has one hour difference compared with the time
shown in BIOS. It is normal behavior. Use dpkg-reconfigure tzdata to change the time zone in
Debian according to your geographical position.
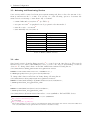
3.6. Create Swap File
Swap file can be created instead of creating a swap partition. To create it execute following steps:
1. create file with count being equal to the desired block size: dd if=/dev/zero of=/var/swapfile
bs=1024 count=131072
2. mkswap /var/swapfile
3. add entry to the /etc/fstab: /var/swapfile none swap sw 0 0
4. reboot and check if /var/swapfile is used by looking at /proc/swaps
debian:~# cat /proc/swaps
Filename Type Size Used Priority
/var/swapfile file 131064 0 -1
3.7. Complete System Image
The complete system image contains lots of programs and libraries. It contains a development
environment consisting of the gcc tool chain and vim-tiny text editor. Besides development tasks
this image is designed to use the OnRISC as a server and/or desktop system to accomplish such
tasks as mail server, web server, resource sharing and office tasks. For the latter window manager
is installed to provide graphical desktop on the OnRISC.
3.7.1. Program Overview
The complete image provides among others the following utilities:
• Software Development
– gcc
– vim-tiny
• Network
– ssh (server and client)
– telnet (server and client)
– vsftpd (server and client)
May 2014
OnRISC User Manual
19
3
Software Configuration
– netcat
– socat
– Samba client and server
– Apache2 web server
– Courier mail server
– NTP client and server
– sredird RFC2217 server
• Desktop:
– WindowMaker (KS8695 based devices) or XFCE (OMAP3 based devices) desktop
– xdm server
– AbiWord
– dillo or netsurf web browser
3.7.2. GCC
GCC15 development is a part of the GNU Project, aiming to improve the compiler used in the GNU
system including the GNU/Linux variant. The GCC development effort uses an open development
environment and supports many other platforms in order to foster a world-class optimizing compiler,
to attract a larger team of developers, to ensure that GCC and the GNU system work on multiple
architectures and diverse environments, and to more thoroughly test and extend the features of
GCC.
3.7.3. Netcat
Netcat16 is a featured networking utility which reads and writes data across network connections,
using the TCP/IP protocol. It is designed to be a reliable "back-end" tool that can be used directly
or easily driven by other programs and scripts. At the same time, it is a feature-rich network
debugging and exploration tool, since it can create almost any kind of connection you would need
and has several interesting built-in capabilities.
3.7.4. Socat
socat17 is a relay for bidirectional data transfer between two independent data channels. Each of
these data channels may be a file, pipe, device (serial line etc. or a pseudo terminal), a socket
(UNIX, IP4, IP6 - raw, UDP, TCP), an SSL socket, proxy CONNECT connection, a file descriptor
(stdin etc.), the GNU line editor (readline), a program, or a combination of two of these. These
modes include generation of "listening" sockets, named pipes, and pseudo terminals.
15
http://gcc.gnu.org/gccmission.html
http://netcat.sourceforge.net/
17
http://www.dest-unreach.org/socat/
16
May 2014
OnRISC User Manual
20
3
Software Configuration
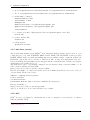
3.7.5. Samba
Samba18 is an Open Source/Free Software suite that has, since 1992, provided file and print services to all manner of SMB/CIFS clients, including the numerous versions of Microsoft Windows
operating systems. Samba is freely available under the GNU General Public License.
To share an extra directory for users create this directory:
mkdir /samba
Edit /etc/samba/smb.conf:
[global]
workgroup = debian
netbios name = debianserver
server string = %h server (Samba %v)
log file = /var/log/samba/log.%m
max log size = 1000
syslog = 0
[SAMBA]
path=/samba
browseable=yes
writeable=yes
valid users = user
admin users = debian
Now you need to restart the samba to take the new changes effect:
/etc/init.d/samba restart
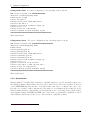
3.7.6. Web Server (Apache2.2)
The Apache HTTP Server Project19 is an effort to develop and maintain an open-source HTTP
server for modern operating systems including UNIX and Windows NT. The goal of this project
is to provide a secure, efficient and extensible server that provides HTTP services in sync with
the current HTTP standards. Apache has been the most popular web server on the Internet since
April 1996.
In addition to the Apache2 packages the openssl package is installed to enable a SSL certificate
creation. Apache2 is already equipped with SSL certificate and is ready to accept https connections
needed for example to configure mail server via webadmin tool (see 3.7.7) . To create your own
certificate or to install the official certificate take a look at the following paragraph.
How to Configure SSL? To enable https connections, a SSL certificate must be created and then
registered by the Apache2 web server:
1. mkdir /etc/apache2/ssl/
2. openssl req $@ -new -x509 -days 365 -nodes -out /etc/apache2/ssl/apache.pem
-keyout /etc/apache2/apache.pem
3. chmod 600 /etc/apache2/ssl/apache.pem
18
19
http://us3.samba.org/samba/
http://httpd.apache.org/
May 2014
OnRISC User Manual
21
3
Software Configuration
4. cp /etc/apache2/sites-available/default /etc/apache2/sites-available/ssl
5. ln -s /etc/apache2/sites-available/ssl /etc/apache2/sites-enabled/ssl
6. ssl file must be changed:
NameVirtualHost *:443
<VirtualHost *:443>
SSLEngine On
SSLCertificateFile /etc/apache2/ssl/apache.pem
SSLCertificateKeyFile /etc/apache2/apache.pem
...
</VirtualHost>
7. to activate port 443 for https-Queries edit /etc/apache2/ports.conf. Add
Listen 443
8. activate SSL module:
a2enmod ssl
9. restart Apache:
apache2ctl restart
3.7.7. Mail Server (courier)
The Courier mail transfer agent (MTA)20 is an integrated mail/groupware server based on open
commodity protocols, such as ESMTP, IMAP, POP3, LDAP, SSL and HTTP. Courier provides
ESMTP, IMAP, POP3, webmail and mailing list services within a single, consistent, framework.
Individual components can be enabled or disabled at will. Courier now implements basic webbased calendaring and scheduling services integrated in the webmail module. Advanced groupware
calendaring services will follow soon.
The mail server can be conveniently configured via web interface using courierwebadmin tool. It
can be started with the following URL
https://mail-server-address/cgi-bin/courierwebadmin.
Execute webadmin-tool, setup server name and local domains under Mail server name and local
domains menu. Then create a user:
adduser --ingroup users testuser
login as testuser
cd /home/testuser
maildirmake Maildir (this creates user’s maildir folder structure)
Execute webmail-tool
https://mail-server-address/cgi-bin/sqwebmail
and log on. From now on one can send and receive e-mails.
3.7.8. NTP
NTP21 is a protocol designed to synchronize the clocks of computers over a network to a common
timebase (usually UTC).
20
21
http://www.courier-mta.org
http://www.ntp.org
May 2014
OnRISC User Manual
22
3
Software Configuration
Configuration Client For client configuration edit /etc/ntp.conf as follows:
### client:/etc/ntp.conf ###############
driftfile /var/lib/ntp/ntp.drift
# NTP-server in LAN
server 192.168.1.1
# Grant access from other NTP-server
restrict 192.168.1.1
# Grant access from localhost (ntpq -p)
restrict 127.0.0.1
# deny access for other peers
restrict default notrust nomodify nopeer
###############################################
Then restart ntpd.
Configuration Server For server configuration edit /etc/ntp.conf as follows:
### server:/etc/ntp.conf ########################
driftfile /var/lib/ntp/ntp.drift
# NTP-server
server ptbtime1.ptb.de
server ptbtime2.ptb.de
# Grant access from other NTP-server
restrict ptbtime1.ptb.de
restrict ptbtime2.ptb.de
# Grant access from localhost (ntpq -p)
restrict 127.0.0.1
# grant access for local network
restrict 192.168.1.0 mask 255.255.255.0
# deny access for other peers
restrict default notrust nomodify nopeer
#################################################
Then restart ntpd.
3.7.9. WindowMaker
Window Maker22 is an X11 window manager originally designed to provide integration support for
the GNUstep Desktop Environment. In every way possible, it reproduces the elegant look and feel
of the NEXTSTEP[tm] user interface. It is fast, feature rich, easy to configure, and easy to use.
It is also free software, with contributions being made by programmers from around the world.
Window Maker includes compatibility options which allow it to work with other popular desktop
environments, namely GNOME and KDE, and comes with a powerful GUI configuration editor,
called WPrefs, which removes the need to edit text-based config files by hand
22
http://www.windowmaker.info
May 2014
OnRISC User Manual
23
3
Software Configuration
3.7.10. Connecting to X-Window
The xdm manager23 lets you connect to the X-Server. Following configuration issues should be
considered to enable a remote access to the OnRISC:
• #* #any host can get a login window
in /etc/X11/xdm/Xaccess should be uncommented
• DisplayManager.requestPort: 0
in /etc/X11/xdm/xdm-config must be replaced with
! DisplayManager.requestPort: 0
Xming24 can be used to connect to the X-Server from MS Windows. After installation, execute
XLaunch and configure the proper IP address. The configuration can also be saved. The saved
XML-file can look as follows:
<?xml version="1.0"?>
<XLaunch xmlns="http://www.straightrunning.com/XmingNotes"
xmlns:xsi="http://www.w3.org/2001/XMLSchema-instance"
xsi:schemaLocation="http://www.straightrunning.com/XmingNotes XLaunch.xsd"
WindowMode="Windowed"
ClientMode="XDMCP"
XDMCPHost="192.168.1.66"
Display="0"
Clipboard="true"/>
3.7.11. AbiWord
AbiWord25 is a free word processing program, similar to Microsoft® Word. It is suitable for a wide
variety of word processing tasks.
23
http://en.wikipedia.org/wiki/X_display_manager
http://sourceforge.net/projects/xming
25
http://www.abisource.com
24
May 2014
OnRISC User Manual
24
4
Network Services and Tools Provided by OnRISC
4. Network Services and Tools Provided by OnRISC
The OnRISC can be accessed via Ethernet for remote usage and file sharing. For this purpose there
are several services such as telnet, ssh and ftp installed and preconfigured. For WLAN configuration
wpa_supplicant and wireless-tools are included in the distribution.
4.1. WLAN Configuration
Wpa_supplicant26 is a WPA Supplicant for Linux, BSD, Mac OS X, and Windows with support for
WEP, WPA and WPA2 (IEEE 802.11i / RSN). Supplicant is the IEEE 802.1X/WPA component
that is used in the client stations. It implements key negotiation with a WPA Authenticator and
it controls the roaming and IEEE 802.11 authentication/association of the WLAN driver.
4.1.1. Managed Wireless Network (Wpa_supplicant)
Wpa_supplicant uses /etc/wpa_supplicant.conf file for its configuration (see the Listing below).
ap_scan=1
# no e n c r y p t i o n
network={
s s i d ="TEST"
key_mgmt=NONE
}
# WEP e n c r y p t i o n
network={
s s i d ="TESTWEP"
key_mgmt=NONE
wep_key0=xxxxxxxxxxxxxxxxxxxxx
wep_tx_keyidx=0
auth_alg=SHARED
}
# WPA/WPA2 e n c r y p t i o n
network={
s s i d ="TESTWPA2"
p r o t o=WPA RSN
key_mgmt=WPA−PSK
p a i r w i s e=CCMP TKIP
group=CCMP TKIP
psk="xxxxxxxxxxxxxx "
}
Listing 2: /etc/wpa_supplicant.conf
WLAN interface is automatically configured on system’s startup (see Section 2.3). To test the
configuration just run:
/etc/init.d/networking restart
Wpa_supplicant can also be called manually to investigate configuration problems:
26
http://hostap.epitest.fi/wpa_supplicant/
May 2014
OnRISC User Manual
25
4
Network Services and Tools Provided by OnRISC
wpa_supplicant -iwlan0 -c/etc/wpa_supplicant.conf -dd -Dwext
Further information about configuring the WLAN interface can be taken from wpa_supplicant’s
manual page (man wpa_supplicant) .
4.1.2. Ad-hoc Wireless Network (wireless-tools)
To connect to another node with SSID “Node1” not using encryption execute following commands:
ifconfig wlan0 down
iwconfig wlan0 mode ad-hoc key off essid "Node1"
ifconfig wlan0 up
For WEP encrypted connection:
ifconfig wlan0 down
iwconfig wlan0 mode ad-hoc key restricted key [1] "some WEP key" essid "Node1"
ifconfig wlan0 up
See also iw
4.1.3. WLAN On/Off Button (Alekto LAN only)
OnRISC Alekto LAN provides a special button to enable/disable the WLAN adapter. Pressing
the button will result in button LED going off and WLAN transmit power turning off, so no
communication via WLAN is possible. Pressing the button for the second time will result in button
LED going on and WLAN transmit power returning to the previous value, so WLAN data transfer
is again possible. This functionality will be managed by wland service running on start up. The
source code for wland service is available via our svn repository at http://svn.visionsystems.de/.
4.2. GSM Support
Using PCI Express Mini Card adapter described in the Hardware Manual you can attach a GSM
card. The system was tested with following GSM/UMTS/HSPA cards:
• MC8775 (Sierra Wireless)
• MC8790/MC8705 (Sierra Wireless)
• F5521gw (Ericsson)
Following configuration files were prepared to use this functionality:
• /etc/network/interfaces (the PIN for your SIM-card will be configured there. See comments
in the file)
• /etc/chatscripts/gprs (your provider’s Access Point Name (APN) is stored here)
• /etc/ppp/peers/gprs
May 2014
OnRISC User Manual
26
4
Network Services and Tools Provided by OnRISC
To activate a GSM connection configure proper PIN and APN. After that uncomment auto ppp0
and restart networking service:
service networking restart
You can find the supported AT command reference27 on the CD .
4.3. Bluetooth Support
The Bluetooth support is already integrated in the kernel. To use a USB Bluetooth adapter you’ll
need to install some additional software:
apt-get install bluetooth
To connect to the Bluetooth network access point (NAP) execute:
1. hcitool scan
you’ll get the list of available Bluetooth devices with their addresses
2. select the needed one and connect to it
pand -c <bdaddr>
3. check /var/log/daemon.log to verify that the connection is established or execute
ifconfig -a
if you can see bnep0 interface the connection is definitely established
4. set up the bnep0 interface. For example:
ifconfig bnep0 192.168.10.1
5. assuming the NAP has an address 192.168.10.2 try to ping it:
ping 192.168.10.2
To set up the NAP execute:
1. edit /etc/bluetooth/hcid.conf and set the security option to auto:
# Security Manager mode
# none - Security manager disabled
# auto - Use local PIN for incoming connections
# user - Always ask user for a PIN
#
security auto;
2. execute /etc/init.d/bluetooth restart to activate the new configuration
3. hciconfig hci0 piscan lm master
to enable authentication (required by MS Windows) execute:
hciconfig hci0 piscan auth lm master
the default passkey configured in /etc/bluetooth/hcid.conf is “1234”
4. pand --listen --role NAP
5. after the client has connected, the bnep0 must be also set up
To connect to the OnRISC from MS Windows, use the on-board tools or the software supplied with
the Bluetooth device. For the on-board tools:
27
documentation/2130617_Supported_AT_Command_Reference-v2.4.pdf
May 2014
OnRISC User Manual
27
4
Network Services and Tools Provided by OnRISC
1. select “Join a Personal Area Network”
2. search for the OnRISC
3. select it and try to connect. Enter “1234” as passkey
4. configure the network interface
4.4. Telnet
The telnet console can be accessed with following command:
telnet ip address
This connection can be used only for normal users, not for the super user. To execute super user
commands login as user and then execute su. For further information see:
man telnetd or man issue.net
4.5. SSH
To access the OnRISC via SSH from Linux execute:
ssh ip address
To access OnRISC via SSH from Windows you need a ssh-client such as PuTTY28 . To exchange
files several tools could be used:
• scp (Linux) - secure copy tool
• pscp (Windows) - secure copy tool included in PuTTY distribution
• WinSCP29 (Windows) - secure copy tool with graphical interface
For further information see:
man sshd
4.6. FTP
OnRISC provides vsftpd30 as FTP-server. The files to be shared must be placed in /home/ftp. To
access the files execute:
ftp ip address
The FTP-server is configured for normal user accounts created on the OnRISC, so login as user
“user” with a password “user”. For access via graphical FTP-client following programs can be
used:
• FileZilla (http://www.filezilla.de/)
• Firefox with FireFTP add-on (http://fireftp.mozdev.org/help.html)
28
http://www.chiark.greenend.org.uk/~sgtatham/putty/
http://winscp.net/eng/index.php
30
http://vsftpd.beasts.org/
29
May 2014
OnRISC User Manual
28
4
Network Services and Tools Provided by OnRISC
For further information see:
man vsftpd
4.7. RFC2217
Internal serial interfaces of the OnRISC can be made accessible over network via RFC2217 protocol.
ser2net31 is a daemon, that provides such functionality. On the client side (PC) you need either
a virtual COM port driver or an application/library communicating RFC2217 directly. For MS
Windows OS you can use the VScom driver of NetCom Mini32 .
The installation requires following components to be installed:
• RFC2217 driver and NetCom UPnP Manager (is bundled with the driver)
• vsupnpd (provided with our system images, enabled by default)
• ser2net (provided with our system images, disabled by default)
ser2net will be configured via special configuration file (default /etc/ser2net.conf). This file
contains following information:
SIGNATURE:sign_vs:VScom NetCom:111S:(C) VS Vision Systems GmbH 2010:1
5000:telnet:0:/dev/ttyS1:115200 sign_vs
5001:telnet:0:/dev/ttyS2:115200 sign_vs
#5002:telnet:0:/dev/ttyS3:115200 sign_vs
#5003:telnet:0:/dev/ttyS4:115200 sign_vs
SIGNATURE is a string that will be sent on RFC2217 driver’s request to identify the device. Don’t
change this setting. After that you’ll find the per serial interface configuration strings in following
format:
<TCP port>:<state>:<timeout>:<device>:<options>
In the example the /dev/ttyUSB0 device will be used in RFC2217 mode (telnet), listens on TCP
port 5000 and the timeout function is disabled.
vsupnpd daemon parses /etc/ser2net.conf file and extracts TCP port numbers. This information
will be announced via SSDP broadcasts, so that NetCom UPnP Manager can find and install the
serial interfaces. If OnRISC is behind a router and broadcasts are not allowed, you can manually
add the device in the NetCom UPnP Manager. See NetCom Mini Manual for more details.
Please note that ser2net service is disabled by default. You need to activate using sysv-rc-conf
(see Section 3.3).
31
32
https://sourceforge.net/projects/ser2net/
http://www.vscom.de/download/multiio/Windows7/driver/NCMini-Install-7z.exe
May 2014
OnRISC User Manual
29
4
Network Services and Tools Provided by OnRISC
4.8. Socketcand
socketcand is a daemon that provides access to CAN interfaces on a machine via a network interface. The communication protocol uses a TCP/IP connection and a specific protocol to transfer
CAN frames and control commands. The protocol specification can be found in ./doc/protocol.md.33
The project provides Java API to develop your own client applications for socketcand. There is
also a CAN sniffer software Kayak34 , that uses socketcand protocol, so that you can use OnRISC
as a network based CAN sniffer at once.
Please note that socketcand service is disabled by default. You need to activate using sysv-rc-conf
(see Section 3.3).
4.9. Other Possible Services
Other services such as Samba (see Section 3.7.5) or NFS could also be installed to share resources.
4.9.1. Samba
To install Samba execute:
apt-get install samba
To access your home directory from Windows, you must register the user in Samba:
smbpasswd -a user
For further information see:
man samba
4.9.2. NFS
To install the NFS-server execute:
apt-get install nfs-kernel-server
For further information see:
man nfsd
33
34
https://github.com/dschanoeh/socketcand
http://kayak.2codeornot2code.org/
May 2014
OnRISC User Manual
30
5
Software Development
5. Software Development
5.1. Environment
5.1.1. Compile your software directly on the OnRISC
You can start programming directly on the OnRISC. The toolchain is already installed and GCC
compiler will be invoked in the same way it is done on a desktop Linux. To modify files you can
use vi or some other editor. This method is preferred, if your software has many dependencies.
5.1.2. Cross-compile your software on the PC
KS8695 based Devices For more convenience you can also use a PC with Linux running on it.
This can be either a directly installed Linux or Linux running in a virtual machine35 for Windows
users. For the compilation of your own applications outside of the OnRISC you’ll need a crosscompiler36 for the ARM platform. You’ll find one on the CD. Depending on your Debian version
you’ll need the appropriate version:
1. toolchain_gcc.4.2.2_libc.2.3.6.tar.bz2 for Debian 4.0 Etch
2. arm-linux-gcc-4.3.2-gnueabi.tar.bz2 for Debian 5.0 Lenny37
3. arm-linux-gcc-4.4.5-gnueabi.tar.bz2 for Debian 6.0 Squeeze
Please decompress one of these archives into the /opt directory of your PC. To install the toolchain
for Debian 4.0 execute:
su
mount /dev/cdrom /mnt
cd /opt
tar -xvjf /mnt/development/toolchain_gcc.4.2.2_libc.2.3.6.tar.bz2
Add /opt/arm-linux-gcc-4.2.2/bin to your PATH environment variable:
export PATH=/opt/arm-linux-gcc-4.2.2/bin:$PATH
Following utilities prepent with arm-linux- will be available after extracting the files from the
archive (refer to Table 14).
Warning: please note that your software compiled for Debian 4.0 Etch can’t be executed on Debian
5.0 Lenny without recompilation due to new ABI.
If you are developing on a 64-bit OS, please install all needed 32-bit libraries (zlib etc.), because
toolchains were compiled for 32-bit OS.
35
You can use free VM Software like VMWare Player www.vmware.com or VirtualBox www.virtualbox.org
See http://en.wikipedia.org/wiki/Cross-compile for explanation
37
EABI (http://en.wikipedia.org/wiki/EABI) interface is mandatory for new Debian versions. Debian 5.0 is the
last version where you can choose between old ABI and EABI. The next version will be based only on the new
interface.
36
May 2014
OnRISC User Manual
31
5
Software Development
OMAP3 based Devices Debian 7.0 will be supplied with OMAP3 based devices. It is based on
an arm-linux-gnueabihf 4.7 toolchain. To install this toolchain on your development PC, you’ll
need to add emdebian repository. Add deb http://www.emdebian.org/debian/ unstable main
to your /etc/apt/sources.list. Then execute as root:
apt-get
apt-get
apt-get
apt-get
update
install emdebian-archive-keyring
install gcc-4.7-arm-linux-gnueabihf g++-4.7-arm-linux-gnueabihf
install build-essential git debootstrap u-boot-tools
After installation you’ll need to create symlinks for GCC and other tools:
ln
ln
ln
ln
-s
-s
-s
-s
/usr/bin/arm-linux-gnueabihf-gcc-4.7 /usr/bin/arm-linux-gnueabihf-gcc
/usr/bin/arm-linux-gnueabihf-gcov-4.7 /usr/bin/arm-linux-gnueabihf-gcov
/usr/bin/arm-linux-gnueabihf-g++-4.7 /usr/bin/arm-linux-gnueabihf-g++
/usr/bin/arm-linux-gnueabihf-cpp-4.7 /usr/bin/arm-linux-gnueabihf-cpp
If your software has dependencies on other libraries provided by Debian, it is recommended to use
Debian 7 on your development host. You can get cross-compiled libraries via xapt (see this wiki38
for more details).
Alternatively you can use Buildroot (refer to Section 10) as your development environment. This
way you can develop applications with various dependencies like Qt, Boost, Gtk etc. directly on
your development host.
5.1.3. Integrated Development Environment
For an Integrated Development Environment (IDE) following programs can be used:
• Eclipse (www.eclipse.org). See Appendix F for installation and configuration notes
• Vim39 (www.vim.org)
• many more
For ease of creating Makefiles the CMake40 utility can be used. For that purpose the CMakeLists.txt
file was added to the examples directory. After installing CMake on your OnRISC directly or on
your development host execute:
cd /home/user/examples
cmake .
After that the Makefile is created. This Makefile has the same targets as the original one.
38
https://wiki.debian.org/EmdebianToolchain
A good tutorial to start programming with Vim http://heather.cs.ucdavis.edu/~matloff/ProgEdit/ProgEdit.
html
40
www.cmake.org
39
May 2014
OnRISC User Manual
32
5
Software Development
5.2. Linux Kernel
5.2.1. From Subversion Repository or Archive (old kernels)
The OnRISC uses 2.6 series Linux kernel. The source code for one of these kernels can be obtained
both from CD and from Subversion41 repository at http://svn.visionsystems.de/. For the kernel
archive on the CD execute:
su
mount /dev/cdrom /mnt
exit
cd /home/user/projects
tar -xvjf /mnt/development/linux-2.6.33-OnRISC.tar.bz2
To check out the repository to your development host execute:
svn co svn://svn.visionsystems.de/linux-2.6.33-OnRISC/trunk linux-2.6.33-OnRISC/trunk
After extracting the kernel sources from the archive or checking out the repository execute
cd linux-2.6.33-OnRISC/trunk
to get to the kernels source tree, where the main Makefile is placed.
To configure the kernel via text based graphical user interface Ncurses42 library must be installed
in the development version with all needed headers. After that execute:
make onrisc_ks8695_defconfig
make menuconfig
you’ll see the following menu as shown in Figure 2. Change kernel configuration according to your
needs and save the configuration. To compile the kernel execute:
make43
The compiled kernel image zImage will be placed under
arch/arm/boot/zImage
41
http://subversion.tigris.org/
http://www.gnu.org/software/ncurses/ncurses.html
43
if your development host has more than one CPU core, you can use make -j to utilize all of you cores, that will
accelerate the compilation process
42
May 2014
OnRISC User Manual
33
5
Software Development
Figure 2: Kernel Configuration Menu
5.2.2. From Buildroot Repository
Since kernel version 3.0 there are no more Subversion repositories for Linux kernels on our server.
Instead the patches will be maintained by our Buildroot repository . In order to compile the kernel
you can either checkout our Buildroot repository and compile all components from toochain till
kernel or you can use vskernel.sh script from our OnRISC_Software repository and the toolchain
from our FTP server.
For the first way just follow the instructions in Section 10
For the second way checkout OnRISC_Software as described in Section 5.3, install toolchain and
execute following steps:
1. cd scripts
2. ./vskernel.sh 3.0.4
3. export ARCH=arm
4. cd linux-3.0.4/
5. make
5.2.3. Installation on OnRISC
KS8695 based Devices
To start the OnRISC with new kernel do the following steps:
1. enter BIOS
2. enter “System Console”
3. configure IP address according to your network (for example 192.168.254.254)
May 2014
OnRISC User Manual
34
5
Software Development
4. execute nc -l -p 5000 > /var/zImage this will start Netcat listening on the port 5000
5. on your development host execute netcat 192.168.254.254 5000 < arch/arm/boot/zImage
6. after the data transmission mount your CF and copy new kernel
7. mount /dev/hda1 /mnt
8. cp /var/zImage /mnt/boot
9. umount /mnt
10. reboot the OnRISC
OMAP3 based Devices
1. extract the microSD card and insert into a card reader connected to your host PC
2. mount the first partition
3. copy arch/arm/boot/uImage to this partition
4. unmount
5. reboot
5.2.4. Install Kernel Modules
Linux kernel provides means to create installation package. The most portable packaging type is
a tar package. After kernel compilation invoke:
make tar-pkg
This will create linux-x.y.z.tar file in the root of your kernel tree.
Copy this package to the OnRISC via scp and extract:
scp linux-x.y.z.tar [email protected]:/tmp
cd /
tar xf /tmp/linux-x.y.z.tar
You’ll now get /lib/modules/x.y.z folder created. Remove unneeded files from /boot like
System.map-x.y.z and vmlinux-x.y.z to save space.
May 2014
OnRISC User Manual
35
5
Software Development
5.3. Programming Examples Repository
Some programming examples were prepared to show/test the abilities of OnRISC hardware. The
latest version of this software can be obtained from our repository by executing the following
command:
svn co svn://svn.visionsystems.de/OnRISC_Software/trunk OnRISC_Software/trunk
This repository contains following folders:
• examples - some basic programming examples as described in Section 2.4 (KS8695)
• examples-gui - some basic examples for GUI programming. Each example has README
file with compiling instructions and further info. Copy this folder to your OnRISC’s Debian
image, log in into XFCE, compile and run examples (OMAP3)
• hwtest - Hardware Test Utility enables the testing of OnRISC peripherals (KS8695) (see
Section C)
• hwtest-qt - Hardware Test Utility with GUI enables the testing of OnRISC peripherals
(OMAP3) (see Section D)
• installation - this folder provides files needed for Debian installation as described in Section
(KS8695) 9
5.4. Setup Shared Source Directory
To avoid permanent copying the compiled files, you can share the examples folder on your PC via
Samba. Assuming your PC has the IP address 192.168.254.253 and a valid user like “user” from
group “user” registered in the Samba-server do:
• On the PC side
– cd /home/user
– mkdir onrisc_examples
– copy all files from examples folder to onrisc_examples
– edit as su /etc/samba/smb.conf. Add the [onrisc] share:
[onrisc]
comment=OnRISC programming examples
path=/home/user/onrisc_examples
browsable=yes
writable=yes
valid users=user
– /etc/init.d/samba restart
• On the OnRISC
– login as user
– mkdir onrisc_examples
– su
May 2014
OnRISC User Manual
36
5
Software Development
– mount -t cifs -o username=user //192.168.254.253/onrisc /home/user/onrisc_examples
– enter password
– exit
– cd onrisc_examples
Now you can edit and compile programs on the PC and execute them on the OnRISC.
5.5. Debugging
You have the possibility to debug your own applications with the gdbserver44 on the target. To
debug your application, start the server with the following command:
gdbserver :9000 /home/user/examples/ioctls
Make a connection to the server with the Insight45 debugger:
arm-linux-insight ioctls
Go to the menu Target Settings (see Figure 3) and enter your destination data. Than you can
get connected to the target with Run\Connect to Target. The rest of the debugging is up to
you.
Figure 3: Insight: target selection
To get Insight download the source files and compile the code using the instructions given by
the Insight developers in their FAQ (http://sourceware.org/insight/faq.php#q-2.2). In the case of
OnRISC take the following steps:
host> ls
src/
44
45
Please make sure to install gdb package: apt-get install gdb
http://sourceware.org/insight
May 2014
OnRISC User Manual
37
5
Software Development
host>
host>
host>
host>
mkdir insight-arm; cd insight-arm
../src/configure --target=arm-linux --program-prefix=arm-linuxmake
make install
You can also use Eclipse to debug your application (see Appendix F.2) .
5.6. Recommended Books
A list of books about Linux programming/usage and related topics:
• “The Debian Administrator’s Handbook” by Raphaël Hertzog, Roland Mas (http://debianhandbook.info/)
• “Building Embedded Linux Systems, 2nd Edition ” by Karim Yaghmour, Jon Masters, Gilad
Ben-Yossef, Philippe Gerum
• “Linux Device Drivers, Third Edition” by Jonathan Corbet, Alessandro Rubini, and Greg
Kroah-Hartman (http://lwn.net/Kernel/LDD3/)
• “C: The Complete Reference” by Herbert Schildt
• “Dive Into Python 3” (http://getpython3.com/diveintopython3/)
• “Pro Git” by Scott Chacon (http://git-scm.com/book)
May 2014
OnRISC User Manual
38
6
OnRISC Hardware API
6. OnRISC Hardware API
KS8695 based Devices Such hardware as digital I/O, buzzer, serial interfaces will be controlled
via IOCTL commands. These commands are defined in the onrisc.h header file. Almost all
IOCTL commands are reflected in the /proc-filesystem (see Section 7).
To control the hardware the /dev/gpio device must be opened:
int fd ;
f d = open ( " / dev / g p i o " , O_RDWR) ;
i f ( fd < 0)
e x i t ( −1) ;
Listing 3: Open /dev/gpio
Some examples for the OnRISC hardware are provided in the examples/ioctls.c and
examples/ioctls2.c. For the usage in real applications see the source code of the Hardware Test
Utility (hwtest provided on SVN repository).
OMAP3 based Devices Such hardware as digital I/O, serial interfaces, USB OTG will be controlled through sysfs GPIO entries. To simplify this task onrisctool.py (see Section Section B)
provides a convenient access to these hardware from user space. A good starting point of how to
access these interfaces from C/C++ and/or Python is the source code of hwtest-qt provided on
SVN repository.
6.1. Digital I/O
6.1.1. KS8695 based Devices
The OnRISC provides up to 8 digital input/output channels, 2 optically isolated inputs and 2
relays46 . The data direction for each I/O channel (not for optically isolated inputs or relays) can
be independently set to input (bit value 0) or output (bit value 1). An interrupt for an input channel
can also be independently enabled (bit value 1 enables interrupt, bit value 0 disables interrupt for
the desired channel). The physical driver operates with 32mA for both high and low level. For
digital I/O usage four registers are provided:
• data register - reflected in /proc/vscom/gpio_data
• data direction register - reflected in /proc/vscom/gpio_ctrl
• interrupt mask register - reflected in /proc/vscom/gpio_irqmask
• status register (read only) - reflected in /proc/vscom/gpio_change
In addition the interrupts will be counted for each pin.
Following IOCTL commands are defined in onrisc.h to control digital I/O:
• GPIO_CMD_GET/GPIO_CMD_SET - set/get data register value
46
OnRISC Alekto provides 8 digital I/O channels only, OnRISC Alena provides 4 digital I/O channels, 2 optically
isolated inputs and 2 relays
May 2014
OnRISC User Manual
39
6
OnRISC Hardware API
• GPIO_CMD_GET_CTRL/GPIO_CMD_SET_CTRL - set/get data direction register value
• GPIO_CMD_GET_IRQMASK/GPIO_CMD_SET_IRQMASK - set/get interrupt mask register value
• GPIO_CMD_GET_CHANGE - get status register value
• GPIO_CMD_GET_CHANGES - get interrupt count (reflected in /proc/vscom/gpio_changes)
The digital I/O driver also supports select() and poll() calls. To use this functionality the
interrupt must be enabled for the desired pins.
To change the register values special structure and macros will be used (see the Listing below).
#define
#define
#define
#define
#define
#define
#define
#define
GPIO_BIT_0
GPIO_BIT_1
GPIO_BIT_2
GPIO_BIT_3
GPIO_BIT_4
GPIO_BIT_5
GPIO_BIT_6
GPIO_BIT_7
0 x01
0 x02
0 x04
0 x08
0 x10
0 x20
0 x40
0 x80
//
//
//
//
//
//
//
//
DIO0
DIO1
DIO2
DIO3
DIO4
DIO5
DIO6
DIO7
or o p t i c a l l y i s o l a t e d i n p u t
or o p t i c a l l y i s o l a t e d i n p u t
or r e l a y
or r e l a y
struct g p i o _ s t r u c t
{
unsigned long mask ; // b i t s t o modify
unsigned long v a l u e ; // v a l u e t o s e t
};
Listing 4: GPIO struct
The following Listing shows how to change pins DIO0 and DIO2 to output and then read the
control register back. To change the register direction struct gpio_struct is used because you
need to specify what bits are going to changed and to what values (Lines 5-6). To read the register
you only need to give unsigned long variable to the IOCTL command (Line 9).
1
2
3
4
5
6
7
8
9
10
...
struct g p i o _ s t r u c t g p i o _ v a l ;
unsigned long v a l ;
g p i o _ v a l . mask = (GPIO_BIT_0 | GPIO_BIT_2 ) ;
g p i o _ v a l . v a l u e = (GPIO_BIT_0 | GPIO_BIT_2 ) ;
i o c t l ( fd , GPIO_CMD_SET_CTRL, &g p i o _ v a l ) ;
i o c t l ( fd , GPIO_CMD_GET_CTRL, &v a l ) ;
...
Listing 5: GPIO usage Example
6.1.2. Alekto2
Digital I/O in Alekto2 is made via TCA6416A I2C I/O expander. 8 I/O pins are divided in 3 groups
(refer to Table 4). The direction (input/output) can be configured only for the whole group, i.e. if
you set pin 0 from Group 0 to output, then pins 1-3 are also set to output.
You can set/get I/O status via onrisctool.py (refer to Section B.4)
May 2014
OnRISC User Manual
40
6
OnRISC Hardware API
Group nr.
0
1
2
Pins
0-3
4-5
6-7
Table 4: Digital I/O Groups
6.2. Buzzer for KS8695 based Devices
The OnRISC provides a buzzer for acoustic signaling. You can manipulate it via the IOCTL-calls
or via the Proc-Filesystem. Following IOCTL commands are defined in the onrisc.h to control the
buzzer:
• GPIO_CMD_GET_BUZZER/GPIO_CMD_SET_BUZZER - turn on/off the buzzer
(reflected in /proc/vscom/buzzer)
• GPIO_CMD_GET_BUZZER_FRQ/GPIO_CMD_SET_BUZZER_FRQ - get/set the modulated signal delay. So that the buzzer will be turned on for the delay specified and the it will be turned off
for the same delay and so on till this mode will be turned off
(reflected in /proc/vscom/buzzer_frq)
6.3. LEDs for KS8695 based Devices
The OnRISC provides three configurable LEDs:
• red LED (power LED)
• blue LED (can be used to signal WLAN link)
• green LED (user LED)
• WLAN button LED (OnRISC Alekto LAN only)
Following IOCTL commands are defined in the onrisc.h to control the LEDs:
• GPIO_CMD_GET_LEDS/GPIO_CMD_SET_LEDS - get/set LED combination
(reflected in /proc/vscom/leds)
• GPIO_CMD_SET_LED_POWER - turn on/off the power LED
• GPIO_CMD_SET_LED_BLUE - turn on/off the blue LED
• GPIO_CMD_SET_LED_GREEN - turn on/off the green LED
• GPIO_CMD_SET_LED_BTN_WLAN - turn on/off the WLAN button LED (OnRISC Alekto LAN
only)
May 2014
OnRISC User Manual
41
6
OnRISC Hardware API
6.4. Serial Interfaces
6.4.1. KS8695 based Devices
RS232/422/485 mode switching The serial ports can operate in one of the three modes RS232,
RS422 or RS48547 (see Hardware Manual for electrical configuration issues). These modes will
be controlled through the EPLD circuit. Following IOCTLS are to be used to switch the modes
(alternative /proc/vscom/epld_ttySx entries can be used to switch RS modes. See Section 7):
• TIOCGEPLD - get EPLD mode
• TIOCSEPLD - set EPLD mode
These commands use the following structure to store the desired parameters:
struct e p l d _ s t r u c t
{
unsigned long p o r t ;
unsigned long r e g _ s h i f t ;
unsigned long v a l u e ;
};
The field value can have one of the following values:
• EPLD_RS232 - RS232 mode
• EPLD_RS422 - RS422 mode
• EPLD_RS485_ART_4W - RS485 mode 4-wire transmit control by ART
• EPLD_RS485_ART_2W - RS485 mode 2-wire direction control by ART
• EPLD_RS485_ART_ECHO - RS485 mode 2-wire direction control by ART with echo
• EPLD_RS485_RTS_4W - RS485 mode 4-wire transmit control by RTS
• EPLD_RS485_RTS_2W - RS485 mode 2-wire direction control by RTS
• EPLD_RS485_RTS_ECHO - RS485 mode 2-wire direction control by RTS with echo
• EPLD_CAN - CAN mode
• EPLD_PORTOFF - shutdown the port
RS485 transmission control In RS485 the line driver for transmitting must be disabled (tristated) when the device does not send data. In a 2-wire configuration this is known as data
direction change, with 4-wire it is called line contention. The following modes are provided by
OnRISC:
• RTS: if this mode is set user software is responsible to turn transmitter on/off by toggling
the RTS signal (RTS 1 turns sender on, RTS 0 turns sender off)
• ART (Automatic Receive Transmit): The sender will be automatically turned on/off by
hardware. The turning off occurs after the stop bit was sent (recommended mode).
47
See include/asm/arch/serial.h to see what EPLD capabilities each port has
May 2014
OnRISC User Manual
42
6
OnRISC Hardware API
RS485 receive control
mode:
There are two modes to handle own transmitted messages in 2-wire
• with echo (EPLD_RS485_RTS_ECHO, EPLD_RS485_ART_ECHO): both outgoing and incoming messages will be received by application
• without echo (EPLD_RS485_ART_2W, EPLD_RS485_RTS_2W): application receives only incoming
messages
Baud rate generation interface The OnRISC provides full support for the 16C950 UART baud
rate generation. This allows the user to use the serial interfaces with arbitrary speeds up to
3,6Mbit/s. To use this capability the current baud rate must be set to B38400 and the custom
divisor to the negative value of the desired baud rate. In the source code below the baud rate will
be set to 500000bit/s, so the custom divisor was set to -500000 (see the lines 26-39) and the current
baud rate to 38400 (see the lines 41-66).
1
2
3
4
5
6
7
8
9
10
11
12
13
14
15
16
17
18
19
20
21
22
23
24
25
26
27
28
29
30
31
32
33
34
35
36
37
38
39
40
41
42
43
44
45
46
47
48
49
#include
#include
#include
#include
#include
#include
#include
#include
#include
#include
#include
<s t d i o . h>
< s t d l i b . h>
<s y s / t y p e s . h>
<s y s / time . h>
<s y s / i o c t l . h>
<s y s / s t a t . h>
<u n i s t d . h>
<t e r m i o s . h>
< f c n t l . h>
<l i n u x / s e r i a l . h>
< s t r i n g . h>
i n t main ( i n t a r g c , char ∗∗ a r g v )
{
i n t fd , r e t ;
struct t e r m i o s s e r _ t e r m i o s ;
struct s e r i a l _ s t r u c t s s _ s t ;
f d = open ( " / dev / t t y S 1 " , (O_RDWR | O_NOCTTY) ) ;
i f ( fd < 0)
{
p e r r o r ( " open " ) ;
return −1;
}
// s e t custom d i v i s o r t o −500000 t o a c h i e v e 500000 b i t / s
i f ( i o c t l ( fd , TIOCGSERIAL, &s s _ s t ) <0)
{
p e r r o r ( "TIOCGSERIAL" ) ;
return −1;
}
s s _ s t . c u s t o m _ d i v i s o r = −500000;
s s _ s t . f l a g s |= ASYNC_SPD_CUST;
i f ( i o c t l ( fd , TIOCSSERIAL , &s s _ s t ) <0)
{
p e r r o r ( "TIOCSSERIAL" ) ;
return −1;
}
// s e t baud r a t e t o 38400 b i t / s t o a c t i v a t e custom d i v i s o r
r e t = t c g e t a t t r ( fd , &s e r _ t e r m i o s ) ;
i f ( r e t <0 )
{
perror ( " getattr " ) ;
return −1;
}
...
r e t = c f s e t i s p e e d (& s e r _ t e r m i o s , B38400 ) ;
May 2014
OnRISC User Manual
43
6
50
51
52
53
54
55
56
57
58
59
60
61
62
63
64
65
66
67
68
69
70
OnRISC Hardware API
i f ( r e t < 0)
{
perror ( " ispeed " ) ;
return −1;
}
r e t = c f s e t o s p e e d (& s e r _ t e r m i o s , B38400 ) ;
i f ( r e t < 0)
{
p e r r o r ( " ospeed " ) ;
return −1;
}
r e t = t c s e t a t t r ( fd , TCSANOW, &s e r _ t e r m i o s ) ;
i f ( r e t < 0)
{
perror ( " getattr " ) ;
return −1;
}
...
c l o s e ( fd ) ;
return 0 ;
}
Every time the baud rate will be changed a special baud rate generation function will be invoked in
the serial driver (drivers/char/serial.c) namely serial16C950_get_divisors(). This routine
calculates appropriate values for the clock prescaler register (CPR), times clock register (TCR) and
16-bit divisor supported by 16C950 UART. If the routine couldn’t find the appropriate values the
baud rate 9600bit/s will be set. To disable this functionality comment the following definition in
drivers/char/serial.c:
#d e f i n e ENABLE_16C950_BAUD_GENERATION_FEATURES
May 2014
OnRISC User Manual
44
6
OnRISC Hardware API
6.4.2. OMAP3 based Devices
Serial interfaces on OMAP3 devices use FTDI USB-to-serial converter chips (FT2232D). Both ports
appear in the system as /dev/ttyUSB0 and /dev/ttyUSB1. Two methods are provided to switch
between RS232/RS422/RS485 modes (termination inclusive): via software48 and via DIP-switch.
Each port has its own DIP-switch named SW1 and SW2. Table 5 shows possible DIP-switch
settings.
S1
off
on
on
on
on
on
off
off
S2
off
off
on
on
on
on
on
on
S3
x
x
on
on
off
off
off
off
S4
x
x
off
on
off
on
off
on
Mode
RS-232
RS-232
RS-422
RS-422
RS-485
RS-485
RS-485
RS-485
Loopback Test
MODE
MODE
MODE RxD +/- with 120 ohm Term
Full Duplex Mode
Full Duplex Mode RxD +/- with 120 ohm Term
Half Duplex Mode without Echo
Half Duplex Mode without Echo RxD +/- with 120 ohm Term
Table 5: Serial Modes (hardware switching)
48
Refer to Section B.1 for software method.
May 2014
OnRISC User Manual
45
6
OnRISC Hardware API
6.5. CAN
SocketCAN provides access to CAN controller on all CAN capable OnRISC devices49 (refer to
Table 1). SocketCAN50 is a set of open source CAN drivers and a networking stack contributed
by Volkswagen Research to the Linux kernel. Formerly known as Low Level CAN Framework
(LLCF).
6.5.1. CAN Interface Configuration
Special script /etc/init.d/can_if51 is provided to setup can0 interface. It is preconfigured to
use can0 at 1000000b/s. These settings are stored in the CAN_IF variable:
CAN_IF="can0@1000000,200"
To start the CAN interface issue:
/etc/init.d/can_if start
to stop CAN interface issue:
/etc/init.d/can_if stop
Further information regarding programming and configuration can be found on the SocketCAN’s
project site.
6.5.2. CAN Usage Examples
To send a CAN frame execute:
cansend can0 123#1234
To receive CAN frames execute:
candump can0
6.5.3. CANopen
It is possible to use CANopen52 library from CanFestival53 or any other open source or proprietary
CANopen stack, that has SocketCAN support.
49
The CAN interface and the fourth serial interface on OnRISC Alena are sharing the same connector. The EPLD
must be switched to can before opening the CAN interface.
50
http://elinux.org/CAN_Bus
51
this script is maintained in this git repository: http://gitorious.org/linux-can/can-misc
52
www.can-cia.org
53
www.canfestival.org
May 2014
OnRISC User Manual
46
6
OnRISC Hardware API
6.6. I2C
I2C54 (Inter-Integrated Circuit) is a multi-master serial computer bus. In the OnRISC integrated
I2C controller is already supported by the mainline kernel. A good starting point on how to use
I2C is the hwtest utility (see Section C.6). test_LCD() routine from hwtest/module_i2c.c shows
how to communicate with an I2C device. Additional information can be found in the Linux kernel
documentation Documentation/i2c. I2C platform device initialization is described in
Documentation/i2c/instantiating-devices.
6.7. WLAN Button (Alekto LAN Only)
OnRISC Alekto LAN provides an additional button. By default this button is used to control
WLAN card’s transmit power. This button is just connected to GPIO line and will be controlled
by wland service (refer to Section 4.1.3). To use it for other needs just disable the wland service.
Following ioctl command for /dev/gpio is provided to get button’s state:
GPIO_CMD_GET_BTN_WLAN
return value is 0 - for not pressed and 1 - for pressed.
6.8. Watchdog Timer
The OnRISC provides a watchdog timer55 (WDT) that can work in intervals from 1 second to
maximal 171 seconds. The access to the WDT occurs via /dev/watchdog device. After starting
the WDT it should be turned off or reloaded after the critical part otherwise the system will reboot.
Table 6 shows the most important IOCTLs to control WDT.
IOCTL
WDIOC_SETTIMEOUT
WDIOC_GETTIMEOUT
WDIOC_SETOPTIONS
WDIOC_KEEPALIVE
Description
set timeout and start the timer
get timeout
enable (WDIOS_ENABLECARD)
disable (WDIOS_DISABLECARD) the timer
reload the timer
Table 6: Watchdog Timer IOCTLs
The WDT driver provides a special option called "Disable watchdog shutdown on close" to prevent
stopping the timer on WDT descriptor close (see Figure 4). This is a compile-time option. It is
deactivated by default, so you have to build your own kernel if you need it.
See examples/wdtimer.c for WDT usage example.
54
55
http://en.wikipedia.org/wiki/I2C
For further information see drivers/watchdog/ks8695_wdt.c
May 2014
OnRISC User Manual
47
6
OnRISC Hardware API
Figure 4: Watchdog Timer Support
6.9. Read Hardware Parameters like MAC Address, Serial Number etc.
6.9.1. KS8695 based Devices
Such parameters as MAC addresses, serial number etc. are stored in flash and can be accessed via
special structure:
1
2
3
4
5
6
7
8
9
10
11
12
13
14
struct _param_hw
{
byte pad [ 1 ] ;
u s h o r t szram ;
ushort s z f l a s h 2 ;
ushort s z f l a s h 1 ;
byte mac2 [ 6 ] ;
byte mac1 [ 6 ] ;
ushort biosid ;
char p r d d a t e [ 1 1 ] ;
ulong s e r i a l n r ;
u l o n g hwrev ;
u l o n g magic ;
} __attribute__ ( ( packed ) ) ;
// v1 . 0
// d i r e c t i n MB
// d i r e c t i n MB
// as a s t r i n g i e . " 0 1 . 0 1 . 2 0 0 6 "
See hwtest/hwtest.c->param_read_hw_params() routine on how to read the parameters from
flash.
6.9.2. OMAP3 based Devices
1
2
3
4
5
6
7
8
9
10
11
typedef struct _BSP_VS_HWPARAM
// v1 . 0
{
ULONG Magic ;
ULONG HwRev ;
ULONG SerialNumber ;
CHAR PrdDate [ 1 1 ] ;
// as a s t r i n g i e . " 0 1 . 0 1 . 2 0 0 6 "
USHORT SystemId ;
BYTE MAC1 [ 6 ] ;
BYTE MAC2 [ 6 ] ;
BYTE MAC3 [ 6 ] ;
} BSP_VS_HWPARAM;
Use onrisctool.py without parameter and you’ll get a list of all parameters stored in EEPROM.
May 2014
OnRISC User Manual
48
6
OnRISC Hardware API
6.10. Change Screen Resolution (Alekto 2 Only)
Alekto 2 supports tree resolutions:
• 640x480
• 800x600
• 1024x768 (default)
The resolution will be configured via kernel command line parameter video. Following values are
accepted:
• 640x480@60
• 800x600@60
• 1024x768@60
This parameter will be configured in uEnv.txt located on the first partition. Example:
bootargs=video=da8xx_lcdc:1024x768@60
6.11. Built-in Touchscreen Calibration (VS-860 Only)
You can choose between two calibration methods:
• tslib56 - suitable for Qt Embedded applications
• X11 evdev driver - as the name says suitable for X11
Tslib package provides ts_calibrate utility, to calibrate the touchscreen. New calibration values
will be written to /etc/pointercal. Tslib requires following environment variables to use the
touchscreen:
TSLIB_CALIBFILE=/etc/pointercal
TSLIB_CONFFILE=/etc/ts.conf
TSLIB_TSDEVICE=/dev/input/event1
Hwtest-qt utility provides special Python script (scripts/input_dev.py), that reads /proc/bus/input/devices and configures TSLIB_TSDEVICE together with Qt Embedded related environment variables.
X11 evdev driver will be calibrated via xinput_calibrator (must be started from X11 session). The
calibration values will be stored in /usr/share/X11/xorg.conf.d/10-evdev.conf. Example:
Section "InputClass"
Identifier "evdev touchscreen catchall"
MatchIsTouchscreen "on"
MatchDevicePath "/dev/input/event*"
Option "Calibration" "28 999 988 41"
Driver "evdev"
EndSection
56
https://github.com/kergoth/tslib
May 2014
OnRISC User Manual
49
7
/proc-Extensions for the KS8695 based Devices
7. /proc-Extensions for the KS8695 based Devices
In the /proc/vscom directory reside several files to manipulate the OnRISC hardware:
• epld_ttyS* - configure serial driver e.g. rs232, rs422, rs485. For exact values execute
echo /proc/vscom/epld_ttySn (n=1..4)
For detailed description see 6.4
• gpio_* - set and read digital IO channels. For detailed description see 6.1
• leds - set and read LEDs values. For detailed description see 6.3
• buzzer, buzzer_frq - configure the buzzer. For detailed description see 6.2
• reset - reboot the OnRISC. To execute the hardware reset
echo 1 > /proc/vscom/reset
Examples:
echo 1 > /proc/vscom/buzzer
turn buzzer on
echo 0 > /proc/vscom/buzzer
turn buzzer off
echo 0x000001f4 > /proc/vscom/buzzer_frq
this will activate the buzzer for 500ms and then
deactivate it for 500ms and so on
cat /proc/vscom/leds
get the current LED status
echo GREEN > /proc/vscom/leds
turn the green LED on
echo green > /proc/vscom/leds
turn the green LED off
echo rs422 > /proc/vscom/epld_ttyS2
sets the mode of the second port to rs422
echo 0x05 0x05 > /proc/vscom/gpio_ctrl
set DIO0 and DIO2 to output
May 2014
OnRISC User Manual
50
8
BIOS for KS8695 based Devices
8. BIOS for KS8695 based Devices
BIOS (Basic Input Output System) lets you configure your OnRISC e.g. configure how to boot,
set up date, time and so on. To get into the BIOS, press ’ESC’ during the system start and you’ll
enter the following menu (see Figure 5).
Figure 5: BIOS: main menu
To connect to the BIOS via Telnet press reset push button for a while till WLAN LED turns on
and the following output appears (see Figure 6). Now you can connect to the BIOS via network
by using the IP address specified under “Configure Network Parameter” (see 8.4).
Press ’Esc’ to enter setup or ’Tab’ for a bootlist
Figure 6: BIOS Prompt for Bootlist
May 2014
OnRISC User Manual
51
8
BIOS for KS8695 based Devices
8.1. System Console
Choosing this menu item, you’ll get to the system console. To return to the main menu press
’Ctrl+D’ or execute exit (see Figure 7). You can use the console to mount CompactFlash, copy
the kernel (see 9.11), partition the disk and so on.
Figure 7: BIOS: System Console
8.2. Boot Priority
In this menu item you can change the boot priority (see Figure 8). You can choose between following
sources:
• CompactFlash
• USB
• Network (Windows share, Samba)
Figure 8: BIOS: Boot Priority
May 2014
OnRISC User Manual
52
8
BIOS for KS8695 based Devices
8.3. Configure Network Shares
Here you can configure a Windows share (SMB) to boot from (see Figure 9). To use this feature,
you should set up following parameters:
• Type
• Server IP address
• Samba directory name
• User name
• Password
Figure 9: BIOS: Configure Network Shares
May 2014
OnRISC User Manual
53
8
BIOS for KS8695 based Devices
8.4. Configure Network Parameter
Here you can configure the network parameters (see Figure 10). You can choose between getting
IP Address via DHCP or to assigning it statically. For the latter you should configure following
parameters:
• IP Address
• Netmask
• Broadcast
• Gateway
Warning: please note that these network parameters are applicable only to BIOS not the system
BIOS is booting.
Figure 10: BIOS: Configure Network Parameter
May 2014
OnRISC User Manual
54
8
BIOS for KS8695 based Devices
8.5. Configure Miscellaneous Parameter
Following parameters can be set up here (see Figure 11):
• Date
• Time
• Start-Timeout57 - the time in seconds during that the BIOS or bootlist could be accessed.
• Terminal Type (Console/Telnet) - emulation type to choose by terminal software such as
Hyperterminal, ZOC etc while connecting via serial link or telnet. The OnRISC can emulate
three types of terminals:
– Linux
– ANSI
– VT100
• Password - BIOS protecting password
Figure 11: BIOS: Configure Miscellaneous Parameter
57
for devices with internal microSD card reader the timeout should be set to at least 5 seconds
May 2014
OnRISC User Manual
55
8
BIOS for KS8695 based Devices
8.6. Edit Bootscript
The bootscript can be edited here (see Figure 12):
Figure 12: BIOS: Edit Bootscript
May 2014
OnRISC User Manual
56
8
BIOS for KS8695 based Devices
8.7. BIOS Update
BIOS update can be done either via serial connection or via network connection58 .
(a) Update prompt
(b) Waiting for data
Figure 13: BIOS: Update
Update procedure via serial connection In the dialog shown in Figure 13a choose “Ok”. “Send
the data...” prompt appears (see Figure 13b). Select the appropriate *.b64 file and send it via the
“Send Text File” functionality of your terminal software.
(a) Kernel
(b) Filesystem
Figure 14: BIOS: Update (Images)
The *.b64 file consists of two files:
• Kernel - Linux kernel image (zImage)
• Cramdisk - filesystem image
After transmission you can choose between installing both kernel (see Figure 14a) and filesystem
image (see Figure 14b) or only one of them.
Warning: do not power off or reset the OnRISC during the flashing of the images!!!
The last step is to reboot the system (see Figure 15).
Figure 15: BIOS: Update (Reboot System)
58
The network option is available since BIOS version 2.1
May 2014
OnRISC User Manual
57
8
BIOS for KS8695 based Devices
Update procedure via network connection Push the reset button till the WLAN LED is on.
Send the appropriate *.b64 file via netcat59 or socat (socat should be used if netcat closes
connection as soon as the update image is transferred) as in the examples below:
netcat -w 600 192.168.254.254 23 < OnRISC-BIOS-2.2.bin.b64
or
socat -,ignoreeof TCP:192.168.254.254:23 < OnRISC-BIOS-2.2.bin.b64
As a result you’ll see following output in your shell window (see Figure 16). The characters before
this output are echo and terminal sequences for BIOS menu.
Update BIOS
Receiving update file
...............................................................................
...............................................................................
...............................................................................
...............................................................................
...............................................................................
Extracting binary images
Flashing image
Type: Kernel
Size: 2012752
Version: 2.1
Date: 28.10.2008
O.K.
Flashing image
Type: Cramdisk
Size: 1687552
Version: 2.1
Date: 28.10.2008
O.K.
BIOS updated. The system will be restarted...
Figure 16: BIOS: Update via Network
59
on some systems netcat binary is called nc. Windows version nc.exe is provided on the CD
May 2014
OnRISC User Manual
58
8
BIOS for KS8695 based Devices
8.8. View Board Information
Shows some board information (see Figure 17)
Figure 17: BIOS: View Board Information
8.9. Hardware Test
The hwtest program will be invoked for one cycle with the parameters listed in Table 7. For
detailed information about hwtest refer to Appendix C.
size
4096
modem
cycles
1
sero
/dev/ttyS1
confirm
seri
/dev/ttyS2
serial
io
net
buz
gpio
led
mpci
sleep
cf
testrtc
i2c
eplddev
/dev/ttyS1
epld
eplddev
/dev/ttyS2
usb
usbmntdev
/dev/sda1
1
Table 7: BIOS: hwtest parameters
8.10. Default Parameter
Sets all parameters to factory settings.
8.11. Exit
Leaves BIOS. If any parameters were changed, you’ll be asked to save the changes.
May 2014
OnRISC User Manual
59
9
Debian Installation
9. Debian Installation
The installation of the Debian 5.0.3 Lenny60 will be described in this section. The installation
instructions for other Debian versions are similar with this one. Your system should meet the
following requirements:
• BIOS 2.6 or later
• Serial Terminal (Emulation) at 115200bps, 8N1
• Installation source: CD/DVD-ROM on USB or Windows share (Samba)
• Installation target: CompactFlash card or USB Mass Storage device61
Due to the fact that OnRISC is not officially supported by arm-debian port there is no suitable
kernel in the distribution. So you have to provide boot image files to the OnRISC to be able to
start the Debian installer. These files (see the description below) can be downloaded from our SVN
repository.
Generally two types of Debian installer are provided:
• CD-ROM Installer
• Network Installer
For Debian 4.0 Etch you’ll find only CD-ROM Installer etch/initrd.gz. For Debian 5.0 Lenny
both installer are supplied lenny/initrd.gz-cdrom and lenny/initrd.gz-net. The desired installer must be renamed to initrd.gz when copying to a mass storage device or Windows share.
You can get the latest install DVDs at http://www.debian.org/distrib/
9.1. Preparing Boot Image Files
Copy the downloaded files to the root directory of your USB mass storage device. These files are:
• initrd.gz - RAM disk image with Debian Installer
• zImage - Linux kernel
• kparam - Kernel parameter like root=/dev/ram describing that kernel should use RAM disk
as root filesystem (refer to Section 3.1.1)
Alternatively you can use a Windows share (Samba) (see Figure 18). It can be made in four steps:
1. create shared folder. For example D:\shared folders\bootdir (see Figure 18a)
2. copy the image files to this folder (see Figure 18b)
3. enter BIOS and set the Network Parameter (see 8.4)
4. configure your BIOS to access the network share directory (see 8.3)
60
61
For detailed information about Debian Installation visit http://www.debian.org/releases/stable/arm
1GB or more recommended
May 2014
OnRISC User Manual
60
9
Debian Installation
(a) Shared Folder Properties
(b) Boot Image Files
Figure 18: Windows Share
9.2. Starting Debian Installer
Exit BIOS and save changes if required. Press ’Tab’ to access bootlist and choose USB Mass
Storage Device (see Figure 19a) or Network (see Figure 19b). The Installer will be put into low
memory mode (see Figure 20). Press ’Enter’ and choose your country in the next dialog.
(a) Mass storage
(b) Windows share
Figure 19: Bootlist
May 2014
OnRISC User Manual
61
9
Debian Installation
Figure 20: Low Memory Mode
9.3. Choosing CD-ROM
Debian Installer will try to find a device driver for your USB CD-ROM. This could fail as for Debian
Etch installer. To select the device manually answer with ’No’ (see Figure 21). In the second dialog
say ’Yes’ to manually select your CD-ROM module. In the third dialog select ’none’. In the fourth
dialog press ’Enter’ to select /dev/cdrom device file to access the CD-ROM. The Debian Installer
will now scan your CD-ROM.
Figure 21: Detect and mount CD-ROM
9.4. Load Installer Components from CD
First you’ll see a dialog with the statement that the kernel modules were not found (see Figure 22).
It is due to the issue that all needed modules were compiled into the kernel. So answer with ’Yes’.
Additional components will be loaded.
Figure 22: No Modules Found Warning
9.5. Network Configuration
In the next dialog the network configuration will be executed (see Figure 23). Choose the network
interface to which the Ethernet cable is connected to. In the next two dialogs enter host and domain
May 2014
OnRISC User Manual
62
9
Debian Installation
names.
Figure 23: Network configuration
In the case of network installation you’ll be asked to configure package mirror as in Figures 24 and
25.
Figure 24: Proxy Configuration
Figure 25: Mirror Configuration
May 2014
OnRISC User Manual
63
9
Debian Installation
9.6. Partition Disks
After scanning your target storage media, you’ll be asked to continue with partitioning (see Figure
26). Answer with ’Yes’. In the second dialog select ’Guided - use entire disk’ as in Figure 27.
Figure 26: Partition Disks
Figure 27: Partitioning Method
In the next dialog confirm your target disk and then select ’All files in one partition’ scheme as in
Figure 28.
Select ’msdos’ for partition table type as in Figure 29
You’ll get the following partition table as in Figure 30. It is very important that you leave swap
partition during the installation. You can then change your partitions so you have only one partition
and swap as a swap file (see Section 3.6). Select ’Finish partitioning and write changes to disk’. In
the next dialog select ’Yes’ to format both partitions.
After doing this select ’Finish partitioning and write changes to disk’. In the next dialog select
’Yes’ to format both partitions.
May 2014
OnRISC User Manual
64
9
Debian Installation
Figure 28: Partitioning Scheme
Figure 29: Partition Table Type
Figure 30: Partition Table
May 2014
OnRISC User Manual
65
9
Debian Installation
9.7. Setting Passwords
After partitioning the disks and setting up the clock, you’ll be asked to set a password for ’root’
and create a new user.
9.8. Install the Base System
As the OnRISC is not officially supported by Debian, there is no kernel shipped with the distribution. Answer with ’Yes’, when you’ll be asked to install without a kernel.
9.9. Configure the Package Manager
In the case of a CD-ROM installer you’ll be asked if you want to download and install updates
from a network mirror. The network mirror will be configured as described in Subsection 9.5. After
configuring the package manager, you’ll be asked to participate in the package usage survey.
9.10. Software Selection
In this dialog you can select which component groups will be installed on your system (see Figure
31).
Figure 31: Software Selection
May 2014
OnRISC User Manual
66
9
Debian Installation
9.11. Finish the Installation
Due to the lack of the official support by Debian there is no boot loader (see Figure 32). After
reboot, enter BIOS and go to the console. Mount the first partition:
mount /dev/hda1 /mnt
Copy zImage either from your host or USB mass storage device into the /boot directory and
execute:
echo “mem=59M root=/dev/hda1” > /boot/kparam
Exit BIOS and enter the bootlist by pressing ’Tab’. You can now boot from /dev/hda1.
To enable the console port edit /etc/inittab, so that tty1-tty6 are commented and console is
configured for 115200bps:
...
# Note that on most Debian systems tty7 is used by the X Window System,
# so if you want to add more getty’s go ahead but skip tty7 if you run X.
#
#1:2345:respawn:/sbin/getty 38400 tty1
#2:23:respawn:/sbin/getty 38400 tty2
#3:23:respawn:/sbin/getty 38400 tty3
#4:23:respawn:/sbin/getty 38400 tty4
#5:23:respawn:/sbin/getty 38400 tty5
#6:23:respawn:/sbin/getty 38400 tty6
# Example how to put a getty on a serial line (for a terminal)
#
T0:2345:respawn:/sbin/getty -L console 115200 linux
#T1:23:respawn:/sbin/getty -L ttyS1 9600 vt100
...
Figure 32: Continue without Boot Loader
May 2014
OnRISC User Manual
67
10
Buildroot
10. Buildroot
Buildroot62 is a set of Makefiles and patches that allows you to easily generate a cross-compilation
toolchain, a root filesystem and a Linux kernel image for your target. Buildroot can be used for
one, two or all of these options, independently. The benefits are:
• you don’t have to supply the toolchain it will be built automatically
• you can choose between various file systems for your target image
• you can build a very small and quick booting system that suits your needs
• drivers compiled as modules will be automatically installed on your file system image
• many more
The distribution provided by VScom is configured to create a ready-to-run images for OnRISC and
OpenNetCom systems. You’ll get a minimal setup, that can run either form flash or mass storage
device. A big variety of software can be then automatically added to your system using Buildroot
repository.
10.1. Downloading
Subversion will be required to download and update the Buildroot distribution. Go to the desired project directory and execute the following command to get the latest version of Buildroot
distribution:
svn co svn://svn.visionsystems.de/buildroot/trunk/buildroot-2010.08
10.2. Building the Image
After checking out the repository you can build the default image by issuing the following command:
make vscom_onrisc_defconfig && make
or
make vscom_opennetcom_defconfig && make
Buildrootwill start to automatically download needed packages and compile them. At the end of
this procedure you’ll find built images under:
output/images
The rootfs image can now be burned on to the target media.
62
http://buildroot.org/
May 2014
OnRISC User Manual
68
10
Buildroot
10.3. Copying the Created Image to the System
OpenNetCom You can copy the newly created image via RedBoot and console. This will require a
special Service Board to interact with RedBoot. It is very important that write-protection jumper
is set in order to protect RedBoot from getting corrupted. Please refer to OpenNetCom’s user
manual.
OnRISC You’ll need to create a ext2 partition on your media (CF or microSD-card). Then insert
your media in OnRISC and go to “BIOS->System Console” and execute following actions:
1. OnRISC: nc -l -p 5000 | cat > /dev/hda1
2. PC: nc 192.168.254.254 5000 < output/images/rootfs.ext2
3. OnRISC: reboot
This will copy ext2 image to the first partition of your CF card. For microSD-card just change
/dev/hda1 to /dev/sda1.
Type “root” to login to the system. No password is required.
10.4. Customizing the Image
Buildroot uses Kconfig63 subsystem to manage the process of configuration just like Linux kernel
does. Following bigger parts can be configured:
• make menuconfig - configures Buildroot: toolchain, rootfs, packages
• make busybox-menuconfig - configures BusyBox64
• make uclibc-menuconfig - configures uClibc65
• make linux26-menuconfig - configures Kernel
First place to look for choosing new packages is BusyBox configuration. If the package is not
available there then it can be found in Buildroot itself if it was included into its repository.
You can specify a special script, that will be running before the file system image is built. In this
script you can change your file system image via adding or modifying files. See following script,
that copies device specific interfaces files: target/devices/vscom/OnRISC/custom.sh.
63
en.wikipedia.org/wiki/Kconfig
www.busybox.net
65
www.uclibc.org
64
May 2014
OnRISC User Manual
69
10
Buildroot
10.5. Compiling Your Own Software
There are following ways on how to get your software to be build and installed on the system using
Buildroot:
• adding your software to the packages folder
• using generated toolchain to compile your software and then manually copying it either to
fs/skeleton or output/target
The first way is described here Add packages. The second way is described here Using toolchain.
See this article on how to override source directory Source directory override.
You can also use Buildroot together with Eclipse to develop your application Eclipse integration.
10.6. Using Your Own Kernel
If you have your own kernel or just want to use our 2.6.33 kernel, execute following steps:
1. disable automatic kernel compilation (BR2_LINUX_KERNEL)
2. copy your zImage to target/device/vscom/OnRISC/
3. execute make (your zImage will be installed to output/target/boot/)
10.7. Setup SSH Server
SSH server will be activated via the BR2_PACKAGE_OPENSSH variable. After copying the
new rootfs image to the media, you’ll see RSA/DSA keys will be created. By default password is
required to login via SSH. You can configure the system in the following ways:
• define root password via passwd root
• change sshd behavior to accept empty passwords (set PermitEmptyPasswords to yes in
/etc/sshd_config)
10.8. Getting Help
If you encounter any non-kernel related problems, you should get in contact with Buildroot community. As usual it is recommended to read the mailing list archives before asking questions on
the mailing list.
May 2014
OnRISC User Manual
70
A
Debian Maintenance Notes
A. Debian Maintenance Notes
A.1. Debian Package Management
Debian uses following utilities for the package management66 :
• dpkg - the main package management program.
• APT - the Advanced Package Tool. It provides the apt-get program. apt-get allows a simple
way to retrieve and install packages from multiple sources using the command line. Unlike
dpkg, apt-get does not understand .deb files, it works with the packages proper name and
can only install .deb archives from a source specified in /etc/apt/sources.list. apt-get
will call dpkg directly after downloading the .deb archives from the configured sources.
• aptitude - a package manager for Debian GNU/Linux systems that provides a frontend to the
apt package management infrastructure. aptitude is a text-based interface using the curses
library, it can be used to perform management tasks in a fast and easy way.
To find a package execute:
apt-cache search pkg name
To view info such as version, dependencies, installed size etc. execute:
apt-cache show pkg name
To install packages execute:
apt-get install pkg1 pkg2 ... (su rights needed)
To update the list of package known by your system execute:
apt-get update (su rights needed)
To upgrade all the packages on your system
apt-get upgrade (su rights needed)
To remove packages from your system execute:
apt-get remove pkg1 pkg2 ... (su rights needed)
To install a package that is not contained in the repository download the *.deb file and execute:
dpkg -i pkg file name (su rights needed)
66
for detailed information visit http://www.debian.org/doc/FAQ/ch-pkgtools.en.html
May 2014
OnRISC User Manual
71
A
Debian Maintenance Notes
A.2. Keep a Track on Disk Usage
To get the list of all installed packages with its installed sizes execute:
dpkg-query -W -f’${Package}\t${Installed-Size}\t${Status}\n’ | awk ’/installed/ { print
$2 "\t" $1 }’
To estimate the file space usage execute:
du -h
To get a HTML output execute:
durep -w /tmp/web/
For detailed information see the manpages for du and durep.
To estimate free disk space execute:
df -h
May 2014
OnRISC User Manual
72
B
onrisctool.py
B. onrisctool.py
OnRISC configuration utility provides following features to configure OMAP3 based devices:
• configure serial interfaces (RS232, RS422 etc.)
• configure OTG/CFast switching
• configure RTC
• configure digital I/O
• get EEPROM info
• set MACs from EEPROM
B.1. Configure Serial Interfaces
Both VS-860 and Alekto2 provide two UARTs working in RS232/RS422/RS485 modes. Invoking
onrisctool.py without parameters will show which mode each port is configured to:
Port
Port
Port
Port
1:
1:
2:
2:
mode control:
mode: rs232
mode control:
mode: rs232
DIP-switch
DIP-switch
As one can see both port are configured in RS232 mode through DIP-switches. To switch the first
port into RS422 mode execute:
onrisctool.py -t rs422 -p 1
All possible modes are show in the Table 8
Mode
dip
loop
rs232
rs422
rs422-term
rs485-fd
rs485-fd-term
rs485-hd
rs485-hd-term
Description
DIP-switch settings are valid
loopback mode
RS232
RS422
RS422 with termination
RS485 full duplex
RS485 full duplex with termination
RS485 half duplex
RS485 half duplex with termination
Table 8: Serial Modes (Software switching)
May 2014
OnRISC User Manual
73
B
onrisctool.py
B.2. Configure OTG/CFast
Both VS-860 and Alekto2 use USB OTG port in two modes: OTG and CFast. The mode can be
switched both via jumper and GPIO pin (software). The software settings “overwrite” the jumper.
Executing onrisctool.py will show the status of hardware/software settings. Following output
says, that the USB port is in OTG mode set over jumper:
OTG automatic mode:
OTG
You can switch to CFast via executing:
onrisctool.py -o cfast
If you then execute onrisctool.py without parameter you’ll see following output, indicating, that
CFast mode is set via software:
OTG force mode:
CFast
B.3. Configure RTC
onrisctool.py lets you read the RTC directly and also write current system time to it.
Reading RTC:
onrisctool.py --readrtc
RTC read: 2013-06-03 12:44:47
Writing system time to RTC:
onrisctool.py --systohc
B.4. Configuring Digital I/O
As described in Section 6.1.2 Alekto2 provides 8 digital I/O pins. With onrisctool.py you can
set direction and data.
Set direction “output” for the first group:
onrisctool.py -c out -g 0
Set pin 0 to 1:
onrisctool.py -m 0x01 -d 0x01
Set pin 0 to 0 and pin 1 to 1:
onrisctool.py -m 0x03 -d 0x02
May 2014
OnRISC User Manual
74
B
onrisctool.py
B.5. Get EEPROM Info
onrisctool.py shows hardware related data like MACs, serial number etc. stored in EEPROM if
called without parameters:
magic: 0xDEADBEEF
hw rev: 1.0
SerNum: 860102014
Prod date: 31.05.2013
SysId: 100
MAC1: 00:04:D9:8E:00:04
MAC2: 00:04:D9:8E:00:05
MAC3: 00:04:D9:8E:00:06
B.6. Setting LAN MACs from EEPROM
You can use in EEPROM stored MACs for internal LAN interfaces:
onrisctool.py --setlanmacs
Executing this command will set MAC1 and MAC2 to eth0 and eth1/usb0.
May 2014
OnRISC User Manual
75
C
hwtest
C. hwtest
The test utility for the OnRISC hardware is provided in both BIOS and preconfigured Debian
system images and consists of the following test modules:
• Network
• MiniPCI
• Serial
• GPIO
• CompactFlash
• I2C and RTC
• EPLD
• USB
• CAN
• WLAN Button
Three modes can be chosen for the test execution :
1. userless - executes all tests and shows the statistics at the end
2. fully interactive - the user has to acknowledge each test
3. half interactive - all of the automatic tests such as Network, MiniPCI, Serial, EPLD, USB,
CAN and CompactFlash will be executed without user acknowledgment but GPIO and I2C
would ask for the acknowledgment
The parameters can be specified in the command line or stored in the configuration file67 . Without
any parameter, the program will not execute any test. For the list of common parameters see Table
9.
For detailed information about options execute:
hwtest --help
67
To use configuration file execute hwtest --cfg=hwtest.conf
May 2014
OnRISC User Manual
76
C
hwtest
--cfg <file name>
--cycles <number>
--size <bytes>
--mode <mode>
--failstop
--verbose
--net <params>
--mpci <params>
--serial <params>
--gpio <params>
--cf <params>
--i2c <params>
--epld <params>
--usb <params>
--can <params>
--wlanbtn <params>
configuration file
number of test cycles. Default: infinite
test file size in bytes. Default: 1048576 bytes
uless for userless, fint for fully interactive, hint for half
interactive. Default: uless
stop testing after the first failure
verbose output
network test module with its parameters
MiniPCI test module with its parameters
serial test module with its parameters
GPIO test module with its parameters
CompactFlash test module with its parameters
I2C and RTC test module with its parameters
EPLD test module with its parameters
USB test module with its parameters
CAN test module with its parameters
WLAN button test with its parameters
Table 9: Common parameters and test modules
C.1. Network Test
Two interfaces must be connected with each other for the network test (either with a patch or
crossover cable). A test file will be sent as raw Ethernet packets. To see the packet content use
the --verbose flag. The size of the Ethernet packet (in bytes) can be defined with --nblock
option. The delays between two packets will be defined with the --ndelay option (default 100000
microseconds).
Usage example:
hwtest --cycles=1 --size=4096 --net --verbose
executes the network test with a 4096 byte test file in verbose mode
C.2. MiniPCI Test
During the test /proc/bus/pci/devices will be searched for the presence of the WLAN card. If
the WLAN card is found the name of the chip will be printed. After that, the WLAN environment
will be searched for available participants.
Usage example:
hwtest --cycles=1 --mpci
executes the MiniPCI test
C.3. Serial Test
To test the serial port you will need a special null-modem cable. Following pinout will be used (see
Table 10 and Figure 33 without USB-CAN connector):
May 2014
OnRISC User Manual
77
C
hwtest
TX
RX
RTS
CTS, RI
DTR
DSR, CD
GND
↔
↔
↔
↔
↔
↔
↔
RX
TX
CTS, RI
RTS
DSR, CD
DTR
GND
Table 10: Serial Test Cable Wiring
5 GND
9 RI
4 DTR
8 CTS
3 RXD
7 RTS
2 TXD
6 DSR
1 CD
5 GND
9 RI
4 DTR
8 CTS
3 RXD
7 RTS
2 TXD
6 DSR
1 CD
PORT 2
3 GND
7 CANH
2 CANL
PORT 4
USB-CAN
Figure 33: Serial Test Cable Wiring
The test file will be transferred from the first interface to the other and vice versa. This test can
be also used to simultaneously test the serial and USB interfaces. To do this you must connect
the USB port with the serial one using a USB-to-Serial adapter based on the FTDI chip. The
serial test module has its own parameters --seri and --sero to configure the interfaces. With
the --sblock parameter, the serial write block size can be configured. By default it is set to 64
bytes. The --rtscts option enables hardware handshake. The --modem option enables the test of
the modem status pins.
Usage examples:
hwtest --cycles=1 --size=4096 --serial --seri=/dev/ttyS1 --sero=/dev/ttyS2
executes the serial test for on-board serial interfaces
hwtest --cycles=1 --size=4096 --serial --sblock=200 --rtscts
executes the serial test for default on-board serial interfaces (/dev/ttyS1 and /dev/ttyS2) using
hardware handshake and write block size of 200 bytes
hwtest --cycles=1 --size=4096 --serial --seri=/dev/ttyS1 --sero=/dev/ttyUSB0
executes the serial test using a USB-to-Serial adapter based on the FTDI chip
C.4. GPIO Test
The GPIO test module consists of following tests:
• IO test (will be activated with --io option)
• poll(), select() and interrupt functionality test (will be activated with --poll option)
• buzzer test (will be activated with --buz option)
• LEDs test (will be activated with --led option)
May 2014
OnRISC User Manual
78
C
hwtest
The I/O pins must be connected with each other for the IO test (using 4,7k resistors for example)
(see Table 11). The optical isolated input channels will be connected to relays by Alena without
any resistors(see Table 12).
DIO0
DIO2
DIO4
DIO6
↔
↔
↔
↔
DIO1
DIO3
DIO5
DIO7
DIO2
DIO4
↔
↔
DIO3
DIO5
Table 11: I/O Pin Connections for Alekto (left) and Alena (right)
DI0-G
DI0-S
DI1-G
DI1-S
↔
↔
↔
↔
DO6-B
DO6-C
DO7-B
DO7-C
Table 12: Optically Isolated Input Channels and Relays
Usage examples:
hwtest --cycles=1 --gpio --io --poll --buz --led --mode=fint
executes the complete GPIO test in full interactive mode
hwtest --cycles=1 --gpio --io
executes only the IO test in userless mode
C.5. CompactFlash Test
The CompactFlash test must be started from the BIOS or USB mass storage device, because the
CF card must be unmounted. A test file will be written to the CF card during the test and then
compared with the original one. After that, the test file will be removed from the CF card.
Usage example:
hwtest --cycles=1 --size=4096 --cf
executes the CompactFlash test with 4096 bytes big test file
C.6. I2C and RTC Test
A time stamp will be read from the Real Time Clock using I2C bus during the RTC test . The
second time stamp will be read after the delay in seconds specified by --sleep option (default
value is 1 second) and then compared. The test can be activated/deactivated with --testrtc and
--testlcd options.
The LCD display (EAT123A-I2C) must be connected to the OnRISC for the I2C test. The program
connects to the display and “O.K.” string must be visible on the display.
Usage examples:
hwtest --cycles=1 --i2c --testrtc --testlcd
executes the RTC and LCD tests
May 2014
OnRISC User Manual
79
C
hwtest
hwtest --cycles=1 --i2c --testrtc
executes the RTC test only
hwtest --cycles=1 --i2c --testlcd
executes the LCD test only
C.7. EPLD Test
Each UART has its own EPLD to switch between RS232, RS422 and RS485 modes. Current
configuration will be acquired and then switched to RS232 or RS422 depending on what the current
configuration was. The EPLDs will be chosen using serial port devices configured in --eplddev
option.
Example:
hwtest --cycles=1 --epld --eplddev=/dev/ttyS1 --eplddev=/dev/ttyS2
executes the EPLD test for both serial ports
C.8. USB Test
For USB test USB mass storage device should connected to the USB port. The device must be
properly detected and mounted. --usbmntdev option defines which device to mount.
Usage examples:
hwtest --cycles=1 --usb --usbmntdev=/dev/sda1
executes the USB test for the first detected mass storage device
hwtest --cycles=1 --usb --usbmntdev=/dev/sda1 --usbmntdev=/dev/sdb1
executes the USB test for the first and the second detected mass storage devices
C.9. CAN Test
The CAN test will be made between the internal CAN interface and the VScom USB-CAN device.
At first the USB-CAN sends one frame with the following data 0xDEADBEEF00000001, after
internal interface receives this frame it send the same frame in return. There is only one parameter
--canpseed to configure the CAN baudrate.
hwtest --cycles=1 --can --canspeed=20000
executes CAN test at 20Kbit/s
C.10. WLAN Button Test
WLAN Button test checks if WLAN button and WLAN button LED are functioning properly.
Starting the test will let the WLAN button LED light on. The button must be pressed during the
via –wbtimeout specified time slot. After pressing the button the LED will go off and the test is
successful.
hwtest --cycles=1 --wlanbtn --wbtimeout=5
executes WLAN button test for 5 seconds
May 2014
OnRISC User Manual
80
C
hwtest
C.11. All-in-one Test for Alena
It is possible to test all serial ports, CAN and GPIO without reattaching the cables. Following
components will be needed to make such a test:
• modified USB cable for USB-CAN (see Figure 34) so that GND and VCC wires will switched
through relays and the outer GND is also isolated
• modified null-modem cable to connect PORT2, PORT4 and USB-CAN together (see Figure
33). Ports 1 and 3 will be connected with the same cable but without connector for USB-CAN
• special board for GPIO tests, that connects optically isolated inputs to bidirectional channels
(see Figure 35)
• special --canprod flag must be activated to use this features
The outer GND must be isolated
DO7-B
DO7-C
VCC
DD+
GND
DO6-B
DO6-C
Figure 34: Modified USB cable
Figure 35: Special Board for GPIO Tests
Connect all components as described above. With the following command GPIO, CAN and serial
tests will be executed:
hwtest --cycles=2 --size=4096 --can --canspeed=20000 --canprod --serial --seri=/dev/ttyS2
--sero=/dev/ttyS4 --gpio --io --poll
CAN test must be executed with low speed like 20000 bit/s, because the cable has no termination
resistors. All other tests can be made without further modifications.
May 2014
OnRISC User Manual
81
C
hwtest
C.12. Build Notes
hwtest can be built either with GNU make or CMake. Both Makefile and CMakeLists.txt are
supplied. The command line parameter parser was generated using GNU gengetopt68 . To be able
to generate the parser for changed options in hwtest.ggo one has to install GNU gengetopt tool.
68
http://www.gnu.org/software/gengetopt/
May 2014
OnRISC User Manual
82
D
hwtest-qt
D. hwtest-qt
Hwtest-qt provides various hardware tests in both console and graphical environment. To get GUI
start ghwtest-qt instead of hwtest-qt. Hwtest-qt can be run using special configuration file. See
/etc/hwtest.conf for example.
hwtest-qt -qws -c /etc/hwtest.conf
If you want to execute the tests in parallel:
hwtest-qt -qws -c /etc/hwtest.conf --parallel-exec
Please see hwtest-qt --help for further options.
D.1. Controller Area Network Test
CAN test requires USB-CAN device attached to one of the USB ports69 . Connect internal CAN
interface with USB-CAN via CAN cable and execute:
hwtest-qt -qws --test-can --cani=can1 --cano=can0
D.2. UART Test
Connect both internal serial ports via null-mode, cable and execute:
hwtest-qt -qws –test-serial --seri=/dev/sertest0 --sero=/dev/sertest1
D.3. Network Test
Connect both LAN insteraces via patch cable and execute:
hwtest-qt -qws --test-network --neti=eth0 --neto=usb0
D.4. RTC Test
hwtest-qt -qws --test-rtc
D.5. WLAN Test
WLAN test scans for available WLAN hosts (iw wlan0 scan). At least one AP must be running
and antenna must be attached.
hwtest-qt -qws --test-wlan
69
You’ll need a slcan tools to bring USB-CAN up. See VSCAN SocketCAN FAQ
May 2014
OnRISC User Manual
83
D
hwtest-qt
D.6. Bluetooth Test
Bluetooth test needs an active Bluetooth device like headset, Bluetooth dongle etc. to find during
the scan.
hwtest-qt -qws --test-bt
D.7. Disk Test
Insert CFast card and execute:
hwtest-qt -qws --test-disk --drive=/dev/sda
D.8. Touch Test
If you start ghwtest-qt and you can precisely touch the buttons, then touch controller is functioning
properly. You can calibrate it by executing
ts_calibrate
D.9. SIM-card Test
You’ll need a 3G card and a SIM-card For Ericsson F5521gw execute:
hwtest-qt -qws --test-simcard --cardmodel=F5521gw --cmdport=/dev/ttyACM0
For Sierra Wireless creates /dev/ttyUSBx devices, so according to where external FTDI devices are
connected the port numbering can differ. Please refer to dmesg, to see what ports were assigned to
Sierra Wireless card and calculate an offset. If numbered from /dev/ttyUSB0 the command port
is /dev/ttyUSB3
hwtest-qt -qws --test-simcard --cardmodel=mc8790 --cmdport=/dev/ttyUSB3
D.10. Button Test
For button test the user will be prompted to press buttons on the front panel from left to right,
skipping the first button (power button).
hwtest-qt -qws --test-btn
D.11. Audio Test
Insert earphones into the left connector and execute:
hwtest-qt -qws --test-audio
You’ll hear a woman voice saying “Front left”
May 2014
OnRISC User Manual
84
E
Managing System Images
E. Managing System Images
System images provide 1:1 copy of the Debian OS installed on a CF/microSD card. The image has
the size of a medium being used to produce the system image. For KS8695 based devices it is ca.
2GB and for OMAP3 based devices ca. 4GB. In the case of OMAP3 based devices a special utility
raspi-config70 is provided to automatically enlarge partition/file system to the real physical size
of a medium, i.e. if you burn the image to a 8GB card, it will occupy only 50% of the medium,
after executing raspi-config whole 8GB will be at your disposal. To expand the root partition
start raspi-config and select “expand_rootfs” in the menu as show in Figure 36 and exit. The root
partition expanding runs in two stages: at first the partition will be enlarged and after a reboot
the file system will be enlarged too.
Figure 36: Expand Root Partition
E.1. VS Image Tool: VSImgTool
VSImgTool71 was developed to make/copy images from/to the flash drives connected to a Windows
host. This utility can make the whole image or only part of it. Refer to Table 13 for parameters.
Warning: please note that you must have administrator privileges to properly execute VSImgTool.
--list
source destination
source destination custom_size
list available flash drives with their size in bytes
copy image from source to destination
copy only part of the image from source to destination
Table 13: VSImgTool call parameters
The is also an open source tool with GUI named Win32 Disk Imager72 to accomplish the same task
(see Figure 37).
70
raspi-config repository
VSImgTool can be found on the CD under tools or on our FTP server
72
http://sourceforge.net/projects/win32diskimager/
71
May 2014
OnRISC User Manual
85
E
Managing System Images
Figure 37: Win32 Disk Imager
E.1.1. Burn System Image to CF/microSD Card
1. Insert CF/microSD card in your card reader and execute
vsimgtool --list
you should see the similar output:
>vsimgtool.exe --list
VSImgTool 1.0
Available devices:
PhysicalDrive2 Size: 1024450560 bytes
2. to copy the complete image to the CF/microSD card on the PhysicalDrive2 execute
vsimgtool.exe 26082008_etch_complete.bin PhysicalDrive2
you should see the following output:
>vsimgtool.exe 26082008_etch_complete.bin PhysicalDrive2
VSImgTool 1.0
Image source: 26082008_etch_complete.bin
Size: 1008451584 bytes
Removable destination: PhysicalDrive2
Size: 1024450560 bytes
The data on the destination will be lost. Are you sure you want to continue?
>
[yes/no]
3. answer with "yes" and the copying process will begin
4. at the end of the copying process you should see the elapsed time and the size of the burned/copied image
If your CF/microSD card has bigger capacity than the system image, you can just insert it in the
card reader and change the partition with some partition manager like Gparted73 on your Linux
host.
73
http://en.wikipedia.org/wiki/Gparted
May 2014
OnRISC User Manual
86
E
Managing System Images
E.1.2. Make An Image From CF/microSD Card
vsimgtool drive_name image.bin
where drive_name is the name showed by vsimgtool --list.
For 256MB and 512MB CF/microSD cards there are two custom sizes prepared:
vsimgtool PhysicalDrive2 image.bin 256
will copy exactly 244 · 1024 · 1024 = 255852544 bytes
vsimgtool PhysicalDrive2 image.bin 512
will copy exactly 488 · 1024 · 1024 = 511705088 bytes
vsimgtool PhysicalDrive2 image.bin 519192576
will copy exactly 519192576 bytes
E.2. dd
E.2.1. From Host PC
To copy a system image to a CF/microSD card using your host PC just download the required
system image from our FTP server and extract the *.bin file (for example to /home/user/).
If USB card reader is used the CF/microSD could be found under /dev/sdx devices (for example
/dev/sda, /dev/sdb etc). If CF card is attached to IDE channel then CF card could be found
under /dev/hdx (for example /dev/hda, /dev/hdb etc). Please note, that the system images are
complete images of a CF/microSD card not of the single partition and must be applied to the
device like /dev/sda and not /dev/sda1.
For the example below it will be assumed that the CF/microSD card is assigned to /dev/sda device
and the system image is 27032008_etch_complete.bin:
su
dd if=/home/user/27032008_etch_complete.bin of=/dev/sda bs=4096
To create an image from the CF/microSD card execute following:
dd if=/dev/sda of=/home/user/image.bin
E.2.2. Directly From OnRISC (KS8695 based Devices)
The procedure is the same as with PC with a small difference, that the system image has to be
copied on some removable medium (USB drive) and then mounted on OnRISC to /mnt from within
BIOS. So that the dd command looks as follows (for microSD card):
dd if=/mnt/27032008_etch_complete.bin of=/dev/sda bs=4096
E.3. Working with Partitions
It is also possible to write/extract only one partition at file system level. The advantage: you can
write this partition even to a smaller medium. Please refer to this project FSArchiver
May 2014
OnRISC User Manual
87
F
Eclipse
F. Eclipse
F.1. Installation Notes
Eclipse is an open source community whose projects are focused on building an extensible development platform, runtimes and application frameworks for building, deploying and managing software
across the entire software life cycle. In Debian run:
apt-get install eclipse
to install it. Additionally you’ll need to download and install Java 2 SDK or Java 2 JRE from Sun
Microsystems74 . It can happen that Eclipse doesn’t find Java binary, in this case execute:
eclipse -vm java
To get working with C projects you’ll need the CDT75 plug-in to compile and debug your software
for the OnRISC.
If you’d like to checkout Kernel or examples from our Subversion repository, use doxygen etc. you
could also find these plug-ins as useful:
• Subclipse (subclipse.tigris.org)
• Gengetopt Eclipse (ggoeclipse.sourceforge.net)
• CMake Editor(www.cthing.com/CMakeEd.asp)
74
75
java.sun.com/javase
http://www.eclipse.org/cdt/
May 2014
OnRISC User Manual
88
F
Eclipse
F.2. Debugging
Assuming your OnRISC has IP address 192.168.1.66. Start your ioctls executable on the OnRISC
with following command:
gdbserver :9000 ioctls
On the PC side:
• open examples project (the .project and .cdtproject file are already created)
• Select Run->Debug
• Double click Embedded debug (Native). After that you’ll get new configuration entry
• select the project corresponding to yours (see Figure 38)
• select C/C++ Application to ioctls
• choose Debugger tab (see Figure 39)
• GDB debugger: arm-linux-gdb
• choose Commands tab (see Figure 40)
• ’Initialize’ commands: target remote 192.168.1.66:9000
• ’Run’ commands: c
• Apply
• Debug
Figure 38: Eclipse debug: Main tab
May 2014
OnRISC User Manual
89
F
Eclipse
Figure 39: Eclipse debug: Debugger tab
Figure 40: Eclipse debug: Commands tab
May 2014
OnRISC User Manual
90
H
Frequently Asked Questions (FAQ)
G. Cross-Compiler Tools
Name
ar
as
g++
cpp
gcc
ld
nm
objcopy
objdump
ranlib
readelf
Description
Creates and updates static library files
Assembler
C++ compiler
C preprocessor
C compiler
Linker
Lists symbols from object files
Copies and translates object files
Displays information about object files
Generates indexes to archives (static libraries)
Displays information about ELF files
Table 14: Toolchain items
H. Frequently Asked Questions (FAQ)
There is dedicated website http://faq.visionsystems.de to handle the FAQ concerning OnRISC and
other products provided by VScom. The customer question will be posted to the support team for
approval and if approved appears in the corresponding category.
May 2014
OnRISC User Manual
91
Index
/proc-extentions, 50
ABI, 31
AbiWord, 24
Apache, 21
APN, 26
apt, 71
BIOS, 51
Bluetooth, 27
buzzer, 41
CAN, 46
can0, 46
CDT, 88
CMake, 32
courier, 22
cross-compiler, 31, 91
dd, 16, 87
DNS, 13
EABI, 31
Eclipse, 32, 88
EPLD_CAN, 42
EPLD_PORTOFF, 42
EPLD_RS232, 42
EPLD_RS422, 42
EPLD_RS485_ART_2W, 42
EPLD_RS485_ART_4W, 42
EPLD_RS485_ART_ECHO, 42
EPLD_RS485_RTS_2W, 42
EPLD_RS485_RTS_4W, 42
EPLD_RS485_RTS_ECHO, 42
FTP, 28
gateway, 13
gcc, 20
gdbserver, 37, 89
gengetopt, 82, 88
Gparted, 86
GPIO_CMD_GET, 39
GPIO_CMD_GET_BUZZER, 41
GPIO_CMD_GET_BUZZER_FRQ, 41
GPIO_CMD_GET_CHANGE, 40
GPIO_CMD_GET_CHANGES, 40
GPIO_CMD_GET_CTRL, 40
GPIO_CMD_GET_IRQMASK, 40
GPIO_CMD_GET_LEDS, 41
GPIO_CMD_SET, 39
GPIO_CMD_SET_BUZZER, 41
GPIO_CMD_SET_BUZZER_FRQ, 41
GPIO_CMD_SET_CTRL, 40
GPIO_CMD_SET_IRQMASK, 40
GPIO_CMD_SET_LED_BLUE, 41
GPIO_CMD_SET_LED_BTN_WLAN, 41
GPIO_CMD_SET_LED_GREEN, 41
GPIO_CMD_SET_LED_POWER, 41
GPIO_CMD_SET_LEDS, 41
Greenwich Mean Time (GMT), 19
GSM, 26
GUI, 23
HTTP, 22
hwtest, 59, 76
I2C, 47
IMAP, 22
Insight, 37
ioctls.c, 39
ioctls2.c, 39
Java, 88
JRE, 88
LDAP, 22
LEDs, 41
Mail Server, 22
NAP, 27
netcat, 20
NFS, 30
NTP, 22
onrisc.h, 39
PIN, 26
poll(), 40
POP3, 22
Real Time Clock (RTC), 79
resolv.conf, 13
Samba, 30, 36, 53
select(), 40
services, 18
SIM, 26
Index
socat, 20
SocketCAN, 46
SSH, 28
SSL, 21
Subclipse, 88
Subversion, 33
swap, 17, 19
syslog, 17
telnet, 28
TERM, 12
TIOCGEPLD, 42
TIOCSEPLD, 42
udev, 18
Universal Time Coordinated (UTC), 19
Vim, 32
vsimgtool, 16, 85
vt100, 12
Watchdog Timer (WDT), 47
WEP, 25
WindowMaker, 23
WLAN, 25
wland, 26, 47
WPA, 25
WPA2, 25
wpa_supplicant, 25
X-Server, 24
X-Window, 24
X11, 23
Xming, 24
May 2014
OnRISC User Manual
93