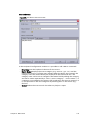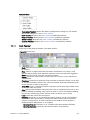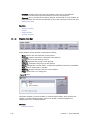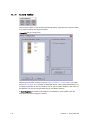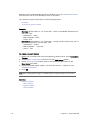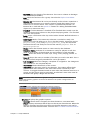
1
Viz Content Pilot
User’s Guide
Product Version 5.6
December 11, 2013
Copyright © 2013 Vizrt. All rights reserved.
No part of this software, documentation or publication may be reproduced,
transcribed, stored in a retrieval system, translated into any language, computer
language, or transmitted in any form or by any means, electronically,
mechanically, magnetically, optically, chemically, photocopied, manually, or
otherwise, without prior written permission from Vizrt.
Vizrt specifically retains title to all Vizrt software. This software is supplied under
a license agreement and may only be installed, used or copied in accordance to
that agreement.
Disclaimer
Vizrt provides this publication “as is” without warranty of any kind, either
expressed or implied.
This publication may contain technical inaccuracies or typographical errors. While
every precaution has been taken in the preparation of this document to ensure
that it contains accurate and up-to-date information, the publisher and author
assume no responsibility for errors or omissions. Nor is any liability assumed for
damages resulting from the use of the information contained in this document.
Vizrt’s policy is one of continual development, so the content of this document is
periodically subject to be modified without notice. These changes will be
incorporated in new editions of the publication. Vizrt may make improvements
and/or changes in the product(s) and/or the program(s) described in this
publication at any time.
Vizrt may have patents or pending patent applications covering subject matters in
this document. The furnishing of this document does not give you any license to
these patents.
Technical Support
For technical support and the latest news of upgrades, documentation, and
related products, visit the Vizrt web site at www.vizrt.com.
Last Updated
December 11, 2013
© Copyright Vizrt 2013
Contents
1
Introduction .............................................................................................. 1
1.1
1.1.1
Document Structure ........................................................................................... 1
1.1.2
Related Documents ............................................................................................ 2
1.1.3
Conventions ....................................................................................................... 2
1.2
1.3
2
New Features in Viz Content Pilot 5.6 .........................................................4
2.3
Workflow ....................................................................................................5
System Overview ........................................................................................5
Requirements............................................................................................ 8
3.1
General Requirements ................................................................................8
3.3
Software Requirements ...............................................................................9
Hardware Requirements .............................................................................8
3.3.1
Viz Anchor ......................................................................................................... 9
3.3.2
Viz Artist ........................................................................................................... 9
3.3.3
Viz Content Pilot .............................................................................................. 10
3.3.4
Viz Engine ....................................................................................................... 15
3.3.5
Viz Gateway ..................................................................................................... 17
3.3.6
Viz Graphic Hub ............................................................................................... 17
3.3.7
Media Sequencer .............................................................................................. 18
3.3.8
Viz Trio ............................................................................................................ 19
3.3.9
Viz Video Hub .................................................................................................. 19
3.3.10
3.4
3.5
Vizrt Maps ....................................................................................................... 20
Shared Data .............................................................................................21
Ports and Connections .............................................................................21
3.5.1
Port Numbers ................................................................................................... 21
3.5.2
Multiplexing Ports ............................................................................................ 25
Storage and Backup Recommendations ................................................... 27
4.1
Graphics Data ...........................................................................................27
4.3
Media Sequencer ......................................................................................28
4.2
4.4
5
Contact Vizrt ..............................................................................................3
2.1
3.2
4
Words and Expressions ..............................................................................2
Viz Content Pilot ....................................................................................... 4
2.2
3
About the Guide .........................................................................................1
Viz Content Pilot ......................................................................................28
Viz Trio ....................................................................................................28
Installation .............................................................................................. 30
5.1
5.2
Viz Content Pilot Installation ....................................................................30
Silent Installation ......................................................................................35
5.2.1
Creating the Batch File ..................................................................................... 36
5.2.2
Creating a Response File .................................................................................. 36
5.3
Plugin Installation .....................................................................................38
5.5
Control Room Client .................................................................................40
5.7
Custom ....................................................................................................42
5.4
5.6
5.8
5.9
Newsroom Integration Client ....................................................................38
Template Design Client ............................................................................41
Video Codecs ...........................................................................................42
Component Descriptions ..........................................................................44
6
Getting Started........................................................................................ 46
7
Configuration.......................................................................................... 48
7.1
7.2
Startup Options ........................................................................................48
Profile Configuration ................................................................................49
7.2.1
Categories and Channels ................................................................................. 49
7.2.2
Profile Setups ................................................................................................... 50
7.2.3
Forked Execution ............................................................................................. 51
7.3
Working with the Profile Configuration .....................................................54
7.3.1
Configuring Profiles ......................................................................................... 54
7.3.2
Configuring Channels ...................................................................................... 54
7.3.3
Configuring Devices ......................................................................................... 56
7.4
Preview Configuration ..............................................................................59
7.6
Working with Local Viz Preview .................................................................61
7.5
Preview Port Numbers ..............................................................................60
7.6.1
Configuring Local Preview of Graphics ............................................................. 61
7.6.2
Configuring Local Preview of Video Files .......................................................... 62
7.7
7.8
Working with Remote Viz Preview .............................................................63
External Interfaces ...................................................................................65
7.8.1
VCP Database .................................................................................................. 66
7.8.2
Media Engine ................................................................................................... 67
7.8.3
MOS ................................................................................................................. 68
7.8.4
General Purpose Input (GPI) .............................................................................. 70
7.8.5
Video Disk Control Protocol (VDCP) .................................................................. 74
7.8.6
Video Hub ........................................................................................................ 75
7.9
7.10
Working with Viz One ...............................................................................76
Database Configuration ............................................................................77
7.10.1
Database Configuration During Installation ...................................................... 77
7.10.2
Database Setup Options ................................................................................... 78
7.10.3
Database Initialization File Configuration ......................................................... 79
7.10.4
Database Registry Settings ............................................................................... 80
7.10.5
Database Parameters ....................................................................................... 81
7.10.6
Database Service Names and SID ...................................................................... 85
7.10.7
Database TNS Alias .......................................................................................... 86
7.10.8
Database Client ................................................................................................ 90
7.11
7.12
Initialization Files .....................................................................................92
Registry Settings ......................................................................................96
7.13
7.14
Create a Stillstore Scene in Viz Artist .............................................................. 101
7.14.2
Move the Stillstore Scene to the Viz Graphics Hub Root .................................. 102
Display Font ...........................................................................................102
Main Menu ............................................................................................ 104
8.1
File .........................................................................................................104
8.3
Options ..................................................................................................106
8.2
Edit ........................................................................................................105
8.3.1
Delete Data Items .......................................................................................... 106
8.3.2
Keyboard Configuration ................................................................................. 107
8.3.3
Preferences .................................................................................................... 111
8.3.4
8.4
Hints .............................................................................................................. 120
Tools ......................................................................................................120
8.4.1
Camera Control ............................................................................................. 121
8.4.2
Import MOS message file ............................................................................... 122
8.4.3
Template Wizard ............................................................................................ 122
8.4.4
Show VCP Commands .................................................................................... 123
8.4.5
External Interfaces ......................................................................................... 124
8.4.6
Profile Configuration ...................................................................................... 124
8.4.7
Export ............................................................................................................ 125
8.4.8
Import ........................................................................................................... 128
8.4.9
Post Render Device ........................................................................................ 130
8.4.10
TC Monitor .................................................................................................... 133
8.5
Viz Engine ..............................................................................................134
8.5.1
Local Viz Preview ........................................................................................... 135
8.5.2
Remote Viz Preview ........................................................................................ 137
8.6
Playlist ...................................................................................................138
8.8
Help Menu ..............................................................................................140
8.7
9
Fullscreen Stillstore Images ....................................................................100
7.14.1
7.15
8
Command Line Options ............................................................................99
Windows ................................................................................................140
Status Bars ............................................................................................ 141
9.1
9.2
Status Information ..................................................................................141
Status Indicators ....................................................................................141
10 Resource Panel ...................................................................................... 144
10.1
Templates ..............................................................................................145
10.1.1
Concepts and Variants ................................................................................... 147
10.1.2
Template Control Buttons .............................................................................. 148
10.1.3
Template Save Dialog Box .............................................................................. 148
10.1.4
10.2
10.3
10.3.1
Template Spell Checker .................................................................................. 149
Data .......................................................................................................150
Playlists ..................................................................................................152
Context Menu ................................................................................................ 153
10.4
10.5
Viz .........................................................................................................155
Files .......................................................................................................158
10.5.1
10.6
Crop Tool ...................................................................................................... 159
Trio ........................................................................................................160
10.6.1
Context Menu ................................................................................................ 162
10.7
Media .....................................................................................................162
10.9
Resource Search .....................................................................................165
10.8
Cliplist ...................................................................................................165
11 Playlist Window ..................................................................................... 166
11.1
Playlist Toolbars .....................................................................................166
11.1.1
Item Toolbar .................................................................................................. 167
11.1.2
Playlist Toolbar .............................................................................................. 168
11.1.3
Video Toolbar ................................................................................................ 169
11.1.4
Custom Toolbar ............................................................................................. 170
11.2
Playlist ...................................................................................................173
11.2.1
Playlist Columns ............................................................................................ 176
11.2.2
Playlist Concept ............................................................................................. 179
11.2.3
Playlist Time Editor ........................................................................................ 182
12 Newsroom Integration ........................................................................... 183
12.1
Newsroom Component ...........................................................................184
12.1.1
Template View ............................................................................................... 185
12.1.2
Working with the Template View .................................................................... 187
12.1.3
Template Editor ............................................................................................. 188
12.1.4
Working with the Template Editor .................................................................. 189
12.1.5
Media Search ................................................................................................. 191
12.1.6
Timeline Editor .............................................................................................. 193
12.1.7
Working with the Timeline Editor ................................................................... 195
12.1.8
Maps .............................................................................................................. 196
12.1.9
Local Viz Preview ........................................................................................... 197
12.1.10
Remote Viz Preview ........................................................................................ 198
12.1.11
Configuring Remote Preview .......................................................................... 200
12.1.12
Shortcut Keys ................................................................................................. 201
12.1.13
About ............................................................................................................ 202
12.2
12.2.1
12.3
12.4
Quick CG ................................................................................................202
Working with Quick CG .................................................................................. 203
Newsroom Component Test Page ...........................................................204
MOS IDs .................................................................................................206
13 Thumbnail Generation........................................................................... 207
13.1
Getting Started .......................................................................................207
13.3
Command Line Options ..........................................................................209
13.2
13.4
Configuration .........................................................................................208
User Interface .........................................................................................210
13.5
Logging ..................................................................................................212
14 Database Administration ....................................................................... 213
14.1
Requirements .........................................................................................213
14.3
Getting Started .......................................................................................215
14.2
14.4
Installation .............................................................................................215
User Interface .........................................................................................216
14.4.1
Connect to DB ................................................................................................ 216
14.4.2
Database Login .............................................................................................. 217
14.4.3
Advanced Configuration ................................................................................. 218
14.4.4
Schema Status ............................................................................................... 219
14.4.5
Connection Status .......................................................................................... 220
14.4.6
Error Logs ...................................................................................................... 220
14.5
Management Options .............................................................................221
14.5.1
Install Schema ................................................................................................ 221
14.5.2
Upgrade Schema ............................................................................................ 222
14.5.3
Show Schema Status ...................................................................................... 223
14.5.4
Create Complete DB Solution ......................................................................... 224
14.5.5
Backup Schema .............................................................................................. 225
14.5.6
Restore Backup of Schema ............................................................................. 225
14.5.7
Full Export of Database .................................................................................. 226
14.5.8
Import All Schemas in Dump .......................................................................... 226
14.5.9
Extended Information .................................................................................... 227
14.5.10
Database Test ................................................................................................ 228
15 Data Server ........................................................................................... 230
16 Preview Server ....................................................................................... 234
1
Introduction
This is the user’s guide for Viz Content Pilot version 5.5.
This section contains information on the following topics:
• About the Guide
• Words and Expressions
• Contact Vizrt
See Also
• About Viz Content Pilot
1.1
About the Guide
This Viz Content Pilot User’s Guide is designed to fit people with no or little
experience in using Viz Content Pilot. The purpose of this document is to help
new users of Viz Content Pilot become familiar with the system.
This section contains information on the following topics:
• Document Structure
• Related Documents
• Conventions
1.1.1
Document Structure
The Introduction and Viz Content Pilot introduce the manual and Viz Content
Pilot’s work flow and latest features.
The Requirements section describes the software requirements for Viz Content
Pilot and some of the most common integration points (e.g. Media Sequencer and
Viz Engine).
The Storage and Backup Recommendations section gives some generic
recommendation on storage and backup.
The Installation and Configuration sections describe the installation and
configuration options and procedures, while the Getting Started section describes
how to get started with Viz Content Pilot.
The Main Menu, Status Bars, Resource Panel and Playlist Window sections describe
the user interface and also provides procedures on how to perform specific tasks
such as searching for media content and creating a play list and populating it with
data elements.
The Newsroom Integration, Thumbnail Generation, Database Administration, Data
Server and Preview Server sections are stand-alone sections that describe how to
configure and use Viz Content Pilot’s integrated components. For information on
Viz Template Wizard and Viz Object Store, see separate user guides.
Chapter 1: Introduction
1
1.1.2
Related Documents
1. Viz Template Wizard User’s Guide: How to create and organize templates.
2. Viz Object Store User’s Guide: How to store and retrieve images from the
image database.
3. Viz IO Studio Setup User’s Guide: How to configure and calibrate virtual sets.
4. Viz Artist User’s Guide: How to create scenes and use the Device manager.
1.1.3
Conventions
The following typographic conventions are used in this document:
• Bold Text: Bold is used to indicate emphasized text.
• Italic Text: Italic is used to indicate text that should be typed, or variables that
should be entered. Italic is also used to refer to related documents.
• Cross References: The color blue is used to indicate cross-references.
• Numbered Paragraphs: Numbered paragraphs are used to indicate tasks that
need to be carried out. Text in paragraphs without numbering represent
ordinary information.
1.2
Words and Expressions
The following are a number of common words and expressions used throughout
the documentation:
• Component: In Viz Template Wizard, components are used to create text
fields, buttons, drop-lists, database connections etc.
• Control Plug-ins: A graphics scene can contain all sorts of objects that can be
controlled from a template such as text, back plates, images, colors and more.
The graphics designer uses control plug-ins to expose objects to make them
editable in a template. When importing the scene to Viz Template Wizard the
exposed objects with control plug-ins appear as list items with check boxes.
• Control Object: Every scene with control plug-ins must have one instance of
the control object plug-in at the root level of a scene tree. Control Object
reads the information from all other control plug-ins. When a scene is
imported to Viz Template Wizard, it reads the information about other lower
level control plug-ins through Control Object.
• Data element: A data element is a template that is filled with data. A data
element holds a reference to its template (original) just as the template holds
a reference to its scene. A data element is contains a set of data and
references to where data (e.g. images and video clips) can be found. In most
cases it is the data element that gets played out on-air, and not the template.
• Newsroom Component: In a Newsroom Computer System (NCS), the
Newsroom Component (NrC) is used to add data elements to a story. The user
is typically a journalist working on a story. The NrC is an embedded
application in the NCS that connects to a database of templates. The templates
can be filled with text, images, video and maps.
• Scene: A scene is built in Viz Artist. It can be a single scene, or one part (layer)
of a combination of scenes (transition logic).
• Template: A template is a customized interface created in Viz Template
Wizard. The template is used in Viz Content Pilot or the Newsroom Component
to create data elements that are added to a playlist for playout. A template is
based on one or several (transition logic) Viz Artist scenes.
2
Chapter 1: Introduction
• Transition Logic Scene: A set of scenes built in Viz Artist. It contains one scene
that controls the state of or toggles a set of scenes (layers). The layered scenes
are used by the controlling scene to toggle in and out the layered scenes,
using pre-configured or customized transitions effects, without the need to
take scenes already on-air, off-air. For example; A lower third may be on-air
at the same time as a bug, and the lower third may be taken off-air without
taking the bug off-air or reanimating it.
• Viz Artist: The design tool where the graphics scenes and all animations are
created.
• Viz Engine: The output engine used for playout of graphics and video.
1.3
Contact Vizrt
We encourage your suggestions and feedback regarding the products and this
documentation. Our support e-mail address is [email protected]. You are also
welcome to use the web-based support at www.vizrt.com, or to contact your local
Vizrt support person by telephone.
Chapter 1: Introduction
3
2
Viz Content Pilot
Viz Content Pilot provides an optimal environment to create, manage and deliver
high volumes of top-quality content to live and taped news, sports, election and
other broadcast productions, independently of the design department.
Viz Content Pilot can serve as the core content control system for broadcasters
that require speed, consistent look, and a streamlined workflow for their graphics
and video content.
Graphics templates that are used in Viz Content Pilot are built in Viz Template
Wizard. Vizrt’s superior 3D renderer, Viz Engine, is the output source for Viz
Content Pilot driven graphics, video embedded in graphics and fullscreen video.
Viz Content Pilot has two main roles in the broadcast production line:
• Content Creation: Viz Content Pilot provides a unique and easy solution for
the creation of graphics and video content. Data can be entered directly into
Viz Content Pilot, or through our Newsroom Integration using our Newsroom
Component. Data can then be added to a playlist for playout automation.
• Playout Automation: The playlist in Viz Content Pilot allows playout of
graphics and video in a seamless way. Elements can be triggered in Viz
Content Pilot’s user interface, through GPI or third party integrations. Playlists
are typically created in newsroom systems or Viz Content Pilot itself, and can
be monitored and played out using Viz Content Pilot or other third party
control applications.
This section contains information on the following topics:
• New Features in Viz Content Pilot 5.6
• System Overview
• Workflow
2.1
New Features in Viz Content Pilot 5.6
Viz Content Pilot version 5.6 is mainly about the Viz One integration which now
supports searching for and adding clips to templates and directly to your playlist.
Viz Content Pilot has the following new and enhanced features:
Newsroom Component
• The Timeline Editor will now work on systems with no audio hardware/driver
• The Newsroom Component’s preview will now adhere to any custom aspect
ratio defined in your scene.
Viz Content Pilot client
• Search for and add Media from your Viz One to your template and playlist.
• A Media Engine connection for the Media Sequencer can now be configured
through the External Interfaces.
4
Chapter 2: Viz Content Pilot
Note: For a complete overview of new features, please see the release notes.
2.2
System Overview
Figure 1: VCP system overview
New to this release is the enhanced Newsroom Component that now has its own
Timeline Editor for adding graphics to video clips fetched from Viz One. The Viz
One integration enables playout of fullscreen and/or embedded video clips in
graphics on the same renderer.
The overview also shows a newsroom setup using the MOS protocol (ref. Viz
Gateway). Other protocols are of course supported as well (e.g. Intelligent
Interface and Video Disk Control Protocol).
Note: Connections to different components depend on the system setup, hence, not
all possible combinations of connections are shown in the overview.
2.3
Workflow
A common workflow using Vizrt’s MOS integration can be described as follows:
1. A user add stories to the newsroom system using the newsroom system client
2. In addition to creating stories, graphics, video clips and images can be added
to the stories using the Newsroom Component
Chapter 2: Viz Content Pilot
5
• New data elements created by the Newsroom Component are added to the
VCP database
• The newsroom system client adds the data element information to the story
3. Whenever a newsroom playlist is monitored by a control application, the
newsroom system is requested to send information about the playlist to Viz
Gateway which sends the playlist to the Media Sequencer.
4. Based on the information received from the newsroom system, the Media
Sequencer is able to retrieve data elements from the VCP database, created by
the Newsroom Component, and present them as a playlist to the control client
• When a playlist is made available to the control client it can monitor the
playlist and receive all changes to it from the newsroom system and the VCP
database
5. Once the playlist is monitored the control client operator can take the graphics
on air
Note: The Media Sequencer stores all playlists/shows making it available to all
control applications.
6
Chapter 2: Viz Content Pilot
Chapter 2: Viz Content Pilot
7
3
Requirements
This chapter describes general requirements, such as hardware, software, access
rights and policies for a number of software components in your Vizrt work flow.
For more in-depth system information, see the relevant sections in your
respective user and/or administrator guides.
IMPORTANT! Always check release notes for information on supported versions.
This chapter contains information on the following topics:
•
•
•
•
•
3.1
General Requirements
Hardware Requirements
Software Requirements
Shared Data
Ports and Connections
General Requirements
There are some general requirements for any Vizrt system to run. These
requirements apply when setting up a complete system with integration to other
Vizrt and third party software products:
• All machines should be part of the same domain.
• Users of the Vizrt machines should ideally be separated in at least two groups,
administrators and designers/operators.
• Most machines running desktop applications must be logged in with sufficient
privileges in order to run Vizrt programs, while services by default do not
require users to be logged in.
• Vizrt servers must have static IP addresses.
CAUTION! Third party systems that provide Vizrt systems with files must only use
Microsoft Windows operating system compatible characters as the file name.
• Vizrt has license restrictions on all Viz Engine and Viz Artist instances. To have
an output of Vizrt generated graphics (preview and program channels), either
an USB or parallel port dongle on the renderer machine is required.
3.2
Hardware Requirements
Hardware requirements vary depending on the system purchased; however, every
system delivered by Vizrt has an accompanying hardware specification sheet that,
for a new system, matches the Software Requirements.
For older hardware that are used with newer versions of Vizrt software, such as
Viz Engine, it is always recommended to check against the current hardware
specifications for the new software version to make sure that the latest software
can run on the old hardware specification.
8
Chapter 3: Requirements
Additional hardware must always be checked to see if it is compatible with
existing hardware. For example, the GPI cards supported by Vizrt must fit in the
Media Sequencer servers.
For more information on hardware specifications, please contact your local Vizrt
customer support team.
3.3
Software Requirements
The following sections describe software requirements for the product described
in this manual and a range of components that may be integrated with it. For
more information see the following topics:
•
•
•
•
•
•
•
•
•
•
3.3.1
Viz Anchor
Viz Artist
Viz Content Pilot
Viz Engine
Viz Gateway
Viz Graphic Hub
Media Sequencer
Viz Trio
Viz Video Hub
Vizrt Maps
Viz Anchor
Viz Anchor is a Vizrt application targeted at the presenter in the studio. The
application runs natively on Apple’s iPad and allows users to control playlists with
video and graphics directly from the handheld device.
Table 1:
3.3.2
Software
Viz Anchor 1.0 or later, Media Sequencer 1.22 or later
Operating system
Apple iOS 3.2 or later
Network access
Uses the Bonjour protocol to automatically discover the
Media Sequencer and Preview Server if the wireless
router/switch allows it.
Hardware
Apple iPad 1, 2 or 3
Viz Artist
Viz Artist is an advanced real-time motion graphics authoring system for the
creation of stunning real-time graphics. Built with an elegant and easy to use
drag-and-drop user interface and sophisticated 3D animation and modeling
tools, Viz Artist enables the digital artist to produce complex and engaging visual
Chapter 3: Requirements
9
content for broadcast, virtual sets, and visualization in less time and with greater
creative freedom.
Table 2: Viz Artist specifications
Software
Viz Engine 3.5.1 or later, or
Viz Engine 2.8 PL5 HotFix3
Viz World Client 12.0 or later (see Vizrt Maps)
Viz DataPool 2.10 or later
Extra Viz 2 plug-ins (for Viz 2.x)
Optional: ArdFtp and ArdFSMon are used for the Viz One
integration. Installers are bundled with Viz One.
Optional: Viz Content Pilot with Viz Template Wizard,
Media Sequencer, Viz Multiplexer and Thumbnail
Generator.
Note: Viz Engine 2.8 is not compatible with Viz One.
Executable(s)
viz.exe
VizGui.exe
vizSend.exe
Ports and
Connections
TCP: 6100 (preview and playout)
14300 (Viz Multiplexer)
50007-50009 (multiplexing).
Local drive access
Read and write access to C:\Program Files\vizrt\viz\
Network access
Mapped drive to VOS still store folder and Viz Engine
data root (see Shared Data)
Operating system
Windows XP SP2/SP3 (32-bit) and Windows 7 (64-bit)
The Viz Artist design machine should preferably have the same specifications as
the Viz Engine playout renderers, especially if the designers need to test
performance issues on demanding scenes.
If designers are creating templates for Viz Content Pilot (VCP), it is recommended
that VCP is installed on a separate machine for more accurate playout emulation
on Viz Engine.
3.3.3
Viz Content Pilot
Viz Content Pilot (VCP) is built on a client-server software model where the VCP
client connects to the Viz Content Pilot Database (Oracle database server) for
templates and content, and the Media Sequencer for playout.
• VCP requires an Oracle database as the back-end server.
• VCP requires a Media Sequencer for communication with Viz Engine and other
systems.
• VCP 5.5 requires Media Sequencer version 1.21 or later.
On the server side, the database serves all clients storing and retrieving content
data for the control, delivery and triggering of graphics rendered on the graphics
renderer Viz Engine.
10
Chapter 3: Requirements
This section contains information on the following topics:
•
•
•
•
•
•
•
Viz Content Pilot Client
Viz Content Pilot Database
Viz Content Pilot Database Administrator
Viz Content Pilot Newsroom Component
Viz Content Pilot Thumbnail Generator
Viz Template Wizard
Data Server
Viz Content Pilot Client
The VCP specifications shown below are machine specifications for a typical
newsroom system setup, where VCP is the control application receiving the
playlist.
Table 3: VCP specifications
Software
Viz Content Pilot 5.6
Media Sequencer 1.22 or later
Oracle 10g Instant Client 32-bit
Microsoft .NET Framework 4
Optional: Oracle 11g Instant Client 32-bit
Optional: Oracle 11g or 10 g Runtime Client 32-bit
Optional: Viz World Client, VCP TimeCode Monitor, Viz
PreCut.
Optional: If you are using a local Viz Engine to preview
video clips from Viz One, Viz Engine must be installed with
video codecs (e.g. MPEG-4 codec and Haali Media Splitter).
Optional: Windows Media Player 11 for video clip preview in
Viz Object Store.
Executable(s)
VizContentPilot.exe
vizPreviewEngine.exe (local preview)
Local drive
access
Access to Oracle client files and folders
Network access
Mapped drive to Viz Object Store still store folder
Read and write access to C:\Program Files\vizrt\
Optional: If local preview using Viz Engine 2 is chosen, a
mapped drive to Viz Engine’s data root is needed
Also see Shared Data
Operating system
Windows
Windows
Windows
Windows
7 Professional 64-bit (recommended)
7 Enterprise 64-bit
7 Ultimate 64-bit
XP Professional 32-bit
The Viz Content Pilot client gets its Viz One connection parameters from the VCP
database. This is also true for the older Viz Video Hub.
Vizrt recommends the use of remote preview that has no need for a local Viz
Engine or graphics cards on the client machine.
Chapter 3: Requirements
11
Viz Content Pilot Database
The VCP database is an Oracle database server. Usually two database servers are
installed where one is used for manual failover and to hold the Viz Engine 2.x data
root. Viz Engine 3.x graphics data is stored on the Viz Graphic Hub).
Table 4: VCP database specifications
Software
Oracle 11g Database 64-bit
Oracle 11g Administrator Client 64-bit (standard edition)
Optional: Oracle 10g Database and Administrator Client
64-bit
Executable(s)
Please refer to official Oracle documentation.
Ports and
Connections
1521 (queries)
Services
Oracle database service, TNS listener service
Local drive access
A shared folder on the second server (failover) has to be
accessible for all machines showing the rendered
graphics.
Operating System
Windows 2008 R2 Server (with 8GB RAM or more)
Oracle
Documentation
Oracle Database Documentation Library:
11g: http://www.oracle.com/pls/db112/homepage
10g: http://www.oracle.com/pls/db102/homepage
Viz Content Pilot Database Administrator
The Viz Content Pilot Database Administrator tool (VCP DBA) is a small application
used for installing, upgrading, exporting, importing, and setting various
parameters for the Viz Content Pilot Database. It is purely a DBA tool, and should
therefore only be used by database administrators.
Table 5: VCP DBA specifications
Software
Viz Content Pilot DBA tool
Oracle 10g Administrator Client 32-bit
Optional: Oracle 11g Administrator Client 32-bit
Executable(s)
VCPDBA.exe
Service(s)
Oracle database service
TNS listener service
Operating system
Windows Server 2003 32-bit
Windows XP 32-bit
Windows 7 32-bit or 64-bit
Viz Content Pilot Newsroom Component
The newsroom client machine specification describes a basic setup for journalists
and editors. For a more detailed view on available software options, see the Viz
12
Chapter 3: Requirements
Content Pilot and other administrator guides for descriptions on different types of
setup.
Table 6: Newsroom Component specifications
Software
VCP’s Newsroom Component 5.6
Viz Object Store 5.6
Viz World Client 12.0 or later (see Vizrt Maps)
Oracle 10g Instant Client 32-bit
Microsoft .NET Framework 4
Newsroom system client
Optional: Oracle 11g Instant Client 32-bit
Optional: Oracle 11g or 10 g Runtime Client 32-bit
Optional: Vizky 1.6 and later (older versions will not work)
Optional: If you are using a local Viz Engine to preview
video clips from Viz One, Viz Engine must be installed with
video codecs (e.g. MPEG-4 codec and Haali Media Splitter).
Optional: Viz EasyCut or Viz PreCut for video clip editing.
Executable(s)
VCPAxFiller.ocx
VCPAxNle.exe (NLE)
viz.exe
VizObjectStore.exe
Local drive
access
Read access to Oracle client files and folders
Network access
Mapped drive to VOS still store folder.
Read and write access to C:\Program Files\vizrt\
Optional: If local preview using Viz Engine 2 is chosen, a
mapped drive to Viz Engine’s data root is needed.
Also see Shared Data.
Other
Registry settings for preview
Registry settings for Media Object Server (MOS) ID
Operating system
Windows
Windows
Windows
Windows
7 Professional 64-bit (recommended)
7 Enterprise 64-bit
7 Ultimate 64-bit
XP Professional 32-bit
Vizrt recommends the use of remote preview that has no need for a local Viz
Engine on the client machine; hence, local preview is not recommended.
All users of machines installed with Viz Engine must have read and write access to
the following folder: C:\Program files\vizrt\.
The Newsroom Component gets its Viz One connection parameters from the VCP
database. This is also true for the older Viz Video Hub; however, for Viz Video
Hub you may also choose, during installation, to use an INI file instead.
Note: Newsroom Component’s timeline editor does not work on virtual machines.
Chapter 3: Requirements
13
Viz Content Pilot Thumbnail Generator
VCP’s Thumbnail Generator is an optional addition to a VCP setup that generates
data element snapshots used as thumbnails in order to visualize graphics and
video elements in the VCP client’s playlist.
It is recommended to install Thumbnail Generator on the Viz Graphic Hub or Viz
Content Pilot Database machine.
It is also recommended to configure Viz Thumbnail Generator to fetch scene
snapshots from one of the newsroom Viz Engine preview machines. If installed on
a local Viz Engine, see also Viz Engine.
CAUTION! Do not use an on-air Viz Engine to generate thumbnails.
Table 7: Viz Thumbnail Generator specifications
Software
Oracle 10g Instant Client 32-bit
Viz Content Pilot’s Thumbnail Generator 5.6
Optional: Oracle 11g Instant Client 32-bit
Optional: Oracle 11g or 10g Runtime Client 32-bit
Executable(s)
ThumbnailGenerator.exe
Operating system
Windows
Windows
Windows
Windows
Windows
7 Professional 64-bit (recommended)
7 Enterprise 64-bit
7 Ultimate 64-bit
XP Professional 32-bit
2003 32-bit.
Viz Template Wizard
Viz Template Wizard is a template design and scripting tool used to create
templates for graphics and video. Viz Template Wizard can also be used to create
control templates for Viz Trio.
It is possible to install Viz Template Wizard on the same machine as Viz Artist;
however, it is recommended to install it on a separate design client for template
designers.
Table 8: Viz Template Wizard specifications
Software
Oracle 10g Instant Client 32-bit
Media Sequencer 1.22
Viz Template Wizard 5.6
Optional: Oracle 11g Instant Client 32-bit
Optional: Oracle 11g or 10g Runtime Client 32-bit
Optional: Windows Media Player 11 for video clip preview
in Viz Object Store.
Executable(s)
14
scheduler.exe (when running in Console mode)
VizTemplateWizard.exe
Chapter 3: Requirements
Table 8: Viz Template Wizard specifications
Operating system
Windows
Windows
Windows
Windows
7 Professional 64-bit (recommended)
7 Enterprise 64-bit
7 Ultimate 64-bit
XP Professional 32-bit.
Viz Template Wizard connects to Media Sequencer for testing and previewing of
template graphics. The Media Sequencer connection defaults to localhost. To use
a different host set the command line option -mse <host> in Viz Template
Wizard’s target path.
Data Server
The Data Server is installed as an application layer on top of the Viz Content Pilot
database. The Data Server may be asked to handle requests from scripts to
provide information on data elements, or to provide frame servers the information
needed in order to resolve which scene and data that is to be rendered by the
frame server.
Table 9: Data Server specifications
Software
Data Server 1.2 or later
Oracle 10g Instant Client 32-bit
Microsoft .NET Framework 4
Optional: Oracle 11g Instant Client 32-bit
3.3.4
Service(s)
Vizrt Pilot Data Server
Ports and
Connections
8177
Operating system
Windows
Windows
Windows
Windows
Windows
7 Professional 64-bit (recommended)
7 Enterprise 64-bit
7 Ultimate 64-bit
XP Professional 32-bit
2008 server 32-bit
Viz Engine
Viz Engine is an extremely powerful rendering engine and at the core of Vizrt’s
real-time graphics solutions. 2D and 3D animated scenes designed in Viz Artist
are rendered in real-time as high-end animations, and the output can be SD or
HD video. Viz Engine systems work with all other Vizrt products to provide users
with the total solution for producing on-air graphics content.
Chapter 3: Requirements
15
To run Viz Engine as a program or preview (optional) machine, the following
software and configuration is needed:
Table 10: Viz Engine specifications
Software
Extra Viz 2 or 3 Plug-ins (only for Viz 2.x)
Viz Engine 2.8 PL5 HotFix3 or Viz Engine 3.5.1 or later
Viz DataPool 2.10 or later
Viz World Client 12.0 or later (see Vizrt Maps)
Optional: When used for local preview of video clips from
Viz One, Viz Engine must be installed with video codecs
(e.g. MPEG-4 codec and Haali Media Splitter).
Hardware
Licensed dongle
Executable(s)
viz.exe
Ports and
Connections
6100 (preview and playout), 14300 (Viz Multiplexer),
50007-50010 (multiplexing).
Local drive access
Local preview: Read and write access to folder
Network access
Mapped drive to VOS still store folder
C:\Program Files\vizrt\
Local preview: Mapped drive to Viz Engine data root
Also see, Shared Data
Operating system
Windows XP SP2/SP3 (32-bit) and Windows 7 (64-bit)
Machines setup for local preview need an OpenGL compatible graphics card and
at least 512MB of memory (RAM) in addition to a reasonably new processor. Some
graphics features on a preview machine will not be shown exactly as on a Viz
Engine renderer. This is limitations in the OpenGL features on the graphics cards,
and not related to Vizrt’s software.
This section also contains information on the following topics:
• Preview Server
Preview Server
The Preview Server option is used in situations where Viz Engine is used in order
to provide frames for snapshot/thumbnail generation. A typical use case would be
to connect multiple Newsroom Components to a preview server. Note that the
Preview Server must be installed on a separate Viz Engine machine with its own
license.
Table 11:
16
Software
Preview Server 1.0 or later
Microsoft .NET Framework 4
Viz Engine 2.8 or Viz 3.2 and later
Hardware
Licensed dongle
Executable(s)
PreviewServer.exe
Chapter 3: Requirements
Table 11:
3.3.5
Ports and
Connections
54000 is used when connecting over http using the REST
interface.
Network access
Uses the Bonjour protocol to announce available services.
Operating system
Windows XP 32-bit
Windows 7 32-bit or 64-bit
Viz Gateway
Viz Gateway is Vizrt’s implementation of the MOS Protocol. It enables users of a
Newsroom Computer System (NCS) to perform instant updates on playlists in
Vizrt’s control applications (Viz Trio and VCP).
The Viz Gateway is a framework built to help in newsroom integration tasks.
Currently Viz Gateway support NCSs based on the MOS Protocol that is supported
by the leading NCS vendors.
Viz Gateway is in principle an extension to the Media Sequencer; hence, any Viz
Gateway supported version of the Media Sequencer may be configured to run as a
Viz Gateway server using the Viz Gateway configuration tool.
Table 12: Viz Gateway specifications
Software
Oracle 10g Runtime Client 32-bit
Viz Gateway 1.0.10 or 2.0 (beta)
Optional: Oracle 11g Runtime Client 32-bit
Executable(s)
scheduler.exe (if running in Console mode)
Ports and
Connections
10540 - 10541 (MOS lower and upper port)
10640 (DB event port)
10002 (Viz Gateway Controller Client)
Services
vizgwservice.exe
Local drive access
Access to Oracle client files and folders
Read and write access to folder C:\Program Files\vizrt\
Operating system
3.3.6
Windows 2003 32-bit (recommended)
Windows XP 32-bit
Viz Graphic Hub
Viz Graphic Hub is delivered as a pre-installed system with recommended
hardware and software. Viz Graphic Hub must be installed as a separate server;
hence, it is not recommended to install anything else on the server that will cause
the system to lose performance.
Note: The database directory cannot reside on a remote machine.
Table 13: Viz Graphic Hub specifications
Software
Chapter 3: Requirements
Viz Graphic Hub 2.3 or later
17
Table 13: Viz Graphic Hub specifications
Executable(s)
VizDbNamingService.exe
VizDbTerminal.exe
Ports and
Connections
19392-19396 (in most cases the ports are configurable).
Local drive access
Read and write access to database folders (configurable).
Operating system
Windows XP 32-bit
IMPORTANT! Do not run firewall or antivirus scanning software on the server.
3.3.7
Media Sequencer
The Media Sequencer is middleware software primarily used by control
applications to connect to for example render engines, newsroom systems and
video server (e.g. Viz One) systems.
More concrete the Media Sequencer is a framework for defining and executing
media elements. The media elements are defined in a tree-based schedule that
the sequencer interprets. The schedule is saved as an XML file (named
default.xml). The XML file, in short, contains the configuration settings and the
playlists saved to it by the control application.
The Media Sequencer’s scheduler has a high-resolution timer that manages a
Virtual Document Object Model (VDOM) that contains the schedule. The scheduler
also performs the actual execution of the schedule by interpreting elements
describing actions from the VDOM. The communication between end user
products and the Media Sequencer mostly goes through a protocol named
TreeTalk.
Table 14: Media Sequencer specifications
Software
Oracle 10g Runtime Client 32-bit
Media Sequencer 1.22
Optional: Oracle 11g Runtime Client 32-bit
Executable(s)
scheduler.exe (if running in Console mode)
Ports and
Connections
8580 (REST), 8594 (Media Sequencer TreeTalk)
Services
scheduler.exe
Local drive access
Access to Oracle client files and folders.
Read and write access to the following folders:
C:\Program Files\vizrt\
C:\Documents and Settings\All Users\Application
Data\Vizrt\Media Sequencer
Network access
18
Uses the Bonjour protocol to announce available services.
Chapter 3: Requirements
Table 14: Media Sequencer specifications
Operating system
3.3.8
Windows 2003 32-bit (recommended)
Windows XP 32-bit
Viz Trio
The Viz Trio client is the CG operator’s user interface. It has a TCP connection to a
Media Sequencer. The client gives the user access to creation, editing and playout
of pages with graphics. A Viz Engine for local preview renders the graphics within
the Viz Trio client.
Table 15: Viz Trio specifications
Software
Extra Viz 2 or 3 Plug-ins (only for Viz 2.x)
Microsoft .NET Framework 4.0 or higher
Windows XP Service Pack 1 or higher, or Microsoft Windows
7 (recommended)
Viz Engine 3.5.1 or higher (lower versions do not support
the Viz One integration). If you are using a local Viz Engine
to preview video clips from Viz One, Viz Engine must be
installed with video codecs (e.g. MPEG-4 codec and Haali
Media Splitter).
Viz One 5.2 or higher
Media Sequencer 1.22 or higher
Viz Trio 2.11 client
Viz World Client 12.0 or later (see Vizrt Maps)
Optional: Local Media Sequencer and Oracle 11g or 10g
Runtime Client for connecting to the Viz Content Pilot
Database.
3.3.9
Executable(s)
trio.exe
trionle.exe
viz.exe
Operating system
Windows XP SP3 32-bit
Windows 7 32-bit or 64-bit
Viz Video Hub
Viz Video Hub allows users to ingest video clips for use in graphics and as full
screen video, supporting both SD and HD output.
Viz Video Hub can be used for finding and adding video to graphics using a range
of different control applications for both preview and playout on Viz Engine.
IMPORTANT! Before Viz Video Hub is used the first time, it is important to decide
upon the playout format. Ingesting and storing other formats on Viz Video Hub may
Chapter 3: Requirements
19
lead to an undefined behavior if they are different from what is configured on Viz
Engine.
Table 16: Viz Video Hub specifications
3.3.10
Software
Viz Video Hub 2 or later
Ports and
Connections
22, 80, 445, 6555
Vizrt Maps
Vizrt provides a map solution that offers branded maps and geographic
animations using Viz Curious Maps and Viz World Client and Server.
Viz Curious Maps
Viz Curious Maps is ideal for designers, program researchers, and producers who
need to create high-quality map animations for news, documentary, promotional
videos, and online. It is designed to be simple and intuitive to use, so that users
with no specific training in computer graphics, or video editing, can create
professional maps on demand and at short notice.
Table 17: Viz Curious Maps specifications
Software
Viz Curious Maps 12.0 or later
Executable(s)
WorldMaps.exe
Ports and
Connections
80, 8080 (Microsoft Bing and Imagery on Demand)
Operating system
Windows XP 32-bit
1947 Sentinel HASP Run-time Environment
It is possible to run the server and design machine at the same time on the same
machine, but it is likely that this will impact the server performance.
Note: Minimum screen resolution is 1280x1024, and it has to be a display size of 96
DPI.
Viz World Client and Server
Viz World Client and Server integrates Viz Curious Maps mapping ability and
database into Viz Artist and Viz Engine graphics. By utilizing a set of geographic
referencing plug-ins and the maps produced by WoC, the creation of location
based graphics using maps, 3D objects, texts, and so on, is seamless.
Table 18: Viz World Client and Server specifications
Software
20
Viz World Client 12.0 or later
Viz World Server 12.0 or later
Chapter 3: Requirements
Table 18: Viz World Client and Server specifications
Executable(s)
AxMapsClient.ocx (embedded editor)
MapBuilder.exe
MapConfigClient.exe
ServerAllocator.exe
ServerLauncher.exe
Ports and
Connections
101, 102, 103
Operating system
Windows XP 32-bit (client and server)
80, 8080 (Microsoft Bing and Imagery on Demand).
Windows Server 2003 32-bit (server)
See Also
• Viz World Client and Server documentation
3.4
Shared Data
Vizrt recommends having mapped drive letters for all your shared data. Mapped
drives are commonly used for your Viz Engine 2.x data root, Viz Object Store
images and Viz World cache folders.
Note that it is possible to configure most systems to use Universal Naming
Convention (UNC) as an alternative to mapped drives.
Example: \\hostname\shared folder\resource
3.5
Ports and Connections
This section contains information on the following topics:
• Port Numbers
• Multiplexing Ports
3.5.1
Port Numbers
The table below lists all default server and listening port numbers that are used. It
is, if possible, recommended to run the system on a network without a firewall.
Table 19: Listening port numbers
Listener
Port(s)
Descriptions and Comments
ArdFTP
21
Used for video transfers from Viz Video Hub to Viz
Engine.
Viz Video Hub
22
TCP and UDP for logging in to the Viz Video Hub
operating system (service: SSH).
Chapter 3: Requirements
21
Table 19: Listening port numbers
Viz World Server
102103
102 (TCP) is a Viz World Server listener port for Viz
World Client connections when Server Allocator is
not in use or only has one Viz World Server
running.
103 (TCP) is a Viz World Server listener port for
configuration tool connections to the first Viz
World Server instance (as configurations are
controlled by the first server instance).
See also Vizrt Maps.
Viz Video Hub
137
Used for SMB file sharing (service: Netbios)
139
Viz Video Hub,
Microsoft Bing
and Imagery on
Demand
80,
8080
Web interface and client software. SOAP port for
communication with Viz Video Hub.
For download of Microsoft Bing and Imagery on
Demand images.
(service: HTTP)
Viz Video Hub
22
443
(service: HTTPS)
445
TCP & UDP used for SMB file sharing (service:
Microsoft-DS).
Viz One
Delivery
554
Real Time Streaming Protocol (service: TCP).
Oracle database
1521
For clients that connect to the Viz Content Pilot
Database.
Sentinel HASP
Run-time
Environment
1947
The Sentinel HASP Run-time Environment uses
port 1947 to communicate with local and remote
components. This relates to hardlock dongles
used with Viz Curious Maps.
Viz Video Hub
3080
Low resolution video and index files (service:
lighttpd).
Video servers
5250
MVCP and Xlator control port for video servers.
Note: this port is only necessary in combination
with the video server extension (service: AVCP).
Chapter 3: Requirements
Table 19: Listening port numbers
Viz Engine
6100
6700
6800
Ports are used by Media Sequencers that connect
to a Viz Engine program and/or preview channel.
Viz Engine’s default program and preview port is
6100.
In a single channel setup where both program and
preview output is on the same machine, the
default preview port is set to 6800 in order to
separate the program and preview channels.
In a dual channel setup, the default program ports
are 6100 and 6800 for channel 1 and channel 2,
respectively.
In a dual channel setup, when used for stereo
production, the default program ports are 6700
and 6800 for channel 1 (left eye) and channel 2
(right eye), respectively.
Viz Trio
6200
6210
6200 is used for controlling the Viz Trio client
over a socket connection.
6210 is used by the Viz NLE plugin to establish a
connection to Viz Trio.
Newsroom
Component
6220
Used by the Viz NLE Plugin to establish a
connection to Viz Content Pilot’s Newsroom
Component.
Viz NLE Editor
6230
Used by the Viz NLE Plugin to establish a
connection to the Viz NLE Editor (on Mac).
Viz NLE Config
6240
Used by the Viz NLE plugin to establish a
connection to the Viz NLE Configuration tool (on
Mac).
Ticker Service
6300
Ticker handler in Media Sequencer connects to
port 6300 for feedback from Ticker Service.
6301
Ticker handler in Media Sequencer connect to port
6301 when controlling the ticker via a socket
connection.
Viz Content
Pilot
6484
Socket connection used for controlling Viz
Content Pilot using macro commands.
Viz Video Hub
6555
Message bus port for communication with Viz
Video Hub (service: Message bus).
Viz Preview
License server
7452
For the Newsroom Component using an
unlicensed Viz Engine for local preview with a
connection to the Viz Preview License server (is
not the same as the Preview Server).
Viz Content
Pilot Data
Server
8177
Used when connecting over http using the REST
interface.
Chapter 3: Requirements
23
Table 19: Listening port numbers
Media
Sequencer
8580
8594
For clients connecting to the Media Sequencer.
8580 is specifically used when connecting over
http using the REST interface.
Viz Video Hub
8080
Used for sending keyframes (service: ardok).
Viz Gateway
10001
For DB notification events.
10002
For Viz Gateway controller clients.
10540
For MOS object updates.
10541
For MOS playlist updates.
10100
10100 (TCP) is a Server Allocator listener port for
Viz World Client connections, and is only used in
order for clients to get connection details about
Viz World Server(s). The first client connection will
always be diverted to port 102. In case of multiple
server instances port numbers are assigned
according to a predefined schema (i.e. 10101,
10102 for server instance 2 and 3 and so on). In
case there is no Server Allocator, Viz World Server
will itself switch to port 102.
Viz World Server
10200
10100 (UDP) is a Viz World Server listener port for
Server Allocator communication.
10200 (UDP) is a Server Allocator listener port for
Viz World Server communication.
Both UDP ports are internal ports used between
the servers.
For more information, please see the Viz World
Client and Server 11.1 User’s Guide and later. See
also Vizrt Maps.
Viz Content
Pilot
10640
Used by Viz Gateway to establish a connection to
Viz Content Pilot in order to send and receive
updates on MOS messages (e.g. elements and
playlists).
Viz Engine
14300
Alternative port used to avoid conflicts with port
6100 (e.g. when using Viz Multiplexer). Port 6100
is normally used by renderers that are on air,
hence, it is (e.g. when running Viz Content Pilot
version 4 or Viz NLE Plugin towards Viz 2.x)
recommended to use another port.
Port 14300 is an optional port. The default 6100
may also be used if the renderer is not used on air.
24
Viz Graphics
Hub
19392-
Viz Connection
Broker
21098
19396
Ports in use when connecting to different Viz
Graphics Hub components.
Connection to the Viz Connection Broker
configuration interface (e.g. http://
localhost:21098/)
Chapter 3: Requirements
Table 19: Listening port numbers
Viz Engine
50007
50008
50009
50010
Ports 50007 - 50009 are all Multiplexing Ports
that enables Viz Engine to work on other scenes in
sessions that are used for preview purposes.
Isolated port (50007): All connections to this port
get its own session.
Shared port (50008): All connections from one
single host shares one session.
Fixed port (50009): Same as shared port except
that allocated resources are never cleared from
memory.
On Air Preview port (50010): Enables a user to
request a preview of the next scene to be put on
air while another scene is on air.
Preview Server
3.5.2
54000
Used when connecting over http using the REST
interface.
Multiplexing Ports
For Viz Engine 2 users an external application named Viz Multiplexer is used to
allow multiple users connect to Viz for graphics preview. Viz Multiplexer acts as a
special proxy between the client software and Viz, and stores the engine’s state
for each connected client and restores/updates that state each time a client sends
a command to Viz.
For Viz Engine 3 users the multiplexer functionality is an integral part of Viz
Engine; hence, there is no need for additional installation and configuration. When
using Viz Engine a session management takes place internally, with one default
session for the GUI and internal/external commands, and additional sessions
created on-demand for the multiplexing ports or the preview port.
With multiplexing ports other than 50010 the Viz Engine state is only switched on
when a command is received; hence, ten consecutive commands from a client will
only result in one state switch on the first command.
Chapter 3: Requirements
25
With 50010 the state is switched when a command is received and immediately
switched back to the main session such that on air rendering will not be hindered
in any way.
The 50009 port is traditionally used by Viz Content Pilot 4’s Newsroom
Component, and is the same as the shared port (50008) except that allocated
resources are never cleared from memory. To avoid memory overload, it is
recommended to clean up the Viz Engine regularly when using this port.
The 50008 port is a shared port where all connections from one single host
shares one session. It is most often used by Viz Trio and the Newsroom
Component to display preview frames.
The 50007 port is an isolated port where all connections get their own session. It
is used, for example in an NLE setup, to deliver frames to the host NLE-system
when rendering or scrubbing video clips with graphics. Using this port will also
suppress bounding box commands. Note that 50007 cannot be used by the
Newsroom Component.
Note: All multiplexing ports are supported by all Viz Engine versions
26
Chapter 3: Requirements
4
Storage and Backup Recommendations
This section gives some general recommendations on storage and usage of data
which can be divided in two main parts;
• Graphics, image and video storage and settings
• Control room and newsroom configuration storage and settings
The following sub sections divide these parts into more user specific areas in
order to give an overview of what is stored where and what is important to
maintain for each installation.
This section contains information on the following topics:
•
•
•
•
4.1
Graphics Data
Viz Content Pilot
Media Sequencer
Viz Trio
Graphics Data
Graphics data is where the scenes, images, fonts, objects, materials and
animations are stored.
There are currently two ways of storing graphics depending on whether the
graphics used is Viz 2.x or 3.x compatible.
It is important to regularly take backups of the data as data is basically stored in a
normal Windows directory structure.
For Viz 2.x versions data is structured as files, and are often referred to as the
data root. For Viz 3.x versions data is structured as file objects on Viz Graphic
Hub.
Data is organized by graphics designers using Viz Artist. For Viz 3.x users, data
can also be organized using the Viz Graphic Hub Manager tool.
The data is common for all Vizrt graphics systems that support the different Viz
Engine versions.
• Default location for Viz 2.x data: C:\Program Files\vizrt\viz\data
• Default location for Viz 3.x data: C:\Program Files\vizrt\VizDb
The location of the data root is configured by Viz Engine’s Viz Config tool, while
the location of the database is configured by the Viz GH Terminal. Both data sets
should ideally be placed on a dedicated machine.
IMPORTANT! Only offline backup operations are allowed as the server must be shut
down during a backup process.
Chapter 4: Storage and Backup Recommendations
27
See Also
• Viz Graphic Hub User’s Guide
4.2
Viz Content Pilot
In addition to information stored on the Media Sequencer and VCP’s database,
VCP’s INI files and playlists are important to backup when needed. INI files are
used for local configurations for the application itself, third party integrations,
and overrides of database settings. All VCP playlists, both local and newsroom
playlists, can be exported and imported for backup and transfer to other VCP
installations.
The INI file ContentPilot.ini is used by VCP, Viz Template Wizard, Viz Object Store,
and VCP’s Newsroom Component (Viz Video Hub settings). VCP’s Thumbnail
Generator has its own INI file named ThumbnailGenerator.ini. The INI files are
stored in the program folder.
4.3
Media Sequencer
The file default.xml is a Media Sequencer file.
Microsoft Windows XP:
• C:\Documents and Settings\All Users\Application Data\Vizrt\Media
Sequencer
Microsoft Windows Vista and 7:
• C:\ProgramData\Vizrt\Media Sequencer
The file holds a stored copy - of the memory held information - over control
application client settings, user data for graphics templates, references to scenes
on the database, stills in the still store and video clips.
For a backup it is recommended to set up the system, then save a copy of the
default.xml remotely to more easily set up a new build of a similar machine in the
event of a system failure.
The default.xml file stores all persistent data, and at regular intervals the Media
Sequencer creates a backup file named default.xml.1, which again replaces the
file default.xml.2. In a failure situation where default.xml may get corrupted,
default.xml.1 is used to create a new instance of default.xml. If default.xml.1 is
also corrupted it will try to use default.xml.2.
4.4
Viz Trio
Unlike Viz Content Pilot (VCP), Viz Trio does not use an INI file or a database (by
default). Viz Trio is dependent on the Media Sequencer to keep local client
specific configurations intact. The only exception is command line options used
locally for each client. As with VCP, Viz Trio is able to export and import shows
(similar to VCP’s playlists).
28
Chapter 4: Storage and Backup Recommendations
Generally it is recommended to do regular show exports in order to preserve the
show if something is corrupt. A show export is performed using Viz Trio to create
an archive of the show, its graphics templates, pages, settings and so on. For
more information, see Viz Trio’s user guide on show export and import and the
available options. For graphics export or archiving, see Viz Artist’s user guide.
It is also recommended to backup, at regular intervals, the Media Sequencer’s
default.xml file as it stores a lot of the data used by Viz Trio and other control
applications, except graphics data and external files, such as file scripts. This
enables the system to be restored to a previous state. If the system must be reset
entirely, a new default.xml file will be created. The latter requires that the Media
Sequencer is shut down, the default.xml file deleted or removed, and the Media
Sequencer restarted. This also requires that all configurations, shows with
graphics and script references are setup.
If Viz Trio is used in combination with Viz Content Pilot, see the Viz Content Pilot
User’s Guide for further information on use of VCP’s database and still store.
Chapter 4: Storage and Backup Recommendations
29
5
Installation
This section describes how to install the Viz Content Pilot (VCP) product family,
and how to choose between the different setup types and components. In
addition, it describes how to run VCP’s database scripts.
Before installing a VCP system make sure that the correct hardware and latest
software is available. Software is accessible on Vizrt’s FTP server, and contains the
latest official releases of all Vizrt software.
This section contains information on the following topics:
•
•
•
•
•
•
•
•
•
5.1
Viz Content Pilot Installation
Silent Installation
Plugin Installation
Newsroom Integration Client installation
Control Room Client installation
Template Design Client installation
Custom installation
Video Codecs installation
Component Descriptions
Viz Content Pilot Installation
This section describes the installation steps for the Viz Content Pilot (VCP)
applications.
To install Viz Content Pilot
1. Start the VCP installer
• Optional: On Windows 7 run the installer from command line with RunAs
parameters or by using the context menu option Run as administrator
2.
3.
4.
5.
30
Click Next in the Welcome screen.
Enter Customer Information, and click Next.
Click Yes to accept the single End-User License Agreement (EULA).
Select destination folder where the setup program will install the files, and
click Next. Default is C:\Program Files\Vizrt\Viz Content Pilot 5.x\.
Chapter 5: Installation
Figure 2: Setup Type
6. Select setup type:
• Newsroom Integration Client
• Control Room Client
• Template Design Client
• Custom
Note: For local preview, select Custom installation and Viz Engine Preview Plugin.
7. Review the selected settings, and click Next to install.
8. Click Yes to add program shortcuts to the desktop.
After the installation has finished, VCP’s database connection, Viz Engines, and, if
selected, the Newsroom Component (NrC) must be configured. This is all part of
the same installer, and will continue right after the installer has finished copying
files to the computer.
In order to use VCP’s database locally, an Oracle Instant Client can be configured
during installation.
Chapter 5: Installation
31
Figure 3: Database configuration
9. Optional: Configure VCP’s database connection.
• Select the SID option to configure a connection string, and enter a valid SID/
Service name and hostname, or
• Select the TNS option to configure a TNS connection, and enter a valid TNS
name alias and directory path for the tnsnames.ora file.
• Enter database Username and Password. If left empty, it will default to
PILOT/PILOT.
Note: If the default port number (1521) is not used, add it as an extension to the
hostname: <hostname>:<port number>.
32
Chapter 5: Installation
Figure 4: Viz Template Wizard configuration
10. In the Viz Template Wizard Configuration dialog box add Viz Engine hosts and
a Media Sequencer host (default is localhost), and click Next.
• Enter password for the Viz Engine host if needed.
Note: Program and preview channels are configured in VCP’s profile configuration.
Chapter 5: Installation
33
Figure 5: Newsroom Component configuration
Configuring the preview settings will add the settings to your local machine’s
registry. If you have multiple newsroom clients it also possible to have all clients
use the preview host settings by adding them to your Database Parameters. If the
latter is required leave the preview settings blank.
11. Configure the NrC, and click Next
• Enter the Viz Engine preview hostname or IP address.
• Enter the port number. If remote preview is used, use port 50008. If local
preview is used, use port 6100.
• To obtain the same preview settings for multiple Newsroom Components
you should also add the same settings to the database.
Note: Multiple renderers can be defined as a comma separated string. For example
<host>, <host>, ... or <host>:<port>,<host>:<port>, ... . If hosts are defined
without a trailing port number, it is recommended to set the default port in the Port
field. If no port number is set, it will default to 6100.
12. Optional: Set Advanced iNEWS settings if needed
13. Optional: Obtain, and enter, a valid MOS ID from the newsroom system
34
Chapter 5: Installation
Figure 6: Viz Link configuration
The Viz Link configuration will, if enabled, override the database settings. When
selected it applies the settings to a local ContentPilot.ini (initialization) file; hence,
it does not overwrite database settings.
Database settings can be configured after installation in the Preferences window.
14. Optional: Configure the Newsroom Component to only show the Media tab.
This also adds the NODB registry setting.
15. Optional: Configure the Viz Video Hub connection to only use video search
and/or add local INI file settings to override the database settings.
16. Click Next.
17. Click Finish to end the installation.
Note: For manual configuration of MOS ID, see the ContentPilot.ini’s MOS section.
5.2
Silent Installation
The VCP silent installer option is used to automate responses used for software
installations. A normal installation receives the input from the user as responses
to dialog boxes. However, a silent installation does not prompt the user for input.
A silent installation must get its user input from a different source. That source is
the InstallShield Silent response (.iss) file.
The format of response files resembles that of an .ini file, but response files have
.iss extensions. A response file is a plain text file consisting of data entry
sections.
Chapter 5: Installation
35
The InstallShield’s silent response file must be manually created. After the file has
been created, a command line with a few arguments is required to execute the
installer with the response file.
Note: A sample ISS file is included in VCP’s installation directory.
This section contains information on the following topics:
• Creating the Batch File
• Creating a Response File
5.2.1
Creating the Batch File
Users who are accustomed to the use of silent installers usually create batch (.bat)
files that are run from the command line with the arguments for the VCP installer
package. Usually two are created: One batch file to install the VCP package, and
one batch file to uninstall the VCP package.
The batch file to install the VCP package looks like this:
• Filename example: install_vcp.bat
• Content example:
VCP_x.x.xxxxx.exe /s /z"ANSWERFILE:setup.iss"
The batch file to uninstall the VCP package looks like this:
• Filename example: Uninst_vcp.bat
• Content example:
VCP_x.x.xxxxx.exe /s /z"ANSWERFILE:setup.iss"
5.2.2
Creating a Response File
The following examples cover the sections and installation options required to
perform a successful silent installation of VCP.
Note: A sample ISS file is included in VCP’s installation directory.
The response property to install VCP:
UNINSTALL_EVERYTHING=no
The response property to uninstall VCP:
UNINSTALL_EVERYTHING=yes
The rest of the response file looks like this:
[INSTALLATION]
UNINSTALL_EVERYTHING=no
ALLUSERS=yes
USERNAME=Username
COMPANYNAME=Company
INSTALLDIR=C:\Program Files\Vizrt\Viz Content Pilot\
SILENTINSTALL=yes
IconsOnDesktop=yes
ORACLESID=vizrtdb
ORACLEHOST=vogon
ORACLETNSADMINPATH=
36
Chapter 5: Installation
For a visual reference, see Database configuration.
Newsroom_PreviewDisabled=no
Newsroom_PreviewHost=preview
Newsroom_PreviewPort=6100
Newsroom_insertBCSTag=no
Newsroom_UseVCPDM=no
Newsroom_UseUTF8=yes
Newsroom_BCSDeviceName=
Newsroom_BCSTemplateName=
Newsroom_DatabaseUsername=pilot
Newsroom_DatabasePassword=pilot
Newsroom_MOSID=PILOT
For a visual reference, see Newsroom Component configuration.
; new from 5.2
MSEHostName=localhost
;Videohub_SoapHost=videohub
;Videohub_SoapPort=80
;Videohub_MbHost=videohub
;Videohub_MbPort=6555
;Videohub_NewsroomNODB=yes/no
;Videohub_BackupSoapHost=backupVideohub
;Videohub_BackupSoapPort=80
;Videohub_BackupMbHost=backupVideohub
;Videohub_BackupMbPort=6555
;Videohub_Username=vizlink
;Videohub_Password=vizlink
For a visual reference, see Viz Link configuration.
[UPGRADE_RESPONSES]
UninstallNewerInstalledVersion=no
ModifyCurrentInstallation=no
UpgradeOlderInstallation=yes
[INSTALL_PROGRAMS]
VizContentPilot=yes
VizTemplateWizard=yes
VizTemplateManager=yes
VizObjectStore=yes
VCPEXP=yes
VizScribe=yes
VizVirtualSet=yes
Newsroom=yes
VizPreviewEngine=yes
GPI_Drivers=yes
VizArchiveDistributor=yes
PreviewGenerator=yes
TCMonitor=yes
TrioDataResource=yes
CuriousPlugin=yes
OmneonPlugin=yes
For reference, see Component Descriptions
; these are not essential, but included anyway
BDE=yes
Examples=yes
; new from 5.1
OracleInstantClient=yes
ActiveXNle=yes
QuickCG=yes
OracleInstantClient installs Oracle’s Instant Client which can be used in those
cases where a runtime or administrator client is not needed (see the Database
Client and Database Administration sections for further details).
Chapter 5: Installation
37
ActiveXNle installs the Newsroom Component (see the Newsroom Integration
Client and Newsroom Component sections for further details). QuickCG installs
the QuickCG tool (see the Quick CG section for further details).
; new from 5.2
Spellcheck=yes
VCPNLE=yes
Spellcheck enables you to add spell-checking functionality to your templates.
VCPNLE enables you to use VCP’s Newsroom Component for adding Vizrt graphics
to your NLE tool’s timeline.
[VIZ_MACHINES]
Machine1=preview
Pwd1=
Machine2=localhost
Pwd2=
For a visual reference, see Viz Template Wizard configuration
5.3
Plugin Installation
When using the VCP client or the Newsroom Component to preview graphics a Viz
Engine connection is needed; hence, you should always make sure to have the
same setup for both program and preview renderers with regards to the plugins
used by your graphics designer.
Typically, if you are using Viz Engine 2.x you always need to make sure you install
Extra Viz Plugins as it is a separate installer that contains the control plugins used
to control the templates. This is not the case with Viz 3.x users that have the
same plugins installed by default.
Also, if you are previewing your graphics using a local Viz Engine you should
remember to perform a Custom installation instead of a standard one in order to
install the Viz Engine Preview Plugin.
All plugins are available on the Vizrt FTP, either as part of the VCP or Viz Artist
installer or as separate plugin packages.
Note: If plugins are not installed preview might not work or look as expected.
See Also
• Custom
• Vizrt FTP
5.4
Newsroom Integration Client
The Newsroom Integration Client option installs Viz Content Pilot’s Newsroom
Component (NrC) which is normally used by newsroom users (e.g. journalists and
editors) and by editors using Non-linear editing (NLE) tools. The software is
normally integrated to newsroom systems as an embedded component.
38
Chapter 5: Installation
When installing the Newsroom Component for use in a Java or web based
newsroom system, the Oracle Instant Client should not be installed (i.e. use the
Custom install option).
As most newsroom computers running the Newsroom Component does not have
administrator rights you could optionally install it using RunAs parameters,
installing the software from the command line or use the Run as administrator
context menu option available to Windows 7 users. Note that you need to have
administrator rights for this to work.
If the Newsroom Component is used as part of the Viz Video Hub integration you
should also perform the Viz Link configuration during installation.
Figure 7: Newsroom Component configuration
The newsroom integration client is normally installed for journalists and NLE
system user.
The newsroom integration client installation includes the following components:
• Oracle Instant Client
• Viz Content Pilot Newsroom Component
• Viz Content Pilot Non-linear Editing plug-in
• Viz Content Pilot Spell Checker
• Viz QuickCG
Note: Installs a Newsroom Component Test page in the program menu to simulate
template filling in a newsroom system.
Chapter 5: Installation
39
NrC allows for preview of template graphics in two ways; remote snapshot
preview using a remote Viz Engine (recommended) and local preview using a
locally installed Viz Engine (requires a Viz license).
The Preview Settings defines if the Newsroom Component should use preview or
override the database settings. Database settings apply to all clients that does not
have preview configured locally.
• Disable Preview: Disables both local and remote preview for the Newsroom
Component.
• Viz Engine preview host: Overrides the database settings and sets a locally
configured preview host.
• Port: Sets the port number for the locally configured preview host. Default port
is 50008.
Note: If performing a custom installation, do not select Viz Engine Preview plug-in
as this is intended for local Viz Engine preview.
The Advanced iNEWS settings should be used if Avid’s iNEWS Control Air is being
used. There are two ways of using the NrC in conjunction with iNEWS Control Air.
1. It can be used for filling VCP data elements (same as MOS integrations), or
2. It can be used for returning character generated (*cg1 my_template tab1 tab2)
elements based on custom templates designed to return tab fields like image
paths and so on.
• Insert BCS Tag: This option should be checked for both cases as described
above. BCS device name is the Avid iNEWS Control Air device name that by
default is set to cg1.
• Use VCPDM: Check this option if VCP elements are used. BCS template name is
by default set to pilotdata.
• Override database MOSID: Overrides the default MOS ID (PILOT).
See Also
• Viz Content Pilot Installation
• Newsroom Component configuration
5.5
Control Room Client
The Control room client installation is normally installed for control room
operators that manage the playlists for playing out graphics on air.
The control room installation includes the following components:
• Viz Content Pilot Client
• Viz Content Pilot Examples
• Viz Content Pilot Export and Import plug-in
• Viz Content Pilot NLE plug-in
• Viz Content Pilot Spell Checker
• Viz Object Store Client
• Viz QuickCG
• Viz Template Wizard Client
40
Chapter 5: Installation
5.6
Template Design Client
Figure 8: Viz Template Wizard configuration
The Template design client installation is normally installed for template
designers that creates and manages the graphics templates.
The Viz Template Wizard configuration dialog box is used to add Viz Engine hosts
and a Media Sequencer host for use with Viz Template Wizard.
Note: Default hosts are localhost.
The template design client installation includes the following components:
• Oracle Instant Client
• Viz Content Pilot Client
• Viz Content Pilot Examples
• Viz Content Pilot Export and Import plug-in
• Viz Content Pilot Newsroom Component
• Viz Content Pilot Spell Checker
• Viz Object Store Client
• Viz Template Wizard Client
Note: Installs a Newsroom Component Test page in the program menu to simulate
template filling in a newsroom system.
Chapter 5: Installation
41
5.7
Custom
Custom installation is for advanced users only, and can be used to select or
unselect specific components that are or are not needed.
The custom installation includes all options seen in Table 20: Viz Content Pilot
Components.
Note: The option to select features is only available when Custom installation is
selected.
Figure 9: Select Features
Some options are dependent on each other, and these are as follows:
• The following components cannot be installed without VCP:
• VCP Export and Import Plug-in, VCP Time Code Monitor, Viz Trio Data
Resource and Viz Virtual Set Plug-in.
• The Viz Virtual Set plug-in cannot be installed without VCP.
• The VCP Non-linear Editing Plug-in cannot be installed without the Newsroom
Component.
5.8
Video Codecs
If you are previewing proxy versions of video from Viz One using Viz Content
Pilot’s Newsroom Component (i.e. Timeline Editor) or Viz Engine (i.e. Viz Engine
installed on your control client machine) you will have to install video codecs that
are not part of Vizrt’s standard installation.
42
Chapter 5: Installation
IMPORTANT! Due to licensing requirements, Vizrt does not provide the codecs
required for local preview. Users must obtain and install their own codecs.
Note: Codecs are only required when local preview is done, as in the cases above.
Playout of the high resolution versions do not require a codec installation.
The following procedures will guide you through the necessary installation steps:
• To install codecs for local preview
• To set a preferred decoder
To install codecs for local preview
Codecs are available from several suppliers. The example below sets up support
for h.264 playback using the FFDShow MPEG-4 codec package and a Matroska
Splitter from Haali.
Note: You need to have your own license for clip playback as FFDShow does not
come with a decoding license.
1. Make sure you do not have any other codec packages installed on the machine
that interfere with FFDShow or the media splitter.
2. Download the Matroska Splitter from Haali
3. Download the Windows 7 DirectShow Filter Tweaker
4. Download the FFDShow MPEG-4 Video Decoder
• Make sure you have a license to use the codec
• Make sure you download a 32-bit version of the codec
5. Uninstall older 64-bit versions of the MPEG-4 codec
6. Install the Matroska Splitter from Haali
7. Install the Windows 7 DirectShow Filter Tweaker
8. Install the FFDShow MPEG-4 codec
• After installing the FFDShow codec package make sure that no applications
are excluded, especially Viz Engine (there is an inclusion and exclusion list
in FFDShow).
9. Set your MPEG-4 32-bit decoder to FFDShow (see how To set a preferred
decoder)
• You should now be able to preview video clips from Viz One
To set a preferred decoder
1. Run the Windows 7 DirectShow Filter Tweaker
2. In the appearing dialog box click Preferred decoders
Chapter 5: Installation
43
3. Set your MPEG-4/H.264 32-bit decoder to FFDShow and click Apply & Close
4. Click Exit
See Also
•
•
•
•
Working
Working
Working
Working
with
with
with
with
Viz One
Local Viz Preview
Remote Viz Preview
the Timeline Editor
• Viz Engine 3.x Administrator’s Guide
5.9
Component Descriptions
The table below describes the main components that can be installed as part of a
VCP installation.
Table 20: Viz Content Pilot Components
44
Type
Description
Borland Database Engine 5.2
The Borland Database Engine 5.2 is used for
legacy templates that use BDE's data access
components such as TDataSource, TQuery
and TDatabase. For details, see Viz
Template Wizard User’s Guide.
Oracle Instant Client
The Oracle Instant Client is used for
accessing VCP’s database.
Viz Content Pilot Archive
Distributor plug-in
The Archive Distributor is a tool for remotely
importing Viz Artist archives to a
configurable amount of Viz Engines.
Viz Content Pilot Client
Template based solution for the control of
broadcast graphics
Viz Content Pilot Examples
Example scenes, templates and scripts.
Viz Content Pilot Export &
Import plug-in
The VCP Export & Import plug-in is a tool
for export and import of templates and
playlists along with associated Viz Artist
graphics.
Viz Content Pilot GPI Drivers
The General Purpose Input (GPI) drivers
allow for external control of VCP.
Chapter 5: Installation
Table 20: Viz Content Pilot Components
Type
Description
Viz Content Pilot Newsroom
Component
The NrC integrates into the newsroom
system allowing journalists to add graphics
to the story.
Viz Content Pilot Non-linear
Editing Plug-in
The VCP NLE plug-in uses the NrC to add
graphics to an NLE timeline.
Viz Content Pilot Spell Checker
Installs a set of default dictionaries that uses
the Hunspell spell checker.
By default the installer includes the
following OpenOffice.org dictionaries:
Arabic (both North Africa and Middle East),
English (both United Kingdom and United
States of America), French, German,
Norwegian (both bokmaal and nynorsk),
Russian and Spanish.
Dictionaries are UTF-8 formatted by Vizrt.
Viz Content Pilot Time Code
Monitor
The Time Code Monitor is used to monitor
the progress of video playout.
Viz Object Store Client
The VOS Client helps store and retrieve
images, sounds and video clips to and from
the file share (stills and person information),
VCP’s database (thumbnails), and Viz Video
Hub (videos) for use in templates.
Viz Engine Preview plug-in
Preview a scene in VCP and the NrC.
Requires a local installation of Viz Engine.
Viz Quick CG
A system tray application that allows quick
creation of character generated (CG) data
elements.
Viz Template Wizard Client
Viz Template Wizard is used to create
templates for use with VCP and in some
cases for Viz Trio.
Viz Thumbnail Generator
Viz Thumbnail Generator generates
thumbnails for all saved data elements.
Viz Trio Data Resource plug-in
The Data Resource plug-in displays Viz Trio
shows and pages that can be added to a
playlist.
Viz Virtual Set plug-in
The Viz Virtual Set plug-in is a tool for
controlling a virtual set.
Chapter 5: Installation
45
6
Getting Started
Viz Content Pilot consists of multiple applications, but you can divide the main
areas of use into three; control room, newsroom and template design.
In addition you have the Viz Object Store (image database), the Viz Thumbnail
Generator, the update script service and more; however, you can think of these as
service providers to the main areas of use.
The Viz Content Pilot (VCP) client depends on several systems to be able to
function in a control room. Most important are the Media Sequencer and the VCP
database. Without these two the VCP client will not start.
The basic setup therefore consists of a connection to the Media Sequencer and
the VCP database. For actual playout you will further need a Viz Engine with a
connection to a Viz Graphics Hub for content creation and graphics playout.
A common setup is also to run the VCP client with a newsroom system
connection. A newsroom connection allows VCP to fetch playlists made available
by the newsroom system. This effectively means that the VCP client operator will
only monitor and control the playout of the playlist elements, and not create
them.
Additionally, for playout of video clips a connection to Viz One for search and
transfer of video clips to Viz Engine can be used.
Note: The Media Sequencer is, amongst other things, used to configure connections
to External Interfaces. The Media Sequencer may be installed locally or on a separate
server (see Startup Options).
To start Viz Content Pilot client
1. Start the Media Sequencer.
2. Configure the VCP client’s Database parameters in the local initialization file
to connect to the VCP database.
3. Double-click the icon on the desktop, or
4. Select the program from the Start menu (All Programs > Vizrt > Viz Content
Pilot > Viz Content Pilot 5.x)
Note: Default intallation path: C:\Program Files\vizrt\viz content pilot 5.x.
See Also
• Newsroom Integration
• Thumbnail Generation
46
Chapter 6: Getting Started
• Database Administration
• Viz Object Store User’s Guide
• Viz Template Wizard User’s Guide
Chapter 6: Getting Started
47
7
Configuration
This section describes how to configure Viz Content Pilot (VCP). In order to have a
working VCP system, most of the applications must be configured to use a Media
Sequencer, a database and a Viz Engine for playout and preview.
This section contains information on the following topics:
•
•
•
•
•
•
•
•
•
•
•
•
•
•
•
Startup Options
Profile Configuration
Working with the Profile Configuration
Preview Configuration
Preview Port Numbers
Working with Local Viz Preview
Working with Remote Viz Preview
External Interfaces
Working with Viz One
Database Configuration
Initialization Files
Registry Settings
Command Line Options
Fullscreen Stillstore Images
Display Font
See Also
• Software Requirements reference
7.1
Startup Options
The Media Sequencer is used to create, store and play out Viz Content Pilot’s
(VCP) data elements.
A Media Sequencer can be installed on a separate machine, but it is recommend
to run it on the same machine as the VCP client.
For failover or backup you can specify which Media Sequencer the VCP client
should use, it is recommended that a unique desktop shortcut is created for each
Media Sequencer that can be used.
Edit the properties of each shortcut, and add the following:
48
Chapter 7: Configuration
• -mse <hostname>
In a scenario where it is needed to switch from one Media Sequencer to another, it
is useful to have the same profile setups on each Media Sequencer so that fail
situations are easier to handle.
See Also
• Configuration
• Getting Started
• Command Line Options
7.2
Profile Configuration
Figure 10: Profile Configuration
An important part of the profile configuration is to create profiles for different
purposes. For example; Profile Setups can be created where different channels
have the program and preview function. This makes it fast and easy to switch
between different output settings.
This section contains information on the following topics
• Categories and Channels
• Profile Setups
• Forked Execution
See Also
• Working with the Profile Configuration
7.2.1
Categories and Channels
When setting categories and channels to filter playlists, it is important to note that
the channel configuration configured in Viz Template Wizard (see template
manager tool) corresponds with the actual channel name.
IMPORTANT! Legacy templates that do not use Control Object are unable to assign
itself to the correct program channel; hence, it will always default to the default
Chapter 7: Configuration
49
program channel in the profile configuration, and disregard information in the
Categories and Channels setup.
7.2.2
Profile Setups
Table 21: Profile setups
Profile
Program
Preview
Main
A
B
Backup
B
A typical example for when it makes sense to use different profiles would be a
backup configuration where a switch from a main to a backup renderer is needed.
For example if two output renderers are named A and B, where A is program and
B is preview, a profile named “Main” will then have channel A as program and
channel B as preview.
A profile named “Backup” could, if the renderer acting as program (A) in the
“Main” profile fails, have channel B as program.
Note that a channel can be designated as a Program or Preview channel by
selecting the check box in the appropriate columns (Program or Preview);
however, the program and preview channels are reciprocally exclusive - only one
channel can be set to program, and only one channel can be set to preview. If for
example A is set to program and B is set to preview, and then C is set to program,
A will no longer be set as program.
GPI
Another example of typical use of profiles is when playout is controlled through a
General Purpose Input (GPI), for instance through hardware such as a vision
mixer.
When GPI is enabled, the external cursor (the GPI system’s cursor) will be
displayed/shown in any client that is using the same profile as the external
system. A typical setup would be that one Viz Trio client is in the same profile as
the GPI system, and functions as a “prepare station” for the producer sitting at the
vision mixer desk. Data elements are then made ready and displayed on a preview
visible to the producer, and then the elements are triggered from the vision
mixer. This configuration needs a separate “GPI” profile that is not used by other
control application clients. Other clients can be in other profiles and produce
content to the same output channels. However, they need to be on other
transition layers or on another Viz layer so that they will not interfere with the
graphics controlled by the external system.
VDCP
If you are browsing the Cliplist for clips on other video devices (that support the
Multiport Video Control Protocol (MVCP)) you may add these clips for manual
playout in any playlist regardless of the profile configuration.
50
Chapter 7: Configuration
Viz Video Hub
This section contains information on limitations of the Viz Video Hub and is still
valid for those that use Viz Video Hub. Viz One replaces the Viz Video Hub and
does not have the following limitations.
If you to transfer video clips from Viz Video Hub you can use the default vizroom1
profile, unless you configure a profile manually in Viz Video Hub. If you configure
a profile manually, the profile must be identical in the Viz Content Pilot client and
Viz Video Hub.
When configured to use video clips from Viz Video Hub it is required to use IP
addresses for both the Viz and video devices in order to visualize the transfer
progress correctly; hence, a hostname on the Viz device will work, but not when
configured to be used alongside a video device. Also, they must match the video
configuration for both program and preview.
See Also
• Forked Execution
7.2.3
Forked Execution
Forked execution can be used with standalone and transition logic scenes. It also
replaces the execution of visible containers.
This section contains information on the following topics:
• Standalone scenes
• Transition logic scenes
• Visible containers
Standalone scenes
Forked execution supports standalone scenes by executing the same graphics
with different concepts on two or more render engines. Concepts are defined per
channel in when Working with the Profile Configuration tool.
As an option you can also use this setup to handle fail situations by having the
same graphics concept rendered on both engines.
Transition logic scenes
As with Standalone scenes, forked execution supports setting concepts for
Transition Logic scenes. In addition Transition Logic scenes, by defining channels
with different render engine setups, can show different states of the same scene
on a per engine basis. All states are synchronized for all engines (at all times) in
order to achieve an artifact-free and smooth morphing of the graphics from one
state to the other.
Chapter 7: Configuration
51
If for example you have three render engines you can set up a range of channels
with different combinations of render engines per channel.
Channel
Viz Engines
A
1,2,3
B
1,3
C
1
D
2,3
E
2
If for example you have a scene with four layers each layer can be controlled
separately from the other layers (see table below). By setting a state per layer you
can achieve a varied output depending on the channel used and how that channel
is configured in terms of render engines (see table above).
•
•
•
•
Layer
Layer
Layer
Layer
1:
2:
3:
4.
Shows and hides a geometry (e.g. a cube)
Shows and hides a geometry (e.g. a cube)
Positions the geometries.
Animates the layer 1 geometry by showing the next image or a logo.
States for layer 1
States for layer 2
States for layer 3
States for layer 4
Show cube
Show text
Position left
Next image
Hide cube
Hide text
Position right
Show logo
<ignore>
<ignore>
Position center
<ignore>
<ignore>
With the aforementioned scene layers and configured channels you can have the
following output on each of the three engines.
Channel
Layer state
Channel C
Show cube
(Viz 1)
Pos left
Output on Viz Engine 1, 2 and 3
Show text
Show logo
Channel D
Show cube
(Viz 2,3)
Pos right
Show Text
Show Logo
52
Chapter 7: Configuration
Channel
Layer state
Channel E
Pos center
(Viz 2)
Hide text
Channel A
Next image
Output on Viz Engine 1, 2 and 3
(Viz 1,2,3)
Channel A
Next image
(Viz 1,2,3)
Channel A
Show text
(Viz 1,2,3)
Next image
Channel A
Show logo
(Viz 1,2,3)
Channel B
Hide cube
(Viz 1,3)
Channel E
Hide cube
(Viz 2)
Visible containers
Viz Content Pilot still support, though it is considered deprecated, a behavior
similar to that of forked execution. By designing a standalone scene where each
root container is a variant of the other, you can configure each render engine To
render specific scene containers (by name). In effect a scene with two or more
root containers can have one or several containers assigned and rendered visible
by one render engine.
Due to potential performance issues when using large textures (e.g. HD) this
option is no longer recommended. Concept and variant design of standalone and
transition logic scenes is therefore the recommended design convention.
See Also
• Profile Configuration
• Working with the Profile Configuration
Chapter 7: Configuration
53
• To render specific scene containers
• Viz Artist’s user guide on Transition Logic
7.3
Working with the Profile Configuration
This section contains information on the following procedures:
• Configuring Profiles
• Configuring Channels
• Configuring Devices
See Also
• Working with Local Viz Preview
• Working with Remote Viz Preview
• Preview Port Numbers
7.3.1
Configuring Profiles
This section contains information on the following topics:
• To open the profile configuration
• To add a new profile
• To rename a profile
• To delete a profile
To open the profile configuration
1. Select Tools from the main menu, and then Profile Configuration (CTRL+M), or
2. Right-click the profile on the status bar (lower-left) and select Profile
Configuration... from the appearing context menu.
To add a new profile
• In the Profile Configuration window click the Add profile button, and in the
appearing text field enter a new unique profile name, and press Enter.
To rename a profile
1. Right-click the profile and from the appearing context menu select Edit Profile
Name, or simply double-click it and enter the new name.
2. When finished editing the name, press Enter or click the cursor outside the
Profiles list.
To delete a profile
• Right-click the profile and from the appearing context menu select Delete
Profile, or simply select it and press the Delete button.
7.3.2
Configuring Channels
This section contains information on the following topics:
54
Chapter 7: Configuration
•
•
•
•
•
To
To
To
To
To
add an output channel to the Channels list
add a concept override for a channel’s output device
rename an output channel in the Channels list
remove an output channel from the Channels list
remove an output from the Channels list
To add an output channel to the Channels list
• Click the New Channel button, or drag and drop a Viz Engine or video device
to the Channels list.
To add a concept override for a channel’s output device
1. Expand the channel’s output device and append the concept name.
• This will override any concepts set elsewhere
2. Click OK
CAUTION! Note that concept names are case sensitive.
To rename an output channel in the Channels list
• Right-click the channel and select Edit Channel Name from the appearing
context menu, or double-click the name.
To remove an output channel from the Channels list
• Right-click the channel entry and select Delete channel from the appearing
context menu, or select the channel and press the Delete button.
To remove an output from the Channels list
• Right-click the Viz Engine or video device and from the appearing context
menu select Delete Output, or simply select it and press Delete.
Chapter 7: Configuration
55
7.3.3
Configuring Devices
This section contains information on the following topics:
• To add a Viz Engine
• To add a video device
• To edit a Viz Engine or video device
• To delete a Viz Engine or video device
• To enable scene transitions
• To enable still preview
• To render specific scene containers
• To set a different font encoding
To add a Viz Engine
1. Click the Add Viz... button in the Profile Configuration window to open the
Configure Viz Engine dialog box.
2. Enter the hostname and port (default port is 6100).
3. Optional: Select Mode
• Scene Transitions: See how To enable scene transitions
• Still Treview: See how To enable scene transitions
4. Optional: Select a Viz One storage (VME Storage)
5. Optional: Select Visible containers and/or Font Encoding
6. Click OK.
• A status indicator will show if the renderer is on-air.
Note: Viz One Storage lists available Viz Engine storages for clip transfer and
playout.
56
Chapter 7: Configuration
To add a video device
1. Click the Add Video... button in the Profile Configuration window to open the
Configure Video Device dialog box.
2. Select the video server Type
3. Enter the Host or IP address and the port
• Default port for MVCP is 5250
• Default port for Viz Engine is 6100
4. Select VME Storage
5. Enable/Disable Fullscreen mode
• When Fullscreen is enabled, which is the default behavior, stand-alone
video clip elements are played out full screen in the back layer. Graphics in
the middle or front layer will still play.
• When Fullscreen is disabled stand-alone video clip elements will only
replace the current video clip without triggering animations or transition
effects.
6. Select Clip Channel (only relevant for Viz Engine)
7. Click OK.
• A status indicator will show if the video device is on-air or online.
To edit a Viz Engine or video device
• Right-click the device and select Edit from the appearing context menu, or
simply double-click it.
To delete a Viz Engine or video device
• Right-click the device and select Delete from the appearing context menu, or
simply select it and press the Delete button.
To add an output to the Channels list
• Simply drag and drop a Viz Engine or video device onto the channel in the
Channels list, or select it and from the appearing context menu select Add to
profile (creating a new channel) or Add to selected channel.
Chapter 7: Configuration
57
To enable scene transitions
Transition Effect scenes are made in Viz Artist and can be applied to data
elements to create custom transition effects from one scene to the other. If an
effect is specified, the effect will be shown when the scene is taken on-air. Effects
are typically wipes, dissolves, alpha fades and so on.
1. Configure the Viz Engine settings as seen in how To add a Viz Engine
2. Set the Mode to Scene Transitions to allow the renderer to copy (or snapshot)
the scenes to create a transition effect between them.
3. Click OK
4. Add the program renderer to the program channel
Note: To see the effects the program channel must be configured and on-air.
To enable still preview
See how To configure remote still preview
58
Chapter 7: Configuration
To render specific scene containers
Before configuring your Viz Engines to render specific scene containers it is
recommended to read the Forked Execution section for further explanation.
1. Configure the Viz Engine settings as seen in how To add a Viz Engine
2. Click the Deprecated settings button to expand the editor
3. Click the Add button to enter the scene’s container name that should be
rendered visible
4. Optional: Repeat step 3 to Add other containers
5. Click Ok
To set a different font encoding
1. Configure the Viz Engine settings as seen in how To add a Viz Engine
2. Click the Deprecated settings button to expand the editor
3. Select the Font encoding
• Font encoding: Sets the font encoding of the Viz Engine. The encoding can
either be set to UTF-8 or ISO-8859-1. Default is UTF-8.
4. Click Ok.
See Also
•
•
•
•
•
7.4
Profile Configuration reference
Working with Local Viz Preview
Working with Remote Viz Preview
Playlist filters
Viz Template Wizard on Categories and Channels.
Preview Configuration
There are several preview options available; however, they also represent different
areas of use.
Chapter 7: Configuration
59
Local preview uses a local Viz Engine; however, it is not a recommended setup if
the machine does not meet the hardware requirements.
Remote preview uses a remote Viz Engine. This can either be a real time or a
snapshot preview. The real time preview option uses a reference monitor, and is
the recommended solution for graphics designers, template designers and
control room operators. The snapshot preview option uses a shared Viz Engine,
and is the recommended solution for multiple simultaneous users (e.g. for
thumbnail generation and newsroom and non-linear editing users).
In general it is recommended to add the pilot1 (lowercase only) tag on the scene’s
default (main) director in order to set a specific preview or generation point. The
same goes for transition logic scenes that must have the tag set for the
foreground scenes.
See Also
•
•
•
•
•
7.5
Preview Port Numbers
Working with Local Viz Preview
Working with Remote Viz Preview
Profile Configuration on how to configure Viz Engines
Local Viz Preview and Remote Viz Preview on how to preview graphics
Preview Port Numbers
By default Viz Engine uses port number 6100 for both program and preview
rendering. If a port number is changed Viz Engine must change its
communication port as well. Use Viz Config to set the new communication port
number. Note that this is not required for the multiplexing ports (50008 or
50010, see Ports and Connections)
For local preview it is recommended to configure a Viz Engine to use the default
port 6100. If local preview is a requirement, it is recommended to use the Viz
Preview License server to minimize the need for hardware license dongles.
For remote preview there are several options; however, the recommended option
is to configure a second Viz Engine to use the default port 6100 (which will give
you a real-time preview on a reference monitor).
For remote preview where you want to support multiple users a remote Viz Engine
can be configured to use preview port 50008 (which will give you a client-side
still/snapshot preview).
For remote preview where you need to use the same Viz Engine for both program
and preview renderering you can use port number 50010 (which will give you a
still/snapshot preview on a reference monitor (see Working with Remote Viz
Preview)).
Note: Do not use a program renderer for snapshot preview using port 50008.
For Viz Engine 2.x users, a Viz Multiplexer is required for preview. Viz Multiplexer
connects to Viz Engine using port 6100 or the multiplexing port 50008.
60
Chapter 7: Configuration
For Viz Engine 3.x users, Viz Multiplexer is not required as Viz has its own builtin multiplexing functionality; however, the same ports apply as for Viz 2.x.
Note: In control rooms it is recommended to use a stand-alone Viz Engine with a
reference monitor for full graphics and video preview.
See Also
• Ports and Connections
7.6
Working with Local Viz Preview
Local preview requires Viz Content Pilot client’s preview plugin and a Viz Engine
with plugins (see the Plugin Installation section). The local Viz Engine used for
preview rendering should preferably have the same configuration and hardware
setup as the Viz Engine used for program renderering.
If you are using Viz Engine to preview video clips from Viz One, Viz Engine must
be installed with Video Codecs (e.g. MPEG-4 codec and Haali Media Splitter).
By default the VCP installer will not install the preview plugin; however, this can be
done by performing a Custom installation.
IMPORTANT! Viz 3.x users must configure Viz To automatically login to Viz Graphics
Hub (database) as the Viz Content Pilot client is unable to do this.
This section contains information on the following topics:
• Configuring Local Preview of Graphics
• Configuring Local Preview of Video Files
7.6.1
Configuring Local Preview of Graphics
This section contains information on the following topics:
• To configure Viz 3.x local preview
• To configure Viz 2.x local preview
• To enable local preview
• To use local preview
• To automatically login to Viz Graphics Hub
To configure Viz 3.x local preview
• Perform the same steps as shown in how To configure Viz 3.x remote preview
and make sure you add localhost as your hostname
To configure Viz 2.x local preview
• Perform the same steps as shown in how To configure Viz 2.x remote preview
and make sure you add localhost as your hostname
Chapter 7: Configuration
61
To enable local preview
If you are running a Viz Engine locally, you need to install Viz Content Pilot client’s
Preview plugin
• Select the Viz Engine Preview plug-in during Custom installation. In addition a
Viz Engine must be installed on the same machine.
To use local preview
1. From the main menu select Viz Engine > Local Viz Engine Preview, or press
CTRL+P
2. Right-click in the playlist and from the appearing context menu select Auto
Preview (which allows preview to be sent as soon as an item in the list is
selected)
3. Select (by left-click) an item and it will be sent to the preview window
To automatically login to Viz Graphics Hub
1. Start Viz Config
2. In the Database section enable Auto Login
3. Click Save and close Viz Config
See Also
•
•
•
•
•
7.6.2
Working with the Profile Configuration
Local Viz Preview reference
Custom installation
Plugin Installation
Viz Engine 3.x Administrator’s Guide
Configuring Local Preview of Video Files
If you are previewing proxy versions of video clips from Viz One using Viz Engine
(i.e. Viz Engine installed on your control client machine) you will have to install
Video Codecs that are, for Viz Engine 3.5, not part of the Viz Engine installation.
Note that the setup procedures of Video Codecs are only relevant for Viz Engine
3.5 when used for previewing low resolution versions of video clips stored on Viz
One. In most cases this happens when you are using a control application to for
example preview a full screen clip. Playout of the high resolution versions do not
require this codec.
See Also
•
•
•
•
62
Video Codecs
Working with the Profile Configuration
Local Viz Preview reference
Viz Engine 3.x Administrator’s Guide
Chapter 7: Configuration
7.7
Working with Remote Viz Preview
Remote preview can be done in several ways; using a Viz Engine with a reference
monitor for animated and snapshot still previews or as a snapshot preview on the
client side with the option of showing stills, animations and preview points.
Using a reference monitor is the recommended remote preview option. This
option works best using an additional Viz Engine as this will give you an option to
pass through your video input. As an alternative to the extra Viz Engine you may
also run two Viz Engine instances on one physical machine provided you have two
graphics cards (in a dual channel setup). As a final alternative you may also
configure the Viz Engine used for program output to feed still previews using port
50010 (see Port Numbers). This kind of remote preview can be configured from
the Profile Configuration window.
If using a reference monitor is not an option, you may use the Viz Content Pilot
client’s built in Remote Preview (CTRL+P) window for a snapshot preview. This
option is configurable from the Preferences window and must not be confused
with Viz Content Pilot’s Preview plugin which requires a local Viz Engine (see
Working with Local Viz Preview). The snapshot preview option allows you to see a
frame by frame preview. Either selected frames or frames of preview points added
to the scene by the graphics designer. This option does not support preview of
your video input.
This section contains information on the following topics:
• To configure Viz 3.x remote preview
• To configure Viz 2.x local preview
• To configure remote still preview
• To configure remote snapshot preview
• To enable remote snapshot preview
To configure Viz 3.x remote preview
1. First, see how To add a Viz Engine, and then perform the following steps:
2. Add the newly created Viz Engine to your channel and check the Viz Preview
check-box
3. Click Close
To configure Viz 2.x remote preview
Note: These configurations are for Viz Engine 2.x using Viz Multiplexer.
1. First, see how To configure Viz 3.x remote preview, and then perform the
following steps:
2. Set Viz Multiplexer to NLE mode by adding the following to the target path:
--nle-mode hostname:<listening port>
3. Set Viz Engine to Off Screen mode
• See the Render Options section in Viz Engines configuration user interface,
and set, for Viz Engine 2.x, Video Output Window to Off Screen
Chapter 7: Configuration
63
To configure remote still preview
Still Preview allows you to use the program output to get a still preview, typically
on a reference monitor. To achieve this the Media Sequencer creates a copy of the
scene being read and sends commands to your program output renderer asking
for a snapshot of the scene while the current scene on air is being rendered.
1.
2.
3.
4.
5.
Create two channels, one for program and one for preview
Configure the same render engine twice as seen in how To add a Viz Engine
For the second render engine set Port to 50010 and the Mode to Still Preview
Click Ok
Add the program renderer to the program channel and the still preview
renderer to the preview channel
WARNING! This setup requires sufficient ring buffer on the program renderer in
order for the rendered still preview not to cause the scene on air to drop frames;
hence, this setting is deprecated.
To enable remote snapshot preview
Note: This operation is only needed if you already installed Viz Content Pilot client’s
preview plugin for local preview.
1. Start Add or Remove Programs.
2. Select Vizrt Viz Content Pilot and click the Change/Remove button
3. In the appearing dialog box click No to uninstall the installation to start the
Custom installation process
4. Select Viz Content Pilot Newsroom Component
5. Deselect Viz Engine Preview plug-in
6. Click Next to restart the installation process
To configure remote snapshot preview
1.
2.
3.
4.
64
Start the Viz Content Pilot client
Select Preferences from the Options menu
Select the Remote Preview option in the Preferences window
Enable the Use this server option to override the database settings
• Host: <hostname>
• Port: 50008
Chapter 7: Configuration
5. Optional: Enable the Always show “Animate” button option, and set a preferred
poll interval (seconds) for how often images should be retrieved from Viz
6. Optional: Configure size and position of the remote preview window
Note: If the Viz Engine Preview plug-in is installed (custom installation), local
preview will start and not remote preview (snapshots).
See Also
•
•
•
•
•
7.8
Working with the Profile Configuration
Newsroom Integration Client
Remote (snapshot) preview Preferences
Remote Viz Preview using the VCP client
Remote Viz Preview using the Newsroom Component
External Interfaces
The External Interfaces window is used to configure the Media Sequencer enabling
VCP to connect to other devices. This can for example be a newsroom integration
with connections to Viz Gateway, a connection to the VCP database, a GPI
configuration of a GPI card on the Media Sequencer and so on.
This section contains information on the following topics:
•
•
•
•
•
•
VCP Database
Media Engine
MOS
General Purpose Input (GPI)
Video Disk Control Protocol (VDCP)
Video Hub
Chapter 7: Configuration
65
7.8.1
VCP Database
Figure 11: VCP Database
The VCP Database option sets the database connection for the Media Sequencer.
If the information was added during the Viz Content Pilot Installation the
information is made available in the External Interfaces window; however, it must
be manually applied.
IMPORTANT! Media Sequencer requires the Oracle 11g Runtime Client.
The VCP Database tab also shows the current database and application client
encoding settings. The application encoding settings can be changed in the
ContentPilit.ini file if the database has another Unicode encoding than UTF8;
however, it is recommended to use Unicode encoding UTF8 on both ends.
This section contains information on the following topics:
• Properties and Parameters
• To apply the VCP Database settings
Properties and Parameters
• Connection string: Use a regular connection string or a TNS name alias.
• Example 1: pilot/pilot@<hostname>/<SID>
• Example 2: pilot/pilot@<tnsname alias>
• Schema: PILOT
66
Chapter 7: Configuration
To apply the VCP Database settings
1. Select the External Interfaces option from the Tools menu.
2. Select the VCP Database tab, and enter the database settings.
3. Click Apply.
See Also
• Database Configuration
• External Interfaces
7.8.2
Media Engine
Figure 12: Media Engine configuration
The Media Engine option sets the Viz One connection for the Media Sequencer.
The Viz One connection enables the Media Sequencer to request transfer of media
to Viz Engine for playout.
Note: The Viz Content Pilot client and Newsroom Component gets its Media Engine
connection parameters from the VCP database.
This section contains information on the following topics:
• Properties and Parameters
• To apply the Viz One settings
Chapter 7: Configuration
67
Properties and Parameters
• Enable the Media Engine handler: Enables the Media Sequencer to handle Viz
One transfer requests.
• Service document URI: Sets the service document URI which describes the
services the search will provide.
To apply the Viz One settings
1.
2.
3.
4.
Select the External Interfaces option from the Tools menu
Select the Media Engine tab
Click the asset search provider link
From the appearing web page (under Search Providers) copy the relevant asset
search provider URL and paste it into the Service document URI field seen in
the External Interfaces’ window
5. Click Apply.
See Also
• To configure search providers on your Data Server
• Working with Viz One
7.8.3
MOS
Figure 13: Viz Gateway configuration
The MOS tab enables the Media Sequencer to connect to Viz Gateway. If
configured to use Viz Gateway 1.0, the newsroom system and Viz Gateway must
68
Chapter 7: Configuration
be pre-configured with an NCS ID and MOS ID. For connections to Viz Gateway
versions 2.0 and later, only the Viz Gateway host and port number is needed.
Note: MOS IDs are configured on the NCS server, and are usually case sensitive.
This section contains information on the following topics:
• Properties and Parameters
• To configure a Viz Gateway connection
Properties and Parameters
•
•
•
•
•
•
•
•
•
•
•
Start: Starts a connection to Viz Gateway.
Stop: Closes a connection to Viz Gateway.
Restart: Restarts a connection to Viz Gateway.
Automatic reconnect: Starts the Viz Gateway connection automatically when
starting or resetting the Media Sequencer.
Messages per second limit (0=disabled): Sets the number of MOS messages
from a newsroom system that will be forwarded by Viz Gateway to the Media
Sequencer per second. 0 (zero) disables this throttling mechanism allowing
unlimited messages per second.
Reconnect interval (sec.): Specifies the number of seconds that the Media
Sequencer should wait, when the connection is lost, before trying to reconnect
to Viz Gateway.
Viz Gateway Host: Shows the IP address of the Viz Gateway host.
Viz Gateway Port: Shows the port number on the Viz Gateway host.
MOS ID: Shows the ID of the connecting MOS device.
NCS ID: Shows the ID of the Newsroom Control System (NCS).
Send item stat: Sends feedback to the NCS via MOS, for example information
about the availability of the elements/items in a MOS playlist (running order).
IMPORTANT! A database connection must be established in order for the MOS
integration to work. See how To apply the VCP Database settings for details.
To configure a Viz Gateway connection
1. Start VCP.
2. Select Profile Configuration from the Tools menu (see External Interfaces).
3. Click the MOS tab, and enter the appropriate settings collected from the
newsroom system and the Viz Gateway host.
4. Click OK and check that the status indicator (G) appears in the lower right of
VCP’s status bar.
5. Click the Playlists button in the Resource Panel, and check that MOS Playlists
are added to the list of available playlists.
See Also
• MOS (reference)
• Viz Gateway Administrator’s Guide
Chapter 7: Configuration
69
7.8.4
General Purpose Input (GPI)
Figure 14: General Purpose Input
The GPI settings allow the Media Sequencer to be configured to handle GPI
commands. The commands can be handled by the Media Sequencer itself (Server
Command) or forwarded to the VCP client (Macro Command).
Both server and client side commands are profile specific, meaning that the
profile determines which VCP client and potentially which Viz Engine(s) that
should execute a client and/or server command. It is therefore very important to
assign the correct profile for each GPI action as they refer to unique profiles
configured per VCP client.
For example; A VCP client has its own profile with two Viz Engines (program and
preview) and receives a client command from a GPI on the Media Sequencer. The
command executes some logic on the VCP client that issues commands to the
program renderer. If the correct profile is not set, such commands might end up
on the wrong VCP client and potentially on the wrong program renderer. The
same would happen if the GPI action was defined as a server command; however,
it would then trigger commands from the Media Sequencer to the Viz directly and
not through the VCP client.
This section contains information on the following topics:
•
•
•
•
70
Properties and Parameters
To assign a Server Command
To assign a Client Command
To add a macro command
Chapter 7: Configuration
Properties and Parameters
• Show advanced: Displays all the settings in the GPI Settings frame.
• Box Type: Select the type of GPI box that is being configured. The Box Type
can be set to SRC-8, SRC-8 III or SeaLevel.
• Port: Sets the port that the GPI box is connected to. The Port can be set to
COM1-COM17, or None.
• Base Entry: This is the node in the Media Sequencer’s data structure where the
systems look for the GPI actions. The base entry is by default set to /sys/gpi.
• Baudrate: Sets the maximum rate of bits per second (bps) that you want data
to be transmitted through this port. The Baudrate can be set to 110-921600.
It is recommended to use the highest rate that is supported by the computer
or device that is being used.
• Stopbits: Sets the interval (bps) for when characters should be transmitted.
Stopbits can be set to 1, 1.5, or 2.
• Databits: Sets the number of databits that should be used for each transmitted
and received character. The communicating computer or device must have the
same setting. The number of databits can be set to 5, 6, 7 or 8.
• Parity: Changes the type of error checking that is used for the selected port.
The communicating computer or device must have the same setting. The
parity can be set to:
• Even: A parity bit may be added to make the number of 1's in the data bits
even. This will enable error checking.
• Odd: A parity bit may be added to make the number of 1's in the data bits
odd. This will enable error checking.
• None: No parity bit will be added to the data bits sent from this port. This
will disable error checking.
• Mark: A parity bit set to 0 will be added.
• Space: A parity bit set to 1 will be added.
• Flowcontrol: Changes how the flow of data is controlled. The Flowcontrol can
be set to:
• None: No control of dataflow.
• XonXoff: Standard method of controlling the flow of data between two
modems. XonXoff flowcontrol is sometimes referred to as software
handshaking
• Hardware: Standard method of controlling the flow of data between a
computer and a serial device. Hardware flowcontrol is sometimes referred
to as hardware handshaking.
• Verbose: If enabled, Media Sequencer’s GPI handler outputs log information.
This information is useful for debugging.
• Reversed Input Order: Note that this check box is only available if Box Type is
set to SRC-8. If enabled, the signal line that originally triggered GPI action
DL0/DH0 will now trigger GPI action DL7/DH7, the signal line that originally
triggered GPI action DL1/DH1 will now trigger GPI action DL6/DH6, and so on.
Chapter 7: Configuration
71
Figure 15: Commands and actions list
• GPI action: Shows a list of the available GPI actions.
• Server/Client: Shows a drop-down list box in every row, where the selected
GPI action should apply to either a Media Sequencer (Server option) or the local
Viz Trio (Client option).
Note: The server and client actions are reciprocally exclusive.
• Server Command: Shows a drop-down list box in every row, where the action
to be performed on this GPI line can be selected. Server commands are GPI
actions that apply to the Media Sequencer. When right-clicking an item in the
playlist, the Playlist menu opens. In this menu, select Cursors, and then Set
Next. A red arrow appears next to the selected element in the playlist, which
indicates that this is the current GPI cursor. The server commands can be set
to:
• advance_and_take: The cursor shifts to the next element in the playlist, and
then runs the Start operation.
• take_and_advance: Runs the Start operation on the current element, and
then shifts to the next element in the playlist.
• take_current: Runs the Start operation on the current element (the element
with the cursor).
• next: Shifts to the next element in the playlist.
• previous: Shifts to the previous element in the playlist.
• continue: Runs the Continue operation on the current element.
• out_current: Runs the Take Out operation on the current element.
• Macro Command: Macro commands are silent GPI actions. Clicking the ellipsis
(...) button opens the Add Command window.
• Profile: Sets the profile to be used for the GPI action. This profile must match
the profile set for the playlist that is to be triggered by the GPI actions. The
drop-down list shows the profiles configured on the Media Sequencer.
Description: Shows the description of the GPI action, as it was specified in the Add
Command window.
To assign a Server Command
1. Select a GPI action, and select Server in the Server/Client column.
72
Chapter 7: Configuration
2. Select a Server Command.
3. Select a Profile.
4. Click Apply.
To assign a Client Command
1.
2.
3.
4.
Select a GPI action, and select Client in the Server/Client column.
Select or create a Macro Command.
Select a Profile.
Click Apply.
To add a macro command
1. Select the Macro Command column, and click the small ellipse (...) button to
open the Add Command dialog box.
2. Enter the command in the Command text field, or alternatively click the ellipse
(...) button to open the Predefined Functions window.
See Also
•
•
•
•
Profile Configuration
Keyboard Configuration on the VCP client
General Purpose Input (GPI) reference
Predefined Functions
Chapter 7: Configuration
73
7.8.5
Video Disk Control Protocol (VDCP)
Figure 16: Video Disk Control Protocol
The Video Disk Control Protocol (VDCP) configuration allows a VDCP connection
for the Media Sequencer to be established in order to externally control a Viz
Content Pilot playlist or Viz Trio show.
With VDCP the Media Sequencer acts like a server that controls the graphics
through the VDCP protocol. It sets up a serial connection, and on the other end of
the connection typically a video controller is placed. Over this connection VDCP
commands are sent, and in this way the video controller is able to control the
playlist/show.
The configuration of the Media Sequencer is twofold. There are the general VDCP
settings, and there is the configuration for which playlist to control.
The VDCP protocol defines recommended serial settings, but if you for some
reason need to use different settings please refer to the Media Sequencer
manual’s VDCP section, and in particular the section on "Electrical and Mechanical
Specifications", for information on how to configure this.
This section contains information on the following topic:
• Properties and Parameters
74
Chapter 7: Configuration
Properties and Parameters
Figure 17: Select show or playlist
• Port: Select the appropriate COM port for the communication
• Profile: Select the profile to use.
• Use element name as ID: Specifies if the VCP element’s save name should be
used as VDCP IDs.
• Select Mode: Select a Viz Trio show or a Viz Content Pilot playlist path mode.
• Trio show / Pilot playlist: Sets the base directory for the VDCP integration.
Video clips will be placed here.
7.8.6
Video Hub
Figure 18: Video Hub
The Video Hub settings for the Media Sequencer are based on the settings used
by Viz Object Store and automatically configured during installation of Viz
Content Pilot.
Chapter 7: Configuration
75
• Main Messagebus Host and Port: Sets the main hostname or IP address for Viz
Video Hub and its listening port (default is 6555).
• Backup Messagebus Host and Port: Sets the backup hostname or IP address
for Viz Video Hub and its listening port (default is 6555).
• Same As Messagebus: Enables or disables SOAP settings to be the same as the
Message bus settings. This option is by default enabled.
• Main SOAP Host and Port: Sets the hostname or IP address for Viz Video Hub
and its SOAP listening port (default is 6555).
• Backup SOAP Host and Port: Sets the hostname or IP address for Viz Video Hub
and its SOAP listening port (default is 6555).
• Connection timeout (ms): Sets the time in milliseconds for the Media
Sequencer and VOS to wait for response from the Viz Video Hub before closing
the connection.
• Username and Password: Sets the username and password used by VOS for
logging on to the Viz Video Hub for video, audio and still search. Default is
vizlink/vizlink.
See Also
• Database Parameters
• Viz Video Hub User’s Guide
7.9
Working with Viz One
Viz Content Pilot 5.6 and later is able to connect to media providers/repositories
such as Viz One that support VCP’s Data Server REST API.
In order to successfully connect to Viz One do the following:
1. Install and configure your media provider (e.g. Viz One)
2. Install and configure your Data Server by configuring Viz One as a search
provider
3. Configure Viz Content Pilot’s Media Engine connection (see External
Interfaces) in order for the Media Sequencer to request transfer of video files
from Viz One to your configured Viz Engine for playout
4. Configure your Viz Engine to enable transfer of video files over FTP from Viz
One to Viz Engine for playout
5. Configure your Viz Content Pilot client’s output channels (see Working with
the Profile Configuration) in order to playout video clips from your Viz One
storage
In case you are using Viz Engine to preview video clips from Viz One locally you
also need to install Video Codecs (e.g. MPEG-4 codec and Haali Media Splitter).
See Also
• Media Engine
• Working with the Profile Configuration
• Working with Local Viz Preview
• Viz Engine Administrator’s Guide
• Viz One User’s Guide
• Viz One Administrator’s Guide
76
Chapter 7: Configuration
• Viz Object Store User’s Guide
7.10
Database Configuration
This section describes how to manually configure the database connection.
This section contains information on the following topics:
•
•
•
•
•
•
•
•
7.10.1
Database
Database
Database
Database
Database
Database
Database
Database
Configuration During Installation
Setup Options
Initialization File Configuration
Registry Settings
Parameters
Service Names and SID
TNS Alias
Client
Database Configuration During Installation
Database Parameters for all Viz Content Pilot (VCP) clients and its Newsroom
Component (NrC) can be set during the Viz Content Pilot Installation.
Note: The VCP Database option sets the database connection for the Media
Sequencer.
When running the VCP installer, the following database configuration parameters
can be set:
• SID/Service name or TNS alias or Connect Descriptor
• Hostname or IP address
• Username (default PILOT)
• Password (default PILOT)
Note: Hostname is not needed during installation when using a TNS alias or Connect
Descriptor.
The VCP installer configures the database connection parameters in the registry
for the NrC. As the NrC does not use an INI file, all changes and additions must be
made to the registry after installation.
For VCP, Viz Object Store (VOS) and Viz Template Wizard (VTW) a common
initialization (INI) file is created during installation. Connection settings can be
configured using a TNS name alias, a full connect descriptor, or by using Oracle’s
easy connect naming method (EZCONNECT). The database connection type should
ideally be the same for all applications.
All database connections for VCP 5.x should all use UTF-8 character encoding.
Note: Administrator rights are needed to change registry settings.
Chapter 7: Configuration
77
See Also
• Database Configuration
• Database Service Names and SID
• Database TNS Alias
7.10.2
Database Setup Options
There are several ways to configure the database connection settings. The
following sections describe the configuration options for the Viz Content Pilot
(VCP) client and the Newsroom Component (NrC). Configurations for the VCP
client also applies for Viz Template Wizard (TW) and Viz Object Store (VOS).
This section contains information on the following topics:
•
•
•
•
Initialization File
Initialization File and Registry
Initialization File and Environment Variable
Registry
Initialization File
A initialization file (INI) is used by all the VCP applications. The only exception is
the Newsroom Component (NrC) that mainly uses registry settings, except when
configured to use Viz Video Hub. Since it is possible to connect to the VCP
database by only using an INI file, the tnsnames.ora file may be omitted.
The INI file can be opened with the Inifile Editor (located in the program folder) or
a regular text editor.
If the database username and password is changed (default is PILOT/PILOT), they
too must be set under the Database section.
Initialization File and Registry
A combination of an initialization (INI) file and registry settings, allow the use of a
Database TNS Alias. This is helpful if the database setup is used by more than one
application.
The TNS alias is held by the name property under the Database section in the
ContentPilot.ini file.
In addition to the INI file, a TNS_ADMIN string must be added to the registry to
avoid potential conflicts with other applications using a local environment
variable. The TNS_ADMIN string holds the path to the tnsnames.ora file which
contains database connection information for one or more databases.
The TNS_ADMIN string should be added to the Viz content pilot 5.x registry key.
The following are valid path definitions to a tnsnames.ora file:
• TNS_ADMIN: C:\Program Files\<directory> (path to a local tnsnames.ora file)
• TNS_ADMIN: \\<hostname>\<directory> (path to a remote tnsnames.ora file)
78
Chapter 7: Configuration
Initialization File and Environment Variable
As with the Initialization File and Registry combination, an INI file and an
environment variable allows the use of a TNS alias.
However, this could potentially affect the use of Database TNS Aliases for other
database clients. If more than one tnsnames.ora file is used, it is recommended
that the files are merged when setting the TNS_ADMIN as an environment
variable. If this is not desirable, add the TNS_ADMIN to the registry.
Registry
Only the NrC can use database Registry Settings alone.
See Also
• Database Configuration
• Database Initialization File Configuration
7.10.3
Database Initialization File Configuration
When setting up VCP and Newsroom computers, two initialization (INI) files are
mainly in use as the table below depicts, however, other application specific INI
files can be used.
Table 22: Initialization files
Computer Type
Applications
Initialization Files
Newsroom
Newsroom Component
ContentPilot.ini
Viz Object Store
Control Room
Viz Content Pilot
ContentPilot.ini
Viz Object Store
Template Design
Viz Object Store
ContentPilot.ini
Viz Template Wizard
Thumbnail Generator
Viz Thumbnail Generator
ThumbnailGenerator.ini
Note: For a VCP computer, the ObjectStore.ini is no longer needed.
The above image depicts a database connection configuration to a remote
database. The setup is done with an INI file without the use of a TNS name alias.
To edit an INI file, it is recommended to use the Inifile Editor (see example path).
The Inifile Editor is not available as part of the NrC installation.
Chapter 7: Configuration
79
Example: C:\Program Files\vizrt\viz content pilot 5.x\
To
1.
2.
3.
edit an INI file, do the following:
Start the Inifile Editor.
Select the INI file to edit, and click Open.
Select the Database section and enter the following parameters:
• login: database login string (pilot)
• pwd: database password string (pilot)
• utf8: Sets the VCP client encoding for all database communication. Set Y
(Yes) to use the recommended and default UTF-8 encoding, or N (No) to use
the local Oracle client’s encoding setting.
• nls_lang: define the NLS_LANG environment variable here.
• name: database name (either the TNS name or the SID).
The SID can be combined with a hostname <hostname>/<SID>. This is useful
because the database host is, in most cases, not the same host as for the client
applications.
When using a tnsnames.ora file, use the Database TNS Alias (default: VIZRTDB).
To set the database properties for the ini file
1. Open the ContentPilot.ini file located in the Viz Content Pilot 5.x program
folder.
2. Search for and edit the Database section’s name, login and pwd properties.
• name: VIZRTDB (default)
• login: PILOT (default)
• pwd: PILOT (default)
3. Save the INI file.
Note: VIZRTDB is often used as a default TNS name alias.
See Also
•
•
•
•
•
7.10.4
Database Configuration
Database Setup Options
Database Registry Settings
Initialization Files
To set the database properties for the ini file
Database Registry Settings
If connection properties are entered during installation, all applications will have
their Registry Settings set for each application.
See Also
• Registry Settings
• Database Configuration
• Database Setup Options
80
Chapter 7: Configuration
• Database Initialization File Configuration
7.10.5
Database Parameters
Figure 19: Advanced configuration
The Advanced configuration section, available in VCP’s Preferences window,
allows the user to configure settings for VCP applications. This requires a
database connection to the VCP database. Applied changes in most cases requires
the affected application to be restarted.
Note that you can access all database parameters from your Data Server (i.e.
http://<hostname>:8177/settings).
•
•
•
•
Add: Adds a new parameter to the database.
Delete: Deletes a parameter on the database.
Apply: Applies changes to the database.
Reset: Resets changes before Apply is clicked.
CAUTION! Settings should only be changed by administrators.
This section contains information on the following topics:
Chapter 7: Configuration
81
• Properties and Parameters
• To add a new database parameter
82
Chapter 7: Configuration
Properties and Parameters
Table 23: VCP Database Parameters
Name
Description
activex_preview_timeout
Sets the time in milliseconds the Newsroom
Component will wait for a remote preview
Viz Engine connection before continuing.
Default is 10000. Can be overridden by the
local registry setting PreviewTimeOut.
activex_preview_socket_timeout
Sets the time in milliseconds the Newsroom
Component will wait for a local preview Viz
Engine connection before continuing.
Default is 10000. Can be overridden by the
local registry setting PreviewSocketTimeOut.
ActiveXShowClipsTab
Enables or disables the Clips tab for the
Newsroom Component. Allowed parameters
are 1 or 0. Default is On (1).
ActivexShowStillsTab
Enables or disables the Stills tab for the
Newsroom Component. Allowed parameters
are 1 or 0. Default is On (1).
ActivexShowTemplatesTab
Enables or disables the Templates tab for
the Newsroom Allowed parameters are 1 or
0. Default is On (1).
app_server
Sets the Data Server URI.
ax_dataelement_timer_enabled
Sets the default behavior for showing or
hiding the graphics event timing options in
the Newsroom Component when saving a
data element. When enabled (1) it will show
the timing editor, and when disabled (0) it
will hide the timing editor. This setting can
be overridden by enabling the
ShowGraphicEventTiming setting for the
Template Info component in Viz Template
Wizard on a template by template basis.
ax_disable_data_overwrite
When enabled (1) this setting will disable the
Newsroom Component’s Save button;
hence, only the Save As button is active.
When enabled, this also un-checks the Add
to Library check-box in the Save/Save As
dialog box for all saved elements.
ax_enableMediaSendToRundown
Enables (1) the Add to Rundown context
menu option when adding media elements
to the rundown. This is only useful if the
newsroom system does not support drag
and drop operations.
Chapter 7: Configuration
83
Table 23: VCP Database Parameters
84
Name
Description
ax_use_custom_gui_dlg
Enables (1) the Viz World Map Editor (WME)
to be embedded within the Newsroom
Component’s user interface. This parameter
is by default not set in the database.
delete_data_from_activex
If set to Y (yes) it will enable the user to
delete data elements using the Newsroom
Component. Default is Y.
shared_curious_server
Sets the hostname or IP address of the Viz
World Server. It is not configured when set
to <server>. See also the VCP client’s Viz
World Server preferences.
spellcheck_dict_filename
Sets the filename for the dictionary and
affixation for the spell check option. Default
is en_US.
spellcheck_dict_path
Sets the path to the dictionary files. Use a
full path, mapped drive or UNC path if the
files are not located under its default
location. If it is located under its default
location, it should be set to <local>.
Videohub_mbHost
Sets the hostname or IP address for Viz
Video Hub for the message bus protocol.
Videohub_soapHost
Sets the hostname or IP address for Viz
Video Hub for the SOAP protocol.
Videohub_viz_video_suffix
Sets the video suffix for video files
transferred from Viz Video Hub to Viz
Engine. Default is .mxf.
Videohub_soapPort
Sets the port number used by clients
connecting to Viz Video Hub using SOAP.
Default is 80.
Videohub_mbPort
Sets the port number used by clients
connecting to Viz Video Hub using message
bus. Default is 6555.
Videohub_ConnectionTimeout
Sets the time in milliseconds before the
Media Sequencer or VOS stops its
connection requests to Viz Video Hub.
Default is 10000.
Videohub_username
Sets the username used by the Media
Sequencer when creating playlists with
video clips and stills from Viz Video Hub.
Default is vizlink.
Chapter 7: Configuration
Table 23: VCP Database Parameters
Name
Description
Videohub_password
Sets the password used by the Media
Sequencer when creating playlists with
video clips and stills from Viz Video Hub.
Default is vizlink.
vos_allow_edit_from_dll
(optional)
Enables or disables the toolbar in Viz Object
Store. When disabled it will disallow
registering and editing of images and
person information when VOS is used with
the Newsroom Component and Viz
Template Wizard. This option can be added
to the database. Values are Y for allow edit
and N for disallow edit.
VOS_PASSWORD
Shows the encrypted VOS password that is
used to enforce access control when using
the VOS Settings window. Is only visible if
access control has previously been enabled.
This setting can be used to reset the
password by deleting it; however, it cannot
be used to change the password. For details,
see Viz Object Store’s User Guide on General
settings.
To add a new database parameter
1.
2.
3.
4.
Select Preferences from the Options menu.
Select the Advanced option in the Preferences window.
Click the Add button.
Enter the name (e.g. ax_preview_port) of the new property, and add its
parameter (e.g. 50008).
5. Click Apply to save the new property and its parameter to the database.
6. Click OK to exit the Preferences window.
See Also
• Database Registry Settings
7.10.6
Database Service Names and SID
A SID is a unique name that uniquely identifies the database instance where as a
service name is the Database TNS Alias that is given when users remotely connect
to the database. The Service name is recorded in the tnsnames.ora file on the
clients and it can be the same as the SID, and it can also be given any other name.
A service name is a feature in which a database can register itself with the
listener. If a database is registered with a listener using a service name then the
service name can be used as a parameter in the tnsnames.ora file. Otherwise a SID
can be used in the tnsnames.ora file.
Chapter 7: Configuration
85
With Oracle Real Application Clusters (RAC) there will be different service names
for each database instance.
Service name specifies one or more names for the database service to which this
instance connects. It is possible to specify multiple service names in order to
distinguish among different uses of the same database. It is also possible to use
service names to identify a single service that is available from two different
databases through the use of replication.
So, SID is a unique database system identifier while service name is an alias.
If VCP is running without a tnsnames.ora file all database connection parameters
must be specified in the initialization (INI) file. Database configuration can be
done during the Viz Content Pilot Installation.
Note that the Newsroom Component (NrC) does not use an INI file, hence the
database connection parameters must be applied during installation or by editing
registry settings (the latter is not recommended).
• Local database: <SID>
• Remote database: <hostname>/<SID>
• Remote database: <hostname>/Service name
See Also
•
•
•
•
•
7.10.7
Database
Database
Database
Database
Database
Configuration
TNS Alias
Registry Settings
Service Names and SID
Initialization File Configuration
Database TNS Alias
A Transparent Network Substrate (TNS) alias is useful if more than one machine
connects to the same database. A tnsnames.ora file can contain one or more TNS
name aliases, and can be placed on a server for ease of use and maintainability.
The file itself contains client side network configuration parameters, and defines
incoming database requests. It contains all service names. This file also describes
each domain name, with protocol, host, and port information.
A tnsnames.ora file maps TNS names to connect descriptors (usually ADDRESS
and CONNECT_DATA). The TNS name becomes a, most likely shorter and more
readable, alias for the somewhat cumbersome service name.
Note: A tnsnames.ora file can contain more than one TNS name.
Note that when using an Oracle Instant Client a tnsnames.ora file needs to be
created manually. Place the file in a directory with read access. For other Oracle
clients, the default tnsnames.ora file can be found in the Oracle client folder.
Example: C:\Oracle\product\10.1.0\Client_1\NETWORK\ADMIN \
86
Chapter 7: Configuration
A client needs a connect descriptor in order to connect to an Oracle instance. The
tnsnames.ora file can define more than one database so that a backup database
can be used in a fail situation. Oracle uses the normal TCP communication
between the clients and the database.
• Local database: <SID>
• Remote database: <hostname>/<SID>
• Remote database: <hostname>/Service name
The example below uses two hosts. These settings are needed if the database
server is set up with a standard Oracle failover mechanism. When failing over a
standby solution (not Data Guard) both servers will for a short period of time be
unavailable. To avoid disconnect problems on clients a configuration is needed to
make sure clients try to reconnect long enough to get reconnected. This can be
accomplished with a connect descriptor as shown below.
Note: Always check with the current Oracle documentation for current
recommendations regarding failover setups.
Example of a tnsnames.ora file for a standby failover setup:
# Generated by Oracle configuration tools.
VIZRTDB =
(DESCRIPTION =
(ADDRESS = (PROTOCOL = TCP)(HOST = SomeHost1)(PORT = 1521))
(ADDRESS = (PROTOCOL = TCP)(HOST = SomeHost2)(PORT = 1521))
(CONNECT_DATA =
(SERVER = DEDICATED)
(SERVICE_NAME = SomeName)
(FAILOVER_MODE =
(TYPE = SESSION)
(METHOD = BASIC)
(RETRIES = 180)
(DELAY = 5)
)))
• Host: Preferably host, or an IP address
• Service name: Database service name (e.g. VIZRTDB.tvchannel.place)
The ADDRESS_LIST property lists the server addresses. When a server is in
standby mode the database is not open and does not register the service name
with the listener. This means that if the client tries to connect to the standby
server it will be rejected and try the other server instead.
(ADDRESS_LIST =
(ADDRESS = (PROTOCOL = TCP)(HOST = SomeHost1)(PORT = 1521))
(ADDRESS = (PROTOCOL = TCP)(HOST = SomeHost2)(PORT = 1521))
)
The FAILOVER_MODE property tells the Oracle client to fail over the session and
ignore any currently open cursors. The sub-parameters say that it will use basic
failover (not preconnect) and at failover time will retry 180 times waiting 5
seconds between each retry (15 minutes). This should be enough time for the
switch to happen.
(FAILOVER_MODE =
(TYPE = SESSION) (METHOD = BASIC) (RETRIES = 180) (DELAY = 5)
Chapter 7: Configuration
87
)
IMPORTANT! A failover situation will not be initiated until the user tries to access the
database.
This section contains information on the following topics:
• TNS File Location
• To set the TNS alias in registry
TNS File Location
Figure 20: Registry setting
In order for Viz Content Pilot to use a tnsnames.ora file on a local or remote
machine the TNS_ADMIN string must be added to registry.
88
Chapter 7: Configuration
Figure 21: Environment variable
Another option is to add a local environment variable called TNS_ADMIN with the
same parameters as for the registry option. The difference between the two is that
a registry string will only affect the VCP applications, while the others will affect
all applications using an Oracle client.
Figure 22: Initialization file
In order for the TNS_ADMIN setting to work for VCP, the name key in the Database
Initialization File Configuration (ContentPilot.ini) must hold the TNS name alias
(e.g. VIZRTDB) set in the tnsnames.ora file.
To set the TNS alias in registry
1. Open Registry.
2. Add the TNS_ADMIN registry string to the viz|content pilot 5.x key.
Chapter 7: Configuration
89
3. Specify the path to the tnsnames.ora file (e.g. a UNC path)
• Windows 32-bit: HKEY_LOCAL_MACHINE\SOFTWARE\[vizrt]\viz|content
pilot 5.x
• Windows 32-bit: HKEY_LOCAL_MACHINE\SOFTWARE\Wow6432Node\
[vizrt]\viz|content pilot 5.x
• Example paths: C:\Program Files\vizrt\Common\Oracle or
\\hostname\directory
4. Click OK.
See Also
• Database Configuration
• Database Service Names and SID
• Database Initialization File Configuration
7.10.8
Database Client
By default the Oracle Instant Client is installed when installing Viz Content Pilot
(VCP). A separate installation of an Oracle client is not needed, and the database
configuration for VCP and the Newsroom Component (NrC) can be done during
the installation.
If Oracle’s Runtime Client is already installed, it is not necessary to install Oracle’s
Instant Client, and if the NrC is embedded in a Java-based newsroom system it is
recommended to use Oracle’s Runtime Client.
By default all VCP applications will use the Instant Client found under
“...\vizrt\Common\Oracle”, so no registry entries are needed unless it is
desirable to disable the use of the Instant Client and use a full Runtime Client.
Note: Media Sequencer must use the Oracle 11g Runtime Client.
The Instant Client does not create a tnsnames.ora file so a file must be created if
it is to be used. In order to use a tnsnames.ora file, a registry entry or a system
environment variable, called TNS_ADMIN, must be entered.
Note: It is possible to choose Custom, and uninstall the Instant Client if a Runtime
Client is already installed.
This section contains information on the following topics:
• To use a tnsnames.ora file with Instant Client
• To disable Instant Client and use Runtime Client
• To override the default Oracle client
To use a tnsnames.ora file with Instant Client
1. Open Registry
2. Search for the registry key
• Windows 32-bit: HKEY_LOCAL_MACHINE\SOFTWARE\[vizrt]\
viz|content pilot 5.x
90
Chapter 7: Configuration
• Windows 64-bit: HKEY_LOCAL_MACHINE\SOFTWARE\Wow6432Node\
[vizrt]\viz|content pilot 5.x
3. Add the following string value to TNS_ADMIN
• Windows 32-bit: C:\Program Files\vizrt\Common\Oracle
• Windows 64-bit: C:\Program Files (x86)\vizrt\Common\Oracle
• This sets the path to the location of the tnsnames.ora file.
To disable Instant Client and use Runtime Client
1. Open Registry
2. Search for the registry key
• Windows 32-bit: HKEY_LOCAL_MACHINE\SOFTWARE\[vizrt]\
viz|content pilot 5.x
• Windows 64-bit: HKEY_LOCAL_MACHINE\SOFTWARE\Wow6432Node\
[vizrt]\viz|content pilot 5.x
3. Add the integer value IGNORE_IC with 1 as parameter.
• If set to 1 the application will ignore the Instant Client (if installed) and just
use the Runtime Client (if installed).
To override the default Oracle client
1. Open Registry
2. Search for the registry key
• Windows 32-bit: HKEY_LOCAL_MACHINE\SOFTWARE\[vizrt]\
viz|content pilot 5.x
• Windows 64-bit: HKEY_LOCAL_MACHINE\SOFTWARE\Wow6432Node\
[vizrt]\viz|content pilot 5.x
3. Add the following string value ORACLE_HOME:
• Windows 32-bit: C:\Program Files\vizrt\Common\Oracle
• Windows 64-bit: C:\Program Files (x86)\vizrt\Common\Oracle
• ORACLE_HOME will be added as an environment variable, and the Oracle
client this path points to will be used.
4. Add the following string value OCIDLL:
• Windows 32-bit: C:\Program Files\vizrt\Common\Oracle\oci.dll
• Windows 64-bit: C:\Program Files
(x86)\vizrt\Common\Oracle\oci.dll
• The OCIDLL string can be used to specify which library the application will
use.
IMPORTANT! An override should only be set if Viz Content Pilot requires a different
version of the Oracle client than other programs residing on the same machine.
See Also
• Database Configuration
• Database TNS Alias
Chapter 7: Configuration
91
7.11
Initialization Files
Figure 23: Initialization (INI) file editor
Most Viz Content Pilot clients use the ContentPilot.ini file; however, the
extent of the use varies. Note that the Thumbnail Generator creates its own
ThumbnailGenerator.ini file and that Viz Object Store may use its own
objectstore.ini file for reading and connecting to the VCP database.
The initialization (INI) file is organized in categories. To edit it, it is recommended
to use the Inifile Editor located in the VCP program folder.
Example: C:\Program Files\Vizrt\Viz Content Pilot 5.x\InifileEditor.exe
The left pane displays the sections, organizing the settings into logical groups.
The right pane displays the keys sorted under each category.
•
•
•
•
•
92
New section ...: Adds a new section to the INI file.
New key ...: Adds a new key to the section.
New description ...: Adds a new description to the section or key.
OK: Confirms any changes made and closes the editor.
Cancel: Cancels all changes and closes the editor.
Chapter 7: Configuration
Some INI file settings are not described for the VCP 5.1.x and later. These are
deprecated settings valid for versions older than version 4.x.
This section contains information on the following topics:
•
•
•
•
•
•
•
•
•
•
•
•
Button Box
Database
General
GPI
Import Sequence
Language
Path
Sequencer
SGI
VideoHub
Viz
Viz IO
Button Box
Settings pertaining to the use of a button box with VCP.
• enabled: Set Y or N to enable or disable button box.
Database
•
•
•
•
login: User ID for the database connection
pwd: Password for the database connection
utf8: Sets whether the program and database should use UTF8 font encoding.
nls_lang: If UTF-8 is used for the database, the NLS_LANG environment setting
must be here.
• name: This entry must contain the connection string for the database in the
form: “hostname/instance name”. If a database client (e.g. Oracle Client) is
used enter the TNS name.
General
• diff_tool: The path to a text compare tool executable can be entered here. This
will enable the possibility to compare script files when conflicts between local
scripts and repository scripts appear.
• imageheight: Sets the default thumbnail image height generated by TnG.
GPI
This section contains settings dealing with GPI triggering of the VCP client.
• enabled: Enable GPI triggering? Y or N.
• poll: Number of milliseconds between each poll of the GPI port.
• delay_interval: Number of milliseconds before repeating a GPI trigger.
• use_lpt: Use the LPT port for GPI triggering? Y or N.
• send_to_cockpit: Send the trigger to the cockpit? Y or N. If set, VCP will send a
recall message to the Viz IO when a GPI received.
Chapter 7: Configuration
93
• allow_combination: When sending a trigger to the cockpit, the
allow_combination specifies if for instance GPI 3, should be sent as GPI 1, and
GPI 2.
Import Sequence
Settings for enabling import of playlists from file (advanced).
• enabled: If set to Y it will enable the menu Playlists.
• default_file: Sets the default file to import.
Language
• font: Sets the application’s template and data list font. By default this setting
will be set using the operating system font; however, in many cases other
fonts, such as Arial Unicode MS, are used for language localization purposes
(for example Arabic, Hebrew or Cyrillic).
Note: The font setting does not affect the Newsroom Component which has its font
settings configured in the registry.
Path
This section specifies a set of file and folder paths that VCP needs to know about.
• picture: Defines the picture archive path.
• production: The directory where the images for today's production are placed
- excluding the date.
• autosave: The directory where automatically saved template records are
stored.
• tmpbmp: The directory where temporary bitmaps are stored.
• scene_node: Specify a node that should automatically be selected when
viewing the scene tree from Viz Engine in VCP.
• image_node: Specify an image that should automatically be selected when
viewing images from Viz Engine in VCP.
• object_node: Specify an object that should automatically be selected when
viewing objects from Viz Engine in VCP.
• sounds: The directory where WAV files are initially looked for.
• shared: The directory where the shared image disk is mounted on the Unix
system. Used for specifying the Unix path to the shared image server. For
instance on windows the drive is often mapped as K:\ but on a Unix system it
would be \shared\images.
• fileopen: Sets the default folder when opening image files.
• tmpbmp: Sets the folder for saving temporary bitmap files.
Pilot
These settings have to do with the general behavior of VCP.
• restrict_characters: Restrict characters when saving data.
• legal_characters: The characters that will be permitted in the names of saved
data if "restrict_characters=Y". If this value is empty then there is no
restriction on the data name regardless of the "restrict_characters" setting.
• liveupdate_timer: The time in milliseconds between each time a template's
Live Update event-handler is called. (If the template has Live Update.)
94
Chapter 7: Configuration
• dateformat: The date format for saved data.
• unique_names: Whether or not it is permitted to save several data elements
with the same name.
• autostart_preview: When set to Y, pilot will automatically start viz [preview
engine] if it is installed.
• plugins: The directory where the plug-ins for VCP are located. Normally, this
value is empty, otherwise it should be the path to the directory.
• UTF8: Set to Y for UTF8 support in VCP.
Sequencer
• hostname: Sets the hostname of the Media Sequencer when one is specified
during installation. If no host is specified it is set to localhost.
• locktoprofile: When set to a specific profile users will not be allowed to select
other profiles or open the profile configuration in the Viz Content Pilot client.
Note: If you perform a custom installation the hostname will also have an effect on
the Viz Content Pilot client.
SGI
The SGI section can be used to add new Viz Engine’s that can be used by Viz
Template Wizard. Click the New key ... button in the Inifile Editor and enter the
new key value, e.g. machine2 and so on.
• machine1: The host name of the Viz Engine to connect to. More machines can
be added to the list: machine2, pwd2 etc.
• pwd1: On air password for the Viz Engine.
VideoHub
These settings are used to override database settings for Viz Video Hub for both
VCP and NrC. These settings are only used for searching Viz Video Hub using for
example the Viz Object Store interface.
• soapHost: Sets the SOAP hostname or IP address for connecting to Viz Video
Hub.
• soapPort: Sets the SOAP port. Default is 80.
• mbHost: Sets the Message bus hostname or IP address for connecting to Viz
Video Hub.
• mbPort: Sets the Message bus port. Default is 6555.
• username: Sets the username for connecting to Viz Video Hub. Default is
videohub.
• password: Sets the password for connecting to Viz Video Hub. Default is
videohub.
Viz
These settings have to do with how Viz Content Pilot interacts with Viz Engine.
• onairpwd: Sets the Register ON AIR password for the Viz Content Pilot client
users.
• host: Viz Engine hostname or IP address (used by the Thumbnail Generator).
• port: Set a listener port to be used by Viz Engine when creating thumbnails.
For Viz Engine 2.x this port is used by the Viz Multiplexer. For Viz Engine 3.x
Chapter 7: Configuration
95
this is used by the Viz Engine 3.x built in multiplexer (used by the Thumbnail
Generator).
• icon_timeout: Sets the timeout in milliseconds for the Viz Thumbnail
Generator. If nothing is received from Viz Engine within X seconds, it
continues to request thumbnails for the next data element (used by the
Thumbnail Generator). Default is 2000 milliseconds (2 seconds).
• data_timeout: Sets the Viz Engine connection timeout in milliseconds for
receiving data from Viz Engine. Default is 60000 milliseconds (60 seconds).
This is helpful if you are loading a scene that is very complex or loads a lot of
data that will take time to render (e.g. a map scene).
Viz IO
Viz IO (input/output) specific settings.
• enabled: Enables the Viz IO connection. Y or N.
• host: The machine hostname (or IP) of the Viz IO machine.
• port: The Viz IO communications port.
• auto_reconnect: In case the connection to the Viz IO is cut, this flag indicates
whether to automatically try and re-establish the connection. (It will try after
30seconds, then after 1 minute, then after 2 minutes, then after 4 minutes.)
• offset: Used to offset the incoming triggers by a fixed number.
7.12
Registry Settings
The table below shows the default registry settings and some others that might
be useful for the Viz Content Pilot client and the Newsroom Component. Before
altering registry settings it is recommended to check with a local Vizrt
representative or support person. It is also recommended to test changes before
applying them to a production system.
Registry settings that are not covered are either legacy settings and no longer
supported or not to be changed. The table below covers those settings that can
be changed during installation or manually using the Registry Editor.
Start Windows’ registry editor and open the following path to edit your
parameters:
• Windows 32-bit: HKEY_LOCAL_MACHINE\SOFTWARE\[vizrt]
• Windows 64-bit: HKEY_LOCAL_MACHINE\SOFTWARE\Wow6432Node\[vizrt]
Table 24: Registry Settings
96
Key
Name
Description
ActiveX\
DataBroker
DatabaseName
Sets the database name for the
Newsroom Component. Supported
values are TNS name alias,
connection string or a full TNS
connection string.
Password
Sets the database username
UserName
Sets the database username
Chapter 7: Configuration
Table 24: Registry Settings
Key
Name
Description
ActiveX\
TemplateFiller
BCSDeviceName
Sets the name for the device that is
connected to the Avid iNEWS Control
Air (formerly known as iNEWS
Broadcast Control System (BCS)).
Default device name is cg.
BCSTemplateName
Sets the template name. Default is
pilotdata. This must be configured in
Avid iNEWS. See also
BCSDeviceName.
Chapter 7: Configuration
insertBCS
Set this to 1 to insert the BCS s in the
iNEWS production cue. If using MOS,
set this to 0. See also
BCSDeviceName.
mosID
are created by Newsroom Computer
System administrators.
NODB
Disables (1) the database connection
with only the Viz Video Hub
connection active. Default is enabled
(0).
PreviewDisabled
Disables (1) preview. Default is
enabled (0).
PreviewHost
By default set in the database. This
setting will override the database
settings, and can be hostname or IP
address.
PreviewPort
By default set in the database. This
setting will override the database
settings. Default port is 50008.
PreviewSizeX
By default set by Viz Engine. This
setting overrides the aspect ratio set
by Viz Engine.
PreviewSizeY
By default set by Viz Engine. This
setting overrides the aspect ratio set
by Viz Engine.
97
Table 24: Registry Settings
Key
98
Name
Description
PreviewSocketTimeOut
The Newsroom Component will wait
for a socket connection to the local
Viz Engine before continuing. By
default the
"activex_preview_socket_timeout"
setting would be set in the database
if needed; however, the same setting
can also be set in the registry to
override the database setting.
Recommended default value is
10000 ms.
PreviewTimeOut
By default set in the database. This
setting overrides the database
parameter setting for
“activex_preview_timeout”. Default
value is 10000 ms.
StartBlank
Enables (1) the Newsroom
Component (NrC) to start without
fetching the data elements for each
template; hence, this setting can be
used load and start the NrC faster.
Default is disabled (0).
use_utf8
Enables (1) or disables (0) the use of
UTF8 when writing to the database. It
is NOT recommended to disable
UTF8 if the database configured to
use UTF8. Default is enabled (1).
UseVCPDM
Enables (1) the Newsroom
Component to be used with the Viz
Device Manager. Default is disabled
(0).
Preview Engine
ShowConsole
Enables (1) the Viz Engine console to
always be visible when using local
preview. This setting will override
the user preference. Default is
disabled (0).
Viz Content
Pilot
ORACLEHOST
Oracle database hostname. Note that
INI file settings will override registry
settings.
ORACLESID
Oracle database SID. Note that INI
file settings will override registry
settings.
Chapter 7: Configuration
Table 24: Registry Settings
Key
7.13
Name
Description
TNS_ADMIN
Alternative to a full connection
string. If a TNS name file is
configured, setting the path may be
used to set a different location than
Oracle’s default location, and to
avoid conflicts with similar database
connections defined as a local
environment variable.
Command Line Options
The following command line options are supported by some or all of the Viz
Content Pilot applications. Command line options are added to the program’s
target path.
• All: Viz Content Pilot client, Viz Object Store client, Viz Template Wizard client
and Viz Thumbnail Generator.
• VCP: Viz Content Pilot Client.
• TnG: Viz Thumbnail Generator.
• TW: Viz Template Wizard.
Table 25: Command Line Options
Command
Default
Apps.
Description
-viz <hostname>
localhost
TnG
Specifies the Viz Multiplexer host
used for thumbnail generation
-port <port>
50008
TnG
Specifies the Viz Multiplexer port
-db <tnsname>
VIZRTDB
All
Specifies the database to connect
to. Use a TNS alias or connect
string. Uses the TNS alias VIZRTDB
if nothing else is specified.
20
TnG
Specifies the timeout on the
connection to Viz Multiplexer in
seconds.
-disable_auto_open_
recent_playlists
VCP
Disables automatic loading of the
last opened playlists on startup
-dologging
TnG
Enables VCP thumbnail generator
logging.
TnG
Enables VCP thumbnail generator
logging and specifies path of the
log file:
viz_thumbnailgenerator.log.
-db <connect
string>
-timeout <sec>
-logpath <path>
Chapter 7: Configuration
<none>
99
Table 25: Command Line Options
7.14
Command
Default
Apps.
Description
-inifile <filename>
localhost
VCP
TW
VCP and TW support both full path
references and single filenames.
The latter assumes that the ini file
is located in the program folder.
-mse <hostname>
localhost
VCP
Sets the Media Sequencer to be
used. If no parameter is defined it
will try to use a local Media
Sequencer.
-showcommands
<none>
VCP
Displays the VCP Commands
window. See also Show VCP
Commands.
Fullscreen Stillstore Images
When searching for still images within VCP, whether it is media from Viz Object
Store, Viz One, Viz Engine or just from the file system, VCP allows the user to drag
and drop any still image into the playlist for playout without the need for a
graphics template.
However, current limitations with VCP’s Viz Graphics Hub (GH) integration require
a default stillstore scene to be present in order to enable playout of fullscreen
stillstore images. The stillstore scene must be named vizrt_stillstore, and must be
placed in GH’s data (root) directory.
This section will explain how to Create a Stillstore Scene in Viz Artist with the
required elements and parameters, and how to Move the Stillstore Scene to the
Viz Graphics Hub Root to GH’s data (root) project folder.
This section contains information on the following topics:
100
Chapter 7: Configuration
• Create a Stillstore Scene in Viz Artist
• Move the Stillstore Scene to the Viz Graphics Hub Root
7.14.1
Create a Stillstore Scene in Viz Artist
Vizrt provides a basic stillstore scene which can be imported and used, however,
in order to get the look and feel required to match the overall theme it is
recommended to further improve the scene.
In addition it is also recommended to utilize Viz Object Store’s functionality to
add keywords to images that are used for fullscreen playout. Fullscreen images
also have a fixed ratio to comply with the final design and desired output.
The scene example below describes the required elements and parameters for the
stillstore scene.
To create a stillstore scene
1. Start Viz Artist
2. Add a Group container to the scene tree
3. Click Built Ins on the main menu, and then press the CTRL+2 keys to open the
Container Plugins view
4. Select the Control folder
5. Add the ControlImage plugin to the group container
• Set ControlImage’s Field identifier attribute to 1.
• Adding a control plug-in automatically adds the ControlObject plug-in to
the group container.
6. Add an image to the container
7. Rename the group container to object (lower case)
8. Optional: Design your scene
9. Save the scene as vizrt_stillstore
10. Continue To move the stillstore scene to the Viz Graphics Hub root using the
Viz Graphics Hub Manager
See Also
• Move the Stillstore Scene to the Viz Graphics Hub Root
• Viz Artist User’s Guide
• Viz Object Store User’s Guide
Chapter 7: Configuration
101
7.14.2
Move the Stillstore Scene to the Viz Graphics Hub Root
Viz Graphics Hub (GH) is the graphics database where all scenes created in Viz
Artist 3.x are stored and fetched for play out on Viz Engine. GH also has a tool
named Viz Graphics Hub Manager (GHM) that is used to manage the database(s).
To move the stillstore scene to the Viz Graphics Hub root
1. Start Viz Graphics Hub Manager
2. Login as admin
• The standard out-of-the-box password for administrators is VizDb
3. Open the project or folder containing the vizrt_stillstore scene
4. Select the scene, press CTRL and drag and drop it onto Viz Graphics Hub’s
data (root) project folder
• Alternatively copy and paste it using the keyboard keys or context menus
Note: VCP’s stillstore scene is located in the scenes_to_be_dragged_to_root project
folder.
See Also
• To create a stillstore scene
• Viz Graphics Hub User’s Guide
7.15
Display Font
The template and data list font settings for the Viz Content Pilot client is set in the
initialization (INI) file ContentPilot.ini, but in registry for the Newsroom
Component (NrC).
• font: Sets the font for the Viz Content Pilot. This parameter by default set to
MS Sans Serif, but can be changed.
• ListDisplayFont: Sets the font for the Newsroom Component. This string value
is not set by default, and can therefore be used to override the operating
system defaults.
This section contains information on the following topics:
• To set the display font for the Viz Content Pilot client
• To set the display font for the Newsroom Component
To set the display font for the Viz Content Pilot client
1. Open the ContentPilot.ini file
102
Chapter 7: Configuration
2. Select the LANGUAGE section and set a new Unicode font parameter.
3. Save the file, and restart Viz Content Pilot client for the changes to take effect.
To set the display font for the Newsroom Component
1. Open Registry
2. Search for the key:
• Windows 32-bit: [HKEY_LOCAL_MACHINE\SOFTWARE\[vizrt]\ActiveX\
TemplateFiller]
• Windows 64-bit: [HKEY_LOCAL_MACHINE\SOFTWARE\Wow6432Node\
[vizrt]\ActiveX\ TemplateFiller]
Add the string value ListDisplayFont with the desired font name as parameter.
Chapter 7: Configuration
103
8
Main Menu
The Main menu is positioned in the upper left corner of the window, and has the
following appearance:
Figure 24: Menu bar
This section contains information on the following topics:
•
•
•
•
•
•
•
•
8.1
File
Edit
Options
Tools
Viz Engine
Playlist
Windows
Help Menu
File
The File menu has the following appearance:
Figure 25: File menu
The File menu contains the following commands:
• Reconnect to Database: If the connection to the database for some reason is
lost, and the connection should be re-established, click Reconnect to
Database. It is also advisable to reconnect if the application has been running
unattended for a long time.
• Refresh Scripts: Reloads all the scripts in the database.
• New Playlist: Creates a new Playlist Window.
• View log: Opens the View log dialog box.
• Exit: Shuts down Viz Content Pilot.
104
Chapter 8: Main Menu
Figure 26: View log
The log window is an accumulation of all operations handled by the system.
Individual log messages are also displayed as Status Information in the Status
Bars.
Tip: Check the View Log window frequently when troubleshooting the system.
8.2
Edit
The Edit menu has the following appearance:
Figure 27: Edit menu
• Cut: Moves the highlighted text to the Clipboard. Alternatively, use the
keyboard shortcut CTRL+X.
• Copy: Copies the highlighted text to the Clipboard. Alternatively, use the
keyboard shortcut CTRL+C.
• Paste: Pastes the information from the clipboard to where the pointer is
located. Alternatively, use the keyboard shortcut CTRL+V.
Chapter 8: Main Menu
105
8.3
Options
Figure 28: Options menu
The Options menu has the following appearance:
• Data List: Displays the data elements in the database:
• Show Last Two Weeks: Displays data elements created the last two weeks.
• Show All: Displays all data elements.
• Show X Day(s): Displays data elements that has been used the last X days.
Note: X number of days is set under the General tab in the Preferences window.
•
•
•
•
Delete Data Items: Opens the Delete Data Items dialog box.
Keyboard Configuration: Opens the Keyboard Configuration dialog box.
Preferences: Opens the Preferences dialog box.
Hints: Displays Hints in the Status bar.
This section contains information on the following topics:
•
•
•
•
8.3.1
Delete Data Items
Keyboard Configuration
Preferences
Hints
Delete Data Items
This function will permanently remove data elements from the database that are
not tagged as Library elements. Library elements must be deleted manually.
• Concept: Sets the concept from where the data elements should be deleted.
Selecting All consequently deletes all data elements of all concepts for all
templates that are not saved as library elements.
106
Chapter 8: Main Menu
• Template type: Sets the template type from where the data elements should be
deleted. Selecting All consequently deletes all data elements of templates that
are not saved as library elements within the selected concept.
• Delete All Files Older Than: Deletes data elements, except those tagged as
Library elements that are older than the given date. This date is by default set
one week back in time.
See Also
• Template Save Dialog Box
8.3.2
Keyboard Configuration
Figure 29: Keyboard Configuration window.
The Keyboard configuration window allows the user to define macros assigned to
specific key combinations, pre-defined functions and VB Scripts. The latter is an
option to further enhance and adapt the commands. It is also possible to
configure specific key combinations to trigger GPI actions from the Viz Content
Pilot (VCP) client.
The recommended alternative to GPI triggering using the LPT ports on the VCP
client is to add a GPI card to the Media Sequencer machine. This allows the user to
trigger client side macros and pre-defined functions forwarded by the Media
Sequencer to the VCP client or server side commands to the Media Sequencer
using its pre-defined commands.
The Keyboard Configuration columns:
• Shortcut: Displays the macro name.
• Keycode: Displays the keyboard shortcut.
• Commands: Displays the shortcut command.
Chapter 8: Main Menu
107
The Keyboard Configuration buttons:
• Import: Opens the Open window where a previously exported KBD (keyboard)
file can be imported.
• Export: Opens the Save As window where the current settings can be exported
as a KBD file.
• OK: Saves the keyboard shortcut configurations, and closes the window.
• Cancel: Closes the window.
This section contains information on the following topics:
•
•
•
•
•
•
•
•
Context Menu
Macro Shortcut
Predefined Functions
To open keyboard configuration
To add a macro command
To edit a macro command
To delete a macro command
To remove a macro command shortcut
Context Menu
• Add Macro: Opens the New Macro Shortcut window, where a new macro can be
created.
• Delete Macro: Deletes the currently selected macro. Alternatively, click the
keyboard shortcut CTRL+Delete.
• Remove Shortcut: Deletes the shortcut key code of the currently selected
macro. Alternatively, click the keyboard shortcut Delete.
108
Chapter 8: Main Menu
Macro Shortcut
Figure 30: New Macro Shortcut window
In the Keyboard Configuration window it is possible to add a Macro command.
• Enter Key: Sets the keyboard shortcut for the macro.
• Macro Name: Displays the macro category (e.g. macros:, gui:, viz:) and the
name of the macro. If a folder was selected when the Macro was opened, the
category name will automatically be displayed in the Name text box. The
category name can be set or changed in the Name field by adding the category
and macro name separated by a colon (<macro category>:<macro name>). If
a category is not added to the name it will be placed in the macros category. It
is also possible to add new categories by defining them in the macro (e.g.
foo:bar).
• Global: Makes the macro work also when no playlist is open.
Chapter 8: Main Menu
109
Figure 31: VB Script
• Macro Commands: In the Macro Commands tab’s text field, the names of the
selected Predefined Functions can be entered. In the VB Script tab’s text field,
script code can be entered.
IMPORTANT! The function stub named RunScript must be used as the main script or
entry point for other scripts; hence, it cannot be renamed or removed.
•
•
•
•
Show Macros: Opens the Predefined Functions window.
Save As New: Saves the macro as a new instance.
OK: Saves the macro, either as a new or modified macro.
Cancel: Closes the window, without saving any changes.
Predefined Functions
Figure 32: Predefined functions
In the Predefined Functions window a list of functions is accessible to the user.
To open keyboard configuration
• Select Keyboard Configuration option on the Options menu to open the
Keyboard Configuration window.
To add a macro command
1. Right-click the Keyboard Configuration window and from the appearing
context menu select Add Macro... .
110
Chapter 8: Main Menu
2. In the New Macro Shortcut window enter the key combination, macro
category:macro name and commands/scripts.
3. Click OK.
Note: If the macro category (e.g. foo:bar) is not added it will be placed in the Macros
section.
To edit a macro command
• Double-click the macro listed under the category it was placed to open the
Edit Macro Shortcut window.
To delete a macro command
1. Select a macro from under the category it was placed and press the CTRL+DEL
keys, or
2. Right-click the macro and from the appearing context menu select Delete
Macro.
To remove a macro command shortcut
1. Select a macro from under the category it was placed and press the DEL keys,
or
2. Right-click the macro and from the appearing context menu select Remove
Shortcut.
See Also
• Show VCP Commands
• General Purpose Input (GPI) for the Media Sequencer
8.3.3
Preferences
Selecting Preferences on the Options menu opens the Preferences window. The
Preferences dialog is used to set parameters for Viz Content Pilot and the Viz
Content Pilot database.
This section contains information on the following topics:
•
•
•
•
•
•
•
•
•
Startup
General
Viz Connection
Playlist
• To create a new playlist filter
Remote Preview
Advanced
Viz World Server
Spellcheck
Resource Plug-ins
Chapter 8: Main Menu
111
Startup
Figure 33: Startup
• Allow multiple copies of Viz Content Pilot to be loaded: If enabled, multiple
copies of Viz Content Pilot can be loaded simultaneously.
• Autostart local Viz Engine preview: If enabled, a local instance of Viz Engine
will automatically start when Viz Content Pilot is launched.
• Disable Auto Open Of Recent Playlists: When checked, any opened playlist(s)
will not be opened when restarting Viz Content Pilot.
General
Figure 34: General
• Confirm before closing Viz Content Pilot: If enabled, the user must confirm
that Viz Content Pilot should close.
• Hide resource buttons: If enabled, the buttons on the Buttons panel will be
hidden. The different views can still be selected through the Drop-Down list.
• Show Viz host name in status bar: Shows the Viz Engine hostname on the
status bar.
• Open templates in a new window: If enabled, the template will be opened in a
separate window.
• Automatically close templates after saving: If enabled, templates will be closed
automatically when being saved.
• Send open template to preset viz channel: Sends the open template to the
preset Viz Engine channel.
• Custom number of days to show in data list: Shows data items that has been
used the last number of days.
112
Chapter 8: Main Menu
• Crop tool save path: Sets the path for the image saved when using the Paste
and Crop tool in the Newsroom Component. Images can be added to a
template or data element if the ImageSources.isPaste property is set for the
template. For details, see the Viz Template Wizard User’s Guide.
• Media Sequencer: Sets the hostname of the Media Sequencer machine.
Viz Connection
Figure 35: Viz Engine connection timeout
• Normal operation timeout: When browsing for data from Viz, and if Viz is not
sending a response within X ms, an error report will be displayed. By default
the Normal Operation Timeout value is set to 10.000 ms (10 sec).
• Check connection timeout: Right-clicking the Viz Connection icon on the
Status bar, makes the Check Connection operation available. If Viz Engine
does not respond within X ms after checking the connection, the Viz Engine
connection icon turns red. By default the Check Connection Timeout value is
set to 500 ms.
Chapter 8: Main Menu
113
Playlist
Figure 36: Playlist general settings
• Confirm before item is deleted- If enabled, the user must confirm that the
delete operation should be carried through.
• Loop playlist: Loops all the elements in the playlist.
• Preview templates automatically: Opens the selected element in the playlist
automatically.
• Play sound when MOS playlist goes inactive: Plays a sound whenever the
newsroom (MOS) playlist goes inactive.
• Allow only one open playlist: Makes sure that only one playlist can be open at
a time. When opening a playlist, other open playlists will be closed.
• Image bar navigation: Selects the corresponding element in the playlist when a
thumbnail on the Image bar has been selected.
• Fade non-selected images: Fades all images, except for the selected
thumbnail.
• Image bar on top: Shows the Image bar at the top of the playlist.
• Cursor position: When the playlist’s cursor is active (see playlist Context
Menu), it decides where in the window the cursor stays in the situations
described above. The position can be adjusted by moving the slider control.
114
Chapter 8: Main Menu
Figure 37: Playlist colors
The Colors window displays status colors of the different elements in the playlist.
The element colors can be customized. To change the color of an element, click
the colored circle adjacent to an element label. In the Color window that opens,
pick a color, and then click the OK button.
• Runnable group: Refers to timeline editor groups (runnable groups). Makes it
possible to color video timeline groups in the playlist differently than other
groups.
• Global Last Played/Cued: Refers to data elements played or cued by the Media
Sequencer based on commands issued by other control clients or through a
GPI.
• Default Colors: Loads the default color settings.
The Status Colors list refers to the Status column in the playlist. To add a color to
a Media Sequencer status, click the Add button. Select the Status column of the
new entry that appears in the Status Colors list, and then type the appropriate
status name. Then select the Color column of the entry. In the drop-down list that
appears, select a color.
• Add: Adds a new color to a Media Sequencer status.
• Delete: Deletes a color.
Alternatively, click the ellipsis (...) button to select a color using the Color Picker.
Chapter 8: Main Menu
115
Note: Close and reopen playlists to see the color change take effect.
When creating a category in Viz Template Wizard, it is possible to use that
category to set which category a template belongs to, and eventually which
channel it is played out on. Note that the channel name configured in Viz
Template Wizard must correspond with the profile configured for Viz Content
Pilot. For details on Categories and Channels, see the Viz Template Wizard User’s
Guide.
A category can be used to filter the different template variants. For example a
Lower third (straps) filter, or a fullscreen filter. In some cases the graphics are
played out on different renderers. Thus the channel configuration adds a usable
feature to differentiate the output.
Figure 38: Playlist filters
•
•
•
•
•
•
•
•
116
Filters: Displays the available operator defined filters.
New: Makes the categories and Name field available to create a new filter.
Edit: Makes the settings belonging to the selected filter editable.
Delete: Deletes the selected filter.
Name: Displays the name of the filter.
Hide empty groups: Hides empty groups.
Apply: Applies the new or modified filter settings.
Cancel: Cancels the recent filter settings.
Chapter 8: Main Menu
Figure 39: Playlist not filtered
Figure 40: Playlist filtered
The above images depict the same playlist. The first shows a playlist with three
data elements. The second shows the same playlist with the Lower3rd filter (see
Playlist Toolbar) turned on.
To create a new playlist filter
Note: Create categories and channels in Viz Template Wizard.
1.
2.
3.
4.
5.
Select the Preferences option on the Options menu.
Select Filters under the Playlist category.
Click New ... to add a new filter.
Select the category, or categories, which the filter applies to.
Click Apply, and confirm the dialog to save the new filter.
Note: All category and channel configurations are saved to the VCP database. Filter
configurations are saved to the Media Sequencer.
WARNING! If the Media Sequencer is reset, all filter settings are removed.
Chapter 8: Main Menu
117
Remote Preview
Figure 41: Remote preview
Remote preview is a feature that is used to see snapshots of scenes rendered on a
remote Viz Engine, and should not be mistaken for the preview channel.
Note: If the Viz Engine Preview plug-in is installed (custom installation), local
preview will start and not remote preview (snapshots).
• Use this server: Enables the user to set host and port parameters locally in
order to override the remote preview configurations on the database.
• Host: Defines the external Viz Engine host name.
• Port: Sets the external port number. Recommended port is 50008.
• Always show “Animate” button: Enables the Animate button in the Remote
Preview window.
• Poll Interval (sec): Sets how often Viz Engine is polled for a new snapshots of
the previewed scene.
• Width: Sets the width of the preview window.
Note: For optimal preview, use the Viz Engine Output Format as a preference.
• Open as child window: Opens the window within the Work area.
• X: Sets the X coordinate. 0 is the value in the upper left corner.
Note: Y: Sets the Y coordinate. 0 is the value in the upper left corner.
For more information see the Working with Remote Viz Preview section.
Advanced
The advanced section should only be used by system administrators only as it is
used to configure Database Parameters for all clients connected to the database.
118
Chapter 8: Main Menu
Viz World Server
Figure 42: Viz World Server
• Viz World Server: Sets the hostname or IP address of the Viz World Server.
Spellcheck
Figure 43: Spell check
• Spellcheck dictionary path: Sets the path to the dictionary files. The parameter
<local> refers to the local default path (see example below). Use a UNC path
to use a dictionary file on a remote machine or server.
• Spellcheck dictionary filename: Sets the filename of the dictionary files. For
example en_US refers to the affix file en_US.aff and dictionary file en_US.dic.
Several dictionaries have been included as part of the VCP installation. The
dictionaries are installed in the Common folder under Vizrt.
Example: C:\Program Files\vizrt\Common\dicts\
Other dictionaries can be downloaded from http://wiki.services.openoffice.org/
wiki/Dictionaries; however, these must be UTF-8 formatted. Take contact with
your local Vizrt representative if there is a need to convert and use another
dictionary for spell checking purposes.
Note: Spell checking can only be enabled for TTWUniMemo and TTWUniEdit
components. See the Viz Template Wizard User’s Guide for more information.
Chapter 8: Main Menu
119
Resource Plug-ins
Figure 44: Resource plug-ins
• Trio: Enables the Trio resource panel.
8.3.4
Hints
Figure 45: Hints
Hints are displayed in the left sided text field of the Status Bars when the pointer
is positioned at screen items containing hint information, for example the Viz
Gateway connection icon. Hints are enabled by default.
To enable or disable hints
• From the Options menu select Hints to enable or disable hints.
8.4
Tools
Figure 46: Tools menu
• Camera Control (CTRL+W): Opens the Camera Control dialog box.
• Import MOS message file...: Opens the Select MOS Message File To Import
dialog box. For details about this dialog box, see Import MOS message file.
120
Chapter 8: Main Menu
• Template Wizard: Opens Viz Template Wizard. This option is only available if
Viz Template Wizard is installed. For details, see the Viz Template Wizard
User’s Guide.
• Show VCP Commands: Opens the VCP Commands window, see Show VCP
Commands.
• External Interfaces: Opens the External Interfaces window.
• Profile Configuration... (CTRL+M): Opens the Profile Configuration window.
• Export: Opens the Export window.
• Import: Opens the Import window.
• Post Render Device: Opens the Post Render Device window.
• TC Monitor: Opens the TC Monitor window.
Note: The TC Monitor menu option is only available if video playout is integrated.
This section contains information on the following topics:
•
•
•
•
•
•
•
•
•
•
8.4.1
Camera Control
Import MOS message file
Template Wizard
Show VCP Commands
External Interfaces
Profile Configuration
Export
Import
Post Render Device
TC Monitor
Camera Control
Virtual cameras are set up in Viz Artist. The Camera Control in Viz Content Pilot
controls the virtual cameras, so that image sequences may be used together with
Chapter 8: Main Menu
121
the templates. In a virtual studio system, this window will call matrix setups as
they are defined in the Viz IO setup. If no virtual studio is available, button 1: 16
will cut between virtual cameras 1: 16.
To open the camera control
• Select Camera Control on the Tools menu, or press the CTRL+W keys to use
the Camera Control.
8.4.2
Import MOS message file
This option enables users, that need to manually export a playlist from a
newsroom system, to have the playlist sent to the Media Sequencer through Viz
Content Pilot.
To import a MOS Message File
1. Select Import MOS Message File on the Tools menu to open the Select MOS
Message File To Import window.
2. Browse for and select the exported newsroom playlist to be added to the
Media Sequencer, and click Open.
8.4.3
Template Wizard
This menu option is enabled when Viz Template Wizard (template design tool) is
installed alongside the Viz Content Pilot (VCP) client, and allows the user to start
Viz Template Wizard from within VCP.
122
Chapter 8: Main Menu
See Also
• Templates
• Data
8.4.4
Show VCP Commands
The VCP Commands window can be used to see the macro commands that are
executed when different user operations are performed. The window is also
helpful in learning the different macro commands.
This section contains information on the following topics:
• To show VCP commands
• To run a command
• To lookup commands using apropos
To show VCP commands
• Select Show VCP Commands from the Tools menu.
To run a command
• Enter the name of the command (e.g. gui:new_playlist) in the combo box,
and then click the Execute button to run the command.
To lookup commands using apropos
The VCP Commands window has a lookup function named apropos that is helpful
when searching for information about a command.
1. Open the VCP commands window
2. Enter e.g. apropos run_element and press Enter
Chapter 8: Main Menu
123
• The following result should appear:
COMMAND: main:apropos run_element
RESULT: control:run_element(restString ElementPath) : Run specific
MSE element
control:run_element_with_context(string ElementPath, string
ContextName, string ContextValue) : Run specific MSE element where
ContextName is a comma separated list of Names and ContextValues
their values
See Also
• Keyboard Configuration
8.4.5
External Interfaces
Selecting External Interfaces in the Tools menu opens the External Interfaces
window. All configuration options available through this window are stored on the
Media Sequencer.
8.4.6
Profile Configuration
Figure 47: Profile Configuration
Profile Configuration is used to configure the Viz profiles that are used for playing
out graphics and video.
• Profiles
• Profiles: Displays the available profiles.
• New profile: Adds a new profile to the Profiles list.
• Channels
• Name: Shows the name of the output channel.
• Viz Program Preview: Allows you to set the Viz Engine as a program or
preview renderer for the current channel.
• Video Program Preview: Allows you to set the Video device as a program or
preview renderer for the current channel.
• Allocated: Allocates video devices for the clips in the playlist. For two
channels with a video device each, the Media Sequencer will enable transfer
of all clips to all video devices. The clips in the playlist are, based on the
124
Chapter 8: Main Menu
•
•
•
•
•
allocation, played out in a given order (e.g. A, B, A, B) to allow back to back
playout. For video devices that is able to playout back to back this allocation
is not necessary.
Viz Engines: Shows the hostname or IP address of the selected Viz Engine
host.
Add Viz...: Opens the Configure Viz Engine dialog box for adding a Viz Engine
hostname and port number.
Video Devices: Shows a list of the available hosts.
Add Video... : Opens the Configure Video Device dialog box for selecting video
device, setting hostname and port number.
Close: Closes the profile configuration editor.
Note: The Media Sequencer requires a profile to be present in the system. If all
profiles are deleted, an empty vizroom1 profile is automatically added.
See Also
• Profile Configuration on how to configure your output
8.4.7
Export
In the Export window, playlists with its content and scenes can be exported to file.
This option supports export of templates, concepts, scripts, standalone and
transition logic scenes. Playlists and all parts of the templates are included in the
XML file, and scenes as a Viz archive.
Export of templates and scenes will, unless a shared export folder is mapped on
both the control and render machines, be exported to different folders. Export of
templates will normally be placed on the desktop of the current user, and Viz
archives to the Viz program folder (see Example paths and archives).
When exporting graphics a preview channel must be configured and used.
Note: Export of playlists created by newsroom systems, stored on the Media
Sequencer, is only supported by Viz Content Pilot versions 5.1.6 and later.
Table 26: Example paths and archives
Path
Filename
Comments
archive
The archive will be placed in the Viz default folder. For
Viz 3.x it is the Viz 3.x program folder. For Viz 2.x it
is the archive folder under the Viz data root.
archive.via
archive.eva
archive.txt
If the file extension is missing Viz will automatically
add one (e.g. archive.via for Viz 3.x).
If the file extension is not correct according to Viz, Viz
will simply replace the extension with the correct one
(e.g. archive.txt will become archive.via on Viz 3.x).
C:\temp\
Chapter 8: Main Menu
archive.via
The temp folder must be present on the Viz machine,
and the Viz user must have write access.
125
Table 26: Example paths and archives
Path
Filename
Comments
\\host\
archive.via
The Viz machine must have write access to the UNC
path.
This section contains information on the following topics:
• Export Window
• To export
Export Window
• PlayLists: Shows a list of playlists that are ready for export.
• Playlist: Shows the names of the playlists.
• Element Type: Shows the element types.
• Template Information: Shows information about the templates.
• Viz Scene Information: Shows information about the Viz scenes.
• Templates: The Templates tab shows a list of the templates that are ready for
export.
• Template Name: Shows the names of the templates.
• Template Information: Shows template information, for example if the
template has been generated by the Wizard in Viz Template Wizard.
• Viz Scene Information: Shows Viz scene information.
• Template Scripts: Shows the script name.
• Concepts: Shows the concept name the template belong to.
• Scenes: Shows the scene name and path.
• Transition Scenes: Shows the transition logic scene(s).
• Transition Scene Name: Shows the name and path of the transition logic
scene(s).
• Background Scene Name: Shows the name and path of the transition logic
background scene(s).
• XML Source: Shows a preview of the XML source that will be generated when
the playlist is exported.
• Select Viz Content Pilot export filename: Sets the path and filename for the
exported XML file.
126
Chapter 8: Main Menu
• Select Viz Engine archive filename: Sets the path and filename for the exported
Viz archive.
• Irix mountpoint: Sets the shared mountpoint for Viz 2.x installations on Irix.
• Browse...: Enables the user to search for and select a specific directory (see
Example paths and archives).
To export
1. Configure a Viz preview channel in the Profile Configuration.
2. Select Export from the Tools menu.
3. Drag Playlists and Templates from the Resource Panel onto the Export
Window, and click Next.
4. Enter a path and filename.
5. Optional: Check the Create Viz Engine Archive option to export Viz scenes.
6. Click Next.
7. Click Export.
8. Click Finish.
See Also
• Tools
• Import
Chapter 8: Main Menu
127
8.4.8
Import
Figure 48: Import playlist
In the Import window, playlists (includes templates, concepts, scripts and
transition logic scenes) and scenes can be imported from file. Playlists and
templates are exported as an XML file, and scenes as a Viz archive.
Import of playlists and scenes must, unless a shared import folder is given, be
imported from different machines. For more information see the Export section
and Example paths and archives.
Note: The network drive mappings that are used for the templates must be the same
in the import environment as in the export environment. Also, as some template
elements use file paths to access resources, the resources (such as images etc.)
must be accessible in the import environment.
• Select Viz Content Pilot Import Filename: Sets the name and path of the
content (XML) file that should be imported. Either type the filename directly in
the text box, or click the Open button to browse for available files.
• Select Viz Engine Archive Filename: Sets the name and path of the graphics
(EVA) file that should be imported.
Note: If the Viz Engine archive has the same name and is located in the same folder
as the Viz Content Pilot import file, the name and path of the archive will
automatically appear in the Select Viz Engine Archive Filename text box.
• Irix Mountpoint (i.e. /Shared): Only For Import To Viz Engine On Irix: If Irix is
running, type the Irix mountpoint. This is only for Viz 2.x users.
• Preserve Data Element IDs: Preserves the data elements IDs. This will overwrite
any other data element with the same IDs.
This section contains information on the following topics:
• Context Menu
128
Chapter 8: Main Menu
• To import playlists, templates and scenes
Context Menu
Context menu for the playlist tab columns:
• Expand: Expands the selected node(s).
• Collapse: Collapses the selected node(s).
• Expand All: Expands all nodes.
• Collapse All: Collapses all nodes.
• Select All: Selects all nodes.
• Clear Selection: Clears the selection of nodes.
Context menu for the templates tab columns:
• Select All: Selects all templates.
• Clear Selection: Clears the selection of templates.
• Check Selected: Checks the selected templates.
• Uncheck Selected: Unchecks the selected templates.
Chapter 8: Main Menu
129
Option(s) for the Content Import Status window:
• Alternative Concept: Sets an alternative concept for all imported templates
before the content is imported.
To import playlists, templates and scenes
1.
2.
3.
4.
5.
6.
7.
8.
On the Tools menu, select Import to open the Import window.
Browse for and select the Viz Content Pilot archive file.
Optional: Browse for and select the Viz Engine archive file.
Click Next.
Select templates and playlists to be imported, and click Next.
Click Import Content.
Click Next.
Browse and select the location the graphics should be imported to (it is
possible to exclude parts of scenes, for example fonts).
9. Click Import Graphics.
10. Click Finish.
See Also
• Export
8.4.9
Post Render Device
Post rendering is used to create images or video files of graphical scenes. The
files can be used for playout on Viz Engine. Selecting a video plugin will create
one file; however, selecting an image plugin will render an image according to the
configured frame rate. For example; Rendering a scene for five seconds will result
in 125 images if the frame rate is 25 frames per second (fps).
Rendered data elements can be fullscreen graphics or graphics with Alpha values
such as lower thirds and over the shoulder graphics.
Viz Content Pilot has two implementations of the Post Render Device. One for Viz
2.x users and another for Viz 3.x users.
Note: Only scene-based data elements can be post rendered.
This section contains information on the following topics:
130
Chapter 8: Main Menu
•
•
•
•
•
Post rendering with Viz 2.x
Post rendering with Viz 3.x
To post render a scene
To setup a render device for Viz 2.x
To setup a render device for Viz 3.x
Post rendering with Viz 2.x
Figure 49: Device: Render To File
• Device: Specifies the Viz Engine rendering device.
• Time Codes: Specifies the length of the clip:
• From: Starts the recording at the specified time code.
• To: Stops the recording at the specified time code.
• Format: Sets the Time Code format to either TC (Time Codes), Fields, or
Frames.
• Recording: Records the clip:
• Left Button: Starts the recording.
• Right Button: Stops the recording.
• Clip/Directory Name: Enter a filename for the clip.
• Playback: The functions in the Playback section control the playout of
templates in the Viz Engine preview window. The Playout functions are from
left to right:
• Backward: Shuttles the clip backwards. Clicking the Backward button again,
increases the shuttle speed. To reduce the speed, click the Forward button.
To resume normal speed, click the Play button.
• Step Backward: When the clip is paused, steps the clip backwards frame by
frame.
• Play Backward: Plays the clip backwards.
• Stop: Stops the clip.
• Play: Plays the clip.
• Step Forward: When the clip is paused, steps the clip forwards frame by
frame.
Chapter 8: Main Menu
131
• Forward: Shuttles the clip forwards. Clicking the Forward button again,
increases the shuttle speed. To reduce the speed, click the Backward
button. To resume normal speed, click the Play button.
• Pause: Pause the clip.
Post rendering with Viz 3.x
Figure 50: Post rendering
The render devices for Viz 3.x are automatically setup and do not need any
configuration.
• Host name: Displays the render engine that is configured in the profile
configuration. To change the render engine, open the Profile Configuration.
• Plugin: Sets the renderer device. Options are defined by the installed codecs
on the render engine.
• Format: Sets the format of the clip. Available options are Full Frame, Fields
Top, Fields Bottom, Full Frame/Interlaced Top and Full Frame/Interlaced
Bottom.
• Codec: Sets the codec to be used.
• FPS: Sets the frames per second. Available options are 25, 30, 50, 60, 29.97
and 59.94.
• File/directory name: Sets the filename. A full or relative path can be added. If
no path is given, the file is stored in the Viz program folder on the rendering
machine.
• From: Sets the start time in seconds.
• To: Sets the end time in seconds.
• RGB: Sets the pixel format to RGB.
• RGBA: Sets the pixel format to RGBA which includes the alpha channel
(blending/transparency).
• Record button (circle): Starts the rendering process of the selected data
element. Clicking the Record button will run the recording process according
to the duration interval set using the From and To parameters. Controlling the
data element is possible during the recording.
• Stop button (square): Stops the rendering process before the configured stop
time.
132
Chapter 8: Main Menu
To post render a scene
1.
2.
3.
4.
Open a data element.
Open the Post Rendering window.
Set the output parameters.
Click the record button.
To setup a render device for Viz 2.x
1. Start Viz Engine’s configuration tool Viz Config, and specify a render device
under the Device Manager section.
2. Optional: Set a new destination directory for the files.
Note: For more information about how to configure post rendering devices, see the
Viz Artist 2.x User’s Guide.
To setup a render device for Viz 3.x
• Rendering in Viz 3.x is automatically configured.
Note: For more information about how to use the Device Manager in Viz Artist, see
the Viz Artist 3.x User’s Guide.
8.4.10
TC Monitor
Figure 51: TC Monitor
Selecting TimeCode (TC) monitor on the Tools menu opens the TC monitor
window. TC monitor monitors the time code and the video server channels; hence,
it will only work if the system is configured to be integrated with a video server.
The VCP client uses the Multiport Video Control Protocol (MVCP) to communicate
with a translator (Xlator) which again communicates with the video server.
For more information on supported video server setups, please Contact Vizrt.
• Next: Shows the next clip to be played.
• Location: Shows current location (time) in the clip (for example 00:10:01). This
time code increases when playing the clip (see, Remaining).
• Unit: Shows the video channel name.
• Overridden: If the user checks this box, it is possible to cue a new clip on the
same unit even though the tally is high (channel is currently in use/on air).
Chapter 8: Main Menu
133
• Status: Shows the status of the unit, CUEING, CUED, LOADING, PLAYING and so
on.
• Remaining: Shows the remaining time the clip has to play. The time code
decreases when playing the clip (see, Location).
• Clip: Shows the name of the clip.
Note: The Viz One workflow (as with Viz Video Hub) is not fully supported; meaning,
the TC monitor will not display information in the Next, Override and Status
columns.
IMPORTANT! In order to monitor video clips that are embedded in graphics, the Viz
channel must also be defined as a video device channel.
8.5
Viz Engine
Figure 52: Viz Engine menu
• Show CMD ON (SHIFT+CTRL+C)- Shows the Viz Engine console window on the
program channel, and verbose all commands being sent and received.
• Show CMD OFF (SHIFT+CTRL+F): Hides the Viz Engine console window on the
program channel.
• Cleanup Renderers: Unloads all scenes, images, and fonts from both program
and preview channels, and resets them to their initial state.
• Commands: Controls the playout of the loaded scene:
•
•
•
•
Start: Runs the scene on the selected program channel.
Continue: If the scene contains stop points, and the current state is at a stop point,
click Continue to run the animation from this stop point until the next.
Stop: Stops the running animation.
Reset: Resets the animation to its start state.
• Clear: Clears the layers of the loaded scene:
•
•
•
•
All Layers: Clears all layers.
Front Layer: Clears the front layer.
Middle Layer: Clears the middle layer.
Back Layer: Clears the back layer.
• Local Viz Preview: Opens a Local Viz Preview window.
• Remote Viz Preview (CTRL+P): Opens a Remote Viz Preview window.
134
Chapter 8: Main Menu
This section contains information on the following topics:
• Local Viz Preview
• Remote Viz Preview
8.5.1
Local Viz Preview
Figure 53: Local preview
Local Viz preview means that a Viz Engine is installed locally on the VCP client
machine for preview purposes. Local preview is a feature that must be selected
during Custom installation of the VCP client by selecting the Viz Engine Preview
plug-in.
This section contains information on the following topics:
• Properties and Parameters
• Context Menu
• To see a local preview
Properties and Parameters
• Start: Animates the scene.
• Continue: Continues to animate the scene to the next stop point or completes
the animation of the scene.
• Stop: Stops the scene.
• Step Backward: Steps the scene backwards frame by frame when it is paused.
• Time field: Shows the current timeframe for the scene.
• Title Area: Shows the boundaries of the defined title area (green rectangle).
Chapter 8: Main Menu
135
• Bounding Box: Shows the boundaries of the scene’s objects.
• Safe Area: Shows the boundaries of the defined safe area (purple rectangle).
• Show Commands: Opens a console window that shows the Viz commands. The
console window can be enabled by default by adding the ShowConsole registry
setting.
• Restart: Restarts the local Viz Engine.
Context Menu
• Keep aspect: Sets and keeps the correct aspect ratio according to the Viz
output format settings when the window is resized.
• Show console: Shows the Viz console, showing all commands sent to and
processed by Viz.
• Always on top: Floats the preview window on top of all other application
windows.
To see a local preview
1. Set a local Viz Engine (i.e. localhost) as the preview renderer in the Profile
Configuration
2. Select Local Viz Engine Preview from the Viz Engine menu to open the Local
Viz Engine Preview window.
3. Open a playlist.
4. Right-click the playlist and from the appearing context menu check the Auto
preview option.
5. Left-click a data element to see a preview.
See Also
• Remote Viz Preview using the Viz Content Pilot client
• Custom installation
• To enable local preview
136
Chapter 8: Main Menu
8.5.2
Remote Viz Preview
Figure 54: Remote preview window
This option allows you to see a remote “snapshot” preview (still or animated) of a
template or data element. Animated means that a series of frames are fetched
from the preview renderer on-the-fly; hence, it is not a real-time rendering.
However, if you have a reference monitor connected to your Viz Engine’s DVI/VGA
output you may use the preview window’s control buttons to play or scrub the
graphics in real-time.
Note: Remote Viz preview means that a Viz Engine is installed remotely on another
machine for preview purposes.
• Start: Asks Viz for a snapshot of the first frame or the first tag on the main
(default) director. If the scene, or foreground scene in transition logic terms,
has a pilot1 tag it will by default jump to that tag on the director and show
that frame.
• Continue: Asks Viz for a snapshot of the remaining tags on the default
director.
• Key: Shows the key signal of the graphics.
• Time field: Shows the current timeframe for the scene. Allows the user to
scrub the scene manually.
• Tag field: Shows the scene’s director tags on the Default director. These tags
are used for previewing the scene, and are not actual stop points. Proper stop
points enable the use of Continue to trigger the animation and should not be
used for creating tags for preview purposes.
• Animate: Asks Viz for a series of snapshots according to the Remote Preview
configuration under Preferences this in turn is played out in sequence in the
preview window in order to animate the scene.
• Title Area: Shows the boundaries of the defined title area (green rectangle).
Chapter 8: Main Menu
137
•
•
•
•
•
Safe Area: Shows the boundaries of the defined safe area (purple rectangle).
Copy: Copies the current snapshot onto the Windows clipboard.
Save: Saves the snapshot as a PNG file.
Error: Shows the error log for the current session.
Connection: Shows the current Viz connection status.
To see a remote snapshot preview
1. Right-click in the playlist and from the appearing context menu select Auto
Preview
2. From the main menu select Viz Engine > Remote Preview, or press CTRL+P
3. Open an item in the playlist
• This will send a preview to Viz asking for the first frame of the scene or the
frame of the first preview tag
See Also
• Remote (snapshot) preview Preferences
• Working with Remote Viz Preview
8.6
Playlist
This menu option is only visible when a playlist is open. In the VCP client it is
possible to import a playlist from a XML file. The XML file must be created with
references to templates and data that will be inserted into the playlist, thus
creating new data elements during import. A template reference is a reference to
the external ID registered for a template using Viz Template Wizard’s template
manager tool.
• XML Filler: Displays two options (Open and Add).
• Open: Creates a new playlist based on the content of the XML file.
• Add: Appends the content of the file to a new or existing playlist.
• Clear Playlist: Clears the playlist by removing all elements in it.
• Save to database: Saves any playlist held by the Media Sequencer to the
database. Imported Media Sequencer playlists are added to the Media
Sequencer the VCP client is currently connected to.
This section contains information on the following topics:
•
•
•
•
XML example
To import a playlist file
To save a playlist to the database
To import a playlist saved to the database
XML example
The XML example below contains the name of the playlist, a group and three
elements with an external ID (templateID). External IDs are configured in Viz
Template Wizard’s template manager tool per template.
<?xml version="1.0"?>
<playlist>
138
Chapter 8: Main Menu
<name>Name of playlist</name>
<group visible="true" name="Group name">
<event>
<templateID>100</templateID>
<dataName>Data Element Name 001</dataName>
<comment/>
<data>
<field>FirstName LastName 001</field>
<field>Designation 001</field>
</data>
</event>
<event>
<templateID>100</templateID>
<dataName>Data Element Name 002</dataName>
<comment/>
<data>
<field>FirstName LastName 002</field>
<field>Designation 002</field>
</data>
</event>
<event>
<templateID>100</templateID>
<dataName>Data Element Name 003</dataName>
<comment/>
<data>
<field>FirstName LastName 003</field>
<field>Designation 001</field>
</data>
</event>
</group>
</playlist>
To import a playlist file
1. On the Playlist menu select XML Filler and then Open ... or Add ....
2. Select the XML file and click OK.
To save a playlist to the database
1. Open a playlist
2. On the Playlist menu select Save to database
3. Enter a name in the appearing dialog box and click Save
To import a playlist saved to the database
1. Open the Playlists tab in the resource panel and select DB Exported
2. Double-click the exported playlist
3. In the appearing dialog box click Yes to confirm the operation
• Playlist is opened and listed under the Imported node displaying the its save
name
See Also
• Viz Template Wizard User’s Guide on Import components and use of external
IDs.
Chapter 8: Main Menu
139
8.7
Windows
Figure 55: Windows menu
The Windows menu options are commonly used to quickly cascade or tile the
playlist windows.
• Cascade: Arranges all open playlists into a cascaded stack, and displays the
playlists in the Work area.
• Tile: Arranges all open playlists horizontally from the top of the screen to the
bottom, and displays an equal part of all the playlists.
• Hide resource bar (CTRL+B): Hides the Resource Panel. Alternatively, use the
keyboard shortcut CTRL+B. The Control panel is displayed by default.
Note: The Windows options affect other windows as well.
To hide or show the resource panel
• Select Hide resource bar from the Windows menu, or use the keyboard
shortcut CTRL+B.
8.8
Help Menu
Figure 56: Help menu
• Viz Content Pilot Help (F1): Opens the Viz Content Pilot user’s guide.
• About: Opens the About window that contains information about the installed
Viz Content Pilot version.
140
Chapter 8: Main Menu
9
Status Bars
The Status bar is positioned at the bottom of the window, and consists of Status
Information and Status Indicators.
This section contains information on the following topics:
• Status Information
• Status Indicators
9.1
Status Information
Status information is positioned to the lower left.
Status information gives feedback on different objects in the Viz Content Pilot
user interface and from connected systems. The information is divided in the
following two categories:
• General information: General information is displayed when a pointer is
positioned over objects in the user interface that contain information relevant
to the user.
• Error information: Error information is displayed if errors occur. When the
Hints area displays general information, it remains its default color (grey).
When the text field displays error information, the text field background color
turns red. Error information is also displayed in the Errors log.
9.2
Status Indicators
• Viz Channel: Displays the status of the Viz channel’s Viz Engine(s).
Chapter 9: Status Bars
141
• Right-clicking the Viz channel will display a context menu for setting the
channel as a program or preview channel. In additon it will display the Viz
Engines configured for that channel and their current status.
• Database: Shows if the Media Sequencer is connected to the Viz Content Pilot
database (see the External Interfaces configuration window).
• Video Channel (clapperboard): Shows if the Media Sequencer is connected to a
Viz Video Engine, Viz Engine or other video servers for video playout. Clicking
the indicator when it is disconnected (status: red) makes the system try to
reconnect (see the Profile Configuration window).
• Viz Gateway: Shows if the Media Sequencer is connected to Viz Gateway. If the
indicator is red there is no connection. Clicking the indicator when it is
disconnected (status: red) makes the system try to reconnect (see the External
Interfaces configuration window).
• Matrix: Shows if Viz Content Pilot is connected to Viz IO. If the indicator is red
there is no connection. Clicking the indicator when it is disconnected (status:
red) makes the system try to reconnect.
• Viz Video Hub: Shows if the Media Sequencer is connected to Viz Video Hub.
Double-clicking the indicator opens the External Interfaces configuration
window.
• Media Engine: Shows if the Media Sequencer is connected to Viz One. Doubleclicking the indicator opens the External Interfaces configuration window.
• Errors: Shows when errors occur. Clicking the button opens the Errors window.
Errors that occur are saved in the Errors log, and displayed in the Errors
window.
142
Chapter 9: Status Bars
Figure 57: Error log
The Errors window contains two buttons.
• Close: Closes the Errors Log dialog box.
• Clear Log: Removes all the error messages from the log window, but not from
the log file. The Errors window also closes, and the Errors button is hidden.
• Profile: Shows the current profile name. Right-clicking the profile name will
open a context menu with a list of available profiles, and option to open the
Profile Configuration.
Chapter 9: Status Bars
143
10 Resource Panel
Figure 58: Resource panel
Viz Content Pilot can be configured to access up to nine (9) different resources.
The resource panel is positioned to the left in the main program window, and
provides an overview of available resources. The buttons and the drop-down list
open various resource panels.
Selecting Templates and Data give access to all templates and data elements
stored on the Viz Content Pilot database. Templates are created by the template
designer, while data elements are based on the templates and created by the user
(e.g. a journalist or an operator).
Selecting Playlists give access to all playlists stored on the Media Sequencer.
Playlists can be created using VCP, or monitored by VCP when they are created
using a newsroom system.
Selecting Viz and Files give access to objects on Viz Engine and files stored locally
on the computer, respectively.
Selecting Trio gives access to Viz Trio’s show folders and shows that are stored on
the same Media Sequencer that VCP is using. Accessing the shows enables the
user to drag and drop Viz Trio pages into a VCP playlist.
Selecting Media gives you access to the VCP media repository Viz Object Store and
the Viz One. The Media tab enables the operator to search for and add media
items directly into the playlist or to the templates/data elements through drag
and drop.
Selecting Cliplist gives you access to clips on video servers that support the MVCP
protocol.
Note: Audio cannot be added directly to the playlist.
This section contains information on the following topics:
• Templates
• Data
• Playlists
144
Chapter 10: Resource Panel
•
•
•
•
•
•
10.1
Viz
Files
Trio
Media
Cliplist
Resource Search
Templates
Figure 59: Template resources
Templates are built using Viz Template Wizard. Templates are used to add
content to the graphics and to a certain extent control the look and feel.
Data stored on the VCP database with references to a template and scene is, when
it is displayed in VCP, called a Data element. Data elements added to a Playlists
are stored on the Media Sequencer for playout, and are consequently stored with
references to the templates and scenes.
A template is used to populate one or many Data elements in order to have
elements with differing content (e.g. text, images, video), and differing control
parameters than another Data elements.
Additionally, a template, and consequently a data element, may belong to one or
many concepts (e.g. Sports and News scenes) and belong to one or many variants
of a scene (e.g. Sports lower and top thirds).
Note: All (<All>) templates are listed the first time Viz Content Pilot is started. The
next time Viz Content Pilot is started it will remember which concept was selected
and start with that concept template listing.
Chapter 10: Resource Panel
145
See Also
•
•
•
•
•
•
Resource Panel
Resource Search
Context Menu
Template Control Buttons
To open a template
To select a concept and variant
Context Menu
Context menu for the columns:
• Auto Width: When enabled (selected) Auto Width expands the columns and
distributes them evenly.
• Enable Sorting: When enabled (selected) Enable Sorting enables the user to
sort the list (ascending/descending).
Context menu for the resources:
• Edit Template: Opens the template in Viz Template Wizard for editing.
• Find: Displays the Resource Search.
• Show Images: Adds the Image column to the Template list, and shows
thumbnails of the scenes in this column.
To open a template
• Double-click a template to open it, or right-click and select Open from the
appearing context menu.
To select a concept and variant
1. Open a template from the resource panel.
2. In the template’s window click the Concept and Variant drop-list, and select a
concept and variant.
See Also
• To select a concept and variant using the playlist
146
Chapter 10: Resource Panel
10.1.1
Concepts and Variants
Tip: The template list is alphabetically ordered (ascending). Click the Name column
to reverse the order (descending).
The concept drop-down list in the resource panel displays all available concepts,
and is basically used to filter the templates that belong to each concept. When
saving a template, the data element will be stored with the selected concept and
variant. These can be changed later on by the operator when the data element is
added to the Playlists or by opening the Data element and selecting a different
concept and variant.
Concepts are essentially a means of reusing content for graphics that have the
same properties. Having the same properties enables the template designer to
create one template for several scenes that have the same properties. The
operator is then able reuse the parameters saved with the data element and
switch concepts and variants without re-entering the data for each Data element
in the Playlists.
When using a newsroom system for story creation the journalist is able to select
which concept or variant a specific story is to be aired with. This will save time
before a story is put on air, and consequently pushes the deadline for when a
story is ready for playout to near real-time.
In addition the control room operator has the freedom to override these settings,
in order to reuse any content, as long as the template supports the concept and
variant to be used.
Chapter 10: Resource Panel
147
Note: Concepts and variants are created and organized by the template designer
using Viz Template Wizard. Templates are stored on the VCP database.
10.1.2
Template Control Buttons
Each template has the same set of control buttons and options.
•
•
•
•
•
Back: Rewinds the scene to frame 0.
Start: Runs the scene from the current frame
Load: Loads the scene.
Continue: Continues the scene from the stop point.
Take Out: Takes the scene to the out state stop point. If the scene is based on
transition logic, the scene is cleared.
• Save: Opens the save dialog saving the current data added to the template.
Will also open the spell checker before the save dialog if spell checking is
enabled and misspelled words are used.
• Close: Closes the template.
10.1.3
Template Save Dialog Box
• Description: In the text box, type a description that uniquely identifies the
data element.
• Finished: If the settings are final, select the Finished check box. This
information will be stored on the database. If a data element is finished it can
be shown in the Finished column in the playlist displaying either 1 for finished
and 0 for not finished.
• Add to library: Viz Content Pilot has a library for templates that are used often.
If the template is likely to be used often, select the Add To Library check box.
All concept and variant information is kept. This option will also prevent data
elements from being deleted when using the Delete Data Items... option on
the Options menu. Library elements can be deleted manually.
Note: If the data element should be post rendered, the data element must have post
rendering start and stop points defined. For more information, see Post Render
Device.
• Save as new (Alt+S): Creates a new data element.
148
Chapter 10: Resource Panel
• Overwrite (Alt+O): Updates a previously created data element. If the data
element is new, the Overwrite button will not be available.
• Cancel: Cancels the save operation.
See Also
• Data
10.1.4
Template Spell Checker
The template spell checker processes the text as part of the save operation. If
spell checking is enabled the spell checker dialog will appear.
Spell checking is enabled by the template designer using Viz Template Wizard.
See Viz Template Wizard User’s Guide for information on how to enable spell
checking for Unicode Edit and Unicode Memo text fields.
• Change: Changes the marked (red) word with the suggested word moving on
to the next misspelled word. When done the spell checker opens the save
dialog.
• Change All: Changes all misspelled words that are the same as the checked
word in one operation moving on to the next misspelled word. When done the
spell checker opens the save dialog.
• Skip: Skips the marked (red) word moving on to the next misspelled word.
When done the spell checker opens the save dialog.
• Skip All: Skips all misspelled words and opens the save dialog.
• Cancel: Stops the spell checking operation going back to the template editing
view. The save dialog is not opened.
Chapter 10: Resource Panel
149
Note: When creating multiple data elements based on the same template (without
closing it), the spell checker will remember previous spelling corrections and
automatically apply them to new data elements before they are saved.
10.2
Data
Figure 60: Data resources
The data elements view enables the user to see a list of all data elements or see a
filtered view by selecting concept and/or template from the drop-lists.
Note: A concept that is selected in the Templates view is reflected in the Data view,
and conversely.
Data elements are described with name, template name, date of creation and a
thumbnail (if the Thumbnail Generator is used).
Data elements are based on templates and can be created by the VCP operator;
however, in most cases data elements are created using the Newsroom
Component (e.g. by journalists). Data elements are then used to populate the
playlist.
This section contains information on the following topics:
•
•
•
•
150
Context Menu
To create a data element
To edit a data element
To delete a data element
Chapter 10: Resource Panel
Context Menu
Context menu for the columns:
• Date: Shows the date and time the data element was created.
• Template: Shows the template the data element is based on.
• Auto Width: When enabled (selected), Auto Width expands the columns and
distributes them evenly.
• Enable Sorting: When enabled (selected), Enable Sorting enables the user to
sort the list (ascending/descending).
Context menu for the resources:
• Open: Displays the selected data element in the Work area.
• Refresh: Refreshes the elements in the Data list.
• Show Library Items: Shows elements that have been created in previous
versions of Viz Content Pilot, and that are stored in the library.
• Find: Displays the Resource Search.
• Delete: Deletes the selected data element. A confirmation dialog box appears
when trying to delete library elements.
• Show images: Displays the Image column.
• Show templates: Displays the Template column.
• Show dates: Displays the Date column. This column is displayed by default,
and the data elements are sorted by date. Clicking the title area of the Date
column reverses the sorting.
To create a data element
1.
2.
3.
4.
Open a template from the Templates resource list.
Fill the template with data (e.g. images, text and so on).
Click the Save button.
Enter a name in the Template Save Dialog Box and click the Save as new
button.
To edit a data element
1. Double-click the data element, or
2. Right-click it, and from the appearing context menu select Open.
To delete a data element
1. Select the data element and press the Delete button on the keyboard, or
2. Right-click it, and from the appearing context menu select Delete.
See Also
•
•
•
•
Resource Panel
Resource Search
Templates
To add a data element to a playlist
Chapter 10: Resource Panel
151
10.3
Playlists
Figure 61: Playlist resources
The Playlists button displays the available playlists on the Media Sequencer.
Media Sequencer playlists can be created in VCP; however, in most cases playlists
are created by newsroom systems that are monitored and played out by the VCP
client or other control applications such as Viz Trio or Viz Multichannel.
The newsroom playlists are stored on the Media Sequencer, and updated through
the Viz Gateway or Viz Device Manager. Viz Gateway supports most newsroom
systems that support the MOS protocol. Viz Device Manager only supports Avid
iNEWS Control Air.
•
•
•
•
Modified: Shows the date and time of when the playlist was modified.
Name: Shows the name of the playlist. Name is enabled by default.
Profile: Shows which profile each playlist is configured to use.
State: Shows if the playlist is active or inactive. When set to active, and the
playlist contains video clips, the Media Sequencer will trigger transfer of video
clips to Viz.
Note: Viz Content Pilot 4 compatible playlists are no longer supported by VCP
versions 5.4 and later.
This section contains information on the following topics:
• Context Menu
• To create a new playlist
• To open a playlist
• To add a data element to a playlist
• To set the same concept for the whole playlist
• To select a concept and variant using the playlist
• To convert VCP 4 playlists.
152
Chapter 10: Resource Panel
See Also
• Resource Panel
• Resource Search
• Playlist Window
10.3.1
Context Menu
Context menu for the columns:
• Modified: Displays the Modified column. This column shows the date and time
of when the playlist was modified.
• Name: Displays the Name column. The name column shows the name of the
playlist. Name is enabled by default.
• Profile: Displays the Profile column. The column shows which profile each
playlist is configured to use.
• State: Displays the State column. Possible states are Active or Inactive.
• Auto Width: When enabled (selected), Auto Width expands the columns and
distributes them evenly.
• Enable Sorting: When enabled (selected), Enable Sorting enables the user to
sort the list (ascending/descending).
Context menu for the resources:
• New Playlist: Creates a new playlist in the Playlists resource list.
• New Folder: Creates a new folder in the Playlists resource list.
• Open: Displays the selected Playlists.
• Open in New Window: Displays the selected playlist in a separate window.
• Activate in current profile: Activates and monitors the selected playlist in the
current profile, and enables the Media Sequencer to trigger transfer of video
clips to Viz.
• Deactivate: Deactivates and stops monitoring of an activated playlist.
• Find: Displays the Resource Search.
• Rename: The selected playlist may be renamed.
• Delete: Deletes the selected playlist. Alternatively, use the keyboard key Delete
(Del).
Note: New Playlist, New Folder, Rename and Delete operations can only be
performed on VCP client playlists or folders that group VCP playlists.
To create a new playlist
1. Right-click the Playlist resources, and from the appearing Context Menu select
New Playlist, or
2. Select New Playlist on the File menu.
• This will set the focus on the new playlist.
To open a playlist
1. Double-click a playlist name in the Playlists resource list, or
2. Right-click the Playlist entry, and from the appearing Context Menu select
Open.
Chapter 10: Resource Panel
153
To add a data element to a playlist
1. Select the Data resource panel.
2. Drag and drop the data element(s) onto the playlist.
• If the element is dropped over an existing element, the new element is
positioned above the existing.
• If the element is dropped in an empty section of the Playlist, the new
element is positioned at the bottom of the list.
3. Arrange the order of the elements by drag and drop.
To set the same concept for the whole playlist
1. Open the Playlists.
2. Select the concept from the Item Toolbar’s Concept drop-list.
Note: Data elements that do not support the selected concept will be colored yellow.
To select a concept and variant using the playlist
1. Open the Playlists where the Data element was added.
2. Select the Data element, and then select the new concept and variant from the
element’s Concept and Variant column.
See also how To select a concept and variant.
To convert VCP 4 playlists
1. Install and start a VCP client version 5.0-5.3.
2. From the main menu select Options, and then Preferences to open the
Preferences window.
3. Select the Playlist (General) option, and then check the two options Show DB
playlists and Open DB playlists in MSE.
4. Click OK to close the Preferences window.
5. Click the Playlists button to display the available playlist resources.
6. Select the DB Playlists tab to display the available DB playlists.
7. Double-click a DB playlist, or right-click and select Open from the appearing
context menu.
8. Select the MSE Playlists tab and see that the DB playlist is recreated and added
to the Media Sequencer Playlists resource list.
154
Chapter 10: Resource Panel
10.4
Viz
Figure 62: Viz resources
The Viz button refers to the currently configured Viz Engine preview channel and
its Viz Graphic Hub connection. Clicking the Viz button the Viz Content Pilot client
is able to show the different scenes, images, objects, materials and fonts available
to Viz Engine.
The Viz panel (aka the treeview browser) also has a range of buttons/tabs that
displays different views of different items/objects available to Viz Engine. The
display area shows the directory and the contents of the currently selected folder.
Below there are some options for refreshing the views and sorting the order of the
listed items.
Note: Viz images can be played out as Fullscreen Stillstore Images; however, this
requires a still store scene.
• Scene: Shows available Scenes in Viz Graphics Hub. Server relates to the Server
- Scenes option in Viz Artist.
Chapter 10: Resource Panel
155
• Image: Shows available Images in Viz Graphics Hub. Image relates to the
Server - Images option in Viz Artist.
• Geom: Shows available Geometry objects on Viz Graphics Hub. Geom relates
to the Server - Objects option in Viz Artist.
• Material: Shows available Materials (colors) on Viz Graphics Hub. Material
relates to the Server - Material and - Materials Advanced options in Viz Artist.
• Font: Shows available Fonts in Viz Graphics Hub. Font relates to the Server Fonts option in Viz Artist.
Note: For Viz 2.x there are default Geom, Font and Material folders in the Viz data
root. For Viz 3.x users these can be placed anywhere on the Viz Graphics Hub.
Figure 63: Scenes
Figure 64: Images
156
Chapter 10: Resource Panel
Figure 65: Geometry objects
Figure 66: Materials
Figure 67: Fonts
Chapter 10: Resource Panel
157
10.5
Files
Figure 68: Files
The Files view allows the user to use external images from local and remote
locations. The drop-down list basically shows the local drive and whatever drives
are mapped to the computer. The display area shows the external images found
for each location.
Double-clicking an image will open a preview of the image.
Context Menu
• Show Thumbnail: Displays thumbnail images instead of text.
• Show Text: Displays textual information regarding picture instead of
thumbnails.
• Auto Refresh: Automatically displays the content of the folder selected in the
Folder list.
Note: External images can be played out as Fullscreen Stillstore Images; however,
this requires a still store scene.
See Also
• Resource Panel
158
Chapter 10: Resource Panel
10.5.1
Crop Tool
Figure 69: Crop image tool
The Crop Image tool is an efficient tool for basic cut and rotate editing. The crop
tool is also used in Viz Object Store (VOS); however, when used with single files
for “on the fly” copy and paste into a template, images are not saved to the Viz
Object Store database. Hence, if an image from the VOS file share is used it will
not affect an already saved image registered to the database.
All edited images are saved as Portable Network Graphics (PNG) images, and
saved with the same image and person information as the original image if that
exists. The new file is given a default prefix “crop_paste_<random characters>”.
Images with alpha values are NOT preserved.
Note: Images saved using the Crop Image tool are not saved and registered with the
Viz Object Store database.
•
•
•
•
•
Save: Saves the image to the image directory set in the crop tool save path.
Cancel: Resets editing and closes the Crop Image tool.
Left 90: Rotates the image 90 degrees to the left.
Right 90: Rotates the image 90 degrees to the right.
Zoom: Zoom the editable version of the image to a size of; 500%, 200%, 150%,
100%, 75%, 50%, 25% and 10% of the original image size. In additon there is an
option to Fit the image to the available space. Zoom can also be performed by
using the mouse wheel. Zoom does not resize the saved image.
Note: Still store images can be played out as Fullscreen Stillstore Images; however,
this requires a still store scene.
To enable the crop tool
1. Start Viz Template Wizard.
2. Open a template with an image component.
3. Select the image component and set one or both of the following properties:
Chapter 10: Resource Panel
159
• AlwaysUseCropTool: Enables the user to always use the crop tool when an
image is added to the template.
• DestHeight and DestWidth: When set to values greater than 0 (zero), it will
enable the crop tool. The parameters set a fixed height and width for the
crop tool. Using this setting will force the user to use the configured height
and width, and the aspect. Meaning, if the selection is greater than then
actual height and width parameters, the image will be scaled to fit, allowing
the user to select a greater area, and conversely.
4. Select one or several image sources.
• ImageSources: Sets one or multiple image source locations. Valid sources
for the crop tool are isDataBase, isFileOpen and isPaste.
5. Save the template.
To crop an image
Note: This procedure requires that the template’s image component use the
ImageSources.isPaste parameter.
1. Open a template or a data element.
2. Search for and copy an image (e.g. web-based systems or file shares).
3. Right-click the image icon and from the appearing context menu select Paste
... .
4. Adjust the anchored frame and/or rotation of the image, and click the Save
(CTRL+S) button on the toolbar.
See Also
• Files
• General preferences
• Fullscreen Stillstore Images
10.6
Trio
Viz Trio resources can be used in a VCP playlist. Viz Trio has all its shows and
pages (similar to VCP’s data elements) stored and organized on the Media
Sequencer.
160
Chapter 10: Resource Panel
Figure 70: Show view
When clicking the Trio button, the Show tab is selected by default. The left pane
displays the folder(s) that organizes the different shows stored on the Media
Sequencer. The right pane lists the show(s) organized under each show folder. A
show contains pages (data elements).
Tip: Hide the Show pane by clicking the vertical oblong arrow button.
Figure 71: Elements view
See Also
• Context Menu
• To open a show
• To add elements to a playlist
Chapter 10: Resource Panel
161
10.6.1
Context Menu
Context menu for the columns:
• Name: Shows the names of the elements.
• Description: Shows a description of the elements.
• Auto Width: When enabled (selected), Auto Width expands the columns and
distributes them evenly.
• Enable Sorting: When enabled (selected), Enable Sorting enables the user to
sort the list (ascending/descending).
Context menu for the resources:
• Show Templates: When selected, Show Templates will display all templates in
the currently selected show as well as all the pages.
To open a show
• Double-click a show (e.g. Viz Trio Show.show) to see its pages (data
elements).
To add elements to a playlist
• Drag and drop pages (data elements) from the Elements view onto the playlist.
10.7
Media
The Media tab allows users to search for media assests (i.e. still images and video
clips) that can be added directly to the story (e.g. a full screen video clip).
162
Chapter 10: Resource Panel
Note: Viz Content Pilot does not support the use of audio files.
Media information resides on storage systems such as Viz Object Store and Viz
One. Viz Object Store traditionally stores still images and person information. Viz
One traditionally stores video, audio and video stills. The Media tab combines the
sources into one.
The left pane shows the Search and Filter Options and a list of categories, while
the right pane displays the search result.
Search results are limited to a 100 hits per source (e.g. Viz Object Store or Viz
One) in order to reduce network load and to increase the speed of the search. The
most recent assests are displayed first. If your results exceed a 100 hits it is
recommended to refine the search.
Note that searching Viz One currently only supports free text search, while Viz
Object Store search supports free text, setting from and to dates and use of one
or multiple keywords.
This section contains information on the following topics:
• Context Menu
• Search and Filter Options
Context Menu
Figure 72: Media context menu
• Sort By: Displays a sub menu with sort options.
• Name/Name (Descending): Sorts by name in ascending and descending
order.
• Registration Date / Registration Date (Descending): Sorts by registration
date in ascending and descending order.
• Show Extra Metadata: Switches the media icons to display meta data such as
complete filename, creation date, and clip length and so on.
• Launch Viz PreCut: Opens the selected video clip(s) in Viz PreCut for editing.
• Launch Viz EasyCut: Opens the selected video clip(s) in Viz EasyCut for editing.
• Edit Metadata: Enables the user to edit the meta data for the selected clip (in
Viz Video Hub) for editing.
• Preview: Previews images using the Windows Picture and Fax Viewer. Is only
available for Viz Object Store items.
Chapter 10: Resource Panel
163
Search and Filter Options
A Viz Object Store search supports free text, keywords and from and to dates,
whereas a Viz One search supports free text search.
Figure 73: Search and filter
• Search field: Combo box for entering a search criteria. Previously entered
search criteria are remembered per session.
• Filter: Enables/disables the image, audio or video filter.
• From/To: Filters the search result based on From and To registration dates.
• Keywords: Filters the search result based on keywords.
• Person: Filters the search result displaying only pictures that are defined as
person (i.e. profile) images in Viz Object Store.
Note: Viz Content Pilot does not support the use of audio files.
Note: Still store images can be played out as Fullscreen Stillstore Images; however,
this requires a still store scene.
See Also
• Viz Template Wizard’s user guide on use of required keywords
• Viz Object Store’s user guide
• Viz Video Hub’s user guide
164
Chapter 10: Resource Panel
10.8
Cliplist
Viz Content Pilot is able to monitor clips on a video device (that supports the
Multiport Video Control Protocol (MVCP)). With MVCP support, operators can add
clips to any playlist, trigger the clips manually for playout, and monitor the
playout status using the TC Monitor. The TC monitor displays the time code and
video server channels. Video servers are added using the Profile Configuration.
See Also
• To add a video device
10.9
Resource Search
Typing the first letters of the name of a resource in the search area, marks the
resource that correspond to the letters in the list.
The resource search applies to the Templates, Data, Playlists and Trio.
To show the Search Area
1. Right-click a resource list, and from the appearing context menu select Find,
or
2. Press the keyboard shortcut keys CTRL+F
3. Enter the search criteria, and navigate up and down with the arrow buttons to
find the next or previous resource matching the search criteria.
Note: The resource search is always enabled for the Viz Trio elements tab.
Chapter 10: Resource Panel
165
11 Playlist Window
Figure 74: Playlist
The playlist window is used to add data elements, fullscreen images and videos
for playout. From the playlist window it is possible to configure the playlist as a
whole, and down to the smallest details concerning each element in it. The
playlist is used to initialize the playlist on Viz Engine and to have direct control
over its groups and elements.
See Also
•
•
•
•
11.1
Playlist Toolbars
Playlist
Playlist preferences
To create a custom button
Playlist Toolbars
There are several toolbars available which can be displayed or hidden using the
Context Menu.
See Also
•
•
•
•
•
•
166
To create a custom button
Item Toolbar
Playlist Toolbar
Video Toolbar
Custom Toolbar
Context Menu
Chapter 11: Playlist Window
Context Menu
• Customize Toolbar: Opens the Button Configuration dialog box. For details
about this dialog box, see Custom Toolbar.
• Item Toolbar: Displays the Item Toolbar (enabled by default).
• Playlist Toolbar: Displays the Playlist Toolbar (enabled by default).
• Video Toolbar: Displays the Video Toolbar (disabled by default).
• Custom Toolbar: Displays the Custom Toolbar (disabled by default).
11.1.1
Item Toolbar
At the top of the playlist window is the Item toolbar:
Figure 75: Item toolbar
• Back: Rewinds the selected scene (represented as a Viz Content Pilot template)
to frame 0.
• Stop: Cancels a playlist item that has been scheduled to run. Stop is only
relevant when groups with elements with time code set have been triggered.
• Start: Runs the scene from the current time frame.
• Pause: Pause the scene at the current time frame. Pause is only relevant for
clip playback.
• Continue: Continues to play the scene from the current time frame. To be able
to use the Continue function, the scene must either have been affected by the
Pause function or have a stop point.
• Take Out: Clears a scene based item, and takes a transition logic based scene
to the out state stop point.
• Clip: Ignores the animation and takes the scene to a defined Clip point. A Clip
point is defined by adding a tag named noanim. To learn more about adding
Clip points, see the Tag points section of the Viz Artist User’s Guide.
• Load: Loads the scene into Viz Engine.
• Initialize: Initializes or re-initializes the entire playlist. Scenes are loaded in
memory for the channel that is defined per data element (see the channel
column in the playlist). A status indicator at the bottom of the playlist is
displayed while initialization is in progress.
• Initialize Playlist: Initializes or re-initializes the entire playlist (default).
• Initialize Selected: Initializes the selected items in the playlist.
Chapter 11: Playlist Window
167
• Cleanup: Unloads all scenes that are loaded in memory for the defined
channel(s) in the playlist (see the channel column in the playlist).
• Concept: Sets a concept for the whole playlist. If the value is set to default, all
data elements will use the concept that is set in the Concept column (see also
Playlist Concept).
See Also
•
•
•
•
11.1.2
Playlist Toolbars
Playlist
Video Toolbar
Custom Toolbar
Playlist Toolbar
At the bottom of the window is the Playlist toolbar:
•
•
•
•
•
•
•
•
•
Next: Selects the next element in the playlist.
Previous: Selects the previous element in the playlist.
Cursor: Jumps to the external cursor.
Expand: Expands the groups in the playlist.
Collapse: Collapses the groups in the playlist.
Merge: Merges the current folder, so that the subfolders become unavailable.
Split: Splits a folder that is merged.
NCS line: Displays the NCS red line in the playlist.
Filter: Opens the Filter dialog box.
Figure 76: Filter
The Filter window is used to enable or disable playlist filters. Each playlist can
enable or disable different filters. Filters are based on how templates are
categorized in Viz Template Wizard.
See Also
• Playlist Toolbars
168
Chapter 11: Playlist Window
•
•
•
•
•
11.1.3
Item Toolbar
Video Toolbar
Custom Toolbar
To create a new playlist filter
Viz Template Wizard User’s Guide on Categories and Channels.
Video Toolbar
The Video toolbar is not displayed by default, and is only available for MVCP
integrations, hence, it is not used for the Viz Video Hub integration.
When selected, the Video toolbar is by default positioned below the Playlist
toolbar.
Note: The Video Toolbar settings only work if the system is configured to be
integrated with a video server.
• On Air: Sets the playlist in On Air mode. When the playlist is set to On Air an
On Air icon
appears in the Media Sequencer Playlists list.
• Allocate: Automatic channel allocation starts, the first clips are cued up, and
the external cursor is set to the first story that contains a video clip.
• Off Air: Sets the playlist in Off Air mode.
• Auto Cue:
• Enable Auto Cue: Enables the automatic channel allocation.
• Disable Auto Cue: Disables the automatic channel allocation.
See Also
•
•
•
•
•
Playlist Toolbars
Item Toolbar
Playlist Toolbar
Custom Toolbar
Example
Example
If a playlist uses two channels (A and B) and the playlist is set in On Air mode, the
first clips allocated to these channels will be cued. Channel A is taken On Air by a
vision mixer GPI (advance and take). This also takes the studio tally (red light on
monitors) high. This is received by the Media Sequencer as a GPI, and the TC (time
code) monitor indicates high tally on that channel. The vision mixer cuts to
camera or to another video source. This takes tally low on that channel, and the
Media Sequencer receives a GPI low signal. After 5 seconds, the tally goes low,
and the next clip allocated to that channel will be cued.
Chapter 11: Playlist Window
169
11.1.4
Custom Toolbar
The Custom toolbar is not selected by default. When selected, the Custom toolbar
is positioned above the Playlist toolbar.
Figure 77: Button Configuration
Selecting Customize Toolbar from the Playlist Toolbars’ Context Menu will open
the Button Configuration window as depicted above. The customized buttons list
is empty by default. If the list contains two or more custom buttons, the order of
the buttons can be rearranged with the Up and Down buttons.
If Show Captions is enabled, the buttons in all buttons in all toolbars will be
displayed with their respective names.
170
Chapter 11: Playlist Window
Figure 78: Add Command
Clicking the Add Command button in the Button Configuration window will open
the Add Command window.
• Description: Add a descriptive text to the new command button.
• Image: Add an image or icon to visualize the new command button.
• Simple button: Add a predefined function by clicking the ellipsis (...) button to
use macro commands or Viz Engine commands (see image below).
• Command: Click the ellipsis (...) button to open the Predefined Functions
window. Select a function to add to the button.
• MSE Status button: Depending on the status of a button, if it is “on” or “off”, it
can have different behaviors and trigger different functions. A Media
Sequencer button is defined to monitor the Media Sequencer.
• Subnode of: Root, Profile or Playlist
• MSE nodepath: Sets the relative path of the sub node.
• Value: Any given value in the Media Sequencer.
• Exists: When checked the button is turned “on” if the node exists.
Independent of the value field.
• While down: Command that is triggered while button is down
• While up: Command that is triggered while button is up
Chapter 11: Playlist Window
171
Both the Simple and the Media Sequencer buttons can use Predefined Functions.
The functions can be user defined or built-in functions.
This section contains information on the following topics:
• Example
• To create a custom button
Example
• Example 1: The button is “on” if the path “/hello” in the Media Sequencer has
the value “aaa”
• Subnode of = Root
• MSE nodepath=”hello”
• Value=”aaa”
• Example 2: The button is “on” if the path “/config/profiles/Studio/top/sub” in
the Media Sequencer has the value “aaa”.
• Subnode of = Profile
• MSE nodepath = “/top/sub”
• Value = “aaa”
To create a custom button
1. Right-click a toolbar and from the appearing context menu select Customize
Toolbar.
2. In the Button Configuration window click the Add Button button.
3. In the Add Command window enter a description for the button in the
Description text field.
4. Select the Simple button option, and click the ellipse (...) button to add
Predefined Functions.
5. Click OK.
Note: When adding button images, use BMP images of approximately 30 x 40 pixels.
See Also
• Playlist Toolbars
• Item Toolbar
• Playlist Toolbar
• Video Toolbar
172
Chapter 11: Playlist Window
11.2
Playlist
Figure 79: Playlist context menu
A playlist can contain various groups and elements. Each group and element is
presented as a row in the Playlist.
This section contains information on the following topics:
• Context Menu
• To group elements in a playlist
Context Menu
Context menu for the status bar:
• Activate in current profile: Activates and monitors the selected playlist in the
current profile, and enables the Media Sequencer to trigger transfer of video
clips to Viz.
• Deactivate: Deactivates and stops monitoring of an activated playlist.
Chapter 11: Playlist Window
173
Context menu for the columns:
• Cursors: Shows three options for setting, clearing and resetting the cursor.
• Reset Cursor: Sets the external cursor back to the point it was before a Set
Next was executed.
• Set Next: Sets the external cursor (yellow arrow) for a selected element. The
cursor indicates which element that will be taken next for example a “take
and advance” General Purpose Input (GPI) action is executed. There is also a
red arrow which indicates the current element that will be taken on-air.
• Clear Next: Clears the Set Next cursor. This option is only available when
clearing a cursor set with the Set Next option.
• Schedule Playlist: Activates the playlist. If for example Begin time has been set,
the playlist must be scheduled before the changes take effect.
• Stop Playlist: Stops a previously scheduled playlist.
• Find: Shows the Playlist Search area below the Playlist.
Typing the first letters of the name of a playlist element in the Find text box,
marks the closest element in the playlist (either above or below the current
element, depending on whether the Find Next or Find Previous button is clicked)
that corresponds to the letters in the text box. The Find Next button is selected by
default. Clicking the X button hides the Playlist Search area.
• Cut: Removes the current element from the playlist.
• Copy: Copies the current element in the playlist.
• Paste: Adds a copied element above the currently selected element in the
playlist.
• Insert Item
• Group: Adds a new group to the playlist, above the currently selected
element. To place an element into the group, press the CTRL key, and then
drag and drop the element onto the desired group. The action is indicated
by an angled arrow. Groups can also be organized as sub-groups.
• Edit Item: Displays the editable text elements in the item editor. Allows last
minute changes to text in graphics.
• Delete Item: Deletes the current Playlist element. It is only removed from the
playlist.
• Auto Preview: Automatically displays selected playlist elements using the
preview channel.
• Filters: Opens the Filter dialog box, where types of elements that should be
hidden in the playlist can be selected.
• View
• Visible Toolbars: Shows which toolbars that should be visible.
174
Chapter 11: Playlist Window
• Show Item Editor: Shows the Item editor at the right side of the Playlist list.
The Item editor displays editable text for the selected graphics item in the
playlist. The editor can be expanded, hidden or closed by clicking the arrow
and X buttons in the upper right corner.
•
•
•
•
• Show Image Bar: Shows a bar with thumbnails of the elements in the
playlist. To hide the Image bar, click the X button in the upper left corner.
Right-clicking the Image bar opens the Change Image Size dialog box.
• Auto Width: When enabled, the columns are minimized, so that they fit
perfectly to the content. This setting stores the setting for the current
playlist. See also the Store as Default option.
• Font: Opens a dialog for setting font, font style, size and so on. The font
settings change the text in the Playlist list.
• Image Size: Sets the thumbnail images to the selected pixel size.
Settings
• Store as Default: Sets the current settings (selected columns, column
widths, filters, etc.) as default for all new playlists. Remember to disable
Auto Width for this function to work properly.
• Restore Default: Restores the settings to the original setup.
Import From File: Opens the Open dialog box, where a previously exported
XML file can be searched for and imported.
Export To File • Playlist: Opens the Save As dialog box, where the entire playlist can be
exported.
• Selected Items: Opens the Save As dialog box, where the selected elements
in the playlist can be exported.
Tree
• Select All: Selects all the items in the playlist.
• Expand All: Expands all groups in the playlist.
• Collapse All: Collapses all groups in the playlist.
Chapter 11: Playlist Window
175
To group elements in a playlist
1. Right-click the Playlist and select Insert Item -> Group from the appearing
Context Menu.
2. Place an element in a group by holding the CTRL key down while performing a
drag and drop operation. An angled arrow indicates that the element may be
dropped.
See Also
• Playlist Columns
• Playlist Concept
• Playlist Time Editor
11.2.1
Playlist Columns
Playlist columns can be displayed or hidden by using the Context Menu. Many of
the columns are presented by default. Dragging and dropping the column
headings changes the order of the columns. When columns are displayed, they
are positioned to the right.
The columns that by default are displayed are; Name, Channel, Status, Available,
Concept, Variant, Finished and Loaded.
Tip: F2 can be used to change the value of a data element’s column setting.
This section contains information on the following topics:
• Context Menu
• To add a transition effect
Context Menu
• Misc: Displays miscellaneous options. Begin, end, time code and duration can
be set directly in the playlist. Some newsroom systems also propagate timing
information to their control applications for monitoring and playout of
newsroom playlists. Such information can for example be sent using the MOS
protocol.
Note: VCP is able to override timing information from newsroom playlists, however,
this is not recommended.
• Begin: Shows the start time of a group. Hence, begin and end times can only
be set for groups and not elements of a group. To set time for elements,
use the Timecode and Duration columns. See also the Playlist Time Editor
section.
• Category: Shows the category the Sub Category resides under. Default
category for Viz Template Wizard templates is the pilot category.
• Channel: Shows which output channel an element should be sent to. Various
elements can be sent to different output channels. The output channels can
be set directly in the column. By default the main (program) output channel
is selected, but this can be overruled by setting an alternative channel in a
template (that all data elements made from it will have). This column is
presented by default.
176
Chapter 11: Playlist Window
• Duration: Sets the length of the element. This time is relative to the Begin
and Timecode parameters.
• End: Shows the end time for a group. See also the Playlist Time Editor
section.
• External Id: The External Id can be set directly in the column. It attaches a
data element execution to a specific external signal that comes from a
button box or similar device. This column is presented by default. An
External Id is used with the Quick CG feature for adding embedded MOS
objects to a newsroom story.
• Finished: If a data element is checked off as finished when saved it can be
shown in the Finished column in the playlist displaying either 1 for finished
and 0 for not finished.
• Loop: Loops a fullscreen video clip on the video channel. Default behavior is
to play once.
• MOS ObjAir: Marks if the newsroom element is marked as ready. The
element can only be taken on air if it is checked (ready). Using the macros
playlist:next_ready and playlist:previous_ready will skip those
elements that are not ready. Do not use the macros playlist:next or
playlist:previous.
• Name: Shows the element name as it was saved in the database.
• Resource Status: Indicates if an element is ready for playout. It will also
show an error status if the element was not loaded or made available.
• Status: Shows the status for video clips; cuing, cued, playing, paused, or
aborted.
• Story #: Shows the name or number of the Story as used in the NCS. This is
an optional field originally intended for use by prompters.
• Sub Category: Shows the category a template is assigned to. See Categories
and Channels in Viz Template Wizard.
• Thumbnail: Shows thumbnails of the scenes.
• Timecode: Sets the time code for the element. This setting affects both
graphics and video elements. The time code can be set directly in the
column. To trigger elements based on time code, the elements must be in a
group, and the group must be executed. An element’s time code must be
set within the group’s Begin and End time.
Note: To monitor video elements in graphics using the TimeCode monitor, the Viz
Engine that renders graphics must also be defined in the profile configurations for
video playout.
Figure 80: Playlist showing the Concept and Variant columns
• Graphics: Displays the graphics options.
• Concept: Shows which concept(s) the data element is associated with.
• Effect: Displays transition effects that can be set per data element. When the
effect is executed it will have an effect on the data element it was set for,
and the next data element taken. See also how To enable transition effects.
Chapter 11: Playlist Window
177
• Effect Image: Displays an image of the transition effect scene.
• Layer: Allows loading of graphics in separate layers on Viz Engine (front,
middle, back). For example, a lower third can be shown in front of a virtual
studio set or any other background, or a bug can be shown in the front layer
while a lower third is shown in the middle layer. This column is presented by
default.
• Loaded: Shows the loaded status (in memory) of the scene and images used
for a data element of that scene.
• Template: Shows the name of the template. This column is presented by
default.
• Variant: Select a concept’s variant from the drop-list (see the Concept
column).
• Video: Displays the video options.
Figure 81: Video transfer, Playlist.
• Mark In: Sets mark in times for video clips.
• Mark Out: Sets mark out times for video clips.
• Postroll: Sets postroll for video clips. When a video clip is played, the time
and remaining time are shown in the TC Monitor. The remaining time; zero
at clip-end if postroll is set to 0. Normally it is desirable with a few seconds
of postroll so that the vision mixer can cut to another source without risking
displaying a freeze frame. With a postroll of 3, the countdown/remaining
time will be zero 3 seconds before clip end and count from zero and
downwards for three seconds.
• Available: Displays the status of external resources needed by the Viz
Engine (e.g. transferred video, and if it is avaiable on the video playout
engines). This column was previously named Progress.
• Index: Sets an index number for each row in the playlist. This number will
always be sorted either ascending (lowest to highest). If a row is moved or
deleted the index changes accordingly.
• Auto Width: When enabled (selected), Auto Width expands the columns and
distributes them evenly.
To enable transition effects
1. Configure a program channel that has a Viz in On-air mode.
2. Make sure the scene effects folder in Viz is named transitions and placed at
the root level of the scene directory.
To add a transition effect
1. Right-click the playlist’s column headers, and from the appearing context
menu select Graphics, and then Effect and Effect Icon (last is only for visual
reference)
178
Chapter 11: Playlist Window
2. Click the arrow button in the Effect column and select, from the appearing
drop list, the transition effect.
See Also
• To create a custom button
• Playlist Concept
• Playlist Time Editor
11.2.2
Playlist Concept
In most cases Viz Content Pilot (VCP) playlists are created in Newsroom Computer
Systems (NCS). A playlist created using an NCS client, can consist of data elements
within a specific concept. For example a News or Sports concept.
The VCP client is able to override a playlist’s concept. Data elements, saved to a
specific concept, can belong to several concepts. Thus, a data element that does
not belong to the overriden concept is highlighted in yellow.
Some newsroom systems support the use of master concepts (e.g. ENPS) set by
the newsroom system itself. A master concept is able to override a concept set
when creating a data element.
Chapter 11: Playlist Window
179
Figure 82: Master concept
When a concept is overridden, the playlist will, when opened in Viz Content Pilot
for monitoring and playout, show all data elements with the concept they were
saved with, but played out using the Master concept. Hence, if a data element was
saved with a Sports concept, and the master concept is News, the News concept is
used.
Figure 83: Master concept is changed
If the Master concept is changed, and the data elements are not part of the master
concept, the data element’s concept column will be highlighted with a yellow
color.
If a data element’s concept is manually changed in Viz Content Pilot, the master
concept will not override the new concept, and a warning is not issued since the
concept is manually overridden.
The concept a data element is saved with is depicted with square brackets [ ]. A
data element’s concept and variant, that are manually changed in Viz Content
Pilot, do not show the concept and variant name with square brackets.
MOS Graphics Concept
The concept implementation of the MOS protocol, that is supported by Viz
Content Pilot and Viz Gateway, can be used by any newsroom system that use the
MOS protocol. However, the feature must be implemented.
Below is an excerpt of a MOS message sent from the newsroom system when a
playlist is created with a master concept.
<mosExternalMetadata>
<mosScope>PLAYLIST</mosScope>
...
<mosPayload>
...
<GraphicConcept>A News</GraphicConcept>
...
</mosPayload>
180
Chapter 11: Playlist Window
</mosExternalMetadata>
In ENPS it is possible to set the concept (or style) when creating a rundown
(playlist). Set the rundown property Viz Graphics Style to the same as the graphics
concept used.
Note: The naming convention must be the same for the scene design and the playlist
created in the newsroom system.
See Also
• To create a custom button
• Playlist Columns
• Playlist Time Editor
Chapter 11: Playlist Window
181
11.2.3
Playlist Time Editor
Figure 84: Time Editor for the Begin and End columns
The Time Editor is displayed when clicking the ellipsis (...) button in the Begin or
End columns. In this window, a group can be set to run between a start- and stop
date and time. It can also be set to run on specific weekdays. Once a start and
stop time has been set, the date and time is shown in the Begin and End column.
See Also
• To create a custom button
• Playlist Columns
• Playlist Concept
182
Chapter 11: Playlist Window
12 Newsroom Integration
Newsroom integration is first and foremost about the Newsroom Component
which is an embedded client that runs within the newsroom system client. An
alternative is VCP’s QuickCG tool for creation of *cg like elements which also can
be installed on newsroom system clients.
Both are used by journalists to fill templates with content and store them as data
elements. The data elements are then put into a running order/rundown, created
using a newsroom client, and made available to the Viz Content Pilot client for
monitoring and playout through Viz Gateway or Viz Device Manager.
Depending on the features selected during installation, the Newsroom
Component allows for template, still image, audio and video clip searches.
Templates can be opened and saved as data elements. Stills and videos can be
searched for and added to templates; however, they can also be added directly
into the newsroom story for fullscreen playout.
Preview of graphics and graphics with video is either available as local or remote
preview. For remote preview, low resolution video clips are used instead of high
resolution video clips. Low resolution clips are also streamed from Viz Video Hub
instead of being rendered on Viz Engine.
The QuickCG tool is simpler, but more efficient when creating data elements that
only contains text (e.g. lower thirds).
The following sub-sections describe the Newsroom Component and QuickCG
properties and features, and how they are used.
This section contains information on the following topics:
•
•
•
•
Newsroom Component
Quick CG
Newsroom Component Test Page
MOS IDs
Chapter 12: Newsroom Integration
183
12.1
Newsroom Component
Figure 85: Template and data element view
The Newsroom Component user interface enables the user, often a journalist, to
fill templates with text, still image(s), video clip(s) and audio, or simply add them
directly to the newsroom system for full screen graphics display, still image or
video clip.
This section contains information on the following topics:
•
•
•
•
•
•
•
•
•
•
•
•
Template View
Working with the Template View
Template Editor
Working with the Template Editor
Media Search
Timeline Editor
Working with the Timeline Editor
Maps
Local Viz Preview
Remote Viz Preview
Configuring Remote Preview
Shortcut Keys
• Quick CG
184
Chapter 12: Newsroom Integration
12.1.1
Template View
Figure 86: Templates and data elements
The Templates tab allow users to search for and open templates, and save them
as unique data elements.
The template pane (left) shows all templates based on the selection made in the
concepts drop-list. Click the concepts view button to switch between a list or icon
view.
The Data Element pane (right) shows all data elements based on the selected
concept from the concepts drop-list, or template pane. Click a template to show
data elements based on the selected template. Click the data element’s view
button to switch between a list or icon view.
Note: Media files that are added to a template are searched for through Viz Object
Store and not by using the Media tab.
Table 27: Template and data element view functions
Function
Description
The concepts drop-list shows all template concepts
available on the database. Note that when viewing all
templates, regardless of concepts, icons are not
shown per template. Select a concept to see icons
for that concept.
There are two refresh buttons. One for the template
view and one for the data element view. The button
refreshes the window, and reloads all templates/
data elements available on the database.
The view button enables two views of the templates
or data elements; as a list, or as thumbnails.
Chapter 12: Newsroom Integration
185
Table 27: Template and data element view functions
Function
Description
When the finish button is enabled the data elements
view will only show data elements that are not
marked as finished when saved.
The calendar button exposes the start and end date
fields.
The information button opens an “About” window
with name, version and copyright information on the
Newsroom Component.
The arrow buttons switches to the template editor
view, and back to the template and data element
view. Alternatively press the shortcut keys CTRL+SHIFT+L
to switch between the two views.
This section contains information on the following topics:
•
•
•
•
Context Menu
Search
To filter the list on date
To open a template
Context Menu
Context menu for templates:
• Refresh: Retrieves new and updated data elements from the database.
• Sorting: Sets the sorting for the template view. Options are; Sort by template
name (CTRL+N).
• Copy: No available for the template view.
• Show icon view: Lists template icons instead of text items.
• Show list view: Lists template text items instead of icons.
• Font ...: Sets the font’s type, style, size, effects, color and script.
Context menu for data elements:
• Refresh: Retrieves new and updated data elements from the database.
• Sorting: Sets the sorting for the data element view. Options are; Sort by data
element name (CTRL+N) and Sort by creation date (CTRL+D).
• Show only library elements: Displays only data elements that are saved as
library items. For details, see Save Dialog.
• Copy: Copies the data element’s XML source such that it can be pasted into a
newsroom story item or text editor.
• Show icon view: Lists data element icons instead of text items.
• Show list view: Lists data element text items instead of icons.
• Font ...: Sets the font’s type, style, size, effects, color and script.
186
Chapter 12: Newsroom Integration
Search
Below the template and data element panes there are two search fields. These are
used to search what is displayed in the two panes. Typing into them will search
the respective template or data element pane for matching templates or data
elements.
When searching for templates, the Newsroom Component will automatically
display all data elements related to a template. When searching the data elements,
it will select the first element matching the search criteria.
See Also
• Working with the Template View
12.1.2
Working with the Template View
This section contains information on the following topics:
• To filter the list on date
• To open a template
To filter the list on date
1. Click the calendar button to enable the start and end date fields (see Template
and data element view functions).
2. Select start and end date to view data elements created within the given period
of time.
To open a template
1. Double-click a template, or
2. Press the shortcut keys CTRL+SHIFT+O to open a template by name or
CTRL+SHIFT+I to open a template by ID.
See Also
• Template View
Chapter 12: Newsroom Integration
187
12.1.3
Template Editor
Figure 87: Saved data element with remote preview enabled
The editor is divided in three; a control bar, template window, and preview
window. Note that the preview window, when performing preview using a remote
Viz Engine, can be detached giving more space for the template. Local preview is
always detached from the Newsroom Component.
The left side of the control bar shows the status and the name of the template.
The right side shows the available concepts and variants, the save options,
preview, information and back buttons.
When the status of a saved data element is orange, as depicted above, the
element is saved to the database and ready to be added to a running order/
rundown in the newsroom system. Usually a drag & drop operation will add the
data element to the news story; however, this may be different depending on the
newsroom system.
Table 28: Template and data element editor functions
Function
Description
There are two save buttons; Save and Save As. The Save button is
only available if a data element is to be overwritten. When opening a
template it is not possible to save the template without saving it as a
data element. Hence, only the Save As button is enabled. Alternatively
press the shortcut keys CTRL+SHIFT+S or CTRL+S to save, or CTRL+ALT+S to
Save As.
188
Chapter 12: Newsroom Integration
Table 28: Template and data element editor functions
Function
Description
The Preview button enables the preview. Depending on the preview
configuration, it will open the local or remote preview window.
Alternatively press the shortcut keys CTRL+SHIFT+P to open the preview
window.
The arrow buttons switches to the template editor view, and back to
the template and data element view. Alternatively press the shortcut
keys CTRL+SHIFT+L to switch between the two views.
To copy a data element you can press the shortcut keys
CTRL+ALT+C and paste it to your newsroom story
Save Dialog
The Newsroom Component has its own save dialog for setting additional
properties such as Finished and Graphics Event Timing for start and duration of
an animation.
If the Template Spell Checker has been enabled, the save operation will open the
spell checker prior to the save dialog. Spell checking is enabled by the template
designer using Viz Template Wizard.
• Finished: If the settings are final, select the Finished check box. This
information will be stored in the database. If a data element is finished it can
be shown in the Finished column in the playlist displaying either 1 for finished
and 0 for not finished.
• Add to library: Viz Content Pilot has a library for templates that are used often.
If the template is likely to be used often, select the Add To Library check box.
All concept and variant information is kept. This option will also prevent data
elements from being deleted when using the Delete Data Items... option on
the Options menu. Library elements can be deleted manually.
• Graphics Event Timing: Select automatic to enable event timing. This option
must be configured on the database (see ax_dataelement_timer_enabled).
• In at: Sets a start time (MOS-itemEdStart). Timing is relative to the story/group
the element is a part of, and not the complete playlist. Time is given in
minutes and seconds.
• Event length: Sets the duration (MOS-itemEdDur) which tells the newsroom
system how long the graphics will be on air.
See Also
• Working with the Template Editor
12.1.4
Working with the Template Editor
This section contains information on the following topics:
• To create a data element
• To rename a data element
• To edit a data element
• To add an open data element to the newsroom story
• To copy an open data element
Chapter 12: Newsroom Integration
189
•
•
•
•
To
To
To
To
copy a data element from the data element list
delete a data element
change a concept and/or variant
preview a data element
To create a data element
1.
2.
3.
4.
5.
Double-click a template from the Template pane to open it in the editor.
Make the necessary changes to the data (e.g. text, images, video clips).
Click the Save button.
In the appearing Save Dialog, enter a name for the data element.
Click OK.
To rename a data element
1. Double-click to open a data element in the editor, and click the Save As
button.
2. In the appearing Save Dialog, enter a name for the data element.
3. Click Overwrite Existing.
To edit a data element
1. Search for and select a data element and double-click it to open it in the
editor.
2. Make the necessary changes to the data (e.g. text, images, video clips).
3. Click the Save button.
4. Click OK.
To add an open data element to the newsroom story
You basically have three options for adding a data element to a newsroom story:
1. Drag and drop the orange icon (top-left) onto your newsroom story, or
2. Press CTRL+ALT+C to copy it to your clipboard and paste it into your
newsroom story, or
3. Open an already saved data element and drag and drop the green icon (topleft) onto your newsroom story
To copy an open data element
• Open a data element and press CTRL+ALT+C to copy it to your clipboard and
paste it into your newsroom story
To copy a data element from the data element list
• Select a data element from the list and press CTRL+ALT+C (or CTRL+C) to
copy it to your clipboard and paste it into your newsroom story
190
Chapter 12: Newsroom Integration
To delete a data element
• Select a data element in the Data element pane and press the Delete key, and
click OK in the appearing confirmation dialog box.
To change a concept and/or variant
1. In the editor, simply use the Concept or Variant drop-list to select a new
concept and/or variant.
2. Click Save to save the data element.
Note: Concepts and variants are created using Viz Template Wizard’s template
manager tool.
To preview a data element
1. Click the preview button
(top right), or
2. Press CTRL+SHIFT+P
See Also
• Template Editor
• Template Save Dialog Box
• Template Spell Checker
12.1.5
Media Search
Figure 88: Media
The Media tab allows users to search for media assests (i.e. still images and video
clips) that can be added directly to the story (e.g. a full screen video clip).
Chapter 12: Newsroom Integration
191
Note: Viz Content Pilot does not support the use of audio files.
Media information resides on storage systems such as Viz Object Store and Viz
One. Viz Object Store traditionally stores still images and person information. Viz
One traditionally stores video, audio and video stills. The Media tab combines the
sources into one.
The left pane shows the Search and Filter Options and a list of categories, while
the right pane displays the search results.
Search results are limited to a 100 hits per source (e.g. Viz Object Store or Viz
One) in order to reduce network load and to increase the speed of the search. The
most recent assests are displayed first. If your results exceed a 100 hits it is
recommended to refine the search.
Note that searching Viz One currently only supports free text search, while Viz
Object Store search supports free text, setting from and to dates and use of one
or multiple keywords.
This section contains information on the following topics:
• Context Menu
• Search and Filter Options
Context Menu
Figure 89: Media context menu
• Sort By: Displays a sub menu with sort options.
• Name/Name (Descending): Sorts by name in ascending and descending
order.
• Registration Date / Registration Date (Descending): Sorts by registration
date in ascending and descending order.
• Add to Rundown: Enables newsroom systems, that do not support drag and
drop operations, to add media elements to their rundown(s). In order to use
this menu option, the database setting ax_enableMediaSendToRundown must
be added to the database and enabled.
• Show Extra Metadata: Switches the media icons to display meta data such as
complete filename, creation date, and clip length and so on.
• Launch Viz PreCut: Opens the selected video clip(s) in Viz PreCut for editing.
192
Chapter 12: Newsroom Integration
• Launch Viz EasyCut: Opens the selected video clip(s) in Viz EasyCut for editing.
• Edit Metadata: Enables the user to edit the meta data for the selected clip (in
Viz Video Hub) for editing.
• Preview: Previews images using the Windows Picture and Fax Viewer. Is only
available for Viz Object Store items.
• Open in Timeline Editor: Opens the Timeline Editor that enables you to add
graphics placeholders to a video clip’s timeline.
Search and Filter Options
A Viz Object Store search supports free text, keywords and from and to dates,
whereas a Viz One search supports free text search.
Figure 90: Search and filter
• Search field: Combo box for entering a search criteria. Previously entered
search criteria are remembered per session.
• Filter: Enables/disables the image, audio, video or person filter.
• From/To: Filters the search result based on From and To registration dates.
• Keywords: Filters the search result based on keywords. This is currently
supported with Viz Object Store search only.
Note: Viz Content Pilot does not support the use of audio files.
See Also
• Media search
• Viz Template Wizard’s user guide on use of required keywords
12.1.6
Timeline Editor
The timeline editor is used to add graphics to a video timeline. The editor is
available to Newsroom Component users.
In short you search for a video using the Newsroom Component and preview
proxy versions of the video clips. When you have found/edited the video, it is
possible to open the video in the Newsroom Component’s built-in timeline editor.
Chapter 12: Newsroom Integration
193
Note that in order to preview the proxy versions you also need to install Video
Codecs.
The timeline editor offers basic functionality for adding graphics to the video
timeline. The graphics are added using data elements that are saved down to the
VCP database (normal graphics workflow).
When using data elements, the timeline editor will add them as placeholders on
the video timeline. The placeholders will display snapshots of the graphics as
video overlays (fetched from the Preview Server). The placeholders can of course
be manually adjusted on the timeline.
A story item containing clip and graphics references from the timeline editor will
appear as a group in the playlist. Issuing a Take command on the group will
trigger the video clip and timed graphics.
This section contains information on the following topic and procedure:
• Video Codecs
• Keyboard Shortcuts
• Known Limitations
Video Codecs
If you are previewing proxy versions of video clips from Viz One using the
Newsroom Component’s timeline editor you will have to install Video Codecs that
are not part of Viz Content Pilot’s Newsroom Component installation.
Note that the setup procedures of Video Codecs are only relevant when using the
timeline editor and not for the Newsroom Component as such. Playout of high
resolution versions on Viz Engine do not require this codec.
See Also
• Video Codecs
• Working with Local Viz Preview
Keyboard Shortcuts
194
Key
Description
Mouse wheel
Zoom in and out
CTRL + ‘+’
Zoom in
CTRL + ‘-’
Zoom out
CTRL + ‘0’
Reset zoom
Insert
Add new graphics
Enter
Open selected data element for editing
Del
Remove currently selected graphics from
timeline
Chapter 12: Newsroom Integration
Key
Description
CTRL + Arrow
Move graphics in small steps back and forth
on the timeline
CTRL + SHIFT + Arrow
Move graphics in big steps back and forth on
the timeline
CTRL + ALT + Arrow
Increase or decrease duration by a small
amount
CTRL + ALT + SHIFT + Arrow
Increase or decrease duration by a large
amount
CTRL + L
Move the selected graphics next to the one to
the left
CTRL + R
Move the selected graphics next to the one to
the right
CTRL + ALT + L
Stretch the selected graphics next to the one
to the left
CTRL + ALT + R
Stretch the selected graphics next to the one
to the right
CTRL + H
Sets video position to start of the clip
CTRL + E
Sets video position to end of the clip
Note: Media keyboard shortcuts for play, pause and mute should also work.
Known Limitations
• Graphics may be overlayed on the timeline; however, graphics that use the
same layer (front, middle, back or transition logic layer) will not play out
correctly. The timeline editor will always indicate a possible conflict by
coloring the graphics placeholders red.
• Current limitations on the Media Sequencer will cause the following behavior:
• If you issue a Take on a timed group (1), and while that group is played out
issue a Take on an graphics in another layer (2), the Media Sequencer will,
when issuing the timed Take Out command (for the timed graphics), take
out the last taken element instead (2).
• Hence, it is currently not recommended to take other data elements on-air
while a timed group is being played out.
12.1.7
Working with the Timeline Editor
This section contains information on the following topics:
• To add graphics to a video clip timeline
Chapter 12: Newsroom Integration
195
To add graphics to a video clip timeline
1. In the Newsroom Component, click the Media tab to search for videos.
2. Right-click the video item, and from the appearing context menu select Open
in Timeline Editor.
3. To add graphics, click the Add button
• This will open the Template and Data Elements’ view.
4. Select a template or already saved data element, and click OK.
• Clicking OK will prompt the template or data element to be saved.
• After it is saved you will see a graphics placeholder on the timeline.
5. Adjust the placeholder to set the desired duration of the animation.
6. Optional: Repeat steps 3 and 4 to add more graphics.
7. Drag and drop the timed video and graphics onto your story.
•
: Depicts an item that can be added (by drag and drop) to a
newsroom story.
• OK: Saves a reopened story item back to the story.
• Cancel: Cancels any changes.
Note: Graphics may be overlayed on the timeline; however, graphics that use the
same layer (front, middle, back or transition logic layer) will not play out correctly.
See Also
• Timeline Editor
• Video Codecs (video preview requirement)
12.1.8
Maps
The Newsroom Component also integrates with Viz World which allows you to add
animated and/or still maps to your graphics.
196
Chapter 12: Newsroom Integration
For more information on how to work with maps, please read the Viz World User’s
Guide.
12.1.9
Local Viz Preview
Figure 91: Local preview
Local preview is a feature that must be selected during Custom installation by
selecting the Viz Engine Preview plug-in. For more information, see Local Viz
Preview using the Viz Content Pilot client.
See Also
• Local Viz Preview using the Viz Content Pilot client
• Remote Viz Preview using the Newsroom Component
• Custom installation
Chapter 12: Newsroom Integration
197
12.1.10 Remote Viz Preview
Figure 92: Remote preview
Unlike Local Viz Preview and Remote Viz Preview using the Viz Content Pilot client,
remote Viz preview using the Newsroom Component does not animate the scene.
The scene, according to the time set in the scrub field, is rendered on a remote
Viz Engine and snapshots are sent back to the Newsroom Component. For remote
Viz preview, low resolution video clips are used instead of high resolution video
clips. Low resolution clips are also streamed from Viz Video Hub instead of being
rendered on Viz Engine.
If remote Viz preview is configured, it will open a preview within the newsroom
component. The Newsroom Component configuration is performed during Viz
Content Pilot Installation.
Note: If Viz Engine 2.x is used for remote preview, a Viz Multiplexer is needed.
• Start: Asks Viz for a snapshot of the scene from the first tag on the default
director.
• Continue: Asks Viz for a snapshot of the remaining tags on the default
director.
• Key: Shows the key signal of the graphics.
• Time field: Shows the current timeframe for the scene. Allows the user to
scrub the scene manually.
• Tag field: Shows a list of the scene’s director tags (not stop tags) on the
Default director. These tags are used for previewing the scene.
• Close (cross): Closes the preview window.
This section contains information on the following topics:
198
Chapter 12: Newsroom Integration
• Context Menu
• Registry Settings
Context Menu
• Always on top: If the preview window is detached from the newsroom
component, this option enables the preview window to stay on top of other
application windows.
• Show Safe Area: Shows the boundaries of the defined safe area (purple
rectangle).
• Show Title Area: Shows the boundaries of the defined title area (green
rectangle).
• Detach preview: Detaches the preview window from the newsroom component
(see, Always on top).
• Set Size as Default: This option sets a new, customized, default preview
window size.
• Optimize: Displays the optimization options.
• Speed: Uses an algorithm for calculating the image resolution which results
in low quality images that are faster across the network.
• Quality: Uses an algorithm for calculating the image resolution which results
in high quality images that are slower across the network.
Registry Settings
The Newsroom Component (NrC) use (in most cases) remote preview, and is by
default configured during installation. It is therefore, under normal
circumstances, no need to change registry settings for the NrC after installation.
Registry settings should preferably be changed by reinstalling the NrC.
Newsroom Component registry path:
• Windows 32-bit: HKEY_LOCAL_MACHINE\SOFTWARE\[vizrt]\ActiveX
5.x\TemplateFiller\
• Windows 64-bit: HKEY_LOCAL_MACHINE\SOFTWARE\Wow6432Node\[vizrt]\
ActiveX 5.x\TemplateFiller\
Table 29: Newsroom Component registry properties
Property
Parameter
Description
PreviewHost
<host>
The preview host is set during
installation.
or
<host>,<host>,
<host> ...
or
<host>:<port>,
<host>:<port>
...
Chapter 12: Newsroom Integration
For failover, PreviewHost can have more
than one host and port number defined.
<host> defines the Viz Engine
hostname, or Viz Multiplexer hostname
for Viz Engine 2.x users, for remote
preview.
If <host> is set without a trailing <port>
then the PreviewPort number must be
set.
199
Table 29: Newsroom Component registry properties
Property
Parameter
Description
PreviewPort
<port>
Defatult ports are 50008 (multiple
connections) and 6100 (single
connection).
<port> defines the Viz Engine port
number, or Viz Multiplexer port number
for Viz Engine 2.x users, for remote
preview.
PreviewDisabled
0 or 1
Enables (0) or disables (1) both local and
remote preview for the Newsroom
Component.
CAUTION! Changing registry settings may cause the system to become unstable.
See Also
• Configuring Remote Preview
12.1.11 Configuring Remote Preview
This section contains information on the following topics:
• To configure remote preview with registry settings
• To configure remote preview with database settings
To configure remote preview with registry settings
1. Open the Registry Editor
2. Locate the TemplateFiller key
• Windows 32-bit: HKEY_LOCAL_MACHINE\SOFTWARE\[vizrt]\ActiveX
5.x\TemplateFiller\
• Windows 64-bit: HKEY_LOCAL_MACHINE\SOFTWARE\Wow6432Node\
[vizrt]\ActiveX 5.x\TemplateFiller\
3. Add PreviewHost as a string
4. Add PreviewPort as a string
5. If preview has been disabled, set PreviewDisabled to 0.
Note: If Local Viz Preview has been used, the Newsroom Component should be
reinstalled and the Viz Engine Preview plug-in removed.
To configure remote preview with database settings
1.
2.
3.
4.
200
Start the Viz Content Pilot client
Select Preferences from the Options menu.
Select the Advanced option in the Preferences window.
Add or edit the ax_preview_host and ax_preview_port parameters.
Chapter 12: Newsroom Integration
• ax_preview_host: <hostname>
• ax_preview_port: 50008
5. Click OK
Note: If the Viz Engine Preview plug-in is installed (custom installation), local
preview will start and not remote preview (snapshots).
See Also
• Local Viz Preview using the Newsroom Component
• Newsroom Integration Client
• Database Configuration
12.1.12 Shortcut Keys
There are several shortcut keys available. The following table lists all of them:
Table 30: Shortcut keys
Keys
Description
CTRL+ALT+C
Copies a data element from the data element list and an
open element in edit mode. See also Template Editor.
CTRL+ALT+S
Saves the data elements as a new data element. See also
Template Editor.
CTRL+C
Copies a data element from the data element list. See
Template Editor and CTRL+ALT+C.
CTRL+D
In data element view you can sort according to a data
element’s creation date. See Template Editor.
CTRL+N
In Template View you can sort according to template name.
In data element view you can sort according to data element
name.
CTRL+SHIFT+I
In template view you can open a template by ID.
CTRL+SHIFT+L
Switches to the template editor view, and back to the
Template View and data element view.
CTRL+SHIFT+O
Opens a template by name when in Template View.
CTRL+SHIFT+P
Toggles the preview. See also Template Editor, Local Viz
Preview and Remote Viz Preview.
CTRL+SHIFT+S
Saves the data elements. See also Template Editor and
CTRL+ALT+S.
CTRL+S
Chapter 12: Newsroom Integration
201
12.1.13 About
The about splash displays your typical version information, but also the
Newsroom Component’s connection parameters to the VCP database and Viz
Video Hub.
See Also
• Database Parameters
12.2
Quick CG
The Quick CG (character generator) is a small and easy to use tool to quickly
create an embedded MOS object to be used in a newsroom story.
Figure 93: QuickCG
• Type CG data: Use the External Id combined with the data needed to fill the
textfields for the graphics. For example: 200-FirstName/LastName/
Designation. Use the delimiters dash ( - ) and forward slash ( / ).
CAUTION! Input must be made without blank spaces.
• Auto-paste to Editor: When selected, it enables the QuickCG to auto-paste the
generated XML output to a previously selected editor (for example a
newsroom story editor).
• Settings (i): Click the i symbol to open the Settings dialog box to configure
another activation key. Available options are; Disabled, Ctrl, Alt, Shift, Home,
End, Insert, Num Lock and Scroll Lock.
• Minimize: The minimize button minimizes the application to the taskbar.
Reopen it by double-pressing the assigned activation key.
• OK: When clicked, the OK button will initiate the generation of the XML needed
to create a proper MOS object that can be added to the newsroom system. If
Auto-paste to Editor is selected, it will paste the XML directly to the previously
202
Chapter 12: Newsroom Integration
selected editor (for example a newsroom story editor). The MOS object (XML
data) is placed on the clipboard.
<mos>
<mosItemBrowserProgID>VCPAxFiller.VCPTemplateFiller</
mosItemBrowserProgID>
<mosItemEditorProgID>VCPAxFiller.VCPTemplateFiller</
mosItemEditorProgID>
<mosID>PILOT</mosID>
<objID>EMBEDDED</objID>
<mosAbstract> FirstName LastName Designation</mosAbstract>
<createdBy>SomeUser</createdBy>
<created>2007-11-12T13:05:05</created>
<description> FirstName LastName Designation</description>
<mosExternalMetadata>
<mosScope>PLAYLIST</mosScope>
<mosSchema>http://www.vizrt.com/mosObj/embedded</mosSchema>
<mosPayload>
<embedded_item>
<external_id>200</external_id>
<fields>
<field>FirstName</field>
<field>LastName</field>
<field>Designation</field>
</fields>
</embedded_item>
</mosPayload>
</mosExternalMetadata>
</mos>
When the MOS object (XML data) is added to a newsroom story editor, it is
possible to double-click it and save it as a data element using the Newsroom
Component if needed.
Note: See the Viz Template Wizard User’s Guide on how to set External IDs.
This section contains information on the following topics:
• Working with Quick CG
12.2.1
Working with Quick CG
This section contains information on the following topics:
• To open Quick CG
• To create a CG data element
To open Quick CG
• Double-press the assigned activation key (default is CTRL).
Chapter 12: Newsroom Integration
203
To create a CG data element
1. Enter the template’s External ID followed by a dash.
2. Enter the data separated with a forward slash.
3. Select newsroom story editor, and click the Auto-paste to Editor button (first
button (upper-right)).
4. Click OK to add the XML output to the editor, or
5. Paste it manually into the eidtor by pressing the CTRL+V keys.
See Also
• Quick CG
• Newsroom Component
12.3
Newsroom Component Test Page
In the program menu and in the program folder there is a file named Newsroom
Component Test Page. This web page loads the Newsroom Component (NrC)
within Internet Explorer such that it can be used for testing the NrC connection
properties and functionality.
204
Chapter 12: Newsroom Integration
Figure 94: Newsroom Component test page.
To edit the connection settings either reinstall the NrC or use a registry editor
(only for system administrators).
When the Newsroom Component Test Page is opened, Internet Explorer (IE) will
issue a warning and ask the user to accept the ActiveX to run within IE.
To allow the test page to run without a warning
1. Start Internet Explorer, and from the Tools menu select Internet Options.
2. In the Internet Options window select the Advanced tab.
3. Under the Security category, check the Allow active content to run in files on
My Computer option.
WARNING! Check with the system administrator before enabling on this option.
See Also
• Newsroom Component
Chapter 12: Newsroom Integration
205
12.4
MOS IDs
The above image depicts the ActiveX 5.x registry key used by the NrC (on a
Windows 32-bit machine). It shows the DatabaseName string with a TNS name
alias (VIZRTDB).
• Windows 32-bit: HKEY_LOCAL_MACHINE\SOFTWARE\[vizrt]\ActiveX
5.x\DataBroker\
• Windows 64-bit: HKEY_LOCAL_MACHINE\SOFTWARE\Wow6432Node\
[vizrt]\ActiveX 5.x\DataBroker\
Note that the TNS_ADMIN string that points to the tnsnames.ora file is not set; it
must be added to the Viz content pilot 5.x key, or as an environment variable. The
password and username is by default pilot/pilot. Leave the registry strings empty
unless the username and password has been changed.
A mosID must be set for the NrC. Obtain the mosID from the Newsroom Computer
System server. The mosID string can be overridden during the Newsroom
Integration Client installation or by setting the TemplateFiller key manually. Note
that by default the mosID is PILOT, but this is most likely not the correct mosID
for a production system.
IMPORTANT! Most newsroom systems generate case sensitive MOS IDs.
See Also
• Newsroom Integration
• Newsroom Integration Client installation
• Registry Settings
206
Chapter 12: Newsroom Integration
13 Thumbnail Generation
The Viz Thumbail Generator (TnG) is a stand-alone application that generates
thumbnail images for data elements used in VCP and NrC for template
recognition. Template thumbnails are stored on the VCP database.
Note: Thumbnails are also visble in Viz Trio newsroom playlists.
To
•
•
•
create thumbnails the following is needed:
A connection to VCP’s database using an Oracle Runtime Client.
A connection to Viz Engine.
Standalone scenes, or front scenes for transition logic scenes, must have a tag
on the director named pilot1 (lowercase only).
Viz Engine must have the same setup and plug-ins as the playout engine. For this
reason, a dedicated Viz Engine is recommended. If connecting to a Viz Engine 2.x
version remotely, a Viz Multiplexer is also needed.
TnG sends Viz Engine commands for a saved data element to the Viz Engine, and
a thumbnail is returned. The thumbnail is then saved back to the database.
Thumbnails can be used for a basic VCP client embedded still preview shown in
VCP’s thumbnail column and in the playlist’s ImageBar column. It is also made
visible in VCP’s template and data element Resource Panel and NrC’s template
and data element panes.
From a scene design perspective, the scene designer needs to add a director tag
named pilot1 (lowercase only). This is treated as a “stop point” when previewing
the scene, and a snapshot of the scene’s state is sent back to the TNG. The same
goes for transition logic scenes that must have the tag set for the front scenes.
This section contains information on the following topics:
•
•
•
•
•
Getting Started
Configuration
Command Line Options
User Interface
Logging
See Also
• Preview Configuration
13.1
Getting Started
Start the TNG, either of the following ways:
Chapter 13: Thumbnail Generation
207
1. Double-click the icon on the desktop, or
2. Select the program from the Start menu (All Programs > Vizrt > Viz Content
Pilot > Viz Thumbnail Generator)
Note: Make sure Viz Engine and Viz Multiplexer (if needed) is configured and
running.
See Also
• Thumbnail Generation
13.2
Configuration
The Settings window configures connection parameters for VCP’s database and
Viz Engine, and the thumbnail image height.
The database settings enable Viz Thumbnail Generator (TnG) to listen for
Advanced Queuing messages from the database to automatically send requests to
Viz Engine to create snapshots.
All settings are saved to an initialization (INI) file that is stored locally in the
following folder:
C:\Program Files\Vizrt\Viz Content Pilot 5.x\ThumbnailGenerator.ini
In order to successfully generate thumbnails, Viz must be set in
This section contains information on the following topics:
To configure Viz Thumbnail Generator
• To set Viz Engine 2 in off-screen mode
To configure Viz Thumbnail Generator
1. Click Settings to open the Settings window.
2. Add the Settings as described in the User Interface section.
3. Click Save and restart TnG.
To set Viz Engine 2 in off-screen mode
1. Start Viz Config (Viz Engine’s configuration tool).
2. Select Render-options , and set the Video Output Window option to Off
Screen.
Note: Viz Engine 3 is by default configured to render in off-screen mode.
208
Chapter 13: Thumbnail Generation
See Also
• Thumbnail Generation
13.3
Command Line Options
TnG can use command line parameters in the target path. For more information
on different commands and parameters, see Command Line Options.
thumbnailgenerator.exe -viz <host> -port 50008 -db VIZRTDB -timeout 20
Note: For Viz Engine 2.x a Viz Multiplexer is needed (see Preview Configuration).
See Also
•
•
•
•
Thumbnail Generation
Getting Started
Configuration
To configure Viz Thumbnail Generator
Chapter 13: Thumbnail Generation
209
13.4
User Interface
Figure 95: User interface
The TNG has a main user interface, and a menu option for configuring the TNG’s
connection parameters.
The main window shows the number of elements in the database that can be
generated based on the selected date(s). In addition it shows a progress bar and
status messages for each element that is updated or generated. TNG sends its
requests to Viz Engine, based on messages received from the database. At the
bottom of the main user interface a Connection Status bar shows the connection
status for VCP database, Viz Engine and Advanced Queuing messages. The latter
indicates that TNG is able to receive updates from the database whenever new
elements are created.
• Latest generated: Displays the last generated thumbnail.
• Limit to elements created after: Sets the date limiting elements created after a
certain date. When selected the field displays a date picker.
• Limit to elements created before: Sets the date limiting elements created
before a certain date. When selected the field displays a date picker.
• Generate thumbnails: Starts the generation of thumbnails.
210
Chapter 13: Thumbnail Generation
• Remaining elements: Shows new or updated elements that are not generated.
• Remaining thumbnails for current element: Shows remaining thumbnails to be
generated for the current element. For example if a template has four variants,
the remaining thumbnails will generate all four variants.
• AQ and error status: Shows information about created elements, connection
status, and error messages.
• Status: Displays a progress bar showing the progress status of each generated
thumbnail.
• Connection Status: Displays three indicators showing the connection status
for VCP’s database, Viz Engine and Advanced Queuing messaging queue.
Figure 96: Settings
•
•
•
•
SID or TNS-alias: Database hostname and SID or TNS name alias.
Username: Database username (default: pilot).
Password: Database password (default: pilot).
Hostname: Viz Engine or Viz Multiplexer hostname. Use Viz Multiplexer’s
hostname if it is used as it will forward requests to Viz Engine.
• Port: Set the port number used for communication with Viz Multiplexer or Viz
Engine. Use Viz Multiplexer’s port number if it is used as it forward requests
to Viz Engine.
• Timeout: Set the timeout before TNG should stop waiting for response and
continue requesting thumbnail(s) for the element.
• Thumbnail height: Sets the pixel height for the thumbnail: The width is
automatically calculated based on the aspect of the scene set in the attached
Viz Config.
See Also
• Thumbnail Generation
• To configure Viz Thumbnail Generator
Chapter 13: Thumbnail Generation
211
13.5
Logging
Thumbnail Generator has its own log files (e.g. viz_thumbnailgenerator.log).
The logfiles are normally located in the program folder; however, you can also
place the log files in other directories using the -logpath <path> command line
parameter (added to your program shortcut’s target path). If you only want to
enable logging you can use the -dologging command line parameter.
See Also
• Command Line Options
212
Chapter 13: Thumbnail Generation
14 Database Administration
The database installation is a typical Oracle database server installation. For how
to install an Oracle database server, see the related documentation supplied by
Oracle.
Vizrt’s standard installation of a VCP database uses the service name VIZRTDB.
The SQL schema and table creation scripts add the user PILOT with password
PILOT which makes up the schema name and the default credentials all VCP
applications are configured to use. All this can be changed either during
installation or after installation.
Table 31: Database connection parameters
Oracle system identifier (SID/Service name)
VIZRTDB
All system users (default)
system/oracle
sys/oracle
All users (default)
PILOT/PILOT
Database schema (default)
PILOT
VCP’s database setup involves the use of Viz Content Pilot’s Database
Administrator tool (VCP DBA).
VCP DBA is a program that is used by database administrators (DBA) in order to
install, maintain and upgrade the Viz Content Pilot database system.
VCP DBA also enables the database administrator to check the current status of
the database.
IMPORTANT! Vizrt does not support installations on express edition (XE) databases.
This section contains information on the following topics:
•
•
•
•
•
14.1
Requirements
Installation
Getting Started
User Interface
Management Options
Requirements
To run VCP DBA, the following software is required:
• VCP DBA client
• Oracle 11g Administrator Client.
• Installs the management console, management tools, networking services,
util, and basic client software.
Chapter 14: Database Administration
213
VCPDBA and all script files are bundled into a zip file. Please unzip all files into
one folder.
Example: C:\temp\VCPDBA
This section contains information on the following topics:
• Current Limitations
• Upgrade Considerations
• Upgrade Limitations
Current Limitations
• VCP DBA’s install path cannot contain spaces.
• VCP DBA can only logon with Oracle’s system user.
Upgrade Considerations
As a general rule, the schema version should be upgraded to the same version as
the Viz Content Pilot (VCP) client tools. Although, it is important to remember in
which order to do the upgrade, and to do the actual schema upgrade work at a
convenient time when the system is not in use.
Please refer to the VCP release notes for recommended schema version for a
specific version of VCP System.
As the order is crucial for the functioning of the templates in the VCP system, the
following order of upgrading is recommended. If instructions are not followed,
and a newer version of Viz Template Wizard (VTW) is used to save a template, the
template will most likely not work inside the Newsroom Component (NrC) and
VCP client.
1. Upgrade Viz Content Pilot system’s schema in the VCP database
2. Upgrade all clients except the Viz Template Wizard client(s)
3. Upgrade the Viz Template Wizard client(s)
The order of 1 and 2 can be switched, but the last component to be upgraded
should always be the VTW. This is to avoid saving down templates with new
functionality that may come with the version, which is not supported by older
versions of the NrC or VCP client.
Test the versions of the NrC, VTW and VCP client you want to upgrade to, at least
on one non-live client of each. The test should involve at least opening all
templates in each client, saving down one data element of each template in the
NrC, and finally playing all those data elements out from the updated VCP client.
Contact local support team with information about the current state of the VCP
database; for example which version the current VCP schema is on, what version
you want to upgrade to so that support is aware that the upgrade is happening
and can prepare second line and personal follow-up, if needed.
When you start the upgrade process any data elements or new templates saved
after this time may be lost if the upgrade is not successful. The chances of this are
small, but it may happen and it should be incorporated into the plans.
214
Chapter 14: Database Administration
If you have a main and standby setup, check that they are synchronized. If this is
not the case, Vizrt support must be informed and any schema upgrade cannot go
ahead before this is rectified. If it cannot be solved, a full recreation of the
standby server may be needed before continuing. Also, a set time is needed where
you can break the synchronization between the two databases.
Upgrade Limitations
When upgrading from a VCP 4.x or older version it is advisable to contact a local
Vizrt representative or support person so they can advise on how to proceed.
Some features found in VCP 4.x are not available in VCP 5.x.
When upgrading from a previous VCP 5.x version it is advisable to upgrade the
database schema to the latest schema version that is compatible with the sofware
version. When upgrading the database, please use the Database Administration
tool. For more information on supported schema version, please see the release
notes.
See Also
• Database Administration
14.2
Installation
There is currently no installer for Viz Content Pilot’s Database Administrator tool
(VCP DBA). The tool can be downloaded from Vizrt’s FTP as a ZIP archive. It is
located in the same directory as the VCP installer.
To install VCP DBA
1. Extract the ZIP archive to a preferred directory.
2. Create a shortcut for the desktop and/or the start menu.
See Also
• Database Administration
14.3
Getting Started
Start the VCP DBA, either of the following ways:
1. Browse to the location where you extracted the VCP DBA files.
2. Double-click the VCP DBA executable file to start the application.
Note: Make sure Viz Engine is configured and running. If you are using Viz Engine
2.x you will also need a Viz Multiplexer (which then will be your connection point).
Chapter 14: Database Administration
215
See Also
• Database Administration
14.4
User Interface
Figure 97: Connect to database
Starting the client will open the Connect to DB window which is the initial screen
of VCP DBA. This screen gives the user several options; the Database Login,
different Management Options and Advanced Configuration of user levels.
This section contains information on the following topics:
•
•
•
•
•
•
Connect to DB
Database Login
Advanced Configuration
Schema Status
Connection Status
Error Logs
See Also
• Database Administration
14.4.1
Connect to DB
The Connect to DB tab is the initial startup window where the user can perform
the Database Login, set user levels and initiate different Management Options.
• Connect to DB/Change DB: Enables the user to log on to the database.
• Advanced Config ...: Enables the user to select a default user level or create a
custom user level.
216
Chapter 14: Database Administration
• Install New Schema: Enables the user to install a schema on the specified
database. See Install Schema.
• Upgrade Current Schema: Enables the user to upgrade the current version of
the schema to a later version. See Upgrade Schema.
Note: The application first scans the installed schema for critical errors and blocks
the option to upgrade if any critical errors are found.
• Show Schema Status: Enables the user to see the status of the currently
installed schema. See Show Schema Status.
• Create complete db solution: Enables the user to create a complete database
solution. See Create Complete DB Solution.
• Backup Schema: Enables a user to export a database dump of the schema. See
Backup Schema.
• Restore Backup of Schema: Enables the user to import a database dump of a
schema. See Restore Backup of Schema.
• Full Export of DB: Enables the user to perform an export of the entire
database. See Full Export of Database.
• Imp. All Schemas in Dump: Enables the user to import all schemas in dump.
See Import All Schemas in Dump.
See Also
•
•
•
•
14.4.2
User Interface
Database Login
Advanced Configuration
Management Options
Database Login
Figure 98: Database login
In order to successfully connect to a database, a local net service name must be
configured for the Oracle database client using Oracle’s Net Configuration
Assistant.
• Username: Displays the pre-configured system user.
• Password: Sets the password for the system user.
• Database: Sets the database service name or connection string.
Chapter 14: Database Administration
217
• Connect as: Sets the connection privileges. Available options are Normal,
SYSDBA or SYSOPER.
See Also
•
•
•
•
•
14.4.3
User Interface
Connect to DB
Advanced Configuration
Database Service Names and SID
Database TNS Alias
Advanced Configuration
Figure 99: Advanced Configuration
• Set User Level: Shows the available user modes.
• Basic: This user level is for users who are doing regular maintenance and
fresh installations or upgrades of the database schema.
• Support: This user level is mainly used by Vizrt’s support personnel and
skilled administrators who are doing special customizations to an existing
installation or fixing common errors found in schemas.
• R&D: This user level is for use by Vizrt’s R&D department when doing
development or searching for bugs that is not solved by customer support.
• Advanced Options: Shows the available options.
• Enable Recreate/Recompile options: This enables the Recreate/Recompile
options in the Schema Status window and the button to recreate AQ tables
in Extended Info-AQ & Purge Job.
• Enable option to have different name on tablespace: Enables the user to
select a different tablespace name. Default is the same as Schema name.
• Enable support imports: Enables "support only"-version in the combo box
for selecting version for import. This is to import a single schema without
first installing a new schema, so that Vizrt can debug the schema. Also
enables "Imp.All Schemas in Dump" option.
• Add Destroy=Y to all imports: Overwrites tablespaces if already found.
218
Chapter 14: Database Administration
• Show preprocessed scripts and advanced script options: Shows an extra tab
before executing the chosen script where the user can see through the preprocessed script or reload it.
• Stop on errors when executing scripts: Stops the execution of scripts when
errors occur. For versions 5.1.7 and later this option should be enabled. For
older versions than 5.1.7 this option should be disabled.
• Enable advanced options in extended info: Enables the buttons to activate/
deactivate the AQ triggers and purge job, and the button to delete all
entries in the errlog table older than 3 months.
• Allow unstable versions in upgrade: Allows the schema to be upgraded to/
installed as an unstable version, meant for R&D.
See Also
• User Interface
• Connect to DB
• Database Login
14.4.4
Schema Status
Figure 100: Status of schema
• Save icon: Creates a packaged file (zip) with debug information. The file can
be sent to support for external help with the database.
Note: If dump files are not created as expected, check that VCPDBA’s installation
path does not contain spaces.
• Upgrade Application Schema: Enables the user to upgrade to a new schema.
• Run Custom Script (Advanced): Enables the user to run a custom script,
specific to the database.
Chapter 14: Database Administration
219
• View Extended Info (Advanced): Enables the user to display extended
information about the schema.
• Recreate all constraints (Advanced): Enables the user to execute a script that
recreates all constraints in the schema. Typically needed after a "support only"
import, or if some constraints for some reason are missing. Missing
constraints are reported in the status window.
• Recreate all sequences and recompile schema (Advanced): Enables the user to
recreate all sequences in the schema and then recompiles the entire schema.
This is usually done by normal imports, but could be needed if something
went wrong during the import, or if “support only" import was used. This will
also fix problems that might appear if for some reason a manual import was
done.
• Recompile schema (Advanced): Enables the user to recompile all packages,
triggers, functions and procedures.
• Reorganize LOB's (Advanced): Enables the user to speed up SQL in older
databases. This option will only be visible with older VCP installations (usually
VCP 4 and some 5.1 versions). For example: The large object (LOB) columns of
Plakat_data are stored in_row. If you have problems with slow SQL,
reorganizing the columns could improve the SQL performance.
See Also
• User Interface
• Advanced Configuration
14.4.5
Connection Status
Figure 101: Connection indicator to database
The connection indicator field at the bottom right shows the connection status for
VCP DBA to the database. It is red when disconnected, and green when connected.
If the connection is lost try clicking on this field to reconnect to the database.
See Also
• User Interface
14.4.6
Error Logs
When errors occur during operation, an indicator is shown in the lower right of
VCPDBA’s user interface. Clicking this warning indicator will open a log window
with the following three logs:
• VCPDBA.log: Shows the main application log.
• VCPDBA_SQL.log: Shows the SQL output from the last script that was
executed.
• vcp_ora.log: Shows the log for the internal Oracle module.
All log files are stored in the same directory as the VCP DBA application.
220
Chapter 14: Database Administration
Note: All vcp_ora.log files are added to the vcp_ora.log.old file.
See Also
• User Interface
14.5
Management Options
This section describes the different management options:
•
•
•
•
•
•
•
•
•
•
Install Schema
Upgrade Schema
Show Schema Status
Create Complete DB Solution
Backup Schema
Restore Backup of Schema
Full Export of Database
Import All Schemas in Dump
Extended Information
Database Test
See Also
• Database Administration
14.5.1
Install Schema
Install New Schema enables the user to install a new schema, set a schema name,
username and password, and a tablespace name.
If the user level is set to R&D mode (see Advanced Configuration) it is possible to
install an unstable version of the database schema. This is typically the latest
version in development, and is only recommended for testing.
Chapter 14: Database Administration
221
To install a new schema
Figure 102: Install new schema
1.
2.
3.
4.
Click the Install New Schema button.
In the New Schema window, select the VCP version to be installed.
Optional: Enter the schema name and password
Optional: Enter the tablespace name. Setting a different tablespace name
requires this option to be selected (see Advanced Configuration).
5. Click Next twice to start the installation.
6. Click Next when finished.
Note: If errors occur, see Error Logs.
See Also
• Management Options
• Advanced Configuration (reference)
14.5.2
Upgrade Schema
The Upgrade Schema option enables the user to upgrade the schema from the
current version to new versions.
If the user level is set to R&D mode (see Advanced Configuration) it is possible to
upgrade to an unstable version of the database schema. This is typically the latest
version in development, and is only recommended for testing.
This section contains information on the following topics:
• To upgrade to a new schema
222
Chapter 14: Database Administration
To upgrade to a new schema
Figure 103: Upgrade schema
1. Click the Upgrade Schema button.
2. In the Select Schema window, select the schema that should be upgraded, and
click Next.
• When VCP DBA has checked the status of the current schema, the Upgrade
Schema window will list the available upgrade options.
3. Select the schema version, and click Next to see the script that will be
executed.
4. When ready to upgrade, click Next to run the scripts.
5. Click Next when finished.
Note: If errors occur, see Error Logs.
See Also
•
•
•
•
14.5.3
Upgrade Considerations
Upgrade Limitations
Management Options
Advanced Configuration (reference)
Show Schema Status
Schema status shows the status of the selected database schema. The list gives
status information on the following:
• The version of the currently installed schema.
• Text encoding of the database.
• Status of AQ.
Chapter 14: Database Administration
223
• Whether the schema complies with a reference of the currently installed
version.
If more than one schema is installed on the same database, a selection dialog is
displayed before the status information window is shown.
The available options depend on the configured user level, see Advanced
Configuration. Note that most features will be blocked if the database text
encoding is not UTF-8.
CAUTION! With the exception of “View Extended Info”, the “Advanced” options may
stop the schema from working if an error occurs while running the scripts.
To see the schema status
1. Click the Show Schema Status button.
2. Select the schema and enter the schema password.
3. Click Next.
See Also
• Management Options
• Advanced Configuration (reference)
• Upgrade Schema
14.5.4
Create Complete DB Solution
Creating a complete database solution using VCP DBA ensures that the database
is setup and configured according to our recommendations. It also installs the
latest version of the PILOT schema.
The Oracle Standalone Server is a setup with a single server and no form of
automated backup.
The Oracle Standby Server is a setup with two standard Oracle servers where one
is working as the failover server in case the main server goes down.
The standby server’s failover mechanism is manual, and the backup server is
inactive for users when in standby mode. The standby server setup also requires
that the main server is started before the backup server.
IMPORTANT! There is no instant synchronization between the servers.
The standby setup is meant to be used with new installations of standby servers.
It is created to work with C: drive as the program disk and D: drive as the data
disk.
To create a complete stand alone server
1.
2.
3.
4.
224
Click Advanced Configuration and select the support or R&D user level.
Click the Create complete db solution button.
Select the Stand Alone Server (Windows) option.
Select the drives for the software and the data files.
Chapter 14: Database Administration
5. Enter the hostname if the hostname was not detected.
6. Click Next.
• Clicking Next will launch the Oracle Universal Installer, and a separate
command schell. The Oracle Universal Installer will install the database.
• After the installation the Oracle Universal Installer will start to execute the
configuration assistants (e.g. Oracle Net Configuration Assistant and so on).
7. In the separate command shell window click any key to continue after
receiving the message “The installation of Oracle Database 11g was
successful.” from the Oracle Universal Installer.
8. VCP DBA will now log itself on to the database and install the PILOT schema.
9. Check that the host information in listener.ora and tnsnames.ora use
hostnames and not IP-addresses.
Example: C:\oracle\product\10.2.0\db_1\NETWORK\ADMIN\
To create a complete standby server
• It is not recommended to perform this setup option without consulting your
local Vizrt representative or support person.
See Also
• Management Options
• Advanced Configuration (reference)
14.5.5
Backup Schema
The database backup feature exports a database dump of the schema. If the
backup does not produce an output, it is important to check that the VCP DBA
install folder does not contain spaces, and that the Oracle 11g Administrator
client is used.
To backup a schema
1. Click Backup Schema.
2. In the Select Schema window, select the schema that should be backed up, and
click Next.
3. Click Next when finished.
See Also
• Management Options
• Advanced Configuration (reference)
14.5.6
Restore Backup of Schema
Restore a backup imports a database dump of a schema. If the schema name
imported to is not the same as the schema name that was exported, it is possible
to choose to import to a new schema, however, this also requires that the version
of the schema that was dumped is known. The application will do a complete
install of that schema version, truncate the tables and import the dump.
Chapter 14: Database Administration
225
Setting the user level to Support will enable the option to select the VCP version
Support only. This version allows a raw import of a database schema which in turn
can be used for debugging. A schema imported this way will not have AQ, triggers
or constraints enabled, and will therefore not be a schema one can use with the
Pilot applications.
To restore a schema
1. Click the Restore Backup of Schema button.
2. In the Select Schema window, select the schema that should be imported to,
and click Next.
3. In the appearing dialog, select the dump file to restore and click OK.
4. Click Next when finished.
See Also
• Management Options
• Advanced Configuration (reference)
14.5.7
Full Export of Database
Does an export of the entire database, this is mainly for Support and R&D
purposes. This export contains all schemas in the database.
To create a full export of the database
1. Click the Full Export of DB button (Management Options).
2. In the appearing dialog, click Yes to confirm the backup.
Example: exp_complete.dmp
The database dump file is saved in the VCP DBA installation folder.
See Also
• Management Options
• Advanced Configuration (reference)
14.5.8
Import All Schemas in Dump
This option analyses a dump file to find all tablespaces and users before creating
them and importing data from the dump file. Oracle default users and tablespaces
are excluded from the imports.
This option is only available to Support and R&D users.
To import all schemas in a dump file to the database
1. Click the Imp. All Schemas in Dump button (Management Options).
2. In the appearing dialog, click Yes to confirm the backup.
See Also
• Management Options
226
Chapter 14: Database Administration
• Advanced Configuration (reference)
14.5.9
Extended Information
Figure 104: Extended information
Extended information can be viewed if the option Enable advanced options in
extended info is enabled.
CAUTION! The different actions in these views could potentially stop the schema
from working if an error occurs while running the scripts.
All information tabs have the option to refresh the database information result b
clicking the Refresh button. The following information and options are available:
• List all tables with counts: Lists all tables in the schema and the number of
rows in each.
• AQ Subscribers: Shows a list of the message queue (AQ) Subscribers currently
registered.
• AQ & Purge Job: Lists the status of and allows the user to activate/deactivate
the AQ Triggers and the Purge Job. This view also has an option to recreate the
AQ tables, which is done by deleting and recreating the tables.
• Deact. and Act. AQ Triggers: Disables and enables the AQ system if this is
working properly (see, Message Queue).
• Deact. and Act. Purge Job: Disables and enables a scheduled job on the
database that purges old messages from the AQ system to avoid these
tables clogging the database with obsolete data. (see, Purge Expired
Messages).
• Recreate AQ Tables: Deletes all AQ tables and all data in them, and then
creates new tables and register these with Oracle’s AQ system. This option
will delete all messages not received in the AQ tables, and if any errors
occur the AQ system will not work afterwards. This option should therefore
Chapter 14: Database Administration
227
•
•
•
•
not be used by users that do not know how to read to error logs and that
are not able to fix AQ issues manually.
Errlog: (# items in the errlog): Lists the last 100 entries in the errlog. It also
gives the option to delete all entries older than 3 months.
Sys' Error view: Lists all errors with the current schema as owner, in the sys'
all_errors view.
VizAdmin log: Shows the last 100 entries of the VizAdmin log table.
Invalid objects: Shows all invalid objects in the database.
This section contains information on the following topics:
• Message Queue
• Purge Expired Messages
• To see extended information
Message Queue
In order to enable the VCP notification mechanism utilizing "Oracle Streams and
Advanced Queuing" for VCP versions prior to 5.1.3, some triggers need to be
enabled.
Purge Expired Messages
When a journalist creates a new element of a template, a MOS message is sent
from the database to Viz Gateway. All MOS messages are stored on the database
which again takes up space on the database server. It is therefore convenient to
purge expired messages from the VCP message queue. As expired messages are
transferred to the exception queue, they need to be explicitly removed. This can
be done by running a job at regular intervals (every day). By default this is done
every day.
To see extended information
1.
2.
3.
4.
Click Show Schema Status.
Select schema, enter schema user password, and click Next.
Select View Extended Info (Advanced), and click Next.
Select one of the tabs to view the extended information.
See Also
• Management Options
• Advanced Configuration (reference)
14.5.10 Database Test
Try connecting to VCP’s database to test if the database is successfully installed
and running.
Start a command-line tool, and then type the following:
• sqlplus userid/password@tnsname, or
• sqlplus userid/password@hostname/SID
228
Chapter 14: Database Administration
Figure 105: SQLPlus connection
Check that the output is something like the example output below:
C:\>sqlplus pilot/pilot@viz-xw4300/xe
SQL*Plus: Release 10.2.0.1.0 - Production on Wed Jun 20 12:17:19 2007
Copyright (c) 1982, 2005, Oracle. All rights reserved.
Connected to:
Oracle Database 10g Express Edition Release 10.2.0.1.0 - Production
SQL>
The example output above shows that the database is placed on a remote
machine, named viz-xw4300, thus the connection string @viz-xw4300/xe is
needed (hostname/SID) or just the TNS name.
C:\>sqlplus pilot/pilot@VIZRTDB
Note: The above screenshot and output example use the SID XE. This is the default
SID for Oracle 10g XE, which is an Oracle ‘test database’.
Chapter 14: Database Administration
229
15 Data Server
Viz Content Pilot’s Data Server acts as an application server for accessing VCP’s
database and other services. This section describes the installation and
configuration of the Data Server. A Viz Content Pilot setup has three possible use
cases for using the Data Server:
• Fetching frames from the Preview Server (see Timeline Editor).
• Running scripts using the Update Service (see Viz Template Wizard’s user
guide).
• Setup clients to search, fetch and transfer images and videos to and from Viz
One.
If your system does not require any of these components you do not need to
install the Data Server. For reference, see the System Overview.
Note that the Data Server requires a working VCP database with an installed
schema greater or equal to version 5.6.0. Also note that you need a Data Server
for each database instance, meaning, you cannot share a Data Server.
Both the VCP’s Update Service and the Data Server services are logging
information to the Event Log. Open up the Windows Application Event Log to see
information and errors logged. When the services are started, they will log a
message to the Event Log stating were a more verbose log file can be found.
This section contains information on the following topics:
•
•
•
•
•
•
•
•
To
To
To
To
To
To
To
To
install the Data Server
configure the VCP Update Service
configure the Data Server service
access the Data Server settings
add the Data Server setting to the database
add the Preview Server setting to the database
add the Update Service setting to the database
configure search providers
To install the Data Server
1. Run the installer.
2. Click Next.
3. Click Next.
• Optional: Select the location of the installed files.
4. Click Next to start the installation process.
5. Click Close.
To configure the VCP Update Service
By default the VCP Update Service will use port 1981. If you for some reason need
to change the port you should do the following:
230
Chapter 15: Data Server
1. Start Windows Explorer on the machine Data Server is installed.
2. Go to the install folder
• Windows 7: C:\Program Files (x86)\vizrt\Vizrt Pilot Data Server
• Windows XP: C:\Program Files\vizrt\Vizrt Pilot Data Server
3. Open the VCPScriptRunnerHostService.exe.config file in a text editing tool
(e.g. Notepad)
4. Change the port by modifying the following line:
<add baseAddress="http://localhost:1981" />
5. Save the file and restart the service Vizrt VCPScriptRunner from the Windows
Services window.
To configure the Data Server service
1. Start Windows Explorer on the machine VCP’s Data Server was installed
2. Go to the install folder
• Windows 7: C:\Program Files (x86)\vizrt\Vizrt Pilot Data Server
• Windows XP: C:\Program Files\vizrt\Vizrt Pilot Data Server
3. Open the PilotAppServerHostService.exe.config file in a text editing tool (e.g.
Notepad).
4. Edit the following parameters (in bold):
<PilotDataServer.Properties.Settings>
<setting name="DBConnectString" serializeAs="String">
<value>hostname/vizrtdb</value>
</setting>
<setting name="DBUserName" serializeAs="String">
<value>PILOT</value>
</setting>
<setting name="DBPassword" serializeAs="String">
<value>PILOT</value>
</setting>
</PilotDataServer.Properties.Settings>
5. Save the file and restart the service Vizrt Pilot Data Server from the Windows
Services window.
To access the Data Server settings
• Start the Data Server in a browser (e.g. http://localhost:8177/settings)
• If you do not have access to the server using a browser you can add them
using the VCP client.
• From the menu select Options -> Preferences, and in the appearing window
select Advanced.
Chapter 15: Data Server
231
To add the Data Server setting to the database
1. See how To access the Data Server settings
2. Select the app_server setting, and add the parameter (i.e. <hostname>:8177)
for the machine you installed VCP’s Data Server on
3. Click Save
• This will give all applications with a connection to the database access to
VCP’s Data Server.
IMPORTANT! Firewalls must allow inbound communications on port 8177.
To add the Preview Server setting to the database
1. See how To access the Data Server settings
2. Select the preview_server_uri setting, and add the parameter (i.e. http://
<hostname>:54000) for the machine you installed the Preview Server on
• This machine, with Viz Engine and Preview Server installed, is typically
identified as your frame server.
3. Click Save
• This will give all applications with a connection to the database access to
the Preview Server.
To add the Update Service setting to the database
1. See how To access the Data Server settings
2. Select the script_runner_uri setting, and add the parameter (i.e.
<hostname>:1981) for the machine running the Update Service
• This setting is needed if templates run scripts that use the update service.
3. Click Save
• This will give all applications with a connection to the database access to
VCP’s Update Service.
IMPORTANT! If you change the script_runner_uri parameter (after setting it the first
time) you need to restart the Media Sequencer for it to take effect.
To configure search providers
Both the Viz Content Pilot client and the Newsroom Component gets its Viz One
connection parameters from the VCP database. The Media Sequencer must be
configured using your control application.
1. Start your browser and enter the following URL: http://<vcp data
server>:8177/settings
2. Click the Search Providers link
3. Under Asset search providers click the Add button and enter the host’s service
document URL
• Viz One: http://<media engine>/api/
232
Chapter 15: Data Server
4. Add a short name (next column) to help identify the asset’s location.
Note: If you change the short name you need to restart the server for the changes to
take effect (see To configure the Data Server service).
5. Under Pre-authenticated hosts click the Add button and enter the host’s URL,
username and password in order to authenticate your search
• This is required for Viz One
6. Click Save
See Also
• Working with Viz One
• Preview Server
• Viz Template Wizard’s User Guide on Update Services
Chapter 15: Data Server
233
16 Preview Server
This section describes the installation and configuration of the Preview Server.
The Preview Server is a console application setting up an HTTP REST service on
port 54000 on the host it is running. This service accepts requests for graphical
snapshots of playout elements from a Viz Engine. Per default, the Viz Engine must
run on the same host as the Preview Server, but it is possible to specify another
host for the Viz Engine.
IMPORTANT! The Preview Server must be installed on a separate Viz Engine machine
with its own license.
This section contains information on the following topics:
•
•
•
•
Command Line Arguments
To install/upgrade the Preview Server
To configure the Preview Server using command line arguments
To start the Preview Server
Command Line Arguments
The executable file can be started with the following command line arguments:
Table 32: Preview Server Command Line Options
Argument
Description
-h= or -host=
Specifies the host name of the host running the Viz Engine.
Default is localhost.
-p= or -port=
Specify the host port of the host running the Viz Engine.
Default is 50007, which is the Viz Multiplexer port of the
old Viz 2.x, and the built-in multiplexer port of Viz 3.x.
-l= or -listen=
Specifies the listener port for the Preview Server. Default is
54000.
-t= or -timeout=
Specifies the default time out for a preview request in
seconds. Default is 30s.
-v or -verbose
Specifies verbose output to the Preview Server log. Enable
this if you want to report issues to Vizrt.
-? or -help
Displays help on command line arguments when using
command prompt.
To install/upgrade the Preview Server
1. Run the installer.
2. Click Next.
• Optional: Select the location of the installed files.
234
Chapter 16: Preview Server
3. Click Next.
4. Click Install to start the installation process.
5. Click Finish.
To configure the Preview Server using command line arguments
Note: Configuring the Preview Server is not needed unless you have to specify other
than the default by using command line arguments.
1. From the Start menu select and right-click the Preview Server, and from the
appearing context menu select Properties.
2. Click the Shortcut tab, and add your Command Line Arguments.
To start the Preview Server
• From the Start menu select Preview Server.
• The Preview Server is started in a console, and is up and running
immediately. Upon start it will try to connect to the specified Viz Engine, or
the Viz Engine running on localhost, if not specified.
• To view the main web page of the server, start a browser and go to http://
<hostname>:54000/ (e.g. http://localhost:54000).
Chapter 16: Preview Server
235
See Also
• Preview Server requirements
• Data Server
• Viz Engine Administrator’s Guide for information on installing the Viz Engine
graphics and video render engine.
236
Chapter 16: Preview Server
Chapter 16: Preview Server
237