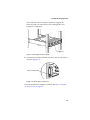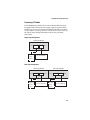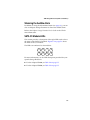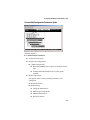
1
2U STORAGE ENCLOSURE
INSTALLATION & USER’S GUIDE
FS4100, FS4500, SC4100, AND FC4100
Copyright
©2004-2006 Adaptec, Inc. All rights reserved. No part of this publication may be
reproduced, stored in a retrieval system, or transmitted in any form or by any
means, electronic, mechanical, photocopying, recording or otherwise, without the
prior written consent of Adaptec, Inc., 691 South Milpitas Blvd., Milpitas, CA 95035.
Trademarks
Adaptec and the Adaptec logo are trademarks of Adaptec, Inc., which may be
registered in some jurisdictions.
Windows is a trademark of Microsoft Corporation in the US and other countries,
used under license.
All other trademarks are the property of their respective owners.
Changes
The material in this document is for information only and is subject to change
without notice. While reasonable efforts have been made in the preparation of this
document to assure its accuracy, Adaptec, Inc. assumes no liability resulting from
errors or omissions in this document, or from the use of the information contained
herein.
Adaptec reserves the right to make changes in the product design without
reservation and without notification to its users.
Disclaimer
IF THIS PRODUCT DIRECTS YOU TO COPY MATERIALS, YOU MUST HAVE
PERMISSION FROM THE COPYRIGHT OWNER OF THE MATERIALS TO AVOID
VIOLATING THE LAW WHICH COULD RESULT IN DAMAGES OR OTHER
REMEDIES.
i
Adaptec Customer Support
If you have questions about installing or using your Adaptec product, check this
document first—you will find answers to most of your questions here. If you need
further assistance, use the support options listed below.
Technical Support Identification (TSID) Number
■
Before contacting Technical Support, you need your unique 12-digit TSID
number. The TSID number identifies your product and support status.
■
The TSID number is included on two white, bar-coded labels, like the example
below.
■
If you register by mail, affix one copy of the TSID label to the registration card,
which may be contained on the CD. Also affix a copy of the TSID label to the CD
jacket so that you don’t lose it.
Support Options
■
Search the Adaptec Support Knowledgebase (ASK) at ask.adaptec.com for
articles, troubleshooting tips, and frequently asked questions for your product.
■
For support via Email, submit your question to Adaptec’s Technical Support
Specialists at ask.adaptec.com.
North America
■
Visit our Web site at www.adaptec.com.
■
For information about Adaptec’s support options, call +1 408-957-2550,
24 hours per day, 7 days per week.
■
To speak with a Technical Support Specialist,
■
For Hardware products call +1 408-934-7274,
Monday to Friday, 3:00 A.M. to 5:00 P.M., Pacific Time.
■
For RAID and Fibre Channel products call +1 321-207-2000,
Monday to Friday, 3:00 A.M. to 5:00 P.M., Pacific Time.
To expedite your service, have your computer in front of you.
■
To order Adaptec products, including accessories and cables, call +1 408-957-7274.
Or, you can order cables online at www.adaptec.com/buy-cables.
ii
Europe
■
Visit our Web site at www.adaptec-europe.com.
■
German: To speak with a Technical Support Specialist, call +49 89 43 66 55 22,
Monday to Friday, 9:00 to 17:00, CET. For support via e-mail, submit your
question to Adaptec’s Technical Support Specialists at ask-de.adaptec.com.
■
French: To speak with a Technical Support Specialist, call +49 89 43 66 55 33,
Monday to Friday, 9:00 to 17:00, CET. For support via e-mail, submit your
question to Adaptec’s Technical Support Specialists at ask-fr.adaptec.com.
■
English: To speak with a Technical Support Specialist, call +49 89 43 66 55 44,
Monday to Friday, 9:00 to 17:00, GMT. For support via e-mail, submit your
question to Adaptec’s Technical Support Specialists at ask.adaptec.com.
■
You can order Adaptec cables online at www.adaptec.com/buy-cables.
Japan
■
Visit our Web site at www.adaptec.co.jp.
■
To speak with a Technical Support Specialist, call +81 3 5308 6120,
Monday–Friday, 9:00 A.M. to 12:00 P.M and 1:00 P.M. to 6:00 P.M.
iii
Limited 3-Year Hardware Warranty
1.
Adaptec, Inc. (“Adaptec”) warrants to the purchaser of this product that it will be free from
defects in material and workmanship for a period of three (3) years from the date of
purchase. If the product should become defective within the warranty period, Adaptec, at
its option, will repair or replace the product, or refund the purchaser’s purchase price for the
product, provided it is delivered at the purchaser’s expense to an authorized Adaptec
service facility or to Adaptec.
2.
Repair or replacement parts or products will be furnished on an exchange basis and will
either be new or reconditioned. All replaced parts or products shall become the property of
Adaptec. This warranty shall not apply if the product has been damaged by accident,
misuse, abuse or as a result of unauthorized service or parts.
3.
Warranty service is available to the purchaser by delivering the product during the warranty
period to an authorized Adaptec service facility or to Adaptec and providing proof of
purchase price and date. The purchaser shall bear all shipping, packing and insurance costs
and all other costs, excluding labor and parts, necessary to effectuate repair, replacement or
refund under this warranty.
4.
For more information on how to obtain warranty service, write or telephone Adaptec at 691
South Milpitas Boulevard, Milpitas, CA 95035, (800) 959-7274.
5.
THIS LIMITED WARRANTY DOES NOT EXTEND TO ANY PRODUCT WHICH HAS
BEEN DAMAGED AS A RESULT OF ACCIDENT, MISUSE, ABUSE, OR AS A RESULT OF
UNAUTHORIZED SERVICE OR PARTS.
6.
THIS WARRANTY IS IN LIEU OF ALL OTHER EXPRESS WARRANTIES WHICH NOW
OR HEREAFTER MIGHT OTHERWISE ARISE RESPECT TO THIS PRODUCT. IMPLIED
WARRANTIES, INCLUDING THOSE OF MERCHANTABILITY, FITNESS FOR A
PARTICULAR PURPOSE AND NON-INFRINGEMENT SHALL (A) HAVE NO GREATER
DURATION THAN 3 YEARS FROM THE DATE OF PURCHASE, (B) TERMINATE
AUTOMATICALLY AT THE EXPIRATION OF SUCH PERIOD AND (C) TO THE EXTENT
PERMITTED BY LAW BE EXCLUDED. IN THE EVENT THIS PRODUCT BECOMES
DEFECTIVE DURING THE WARRANTY PERIOD, THE PURCHASER’S EXCLUSIVE
REMEDY SHALL BE REPAIR, REPLACEMENT OR REFUND AS PROVIDED ABOVE.
INCIDENTAL OR CONSEQUENTIAL DAMAGES, INCLUDING WITHOUT LIMITATION
LOSS OF DATA, ARISING FROM BREACH OF ANY EXPRESS OR IMPLIED WARRANTY
ARE NOT THE RESPONSIBILITY OF ADAPTEC AND, TO THE EXTENT PERMITTED BY
LAW, ARE HEREBY EXCLUDED BOTH FOR PROPERTY DAMAGE, AND TO THE
EXTENT NOT UNCONSCIONABLE, FOR PERSONAL INJURY DAMAGE.
7.
SOME STATES DO NOT ALLOW THE EXCLUSION OR LIMITATION OF INCIDENTAL
OR CONSEQUENTIAL DAMAGES FOR CONSUMER PRODUCTS, AND SOME STATES
DO NOT ALLOW LIMITATIONS ON HOW LONG AN IMPLIED WARRANTY LASTS, SO
THE ABOVE LIMITATION OR EXCLUSIONS MAY NOT APPLY TO YOU.
8.
This warranty gives you specific legal rights, and you may also have other rights which vary
from state to state.
iv
Adaptec Software License Agreement
PLEASE READ CAREFULLY: THE USE OF THIS SOFTWARE IS SUBJECT TO THE SOFTWARE
LICENSE TERMS OF ADAPTEC, INC. AND OTHER LICENSORS WHOSE SOFTWARE MAY
BE BUNDLED WITH THIS PRODUCT.
BY YOUR USE OF THE SOFTWARE INCLUDED WITH THIS PRODUCT YOU AGREE TO THE
LICENSE TERMS REQUIRED BY THE LICENSOR OF THAT SOFTWARE, AS SET FORTH
DURING THE INSTALLATION PROCESS. IF YOU DO NOT AGREE TO THE LICENSE
TERMS APPLICABLE TO THE SOFTWARE, YOU MAY RETURN THE ENTIRE UNUSED
PRODUCT FOR A FULL REFUND.
In return for acquiring a license to use the Adaptec software (“Software”) and the related
documentation, you agree to the following terms and conditions:
1. License. This Agreement grants you, the Licensee, a license to:
a. Use the Software on a single computer system or on multiple workstations, systems and
servers which incorporate an Adaptec hardware product and may be accessed by
multiple users from multiple locations. You may make as many installations of the
Software as needed, but must restrict such installation only to systems, workstations or
servers using an Adaptec hardware product.
b. Make one copy of the Software in machine readable form solely for back-up purposes
provided you reproduce Adaptec’s copyright notice and any proprietary legends.
2. Open Source Software. Portions of the Software (“Open Source Software”) provided to you
may be subject to a license that permits you to modify these portions and redistribute the
modifications (an “Open Source License”). By providing Open Source Software, Adaptec
does not grant you a license to modify these portions to the extent that it would require any
proprietary Adaptec Software to be distributed to third parties. Any such modification and
third party distribution shall subject you to immediate termination of your rights to use the
Software and you agree to indemnify, defend and hold harmless Adaptec from any claims
arising from such modification and distribution. More details regarding the Open Source
Software are available in the README files. Some of the Open Source Software may be
subject to the GNU General Public license v.2, a copy of which is available at www.fsf.org or
if the link is broken, by contacting the Free Software Foundation, 59 Temple Place Suite 330,
Boston, MA 02111-1307 USA.
3. Restrictions. You may not distribute copies of the Software to others. You may not post or
otherwise make available the Software, or any portion thereof, in any form, on the Internet.
You may not use the Software in a computer service business, including in time sharing
applications. The Software contains trade secrets and, in order to protect them, you may not
decompile, reverse engineer, disassemble, or otherwise reduce the Software to a humanperceivable form. YOU MAY NOT MODIFY, ADAPT, TRANSLATE, RENT, LEASE, LOAN,
RESELL FOR PROFIT, DISTRIBUTE, NETWORK OR CREATE DERIVATIVE WORKS
BASED UPON THE SOFTWARE OR ANY PART THEREOF.
4. Ownership of Software. As Licensee, you own the media upon which the software is
recorded or fixed, but Adaptec and its licensors retain title and ownership of the Software
recorded on the original media and all subsequent copies of the Software, regardless of the
form or media in which or on which the original and other copies may exist. This license is
not a sale of the Software or any copy.
5. Confidentiality. You agree to maintain the Software in confidence and that you will not disclose
the Software to any third party without the express written consent of Adaptec. You further agree
to take all reasonable precautions to preclude access of unauthorized persons to the Software.
6. Term. This license is effective until January 1, 2045, unless terminated earlier. You may terminate
the license at any time by destroying the Software (including the related documentation) together
with all copies or modifications in any form. Adaptec will have the right to terminate our license
immediately if you fail to comply with any term or condition of this Agreement. Upon any
termination, including termination by you, you must destroy the Software (including the related
documentation), together with all copies or modifications in any form.
7. Special Terms Applicable to Databases. Where a database is included with the Software, you
acknowledge that it is licensed only in connection with the use of the Software to perform
disc creation, and that the database and all data derived therefrom must be maintained in
confidence in accordance with the provisions of Section 4. This license does not grant you
any rights to distribute or disclose such database or data.
v
8.
Limited Warranty. Adaptec and its Licensors warrant only that the media upon which the
Software is furnished will be free from defects in material or workmanship under normal
use and service for a period of thirty (30) days from the date of delivery to you. THE
FOREGOING WARRANTY EXPRESSLY EXCLUDES ANY OPEN SOURCE SOFTWARE
PROVIDED TO YOU WITH THE ADAPTEC SOFTWARE. ADAPTEC AND ITS
LICENSORS DO NOT AND CANNOT WARRANT THE PERFORMANCE OR RESULTS
YOU MAY OBTAIN BY USING THE SOFTWARE, OPEN SOURCE SOFTWARE OR
DOCUMENTATION. THE FOREGOING STATES THE SOLE AND EXCLUSIVE
REMEDIES ADAPTEC AND ITS LICENSORS WILL PROVIDE FOR BREACH OF
WARRANTY. EXCEPT FOR THE FOREGOING LIMITED WARRANTY, ADAPTEC AND
ITS LICENSORS MAKE NO WARRANTIES, EXPRESSED OR IMPLIED, INCLUDING, BUT
NOT LIMITED, AS TO NON-INFRINGEMENT OF THIRD PARTY RIGHTS,
MERCHANTABILITY OR FITNESS FOR A PARTICULAR PURPOSE. Some states do not
allow the exclusion of implied warranties or limitations on how long an implied warranty
may last, so the above limitations may not apply to you. This warranty gives you specific
legal rights and you may also have other rights which vary from state to state.
9. The entire liability of Adaptec and its licensors, and your exclusive remedy for a breach of
this warranty, shall be:
a. The replacement of any media not meeting the above limited warranty which is
returned to Adaptec; or:
b. If Adaptec or its distributor is unable to deliver replacement media which is free from
defects in materials or workmanship, you may terminate this Agreement by returning
the Software and your money will be refunded.
10. Limitation of Liability. IN NO EVENT WILL ADAPTEC OR ITS LICENSORS BE LIABLE TO
YOU FOR ANY INCIDENTAL, CONSEQUENTIAL OR INDIRECT DAMAGES,
INCLUDING ANY LOST PROFITS, LOST SAVINGS, OR LOSS OF DATA, EVEN IF
ADAPTEC OR A LICENSOR HAS BEEN ADVISED OF THE POSSIBILITY OF SUCH
DAMAGES, OR FOR ANY CLAIM BY ANY OTHER PARTY. Some states do not allow the
exclusion or limitation of special, incidental, or consequential damages, so the above
limitation or exclusion may not apply to you.
11. Export. You acknowledge that the laws and regulations of the United States and other
countries may restrict the export and re-export of the Software. You agree that you will not
export or re-export the Software or documentation in any form in violation of applicable
United States and foreign law.
12. Government Restricted Rights. The Software is subject to restricted rights as follows. If the
Software is acquired under the terms of a GSA contract: use, reproduction or disclosure is
subject to the restrictions set forth in the applicable ADP Schedule contract. If the Software is
acquired under the terms of a DoD or civilian agency contract, use, duplication or disclosure
by the Government is subject to the restrictions of this Agreement in accordance with 48
C.F.R. 12.212 of the Federal Acquisition Regulations and its successors and 48 C.F.R.
227.7202-1 of the DoD FAR Supplement and its successors.
13. General. You acknowledge that you have read this Agreement, understand it, and that by
using the Software you agree to be bound by its terms and conditions. You further agree that
it is the complete and exclusive statement of the agreement between Adaptec and you, and
supersedes any proposal or prior agreement, oral or written, and any other communication
between Adaptec and you relating to the subject matter of this Agreement. No additional or
any different terms will be enforceable against Adaptec unless Adaptec gives its express
consent, including an express waiver of the terms of this Agreement, in writing signed by an
officer of Adaptec. You assume full responsibility for the use of the Software and agree to
use the Software legally and responsibly. This Agreement shall be governed by California
law, except as to copyright matters, which are covered by Federal law. This Agreement is
deemed entered into at Milpitas, California by both parties. Should any provision of this
Agreement be declared unenforceable in any jurisdiction, then such provision shall be
deemed severable from this Agreement and shall not affect the remainder hereof. All rights
in the Software not specifically granted in this Agreement are reserved by Adaptec.
Should you have any questions concerning this Agreement, you may contact Adaptec by writing to:
Adaptec, Inc.
Legal Department
691 South Milpitas Boulevard
Milpitas, California 95035.
vi
Regulatory Compliance Statements
Federal Communications Commission Radio Frequency Interference Statement
WARNING: Changes or modifications to this unit not expressly approved by the party
responsible for compliance could void the user’s authority to operate the equipment.
This equipment has been tested and found to comply with the limits for a Class A digital device,
pursuant to Part 15 of the FCC rules. These limits are designed to provide reasonable protection
against harmful interference when the equipment is operated in a commercial environment.
This equipment generates, uses, and can radiate radio frequency energy, and if not installed and
used in accordance with the instruction manual, may cause harmful interference to radio
communications. Operation of this equipment in a residential area is likely to cause harmful
interference in which case the user will be required to correct the interference at his or her own
expense.
This device complies with part 15 of the FCC rules. Operation is subject to the following two
conditions: (1) this device may not cause harmful interference and (2) this device must accept
any interference received, including interference that may cause undesired operation.
European Union Compliance Statement
This Information Technology Equipment has been tested and found to comply with
EMC Directive 89/336/EEC, as amended by 92/31/EEC and 93/68/EEC, in
accordance with:
■ EN55022 (1998) Emissions
■ EN55024 (1998) Immunity:
–
–
–
–
–
–
EN61000-4-2 (1998) Electrostatic discharge: ±4 kV contact, ±8 kV air
EN61000-4-3 (1998) Radiated immunity
EN61000-4-4 (1995) Electrical fast transients/burst: ±1 kV AC, ±0.5 kV I/O
EN61000-4-5 (1995) Surges ±1 kV differential mode, ±2 kV common mode
EN61000-4-6 (1996) Conducted immunity: 3 V
EN61000-4-11 (1994) Supply dips and variation: 30% and 100%
In addition, all equipment requiring U.L. listing has been found to comply with EMC
Directive 73/23/EEC as amended by 93/68/EEC in accordance with EN60950 with
amendments A1, A2, A3, A4, A11.
Canadian Compliance Statement
This Class A digital apparatus meets all requirements of the Canadian InterferenceCausing Equipment Regulations.
Cet appareil numérique de la classe A respecte toutes les exigences du Règlement sur
le matériel brouilleur du Canada.
Japanese Compliance (Voluntary Control Council Initiative)
This is a class A product. In a domestic environment, this product may cause radio
interference, in which case the user may be required to take corrective action.
vii
Contents
1
Introduction
About This Guide 1-2
Finding the Information You Need in this Guide
Kit Contents 1-3
Overview of the Storage Enclosure 1-3
Drive Slot Numbers 1-5
2
1-2
Installing the Storage Enclosure
Installation Checklist 2-2
Step 1: Preparing for Installation 2-2
Step 2: Installing into a Rack or Tower (optional) 2-3
Installing into an Equipment Rack 2-4
Installing into a Tower Assembly 2-7
Step 3: Installing the Drive Carriers 2-9
Step 4: Connecting the I/O Cables 2-9
Connecting SATA Cables 2-10
Connecting FC Cables 2-11
Connecting Ultra320 SCSI Cables 2-12
Step 5: Connect Power Cords to the APC Modules. 2-13
Next Steps 2-13
3
Monitoring
About the ES Module 3-2
Silencing the Audible Alarm 3-2
Understanding the LEDs 3-3
Front Panel LEDs 3-3
Drive Carrier LEDs 3-4
APC Module LEDs 3-5
4
Removing and Replacing Enclosure Components
Hot-swapping Drive Carriers 4-2
About the Drive Carriers 4-2
viii
Contents
Important Safety Precautions 4-2
Removing a Drive Carrier (or Carrier Blank) 4-3
Hot-swapping an APC Module 4-4
About the APCs 4-4
Removing an APC 4-5
Installing an APC 4-6
Replacing an I/O Module 4-7
Removing an I/O Module 4-7
Installing an I/O Module (or I/O Blank) 4-8
Hot-swapping the ES Module 4-9
Removing the ES Module 4-9
Installing an ES Module 4-9
5
SATA Storage Enclosures (FS4100 and FS4500)
About the SATA Storage Enclosure 5-2
Disk Drive Spin-up Sequence 5-2
I/O Modules 5-2
SATA Cables 5-3
SATA Configurations 5-3
Single SATA Configurations 5-3
Dual SATA Configurations 5-4
Flexibility and Limitations 5-4
Daisy-chaining Adaptec SATA Storage Enclosures
Setting Shelf IDs 5-5
Silencing the Audible Alarm 5-5
SATA I/O Module LEDs 5-5
SATA I/O Module Configuration 5-7
FS4100 I/O Module Configuration 5-7
FS4500 I/O Module Configuration 5-7
Drive Carrier LEDs 5-7
6
5-5
Fibre Channel Storage Enclosures (FC4100)
About the Fibre Channel Storage Enclosure 6-2
Disk Drive Spin-up Sequence 6-2
I/O Modules 6-2
Supported Fibre Channel Disk Drives 6-3
ix
Contents
Fibre Channel Cables 6-3
Fibre Channel ID Assignment 6-5
Disk Drive Loop Identifier Map 6-5
LIO JBOD Module Configurations 6-6
Single Loop (Nonredundant) Operation 6-6
Dual Loop Operation 6-6
Quad Loop Operation 6-6
2 Gb/sec Operation 6-7
Daisy-chaining FC Storage Enclosures 6-7
Speed Mismatches between Enclosures 6-7
Option Slot Loop AL_PA Assignments 6-7
LIO Module LEDs 6-7
Storage Enclosure LEDs 6-8
Drive Carrier LEDs 6-8
7
Ultra320 SCSI Storage Enclosures
About the Adaptec SC4100 Storage Enclosure 7-2
Disk Drive Spin-up Sequence 7-2
I/O Modules 7-2
Drive Carrier LEDs 7-3
Cables and Termination 7-3
Ultra320 SCSI Split-bus Configurations 7-4
Split-bus SCSI IDs 7-4
Configuring a Split-bus Enclosure 7-5
Ultra320 SCSI Joined-bus Configurations 7-5
Joined-bus SCSI IDs 7-5
Configuring Joined-Bus 7-6
8
Technical Specifications
General Specifications 8-2
System 8-2
Redundant Components 8-2
Field Replaceable Units 8-2
Storage Enclosure Physical Dimensions 8-2
Advanced Power and Cooling (APC) Modules
Temperature 8-3
8-3
x
Contents
Humidity 8-3
Altitude 8-4
Operational Shock 8-4
Nonoperational Shock 8-4
Drive Hot-Swap Shock 8-4
Operational Vibration 8-4
Nonoperational Vibration 8-4
Acoustics 8-5
Product Orientation 8-5
Ultra320 SCSI Storage Enclosure Technical
Specifications 8-5
Disk Drives 8-5
SCSI Bus 8-5
SCSI Midplane 8-5
I/O Modules 8-6
I/O Module Configurations 8-7
Cable Lengths Supported 8-7
SATA Storage Enclosure Technical Specifications 8-7
Currently Supported Disk Drives 8-7
Serial ATA Interface 8-8
SATA I/O Modules 8-8
SATA Cables 8-8
SATA Configurations 8-8
FC Storage Enclosure Technical Specifications 8-9
Disk Drives 8-9
Daisy Chaining Adaptec FC Enclosures 8-9
A
Configuring the RAID Controller (FS4500 only)
Communication Parameters A-2
Navigating the Terminal Emulation Software A-2
Initial Screen A-2
Creating a Logical Drive A-3
Terminal Emulation Software Menu Options A-3
Quick Installation Option A-4
View and Edit Logical Drives Option A-5
View and Edit Logical Volumes Option A-5
View and Edit Host LUNs A-6
xi
Contents
View and Edit Drives (Select Drive) Option A-7
View and Edit Channels (Select Channel) Option A-8
View and Edit Configuration Parameters Option A-9
View and Edit Peripheral Devices Option A-11
System Functions Option A-11
View System Information Option A-12
View and Edit Event Logs Option A-12
xii
1
Introduction
In this Chapter....
About This Guide
1-2
Finding the Information You Need in this Guide
1-2
Kit Contents
1-3
Overview of the Storage Enclosure
1-3
This chapter introduces the Adaptec 2U Storage Enclosure
documented in this Guide and provides an overview of the
enclosure’s features.
1-1
Introduction
About This Guide
This Guide explains how to set up and use Adaptec’s 2U Storage
Enclosures. The models supported by this manual are:
■
Adaptec FS4100 Fibre Channel-to-Serial ATA JBOD enclosure
■
Adaptec FS4500 Fibre Channel-to-Serial ATA RAID enclosure
■
Adaptec SC4100 Ultra320 SCSI JBOD enclosure
■
Adaptec FC4100 Fibre Channel JBOD enclosure
The Guide assumes that you are familiar with computer hardware,
data storage, and network administration terminology and tasks. It
also assumes that you have basic knowledge of Fibre Channel (FC),
Serial ATA (SATA), Small Computer System Interface (SCSI), and
Redundant Array of Independent Disks (RAID) technology.
This Guide does not provide any information on the storage
management software tools included with your Adaptec Storage
Enclosure. Please refer to the Installation and User’s Guide included
on your Adaptec Storage Enclosure CD for detailed information
about installing and using the storage management software.
Note: The FS4100, SC4100, and FC4100 enclosures are
managed by Adaptec Storage Examiner; the FS4500 enclosure
is managed by Spheras RAIDWatch.
Finding the Information You Need in this Guide
In addition to basic installation and maintenance information, this
Guide includes separate chapters that present model-specific
information and requirements.
■
Chapter 5 provides information for the Adaptec FS4100 and
FS4500.
■
Chapter 6 provides information for the Adaptec FC4100.
■
Chapter 7 provides information for the Adaptec SC4100.
1-2
Introduction
Kit Contents
■
Adaptec Storage Enclosure (FS4100, FS4500, SC4100, or FC4100)
■
CD, including software, drivers, and documentation
■
Two power cables
Note: Mounting rails for rack installations are sold separately.
See your Adaptec reseller for purchase information.
Overview of the Storage Enclosure
Your Adaptec Storage Enclosure features these redundant and hotswappable components:
■
Twelve disk drive carriers (each with three LEDs for monitoring
status)
Drive carriers are color-coded by interface—grey for SATA, red
for SCSI, blue for FC
■
Two Advanced Power and Cooling (APC) modules
■
Two I/O Option modules (SATA, FC, or SCSI, depending on the
interface of your Storage Enclosure model)
Your Adaptec Storage Enclosure also features one hot-swappable
(but non-redundant) Enclosure Services (ES) module, which
includes the Alarm Mute button.
Figure 1-1 on page 1-4 illustrates these basic features.
1-3
Introduction
Front of Storage Enclosure
Disk Drive Carrier LEDs
Disk Drive Carriers
Rear of Storage Enclosure
ES Module
APC Module
Alarm Mute Button
APC Module
I/O Module 2
I/O Module1
I/O Option Modules
(FC Model shown here)
Figure 1-1 Overview of Storage Enclosure
1-4
Introduction
Drive Slot Numbers
Figure 1-2 shows the position of the drive slots on the front of the
Adaptec Storage Enclosure. The slots are numbered 1 to 12, starting
from the bottom right (slot 1) to the top left (slot 12.)
Slot 12
Slot 11
Slot 10
Slot 9
Slot 8
Slot 7
Slot 6
Slot 5
Slot 4
Slot 3
Slot 2
Slot 1
Figure 1-2 Storage Enclosure Slot Numbers
For more detailed information about these components, see the
chapter of this Guide dedicated to your specific Storage Enclosure
interface:
■
For a SATA interface (Adaptec FS4100 or FS4500), see Chapter 5.
■
For an FC interface (Adaptec FC4100), see Chapter 6.
■
For an Ultra320 SCSI interface (Adaptec SC4100), see Chapter 7.
1-5
2
Installing the Storage
Enclosure
In this Chapter....
Installation Checklist
2-2
Step 1: Preparing for Installation
2-2
Step 2: Installing into a Rack or Tower (optional)
2-3
Step 3: Installing the Drive Carriers
2-9
Step 4: Connecting the I/O Cables
2-9
Step 5: Connect Power Cords to the APC Modules.
2-13
Next Steps
2-13
This chapter explains how to set up the Storage Enclosure and
install it in a rackmount or tower assembly (optional.)
For model-specific connection and configuration information, see
Chapter 5 to Chapter 7.
2-1
Installing the Storage Enclosure
Installation Checklist
For a smooth and trouble-free installation, thoroughly review this
chapter and perform the tasks in the order shown here:
1 Plan and prepare for installation. See page 2-2.
2 Install the enclosure in a rack or tower assembly (optional.) See
page 2-3.
3 Install the drive carriers. See page 2-9.
4 Connect the AC power cords to the APC modules. See page 2-13.
5 Connect the I/O cables. See page 2-9.
6 Go to the chapter for your specific Storage Enclosure interface.
See Next Steps on page 2-13.
Step 1: Preparing for Installation
!
Caution: Before touching any of the Storage Enclosure
components, ground yourself and take antistatic precautions.
Adaptec recommends that you use an antistatic wrist strap
and a grounding wire as a minimum precaution.
Remove all of the components from the packaging and place them
on an antistatic surface until you are ready to use them. If you are
using new disk drives, place them so they acclimate to room
temperature before you install them in the enclosure and power on
the system.
Before continuing, inspect the components for shipping damage.
Ensure that you have the tools you require for rack or tower
assembly installation:
■
Phillips-head screwdriver
■
Wrench for tightening nuts (if your rack does not have threaded
holes)
2-2
Installing the Storage Enclosure
Before you begin the installation, carefully read through this list of
tips and safety cautions:
■
Make sure that the mounting hardware and tools are easily
accessible before you begin, and plan to have someone assist
you during physical installation.
■
Decide on a suitable location for the rack (if you plan to mount
your Storage Enclosure into a rack). Choose a clean, dust-free,
well-ventilated area close to a grounded power outlet.
Leave enough room behind the rack for servicing and to allow
for sufficient airflow.
Decide on a suitable location for the subsystem in the rack.
■
Warning: Prevent instability due to top-heaviness by
installing heavier items into the bottom of the rack.
Step 2: Installing into a Rack or Tower (optional)
Note: Mounting rails for rack installation are sold separately.
To purchase a rail kit, see your Adaptec reseller.
Follow the instructions in this section if you are installing your
Storage Enclosure into a rack or tower assembly. (A tower
assembly is also known as a deskside assembly or pedestal.)
If you are not installing your Storage Enclosure into a rack or
tower, skip to Step 3: Installing the Drive Carriers on page 2-9.
!
Caution: A fully loaded enclosure is heavy. Avoid personal
injury by obtaining help to lift the Storage Enclosure, and
reduce the weight of the enclosure by removing the drive
carriers before installing the enclosure in the rack or tower.
(You can also remove the two APCs to further reduce the
weight, if required. See page 4-4 for instructions.)
■
To install into an rack, see page 2-4.
■
To install into a tower assembly, see page 2-7.
2-3
Installing the Storage Enclosure
Installing into a Rack
Begin the installation by ensuring that you have all these rail kit
components:
■
Front rails (1 left, 1 right)
■
Rear rails, two different sizes (2 left, 2 right)
■
Two sizes of screws (10 large, 4 small)
■
Two types of nuts (10 of each)
To install your Storage Enclosure in a rack:
1 Secure the front rails to the front supports of the rack, using the
supplied screws, as shown in Figure 2-1.
Note: Use either the speednuts or cagenuts provided if
your rack does not have threaded holes.
Figure 2-1 Securing the Rails to the Rack
2 Check the length between the front and rear supports of your
equipment rack and determine which set of rear rails to use, the
long or the short.
2-4
Installing the Storage Enclosure
3 Secure the rear rails you selected to the rear supports of the
equipment rack, using the supplied screws, as shown in
Figure 2-1 on page 2-4.
4 Secure the front rails to the rear rails, as shown in Figure 2-2.
Figure 2-2 Securing the Front Rails to the Rear Rails
5 Tighten all the screws before continuing.
6 Carefully remove the rack ear plastic covers from the Storage
Enclosure. (They will be re-used.)
7 With assistance from a second person, lift the Storage Enclosure
and, from the front of the rack, slide the rear of the enclosure
onto the rails. Slide the enclosure all the way back until it rests
completely on the rails, as shown in Figure 2-3 on page 2-6.
2-5
Installing the Storage Enclosure
You can choose to have someone continue to support the
enclosure until it is secured in the rack, although this extra
support is not required.
Figure 2-3 Storage Enclosure in Rack
8 Secure the front of the enclosure with one screw on each side, as
shown in Figure 2-4.
One screw per side
Figure 2-4 Secure Front of Enclosure
The rack installation is complete. Continue with Step 3: Installing
the Drive Carriers on page 2-9.
2-6
Installing the Storage Enclosure
Installing into a Tower Assembly
!
Caution: Do not modify the tower assembly. The feet are
designed to keep the tower from tipping over. Do not remove
the acoustic foam inside the tower skin assembly.
1 If the Storage Enclosure is already set up and running, shut
down the enclosure and remove all cables and power cords.
You can remove all the drive carriers and both APCs to reduce
the weight of the enclosure, if required.
If the enclosure is in an equipment rack,
remove the two screws holding it in place at
the front, then slide the enclosure out of the
rack. Remove both the right and left rack
mount ear plastic covers (shown at right), as
they are no longer needed. (They can be
removed by pressing on the plastic inserts
from the backside of the rack mount ear or
pried off with a screwdriver).
2 Unpack the tower and inspect it for shipping damage. Do not
install the enclosure into a damaged or bent tower assembly.
3 Remove the tower’s front bezel, as shown in Figure 2-5, saving
the screws for use in Step 6.
Figure 2-5 Removing the Tower’s Front Bezel
4 Turn the enclosure 90° so that the right hand rack mount ear
and LEDs are on top.
2-7
Installing the Storage Enclosure
5 Slide the enclosure into the tower skin, as shown in Figure 2-6.
Figure 2-6 Sliding Storage Enclosure into Tower Skin
6 Replace the front bezel, using the screws removed in Step 3.
7 Install the tower labels at the top and bottom of the tower. Align
the holes in the top label with the LEDs on the enclosure.
8 Replace the drive carriers and APCs, if they were removed
before installation.
The tower assembly installation is complete. Continue with Step 3:
Installing the Drive Carriers on page 2-9.
2-8
Installing the Storage Enclosure
Step 3: Installing the Drive Carriers
These instructions assume that the drive carriers have already been
attached to your disk drives.
!
Caution: Acclimate new disk drives to room temperature
before you install them and power up the Storage Enclosure.
To install the drive carriers into the Storage Enclosure:
1 Hold the drive carrier with the LEDs on the left side (at the bottom
for tower-mounted systems) and select an open disk drive slot.
Note: It is easier to install the drive carriers from left to
right on the Storage Enclosure.
2 With the cam lever of the drive slot fully open, slide the carrier
into the slot until the lever starts to close.
3 Push the cam lever until it engages the latch on the left side of
the carrier assembly and clicks into place.
4 Repeat for all drive carriers.
Note: Either a drive carrier or a carrier blank must be installed
in all the slots of the enclosure to maintain proper airflow and
cooling.
When all drive carriers are installed, continue with Step 5: Connect
Power Cords to the APC Modules.
Step 4: Connecting the I/O Cables
To connect the I/O cables to your Storage Enclosure, follow the
instructions provided for your specific Storage Enclosure interface:
■
For a SATA interface (Adaptec FS4100 or FS4500), see page 2-10.
■
For an FC interface (Adaptec FC4100), see page 2-11.
■
For an Ultra320 SCSI interface (Adaptec SC4100), see page 2-12.
2-9
Installing the Storage Enclosure
Connecting SATA Cables
The FS4100 and FS4500 Storage Enclosures have removable Small
Form-factor Pluggable (SFP) connectors that support copper or
optical cables. Ensure that you have the appropriate SFP installed
for your cables. See the Adaptec 2U Storage Enclosure Installation and
User’s Guide on the CD for more cabling information and for daisychaining instructions.
JBOD Configuration (FS4100)
FS4100 SATA I/O Module
HOST 1
EXP 1
HOST BUS ADAPTER
HOST 2
EXP 2
HOST BUS ADAPTER
Daisy-chain
Daisy-chain
to next
to next
FS4100
FS4100
RAID Configuration (FS4500)
FS4500 SATA I/O Module
HOST 1
HOST 2
HOST BUS ADAPTER
HOST BUS ADAPTER
ENET
EXP
Ethernet
Port
Daisy-chain
to
FS4100
2-10
Installing the Storage Enclosure
Connecting FC Cables
The FC4100 Storage Enclosure has removable Small Form-factor
Pluggable (SFP) connectors that support copper or optical cables.
Ensure that you have the appropriate SFP installed for your cables.
See the Adaptec 2U Storage Enclosure Installation and User’s Guide on
the CD for more cabling information and for daisy-chaining
instructions.
Single Loop Configuration
FC4100 FC I/O Module
OUTPUT
Daisy-chain
INPUT
HOST BUS ADAPTER
to next
FC4100
Dual Loop Configuration
FC4100 FC I/O Module
FC4100 FC I/O Module
OUTPUT
Daisy-chain
INPUT
HOST BUS ADAPTER
OUTPUT
Daisy-chain
to next
to next
FC4100
FC4100
INPUT
HOST BUS ADAPTER
2-11
Installing the Storage Enclosure
Connecting Ultra320 SCSI Cables
See the Adaptec 2U Storage Enclosure Installation and User’s Guide on
the CD for supported cable lengths and additional cabling
information.
!
Caution: Use only Ultra320 certified cables. Ultra160 certified
cables are not supported by the Adaptec SC4100 Storage
Enclosure.
Single Bus Configuration
SC4100 SCSI I/O Module
HOST BUS ADAPTER
Dual Bus Configuration
SC4100 SCSI I/O Module
HOST BUS ADAPTER
HOST BUS ADAPTER
2-12
Installing the Storage Enclosure
Step 5: Connect Power Cords to the APC
Modules.
Connect one of the supplied power cords to each of the APC
modules and to a grounded power outlet.
!
Caution: Always use a regulating uninterruptible power
supply (UPS) to protect your Storage Enclosure.
Next Steps
To complete the cabling, power on your system, and configure
your enclosure, see the chapter provided for your specific Storage
Enclosure interface:
■
For a SATA interface (Adaptec FS4100 or FS4500), see Chapter 5.
■
For an FC interface (Adaptec FC4100), see Chapter 6.
■
For an Ultra320 SCSI interface (Adaptec SC4100), see Chapter 7.
2-13
3
Monitoring
In this Chapter....
About the ES Module
3-2
Silencing the Audible Alarm
3-2
Understanding the LEDs
3-3
Your Adaptec Storage Enclosure’s status is monitored by the ES
module, which reports enclosure status through the use of LEDs
and an audible alarm.
The chapter describes the monitoring features of the Adaptec
Storage Enclosure, including the ES module, the alarm, and the
LEDs, and explains how to use these features to monitor the status
of your enclosure’s components.
3-1
Monitoring
About the ES Module
The ES module, shown in Figure 3-1, is located on the rear of the
Storage Enclosure, between the two APC modules.
Yellow LED = ES/Alarm Fault
ES Module
ID Switch
Green LED =
ES/Alarm OK
Alarm Mute Button
Figure 3-1 ES Module
The ES module receives and reports status information for the Storage
Enclosure’s APC modules, disk drives, and for the enclosure itself. The
ES module receives and reports status through a two-wire serial bus
that connects to the I/O module. It reports status using LEDs (on the
APC modules, drive carriers, and enclosure) and an audible alarm.
The ES module can also be used for downloading firmware.
The ES module is hot-swappable, and removing it does not affect
the data path. For more information, see Hot-swapping the ES
Module on page 4-9.
Silencing the Audible Alarm
When an event occurs in the Storage Enclosure that triggers the
audible alarm, you can turn off the alarm manually by pressing the
Alarm Mute button on the ES module (shown in Figure 3-1.)
Pressing the Alarm Mute button deactivates the alarm. The alarm
remains deactivated until the ES module is reset or until another
alarm occurs.
Note: You can also silence the alarm using Adaptec Storage
Examiner software. See the Installation and User’s Guide on
your Adaptec Storage Enclosure CD for detailed instructions.
3-2
Monitoring
Understanding the LEDs
This section explains the LEDs used to report the component status
of your Storage Enclosure.
For more LED information for the Adaptec Storage Enclosure, see
the chapter in this Guide that’s dedicated to the specific interface for
your enclosure. (Chapter 5 to Chapter 7.)
Front Panel LEDs
There are four LEDs on the front panel of the enclosure (shown at
right).
The LEDs function as described in Table 3-1.
LED
1
Table 3-1 Front Panel LEDs
LED
On
Off
1
Enclosure power on
Enclosure power off
2
Shelf fault
No shelf fault
3
FS4100/FS4500:
Enclosure speed is
3 GB/second
Enclosure speed is
1.5 GB/second
SC4100:
Split-bus
configuration
Joined-bus
configuration
2
3
4
FC4100:
Not used
4
Not used
3-3
Monitoring
Drive Carrier LEDs
Each drive carrier has three LEDs that are visible from the front of
the Storage Enclosure, as shown in Figure 3-2.
LED 1
LED 2
Drive Carrier
LED 3
Figure 3-2 Drive Carrier LEDs
The next three Tables describe the functions of the three LEDs for
all Adaptec Storage Enclosure models and interfaces.
Table 3-2 Drive Carrier LEDs
LED 1
(Green)
LED 2
(Green/Amber)
LED 3
(Green)
U320 SCSI (SC4100)
Not used.
Drive
present
I/O
activity.
FC (FC4100)
Not used.
Drive
present.
I/O
activity.
SATA
(One FS4100 I/O Module)
Not used.
Drive
present.
I/O
activity.
SATA
(Two FS4100 I/O Modules)
I/O module
2 activity.
Drive
present
I/O module
1 activity.
SATA
(One FS4500 I/O Module)
I/O
activity.
Drive
present
Not used.
SATA
(Two FS4500 I/O Modules)
I/O module
2 activity.
Drive
present
I/O module
1 activity.
Interface
3-4
Monitoring
Table 3-3 Drive Carrier LED 2 (Bicolor LED)
Color and Condition of LED 2a
Green
a
Amber
Status Indicated
Off
Off
No drive present.
On
Off
Drive present.
Slow blink
Off
Drive spinning down.
Fast blink
Off
Drive being identified, or drive
has spun down.
Off
Fast blink
Drive failed.
When Drive Carrier LED 2 is illuminated or blinking, LED 2 on the front panel of
the Storage Enclosure is also illuminated, indicating a shelf fault. (See Table 3-1 on
page 3-3.)
Table 3-4 Drive Carrier LED 3
Drive Status
Interface
Spin Up
U320 SCSI (SC4100)
FC (FC4100)
SATA (FS4100 or FS4500)
Online
I/O Activity
On
Off
On (briefly)
Blinking
On
Off (briefly)
Off
On
Off (briefly)
APC Module LEDs
Each APC module has two LEDs, which are visible from the rear of
the Storage Enclosure, as shown in Figure 3-3:
Yellow LED = APC Fault
Green LED = APC OK
Figure 3-3 APC Module LEDs
3-5
Monitoring
The LEDs function as described in Table 3-5:
Table 3-5 APC Module LEDs
LED
On
Blinking
Off
Green
APC functioning
normally
N/A
Enclosure is not
powered on
Yellow
APC failure
Failure
predicted
APC functioning
normally
3-6
4
Removing and Replacing
Enclosure Components
In this Chapter....
Hot-swapping Drive Carriers
4-2
Hot-swapping an APC Module
4-4
Replacing an I/O Module
4-7
Hot-swapping the ES Module
4-10
The Storage Enclosure features described in Chapter 3 help you
identify which enclosure components require immediate
replacement. This chapter provides detailed instructions for
removing and replacing failed or damaged components of your
Adaptec Storage Enclosure.
!
Caution: Before touching any of the Storage Enclosure
components, ground yourself and take antistatic precautions.
Adaptec recommends that you use an antistatic wrist strap
and a grounding wire as a minimum precaution.
Failure to take adequate electro-static discharge (ESD)
precautions may lead to damage to your disk drives and
enclosure electronics.
4-1
Removing and Replacing Enclosure Components
Hot-swapping Drive Carriers
This section provides basic information about the drive carriers
and carrier removal instructions. For drive carrier installation
instructions, see page 2-9.
About the Drive Carriers
The drive carriers are located on the front of the Storage Enclosure.
(See Figure 1-1 on page 1-4.) The drive carriers have a mechanical
button-activated cam system that helps control installation and
removal, and have an optional disk drive shield attached.
Carrier blanks are provided for drive slots without disk drives
installed.
Holes in the front of the drive carriers and carrier blanks allow air
to flow into the enclosure and cool the disk drives and enclosure.
During installation, ensure that the cooling holes in the carriers or
carrier blanks are not obstructed.
Either a drive carrier or a carrier blank must be installed in every
drive slot to maintain proper airflow and cooling inside the
enclosure.
Failed drive carriers can be hot-swapped.
Important Safety Precautions
Before you remove a drive carrier, read these important cautionary
notes:
!
Caution: Although the drive carriers are hot-swappable, stop
all I/O activity on the disk drive to be replaced to avoid data
loss. Removing a disk drive during I/O activity could also
hang the host system.
!
Caution: Do not attempt to remove more than one drive carrier
or carrier blank at one time. Damage to the drive carrier
locking tabs can occur if adjacent drive carriers are removed
at the same time.
4-2
Removing and Replacing Enclosure Components
Warning: If the Storage Enclosure is powered on, you must
wait for the disk drive to power down and spin down fully to
prevent disk drive damage and possible personal injury.
!
Caution: Immediately replace the removed drive carrier or
install a carrier blank to maintain correct airflow and cooling.
Removing a Drive Carrier (or Carrier Blank)
To remove a drive carrier or carrier blank:
1 Press on the button to release the cam
lever (shown at right).
2 Gently pull open the cam lever.
The carrier locking tabs disengage,
releasing the drive carrier from the
enclosure.
3 If the Storage Enclosure was powered on and you are removing
a disk drive, allow the disk drive to spin down fully
(approximately one minute).
4 Gently pull the drive carrier (or carrier blank) out of the
enclosure.
5 Immediately replace the removed drive carrier or install a
carrier blank to maintain correct airflow and cooling.
For instructions on installing a drive carrier, see Step 3: Installing the
Drive Carriers on page 2-9.
4-3
Removing and Replacing Enclosure Components
Hot-swapping an APC Module
This section provides basic information about your Storage
Enclosure’s APC modules, including removal and installation
instructions.
About the APCs
Each APC is a self-contained power supply with an integral
cooling fan. Your Adaptec Storage Enclosure includes two APCs,
located on the rear of the enclosure, as shown in Figure 4-1.
Handle
Power Cord
Connector
Power
Switch
Handle
Figure 4-1 APC Module
Your Adaptec Storage Enclosure requires both APCs to be running
for proper operation and cooling. However, it can run with a single
APC for a brief time period, long enough to replace the other APC
in the event of a failure.
An APC module failure can be caused by failures of the power
supply or one or more of the cooling fans. Other types of failures
are also possible. The cooling fans in each APC run on separate
circuits from the power supply and run on power supplied by the
other APC module in the event of a failure.
Failed APC modules can be hot-swapped.
4-4
Removing and Replacing Enclosure Components
Removing an APC
Before you remove an APC, ensure that you have a replacement
module ready for immediate installation so that proper cooling and
airflow are maintained. Failed APCs must be replaced within five
minutes, or the system does an orderly shut-down.
To remove an APC from the Storage Enclosure:
1 Power off the failed APC module and remove the power cable.
If the enclosure is powered on, the fans in both APC modules
switch to high speed. The cooling fans in the failed APC are
now running on power supplied by the other APC module.
2 Using a Phillips-head screwdriver, loosen the two screws on the
APC module that hold the handles in place.
3 Gently push down on the handles to disengage the APC
module from the enclosure.
4 Using the handles, gently slide the APC out of the enclosure, as
shown in Figure 4-2.
Slide APC out, using
its handles
Figure 4-2 Sliding the APC from the Enclosure
Warning: To avoid electrical shock, do not insert any
instruments or tools into the open APC slot.
Note: Do not use the handles to lift or carry APC modules.
4-5
Removing and Replacing Enclosure Components
5 Immediately replace the APC to maintain correct airflow and
cooling. Failed APCs must be replaced within five minutes, or
the system does an orderly shut-down.
!
Caution: The enclosure will overheat without adequate
cooling and airflow, which could cause damage to disk
drives and other components.
Installing an APC
Warning: To avoid electrical shock, do not insert any
instruments or tools into the open APC slot.
To install an APC into the Storage Enclosure:
1 Ensure that the handles of the new APC module are lowered
(open).
Note: Do not use the handles to lift or carry the APC
modules.
2 Holding the APC module with the handles towards you, slide it
into the empty slot.
3 Gently push up on both handles
simultaneously to fix the APC
module into place (shown at right).
4 Secure the APC module by handtightening the screws. Do not overtighten them.
5 Reconnect the power cable to the APC module’s power
connector.
6 Power on the APC module.
When their local power supply is detected, the fans return to
their normal speed.
4-6
Removing and Replacing Enclosure Components
Replacing an I/O Module
This section provides basic information about your Storage
Enclosure’s I/O modules, including removal and installation
instructions.
Two I/O modules are located on the rear of the Storage Enclosure,
and they are interface-specific. A blank I/O module may also be
available for single I/O module configurations.
(For detailed information about your I/O modules, see the chapter
dedicated to your specific interface:
■
For a SATA interface (Adaptec FS4100 or FS4500), see
Chapter 5.
■
For an FC interface (Adaptec FC4100), see Chapter 6.
■
For an Ultra320 SCSI interface (Adaptec SC4100), see Chapter 7.
To maintain proper airflow and cooling, either an I/O module or
an I/O blank must be installed in both of the Storage Enclosure’s
I/O slots.
!
Caution: The I/O modules on the SC4100 are not hotswappable. Do not attempt to hot-swap SCSI I/O modules.
!
Caution: Although SATA and FC I/O modules are hotswappable, Adaptec highly recommends that you power off the
Storage Enclosure before removing or installing any I/O
module. Hot-swapping an I/O module may result in data
loss or damage to the module and enclosure electronics.
Removing an I/O Module
To remove an I/O module from the Storage Enclosure:
1 Power off the host system and enclosure.
4-7
Removing and Replacing Enclosure Components
!
Caution: Adaptec highly recommends that you power off the
Storage Enclosure before removing or installing any SATA
or FC I/O module.
SCSI I/O modules are not hot-swappable.
2 Disconnect all the cables connected to the I/O module.
3 Loosen the two screws below the I/O module handles.
4 Gently push down on the handles
to disengage the I/O module from
the enclosure.
5 Using the handles, gently slide the
I/O module out of the enclosure
(shown at right).
Installing an I/O Module (or I/O Blank)
1 Power off the host system and enclosure.
!
Caution: I/O modules are not hot-swappable. You must
power off the host system and enclosure before installing
an I/O module or I/O blank.
2 Ensure that the handles of the new I/O module are lowered
(open).
Note: Do not use the handles to lift or carry the I/O module.
3 Gently push up on both handles simultaneously to fix the I/O
module into place.
4 Secure the module by tightening the two screws you loosened
in Step 3 on page 4-8. Hand-tighten the screws. Do not overtighten them.
5 Connect the I/O cables, as described in the chapter of this Guide
that is dedicated to your specific Storage Enclosure’s interface:
4-8
Removing and Replacing Enclosure Components
■
For a SATA interface (Adaptec FS4100 or FS4500), see
Chapter 5.
■
For an FC interface (Adaptec FC4100), see Chapter 6.
■
For an Ultra320 SCSI interface (Adaptec SC4100), see
Chapter 7.
4-9
Removing and Replacing Enclosure Components
Hot-swapping the ES Module
This section provides removal and installation instructions for
your Storage Enclosure’s ES modules. For detailed information
about the ES module and how it works, see About the ES Module on
page 3-2.
The ES module is located on the rear of the Storage Enclosure
between the two APCs, as shown in Figure 1-1 on page 1-4.
The ES module is hot-swappable; removing the ES module does
not impact the data path.
Removing the ES Module
To remove the ES module from the Storage Enclosure:
1 Using a Phillips-head screwdriver, loosen the screw that
secures the module to the enclosure.
2 Grasp the ES module handle and gently pull the module from
the enclosure. Be sure to pull straight back and not to one side.
The cooling fans switch to high speed.
Warning: To avoid electrical shock, do not insert any
instruments or tools into the open ES module slot.
Installing an ES Module
To install an ES module in the Storage Enclosure:
1 With the handle toward you, slide the ES module straight into
the enclosure slot.
2 Gently push the module until the connectors engage.
3 Secure the module using the screw you loosened in Step 1 on
page 4-10. Hand tighten the screw. Do not over-tighten it.
The ES module automatically reboots and enclosure services are
reactivated. (See Chapter 3, Monitoring for more information.)
4-10
5
SATA Storage Enclosures
(FS4100 and FS4500)
In this Chapter....
About the SATA Storage Enclosure
5-2
SATA Configurations
5-3
Daisy-chaining Adaptec SATA Storage Enclosures
5-5
Silencing the Audible Alarm
5-6
SATA I/O Module LEDs
5-6
SATA I/O Module Configuration
5-8
This chapter introduces the Adaptec SATA Storage Enclosure and
describes how to cable and configure it as part of a complete
storage subsystem.
The Adaptec SATA Storage Enclosure can be configured as either a
JBOD or as a RAID enclosure:
■
The FS4100 has one or two JBOD I/O modules.
■
The FS4500 has one or two RAID I/O modules.
This chapter provides the configuration and cabling information
for both Storage Enclosure models.
5-1
SATA Storage Enclosures (FS4100 and FS4500)
About the SATA Storage Enclosure
Disk Drive Spin-up Sequence
The two APC modules in the Storage Enclosure provide enough
power for 12 disk drives to spin up simultaneously. If one APC
fails, drives 1–6 will spin up first, followed by drives 7 and 8,
drives 9 and 10, and then drives 11 and 12. Spin-up is staggered
only on enclosures with one APC.
See Drive Slot Numbers on page 1-5 for the location of each drive
slot.
I/O Modules
The SATA I/O modules have multiple FC Small Form Factor
Pluggable (SFP) receptacles, used to connect hosts or to daisy-chain
the Storage Enclosure to additional enclosures. The FS4100 (JBOD)
has two Host ports and two Expansion ports. The FS4500 (RAID)
module has two Host ports and one Expansion port. The Adaptec
FS4100 I/O module is shown in Figure 5-1:
I/O Module LEDs
SFP Receptacles
Figure 5-1 SATA I/O Module
Table 5-1 shows the I/O modules available for your Adaptec SATA
Storage Enclosure:
Table 5-1 SATA I/O Modules
Model Number
Host
Connection
Disk
Connection
Disk
Organization
Adaptec FS4100
Fibre Channel
SATA
JBOD
Adaptec FS4500
Fibre Channel
SATA
RAID
5-2
SATA Storage Enclosures (FS4100 and FS4500)
Both I/O modules use SFP connectors, and accept either a copper SFP
connected to a copper cable, or an optical SFP connected to an optical
cable with LC connectors. The cable interface must be a standard FC
cable, so the end that connects to the host is purely dependent on the
host HBA connector selection.
The Adaptec SATA Storage Enclosure uses a SATA interface to the
hard disk drives. This SATA interface supports data rates of 1.5
Gb/sec.
The Adaptec FS4500 Storage Enclosure supports RAID levels 0, 1,
0+1, 3, 5, 10, 30, and 50.
SATA Cables
Hosts communicate with the Adaptec SATA Storage Enclosure
through FC cables. Optical cable lengths supported:
■
Minimum length is 2 meters for all data rates.
■
Maximum lengths at 2 Gb/sec are 150 m of 62.5 µm cable and
300 m of 50 µm cable.
■
Maximum cable lengths at 1 Gb/sec are 300 m of 62.5 µm cable
and 500 meters of 50 µm cable.
■
Maximum copper cable lengths are 6 m with a passive SFP
connector and up to 12 m with an active SFP connector.
Note: Copper cables and optical cables are available for sale on
the Adaptec Web site at www.adaptec.com.
SATA Configurations
Each FS4100 and FS4500 Storage Enclosure I/O module can be
connected to up to two hosts. The I/O modules can be used to form
both single and dual SATA configurations.
Single SATA Configurations
A single Storage Enclosure has one I/O module, either FS4100
(JBOD) or FS4500 (RAID) and can be connected to one or two hosts.
Note: An I/O blank must be used in a single I/O configuration
to maintain proper airflow and cooling.
5-3
SATA Storage Enclosures (FS4100 and FS4500)
Dual SATA Configurations
A dual Storage Enclosure has two FS4100 or two FS4500 I/O
modules, and can be connected to one, two, three, or four hosts.
Note: You cannot include Adaptec FS4100 and Adaptec FS4500
I/O modules together in the same Storage Enclosure.
Dual SATA configurations provide a redundant controller and
make better use of the available FC front-end bandwidth. The
redundant controller provides data access to more hosts and adds
the security of a second controller for data access.
Table 5-2 summarizes the supported single and dual SATA
configurations. (For example, a single SATA configuration can
include one FS4100 or one FS4500.)
Table 5-2 SATA Configurations
Adaptec FS4100
Adaptec FS4500
Single SATA
Configuration
1
1
Dual SATA
Configuration
2
2
Flexibility and Limitations
■
The FS4500 RAID single controller configuration can be
upgraded to dual controllers.
■
The FS4100 JBOD single I/O processor configuration can be
upgraded to dual processors.
■
All SATA systems with an FC interface at the front end require
SFP transducers, either copper or optical. (Copper cables with
SFPs built into them are available.)
■
Dual SATA RAID and JBOD configurations require drive
carriers with MUX cards installed.
■
The FS4050 single SATA JBOD configuration does not require
drive carriers with MUX cards installed.
5-4
SATA Storage Enclosures (FS4100 and FS4500)
Daisy-chaining Adaptec SATA Storage
Enclosures
You can daisy-chain up to eight FS4100 Storage Enclosures in a
system. You can daisy-chain up to seven FS4100 Storage Enclosures
behind an FS4500 Storage Enclosure.
To daisy-chain enclosures, connect the Expansion port of one shelf
to the Host port of another.
Setting Shelf IDs
You must set a unique shelf ID for each Storage Enclosure before
powering on the system. The shelf ID switch is located in the ES
module on the back of the Storage Enclosure. (See Figure 3-1 on
page 3-2.) Adaptec recommends that the first shelf in the chain be
set to 0, the second shelf in the chain be set to 1, and so on.
Disk Drive IDs
Table 5-3 shows the disk drive IDs by drive slot and enclosure ID.
Table 5-3 Disk Drive IDs
Enclosure
ID
12
Disk Drive IDs by Drive Slot
11
10
9
8
7
6
5
4
3
2
1
0
11
10
9
8
7
6
5
4
3
2
1
0
1
27
26
25
24
23
22
21
20
19
18
17
16
2
43
42
41
40
39
38
37
36
35
34
33
32
3
59
58
57
56
55
54
53
52
51
50
49
48
4
75
74
73
72
71
70
69
68
67
66
65
64
5
91
90
89
88
87
86
85
84
83
82
81
80
6
107
106
105
104
103
102
101
100
99
98
97
96
7
123
122
121
120
119
118
117
116
115
114
113
112
5-5
SATA Storage Enclosures (FS4100 and FS4500)
Silencing the Audible Alarm
In addition to using the Alarm Mute button (see page 3-2), you can
also use Adaptec Storage Examiner to silence the audible alarm.
Refer to the Adaptec Storage Examiner User’s Guide on the CD for
more information.
SATA I/O Module LEDs
This section provides a description of the eight LEDs used to show
the status of the SATA I/O module. Figure 5-1 on page 5-2 shows
the LEDs on the I/O module.
The LEDs are numbered as shown below.
5
6
7
8
1
2
3
4
For more information, see the LED descriptions provided for your
specific Storage Enclosure:
■
For the Adaptec FS4100, see Table 5-4 on page 5-7.
■
For the Adaptec FS4500, see Table 5-5 on page 5-7.
5-6
SATA Storage Enclosures (FS4100 and FS4500)
Table 5-4 FS4100 I/O Module LEDs
a
LED
Designation
LED On
LED Off
1
Host 1 Signal
Detect
Valid FC signal
detected
No signal detected
2
Expansion 1
Signal Detect
Valid FC signal
detected
No signal detected
3
Host 2 Signal
Detect
Valid FC signal
detected
No signal detected
4
Expansion 2
Signal Detect
Valid FC signal
detected
No signal detected
5
FC Ports
Active
I/O activity on FC port
No I/O activity
6
SATA Ports
Active
I/O activity on SATA
port
No I/O activity
7a
Partner Failed
Partner controller
failure detected
Partner controller
operating normally
8
Controller
Ready
Controller active and
operating normally
Controller not ready
In single controller configurations, this LED is not used.
Table 5-5 FS4500 I/O Module LEDs
LED
Designation
LED On
LED Off
D1
Host 1
Valid FC signal is
detected
No valid signal is
detected
D2
Host 2
Valid FC signal is
detected
No valid signal is
detected
D3
Disk
Expansion
Valid FC signal is
detected
No valid signal is
detected
D4
Controller
Ready
Controller is active and
operating properly
Controller not
ready
D5
Host Ports
Activity on FC Host ports
No activity on
host ports
D6
SATA Drive
Ports
Activity on SATA disk
drive ports
No activity on
drive ports
5-7
SATA Storage Enclosures (FS4100 and FS4500)
Table 5-5 FS4500 I/O Module LEDs
LED
Designation
LED On
LED Off
D7a
Partner
Failed
Partner controller has
failed
Partner controller
operating
properly
D8-1
Cache/BBU
Fault
■
■
■
■
■
a
Data in cache memory
Cache memory failed
Cache being held by
battery back-up
Battery not capable of
sustaining memory
Battery not present
Battery back-up is
capable of
sustaining
memory in case of
power loss (has
87% or more
original charge
capacity)
In single controller configurations, this LED is not used.
SATA I/O Module Configuration
This section describes how to configure the two I/O modules.
FS4100 I/O Module Configuration
The Adaptec FS4100 I/O module supports JBOD and does not
require configuring.
FS4500 I/O Module Configuration
Use the Spheras RAIDWatch software application included on
your Adaptec Storage Enclosure CD to configure the Adaptec
FS4500 I/O module. Refer to the Adaptec Storage Enclosure CD for
software documentation.
Drive Carrier LEDs
Each drive carrier has three LEDs that are visible from the front of
the Storage Enclosure. See Drive Carrier LEDs on page 3-4 for
detailed information about LED functions.
5-8
6
Fibre Channel Storage
Enclosures (FC4100)
In this Chapter....
About the Fibre Channel Storage Enclosure
6-2
LIO JBOD Module Configurations
6-6
2 Gb/sec Operation
6-7
Daisy-chaining FC Storage Enclosures
6-7
LIO Module LEDs
6-7
Option Slot Loop AL_PA Assignments
6-7
Storage Enclosure LEDs
6-8
This chapter introduces the Adaptec FC4100 Storage Enclosure and
describes how to cable and configure it as part of a complete
storage subsystem.
6-1
Fibre Channel Storage Enclosures (FC4100)
About the Fibre Channel Storage Enclosure
Disk Drive Spin-up Sequence
The two APC modules in the Storage Enclosure provide enough
power for 12 disk drives to spin up simultaneously. If one APC
fails, drives 1–3 will spin up first, followed by drives 4–6, drives
7–9 and drives 10–12, with a 6-second delay between each set.
See Drive Slot Numbers on page 1-5 for the location of each drive
slot.
I/O Modules
The Adaptec FC Storage Enclosure can accommodate two LIO
modules, although it is possible to have only one. LIO modules are
a combination of an LRC3 module and a copper or optical module.
The LIO modules are located on the back of the Storage Enclosure,
as shown in Figure 6-1.
FC I/O Modules
Figure 6-1 FC I/O Modules
The Input connector is the primary FC Loop Input port, and the
Output connector is available for FC loop expansion output. A
loop-back module is not required, since the I/O expansion module
automatically enables the expansion/output connector when valid
FC signals are present.
The LIO JBOD module is used for FC JBOD applications, and has
two connectors on it, labelled Input and Output.
6-2
Fibre Channel Storage Enclosures (FC4100)
Supported Fibre Channel Disk Drives
■
7.2, 10, and 15 K RPM hot-pluggable FC disk drives
■
SCA-2, 40-pin connector.
■
FC Arbitrated Loop (FCAL) 1 or 2 Gb/sec
■
3.5” form factor, 1” high
■
Downloadable firmware
■
Drive device control bits for 1, 2 and other FCAL controlled by
Storage Enclosure
■
Speed operations
■
+5 and +12 VDC on the drive connector
Fibre Channel Cables
This section describes the cables supported by the Adaptec FC
Storage Enclosure.
Copper Cables
FCAL copper cables up to 10 meters long can be used between the
host and the enclosure. FCAL copper cables up to 5 meters can be
used between enclosures for loop expansion. The 10 meter copper
cable length is supported with any number of disk drives installed
at an enclosure speed of 1 Gb/sec.
Copper cabling between shelf enclosures requires SFP-to-SFP
copper cables having the lengths specified in Table 6-1 on page 6-4.
An optical interface I/O SFP module can be used to achieve FC
optical cable lengths.
For 2 Gb/sec speeds, FCAL copper cables up to 5 meters in length
can be used between the host and the enclosure, and between
enclosures. These cable lengths are supported with any number of
disk drives installed. An optical interface I/O SFP module can be
used to achieve FC optical cable lengths. The supported cables are
shown in Table 6-2 on page 6-4.
6-3
Fibre Channel Storage Enclosures (FC4100)
Table 6-1 Supported 1 Gb/sec Copper Cables
Cable Length
Connectors
0.3 m
SFP/SFP
0.5 m
SFP/SFP
1.0 m
SFP/SFP
1.0 m
SFP/HSSDC
3.0 m
SFP/HSSDC
3.0 m
SFP/SFP
5.0 m
SFP/SFP
5.0 m
SFP/HSSDC
10 m (1 Gb/sec only)
SFP/HSSDC
Optical Cables Lengths Supported for 1 Gb/sec and 2 Gb/sec
Multimode, short wave length 1 and 2 Gb/sec optical cables are
approved for optical FC operation. This includes SC-to-LC variants
for use with 1 Gb/sec SFF SFP to SFF LC connectors or any other
variant required.
Table 6-2 Supported 1 and 2 Gb/sec Cables
Cable Length
Description
0.3 m
0.5 m 2 GB FC Optical, Multimode, LC-to-LC
5.0 m
5.0 m 2 GB FC Optical, Multimode, LC-to-LC
10.0 m
10 m 2 GB FC Optical, Multimode, LC-to-LC
25.0 m
25 m 2 GB FC Optical, Multimode, LC-to-LC
6-4
Fibre Channel Storage Enclosures (FC4100)
Fibre Channel ID Assignment
Each FC drive slot has a unique ID assigned to it.
The IDs are assigned by a combination of slot number and
enclosure ID. The slot numbers are pre-assigned, as shown in
Figure 1-2 on page 1-5. You set the enclosure ID to any number
between 0 and 9, using the ID switch on the ES module, shown in
Figure 1-1 on page 1-4.
When you power-on the enclosure, the ES module and LIO module
read the ID switch setting and set the enclosure ID.
If you change the enclosure ID, you must power cycle the enclosure
before it will read the change.
Disk Drive ID Map
This table lists disk drive IDs by enclosure ID. If you change the
enclosure ID, you must power cycle the enclosure before it will
read the change and update the disk drive ID.
Table 6-3 Loop Identifier Map
Enclosure
ID
12
Disk Drive IDs by Drive Slot
11
10
9
8
7
6
5
4
3
2
1
0
11
10
9
8
7
6
5
4
3
2
1
0
1
27
26
25
24
23
22
21
20
19
18
17
16
2
43
42
41
40
39
38
37
36
35
34
33
32
3
59
58
57
56
55
54
53
52
51
50
49
48
4
75
74
73
72
71
70
69
68
67
66
65
64
5
91
90
89
88
87
86
85
84
83
82
81
80
6
107
106
105
104
103
102
101
100
99
98
97
96
7
123
122
121
120
119
118
117
116
115
114
113
112
6-5
Fibre Channel Storage Enclosures (FC4100)
LIO JBOD Module Configurations
This section describes the FC configurations supported by your
Adaptec FC Storage Enclosure.
Note: All FC enclosures require the use of an appropriate SFP
transducer (copper or optical).
Single Loop (Nonredundant) Operation
One LIO and the ES module are used for single, nonredundant, FC
loop operation. A blank panel is used in the second LIO module
slot to maintain proper airflow and cooling. In this configuration,
the LIO module is installed in I/O Option Slot 1 (the slot on the
right.)
Dual Loop Operation
Two LIO modules are used for dual FC loop operations. Dual FC
loops allow for a redundant data path to the dual port disk drives.
In dual loop operation, both loops flow in the same direction with
the second LIO module loop direction the same as the first.
Quad Loop Operation
The LIO module allows for operation in a quad loop mode. In this
mode, the Input port forms a loop using drives 12 through 7. The
Output port will form a loop using drives 1 through 6. This mode is
initiated by setting a switch in location S1 on an LIO.
PRIM
7
8
9
10
11
12
Input Loop in Quad
Loop Configuration
Output Loop in Quad
Loop Configuration
EXP
1
2
3
4
5
6
6-6
Fibre Channel Storage Enclosures (FC4100)
2 Gb/sec Operation
The LIO module operates in both 1 and 2 Gb/sec FC modes. The
FC loop speed is selected by setting LIO switch S1.2. When the
switch (located on the LIO module), is set for 2 Gb/sec, the LIO
module and entire enclosure will operate at 2 Gb/sec.
The LIO module does not support auto-negotiation of the FC loop
speed.
Daisy-chaining FC Storage Enclosures
You can daisy-chain Adaptec FC Storage Enclosures to a total of
120 disk drives.
Speed Mismatches between Enclosures
When Storage Enclosures are daisy-chained together, all enclosures
must be set to the same FC loop speed. The FC loop speed is
determined by the first host-connected enclosure in the chain.
If a down-stream enclosure is set incorrectly, the loop opens at that
enclosure; that enclosure plus all the enclosures behind it are
invisible to the host.
Option Slot Loop AL_PA Assignments
The option slot modules and HBAs can be hard-assigned to any of
these FC loop identifiers: 0, 1, 122, 123, 124, or 125 (decimal).
LIO Module LEDs
Figure 6-2 shows the location of the LIO module LEDs. Table 6-4 on
page 6-8 describes the function of the LEDs on the LIO module.
Output LED—
Indicates output
cable present with
valid FC signal
Input LED—Indicates
input cable present
with valid FC signal
Status LEDs
1234
Figure 6-2 LIO Module LEDs
6-7
Fibre Channel Storage Enclosures (FC4100)
Table 6-4 LIO Module LEDs
LED
1
On
Off
I/O channel fault in either
single or split loop mode
-
2
Dual Loop configuration
-
3
LIO functioning normally
-
4
Loop running at 2 Gb/sec
Loop running at 1 Gb/sec
Storage Enclosure LEDs
There are four LEDs on the front panel of the enclosure. (See the
Figure in Front Panel LEDs on page 3-3.) The LEDs function as
described in Table 6-5:
Table 6-5 FC Enclosure Front Panel LEDs
LED
On
Off
1
Enclosure power on
Enclosure power off
2
Shelf fault
No shelf fault
3
Not used (Configurable)
4
Not used (Configurable)
Drive Carrier LEDs
Each drive carrier has three LEDs that are visible from the front of
the Storage Enclosure. See Drive Carrier LEDs on page 3-4 for
detailed information about LED functions.
6-8
7
Ultra320 SCSI Storage
Enclosures
In this Chapter....
About the Adaptec SC4100 Storage Enclosure
7-2
Ultra320 SCSI Split-bus Configurations
7-4
Ultra320 SCSI Joined-bus Configurations
7-5
This chapter introduces the Adaptec SC4100 Ultra320 SCSI Storage
Enclosure and describes how to cable and configure it as part of a
complete storage subsystem.
7-1
Ultra320 SCSI Storage Enclosures
About the Adaptec SC4100 Storage Enclosure
Disk Drive Spin-up Sequence
The two APC modules in the Storage Enclosure provide enough
power for 12 disk drives to spin up simultaneously. If one APC
fails, drives 7–12 will spin up first, followed by drives 1–6
approximately 15 seconds later.
See Drive Slot Numbers on page 1-5 for the location of each drive
slot.
I/O Modules
The Adaptec SC4100 Storage Enclosure has two I/O modules
available—the Adaptec JBOD I/O module and the Joiner module.
SCSI JBOD I/O Module
The Adaptec SC4100 Storage Enclosure supports one SCSI JBOD I/
O module, which can be located in either of the I/O module slots.
The SCSI JBOD I/O module provides two very high-density cable
interconnect (VHDCI connectors), as shown in Figure 7-1, that are
used to connect the enclosure to hosts.
Connector LED
Module Fault LED
Connector LED
VHDCI SCSI Connectors
Figure 7-1 SCSI JBOD Connectors and LEDs
SCSI JBOD I/O Module LEDs
The Adaptec SC4100 has three LEDs, shown in Figure 7-1.
The two Connector LEDs are green, and illuminate when the
connectors are attached to a host system with VHDCI cables. When
a Connector LED is blinking, the I/O module is communicating
with the ES module. (See page 3-2 for information on the ES
module.)
7-2
Ultra320 SCSI Storage Enclosures
The Module Fault LED is yellow, and illuminates when there is an
I/O module fault.
Joiner Module
Use a Joiner module to create a joined bus, where the enclosure’s
two SCSI busses are joined into one SCSI bus. With a joined bus,
the enclosure has a single bus backplane with up to 12 disk drives
on the bus.
Without a Joiner module inserted, the bus will be split. (See
Replacing an I/O Module on page 4-7 for installation instructions.)
Note: If you are not using a Joiner module, you must install an
I/O blank to maintain adequate airflow and cooling inside
the enclosure.
Drive Carrier LEDs
Each drive carrier has three LEDs that are visible from the front of
the Storage Enclosure. See Drive Carrier LEDs on page 3-4 for
detailed information about LED functions.
Cables and Termination
The Adaptec Ultra320 Storage Enclosure is self-terminated for
single- and dual-bus configurations and does not need external
termination.
You can use cables up to 5 meters (16.4 feet) long to connect the
enclosure to hosts.
To connect the enclosure to a host, use interconnect cables with
these connectors:
■
To connect to the enclosure—68-pin VHDCI connector.
■
To connect to the host—Either a high-density 68-pin connector
or a 68-pin VHDCI connector (depending on the type of host
bus adapter.)
7-3
Ultra320 SCSI Storage Enclosures
Ultra320 SCSI Split-bus Configurations
Note: The Ultra320 Storage Enclosure does not support daisychaining JBOD shelves.
A split-bus configuration has two separate busses with up to six
disk drives on each bus. In this configuration, the enclosure has an
I/O module in one I/O slot, and an I/O blank in the other.
The busses can connect to the same host or to two different hosts.
Note: The I/O blank must be installed to maintain adequate
airflow and cooling in the enclosure.
If you are not populating all drive slots on the enclosure, you
must install carrier blanks in the empty slots to maintain
adequate airflow and cooling.
Split-bus SCSI IDs
The Ultra320 SCSI Storage Enclosure’s SCSI IDs are hard set and
cannot be changed.
In a split-bus enclosure, each bus has seven SCSI IDs. SCSI ID 6 on
each bus is reserved for the host. The I/O module has SCSI ID 15.
Table 7-1 shows the SCSI ID assignments for a split bus:
Table 7-1 SCSI ID Assignments for a Split Bus
Slot 12
ID 0 (Bus 2)
Slot 9
ID 3 (Bus 2)
Slot 6
ID 0 (Bus 1)
Slot 3
ID 3 (Bus 1)
Slot 11
ID 1 (Bus 2)
Slot 8
ID 4 (Bus 2)
Slot 5
ID 1 (Bus 1)
Slot 2
ID 4 (Bus 1)
Slot 10
ID 2 (Bus 2)
Slot 7
ID 5 (Bus 2)
Slot 4
ID 2 (Bus 2)
Slot 1
ID 5 (Bus 1)
Note: SCSI IDs 6 and 7 are not used; they are reserved for host
connections. SCSI ID 15 is assigned to the I/O module.
7-4
Ultra320 SCSI Storage Enclosures
Configuring a Split-bus Enclosure
In a split-bus configuration, the Ultra320 Storage Enclosure provides
two six-slot single buses. Both buses can be connected to one dualSCSI-channel host, or each SCSI bus can be connected to its own host.
You must use high-quality Ultra320 SCSI cables to connect to the
hosts. High-quality Ultra320 SCSI cables are available for sale on
the Adaptec Web site at www.adaptec.com.
To connect a split-bus enclosure to one or two host systems:
1 Shut down your host system.
2 Connect an Ultra320 SCSI cable to a host system.
3 Connect a second Ultra320 SCSI cable to either the same host
system or to a second host system.
4 Connect the other ends of the cables to the VHDCI SCSI
connectors on the Ultra320 Storage Enclosure.
5 Secure the ends of both cables by tightening the connector
thumbscrews.
Ultra320 SCSI Joined-bus Configurations
A joined-bus configuration has two separate buses joined to make
one SCSI bus with up to twelve disk drives. In this configuration,
the enclosure has an I/O module in one I/O slot, and an Joiner
module in the other.
You must use a Joiner module to use the Ultra320 Storage
Enclosure in single-bus mode.
Joined-bus SCSI IDs
The Ultra320 SCSI Storage Enclosure’s SCSI IDs are hard set and
cannot be changed.
In a joined-bus enclosure, the bus has 14 SCSI IDs. SCSI ID 6 and 7
are reserved for the hosts. The I/O module has SCSI ID 15.
7-5
Ultra320 SCSI Storage Enclosures
Table 7-2 shows the SCSI ID assignments for a split bus:
Table 7-2 SCSI ID Assignments for a Split Bus
Slot 12
ID 0
Slot 9
ID 3
Slot 6
ID 8
Slot 3
ID 11
Slot 11
ID 1
Slot 8
ID 4
Slot 5
ID 9
Slot 2
ID 12
Slot 10
ID 2
Slot 7
ID 5
Slot 4
ID 10
Slot 1
ID 13
Configuring Joined-Bus
In a joined-bus configuration, the Ultra320 Storage Enclosure
provides one 12-slot bus, which can be connected to one host or
one SCSI channel.
You must use high-quality Ultra320 SCSI cables to connect your
Ultra320 SCSI Storage Enclosure. High-quality Ultra320 SCSI
cables are available for sale on the Adaptec Web site at
www.adaptec.com.
To connect a joined-bus enclosure to a host or SCSI channel:
1 Shut down your host system.
2 Connect an Ultra320 SCSI cable to a host system or to Channel 1
of a dual-port Ultra320 SCSI adapter.
3 Connect the other end of the cable to either VHDCI SCSI
connectors on the Ultra320 Storage Enclosure.
4 Secure the ends of both cables by tightening the connector
thumbscrews.
7-6
8
Technical Specifications
In this Chapter....
General Specifications
8-2
Ultra320 SCSI Storage Enclosure Technical Specifications
8-5
SATA Storage Enclosure Technical Specifications
8-7
FC Storage Enclosure Technical Specifications
8-9
8-1
Technical Specifications
General Specifications
System
■
2U enclosure height (rack and tower configurations)
■
Up to 12 drives per enclosure
Redundant Components
■
Two Advanced Power and Cooling (APC) units
■
Up to two RAID or JBOD controllers (depending on interface)
■
Two independent AC power cords
■
Up to 12 drives per enclosure
Field Replaceable Units
■
Disk drive carriers
■
Disk carrier blanks
■
Advanced Power and Cooling (APC) units
■
I/O modules
■
I/O slot blanks
■
Enclosure Services (ES) module (hot-swappable, nonredundant)
Storage Enclosure Physical Dimensions
■
Height: 3.5 inches (8.9 cm)
■
Width: 17.6 inches (44.7 cm)
■
Depth: 19.5 inches (49.5 cm)
■
Weight: up to 60 lbs (27 kg) maximum (with all drives installed)
8-2
Technical Specifications
Advanced Power and Cooling (APC) Modules
■
Input Voltage: 100–240 VAC
■
Current Rating: 6–2.5 Amps
■
Input Frequency: 50–63 Hz
■
Outputs:
■
+5 V @ 37.5 A
■
+12 V @ 20.0 A
■
+3.3 V @ 1.0 A
■
Maximum Average Output Power: 430 Watts
■
Maximum Peak Output Power: 491 Watts
■
Cooling: Variable speed fans, 3 per APC unit rated at 20cfm
each. Total of 6 fans per enclosure
Note: APC units are hot-swappable.
Note: Adaptec Storage Enclosures do not support single APC
configurations due to thermal requirements.
Note: In the event of a power supply failure, the fans in the
failed supply will continue to operate on power provided by
the redundant APC unit.
Temperature
■
Operating: 5 ° C to +40 ° C
■
Storage: -40 ° C to +70 ° C
■
Maximum rate of temperature change: 20 ° C per hour
Humidity
■
Relative Humidity Operating: 10% to 80%, noncondensing
■
Maximum rate of operational humidity change: 10% per hour
■
Relative Humidity Storage: 5% to 95%, noncondensing
8-3
Technical Specifications
Altitude
■
Altitude Operating: -200 to 10,000 feet
■
Altitude Storage: -200 to 40,000 feet
Operational Shock
■
8 G half sine shock with pulse duration of 11 milliseconds or
less. Drives not to exceed 60Gs.
Nonoperational Shock
■
Half sine shock: 15 G half sine shock with pulse duration of 11
milliseconds or less. Drives not to exceed 350 Gs at this level.
Drive Hot-Swap Shock
■
Half sine shock: 5 G half sine shock with pulse duration of 2
milliseconds or less.
■
No permanent damage will occur at or below this level.
Operational Vibration
■
Sinusoidal vibration from 5 to 400 Hz at 0.08 G (0 to peak) at a
sweep rate of 0.5 octaves per minute. Drives not to exceed .5 Gs
during this test.
■
Random vibration from 5 to 400 Hz at .15 G.
■
Disk drives in the shelf not to exceed manufacturer’s rotational
vibration guidelines during typical use.
Nonoperational Vibration
■
Sinusoidal vibration from 5 to 22 Hz at 0.06-inch displacement
at a sweep rate of 0.5 octaves per minute.
Sinusoidal vibration from 22 to 400 Hz at 1.5 G (0 to peak) at a
sweep rate of 0.5 octaves per minute.
No permanent damage to the enclosure will occur at or below
these levels. Drives not to exceed 5 Gs at these levels.
■
Random vibration from 5 to 400 Hz at .5 G.
8-4
Technical Specifications
Acoustics
Acoustic level shall not exceed a weighted sound power of 6.5 Bels
at normal operation tested to ISO7779. Normal operation is defined
as ambient temperature of 23 ° C, 60 I/O/sec/drive, all fans
operational, and no fault conditions. The acoustic sound level will
increase under fault conditions.
Product Orientation
The product can be used in the horizontal or vertical (tower)
orientation.
Ultra320 SCSI Storage Enclosure Technical
Specifications
Disk Drives
■
Support for a mix of drives, capacities, and spindle speed (10 K
and 15 K rpm).
■
Support for 1.0 inch, hot swap, and direct attach U160 or U320
disk drives.
■
The disk drives are direct connected to the midplane via 80-pin
SCA-2 connectors.
SCSI Bus
The Adaptec U320 SCSI Storage Enclosure features an LVD SCSI
interface supporting Ultra320 (320 MB/sec synchronous transfer
rate), Ultra160 (160 MB/sec synchronous transfer rate), and Ultra-2
SCSI (80 MB/sec synchronous transfer rate). The Adaptec SCSI bus
is not intended to support single-ended drives.
SCSI Midplane
The Adaptec SCSI Storage Enclosure backplanes contain no active
components, apart from terminators, and support hot plugging of
disk drives, power supplies, and fans. The backplanes support the
full 320 MB/sec bandwidth for each configured bus. The Ultra320
SCSI split bus mode supports the full 320 MB/sec bandwidth for
each bus, giving a total aggregate bandwidth of 640 MB/sec.
8-5
Technical Specifications
Note: Note: Actual real-world bandwidth is 280MB/560MB.
I/O Modules
The Adaptec U320 SCSI midplane has two I/O module connectors
on the rear of the midplane. The I/O modules connect to the two
SCSI buses. There is also a connector for the Enclosure Services (ES)
module.
■
The ES module monitors and controls cooling and supports
in-band environmental reporting.
■
The IO module contains the external (dual port) SCSI VHDCI
connectors.
■
The Joiner module connects the two SCSI buses into a single
SCSI bus with SCSI IDs 0 to 5 and 8 to 13. Without the Joiner
module, the backplane is a dual-bus backplane with each bus
having SCSI IDs 0 to 5.
8-6
Technical Specifications
I/O Module Configurations
The Adaptec SCSI Storage Enclosure supports the following
configurations:
■
Single I/O – Split Bus—An I/O module can be located in either
I/O module slot. This results in a two-bus backplane, with up to
six drives on each bus, with no expansion possible.
■
Single I/O – Joined Bus—An I/O module can be located in one
I/O module slot and a Joiner module located in the other slot.
This gives a single-bus backplane that supports up to twelve
drives.
Note: Daisy-chaining JBOD shelves together is not supported.
Note: Hot-swapping of the SCSI I/O and Joiner modules is not
supported.
Cable Lengths Supported
The external cable lengths supported for the Adaptec U320 Storage
Enclosure are 1, 2, and 5 meters in Ultra320 LVD and Ultra-2 LVD
SCSI bus modes. Single-ended SCSI is not supported.
SATA Storage Enclosure Technical Specifications
Currently Supported Disk Drives
Contact your Adaptec sales representative for up-to-date disk
drive information.
■
Support for a mix of capacities: 80, 120, 160, 200, and 250 GB.
■
Support for a rotational velocities of 5400, 7200, 10K, and 15K rpm.
■
The disk drives are direct connected to the midplane via an
MUX board.
■
The disk drives are connected to the midplane using the host
receptacle connector as defined in the Serial ATA specification.
■
Support for 1.0 inch, hot swap, and direct attach disk drives.
8-7
Technical Specifications
Serial ATA Interface
The Adaptec SATA Storage Enclosure supports a point-to-point,
SATA interface. The interconnect has controlled impedance
(50 ohm single-ended, 100 ohm differential) supporting the 1.5 Gb/
sec data rate and allows expansion to 3 GB/sec. The interface
complies with the guidelines issued by the SATA/High Speed
SATA specification, version 1.
SATA I/O Modules
The Adaptec SATA Storage Enclosure has two I/O modules
available--the FS4100 and the FS4500.
Both I/O modules have two connectors to either connect hosts or
to daisy chain to additional enclosures. Both the FS4100 and FS4500
modules use SFP connectors. They will accept either a copper SFP
connected to a copper cable, or an optical SFP connected to an
optical cable with LC connectors. The cable interface must be a
standard FC cable, so the end that connects to the host is purely
dependent on the host HBA connector selection.
The Adaptec FS4500 supports RAID levels 0, 1, 0/1, 3, 5, 10, 30, and
50.
SATA Cables
Hosts communicate with the Adaptec SATA Storage Enclosure
over FC cables. The optical cable lengths supported are per the FC
channel industry specification. The minimum length is 2 meters for
all data rates. At 2 Gb/sec data rates, the maximum lengths are 150
meters of 62.5 µm cable and 300 meters of 50 µm cable. At 1 Gb/sec
data rates, the maximum cable lengths are 300 meters of 62.5 µm
cable and 500 meters of 50 µm cable. Maximum copper cable
lengths are 6 meters with a passive SFP connector and 12 meters for
an active SFP connector.
SATA Configurations
Each FS4100 and FS4500 module can be connected to up to two
hosts. The modules can be used to form both single and dual SATA
configurations.
8-8
Technical Specifications
Single SATA
A single enclosure has one I/O module, either FS4100 or FS4500. A
single enclosure can be connected to one or two hosts.
Dual SATA
A dual enclosure has two FS4100 or two FS4500 I/O modules, and
connects to from one to four hosts. Dual SATA provides a
redundant controller and better utilization of the available FC front
end bandwidth. The redundant controller provides data access
from more hosts and added security of a second controller for data
access.
Note: Including an FS4100 and an FS4500 together in the same
enclosure is not supported.
Daisy Chaining Adaptec SATA Enclosures
You can daisy chain up to eight FS4100 enclosures together in a
system.
FC Storage Enclosure Technical Specifications
Disk Drives
■
Support for 3.5 inch disk drives of 1.0 inch height.
■
Support for FC 1 and 2 Gb/sec disk drives.
■
Support for 7200 (1 Gb/sec FC only), 10K and 15K RPM disk
drives.
■
Support for mix of drive capacities and RPMs.
■
Support for mix of disk drive vendors in a single enclosure.
Daisy Chaining Adaptec FC Enclosures
You can daisy chain up to ten Adaptec FC enclosures together in a
system for a total of 120 drives.
8-9
A
Configuring the RAID
Controller (FS4500 only)
In this Appendix.
Communication Parameters
A-2
Navigating the Terminal Emulation Software
A-2
Initial Screen
A-2
Creating a Logical Drive
A-3
Terminal Emulation Software Menu Options
A-3
This appendix explains how to use terminal emulation software to
create a logical drive. It also introduces the text menu options used
when configuring the RAID controller in FS4500 Storage
Enclosures using terminal emulation software.
A-1
Configuring the RAID Controller (FS4500 only)
Communication Parameters
■
38,400 baud
■
8 data bits
■
No parity
■
One stop bit
■
No flow control
Navigating the Terminal Emulation Software
■
Arrow keys—Move to options.
■
<Enter>—Move to a sub-menu or execute a function.
■
<Esc>—Move back to a higher level menu.
■
<Ctrl+L>—Refresh the screen.
■
Ctrl+W—Switch to secondary controller. (Cable must be in the
primary controller RS-232 port.)
Shortcut keys shown in bold onscreen can also be used for
navigation. For example, L is the shortcut key to open the view and
edit Logical drives menu.
Initial Screen
Use <Ctrl-L> to refresh, if necessary. Select the appropriate
terminal emulation mode or display the data transfer rates.
A-2
Configuring the RAID Controller (FS4500 only)
Creating a Logical Drive
This section describes the steps necessary to create a logical drive
that is visible to the operating system.
To create a logical drive:
1 Create a logical drive using the view and edit Logical drives
menu (see page A-5). Enter the parameters when prompted.
2 Map the Host LUN using the view and edit Host luns menu
(see page A-6).
When you are finished, the logical drive should be available to the
operating system, and file systems can be prepared for it using the
appropriate utilities.
Terminal Emulation Software Menu Options
The remainder of this appendix outlines the menu options
available on the terminal emulation software.
A-3
Configuring the RAID Controller (FS4500 only)
See the referenced page numbers for more information on any
menu item:
■
Quick Installation (see page A-4)
■
View and edit logical drives (see page A-5)
■
View and edit logical volumes (see page A-5)
■
View and edit host LUNs (see page A-6)
■
View and edit drives (see page A-7)
■
View and edit channels (see page A-8)
■
View and edit configuration parameters (see page A-9)
■
View and edit peripheral devices (see page A-11)
■
System functions (see page A-11)
■
View system information (see page A-12)
■
View and edit event logs (see page A-12)
Quick Installation Option
This option creates a logical drive with minimal user input. It
prompts for the RAID level, and in a single shelf uses all the drives
and assigns a LUN number of 0 to the logical drive.
A-4
Configuring the RAID Controller (FS4500 only)
View and Edit Logical Drives Option
This option displays the Volume Information list, if a valid volume
is selected. If no valid volume is selected then the menu prompts
you to create one.
Submenu options:
■
View drives—Shows the drives that are associated with the
logical volume that was selected.
■
Delete logical drive—Deletes the selected logical drive.
■
Partition logical drive—Permits the logical drive to be
partitioned into smaller volumes, which will appear as LUNs to
the system.
■
Logical drive name—Assigns a name to the logical volume.
■
Logical drive assignments—Lets logical drives be assigned to
the alternate (for instance, from Primary to Secondary.)
■
Expand logical drive—If free capacity is available, the drive can
be expanded.
■
Add drives—If physical drives are available they can be added
to increase the overall capacity of the logical drive.
■
Regenerate parity—Includes Execute Regenerate Logical Drive
parity, Overwrite Inconsistency Parity (Enabled), and Generate
Check Parity Event (Enabled) options.
■
Copy and replace drive—Presents a list of physical drives
associated with the logical drives and allows the user to select a
drive for copying.
■
Media scan—Includes Media Scan Priority (Normal) and
Iteration Count (Single Time) options.
■
Write policy—This option permits the caching to policy to be
set as Write-Back, Write Through or Default for the selected
logical drive.
View and Edit Logical Volumes Option
A logical volume is a grouping of logical drives.
This option displays the Volume Information list, if a valid volume is
selected. If no valid volume is selected, it prompts you to create one.
A-5
Configuring the RAID Controller (FS4500 only)
View and Edit Host LUNs
Submenu options:
■
CHL 0 ID xxx (Primary Controller)
LUN# LV/LD (Type) DRV# Partition# Size (MB) RAID
(Level)
■
CHL 0 ID xxx (Secondary Controller)
LUN# LV/LD (Type) DRV# Partition# Size (MB) RAID
(Level)
■
CHL 1 ID xxx (Primary Controller)
LUN# LV/LD (Type) DRV# Partition# Size (MB) RAID
(Level)
■
CHL 1 ID xxx (Secondary Controller)
LUN# LV/LD (Type) DRV# Partition# Size (MB) RAID
(Level)
If no logical drives or volumes are assigned, the submenu changes
from an information line to:
■
CHL Y ID xxx (Z Controller)
Logical Drive
Logical Volume
■
Edit Host-ID/WWN Name List
No Host-ID/WWN Name List – Create Name List ? (If not
set)
A-6
Configuring the RAID Controller (FS4500 only)
View and Edit Drives (Select Drive) Option
View drive information submenu options:
■
Revision number
■
Serial number
■
Disk capacity (blocks)
■
Disk reserved space
A-7
Configuring the RAID Controller (FS4500 only)
View and Edit Channels (Select Channel) Option
Submenu Options:
■
■
■
■
Host
■
View and edit scsi Id
■
View chip information
■
View channel host-id/Wwn
■
View device port name list (wwpn)
■
Data rate
■
Issue lip
RCCOM
■
View chip information
■
Data rate
Drive/Serial
■
Primary controller scsi id
■
Secondary controller scsi id
■
View chip information
■
Data rate
■
Issue lip
Drive/SATA
■
Primary controller scsi id
■
Secondary controller scsi id
■
View chip information
■
Data rate
A-8
Configuring the RAID Controller (FS4500 only)
View and Edit Configuration Parameters Option
Submenu Options:
■
Communication Parameters
■
Communication Status
■
RS-232 Port Configuration
■
■
COM1 Configuration
■
Baud Rate 38400 (Use this option to change the baud
rate)
■
Terminal Emulation Enabled (Leave this option
enabled)
Modem Operation
This option allows various modem parameters to be
configured.
■
Modem Functions
■
Modem Setup
■
Configure Modem Port
■
Modem Operating Modes
■
Modem Initialization
■
Dial out Function
A-9
Configuring the RAID Controller (FS4500 only)
■
Internet Protocol (TCP/IP)
Displays MAC information and DHCP status (Select to
change)
■
■
■
View Statistics
■
Set IP Address
Caching Parameters
■
Write-Back Cache Enabled
■
Optimization for Sequential I/O (This option toggles
between Random and Sequential)
Host-side Parameters
■
Maximum Queued I/O Count – 256
■
LUNs per SCSI ID - 8
■
Max Number of Concurrent Host-LUN Connection – Def (4)
■
Number of Tags Reserved for each Host – LUN Connection –
Def (32)
■
Peripheral Device Type Parameters
■
Host/Cylinder/Head/Sector Mapping Configuration
■
Fibre Connection Option – Loop Only
A-10
Configuring the RAID Controller (FS4500 only)
■
Drive-side Parameters
■
Disk Array Parameters
■
Redundant Controller Parameters
■
Controller Parameters
View and Edit Peripheral Devices Option
Submenu options:
■
View Peripheral Device Status
■
Set Peripheral Device Entry
■
Adjust LCD Contrast Device Configuration
■
Controller Peripheral
System Functions Option
Submenu options:
■
Mute beeper
■
Change password
■
Reset controller
■
Shutdown controller
■
Controller maintenance
■
Download Firmware
■
Advanced Maintenance Functions
■
Save nvram to disks
■
Restore nvram from disks
A-11
Configuring the RAID Controller (FS4500 only)
View System Information Option
Submenu options:
■
CPU Type
■
Total cache size
■
Firmware Version
■
Bootrecord Version
■
FW Upgradability
■
Serial Number
■
Battery Backup Unit
■
Base Board Rev. ID
■
Base Board ID
■
ID of NVRAM Defaults
■
Controller Position
View and Edit Event Logs Option
This option permits viewing of event activity within the controller.
A-12
R
Adaptec, Inc.
691 South Milpitas Boulevard
Milpitas, CA 95035 USA
©2004-2006 Adaptec, Inc.
All rights reserved. Adaptec and the Adaptec logo
are trademarks of Adaptec, Inc. which may be
registered in some jurisdictions.
Part Number: CDP-00134-01-A, Rev. A, LB 01/06