1
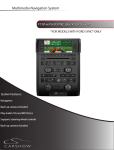
Quick Start Guide
Multimedia
Navigation
System
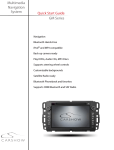
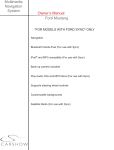
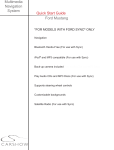
Navigation
Bluetooth Hands-Free
iPod® and MP3 compatible
Back-up camera ready
Play DVDs, Audio COs, MP3 Discs
Supports steering wheel controls
Customizable backgrounds and illumination
Satellite Radio ready
Bluetooth Phonebook and favorites
~
CARS HOW
CS104 Rev A
All rights reserved. Copyright 2012 CarShow Entertainment Systems
NOTICE OF INTENDED USE
Some features of CarShow Entertainment Systems are not intended for viewing by the driver when the vehicle is in motion,
such as movie playback. When using navigation, minimize the amount of time spent viewing the screen and use voice
prompts as much as possible. Avoid prolonged use of the touch screen controls. Such use might distract the driver or
interfere with the driver's safe operation of the vehicle, and thus result in serious injury or death. Such use might also
violate state or local laws.
CarShow Entertainment Systems disclaims any liability for
any bodily injury or property damage that might result
from any improper or unintended use.
Copyright© 2012 by CarShow Entertainment Systems. All rights reserved. Except as
permitted under the Copyright Act of 1976, no part of this publication may be reproduced or
distributed in any form or by any means, or stored in a database or retrieval system, without
the prior written permission of CarShow Entertainment Systems.
ABOUT THE REGISTERED TRADEMARKS
This item incorporates copy protection technology that is protected by U.S. patents and
other intellectual property rights of Rovi Corporation. Reverse engineering and disassembly
are prohibited.
iPod® is a registered trademark of Apple Computer, Inc.
NAVIGATION MAPS
Car navigation maps are frequently updated. While the database was judged to be as
accurate as possible at the time of its release, a map database can never be 100°/o accurate.
Road information that is maintained in the map databases, such as turn restrictions or road
names may change over time.
Errors or missing information in the map data are not covered by the Product Warranty.
New and/or updates for the map data are the responsibility of the End-user.
NOTE: Features listed in this manual are subject to change without notice.
For complete Owner's and Navigation Manuals,
please visit
CarShow Entertainment Systems online
The Basics
Screen Organization
Your system will automatically default to the last screen you were on prior to turning off the unit.
The Information Bar is located at the
top of the screen. Depending on the
source, it will provide information or content
sensitive controls
This will take you to the Settings
Menu for advanced control settings.
The Source Tabs located at the bottom of
the screen will give you direct access to
common sources.
Note: "PHONE" is highlighted BLUE when a phone is paired to CarShow Bluetooth.
Voice Dial
(if supported)
Screen Dimmer
Customizing Source Tabs
You have the option to customize the Source Tabs
3-6 on the bottom of the screen.
AM/FM, DISC and PHONE are not customizable.
To access the tab menu:
1) Press MENU and select SETTINGS
2) In left panel , select TABS
3) For each tab select the left and right arrows to
toggle through the selections
4) Once you are satisfied with your choices,
press RETURN to save. The customized tabs
will now appear
1
Mute ON/OFF
Radio
Channel Selection
. . . . Short touch to seek previous and
next available stations.
Touch to scan. Each station will
play for several seconds.
FM1
102.4
MHz
Stand for
Push the volume knob for Tuning, push again
to go back to volume. In Tuning mode,
after several seconds it will automatically
go back to volume if it is not used.
Note: This is only for vehicles with one knob .
IMdl
CRock
889MHz
97 .5MHz
102.4MHz
102.4MHz
103 5MHz
103.7MHz
AMIFM
CISC
,por,
S/,i
I>LDIO
NAV
Touch to select AM1 & 2 and FM1 ,2 & 3
preset screens .
Satellite Radio (If E~.t~J.Ppe d)
. . . . Short touch to seek previous and
next available stations.
Touch to select SAT 1,2 & 3 preset
screens
Use numeric keypad to directly enter a
channel station
Preset Channels
To set a station as a Preset, press and hold the
button. The name of the channel for SAT Radio
or station frequency for AM/FM Radio will
appear in the button when saved.
Short touch the desired Preset button to select
that channel.
To learn how to access preset channels while in navigation mode, please refer to the
Navigation section of this Quick Start Guide.
2
iPod
You can access music files on your iPod by using your Apple iPod cable to connect
to the unit. Simply plug it into the USB slot located on the front or rear of the unit.
Note: Sleep mode should be enabled on the iPod to reduce battery drain if the iPod is left
connected with the vehicle off.
Touch Button Descriptions
1:1 Press once to restart current track, press
again for Previous Track
a
Play/Pause
11:1 Next track
&I Repeat the current played song
EEl Shuffle tracks
1\11 Search for artist, album, or song by the
first letter
IEJ Main iPod root menu
Root Menu
Use this to toggle between Video and Audio
menus
Note: A special iPod video cable is required
1\11 Use to search by first letter
IEJ Toggle between song details and root menu
To Play a Song
From the list of songs, press once to play the
track and the song playing will be highlighted
Press a second time to display song details and
album artwork.
IEJ Select to go back to track list
3
CD/DVD
CD
a
a
Press once to restart current track,
press again for Previous Track
Play/Pause
1:1 Next track
H Repeat the current played song
&I Shuffle tracks
a
Search for artist, album, or song
lEI Main CD root menu
DVD
Long Touch in DVD mode to show the DVD
control screen. To return to full screen,
either touch the image or leave the screen
idle for several seconds.
a
a
Previous Chapter
Play/Pause
I:J Next Chapter
Shows information such as Chapter,
Time Elapsed, etc
lEI Main DVD menu
-
m
Exit Menu and return to full screen
DVD Settings menu
Note: DVD video can only be viewed if parking brake is engaged.
4
Bluetooth General
Note: This system requires a Bluetooth enabled phone. Bluetooth phones and software
vary by brand and date of manufacture. Some phones or phone functions may not be compatible or may operate differently with this system during use. Phone compatibility problems
are not warrantable issues.
There are several different Bluetooth screens
in the PHONE function . The first screen you
will see is the Call Screen. To switch between
screens, press the PHONE tab repeatedly or
select from one of the options below.
Favorites will display your selected
favorite Contacts
Lists the Contacts from your phone
niJ Call Log lists Dialed, Received and
llil1l Missed calls
R Devices menu will be shown to setup
Press the keyboard
button to access the Call
Screen below
I I J i yourphone
Making/Ending A Call
You can dial the number from your
phone or use the touch-screen
shown at the right by entering the
number, then press the Call button.
Press to end the call.
Clear last number
Jji$j
Press to transfer call between phone
and car speakers.
5
Bluetooth Pairing
Pairing Your Phone
OEM: If using vehicle manufacturer's Bluetooth ,
Sync system , etc, please refer to your vehicle's
owner's manual.
CarShow: Set your phone into discoverable mode.
1) Select DEVICES from the Bluetooth menu
2) Press "Add"
3) After several seconds, the unit will display all
devices within range.
4 ) Select your phone from then list, then "Connect"
6
5) "Pairing" will be displayed on the screen. After
the connection succeeds on your phone, enter
the password (1234). The system will indicate
"Pairing Successful" when your phone is
connected and its name will be displayed
on the unit.
Please note that an authorization request will
appear on your phone. You must accept it before
your phone can share contacts, phonebook and
call history.
6) Press ''Close" and you will exit back to the main
Bluetooth menu. The name of your phone will
appear in the top menu bar.
Setup Tab
Select Auto Connect If you desire the system's
Bluetooth feature to automatically detect your
phone when the system is turned on.
You can also change the Pin Code and
Microphone settings in the Setup screen.
7
Bluetooth Options
Contacts
While your phone is paired , your contacts will
be displayed . This may take several seconds
to load .
When you select a contact from the list, all
associated numbers will be displayed on the left
screen.
Press to set a number as a Favorite
Press to search your Contacts list using the
alpha keypad
Favorites
You can save up to 5 numbers in the Favorites
folder.
In order to replace a favorite, you will need to
delete the existing number first, as the unit will
not override it.
Call List
The call list can be used to view your dialed,
received and missed calls.
The unit will display as many calls that you can
view from your phone.
You can also quickly access your Contacts and
Favorites from this screen .
To make a call from the list, touch the number
on the screen and it will automatically dial the
number.
Bluetooth Music
You can access the music stored on your phone
by pressing the PHONE tab several times or by
pressing MENU and selecting A2DP.
From your phone, access your music and select
a song to play.
You can use the Previous, Play/Pause, Next
and Stop buttons on the unit to navigate through
your music
Note: Some phones do not support this featu re
8
Settings
1.-liiiW~Press
to enter the Settings Menu. To
change system settings, select desired
option.
Main
Clock: Set clock to display 12hr, 24hr or OFF
Note: The time displayed is controlled by
GPS. Please refer to the navigation section for
instructions on adjusting the time zone.
Settings Menu Screen
Beep: Turn button beep ON/OFF
OSD: Set display language
TS Calibrate: Calibrate the Touch Screen
Main Screen
Camera
Reverse Trigger:
For backup camera ON/OFF
Mute Audio : Mute ON/OFF whi le in reverse
Style
You can customize the style of your unit with
backgrounds and illumination.
Camera Screen
Illumination: Set to Auto/ON/OFF for the unit
button
Illumination Color: Choose White, Aqua, Blue,
Red, Amber and Green to best match vehicle
illumination color.
Highlight Color: White, Gold, Green, Red, Blue
and Aqua
Background: Select from several options
LED Brightness: Illumination button brightness
9
Style Screen
Navigation
Before operating your CarShow Navigation system, please carefully read and
follow the instructions provided in the "Safety Information and Precautions"
located on the inside back cover of this Quick Start Guide.
Entering Navigation
To access navigation, press the NAV button on the left side of the unit.
To exit navigation, you will need to press the same NAV button.
Nav Button
Note: The only way to exit navigation is by selecting the NAV button on the left side of the
unit as pictured above.
Start Up
When the navigation software starts, you will see the reminder warning to use your
navigation software safely and lawfully.
Attention!
If you are usmg the software product dunng dnv•ng or transportation. we
strongly advise you to dtreel all your attentoon to dnvong or toansportabon
and to observong traffiC regulallons and safety requ11ements Espetoally
do not uy to operate, enter data onto 01 obtatn data from the software
producl whtle dnving. because such presents a life hazard. and the lack
of proper attention may cause death. InJury or material damage
G
G
/1
"
../ Accept
~ Accept
You must accept these conditions to continue
Please refer to the User's Manual for additional information and warning on proper
use of the Rosen Navigation product.
10
Understanding the Map
The top part of the screen shows
you what the next street is and which
direction to turn on your route
Select the Quick
Menu to access the
most used function s
Distance
16.9 ktD
Time Left
0:16
Arrival lime
These displays show
you the distance, time
left and the estimated
arrival time of your trip
17:22
Shows you the street
you are currently on
(
Menu
J
Access the Navigation Menu
*
I Find an address or Point of Interest and
access the Favorites and History menu
MvRoute
My Route
I Displays the route details and allows
you to edit, change or cancel existing
route
Show Map
~
I Displays current position , surrounding
map area and route .
f.
Settings
I Customize the navigation software
11
Settings
Quick Menu
Located in the top right corner of the
map screen is the Quick Menu. In
this screen, there is a selection of
functions that are frequently needed
during navigation.
p
Quick Place
Search
You can use this option to search for
places of interest along the way of
your route, such as: Gas Stations,
Restaurants, Parking , etc.
p
~ickPiace
Search
u
Avoid
Favorites
•.
Edit Route
~
Route Settings Map Settings
Where Am I?
cancel Route
~
))
Modifying Existing Routes
You can modify an existing route by accessing
either the Quick Menu or Main Navigation menu
-
Route AlternatiVeS
GAlen
0
:
~
. . You can use this option to
~Route Alternatives select an alternative route to
your destination.
•BaltimDI
co,
®
Vehicle
This option is a good way to
change road types and modes.
,____ _ _ ___,You can avoid highways, allow
toll roads, etc.
12
Greet! 2
531111
1:25
....
13.l>q
Gretn 3
lngton
Jl'Route Settings
co,
51 ..
1: 15
11.6 ..
611111
co,
1:25
1.4.9 ..
More
Results
Default Car
·----------------------------·
On-road
Navigation Mode
Route Planning Method
Green
Accessing Audio Functions in Navigation
There are several features in navigation that allows you to interact with functions within the
CarShow unit.
While in navigation, you can access the current
Audio function you are listening to (Radio, SAT,
iPod and CD) without leaving navigation.
Radio/SAT Radio:
•
Previous Preset
•
Next Preset
Note: This will not scroll through all stations in
Radio and SAT mode, only presets.
iPod/CD:
•
Previous Song/Track
•
Next Song/Track
13
Enter or Find Address
If you are on the Map screen, press MENU. In the Navigation Menu, select Find Address.
Note: By default, the software proposes the country and state where you are currently
located.
1. Touch "City Name" and the
keyboard screen will appear.
2. Your current city will automatically
default. To search for a different city,
start typing each letter of the City
name
I~ I
Tap to confirm city
3. A "Select City" screen will appear.
This will show a list of cities that
match your selection. Touch the city
you desire.
Washington, VA
Virglr1ia, United Slates
Washington De Metro Area, VA
Vlrg1111a, United SlateS
4. Select "Street" and the keyboard
screen will appear.
Country
Oty
United Kingdom
London
<Street Name>
14
5. Start typing each letter of the
street name.
6. A Street Name list will appear.
Select the one you are looking fo r.
Bob 0 Link Cir
Great Falls, 22066
Colonel Llndsav Ct
Pals Church, 221M3
7. Repeat these steps for House number,
or if you do not know it, you can select the
SELECT STREET option .
11-------------Colonel Undsav Dr
Falls Church, 22&13
E Linden St
Alexal)(lia, 22301
8. A map will appear.
~ Next
Click Next and a short
summary of the route will flash on the
screen for a few seconds.
vI :•:•
9. After the summary, the map
appears showing the entire route.
_. Go!
242 W Timomum Rd
Lutherville T1mon1um
I Tap to start your journey.
.,_ Back
15
C
More
'f(
Setting Favorites
You can set Favorite destinations (like Home, etc) so you do not have to enter it manually
each time.
-Once you have entered all information and press
DONE, in the next screen, you will select MORE
-Select ADD TO FAVORITES
-It will take you to keyboard where you can rename
your favorite. (Example: HOME)
r
eysville
-Select DONE and you Favorite is now saved.
You can also set a Favorite from the History
section. Please see below.
Route History
You can search through the History menu to access
past routes or to set a past route as a Favorite .
-From the QU ICK MENU or SETTIN GS in the main
menu , select HISTORY
- To set as a Route, select the address, then tap
SELECT.
-To set as a Favorite, select the address, then tap
MORE. Select ADD TO FAVORITES.
16
•Owfnt•
Pikesville
rokingsville
Perrt Hall
Adjusting the Time Zone
To adjust the time displayed on the unit, please use the steps below.
1. Press MENU in the bottom left
corner of the screen
Tenley Cir
"
Menu
2. Select SETIINGS
---->REGIONAL
---->Time Zone
My Route
Show Map
3. Now you are in the clock setting screen.
-Use can set the time zone to change
automatically when entering a new time
zone.
-Use the minus and plus icons to adjust
the time in increments of 15 min
. - sack
-Set Daylight Savings OFF/ON
17
~
Settings
You can modify and customize the way your maps are displayed by accessing the Map
Settings
p
From the map screen select the
Quick Menu button.
Quick Place
5eilrch
;\
1;i(
Favorites
•
Avoid
~~
Route Settings Map Settings
Select Map Settings from the list
Edit Route
Where Am r? cancel Route
Ql
.. >)
Map Settings
Map Setting Options
View Mode: Set as 30 or 20
Viewpoint: Low, Med or High
.
Bethesda
Nap Settmgs
0
Automatic Overview: ON/OFF
Colors:
('
Day, Night or Auto
Day Map Color: Select from several themes
Colors
Auto
Night Map Color: Select from several themes
30 Vehicle Gallery: Select from several vehicles/people
that will be displayed as your marker
Landmarks: ON/OFF
Buildings: ON/OFF
Track Logs: ON/OFF
Place Markers: Select what markers (such as gas, food,
etc) that you would like the map to automatically display
18
:,3
Day Map Color
0
'Y
Safety Information and Precautions
WARNING! Please read and follow the following safety precautions.
Failure to follow the instructions below may increase
your risk of collision and personal injury.
The Rosen Navigation software is not a substitute for your personal judgment. The route suggestions should never
y
supersede any local traffic regulation or your personal judgment and lor knowledge of safe driving practices. Prior to
completing any maneuvers suggested by your Rosen Navigation software (for example, a U-turn or a left turn), verify that
you can legally and safely complete the maneuver. Do not follow route suggestions if they direct you to perform an unsafe
or illegal maneuver, would place you in an unsafe situation, or would route you into an area that you consider unsafe.
Do not use the Rosen Navigation software to locate emergency services (such as police, fire stations, hospitals, and
clinics). The database may not include all emergency service providers. Use your own best judgment and ask for directions
in these situations.
If the vehicle is in motion, only a passenger should program the Rosen Navigation software. The driver should not program
the system unless the vehicle is parked in a safe location.
The Rosen Navigation software's map database provides information on suggested routes without regard to factors that
may affect your driving experience or the time required to arrive at your destination. For example, the system does not
reflect road detours, closures or construction, some road characteristics (e.g., road surface, slope or grade, weight or height
restrictions, etc.), temporary traffic congestion, weather conditions, and similar factors.
Vehicle Position
The Rosen Navigation software's computer considers vehicle speed and heading changes, together with longitude and
latitude information, to accurately determine vehicle heading and position on a digital map.
Map and Information Database
The map database used by your Rosen Navigation software was created using high-resolution aerial and land based data
collection.
Car navigation maps are frequently updated. While the database was judged to be as accurate as possible at the time of its
release, a map database can never be 100% accurate. Road information that is maintained in the map databases, such as
turn restrictions or road names may change over time.
Errors or missing information in the map data are not covered by the Product Warranty. New and/or updates for the map
data are the responsibility of the End-user.
End-User License Agreement
Please refer to the Rosen Navigation User's Manual to review and accept the terms and conditions in the End-User License
before operating this product.
THE CAR SHOW MULTI-MEDIA NAVIGATION SYSTEMS CONTAIN AN INTERNAL VIDEO PLAYER, WHICH
IS NOT INTENDED FOR VIEWING BY THE DRIVER. THE VIDEO PLAYER IS DISABLED WHEN THE
VEHICLE IS IN MOTION THROUGH A CONNECTION TO THE PARKING BRAKE.
THE INSTALLER OF THIS PRODUCT MUST INSURE THE VIDEO DISABLE CONNECTION IS
WORKING PROPERLY PRIOR TO DELIVERY OF THE VEHICLE.
IMPROPER INSTALLATION COULD DISTRACT THE DRIVER OR INTERFERE WITH SAFE OPERATION
OF THE VEHICLE, WHICH COULD RESULT IN SERIOUS INJURY OR DEATH, AND COULD ALSO
VIOLATE STATE AND/OR FEDERAL LAW.
CAR SHOW DISCLAIMS ANY LIABILITY FOR ANY BODILY INJURY OR PROPERTY DAMAGE THAT MAY
RESULT FROM ANY IMPROPER OR UNINTENDED INSTALLATION AND/OR USE.
STOP
Damage to the vehicle may occur
Do not proceed until process has been completed
CAUTION
Process must be carefully observed in order to reduce
the risk of damage to the accessory or vehicle
CRITICAL
Process must be carefully observed in order to ensure a
quality installation
/
+
TOOLS and EQUIPMENT
Specific tools and equipment recommended for this
process
SAFETY RISK
Observe safe practices, this process can be dangerous
and there is a risk of personal injury
TESTING and TROUBLESHOOTING
Content specific testing and troubleshooting points
Car Show
Multi-Media Navigation System Installation Guide
Copyright 2012 All Rights Reserved
Rev A
Car Show Installation Guide
BEFORE YOU START THE
INSTALLATION,
READ THIS GUIDE!
CHECK THE BATTERY
Test the battery voltage to make sure it's fully charged
This only takes seconds and can save hours of
troubleshooting later.
TURN THE VEHICLE
OFF
Keep the Vehicle Off during the installation to avoid
setting various Vehicle Faults
STOP
Keep the Vehicle OFF during the
installation
Failure to follow this may cause the AIRBAG FAULT
SENSOR to become enabled. Dealer Service
Departments charge a significant fee to reset the Fault
Sensor.
Car Show
Installation Guide
Copyright 2012 All Rights Reserved
CS-UN1170- 12
Page2
Car Show Installation Guide
Use Caution around SRS Components
It is the installer's responsibility to ensure that the safety
equipment in the vehicle is NOT adversely affected by
installation of this system. Ensure that the routing of the
harnesses do NOT obstruct airbags, SRS or other safety
devices.
Mount the GPS and Sat Radio antenna
on the EXTERIOR of the Vehicle
Route the GPS harness away from other power harnesses
in the vehicle.
This will help to ensure optimum performance of the GPS
system.
Install the iPod interface connector in a
location accessible to the end-user
iPod cable can be connected via front OR rear mounted
USB connections.
For iPod Video use cable P/N: PP1 013
Connect the Power and GPS Harnesses
The GPS Harness must be properly seated into connector.
Failure to follow this step may result in poor GPS signal
Car Show
Installation Guide
Copyright 2012 All Rights Reserved
CS-UN1170-12
Page 3
Car Show Installation Guide
Connect Optional Harnesses such as
iPod, Satellite Radio, Camera, Reverse
Sensors
These harnesses must be fully engaged prior to the system
installation.
See the Main Harness Diagram below for more information
Yellow, Battery +12VDC
._.......... Red, ACC SW+12VDC
~---- Black, Ground
Green!Wl!t Reverse Trigger +12VDC
· ·"""'' *>'*' ' "'--
PP-UN1170-2
Main Harness
Pink, Park Brake Ground
Blue, Antenna Power +12VDC
Orange, Illumination
Gray, Speaker Front R+
Gray/Bik, Speaker Front RWhite, Speaker Front L+
White/Bik, Speaker Front LPurple, Speaker Rear R+
Purple/Bik, Speaker Rear RGreen, Speaker Rear L+
Green/Bik, Speaker Rear LBiue!Wht, Amp Remote Turn On +12VDC
Car Show
Installation Guide
Copyright 2012 All Rights Reserved
CS-UN1170-12
Page4
Car Show Installation Guide
Turn the vehicle ON and confirm the
unit is fully operational
With the connectors Fully Engaged, turn the vehicle
on and press the RESET located behind SO card
access door.
Insert a DVD to confirm the Video
Disable Circuit is properly Operating.
In some vehicles the Brake Wire must be connected to
the Park Brake Indicator Wire to complete a ground
when the brake is engaged.
Launch the Installer Setting Screen
From any screen with the Menu Button, follow these
steps to display the Installer Setting Screen:
1) From any Screen, select "Menu"
2) From the Menu Screen, select "Settings"
3) Press "Keypad," Press "1120" and "Enter"
Select the individual Settings as needed
for the installed components
Selectable options vary by product and installation.
Select the options as applicable for the installed
optional components.
Car Show
Installation Guide
Copyright 2012 All Rights Reserved
GS-UN1170-12
PageS
Car Show Installation Guide
Turn the vehicle ON and System ON
Confirm the unit starts up properly
Troubleshooting
1) Reset the System while the Vehicle is ON
2) Confirm all connectors are properly installed
3) Check the Vehicle and System Fuses
Select RADIO as the Source
Confirm that the AM and FM reception are as
expected
Troubleshooting
1) Confirm Antenna is properly connected.
2) Reset the System
Select SATELLITE RADIO as the Source
Troubleshooting
1) Confirm the antenna has unobstructed view of the sky
2) Confirm the antenna is located on the outside of the
vehicle
Select iPod as the Source
Confirm iPod is communicating and playback is OK
Troubleshooting
1) Confirm the harnesses are properly engaged
2) Reset the System
Select CD as the Source
Confirm CD audio playback is OK
Troubleshooting
1) Confirm the disc is store bought and in good condition
2) Reset the system
Car Show
Installation Guide
Copyright 2012 All Rights Reserved
CS-UN1 170- 12
Page6
Car Show Installation Guide
Select DVD as the Source
Confirm DVD video playback is OK
Troubleshooting
11
Ensure the Park Brake is set to view video
Confirm the disc is store bought and in good condition
Reset the system
~
~
Select Phone as the Source
Confirm Phone Pairing is successful
Consult Quick Start Guide for Bluetooth pairing instructions
Select NAV as the Source
Confirm the Navigation loads and signal strength is
OK
Troubleshooting
1) Confirm the antenna has an unobstructed view of the
sky
2) Confirm the antenna is located on the outside of the
vehicle
3) Confirm the antenna connection is properly tightened
4) Confirm GPS antenna cable clamp on back of unit is
being used
Select Reverse Camera
Confirm the backup camera screen shows in reverse
Troubleshooting
!l
Confirm the Camera is set to ON in the Installer Settings
Confirm the Reverse Trigger wire is attached properly
~ Confirm the Camera is receiving 12VDC as required
~
Car Show
Installation Guide
Copyright 2012 All Rights ReseNed
CS-UN1170-12
Page 7
Car Show Installation Guide
Steering Wheel Control Programming
(If vehicle is equipped)
Your system is equipped with a capability to interface with
most factory Steering Wheel Controls.
Popular Vehicle steering wheel controls values are "preprogrammed" in unit.
(Vehicles makes/models that aren't listed mav still be
compatible)
To program your vehicles Steering Wheel Controls, follow
the steps below.
Note: Some vehicles use a data bus system, which is not
compatible. If you do not see the "Programmed" response,
is not
it's because the
**Pre-Programmed SWC Setup Instructions:**
1) En~ure the vehicle is RUNNING. not on ACC
2) Enter Installer settings menu
3) Press the SWC Preset button
Car Show
lnstaflation Guide
Copyright 2012 All Rights Reserved
CS-UN11 70-12
Page B
Car Show Installation Guide
~
4)
5)
Select the make, model, and type of your
particular vehicle
(Type 1 most common)
~~1 • •
H;;,M u
~f"'"'
l."o>K
...
..
~
1 t "' '
T~f>(> 1
-
-..
Press OK
6) Test controls
**Manual SWC Setup Instructions:**
1) Ensure the vehicle is RUNNING, not on ACC
Car Show
Installation Guide
Copyright 2012 All Rights Reserved
CS-UN1170-12
Page 9
Car Show Installation Guide
2) Enter Installer settings menu
3) Select SWC Preset button
4)Select USER for Make. then press OK
5) Select SWC Custom button
6)Select OK for the button you wish to program
Car Show
Installation Guide
Copyright 2012 All Rights Reserved
CS-UN1170- 12
Page 10
Car Show Installation Guide
7)Press proper button on steering wheel
8)Programming is saved once "Programmed" appears
9)Repeat steps
lO)Test Controls
Car Show
Installation Guide
Copyright 2012 All Rights Reserved
CS-UN1170- 12
Page 11
Car Show Installation Guide
Harness Diagram
Back Of Car Show
External Microphone
PP1011
Camera
I Aux 2 In
Steering Wheel Controls
PP-UN1170-3
PP1008
0
Amplifier Pre-Outs
PP1007
Satellite Radio
PP1010
Second Zone/ AV Out
PP1009
CARS HOW
www. CarShowEntertainment.com
Car Show
Installation Guide
Copyright 2012 All Rights ReseNed
CS-UN1170- 12
Page 12
For additional technical tips, please visit
www.Rosendealercentral.com
Piranha Series UN1170
Can-Bus SWC Integration
Instructions
If your vehicle is equipped with Can-Bus operated SWC and listed below, the corresponding P.A.C interfaces
will need to be purchased and installed for proper steering wheel control integration.
(If your vehicle is not listed please refer to P.A.C audio for the correct SWC interface and programming.)
>>> Compatibility <<<
Vehicles:
Interface:
GM Vehicles
05-4 & SWI-X
VWVehicles
SWI-CAN & SWI-X
Dodge Vehicles
SWI-CAN & SWI-X
Chrysler Vehicles
SWI-CAN2 & SWI-X
(Please note: Using any other interfaces may not work correctly and have not been verified.)
Rosen Entertainment, LP. Assumes no responsibility with regards to the accuracy of this information. Proper installation in every
case is and remains the responsibility of the installer. R.E.S assumes no liability or responsibility resulting from improper installation,
even when the installer has relied upon this information
Rosen Entertainment Systems
Multi-Media Navigation System Installation Guide
PP-UN11 70TT
Copyright 2011 All Rights Reserved
PP-UN1170TT SWC Tech Tip Rev A