1
FLAMINGOS at the MMT
FLAMINGOS at the MMT
A User's Guide
Michael Ledlow
Joanna Levine
Nick Raines
Katherine Wu
Version 1.0; 2003 February
Contents:
I.
II.
III.
IV.
V.
VI.
VII.
Overview
Getting Started
Imaging with FLAMINGOS
Taking Spectra with FLAMINGOS
Shutting Down
Troubleshooting
Contacts
Appendices:
A1.
Executive Command Summary
1/23
FLAMINGOS at the MMT
I. FLAMINGOS+MMT Overview
FLAMINGOS is the FLoridA Multi-object Imaging Near-ir Grism Observational Spectrometer. This manual
attempts to provide the user with a good portion of the tools needed to successfully take data with FLAMINGOS
at the MMT. A knowledge of basic unix commands is assumed.
FLAMINGOS is comprised of 2 cryogenic dewars. The Mos dewar, closest to the telescope backplane contains
a wheel which can position one of 11 different slit plates into the cassegrain focal plane. The Camera dewar,
immediately following the Mos dewar contains all of the powered optics, filters, stops, grisms, and the detector
array.
Array:
Hawaii II 2048x2048 HgCdTe science grade array, divided into four quadrants with 8
amplifiers each (32 amplifiers for the whole array).
Linearity:
Using a bias voltage of 1.0V, the array is
0.5% non-linear at 25,000 counts
2% non-linear at 35,000 counts
>3% non-linear at 40,000 counts
Plate Scale and Field of View:
0.169"/pixel
5.76 arcminute FOV
Detector Characteristics:
Bias Voltage (Volts)
1.0
0.75
~50,000
~38,000
25,000 – 35,000
25,000 – 30,000
Read Noise (e)
50
50.0
Gain (e / ADU)
~4.9
~4.5
Full Well (ADU)
Target Count level (ADU)
Filters: J, H, K, Ks, JH, and HK bandpass filters.
Grisms: JH, and HK bandpass coverage. The HK-grism may be used with the HK-filter to obtain H and K band
spectra in first order, or it may be used with the JH-filter to obtain H-band in first order, and J-band in second
order.
Long Slits: 2, 3, 6, 9, 12, and 20-pixel slits are available; the 3 and 6 pixel slits cover much of the chip. All of
the long slits are located on the Mos wheel.
2/23
FLAMINGOS at the MMT
Resolving Powers for 3 pixel slit:
Filter Combination
Band
R
JH-bandpass + JH-grism
J
960
H
1250
H
650
K
865
HK-bandpass + HK-grism
Mos Plates: 11 positions are available for Mos plates; at present 1 position is occupied by a Mos-plate shapped
single long slit with width of 3 pixels.
Mechanisms: The Mos dewar contains the Decker and Mos wheels; the Decker wheel contains an imaging
hole, a psuedo dark, and aperture masks to baffle stray light for long slit and mos plates on the Mos wheel. The
Camera dewar contains the filter, lyot, and grism wheel; the lyot wheel contains lyot stops for the KPNO 2.1-m
and 4-m telescopes, and stops for the MMT and Gemini South; the grism wheel contains the two grisms, and
imaging hole, and the only truly dark cold stop in the system.
Instrument Control: The MMT has two computers that the astronomer uses: packrat and cfaguider .
FLAMINGOS is operated via an rsh connection from packrat to flamingos1b, which is the FLAMINGOS
control computer (flamingos1b is mounted on the right-hand electronics rack). All data taking commands are
run from flamingos1b; the data taking commands are all perl scripts (.pl extension). cfaguider's monitor is
used for displaying several windows important for monitoring FLAMINGOS; these windows are started from
packrat, via the xwindows sharing program X2X.
Data Storage: While you are taking data, all data will be located on flamingos1b .
Flamingos' data storage area is /data0/mmtguest/<UTDATE>/.
Packrat's data storage area is /packrat1/scratch/flam/<UTDATE>/.
Data Transport: Brian McLeod and I will setup flamingos1b such that data can be copied directly to packrat as
it is taken; from there it may be transferred to your home institution via ftp, or written to tape. Packrat has a
dds4 tape drive; the MMT web page claims that a DVD-RAM is available, too. Last year a DLT drive was also
available.
Image Size: Each Flamingos frame is 16 MB in size! During a single night of imaging, it is possible to take 8
– 16 GB of data (500 to 1,000 images). Pay attention to disk usage, and bring many tapes for data archiving.
Unix Tips: Many of the command names are quite long. However, if you type a portion of the command and
then hit the TAB key, you will be offered a list of possible completions to the command name. Similarly, the up
arrow key will allow you to go up through the history stack of commands entered on the command line.
Halting A Script: Never type Ctrl-C. It is much safer to suspend a job with Ctrl-Z. Then you can kill a
job by typing jobs, and kill -9 %<job number>. If you are moving a wheel, please just wait for the
wheel to finish motion, and the script to complete, and then try again. If you are taking an image or a sequence
of images, wait until the script starts counting the number of seconds elapsed in the exposure before suspending
3/23
FLAMINGOS at the MMT
the script. Then run ufstop.pl -clean -stop, and start over. Never type Ctrl-C before the exposure
time counter has begun.
4/23
FLAMINGOS at the MMT
II. Getting Started....
...at the beginning of your run (or in case of crashes):
When you arrive at the telescope, you will have to bring up the FLAMINGOS windows and
initialize the system. This is a procedure that will hopefully only need to be done once at the beginning of your
run, however, you may need to repeat this process during the course of your observing time if the system
crashes. Taking it from the top, the startup procedure is as follows:
1. Log onto cfaguider and packrat - the login and password are usually written on a piece of paper taped inside
of the desk drawer on the right, where the astronomer sits.
The cfaguider login should automatically start a program called mountdisplay, which starts a window
titled MMTO Status; this shows where the telescope is presently pointed. Another window titled Paddle
should start as well; this may be used for offseting the telescope, however flamingos1b has a set of scripts
for doing this.
The packrat login should start an xgterm titled Flamingos Control. It should also start x2x to
cfaguider and set xhost to allow display connections from flamingos1b. If for some reason you cannot
access the cfaguider monitor using the packrat mouse, use the packrat desktop pulldown titled Restart
X2X.
2. From the Flamingos Control xgterm, rsh into flamingos1b, as mmtguest. The password is in the same
location as for logging into packrat. The command is
flamingos packrat 1> rsh -l mmtguest flamingos1b
3. Open a ds9 and an xgterm, and start iraf and start iraf:
mmtguest@flamingos1b{1}
iraf.start.mmt.sh
ds9 should start on the right-hand monitor, and an xgterm labeled flamingos_iraf should appear on the
central monitor; in this xgterm type cl to start iraf.
4. You are now ready to initialize FLAMINGOS! This is done by running the command
mmt.initflam.pl. This will initialize several software agents and start the following windows on
cfaguider's monitor (the left-hand monitor):
Temperature Daemon - This daemon reads temperatures from 5 different sensors in FLAMINGOS with
the following output written to the screen:
UFLakeShore208Agent::ancillary
>new reading:(2002:170:05:24:06.920436) 1,75.67 2,82.05 4,76.04
5,76.67 6,82.73
You should always keep an eye on the array temperature ( ~76 K, in the example above where it says 1,
75.67 ) and the MOS dewar temperature (~83 K, where it says 6,82.73 in the example above). The array
5/23
FLAMINGOS at the MMT
temperature should never vary by more than ~0.5 K and the MOS dewar temperature must remain below 200.0
for sucessful imaging. If you are taking spectra, the Mos dewar must be at ~83 K. Mechanisms inside of the
Mos dewar should not be moved for about 4 hours from the time it is first cooled down from room temperature.
Record Temps window - This window logs all five temperatures every 10 minutes. It is sometimes easier
to monitor the array and MOS dewar temperatures from here.
Motor Daemon - This daemon controls the motors which move all of the wheels.
MCE4 Daemon - This daemon runs the array controller, referred to as MCE4.
UFSTATUS GUI - This window displays the temperatures, the bias voltage on the array, and the positions
of all of the wheels. Note that it is NOT updated automatically. Rather you must click the update button in the
middle of the gui for the most recent values and positions. DO NOT press the update button while any of the
wheels are moving.
During mmt.initflam.pl execution, you will be asked at multiple points whether you wish to continue. In
general, if the correct windows are present and the daemon windows say listening on port, startup has
been succesful and you should answer yes. (Sometimes initflam will complain that agents are stalled, however,
if you see the daemon in question functioning normally just answer yes anyway.)
Finally, you do not need to run mmt.initflam.pl every night; only in the case of a reboot or if one of the
daemons crashes or is missing.
6/23
FLAMINGOS at the MMT
II. Getting Started....
...at the beginning of each night:
Unless some of the daemons have crashed or hung, it is not necessary to run mmt.initflam.pl every night.
The following is a list of things you do need to do prior to each night's observing:
1. Fill Both Dewars. The telescope operator should be in charge of filling the dewars with liquid nitrogen.
Although the telescope operator is in charge of this at the MMT, guest observers do this at the KPNO 2.1-m.
The instructions from the 2.1-m manul are presented here for completeness:
Both the main dewar (the big one on the bottom) and the MOS dewar (the little one on the top) need to be
filled with liquid nitrogen at the start of the night before you can observe. The MOS dewar needs to be filled
at the end of the night, too. Fill the main dewar first and then the MOS dewar using the following procedure:
a) Check the pressure and fill gauges on the big storage dewar. The pressure should be ~20 psi and the
tank should be more than 1/3 full. If this is not the case, have someone refill the tank before it gets too
low. Also, note that you should give the tank a shake prior to reading the fill level as the gauges can get
stuck.
b) Un-velcro or pull out the fill line of your desired dewar and connect it to the storage dewar so that it is
"finger tight".
c) Open the valve on the storage dewar SLIGHTLY and let the line cool. At this point, you should hear a
"whooshing" from the dewar you are filling and see some initial boil-off.
d) When the "whooshing" stops and/or the line freezes, open the valve the rest of the way and let the
dewar fill. The dewar is full when liquid is vigorously pouring out of the vent (a few drops does not a full
dewar make!).
CAUTION: The vent of the Mos dewar is about face-level in height. Do not stand close enough to the
vent such that liquid nitrogen can splash you in the face!
e) Using the polar gloves on the work table (and a crescent wrench if necessary) unscrew the fill line from
the tank and tie it back down in between the dewars and the electronics rack. NEVER unscrew the fill
lines from FLAMINGOS. ALWAYS leave them attached and securely tied down.
NEVER let nitrogen drip on any of the cables on the electronics racks!
The end of the hose where it attaches to the Mos dewar may need to be tightened-do so very carefully by
hand, until it is just snug so that it does not drip liquid nitrogen when filling the dewar.
2. Create a data directory for the night. Each night's data should be stored in a separate directory. In any
flamingos1b window, cd into /data0/mmtguest/. Create a directory with the UT date in the format
YYYYMMMDD (e.g. 2002dec12). Note that you should always check the disk space using the df -k
7/23
FLAMINGOS at the MMT
command and check the usage of /export/home0/; if it is getting full, start taping!
4. Set up header information, data location, file names: Once you have created a data directory, you need to tell
the computer where it is.
mmtguest@flam-4m-1b{17} config.exposure.pl
The script will then prompt you for the desired information. Make sure you change the date, data directory, and
file name! Weather info is usually a good thing as well.
You are now ready to start observing!
8/23
FLAMINGOS at the MMT
III. Imaging with FLAMINGOS
FLAMINGOS is set up so that all data taking is run from the command line of flamingos1b using a
set of perl scripts1. In the following sections, the scripts useful for taking imaging data are discussed.
A. Wheel set-up for Imaging:
FLAMINGOS has five wheels in its optical path, each containing various filters, pupil masks, and
spectroscopic slits. In imaging mode the following configuration should be in place:
Decker Wheel (motor a) should be set to imaging
MOS Wheel (motor b) should be set to imaging
Filter Wheel (motor c) should be set to one of the following bandpass filters: J, H, K, Ks, JH, HK.
Lyot Wheel (motor d) should be set to mmt2
Grism Wheel (motor e) should be set to open1
For general purposes, observers can ignore the lyot wheel as it should already have been configured during
engineering time. However, during the first pointing check on a very bright star (V = 2) of the evening, it is
advisable to take an image of the star way out of focus, to verify that the stop has not moved, and that the mirror
covers and dome are open and positioned properly. You should see a bright donut, with shadows for the
secondary and the spider vanes.
The remaining wheels positions will need to be adjusted. This is done using the wheel configuration commands:
config.mos.wheel.pl - Allows selection of the MOS wheel position.
config.filter.grism.decker.wheels.pl - Allows selection of the position of the decker,
filter, and grism wheels. Note if you are unsure where the wheels are, you can hit update on the UFSTATUS
GUI and it will tell you.
B. Configuring an Exposure:
In order to set up an exposure, run the config.exposure.pl command. This allows you to set up the
following observing parameters3:
OBS_TYPE - Type of observation being taken (e.g. object, standard, flat, dark, etc.).
OBJECT
- Name of object being observed.
FILEBASE - Prefix of image file. Naming convention is <filebase>.####.fits where the
numbers are automatically incremented by the data taking script.
ORIG_DIR - Absolute pathname of the directory to which you wish to write data.
Make sure you include the trailing / on the pathname.
1 Located in /usr/local/flamingos/, in the directories perl_all_tel/, perl_mmt/,
flamingos.headers.lut/, and flamingos_modules/.
2 If the power to the motor controller has been cycled, the gui will claim that the lyot wheel is at Hartmann1. The lyot
wheel should have been set during the first engineering night of Flamignos' run, and should not need to be adjusted.
3 There are several other parameters that should not be changed: USE_MST = 1 and MSTBREAK = 60.
9/23
FLAMINGOS at the MMT
DATE_OBS - UT date at the end of the night (YYYY-MM-DD)
EXP_TIME - Exposure time for integration. Must be an integer >= 3 seconds.
NREADS
- Number of non-destructive reads per endpoint (currently must equal 1)
WEATHER
WIND
- Sky conditions (1=photometric, 2=thin cirrus, 3=broken clouds,
4=overcast, 5=snowing, 6=fog).
- Wind conditions (1=calm, 2=low, 3=moderate, 4=high, 5=closed).
In addition, after prompting you for all of these parameters, config.exposure.pl will ask if you want to
change the bias. In imaging mode, the bias should always be set to 1.0 V!
If you wish to change just the exposure time, or just the filename and don't want to run through the entire
list of parameters, you can use the following commands:
set.exposuretime.pl - Allows adjustment of integration time and number of reads.
set.filename.pl - Allows adjustment of the filebase and directory only.
set.bias.pl - Allows adjustment of the bias only. Type i for imaging, s for spectroscopy.
C. Taking Images at a Single Pointing
singleimage.pl - Take a single image at the current pointing, with the current configuration.
more.singleimages.pl <n> - Take n images at the current pointing, with the current
configuration, and stepping the image number. This comes in very handy when taking darks!
D. Taking Dithered Images
FLAMINGOS also has the ability to take a sequence of images using a set of pre-determined dither
patterns. In order to configure the dither pattern, run config.dither.mmt.pl. This allows you to change
the following parameters:
DPATTERN
D_SCALE
The desired dither pattern. Your choices are 2x2, 3x3, 4x4, 5x5, 5point+, 5pointx
Additional scale factor for the offsets. The default of D_SCALE = 1 will add a border to
your images of 10 arcseconds, or a total width of 20 arcseonds to the total field of view of
the final stacked image.
D_RPTPOS
Number of times to repeat each dither position.
D_RPTPAT
Number of times to repeat the entire dither pattern.
STARTPOS
Starting position in the dither pattern (0=first position). This is very useful if the system
crashes or hangs mid-sequence.
USENUDGE
Nudge pointing center on pattern repeats.
NUDGESIZE Radial size of nudge, randomly chosen in one of the cardinal directions.
THROW
Radial length to other nod beam, for on-source / off-source imaging.
THROW_PA
PA of other beam for nodding.
10/23
FLAMINGOS at the MMT
E. Offsetting the Telescope from Flamingos1b
At certain times (such as pointing checks or adjusting the position of your sources on the detector) you
may wish to offset the telscope directly from flamingos1b rather than having your operator do it. In this case,
the following commands may prove to be useful:
absolute.offset.mmt.pl <Dx> <Dy> - Allows manual absolute offsets (e.g., an fixed offset
with respect to the present target's catalog cordinates) of the telscope by the observer. Repeating this command
will not move the telescope.
relative.offset.mmt.pl <Dx> <Dy> - Allows manual offsets of the telescope by the
observer relative to wherever the telescope presently is pointed.
Notes:
1) The offsets for each of these commands is in arcseconds.
2) Both of these commands offset the telescope in instrument coordinates, i.e., along the
detector's x and y axes, and not in α, δ.
3) These commands are only used if you are not guiding. There are different commands
which are used for spectroscopy when guiding.
11/23
FLAMINGOS at the MMT
IV. Taking Spectra with FLAMINGOS
Flamingos may be used for obtaining long slit or multi-object slit spectra; please see the overview section for
resolving powers within selected passbands. This section sketches out the sequence of commands required to
align a long slit or mos plate, and describes some of the calibration data typically taken. The following list of
commands is used for alignment of both long slits and mos plates:
On the flamingos command line:
config.exposure.pl
config.filter.grism.decker.wheels.pl
config.mos.wheel.pl
config.mos.dither.mmt.pl
dither.mos.mmt.pl
guided.relative.offset.mmt.pl
set.bias.pl
tweak.decker.pl
tweak.mos.pl
Setup the filename and exposure time.
Use to insert filter and grism and appropriate baffle.
Use to insert long slit or mos plate
Setup the spectroscopy ABBA parameters
Take the spectrosopy ABBA data
Use for offseting the telescope while guiding.
Use to change bias for imaging or spectroscopy.
Allows adjustments to the decker wheel position.
Allows adjustments to the mos wheel position.
At the iraf cl prompt:
imexam
xbox
Measure slit profiles and stellar centers (keys: a, x, g, i)
Use to align a mosplate (keys: q, f, g)
A. Long slit Alignment
1. Acquire target on Flamingos. If necessary, adjust telescope pointing with relative.offset.mmt.pl until
target is positioned at the center of the array.
2. Have the telescope operator acquire a guide star, and begin guiding.
3. Have the telescope operator adjust focus; the guide camera should be confocal with Flamingos and should
give a good starting focus. Take another image with Flamingos, to see if the focus still needs a tweak.
4. Measure the object's centroid with imexam.
5. Insert decker long-slit baffle using config.filter.grism.decker.wheels.pl.
Verify slit is straight along the chip (small dx for a large dy). Use imexam and j to fit a gaussian to a
cross-cut through the slit at two different y-values. You may need to epar jimexam, and modify the
fitted sigma, since this slit is very wide.
If necessary, straighten the decker slit using tweak.decker.pl.
6. Now insert slit using config.mos.wheel.pl.
Verify slit is straight; don't forget to reset jimexam if you modified any parameters earlier when
inserting the decker.
Measure x-location of slit.
7. Use guided.relative.offset.mmt.pl to move the star onto the slit. You may need to iterate with this step,
and peak up the flux from the object through the slit.
8. Once aligned, insert filter and grism combination with config.filter.grism.decker.wheels.pl.
9. Verify bias is set to 0.75 V for spectroscopy.
10.Configure filename and exposure time.
12/23
FLAMINGOS at the MMT
B. Mosplate Alignment
1. Load the mask design image and region file into buffer 3 of ds9. Flip and rotate until the image's WCS
matches that of a raw Flamingos frame. Turn on tiling, with a vertical orientation.
2. Acquire target on Flamingos and attempt to visually pick out the alignment targets (stars or galaxies). If
necessary, adjust telescope pointing with relative.offset.mmt.pl until the targets are within the central
region of the array. If targets are faint, may need to offset a small amount and work on a difference
image.
3. Have the telescope operator acquire a guide star and start guiding.
4. Have the telescope operator adjust focus on the guide camera, then check focus on Flamingos and tweak
if necessary.
5. Insert the decker mos baffle using config.filter.grism.decker.wheels.pl.
6. Verify the decker is straight (see the section on aligning a long slit); use tweak.decker.pl if necessary.
7. Measure the star centroids and write them to a stars file for xbox:
imexam logf=stars keep+
Type a on each star
8. Insert mosplate using config.mos.wheel.pl
9. Check the plate is straight on the array with by stretching the display to see the plate frames. If necessary,
use tweak.mos.pl.
10.Measure the box centers and write them to a box file for xbox: Measure the boxes in the same order as
you measured the stars.
imexam logf=box1 keep+
type e to generate a contour map
type g to get the graphics cursor
center the cursor on the box and type x
type i to return the image, and repeat this process for the other boxes.
If you cannot see the box well in the contour plot, consider starting over after setting the upper contour
limit threshold to ~5,000 ADU (epar eimexam).
10. epar xbox, and run it on the mask image; set the box and star file parameters to your imexam filenames,
then type go.
11.Type q to step through each of the boxes in the graphics window. If the box center is not clearly detected,
use the f key to force the center, and g to force the signal threshold.
12.After the last box it will tell you how much to rotate the mos wheel and offset the telescope.
Use guided.relative.offset.mmt.pl to offset in instrument coordinates.
Have the telescope operator increment the instrument position angle by the suggested rotational
motion; do not tweak the mos unless xbox is using the mos wheel's center of rotation for calculations.
13. Take another image. At this point you should have stars in boxes.
14.If you have rotated the mos wheel with respect to the detector, remeasure the boxes with imexam and
make a new box file.
15.Run xbox on the latest image, with no star file. After several iterations of offsetting and rotating the
telescope and taking images the mos plate should be aligned.
Note: if the alignment stars are faint, you may need to run xbox on images with some of the sky flux
subtracted. To do this take an image with no starts in boxes; scale this image by 0.8 (use imarith) and then
subtract the scaled image from the newest image; run xbox on the difference image.
13/23
FLAMINGOS at the MMT
C. Calibrations
There are two types of calibrations required for long slit and mos spectra: wavelength calibration and flat fields.
These measurements need to be made after the instrument is fully configured, and before you change the
configuration (do not move any wheels until you've taken these data!). If the telescope stays focused and
collimated for several hours, then it's probably good to take flat field images at the start and the end of acquiring
an object's spectrum; wavelength calibrations can be taken at the start or end of the observation, but only need to
be measured once per object.
To take calibrations, guiding must be suspended while the lamps are on.
The observer selects what lamps are on using an interface box on the table next to packrat.
After setting the filename and exposure time, use more.single.images.pl to take 3 to 5 images.
When you have finished with the calibrations and are back to guiding on the sky, take a junk image with
the same exposure time that you want to use on your object. You should do this because the first image
taken in low-flux conditions after being in high-flux conditions has lower counts than normal. For
example, the calibrations might be taken at 30 seconds and the object taken at 300 seconds, so you need to
take a junk image at 300 seconds before taking any real data.
D. Taking spectra
There are two common techniques for taking spectra: walking up the slit, and nodding the telescope back and
forth between two beams A and B in a ABBA pattern.
Walking up the slit:
Use singleimage.pl to take an image at every location.
Use guided.relative.offset.mmt.pl to move the star up and down the slit while continuing to guide.
Nodding between A & B beams:
Use config.mos.dither.mmt.pl to set up the distance in arcseconds between beams and the number of
times to repeat the ABBA pattern. If you want, you can nudge the entire ABBA pattern up and down
the slit by a small amount (in arcseconds; typically the size of one or two pixels). I think this nudging
works, but we'll have to test it.
Use dither.mos.mmt.pl to execute the actual dither pattern.
14/23
FLAMINGOS at the MMT
V. Shutting Down at the End of the Night
At the end of a long and productive (we hope!) night of observing, there is a small sequence of things that
need to be done. In order, they are:
1. Move the wheels to their resting positions - Using the scripts config.mos.wheel.pl and
config.filter.grism.decker.wheels.pl send the MOS wheel to imaging, the decker wheel to
imaging, the filter wheel to J, and the grism wheel to true_dark.
2. Take any necessary dark frames - Now that the grism is in the dark position, you will be able to take dark
frames. We recommend 10-20 darks per exposure time. Use the set.exposuretime.pl,
set.filename.pl, and the more.singleimages.pl scripts to complete this task.
3. Fill the MOS Dewar (as long as no one is changing MOS PLATES) - Use the same procedure as you used at
the beginning of the night. If someone is changing Mos plates, turn on the heater; note you should not take
darks while the heater is on.
4. Begin ftping data to packrat if it has not already been copying in the background as you took data, and write
the transferred data to tape.
15/23
FLAMINGOS at the MMT
VI.Troubleshooting
1) Problem: The image looks funny. You can see all 32 amplifiers, and the signal level is ~58,000 ADU.
Solution: This is a hardware problem related to electrical noise causing an early readout of the detector. In
imaging mode, MCE4 reads the array once, and then lets it integrate before reading it again. The final image
written to disk is the difference of these two images. This problem occurs when MCE4 spits out the image
before making the second read and difference. There is nothing you can do to resolve the problem. Typically,
we get bad reads for about 2-5% of the images taken. If you are getting a much higher failure rate you should
call for help You should be cautious with the image immediately following a bad read frame, because the ADU
level in the image is frequently lower than it should be.
2) Problem: Excess Background
Possible solutions:
a) Image a very bright star (V ~ 2) at Ks-band, with the telescope way out of focus, say 2000 units lower.
You should see a donut with a central obscuration and spider vanes. If it's not circular, then you could have
something obscuring the beam---e.g., the dome, the mirror covers, or a mispositioned filter, lyot stop, or grism
wheel.
b) Check that the ion gauge on the Granville-Phillips pressure monitor is off. When left on it casts a
large amount of warm illumination on the lower right hand corner of the array.
c) Check that the Mos dewar temperature is lower than 200 K. If the temperature is not between 80 – 85
K, did you forget to fill the dewar with LN2? What about the camera dewar?
3) Various Problems related to image readout, wheel motion and iocomm communication.
The three daemons started by initflam.pl ( temperature, motor, and MCE4) work by issuing commands to
particular hardware addresses on a networked device called the iocomm. This device is like a multiplexer. We
have three devices (the temperature monitor, the motor controller, and the array controller, MCE4) which accept
commands via serial ports. The iocomm has one serial port connection for each device. Commands from the
software daemons running on flamingos1b are received by the iocomm via an ethernet connection, and then
passed to correct device.
Troubleshooting several types of problems involves deciding if the problem is intrinsic to the device, or to
the communication via the iocomm itself.
a) Problem: The image has not read out. The exposure time counter never appears.
This is our most common failure mode. Sometimes the array controller crashes before the image
acquisition script issues the START command to MCE4. For example, a successfully started image
acquistion should show:
/usr/local/uf/bin/ufdc -host flamingos1b -port 52008 -acq "start timeout 9 -cnt 1 -lut /usr/
local/flamingos/flamingos.headers.lut/Flamingos.lut -fits
16/23
FLAMINGOS at the MMT
/usr/local/flamingos/flamingos.hea
ders.lut/Flamingos.fitsheader -file /data0/mmtguest/Test/test -index 2"
If it hangs here for more than ~6 seconds, type ufdc -q status in
another flmn-2m-1b window
ufdc> greeting: UFGemMCE4Agent -- accepted client: ufdc@flmn-2m-1b@2002:
350:03:40:49.170980
2002:350:03:40:49.170980
2002:350:03:40:50.440745ufdc@flmn-2m-1b
START
GATIR *Flamingos Beta* 2.00_f.07 >>
>>>>>.....TAKING AN IMAGE OR APPLYING LUT.....
(Exposure time + number of reads = 3 + 1)
Have slept 3 seconds out of an exposure time of 4 seconds
If you do not see the START command and the exposure time counter above, then MCE4 has crashed.
The statement in the output above that saying to type ufdc -q status is a red herring, doing so will
not change anything.
Solution: Reboot MCE4 and reinitialize it with initflam.pl. To reboot MCE4 telnet to baytech from
flamingos1b with userid mce4pow and password 16Mb,img. Type reboot 1, and wait for the prompt
to return. Then type logout. Example output from this procedure follows:
mmtguest@flamingos1b{2001}telnet baytech
Trying 140.252.53.86...
Connected to baytech.
Escape character is '^]'.
RPC-3 Telnet Host
Revision F 4.20a, (C) 1999
Bay Technical Associates
Unit ID: flamingos1b
Enter username>mce4pow
Enter password>16Mb,img
Option(s) installed:
True RMS Current
Internal Temperature
True RMS current:
Maximum Detected:
1.6 Amps
1.7 Amps
Internal Temperature: 18.5 C
Circuit Breaker: On
Selection
Number
1
Outlet
Name
mce4
Outlet
Number
4
Power
Status
On
Type "Help" for a list of commands
RPC-3>reboot 1
17/23
FLAMINGOS at the MMT
(Now it counts down for 10 seconds before applying the power).
..RPC-3>logout
Now run initflam.pl at the flamingos1b prompt. You do not need to close any of the daemons to rerun
initflam.pl for this problem. At the start initflam.pl will complain that the motor and mce4 daemons are
not up and listening, and ask if you want to continue. You do want to continue, as the daemons were
working properly before the crash of MCE4. MCE4 must be reinitialized, in order to set the proper
clocking of the array. You need to set the bias for imaging or for spectroscopy (enter i for imaging, or s
for spectroscopy when it prompts you). After it has successfully initialized the EDT frame grabber
(where it says do you see 10 lines of text between a line saying opening pdv unit 0 and a line
saying done), it will ask if you want to continue. You can type n at this point (typing y will just launch
another array temperature gui).
Next, you need to take two junk frames with short exposure time (e.g. 3 seconds). The first frame after
repowering and initializing MCE4 is not good, and taking a second frame makes sure that it looks
normal.
b) Problem: The image acquition counts past the exposure time without reading out an image.
Solution: This problem rarely happens anymore. With our previous slower version of flamingos1b, it
would sometimes take an extra 5 to 10 seconds to finish reordering the pixels, i.e., applying the look up
table, or LUT, before it writes the image to disk. In the MCE4 daemon window you sould see string of
dots being printed out during the apply lut phase:
UFEdtDMA::applyLut>
.
.
.
.
.
.
.
.
.
.
You should watch for several seconds to see if this line is present, and that it is printing additional dots.
When it finishes, it should also print something similar to:
UFEdtDMA::takeAndStore> close mmap file:
/data0/mmtguest/Test/test.0002.fits
UFEdtDMA::> completed: 1 -- /data0/mmtguest/Test/test.0002.fits
ufgtake> acquired frames: 1
UFEdtDMA::takeAndStore> close mmap file:
/data0/mmtguest/Test/test.0002.fits
UFEdtDMA::> completed: 1 -- /data0/mmtguest/Test/test.0002.fits
ufgtake> acquired frames: 1
If this never appears, try typing ufstop.pl -stop -clean at a flamingos1b prompt. Then try
taking another image; if that fails see if ping iocomm returns with the message that the iocomm is
alive. If the iocomm is alive, try rebooting MCE4 and reinitializing. If that completely fails, call for help.
c) Problem: A large number of error messages are printed out either when trying to move a wheel (e.g.,
with config.filter.grism.decker.wheels.pl), or during the first part of an image
acquisition, where it sends commands to MCE4.
Solution: It's possible that the iocomm has crashed, or is very confused. Try ping iocomm from
flamingos1b; if there is no response, it needs rebooting. Even if there is a response, it may be advisable to
18/23
FLAMINGOS at the MMT
reboot it. To do this telnet baytech, userid iocompow (note there's only one m in this userid)
password 16Mb,img. At the prompt type reboot 1, and then type logout when the prompt returns
(e.g., see the example output in 3a, above). Now you must close all three daemons (Temperature, Motor,
and MCE4) and the record_temperatures window and run initflam.pl.
4) Problems when running config.filter.grism.decker.wheels.pl or config.mos.wheel.pl. The script ends by
saying that the time for the wheel's motion to complete has expired.
The default algorithm for motion of the wheels is that they first go to the home position, tell the controller to
zero the position, and then move to the demanded position. We refer to this as a home-type of limit, or limit
switch. We usually run the Mos wheel in an alternative mode refered to as a home-type of near-home. In this
mode the wheel moves from the present position back to somewhere close to home, and then to the demanded
position.
There are two modes of failure for each wheel.
(1) The limit switch fails to engage. If the wheel operates with a limit-switch home type, then the
wheel can spin endlessly, and the perl script will just give up after some time limit. If you can stop
the wheel and determine the location of the mechanism, it is possible to recover from such a failure
and then use the near-home motion algorithm for the wheel.
(2) The wheel binds, and a grinding noise is audible if you stand next to the dewar. If this happens
there usually is no quick recovery after you have stopped the motor.
Solutions:
A) First, you must stop the wheel that is either spinngin endlessly, or is jammed.
1. Type ctrl-Z, type jobs, kill -9 %<jobnumber> if the perl script has not yet finished
and you already know that there is a problem.
2. Type ufmotor -host flamingos1b -port 52004
a) At the motor prompt, type <motor_name>@, where <motor_name> is one of letters a,
b, c, d, or e, where motor a = decker, b = mos, c = filter, d = lyot, and e = grism. This should
do a soft-stop of the motor.
b) Type exit to quit ufmotor.
3. Type turn.off.motor.hold.current.pl (or, alternatively, you can do this through the
engineering pulldown on ufstatus_gui).
If this does not stop the motion of the wheel (e.g., you can hear it spinning, or grinding), the last
recourse is to turn off the motor controller itself. Note: any wheels that use near-home type and
are not at home will be lost when the motor controller is powered up again. You should call for
assistance if this happens. To do cycle the power on the controller, telnet baytech as
motorpow, password 16Mb,img, and then reboot 1, and logout to exit.
B) If the failure was of the limit switch, you need to recenter the mechanism in question, and
redetermine the home point. The best way to do this is to image a very bright star with the telescope out
of focus by about 3000 units. The wheel probably is not well centered, so use one of the tweak scripts
to adjust it. Then step the wheel by discrete positions, and measure the background. With some help
you should be able to determine where you are, and use the ufmotor command to rezero everything.
19/23
FLAMINGOS at the MMT
VII.Contacts
Nick Raines, University of Florida, Flamingos support scientist
office 352-392-2052, ext. 244
home: 352-381-9069
[email protected]
Richard Elston, University of Florida, Flamingos PI
office: 352-392-2052
[email protected]
20/23
FLAMINGOS at the MMT
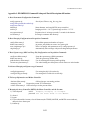
Appendix 1: FLAMINGOS Command Listing and Partial Description of Function
A. Basic Instrument Configuration Commands
config.exposure.pl
config.filter.grism.decker.wheels.pl
config.mos.wheel.pl
initflam.pl
set.bias.pl
set.exposuretime.pl
set.filename.pl
Sets object, filebase, orig_dir, exp_time.
Starts daemons, and setup MCE4 (array controller).
Imaging use bias = 1.0 V; Spectroscopy use bias = 0.75 V.
Exposure time is in integer seconds; 3 seconds is the shortest.
Set image's rootname and directory.
B. Basic Imaging Configuration and Acquistion Commands
config.dither.mmt.pl
dither.source.mmt.pl
more.singleimages.pl #
singleimage.pl
Select dither pattern and number of repeats.
At present, only dithers on source in a square grid.
Takes # of images with parameters set by config.exposure.pl.
Automatically take an image with present integration parameters.
C. Basic Spectroscopy (MOS and Long Slit) Configuration and Acquisition Commands
config.mos.dither.mmt.pl
dither.mos.mmt.pl
guided.relative.offset.mmt.pl
set.new.mos.plate.names.pl
Setup the spectroscopy ABBA parameters.
Take the spectrosopy ABBA data.
Use for offseting the telescope while guiding.
Use when loading new Mos plates so their names are in the header.
D. Advanced Imaging and Spectroscopy Commands
config.chippa.mmt.pl
config.slit.chip.pa.mmt.pl
For setting the chip's PA on the sky.
For setting the PA of the slit wrt the chip.
E. Telescope Information and Motion Controller
absolute.offset.mmt.pl
Offset telescope wrt catalog position.
mmtops.pl -info
Request the present TCS information.
relative.offset.mmt.pl Offset telescope wrt the present offsets.
F. Reseting the Array Controller (MCE4), the Motor Controller, and the Iocomm
1). Telnet baytech
userid:
mce4pow, motorpow, or iocompow
password: see the cheat sheet in the drawer.
2). reboot 1
3). logout
4). If you rebooted the iocomm, close all daemons (the TEMPS, MOTOR, and MCE4 xterm windows),
otherwise leave them open.
5). initflam.pl
21/23
FLAMINGOS at the MMT
G. Data Taping
1) Packrat's dds4 tape drive is /dev/rmt/0cn. Here are some common taping commands:
flamingos
flamingos
flamingos
flamingos
flamingos
packrat
packrat
packrat
packrat
packrat
28>
29>
30>
31>
32>
mt -f /dev/rmt/0cn status
mt -f /dev/rmt/0cn fsf #
mt -f /dev/rmt/0cn rewind
mt -f /dev/rmt/0cn offline
tar -cvf /dev/rmt/0cn *.fits
H. Data Transfer
To use a tape device on either packrat you must transfer it from flamingos1b first. One option is to ftp the data
from Flamingos to packrat. A better option is to run on packrat the program autocopy to copy each image
from Flamingos to packrat as you take data.
1. Transfer using ftp:
ftp flamingos1b
Set binary mode, turn off the prompt, and grab all fits files: bin; prompt; mget *fits
2. Transfer using autocopy:
At start of night make a data directory on flamingos and packrat with the same name, e.g.
mmtguest@flamingos1b{3} mkdir 2003feb12
flamingos packrat 33> mkdir 2003feb12
Make the flamingos data directory world writable, e.g.
mmtguest@flamingos1b{3} chmod a+w 2003feb12
From the flamingos home directory on packrat, run autocopy. For example:
flamingos packrat 34> cd; autocopy
At the prompt type the data directory name, e.g. 2003feb12. After you have taken a few
frames, you should see the data being transferred to packrat.
I. Instrument Engineering Commands
center.of.rotation.pl
Determine the center of rotation from 3 points.
config.location.pl
Copies the correct Flamingos.fitsheader for a telescope.
engineering.config.home.type.wheels.pl Sets Limit Switch or Near Home wheel motion.
engineering.config.output.pl
Various settings (unlock file, talk to TCS, png image, etc.).
engineering.ct10.singleimage.pl
Output the first read of a CDS read.
engineering.ct12.singleimage.pl
Output the first set in a multiple read.
engineering.set.lyot.wheel.pl
Moves Lyot wheel for each telescope.
engineering.soft.stop.mos.wheel.pl
Sends and escape character to the Mos wheel controller.
engineering.tweak.filter.wheel.pl
Allows adjustments to the filter wheel position.
engineering.tweak.grism.wheel.pl
Allows adjustments to the grism wheel position.
engineering.tweak.lyot.wheel.pl
Allows adjustments to the lyot wheel position.
readFITheader.pl -f /usr/local/flamingos.headers.lut/Flamingos.fitsheader
Prints out the present fitsheader template file for the next image.
turn.off.motor.hold.current.pl
Sends command to filter, lyot and grism wheel controllers.
tweak.decker.pl
Allows adjustments to the decker wheel position.
22/23
FLAMINGOS at the MMT
tweak.mos.pl
ufidle.pl
ufstop.pl -clean
-stop
Allows adjustments to the mos wheel position.
Sets MCE4 in continuous resetting mode on the array.
Sets various semaphores in /var/tmp/
Stops the present integration.
23/23