Download Epson P-1000 - Photo Viewer - Digital AV Player Specifications
Transcript
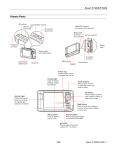
Epson P-2000 P-2000 Parts Audio/Video out connector CompactFlash® card slot SD card slot Eject button Headphone connector Power switch AC adapter connector USB connector Speaker USB connector cover Battery cover Reset button LCD Print button Displays the Print menu. Charge light Turns green when the battery is being charged. Access light Flashes orange when you turn on the P-2000 or access data. Menu button Displays the Pop-up menu. 4-way ring Press up, down, left, or right to select a photo or an option in a menu. Activity light Flashes blue during power on, printing, and certain other operations. OK button Selects a highlighted option, opens the selected folder or photo, and zooms into an image. Display button Displays information, instructions, or messages. Cancel button Cancels the current operation and returns to the previous screen. Home button Returns to the Home screen. 11/04 Epson P-2000 - 1 Epson P-2000 Interface Specifications USB connector One USB 2.0 (Mass Storage Class) interface General CPU TMS320DM270 A/V Out connector Mini pin jack (3.5 mm) LCD 3.8 inches, Epson VGA TFT LCD; 640 × 480 pixels; 262,144 colors; 212 ppi Headphone Out connector M3 stereo mini pin jack (3.5 mm) Memory 64MB SDRAM; 4MB flash ROM CF Card slot HDD 2.5 inch HDD, 40GB, FAT 32 One slot (Type I/Type II, 3.3V) for CompactFlash memory card and Microdrive Dimensions (without projections) Height 3.3 inches (84 mm) SD Card slot Width 5.8 inches (147 mm) One slot for SD memory card and MultiMediaCard Depth 1.2 inches (31.4 mm) Battery Weight Approx. 0.9 lb (415 g), including battery Type Rechargeable Lithium-ion battery Temperature Operating (or charging): 41 to 95 °F (5 to 35 °C) Non-operating: –4 to 140 °F (–20 to 60 °C) Model EU-97 Size (H × W × D) 0.88 × 0.80 × 2.78 inches (22.45 × 20.4 × 71 mm) Ratings 3.7 V, 2300 mAH Temperature Storing: –4 to 104 °F (–20 to 60 °C) Humidity (without condensation) Operating: 30 to 80% Non-operating: 10 to 80% Memory card CompactFlash memory card (Type I/ Type II, including Microdrive™ 3.3V ); SD™ memory card, MultiMediaCard™ Note: A commercially available CF adapter is needed to use other memory cards. Power sources Lithium-ion battery (EU-97) AC adapter (A351H) Electrical Input voltage DC 5.0 V Rated current Maximum 2.3 A Power consumption Keep the battery in a cool place when storing for a long period. AC Adapter Model A351H Input AC 100 to 240 V, 50 to 60 Hz, 0.3 to 0.1 A Output DC 5.0 V, 2.3 A Power consumption Maximum 18 W Optional Battery 4 W (with the battery) 9 W (when using the AC adapter) 2 - Epson P-2000 If you need a replacement battery, order the Lithium ion battery (EU-97), model number B32B818252, from Epson. Contact your dealer or call Epson at (800) 873-7766 or visit the Epson StoreSM at www.epsonstore.com (U.S. sales only). In Canada, please call (800) 463-7766 for dealer referral. 11/04 Epson P-2000 Installing/Replacing the Battery 4. Push the catch down. The battery pops out. Follow these steps to install or replace the Lithium ion battery: 1. Turn the P-2000 upside down and slide the battery cover to the left to open it. Catch 5. Pull out the battery. Then close the battery cover. 2. If you need to remove the battery, follow the instructions below, then return here to step 3. 3. Insert the battery into the compartment as shown. Make sure the gold contacts on the battery go in first. Charging the Battery After installing the battery, you need to charge it using the AC adapter. It takes about 3 hours to fully charge the battery when the P-2000 is off. It takes longer when the P-2000 is on. The Charge light is green while the battery is being charged. When the battery is fully charged, the light turns off. To charge the battery, connect the AC adapter as shown below. Connect the other end to the power cord, and plug it into an electrical outlet. BATT. 4. Close the battery cover and slide it to the right until it clicks. Caution: Do not connect the AC adapter when the battery is not installed; this can damage the P-2000. Removing the Battery If you need to replace the battery or plan to store the P-2000 for an extended period of time, follow these steps to remove the battery: The battery status is displayed in the top right corner of the LCD screen when the P-2000 is on. : Battery is fully charged. 1. Make sure the P-2000 is turned off. : Battery power is about half full. 2. Remove the AC adapter if it is connected to the P-2000. : Battery power is low. : Battery power is running out. The P-2000 will shut down automatically. Charge the battery using the AC adapter. : Battery is charging. Caution: Never remove the battery while the P-2000 is turned on. Doing so may cause files to be lost or damaged. 3. Open the battery cover. Note: The P-2000 stops charging if the battery becomes hot when charging while it is on. It will start charging again when it cools down. 11/04 Epson P-2000 - 3 Epson P-2000 Conserving Battery Power To conserve battery power and protect the LCD screen, the P-2000 has two power-saving features. If no button has been pressed and there has been no activity for 10 minutes, the backlight on the LCD screen is turned off. After 15 minutes, the power is turned off. Using the Home Screen Whenever you turn on the P-2000, the Home screen appears. All operations can be started from this screen. Battery icon If the screen goes dark because the backlight is turned off, press any button on the P-2000 to resume operation. If the P-2000 has been powered off, you need to turn it back on with the power switch. Home Saved Data Albums Memory Card Album shortcuts Turning the P-2000 On and Off To turn on the power, slide the power switch down as shown below, then release it. The blue activity light flashes and the Home screen appears. Latest Data The following table summarizes the Home Screen functions. Access light Activity light When you’re ready to turn off the P-2000, make sure the Access light is off. Then slide the power switch down and hold it down for a few seconds until the Access light flashes and the P-2000 turns off. Locking the Buttons Icon Function Battery Indicates the charge remaining in the battery. Saved Data Lets you select folders that include files saved on the P-2000. Albums Lets you select albums that you have created for your images, videos, or audio files. Memory Card Lets you display or copy files from a memory card. Shortcut icons Let you go right to a favorite album. Latest Data Lets you access the most recent files saved on the P-2000. Settings Lets you change the P-2000’s settings. You can return to the Home screen at any time by pressing the Home button. You can lock the buttons on the P-2000. This allows you to place it in a purse or backpack and use it with headphones without accidentally pressing the buttons. To lock the buttons, slide the power switch to Hold. To unlock the buttons, slide the power switch back to the middle position. 4 - Epson P-2000 Settings 11/04 Epson P-2000 To remove a card from the C/F Card slot, first make sure the Access light is off. Then press the eject button and pull out the card. Using Memory Cards The P-2000 has two memory card slots, one for CompactFlash cards, and one for Secure Digital cards. It supports the following types of memory cards: If the button is not sticking out, press it once to pop it out, then press it again to eject the card. ❏ CompactFlash Type I and Type II ❏ Microdrive™ (3.3 V) ❏ SD (Secure Digital) ❏ MultiMedia card (MMC V 2.1 or later), up to 512MB If you have a CompactFlash adapter, you can also use the following types of memory cards: ❏ Memory Stick® ❏ SmartMedia™ (3.3 V only) ❏ xD-Picture card™ Note: If you are using a CompactFlash adapter, remove the adapter from the P-2000; do not remove only the memory card. Caution: Make sure you follow all instructions included with your memory card. Using the Secure Digital Card Slot Never remove a memory card while the Access light is flashing. Doing so may cause files to be lost or damaged. You can use Secure Digital or MultiMedia cards in the SD Card slot. Do not put labels or stickers on memory cards. The sticker may peel off, preventing the card from being ejected and damaging the P-2000. Insert the memory card into the slot with the back of the card facing the LCD. Then push the memory card all the way into the slot. Avoid using or storing cards in direct sunlight, or in places that are extremely hot, humid, or dusty. Using the CompactFlash Card Slot You can use Type I and Type II CompactFlash cards or Microdrive cards in the C/F Card slot. Insert the memory card into the slot with the back of the card facing the LCD. Then push the memory card all the way into the slot. Back side Caution: Make sure you insert memory cards in the correct orientation. Otherwise, the card and P-2000 may be damaged. Back side Caution: Make sure you insert memory cards in the correct orientation. Otherwise, the card and P-2000 may be damaged. To remove a card from the SD Card slot, first make sure the Access light is off. Then press the top of the card to make it pop out. Then pull it out of the slot. If you are using a CompactFlash adapter, put the card into the adapter and insert the adapter into the slot. 11/04 Epson P-2000 - 5 Epson P-2000 Copying Files from a Memory Card Copying your files After you insert a memory card, you can browse the files and decide what you want to do with them, or simply copy all the files on the card to the P-2000. 1. Insert the memory card. Note: When the battery is low, copying may not be completed. Use the AC adapter if this happens. 2. Select Memory Card in the Home screen and press the OK button. 3. If necessary, select the memory card you want to access. You see the following menu: Supported Image Formats Supported Files Extension Details JPEG .jpg .jpeg Minimum size: 160 × 120 pixels Maximum size: 8.9 megapixels Maximum image aspect ratio: 8:1 Progressive JPEG files are not supported. RAW .nef .crw .erf .cr2 JPEG data stored in the header of RAW files is displayed. Home Saved DataCopy Data from Albums Memory Card Memory Card Create Album After Copying Data Browse the Memory Card Latest Data Settings 4. Select what you want to do by pressing up or down on the 4-way ring. Then press the OK button. ❏ If you select Copy Data from Memory Card, copying starts and the following screen appears: The P-2000 supports images in RAW format that you have taken with the following digital SLR cameras: Home ❏ Epson R-D1 ❏ Nikon® D100, D1H, D2H, D1X, and D70 Saved Data ® Albums Memory Card Copying data... ❏ Canon EOS-D30, EOS-D60, EOS-10D, Kiss Digital, and EOS-1D Mark II Cancel RAW files do not support slide shows, zooming, rotation, or direct printing from the P-2000. Latest Data Settings The files are copied to a folder that is automatically created on the P-2000. The folder is named according to the date, for example 20041225.001. Folders are numbered in the order they are copied. ❏ If you select Create Album After Copying Data, you can select an album or create a new one. (See the P-2000 User’s Guide for instructions.) ❏ If you select Browse the Memory Card, you see thumbnail images of the files on the card. 6 - Epson P-2000 11/04 Epson P-2000 Viewing and Playing Images, Audio, and Video Screen icon descriptions After you have copied files from a memory card, you can view or play them in various ways on your P-2000 or on a TV or projector. PC_DATA folder This is one of the default albums, which you use for copying files from your computer. Battery status Indicates the amount of battery power remaining. Folders containing audio Only folders that do not include image or video files display this icon. Album shortcuts Up to 3 album shortcuts can be created for quick album access. RAW files Appears on RAW image files. Images selected for printing The number next to the icon indicates how many photos have been selected for printing. Screen Icons The following illustrations identify the icons that appear on the screen: Battery status Albums PC_DATA folder PC_DATA Scenery Flower Travel Video files Appears on video files. Album1 Travel2 New Album3 Files with P.I.F. frames P.I.F. icons are displayed only in Saved Data. Album set as a shortcut Unsupported data files Photo Favorite Album4 Unsupported image files A folder that includes audio Video File with P.I.F. frame* Image selected for printing RAW file You can set whether unsupported files are displayed or not. The default setting is not to display them. Folders copied from a computer When you select a folder in Saved Data, all files including those in subfolders are displayed. Subfolders are not displayed. Audio files Indicates that the file includes sound. Locked files Indicates that the photo has been locked. Albums / XXXXX Locked file Audio file Note: Files whose names contain characters other than alphanumeric are not displayed. DSC00001.erf DSC00002.mpg DSC00003.tif DSC00004.JPG XXXXX05.mp3 DSC00006.JPG DSC00007.JPG DSC00007.txt When you select an album, files and subfolders included in the selected folder are displayed. Subfolders are displayed with the icon. To display information or instructions, press the Display button. DSC00008 Folder copied from a computer Unsupported image file Unsupported data file * P.I.F. is the abbreviation for Print Image Framer,® which lets you add frames to your images. Some Epson digital cameras support this feature. 11/04 Epson P-2000 - 7 Epson P-2000 Displaying Images You can display all images in Saved Data or Albums as thumbnails. You can also display an image in full-screen format. 3. Use the 4-way ring to select the image you want to view, then press the OK button. The selected image is enlarged to fill the screen: 1. Select Saved Data or Albums in the Home screen and press the OK button. Home Saved Data Albums Memory Card Zooming an image Latest Data Settings ❏ To zoom in on an image displayed full screen, press the OK button. Continue pressing it to zoom in even further. Folders or albums that include data such as images, videos, or audio appear. ❏ To zoom out, press the Cancel button. ❏ To move around a zoomed image, use the 4-way ring. Note: In the Saved Data screen, folders are displayed by memory card. You can change the setting to display folders by date. The P-2000 supports video files in resolutions ranging from 160 × 112 pixels to 640 × 480 pixels, with file sizes up to 2GB. The P-2000 supports audio files up to 100MB. Saved Data 20040829\002 20040827\001 Playing Audio and Videos 20040820\001 20040818\003 20040815\001 20040813\001 20040810\002 20040805\001 20040801\005 20040720\002 20040715\003 20040630\001 WMV, MPEG1, MPEG2, and DVD-Video are not supported. However, you may be able to convert files to supported formats using programs such as QuickTime Pro. Supported video formats 2. Select the folder or album which includes images you want to view by using the 4-way ring, then press the OK button. To move to the next screen, press down on the 4-way ring and hold. File extension Video codec Audio codec Max bit rate .avi MPEG4 AAC, MP3, ALaw, µLaw PCM, ADPCM 1.5 Mbps (at 24 fps) Motion JPEG ALaw µLaw PCM 3 Mbps MPEG4 AAC 1.5 Mbps (at 24 fps) Motion JPEG ALaw µLaw PCM 3 Mbps .mp4 MPEG4 AAC 1.5 Mbps (at 24 fps) .asf MPEG4 ADPCM 1.5 Mbps (at 24 fps) Thumbnails of the images and other data are displayed: Saved Data / 2004.08.26 .mov DSC00331.JPG DSC00330.mpg DSC00329.JPG DSC00327.JPG DSC00326.JPG DSC00325.JPG DSC00323.JPG DSC00322.JPG DSC00321.JPG 8 - Epson P-2000 DSC00328.JPG DSC00324.JPG 11/04 Epson P-2000 Supported audio formats Viewing Files on a TV File extension Audio codec Detail .m4a .aac AAC (MPEG4) Maximum bit rate: 320 kbps (48 kHz, 16 bit Stereo) .mp3 MP3 Maximum bit rate: 320 kbps (48 kHz, 16 bit Stereo) To start playing an audio or video file, just select it and press the OK button. Note the following when playing video and audio: ❏ All videos are played with the LCD resolution (640 × 480 pixels). You can connect the P-2000 to a TV or AV projector and view your images, videos, and slide shows. You’ll need a camcorder-to-TV/VCR audio/video cable (A/V cable with 3.5 mm mini-plug to 3 RCA phono plugs). You can purchase the cable at an electronics store. 1. Connect the three RCA plugs to the video and audio IN jacks on your TV. 2. Connect the mini-plug on the other end to the A/V Out connector on the side of the P-2000. The LCD screen turns off. ❏ While the P-2000 is playing audio, it turns off the LCD to conserve battery power. The LCD comes back on when you press any button. ❏ You can select audio files to use as slide show background music using the pop-up menu. ❏ You can listen to audio using headphones. Simply insert the headphone cable into the headphone connector on the side of the P-2000. The following table describes how the buttons work while playing audio and video files: Button Audio function Video function OK Pause (press OK again to restart). Cancel Stop the audio or video and return to the previous screen. Note: Some TVs may crop your images on the top and bottom. Up Raise the volume. Down Lower the volume. You can now use all of the P-2000 controls to play slide shows, photos, and videos on your TV. Left Play the previous audio file. Press and hold to rewind. Rewind. Right Play the next audio file. Press and hold to fast forward. Fast forward. 3. Set the TV display to video input from the P-2000. 11/04 Epson P-2000 - 9 Epson P-2000 Copying Files to and From Your Computer 3. Select the EPSON_PV drive on your computer. In Windows, you may have to use My Computer to select the drive. From your computer, you’ll see an Albums folder and a Cards folder (corresponding to Saved Data on the Home screen). Do not change the names of these folders or any of their subfolders. You can connect the P-2000 to your computer using the USB cable that came in the box. Your computer recognizes the P-2000 as an external hard disk drive, and you can easily copy files back and forth. Note: You cannot copy files from a memory card in the P-2000 directly to your computer; you must first copy them to the P-2000 and then to the computer. You should use the AC adapter when you connect the P-2000 to your computer. To locate files in the Cards folder, you’ll need to open a series of subfolders. 4. Copy files to the PC_DATA folder (within the Albums folder) only. If you copy files to any other folder, the P-2000 will not recognize the files. Albums Note: If your computer uses Windows® 98SE, you need to install driver software before you connect the P-2000. See the P-2000 Basics guide for instructions. PC_DATA folder 1. Connect the AC adapter to the P-2000 and plug it in. Then turn on the P-2000 and your computer. Make sure the Home screen is displayed. PC_DATA Scenery Flower Travel Album1 Travel2 New Album3 Photo Favorite Album4 The PC_DATA folder is one of the default albums on the P-2000; you cannot rename or delete it or create an album thumbnail for it. Disconnecting the P-2000 From Your Windows Computer 2. Connect the USB cable to your computer. Then open the USB connector cover and connect the other end of the USB cable to the P-2000. 1. Click Unplug or Eject Hardware on the computer screen. 2. Turn off the P-2000 and remove the USB cable from your computer. Note: After copying files to a computer running Windows 98, you may see a blue screen when you remove the cable. To avoid this, turn the computer off before removing the cable. 3. Remove the USB cable from the P-2000. The PC peripheral mode icon is displayed briefly, then the LCD turns off. (You can turn it on by pressing any button.) Disconnecting the P-2000 From Your Macintosh® 1. Drag and drop the P-2000 icon to the trash. 2. Turn off the P-2000 and remove the USB cable from your Macintosh. 3. Remove the USB cable from the P-2000. 10 - Epson P-2000 11/04 Epson P-2000 4. Connect the other end of the cable to the EXT I/F connector on the printer. Direct Printing You can print your photos directly from the P-2000 to any of the following Epson printers without connecting a computer: ❏ Epson Stylus Photo R300 and R300M ❏ Epson Stylus Photo R320 ❏ Epson Stylus Photo RX600 ❏ PictureMate Note: Additional printers may be supported; check the Epson web site to get the latest information: http://support.epson.com. You can use the following sizes and types of paper: Paper Size Premium Glossy Photo Paper 4 × 6 in., 5 × 7 in., Letter, A4 Premium Semigloss Photo Paper Letter PictureMate™ Photo Paper 4 × 6 in. The EXT I/F connector may be in a different location on your printer. 5. Connect the AC adapter to the P-2000. 6. Turn on the printer and the P-2000. Note: Don’t worry if you see the message Camera is connected on the printer’s LCD panel. You will still be able to print from the P-2000. Printing Your Photos Note: PictureMate prints on 4 × 6-inch paper only. For details about paper, see your printer documentation. Connecting the P-2000 to a Printer Follow these steps to connect the P-2000 to your printer: 1. Make sure the P-2000 and the printer are turned off. 2. Open the USB connector cover: 1. Make sure the printer is connected and has paper and ink. Make sure the AC adapter is connected to the P-2000 before you print. 2. To print a single photo, select the image. If you want to print multiple images in a folder or album, just open the folder or album. 3. Press the PRINT button. You see the Print menu: Print Print This Image Print All Image Select Images to Print Number of Print Orders 2 3. Connect the small end of the USB cable to the P-2000. 11/04 Epson P-2000 - 11 Epson P-2000 4. Do one of the following: ❏ To print only the selected image, choose Print This Photo. ❏ To print all the images in the selected folder or album, select Print All Photos. ❏ To add images to be printed and select the number of copies, choose Select Photos to Print. You see this screen: Select Photos for print order Updating the Firmware and Printer Driver Epson will occasionally update the P-2000 firmware. You can download the latest version from Epson’s Support web site: http://support.epson.com. Instructions for updating the firmware in your P-2000 will be included with the download information. Resetting the P-2000 Total Sheets 08 3 DSC00331. JPG ON 2003.10.25 ON 640+480 If the P-2000 locks up, stops working, or you want to restore the default values, you can reset it. Press the Reset button with a thin object. Press OK for the Print Settings screen Select the images you want to print and the number of copies for each one. Reset button 5. Press the OK button. You see the Print Settings menu: Select Photos to Print Number of Prints 1 Print Date ON Paper 4×6 in. Prem. Glossy Layout Borderless Print Mode Best Photo Print P.I.F. Frames The P-2000 shuts off, resets its default values, and comes back on. Yes Press OK to start printing 6. Use the 4-way ring to choose the settings you want: Number of Prints Select the number of copies, up to 99, you want printed of the selected photo(s). Print Date Set whether to print the date the photo was taken (if the image includes date information) or the date the file was created. Paper Select the paper type and size that is loaded in the printer. Layout Choose Border or Borderless printing. If you selected all photos, choose the number per page. For Letter size, choose 3, 4, 9, or 20. Print Mode Select Photo or Best Photo. Print P.I.F. Frames Set whether to print the frame if the image includes P.I.F. data. Related Documentation CPD-18999 Epson P-2000 Basics CPD-18998 Epson P-2000 CD-ROM with electronic Epson P-2000 User’s Guide 7. Press the OK button when you are ready to start printing. During printing, the LCD is turned off. When you are finished printing, be sure to disconnect the USB cable. 12 - Epson P-2000 11/04


