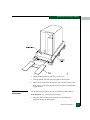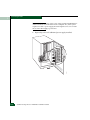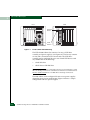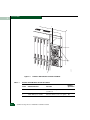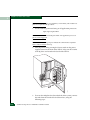
1
UltraNet™ Storage Director
eXtended
Release 4.0
Hardware Installation Guide
P/N 620-000256-020 REV A
Record of Revisions and Updates
Revision
Date
Description
620-000256-000
8/2005
Initial release of this manual under the
McDATA brand.
620-000256-010
4/2006
Updated safety information.
620-000256-020
7/2006
Updated to include LSM, miscellaneous
changes.
Copyright © 2005-2006 McDATA Corporation. All rights reserved.
Printed July 2006
First Edition
No part of this publication may be reproduced or distributed in any form or by any means, or stored in a
database or retrieval system, without the prior written consent of McDATA Corporation.
The information contained in this document is subject to change without notice. McDATA Corporation
assumes no responsibility for any errors that may appear.
All computer software programs, including but not limited to microcode, described in this document are
furnished under a license, and may be used or copied only in accordance with the terms of such license.
McDATA either owns or has the right to license the computer software programs described in this document.
McDATA Corporation retains all rights, title and interest in the computer software programs.
McDATA Corporation makes no warranties, expressed or implied, by operation of law or otherwise, relating
to this document, the products or the computer software programs described herein. McDATA
CORPORATION DISCLAIMS ALL IMPLIED WARRANTIES OF MERCHANTIBILITY AND FITNESS FOR
A PARTICULAR PURPOSE. In no event shall McDATA Corporation be liable for (a) incidental, indirect,
special, or consequential damages or (b) any damages whatsoever resulting from the loss of use, data or
profits, arising out of this document, even if advised of the possibility of such damages.
©2005 McDATA Corporation. All rights reserved. McDATA, the McDATA logo, McDATA UltraNet,
McDATA Eclipse, Fabricenter, HotCAT, Intrepid, Multi-Capable Storage Network Solutions, Networking the
World's Business Data, nScale, nView, OPENready, SANavigator, SANpilot, SANtegrity, SANvergence,
SecureConnect and Sphereon are trademarks or registered trademarks of McDATA Corporation. OEM and
Reseller logos are the property of such parties and are reprinted with limited use permission. All other
trademarks are the property of their respective companies. All specifications subject to change.
ii
UltraNet Storage Director Hardware Installation Guide
Contents
Regulatory and Safety Statements................................................. xiv
Chapter 1
Hardware Installation
Introduction .......................................................................................1-1
Unpacking and Inspecting the Hardware .....................................1-1
USDX Cabinet Placement .........................................................1-3
Preventing Damage From Electrostatic Discharge (ESD) ....1-4
Cables and Equipment .....................................................................1-6
McDATA-Supplied Cables and Equipment...........................1-7
Customer-Supplied Cables and Equipment ..........................1-8
Power Cord Requirements .......................................................1-8
Connecting the USDX ......................................................................1-9
Connecting the Cables ..............................................................1-9
Service Monitor SCSI Cabling................................................1-16
Hardware Monitor Board Cabling ........................................1-18
Cable Routing...........................................................................1-26
Powering-On the USDX..........................................................1-27
Chapter 2
Switches and Indicators
USD-X 9112 Cabinet Layout ............................................................2-1
USD-X 9106 Cabinet Layout............................................................2-3
Front of Cabinet.................................................................................2-5
Back of Cabinet..................................................................................2-7
Circuit Boards ....................................................................................2-8
Circuit Board Jumper Settings ......................................................2-28
Chapter 3
Maintenance Procedures
Circuit Card Removal and Installation Procedures .....................3-1
i
Contents
Hardware Monitor Board Removal Procedure .....................3-2
Hardware Monitor Board Installation Procedure.................3-3
UltraNet Service Monitor (USM) Removal and Installation
Procedures ..................................................................................3-5
ZSP Application Processor Removal and Installation
Procedures ................................................................................3-12
USM I/O Adapter (USMIO) Removal Procedure ..............3-23
USM I/O Adapter (USMIO) Installation Procedure ..........3-24
SBus I/O Adapter (ZSIO) Removal Procedure ...................3-26
SBus I/O Adapter (ZSIO) Installation Procedure...............3-29
ESCON (ZENx) Adapter Removal Procedure ....................3-30
ESCON (ZENx) Adapter Installation Procedure ................3-31
PowerPC Adapter (ZAP5) and PCI I/O Adapter Card
Removal Procedure .................................................................3-32
PowerPC Adapter (ZAP5) and PCI I/O Adapter Card
Installation Procedure .............................................................3-34
Master and Slave Switch Card Removal Procedure...........3-35
Master and Slave Switch Card Installation Procedure.......3-40
Midplane Fuse Removal Procedure .............................................3-40
Midplane Fuse Installation Procedure.........................................3-46
Fan Tray Replacement Procedure.................................................3-46
Power Supply Replacement Procedure .......................................3-48
Application Processor Hard Disk Replacement Procedure......3-50
Application Processor Hard Disk Replacement Procedure With
SCSI Adapter Kit Installation........................................................3-54
SCSI Adapter Kit Contents.....................................................3-54
Application Processor Hard Disk Replacement and SCSI
Adapter Kit Installation Procedure.......................................3-55
CD-RW Drive Replacement Procedure .......................................3-58
DAT Drive Replacement Procedure.............................................3-61
Application Processor Backup and Restore Procedures for a
DAT Drive.................................................................................3-64
Resetting a SPARC Application Processor ..................................3-65
Shut Down Solaris ...................................................................3-65
Reset a SPARC Application Processor..................................3-66
Reset the Service Monitor.......................................................3-66
Resetting an ESCON Adapter.......................................................3-67
Resetting a PowerPC Processor ....................................................3-67
Removing Power to a USD-X........................................................3-67
Serial Number Information ...........................................................3-69
Displaying a USD-X Serial Number .....................................3-69
Adjusting the USD-X Clock...........................................................3-69
Minor Clock Adjustments ......................................................3-69
ii
UltraNet™ Storage Director Hardware Installation Guide
Contents
Major Clock Adjustments ...................................................... 3-70
Chapter 4
Installing and Using WebView
Overview ........................................................................................... 4-1
Obtaining the UltraNet WebView Software ................................. 4-1
Installing WebView .......................................................................... 4-2
Loading the RPM File............................................................... 4-2
Installing the Software.............................................................. 4-2
Using the WebView Application.................................................... 4-3
Browser and System Requirements for WebView ....................... 4-3
Chapter 5
Using the CD-RW Utility for Backups and Restores
Mounting and Unmounting a CD ................................................. 5-1
Logging on to the Utilities .............................................................. 5-2
CD-RW Utility Main Menu............................................................. 5-2
Blank a CD-RW Media ............................................................. 5-3
List CD Contents ....................................................................... 5-4
Performing a Complete Backup.............................................. 5-5
Performing Restore Operations from a CD........................... 5-6
Chapter 6
Using the Tape Utility for Backups and Restores
Logging on to the Utilities .............................................................. 6-1
Viewing Operating System Statistics ..................................... 6-2
Performing Backups Using the Tape Utilities....................... 6-2
Performing Restore Operations from a Tape ........................ 6-4
Configuring Automatic Tape Backups................................... 6-6
Appendix A
HMB3 Board Default Settings
Port and Factory Default Settings ................................................ A-1
Port Defaults ................................................................................... A-2
Appendix B
Remote Support
Modem Setup ...................................................................................B-3
Microcom Modem Settings......................................................B-3
Multi-Tech Modem Settings ....................................................B-3
Remote Support Configurations ...................................................B-4
Appendix C
WTI and Penril Switch Support
iii
Contents
Cables and Adapters ...................................................................... C-1
Installing the Serial Switch Cables ............................................... C-2
Penril Cabling ........................................................................... C-3
WTI Serial Switch Cabling ...................................................... C-5
Penril™ Serial Switch Settings ...................................................... C-8
Daisy Chain Penril Configuration.......................................... C-9
Western Telematic Serial Switch Settings .................................... C-9
Connector Pinouts .................................................................. C-10
Configuration Parameters ..................................................... C-10
Port 01 Parameters.................................................................. C-11
Port 02 Parameters.................................................................. C-12
Ports 03 Through 12 and 15 Through 16 Parameters ........ C-12
Ports 13 and 14 Parameters ...................................................C-13
Daisy Chain Western Telematic Configuration ........................ C-13
Hardware Monitor Adapter Jumper Settings ........................... C-14
How To Access Jumper B1 on a 20501405 RS-232 Serial
Interface ................................................................................... C-15
How to Access Jumper B1 on a 20501384 RS-232 Serial
Interface ................................................................................... C-16
Appendix D
RJ-45 Cables and DB Adapters
RS-232 Cables with RJ-45 Connectors ..........................................D-1
DB Adapters ....................................................................................D-2
DB Adapters Available From McDATA ................................D-2
Required Adapters for USD-X Applications ........................D-2
Adapter Pinouts........................................................................D-3
Pinout Initials ............................................................................D-8
Appendix E
Fuse Voltage Information
F9112 Fuse Voltage Information ................................................... E-1
F9106 Fuse Voltage Information ................................................... E-2
iv
UltraNet™ Storage Director Hardware Installation Guide
Figures
F9112 Wrist Strap Connector ..................................................................................... 1-5
F9112 Cabinet Slot Numbering ................................................................................. 2-2
F9112 Cabinet Front Layout ...................................................................................... 2-3
F9106 Cabinet Slot Numbering ................................................................................. 2-4
F9106 Cabinet Front Layout ...................................................................................... 2-5
Switches and Indicators on Front of Cabinet .......................................................... 2-6
Switches on Back of Cabinet ...................................................................................... 2-7
PCI Board Indicators ................................................................................................ 2-25
F9112 Master and Slave Circuit Card Locations .................................................. 3-36
F9106 Master and Slave Circuit Card Locations .................................................. 3-37
F9112 Fuse Locations ................................................................................................ 3-41
F9106 Fuse Locations ................................................................................................ 3-43
USD-X to USD-X (Requires ATM Configured With TCP/IP) .............................. B-4
Penril Daisy Chain Configuration ............................................................................ C-9
v
Figures
vi
UltraNet™ Storage Director Hardware Installation Guide
Tables
McDATA Supplied Cables and Equipment.............................................................. 1-7
Customer-Supplied Cables and Equipment Specifications .................................... 1-8
Domestic Power Plug Options.................................................................................... 1-9
International Power Plug Options.............................................................................. 1-9
Fiber Type and Distance Restrictions ...................................................................... 1-12
Switches and Indicators on Front of Cabinet............................................................ 2-6
HMB3(Hardware Monitor Board) Indicators ......................................................... 2-10
HMA2 (Hardware Monitor Adapter) Indicators ................................................... 2-11
USM (UltraNet Service Monitor Front Panel) Indicators...................................... 2-12
USM Diagnostic Display Codes................................................................................ 2-13
USMIO (UltraNet Service Monitor I/O Adapter) Indicator and Ports............... 2-16
ZSP (SPARC Application Processor) Indicators..................................................... 2-17
ZSIO (SBus I/O) Indicators ....................................................................................... 2-18
ZEN4 (ESCON) Switches and Indicators ................................................................ 2-19
ZAP5 (PowerPC) Switches and Indicators.............................................................. 2-21
ZAP5 Power-Up Diagnostic Code Sequence .......................................................... 2-22
ZAP5 Console Serial Port Speed LED Codes.......................................................... 2-24
Fuse Numbers Corresponding to Slots on the F9112 Midplane .......................... 3-42
Fuse Numbers Corresponding to Slots on the F9106 Midplane .......................... 3-43
SCSI Adapter Kit Contents ........................................................................................ 3-54
WTI/Penril Cables and Adapters...............................................................................C-1
WTI DB-9 Pinout .........................................................................................................C-10
WTI Configuration......................................................................................................C-10
RS-232 Cable with RJ-45 Connectors: Lengths and Part Numbers....................... D-1
DB Adapter Part Numbers ......................................................................................... D-2
Required Adapters for USD-X Applications ........................................................... D-2
AA Adapter Pinouts .................................................................................................... D-4
DD Adapter Pinouts .................................................................................................... D-4
MM Adapter Pinouts................................................................................................... D-6
NN Adapter Pinouts ................................................................................................... D-7
vii
Tables
PP Adapter Pinouts ......................................................................................................D-7
Pinout Initials ................................................................................................................D-8
F9112 Fuse Voltage Information................................................................................. E-1
F9106 Fuse Voltage Information................................................................................. E-2
viii
UltraNet™ Storage Director Hardware Installation Guide
Preface
The intended audience for this document is anyone who is
responsible for installing, maintaining, or operating the UltraNet
Storage Director - eXtended system.
Organization of this
Manual
This guide is organized as follows:
Chapter 1, Hardware Installation provides the procedures to install
a USD-X.
Chapter 2, Switches and Indicators provides illustrations and
descriptions of the USD-X hardware switches and indicators.
Chapter 3, Maintenance Procedures provides removal, installation,
and replacement procedures for the hardware components.
Chapter 4, Installing and Using WebViewprovides information
related to the installation and usage of McDATA’s UltraNet
WebView monitoring application. UltraNet WebView is an
optional application.
Chapter 5, Using the CD-RW Utility for Backups and
Restoresprovides information on how to use the CD-RW utility to
perform backups and restores.
Chapter 6, Using the Tape Utility for Backups and Restoresprovides
information on how to use the tape utility to perform backups
and restores.
Appendix A, HMB3 Board Default Settingsprovides the port and
factory default settings for the Hardware Monitor Board.
Preface
ix
Preface
Appendix B, Remote Support provides the required settings for all
parameters used in modem operation. This appendix also
provides remote support configurations.
Appendix C, WTI and Penril Switch Supportprovides the cabling
procedures, settings, and configuration parameters for the Penril
and WTI switches. Additionally, it provides the Hardware
Monitor Adapter (HMA2) jumper settings.
Appendix D, RJ-45 Cables and DB Adapters provides information
on the RS-232 cables, RJ-45 connectors, and DB adapters available
through McDATA.
Appendix E, Fuse Voltage Information provides the fuse voltage
information for the F9106 and F9112 midplanes.
NOTE: The customer is responsible for ensuring conformance with power
and specifications provided in this guide, for ensuring adherence to federal,
state, and local building and electrical codes, for providing and installing
communication cables on other vendors’ equipment, and for providing a
storage area.
Document
Conventions
This manual uses the following conventions:
Italic text
Italicized text is used to emphasize information.
CTRL+C
Key combinations are indicated by keyboard key names and a plus sign,
all of which are in small caps sans serif text. In the example given to the
left, press and hold down the CTRL key and press C.
Courier text
Courier font is used for messages or program screen output that appears
on your display.
Bold Courier text
Bold Courier text is used for commands (also, referred to as syntax
statements) and system input that you type exactly as shown.
< > (angle brackets)
In commands, angle brackets indicate that the word contained within must
be substituted with an actual value (do not type the angle brackets). In the
following example, replace <filename> with the actual name of the file:
check_release <filename>
[ ] (square brackets)
In commands, square brackets are used to indicate that the parameter
contained within is optional. For example, in the following statement, the
<module> parameter is optional:
logcf get [<module>]
x
UltraNet™ Storage Director Hardware Installation Guide
Preface
| (vertical bar)
In commands, a vertical bar is used between items in a list to indicate that
you choose one of the items. For example, the vertical bar in the syntax
statement below means you can use either the -u or the -q option (or
neither):
swipplumb [-u|-q]
... (ellipsis)
An ellipsis in a command indicates that you can specify one or more of
that <value> in the command. In the following example, the ellipsis within
<module_name...> means that you can specify one module name or
multiple module names.
get [<module_name...>]
For commands that have options such as -u, as in the following example,
you must type -u before each filename if you wish to specify multiple file
names:
[-u <filename>|-u <filename> -u <filename>...]
Related
Documentation
This document is part of a book set for the UltraNet Storage Director eXtended. The book set provides installation, operation,
configuration, and reference information for system administrators
and operators. The book set consists of:
•
UltraNet Storage Director - eXtended Site Preparation User
Guide (620-000258-000) provides information required for site
pre-installation planning.
•
UltraNet Command Reference (620-000255-000) provides a
reference to the commands used for the UltraNet Storage
Director, UltraNet Storage Director - eXtended, UltraNet Open
Systems Director, UltraNet Storage Gateway, and UltraNet Open
Systems Gateway.
•
UltraNet Message Reference (620-000254-000) provides a
reference to the messages produced by the UltraNet Storage
Director, UltraNet Storage Director - eXtended, UltraNet Open
Systems Director, UltraNet Storage Gateway, and UltraNet Open
Systems Gateway.
•
UltraNet Storage Director Configuration Wizards User Guide
(620-000259-000) provides information for using the UltraNet
configuration wizards to configure the UltraNet Storage Director.
Preface
xi
Preface
Where to Get Help
For technical support, end-user customers should call the phone
number located on the service label attached to the front or rear of the
hardware product.
McDATA’s “Best in Class” Solution Center provides a single point of
contact for customers seeking help with McDATA software products.
The Solution Center will research, explore, and resolve inquiries or
service requests regarding McDATA products and services. The
Solution Center is staffed 24 hours a day, 7 days a week, including
holidays.
NOTE: To expedite warranty entitlement, please have your product serial
number available.
McDATA Corporation
11802 Ridge Parkway
Broomfield, CO 80021 US
Phone: (800) 752-4572 or (720) 558-3910
Fax: (720) 558-3860
E-mail: [email protected]
NOTE: Customers who purchased the hardware product from a company
other than McDATA should contact that company’s service representative for
technical support.
Forwarding
Publication
Comments
We sincerely appreciate any comments about this publication. Did
you find this manual easy or difficult to use? Did it lack necessary
information? Were there any errors? Could its organization be
improved?
Please send your comments via e-mail, our home page, or FAX.
Identify the manual, and provide page numbers and details. Thank
you.
xii
UltraNet™ Storage Director Hardware Installation Guide
Preface
E-mail:
[email protected]
Home Page: http://www.mcdata.com
FAX:
Ordering Publications
Technical Communications Manager
(720) 558-8999
To order a paper copy of this manual, contact your McDATA
representative, or use the contact information listed below.
Phone: (800) 545-5773 and select the option for information on
our complete family of enterprise-to-edge SAN solutions.
Fax: (720) 558-4193
Trademarks
The following terms, indicated by a registered trademark symbol (®)
or trademark symbol (™) on first use in this publication, are
trademarks of McDATA Corporation in the United States, other
countries, or both:
Registered Trademarks
Trademarks
Fabricenter®
E/OS™
HotCAT®
Eclipse™
Intrepid®
Fibre Channel Director™
McDATA®
OPENconnectors™
OPENready®
SANvergence™
SANavigator®
Sphereon™
SANtegrity®
EFCM Basic™
All other trademarked terms, indicated by a registered trademark
symbol (®) or trademark symbol (™) on first use in this publication,
are trademarks of their respective owners in the United States, other
countries, or both.
Preface
xiii
Preface
Regulatory and Safety Statements
Regulatory and safety statements are shown in the following
paragraphs. See also McDATA Product Safety Notices (620-000247) for
a complete list of safety notices with translations.
xiv
Laser Compliance
Statement
Product laser transceivers are tested and certified in the United States
to conform to Title 21 of the Code of Federal Regulations (CFR),
Subchapter J, Parts 1040.10 and 1040.11 for Class 1 laser products.
Transceivers are tested and certified to be compliant with
International Electrotechnical Commission IEC825-1 and European
Norm EN60825-1 and EN60825-2 regulations for Class 1 laser
products. Class 1 laser products are not considered hazardous. The
transceivers are designed to prevent human access to laser radiation
above a Class 1 level during normal operation or prescribed
maintenance conditions.
Federal
Communications
Commission (FCC)
Statement
Products generate, use, and can radiate radio frequency energy, and if
not installed and used in accordance with instructions provided, may
cause interference to radio communications. Products are tested and
found to comply with the limits for Class A and Class B computing
devices pursuant to Subpart B of Part 15 of the FCC Rules, which are
designed to provide reasonable protection against such interference
in a residential environment. Any modification or change made to a
product without explicit approval from McDATA, by means of a
written endorsement or through published literature, invalidates the
service contract and voids the warranty agreement with McDATA.
Canadian EMC
Statements
The statements below indicate product compliance with Interference
Causing Equipment Standard (ICES) and Norme sur le Matériel
Brouiller (NMB) electromagnetic compatibility (EMC) requirements
as set forth in ICES/NMB-003, Issue 4.
•
This Class A or Class B digital apparatus complies with
Canadian ICES-003.
•
Cet appareil numérique de la classe A et classe B est conforme à la
norme NMB-003 du Canada.
UltraNet™ Storage Director Hardware Installation Guide
Preface
United States and
Canada UL
Certification
The C-UL-US mark on a product indicates compliance with
American National Standards Institute (ANSI) and Standards
Council of Canada (SCC) safety requirements as tested, evaluated,
and certified by Underwriters Laboratories Inc. (UL) and
Underwriters Laboratories of Canada (ULC).
International Safety
Conformity
Declaration (CB
Scheme)
A certification bodies (CB) test report supporting a product indicates
safety compliance with the International Electrotechnical
Commission (IEC) system for conformity testing and certification of
electrical equipment (IECEE) CB scheme. The scheme is a multilateral
agreement among participating countries and certification
organizations that accepts test reports certifying the safety of
electrical and electronic products.
European Union
Conformity
Declarations and
Directives (CE Mark)
The CE mark on a product indicates compliance with the following
regulatory requirements as set forth by European Norms (ENs) and
relevant international standards for commercial and light industrial
information technology equipment (ITE):
•
EN55022: 1998 - ITE-generic radio frequency interference (RFI)
emission standard for domestic, commercial, and light industrial
environments, including electrical business equipment.
•
EN55024-1: 1998 - ITE-generic electromagnetic immunity
standard for domestic, commercial, and light industrial
environments, including electrical business equipment.
•
EN60950/A11:1997 - ITE-generic electrical and fire safety
standard for domestic, commercial, and light industrial
environments, including electrical business equipment.
•
EN61000-3-2:1995 - ITE-generic harmonic current emissions
standard for domestic, commercial, and light industrial
environments (equipment with rated current less than or
equal to 16 amperes per phase).
•
EN61000-3-3:1995 - ITE-generic voltage fluctuation and flicker
standard (low-voltage power supply systems) for domestic,
commercial, and light industrial environments (equipment with
rated current less than or equal to 16 amperes per phase).
Preface
xv
Preface
In addition, the European Union (EU) Council has implemented a
series of directives that define product safety standards for member
countries. The following directives apply:
•
Products conform with all protection requirements of EU
directive 89/336/EEC (Electromagnetic Compatibility Directive)
in accordance with the laws of the member countries relating to
EMC emissions and immunity.
•
Products conform with all protection requirements of EU
directive 73/23/EEC (Low-Voltage Directive) in accordance with
the laws of the member countries relating to electrical safety.
•
Products conform with all protection requirements of EU
directive 93/68/EEC (Machinery Directive) in accordance with
the laws of the member countries relating to safe electrical and
mechanical operation of the equipment.
McDATA does not accept responsibility for any failure to satisfy the
protection requirements of any of these directives resulting from a
non-recommended or non-authorized modification to a product.
European Union EMC
and Safety
Declaration (N-Mark)
Argentina UL
Certification
Australia and New
Zealand C-Tick Mark
xvi
The N-mark on a product indicates compliance with European Union
EMC and safety requirements as tested, evaluated, and certified by
the Norwegian Board for Testing and Approval of Electrical
Equipment (Norges Elektriske Materiellkontroll or NEMKO)
laboratory or a NEMKO-authorized laboratory.
The UL Argentina plus S mark (UL-AR-S mark) on a product
indicates compliance with Direccion Nacional de Comercio Interior
(DNCI) Resolution Number 92/98, Phase III (for information
technology equipment safety). The mark is certified by UL de
Argentina, S.R.L., and accredited by the Argentine Accreditation
Organization (OAA).
The Australia and New Zealand regulatory compliance mark
(C-tick mark) on a product indicates compliance with regulatory
requirements for EMC (for information technology equipment) as set
forth by the Australian Communications Authority (ACA) and the
Radio Spectrum Management Group (RSM) of New Zealand.
UltraNet™ Storage Director Hardware Installation Guide
Preface
People’s Republic of
China CCC Mark
The China Compulsory Certification mark (CCC mark) on a product
indicates compliance with People’s Republic of China regulatory
requirements for safety and EMC (for information technology
equipment) as set forth by the National Regulatory Commission for
Certification and Accreditation.
Chinese National
Standards Statement
The Taiwanese Bureau of Standards, Metrology, and Inspection mark
(BSMI mark) and the Chinese National Standards (CNS) statement
below indicate product compliance with Taiwanese regulatory
requirements. The statement indicates in a domestic environment the
product may cause radio interference, in which case the user is
required to take corrective actions.
German GS Mark
The Geprüfte Sicherheit mark (GS mark) on a product indicates
compliance with the German Safety of Equipment Act as tested by
Underwriters Laboratories International Demko A/S, and accredited
by the Central Office of Safety of the German Länder (Zentralstelle
der Länder für Sicherheitstechnik or ZLS).
Japanese VCCI
Statement
The Voluntary Control Council for Interference (VCCI) statement
below applies to information technology equipment, and indicates
product compliance with Japanese regulatory requirements. The
statement indicates a product is a Class A or Class B product, and in a
domestic environment may cause radio interference, in which case
the user is required to take corrective actions.
Preface
xvii
Preface
Korean MIC Mark
Mexican NOM Mark
NOM
Russian GOST
Certification
South African SABS
Certification
European Union Waste
Managment
Information
The Korean Ministry of Information and Communications mark
(MIC mark) on a product indicates compliance with regulatory
requirements for safety and EMC (for information technology
equipment) as authorized and certified by the Korean Radio
Research Institute (RRI).
The Official Mexican Standard (Normas Oficiales Mexicanas or
NOM) mark on a product indicates compliance with regulatory
requirements for safety (for information technology equipment) as
authorized and accredited by the National System of Accreditation of
Testing Laboratories (Sistema Nacional de Acreditamieno de
Laboratorios de Pruebas or SINALP).
The Russian Gosudarstvennyi Standart (GOST) mark on a product
indicates compliance with regulatory requirements for safety and
EMC (for information technology equipment) as authorized and
accredited by the State Committee for Standardization, Metrology
and Certification.
The South African Bureau of Standards (SABS) mark on a product
indicates compliance with regulatory requirements for safety and
EMC (for information technology equipment) as authorized and
accredited by the Independent Communications Authority of South
Africa (ICASA).
Do not discard this product. European Union Directive 2002/96/EC
requires the product to be recycled at the end of its useful life. Follow
all waste management actions defined by this directive. Directive
requirements may be superseded by EU member nation law. Perform
the following to identify pertinent information:
1. Review the original purchase contract to determine a contact
regarding waste management of the product, or
2. Contact the company from which the product was procured.
xviii
UltraNet™ Storage Director Hardware Installation Guide
Preface
Danger and Attention
Statements
The following DANGER statements appear in this publication and
describe safety practices that must be observed while installing or
servicing the product. A DANGER statement provides essential
information or instructions for which disregard or noncompliance
may result in death or severe personal injury.
DANGER statements have a numerical ID (displayed in parentheses)
at the end of each statement. Use the numerical ID to locate translated
statements in the McDATA Product Safety Notices (620-000247).
DANGER
Use the supplied power cords. Ensure the facility power receptacle
is the correct type, supplies the required voltage, and is properly
grounded. (D004)
DANGER
Disconnect the power cords. (D005)
The following ATTENTION statements appear in this publication
and describe practices that must be observed while installing or
servicing a product. An ATTENTION statement provides essential
information or instructions for which disregard or noncompliance
may result in equipment damage or loss of data.
ATTENTION ! Prior to servicing a product, management server, or
customer-supplied server, determine the Ethernet LAN configuration.
Installation of products and servers on a public customer intranet can
complicate problem determination and fault isolation.
ATTENTION ! Activating a preferred path can result in receipt of out-oforder frames if the preferred path differs from the current path, if input and
output (I/O) is active from the source port, and if congestions is present on
the current path.
ATTENTION ! Do not remove a power supply unless a replacement FRU is
immediately available. To avoid product overheating, a removed power
supply must be replaced within five minutes.
Preface
xix
Preface
ATTENTION ! A reset should only be performed if a CTP card failure is
indicated. Do not reset a managed product unless directed to do so by a
procedural step or the next level of support.
ATTENTION ! This procedure deletes all data from the C: hard
drive partition.
ATTENTION ! Contents of the data directory are backed up to the
management server’s CD-RW drive when directory contents change. To
ensure trouble-free backups, always leave a CD in the drive. Ensure data
is not being written to or read from the CD-RW drive before removing the
CD. Removing the CD during a backup or restore operation can corrupt data.
General Precautions
ESD Precautions
xx
When installing or servicing the product, follow these practices:
•
Always use correct tools.
•
Always use correct replacement parts.
•
Keep all paperwork up to date, complete, and accurate.
Follow these electrostatic discharge (ESD) procedures:
•
If the product is connected to facility power (grounded), wear an
ESD wrist strap and grounding cable connected to the product
chassis.
•
If the product is not connected to facility power (not grounded),
wear an ESD wrist strap and grounding cable connected to an
approved bench grounding point.
•
Touch the product chassis once before performing a procedure,
and once each minute during the procedure.
•
Store ESD-sensitive FRUs in antistatic packaging.
UltraNet™ Storage Director Hardware Installation Guide
1
Hardware Installation
This chapter provides instructions for unpacking, inspecting, I/O
cable connecting, power cable connecting, and powering on the
UltraNet Storage Director - eXtended (USDX) system.
Introduction
The UltraNet Storage Director - eXtended (USDX) platform features a
modular design that combines hardware and intelligent software to
enable connectivity of legacy and open systems resources across a
Wide Area Network (WAN).
The USDX is factory-configured to meet your site’s specific hardware
and software requirements. All host and network I/O hardware
components have been pre-installed, so that external host and
network connections are the only hardware requirements. Complete
the site preparation procedures as described in the UltraNet Storage
Director - eXtended Site Preparation User Guide prior to installing the
USDX hardware. After hardware installation is complete, use the
UltraNet Storage Director Configuration Wizards User Guide to make any
adjustments to your USDX software configuration.
Unpacking and Inspecting the Hardware
The USDX is packaged on a shipping pallet. Use the following
procedure to unpack your hardware:
1. Cut and remove the plastic straps holding the cardboard cover in
place.
Hardware Installation
1-1
Unpacking and Inspecting the Hardware
1
2. Lift the cardboard cover up and off the USDX.
3. Lift the foam packaging up and off the top of the USDX.
4. Remove the plastic wrap around the USDX.
5. For the 9112 USDX, continue at Step 6. For the 9106 USDX, lift the
unit off the shipping pallet, then continue with Step 9.
CAUTION
The 9106 system requires that two persons lift
it off the pallet; use correct lifting techniques to
avoid physical harm.
6. Remove the ramp from the top of the system and place as shown
on the next page.
1-2
UltraNet Storage Director Hardware Installation Guide
Unpacking and Inspecting the Hardware
1
7. Lift the holding block up and away to remove it.
8. Push the USDX onto the ramp and guide it off the pallet.
9. Make sure that you have all the items listed on the packing list(s).
If any item(s) are missing or broken, please contact your McDATA
representative.
USDX Cabinet
Placement
Use the following procedure to place and level the USDX cabinet:
Tools Required: A 7/8-inch open-end wrench.
1. Move the USDX cabinet to the location you identified and
prepared during site preparation.
Hardware Installation
1-3
Unpacking and Inspecting the Hardware
1
2. Use the 7/8-inch open-end wrench to lower the leveling pads.
The leveling pads are located at each bottom corner of the USDX
cabinet as shown below.
3. Adjust all leveling pads until the USDX cabinet is off all casters,
stable, and is visually level.
Preventing Damage
From Electrostatic
Discharge (ESD)
Grounding Procedure
1-4
Static electricity can damage or degrade electronic components.
Therefore, observe the precautions described below when handling
USDX hardware.
Before removing any part of the USDX enclosure to expose its
circuitry, ensure that you, the equipment rack, and the circuit boards
are at ground potential to prevent electrostatic discharge (ESD). Such
discharges can damage USDX components. To place yourself at
ground potential, plug the USDX in (nearest power outlet) and insert
your wrist strap into the wrist strap connector on the USDX chassis
(see Figure 1-1).
UltraNet Storage Director Hardware Installation Guide
Unpacking and Inspecting the Hardware
Wrist Strap
Connector
Figure 1-1
Ze0010
1
F9112 Wrist Strap Connector
The following reminders help prevent ESD damage to the
USDX:
•
Wear an electrostatic dissipative lab coat, fully snapped.
•
Always use an ESD wrist strap with proper grounding
connections. See Figure 1-1 for the location of the wrist strap
connectors.
•
Conserve movement. Movement can cause a build-up of static
electricity.
•
Handle the USDX and its components carefully. Never touch the
circuitry. Place your hands only on the edges, rails, or frame of the
unit.
Hardware Installation
1-5
Cables and Equipment
1
•
Place and work on the USDX in an ESD-aware area only.
•
Touch a spare component—while it is still in the anti-static
wrapping—to an unpainted metal portion of the USDX for at
least two seconds. This allows the static electricity to discharge
harmlessly from your body and the spare.
•
Install the spare directly into the USDX after removing it from the
anti-static wrapping. Do not remove the anti-static wrapping
until you are ready to do the install. If you must set down an
unwrapped spare, set it down on a static mat or on its anti-static
wrapping.
ATTENTION! Do not place the spare component on top of the USDX or on a
metal table. Either action could cause severe damage to the spare.
Card Protection
•
Set down adapters with their component sides face up.
•
Be aware of weather conditions. Cold weather increases the
likelihood of static electricity build-up.
•
Be aware of your own conductivity level. Some people are more
likely than others to build up static electricity. Products, such as
Static Guard and other static sprays available at office or
computer supply stores, can be used to diminish personal static
electricity build-up.
Each spare card is shipped in a separate, reusable, and anti-static
shielding bag. Leave each card in its bag until the card is installed in
the machine. Do not remove a card from its bag unless you are
grounded. Do not place a bag on exposed electrical contacts where it
can cause short circuits.
Cables and Equipment
The following sections list the cables, adapters, and other equipment
required for the USDX.
1-6
UltraNet Storage Director Hardware Installation Guide
Cables and Equipment
1
McDATA-Supplied
Cables and
Equipment
Table 1-1
Table 1-1 lists the cables and equipment that McDATA supplies with
each USDX.
McDATA Supplied Cables and Equipment
Type
Description
RJ-45 Cabling
McDATA supplies the RJ-45 cabling used to connect the HMB3 board to the
Primary Service Monitor and Secondary Service Monitor if one is installed.
SCSI Cable
SCSI cable used for the connection from the SCSI-SE port on the USM I/O
adapter to the SCSI terminator on the back of the USDX chassis. The end of
the cable that attaches to the USM I/O has a 68-pin connector and the end of
the cable that attaches to the back of the USDX chassis has a 50-pin connector.
Ethernet Drop
Cable
Each Primary Service Monitor (SBus I/O adapter) card must have an Ethernet
drop cable. This is a 5-foot DB-15 to Ethernet AUI connector cable. The
Primary Service Monitor is a 10 BaseT only Ethernet.
Also, each Ethernet 10/100 I/O port ships with an Ethernet drop cable. This
Ethernet drop cable contains a low profile connector on one end and a RJ-45
jack on the other.
Power Plug
Refer to the section “Power Cord Requirements” to determine the appropriate
receptacle/power cord.
Modem
Either a Microcom or a Multi-Tech modem is required as part of the remote
support configuration.
AA adapter
This Data Bus (DB) adapter inserts into the DTE port on the back of the
remote modem for direct connection to the USDX.
Note:
If a remote modem is being used 1 AA adapter is needed.
See Appendix D for information on DB adapters available from McDATA.
DD Adapter
This Data Bus (DB) adapter inserts into the back of the PC for connection to
the Hardware Monitor Board.
See Appendix D for information on DB adapters available from McDATA.
H adapter
This DB adapter inserts into the DTE port on the modem. It is used to connect
the modem to the Hardware Monitor Board.
Note: The adapter is also needed for the SPARC workstation, if you
are using a 25-pin serial interface on your workstation as an H adapter.
Refer to Appendix D for information on the DB adapters available from
McDATA.
Hardware Installation
1-7
Cables and Equipment
1
Customer-Supplied
Cables and
Equipment
The specific host and network cables for the external cable
connections must be supplied by the customer. Table 1-2 lists the
hardware specifications for the customer-supplied equipment.
NOTE: Your installation may not require all the equipment listed below, as it
is site-specific.
Table 1-2
Customer-Supplied Cables and Equipment Specifications
Cable and Equipment
Description
Power Receptacles
See the “Power Cord Requirements” section to determine the appropriate
receptacle/power cord.
Outside Analog Telephone
An external analog RJ-11 plug type telephone line is required for
McDATA Customer Support Services access.
ESCON Cables
This is from the standard IBM ESCON cable specifications.
Ethernet Transceiver
Attachment Unit Interface (AUI) connection DB-15 pin transceiver
connector to customer dependent connection.
ATM (OC-3)
The customer should ensure conformance to the specifications provided
in the “Cable and Connector Specifications” section of the UltraNet
Storage Director - eXtended Site Preparation User Guide.
ATM/POS (OC-12)
Fibre Channel
FICON
T3
Ethernet 10/100
Gigabit Ethernet
Power Cord
Requirements
The USDX requires one 15 amp outlet for each power supply
installed in the system. The maximum number of power supplies per
F9112 system is 4. The maximum number of power supplies per
F9106 is 2.
NOTE: In addition to the above power requirements, 2 or more power outlets
are required for peripheral equipment including the PC and the modem.
1-8
UltraNet Storage Director Hardware Installation Guide
Connecting the USDX
1
Domestic and International
Table 1-3
Table 1-4
Domestic Power Plug Options
Type
Description
Standard
One 6 ft. power cord with a 5-15P plug that is compatible with
the IEC 320 C-14 receptacle is shipped for each power supply.
Optional 110 AC Distribution
(Domestic)
A 7.5 (2.3 meters) cord with a L5-30P (twist lock) plug is
shipped with each optional 110 VAC distribution panel.
International Power Plug Options
Type
Description
Standard
The customer supplies a cord that is compatible with the IEC
320 C-14 receptacle. One cord is required for each power
supply.
Optional 220 AC
Distribution (European)
The customer supplies a cord that is compatible with the IEC
320 C-19 receptacle. One cord is required for each USDX.
Connecting the USDX
The following section describes the procedures for connecting your
network cables to the USDX. These connections are made by
attaching cables to the appropriate ports on the circuit boards.
Connecting the
Cables
Once your USDX is unpacked and in location, the I/O connections
should be made. Use the following procedures to connect your cables
to the USDX, then use the “Cable Routing” section that follows to
route the cables within the cabinet. Procedures for cabling the
following are provided:
NOTE: The cabling procedures for the WTI and Penril switches are provided
in Appendix C, WTI and Penril Switch Support. This appendix applies only
to UltraNet Storage Director - eXtended systems that have a WTI/Penril
switch installed.
•
ESCON
Hardware Installation
1-9
Connecting the USDX
1
•
ATM (OC-3)
•
ATM/POS (OC-12)
•
Fibre Channel
•
FICON Single-Mode and Multi-Mode
•
T3
•
Ethernet 10/100
•
Gigabit Ethernet
•
Service Monitor SCSI Cabling for the USM I/O and SBus I/O
adapters.
•
Hardware Monitor Board cabling procedures for:
— Primary Service Monitor (USM I/O adapter and SBus I/O
adapter)
— Secondary Service Monitor (USM I/O adapter and SBus I/O
adapter)
— Modem
ESCON Cabling
1. Locate the IBM ESCON channel cable jack on the ZENx (ESCON)
adapter installed in the front of the USDX.
Note: The location of your ZENx circuit card is site
specific.
2. Locate the ESCON channel cable and connector.
3. Align the cable connector with the IBM channel jack. Gently press
the connectors into place.
1-10
UltraNet Storage Director Hardware Installation Guide
Connecting the USDX
1
ATM (OC-3) Cabling
The following sections provide the procedures for the different
cabling connector types.
SC Cabling
1. Locate ZAP5 (see Table 2-10) port configured as ATM.
2. Locate the ATM(OC-3) fiber cable with the standard SC
connector.
3. Align the cable connectors Rx and Tx with the ATM port Rx and
Tx. Gently press the connectors into place.
LC Cabling
1. Locate the ZAP5 (see Table 2-10), or SBus I/O (see Table 2-8) port
configured as ATM.
2. Locate the ATM(OC-3) fiber cable with the standard Duplex LC
connector.
Transmit
Cs0029
Receive
3. Align the cable connectors Rx and Tx with the ATM port Rx and
Tx. Gently press the connectors into place.
Hardware Installation
1-11
Connecting the USDX
1
ATM/POS (OC-12) Cabling
1. Locate the ZAP5 (see Table 2-10) I/O port configured as ATM
(OC-12).
2. Locate the ATM (OC-12) fiber cable with the standard Duplex LC
connector.
Transmit
Cs0029
Receive
3. Align the cable connectors Receive (Rx) and Transmit (Tx) with
the ATM (OC-12) port Rx and Tx. Gently squeeze the locking
clips and press the connectors into place.
Fibre Channel Cabling
Topology Issues
Table 1-5
If you have chosen to use Fibre Channel (FC) for your PCI_0 or PCI_1
option, there are certain topology and cabling issues you need to be
aware of.
Table 1-5 provides cable type and distance information.
Fiber Type and Distance Restrictions
Effective Rate
Mbps
Distance
Kilometers
Baud Rate
Mbaud
Shortwave
100
up to 0.175
1062.5
Shortwave
25
up to 0.7
265.6
Longwave LED
25
up to 1.5
265.6
Type
Laser
62.5-Micron
Multimode Fiber
Cabling Issues
1-12
The Fibre Channel cable uses either an LC connector, SC connector, or
DB-9 connector. Use the appropriate section below depending upon
your cable type and the card to which you are connecting the cable.
UltraNet Storage Director Hardware Installation Guide
Connecting the USDX
1
LC Fibre Channel
Cabling
1. Locate the ZAP5 I/O port configured as Fibre Channel.
2. Locate the Fibre Channel fiber cable with the duplex LC
connector.
Transmit
Cs0029
Receive
3. Align the cable connectors Rx and Tx with the Fibre Channel port
Rx and Tx. Gently press the connectors into place.
FICON Single-Mode
Cabling
1. Locate the port configured as Single-Mode FICON.
2. Locate the Single-Mode FICON cable with the standard Duplex
LC connector.
Transmit
Cs0029
Receive
3. Align the cable connectors Receive (Rx) and Transmit (Tx) with
the Single-Mode FICON port Rx and Tx. Gently squeeze the
locking clips and press the connectors into place.
FICON Multi-Mode
Cabling
1. Locate the port configured as Multi-Mode FICON.
Hardware Installation
1-13
Connecting the USDX
1
2. Locate the Multi-Mode FICON cable with the standard Duplex
LC connector.
Transmit
Cs0029
Receive
3. Align the cable connectors Receive (Rx) and Transmit (Tx) with
the Multi-Mode FICON port Rx and Tx. Gently squeeze the
locking clips and press the connectors into place.
T3 Cabling
1. Locate the ZAP5 (see Table 2-10) I/O ports configured as T3.
2. Locate the T3 cables with the BNC connectors.
Transmit
To Customer Receive Port
To Customer Transmit Port
Ze0076
Receive
3. Align the BNC transmit cable connector to the T3 transmit port
connector. Gently twist the BNC connector clockwise until it locks
into place.
4. Align the BNC receive cable connector to the T3 receive port
connector. Gently twist the BNC connector clockwise until it locks
into place.
Ethernet 10/100
Cabling
1-14
1. Locate the ZAP5 I/O 10/100 Ethernet port (above port PCI I/O
B). See Table 2-10 for the ZAP5 I/O port locations.
UltraNet Storage Director Hardware Installation Guide
Connecting the USDX
1
Ze0088
2. Locate the Ethernet cable with the RJ-45 connector.
3. Align the RJ-45 cable connector with the RJ-45 jack on the
Ethernet card. Gently insert the connector.
1. Locate the ZAP5 I/O port configured as Gigabit Ethernet. See
Table 2-10 for location.
2. Locate the Gigabit Ethernet cable with the standard LC connector.
Transmit
Receive
Cs0029
Gigabit Ethernet
Cabling
3. Align the cable connectors Receive (Rx) and Transmit (Tx) with
the Gigabit Ethernet port Rx and Tx. Gently press the connectors
into place.
Hardware Installation
1-15
Connecting the USDX
1
Service Monitor Ethernet Cabling for the SBus I/O
Adapter
Use the following procedure to connect the Ethernet cabling on the
SBus I/O (ZSIO) adapter:
1. Locate the Ethernet cable connection on the Service Monitor(s)
SBus I/O card installed in the back of the USD.
2. Connect the Ethernet drop cable’s microminiature D-sub
connector to the SBus I/O Ethernet port using a small straight slot
screwdriver.
Note: To avoid damaging the pins, do not force the
connector into the jack.
3. Connect the other end of the cable (an AUI connector) to your
Ethernet network (i.e., a transceiver which converts the AUI
interface to a compatible interface for your site, usually a RJ-45
connection). The AUI connector is a slide clip.
Service Monitor
SCSI Cabling
For the UltraNet
Service Monitor I/O
(USMIO) Adapter
The following sections provide the SCSI cabling procedures for the
UltraNet Service Monitor I/O (USMIO) adapter and the SBus I/O
(ZSIO) adapter. Use the procedure that corresponds to your Service
Monitor type.
Use the following procedure to connect the Service Monitor SCSI
cabling:
1. Locate the SCSI connector on the Primary Service Monitor’s USM
I/O card installed in the back of the USDX.
2. Align the SCSI cable’s 68-pin connector with the SCSI-SE port on
the USM I/O card. Gently press the connector into place.
1-16
UltraNet Storage Director Hardware Installation Guide
Connecting the USDX
1
SCSI Cable
3. Locate the SCSI connector on the upper left corner of the USDX
chassis, as shown in the figure above.
4. Align the SCSI cable’s 50-pin connector with the SCSI connector
on the chassis. Gently press the connector into place.
For the SBus I/O (ZSIO)
Adapter
Use the following procedure to connect the SCSI Narrow cabling for
the SBus I/O adapter:
1. Locate the SCSI connector on the Primary Service Monitor’s SBus
I/O card installed in the back of the USD.
2. Align the SCSI cable connector to the SBus I/O card SCSI
connector. Gently press the connector into place.
Hardware Installation
1-17
Connecting the USDX
1
3. Locate the SCSI connector on the auxiliary disk tray located on
the back of the USD.
4. Align the SCSI cable connector to the auxiliary disk tray SCSI
connector. Gently press the connector into place.
5. Connect a SCSI terminator to the other auxiliary disk tray
connection.
Hardware Monitor
Board Cabling
Connecting to the
Primary Service
Monitor (USMIO)
The following sections provide the procedures to connect the RJ-45
cabling from the Hardware Monitor Board (HMB3) to the Primary
Service Monitor, Secondary Service Monitor, modem, and PC. The
Hardware Monitor Board is located in the back of the USD.
Use the following procedure to connect the Hardware Monitor Board
cable to the Primary Service Monitor:
1. Locate the connection cable (P/N 21500176) for the Hardware
Monitor Board.
2. Connect one end of the cable to the PRIPPP port on the Hardware
Monitor Board and connect the other end of the cable (which has
the USM label closest to it) to the COM1 port on the Primary
Service Monitor (USM I/O adapter), as shown in the figure
below.
1-18
UltraNet Storage Director Hardware Installation Guide
Connecting the USDX
1
HMBx
USMIO
SECPPP
PRIPPP
Output2
Output1
COM1
COM2
PC Input
Hardware
Monitor
Connecting to the
Primary Service
Monitor (ZSIO)
UltraNet
Service
Monitor
Ze0112
E10/100T
Modem Input
Use the following procedure to connect the Hardware Monitor Board
to the Primary Service Monitor:
1. Locate the connection cable (P/N 21500167) for the Hardware
Monitor Board.
2. Connect one end of the cable to the PRIPPP port on the Hardware
Monitor Board and connect the other end of the cable (which has
the cosystem label closet to it), to the PPP SBus Adapter on
interface 1 of the Primary Service Monitor (ZSIO), as shown in the
figure below.
NOTE: The four ports on interface 1 of the SBus I/O adapter (ZSIO) are all
functional ports.
Hardware Installation
1-19
Connecting the USDX
1
HMBx
ZSIO
PPP Sbus Adapter
SECPPP
PRIPPP
Output 2
Output 1
PC Input
Hardware
Monitor
Connecting to the
Secondary Service
Monitor (USMIO)
Primary
Service
Monitor
Ze0106
Modem Input
Use the following procedure to connect the Hardware Monitor Board
cable to the Secondary Service Monitor:
1. Locate the connector cable (P/N 21500176) for the Hardware
Monitor Board.
2. Connect one end of the cable to the SECPPP port on the
Hardware Monitor Board and connect the other end of the cable
(which has the USM label closest to it) to the COM1 port on the
Secondary Service Monitor (USM I/O adapter), as shown in the
figure below.
1-20
UltraNet Storage Director Hardware Installation Guide
Connecting the USDX
1
HMBx
USMIO
SECPPP
PRIPPP
Output2
Output1
COM1
COM2
PC Input
Hardware
Monitor
Connecting to the
Secondary Service
Monitor (ZSIO)
UltraNet
Service
Monitor
Ze0111
E10/100T
Modem Input
Use the following procedure to connect the Hardware Monitor Board
to the Secondary Service Monitor:
1. Locate the connector cable (P/N 21500167) for the Hardware
Monitor Board.
2. Connect one end of the cable to the SECPPP port on the
Hardware Monitor Board and connect the other end of the cable
(which has the cosystem label closest to it), to the PPP SBus
Adapter on interface 1 of the Secondary Service Monitor (ZSIO),
as shown in the figure below.
Note: The four ports on interface 1 of the SBus I/O
adapter (ZSIO) are all functional ports.
Hardware Installation
1-21
Connecting the USDX
1
HMBx
ZSIO
PPP Sbus Adapter
SECPPP
PRIPPP
Output 2
Output 1
PC Input
Hardware
Monitor
1-22
UltraNet Storage Director Hardware Installation Guide
Secondary
Service
Monitor
Ze0107
Modem Input
Connecting the USDX
1
Connecting to the Modem
Use the following procedure to connect the modem to the Hardware
Monitor Board:
1. Insert an H adapter into the DTE port on the back of the modem.
2. Insert one end of the RJ-45 cable into the H adapter on the modem
and the other end of the cable into the MODEM INPUT port on
the Hardware Monitor Board.
HMBx
Modem
SECPPP
PRIPPP
Parallel
Port
Power
DTE
Line Phone
Output 2
Output 1
H
PC Input
Modem Input
Z 0108
Hardware
Monitor
3. Connect the external phone line to the modem.
Caution: When using the modem, follow your site’s
security procedures to protect access to your network.
Hardware Installation
1-23
Connecting the USDX
1
NOTE: If you are using a Microcom modem, note that the battery lasts for 30
days without AC applied. If the battery completely discharges, the modem’s
factory settings change to the default settings. Refer to Appendix B for the
proper modem settings.
Connecting the
Hardware Monitor
Board to a PC
Use the following procedure to connect the Hardware Monitor Board
to the PC:
1. Connect the Hardware Monitor Board to the PC by inserting a
DD adapter into the DB-9 serial connector on the back of your PC.
If your PC has a DB-25 connector, you will need a 9-pin to 25-pin
converter.
2. Insert one end of the RJ-45 cable into the DD adapter and the
other end of the cable into the PC INPUT port on the Hardware
Monitor Board.
1-24
UltraNet Storage Director Hardware Installation Guide
Connecting the USDX
1
HMBx
PC
SECPPP
PRIPPP
DTE
Output 2
Output 1
PC Input
em Input
Hardware
Monitor
Daisy Chaining the
Hardware Monitor
Board
You can daisy chain two Hardware Monitor Boards using a RS-232
straight through cable with RJ-45 connections. To do this connect one
end of the cable to the OUTPUT 1 port on the first Hardware Monitor
Board and connect the other end of the cable to the MODEM INPUT
port on the second Hardware Monitor Board, as demonstrated in the
figure below.
Hardware Installation
1-25
Connecting the USDX
1
SECPPP
SECPPP
PRIPPP
PRIPPP
Output2
Output2
Output1
Output1
PC Input
PC Input
em Input
Modem Input
Hardware
Monitor
Cable Routing
1-26
HMBx
Hardware
Monitor
Ze0110
HMBx
Route the cables within the USDX to allow access to the circuit cards.
For cable connections on the back of the USDX in slots 1-6, route the
cables over and around the side rail (see Figure 0-1). For cable
connections on the back of the USDX in slots 7-12, route the cables
down and out the bottom. For all cable connections to the front of the
USDX route the cables down and out the bottom.
UltraNet Storage Director Hardware Installation Guide
Connecting the USDX
1
Ze0007
Side
Rail
Figure 0-1 Cable Routing within the USDX Cabinet
Powering-On the
USDX
A power cord for the USDX is provided only for North American
customers. Use the following procedure to power-on the USDX:
1. Connect the external power cord to the site-configured power.
2. Set the 4 switches in the lower left back of the USDX to ON (as
shown in the illustration below). Each cord connects to one Power
Supply.
3. Push the Power switch which is located on the power supply on
the front of the USDX to ON.
Hardware Installation
1-27
Connecting the USDX
1
NOTE: The GOOD indicator on the power supply and the POWER indicator
on the front chassis are lit when the circuit is complete. Also, if the system
requires more than 1 power supply, the GOOD light does not come on until
the second or third supply is powered on.
Ze0004
4. Repeat Step 3 for each additional power supply installed.
1-28
UltraNet Storage Director Hardware Installation Guide
2
Switches and Indicators
This chapter contains descriptions of the function and normal
operating status for switches and indicators on the F9112 and F9106
USD-X cabinet and on the circuit boards. The information in this
chapter is for operation reference and on-site problem isolation after
the network is implemented.
USD-X 9112 Cabinet Layout
The USD-X 9112 cabinet contains slots for inserting circuit boards that
connect to a midplane in the USD-X cabinet. The front and back of the
USD-X cabinet each have 12 slots available for circuit boards. Figure
2-1 shows the numbering for these slots.
There are two additional slots on the back of the USD-X cabinet (see
Figure 2-1). These two slots are not numbered; one slot always
contains a Hardware Monitor Board and the other slot is reserved.
Switches and Indicators
2-1
USD-X 9112 Cabinet Layout
2
Back
Front
Fan Tray
1 2
6 5
3 4 5 6
POWER
ON
POWER
ON
GOOD
4 3 2 1
Serial
Number
GOOD
Reserved
7 8
9 10 11 12
Figure 2-1
12 11 10 9 8 7
Ze0028
Hardware
Monitor
F9112 Cabinet Slot Numbering
The USD-X cabinet contains a fan tray, a SCSI drive assembly, and
power supply(s) (see Figure 2-2). The fan tray contains six fans and is
located above the circuit cards. The SCSI drive assembly can be
configured for up to two shared SCSI devices with any combination
of the following:
•
a hard disk drive
•
a DAT drive or CD-RW drive
NOTE: USD-X which have a ZSP Application Processor installed use a DAT
drive for backups and restores. USD-X chassis which have a UltraNet Service
Monitor (USM) installed use a CD-RW drive for backups and restores.
The number of power supplies depends on the system configuration.
Figure 2-2 shows a sample configuration that has two power
supplies.
2-2
UltraNet Storage Director Hardware Installation Guide
USD-X 9106 Cabinet Layout
2
Front
Fan Tray
1 2
SCSI
Drive
Assembly
3 4 5 6
POWER
ON
POWER
ON
GOOD
GOOD
7 8
Figure 2-2
9 10 11 12
Ze0032
Power
Supply
Locations
F9112 Cabinet Front Layout
NOTE: For installation and removal procedures of the above components, see
Chapter 3.
USD-X 9106 Cabinet Layout
The USD-X 9106 cabinet contains slots for inserting circuit boards that
connect to a midplane in the USD-X cabinet. The front and back of the
USD-X cabinet each have 6 slots available for circuit boards. Figure
2-3 shows the numbering for these slots.
There is an additional slot on the back of the USD-X 9106 cabinet (see
Figure 2-3). This slot is not numbered and contains a Hardware
Monitor Board.
July 12, 2006 11:12 am
chapter2.fm
Switches and Indicators
2-3
USD-X 9106 Cabinet Layout
2
Back
Front
1 2
6 5 4 3 2 1
3 4 5 6
Serial
Number
Figure 2-3
Ze0047
Hardware
Monitor
F9106 Cabinet Slot Numbering
The USD-X 9106 cabinet also contains a fan tray, a SCSI drive
assembly, and power supply(s) (see Figure 2-4). The fan tray contains
six fans and is located above the circuit cards. The SCSI drive
assembly can be configured for up to two shared SCSI devices with
any combination of the following:
•
a hard disk drive
•
a DAT drive or CD-RW drive
NOTE: USD-X which have a ZSP Application Processor installed use a DAT
drive for backups and restores. USD-X chassis which have a UltraNet Service
Monitor (USM) installed use a CD-RW drive for backups and restores.
The 9106 cabinet can be configured for one or two power supplies
depending upon system configuration. Figure 2-4 shows a sample
configuration with two power supplies.
2-4
UltraNet Storage Director Hardware Installation Guide
Front of Cabinet
2
Front
Fan Tray
1 2
3 4 5 6
SCSI
Drive
Assembly
Ze0048
Power
Supply
Locations
Figure 2-4
F9106 Cabinet Front Layout
NOTE: For installation and removal procedures of the above components, see
Chapter 3.
Front of Cabinet
The switches and indicators on the front of the USD-X are on the disk
drive bay and each power supply (see Figure 2-5). Table 2-1 provides
a description of each switch and indicator located on the front of the
USD-X.
July 12, 2006 11:12 am
chapter2.fm
Switches and Indicators
2-5
Front of Cabinet
2
1
2
Ze0027
3
4
Figure 2-5
Table 2-1
2-6
Switches and Indicators on Front of Cabinet
Switches and Indicators on Front of Cabinet
Normal
Operation
Index
Switch/Indicator
Function
1
Green LED
When lit, indicates power to the
system is on.
On
2
Amber LED (Service LED)
When lit, indicates service is required.
Off
UltraNet Storage Director Hardware Installation Guide
Back of Cabinet
2
Table 2-1
Switches and Indicators on Front of Cabinet
Index
Switch/Indicator
Function
Normal
Operation
3
Green LED, for power supply
When lit, indicates normal operation.
On
4
Power Switch
Used to turn power supply on or off.
On
Back of Cabinet
On the back of the USD-X cabinet there are four switches located on
the lower left (see Figure 2-6).
NOTE: To turn on system power, set all the switches (4 on the 9112 and 2 on
the 9106) to the on (1) position. Then set the Power switch (located on the
front of the cabinet) to the on position (see Figure 2-5).
Switch
Figure 2-6
July 12, 2006 11:12 am
chapter2.fm
O Off
I On
Ze0026
st Strap
nnector
Switches on Back of Cabinet
Switches and Indicators
2-7
Circuit Boards
2
Circuit Boards
This section describes the switches and indicators for the various
circuit boards available for the USD-X. Each circuit board type is
represented by an illustration in a table that describes the switches
and indicators. The following is a list of the circuit boards described
in this section:
2-8
•
The Hardware Monitor Board (HMBx) monitors environmental
conditions, hardware status, and issues hardware alerts to the
Service Monitor. The Hardware Monitor Board (HMB3) replaces
the Hardware Monitor Adapter (HMAx), which required a
WTI/Penril switch for connection to the Primary and Secondary
Service Monitor.
•
The Hardware Monitor Adapter (HMAx) is used in conjunction
with a WTI/Penril switch to connect to the Primary and
Secondary Service Monitors, PC, and modem. Information on
connecting the Hardware Monitor Adapter to the WTI/Penril
switch can be found in
Appendix C, WTI and Penril Switch Support on page C-2.
•
UltraNet Service Monitor (USM) Application Processor card is a
functional replacement for the ZSP (SPARC Service Monitor). The
USM is the result of merging Sun Microsystem’s CP1400 and
McDATA’s UAN boards into one board. The USM card always
has a corresponding USM I/O card for I/O connections. The
USM Application Processor uses a CD-RW drive for backups and
restores. The ZSP (SPARC Service Monitor) uses a DAT drive for
backups and restores.
•
USM I/O (USMIO) provides the I/O connections for the USM
board. The USM I/O card installs in the back of the USD and
requires an UltraNet Service Monitor (USM) to be installed in the
associated front slot. The USM I/O is a functional replacement for
the SBus I/O card.
•
ZSP is an application processor adapter based on the SPARC
instruction set architecture originally designed by Sun
Microsystems. The ZSP card always has a corresponding SBus
I/O card for I/O connections. For additional information on the
application processor refer to the “Application Processor
Overview” in Chapter 3.
UltraNet Storage Director Hardware Installation Guide
Circuit Boards
2
July 12, 2006 11:12 am
chapter2.fm
•
SBus I/O (ZSIO) provides the I/O connection for the ZSP
application processor card. The SBus I/O card installs into the
back of the USD and requires a SPARC (ZSP) application
processor adapter to be installed in the associated front slot.
•
ESCON (ZENx) contains several Motorola processors to run the
required driver code. ESCON stands for Enterprise Systems
Connection and is part of IBM’s ESA/390 architecture. The
ESCON interface provides a high-speed optical fiber
communications link between host channels and control units.
•
ZAPx is a processor adapter based on the PowerPC running the
Nucleus operating system. The ZAP5 card does not have a
corresponding I/O board in the back of the chassis, all I/O
connections are provided on the ZAP5 card.
Switches and Indicators
2-9
Circuit Boards
2
Table 2-2
HMB3(Hardware Monitor Board) Indicators
Switch/
Indicator
Circuit Card
HMBx
Function
HMB RESET switch Pushing this switch resets the board
without losing any changes that have
been made by the user.
N/A
RESET DEFAULT
SETTINGS switch
N/A
The board returns to the original
default options when the following
actions are performed:
•
•
HMB RESET
•
RESET DEFAULT
SETTINGS
uPGOOD
uP GOOD indicator
This switch is pushed in
The HMB RESET switch is
pushed in and then released
This switch is released
This LED pulses on and off at even
Off
intervals when the HMB has passed its
self test during power up and/or reset.
If the HMB fails the self test and
requires attention, the LED indicator
flashes quickly three times, slowly
three times, and then quickly three
times. This sequence repeats after a
short pause.
Ze0105
Refer to Appendix A, HMB3 Default
Configuration Settings, for information
on the HMB3 port default settings.
2-10
Normal
Operation
UltraNet Storage Director Hardware Installation Guide
Circuit Boards
2
Table 2-3
HMA2 (Hardware Monitor Adapter) Indicators
Circuit Card
Switch/
Indicator
IPL Enable switch
Normal
Operation
Function
When set to off, Initial Process Load
permission (IPL) is disabled.
Off
When set to on, IPL is enabled.
IPL Disable
indicator
July 12, 2006 11:12 am
chapter2.fm
When lit, indicates IPL Enable switch
is set to off.
On
IPL Enable indicator When lit, indicates IPL Enable switch
is set to on.
Off
HMB Reset switch
N/A
When depressed, resets the
environmental monitor controller on
the board.
Switches and Indicators
2-11
Circuit Boards
2
Table 2-4
USM (UltraNet Service Monitor Front Panel) Indicators
Circuit Card
USMx
Port/Indicator
Function
RESET switch
Pressing this switch resets all circuitry N/A
on the USM board.
ABORT switch
Pressing this switch provides a break
out of a system lock-up condition.
FAIL/READY
indicator
When the UltraNet Service Monitor is Green LED is lit
powered on, this LED will either
indicate a fail or ready condition. This
is a single tri-color LED. A green lit
LED indicates that the USM is ready.
A red lit LED indicates that voltage is
out of range. An orange lit LED
indicates IOP failure.
RESET
ABORT
FAIL/READY
Off
DIAG_CODE
display
Displays USD-X
software revision
This is a 4 digit alpha/numeric rolling
display that under normal conditions
shows the USD-X software revision
level.
Ze0116
2-12
N/A
HD_BUSY indicator Indicates hard disk drive activity.
If an error occurs, it displays
diagnostic code(s), which are
described in Table 2-5 on the following
page.
HD_BUSY
DIAG_CODE
Normal Operation
UltraNet Storage Director Hardware Installation Guide
Circuit Boards
2
Table 2-5 lists and describes the diagnostic display codes for the
UltraNet Service Monitor (USM) Application Processor.
Table 2-5
July 12, 2006 11:12 am
chapter2.fm
USM Diagnostic Display Codes
Display Code
Description
boot
USM Boot startup successful and ready for operator input
0000
Setup ROM controller registers
0001
i960 EPROM Checksum Compare
001A
Read SDRAM serial EPROM using 12C engine
001B
Setup V380 SDRAM controller registers
001C
Setup SDRAM Banks, DRAM timing parameters, and SDC Bus Watch
register
001D
Sending PreCharge, 2 AutoFresh cmds, and Mode Set cmd to SDRAM
0002
Walking ones test on the UART
0003
Walking ones test on a first memory location
0004
Write/read test on first 4 long word memory locations
0005
Write/read test on first 4 Megabytes of SDRAM.
0006
Performing a size check of memory
0007
Setup SDRAM parity enable
0008
Clearing all memory
0009
Clearing on-chip data RAM
000A
Copying the .data area from EPROM, initializing the BSS area of RAM
000B
Initializing the interrupt table
000C
Initializing the fault table, copying PRCB to RAM
000D
Re-initializing with the RAM-based PRCB
000E
Jumping to Main
000F
Connecting IOP to COM2
Switches and Indicators
2-13
Circuit Boards
2
Table 2-5
2-14
USM Diagnostic Display Codes (Continued)
Display Code
Description
0010
Initializing Timer
0011
Testing DUART loopback
0012
Initializing DUART COM2
0013
Installing interrupt vectors, enabling timer, and UART interrupts
0014
Setup Secondary ATU to mask out Master Aborts from host
0015
Clearing retry bit, testing for PMC cards
0016
Write/read test from 4 Megabyte boundary up to end of SDRAM
ER80
Unsupported interrupt has occurred
ER81
Unsupported fault condition occurred
ER82
Unexpected Secondary ATU or Bridge PCI error
ER83
Unexpected Primary ATU or Bridge PCI error
ER84
Unexpected message unit interrupt
ER85
Local bus or memory fault
ER86
Watch dog timeout
ER87
Unexpected Level 7 interrupt detected
ER88
SDRAM parity error
ER89
Unknown or external NMI error
ER90
UART test failed
ER91
Failed walking ones test on a first memory location
ER92
Failed write/read test on first 4 long word memory locations
ER93
Failed write/read test on all memory locations
ER94
Failed write/read test on V380 general purpose register #0
ER95
MCBus interrupt could not clear (stuck active)
UltraNet Storage Director Hardware Installation Guide
Circuit Boards
2
Table 2-5
July 12, 2006 11:12 am
chapter2.fm
USM Diagnostic Display Codes (Continued)
Display Code
Description
ER96
Memory detected on SDRAM does not compare to value from SDRAM
Serial Prom
ER97
i960 EPROM Checksum Mismatch
Switches and Indicators
2-15
Circuit Boards
2
Table 2-6
USMIO (UltraNet Service Monitor I/O Adapter) Indicator and Ports
Circuit Card
Port/Indicator
Function
SCSI-SE Port
This port provides access to the SCSI
Single Ended port via a high density
68-pin connector.
USMIO
Normal
Operation
N/A
See the “Service Monitor SCSI
Cabling” section in Chapter 1 for the
instructions on how to connect this
cable to the rear panel of the chassis.
TERM_PWR Indicator Indicates that SCSI terminator power is On
available.
This port provides access to the RS-232 N/A
COM3/TTYC port via a RJ-45 8-pin
connector. This is the PPP port, which is
used for connecting the UltraNet
Service Monitor application processor
(Primary and Secondary) to the HMB3.
COM2 Port
This port provides access to the RS-232 N/A
COM3/TTYC port via a RJ-45 port
8-pin connector. The use for this port is
currently undefined, it can be treated as
a spare PPP port.
E10/100T Port
This port provides access to an Ethernet N/A
auto negotiating 10/100BaseT port via a
RJ-45 8-pin connector.
SCSI-SE
COM1 Port
Ze0113
E10/100T
COM2
COM1
TERM_PWR
2-16
UltraNet Storage Director Hardware Installation Guide
Circuit Boards
2
Table 2-7
ZSP (SPARC Application Processor) Indicators
Circuit Card
ZSPx
Switch/
Indicator
Function
Normal
Operation
Reset switch
When depressed, resets the SPARC processor.
N/A
Status indicator
When lit, indicates startup hardware diagnostic
checks are done and system is ready.
On
RESET
Ze0053
STATUS
July 12, 2006 11:12 am
chapter2.fm
Switches and Indicators
2-17
Circuit Boards
2
Table 2-8
ZSIO (SBus I/O) Indicators
Circuit Board
Port/
Indicator
Function
Normal
Operation
Status indicator
When lit, indicates power to this SBus I/O On
card.
SBUS I/O port 1
All Primary and Secondary Service
Monitors contain the 4 Serial (RJ-45)
ports here.
N/A
Note: All four RJ-45 ports are fully
functional.
All ATM application processors contain
an ATM port here. The ATM port and 4
Serial (RJ-45) ports are shown below:
4 Serial (RJ-45) Ports
2-18
UltraNet Storage Director Hardware Installation Guide
On
Circuit Boards
2
Table 2-9
ZEN4 (ESCON) Switches and Indicators
Switch/
Indicator
Circuit Board
ZEN4
Normal
Operation
Function
RESET switch
When depressed this switch resets the
ESCON processor.
N/A
ABORT switch
When depressed this switch halts software
execution on the processor.
N/A
SP FAIL indicator
When lit, indicates the switch processor has
detected a fatal error.
Off
E0 FAIL indicator
When lit, indicates the ESCON Port 0
processor has detected a fatal error.
Off
E1 FAIL indicator
When lit, indicates the ESCON Port 1
processor has detected a fatal error.
Off
SP STATUS indicator
When lit, indicates a switch processor
heartbeat.
Blinking
E0 STATUS indicator
When lit, indicates an ESCON Port 0
processor heartbeat.
Blinking
E1 STATUS indicator
When lit, indicates an ESCON Port 1
processor heartbeat.
Blinking
SP RAM indicator
When lit, indicates global memory is being
accessed.
On
E0 RAM indicator
When lit, indicates global memory is being
accessed.
On
E1 RAM indicator
When lit, indicates global memory is being
accessed.
On
E0 LOS indicator
When lit, indicates the ESCON Port 0 cable
connection is not present.
Off
E1 LOS indicator
When lit, indicates the ESCON Port 1 cable
connection is not present.
Off
E0 XMIT indicator
When lit, indicates data being transmitted on
ESCON Port 0.
Continued on the next page.
Off or Blinking
RESET
ABORT
SP E0 E1
FAIL
STATUS
RAM
E0
E0 E1
LOS
XMIT
DATA
IDLE
Ze0115
E1
July 12, 2006 11:12 am
chapter2.fm
Switches and Indicators
2-19
Circuit Boards
2
Table 2-9
ZEN4 (ESCON) Switches and Indicators (Continued)
Switch/
Indicator
Circuit Board
ZEN4
Function
Normal
Operation
E1 XMIT indicator
When lit, indicates data being transmitted
on ESCON Port 1.
Off or Blinking
E0 DATA indicator
When lit, indicates data being received on
ESCON Port 0.
Off or Blinking
E1 DATA indicator
When lit, indicates data being received on
ESCON Port 1.
Off or Blinking
E0 IDLE indicator
When lit, indicates E0 Port is connected.
On
Note: If E0 Port is not connected,
the indicator is off.
RESET
ABORT
SP E0 E1
E1 IDLE indicator
FAIL
When lit, indicates E1 Port is connected.
STATUS
Note: If E1 Port is not connected,
the indicator is off.
RAM
E0
E0 E1
LOS
XMIT
DATA
IDLE
Ze0115
E1
2-20
UltraNet Storage Director Hardware Installation Guide
On
Circuit Boards
2
Table 2-10
ZAP5 (PowerPC) Switches and Indicators
Circuit
Card
Switch/
Indicator
EN
ZAP5
Normal
Operation
Function
Reset switch
When depressed, resets the application
processor.
N/A
NMI switch
When depressed, aborts all PowerPC
processor activity.
N/A
NMI
100 Mbps
ENET
LINK
RESET
Off or Blinking
ENET: 100 Mbps
indicator
Indicates that 100 Mbps operation is
selected.
Off or Blinking
FAIL indicator
When lit, indicates the PowerPC
processor has detected a fatal error.
Off
STATUS indicator*
When lit, indicates startup hardware
diagnostics checks are done and system
is ready.
Blinking
RAM indicator*
When lit, indicates RAM activity.
Off or Blinking
BMEM indicator
When lit, indicates there is buffer
memory data activity.
Off or Blinking
DIAG CODES
For descriptions see Table 2-11.
N/A
PCI I/O B
FAIL STATUS RAM BMEM
ENET: LINK indicator Indicates scrambler lock and receipt of
valid idle codes in 100 Mbps operation.
PCI I/O A
DIAG. CODES
* If both Status and RAM indicators are solid red and all other LEDs are off, it is likely
that the ZAP5 has panicked and has entered its boot prom.
Ze0102
See Table 0-1 on page -26 for LED descriptions for the PCI adapter cards.
July 12, 2006 11:12 am
chapter2.fm
Switches and Indicators
2-21
Circuit Boards
2
Table 2-11 provides the power-up diagnostic code sequence for the
ZAP5 card. The sequence has nine phases, which are listed in
numerical order from top to bottom.
Table 2-11
ZAP5 Power-Up Diagnostic Code Sequence
# in Sequence
LED Code
Description
1
MPC107 initialized (Master Bridge)
2
NVRAM access completed
3
Start UART initialization
4
UART line control and speed set
5
UART FIFOs and status registers cleared
2-22
UltraNet Storage Director Hardware Installation Guide
Circuit Boards
2
Table 2-11
ZAP5 Power-Up Diagnostic Code Sequence (Continued)
# in Sequence
LED Code
Description
6
UART initialization complete DTS and RTS have been enabled
7
Remote Reset and NMI have been enabled
8
BSS Memory has been zeroed out
9
Console serial port speed displayed (see the ZAP5 Console
Port Speed LED Codes table on page -24)
July 12, 2006 11:12 am
chapter2.fm
Switches and Indicators
2-23
Circuit Boards
2
Table 2-11
ZAP5 Power-Up Diagnostic Code Sequence (Continued)
# in Sequence
LED Code
Description
Not Applicable
Two rotating lights indicate that ZAP5 is idle and is waiting to
load software when autoboot is not enabled
Not Applicable
Rotating lights indicate that ZAP5 is loading software
5
Table 2-12
ZAP5 Console Serial Port Speed LED Codes
LED
Code
Description
= On The ZAP Diag Code LEDs display a code for the console serial port speed during
= Off console setup. The code displays for only a few seconds during boot up.
9600 bps
19.2 kbps
2-24
UltraNet Storage Director Hardware Installation Guide
Circuit Boards
2
ZAP5 Console Serial Port Speed LED Codes
Table 2-12
LED
Code
Description
38.4 kbps
57.6 kbps
Ethernet
1
ATM
Rx
2 Gig
Fibre
Channel
1 Gig
Fibre
Channel
Gigabit
Ethernet
ATM
OC-3
ATM
OC-12
7
4
Tx
6
3
Figure 2-7
July 12, 2006 11:12 am
chapter2.fm
5
Ze0125
2
PCI Board Indicators
Switches and Indicators
2-25
Circuit Boards
2
Table 0-1 describes the indicators shown in Figure 2-7. Indicators are
listed in the order they are shown in the Figure 2-7 and are grouped
by board type.
Table 0-1 PCI Board Indicator Information
Indicator
Number
Board Type
Indicator
Name
Function
Normal
Operation
1
Ethernet
100Tx
When lit, indicates 100BaseTx mode is operating.
N/A
CF
When lit, indicates a collision on the link.
Blinking
Rx
When lit, indicates there is reception on the link.
Blinking
Tx
When lit, indicates there is transmission on the link.
Blinking
LINK
When lit, indicates the link is up
On
(10/100 Mbps
Ethernet)
Ethernet
(10/100 Mbps
Ethernet)
Ethernet
(10/100 Mbps
Ethernet)
Ethernet
(10/100 Mbps
Ethernet)
Ethernet
(10/100 Mbps
Ethernet)
2
ATM
Link indicator
When lit, indicates link is established to an active
network.
*On
3
Gigabit
Ethernet
RX_ACT
When blinking, indicates there is data transmission
on the link.
Blinking
Note: When the cable is disconnected, no
LEDs on the Gigabit Ethernet board are lit.
Gigabit
Ethernet
TX_ACT
When blinking, indicates there is data transmission
on the link.
Blinking
Note: When the cable is disconnected, no
LEDs on the Gigabit Ethernet board are lit.
Gigabit
Ethernet
2-26
LINK_UP
When lit, indicates the link is good.
Note: When the cable is disconnected, no
LEDs on the Gigabit Ethernet board are lit.
UltraNet Storage Director Hardware Installation Guide
On
Circuit Boards
2
Table 0-1 PCI Board Indicator Information (Continued)
Indicator
Number
4
5
Indicator
Name
Function
Normal
Operation
Gigabit
Ethernet
AUX
When lit, indicates the link is good.
On
1 Gig Fibre
Channel
STATUS
When lit, indicates startup hardware diagnostics
checks are done and system is ready.
Off
1 Gig Fibre
Channel
TX_E
When lit, indicates there is data transmission on the
link.
On
1 Gig Fibre
Channel
RX_OK
When lit, indicates there is data transmission on the
link.
On
1 Gig Fibre
Channel
TX_OK
When lit, indicates there is data transmission on the
link.
On
2 Gig Fibre
Channel
LED2
When lit, indicates there is a connection.
On
2 Gig Fibre
Channel
LED1
When lit, indicates there is a connection.
On
2 Gig Fibre
Channel
RxtOS
When lit, indicates there is nothing connected.
Off
2 Gig Fibre
Channel
TxFLT
When lit, indicates that transmit power has exceeded
the limit and the transceiver has been shut down.
Off
2 Gig Fibre
Channel
RxACT
When lit, indicates there is data transmission on the
link.
Blinking
Board Type
Note: When the cable is disconnected, no
LEDs on the Gigabit Ethernet board are lit.
Note: During data transmission both the
RxACT and TxACT LEDs will flicker.
2 Gig Fibre
Channel
TxACT
When lit, indicates there is data transmission on the
link.
Blinking
Note: During data transmission both the
RxACT and TxACT LEDs will flicker.
6
July 12, 2006 11:12 am
chapter2.fm
ATM OC-3
XMIT
When lit, indicates there is data transmission on the
link.
On
ATM OC-3
ALARM
When lit, indicates that the cable on one or both
sides of the link is disconnected.
Off
Switches and Indicators
2-27
Circuit Board Jumper Settings
2
Table 0-1 PCI Board Indicator Information (Continued)
Indicator
Number
Board Type
Indicator
Name
Function
Normal
Operation
7
ATM OC-12
2
When lit, indicates that data is being transmitted.
Blinking
Note: The blinking of LEDs 2, 3, and 1/CD
alternates during data transmission.
ATM OC-12
3
When lit, indicates that data is being transmitted.
Blinking
Note: The blinking of LEDs 2, 3, and 1/CD
alternates during data transmission.
ATM OC-12
0
When lit, indicates that the link is idle.
On
ATM OC-12
1/CD
When lit, indicates that data is being transmitted.
Blinking
Note: The blinking of LEDs 2, 3, and 1/CD
alternates during data transmission.
*If the LINK indicator is off, check Tx and Rx (a common cause is that
the Tx and Rx are swapped).
Circuit Board Jumper Settings
The Service Monitor application processor; part number 20501327
(ZSP2) and 20501900, have the following jumper settings:
2-28
UltraNet Storage Director Hardware Installation Guide
Circuit Board Jumper Settings
2
2
Application Processor Jumper Settings
July 12, 2006 11:12 am
chapter2.fm
Switches and Indicators
2-29
Circuit Board Jumper Settings
2
2-30
UltraNet Storage Director Hardware Installation Guide
3
Maintenance Procedures
This chapter contains procedures for the removal and installation of
the circuit cards, fan tray, power supplies, Application Processor hard
disk, Master and Slave Switch Card(s), midplane fuses, CD-RW drive,
and DAT drive.
Only McDATA-trained service personnel should remove or install the
circuit cards.
Circuit Card Removal and Installation Procedures
This section contains the procedures for removing or installing the
circuit cards in the USD-X. All circuit cards for the USD-X are
hot-swappable except the Master and Slave switch cards.
Hot-swappable allows the circuit card to be removed or installed
when power is on.
CAUTION
Attach a wrist strap and follow ESD procedures during the
handling of all electronic components.
For all procedures, follow the “Grounding Procedure” provided in
the UltraNet Storage Director - eXtended Site Preparation User Guide. For
all removal procedures, locate an anti-static bag.
Maintenance Procedures
3-1
Circuit Card Removal and Installation Procedures
3
The following cards each have a specific removal and installation
procedure:
•
Hardware Monitor Board (HMBx)
•
UltraNet Service Monitor (USM) Application Processor
•
SPARC (ZSP) Application Processor
•
UltraNet Service Monitor I/O Adapter (USMIO)
•
SBus I/O Adapter (ZSIO)
•
ESCON Adapter (ZENx)
•
PowerPC Adapter (ZAPx)
•
PCI I/O Adapter (PCI) and all PCI Network Interface Cards
(NIC)
•
Master and Slave Switch
NOTE: The UltraNet Command Reference document contains commands that
are useful during maintenance procedures.
Hardware Monitor
Board Removal
Procedure
The Hardware Monitor Board (HMBx) is the replacement for the
Hardware Monitor Adapter (HMAx). The Hardware Monitor Board
has the capability to monitor the USD-X hardware components
without the use of the WTI/Penril switch. Use the following
procedure to remove a Hardware Monitor Board from the USD-X:
NOTE: This procedure will differ slightly if you are removing a Hardware
Monitor Adapter (HMAx). These differences are noted in the procedure.
Tools Required: A medium straight slot screwdriver is required for
this procedure.
1. Make a note of where the cables are located, and remove the RJ-45
connectors from the Hardware Monitor Board.
NOTE: Do not make a note of the cable locations if you are removing a
Hardware Monitor Adapter (HMAx). The replacement for the Hardware
Monitor Adapter uses fewer cables.
NOTE: You do not need to remove power from the system.
3-2
UltraNet Storage Director Hardware Installation Guide
Circuit Card Removal and Installation Procedures
3
2. Use the medium straight slot screwdriver to remove the top and
bottom screws holding the Hardware Monitor Board in place.
Extractor/Inserter Handles
(2 per Circuit Card)
Ze0006
3. Use both the top and bottom extractor/inserter handles to
remove the Hardware Monitor Board from the slot.
4. Place the Hardware Monitor Board in an anti-static bag. If you
removed a Hardware Monitor Board (HMBx), you have
completed this procedure. If you removed a Hardware Monitor
Adapter (HMAx), complete the next step.
5. Power down the WTI/Penril switch and remove all cabling from
the switch.
NOTE: You do not need to remove the WTI/Penril switch from its present
location.
Hardware Monitor
Board Installation
Procedure
Use the following procedure to install the Hardware Monitor Board
into the USD-X:
Tools Required: A medium straight slot screwdriver is required for
this procedure.
Maintenance Procedures
3-3
Circuit Card Removal and Installation Procedures
3
1. Remove the Hardware Monitor Board from the anti-static bag.
NOTE: You do not need to remove power from the system.
2. Position the Hardware Monitor Board in the correct slot location
and gently slide it in until approximately 1 inch from the
extractor/inserter handles.
Extractor/Inserter Handles
(2 per Circuit Card)
Ze0006
3. Use the extractor/inserter handles to insert the circuit card into
place.
4. Use the medium size straight slot screwdriver to tighten the top
and bottom screws to secure the circuit card in place.
5. Install the RJ-45 cables.
6. Use the cabling procedures outlined in the “Hardware Monitor
Board Cabling” section in Chapter 1, to connect the Hardware
Monitor Board to the Primary Service Monitor, Secondary Service
Monitor, modem, and PC.
7. After you have completed the cabling, validate connectivity to the
Hardware Monitor Board by dialing in or by opening up the
terminal emulator.
3-4
UltraNet Storage Director Hardware Installation Guide
Circuit Card Removal and Installation Procedures
3
Refer to Appendix A, HMB3 Default Configuration Settings, for
information on the default port settings for the Hardware Monitor
Board.
UltraNet Service
Monitor (USM)
Removal and
Installation
Procedures
This section provides the procedures for removing and installing the
UltraNet Service Monitor (USM) for a USD-X. The procedures differ
based on whether the Service Monitor you are removing or installing
is a Primary Service Monitor or a Secondary Service Monitor. A
separate set of procedures are provided for each Service Monitor
type.
The main function of the Service Monitor is to perform the following
system management tasks:
Service Monitor Types
•
McDATA software or firmware, diagnostics, and utilities
•
system configuration, is stored on the hard disk drive
•
SNMP
•
performing the hardware monitor functions
•
routing protocols (RIP)
•
loading, dumping, and trace functions of other adapters
•
remote support tools
Each Service Monitor is either designated as a Primary Service
Monitor or Secondary Service Monitor and only one of the Service
Monitors can be active at one time. Following is a description of each:
•
Primary Service Monitor - The Primary Service Monitor by
convention, is the application processor with the cable connection
to the auxiliary CD-RW drive. The Primary Service Monitor has
the authoritative copy of the configuration database on its hard
disk. The Primary Service Monitor periodically replicates the
configuration database from its hard disk out to the Secondary
Service Monitor (if one is installed). There is only one Primary
Service Monitor in a USD-X.
•
Secondary Service Monitor - The Secondary Service Monitor has a
read only replicated copy of the configuration database. When the
Secondary Service Monitor is set as the active Service Monitor, all
functions of a Service Monitor (listed above) are available except
the configuration database cannot be modified. There can be one
or no Secondary Service Monitor.
Maintenance Procedures
3-5
Circuit Card Removal and Installation Procedures
3
•
Primary Service
Monitor (USM)
Removal Procedure
Active Service Monitor - The active Service Monitor is the
Primary or Secondary Service Monitor that is currently
performing the Service Monitor functions. There is one active
Service Monitor at any given point in time. References to the
Service Monitor in this document are to the active Service
Monitor.
When the USD-X is configured with one application processor as the
Service Monitor and no Secondary Service Monitor, other application
processor(s) do not take over the Service Monitor functions in the
event of a failure. The Service Monitor can be hot-swapped,
(shutdown and re-booted) while traffic is running in the system. The
data traffic is not affected by this action. However, any operation that
requires Service Monitor functionality cannot be performed until the
Service Monitor comes back online.
When the USD-X is configured with a Primary Service Monitor and a
Secondary Service Monitor, the Secondary Service Monitor becomes
the active Service Monitor in the event of a Primary Service Monitor
failure.
Use the following procedure to remove a Primary Service Monitor
from a USD-X (slot 6):
Tools Required: A medium straight slot screwdriver is required for
this procedure.
1. Follow the instructions contained in the “Performing a Complete
Backup” section in Chapter 5 to backup the configuration files to
a CD-RW drive.
NOTE: You do not need to remove power from the system.
2. Use the following command string to shutdown the Service
Monitor:
sync;sync;sync;halt
NOTE: Wait for the ‘OK’ prompt to indicate the command has completed.
Then continue with the next step.
3. Use the medium straight slot screwdriver to remove the top and
bottom screws holding the Service Monitor in place.
3-6
UltraNet Storage Director Hardware Installation Guide
Circuit Card Removal and Installation Procedures
3
Extractor/Inserter Handles
(2 per Circuit Card)
Ze0006
4. Use both the top and bottom extractor/inserter handles to
remove the Service Monitor from the slot.
5. If the hard disk needs to be replaced, continue at Step 4 of the
“Application Processor Hard Disk Replacement Procedure With
SCSI Adapter Kit Installation” section later in this chapter.
6. Place the Service Monitor into an anti-static bag.
Maintenance Procedures
3-7
Circuit Card Removal and Installation Procedures
3
Primary Service Monitor (USM) Installation
Procedure
Use the following procedure to install a Primary Service Monitor into
the USD-X (slot 6):
Tools Required: A medium straight slot screwdriver is required for
this procedure.
1. Remove the application processor adapter from the anti-static
bag.
NOTE: You do not need to remove power from the system.
2. Install the application processor hard disk using the “Application
Processor Hard Disk Replacement Procedure” section later in this
chapter.
3. Position the application processor adapter in the correct slot
location and gently slide it in until approximately 1 inch from the
extractor/inserter handles.
Extractor/Inserter Handles
(2 per Circuit Card)
3-8
UltraNet Storage Director Hardware Installation Guide
Ze0006
4. Use the extractor/inserter handles to insert the application
processor adapter into place.
Circuit Card Removal and Installation Procedures
3
5. Use the medium straight slot screwdriver to tighten the top and
bottom screws to secure the circuit card in place.
6. If you did not replace the hard disk with the spare hard disk,
continue at Step 9.
7. Restore the configuration files from the CD-RW drive using the
“Performing Restore Operations from a CD” section in Chapter 5.
8. Use the following command to set the application processor as a
Primary Service Monitor:
/opt/CMNTsm/support/setup_sm primary
9. Clear the service LED that is located below the CD-RW, using the
serv_led_chg 0 command.
Secondary Service
Monitor (USM)
Removal Procedure
If you have a USD-X with an active Secondary Service Monitor, find
out why you do not have your Primary Service Monitor active, and
make any necessary repairs to re-enable it. An active Secondary
Service Monitor should not be removed until the Primary Service
Monitor becomes active again.
Use the following procedure to remove a Secondary Service Monitor
from the USD-X (slot 12):
Tools Required: A medium straight slot screwdriver is required for
this procedure.
NOTE: You do not need to remove power from the system.
1. Use the instructions outlined in the “Performing a Complete
Backup” section in Chapter 5, to backup the configuration files to
the CD-RW drive.
2. Use the following command string to shutdown the Service
Monitor:
sync;sync;sync;halt
NOTE: Wait for the ‘OK’ prompt to indicate the command has completed.
Then continue with the next step.
3. Use the medium straight slot screwdriver to remove the top and
bottom screws holding the Secondary Service Monitor in place.
Maintenance Procedures
3-9
Circuit Card Removal and Installation Procedures
3
Extractor/Inserter Handles
(2 per Circuit Card)
Ze0006
4. Use both the top and bottom extractor/inserter handles to
remove the Secondary Service Monitor from the slot.
5. If the hard disk needs replacing, or if you are only replacing the
application processor, continue with Step 4 of the “Application
Processor Hard Disk Replacement Procedure” later in this
chapter.
6. Place the Secondary Service Monitor into an anti-static bag.
Secondary Service
Monitor (USM)
Installation Procedure
Use the following procedure to install a Secondary Service Monitor in
the USD-X (slot 12):
Tools Required: A medium straight slot screwdriver is required for
this procedure.
NOTE: You do not need to remove power from the system.
1. Remove the application processor adapter from the anti-static
bag.
3-10
UltraNet Storage Director Hardware Installation Guide
Circuit Card Removal and Installation Procedures
3
2. Install the application processor hard disk using the “Application
Processor Hard Disk Replacement Procedure” later in this
chapter.
3. Position the Service Monitor in the correct slot location and gently
slide it in until approximately 1 inch from the extractor/inserter
handles.
Extractor/Inserter Handles
(2 per Circuit Card)
Ze0006
4. Use the extractor/inserter handles to insert the Service Monitor
into place.
5. Using the medium straight slot screwdriver, tighten the top and
bottom screws to secure the Service Monitor in place.
6. If you did not replace the hard disk with the spare hard disk,
continue at Step 9.
7. Restore the configuration files from the CD-RW drive using the
instructions outlined in the “Performing Restore Operations from
a CD” section in Chapter 5.
8. Use the following command to set the application processor as a
Secondary Service Monitor:
Maintenance Procedures
3-11
Circuit Card Removal and Installation Procedures
3
/opt/CMNTsm/support/setup_sm secondary
9. Clear the service LED that is located below the CD-RW drive,
using the serv_led_chg 0 command.
ZSP Application
Processor Removal
and Installation
Procedures
Overview
The sections that follow provide the removal and installation
procedures for the SPARC (ZSP) Application Processor.
The ZSP application processor can be configured as a Service Monitor
or not as a Service Monitor. If the application processor is configured
as a Service Monitor, its main function is to perform the following
system management tasks:
•
McDATA software or firmware, diagnostics, and utilities
•
system configuration, is stored on the hard disk drive
•
SNMP
•
performing the hardware monitor functions
•
routing protocols (RIP)
•
loading, dumping, and trace functions of other adapters
•
remote support tools
When an application processor is a Service Monitor, the application
processor is either a Primary Service Monitor or Secondary Service
Monitor, and only one of the Service Monitors can be active at one
time. Following is a description of each:
3-12
•
Primary Service Monitor - The Primary Service Monitor by
convention, is the application processor with the SCSI cable
connection to the auxiliary DAT tape drive. The Primary Service
Monitor has the authoritative copy of the configuration database
on its hard disk. The Primary Service Monitor periodically
replicates the configuration database from its hard disk out to the
Secondary Service Monitor (if one is installed). There is only one
Primary Service Monitor in a USD-X.
•
Secondary Service Monitor - The Secondary Service Monitor has a
read only replicated copy of the configuration database. When the
Secondary Service Monitor is set as the active Service Monitor, all
UltraNet Storage Director Hardware Installation Guide
Circuit Card Removal and Installation Procedures
3
functions of a Service Monitor (listed above) are available except
the configuration database cannot be modified. There can be one
or no Secondary Service Monitor.
•
Active Service Monitor - The active Service Monitor is the
Primary or Secondary Service Monitor that is currently
performing the Service Monitor functions. There is one active
Service Monitor at any given point in time. References to the
Service Monitor in this document are to the active Service
Monitor.
The following subsections contain removal and replacement
procedures for each of the application processor configurations, the
Primary Service Monitor, the Secondary Service Monitor, and
non-Service Monitor application processor(s).
NOTE: The application processor is not spared with a hard disk installed.
Therefore, prior to installing an application processor, install a hard disk
using the “Application Processor Hard Disk Replacement Procedure With
SCSI Adapter Kit Installation” section later in this chapter.
Primary Service
Monitor (ZSP) Removal
Procedure
When the USD-X is configured with one application processor as the
Service Monitor and no Secondary Service Monitor, other application
processor(s) do not take over the Service Monitor functions in the
event of a failure. The Service Monitor can be hot-swapped,
(shutdown and re-booted) while traffic is running in the system. The
data traffic is not affected by this action. However, any operation that
requires Service Monitor functionality cannot be performed until the
Service Monitor comes back online.
When the USD-X is configured with a Primary Service Monitor and
one or more Secondary Service Monitor(s), the Secondary Service
Monitor becomes the active Service Monitor in the event of a Primary
Service Monitor failure.
Use the following procedure to remove a Primary Service Monitor
from a USD-X (slot 6):
Tools Required: A medium straight slot screwdriver is required for
this procedure.
1. Use the “Configuration Backup Procedure” later in this chapter to
backup the configuration files to a DAT drive.
2. Use the following command string to shutdown the Service
Monitor:
Maintenance Procedures
3-13
Circuit Card Removal and Installation Procedures
3
sync;sync;sync;halt
NOTE: Wait for the ‘OK’ prompt to indicate the command has completed.
Then continue with the next step.
3. Use the medium straight slot screwdriver to remove the top and
bottom screws holding the Service Monitor in place.
NOTE: You do not need to remove power from the system.
Extractor/Inserter Handles
(2 per Circuit Card)
Ze0006
4. Use both the top and bottom extractor/inserter handles to
remove the Service Monitor from the slot.
5. If the hard disk needs to be replaced, continue at Step 4 of the
“Application Processor Hard Disk Replacement Procedure With
SCSI Adapter Kit Installation” section in Chapter 3.
6. Place the Service Monitor into an anti-static bag.
3-14
UltraNet Storage Director Hardware Installation Guide
Circuit Card Removal and Installation Procedures
3
Primary Service
Monitor (ZSP)
Installation Procedure
Use the following procedure to install a Primary Service Monitor into
the USD-X (slot 6):
Tools Required: A medium straight slot screwdriver is required for
this procedure.
1. Remove the application processor adapter from the anti-static
bag.
NOTE: You do not need to remove power from the system.
2. Install the application processor hard disk using the “Application
Processor Hard Disk Replacement Procedure With SCSI Adapter
Kit Installation” section in Chapter 3.
3. Position the application processor adapter in the correct slot
location and gently slide it in until approximately 1 inch from the
extractor/inserter handles.
4. Use the extractor/inserter handles to insert the application
processor adapter into place.
Maintenance Procedures
3-15
Circuit Card Removal and Installation Procedures
Extractor/Inserter Handles
(2 per Circuit Card)
Ze0006
3
5. Use the medium straight slot screwdriver to tighten the top and
bottom screws to secure the circuit card in place.
6. If you did not replace the hard disk with the spare hard disk,
continue at Step 9.
7. Restore the configuration files from the DAT drive using the
“Configuration Restore Procedure” later in this chapter.
8. Use the following command to set the application processor as a
Primary Service Monitor:
/opt/CMNTsm/support/setup_sm primary
9. Clear the service LED that is located below the DAT drive, using
the serv_led_chg 0 command.
Secondary Service
Monitor (ZSP) Removal
Procedure
3-16
If you have a USD-X with an active Secondary Service Monitor, find
out why you do not have your Primary Service Monitor active, and
make any necessary repairs to re-enable it. An active Secondary
Service Monitor should not be removed until the Primary Service
Monitor becomes active again.
UltraNet Storage Director Hardware Installation Guide
Circuit Card Removal and Installation Procedures
3
Use the following procedure to remove a Secondary Service Monitor
from the USD-X (slot 12):
Tools Required: A medium straight slot screwdriver is required for
this procedure.
NOTE: You do not need to remove power from the system.
1. Use the “Configuration Backup Procedure” section later in this
chapter to backup the configuration files to the DAT tape.
2. Use the following command string to shutdown the Service
Monitor:
sync;sync;sync;halt
NOTE: Wait for the ‘OK’ prompt to indicate the command has completed.
Then continue with the next step.
3. Use the medium straight slot screwdriver to remove the top and
bottom screws holding the Secondary Service Monitor in place.
4. Use both the top and bottom extractor/inserter handles to
remove the Secondary Service Monitor from the slot.
Maintenance Procedures
3-17
Circuit Card Removal and Installation Procedures
Extractor/Inserter Handles
(2 per Circuit Card)
Ze0006
3
5. If the hard disk needs replacing, or you are only replacing the
application processor, continue with Step 4 of the “Application
Processor Hard Disk Replacement Procedure” provided on
page -54.
6. Place the Secondary Service Monitor into an anti-static bag.
3-18
UltraNet Storage Director Hardware Installation Guide
Circuit Card Removal and Installation Procedures
3
Secondary Service Monitor (ZSP) Installation
Procedure
Use the following procedure to install a Secondary Service Monitor in
the USD-X (slot 12):
Tools Required: A medium straight slot screwdriver is required for
this procedure.
NOTE: You do not need to remove power from the system.
1. Remove the Service Monitor (application processor adapter) from
the anti-static bag.
2. Install the application processor hard disk using the “Application
Processor Hard Disk Replacement Procedure” provided in this
chapter.
3. Position the Service Monitor in the correct slot location and gently
slide it in until approximately 1 inch from the extractor/inserter
handles.
4. Use the extractor/inserter handles to insert the Service Monitor
into place.
Maintenance Procedures
3-19
Circuit Card Removal and Installation Procedures
Extractor/Inserter Handles
(2 per Circuit Card)
Ze0006
3
5. Using the medium straight slot screwdriver, tighten the top and
bottom screws to secure the Service Monitor in place.
6. If you did not replace the hard disk with the spare hard disk,
continue at Step 9.
7. Restore the configuration files from the DAT drive using the
“Configuration Restore Procedure” section later in this chapter.
8. Use the following command to set the application processor as a
Secondary Service Monitor:
/opt/CMNTsm/support/setup_sm secondary
9. Clear the service LED that is located below the DAT drive, using
the serv_led_chg 0 command.
ZSP Application
Processor Not
Configured as a
Service Monitor
Removal Procedure
3-20
Use the following procedure to remove an application processor that
is not configured as a Service Monitor in the USD-X (slot 5 or slot 4):
Tools Required: A medium straight slot screwdriver is required for
this procedure.
UltraNet Storage Director Hardware Installation Guide
Circuit Card Removal and Installation Procedures
3
NOTE: You do not need to remove power from the system.
1. Use the following command string to shutdown the application
processor:
sync;sync;sync;halt
NOTE: Wait for the ‘OK’ prompt to indicate the command has completed.
Then continue with the next step.
2. Use the medium straight slot screwdriver to remove the top and
bottom screws holding the application processor in place.
Extractor/Inserter Handles
(2 per Circuit Card)
Ze0006
3. Use both the top and bottom extractor/inserter handles to
remove the Service Monitor from the slot.
4. If the hard disk needs replacing, or you are only replacing the
application processor, continue at Step 4 of the “Application
Processor Hard Disk Replacement Procedure” provided on
page -54.
5. Place the application processor into an anti-static bag.
Maintenance Procedures
3-21
Circuit Card Removal and Installation Procedures
3
ZSP Application
Processor Not
Configured as a
Service Monitor
Installation Procedure
Use the following procedure to install an application processor that is
not configured as a Service Monitor in the USD-X (slot 5 or slot 4):
Tools Required: A medium straight slot screwdriver is required for
this procedure.
NOTE: You do not need to remove power from the system.
1. Remove the application processor adapter from the anti-static
bag.
2. Install the application processor hard disk using the “Application
Processor Hard Disk Replacement Procedure” section in Chapter
3.
3. Position the application processor in the correct slot location and
gently slide it in until approximately 1 inch from the
extractor/inserter handles.
4. Use the extractor/inserter handles to insert the application
processor into place.
3-22
UltraNet Storage Director Hardware Installation Guide
Circuit Card Removal and Installation Procedures
Extractor/Inserter Handles
(2 per Circuit Card)
Ze0006
3
5. Using the medium straight slot screwdriver, tighten the top and
bottom screws to secure the Service Monitor in place.
6. Clear the service LED that is located below the DAT drive, using
the serv_led_chg 0 command.
USM I/O Adapter
(USMIO) Removal
Procedure
Use the following procedure to remove a USM I/O adapter from the
USD-X:.
Tools Required: A medium straight slot screwdriver is required for
this procedure.
NOTE: You do not need to remove power from the system.
1. Use the following command string to shutdown the system traffic
to the USM I/O adapter being removed:
sync;sync;sync;halt
Maintenance Procedures
3-23
Circuit Card Removal and Installation Procedures
3
NOTE: Wait for the ‘OK’ prompt to indicate the command has completed.
Then continue with the next step.
2. If cables are attached to the circuit card make a note of where the
cables are located.
3. Using the medium straight slot screwdriver, remove the top and
bottom screws holding the USM I/O adapter in place.
Extractor/Inserter Handles
(2 per Circuit Card)
Ze0006
4. Using both the top and bottom extractor/inserter handles,
remove the USM I/O adapter from the slot.
5. Place the USM I/O adapter in an anti-static bag.
USM I/O Adapter
(USMIO) Installation
Procedure
The USM I/O adapter installs into the back of the USD-X as a
companion to the USM application processor. Use the following
procedure to install an USM I/O adapter into the USD-X.
Tools Required: A medium straight slot screwdriver is required for
this procedure.
NOTE: You do not need to remove power from the system.
3-24
UltraNet Storage Director Hardware Installation Guide
Circuit Card Removal and Installation Procedures
3
1. Remove the USM I/O adapter from the anti-static bag.
2. Position the USM I/O adapter in the correct slot location and
gently slide it in until approximately 1 inch from the
extractor/inserter handles.
Extractor/Inserter Handles
(2 per Circuit Card)
Ze0006
3. Use the extractor/inserter handles to insert the USM I/O adapter
into place.
4. Using the medium straight slot screwdriver, tighten the top and
bottom screws to secure the USM I/O adapter in place.
5. Install the SCSI cable using the “Service Monitor SCSI Cabling”
procedure in Chapter 1.
6. Install the RJ-45 cable that connects to the Hardware Monitor
Board using the “Hardware Monitor Board Cabling” procedure
for either the Primary or Secondary Service Monitor, which is
provided in Chapter 1.
7. Clear the service LED that is located below the CD-RW drive,
using the serv_led_chg 0 command.
8. Issue a reboot command to the application processor.
Maintenance Procedures
3-25
Circuit Card Removal and Installation Procedures
3
SBus I/O Adapter
(ZSIO) Removal
Procedure
Use the following procedure to remove a SBus I/O adapter from the
USD-X:
Tools Required: A medium and small straight slot screwdriver are
required for this procedure.
NOTE: You do not need to remove power from the system.
1. Use the following command string to shutdown the system traffic
to the SBus I/O adapter being removed:
sync;sync;sync;halt
NOTE: Wait for the ‘OK’ prompt to indicate the command has completed.
Then continue with the next step.
2. If cables are attached to the circuit card make a note of where the
cables are located. If there is an Ethernet cable, use the small
straight slot screwdriver to remove it.
3. Using the medium straight slot screwdriver, remove the top and
bottom screws holding the SBus I/O adapter in place.
4. Using both the top and bottom extractor/inserter handles,
remove the SBus I/O adapter from the slot.
3-26
UltraNet Storage Director Hardware Installation Guide
Circuit Card Removal and Installation Procedures
Extractor/Inserter Handles
(2 per Circuit Card)
Ze0006
3
5. Place the SBus I/O adapter in an anti-static bag.
Maintenance Procedures
3-27
Circuit Card Removal and Installation Procedures
3
4 Serial (RJ-45) Port Removal Procedure
Use the following procedure to remove the 4 Serial (RJ-45) port card
from SBus I/O port 1:
Tools Required: A small straight slot screwdriver is required for this
procedure.
1. Remove the SBus I/O adapter using the “SBus I/O Adapter
(ZSIO) Removal Procedure”.
2. Place the SBus I/O adapter onto a static free surface.
3. Remove the two small screws from SBus I/O port 1, these two
screws secure the 4 serial (RJ-45) port card to the front panel of the
SBus I/O card.
4. Disengage the card’s connector from the SBus I/O card.
5. Place the card in an anti-static bag.
6. Use the “4 Serial (RJ-45) Port Installation Procedure” to install a
new card.
3-28
UltraNet Storage Director Hardware Installation Guide
Circuit Card Removal and Installation Procedures
3
4 Serial (RJ-45) Port Installation Procedure
Use the following procedure to install the 4 Serial (RJ-45) port card in
SBus I/O port 1:
NOTE: The following procedure assumes that you have removed the SBus
I/O adapter; if not, use the “SBus I/O Adapter (ZSIO) Removal Procedure”
prior to this procedure.
Tools Required: A small straight slot screwdriver is required for this
procedure.
1. Align the new 4 Serial (RJ-45) port card into the SBus I/O port 1
faceplate opening and SBus I/O port 1 connector.
2. Press the Serial (RJ-45) port card into the SBus I/O port connector.
3. Secure the card in place using the two small screws and a small
straight slot screwdriver.
SBus I/O Adapter
(ZSIO) Installation
Procedure
The SBus adapter installs into the back of the USD-X as a companion
to its assigned application processor adapter. Use the following
procedure to install an SBus I/O adapter into the USD-X:
Tools Required: A medium and small straight slot screwdriver are
required for this procedure.
NOTE: You do not need to remove power from the system.
1. Remove the SBus I/O adapter from the anti-static bag.
2. Position the SBus adapter in the correct slot location and gently
slide it in until approximately 1 inch from the extractor/inserter
handles.
3. Use the extractor/inserter handles to insert the SBus I/O adapter
into place.
Maintenance Procedures
3-29
Circuit Card Removal and Installation Procedures
Extractor/Inserter Handles
(2 per Circuit Card)
Ze0006
3
4. Using the medium straight slot screwdriver, tighten the top and
bottom screws to secure the SBus adapter in place.
5. Install the cables. If an Ethernet cable was attached, use the small
straight slot screwdriver to secure the cable connector back in
place.
6. Clear the service LED that is located below the DAT drive, using
the serv_led_chg 0 command.
7. Issue a reboot command to the application processor.
ESCON (ZENx)
Adapter Removal
Procedure
Use the following procedure to remove a ZENx ESCON adapter from
the USD-X:
Tools Required: A medium straight slot screwdriver and a small
Phillips screwdriver are required for this procedure.
NOTE: You do not need to remove power from the system.
1. Remove the ESCON cable from the front of the ESCON adapter.
3-30
UltraNet Storage Director Hardware Installation Guide
Circuit Card Removal and Installation Procedures
3
2. Use the medium straight slot screwdriver to remove the top and
bottom screws holding the ESCON adapter in place.
Extractor/Inserter Handles
(2 per Circuit Card)
Ze0006
3. Use both the top and bottom extractor/inserter handles to
remove the ESCON adapter from the slot.
4. Place the card in an anti-static bag.
ESCON (ZENx)
Adapter Installation
Procedure
The ESCON adapter installs into the front of the USD-X. Use the
following procedure to install an ESCON adapter into the USD-X:
Tools Required: A medium straight slot screwdriver and a small
Phillips screwdriver are required for this procedure.
NOTE: You do not need to remove power from the system.
1. Remove the ESCON adapter from the anti-static bag.
2. Position the ESCON adapter in the correct slot location and
gently slide it in until approximately 1 inch from the
extractor/inserter handles.
Maintenance Procedures
3-31
Circuit Card Removal and Installation Procedures
3
Extractor/Inserter Handles
(2 per Circuit Card)
Ze0006
3. Use the extractor/inserter handles to insert the ESCON adapter
into place.
4. Using the medium straight slot screwdriver, tighten the top and
bottom screws to secure the ESCON adapter in place.
5. Install the ESCON cable.
6. Clear the service LED that is located below the CD-RW or DAT
drive, using the serv_led_chg 0 command.
PowerPC Adapter
(ZAP5) and PCI I/O
Adapter Card
Removal Procedure
Use the following procedure to remove the PowerPC ZAP5 adapter
and its PCI I/O adapter cards:
Tools Required: A medium straight slot screwdriver and medium
Phillips screwdriver are required for this procedure.
NOTE: You do not need to remove power from the system.
1. If cables are attached to the ZAP5 adapter, make a note of where
the cables are located. Remove all I/O cables from the ZAP5
adapter.
3-32
UltraNet Storage Director Hardware Installation Guide
Circuit Card Removal and Installation Procedures
3
2. Use the medium straight slot screwdriver to remove the top and
bottom screws holding the PowerPC ZAP5 adapter in place.
Extractor/Inserter Handles
(2 per Circuit Card)
Ze0006
3. Using both the top and bottom extractor/inserter handles,
remove the PowerPC ZAP5 adapter from the slot.
4. Place the ZAP5 adapter on an anti-static surface with access to the
PCI I/O adapter cards.
5. Using the Phillips screwdriver, remove the two 2.5 mm screws
that secure the PCI I/O adapter card to the ZAP5 adapter. Repeat
this step for the remaining PCI I/O adapter card.
6. Gently lift the PCI I/O adapter card to disengage it from the
ZAP5 adapter connectors. Repeat this step for the remaining PCI
I/O adapter card.
7. Place each PCI I/O adapter card into an anti-static bag.
8. Place the ZAP5 adapter into an anti-static bag.
Maintenance Procedures
3-33
Circuit Card Removal and Installation Procedures
3
PowerPC Adapter
(ZAP5) and PCI I/O
Adapter Card
Installation
Procedure
Use the following procedure to install the ZAP5 adapter and its PCI
I/O adapter cards:
Tools Required: A medium straight slot screwdriver and medium
Phillips screwdriver are required for this procedure.
NOTE: You do not need to remove power from the system; however, halt
traffic on each interface on the ZAP5 adapter.
1. Remove the ZAP5 adapter from the anti-static bag.
2. Place the ZAP5 adapter on an anti-static surface with access to the
I/O card connectors.
3. For ports PCI I/O B and PCI I/O A, insert the PCI I/O adapter
card’s bezel into the appropriate PCI cutout on the faceplate of
the ZAP5.
NOTE: Ensure the rubber gasket seats into the PCI I/O cutout.
4. Engage each connector, making sure they are seated completely.
NOTE: If the PCI I/O adapter card’s bezel has four threaded screws (such as
the DS3/E3 PCI I/O adapter card), then use the four #2-56 screws to secure
the bezel to the faceplate of the ZAP5.
5. Using the Phillips screwdriver and two 2.5 mm screws, secure
each PCI I/O adapter card to the ZAP5 adapter.
6. Position the PowerPC ZAP5 adapter in the correct slot location
and gently slide it in until it is approximately 1 inch from the
extractor/inserter handles.
3-34
UltraNet Storage Director Hardware Installation Guide
Circuit Card Removal and Installation Procedures
3
Extractor/Inserter Handles
(2 per Circuit Card)
Ze0006
7. Using the extractor/inserter handles, insert the PowerPC ZAP5
adapter into place.
8. Using the medium straight slot screwdriver, tighten the top and
bottom screws to secure the PowerPC ZAP5 adapter in place.
9. Reconnect the cabling to ZAP5 ports PCI I/O B and PCI I/O A.
10. Clear the service LED that is located below the CD-RW or DAT
drive, using the serv_led_chg 0 command.
Master and Slave
Switch Card
Removal Procedure
The USD-X contains one master and three slave switch cards located
on the front of the switch midplane. For master and slave locations on
the F9112 refer to Figure 3-1. For master and slave locations on the
F9106 refer to Figure 3-2.
Maintenance Procedures
3-35
Circuit Card Removal and Installation Procedures
3
Figure 3-1
3-36
F9112 Master and Slave Circuit Card Locations
UltraNet Storage Director Hardware Installation Guide
Circuit Card Removal and Installation Procedures
3
Top Card Lock
ve
Ze0063
Bottom Card Lock
Master
Figure 3-2
F9106 Master and Slave Circuit Card Locations
Use the following procedure to remove the master and slave switch
cards from the USD-X:
Tools Required: A medium straight slot screwdriver is required for
this procedure.
1. Use the following command string on all application processors:
sync;sync;sync;halt
ATTENTION! Shutdown must be done on all application processors prior to
removing power.
NOTE: Wait for the ‘OK’ prompt to indicate the command has completed.
Then continue with the next step.
Maintenance Procedures
3-37
Circuit Card Removal and Installation Procedures
3
2. Turn the power off by using the Power switch (see power
supplies located on the front of the USD-X). Also, turn all
switches to off (0). These switches are located on the back of the
USD-X.
3. To access the master and slave switch cards, the cards in slots 2, 3,
4, 8, 9, and 10 may need to be removed. First, make a note of
where the circuit cards and cables are located. Then use the
medium screwdriver and remove the top and bottom screws
holding the circuit cards in slots 2, 3, 4, 8, 9, and 10 from the front
of the USD-X.
Extractor/Inserter Handles
(2 per Circuit Card)
3-38
UltraNet Storage Director Hardware Installation Guide
Ze0006
4. Finish by using both the top and bottom extractor inserter
handles to remove the circuit cards.
Circuit Card Removal and Installation Procedures
3
5. Locate the top and bottom card locks on each master or slave
switch card you are removing.
6. Carefully slide both the top and bottom card locks to the unlock
position.
7. Using equal pressure on each of the extractor/inserter handles,
remove the switch card(s).
8. Place the switch card(s) into an anti-static bag.
The USD-X requires the switch card(s) for operation, therefore,
continue with the next section “Master and Slave Switch Card
Installation Procedure”.
Maintenance Procedures
3-39
Midplane Fuse Removal Procedure
3
Master and Slave
Switch Card
Installation
Procedure
Use the following procedure to install the master and slave switch
cards in the USD-X:
Tools Required: A medium straight slot screwdriver is required for
this procedure.
1. Position the switch card in the correct slot location and gently
slide it in until it is approximately 1 inch from the
extractor/inserter handles.
2. Use the extractor/inserter handles to insert the switch card into
place.
3. Slide the card locks to the lock position.
4. Install the circuit cards and cables removed previously and use
the small straight slot screwdriver to secure the cards and cable
connectors in place.
5. Power on the system using the “Power On” procedure.
Midplane Fuse Removal Procedure
The USD-X contains fuses for each slot in the F9112 and F9106. These
fuses are on the midplane and are accessed from the back of the
system. For all fuse locations on the F9112, see Figure 3-1 and
Table 3-1. For all fuse locations on the F9106, see Figure 3-2 and
Table 3-2.
3-40
UltraNet Storage Director Hardware Installation Guide
Midplane Fuse Removal Procedure
3
Slot
6
22
Slot
5
20
18
24
21
Slot
3
Slot
4
19
17
23
14
12
10
16
13
Slot
2
Slot
1
3
1
7
4
2
8
5
11
9
15
6
56
55
58
57
59
53
Slot
Slot
10
Slot
11
54 12
Slot
9
Slot
8
Slot
7
dware
itor Board
50
46
49
52
51
Figure 3-3
44
42
48
45
43
41
47
38
36
34
40
37
35
33
39
30
28
26
32
29
27
25
31
F9112 Fuse Locations
Maintenance Procedures
3-41
Midplane Fuse Removal Procedure
3
Table 3-1
Fuse Numbers Corresponding to Slots on the F9112
Midplane
Slot Number
Fuse Numbers
1
1, 3, 5, and 7
2
2, 4, 6, and 8
3
9, 11, 13, and 15
4
10, 12, 14, and 16
5
17, 19, 21, and 23
6
18, 20, 22, and 24
7
25, 27, 29, and 31
8
26, 28, 30 and 32
9
33, 35, 37, and 39
10
34, 36, 38, and 40
11
41, 43, 45, and 47
12
42, 44, 46, and 48
HMB
49, 50, 51, 52, and 54
HMB/Slave/Master
53
J1
55, 56, 57, 58, and 59
NOTE: Refer to Appendix E for the voltage for each of the fuse controls.
3-42
UltraNet Storage Director Hardware Installation Guide
Midplane Fuse Removal Procedure
3
Slot
6
ware
tor Board
22
20
18
24
Slot
5
21
19
17
23
Slot
4
14
12
10
16
Slot
3
13
11
9
15
Slot
2
6
4
2
8
Slot
1
5
3
1
7
54
51
52
49
50
53
Figure 3-4
F9106 Fuse Locations
Table 3-2
Fuse Numbers Corresponding to Slots on the F9106
Midplane
Slot Number
Fuse Numbers
1
1, 3, 5, and 7
2
2, 4, 6, and 8
3
9, 11, 13, and 15
4
10, 12, 14, and 16
5
17, 19, 21, and 23
6
18, 20, 22, and 24
HMB/Slave/Master
53
HMB
49, 50, 51, 52, and 54
Use the following procedure to remove a fuse from the USD-X
midplane:
Maintenance Procedures
3-43
Midplane Fuse Removal Procedure
3
NOTE: A medium straight slot screwdriver, an ohm meter, and a needle-nose
pliers are required for this procedure.
1. Use the following command string on all application processors:
sync;sync;sync;halt
ATTENTION! Shutdown must be performed on all application processors
prior to removing power.
NOTE: Wait for the ‘OK’ prompt to indicate the command has completed.
Then continue with the next step.
Ze0004
2. Turn the power off by pressing the Power switch on the power
supplies located on the front of the USD-X. Also, turn all switches
to off (0), these are located on the back of the USD-X.
3. To access the midplane fuse (from the back of the system), remove
the cards from the slot that has the blown fuse, using the
following steps:
3-44
UltraNet Storage Director Hardware Installation Guide
Midplane Fuse Removal Procedure
3
NOTE: You may need to remove additional cards to allow access to the fuse.
a. Make a note of where the circuit cards and cables are located.
b. Using the medium screwdriver, remove the top and bottom
screws holding the circuit cards in the back of the USD-X.
Extractor/Inserter Handles
(2 per Circuit Card)
Ze0006
c. Using both the top and bottom extractor inserter handles,
remove the circuit cards.
4. To determine which fuse is bad, use the ohm meter, and measure
the slot’s fuses (Figure 3-3 or Figure 3-4). A good fuse has a
reading of less than 5 ohms. A bad fuse has a reading of greater
than 5 ohms.
5. Using the needle-nose pliers, carefully grip the center of the fuse,
and pull it away from the midplane.
The USD-X requires the fuse(s) for operation; therefore, continue with
the next section “Midplane Fuse Installation Procedure.”
Maintenance Procedures
3-45
Midplane Fuse Installation Procedure
3
Midplane Fuse Installation Procedure
Use the following procedure to install the midplane fuse(s) into the
USD-X:
Tools Required: A medium straight slot screwdriver and a
needle-nose pliers are required for this procedure.
1. Grip the center of the new fuse with the needle-nose pliers.
2. Position the fuse and gently press it into the fuse holder.
3. Install the circuit cards and cables removed previously and use
the small straight slot screwdriver to secure the cards and cable
connectors in place.
4. Power on the system using the “Power On” procedure.
Fan Tray Replacement Procedure
This section contains the procedure for replacing the fan tray in the
USD-X. The six fans for cooling the USD-X are located in a fan tray
assembly above the USD-X circuit cards. Only McDATA-trained
service personnel should replace the fan tray assembly.
Tools Required: A medium straight slot screwdriver is required for
this procedure.
NOTE: You do not need to remove power from the system.
1. Use the screwdriver to loosen the two screws located on the front
of the fan tray assembly.
ATTENTION! To ensure that the hardware does not overheat, complete this
procedure immediately.
3-46
UltraNet Storage Director Hardware Installation Guide
Fan Tray Replacement Procedure
3
2. Slide the fan tray assembly straight out from the chassis. As you
slide the fan tray out, power is disconnected from the fan tray
assembly.
CAUTION
Keep fingers away from the fan blades. The blades may
continue turning after power is removed.
3. Place the fan tray in an anti-static bag and return it to the factory.
4. Remove the new fan tray assembly from its container and insert it
into the fan tray slot.
5. Use the medium straight slot screwdriver to screw the new fan
tray assembly into place with the two screws located on the front
of the fan tray assembly.
Maintenance Procedures
3-47
Power Supply Replacement Procedure
3
Thumb screws
Power Supply Replacement Procedure
This section contains the procedure for replacing a power supply in
the USD-X. The USD-X contains two to four power supplies
depending on the system configuration. Only McDATA-trained
service personnel should replace the power supply.
Tools Required: A medium straight slot screwdriver is required for
this procedure.
NOTE: You do not need to remove power from the system, but be aware that
power supply removal may overload the remaining power supplies.
3-48
UltraNet Storage Director Hardware Installation Guide
Power Supply Replacement Procedure
3
1. Use the medium straight slot screwdriver to remove the one
screw located on the front of the power supply.
2. Switch the power supply off.
Ze0025
Power
Supply
Screw
3. Slide the power supply out from the chassis. As you slide the
power supply out, power is disconnected.
4. Remove the new power supply from its container.
5. Place the power supply that was removed from the system into
the container and return it to the factory.
6. Switch the new power supply off and insert it into the power
supply slot.
7. Using the screwdriver tighten the screw located on the front of
the power supply to secure the power supply in place.
8. Switch the new power supply on.
9. Clear the service LED that is located below the CD-RW or DAT
drive, using the serv_led_chg 0 command.
Maintenance Procedures
3-49
Application Processor Hard Disk Replacement Procedure
3
Application Processor Hard Disk Replacement Procedure
This section contains the procedures for replacing the hard disk drive
on an application processor adapter in the USD-X. Only McDATA
trained service personnel should replace the application processor
hard disk.
Tools Required: A medium straight slot screwdriver is required for
this procedure.
1. Use the following command string to shutdown the system traffic
to the application processor adapter:
sync;sync;sync;halt
NOTE: Wait for the ‘OK’ prompt to indicate the command has completed.
Then continue with the next step.
2. Using the screwdriver, loosen the top and bottom screws holding
the application processor in place.
NOTE: You do not need to remove power from the system.
3. Using both the top and bottom extractor/inserter handles, slide
the application processor out so that the hard disk drive can be
accessed.
3-50
UltraNet Storage Director Hardware Installation Guide
Application Processor Hard Disk Replacement Procedure
Ze0023
3
4. Disconnect the power and data cables to the hard disk drive.
5. Depress the clip as shown, slide the hard drive down, and pull it
away from the board until it is free.
Maintenance Procedures
3-51
Application Processor Hard Disk Replacement Procedure
3
6. Place the hard disk into an anti-static bag and return it to the
factory.
7. Remove the new hard disk from the anti-static bag.
8. If this is a ZSP Application Processor, match the model number
with the list below and add or remove the B5 jumper from the
ZSP assembly as needed. If this is a USM Application Processor
continue at step 9.
3-52
UltraNet Storage Director Hardware Installation Guide
Application Processor Hard Disk Replacement Procedure
3
NOTE: The jumper is in the kit supplied.
B5 Jumper State:
Disk Type/Model Types
On
For 50-Pin SCSI Disk (Disables on Board Termination):
•
•
Off
IBM hard drive model DNES-309170 & DDRS-34560
Seagate hard drive model ST39216N-9J6
For 68-Pin SCSI Disk (Enables on Board Termination)
•
•
Hitachi/IBM hard drive (Ultra Star model
IC35L036UWDY10-0)
Seagate hard drive (Seagate Ultra320 model ST336607LW)
9. Attach the data and power cable and then slide the new hard
drive into place. If this is a USM Application Processor skip to
step 11, otherwise continue at step 10.
10. If the SCSI cable and ZSP or SCSI cable and hard drive are not
compatible (68-pin verses 50-pin), refer to the table below for the
kits and instructions used to adapt the drive and ZSP assembly.
ZSP P/N
20501327
20501900
Hard Drive Model(s)
Instructions
•
Hitachi/IBM
IC35LO36UWDY10
Seagate ST336607L
Continue at step 14 of the “Application
Processor Hard Disk Replacement Procedure
With SCSI Adapter Kit Installation” (refer to
page -54 of this chapter).
•
•
•
IBM DNES-309170
IBM DDRS-34560
Seagate ST39216N-9J6
Use the SCSI cable and jumper from kit
#01100605 or #01100606, which is supplied
with the drive.
•
11. Clip the hard disk onto the application processor.
12. Slide the application processor in until it is approximately 1 inch
from the ejector handles.
13. Use the extractor/inserter handles to insert the circuit card into
place.
Maintenance Procedures
3-53
3
Application Processor Hard Disk Replacement Procedure With SCSI Adapter Kit
Installation
14. Using the screwdriver, tighten the top and bottom screws to
secure the circuit card in place.
Application Processor Hard Disk Replacement Procedure With
SCSI Adapter Kit Installation
This section contains the procedures for replacing the hard disk drive
on an application processor adapter in the USD-X and for installing
the SCSI adapter kit.
NOTE: Only McDATA trained service personnel should replace the
application processor hard disk.
SCSI Adapter Kit
Contents
Table 3-3
3-54
This section lists the contents of the SCSI adapter kit.
SCSI Adapter Kit Contents
Quantity
Component
1
SCSI Adapter Board
1
SCSI Cable
1
Right Side Bracket
1
5/64 Allen Wrench
2
Allen Screws
1
Jumper
UltraNet Storage Director Hardware Installation Guide
Application Processor Hard Disk Replacement Procedure With SCSI Adapter Kit
Installation
Application
Processor Hard Disk
Replacement and
SCSI Adapter Kit
Installation
Procedure
Use the following procedure to replace the application processor hard
disk and install the SCSI adapter kit:.
WARNING: Attach a wrist strap and follow ESD procedures during the handling of all electronic
components.
Tools Required: A medium straight slot screwdriver is required for
this procedure.
1. Use the following command string to shutdown the system traffic
to the application processor adapter:
sync;sync;sync;halt
NOTE: Wait for the ‘OK’ prompt to indicate the command has completed.
Then continue with the next step.
2. Using the screwdriver, loosen the top and bottom screws holding
the ZSPx application processor in place.
NOTE: You do not need to remove power from the system.
3. Using both the top and bottom extractor/inserter handles, slide
the ZSPx application processor out so that the hard disk drive can
be accessed.
Maintenance Procedures
3-55
3
Application Processor Hard Disk Replacement Procedure With SCSI Adapter Kit
Installation
Ze0023
3
4. Depress the clip as shown below, slide the hard drive down, and
3-56
UltraNet Storage Director Hardware Installation Guide
Application Processor Hard Disk Replacement Procedure With SCSI Adapter Kit
Installation
pull it away from the board.
5. Disconnect the power and data cables at the PCB connectors on
the ZSPx application processor.
6. Remove the hard disk from the ZSPx application processor. Save
the power cable.
7. Place the hard disk into an anti-static bag and return it to the
factory.
8. Remove the plastic ears from connector P4 on the ZSPx
application processor by forcing the ears outward and pulling
them straight up.
9. Remove the B5 jumper, located between the JSC2 and P4
connectors on the ZSPx application processor.
10. Remove the right side bracket (P/N 05001014) by removing the
two Allen screws with the 5/64 Allen wrench provided in the kit.
Maintenance Procedures
3-57
3
CD-RW Drive Replacement Procedure
3
11. Insert the rubber grommets in the holes of the new right side
bracket (P/N 05001486) and attach it to the ZSPx application
processor with two Allen screws and tighten with the wrench.
12. Remove the new hard disk drive from the anti-static bag, attach
the saved power cable.
13. Install the 4 slotted shoulder screws included in the shipping box
to the new hard disk.
14. Plug the SCSI adapter board from the kit into the JSC2 connector
located on the ZSPx application processor. The JSC1 connector on
the adapter board will rest on top of the P4 connector.
15. Plug the SCSI cable from the kit into the JSC1 connector of the
SCSI adapter board with the orientation such that the ribbon
cable protrudes from the top of the connector and runs over the
top of the adapter board back towards the new hard disk
mounting bracket.
16. Connect the ribbon cable from the SCSI adapter board to the new
hard disk.
17. Slide the new hard disk into the bracket in the locked position.
Connect the power cable from the hard drive to the new ZSPx
application processor.
18. Slide the ZSPx application processor in until it is approximately 1
inch from the ejector handles.
19. Use the extractor/inserter handles to insert the ZSPx application
processor into place.
20. Using the screwdriver, tighten the top and bottom screws to
secure the ZSPx application processor in place.
CD-RW Drive Replacement Procedure
This section contains the procedures to follow when replacing a
CD-RW Drive. Only McDATA trained service personnel should
remove or install the CD-RW drive.
Tools Required: A medium straight slot screwdriver and a small
Phillips screwdriver are required for this procedure.
NOTE: You do not need to remove power from the system.
3-58
UltraNet Storage Director Hardware Installation Guide
CD-RW Drive Replacement Procedure
3
1. Use the following command string to shutdown the Primary
Service Monitor:
sync;sync;sync;halt
NOTE: Wait for the ‘OK’ prompt to indicate the command has completed.
Then continue with the next step.
2. Use the straight slot screwdriver to unscrew the two screws
located on the front of the auxiliary drive chassis.
3. Slide the auxiliary drive chassis out from the USD-X as shown in
the figure on the next page. When you slide out the auxiliary
drive chassis, power is disconnected.
NOTE: Use care when sliding the auxiliary drive chassis out, since the data
cable and power cable are still connected. The data cable is fixed to the
USD-X and must be disconnected before the auxiliary drive chassis can be
moved away from the chassis.
Maintenance Procedures
3-59
CD-RW Drive Replacement Procedure
Ze0117
3
4. Remove the data and power cables from the back of the CD-RW
drive.
3-60
UltraNet Storage Director Hardware Installation Guide
DAT Drive Replacement Procedure
3
5. Using the Phillips screwdriver, remove the 8 screws from the
sides (4 screws per side) of the auxiliary drive chassis.
6. Remove the CD-RW drive from the auxiliary drive chassis as
shown in the figure on the previous picture.
7. Place the CD-RW drive in an anti-static bag and return it to the
factory.
8. Remove the new CD-RW drive from its container and, while
carefully moving the cables out of the way, insert it into the
auxiliary drive chassis. .
9. Using the Phillips screwdriver, secure the CD-RW drive to the
auxiliary drive chassis with the screws removed in step 5.
10. Connect the data and power cables.
11. Slide the auxiliary drive chassis into the USD-X.
12. Using the medium straight slot screwdriver, fasten the auxiliary
drive chassis in place with the screws located on the front of the
auxiliary drive chassis.
13. Boot the application processor connected to the CD-RW drive
with the boot -r command. This causes the application
processor to reprobe for all attached hardware devices.
DAT Drive Replacement Procedure
This section contains the procedures to follow when replacing a
Digital Audio Tape (DAT) drive.
Tools Required: A medium straight slot screwdriver and a small
Phillips screwdriver are required for this procedure.
NOTE: You do not need to remove power from the system.
1. Use the following command string to shutdown the Primary
Service Monitor:
sync;sync;sync;halt
NOTE: Wait for the ‘OK’ prompt to indicate the command has completed.
Then continue with the next step.
Maintenance Procedures
3-61
DAT Drive Replacement Procedure
3
2. Use the straight slot screwdriver to remove the two screws
located on the front of the auxiliary drive chassis.
3. Slide the auxiliary drive chassis out from the USD-X as shown in
the figure on the next page. When you slide out the auxiliary
drive chassis, power is disconnected.
NOTE: Use care when sliding the auxiliary drive chassis out, since the data
cable is still connected.
3-62
UltraNet Storage Director Hardware Installation Guide
DAT Drive Replacement Procedure
3
4. Remove the data cable.
5. Using the Phillips screwdriver, remove the 4 screws from the side
of the auxiliary drive chassis.
6. Remove the DAT drive from the auxiliary drive chassis.
Maintenance Procedures
3-63
DAT Drive Replacement Procedure
3
7. Place the DAT drive in an anti-static bag and return it to the
factory.
8. Remove the new DAT drive from its container and, while
carefully moving the cables out of the way, insert it into the
auxiliary drive chassis.
9. Using the Phillips screwdriver, secure the DAT drive to the
auxiliary drive chassis with the screws removed in step 5.
10. Replace the data cable.
11. Slide the auxiliary drive chassis into the USD-X.
12. Using the medium straight slot screwdriver, fasten the auxiliary
drive chassis into place with the screws located on the front of the
auxiliary drive chassis.
13. Boot the application processor connected to the DAT drive with
the boot -r command. This causes the application processor to
reprobe for all attached hardware devices.
Chapter 6, Using the Tape Utility for Backups and Restores, provides
the procedures for performing full and incremental backups using
the Tape Utility.
Application
Processor Backup
and Restore
Procedures for a
DAT Drive
The application processor backup and restore procedures in this
section describe how to backup and restore the configuration created
and saved by the Graphical Configuration Interface to the DAT tape
drive. Backup and restores should be part of routine maintenance
procedures, use the backup and restore utility to run complete
backups and restores.
Configuration Backup
Procedure for a DAT
Drive
This procedure defines how to backup USD configurations created
and saved with the GCI to tape using the tar command. The
configurations are stored in a subdirectory named for the
configuration, which is located in the /cnt/configs/offline directory. This
procedure describes a method using full path names for backup,
which also applies to any subsequent restores.
1. Login as root.
2. Install a DAT tape that is not write locked.
3. To backup all the configurations enter this command:
tar -cvf /dev/rmt/0 /cnt/configs/offline
3-64
UltraNet Storage Director Hardware Installation Guide
Resetting a SPARC Application Processor
3
4. To backup a specific configuration enter this command:
tar -cvf /dev/rmt/0
/cnt/configs/offline/name-of-config
5. Press the button on the tape drive to eject the tape after the
command has completed.
6. Logout.
Configuration Restore
Procedure for a DAT
Drive
This procedure defines how to restore USD configurations that were
backed up to tape with the tar command. The configurations are
stored in a subdirectory named for the configuration under the
directory /cnt/configs/offline.
1. Login as root.
2. Install a DAT tape.
3. To restore all the configurations on the tape enter this command:
tar -xvf /dev/rmt/0
4. To restore a specific configuration enter this command:
tar -xvf /dev/rmt/0
/cnt/configs/offline/name-of-config
5. Press the button on the tape drive to eject the tape after the
command has completed.
6. Logout.
Resetting a SPARC Application Processor
This section provides information on resetting and shutting down a
SPARC application processor during normal operation.
Shut Down Solaris
Use the following procedure to shut down the operating system on a
SPARC application processor:
1. Log on to a SPARC application processor through the console.
The console is normally only reachable through the serial switch.
2. Issue this command string:
sync;sync;sync;halt
Maintenance Procedures
3-65
Resetting a SPARC Application Processor
3
As Solaris shuts down, a number of messages appear on the console.
The last message is ok on a line by itself. This is known as the
Openboot prompt, or the “ok” prompt. When this prompt is
displayed, it is safe to reset or power down the application processor,
as described in the following section.
If for some reason an application processor is unresponsive or does
not accept a connection, performing a shut down is impossible. At
this point, you must reset the processor without first shutting down
Solaris. You must rely upon the error recovery systems to recover or
repair the file systems.
Reset a SPARC
Application
Processor
To reset a SPARC application processor, first shut down its operating
system (as described in the previous section). After shutting down
Solaris, use either of these methods to reset an application processor:
•
Push the Reset button on the front panel of the card.
•
Log on to the Service Monitor and issue a slot_reset command.
The argument to the command is the slot number (1–12) to be
reset. For example, to reset slot 7, issue the following command
on the Service Monitor processor:
slot_reset 7
NOTE: This command does not work if the Hardware Monitor Board (HMB)
hardware is missing or inoperable; or if the operating system (Solaris) is still
running on the application processor that you are trying to reset. If Solaris is
still running when the slot_reset command is issued, an error message is
received. If it is absolutely necessary to reset a running application processor,
the reset can be forced by using the “-f” option with the slot_reset
command as a last resort.
Reset the Service
Monitor
To reset the Service Monitor, first shut down its operating system (as
described in the section “Shut Down Solaris” in this chapter). Then
issue a reboot command to the Service Monitor.
If the Service Monitor is inoperable or unresponsive, then another
application processor in the same USD-X has become a replacement
Service Monitor, and you can use that application processor to issue a
slot_reset command to the unresponsive Service Monitor.
3-66
UltraNet Storage Director Hardware Installation Guide
Resetting an ESCON Adapter
3
Resetting an ESCON Adapter
No card preparation is needed. To reset an ESCON adapter, perform
either of these actions:
•
Press the Reset button on the front panel of the card.
•
Issue the slot_reset command.
The argument to the command is the slot number (1–12) to be
reset. For example, to reset slot 7, issue the following command
on the Service Monitor processor:
slot_reset 7
Resetting a PowerPC Processor
To reset a PowerPC processor, perform either of these actions:
•
Press the Reset button on the front panel of the card.
•
Issue the slot_reset command.
The argument to the command is the slot number (1–12) to be
reset. For example, to reset slot 7, issue the following command
on the Service Monitor processor:
slot_reset 7
Removing Power to a USD-X
To power down a USD-X, use the procedures described in the section
“Shut Down Solaris,” in this chapter. This places each SPARC
application processor at the ok prompt. All application processors
must be waiting at the ok prompt when the box is turned off or when
the last working power supply is removed.
Choose a value to change, or Q to quit
->
The following explains the fields displayed:
Type of Config
1X — Single processor
system.
Maintenance Procedures
3-67
Removing Power to a USD-X
3
2X — Two-processor
system.
Administrator's E-mail
E-mail address of a
system administrator.
Status information is
automatically sent to
this account.
Local Host
The host name of the
local system
(automatically loaded).
NOTE: The Remote Host and Cron Type fields that follow only pertain to
USD-X chassis, which use a DAT drive for backups and restores. The CD-RW
drive cannot be used to perform incremental backups.
3-68
Remote Host
The host name of the
remote system. If
specified, these
utilities perform dumps
from this system and
puts them on the tape
with the dumps from the
local host.
Cron Type
Allows a “cron”
(chronological) entry to
be set up on a daily,
biweekly, weekly, or
monthly interval. Once
this is set up, the system
performs automatic
incremental dumps for
the interval you select.
There must be a tape in
the drive for this
operation to occur. The
cron-initiated
incremental dumps do
not write over a tape that
has a full dump on it.
UltraNet Storage Director Hardware Installation Guide
Serial Number Information
3
3. Enter or update any of the parameters shown, following the
directions displayed on the screen. Once you set the Cron Type
parameter, the system performs automatic incremental backups
as described above.
4. Type Q to quit the Current Configuration Settings menu, then
type Q again to quit the Main Menu.
Serial Number Information
A serial number appears on the front and back of each USD-X chassis,
in the lower left corner. If you need to display this number on your
screen, use the following procedure.
Displaying a USD-X
Serial Number
To display the serial number of a USD-X, log on as root, and issue
this command:
$ /usr/sbin/serial_number
Adjusting the USD-X Clock
This section provides clock adjustment procedures for the USD-X.
Use the “Minor Clock Adjustments” section to make adjustments
under 15 minutes plus or minus, this adjustment is made in operation
mode. Use the “Major Clock Adjustments” section to make
adjustments 15 minutes or greater plus or minus, this adjustment is
made in single user mode.
Minor Clock
Adjustments
Make minor adjustments [anything under 15 minutes (900 seconds)
either way] to the clock by using the date -a [-]sss (a UNIX command).
The command is as follows:
date -a [-]sss
where:
[-] sss
Equals the time (plus or
minus) in seconds,
needed to adjust the
clock.
Maintenance Procedures
3-69
Adjusting the USD-X Clock
3
Major Clock
Adjustments
To make a major adjustment [any adjustment greater than plus or
minus 15 minutes (900 seconds)] to the SPARC clock, you must first
bring the system down to a single-user mode (the maintenance
mode). Make the corrections and then bring the system back up to
operational status.
Use the following procedure to put the system into single-user mode.
1. Log on through the console. The console is normally only
reachable through the serial switch.
2. To halt processing, type in this command:
sync;sync;sync;halt
The screen indicates that the program has terminated and
returns an ok system prompt.
3. To reset the SPARC and initialize the single user mode, type in
this command:
sysprompt>boot -s
4. Once the SPARC is initialized, login by using the root password.
You will see the following command:
INIT: SINGLE USER MODE
Type CTRL+D to proceed with normal startup (or enter the
root password for system maintenance):
5. Once you are logged in, type in the following command sequence
to adjust the date and time:
sysprompt>date 0113090199
sysprompt>date
sysprompt>exit
where:
3-70
01
month
13
day
09
hour (on a twenty-four hour clock)
01
minute
UltraNet Storage Director Hardware Installation Guide
Adjusting the USD-X Clock
3
99
year
date
verifies the date
exit
resumes normal bootup process
You can login to the console when the system comes up.
Maintenance Procedures
3-71
Adjusting the USD-X Clock
3
3-72
UltraNet Storage Director Hardware Installation Guide
4
Installing and Using
WebView
This chapter provides the necessary information to obtain, install, and
use the UltraNet WebView software on the USD-X platform.
Additionally, it provides the browser and system requirements for
installation. UltraNet WebView is an optional application that is
browser-based, which allows the user to monitor the chassis and
network remotely from any global location.
Overview
UltraNet WebView is McDATA’s browser-based monitoring
application for the UltraNet product family. It provides the ability to
monitor SNMP interface statistics and the status of the chassis for
individual nodes in an UltraNet storage network.
UltraNet WebView provides McDATA node monitoring capabilities
from any location in the world that has an internet connection and
which offers security access to that node. It uses browser-based access
to Java applications through serial or Ethernet interfaces.
Obtaining the UltraNet WebView Software
The UltraNet WebView software is purchased separately from the
other UltraNet products. It can be obtained in a number of different
ways:
•
If WebView is ordered with the USD-X, it will be installed on the
USD-X and the customer will receive a CD-ROM.
Installing and Using WebView
4-1
Installing WebView
4
•
If WebView is purchased after the USD-X is purchased, the
software can be downloaded from McDATA’s web site and the
customer will receive a CD-ROM.
•
Upgrades for WebView’s most current release are available on
McDATA’s web site.
Installing WebView
The following sections provide the necessary procedures to install the
UltraNet WebView software
Loading the RPM
File
Before you can install the UltraNet WebView software, you must load
the .rpm file using a PC with an FTP client. Use the following
procedure to FTP the .rpm file:
1. Insert the UltraNet WebView CD in a PC with an FTP client.
2. Open the FTP Client software and login to the USD-X as “root”, or
by using the appropriate user ID and password.
NOTE: The FTP Client must be set for the transfer type of binary.
3. FTP the .rpm file (CMNTwebview-Vx.x.rpm) from the CD to the
directory /var/spool/pkg/. You may use the original filename
when transferring the .rpm file.
NOTE: x.x is the version of the WebView .rpm file that you are installing.
Installing the
Software
Use the following procedure to install the software:
1. Telnet into the UltraNet Storage Director.
2. Login as “root” or by using the appropriate user ID and
password.
3. Issue the following commands to install the new software:
cd /var/spool/pkg
rpm -U CMNTwebview-Vx.x.rpm
4-2
UltraNet Storage Director Hardware Installation Guide
Using the WebView Application
4
NOTE: If you have not previously installed WebView, you may need to use
the “--force” option (rpm -U --force CMNTwebview-....rpm).
4. If you completed the upgrade without errors, restart the
webserver.
To restart the webserver:
a. First issue the ps -e | grep sm_httpd command
b. Then issue the kill <PID> command, where <PID>
represents the process ID number.
Using the WebView Application
Once the UltraNet WebView application has been purchased and
installed, you can access a node in your network by opening your
internet browser and entering the IP address (or DNS name) of the
USD-X in the address bar. For further help using the UltraNet
WebView application, see the UltraNet WebView Online Help.
NOTE: Local DNS names may be stored on each client in a Window’s “hosts”
file.
Browser and System Requirements for WebView
UltraNet WebView has been tested on the following operating system
and browser combinations:
NOTE: View the ReadMe file on the UltraNet WebView installation CD-ROM
or refer to the UltraNet Webview Online Help for Java plug-in information,
once you have accessed the UltraNet WebView application.
•
Microsoft Windows 98: Microsoft Internet Explorer 5.0
•
Microsoft Windows NT: Microsoft Internet Explorer 5.0, 5.5, and
6.0
•
Microsoft Windows 2000: Microsoft Internet Explorer 5.0, 5.5, and
6.0
Installing and Using WebView
4-3
Browser and System Requirements for WebView
4
4-4
UltraNet Storage Director Hardware Installation Guide
5
Using the CD-RW Utility for
Backups and Restores
This chapter provides information on using the CD-RW utility that is
provided for USD-X chassis, which have a CD-RW drive installed.
You can use the CD-RW utility to perform various tasks such as
creating backups and restoring files from CDs.
Additionally, this chapter provides the alternate UNIX procedures,
which can be used in place of the CD-RW Utility menu options.
Mounting and Unmounting a CD
To prevent the unsolicited CD tray ejections that normally occur after
burning and blanking CDs, the USD-X has been configured to
deactivate the volume management utility. For this reason, access to
the CD must be manually implemented by issuing the mount and
umount UNIX commands before and after any CD related task.
Once mounted, the CD has read only access to files and directories.
The following command provides file system access to the CD
through the /mnt directory of the USD-X:
mount -F hsfs -o ro /dev/dsk/c0t6d0s0 /mnt
When finished accessing a CD, it is important to unmount the CD, so
that the eject button functions properly. You cannot unmount from
within the /mnt directory. The following command will unmount the
file system:
umount /mnt
Using the CD-RW Utility for Backups and Restores
5-1
Logging on to the Utilities
5
Logging on to the Utilities
Contact customer support for account and password information.
After you gain access, type UltraAdm to display the Main Menu:
|=========> ULTRANET SYSTEM ADMINISTRATION System <======
b. Backup and Restore Tape Utilities.
c. Backup and Restore CD-RW Utilities
u. Unix TCP/IP Configuration Utilities.
r. Reboot the UltraNet System.
s. Shut Down the UltraNet System. (Before power off.)
d. Display Snap Shot of the UltraNet System.
a. Analyze System Crash Dump Files.
t. TOP - Real time UNIX Performance Utility.
q. Quit
Choose from above ->
CD-RW Utility Main Menu
The CD-RW Utilities can be called directly by running cdr_utils or
through UltraAdm. After you log on to UltraAdm, type C from the
main menu to display the CD-RW Utility Main Menu:
|=========> ULTRANET SYSTEM CD-RW UTILITIES <==========|
B. Blank a CD-RW media?
L. List CD Contents
M. Make a Complete Backup?
R. Restore from CD?
Q. Quit
Choose from above ->
Descriptions of these options are provided in the sections that follow.
5-2
UltraNet Storage Director Hardware Installation Guide
CD-RW Utility Main Menu
5
Blank a CD-RW
Media
The CD-RW drive can only record data to blank CD-R and CD-RW
disks. CD-R disks may only be written once and CD-RW disks may
be re-written once erased. This option initiates the blanking process
as a background task.
NOTE: It may take up to 40 minutes to erase a CD-RW disk.
Use the following procedure to blank a CD-RW disk:
1. Insert the CD-RW that you want to erase into the drive.
2. From the CD-RW Utilities Main Menu, type B.
The following screen appears:
|=========> ULTRANET SYSTEM CD-RW UTILITIES <==========|
Blank a CD-RW media
NOTICE: A rewritable CD is required for this operation
to complete successfully. All existing data on the CD
will be lost when completed. This operation may take
up to 40 minutes to complete. Please Insert the disk
in the CD drive and close the tray.
Continue?(Y/N)
3. Type Y to erase the contents of the CD-RW. Type N to cancel the
operation and return to the CD-RW Utility Main Menu.
Output similar to the following is displayed after typing Y:
[Y] Blanking CD in progress...
Initializing device...done.
Blanking the media (Can take several minutes)...done.
Press any key to continue...
Using the CD-RW Utility for Backups and Restores
5-3
CD-RW Utility Main Menu
5
UNIX Procedure
Use this alternate procedure to blank a CD-RW by issuing UNIX
commands in a telnet session:
1. Login to the telnet session as root.
2. Insert a CD-RW into the drive.
3. Enter the cdrw -b all command at the prompt to blank the
CD-RW.
4. Logout.
List CD Contents
UNIX Procedure
From the CD-RW Utility Main Menu, type L to list the contents of the
CD.
Use this alternate procedure to list the contents for a CD by issuing
UNIX commands in a telnet session:
NOTE: Verify that there is a CD in the drive. When a valid backup CD is in
the drive, it can be navigated and read from like a regular UNIX directory.
1. Login to the telnet session as root.
2. Insert a valid restore CD into the drive.
3. Mount the CD using this command:
mount -F hsfs -o ro /dev/dsk/c0t6d0s0 /mnt
4. List the CD contents using this command:
ls -Al /mnt
5. Unmount the CD using this command:
umount /mnt
6. Logout.
5-4
UltraNet Storage Director Hardware Installation Guide
CD-RW Utility Main Menu
5
Performing a
Complete Backup
From the CD-RW Utility Main Menu, type M to make a complete
backup. All files and directories in the /cnt sub-directory are copied
to the CD. The following screen appears:
NOTE: The CD-RW drive can only record to blank CD-R and CD-RW disks.
|=========> ULTRANET SYSTEM CD-RW UTILITIES <==========|
Make a Complete Backup
NOTICE: A blank writable CD is required for this
operation to complete successfully. All data from the
CNT directory will be copied to the disk upon completion.
This operation may take up to 10 minutes to complete.
Please Insert a blank disk and close the tray.
Continue?(Y/N) -> [Y] Backup in progress...
Initializing device...done.
Writing track 1...done.
Finalizing (Can take up to 4 minutes)...done.
Press any key to continue...
UNIX Procedure
Use this alternate procedure to perform a CD backup by issuing
UNIX commands in a telnet session:
1. Login to the telnet session as root.
2. Insert a blank CD-R or CD-RW into the drive.
3. Create a file system using this command:
mkisofs -o /temp_img -log-file /temp_log -r /cnt
4. Copy the file system to the CD using this command:
cdrw -i /temp_img
5. Remove the temp files using this command:
rm /temp_img /temp_log
6. Logout.
Using the CD-RW Utility for Backups and Restores
5-5
CD-RW Utility Main Menu
5
Performing Restore
Operations from a
CD
From the CD-RW Utility Main Menu, type R to copy all of the files
and directories from the restore CD to the /cnt subdirectory. The
following screen appears:
NOTE: The CD must have valid restore information. The USD-X must be
rebooted for the restore to take effect.
|=========> ULTRANET SYSTEM CD-RW UTILITIES <==========|
Restore from CD
NOTICE: A CD with valid backup data is required for this
operation to complete successfully. All data from the CD
will be copied over existing data in the CNT directory
upon completion. A Reboot of the UltraNet System is
required for the restore to take effect. This operation
may take up to 10 minutes to complete. Please Insert a
valid backup disk and close the tray.
Continue?(Y/N) -> [Y] Restore in progress...
Restoring: /cnt/configs...
Restoring: /cnt/etc...
Restoring: /cnt/ews...
Restoring: /cnt/snmp...
Press any key to continue...
5-6
UltraNet Storage Director Hardware Installation Guide
CD-RW Utility Main Menu
5
UNIX Procedure
Use this alternate procedure to perform a restore by issuing UNIX
commands in a telnet session:
1. Login to the telnet session as root.
2. Insert a valid restore CD into the drive.
3. Mount the CD using this command:
mount -F hsfs -o ro /dev/dsk/c0t6d0s0 /mnt
4. To restore all configurations enter the following series of
commands:
cp -r
cp
cp
cp
/mnt/configs/* /cnt/configs
-r /mnt/etc/* /cnt/etc
-r /mnt/ews/* /cnt/ews
-r /mnt/snmp/* /cnt/snmp
5. Unmount the CD using this command:
umount /mnt
6. Logout.
Using the CD-RW Utility for Backups and Restores
5-7
CD-RW Utility Main Menu
5
5-8
UltraNet Storage Director Hardware Installation Guide
6
Using the Tape Utility for
Backups and Restores
This chapter provides information on using the Tape utility that is
provided for USD-X chassis, which have a DAT drive installed. You
can use the Tape utility to create full or incremental backups, restore
files from a tape, and set up automatic incremental backups.
Logging on to the Utilities
Contact customer support for account and password information.
After you gain access, type UltraAdm to display the Main Menu:
|=========> ULTRANET SYSTEM ADMINISTRATION System <=====|
b. Backup and Restore Tape Utilities.
c. Backup and Restore CD-RW Utilities
u. Unix TCP/IP Configuration Utilities.
r. Reboot the UltraNet System.
s. Shut Down the UltraNet System. (Before power off.)
d. Display Snap Shot of the UltraNet System.
a. Analyze System Crash Dump Files.
t. TOP - Real time UNIX Performance Utility.
q. Quit
Choose from above ->
Using the Tape Utility for Backups and Restores
6-1
Logging on to the Utilities
6
Viewing Operating
System Statistics
To view system statistics, type d at the Main Menu.
Performing Backups
Using the Tape
Utilities
To perform either full or incremental backups, follow the steps listed
below. For information on configuring automatic incremental
backups, see “Configuring Automatic Tape Backups,” in this chapter.
1. After you log on to the utilities, type B from the Main Menu to
display this menu:
================== CNT ULTRANET SYSTEM TAPE TOOLS =======
Current Tape Information
System Information:
sqatst7
TAPE: TAPE
TAPE: NOT
TAPE: LABELED
Last Full Dump:
Last Incremental:
NONE
121597
:
Device: /dev/rmt/0
Email Addr: NONE
CRON Job :
NONE
Choose selection from below:
S)tatus
F)orward
R)estore
---------->
B)ack
U)nload
reW)ind
C)onfigure
D)ump
H)elp
L)ist
Q)uit
The following explains the fields displayed:
6-2
TAPE_TYPE
Describes the tape that is currently in the drive: UFSINC1 —
Incremental from a single host dump. UFSINC2 — Incremental
from a two-host dump. UFSFULL1 — Full dump from a single
host. UFSFULL2 — Full dump from two hosts.
DATE
The date when data was last written to the tape.
HOST
The name of the local host that copied files to this tape.
RHOST
The remote host (if any) whose files were dumped to this tape.
Device
The current tape device being used by this program.
Last Full Dump
The last date that a full dump was performed on this host.
Last Incremental
The last date that an incremental was performed on this host.
E-mail Address
Error messages are sent to this E-mail address.
CRON Job
The “cron” job interval that is currently configured.
UltraNet Storage Director Hardware Installation Guide
Logging on to the Utilities
6
2. Type S to display the status of the tape drive. You may need to
select this option several times to display all the tape drive status
information.
3. Type F to move the tape forward one “block.” Depending on the
size of the block, this may require several seconds.
4. Type B to move the tape back one block. If the tape was rewound
to the beginning with the rewind option, the drive may report an
error, but this error should not cause any problems.
5. Type W to rewind the tape.
NOTE: You can use the Forward, Back, and Rewind options on tapes that
were not created by this utility.
6. Type D to dump (copy) information from the system to the current
tape. The following screen appears:
Dump routine
Choices are: F)ull System Dump to tape
I)ncremental Update and Configuration File
save
Q)uit
Choose from above:
The dump routine can perform full system dumps and
incremental dumps. Both routines make a separate copy of the
UNIX files that are involved with TCP/IP and USD-X
configuration. This allows a USD-X configuration to be retrieved
very quickly from the full or incremental dump tapes.
7. Perform either of the following:
— Type F to perform a full ufsdump of the / and the /usr file
systems.
— Type I to perform an incremental dump of the / and the /usr
file systems. The incremental dump determines when the last
full dump was performed on this system and copies only the
files that have been modified since that time.
After the backup is complete, type Q to quit (exit) the utilities.
Using the Tape Utility for Backups and Restores
6-3
Logging on to the Utilities
6
Performing Restore
Operations from a
Tape
To restore files from a tape, follow these steps:
1. After you log on to the utilities, type B from the Main Menu to
display the backup and restore menu:
================== CNT ULTRANET SYSTEM TAPE TOOLS =======
Current Tape Information
System Information:
sqatst7
TAPE: TAPE
TAPE: NOT
TAPE: LABELED
Last Full Dump:
Last Incremental:
NONE
121597
:
Device: /dev/rmt/0
Email Addr: NONE
CRON Job :
NONE
Choose selection from below:
S)tatus
F)orward
R)estore
---------->
B)ack
U)nload
reW)ind
C)onfigure
D)ump
H)elp
L)ist
Q)uit
2. Type L to display the contents of the current tape loaded in the
tape drive.
NOTE: Only tapes created with this tape utility can be viewed with the List
option.
Output similar to the following appears:
Now reading
. . .
Checking if
Checking if
in
0+1 records
.
Size = 59
the tape in drive /dev/rmt/01, please wait .
drive is busy, please wait . . . .
drive is busy, please wait . . . .0+1 records
out
The files that will be displayed are dumped from the /
FS.
It was dumped from system sqatst1
The output can be directed to: S)creen or F)ile
Q)uit [F] ->
6-4
UltraNet Storage Director Hardware Installation Guide
Logging on to the Utilities
6
3. Select whether to direct the output to a screen (S), to a file (F), or
whether to quit (Q). This allows you to save file system
information to disk as well as to tape.
4. Repeat steps 2 and 3 as needed (or perform other commands such
as F to move forward) to examine the contents of the
currently-loaded tape.
5. Type Q to return to the Main Menu.
6. Type R to restore selected files from the backup tape. Output
similar to the following appears:
Now reading
. . .
Checking if
Checking if
in
0+1 records
.
Size = 58
the tape in drive /dev/rmt/01, please wait .
drive is busy, please wait . . . .
drive is busy, please wait . . . .0+1 records
out
This tape has data from two systems on it.
Please choose which to restore: L)ocal or R)emote
->[H
[L]
7. Select whether to restore a local (L) or remote (R) system. The
following menu appears:
Restore Choices:
1.
2.
3.
4.
5.
Q.
-
ROOT file system. ( / )
DBOOT files system. ( /dboot )
CNT file system. ( /cnt )
CNTVAR file system ( /cntvar )
USR file system ( /usr )
Quit
NOTE: The restore of an incremental tape places the contents of the data in
the /tmp directory. It does not copy files to their original locations. You must
move the data from the /tmp directory to the desired location or locations
The full restore of a full tape is not available through this utility. To
perform a restore from a full UFSDUMP tape, boot the system from
the alternate boot partition, and mount these partitions manually:
/(root), /dboot, /cnt, /cnt/var, /usr
After that, the UFSRESTORE program can be invoked manually to
restore the tape.
Using the Tape Utility for Backups and Restores
6-5
Logging on to the Utilities
6
8. Type the number that corresponds to the restore option you
would like to use (1-5).
9. Type I to select an interactive restore operation (the “automatic”
option is not yet available).
10. When the restore operation is complete, type Q to quit the utility.
11. Type U to eject the tape from the tape drive.
Configuring
Automatic Tape
Backups
You can set up automatic incremental backups, as follows:
1. After you log on to the utilities, type B from the Main Menu to
display the backup and restore menu:
================== CNT ULTRANET SYSTEM TAPE TOOLS =======
Current Tape Information
sqatst7
Information:
System
TAPE: TAPE
TAPE: NOT
Incremental:
121597
TAPE: LABELED
:
Device: /dev/rmt/0
Last Full Dump:
Last
Email Addr:
CRON Job :
NONE
NONE
NONE
Choose selection from below:
S)tatus
F)orward
R)estore
---------->
B)ack
U)nload
reW)ind
C)onfigure
D)ump
H)elp
L)ist
Q)uit
2. Type C to configure automatic tape backups. The following menu
appears:
Current Configuration Settings:
T)ype of Config:
1X (1X = Single Host, 2X = Two Hosts)
A)dministrator’s Email : NONE
L)ocal Host: sqatst7
R)emote Host:
C)ron Type: NONE
Choose a value to change, or Q to quit ->
6-6
UltraNet Storage Director Hardware Installation Guide
Logging on to the Utilities
6
The following explains the fields displayed:
Type of Config
1X — Single processor system. 2X — Two-processor
system.
Administrator's E-mai
E-mail address of a system administrator. Status
information is automatically sent to this account.
Local Host
The host name of the local system (automatically loaded).
Remote Host
The host name of the remote system. If specified, these
utilities perform dumps from this system and puts them on
the tape with the dumps from the local host.
Cron Type
Allows a “cron” (chronological) entry to be set up on a daily,
biweekly, weekly, or monthly interval. Once this is set up,
the system performs automatic incremental dumps on the
interval you select. There must be a tape in the drive for
this operation to occur. The cron-initiated incremental
dumps do not write over a tape that has a full dump on it.
3. Enter or update any of the parameters shown, following the
directions displayed on the screen. Once you set the Cron Type
parameter, the system performs automatic incremental backups
as described above.
4. Type Q to quit the Current Configuration Settings Menu, then
type Q again to quit (exit) the Main Menu.
Using the Tape Utility for Backups and Restores
6-7
Logging on to the Utilities
6
6-8
UltraNet Storage Director Hardware Installation Guide
A
HMB3 Board Default
Settings
This appendix provides the port and factory default settings for the
HMB3 board. Additionally, it provides the configuration defaults for
each of the HMB3 ports.
Port and Factory Default Settings
The HMB3 can be set to two different default configurations:
•
Port Defaults
•
Factory Defaults
Port defaults can be set using the recessed switches on the HMB3
panel. To set the port defaults hold the RESET DEFAULT SETTINGS
switch while pressing and then releasing the HMB RESET switch. For
more information on these switches refer to Table 2-2.
The dpc command in the Miscellaneous Configuration Menu can also
be used to set the port defaults. For more information on this
command refer to Appendix B in the UltraNet Command Reference
manual.
Factory defaults are set by using the fd command in the
Miscellaneous Configuration Menu. Factory defaults are also loaded
after the program is initially burned into the Flash memory. This is
done because the EEPROM is erased when loading the Flash.
Either default setting will reset the following parameters:
Password:
Command Mode Timeout:
******
30 minutes
A-1
Port Defaults
NOTE: Contact McDATA Customer Support to obtain the default password.
Port defaults set the user-configurable ‘port’ parameters back to the
default settings.
Port Defaults
Following are the port defaults for the slot01 through slot12, prippp,
secppp, output1, and output2 ports:
Baud Rate
WordSize Parity StopBits
Flow Control
Send Break
Logoff Character
38400
8N1
RTS/CTS
no
n/a
Following are the port defaults for the PC Port and Modem Port:
Baud Rate
WordSize Parity StopBits
Flow Control
Send Break
Logoff Character
38400
8N1
RTS/CTS
no
^P
Following are the port defaults for the Internal Port:
Baud Rate
WordSize Parity StopBits
Flow Control
Send Break
Logoff Character
38400
8N1
none
no
^P
Following are the default values for the Service Monitor Port:
Baud Rate
WordSize Parity StopBits
Flow Control
A-2
UltraNet Storage Director Hardware Installation Guide
9600
8N1
none
B
Remote Support
The UltraNet Storage Director system has two support connection
possibilities, direct connection through a modem, which allows
conventional dial-up access to each of the slots, and the PPP
connection to the Service Monitor, or connection through the PC. This
appendix provides the procedures for each of these connections. At
the end of this appendix, there is a troubleshooting section that offers
work arounds for situations that may arise while using the PPP
connection.
Establishing a direct connection through the serial port, a dial-in
through a remote modem, or a Telnet session via Ethernet provides a
command line prompt that allows you to look at traces, logs, status,
user interface statistics, etc., by entering the appropriate command.
For information on UltraNet commands and how to use these
commands, refer to the chapters on Basic commands and PowerPC
commands in the UltraNet Command Reference manual.
To FTP a core dump, capture files, or download configuration files,
you will need to establish a PPP connection through the serial port.
Dial-In PPP Connection
Establish a serial PPP dial-in connection using the tools provided by
your Windows operating system.
NOTE: Do not enable software compression in your dial-up properties.
B-1
After you eatablish a dial-in connection, a small terminal window, as
shown below, is displayed.
1. Log on to using the login you have created.
2. Type net ppp.
B-2
UltraNet™ Storage Director Hardware Installation Guide
Modem Setup
3. Click Continue. A small connection information window will
open to inform you of the established connection.
NOTE: When you FTP via the PPP connection, software compression cannot
be enabled.
Modem Setup
This section assumes that you are using either a Microcom DeskPorte
Fast modem or a Multi-Tech MT5634ZBA modem on the USD-X end.
Microcom Modem
Settings
The modem settings require both a local and remote operational
setting.
Use the following command to configure the modem for local
operation:
AT&F*E0\T15%C0&D0*W0
Use the following command to configure the modem for remote
operation:
AT&F*E1%U1$B38400&D2\D4Q2S2=0*S42*W0
This command configures the modem such that the serial port speed
is at 38400 ($B38400), DTR is ignored (&D0), remote access is enabled
(*E1), and always keeps the current serial port speed (%U1).
Multi-Tech Modem
Settings
The modem settings require both a local and remote operational
setting.
Use the following command to configure the modem for local
operation:
AT&F&D0S9=0%C0\T15&W
Use the following command to configure the modem for remote
operation:
AT&F&D$SB38400&S1Q1S2=128S9=42%DC1&W
B-3
Remote Support Configurations
Remote Support Configurations
Remote support to a McDATA network can be established as a
remote dial-in to a USD-X, then connecting to any other USD-X on
the network. This configuration requires TCP/IP, see Figure A-1.
Remote
Figure B-1
B-4
ATM
(TCP/IP required)
Modem
UltraNet
Storage Director
UltraNet
Storage Director
USD-X to USD-X (Requires ATM Configured With TCP/IP)
UltraNet™ Storage Director Hardware Installation Guide
Ze0109
Modem
PC
C
WTI and Penril Switch
Support
This appendix provides the cabling procedures and settings for the
WTI and Penril switches. Additionally, the jumper settings are
provided for the Hardware Monitor Adapter (HMA2).
NOTE: The information contained in this appendix is intended for McDATA
Customer Support.
Cables and Adapters
Table C-1 lists the cables and adapters used for the WTI/Penril
Switch.
Table C-1
WTI/Penril Cables and Adapters
Type
Description
Serial Cable Harness
This is a McDATA supplied cable harness that contains 14 RJ-45 cables. These
cables connect the serial port switch to the Hardware Monitor Adapter, Primary
Service Monitor, and Secondary Service Monitor (if configured).
AA Adapter
This Data Bus (DB) adapter inserts into the DTE port on the back of the remote
modem for direct connection to the USD.
Note: If a remote modem is being used instead of a switch, 1 AA adapter
is needed.
See Appendix D for information on DB adapters available from McDATA.
C-1
Installing the Serial Switch Cables
Table C-1
WTI/Penril Cables and Adapters (Continued)
Type
Description
DD Adapter
This DB adapter inserts into the DTE port on the back of a Penril or WTI switch
for connection to a PC.
See Appendix D for information on DB adapters available from McDATA.
EE adapter
This DB adapter inserts into a port on the WTI switch. Two EE adapters are
used for connecting the WTI switch to the USD and one EE adapter is used for
connecting the modem to the switch.
Note: If a WTI switch and a modem are used, 16 EE adapters are
needed.
See Appendix D for DB adapters available from McDATA.
H adapter
This DB adapter inserts into the DTE port on the modem. This is used to
connect a modem to a Penril or WTI switch.
Also needed for the SPARC workstation.
See Appendix D for DB adapters available from McDATA.
MM adapter
This DB adapter inserts into the WTI switch. This is used to connect the WTI
switch to the COM 1/2 ports on the USM I/O adapter.
See Appendix D for DB adapters available from McDATA.
NN adapter
This DB adapter inserts into the WTI switch. This is used to connect a WTI
switch to the HMB3 board.
See Appendix D for DB adapters available from McDATA.
P adapter
This DB adapter inserts into the Penril switch. This is used to connect the Penril
switch to a modem.
See Appendix D for DB adapters available from McDATA.
NOTE: The pinouts for the adapters are also provided in Appendix D.
Installing the Serial Switch Cables
This section provides the procedures to install the Penril and WTI
serial switch cables. The installation of the serial switch cables
provides connection to all USD-X card slots, the Primary Service
Monitor Serial port, and Secondary Service Monitor Serial port.
C-2
UltraNet™ Storage Director Hardware Installation Guide
Installing the Serial Switch Cables
Penril Cabling
Use the following procedure to install the Penril serial switch cables:
1. Locate the RJ-45 ports on the Hardware Monitor Adapter
(HMAx) located in the back of the USD chassis. Each RJ-45 port
corresponds to an adapter in the slot number indicated.
2. Locate the connector cable for the switch (P/N 21501273) and
visually inspect the cable and its RJ-45 connectors. The connection
cable for the serial switch consists of cables bundled together to
allow connection of all Hardware Monitor Adapter ports, the
Primary, and the Secondary Service Monitor serial ports (each
connector is labeled). For information on the Primary and
Secondary Service Monitors, see the “Application Processor (ZSP)
Operation Overview” section in this chapter.
3. Connect the cables to the appropriately labeled port on the
Hardware Monitor Adapter, Primary, and Secondary Service
Monitor serial ports (as shown in the following illustration).
C-3
Installing the Serial Switch Cables
NOTE: If your USD-X does not have a Secondary Service Monitor, connect
the cable to an available Primary Service Monitor Serial port and switch port
14.
4. Connect the other ends of the remaining cables to ports on the
serial switch as shown in the following illustration.
5. If you do not have a modem, go to step 8. Connect the switch to
the modem by inserting adapter H (Revision B part number
2140030) into the DTE port on the back of the modem (refer to the
following illustration).
6. Insert one end of a RJ-45 cable into the connector and the other
end into port 15 of the switch.
7. Connect the external phone line to the modem.
C-4
UltraNet™ Storage Director Hardware Installation Guide
Installing the Serial Switch Cables
Use Appendix B to select the correct parameter settings for the
modem and the Penril™ or WTI serial switches to daisy chain
serial switches.
NOTE: When using the modem, follow your site’s security procedures to
protect access to your network.
8. Connect the serial switch power cord into the back of the serial
switch and plug it into an external power receptacle. If you are
installing a PC, continue with step 9; if you are not installing a PC,
you are done with this procedure.
9. Connect the serial switch to the PC by inserting adapter H
(revision B) into a Female-to-Female Null modem connector.
Connect the Null modem to the DB-25 serial connector on the
back of your PC. If your PC has a DB-9 connector, you need a
25-pin to 9-pin converter (CNT DD adapter).
10. Insert one end of an RJ-45 cable (this is a customer-supplied cable)
into adapter H and the other end into port 16 of the switch.
NOTE: If the serial switch you are using is a Penril™ switch, ensure port 1 on
the Penril is cabled to port 1 on the HMA. Also, when a Penril switch is used,
you must remove the B1 jumper on the HMA. To locate the jumper, refer to
the “Hardware Monitor Adapter Jumper Settings”later in this appendix
(Note that the B1 jumper is removed at the factory prior to shipping).
If using a Microcom modem, note that the battery lasts for 30 days
without AC applied. If the battery completely discharges, the
modem’s factory settings change to the default settings. See
Appendix B for proper modem settings.
WTI Serial Switch
Cabling
Use the following procedure to install the WTI serial switch cables:
1. Locate the RJ-45 ports on the Hardware Monitor Adapter
(HMAx) located in the back of the USD chassis. Each RJ-45 port
corresponds to an adapter in the slot number indicated.
C-5
Installing the Serial Switch Cables
2. Locate the connector cable for the switch (P/N 21501273) and
visually inspect the cable and RJ-45 connectors. The connection
cable for the serial switch consists of 14 cables bundled together
to allow for connection of all HMAx ports, the Primary, and the
Secondary Service Monitor serial ports (each connector is
labeled). For information on Primary and Secondary Service
Monitors, see the section “Application Processor (ZSP) Operation
Overview” in Chapter 3.
3. Install 16 EE (P/N 2149058) connectors to the ports on the WTI
serial switch.
4. Connect the 14 cables to the appropriately labeled ports on the
Hardware Monitor Adapter, Primary, and Secondary Service
Monitor serial ports (as shown in the following illustration).
C-6
UltraNet™ Storage Director Hardware Installation Guide
Installing the Serial Switch Cables
NOTE: If your USD-X does not have a Secondary Service Monitor, connect
the cable to an available Primary Service Monitor serial port, and connect the
other end to an EE adapter on the WTI serial switch port 14.
5. Connect the other ends of the remaining cables to the EE adapters
installed on the WTI serial switch port, as shown in the following
illustration.
6. If you are not connecting to a modem, go to step 9. Connect the
WTI switch to the modem by inserting adapter H into the DTE
port on the back of the modem as shown in the following
illustration:
Remote Modem
1
DTE
2
H
3
Phone Line
WTI Switch
15
16
13
14
11
12
4
9
10
7
8
5
6
3
4
1
2
5
6
EE Connectors
Connect to
ports 3-14
7
8
To PC
9
10
11
Primary
Service
Monitor
Serial Port
Secondary
Service
Monitor
Serial Port
Hardware Monitor
RJ-45 Connectors
for Slots 1-12
Ze0091
12
7. Insert one end of a RJ-45 cable (this is a customer-supplied cable)
into the H adapter on the modem and the other end into port 1 of
the switch.
8. Connect the external phone line to the modem.
When using the modem, follow your site’s security procedures to
protect access to your network.
C-7
Penril™ Serial Switch Settings
9. Connect the WTI serial switch power cord into the back of the
switch and plug it into the external power receptacle. If you are
installing a PC, continue with step 10; if you are not installing a
PC, you are done with this procedure.
10. Connect the WTI serial switch to the PC by inserting a DD
adapter into the PC.
11. Insert one end of a RJ-45 cable into the DD adapter and the other
end into port 2 of the switch.
If using a Microcom modem, note that the battery lasts for 30
days without AC applied. If the battery completely discharges,
the modem’s factory settings change to the default settings. See
Appendix B for proper modem settings.
Penril™ Serial Switch Settings
The serial switch is shipped with documentation that provides
complete installation and operation information. Use the following
parameter settings with your USD:
Name each port you configure for a reference to the port, such as
(modem, sparcsm, sparcprim, sparcsec, sparc1, escon1, escon2, etc...)
Starting port: 1
(any port on Penril, as long as starting and ending is
the same)
Ending port: 1
Baud rate: 38400
Character length: 8 bits
Stop bits: 1 bits
Parity: None
Escape delay: No
Attachment control: Modem (port with modem only) Unqualified
(for all other ports)
Device flow control: RTS/CTS
Port flow control: RTS/CTS
Timeout (mins): 0
Timeout direction: Both
Direction: Both
Session limit: 8
Echo: CPU & VCX services
Messages: All
Confirm connections: No
Login required: No
Ignore routine bcasts: No
Detach after disconnect: Yes
BREAK key: Pass Through
Control state char: 1
C-8
UltraNet™ Storage Director Hardware Installation Guide
Western Telematic Serial Switch Settings
Forward toggle char: 0
Backward toggle char: 0
Channel priority: 1
Disconnect delay(secs): 0
Terminal type: 13 (DEC VT-100/VT-180)
Originate access rights: 1-8
Answer access rights: 1-8
Password override: No
Daisy Chain Penril
Configuration
Figure C-1
Use the following illustration to daisy chain Penril serial switches:
Penril Daisy Chain Configuration
Western Telematic Serial Switch Settings
The WTI serial switch ships with documentation that provides
complete installation and operation information.
C-9
Western Telematic Serial Switch Settings
Connector Pinouts
The WTI contains DB-9 RS-232 connections wired as follows:
Table C-2
Configuration
Parameters
WTI DB-9 Pinout
Pin Number
Name
Direction
1
DCD
IN
2
RXD
IN
3
TXD
OUT
4
DTR
OUT
5
GND
6
NC
7
RTS
OUT
8
CTS
IN
9
NC
Use the following parameter settings with your USD-X:
When the unit is shipped from the factory, the default settings are:
•
38400 Baud
•
RTS/CTS handshaking
•
Full Duplex
•
8 Bits, No Parity, 1 Stop bit
SYSTEM STATUS:VERSION 1.21,
Table C-3
C-10
Site ID: (UNDEFINED)
WTI Configuration
Port
Name
Status
Baud
COM
HS
Mode
01
modem
Free
38.4K
8N1
RTS
02
PC
Free
38.4K
8N1
03
slot03
Free
38.4K
8N1
Buf
CTS
modem Off
0
L
RTS
modem Off
0
L
RTS
Pass
0
L
UltraNet™ Storage Director Hardware Installation Guide
Timeout
Off
Western Telematic Serial Switch Settings
Table C-3
WTI Configuration (Continued)
Port
Name
Status
Baud
COM
HS
Mode
Timeout
Buf
CTS
04
slot04
Free
38.4K
8N1
RTS
Pass
Off
0
L
05
slot05
Free
38.4K
8N1
RTS
Pass
Off
0
L
06
slot06
Free
38.4K
8N1
RTS
Pass
Off
0
L
07
slot07
Free
38.4K
8N1
RTS
Pass
Off
0
L
08
slot08
Free
38.4K
8N1
RTS
Pass
Off
0
L
09
slot09
Free
38.4K
8N1
RTS
Pass
Off
0
L
10
slot10
Free
38.4K
8N1
RTS
Pass
Off
0
L
11
slot11
Free
38.4K
8N1
RTS
Pass
Off
0
L
12
slot12
Free
38.4K
8N1
RTS
Pass
Off
0
L
13
prippp
Free
38.4K
8N1
RTS
Pass
Off
0
L
14
secppp
Free
38.4K
8N1
RTS
Pass
Off
0
L
15
slot01
Free
38.4K
8N1
RTS
Pass
Off
0
L
16
slot02
Free
38.4K
8N1
RTS
Pass
Off
0
L
Port 01 Parameters
PORT PARAMETERS #01
1. PORT NAME:modem
2. PASSWORD:(undefined)
21.
OPERATION:Wakeup Only
3. BAUD RATE:38.4K
4. BITS/PARITY:8-None
5. STOP BITS:1
6. HANDSHAKE MODE:RTS/CTS
7. PORT MODE:Modem
71. RESET STRING:Hello; you have connected to the
WTI switch
72. INIT STRING:Please wait for the WTI password
prompt . . .
73. HANG-UP(undefined)
8. COMMAND MODE:All
9. LOGOFF CHARACTER^P
C-11
Western Telematic Serial Switch Settings
10.
11.
12.
13.
14.
SEQUENCE DISCONNECTOn
TIMEOUT DISCONNECTOff
RESPONSE TYPE:Verbose
COMMAND ECHO:On
SEND BREAK:No
NOTE: Contact McDATA Customer Support to obtain the default password.
Port 02 Parameters
PORT PARAMETERS #02
1. PORT NAME:PC
2. PASSWORD:(undefined)
21.
OPERATION:Wakeup Only
3. BAUD RATE:38.4K
4. BITS/PARITY:8-None
5. STOP BITS:1
6. HANDSHAKE MODE:RTS/CTS
7. PORT MODE:Modem
71. RESET STRING:Hello; you have connected to the
WTI switch
72. INIT STRING:Please wait for the WTI password
prompt . . .
73. HANG-UP(undefined)
8. COMMAND MODE:All
9. LOGOFF CHARACTER^P
10. SEQUENCE DISCONNECTOn
11. TIMEOUT DISCONNECTOff
12. RESPONSE TYPE:Verbose
13. COMMAND ECHO:On
14. SEND BREAK:No
NOTE: Contact McDATA Customer Support to obtain the default password.
Ports 03 Through 12
and 15 Through 16
Parameters
C-12
PORT PARAMETERS #03
1. PORT NAME:slot03
2. PASSWORD:(undefined)
21.
OPERATION:Wakeup Only
3. BAUD RATE:38.4K
4. BITS/PARITY:8-None
5. STOP BITS:1
6. HANDSHAKE MODE:RTS\CTS
7. PORT MODE:Passive
74. DTR OUTPUTHigh
8. COMMAND MODE:Basic
9. LOGOFF CHARACTER^P
10. SEQUENCE DISCONNECTOn
11. TIMEOUT DISCONNECTOff
12. RESPONSE TYPE:Verbose
13. COMMAND ECHO:On
14. SEND BREAK:No
UltraNet™ Storage Director Hardware Installation Guide
Daisy Chain Western Telematic Configuration
Ports 13 and 14
Parameters
PORT PARAMETERS #04
1. PORT NAME:slot03
2. PASSWORD:(undefined)
21.
OPERATION:Wakeup Only
3. BAUD RATE:38.4K
4. BITS/PARITY:8-None
5. STOP BITS:1
6. HANDSHAKE MODE:RTS\CTS
7. PORT MODE:Passive
74. DTR OUTPUTLow
8. COMMAND MODE:Basic
9. LOGOFF CHARACTER^P
10. SEQUENCE DISCONNECTOn
11. TIMEOUT DISCONNECTOff
12. RESPONSE TYPE:Verbose
13. COMMAND ECHO:On
14. SEND BREAK:No
Daisy Chain Western Telematic Configuration
Use the following procedure to daisy chain the WTI Switch Assembly
25511247:
1. Change the Port Mode parameter of port 2 in the upstream WTI
Switch from "modem" to "Any-to-Any".
2. Change the Logoff Character parameter of port 1 in the
downstream WTI Switch from "^P" to "^Q". With these changes
in place, the following configuration is recommended.
3. Connect the modem to port 1 of the upstream WTI Switch.
4. Connect port 2 (the PC port) of the upstream WTI Switch, using a
DD adapter, to port 1 (the modem port) of the downstream WTI
Switch, using a EE adapter.
Accessing the Daisy
Chained WTI Switch
Use the following procedure to access the downstream daisy chained
WTI Switch from the modem:
1. Dial into and awaken the upstream WTI Switch attached to the
modem.
2. Enter the password for the modem port.
3. At the APS> prompt enter the command /C pc. This makes an
internal connection from port 1 to port 2 on the upstream WTI
Switch.
C-13
Hardware Monitor Adapter Jumper Settings
4. Awaken the downstream WTI Switch and enter the password for
the modem port.
5. Connect to the port of interest, for example, /C slot06. Now there
is a session open with the processor in slot 6, which is attached to
the downstream WTI Switch.
6. When the session is complete, break the connection by typing 3
^Qs followed by <Enter>. The downstream WTI Switch should
respond with its APS> prompt.
7. Make another connection on the downstream WTI Switch or put
it asleep with /X.
8. Break the upstream WTI Switch connection by typing 3 ^Ps
followed by <Enter>.
9. Make another connection on the upstream WTI Switch or put it
asleep and hang up the modem.
NOTE: The procedure above can be used to daisy chain another WTI Switch
further downstream, but a different logoff character must be used such as
"^R".
Hardware Monitor Adapter Jumper Settings
This section provides the procedures for accessing the jumpers on
existing Hardware Monitor Adapters. Refer to the “Circuit Board
Jumper Settings” section in Chapter 2 for the locations on the circuit
board jumpers.
NOTE: The Hardware Monitor Board (HMB3) does not have any user
jumper settings.
Normal connection of the Hardware Monitor Adapter (HMAx) is
through a serial switch; however, a PC can directly connect to a port
on the HMA instead. Install jumper B1 when a PC is directly
connected to a port on the HMA. Jumper B1 is on the RS-232 serial
interface card that is attached to the HMA. There are two versions of
the RS-232 serial interface card, part number 20501384, and part
number 20501405.
One difference between the two RS-232 serial interface cards is the
orientation of jumper B1. For part number 20501384, you must
remove the RS-232 serial interface card from the HMA assembly to
C-14
UltraNet™ Storage Director Hardware Installation Guide
Hardware Monitor Adapter Jumper Settings
access jumper B1. For part number 20501405, jumper B1 is located on
the top edge of the board and can be accessed without removing the
RS-232 serial interface card.
Use the following procedure to access jumper B1:
Tools Required: A medium straight slot screwdriver is required for
this procedure.
1. Remove the HMA card from the USD-X using the “Hardware
Monitor Board Removal Procedure” in Chapter 3.
NOTE: The jumper B1 is located near the edge of the RS-232 serial interface
card and is accessible without removing the RS-232 serial interface card from
the HMA assembly.
2. Install jumper B1 between pins 1 and 2 as shown:
Jumper
1
2
3
4
HMA
RS232 Serial
Interface Card
Ze0067
How To Access
Jumper B1 on a
20501405 RS-232
Serial Interface
C-15
Hardware Monitor Adapter Jumper Settings
How to Access
Jumper B1 on a
20501384 RS-232
Serial Interface
Use the following procedure to access jumper B1on a RS-232 serial
interface part number 20501384:
NOTE: Attach a wrist strap and follow ESD procedures during the handling
of all electronic components.
Tools Required: A medium straight slot screwdriver is required for
this procedure.
1. Remove the HMA card from the USD-X using the “Hardware
Monitor Board Removal Procedure” in Chapter 3.
2. Remove the 4 screws holding the RS-232 serial interface card to
the HMA as shown below.
Screw
HMA
Ze0057
RS232 Serial
Interface Card
3. Gently pull the RS-232 serial interface card from the HMA’s J3
connector.
4. Place the RS-232 serial interface card on top of an anti-static
surface with the component side up (see the illustration on the
next page).
5. If you are using a Penril VCX500 switch, remove the jumper at B1.
C-16
UltraNet™ Storage Director Hardware Installation Guide
Hardware Monitor Adapter Jumper Settings
6. If you are using any other serial switch, insert a jumper on B1 pins
2-3 as shown.
Jumper
B1
B1
1
2
3
J3
* All components
are not shown
Ze0056
Component Side
of RS232 Serial
Interface Card*
Use the following procedure to reattach the RS-232 serial interface
card to the HMA:
1. Align the J3 connector on the RS-232 serial interface card with the
HMA and gently press the two cards together.
NOTE: Ensure that the RS-232 connectors on the RS-232 interface card align
with the faceplate on the HMA.
C-17
Hardware Monitor Adapter Jumper Settings
2. Secure the RS-232 interface card to the HMA card with the 4
screws.
3. Install the HMA using the “Hardware Monitor Board Installation
Procedure” in Chapter 3.
C-18
UltraNet™ Storage Director Hardware Installation Guide
D
RJ-45 Cables and DB
Adapters
This appendix lists the RS-232 cables with RJ-45 connections and Data
Bus (DB) adapters available through McDATA. If you need to build
DB adapters, this appendix also lists the pinouts for the adapters.
RS-232 Cables with RJ-45 Connectors
The RS-232 cable with RJ-45 connectors is used for connecting the
USD-X to a LAN. Refer to Table D-1 for McDATA part numbers and
lengths for the RS-232 cables.
Table D-1
RS-232 Cable with RJ-45 Connectors: Lengths and Part
Numbers
Part Number
Cable Length
21500147
5 feet
21500148
10 feet
21500149
20 feet
21500150
30 feet
21500151
50 feet
21500152
100 feet
D-1
DB Adapters
DB Adapters
This section lists the DB adapters available through McDATA.
Additionally, it provides the adapter types required for USD-X
applications. If you need to build your own DB adapter, this section
also lists the pinouts for the DB adapters.
DB Adapters
Available From
McDATA
Table D-2
DB Adapter Part Numbers
DB Adapter
Part Number
Description
AA adapter
21490054 Rev A (AA)
DB25 pin
DD adapter
21490057 Rev A (DD)
DB9 pin
EE adapter
21490058 Rev A (EE)
DB9 pin
H adapter
21490030 Rev B (H)
DB25 pin
MM adapter
21490074 Rev A (MM)
DB9 pin
NN adapter
21490076 Rev A (NN)
DB9 pin
PP adapter
21490075 Rev A (PP)
DB25 pin
Required Adapters
for USD-X
Applications
Table D-3
D-2
Table D-2 lists the McDATA part numbers for the RJ-45 to DB
adapters. Refer to Table D-3 for information on the adapter types
required for USD-X applications.
Table D-3 lists the required adapters for USD-X applications.
Required Adapters for USD-X Applications
Application
Adapter(s) Required
PC to Penril Switch
DD adapter required for PC
PC to HMA2 (Hardware Monitor
Adapter)
EE adapter required for PC
PC to HMB3 (Hardware Monitor Board)
DD adapter required for PC
UltraNet™ Storage Director Hardware Installation Guide
DB Adapters
Table D-3
Required Adapters for USD-X Applications (Continued)
Application
Adapter(s) Required
PC to WTI Switch
DD adapter required for PC, EE adapter
required for WTI switch
PC to Modem
DD adapter required for PC, H adapter
required for modem
Modem to Penril Switch
PP adapter required for modem
Modem to HMB3 (Hardware Monitor
Board)
H adapter required for modem
Modem to WTI Switch
H adapter required for modem, EE adapter
required for WTI switch
WTI to Penril
DD adapter required for WTI switch
WTI to HMA2 (Hardware Monitor
Adapter)
EE adapter required for WTI switch
WTI to HMB3 (Hardware Monitor
Board)
NN adapter required for WTI switch
WTI to WTI
DD adapter required for local WTI switch,
EE adapter required for remote WTI switch
WTI to SBus I/O Adapter (Cosys)
EE adapter required for WTI switch
WTI to USM I/O Adapter (COM1 and
COM2 ports)
MM adapter required for WTI switch
Adapter Pinouts
AA Adapter Pinouts
The sections that follow provide the pinouts for each adapter type
listed. Refer to Table D-9 for the meaning of the pinout initials.
Table D-4 provides the pinouts of the AA adapter. The AA adapter is
a DB25-to-RJ-45 RS-232 straight through adapter. The AA adapter is
D-3
DB Adapters
attached to the remote modem for connection when directly attached
to the USD-X.
Table D-4
DD Adapter Pinouts
RJ-45 Pin Out
DB25 Pin Out (AA Adapter)
1 DSR
6 DSR
2 DCD
8 DCD
3 DTR
20 DTR
4 GND
7 GND
5 RXD
3 RXD
6 TXD
2 TXD
7 CTS
5 CTC
8 RTS
4 RTS
Table D-5 provides the pinouts of the DD adapter. The DD adapter is
a DB9-to-RJ-45 RS-232 crossover adapter. The DD adapter is used to
connect the switch to a PC (DTE-to-DCE).
Table D-5
D-4
AA Adapter Pinouts
DD Adapter Pinouts
RJ-45 Pin Out
DB9 Pin Out (DD adapter)
1 DSR
6 DSR
2 DCD
1 DCD
3 DTR
4 DTR
4 GND
5 GND
5 RXD
2 RXD
6 TXD
3 TXD
7 CTS
8 CTS
8 RTS
7 RTS
UltraNet™ Storage Director Hardware Installation Guide
DB Adapters
EE Adapter Pinouts
Table 0-1 provides the pinouts of the EE adapter. The EE adapter is a
DB9-to-RJ-45 RS-232 crossover adapter. The EE adapter is attached to
the Hardware Monitor Adapter for connection with the USD-X and
the remote modem. It can also be used on a PC for direct attachment
to a USD-X.
Table 0-1 EE Adapter Pinouts
RJ-45 Pin Out
DB9 Pin Out (EE Adapter)
1 DSR
4 DTR
2 DCD
6 DSR
3 DTR
1 DCD
4 GND
5 GND
5 RXD
3 TXD
6 TXD
2 RXD
7 CTS
7 RTS
8 RTS
8 CTS
H Adapter Pinouts
Table 0-2 provides the pinouts of the H adapter. The H adapter is a
DB25-to-RJ-45 RS-232 crossover adapter. The H adapter is inserted
into the DTE port on the remote modem to connect the modem to the
Hardware Monitor Board. The H adapter is also used to connect a
SPARC workstation to the USD-X.
Table 0-2 H Adapter Pinouts
RJ-45 Pin Out
DB25 Pin Out (H Adapter)
1 DTR
20 DTR
2 DCD
8 DCD
3 DSR
6 DSR
4 GND
7 GND
D-5
DB Adapters
Table 0-2 H Adapter Pinouts (Continued)
MM Adapter Pinouts
DB25 Pin Out (H Adapter)
5 TXD
2 TXD
6 RXD
3 RXD
7 RTS
4 RTS
8 CTS
5 CTS
Table D-6 provides the pinouts of the MM adapter. The MM adapter
is a DB9-to-RJ-45 RS-232 crossover adapter. The MM adapter is
attached to the WTI switch for connection with the COM 1/2 ports on
the USM I/O adapter of the USD-X.
Table D-6
D-6
RJ-45 Pin Out
MM Adapter Pinouts
RJ-45 Pin Out
DB9 Pin Out (EE Adapter)
1 DSR
4 DTR
2 DCD
Note: This pin connects to RJ45
pins 1 and 2.
3 DTR
6 DSR
Note: This pin connects to
DB9 pins 6 and 1.
1 DCD
4 GND
5 GND
6 RXD
3 TXD
6 TXD
2 RXD
7 CTS
7 RTS
8 RTS
8 CTS
UltraNet™ Storage Director Hardware Installation Guide
DB Adapters
NN Adapter Pinouts
Table D-7 provides the pinouts of the NN adapter. The NN adapter is
a DB9-to-RJ-45 RS-232 crossover adapter. The NN adapter is attached
to the WTI switch for connection with the HMB3 board of the USD-X.
Table D-7
PP Adapter Pinouts
NN Adapter Pinouts
RJ-45 Pin Out
DB9 Pin Out (EE Adapter)
1 DTR
1 DCD
Note: This pin connects to
DB9 pins 1 and 6.
6 NC
2 DSR
4 DTR
3 DCD
Note: This pin connects to RJ45
pins 2 and 3.
4 GND
5 GND
5 TD
2 RD
6 RD
3 TD
7 RTS
8 CTS
8 CTS
7 RTS
Table D-8 provides the pinouts of the PP adapter. The PP adapter is a
DB25-to-RJ-45 RS-232 crossover adapter. The PP adapter is attached
to the Penril switch for connection with the modem.
Table D-8
PP Adapter Pinouts
RJ-45 Pin Out
DB25 Pin Out (EE Adapter)
1 DSR
20 DTR
2 DCD
4 RTS
3 DTR
6 DSR
4 SG
7 SG
5 RD
2 TD
6 TD
3 RD
D-7
DB Adapters
Table D-8
Pinout Initials
RJ-45 Pin Out
DB25 Pin Out (EE Adapter)
7NC CTS
5NC CTS
8 RTS
8 DCD
Table D-9 provides the full names of the pinout initials.
Table D-9
D-8
PP Adapter Pinouts (Continued)
Pinout Initials
Initials
Full Name
DSR
Data Set Ready
DTR
Data Terminal Ready
DCD
Data Carrier Detect
GND
Ground
RXD
Receive Data
TXD
Transmit Data
CTS
Clear To Send
RTS
Request To Send
UltraNet™ Storage Director Hardware Installation Guide
E
Fuse Voltage Information
This appendix provides the voltage information for the fuses on the
F9112 midplane and F9106 midplane.
F9112 Fuse Voltage Information
Table E-1 provides fuse voltage information for F9112. Refer to Table
3-1 for information on fuse locations.
Table E-1
F9112 Fuse Voltage Information
Voltage
Fuse Numbers
+48 volts
1, 2, 9, 10, 17, 18, 25, 26, 33, 34, 41, 42,
49, and 55
48 return
3, 4, 11, 12, 19, 20, 27, 28, 35, 36, 43,
44, 50, and 56
-12 volts
7, 8, 15, 16, 23, 24, 31, 32, 39, 40, 47,
48, 52, and 58
+12 volts
5, 6, 13, 14, 21, 22, 29, 30, 37, 38, 45,
46, 51, and 57
+2.1
54
+5
53 and 59
E-1
F9106 Fuse Voltage Information
F9106 Fuse Voltage Information
Use Table E-2 for F9106 fuse voltage information, for fuse locations
see Table 3-2.
Table E-2
E-2
F9106 Fuse Voltage Information
Voltage
Fuse Numbers
+48 volts
1, 2, 9, 10, 17, 18 and 49
48 return
3, 4, 11, 12, 19, 20 and 50
-12 volts
7, 8, 15, 16, 23, 24 and 52
+12 volts
5, 6, 13, 14, 21, 22, and 51
+2.1
54
+5
53
UltraNet™ Storage Director Hardware Installation Guide
Index
A
C
AA adapter 1-7
active Service Monitor 3-6
adapter
AA 1-7, C-1
DD 1-7, C-2
EE C-2
H 1-7, C-2
MM C-2
NN C-2
P C-2
adapter pinouts
AA D-3
DD D-4
EE D-5
H D-5
MM D-6
NN D-7
PP D-7
application processor
hard disk replacement 3-50
hard disk replacement with SCSI adapter kit
installation 3-54
application processor (ZSPx)
jumper settings 2-28
ATM (OC-12)
cabling 1-12
cabinet
F9106
front and back views 2-3
layout 2-3
power supply locations 2-5
F9112
front and back view 2-1
layout 2-1
power supply locations 2-2
placement 1-3
switches and indicators 2-5
switches on back 2-7
unpacking and inspecting 1-1
cables
CNT-supplied 1-7
connection procedures 1-9
customer-supplied 1-8
routing within the USD-X 1-26
cabling
ATM (OC-12) 1-12
ATM (OC-3) 1-11
DS3/E3 1-14
ESCON 1-10
FICON multi-mode 1-13
FICON single-mode 1-13
Gigabit Ethernet 1-15
Hardware Monitor Board
daisy chaining 1-25
modem 1-23
PC 1-24
Primary Service Monitor (USMIO) 1-18
Primary Service Monitor (ZSIO) 1-19
B
backing up data
tape utility 6-1
Index
i-1
Index
Secondary Service Monitor (USMIO)
1-20
Secondary Service Monitor (ZSIO) 1-21
Hardware Monitor Board (HMB3) 1-18
Penril serial switch C-2
SCSI 1-16
SCSI for SBus I/O adapter (ZSIO) 1-17
Service Monitor Ethernet (ZSIO) 1-16
WTI serial switch C-5
CD
mounting 5-1
unmounting 5-1
CD-RW drive 3-58
replacement procedure 3-58
CD-RW utility 5-1
blanking a CD-RW disk 5-3
list CD contents 5-4
Main Menu 5-2
performing a complete backup 5-5
CD-RW utility, system administration
logging on 5-2
performing restore operations 5-6
circuit boards
ESCON (ZENx) 2-19
HMAx (Hardware Monitor Adapter) 2-11
HMBx (Hardware Monitor Board) 2-10
jumper settings 2-28
overview 2-8
PowerPC (ZAP5) 2-21
removal and installation procedures 3-1
SBus I/O (ZSIO) adapter 2-18
SPARC application processor (ZSPx) 2-17
UltraNet Service Monitor (USM) application
processor 2-12
UltraNet Service Monitor I/O (USMIO)
adapter 2-16
clock
adjusting for the USD-X 3-69
making major adjustments 3-70
making minor adjustments 3-69
configuration wizard interface 1-1
connector
WTI DB-9 C-10
D
daisy chain
i-2
Penril switch C-9
Western Telematics configuration C-13
DAT drive
configuration backup procedure 3-64
configuration restore procedure 3-65
replacement procedure 3-61
DB adapters
available from CNT D-2
pinouts D-3
required for USD applications D-2
DD adapter 1-7
dial-in PPP connection procedure B-1
DS3/E3
cabling 1-14
E
Electrostatic Discharge 1-4
ESCON
cabling 1-10
description 2-9
resetting an adapter 3-67
switches and indicators 2-19
ZENx adapter installation procedure 3-31
ZENx adapter removal procedure 3-30
Ethernet
cabling 1-14
drop cable 1-7
maintenance interface 4-1
transceiver 1-8
F
fan tray
replacement procedure 3-46
Fibre Channel
cabling 1-12
type and distance restrictions 1-12
fuse
installation procedure 3-46
removal procedure 3-43
USD-X 12-Slot
fuse locations 3-41
midplane fuse numbers 3-42
voltage information E-1
USD-X 6-Slot
fuse locations 3-43
midplane fuse numbers 3-43
Index
voltage information E-2
Primary Service Monitor (USM application
processor) 3-8
Primary Service Monitor (ZSP) 3-15
SBus I/O adapter 3-29
Secondary Service Monitor (USM application
processor) 3-10
Secondary Service Monitor (ZSP) 3-19
serial from SBus I/O 3-29
USM I/O adapter 3-24
G
Gigabit Ethernet
cabling 1-15
H
H adapter 1-7
halt command 3-65
Hardware Monitor Adapter (HMAx)
description 2-8
indicators 2-11
reset switch 2-11
Hardware Monitor Board
installation procedure 3-3
removal procedure 3-2
Hardware Monitor Board (HMB3)
description 2-8
factory default settings A-1
indicators 2-10
port default settings A-1
port defaults A-2
I
indicators
circuit boards 2-8
ESCON (ZENx) 2-19
Hardware Monitor Adapter 2-11
Hardware Monitor Board 2-10
PCI boards 2-25
power supply 1-28
PowerPC (ZAP5) 2-21
SBus I/O (ZSIO) 2-18
SPARC application processor (ZSPx) 2-17
UltraNet Service Monitor (USM) application
processor 2-12
UltraNet Service Monitor I/O (USMIO)
adapter 2-16
ZAP5 2-21
installation procedures
ESCON ZENx adapter 3-31
Hardware Monitor Board 3-3
master and slave switch card 3-40
midplane fuse 3-46
PowerPC ZAP5 adapter 3-34
J
jumper settings
Hardware Monitor Adapter (HMAx) C-14
ZSPx application processor 2-28
M
master and slave switch card
installation procedure 3-40
removal procedure 3-35
midplane
fuse installation procedure 3-46
fuse removal procedure 3-43
modem setup
Microcom modem settings B-3
Multi-Tech settings B-3
P
PCI board
indicators 2-25
Penril
serial switch settings C-8
Penril switch C-5
cables and adapters C-1
cabling C-3
daisy chain configuration C-9
settings C-8
pinouts
AA adapter D-3
DD adapter D-4
EE adapter D-5
H adapter D-5
initials D-8
MM adapter D-6
NN adapter D-7
PP adapter D-7
Index
i-3
Index
WTI switch connections C-10
power
plug 1-7
receptacles 1-8
power cord requirements
domestic 1-9
international 1-9
power cord, optional 110 AC distribution 1-9
power supply
replacement procedure 3-48
powering-down the USD-X 3-67
powering-on the USD-X 1-27
PowerPC
resetting the processor 3-67
ZAP5 PCI I/O adapter card installation
procedure 3-34
ZAP5 PCI I/O adapter card removal
procedure 3-32
PowerPC (ZAP5)
indicators 2-21
PowerPC (ZAPx)
description 2-9
PPP connection
modem setup B-3
Primary Service Monitor 3-5
R
reboot command 3-66
remote support
configurations B-4
dial-in PPP connection procedure B-1
modem setup B-3
removal procedures
ATM or serial from SBus I/O 3-28
ESCON ZENx adapter 3-30
Hardware Monitor Board 3-2
master and slave switch card 3-35
midplane fuse 3-40
PowerPC ZAP5 PCI I/O adapter card 3-32
Primary Service Monitor (USM application
processor) 3-6
Primary Service Monitor (ZSP) 3-13
SBus I/O adapter 3-26
Secondary Service Monitor (USM application
processor) 3-9
Secondary Service Monitor (ZSP) 3-16
i-4
USM I/O adapter 3-23
replacement procedures
application processor hard disk 3-50
application processor hard disk with SCSI
adapter kit installation 3-54
CD-RW drive 3-58
DAT drive 3-58, 3-61
fan tray 3-46
power supply 3-48
resetting
application processor 3-65
ESCON adapter 3-67
PowerPC processor 3-67
Service Monitor 3-66
RJ-45 connectors D-1
RS-232 cables D-1
S
SBus I/O
ATM and serial ports 2-18
indicator 2-18
SBus I/O adapter
4 serial port installation procedure 3-29
4 serial port removal procedure 3-28
cabling procedures
Ethernet 1-16
Hardware Monitor Board (HMB3) 1-19
description 2-9
installation procedure 3-29
removal procedure 3-26
SCSI adapter kit
installation 3-54
kit contents 3-54
Secondary Service Monitor 3-5
serial number 3-69
displaying for the USD-X 3-69
location on the chassis 2-1
serial switch
Penril
cabling C-3
settings for Penril C-8
settings for Western Telematic (WTI) C-10
WTl
cabling C-5
Service Monitor
active 3-6
Index
Primary 3-5
resetting 3-66
Secondary 3-5
shutting down Solaris 3-65
slot_reset command 3-66, 3-67
SNMP 4-1
Solaris
shutting down 3-65
SPARC application processor
indicators 2-17
reset switch 2-17
resetting 3-65
switches and indicators
cabinet front 2-5
T
tape utility 6-1
tape utility, system administration
configuring automatic tape backups 6-6
logging on 6-1
performing backups 6-2
performing restore operations 6-4
viewing operating system statistics 6-2
U
UltraNet Service Monitor (USM) application
processor
description 2-8
diagnostic display codes 2-13
diagnostic LED display window 2-12
indicators and switches 2-12
removal and installation procedures 3-5
Service Monitor types 3-5
UltraNet Service Monitor I/O (USMIO) adapter
description 2-8
indicators and ports 2-16
installation procedure 3-24
removal procedure 3-23
unpacking the cabinet 1-1
USD-X overview 1-1
W
WebView
browser and system requirements 4-3
installation procedure 4-2
obtaining the software 4-1
overview 4-1
using the software 4-3
Western Telematic
daisy chain C-13
serial switch settings C-9
wrist strap
connector 1-4
WTI switch
cables and adapters C-1
cabling C-5
configuration parameters C-10
accessing the daisy chained WTI switch
C-13
port 01 C-11
port 02 C-12
ports 13 and 14 C-13
ports 3 - 12, 15 - 16 C-12
connector pinout C-10
daisy chain configuration C-13
settings C-9
Z
ZAP
resetting the processor 3-67
ZAP5
adapter installation procedure 3-34
adapter removal procedure 3-32
console serial port speed LED codes 2-24
PCI I/O adapter card installation procedure
3-34
PCI I/O adapter card removal procedure
3-32
power-up diagnostic code sequence 2-22
switches and indicators 2-21
ZENx (ESCON)
switches and indicators 2-19
ZSIO
4 serial port installation procedure 3-29
4 serial port removal procedure 3-28
cabling procedures
Ethernet 1-16
Hardware Monitor Board (HMB3) 1-19
installation procedure 3-29
removal procedure 3-26
ZSIO (SBus I/O adapter)
Index
i-5
Index
indicators 2-18
ZSP application processor
not configured as a Service Monitor
installation procedure 3-22
not configured as a Service Monitor removal
procedure 3-20
Primary Service Monitor installation
procedure 3-15
Primary Service Monitor removal procedure
3-13
Secondary Service Monitor installation
procedure 3-19
Secondary Service Monitor removal
procedure 3-16
ZSPx application processor
backup and restore procedures 3-64
description 2-8
i-6