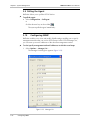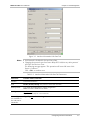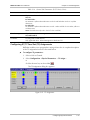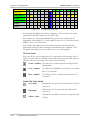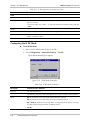
1
RADview-TDM
Element Management System for TDM Applications
FCD-IP
© 1994–2004 RAD Data Communications
Publication 12/04
Contents
Chapter 1. Introduction
1.1
1.2
1.3
1.4
1.5
Overview..................................................................................................................... 1-1
Introducing RADview FCD-IP ...................................................................................... 1-1
The FCD-IP Workplace................................................................................................ 1-2
Edit and Agent Views ................................................................................................... 1-3
LEDs............................................................................................................................ 1-3
Chapter 2. System Management
2.1
2.2
2.3
2.4
Selecting the System Level ........................................................................................... 2-1
Viewing and Modifying System Configuration .............................................................. 2-2
Setting Bridging Parameters.......................................................................................... 2-3
Routing the IP.............................................................................................................. 2-5
Forwarding Table.................................................................................................................. 2-5
Address Resolution Protocol Table ........................................................................................ 2-7
IP Address Table ................................................................................................................... 2-8
2.5 OSPF ......................................................................................................................... 2-10
Configuring OSPF ............................................................................................................... 2-10
OSPF Information ............................................................................................................... 2-14
2.6
2.7
2.8
2.9
2.10
2.11
Viewing the Connection Status .................................................................................. 2-18
Configuring the Dynamic Host Configuration Protocol (DHCP) .................................. 2-19
Resetting the Device .................................................................................................. 2-21
Polling the Agent ....................................................................................................... 2-22
Configuring SNMP ..................................................................................................... 2-22
Switching Between Edit and Agent View .................................................................... 2-23
Chapter 3. Port Management
3.1 Edit and Agent Views ................................................................................................... 3-1
3.2 Configuring Interface Information ................................................................................ 3-1
Configuring E1/T1, CHANNEL, ISDN, and Voice Interface Information .................................. 3-1
Configuring SHDSL Interface Information.............................................................................. 3-4
Configuring E1/T1 over SHDSL Interface Information ............................................................ 3-6
Configuring LAN Interface Information .................................................................................. 3-9
3.3 Configuring Physical Parameters ................................................................................ 3-10
Configuring Async Link (V.24) Physical Parameters .............................................................. 3-10
Configuring ISDN Physical Parameters................................................................................. 3-13
Configuring E1/T1 Link Mode.............................................................................................. 3-16
Configuring General E1/T1 Physical Parameters ................................................................... 3-17
Configuring E1/T1 Time Slot (TS) Assignments ..................................................................... 3-19
Reading the E1/T1 Configuration from the Agent ................................................................. 3-22
Updating the E1/T1 Configuration in the Agent ................................................................... 3-22
Configuring SHDSL Physical Parameters .............................................................................. 3-23
Configuring SHDSL Status Parameters ................................................................................. 3-25
Configuring Voice Interface Physical Parameters.................................................................. 3-26
RADview FCD-IP User’s Manual
i
Table of Contents
3.4 Configuring Protocol Parameters................................................................................ 3-29
Configuring Frame Relay Protocol Parameters ..................................................................... 3-29
Configuring the DLCI Table................................................................................................. 3-30
Configuring PPP Parameters ................................................................................................ 3-32
3.5 Configuring Network Parameters ............................................................................... 3-34
Configuring IP Addresses..................................................................................................... 3-34
Configuring the IP Routing Protocol .................................................................................... 3-35
Configuring the IP RIP Mode............................................................................................... 3-36
Configuring DHCP Relay..................................................................................................... 3-37
3.6 Resetting the Link ...................................................................................................... 3-37
3.7 Performing Diagnostic Tests ....................................................................................... 3-38
Chapter 4. Fault Management
4.1 Edit and Agent Views ................................................................................................... 4-1
4.2 Displaying Sanity Check Errors (E1/T1 Link) ................................................................. 4-1
4.3 Displaying SHDSL Alarms ............................................................................................ 4-2
Chapter 5. Performance
5.1
5.2
5.3
5.4
Edit and Agent Views ................................................................................................... 5-1
Setting the Polling Interval............................................................................................ 5-2
Performing Diagnostic Tests ......................................................................................... 5-2
Displaying E1/T1 Statistics............................................................................................ 5-3
Packets Data Statistics ........................................................................................................... 5-3
Packets Graph Statistics......................................................................................................... 5-4
Physical Layer Statistics ......................................................................................................... 5-6
Protocol Layer Statistics......................................................................................................... 5-9
5.5 Displaying E1 Over SHDSL Statistics .......................................................................... 5-12
Physical Layer Statistics ....................................................................................................... 5-12
5.6 Displaying Ethernet LAN Statistics .............................................................................. 5-15
Chapter 6. Configuring FCD-IP for a Typical Application
6.1 Overview..................................................................................................................... 6-1
Application ........................................................................................................................... 6-1
6.2 Configuring WAN Parameters ...................................................................................... 6-2
Configuring the WAN Interface ............................................................................................. 6-2
Configuring the WAN IP Address .......................................................................................... 6-3
6.3 Configuring the E1 Interface......................................................................................... 6-4
Configuring E1 Parameters .................................................................................................... 6-4
Mapping E1Timeslots ............................................................................................................ 6-5
6.4 Configuring the LAN Interface...................................................................................... 6-5
Enabling the LAN.................................................................................................................. 6-5
Configuring the LAN IP Address ............................................................................................6-6
Configuring Default Gateway Settings.................................................................................... 6-7
ii
RADview FCD-IP User’s Manual
Table of Contents
List of Figures
1-1. FCD-IP Main Window........................................................................................................... 1-2
1-2. Password Dialog .................................................................................................................... 1-3
2-1. FCD-IP Main Window........................................................................................................... 2-1
2-2. System Information ............................................................................................................... 2-2
2-3. Static Forwarding Table ......................................................................................................... 2-3
2-4. Add Static Entry..................................................................................................................... 2-4
2-5. IP Forwarding Table .............................................................................................................. 2-5
2-6. ARP Stations Table ................................................................................................................ 2-7
2-7. IP Addresses Table................................................................................................................. 2-8
2-8. Add IP Address...................................................................................................................... 2-9
2-9. Change IP Address ................................................................................................................ 2-9
2-10. OSPF Parameters (Enable) ................................................................................................. 2-10
2-11. OSPF Parameters (Disable) ................................................................................................ 2-11
2-12. OSPF Area Table ............................................................................................................... 2-12
2-13. OSPF Area Aggregation Table ............................................................................................ 2-13
2-14. Add Area Aggregation........................................................................................................ 2-14
2-15. Interfaces Table ................................................................................................................. 2-15
2-16. Neighbors Table ................................................................................................................ 2-16
2-17. Database Table ................................................................................................................. 2-17
2-18. All Links Connections List .................................................................................................. 2-18
2-19. Dynamic Host Configuration Protocol Table ...................................................................... 2-19
2-20. Add DHCP Entry ............................................................................................................... 2-20
2-21. Change DHCP Entry.......................................................................................................... 2-21
2-22. Reset Brouter .................................................................................................................... 2-21
2-23. Manager List...................................................................................................................... 2-22
2-24. Password Dialog Box ......................................................................................................... 2-23
3-1. Interface Information Info Tab ............................................................................................... 3-2
3-2. Interface Information Link Data Tab ...................................................................................... 3-3
3-3. Interface Information Info Tab for E1/T1 over SHDSL ............................................................ 3-6
3-4. Interface Information Link Data Tab for E1/T1 over SHDSL ................................................... 3-7
3-5. Interface Information – Ethernet LAN .................................................................................... 3-9
3-6. Async Link Parameters Dialog Box....................................................................................... 3-11
3-7. Add New Modem Dialog Box.............................................................................................. 3-12
3-8. ISDN Parameters – Interface Tab......................................................................................... 3-13
3-9. ISDN Parameters –Terminal End Point Tab.......................................................................... 3-14
3-10. ISDN Parameters -Channel Tab ......................................................................................... 3-15
3-11. E1/T1 Link Mode............................................................................................................... 3-16
3-12. General Link Parameters (E1/T1 Ports) ............................................................................... 3-17
3-13. TS Assignment ................................................................................................................... 3-19
3-14. TS Assignment (New HW) ................................................................................................. 3-20
3-15. Read Configuration ........................................................................................................... 3-22
3-16. Update Configuration........................................................................................................ 3-23
3-17. SHDSL Parameters ............................................................................................................ 3-24
3-18. SHDSL Status .................................................................................................................... 3-25
3-19. Voice Parameters Dialog Box............................................................................................. 3-26
RADview FCD-IP User’s Manual
iii
Table of Contents
3-20. FR Parameters ................................................................................................................... 3-29
3-21. DLCI Table........................................................................................................................ 3-31
3-22. Add DLCI .......................................................................................................................... 3-32
3-23. PPP Protocol ..................................................................................................................... 3-32
3-24. IP Address ......................................................................................................................... 3-34
3-25. IP Routing Protocol Dialog Box........................................................................................... 3-35
3-26. IP RIP Mode Dialog Box .................................................................................................... 3-36
3-27. DHCP Relay Parameters.................................................................................................... 3-37
3-28. Testing .............................................................................................................................. 3-38
4-1. Sanity Check Errors List ......................................................................................................... 4-2
4-2. SHDSL Alarms....................................................................................................................... 4-2
5-1. Polling Interval....................................................................................................................... 5-2
5-2. Testing .................................................................................................................................. 5-2
5-3. Link Statistics ......................................................................................................................... 5-3
5-4. Link Packets .......................................................................................................................... 5-4
5-5. Link Octets............................................................................................................................ 5-5
5-6. Link Error Frames .................................................................................................................. 5-5
5-7. E1 Link Statistics .................................................................................................................... 5-6
5-8. Current Graph Statistics ......................................................................................................... 5-7
5-9. Errors Statistics Intervals ......................................................................................................... 5-7
5-10. Intervals Graph.................................................................................................................... 5-8
5-11. FR Error Statistics ................................................................................................................. 5-9
5-12. DLCI Statistics ................................................................................................................... 5-10
5-13. 15 min. Current Data ........................................................................................................ 5-12
5-14. 15 min. Current Graph...................................................................................................... 5-13
5-15. 1-Day Current Data........................................................................................................... 5-13
5-16. 15 min. Intervals Data ....................................................................................................... 5-14
5-17. 15 min. Intervals Graph..................................................................................................... 5-14
5-18. LAN General ..................................................................................................................... 5-15
5-19. LAN Errors Statistics........................................................................................................... 5-16
5-20. LAN Packets ...................................................................................................................... 5-18
5-21. LAN Octets ....................................................................................................................... 5-18
5-22. ETH Error Frames .............................................................................................................. 5-19
5-23. ETH Tx & Rx Errors............................................................................................................ 5-19
5-24. ETH FCS & Test Errors ....................................................................................................... 5-20
5-25. LAN Collisions ................................................................................................................... 5-20
6-1. FCD-IP Providing Access to the Internet and to the PSTN ...................................................... 6-1
6-2. WAN Interface Information Link Data Tab............................................................................. 6-2
6-3. IP Addresses Table................................................................................................................. 6-3
6-4. Add IP Address...................................................................................................................... 6-3
6-5. The E1 Link Parameters ......................................................................................................... 6-4
6-6. TS Assignment ....................................................................................................................... 6-5
6-7. Interface Information - Ethernet LAN ..................................................................................... 6-6
6-8. IP Addresses Table................................................................................................................. 6-6
6-9. Add IP Address...................................................................................................................... 6-7
6-10. Dynamic Host Configuration Protocol Table ........................................................................ 6-7
6-11. Add DHCP Entry Table........................................................................................................ 6-8
iv
RADview FCD-IP User’s Manual
Table of Contents
List of Tables
1-1. FCD-IP LEDs ......................................................................................................................... 1-3
2-1. System Information Parameters ............................................................................................. 2-2
2-2. Static Forwarding Table Parameters ....................................................................................... 2-4
2-3. IP Forwarding Parameters...................................................................................................... 2-6
2-4. ARP Stations Parameters........................................................................................................ 2-7
2-5. IP Address Parameters ........................................................................................................... 2-8
2-6. OSPF Parameters................................................................................................................. 2-11
2-7 OSPF Area Table Parameters ................................................................................................. 2-12
2-8 OSPF Area Aggregation Parameters ....................................................................................... 2-13
2-9. Interfaces Parameters .......................................................................................................... 2-15
2-10. Neighbors Parameters ....................................................................................................... 2-16
2-11. Database Parameters ......................................................................................................... 2-17
2-12. All Links Connections Parameters ...................................................................................... 2-18
2-13. Dynamic Host Configuration Protocol Parameters ............................................................. 2-19
2-14. Manager List Parameters.................................................................................................... 2-23
3-1. Info Tab Parameters for E1/T1, CHANNEL, ISDN, and Voice................................................. 3-2
3-2. Interface Information Link Data Tab Parameters .................................................................... 3-3
3-3. Info Tab Parameters for SHDSL ............................................................................................. 3-5
3-4. Interface Information Link Data Tab Parameters for SHDSL ................................................... 3-5
3-5. Info Tab Parameters for E1/T1 over SHDSL............................................................................ 3-7
3-6. Interface Information Link Data Tab Parameters for E1/T1 over SHDSL ................................. 3-8
3-7. Interface Information – Ethernet LAN Parameters .................................................................. 3-9
3-8. Async Link Parameters......................................................................................................... 3-11
3-9. Add New Modem Parameters ............................................................................................. 3-12
3-10. ISDN Parameters – Interface Tab....................................................................................... 3-13
3-11. ISDN Parameters – Terminal End Point Tab....................................................................... 3-14
3-12. ISDN Parameters -Channel Tab ......................................................................................... 3-15
3-13. E1/T1 Link Mode............................................................................................................... 3-16
3-14. General Link Parameters (E1/T1 Ports) ............................................................................... 3-17
3-15. SHDSL Parameters ............................................................................................................ 3-24
3-16. SHDSL Status Parameters .................................................................................................. 3-26
3-17. Voice Parameters .............................................................................................................. 3-26
3-18. Protocol Options per Interface and Link Types .................................................................. 3-29
3-19. FR Parameters ................................................................................................................... 3-30
3-20. DLCI Table Parameters...................................................................................................... 3-31
3-21. PPP Protocol Parameters ................................................................................................... 3-33
3-22. IP Address Parameters ....................................................................................................... 3-34
3-23. IP Routing Protocol Parameters ......................................................................................... 3-35
3-24. IP RIP Mode Parameters.................................................................................................... 3-36
3-25. DHCP Relay Parameters.................................................................................................... 3-37
3-26. Testing Parameters ............................................................................................................ 3-38
RADview FCD-IP User’s Manual
v
Table of Contents
5-1.
5-2.
5-3.
5-4.
5-5.
5-6.
5-7.
5-8.
Testing Parameters – E1/T1.................................................................................................... 5-3
Link Statistic Parameters ........................................................................................................ 5-4
Link Statistic Parameters ........................................................................................................ 5-6
FR Error Statistics Parameters ............................................................................................... 5-10
DLCI Statistics Parameters ................................................................................................... 5-11
15 min, Current Data Parameters ........................................................................................ 5-12
LAN General ....................................................................................................................... 5-15
LAN Errors Statistics Parameters........................................................................................... 5-16
6-1. Configuration Summary......................................................................................................... 6-2
vi
RADview FCD-IP User’s Manual
Chapter 1
Introduction
1.1 Overview
This chapter describes the RADview management application for FCD-IP, and
includes the following sections:
•
Introducing RADview FCD-IP
•
The FCD-IP Workplace.
1.2 Introducing RADview FCD-IP
RADview FCD-IP enables you to monitor and manage FCD-IP. FCD-IP is an E1/T1
or E1/T1 over SHDSL, fractional integrated access device (IAD), which enables
service providers to bundle data, voice and IP access services over a single E1 or
T1 access line. Additionally, FCD-IP can be used for management applications in
cellular or SDH environments. An integrated router supports IP/IPX routing and
transparent bridging. The FCD-IP supports an optional internal 4-port Ethernet/Fast
Ethernet switch, which can be installed in place of the LAN ports.
Introducing RADview FCD-IP
1-1
RADview FCD-IP User’s Manual
Chapter 1 Introduction
1.3 The FCD-IP Workplace
The RADview FCD-IP main window displays FCD-IP front and back panels,
including all LEDs and interfaces. You can select most of the displayed interfaces in
each section, or select the entire device for system configuration. A blue border
marks the selected item.
Note
To select the device itself, click on any area outside of the ports.
Figure 1-1. FCD-IP Main Window
When an interface is selected, two views are available:
•
Edit View (Edit mode) is used for configuring the interface. When configuring
the interface, the configuration is stored in the management station until you
update the device. When you update the device, the configuration is saved on
the device itself.
•
Agent View (Agent mode) displays the current state of the interface.
The current mode is indicated by “E.#” or “A.#” at the top-left of the dialog box.
The menus and the available menu options vary, depending on the item selected
in the main window (the device or one of its ports), and the current mode (Edit or
Agent). Certain actions can only be performed in one of the modes. For example,
the link mode can be configured only in the Edit mode and switching traffic
between links can only be performed in Agent mode.
1-2
The FCD-IP Workplace
RADview FCD-IP User’s Manual
Chapter 1 Introduction
1.4 Edit and Agent Views
Note
Certain TDM ports can be displayed in both Edit and Agent Views. Configuration is
performed in the Edit mode. In Agent View, the parameters are Read-Only.
To switch between Edit and Agent views:
1. Select the appropriate Link.
2. Switch the view by doing one of the following:
Click the Edit/Agent View button on the toolbar
or
From the Window menu, select Edit View/Agent View to switch to
Edit/Agent View.
3. When entering Edit View, you must enter the password.
Type the password in the field provided and click <Set>.
Figure 1-2. Password Dialog
1.5 LEDs
Table 1-1 describes the device LEDs.
Table 1-1. FCD-IP LEDs
Object
Description
Function
PWR
Green LED
ON when the device is powered on.
READY
Green LED
ON when the packets can be transferred.
LAN1 DATA
LAN2 DATA
Yellow LED
ON when a packet is received or transmitted on the LAN side.
LAN1 ERR
LAN2 ERR
Red LED
ON when a LAN interface indicates an error.
LINK 1 DATA
LINK 2 DATA
Yellow LED
Turns ON briefly when a packet is received or transmitted on the
LINK side.
Blinks constantly to show ISDN link integrity.
LEDs
1-3
RADview FCD-IP User’s Manual
Chapter 1 Introduction
Table 1-1. FCD-IP LEDs (Cont.)
Object
Description
Function
LINK1 ERR
LINK2 ERR
Red LED
OFF when there is a physical connection and no LINK interface
error.
Turns ON briefly when the LINK interface indicates an error.
Continuously ON when there is no physical connection.
LAN 1
LAN 2
(Back Panel, UTP only)
Green LED
ON when synchronized with the network.
FX0 & FXS:
VOICE 1 LOCAL
VOICE 2 LOCAL
VOICE 3 LOCAL
VOICE 4 LOCAL
Green LED
On when the device is OFF hook.
FX0 & FXS:
VOICE 1 REMOTE
VOICE 2 REMOTE
VOICE 3 REMOTE
VOICE 4 REMOTE
Green LED
On when the remote side is calling.
E&M
VOICE 1M LOCAL
VOICE 2M LOCAL
VOICE 3M LOCAL
VOICE 4M LOCAL
Yellow LED
Mouth
E&M
VOICE 1M REMOTE
VOICE 2M REMOTE
VOICE 3M REMOTE
VOICE 4M REMOTE
Green LED
Ear
Fast ETH - LINK
(1 UTP LAN)
Top Green
LED
ON when synchronized with the network.
Fast ETH - 100M
(1 UTP LAN)
Bottom
Green LED
ON when synchronized with the network.
Fast ETH - LINK
(4 UTP LANS)
Left Green
LED
ON when synchronized with the network.
Fast ETH - 100M
(4 UTP LANS)
Right Green
LED
ON when synchronized with the network.
ALARM
LINK1 RED
SUB RED
Red LED
ON when T1 link is in Red alarm.
ALARM
LINK1 YEL
SUB YEL
Yellow LED
ON when T1 link is in YELLOW alarm.
1-4
LEDs
RADview FCD-IP User’s Manual
Chapter 1 Introduction
Table 1-1. FCD-IP LEDs (Cont.)
Object
Description
Function
SYNCH LOSS
LINK1 LOC
SUB1/LINK2 LOC
SUB2 LOC
SUB3 LOC
Red LED
ON when E1 link is in local sync loss alarm.
SYNCH LOSS
LINK1 REM
SUB1/LINK2 REM
SUB2 REM
SUB3 REM
Red LED
ON when E1 link is in remote sync loss alarm
LEDs
1-5
Chapter 1 Introduction
1-6
LEDs
RADview FCD-IP User’s Manual
Chapter 2
System Management
This chapter discusses how to monitor and configure the FCD-IP system.
Managing the FCD-IP system includes the following tasks:
• Selecting the System Level
•
Viewing and Modifying FCD-IP System Configuration
•
Setting Bridging Parameters
•
Routing the IP
•
Viewing the Connection Status
•
Configuring the Dynamic Host Configuration Protocol (DHCP)
•
Resetting the Device
•
Polling the Agent
•
Configuring SNMP
•
Switching Between Edit and Agent View.
2.1
Selecting the System Level
To select the system level:
• Click on the outside frame of the device window.
A blue border outlines the entire device.
Figure 2-1. FCD-IP Main Window
Selecting the System Level
2-1
RADview FCD-IP User’s Manual
Chapter 2 System Management
2.2
Viewing and Modifying System Configuration
RADview enables you to view and modify the configuration of the FCD-IP.
To view or modify FCD-IP system information:
1. Select Configuration > System Info...
or
click the shortcut key on the toolbar
.
The System Information dialog box appears (See figure below).
Figure 2-2. System Information
2. Enter the required settings. You can change the following fields: Name,
Contact, Location, Aging (minutes allowed for station to be inactive without
being removed from the network) and Enable Broadcast Control.
3. Click<Set>to implement the changes.
Table 2-1. System Information Parameters
Parameter
Possible Values / Remarks
Description
Description of hardware and software.
Object ID
Device type.
Name
Meaningful name assigned to this device.
Contact
Name of contact person responsible for device.
Location
Location of this device.
2-2
Viewing and Modifying System Configuration
RADview FCD-IP User’s Manual
Chapter 2 System Management
Table 2-1. System Information Parameters (Cont.)
Parameter
Possible Values / Remarks
System Up Time
Length of time since last power-up of device.
Aging (Min)
IP aging time for the station.
Enable Broadcast Control Enables blocking or forwarding broadcast frames.
Block: blocks broadcast frames.
Forward: forwards broadcast frames.
Block Link Propagation: blocks broadcast frames to the links, transmitting to the
LAN.
Number of Interfaces
Number of interfaces this device contains.
2.3 Setting Bridging Parameters
RADview enables you to add and remove addresses from the static portion of the
LAN table.
To add/remove addresses to the Static Table:
•
Select Configuration > Bridging > Static Forwarding….
The Static Forwarding Table appears (Figure 2-3).
Figure 2-3. Static Forwarding Table
Setting Bridging Parameters
2-3
RADview FCD-IP User’s Manual
Chapter 2 System Management
Table 2-2. Static Forwarding Table Parameters
Parameter
Possible Values / Remarks
MAC Address
The physical address of the device.
Interface
The selected interface.
DLCI#
Data Link Control Identifier
Only for links with FR protocol type.
[Add…]
Click <Add…> to open the Add IP Net Entry dialog box (Figure 2-4).
Enter the desired parameters and click <Set>.
[Remove]
Remove an address from the Static Forwarding Table by selecting an address and
clicking <Remove>.
To add a static entry:
1. In the Static Forwarding table (Figure 2-3), click <Add…>.
The Add Static Entry dialog box appears (Figure 2-4).
Figure 2-4. Add Static Entry
2. Configure desired parameters (see Table 2-2).
3. Click <Set>.
2-4
Setting Bridging Parameters
RADview FCD-IP User’s Manual
Chapter 2 System Management
2.4 Routing the IP
Forwarding Table
To display the IP Forwarding Table:
•
Select Configuration > IP Routing > Forwarding....
The IP Forwarding Table appears (Figure 2-5).
Figure 2-5. IP Forwarding Table
Routing the IP
2-5
RADview FCD-IP User’s Manual
Chapter 2 System Management
Table 2-3. IP Forwarding Parameters
Parameter
Possible Values / Remarks
IP Address
The IP address of forwarding device.
IP Mask
A unique 32 bit value allowing the recipient of IP packets to distinguish between
different host IDs.
Next Hop IP Address
The IP address of the next hop.
Interface
The selected interface.
DLCI#
Data Link Control Identifier
Only for links with FR protocol type.
Interface Cost (Metric)
The number of routers through which a packet must pass to arrive at its destination.
1..15
Type
Other, Invalid, Direct, Indirect
Protocol
The protocol of the interface.
Local indicates a local IP address
NetMgnt indicates a static IP address
RIP2 indicates a dynamic IP address
OSPF indicates IP address is determined using OSPF protocol.
Age
The number of seconds since this route was last updated.
[Add…]
Click <Add…> to open the Add IP Net dialog box. Enter the desired parameters
and click <Set>.
[Remove]
Remove an address from the IP Forwarding Table by selecting an address and
clicking <Remove>.
Only static addresses can be changed.
2-6
Routing the IP
RADview FCD-IP User’s Manual
Chapter 2 System Management
Address Resolution Protocol Table
To display the ARP table:
•
Select Configuration > IP Routing > ARP....
The ARP Stations Table appears (Figure 2-6).
Figure 2-6. ARP Stations Table
Table 2-4. ARP Stations Parameters
Parameter
Possible Values / Remarks
Interface
The selected interface.
MAC Address
The physical address of the device.
Net Address
The IP address of the MAC Address.
Net to Media Type
Other, Invalid, Dynamic, Static
Routing the IP
2-7
RADview FCD-IP User’s Manual
Chapter 2 System Management
IP Address Table
To display the IP address table:
•
Select Configuration > IP Routing > IP Address....
The IP Addresses Table appears (Figure 2-7).
Figure 2-7. IP Addresses Table
Table 2-5. IP Address Parameters
Parameter
Possible Values / Remarks
IP Address
The IP address of forwarding device.
1.0.0.0..255.255.255.255
IP Mask
A unique 32 bit value allowing the recipient of IP packets to distinguish between
different host IDs.
0.0.0.0..255.255.255.255
Interface
The selected interface.
DLCI#
Data Link Control Identifier
Only for links with FR protocol type.
[Add…]
Click <Add…> to open the Add IP Address dialog box (Figure 2-8). Enter the
desired parameters and click <Set>.
[Change…]
Change an address from the IP Address Table by selecting an address and clicking
<Change…>. The Change IP Address dialog box appears. Change parameters and
click <Set>.
[Remove]
Remove an address from the IP Address Table by selecting an address and clicking
<Remove>.
2-8
Routing the IP
RADview FCD-IP User’s Manual
Chapter 2 System Management
To add an IP address:
1. In the IP Address Table (Figure 2-7), click <Add…>.
The Add IP Address dialog box appears (Figure 2-8).
Figure 2-8. Add IP Address
Note
When working in OSPF mode, each LAN can have only one IP address.
2. Configure desired parameters (see Table 2-3).
3. Click <Set>.
To change an IP address:
1. In the IP Address Table (Figure 2-7), click <Change…>.
The Change IP Address dialog box appears (Figure 2-9).
Figure 2-9. Change IP Address
2. Configure desired parameters (see Table 2-3).
3.
Click <Set>.
Routing the IP
2-9
RADview FCD-IP User’s Manual
Chapter 2 System Management
2.5 OSPF
RADview allows you to configure OSPF and view OSPF information.
Configuring OSPF
To enable OSPF:
1. Select Configuration > OSPF > Parameters….
The OSPF Parameters dialog box appears.
Figure 2-10. OSPF Parameters (Enable)
2. In the Admin Status field, select Enable.
3. Enter the Router ID.
4. Enable or disable Redistribute Routes.
5. Click <Set> to implement the changes.
The following confirmation message appears:
This operation will cause Restart of the device /n Connection with Agent
will be lost.”
6. Click <OK>.
2-10
OSPF
RADview FCD-IP User’s Manual
Chapter 2 System Management
To disable OSPF:
1. Select Configuration > OSPF > Parameters….
The OSPF Parameters dialog box appears.
Figure 2-11. OSPF Parameters (Disable)
2. In the Admin Status field, select Disable.
3. Click <Set> to implement the changes.
The following confirmation message appears:
“This operation will cause Restart of the device /n Connection with Agent
will be lost.”
4. Click <OK>.
Table 2-6. OSPF Parameters
Parameter
Possible Values / Remarks
Admin Status
Enable/Disable
Router ID
The IP address format.
Required if OSPF is enabled.
Not available is OSPF is disabled.
Redistribute Routers
Enable/Disable
Not available is OSPF is disabled.
OSPF
2-11
RADview FCD-IP User’s Manual
Chapter 2 System Management
OSPF Areas
To display the OSPF Area Table:
•
Select Configuration > OSPF > Area Table....
The OSPF Area Table appears.
Figure 2-12. OSPF Area Table
Table 2-7 OSPF Area Table Parameters
Parameter
Possible Values / Remarks
ID
The IP address of the area.
1.0.0.0..255.255.255.255
Behavior Type
Transit, Stub, NSSA
[Change…]
Change an OSFP Area behavior by selecting an ID and clicking <Change…>. The
Change Area Parameters dialog box appears. Change parameters and click <Set>.
To change parameters of an area:
1. In the OSPF Area Table, click <Change…>.
The Change Area Parameters dialog box appears.
2. Configure desired parameters (see Table 2-7).
3. Click <Set>.
OSPF Area Aggregation
To display the OSPF Area Aggregation Table:
•
Select Configuration > OSPF > Area Aggregation....
The OSPF Area Aggregation Table appears.
2-12
OSPF
RADview FCD-IP User’s Manual
Chapter 2 System Management
Figure 2-13. OSPF Area Aggregation Table
Table 2-8 OSPF Area Aggregation Parameters
Parameter
Possible Values / Remarks
Area
The ID of the area.
1.0.0.0..255.255.255.255
IP
The IP address of the network.
1.0.0.0..255.255.255.255
Mask
A unique 32 bit value allowing the recipient of IP packets to distinguish between
different host IDs.
0.0.0.0..255.255.255.255
Advertised
Advertising matching is enabled/disabled.
[Add…]
Click <Add…> to open the Add Area Aggregation dialog box
(Figure 2-8). Enter the desired parameters and click <Set>.
[Change…]
Change an address from the Area Aggregation Table by selecting an address and
clicking <Change…>. The Change Area Aggregation dialog box appears. Change
parameters and click <Set>.
[Remove]
Remove an address from the Area Aggregation Table by selecting an address and
clicking <Remove>.
OSPF
2-13
RADview FCD-IP User’s Manual
Chapter 2 System Management
To add an Area Aggregation entry:
1. In the Area Aggregation Table, click <Add…>.
The Add Area Aggregation dialog box appears.
Figure 2-14. Add Area Aggregation
2. Configure desired parameters (see Table 2-8).
3. Click <Apply>.
(Clicking <Apply> performs Set operation without closing dialog box.)
4. When all entries have been added, click <Close>.
The Add Area Aggregation dialog box closes and all added entries appear
at the end of the list.
To enable/disable Advertising for an area aggregation:
1. In the Area Aggregation Table, click <Change…>.
The Change Area Aggregation dialog box appears. This dialog is the same
as the Add Area Aggregation dialog box, except that the only parameter
that can be changed is Advertised.
2. Select Yes or No for the Advertised parameter and click <Set>.
OSPF Information
RADview enables you to view information regarding the following categories:
2-14
OSPF
•
Interfaces
•
Neighbors
•
Database.
RADview FCD-IP User’s Manual
Chapter 2 System Management
OSPF Interfaces Information
To display the OSPF Interfaces table:
•
Select Configuration > OSPF > Information > Interfaces....
The Interfaces Table appears.
Figure 2-15. Interfaces Table
Table 2-9. Interfaces Parameters
Parameter
Possible Values / Remarks
IP Address/Interface
The IP address or the link number of the interface.
Area ID
The IP address associated with the area.
Interface Type
Broadcast, NBMA, Point To Point, Point To Multipoint
Priority
The interface priority.
Designated Router
The IP address of the router.
OSPF Neighbors Information
To display the OSPF Neighbors table:
•
Select Configuration > OSPF > Information >Neighbors....
The Neighbors Table appears.
OSPF
2-15
RADview FCD-IP User’s Manual
Chapter 2 System Management
Figure 2-16. Neighbors Table
Table 2-10. Neighbors Parameters
Parameter
Possible Values / Remarks
IP Address/Interface
The IP address or the link number of the interface.
Router ID
The IP address of the relevant router.
Priority
The interface priority.
State
Down, Attempt, Init, Two Way, Exchange Start, Exchange, Loading, Full
2-16
OSPF
RADview FCD-IP User’s Manual
Chapter 2 System Management
OSPF Database Information
To display the OSPF Database table:
•
Select Configuration > OSPF > Information > Database....
The Database Table appears.
Figure 2-17. Database Table
Table 2-11. Database Parameters
Parameter
Possible Values / Remarks
Area ID
The IP address associated with the area.
DB Type Link
Router, Network, Summary, AS Summary, AS External, Multicast, NSSA External
Link State ID
The IP address format.
Originating Router
The IP address of the originating router.
Seq No
The sequence number.
Age
Age in seconds
Check Sum
Check sum validation value
OSPF
2-17
RADview FCD-IP User’s Manual
Chapter 2 System Management
2.6 Viewing the Connection Status
RADview enables you to view the list of all the logical links related to the physical
links of the device.
To display the connection status of the device:
•
Select Configuration > Connection Status...
The All Links Connections list appears (Figure 2-18).
Figure 2-18. All Links Connections List
Table 2-12. All Links Connections Parameters
Parameter
Possible Values / Remarks
Interface
The selected interface.
DLCI#
Data Link Control Identifier
Only for links with FR protocol type.
Routing Type
The routing type of the selected interface.
Protocol
The protocol being used.
Connection Status
The present connection status of the device.
Link Status
The link status of the device.
2-18
Viewing the Connection Status
RADview FCD-IP User’s Manual
Chapter 2 System Management
2.7 Configuring the Dynamic Host Configuration
Protocol (DHCP)
RADView enables you to configure the Dynamic Host Configuration Protocol
(DHCP).
To display the DHCP:
•
Select Configuration > System Commands > DHCP…
The DHCP table appears (Figure 2-19).
Figure 2-19. Dynamic Host Configuration Protocol Table
Table 2-13. Dynamic Host Configuration Protocol Parameters
Parameter
Possible Values / Remarks
IP Address Allocation
Enable, Disable
Low IP Address
Specifies the lower boundary for the IP address range.
High IP Address
Specifies the upper boundary for the IP address range.
IP Mask
Specifies the IP Mask for the IP address range.
Default Gateway
Specifies the default Gateway IP address for workstations that receive IP addresses
in the range defined by Low and High IP Address.
Primary DNS
The IP address of the DNS server that can be used by the workstation.
Secondary DNS
The IP Address of an additional DNS server used as an alternative to the Primary
DNS.
Configuring the Dynamic Host Configuration Protocol (DHCP)
2-19
RADview FCD-IP User’s Manual
Chapter 2 System Management
Table 2-13. Dynamic Host Configuration Protocol Parameters (Cont.)
Parameter
Possible Values / Remarks
Interface
The interface through which the remote interface of the IP address is received.
All, LAN1, LAN2, Any LAN, WAN
[Apply]
To save changes in table, click <Apply>.
[Add…]
To add an entry to the table, click <Add…>. Configure the parameters in the Add
DHCP Entry table and click <Set>. A maximimum of 10 entries is allowed in the
table.
[Change…]
To change an entry, select it and click <Change…>.
Make desired changes in Change DHCP Entry table and click <Set>.
[Remove]
To delete an entry, select it and click <Remove>.
To add an DHCP entry:
1. In the DHCP Table, click <Add…>.
The Add DHCP Entry dialog box appears.
Figure 2-20. Add DHCP Entry
2. Configure desired parameters (see Table 2-13).
3. Click <Set>.
The Add DHCP Entry dialog box closes.
To change a DHCP entry:
1. In the DHCP Table, click <Change…>.
The Change DHCP dialog box appears.
2-20
Configuring the Dynamic Host Configuration Protocol (DHCP)
RADview FCD-IP User’s Manual
Chapter 2 System Management
Figure 2-21. Change DHCP Entry
2. Configure desired parameters (see Table 2-13).
3. Click <Set>.
The Add DHCP Entry dialog box closes.
2.8 Resetting the Device
RADview enables you to reset the device.
To reset the device:
1. Select Configuration > System Commands > Reset…
or
click the shortcut key on the toolbar
.
The following message appears: “RESETTING BROUTER. Operation may
disrupt network data.”
Figure 2-22. Reset Brouter
2. Click <OK> to confirm reset.
The system is reset.
Resetting the Device
2-21
RADview FCD-IP User’s Manual
Chapter 2 System Management
2.9 Polling the Agent
RADview allows you to poll the FCD-IP device.
To poll the agent:
•
Select Configuration > Poll Agent
or
click the shortcut key on the toolbar
.
The system polls the agent immediately.
2.10
Configuring SNMP
RADview enables you to view and modify SNMP settings; enabling you to specify
management stations that can receive FCD-IP traps. In the FCD-IP Manager List,
you can enter up to ten IP addresses of the relevant management stations.
To view/specify management station IP addresses to which to send traps:
1. Select Options > Manager List….
The Manager List dialog box appears (Figure 2-23).
Figure 2-23. Manager List
2-22
Configuring SNMP
RADview FCD-IP User’s Manual
Chapter 2 System Management
2. Configure the IP Address for the different managers.
3. Click <Set>.
Table 2-14. Manager List Parameters
Parameter
Possible Values / Remarks
Manager ID
The ID number of the manager.
IP Address
The IP address of the manager.
2.11
Switching Between Edit and Agent View
The device is managed with two different community views: one for the TDM
scope, and one for the rest of the parameters. A password provides protection for
the TDM scope preventing you from unintentionally changing the parameters of
the E1/T1, SHDSL and Voice parameters.
The Password is configured via the terminal.
Note
Once the password has been entered, you will not need to re-enter it again when
switching between Edit and Agent Views in other levels.
To enter the password:
1. Select Options > Password…
The password dialog box appears (Figure 2-24).
Figure 2-24. Password Dialog Box
2. Enter a password (up to twenty characters).
Switching Between Edit and Agent View
2-23
Chapter 2 System Management
2-24
Switching Between Edit and Agent View
RADview FCD-IP User’s Manual
Chapter 3
Port Management
This chapter describes RADview’s configuration and operation procedures for the
FCD-IP LINK and LAN. The LINK or LAN Level is available when a LINK or LAN is
selected. Some LINKS have both edit and agent levels. This chapter details the
different management options for each LINK and LAN separately.
3.1 Edit and Agent Views
Note
Certain TDM ports can be displayed in both Edit and Agent Views. Configuration is
performed in the Edit mode. In Agent View, the parameters are Read-Only.
To switch between Edit and Agent views:
1. Select the appropriate interface.
The Agent view is displayed for the selected link.
2. Switch to Edit View by doing one of the following:
Click the Edit/Agent View button on the toolbar
or
Select Window > Edit View/Agent View to switch to Edit/Agent View.
3.2 Configuring Interface Information
This section describes how to view and configure interface information.
Note
For information on configuring physical port parameters, see Configuring Physical
Parameters.
Configuring E1/T1, CHANNEL, ISDN, and Voice Interface Information
This section describes how to view and configure E1/T1, CHANNEL (V.24, V.35),
ISDN and Voice (FXS, FXO and E&M) interface information. The parameters of the
Interface Information dialog boxes differ depending on the selected interface.
Notes
• For information on E1/T1 over SHDSL, see Configuring E1/T1 over SHDSL
Interface Information.
• Voice interface configuration can be performed in both Agent and Edit Views.
Configuring Interface Information
3-1
RADview FCD-IP User’s Manual
Chapter 3 Port Management
To configure interface information:
1. Select a Link or Channel.
The Agent view is displayed for the selected object.
2. Select Configuration > Interface Info…
The Interface Information dialog box appears. There are two tabs: Info and
Link Data.
Figure 3-1. Interface Information Info Tab
3. Click on the required tab.
4. Configure the desired parameters.
5.
Click <Set>.
Table 3-1. Info Tab Parameters for E1/T1, CHANNEL, ISDN, and Voice
Parameter
Possible Values / Remarks
Interface
The selected interface.
Description
Description of the selected interface.
Type
The type of interface.
DS0 Bundle, DS1. Modem, E&M, FXO, FXS
Oper Status
The operational status of link.
Up, Down
MTU (not available for Voice,
Channel, or Sub Link interfaces)
The maximum Transmit Unit for IP fragmentation.
Frames lager than MTU are fragmented into smaller units when sent through
the specified interface
3-2
Configuring Interface Information
RADview FCD-IP User’s Manual
Chapter 3 Port Management
Figure 3-2. Interface Information Link Data Tab
Notes
• Link Data tab is disabled for Sub and Voice links.
• Changing the protocol type from Frame Relay (RFC 1490) to any other protocol
will cause the device to reset.
The following message appears “This operation will cause HW reset of the
Device. Continue?”
Click <OK> to confirm reset.
Table 3-2. Interface Information Link Data Tab Parameters
Parameter
Possible Values / Remarks
Interface
The selected interface.
State
Enable, Disable, Backup (only if there is more than one link)
Backup of Link
The combo box listing links in current configuration.
Note: This field is disabled for SUB links
Link Type
Synchronous,
Asynchronous (only for V.24 connector)
Protocol Type
(not available for
the SUB LINK or
CHANNEL)
Slip, Cslip, PPP, HDLC Framing, RFC 1490
Configuring Interface Information
3-3
Chapter 3 Port Management
RADview FCD-IP User’s Manual
Table 3-2 Interface Information Link Data Tab Parameters (Cont.)
Parameter
Possible Values / Remarks
Routing / Bridging
(not available for
the SUB LINK or
CHANNEL)
Bridge, IP Router, IPX Router, IP and IPX Router, IP Brouter, IPX Brouter, IP and IPX
Brouter
IP Transparent
Mode
Enables/disables IP transparent mode. When this mode is enabled, all frames (including
broadcast and multicast frames) are forwarded from E1/T1 to LAN and from LAN to
E1/T1.
Disable, Enable All
Note: This field is not available in the following cases:
• If any of the following interfaces exists on the device:
LINK 3; LAN 2; ISDN; or a non-Channel
X.21(4), V.24(11), RS-530(3), or DB-25(17)
• When the value in the Routing/Bridging field is one of the following:
Bridge, IPX Router, IPX Brouter
When the selected interface is a Channel
IP Transparent
Default Gateway
Specifies the default Gateway IP address used for transparent IP.
Configuring SHDSL Interface Information
This section describes how to view and configure SHDSL interface information.
To configure interface information:
1. Select an SHDSL Link.
The Agent view is displayed for the selected link.
2. Select Configuration > Interface Info…
The Interface Information dialog box appears. There are two tabs: Info and
Link Data.
Note
Link Data tab is disabled for Sub and Voice links.
3. Click on the required tab.
4. Configure the desired parameters.
5.
3-4
Click <Set>.
Configuring Interface Information
RADview FCD-IP User’s Manual
Chapter 3 Port Management
Table 3-3. Info Tab Parameters for SHDSL
Parameter
Possible Values / Remarks
Interface
The selected interface.
Type
The type of interface.
SHDSL
Description
Description of the selected interface.
Oper Status
The operational status of link.
Up, Down
MTU
The maximum Transmit Unit for IP fragmentation.
Frames lager than MTUare fragmented into smaller units when sent through the
specified interface
Note
Changing the protocol type from Frame Relay (RFC 1490) to any other protocol will
cause the device to reset.
The following message appears “This operation will cause HW reset of the Device.
Continue?”
Click <OK> to confirm reset.
Table 3-4. Interface Information Link Data Tab Parameters for SHDSL
Parameter
Possible Values / Remarks
Interface
The selected interface.
State
Enable, Disable, Backup (only if there is more than one link)
Backup of Link
The combo box listing links in current configuration.
Note: If Link 3 is a SUB link, it is not avalable as a backup link.
Link Type
Synchronous
Protocol Type
PPP, RFC1490, HDLC Framing
Routing / Bridging
Bridge, IP Router, IPX Router, IP and IPX Router, IP Brouter, IPX Brouter, IP and IPX
Brouter
IP Transparent
Mode
Disable, Enable All
Note: This field is not available in the following cases:
• If any of the following interfaces exists on the device:
LINK 3; LAN 2; ISDN; or a non-Channel
X.21(4), V.24(11), RS-530(3), or DB-25(17)
• When the value in the Routing/Bridging field is one of the following:
Bridge, IPX Router, IPX Brouter
When the selected interface is a Channel
IP Transparent
Default Gateway
Specifies the default gateway IP address used for transparent IP.
Configuring Interface Information
3-5
RADview FCD-IP User’s Manual
Chapter 3 Port Management
Configuring E1/T1 over SHDSL Interface Information
This section describes how to view and configure E1/T1 over SHDSL interface
information.
Note
For information on E1/T1 interfaces that are not over SHDSL, see Configuring E1/T1,
CHANNEL, ISDN, and Voice Interface Information.
To configure interface information:
1. Select a Link or Channel.
2. Select Configuration > Interface Info…
The Interface Information dialog box appears. There are two tabs: Info and
Link Data.
This dialog box is divided into two sections: the upper section displays
SHDSL parameters and the lower section displays E1/T1 parameters.
Note
Link Data tab is disabled for Sub links.
Figure 3-3. Interface Information Info Tab for E1/T1 over SHDSL
3-6
Configuring Interface Information
RADview FCD-IP User’s Manual
Chapter 3 Port Management
Figure 3-4. Interface Information Link Data Tab for E1/T1 over SHDSL
3. Click on the required tab.
4. Configure the desired parameters.
5.
Click <Set>.
Table 3-5. Info Tab Parameters for E1/T1 over SHDSL
Parameter
Possible Values / Remarks
Interface
The selected interface.
Description
Description of the selected interface.
Oper Status
The operational status of link.
Up, Down
MTU
The maximum Transmit Unit for IP fragmentation.
Frames lager than MTUare fragmented into smaller units when sent through the
specified interface
Note
t
Changing the protocol type from Frame Relay (RFC 1490) to any other protocol will
cause the device to reset.
The following message appears “This operation will cause HW reset of the Device.
Continue?”
Click <OK> to confirm reset.
Configuring Interface Information
3-7
Chapter 3 Port Management
RADview FCD-IP User’s Manual
Table 3-6. Interface Information Link Data Tab Parameters for E1/T1 over SHDSL
Parameter
Possible Values / Remarks
Interface
The selected interface.
State
Enable, Disable, Backup (only if there is more than one link)
Backup of Link
The combo box listing links in current configuration.
Note: This field is disabled for SUB links
Link Type
Synchronous
Protocol Type
PPP, RFC1490, HDLC Framing
Routing/Bridging
Bridge, IP Router, IPX Router, IP and IPX Router, IP Brouter, IPX Brouter, IP and IPX
Brouter
IP Transparent
Mode
Disable, Enable All
Note: This field is not available in the following cases:
• If any of the following interfaces exists on the device:
LINK 3; LAN 2; ISDN; or a non-Channel
X.21(4), V.24(11), RS-530(3), or DB-25(17)
• When the value in the Routing/Bridging field is one of the following:
Bridge, IPX Router, IPX Brouter
• When the selected interface is a Channel
IP Transparent
Default Gateway
3-8
Specifies the default gateway IP address used for transparent IP.
Configuring Interface Information
RADview FCD-IP User’s Manual
Chapter 3 Port Management
Configuring LAN Interface Information
To configure interface information for an Ethernet LAN:
1. Select the desired Ethernet LAN.
2. Select Configuration > Interface Info…
The Interface Information dialog box appears.
Figure 3-5. Interface Information – Ethernet LAN
Note
Changing the values for Burn In MAC or Locally Administered will cause
disconnection with the agent.
Table 3-7. Interface Information – Ethernet LAN Parameters
Parameter
Possible Values / Remarks
Interface
The selected interface.
Description
Description of the interface.
Type
The type of interface that appears in the MIB IF Table.
Oper Status
The operational status of link.
MTU
The maximum Transmit Unit for IP fragmentation.
Frames lager than MTUare fragmented into smaller units when sent through the
specified interface.
Rate (Mbps)
The transmission speed in Mbps.
Configuring Interface Information
3-9
RADview FCD-IP User’s Manual
Chapter 3 Port Management
Table 3-7. Interface Information – Ethernet LAN Parameters (Cont.)
Parameter
Possible Values / Remarks
Active Address
Burn In MAC
Changing this parameter will cause disconnection with the agent.
Locally Administered
Changing this parameter will cause disconnection with the agent.
LAN State
Enable, Disable
Selecting Disable for this parameter will cause disconnection with the agent.
Routing/Bridging
Bridge, IP Router, IPX Router, IP and IPX Router, IP Brouter, IPX Brouter,
IP and IPX Brouter
Note: Only for two LANS.
3.3 Configuring Physical Parameters
This section describes how to view and configure physical layer parameters of
Async, ISDN, E1/T1, and SHDSL ports.
Notes
• For information on configuring interface information, see Configuring Interface
Information.
• When configuring TDM parameters a password is required.
Configuring Async Link (V.24) Physical Parameters
Note
Async links can only be V.24.
To configure Async physical parameters:
1. Select the Async Link.
2. Select Configuration > Physical Parameters…
The Async Link Parameters dialog box appears.
3. Configure the desired parameters.
4. Click <Set>.
3-10
Configuring Physical Parameters
RADview FCD-IP User’s Manual
Chapter 3 Port Management
Figure 3-6. Async Link Parameters Dialog Box
Table 3-8. Async Link Parameters
Parameter
Possible Values / Remarks
Interface
LINK1, LINK2
Rate (Kbps)
2.4, 4.8, 9.6, 19.2, 38.4, 57.6, 115.2
Data Bits
8
Parity
None, Odd, Even
Stop Bits
One, Two
Connection Type
Originate, Answer, Originate and Answer
Modem
Name
Maximum 50 characters
Unlisted
Setting String
Maximum 80 characters in two rows
AT&C1&D2
Autobauding
Disable, Enable
Analyze Answers
Disable, Enable
Speaker
Off, On
Reset Config
Select the checkbox to reset the configuration
Checked, Unchecked
Dialing Number
Maximum 40 characters.
Valid characters are: 0..9, P, T, W , ', @
Configuring Physical Parameters
3-11
RADview FCD-IP User’s Manual
Chapter 3 Port Management
Table 3-8. Async Link Parameters (Cont.)
Parameter
Possible Values / Remarks
Local Number
Maximum 40 characters.
Valid characters are: 0..9, P, T, W , ', @
Number of rings before
answer
1..2..255
[Add Modem…]
Click <Add Modem…> to open the Add Modem dialog box (Figure 3-7).
Enter the desired parameters and click <Set>.
[Remove Modem]
Remove a modem by selecting a modem from the Modem Name drop-down list
and clicking <Remove Modem>.
To add a new modem to the modems list:
1. In the Async Link Parameters dialog box, click <Add Modem...>.
The Add New Modem dialog box appears.
2. Configure the desired parameters.
3. Click <Set>.
Figure 3-7. Add New Modem Dialog Box
Table 3-9. Add New Modem Parameters
Parameter
Possible Values / Remarks
Name
Maximum 50 characters
Setting String
Maximum 80 characters in two rows
To remove a modem from the modems list:
1. In the Async Link Parameters dialog box, select a modem from the Modem
Name drop-down list.
2. Click <Remove Modem>.
3. The system confirms the removal of the modem:
“Removing the selected modem.”
3-12
Configuring Physical Parameters
RADview FCD-IP User’s Manual
Chapter 3 Port Management
Configuring ISDN Physical Parameters
To configure ISDN physical parameters:
1. Select the ISDN Link.
2. Select Configuration >Physical Parameters…
The ISDN dialog box appears.
3. Click on the desired tab and configure desired parameters.
4. Click <Set>.
Figure 3-8. ISDN Parameters – Interface Tab
Table 3-10. ISDN Parameters – Interface Tab
Parameter
Possible Values / Remarks
Interface
LINK1, LINK2
ISDN Line Type
Dialup, Leased
ISDN Standard
V1, ETSI, 5ESS, DMS100, National-1, NTT
Enabled when ISDN Line Type=Dialup
Connection Mode
Point to Point, Multi Point
Clock Rate (Kbps)
56, 64
Configuring Physical Parameters
3-13
RADview FCD-IP User’s Manual
Chapter 3 Port Management
Figure 3-9. ISDN Parameters – Terminal End Point Tab
Table 3-11. ISDN Parameters – Terminal End Point Tab
Parameter
Possible Values / Remarks
Interface
LINK1, LINK2
ETSI
Abstract Terminal 1
Terminal Index
The Terminal Index.
Service Provider ID (SPID)
The Service Provider ID .
Up to 20 digits
Directory Number
The Directory Number.
Up to 18 digits
TEI Management
Dynamic, Static
TEI Value
0..63
Abstract Terminal 2
Terminal Index
The Terminal Index.
Service Provider ID (SPID)
The Service Provider ID.
Up to 20 digits
Directory Number
The Directory Number.
Up to 18 digits
3-14
Configuring Physical Parameters
RADview FCD-IP User’s Manual
Chapter 3 Port Management
Figure 3-10. ISDN Parameters - Channel Tab
Table 3-12. ISDN Parameters - Channel Tab
Parameter
Possible Values / Remarks
Interface
The selected interface.
Calling Number
The Calling Number.
Up to 18 digits
Calling Sub-Number
The Calling Sub-Numbe.r
Up to 6 digits
Called Phone Number
The Called Phone Number.
Up to 18 digits
Called Sub-Number
The Called Sub-Number.
Up to 6 digits
Permission
Originate, Answer, Originate and Answer
Dial Back Phone Number The Dial Back Phone Number.
Up to 18 digits
Dial Back Sub Number
The Dial Back Sub-Number.
Up to 6 digits
Configuring Physical Parameters
3-15
RADview FCD-IP User’s Manual
Chapter 3 Port Management
Configuring E1/T1 Link Mode
Notes
• Link mode configuration is available for Main E1/T1 link for devices having two
E1/T1 ports.
• Note that, while the link mode can be configured only in the Edit View,
switching traffic between links can only be performed in Agent mode, which
detects the actual current mode of the link.
To configure E1/T1 link mode:
1. Select Link1.
2. Select Configuration >Physical Parameters > Mode….
The E1/T1 Link Mode dialog box appears.
Figure 3-11. E1/T1 Link Mode
Table 3-13. E1/T1 Link Mode
Parameter
Possible Values / Remarks
Mode
Normal,Chain,Ring SUB,Ring Main, Redundancy
Wait to Restore
Wait to restore interval in minutes.
1-99
Note: This field is available only if Mode =Ring
Redundancy Online
Primary, Secondary
Note: This field is available only if Mode = Redundancy
[Flip Cmd]
Toggles the Redundancy Online parameter.
To change a redundant link from Primary to Secondary or vice versa, click <Flip
Cmd> and then confirm the command by clicking OK when the confirmation message
appears: “This operation will change the online link”
Note that this button is Password protected.
3-16
Configuring Physical Parameters
RADview FCD-IP User’s Manual
Chapter 3 Port Management
Configuring General E1/T1 Physical Parameters
To configure E1/T1 general physical parameters:
1. Select an E1/T1 Link or Channel.
2. Select Configuration > Physical Parameters > General….
The E1/T1 Link Parameters dialog box appears.
Figure 3-12. General Link Parameters (E1/T1 Ports)
Table 3-14. General Link Parameters (E1/T1 Ports)
Parameter
Possible Values / Remarks
Interface
The selected interface.
Admin Status
Enable, Disable
Clock Source
The clock source that synchronizes the network.
Internal - system source clock is generated from an internal clock oscillator.
Link1 – Sublink1/Link 2
Sublink 1
Sublink 2
Sublink 3.
Configuring Physical Parameters
3-17
Chapter 3 Port Management
RADview FCD-IP User’s Manual
Table 3-14. General Link Parameters (E1/T1 Ports) (Cont.)
Parameter
Possible Values / Remarks
Multiplier (Kbps)
The data rate of each DATA time slot.
56, 64
Note: This parameter is only enabled for the main link only.
T1:
ESF (24 frames per multiframe),
D4 (12 frames per multiframe).
Line Type
E1:
E1 (G732N-2 frames per multiframe), - CCITT Rec. G.704 - Table 4a
E1-CRC (G732NCRC), - CCITT Rec. G.704 - Table 4b
E1-MF - CCITT Rec. G.704 - Table 4a, with TS16 multiframing enabled.
E1-CRC-MF (G732SCRC-16 frames per multiframe),- CCITT Rec. G.704 - Table 4b,
with TS16 multiframing enabled.
Line Code
The line coding method used for zero suppression.
Note: This parameter is only applicable for T1.
B7ZS coding, Jammed Bit zero suppression. A pulse is forced in bit 8 of each 8-bit
period of each channel. Therefore, only 7 bits per channel (1.344 Mbps) is available for
data.
B8ZS coding, a specified pattern of normal bits and bipolar variations replaces a
sequence of 8 zero bits. This option provides clear channel capability.
Trans - Transparent (AMI) coding, no zero suppression is present.
Sync
Defines time required for the link to return to normal operation after a red alarm event
(local loss of synchronization) has terminated
FAST (after one second),
AT&T 62411 (after ten seconds),
CCITT (after 100 msec)
Tx Gain Mask (db)
The selected attenuation value brings your signal level closer to the expected repeater
signal level on the cable.
Note: This parameter is only applicable for T1.
NA, 7.5, 15, 22.5
Line Length (feet)
Note: This parameter is only applicable for T1.
NA, 0-133, 134-266, 267-399, 400-533, 534-655
Idle code (Hex)
Hexadecimal code transmitted to fill idle (unused) time slots in frames transmitted
through the selected port.
00 - 7C - FF
Rx Gain
The maximum receive sensitivity in dB for the interface.
E1: 12dB, 30dB
T1: 30dB, 36dB
3-18
Configuring Physical Parameters
RADview FCD-IP User’s Manual
Chapter 3 Port Management
Table 3-14. General Link Parameters (E1/T1 Ports) (Cont.)
Parameter
Possible Values / Remarks
RAI
The Remote Alarm Indication (for main links with sub links).
Off, On
For main links:
On transmits a yellow alarm indication on the E1 sub link when Link 1 is in yellow
alarm state .
For Sub links:
On transmits a yellow alarm indication on Link 1 when sub link E1 is in either yellow or
red alarm state.
Note: This field exists only when the E1/T1 has a sub link.
Inband Management
The identifier of inband management over the link.
Off, Dedicated TS
TS Number
TS being used as Dedicated TS
Only applicable when Inband Management=Dedicated TS.
Configuring E1/T1 Time Slot (TS) Assignments
RADview enables you to program the routing of time slots. A complete description
of the TS assignment function is discussed below.
To configure TS parameters:
1. Select a Link or Channel.
2. Select Configuration >Physical Parameters > TS Assign…
or
click the shortcut key on the toolbar
The TS Assignment dialog box appears.
Figure 3-13. TS Assignment
Configuring Physical Parameters
3-19
RADview FCD-IP User’s Manual
Chapter 3 Port Management
MAIN E1
1
2
3
4
5
21
DATA 1 +2
23
24
D
D
30
31
D
D
D
SUB1/ LINK 2
VOICE 1
22
D
D
V
VOICE 2
V
VOICE 3
VOICE 4
Figure 3-14. TS Assignment (New HW)
A rectangular grid displays the time slot assignments. Each row and each column
represents the possible connections of a specific port.
Since all ports are connected to MAIN E1/T1 port, the top row shows the TS
assignments of the MAIN E1/T1. For the MAIN E1, there are 31 Time Slots. For the
MAIN T1, there are 24 Time Slots.
Colors, letters and guides indicate information about the time slots and ports
represented in the grid. Their meanings are described below. In addition a ToolTip appears when the mouse cursor passes over a row, indicating the
TS Color Codes
Since each TS has only one type and can be connected to only one port, each TS
column can have only one cell with a letter inside. Both connection cells and port
indicator cells use color codes to relay connection information.
Green + number TS in this port is connected and is not being used for
Management.
Gray + number
TS in this port is available for connection, but currently
has no TS connection.
Blue + number
TS in this port has no connections and cannot be TS
connected.
Inside Cells Color Codes
Gray empty
3-20
Cell's port has no current TS connections but can be TS
connected.
Blue empty
Cell's port has no TS connections and cannot be TS
connected.
Yellow + letter
Cell's port has at valid TS connection of type indicated
by letter.
Configuring Physical Parameters
RADview FCD-IP User’s Manual
Chapter 3 Port Management
TS Letter Codes
The connection cells use letter codes to describe the type of the connected time
slots.
D
Data
V
Voice
Port Name Color Codes
Green
All of the port's connectable TS connections are
connected.
Gray
None of the port's connectable TSs are being used.
Yellow
Some of the ports have TS connections. This is valid for
the MAIN or SUB ports only.
Selecting a Port Cell
To select a cell:
•
Click on the desired cell.
A selected cell is outlined with a blue border
.
Creating a TS Connection
New TS connections are created only on gray cells (cells with connectable TSs).
To create a new TS connection:
1. Click an empty gray cell.
2. Click <Voice/Data>.
Disconnecting TS Connections
You can disconnect individual TS connections or all TS connections in the selected
port.
To disconnect an individual TS connection:
1. Click on a cell representing a TS connection (yellow).
2. Click <Disconnect>.
The gray color indicates that the cell's ports have no TS connection but
their TSs are connectable. If the cell becomes blue, TS connection is
impossible between the two corresponding ports.
Resetting All TS Connections
To reset all TS connections:
•
In the TS Assignment dialog box, click <Reset All>.
Configuring Physical Parameters
3-21
RADview FCD-IP User’s Manual
Chapter 3 Port Management
Exiting the TS Assignment Window
To exit the TS Assignment window:
•
Double-click the control box in the upper left corner of the window
or
click on the X in the upper right-hand side of the window.
Reading the E1/T1 Configuration from the Agent
Note
Read is only available for TDM ports in Edit View.
RADview enables you to upload the current Agent configuration to the Edit
Configuration mode. The Read command is only available when there is
communication with the agent.
To read the current configuration from the agent:
1. Select a Link or Channel.
2. Select Configuration > Physical Parameters > Read...
The following message appears:
Figure 3-15. Read Configuration
3. Click <OK> to confirm the operation.
Updating the E1/T1 Configuration in the Agent
Note
Update is only available for TDM ports in Edit View.
RADview enables you to download the Edit Configuration to the agent.
To upload the Edit Configuration to the agent:
1. Select a Link or Channel.
2. Click the Edit View button on the toolbar
.
3. Select Configuration >Physical Parameters > Update…
The following message appears:
3-22
Configuring Physical Parameters
RADview FCD-IP User’s Manual
Chapter 3 Port Management
Figure 3-16. Update Configuration
4. Click <OK> to update the configuration.
To abort the Update operation:
•
Click <Abort>.
Configuring SHDSL Physical Parameters
To configure SHDSL physical parameters:
1. Select a SHDSL Link.
2. Select Configuration > Physical Parameters > SHDSL > Parameters…
The SHDSL Link Parameters dialog box appears.
3. Configure the desired parameters.
4. Click <Set>.
Configuring Physical Parameters
3-23
RADview FCD-IP User’s Manual
Chapter 3 Port Management
Figure 3-17. SHDSL Parameters
Table 3-15. SHDSL Parameters
Parameter
Possible Values / Remarks
Interface
LINK 1
Type
SHDSL
Transmission Mode
Annex A, Annex B
Power Specral Density Symmetric, Asymmetric
(PSD) Mask
Asymmetric PSD Rate
R1, R2
(only when
PSD=Asymmetric)
Selected rate depends on transmission mode specified in Annex A or B of G.991.2:
• Annex A
R1 = 776 or 784 kbps
R2 = 1544 or 1552 kbps
• Annex B:
R1 = 2312 kbps
R2 = 2056 kbps
3-24
Configuring Physical Parameters
RADview FCD-IP User’s Manual
Chapter 3 Port Management
Table 3-15. SHDSL Parameters (Cont.)
Parameter
Possible Values / Remarks
Wire Interface
2 Wire, 4 Wire
Rate Mode
Fixed, Adaptive
SNR Startup Margin
Specifies the downstream current condition target SNR margin for a SHDSL line. The
SNR margin is the difference between the desired SNR and the actual SNR. Target SNR
margin is the desired SNR margin for a unit.
-10..10 (Signal to noise ratio)
Line Probe Enabled
Enables/Disables support for Line Probe of the units in a SHDSL line .
Enabled: the system performs Line Probing to find the best possible rate.
Disabled: rate adaptation phase is skipped, to shorten set up time.
Line Mode
STU-C, STU-R
Loop Attenuation
Threshold (dB)
Configures the loop attenuation alarm threshold.
Off, 1…127
Note: Off setting indicates that threshold crossings are not reported
SNR Margin Threshold Configures the SNR margin alarm threshold.
Off, 1…15
(dB)
Note: Off setting indicates that threshold crossings are not reported
TS Compaction Mode Configures how timeslots will be compacted over the SHDSL line.
No Compaction, No Mapping, With Mapping, Low TSs Mapping
Configuring SHDSL Status Parameters
To configure status parameters:
1. Select a SHDSL Link.
2. Select Configuration > Physical Parameters > SHDSL > Status…
The SHDSL Status dialog box appears.
Figure 3-18. SHDSL Status
Configuring Physical Parameters
3-25
RADview FCD-IP User’s Manual
Chapter 3 Port Management
Table 3-16. SHDSL Status Parameters
Parameter
Possible Values / Remarks
Actual Rate (Kbps)
Contains the actual line rate in this HDSL2/SHDSL span.
192…4608
Loop Attenuation (dB)
Current loop attenuation for this endpoint as reported in a Network or Customer Side
Performance Status message.
-127…128
SNR Margin (dB)
Current SNR margin for this endpoint as reported in a Status Response/SNR message.
-127…128
Configuring Voice Interface Physical Parameters
This section describes how to view and configure voice interface (FXS, FXO and
E&M) parameters.
Note
Voice interface configuration can be performed in both Agent and Edit Views.
To configure voice parameters:
1. Select a voice port.
2. Select Configuration > Physical Parameters…
The Voice Parameters dialog box appears.
Figure 3-19. Voice Parameters Dialog Box
Table 3-17. Voice Parameters
Parameter
Possible Values / Remarks
Port
VOICE 1, VOICE 2, VOICE 3, VOICE 4
Interface Type
FXS, FXO, E&M 4 W, E&M 2 W
3-26
Configuring Physical Parameters
RADview FCD-IP User’s Manual
Chapter 3 Port Management
Table 3-17. Voice Parameters (Cont.)
Parameter
Possible Values / Remarks
Tx Gain (dBm)
The transmit gain in dBm.
-10, -8, -6, -4, -2, 0, 2, 4, 5
Rx Gain (dBm)
The receive gain in dBm.
-10, -8, -6, -4, -2, 0, 2, 4, 5
Coding Law
Indicates the Method/Law for decoding/encoding the voice information.
A Law, U Law
Signaling
Tx On/Off Hook
This object represents 2 Octets, 4 nibbles:
A bit, A bit Inverted, B bit, B bit inverted, NA (FXO and E&M)
where:
0001=Tx A bit
0010=Tx A bit inverse
0011=Tx B bit
0100=Tx B bit inverse
0000=NA
Rx On/Off Hook
This object represents 1 Octets, 2 nibbles:
A bit, A bit Inverted, B bit, B bit inverted, NA(E&M)
where:
0001=Rx A bit
0010=Rx A bit inverse
0011=Rx B bit
0100=Rx B bit inverse
0000=NA
Tx M Signal
This object represents 2 Octets, 4 nibbles:
A bit, A bit Inverted, B bit, B bit inverted, NA (FXS and FXO)
where:
0001=Tx A bit
0010=Tx A bit inverse
0011=Tx B bit
0100=Tx B bit inverse
0000=NA
Rx E Signal
This object represents 1 Octets, 2 nibbles:
A bit, A bit Inverted, B bit, B bit inverted, NA (FXS and FXO)
where:
0001=Rx A bit
0010=Rx A bit inverse
0011=Rx B bit
0100=Rx B bit inverse
0000=NA
Configuring Physical Parameters
3-27
RADview FCD-IP User’s Manual
Chapter 3 Port Management
Table 3-17. Voice Parameters (Cont.)
Parameter
Possible Values / Remarks
Tx Ring Detection
This object represents 2 Octets, 4 nibbles:
A bit, A bit Inverted, B bit, B bit inverted, NA (FXS and E&M)
where:
0001=Tx A bit
0010=Tx A bit inverse
0011=Tx B bit
0100=Tx B bit inverse
0000=NA
Default ABCD Bits
For all interfaces:
When A bit or A bit inverted:
For E1 Link:
0001, 0010, 0011, 0100, 0101, 0110, 0111
For T1 Link:
0000, 0101
Else,
For E1 Link:
0001, 0010, 0011, 1000, 1001, 1010, 1011
For T1 Link:
0000, 1010
Reversed Polarity
Indicates the Signaling Profile of the port.
Enabled, Disabled
Seize Ack
Indicates whether the device will acknowledge a seize signal (On/Off Hook).
When the value is Yes and device receives an on/off hook signal, it will transmit
back an on/off hook signal.
When the value is set to No and device receives an on/off hook signal, it will NOT
transmit back an on/off hook signal.
Yes, No, NA (FXS and E&M)
Out of Service
Forced Idle, Forced Busy, NA (FXS)
Remote E&M Wires
Remote device’s wiring.
2 Wires, 4 Wires, NA (FXS and FXO)
E&M Type
Indicates signaling type on the E&M analog side.
Type 1, Type 2, Type 3, Type 5 (SSDC5), NA (FXS and FXO)
3-28
Configuring Physical Parameters
RADview FCD-IP User’s Manual
Chapter 3 Port Management
3.4 Configuring Protocol Parameters
RADview enables you to configure parameters for the different protocols.
Table 3-18. Protocol Options per Interface and Link Types
Note
Interface
Link Type
Protocol
V24
Async
SLIP, CSLIP, PPP
V24
Sync
HDLC, RFC1490, PPP
V35, V11
Sync
HDLC, RFC1490, PPP
ISDN
Sync
PPP
4W, E1/T1, SHDSL
Sync
HDLC, RFC1490, PPP
CHANNEL (N × 64)
Sync
No protocols over CHANNEL
For IP Routing protocol, see Protocol Type.
Configuring Frame Relay Protocol Parameters
To configure Frame Relay parameters:
1. Select a Link or Channel.
2. Select a port where the Protocol Type (see Protocol Type) has been defined as
FR.
3. Select Configuration > Protocol Parameters…
The FR Parameters dialog box appears.
Figure 3-20. FR Parameters
Configuring Protocol Parameters
3-29
RADview FCD-IP User’s Manual
Chapter 3 Port Management
Table 3-19. FR Parameters
Parameter
Possible Values / Remarks
Port Interface
The selected interface.
DLCI / Maintenance
Self Learning
Specifies whether device self learns maintenance protocol on FR link and the
existing DLCIs and staus of the existing DLCIs (Up or Down).
On, Off
When Off, maintenance protocol and DLCI must be configured manually.
Maintenance Protocol
Specifies maintenance protocol of the FR link.
This parameter is available for configuration only when DLCI / Maintenance Self
Learning is Off.
T1.617/Annex D, Q.933/Annex A, LMI, None
CLLM Status (on/off)
Specifies whether or not CLLM frames used for congestion are supported.
Disable, Enable
Polling Interval (Sec)
Specifies number of seconds between transmission of two successive status enquiry
frames.
5 - 30
Full Enquiry Interval
Specifies number of polling intervals after which a full status request frame is
transmittted.
1 - 255
Error Threshold
Specifies number of umacknowledged monitored events allowed in a sliding
monitored event window before link is declared DOWN.
1 - 10
Monitored Events
Specifies number of monitored events (status enquiry frames and full status enquiry
frames).
1 - 10
Configuring the DLCI Table
To configure DLCI parameters:
1. Select a Link or Channel.
2. Select Configuration > Protocol Parameters > DLCI…
or
from the FR Parameters dialog box (Figure 3-20) click <DLCI Table…>.
The DLCI Table dialog box appears.
3-30
Configuring Protocol Parameters
RADview FCD-IP User’s Manual
Chapter 3 Port Management
Figure 3-21. DLCI Table
Table 3-20. DLCI Table Parameters
Parameter
Possible Values / Remarks
Interface
The selected interface.
DLCI #
Specifies DLCI number.
State
Specifies state of DLCI.
Active, Inactive (for receive/transmit)
CIR Value
Specifies maximum number of data bits that the network guarantees to transfer
during the measurement interval.
Excess Value
Specifies maximum number of uncommitted data bits the network attempts to
deliver during measurement interval.
Throughput Value
Specifies the average number of data bits pre second transferred by the network.
When CIR is defined as one second, Throughput Value should also be one second.
To add an entry to the DLCI Table:
1. In the DLCI Table, click <Add...>.
The Add DLCI dialog box appears.
2. Configure the desired parameters (see Table 3-20).
3. Click <Set>.
Configuring Protocol Parameters
3-31
RADview FCD-IP User’s Manual
Chapter 3 Port Management
Figure 3-22. Add DLCI
To remove an entry from the DLCI Table:
1. In the DLCI Table, select an entry.
2. Click < Remove>.
Configuring PPP Parameters
To configure PPP parameters:
1. Select a Link or Channel.
2. Select a port where the Protocol Type (see Protocol Type) has been defined as
PPP.
3. Select Configuration > Protocols > PPP…
The PPP Protocol Parameters dialog box appears.
Figure 3-23. PPP Protocol
3-32
Configuring Protocol Parameters
RADview FCD-IP User’s Manual
Chapter 3 Port Management
Table 3-21. PPP Protocol Parameters
Parameter
Possible Values / Remarks
Interface
The selected interface.
For ISDN the parameters will appear on two tabs: Channel 1 and Channel 2.
Bad Controls
The number of packets received on this link with an incorrect control field.
Bad FCSs
The number of received packets that have been discarded due to having an
incorrect FCS.
Local MRU
1 - 2147483648
Remote MRU
1 - 2147483648
Local to Remote ACC Map
4 octets
Remote to Local ACC Map
4 octets
Local to Remote Compression
Protocol
Enabled, Disabled
Remote to Local Compression
Protocol
Enabled, Disabled
Local to Remote ACC
Compression Protocol
Enabled, Disabled
Remote to Local ACC
Compression Protocol
Enabled, Disabled
Tx FCS Size
0 - 128
Rx FCS Size
0 - 128
Header and Control
Compression
Used for troubleshooting only.
Change the setting only if there is a problem with PPP negotiation.
Yes, No
Protocol Field Compression
Used for troubleshooting only.
Change the setting only if there is a problem with PPP negotiation.
Yes, No
IP Compression
Activates Van Jacobson TCP Header Compression on a specified link.
Yes, No
Note: Since PPP is used for point to point transmissions, both the local and
remote devices must have Van Jacobson TCP Header Compression enabled
for compression to be performed.
Configuring Protocol Parameters
3-33
RADview FCD-IP User’s Manual
Chapter 3 Port Management
3.5 Configuring Network Parameters
RADview enables you to set IP addresses, IP routing protocol and DHCP Relay
parameters for the selected interface or DLCI.
Configuring IP Addresses
To set an IP Address:
1. Select the required interface.
2. Select Configuration >Network Parameters > IP Addresses…
The IP Address Table dialog box appears. The IP Address Table dialog box
varies depending on the selected link or DLCI. The parameters of the
different dialog boxes are provided below.
Figure 3-24. IP Address
Table 3-22. IP Address Parameters
Parameter
Possible Values / Remarks
Interface
The selected interface.
For ISDN there are two tabs: Channel 1 and Channel 2.
IP Address
The WAN/LAN IP Address.
IP Mask
The IP Address mask.
Interface
The selected interface.
DLCI#
Specifies DLCI number.
3-34
Configuring Network Parameters
RADview FCD-IP User’s Manual
Chapter 3 Port Management
Configuring the IP Routing Protocol
Configuring the IP routing protocol varies slightly, depending on the software
version you are running. The appropriate one of the following two options will
appear in the Network Parameters menu:
•
IP Routing Protocol
•
IP RIP Mode
To set IP Routing Protocol:
1. Select a link in which protocol type is not FR.
2. Select Configuration >Network Parameters > IP Routing Protocol…
The IP Routing Protocol dialog box appears.
Figure 3-25. IP Routing Protocol Dialog Box
Table 3-23. IP Routing Protocol Parameters
Parameter
Possible Values / Remarks
Interface
The selected interface.
For ISDN the parameters below will appear on two tabs: Channel 1 and Channel 2.
Routing Mode
RIP 1: Send and receive routing information about IP nets only
RIP 2: Send and receive full routing information including subnets
RIP 1 & RIP 2: Send and receive both RIP 1 (routing information about IP nets only)
and RIP 2 (full routing information including subnets)
OSPF: Routing is determined by the OSPF protocol
No Routing Protocol
Configuring Network Parameters
3-35
RADview FCD-IP User’s Manual
Chapter 3 Port Management
Table 3-23. IP Routing Protocol Parameters (Cont.)
Parameter
Possible Values / Remarks
OSPF
Area ID
The IP address that identifies the OSPF area.
[…]
Opens the Select Area dialog box listing the existing OSPF areas and the behavior
type of each area.
To select an OSPF area, click<…>. Select the desired area from the listing and click
<OK>.
Priority
Hello Interval
The interval (in seconds) at which a hello message is transmitted in the area.
Dead Interval
The interval (in seconds) after which, if no hello message is transmitted from a unit, it
will be considered “dead”.
Metric
Configuring the IP RIP Mode
To set IP RIP Mode:
1. Select a link in which protocol type is not FR.
2. Select Configuration >Network Parameters > IP RIP…
The IP RIP Mode dialog box appears.
Figure 3-26. IP RIP Mode Dialog Box
Table 3-24. IP RIP Mode Parameters
Parameter
Possible Values / Remarks
Interface
The selected interface.
For ISDN the parameters below will appear on two tabs: Channel 1 and Channel 2.
Mode
RIP 1: Send and receive routing information about IP nets only
RIP 2: Send and receive full routing information including subnets
RIP 1 & RIP 2: Send and receive both RIP 1 (routing information about IP nets only)
and RIP 2 (full routing information including subnets)
No RIP
3-36
Configuring Network Parameters
RADview FCD-IP User’s Manual
Chapter 3 Port Management
Configuring DHCP Relay
To set DHCP Relay:
1. Select the desired link.
2. Select Configuration >Network Parameters > DHCP Relay…
The DHCP Relay Parameters dialog box appears.
Figure 3-27. DHCP Relay Parameters
Table 3-25. DHCP Relay Parameters
Parameter
Possible Values / Remarks
Interface
Link 1, Link 2, Link 3
Description
String containing information about the interface.
Type
DS1, MODEM, Frame Relay, PPP, SHDSL
Enable Relay
Enabled, Disabled
Relay IP Address
0.0.0.0, 1.0.0.0…223.255.255.255
3.6 Resetting the Link
To reset the link:
1. Select a Link or Channel.
2. Select Configuration > Reset…
or
click the Reset icon on the toolbar
.
The following message appears: “RESETTING LINK. Operation may disrupt
network data.”
3. Click <OK> to confirm Reset.
Resetting the Link
3-37
RADview FCD-IP User’s Manual
Chapter 3 Port Management
3.7 Performing Diagnostic Tests
RADview enables you to run diagnostic tests for: E1/T1 Link, E1/T1 Sublink,
SHDSL, SUB1/ LINK2, SUB 2, SUB 3, Voice Port.
Note
When configuring TDM (Voice) parameters a password is required.
To run diagnostics tests:
1. Select a Link or Channel.
2. Select Diagnostics > Test…
The Testing dialog box appears.
Figure 3-28. Testing
Table 3-26. Testing Parameters
Parameter
Possible Values / Remarks
Port
The selected port.
Voice 1, Voice 2, Voice 3, Voice 4
Interface Type
The interface type of selected port.
FXS, FX0, E&M 4 W, E&M 2W
Current Test
The currently running test.
New Test
Remote Digital Loopback (T1 only), Remote Analog Loopback, Local Analog
Loopback
[Stop Test]
Click <Stop Test> to stop a currently running test.
[Set]
To run a different test, ensure that no test is currently running (click Stop Test). Select
the test to be run from the New Test list box and click <Set>.
To run a different test:
1. Click <Stop Test> to stop any currently running test.
2. Select a new diagnostic test.
3. Click <Set>.
3-38
Performing Diagnostic Tests
Chapter 4
Fault Management
This chapter discusses how to manage faults for the FCD-IP system.
Managing faults includes the following tasks:
•
Displaying Sanity Check Errors (E1/T1 Link)
•
Displaying SHDSL Alarms.
4.1 Edit and Agent Views
Note
Certain TDM ports can be displayed in both Edit and Agent Views. Configuration is
performed in the Edit mode. In Agent View, the parameters are Read-Only.
To switch between Edit and Agent views:
1. Select the appropriate Link.
2. Switch to Edit View by doing one of the following:
Click the Edit/Agent View button on the toolbar
.
or
Select Window > Edit View/Agent View to switch to Edit/Agent View.
4.2 Displaying Sanity Check Errors (E1/T1 Link)
RADview enables you to display the Sanity Check Errors List.
Note
Sanity Check Errors is available only for E1/T1 interfaces (Edit View).
To display the sanity check errors list:
1. Select a Link or Channel.
2. Click the Edit View button on the toolbar
.
3. Select Fault >Sanity Check Errors…
The system performs a sanity check.
If there are no errors, the following message appears “NO SANITY
ERRORS”.
If there are errors or warnings, the Sanity Check Errors List appears
(Figure 4-1).
Displaying Sanity Check Errors (E1/T1 Link)
4-1
RADview FCD-IP User’s Manual
Chapter 4 Fault Management
Figure 4-1. Sanity Check Errors List
4.3 Displaying SHDSL Alarms
To view SHDSL alarms:
1. Select an SHDSL Link.
2. Select Fault >SHDSL > Alarms…
The SHDSL alarms dialog box appears (Figure 4-2).
Figure 4-2. SHDSL Alarms
4-2
Displaying SHDSL Alarms
Chapter 5
Performance
This chapter discusses how to monitor the performance of the FCD-IP system.
Performance monitoring includes the following tasks:
•
Setting the Polling Interval
•
Performing Diagnostic Tests
•
Displaying E1/T1 Statistics
•
Displaying E1 Over SHDSL Statistics
•
Displaying Ethernet LAN Statistics.
5.1 Edit and Agent Views
Note
Certain TDM ports can be displayed in both Edit and Agent Views. Configuration is
performed in the Edit mode. In Agent View, the parameters are Read-Only.
To switch between Edit and Agent views:
1. Select the appropriate Link.
2. Switch to Edit View by doing one of the following:
Click the Edit/Agent View button on the toolbar
.
or
Select Window > Edit View/Agent View to switch to Edit/Agent View.
Edit and Agent Views
5-1
RADview FCD-IP User’s Manual
Chapter 5 Performance
5.2 Setting the Polling Interval
RADview enables you to set the current statistics polling interval to automate
FCD-IP statistics updates, per assigned elapsed time intervals.
To set the polling interval:
1. Select a Link or Channel.
2. Select Statistics >Physical Layer > Polling Interval…
or
Select Statistics >Physical Layer > SHDSL > Polling Interval…
The Polling Interval dialog box appears (Figure 5-1).
3. Enter the polling interval in seconds and check the Polling Enable checkbox.
4. Click <Set>.
Figure 5-1. Polling Interval
5.3 Performing Diagnostic Tests
RADview enables you to run diagnostic tests.
Note
When configuring TDM (E1/T1) parameters a password is required.
To run diagnostics tests:
1. Select a Link or Channel.
2. Select Diagnostics >Test…
The Testing dialog box appears.
Figure 5-2. Testing
5-2
Performing Diagnostic Tests
RADview FCD-IP User’s Manual
Chapter 5 Performance
Table 5-1. Testing Parameters – E1/T1
Parameter
Possible Values / Remarks
Interface
The selected port.
Link1, Link2, Link3, SUB1/Link2, SUB 2, SUB 3,
Interface Type
The interface type of the selected port.
E1/T1
Current Test
The currently running test.
New Test
Remote Digital Loopback (T1 only), Remote Analog Loopback, Local Analog
Loopback
[Stop Test]
Click <Stop Test> to stop a currently running test.
[Set]
To run a different test, ensure that no test is currently running (click Stop Test). Select the
test to be run from the New Test list box and click <Set>.
5.4 Displaying E1/T1 Statistics
The following types of statistics are available for E1/T1 links:
•
Packets Data Statistics
•
Packets Graph
•
Physical Layer Statistics
Packets Data Statistics
To display link statistics:
1. Select a Link or Channel.
2. Select Statistics >Packets Data Table…
The Link Statistics dialog box appears (Figure 5-3).
Figure 5-3. Link Statistics
Displaying E1/T1 Statistics
5-3
RADview FCD-IP User’s Manual
Chapter 5 Performance
Table 5-2. Link Statistic Parameters
Parameter
Possible Values / Remarks
Interface
The selected interface.
Packets
Rx Unicast Frames
The number of subnetwork Unicast packets received froma higher layer protocol.
Rx Multicast Frames
The number of subnetwork Multicast packets received from a higher layer protocol.
Tx Unicast Frames
The number of subnetwork Unicast packets transmitted to a higher layer protocol.
Tx Multicast Frames
The number of subnetwork Multicast packets transmitted to a higher layer protocol.
Masked frames
The number of masked frames received on this physical link.
Octets
Rx Bytes (k)
The number of octets received on this interface including framing characters.
Tx Bytes (k)
The number of octets transmitted on this interface including framing characters.
Error Frames
RxError Frames
Number of errored packets received on this physical link.
TxError Frames
Number of errored packets transmitted by this physical link.
Packets Graph Statistics
To display link packet statistics in a graph:
1. Select a Link or Channel.
2. Select Statistics >Packets Graph > Packets…
The Link Packets graph appears (Figure 5-4).
Figure 5-4. Link Packets
5-4
Displaying E1/T1 Statistics
RADview FCD-IP User’s Manual
Chapter 5 Performance
To display link octet statistics in a graph:
1. Select a Link or Channel.
2. Select Statistics >Packets Graph > Octets...
The Link Octets graph appears (Figure 5-5).
Figure 5-5. Link Octets
To display link error frame statistics in a graph:
1. Select a Link or Channel.
2. Select Statistics >Packets Graph > Error Frames...
The Link Error Frames graph appears (Figure 5-6).
Figure 5-6. Link Error Frames
Displaying E1/T1 Statistics
5-5
RADview FCD-IP User’s Manual
Chapter 5 Performance
Physical Layer Statistics
RADview enables you to display link statistics about the physical layer of the
selected interface.
To display physical layer statistics:
1. Select a Link or Channel.
2. Select Statistics >Physical Layer > Current Interval > Table…
The E1 Link Statistics dialog box appears (Figure 5-7).
Figure 5-7. E1 Link Statistics
Table 5-3. Link Statistic Parameters
Parameter
Possible Values / Remarks
Interface
The selected interface.
Type
E1, T1
Current Data
Each parameter displays the number of seconds for the particular type of error
encountered by the interface during the current 15-minute interval.
Time Elapsed (sec)
Amount of time that has passed since the beginning of the current 15-minute interval.
LCV
The number of Line Code Violations seconds.
ES
The number of Errored Seconds (containing one or more CRC error events, one or more
OOF events, or one or more controlled slip events).
SES
The number of Severely Errored Seconds (with 832 or more CRC error events, or one or
more OOF events).
UAS
The number of Unavailable seconds (in which a failed signal state exists).
CSS
The current Slip Second Counter (second with one or more controlled slip events).
BES
The number of Bursty Error Seconds (with 2 to 831 CRC error events).
5-6
Displaying E1/T1 Statistics
RADview FCD-IP User’s Manual
Chapter 5 Performance
To display the physical layer statistics in graph form:
1. Select a Link or Channel.
2. Select Statistics >Physical Layer > Current Interval > Graph…
The Current Graph dialog box appears (Figure 5-8).
Figure 5-8. Current Graph Statistics
To display interval statistics for the physical layer:
1. Select a Link or Channel.
2. Select Statistics >Physical Layer > Intervals Data > Table…
The Errors Statistics Intervals dialog box appears (Figure 5-9).
Figure 5-9. Errors Statistics Intervals
Displaying E1/T1 Statistics
5-7
RADview FCD-IP User’s Manual
Chapter 5 Performance
To display the next 20 entries in the table:
•
Click <Next>.
To display statistics starting at a specific interval:
1. Select the desired interval from the Starting from Interval list box (upper right
hand corner of Error Statistics Intervals dialog box).
2. Click <Start From…>.
To display the table data in a graph:
1. Select a Link or Channel.
2. Select Statistics >Physical Layer > Intervals Data > Graph…
The Intervals Graph dialog box appears (Figure 5-10).
Figure 5-10. Intervals Graph
5-8
Displaying E1/T1 Statistics
RADview FCD-IP User’s Manual
Chapter 5 Performance
Protocol Layer Statistics
RADview enables you to display statistics about the protocol layer of the selected
interface.
Note
Protocol Layer statistics are available only for FR ports.
To display FR Error statistics:
1. Select a FR port.
2. Select Statistics >Protocol Layer…
The FR Error Statistics dialog box appears (Figure 5-11).
Figure 5-11. FR Error Statistics
Displaying E1/T1 Statistics
5-9
RADview FCD-IP User’s Manual
Chapter 5 Performance
Table 5-4. FR Error Statistics Parameters
Parameter
Possible Values / Remarks
Interface
The selected interface.
Type
Displays the type of error.
Time
The system up time when error was detected.
Faults
The number of faults that have occurred.
Fault Time
The time when the error was detected.
Data
Provides information about the different faults.
[DLCI…]
Click <DLCI> to view DLCI Statistics dialog box (Figure 5-12).
To display DLCI statistics:
•
From the FR Error Statistics dialog box (Figure 5-11), click <DLCI…>.
The DLCI Statistics dialog box appears.
Figure 5-12. DLCI Statistics
5-10
Displaying E1/T1 Statistics
RADview FCD-IP User’s Manual
Chapter 5 Performance
Table 5-5. DLCI Statistics Parameters
Parameter
Possible Values / Remarks
Interface
The selected interface.
DLCI
The DLCI value.
FECN
The number of frames received from the network indicating forward
congestion since the virtual circuit was created.
BECN
The number of frames received from the network indicating backward
congestion since the virtual circuit was created.
Sent Frames
The number of frames sent from this virtual circuit since it was created.
Sent Octets
The number of octets sent from this virtual circuit since it was created.
Received Frames
The number of frames received over this virtual circuit since it was created.
Received Octets
The number of octets received over this virtual circuit since it was created.
Committed Burst
The maximum amount of data, in bits, that the network agrees to transfer
under normal conditions, during the measurement interval.
Excess Burst
The maximum amount of uncommitted data bits that the network will
attempt to deliver over the measurement interval.
Throught Put
The average number of 'Frame Relay Information Field' bits transferred per
second across a user network interface in one direction, measured over the
measurement interval.
Circuit Discards
The number of inbound frames dropped because of format errors, or
because the VC is inactive.
Received DE
The number of frames received from the network indicating that they were
eligible for discard since the virtual circuit was created.
Sent DE
The number of frames sent to the network indicating that they were eligible
for discard since the virtual circuit was created.
Displaying E1/T1 Statistics
5-11
RADview FCD-IP User’s Manual
Chapter 5 Performance
5.5 Displaying E1 Over SHDSL Statistics
Physical Layer Statistics
To display physical layer statistics:
1. Select a Link or Channel.
2. Select Statistics >SHDSL > Current > 15 min Data…
The 15 min, Current Data box appears (Figure 5-13).
Figure 5-13. 15 min. Current Data
Table 5-6. 15 min, Current Data Parameters
Parameter
Possible Values / Remarks
Index
Link 1
Type
SHDSL
Time Elapsed (sec)
The amount of time that has passed since the beginning of the current 15-minute
interval.
0..900
ES
The number of Errored Seconds (containing one or more CRC error events, one or
more OOF events, or one or more controlled slip events).
0..900
SES
The number of Severely Errored Seconds (with 832 or more CRC error events, or
one or more OOF events).
0..900
CRC Anomolies
Integer
LOSW
0..900
UAS
The number of Unavailable seconds (in which a failed signal state exists).
0..900
5-12
Displaying E1 Over SHDSL Statistics
RADview FCD-IP User’s Manual
Chapter 5 Performance
To display the physical layer statistics in graph form:
1. Select a Link or Channel.
2. Select Statistics >SHDSL > Current > 15 min Graph…
The 15 min, Current Graph box appears (Figure 5-13).
Figure 5-14. 15 min. Current Graph
To display interval statistics for one day:
1. Select a Link or Channel.
2. Select Statistics >SHDSL > Current > One Day Data…
The 1 Day Current Data dialog box appears (Figure 5-15).
Figure 5-15. 1-Day Current Data
Displaying E1 Over SHDSL Statistics
5-13
RADview FCD-IP User’s Manual
Chapter 5 Performance
To display interval statistics for the physical layer:
1. Select a Link or Channel.
2. Select Statistics >SHDSL > Intervals > 15 min. Data…
The 15 min. Intervals Data dialog box appears (Figure 5-16).
Figure 5-16. 15 min. Intervals Data
To display the table data in a graph:
1. Select a Link or Channel.
2. Select Statistics >SHDSL > Intervals > 15 min. Graph…
The 15 min. Intervals Graph dialog box appears (Figure 5-17).
Figure 5-17. 15 min. Intervals Graph
5-14
Displaying E1 Over SHDSL Statistics
RADview FCD-IP User’s Manual
Chapter 5 Performance
5.6 Displaying Ethernet LAN Statistics
RADview enables you to display general statistics as well as error statistics for the
Ethernet LAN interface.
To display general statistics for the LAN:
1. Select the Ethernet LAN.
2. Select Statistics >Table > LAN General…
The LAN General dialog box appears (Figure 5-18).
Figure 5-18. LAN General
Table 5-7. LAN General
Parameter
Possible Values / Remarks
Interface
The selected interface.
Packets
RX Unicast Packets
The number of subnetwork Unicast packets received froma higher layer
protocol.
RX Multicast Packets
The number of subnetwork Multicast packets received from a higher layer
protocol.
TX Unicast Packets
The number of subnetwork Unicast packets transmitted to a higher layer
protocol.
Octets
RX Bytes (k)
The number of octets received on this interface including framing characters.
TX Bytes (k)
The number of octets transmitted on this interface including framing
characters.
Displaying Ethernet LAN Statistics
5-15
RADview FCD-IP User’s Manual
Chapter 5 Performance
To display error statistics for the LAN:
1. Select the Ethernet LAN.
2. Select Statistics >Table > Errors…
The LAN Errors Statistics dialog box appears (Figure 5-19).
Figure 5-19. LAN Errors Statistics
Table 5-8. LAN Errors Statistics Parameters
Parameter
Possible Values / Remarks
Interface
The selected interface.
Error Frames
Received Error Frames
The number of error frames received.
Transmitted Error Frames
The number of error frames transmitted.
Frame Too Long
The number of frames that were too long.
FCS & Test Errors
FCS Errors
The number of frames received with CRC errors.
Alignment Errors
The number of frames received with alignment errors.
SQE Test Errors
The number of times the SQE test error is generated by the PLS sublayer for
the selected interface.
5-16
Displaying Ethernet LAN Statistics
RADview FCD-IP User’s Manual
Chapter 5 Performance
Table 5-8. LAN Errors Statistics Parameters (Cont.)
Parameter
Possible Values / Remarks
Tx & Rx Errors
Internal Mac Transmit Errors
The number of frames for which transmission to selected interface fails due
to internat MAC sublayer transmitt error.
Internal Mac Receive Errors
The number of frames for which transmission to selected interface fails due
to internat MAC sublayer receive error.
Deferred Transmissions
The number of frames for which first transmission attemp on selected
interface delayed due to the media bing busy.
Carrier Sense Errors
The number of time that carrier sense condition was lost or never asserted
when attempting to trasmit frames on selected interface.
Collisions
Single Collision Frames
The number of successfully transmitted frames for which transmission is
inhibited by exactly one collision.
Multiple Collision Frames
The number of successfully transmitted frames for which transmission is
inhibited by more than one collision.
Late Collisions
The number of times that a collision is detected on selected interface later
than 512 bit-times into the transmission of a packet.
Excessive Collisions
The number of frames detected on selected interface that failed due to
excessive collisions.
The following group statistics can also be displayed in a graph:
•
Packets
•
Octets
•
Error Frames
•
Tx & Rx Errors
•
FCS & Test Errors
•
Collisions.
To display the statistics for the Packets group in a graph:
•
Select Statistics >Graph > Packets…
The LAN Packets dialog box appears (Figure 5-20).
Displaying Ethernet LAN Statistics
5-17
RADview FCD-IP User’s Manual
Chapter 5 Performance
Figure 5-20. LAN Packets
To display the statistics for the Octets group in a graph:
•
Select Statistics >Graph > Octets…
The LAN Octets dialog box appears (Figure 5-21).
Figure 5-21. LAN Octets
5-18
Displaying Ethernet LAN Statistics
RADview FCD-IP User’s Manual
Chapter 5 Performance
To display the statistics for the Frame Errors group in a graph:
•
Select Statistics >Graph > Frames Errors…
The ETH Error Frames dialog box appears (Figure 5-22).
Figure 5-22. ETH Error Frames
To display the statistics for the Tx & Rx Errors group in a graph:
•
Select Statistics >Graph > Tx & Rx Errors…
The ETH Tx & Rx Errors dialog box appears (Figure 5-23).
Figure 5-23. ETH Tx & Rx Errors
Displaying Ethernet LAN Statistics
5-19
RADview FCD-IP User’s Manual
Chapter 5 Performance
To display the statistics for the FCS & Test Errors group in a graph:
• Select Statistics >Graph > FCS & Test Errors…
The ETH FCS & Test Errors dialog box appears (Figure 5-24).
Figure 5-24. ETH FCS & Test Errors
To display the statistics for the Collisions group in a graph:
• Select Statistics >Graph > Collisions…
The LAN Collisions dialog box appears (Figure 5-25).
Figure 5-25. LAN Collisions
5-20
Displaying Ethernet LAN Statistics
Chapter 6
Configuring FCD-IP for a
Typical Application
This chapter provides detailed instructions for configuring a typical FCD-IP
application. This application involves configuring:
•
WAN Interface
•
E1 Interface
•
LAN Interface.
Each section shows the appropriate interface connections for those applications on
the FCD-IP rear panel.
6.1 Overview
Application
The section provides detailed instructions for configuring FCD-IP unit with a
sub-E1 and 10/100BaseT LAN interface, operating in the IP router mode (see
Figure 6-1).
Figure 6-1. FCD-IP Providing Access to the Internet and to the PSTN
Overview
6-1
RADview FCD-IP User’s Manual
Chapter 6 Configuring FCD-IP for a Typical Application
Table 6-1. Configuration Summary
WAN Parameters
E1 Parameters
LAN Host Parameters
• Link mode: Synchronous
• Master clock: Link 1
• LAN Status: Enable
• Routing: IP router
• Multiplier: 64 kbps
• Host IP address: 192.168.10.2
• Protocol: PPP
• Timeslots 1–4: FIX SUB Voice • Host IP mask: 255.255.255.000
• WAN IP address: 192.168.10.1
• Timeslots 5–8: DATA LINK1
• WAN IP mask: 255.255.255.252
• Default gateway setting by:
Interface
• Default gateway interface: LINK 1
6.2 Configuring WAN Parameters
Configuring WAN parameters includes the following:
•
Configuring the WAN Interface
•
Configuring the WAN IP Address.
Configuring the WAN Interface
To configure the WAN interface:
1. Select Link1.
2. Switch to Edit View: Click the Edit View button on the toolbar
.
3. Select Configuration > Interface Info…
The Interface Information dialog box appears. There are two tabs: Info and
Link Data.
4. Click the Link Data tab.
Figure 6-2. WAN Interface Information Link Data Tab
6-2
Configuring WAN Parameters
RADview FCD-IP User’s Manual
Chapter 6 Configuring FCD-IP for a Typical Application
5. From the State drop-down list, select Enable.
6. In the Link Type field, type Synchronous.
7. From the Protocol drop-down list, select PPP.
8. From the Routing/Bridging drop-down list, select IP Router.
9.
Click <Set>.
Configuring the WAN IP Address
To configure the WAN IP address:
1. Switch to Agent View: Click the Agent View button on the toolbar
.
2. Select Configuration > Network Parameters > IP Address....
The IP Address Table appears (Figure 6-3).
Figure 6-3. IP Addresses Table
3. In the IP Address Table (Figure 6-3), click <Add…>.
The Add IP Address dialog box appears (Figure 6-4).
Figure 6-4. Add IP Address
Configuring WAN Parameters
6-3
Chapter 6 Configuring FCD-IP for a Typical Application
RADview FCD-IP User’s Manual
4. In the IP Address field, type 192.168.10.1.
5. In the IP Mask field, type 255.255.255.252.
6. In the Interface drop-down list, select LINK1.
7. Click <Set>.
6.3 Configuring the E1 Interface
Configuring the E1 interface includes the following:
•
Configuring E1 Parameters
•
Mapping E1 Timeslots.
Configuring E1 Parameters
To configure E1 parameters:
1. Select LINK1.
2. Switch to Edit View: Click the Edit View button on the toolbar
3. Select Configuration > Physical Parameters > General….
The E1 Link Parameters dialog box appears.
Figure 6-5. The E1 Link Parameters
4. From the Clock Source drop-down list, select Link 1.
5. From the Multiplier drop-down list, select 64 kbps.
6. Click <Set>.
6-4
Configuring the E1 Interface
.
RADview FCD-IP User’s Manual
Chapter 6 Configuring FCD-IP for a Typical Application
Mapping E1Timeslots
To configure TS parameters:
1. Select LINK1.
2. Switch to Edit View: Click the Edit View button on the toolbar
.
3. Select Configuration >Physical Parameters > TS Assign…
or
click the shortcut key on the toolbar
.
The TS Assignment dialog box appears (Figure 6-6).
Figure 6-6. TS Assignment
4. Configure the first eight timeslots as follows:
TS1, TS2, TS3 and TS4 – FIX SUB Voice
TS5, TS6, TS7 and TS8 – DATA LINK 1.
5. Click <Set>.
6.4 Configuring the LAN Interface
Configuring the LAN interface includes the following:
•
Enabling the LAN
•
Configuring the LAN IP Address
•
Configuring Default Gateway Settings
Enabling the LAN
To configure LAN Host Parameters:
1. Select the Ethernet LAN.
2. Switch to Edit View: Click the Edit View button on the toolbar
.
3. Select Configuration > Interface Info…
The Interface Information dialog box appears.
Configuring the LAN Interface
6-5
Chapter 6 Configuring FCD-IP for a Typical Application
RADview FCD-IP User’s Manual
Figure 6-7. Interface Information - Ethernet LAN
4. From the LAN State drop-down list, select Enable.
5. Click <Set>.
Configuring the LAN IP Address
To configure the LAN IP Address:
1. Switch to Agent View: Click the Agent View button on the toolbar
2. Select Configuration > Network Parameters > IP Address....
The IP Addresses Table appears (Figure 6-3).
Figure 6-8. IP Addresses Table
6-6
Configuring the LAN Interface
.
RADview FCD-IP User’s Manual
Chapter 6 Configuring FCD-IP for a Typical Application
3. In the IP Addresses Table, click <Add…>.
The Add IP Address dialog box appears.
Figure 6-9. Add IP Address
4. In the IP Address field, type 192.168.10.2.
5. In the IP Mask field, type 255.255.255.000.
6. In the Interface drop-down list, select LAN1.
7.
Click <Add>.
Configuring Default Gateway Settings
To configure default gateway settings:
1. Select Configuration > System Commands > DHCP…
The DHCP table appears (Figure 6-10).
Figure 6-10. Dynamic Host Configuration Protocol Table
2. Click <Add…>.
The Add DHCP Entry table appears.
Configuring the LAN Interface
6-7
Chapter 6 Configuring FCD-IP for a Typical Application
RADview FCD-IP User’s Manual
Figure 6-11. Add DHCP Entry Table
3. In the Default Gateway drop-down list, select Interface.
4. In the Interface drop-down list, select Link1.
5. Click <Set>.
6-8
Configuring the LAN Interface
Index
—A—
A.#, 1-2
Address resolution protocol, 2-7
Agent
polling, 2-22
Agent View, 1-2
Alarms
SHDSL, 4-2
Async
physical parameters, 3-10
—B—
Bridging
parameters, 2-3
—C—
Channel
interface configuration, 3-1
interface information, 3-1
Configuration
manager list, 2-22
network parameters, 3-34
protocol parameters, 3-29
reading E1/T1 from Agent, 3-22
SNMP, 2-22
typical application, 6-1
updating E1/T1, 3-22
Connection status, 2-18
Current statistics
polling interval, 5-2
—D—
DHCP, 2-19
default gateway, 6-7
network parameters, 3-37
Diagnostics, 3-38, 5-2
DLCI
parameters, 3-30
statistics, 5-10
—E—
E.#, 1-2
E1 over SHDSL
physical layer statistics, 5-12
E1/T1
interface configuration, 3-1
interface information, 3-1
link mode, 3-16
physical layerstatistics, 5-6
physical parameters, 3-17, 6-4
reading configuration from Agent, 3-22
sanity errors, 4-1
statistics, 5-3
time slots, 3-19, 6-5
updating current configuration, 3-22
E1/T1 over SHDSL
interface configuration, 3-6
interface information, 3-6
Edit View, 1-2
password, 1-3
Ethernet
collisions statistics, 5-20
error statistics, 5-16
FCS & test errors statistics, 5-20
frame error statistics, 5-19
general statistics, 5-15
interface configuration, 3-9, 6-5
interface information, 3-9, 6-5
octet statistics, 5-18
packet statistics, 5-17
statistics groups, 5-17
Tx and Rx errors statistics, 5-19
—F—
Fault management, 4-1
FCD-IP
description, 1-1
workplace, 1-2
Forwarding
IP, 2-5
static, 2-3
Frame relay
protocol layer statistics, 5-9
protocol parameters, 3-29
reset, 3-3
—I—
Info tab, 3-2
Information
interfaces, 3-1
Interface configuration
Channel, 3-1
E1/T1, 3-1
E1/T1 over SHDSL, 3-6
Ethernet, 3-9, 6-5
ISDN, 3-1
I-1
RADview FCD-IP User’s Manual
Index
SHDSL, 3-4
Voice, 3-1
Interfaces
configuration, 3-1
information, 3-1
selecting, 1-2
IP
address table, 2-8
addresses
forwarding, 2-5
RIP mode
routing, 2-5
ISDN
interface configuration, 3-1
interface information, 3-1
physical parameters, 3-13
—L—
LAN
configuration, 6-5
IP addresses, 6-6
LEDs, 1-3
Link
connection, 2-18
reset, 3-37
statistics, 5-3
database, 2-17
disable, 2-11
enable, 2-10
information, 2-14
interfaces, 2-15
neighbors, 2-15
—P—
Password, 1-3
setting, 2-23
Performance, 5-1
Physical layer
statistics
interval, 5-7
Physical parameters
async, 3-10
configuration, 3-10
E1/T1, 3-17, 6-4
ISDN, 3-13
SHDSL, 3-23
SHDSL status, 3-25
V.24, 3-10
voice, 3-26
Polling
Agent, 2-22
interval, 5-2
graph, 5-4
octet, 5-5
link mode
PPP
Link tab, 3-3, 6-2
Protocol parameters, 3-29
E1/T1, 3-16
—M—
Main window, 1-2
LEDs, 1-3
selecting interfaces, 1-2
selecting system level, 2-1
Management station, 1-2
Manager list, 2-22
Mode
agent, 1-2
edit, 1-2
indicator, 1-2
switching between, 1-3, 2-23, 3-1, 4-1, 5-1
Modem
adding, 3-12
removing, 3-12
—N—
Network parameters, 3-34
DHCP relay, 3-37
IP addresses, 3-34, 6-3, 6-6
IP RIP mode, 3-36
IP routing, 3-35
—O—
OSPF, 2-10
areas, 2-12
I-2
protocol parameters, 3-32
Protocol layer
statistics, 5-9
DLCI, 3-30
Frame Relay, 3-29
PPP, 3-32
—R—
Reset, 2-21
frame relay, 3-3
link, 3-37
—S—
Sanity errors, 4-1
SHDSL
alarms, 4-2
interface configuration, 3-4
interface information, 3-4
physical parameters, 3-23
SNMP, 2-22
configuration, 2-22
Static forwarding, 2-3
Statistics
DLCI, 5-10
E1 over SHDSL physical layer, 5-12
E1/T1, 5-3
E1/T1 physical layer, 5-6
error frames, 5-5
Ethernet collisions, 5-20
Ethernet error, 5-16
RADview FCD-IP User’s Manual
Ethernet FCS & test errors, 5-20
Ethernet frame errors, 5-19
Ethernet general, 5-15
Ethernet groups, 5-17
Ethernet octets, 5-18
Ethernet packets, 5-17
Ethernet Tx and Rx errors, 5-19
link, 5-3
packets data, 5-3
physical layer
protocol layer, 5-9
System
configuration, 2-2
information, 2-2
level, 2-1
—T—
Tests, 3-38, 5-2
Time slots
assignment, 3-19, 6-5
color codes, 3-20
color codes inside cells, 3-20
Index
creating a connection, 3-21
disconnecting, 3-21
letter codes, 3-21
port name color codes, 3-21
resetting all connections, 3-21
selecting a port cell, 3-21
Typical application
configuration, 6-1
—V—
V.24
physical parameters, 3-10
View
agent, 1-2
edit, 1-2
indicator, 1-2
switching between, 1-3, 2-23, 3-1, 4-1, 5-1
Voice
interface configuration, 3-1
interface information, 3-1
physical parameters, 3-26
I-3
Index
I-4
RADview FCD-IP User’s Manual