1
Ridgeline Installation and Upgrade Guide
Software Version 3.0
Extreme Networks, Inc.
3585 Monroe Street
Santa Clara, California 95051
(888) 257-3000
(408) 579-2800
http://www.extremenetworks.com
Published: February 2011
Part Number: 100397-00 Rev. 01
AccessAdapt, Alpine, Altitude, BlackDiamond, Direct Attach, EPICenter, ExtremeWorks Essentials, Ethernet
Everywhere, Extreme Enabled, Extreme Ethernet Everywhere, Extreme Networks, Extreme Standby Router
Protocol, Extreme Turbodrive, Extreme Velocity, ExtremeWare, ExtremeWorks, ExtremeXOS, Go Purple Extreme
Solution, ExtremeXOS ScreenPlay, ReachNXT, Ridgeline, Sentriant, ServiceWatch, Summit, SummitStack, Triumph,
Unified Access Architecture, Unified Access RF Manager, UniStack, XNV, the Extreme Networks logo, the Alpine
logo, the BlackDiamond logo, the Extreme Turbodrive logo, the Summit logos, and the Powered by ExtremeXOS
logo are trademarks or registered trademarks of Extreme Networks, Inc. or its subsidiaries in the United States
and/or other countries.
sFlow is the property of InMon Corporation.
Specifications are subject to change without notice.
All other registered trademarks, trademarks, and service marks are property of their respective owners.
© 2011 Extreme Networks, Inc. All Rights Reserved.
Ridgeline Installation and Upgrade Guide
2
Contents
Chapter 1: Installation Overview............................................................................................................... 5
Installation Overview ................................................................................................................................................5
The Ridgeline Server ........................................................................................................................................5
Upgrading the Ridgeline Server .................................................................................................................6
The Ridgeline Client ..........................................................................................................................................6
System Requirements ..............................................................................................................................................7
Windows Vista/XP/2003 Server/2008 Server/Windows 7 .................................................................................7
The Ridgeline Server ..........................................................................................................................7
The Ridgeline Client ...........................................................................................................................7
Sun Microsystems Solaris 10 ............................................................................................................................8
The Ridgeline Server ..........................................................................................................................8
The Ridgeline Client ...........................................................................................................................8
Red Hat Enterprise Linux 5 ...............................................................................................................................8
The Ridgeline Server ..........................................................................................................................8
The Ridgeline Client ...........................................................................................................................9
Browser Requirements for Launching the Ridgeline Client...............................................................................9
Upgrading Ridgeline to a Service Pack Release....................................................................................................10
Obtaining a License Key for the Ridgeline Server..................................................................................................10
Evaluation Licenses ........................................................................................................................................10
Permanent Licenses .......................................................................................................................................11
Chapter 2: Installing the Ridgeline 3.0 Server ....................................................................................... 13
Installing the Ridgeline Server................................................................................................................................13
User Permissions ............................................................................................................................................14
Local Name Resolution for the Server ............................................................................................................14
Required Patches for Solaris ..........................................................................................................................14
Setting the Run Level for Linux .......................................................................................................................14
Installation Overview .......................................................................................................................................14
Server Installation Steps .................................................................................................................................15
Adding or Upgrading a License Key .......................................................................................................................23
Adding a License for an Upgrade Product ......................................................................................................24
Starting and Stopping the Ridgeline Server ...........................................................................................................24
Starting the Server on Windows......................................................................................................................24
Starting the Server on Linux or Solaris ...........................................................................................................24
Stopping the Server on Windows ....................................................................................................................25
Stopping the Server on Linux or Solaris..........................................................................................................25
Configuring the Ridgeline Server for NATed Client Connections ...........................................................................25
Installing Ridgeline on a Multi-Homed Server ........................................................................................................26
Setting the EPICENTER_SERVER_ADDRESS Environment Variable ..........................................................26
Configuring a Multi-Homed Server with Separate Management and Client Access Networks .......................27
Configuring the Multi-Homed Server with NAT ........................................................................................28
Configuring the Multi-Homed Server for Client Access from Both Networks ..................................................29
Installing a Difference Viewer .................................................................................................................................29
For Windows .....................................................................................................................................29
For Linux or Solaris...........................................................................................................................29
Enabling SSH for Secure Communications............................................................................................................29
The Ridgeline SSH Enabling Key ...................................................................................................................30
Ridgeline Installation and Upgrade Guide
3
Contents
Uninstalling the Ridgeline Server Software ............................................................................................................31
Uninstalling the Server on Windows................................................................................................................31
Uninstalling the Server on Linux or Solaris .....................................................................................................32
Chapter 3: Launching the Ridgeline 3.0 Client ...................................................................................... 35
About the Client Initialization Process ....................................................................................................................35
Launching the Client Application ............................................................................................................................35
Disabling Installation of Desktop Shortcuts ............................................................................................................38
Configuring the Firefox Browser for the Java Plug-In.............................................................................................39
Chapter 4: Upgrading the Ridgeline Software ....................................................................................... 41
Ridgeline Software Upgrade Overview...................................................................................................................41
Installing a Service Pack Release ..........................................................................................................................42
Installing a Service Pack on Windows Systems..............................................................................................43
Uninstalling the Service Pack on Windows Systems ......................................................................................44
Installing a Service Pack on Solaris or Linux Systems....................................................................................44
Uninstalling the Service Pack on Solaris or Linux Systems ............................................................................45
Upgrading from EPICenter or Ridgeline Service Advisor to Ridgeline ...................................................................46
Migrating the Database ..........................................................................................................................................54
When Ridgeline and a Previous Version are Installed on the Same System..................................................55
Exporting then Importing Data................................................................................................................................56
Exporting Database Information......................................................................................................................56
Importing Database Information ......................................................................................................................59
Ridgeline Installation and Upgrade Guide
4
1
Installation Overview
CHAPTER
This chapter provides an overview of the installation or upgrade of Ridgeline, and includes the
following topics:
●
Installation Overview on page 5
●
The Ridgeline Server on page 5
●
The Ridgeline Client on page 6
●
System Requirements on page 7
●
Browser Requirements for Launching the Ridgeline Client on page 9
●
Obtaining a License Key for the Ridgeline Server on page 10
Installation Overview
Ridgeline is a powerful, yet easy to use, client-server application for the centralized management of a
network of Extreme Networks switches and selected third-party devices. Ridgeline offers a
comprehensive set of network management tools that are easy to use from a client workstation with a
web browser and the appropriate Java plug-in. The Ridgeline software can be installed on systems
running Windows Vista, XP, Windows 2003 server, Windows 2008 server, or Windows 7 (Ridgeline 32bit version only) on SPARC workstations running Solaris 10, or on systems running Red Hat Enterprise
Linux version 5.
There are several options for installing the Ridgeline 3.0 software, depending on whether you already
have versions of Ridgeline installed, or whether this is a new Ridgeline installation.
The Ridgeline Server
The Ridgeline server requires a license key, installed into the server, to enable clients to connect to the
server. You can perform the installation successfully without a Ridgeline license, but you will need to
add a license key by running the License Manager, in order to use the Ridgeline product. License key
installation is separate from the Ridgeline server installation.
You can run the License Manager at any time to add or upgrade licenses.
The installation process is very similar under Windows, Solaris, or Linux.
●
See “Installing the Ridgeline Server” on page 13 for detailed instructions.
Ridgeline Installation and Upgrade Guide
5
Chapter 1: Installation Overview
●
See “Adding or Upgrading a License Key” on page 23 for instructions on running the License
Manager.
There are several additional (optional) components you may want to install along with your Ridgeline
server: a difference viewer you can use to compare configuration files within the Configuration
Manager, and the SSH enabling key, which enables Ridgeline to use SSH2 instead of Telnet to
communicate to the devices Ridgeline manages (assuming the devices are enabled to use SSH), and to
securely upload and download configuration files.
●
See “Installing a Difference Viewer” on page 29 for instructions on obtaining and installing a
difference viewer.
●
See “Enabling SSH for Secure Communications” on page 29 for information on enabling Ridgeline to
use SSH.
Upgrading the Ridgeline Server
From time to time Extreme Networks may choose to release updates to Ridgeline as a Service Pack
release. On systems with a previously installed base release of the Ridgeline server, you can upgrade to
a service pack release by installing a Ridgeline service pack patch. See “Upgrading Ridgeline to a
Service Pack Release” on page 10 for details.
NOTE
If you have been running a beta version of the Ridgeline 3.0 software, you must uninstall the beta version
and do a new install of the final version. You cannot upgrade a beta version of the Ridgeline 3.0 software to the
general availability (GA) release of the software.
The Ridgeline Client
The Ridgeline client is an application that is launched from a Microsoft Internet Explorer or Mozilla
Firefox browser. A browser is also required to display Ridgeline reports and to view the Ridgeline
online help.
The Ridgeline client can run on a different type of system from the server; for example, you can run the
client on a Windows system connected to a Ridgeline server installed on a Linux system.
No software installation is required for a client to connect to the Ridgeline server; however, the
Java 1.6.0_10 plug-in is required, and you will be prompted to install it if it is not already present.
There is no separate installation package for the Ridgeline client. When you connect to the Ridgeline
server with a browser and launch the Ridgeline client, all required files are downloaded and installed
on your system automatically.
No license is needed to run the Ridgeline client; however, the Ridgeline server must have a valid license
installed before any client connections are allowed.
Ridgeline Installation and Upgrade Guide
6
System Requirements
System Requirements
The following sections specify the system requirements for installing and running Ridgeline 3.0.
Please check the most current version of the Ridgeline Release Notes for any additional or changed
requirements for the Ridgeline release you are installing.
Windows Vista/XP/2003 Server/2008 Server/Windows 7
The Ridgeline Server. The system requirements for the Ridgeline server on Microsoft Windows are as
follows:
●
Microsoft Windows Vista, Windows XP Professional with SP1 or later, Windows 2003 server,
Windows 2008 server, or Windows 7 (Ridgeline 32-bit version only) running on an Intel Pentiumcompatible CPU.
Both 32-bit and 64-bit versions of the Windows operating system are supported.
●
2 GB RAM minimum, 4 GB recommended.
Up to 4 GB may be needed to manage very large numbers of devices (1000 or more).
●
2 GB disk space available, NTFS filesystem recommended.
●
2 GB of swap space minimum for the 32-bit version of Ridgeline; for the 64-bit version, we
recommend a minimum of 4 GB of swap space.
●
1 GHz or greater Pentium-compatible processor (2 GHz or greater recommended).
The Ridgeline server software requires the 1.6.0_10 Java runtime package, which is included in the
server installation. No separate installation is needed.
NOTE
Additional disk space may be needed to hold alarm logs and other runtime data. The amount of space
depends on the number of devices and the number of traps and syslog messages generated by the managed
devices.
The Ridgeline Client. The system requirements for the Ridgeline client on Microsoft Windows are as
follows:
●
Windows Vista, Windows XP Professional with SP1 or later, Windows 2003 server, Windows 2008
server, Windows 7 (Ridgeline 32-bit version only) running on an Intel Pentium-compatible CPU.
●
A monitor that supports at least 1024 x 768 resolution, and 16-bit color. Your system display settings
must be set for at least 65536 colors.
●
512 MB RAM minimum (up to 1 GB recommended).
●
256 MB of disk space, NTFS filesystem recommended.
●
Swap space equal to double the amount of memory. For example, if you have 512 MB of RAM, you
should have 1 GB of swap space.
●
A browser (Mozilla Firefox or Microsoft Internet Explorer) is required to launch the Ridgeline client,
display reports, and view the Ridgeline online help.
Ridgeline Installation and Upgrade Guide
7
Chapter 1: Installation Overview
Sun Microsystems Solaris 10
The Ridgeline Server. The Ridgeline server software, version 3.0, is supported on the Sun Solaris
operating environment on SPARC workstations. The system requirements for the server and client are
as follows:
●
2 GB RAM minimum, 4 GB recommended.
Up to 4 GB may be needed for very large numbers of devices (1000 or more).
●
400 Mhz or better processor
●
2 GB disk space available.
●
2 GB of swap space minimum for the 32-bit version of Ridgeline; for the 64-bit version, we
recommend a minimum of 4 GB of swap space.
The Ridgeline server software requires the 1.6.0_10 Java runtime package, which is included in the
server installation. No separate installation is needed.
NOTE
Additional disk space may be needed to hold alarm logs and other runtime data. The amount of space
depends on the number of devices and the number of traps and syslog messages generated by the managed
devices.
The Ridgeline Client. The system requirements for the Ridgeline client on Solaris are as follows:
●
A monitor that supports at least 1024 x 768 resolution, and 16-bit color. Your system display settings
must be set for at least 65536 colors.
●
512 MB RAM minimum. (Up to 1 GB recommended.)
●
256 MB disk space available.
●
Swap space equal to double the amount of memory. For example, if you have 512 MB of RAM, you
should have 1 GB of swap space.
●
A browser (Mozilla Firefox) is required to launch the Ridgeline client, display reports, and view the
Ridgeline online help.
Red Hat Enterprise Linux 5
The Ridgeline Server. The Ridgeline server software, version 3.0, is supported on Red Hat Enterprise
Linux version 5. Both the 32-bit and 64-bit versions are supported, only on X-86 based platforms. The
system requirements are as follows:
●
2 GB RAM minimum, 4 GB recommended.
Up to 4 GB may be needed for very large numbers of devices (1000 or more).
●
1 GHz or greater Pentium-compatible processor (2 GHz recommended).
●
2 GB disk space available.
●
2 GB of swap space minimum for the 32-bit version of Ridgeline; for the 64-bit version, we
recommend a minimum of 4 GB of swap space.
●
A GUI/Desktop environment must be installed on the server machine.
Ridgeline Installation and Upgrade Guide
8
System Requirements
The Ridgeline server software requires the 1.6.0_10 Java runtime package, which is included in the
server installation. No separate installation is needed.
NOTE
Additional disk space may be needed to hold alarm logs and other runtime data. The amount of space
depends on the number of devices and the number of traps and syslog messages generated by the managed
devices.
The Ridgeline Client. The system requirements for the Ridgeline client on Red Hat Enterprise Linux
are as follows:
●
A monitor that supports at least 1024 x 768 resolution, and 16-bit color. Your system display settings
must be set for at least 65536 colors.
●
512 MB RAM minimum (1 GB recommended).
●
256 MB disk space available.
●
Swap space equal to double the amount of memory. For example, if you have 512 MB of RAM, you
should have 1 GB of swap space.
●
A browser (Mozilla Firefox 1.5 or higher) is required to display reports and view the Ridgeline
online help.
Browser Requirements for Launching the Ridgeline Client
The Ridgeline client is launched from a browser window. Ridgeline uses signed applets. You will be
prompted to accept the security certificate from Extreme Networks the first time you try to launch the
applet.
NOTE
The Java plug-in version 1.6.0_10 is required for the Ridgeline client. If this version of the plug-in is not
already installed, you will be prompted to download it the first time you try to launch the Ridgeline client.
Table 1 lists the browsers that are supported by the Ridgeline 3.0 release. A browser is also required to
display Ridgeline reports and the Ridgeline online help.
Table 1: Ridgeline 3.0 supported browsers
Operating System
Minimum Browser Configuration
Windows
Internet Explorer™ 6.0 or higher, Mozilla Firefox 1.5 or
2.0
Sun Solaris 10
Mozilla Firefox 1.5, 2.0, or 3.0
Red Hat Enterprise Linux version 5
Mozilla Firefox 3.0
NOTE
For the Mozilla Firefox browser, you must install the Java plug-in, and then link it to the Firefox browser.
See “Configuring the Firefox Browser for the Java Plug-In” on page 39
Ridgeline Installation and Upgrade Guide
9
Chapter 1: Installation Overview
Upgrading Ridgeline to a Service Pack Release
From time to time Extreme Networks may elect to release updates to the current Ridgeline release as
Service Packs. Service Packs are minor releases that provide fixes for known problems from previous
releases.
A Service Pack is released as a patch release that integrates the Service Pack fixes into an existing base
Ridgeline software installation. If you already have the Ridgeline software installed on your system
when a Service Pack is released, you can add the Service Pack fixes by installing the patch release. See
“Installing a Service Pack Release” on page 42 for installation instructions.
If the Service Pack you want to install is for a different base release than the one currently installed on
your system, first install the base release and then install Service Pack patch.
After you upgrade the Ridgeline 3.0 server to a Service Pack release, if any files are necessary to run the
Ridgeline client on your system, they are downloaded and installed automatically when you launch the
client.
Obtaining a License Key for the Ridgeline Server
To log in to the Ridgeline server from a Ridgeline client, Ridgeline must be configured with a valid
license. You can install the software without a license key, but you cannot connect to it from a Ridgeline
client. (If you install the product without a license key, you can add the key later using the License
Manager, as described in “Adding or Upgrading a License Key” on page 23.)
●
An evaluation license allows you to run the product on a temporary basis. If you want to continue
using the product beyond the evaluation period, you must obtain a permanent license.
●
A permanent license has no time limit. Permanent licenses are sold based on the number of devices
you want Ridgeline to manage.
Both permanent and evaluation license keys are 14-character keys that start with “RS” and are followed
by 12 additional upper- and lower-case alphabetic characters, numbers, and special characters such as
“+”. The license key is NOT the same as the activation key, which starts with “RC,” and is found on the
license agreement shipped with your purchased product. You use the activation key to obtain a
permanent license key as described below.
Ridgeline licenses allow you to use all of the standard features of the product, including discovery and
visualization of the devices in your network, scripting, and point-and-click provisioning for VLANs and
EAPS domains. Additional feature licenses are available from Extreme Networks that unlock additional
Ridgeline features, including: identity management, VM support, and service provider features, such as
E-LINE, E-LAN, VMAN (PB), PBB and VPLS discovery, monitoring, and provisioning for an unlimited
number of devices. For more information about the various types of software licenses available for
Ridgeline, refer to the Ridgeline Release Notes.
Evaluation Licenses
You do not need an activation key to obtain an evaluation license key. To obtain an evaluation license
key, go to www.extremenetworks.com/go/ridgelinelicense.
Select the option to obtain an evaluation license key. You are asked to enter your name, company
information, and similar information, and an email address to which your license key should be sent.
Ridgeline Installation and Upgrade Guide
10
Obtaining a License Key for the Ridgeline Server
Your evaluation license key will be sent to you by return email.
If your evaluation license expires before you have finished evaluating the product, you can request
another evaluation key—up to three evaluation keys for a total of 90 days of evaluation use.
Permanent Licenses
To obtain a permanent license key, you must provide your activation key, found on the license
agreement shipped with your purchased product.
To request a permanent key, go to www.extremenetworks.com/go/ridgelinelicense and select the option to
obtain a permanent license key.
Fill in the requested information, and enter your activation key. The activation key is a 14-character key
that starts with “RC” found on the license agreement you received when you purchased the product.
Your permanent license key will be sent to you by return email.
Ridgeline Installation and Upgrade Guide
11
Chapter 1: Installation Overview
Ridgeline Installation and Upgrade Guide
12
2
Installing the Ridgeline 3.0
Server
CHAPTER
This chapter describes how to install or upgrade the Ridgeline 3.0 server software in Windows, Solaris,
and Linux, and includes the following sections:
●
Installing the Ridgeline Server on page 13
●
Installation Overview on page 14
●
Server Installation Steps on page 15
●
Adding or Upgrading a License Key on page 23
●
Starting and Stopping the Ridgeline Server on page 24
●
Configuring the Ridgeline Server for NATed Client Connections on page 25
●
Installing Ridgeline on a Multi-Homed Server on page 26
●
Installing a Difference Viewer on page 29
●
Enabling SSH for Secure Communications on page 29
●
Uninstalling the Ridgeline Server Software on page 31
Installing the Ridgeline Server
The Ridgeline server can be installed in the following environments:
●
Microsoft Windows Vista, Windows XP Professional with SP1 or later, Windows 2003 server,
Windows 2008 server, or Windows 7 (Ridgeline 32-bit version only) running on an Intel Pentiumcompatible CPU
or
●
Solaris 10 running on a SPARC system
or
●
Red Hat Enterprise Linux Version 5
See “System Requirements” on page 7 for memory, CPU, disk and other requirements.
Ridgeline Installation and Upgrade Guide
13
Chapter 2: Installing the Ridgeline 3.0 Server
CAUTION
If you are running an evaluation version of the Ridgeline 3.0 software, and you want to retain the
information in your Ridgeline database, DO NOT REINSTALL the Ridgeline software to upgrade to a permanent
license.
Reinstalling Ridgeline will reinitialize the database, which erases all information in the database. To
update an evaluation copy of the Ridgeline server to a licensed copy without reinitializing the database,
follow the update procedure described in “Adding or Upgrading a License Key” on page 23.
User Permissions
To install the Ridgeline software components as services under Microsoft Windows, or as daemons
under Solaris/Linux, you must have administrator privileges on that system. In addition, if you want to
be able to import user and host information from a Windows Domain Controller, the Ridgeline server
must run with permissions that allow it to get user information from the Domain Controller.
Local Name Resolution for the Server
The system on which Ridgeline is installed must be able to resolve both its own local name and its
domain name. For example if you install Ridgeline on a system named system1, then it must be able to
resolve both system1 and its domain name, such as system1.company.com. You can test for this by
attempting to ping the system using both the local name and the domain name. If there are problems
resolving either of these names, make sure the hosts file contains the correct information.
Required Patches for Solaris
The Solaris operating environment may require patches for the Ridgeline software to function properly.
Make certain these patches have been installed before you install the Ridgeline server software.
For the most current information on required patches, see the Ridgeline Release Notes that accompanies
your Ridgeline software, or go to the Extreme Networks web site at www.extremenetworks.com.
Setting the Run Level for Linux
On Linux systems, in order for the Ridgeline database and server components to start automatically at
system boot, the run level on the server must be set to 5.
Installation Overview
The installation process is very similar under all three operating environments: the few differences are
noted as appropriate during the description of the process.
To install the Ridgeline server you will need the following information:
●
The port that the Ridgeline server will use to communicate with the database (default is 10553)
●
The HTTP port for communication with Ridgeline clients (default is 8080)
●
See “Obtaining a License Key for the Ridgeline Server” on page 10 for more information.
Ridgeline Installation and Upgrade Guide
14
Installing the Ridgeline Server
You can use any port numbers (numbers between 1024 and 65535 are recommended), except port
numbers already in use by another process, or ports 514, 3873, 8083, 10550, 10554, 10555, and 10556,
which are used by Ridgeline for internal functions. During the installation process, if you specify a port
that Ridgeline uses internally, you are prompted to select a different port number.
If you intend to keep multiple versions of the Ridgeline server on the same computer, to avoid a port
conflict each Ridgeline server must be configured to use a unique port number to communicate with the
database, or all but one of the Ridgeline servers must be disabled.
NOTE
Extreme Networks recommends that you choose port numbers that are not currently registered at Internet
Assigned Numbers Authority (IANA). To check if a port number is registered, go to http://www.iana.org/
numbers.html.
Within the installation procedure you can choose to do the following:
●
Enable automatic information updates, allowing Ridgeline to connect to the Extreme web site when
you start the Ridgeline client, and once every 24 hours thereafter to obtain a list of the current
ExtremeWare and ExtremeXOS releases as well as the latest Ridgeline patches.
●
Start the Ridgeline database and server components manually at system startup (in Windows).
●
Restart your system to start the Ridgeline database and server.
After your installation is complete, you must run the License Manager to install your Ridgeline license
key(s). Clients will not be able to connect to the Ridgeline server until that is done.
NOTE
Prior to installing Ridgeline, make sure the system where you are installing the software is DNS-resolvable
and accessible both by IP address and by hostname from all machines where the Ridgeline client will be launched.
If it is not, add an entry for the system in the local DNS server or the hosts file on the client machines.
Server Installation Steps
To install the Ridgeline server do the following:
1 Download the Ridgeline 3.0 server software for your chosen platform (Windows, Linux or Solaris)
from the Extreme Networks software download page, and extract the contents of the zip or tar file
into a temporary directory.
or
Insert the Ridgeline server installation CD into your CD drive.
2 If you are installing from CD, you will find three installation executables, one for each platform
(Windows, Linux, and Solaris). If you downloaded from the web site, only the executable for your
platform will be included.
3 Start the installation wizard as follows:
For Windows, run Ridgeline_3-0_win32.exe or Ridgeline_3-0_win64.exe, depending on your
version of the operating system.
Ridgeline Installation and Upgrade Guide
15
Chapter 2: Installing the Ridgeline 3.0 Server
For Linux:
a If you downloaded the installation from the web site, change the permissions on the Linux bin
file as follows:
chmod 755 Ridgeline_3-0_linux32.bin
or
chmod 755 Ridgeline_3-0_linux64.bin
(Skip this if you are installing from the CD).
b Run the executable Ridgeline_3-0_linux32.bin or Ridgeline_3-0_linux64.bin, depending
on your version of the operating system.
For Solaris:
a If you downloaded the installation from the web site, change the permissions on the Solaris bin
file:
chmod 755 Ridgeline_3-0_solarisSPARC.bin
(Skip this if you are installing from the CD).
b Run the executable Ridgeline_3-0_solarisSPARC.bin
InstallShield will extract the Ridgeline Installation Wizard. This may take a few minutes.
4 The Ridgeline Installer Welcome screen appears.
Click Next to continue.
Figure 1: InstallShield Wizard Welcome Screen
5 If a previous version of Ridgeline is detected, you are notified that the existing Ridgeline services
must be stopped.
Ridgeline Installation and Upgrade Guide
16
Installing the Ridgeline Server
On Windows systems, if the Ridgeline components were installed as services, select one of the
following options:
●
Select Yes to have the installer shut down the Ridgeline services (if they are running), or
●
Select No to exit the installation process.
Click Next to continue.
On Solaris/Linux systems, you must exit the installation process and stop the Ridgeline database
and server manually. See “Stopping the Server on Linux or Solaris” on page 25.
6 Next, the Ridgeline Software license agreement is presented; after you read the agreement, click the
Accept button to accept the agreement, and click Next to proceed.
Figure 2: License Agreement
Ridgeline Installation and Upgrade Guide
17
Chapter 2: Installing the Ridgeline 3.0 Server
7 Verify or enter a location for the Ridgeline installation. By default this is the directory
C:\Program Files\Extreme Networks\Ridgeline Service Advisor 3.0 for Windows, or
/opt/ExtremeNetworks/RidgelineServiceAdvisor3.0 for Linux or Solaris.
You can type a different directory path, or browse to find the directory in which you want to install.
Click Next to continue.
Figure 3: Installation Destination
8 You are next asked to specify (verify or change) the ports to be used for communication between the
Ridgeline server and the database (default is 10553) and between the server and Ridgeline clients via
HTTP (default is 8080). You can use any port numbers (numbers between 1024 and 65535 are
recommended), except port numbers already in use by another process, or ports 514, 3873, 8083,
10550, 10554, 10555, and 10556, which are used by Ridgeline for internal functions.
NOTE
If you intend to keep multiple versions of the Ridgeline server on the same computer, to avoid a port
conflict, each Ridgeline server must be configured to use a unique port number to communicate with the
database, or all but one of the Ridgeline servers must be disabled. If multiple versions of the Ridgeline server
are detected on the computer, the older versions are disabled automatically during installation.
Ridgeline Installation and Upgrade Guide
18
Installing the Ridgeline Server
Figure 4: Port Information
9 A dialog box appears asking about several options you can enable:
●
Enable Automatic Updates. This feature configures Ridgeline to automatically retrieve the most
current information about device and slot software and bootrom images from the Extreme
Networks web site each time you connect the client to the Ridgeline server.
If you enable this feature, Ridgeline will connect to the Extreme Networks web site at server
start-up and once every 24 hours to obtain a list of the current software releases, and a list of any
available Ridgeline patches. No information is sent to Extreme Networks except an indication
that you are running with an evaluation license, if that is the case.
NOTE
If you disable this feature, you will not able to obtain software update information through the Software
Update feature in the Firmware Manager. You can enable this feature at a later time through Ridgeline
Administration, Server Properties tab, under the External Connections area. Click the checkbox to allow
connection to the Extreme Networks web site.
●
Start Ridgeline 3.0 services automatically. This feature starts Ridgeline services automatically
when Windows starts. On Solaris/Linux systems, Ridgeline services start automatically upon
startup and this setting is not user configurable.
Click Next to continue.
Ridgeline Installation and Upgrade Guide
19
Chapter 2: Installing the Ridgeline 3.0 Server
Figure 5: Settings
10 The next panel asks you to verify the components and installation directory. Click Install to proceed
with the installation, and follow the onscreen instructions.
Figure 6: Installation Summary
Ridgeline Installation and Upgrade Guide
20
Installing the Ridgeline Server
The installation process begins.
Figure 7: Installation Progress
11 If the installation was successful, the final dialog box displays a summary message. If there were any
problems, they will be noted here. Click Finish to continue.
Figure 8: Post Installation Summary
Ridgeline Installation and Upgrade Guide
21
Chapter 2: Installing the Ridgeline 3.0 Server
12 Click OK to accept the warning messages that displays. The VM tracking feature requires an FTP
server running prior to starting Ridgeline. Refer to the “Managing Virtual Machines” chapter in the
Ridgeline Reference Guide for more information.
Figure 9: VM Tracking Requires an FTP Server Running Warning
13 Ridgeline prompts you to restart your system. You must either restart your system or start the
Ridgeline services manually before a client can connect to the Ridgeline server.
Click Finish to complete the installation process.
Figure 10: Reboot
14 Launch the License Manager and install your Ridgeline licenses. You can do this at any time after
you have installed the Ridgeline server. The server can be running while you do this, but this is not
required.
See “Adding or Upgrading a License Key” on page 23 for more detailed instructions.
Ridgeline Installation and Upgrade Guide
22
Adding or Upgrading a License Key
Adding or Upgrading a License Key
To install an evaluation or permanent license for Ridgeline, or to upgrade an evaluation license to a
permanent license you must run the License Manager. Until you install a license, no client will be able
to connect to the Ridgeline server.
NOTE
You must install a Base-50 license key even if you have purchased additional 50-node or 250-node license
keys. The Base-50 license gives you access to the Ridgeline server; the optional upgrade licenses enable you to
manage additional devices.
To install or upgrade a license, do the following:
1 Run the License Manager:
●
In Windows, from the Start menu, select Start > Programs > Extreme Networks > Ridgeline 3.0
> License Manager
●
In Linux or Solaris, go to the Ridgeline installation directory (by default
/opt/ExtremeNetworks/RidgelineServiceAdvisor3.0) and run instlic.bin
You must have write permission for the Ridgeline installation directory.
In Linux, the License Manager is also available in the Startup menu. Select Others > License
Manager
In Solaris, the License Manager is also available in Administrative Tools. Select Administrative
Tools > Extreme Networks > Ridgeline > License Manager
The License Manager window opens:
Figure 11: License Key Manager
Ridgeline Installation and Upgrade Guide
23
Chapter 2: Installing the Ridgeline 3.0 Server
2 Enter the 14-character license key(s) in the appropriate fields, and click Install License.
A pop-up window tells you whether the installation was successful or not.
Adding a License for an Upgrade Product
When you purchase a product upgrade option such as a 50-node license or an Advanced Services
licenses, you receive a separate key to enable Ridgeline to manage additional devices or unlock
additional features. To add the license key for a Ridgeline upgrade, run the License Manager as
described above.
Starting and Stopping the Ridgeline Server
By default, the Ridgeline server components installed as services (in Windows) or daemons (in Linux or
Solaris) are started automatically when you start or restart your computer.
If you elected not to restart your computer at the end of the installation process, then you must start the
Ridgeline database and server manually.
In Windows, if you selected the option to start the Ridgeline server components manually, then you
must start them before running Ridgeline.
Starting the Server on Windows
To start or restart the Ridgeline services manually, do the following in the specified order:
1 Open the Services window (found under Administrative Tools in the Control Panel).
2 Highlight Ridgeline 3.0 Database Engine, right-click and select Start from the pop-up menu to start
the Ridgeline database.
3 Start the Ridgeline 3.0 Server and Ridgeline 3.0 FreeRADIUS Server in the same manner.
Starting the Server on Linux or Solaris
To start or restart the Ridgeline daemons manually, do the following:
●
Enter the following commands in the order shown:
/etc/init.d/RidgelineDB30 start
/etc/init.d/RidgelineServer30 start
/etc/init.d/RidgelineFreeRadius30 start
You must have administrative rights to access init.d files.
Ridgeline Installation and Upgrade Guide
24
Configuring the Ridgeline Server for NATed Client Connections
Stopping the Server on Windows
To stop the Ridgeline server:
1 Open the Services window (found in Administrative Tools in the Control Panel).
2 Highlight Ridgeline 3.0 Server, right-click and select Stop to stop the Ridgeline server. This should
be done while the database is still running.
3 Highlight the Ridgeline 3.0 Database Engine and Ridgeline 3.0 FreeRADIUS Server in the same
manner, right-click and select Stop.
Stopping the Server on Linux or Solaris
To stop the Ridgeline server, enter the following commands:
/etc/init.d/RidgelineServer30 stop
/etc/init.d/RidgelineDB30 stop
/etc/init.d/RidgelineFreeRadius30 stop
Configuring the Ridgeline Server for NATed Client
Connections
If clients will be connecting to the Ridgeline server through a connection that uses Network Address
Translation (NAT), configure the Ridgeline server as follows:
1 Stop the Ridgeline server if it is currently running. See the previous section for information about
how to do this.
2 Set the EPICENTER_SERVER_ADDRESS environment variable to the hostname of the Ridgeline
server. See “Setting the EPICENTER_SERVER_ADDRESS Environment Variable” on page 26 for
information on how to set this variable.
3 Open the runserver.sp file, which resides in <Ridgeline_install_dir>/jboss/bin, and add the
following entry:
remoting.bind_by_host=true
4 In Ridgeline, set the TCP port number that clients use to connect to the Ridgeline server to 56983. To
do this, go to Ridgeline Administration, click the Server Properties tab, select Other from the dropdown list, and enter 56983 in the Client Port field.
5 On the client machine, make sure the hostname of the Ridgeline server resolves to the correct outside
IP address of the server.
If the server’s IP address does not resolve correctly, add an entry for the server in the client’s hosts
file. In Windows, the hosts file is c:\windows\system32\drivers\etc\hosts (where c: is the
drive where Windows is installed). In Solaris and Linux, the hosts file is /etc/hosts.
6 Ensure that the ports used by Ridgeline are accessible through your firewall/NAT setup. Ridgeline
uses the following ports:
Ridgeline Installation and Upgrade Guide
25
Chapter 2: Installing the Ridgeline 3.0 Server
●
jboss ports 3873, 8080 (default), and 8083, which allow the Ridgeline server to talk to the client
●
HTTP port 8334, which allows switches to talk to the Ridgeline server in HTTPs mode
●
FreeRADIUS port 10559 (default)
●
TCP port 56983 for the client to connect to the server in NAT-enabled environments
7 Restart the Ridgeline server, as described in the previous section.
Installing Ridgeline on a Multi-Homed Server
A multi-homed server is one that has more than one network interface card (NIC) installed, and might
be using multiple IP addresses. If you are installing Ridgeline on a multi-homed server, you must
specify which of the server’s IP addresses the Ridgeline server uses. Ridgeline clients use this IP
address to connect to the Ridgeline server, and the Ridgeline server uses this IP address for
communication with its managed devices. To set the IP address for the Ridgeline server, you configure
the EPICENTER_SERVER_ADDRESS environment variable on the server.
For the Ridgeline client to successfully login to a multi-homed server. One of the following two requirements must be
met:
● You must launch the client through a hostname, instead of an IP address.
●
The EPICENTER_SERVER_ADDRESS environment variable must be set to one of the IP addresses of the
server, and you must use that IP address to launch the client.
Setting the EPICENTER_SERVER_ADDRESS Environment
Variable
When you configure the EPICENTER_SERVER_ADDRESS environment variable, the Ridgeline server is available
only on this interface on the multi-homed machine. To connect to the Ridgeline server from a Ridgeline client, use the
specified IP address. On the managed devices, the specified IP address is registered as an SNMP trap receiver.
NOTE
Before proceeding, stop the Ridgeline server if it is currently running. See the “Starting and Stopping the
Ridgeline Server” on page 24 for information about how to do this.
To set the EPICENTER_SERVER_ADDRESS environment variable, do the following:
In Windows:
1 From the Start menu, select Settings > Control Panel.
2 Double click on the System icon to bring up the System Properties window.
3 Click the Advanced tab and the Environment Variables button.
4 In the Environment Variables dialog box, under System variables, click New.
5 In the New System Variable dialog box, enter EPICENTER_SERVER_ADDRESS in the Variable name
field.
6 Enter the IP address to use for communication between the Ridgeline server and the managed
devices in the Variable value field, and click OK.
Ridgeline Installation and Upgrade Guide
26
Installing Ridgeline on a Multi-Homed Server
Figure 12: System Variable
7 Restart Windows to activate the new settings.
NOTE
You can also open a command window and use the SET command from the command prompt to set the
EPICENTER_SERVER_ADDRESS environment variable.
In Solaris or Linux:
1 Open the /etc/ridgeline30.profile file.
2 Locate the following line in the file:
EPICENTER_SERVER_ADDRESS=<ip_addr_to_bind_to>
3 Replace <ip_addr_to_bind_to> with the IP address to use for communication between the
Ridgeline server and the managed devices.
4 Open the /etc/profile file.
5 Locate the following line in the file:
EPICENTER_SERVER_ADDRESS=<ip_addr_to_bind_to>
6 Replace <ip_addr_to_bind_to> with the IP address to use for communication between the Ridgeline
server and the managed devices.
7 Start the Ridgeline server to activate the environment variable setting. To do this, enter the following
command:
/etc/init.d/RidgelineServer30 start
You must have administrative rights to access init.d files.
Configuring a Multi-Homed Server with Separate Management
and Client Access Networks
If the multi-homed Ridgeline server will have one interface connected to a management network (that
is, a network with connections to the managed devices), and another interface on a network used for
Ridgeline client access, configure the Ridgeline server as follows:
1 Set the EPICENTER_SERVER_ADDRESS environment variable to 0.0.0.0, so that the system binds on
all interfaces. See “Setting the EPICENTER_SERVER_ADDRESS Environment Variable” on page 26
for information on how to set this variable.
Ridgeline Installation and Upgrade Guide
27
Chapter 2: Installing the Ridgeline 3.0 Server
2 Stop the Ridgeline server if it is currently running. See “Starting and Stopping the Ridgeline Server”
on page 24 for information about how to do this.
3 Open the runserver.sp file, which resides in <Ridgeline_install_dir>/jboss/bin, and add the
following entry:
epicenter.connect.address=<host_name> or <IP_Address>
This entry specifies the address used by applications such as TFTP for connecting to the Ridgeline
server. If you specify <host_name>, make sure the hostname resolves to the correct IP address.
4 Add the following entry to the runserver.sp file:
epicenter.snmp.connect.ipaddress=<IP_Address>
This entry specifies the address used for sending SNMP traps. Note that you must specify an IP
address, not a hostname.
5 Open the jboss-service.xml file, which resides in <Ridgeline_install_dir>/jboss/server/
epicenter/deploy/http-invoker.sar/META-INF, and locate the following line:
<attribute name="InvokerURLSuffix">:${epicenter.web.port}/invoker/
JMXInvokerServlet</attribute>
6 Change the value of the UseHostName attribute directly below this line to true.
7 On the client machine, make sure the hostname of the Ridgeline server resolves to the correct IP
address of the server.
If the server’s IP address does not resolve correctly, add an entry for the server in the client’s hosts
file. In Windows, the hosts file is c:\windows\system32\drivers\etc\hosts (where c: is the
drive where Windows is installed). In Solaris and Linux, the hosts file is /etc/hosts.
8 Start the Ridgeline server, as described in “Starting and Stopping the Ridgeline Server” on page 24.
NOTE
Configuring the multi-homed server in this way is not supported if the server has more than one interface
to the management network.
Configuring the Multi-Homed Server with NAT
If the multi-homed Ridgeline server with separate management and client access network interfaces is
also used in a NAT configuration, in addition to the procedure above, do the following:
1 In the runserver.sp file, which resides in <Ridgeline_install_dir>/jboss/bin, add the
following entry:
remoting.bind_by_host=true
2 In Ridgeline, set the TCP port number that clients use to connect to the Ridgeline server to 56983. To
do this, go to Ridgeline Administration, click the Server Properties tab, select Other from the dropdown list, and enter 56983 in the Client Port field.
3 On the client machine, make sure the hostname of the Ridgeline server resolves to the correct outside
IP address of the server.
If the server’s IP address does not resolve correctly, add an entry for the server in the client’s hosts
file. In Windows, the hosts file is c:\windows\system32\drivers\etc\hosts (where c: is the
drive where Windows is installed). In Solaris and Linux, the hosts file is /etc/hosts.
4 Ensure that the ports used by Ridgeline are accessible through your firewall/NAT setup. Ridgeline
uses the following ports:
Ridgeline Installation and Upgrade Guide
28
Installing a Difference Viewer
●
jboss ports 3873, 8080 (default), and 8083, which allow the Ridgeline server to talk to the client
●
HTTP port 8334, which allows switches to talk to the Ridgeline server in HTTPs mode
●
FreeRADIUS port 10559 (default)
●
TCP port 56983 for the client to connect to the server in NAT-enabled environments
Configuring the Multi-Homed Server for Client Access from Both
Networks
If Ridgeline clients will be connecting from both networks where the multi-homed server resides, do the
following in addition to the procedure in “Setting the EPICENTER_SERVER_ADDRESS Environment
Variable” on page 26.
1 Stop the Ridgeline server if it is currently running. See “Starting and Stopping the Ridgeline Server”
on page 24 for information about how to do this.
2 On the Ridgeline server, open the runserver.sp file, which resides in <Ridgeline_install_dir>/
jboss/bin, and add the following entry:
remoting.bind_by_host=true
3 On client machines in both networks, make sure the hostname of the Ridgeline server resolves to the
correct IP address of the server.
4 Start the Ridgeline server, as described in “Starting and Stopping the Ridgeline Server” on page 24.
Installing a Difference Viewer
Ridgeline provides a Diff feature that allows you to compare configuration files using a Difference
Viewer. This feature requires that a Difference Viewer be installed on the client system. A Difference
Viewer can automatically compare and highlight the differences between two files. The Diff feature does
not work with a standard text editor.
You can use any Diff viewer that is installed on the system where your Ridgeline client is running.
Select Difference Viewer from the Tools menu to tell Ridgeline the location of the viewer. If you do not
have a Diff viewer already installed, you must install one on your client system in order to use the Diff
feature.
For Windows. You can obtain a Diff viewer from the following sources:
●
WinMerge.exe; downloadable from http://winmerge.sourceforge.net
●
Araxis Merge; 30 day free trial evaluation downloadable from http://www.araxis.com
For Linux or Solaris. sdiff (in /usr/bin/sdiff) is assumed as the default Diff viewer.
Enabling SSH for Secure Communications
By default, the Ridgeline server communicates to the devices it manages using unencrypted access, and
unencrypted file transfers. In addition, the communications between the Ridgeline server and its clients
are also unencrypted by default.
Ridgeline Installation and Upgrade Guide
29
Chapter 2: Installing the Ridgeline 3.0 Server
●
By installing an SSH enabling key, you can use SSH2 instead of Telnet to communicate to the devices
Ridgeline manages, and securely upload and download configuration files to and from your Extreme
devices.
●
By installing an SSH2 server co-resident with the Ridgeline server, and by installing SSH2 clients on
the systems where your Ridgeline clients reside, you can use SSH2 to encrypt the communications
between the Ridgeline server and Ridgeline clients. See the Appendix in the Ridgeline Service Advisor
Concepts and Solutions Guide for details on setting up secure client-server communication.
There are three requirements for enabling Ridgeline to use SSH2 to communicate with the devices it
manages:
●
The Ridgeline SSH enabling key must be installed. Due to export restrictions, you must obtain this
module from Extreme Networks. It is not included with the Ridgeline software distribution.
●
Your switches must be running versions of ExtremeWare or ExtremeXOS that support SSH, and SSH
must be enabled on those devices. Due to export restrictions, a special license is required.
To request versions of ExtremeWare or ExtremeXOS that support SSH, contact Extreme Networks
Technical Support.
●
SSH must be enabled in Ridgeline for the devices to which you want to communicate using SSH.
NOTE
If the SSH enabling key is not installed in the Ridgeline directory, you will not be able to configure SSH
in Ridgeline. The relevant fields will be grayed out.
The Ridgeline SSH Enabling Key
Ridgeline’s SSH2 capability can be enabled by installing the Ridgeline SSH enabling key. This module
must be downloaded from Extreme Networks, as it is subject to export restrictions. It is not provided
with the Ridgeline software distribution.
The SSH2 capability uses strong encryption, so prior to downloading the enabler module you must
provide certain information to Extreme Networks in order to confirm compliance with the export
regulations administered by the Bureau of Industry and Security under the U.S. Department of
Commerce.
To obtain the SSH enabling key, fill out the End-User Certification Form at:
http://www.extremenetworks.com/apps/Ridgeline/ssh.asp
●
After you submit the form, Extreme Networks performs a review and responds to you, generally
within two business days.
●
If the information you provided conforms to the applicable export regulations, you receive an email
with the information needed to obtain the SSH enabling key file. Unzip and place the SSH enabling
key file in your existing Ridgeline installation directory to unlock the Ridgeline SSH2 features.
NOTE
The file “ssh-enabler” must be installed without a file extension.
●
If the information you provided does not conform to the export regulations, you will receive an
email indicating a denial of acceptance.
Ridgeline Installation and Upgrade Guide
30
Uninstalling the Ridgeline Server Software
The SSH enabling key must be placed in the top-level Ridgeline installation directory (by default
\Program Files\Extreme Networks\Ridgeline Service Advisor 3.0 in Windows, or /opt/
ExtremeNetworks/RidgelineServiceAdvisor3.0 under Solaris or Linux).
Uninstalling the Ridgeline Server Software
The following sections describe how to uninstall the Ridgeline server software.
For information on uninstalling a Service Pack patch in order to revert to your previously installed
version of Ridgeline software, see “Uninstalling the Service Pack on Windows Systems” on page 44 or
“Uninstalling the Service Pack on Solaris or Linux Systems” on page 45.
Uninstalling the Server on Windows
An Uninstall utility is provided in the Windows Start menu. This utility removes all the currentlyinstalled components of the Ridgeline server. It also removes some of the supporting files, and asks
about removing certain files that it detects have been modified since installation.
To uninstall the server components, do the following:
1 Shut down the Ridgeline server components if they are still running (see “Stopping the Server on
Windows” on page 25 for instructions).
2 Exit all clients.
3 From the Start Menu, select Programs > Extreme Networks > Ridgeline 3.0 > Uninstall to start the
uninstall wizard.
Ridgeline Installation and Upgrade Guide
31
Chapter 2: Installing the Ridgeline 3.0 Server
Figure 13: Uninstall Wizard
4 Follow the onscreen instructions to uninstall the software.
If you plan to re-install Ridgeline, you should restart your system before you attempt to re-install.
Uninstalling the Server on Linux or Solaris
To remove the Ridgeline server software, follow these steps:
1 Stop the Ridgeline server components if they are running. See “Stopping the Server on Linux or
Solaris” on page 25.
2 Exit all clients.
3 Start the uninstall Wizard:
a Go to the following Ridgeline directory:
cd <install_dir>/_uninst
<install_dir> is the directory (path) where you installed the Ridgeline components. If you
installed in the default directory, the path is /opt/ExtremeNetworks/
RidgelineServiceAdvisor3.0.
b Execute uninstaller.bin.
In Linux, the uninstall Wizard is also available in the Startup menu. Select Others > Uninstall
Ridgeline.
In Solaris, the Ridgeline uninstall Wizard is also available under Administrative Tools. Select
Administrative Tools > Extreme Networks > Ridgeline > Uninstall Ridgeline
Ridgeline Installation and Upgrade Guide
32
Uninstalling the Ridgeline Server Software
4 Follow the onscreen instructions to uninstall the software.
If you plan to re-install the Ridgeline server, you should restart your system before you attempt to
re-install.
The Ridgeline software is now completely uninstalled.
Ridgeline Installation and Upgrade Guide
33
Chapter 2: Installing the Ridgeline 3.0 Server
Ridgeline Installation and Upgrade Guide
34
3
Launching the Ridgeline 3.0
Client
CHAPTER
This chapter describes how to connect to the Ridgeline 3.0 server and launch the Ridgeline 3.0 client
software, and includes the following sections:
●
About the Client Initialization Process on page 35
●
Launching the Client Application on page 35
●
Disabling Installation of Desktop Shortcuts on page 38
●
Configuring the Firefox Browser for the Java Plug-In on page 39
About the Client Initialization Process
The Ridgeline client initialization process makes use of Java Web Start technology. Java Web Start allows
you to obtain files necessary to run the Ridgeline client directly from the Ridgeline server by pointing a
browser to the Ridgeline server and clicking on a hyperlink. The download and installation of the
Ridgeline software on the client system takes place automatically.
Each time you launch the client, Ridgeline checks whether you have the most current software version.
If you do not, Ridgeline automatically updates the client files on your system.
Client initialization using Java Web Start requires that the client system have a certain version of the
Java plug-in installed. If the client system does not have this required Java version, then you are
directed to a location where you can download the correct version.
Launching the Client Application
The Ridgeline client application can be launched on systems running one of the following operating
environments:
●
Microsoft Windows Vista, Windows XP Professional with SP1 or later, Windows 2003 server,
Windows 2008 server, or Window 7 (Ridgeline 32-bit version only) running on an Intel Pentiumcompatible CPU
or
Ridgeline Installation and Upgrade Guide
35
Chapter 3: Launching the Ridgeline 3.0 Client
●
Solaris 10
or
●
Red Hat Enterprise Linux Version 5
A Ridgeline client requires a monitor that supports 1024 x 768 resolution, and at least 16-bit color. Your
system display settings must be set for at least 65536 colors.
See “System Requirements” on page 7 for memory, CPU, disk and other requirements.
NOTE
There is no separate installation for the client. When you launch the client, any software updates are
downloaded from the server and installed automatically.
To launch the client, you need to have the following information:
●
The name or IP address of the Ridgeline server to which the client should connect
●
The HTTP port that the client uses to communicate with the server (the default is 8080). This is the
HTTP port you entered when you installed the Ridgeline server.
To launch the Ridgeline client, do the following:
1 Launch your web browser.
2 Enter the URL for your Ridgeline server, in the form:
http://<host>:<port>/
Replace <host> with the name or IP address of the system where the Ridgeline server is running.
Replace <port> with the TCP port number that you assigned to the Ridgeline web server during
installation.
NOTE
If you configured your Ridgeline server to use the default web server port 80, you do not need to
include the port number. However, the port used by Ridgeline is 8080 by default, so in most cases you do need
to include the port.
Ridgeline Installation and Upgrade Guide
36
Launching the Client Application
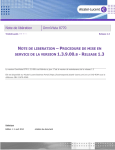
3 The Ridgeline Welcome page appears.
Figure 14: Ridgeline Welcome Page
4 Click the Log on to Ridgeline link.
5 Ridgeline checks if your system is running the correct version of the Java plug-in. If you are not
running the correct version, you are directed to a page where you can download the correct version.
If you are running the correct version of the Java plug-in, the Ridgeline client software is
downloaded from the Ridgeline server and installed on the local system.
6 After the software is downloaded, you are prompted whether you want to run the application. Click
Run to continue.
Ridgeline Installation and Upgrade Guide
37
Chapter 3: Launching the Ridgeline 3.0 Client
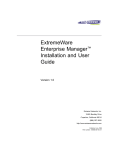
7 The Ridgeline Log On screen appears, and you are prompted for a username and password.
Figure 15: Ridgeline Log On Screen
8 If this is the first time you are logging in to Ridgeline, enter admin in both the Username field and
the Password field. Click Log on to connect to the Ridgeline server.
9 After a successful login, the Ridgeline 3.0 Home screen appears. For instructions on using Ridgeline,
see the Ridgeline Service Advisor Concepts and Solutions Guide, Ridgeline Reference Guide, or the online
help.
Disabling Installation of Desktop Shortcuts
As part of the Ridgeline client initialization process, a shortcut may be installed on your desktop. The
desktop shortcut allows you to start the client without having to point a browser to the server (and
clicking the Log on to Ridgeline link). Installation of the desktop shortcut assumes that the Java setting
for Shortcut Creation is set to the default of Prompt user if hinted.
You can optionally change the Shortcut Creation setting so that a shortcut is not installed with the
Ridgeline client. To do this:
1 From the Control Panel (Start > Settings> Control Panel) double-click the Java icon.
2 When the Java Plug-In control panel appears, click the Advanced tab.
3 Expand the list of items next to Shortcut Creation.
Ridgeline Installation and Upgrade Guide
38
Configuring the Firefox Browser for the Java Plug-In
4 Change the setting to Never allow.
Figure 16: Modifying the Java Shortcut Creation Setting
5 Click OK to apply the setting and close the Java Plug-In control panel.
Configuring the Firefox Browser for the Java Plug-In
If you plan to use the Mozilla Firefox browser to connect to the Ridgeline server, you must download
and install the Java Runtime Environment (JRE) plug-in, and then link it to the Firefox browser. These
are two separate steps. Until you do this, you will not be able to log into Ridgeline using Firefox.
To download and install the JRE plug-in, go to the Sun web site at:
http://www.java.com/en/download/manual.jsp
For Windows, you can download either the Online or Offline versions. For Solaris, download the 32-bit
version. For Linux, download the self-extracting file (not the RPM version).
For installation instructions, click the Instructions link to the right of the download button.
Ridgeline Installation and Upgrade Guide
39
Chapter 3: Launching the Ridgeline 3.0 Client
After the plug-in is installed, you must configure and enable the JRE to run applets in your browser.
You can find the instructions in one of two ways:
●
On the Installation Instructions page, click the “Enable and Configure” link near the top of the page.
●
You can also go directly to these instructions at the following URLs:
For Windows:
http://www.java.com/en/download/help/5000010400.xml#enable
For Linux:
http://www.java.com/en/download/help/5000010500.xml#enable
For Solaris:
http://www.java.com/en/download/help/5000010600.xml#enable
Follow the instructions to create a symbolic link to the JRE libjavaplugin_oji.so file, and to enable
Java under your browser preferences.
Ridgeline Installation and Upgrade Guide
40
4
Upgrading the Ridgeline
Software
CHAPTER
This chapter describes how to upgrade the Ridgeline software, and includes the following sections:
●
Ridgeline Software Upgrade Overview on page 41
●
Installing a Service Pack Release on page 42
●
Upgrading from EPICenter or Ridgeline Service Advisor to Ridgeline on page 46
●
Migrating the Database on page 54
Ridgeline Software Upgrade Overview
The Ridgeline software is available in the following forms. You can select which one to install based on
the circumstances under which you want to upgrade:
●
Base installation. To upgrade to a new software release you can just install the new version of the
software, either from the installation CD or by downloading the software from the Extreme
Networks web site.
As long as you install the software into a different directory, the two versions can co-exist. See
“Installing the Ridgeline Server” on page 13 for instructions.
●
Service Pack. Service Packs are minor releases that may add new features to Ridgeline, as well as
provide fixes for known problems from previous releases. A Service Pack release is made available
as a patch that can be installed over an existing Ridgeline installation.
If you already have the Ridgeline software installed on your system when a Service Pack is released,
you can upgrade the software by installing the patch bundle for the Service Pack; you do not need to
reinstall the full product. See “Installing a Service Pack Release” on page 42 for information.
If you do not already have the Ridgeline software installed on your system, to install the Service
Pack, you must first install the base Ridgeline release, then install the patch bundle for the Service
Pack.
●
EPICenter or Ridgeline Service Advisor to Ridgeline. The Ridgeline 3.0 installer automatically
detects all supported prior versions of the network management software and prompts you to
perform the migration. The supported versions include: EPICenter 6.0 through 7.1 (including Service
Packs) and Ridgeline Service Advisor 2.0 (including Service Packs). See “Upgrading from EPICenter
or Ridgeline Service Advisor to Ridgeline” on page 46 for more information.
Ridgeline Installation and Upgrade Guide
41
Chapter 4: Upgrading the Ridgeline Software
Table 2 summarizes the options for installing and upgrading the Ridgeline software.
Table 2: Ridgeline Installation and Upgrade Options
Release Type Contents
Available Formats
Base Ridgeline
Installation
•
Major Ridgeline
software release
•
Ridgeline installation
CD
How to Install
You want to perform a
fresh Ridgeline
installation/upgrade to a
Large file downloadable
new major release.
from the Extreme
Networks web site
See “Installing the
Ridgeline Server” on
page 13.
See “Installing a
Service Pack
Release” on
page 42.
Service Pack
New features and
software fixes
•
Smaller file that installs
on top of an existing
Ridgeline installation
and integrates the
Service Pack features
and fixes into the
existing installation.
EPICenter to
Ridgeline
Major Ridgeline
software release
•
Ridgeline installation
CD
•
When to Install
You already have a
base Ridgeline software
release installed and you
want to install the
Service Pack features
and fixes.
You have a prior version
of EPICenter or
Ridgeline Service
Large file downloadable
Advisor software
from the Extreme
installed and you want to
Networks web site
install the Ridgeline
software.
See “Upgrading
from EPICenter or
Ridgeline Service
Advisor to
Ridgeline” on
page 46.
Installing a Service Pack Release
From time to time, Extreme Networks releases updates to the current Ridgeline software as Service
Packs. Service Packs are minor releases that provide fixes for known problems from previous releases.
A Service Pack is released as a software patch that integrates the Service Pack fixes into an existing
Ridgeline installation. If you already have the Ridgeline software installed on your system when a
Service Pack is released, you can add the Service Pack updates by installing the patch release.
You can install a Service Pack release only on top of an existing base version of the same Ridgeline
release. If you are still running the previous major release, you cannot install the Service Pack release.
Instead, you must first install the full-installation version of the base version software. Follow the
normal installation instructions under “Installing the Ridgeline Server” on page 13.
To summarize, upgrading to a Ridgeline Service Pack release consists of the following steps:
1 Install the base version of the Ridgeline software (if it is not already installed).
2 Install the Ridgeline Service Pack.
NOTE
It is strongly recommended that you backup your Ridgeline database before installing a Service Pack. If
you need to uninstall the Service Pack and revert to the previous release for any reason, you will need to restore
the database as it was prior to the upgrade.
Ridgeline Installation and Upgrade Guide
42
Installing a Service Pack Release
NOTE
You cannot upgrade a Ridgeline beta release using this method. You must uninstall the beta release and
then install the full Ridgeline release.
Installing a Service Pack on Windows Systems
To install a Ridgeline Service Pack release on a Windows system, follow these steps:
1 Download the Ridgeline Service Pack software from the Extreme Networks software downloads
page and extract the contents of the zip file into a temporary directory.
The extraction process puts the files in a directory named sp<n>win\patch<n> (where <n> is a
number related to the Service Pack) under the directory you select. Make sure you specify that folder
names should be used when you perform the unzip.
2 Exit all Ridgeline clients.
3 If Ridgeline is running, shut down the Ridgeline server and database engine by stopping the
services. See “Stopping the Server on Windows” on page 25 for instructions.
4 It is recommended that you back up your database. In addition, if the database transaction log,
basecamp.log, remains in the top-level Ridgeline installation directory after the Ridgeline server has
been shut down, you should save it also. (Under most circumstances basecamp.log is removed
when the server stops.).
You should also save the files basecamp.db and epicenter.db, which reside in the
<Ridgeline_install_dir>\database\data subdirectory, as well as any database transaction log
files (for example, basecamp.log or epicenter.log) that reside in this directory.
NOTE
While upgrading to a Service Pack release, you may encounter a message indicating the Ridgeline
server and Database have not stopped, even though they are not currently active. This can occur when the
Ridgeline server and database are installed as services in Windows, and the Startup Type for these services is
configured as Manual. If you encounter this message, remove the basecamp.log and epicenter.log files from the
<Ridgeline_install_dir>\database\data directory.
NOTE
It is strongly recommend that you disable any anti-virus software before performing the Ridgeline
installation. Anti-virus software may interfere with Sybase database upgrade.
5 Open a command window and change to the directory where you extracted the Service Pack files:
prompt:\> cd sp<n>win\patch<n>
6 Run the install.bat script.
-
To install the Service Pack in the default Ridgeline installation directory
(which is C:\Program Files\Extreme Networks\Ridgeline Service Advisor 3.0\) enter
the install.bat command without a directory name. For example:
prompt:\> install.bat
Ridgeline Installation and Upgrade Guide
43
Chapter 4: Upgrading the Ridgeline Software
-
To install the Service Pack in a non-default directory that has a name that includes spaces, be sure
to specify the directory name in quotes. For example:
prompt:\> install.bat "C:\Non-Default Directory With Spaces\Ridgeline 3.0"
This batch file calls a script that will back up the Ridgeline files to:
<Ridgeline_install_dir>\backup
7 Restart the Ridgeline server and the database engine, if applicable (see “Starting the Server on
Windows” on page 24).
8 Ensure that you clear your browser cache before reconnecting to the Ridgeline server.
Uninstalling the Service Pack on Windows Systems
NOTE
Please make sure you restore your previously backed-up database (backed up prior to installing the
service pack) after uninstalling the service pack, to completely restore Ridgeline to its previous state.
If you need to uninstall the Service Pack release, do the following:
1 Exit all Ridgeline clients.
2 If Ridgeline is running, shut down the Ridgeline server and database engine by stopping the
services. See “Stopping the Server on Windows” on page 25 for instructions on how to stop the
Ridgeline services.
3 Open a command window and run the script uninstall.bat as follows:
prompt:\> cd <Ridgeline_install_dir>\backup\<service_pack_id>\uninstaller
prompt:\> uninstall.bat
The <service_pack_id> identifies the Ridgeline service pack and software build number you are
uninstalling; for example, sp1_32 or sp2_69.
This batch file calls a script that will restore backed up files from:
<Ridgeline_install_dir>\backup\<service_pack_id>\
4 Restart the Ridgeline server and the database engine. See “Starting the Server on Windows” on
page 24 for instructions.
5 Ensure that you clear your browser cache before reconnecting to the Ridgeline server.
Installing a Service Pack on Solaris or Linux Systems
To install a Ridgeline Service Pack release on a Solaris or Linux system, follow these steps:
1 Download the Ridgeline Service Pack software from the Extreme Networks software downloads
page and extract the contents of the file into a temporary directory.
The extraction process puts the files in a directory named sp<n>sol/patch<n> (for Solaris) or
sp<n>lin/patch<n> (for Linux), where <n> is a number related to the Service Pack, under the
directory you select. Make sure you specify that folder names should be used when you perform the
extraction.
2 Exit all Ridgeline clients.
3 Shut down the Ridgeline server and database engines if they are running (see “Stopping the Server
on Linux or Solaris” on page 25 for instructions).
Ridgeline Installation and Upgrade Guide
44
Installing a Service Pack Release
4 It is recommended that you back up your database. In addition, if the database transaction log,
basecamp.log, remains in the top-level Ridgeline installation directory after the Ridgeline server has
been shut down, you should save it also. (Under most circumstances basecamp.log is removed
when the server stops.)
You should also save the files basecamp.db and epicenter.db, which reside in the /database/data
subdirectory under the Ridgeline installation directory, as well as any database transaction log files
(for example, basecamp.log or epicenter.log) that reside in this directory.
5 Open a command shell and change to the directory where you extracted the Service Pack files:
% cd cd sp<n>sol/patch<n> (for Solaris)
% cd cd sp<n>lin/patch<n> (for Linux)
6 Run the script install.sh. To avoid permission errors, run the script as the same user that
performed the original Ridgeline software installation.
-
To install the Service Pack in the default installation directory (which is /opt/ExtremeNetworks/
RidgelineServiceAdvisor3.0/) enter the install.sh command without a directory name. For
example:
% ./install.sh
-
To install the Service Pack in a non-default directory that has a name that includes spaces, be sure
to specify the directory name in quotes. For example:
% ./install.sh "Directory With Spaces/Ridgeline3.0"
This script file calls a script that will back up Ridgeline files to <Ridgeline_install_dir>/backup
7 Restart the Ridgeline server and the database engine, if applicable (see “Starting the Server on Linux
or Solaris” on page 24 for instructions).
Uninstalling the Service Pack on Solaris or Linux Systems
NOTE
Please make sure you restore your previously backed-up database (backed up prior to installing the
service pack) after uninstalling the service pack, to completely restore Ridgeline to its previous state.
If you need to uninstall the Service Pack release, do the following:
1 Exit all Ridgeline clients.
2 Shut down the Ridgeline server and database engines if they are running. See “Stopping the Server
on Linux or Solaris” on page 25 for instructions.
3 Open a command shell and run the script uninstall.sh. To avoid permission errors, run the script
as the same user that performed the Ridgeline 3.0 patch installation.
% cd <Ridgeline_install_dir>/backup/<service_pack_id>/uninstaller
% ./uninstall.sh
The <service_pack_id> identifies the Ridgeline service pack you are uninstalling. This is a string
that starts with sp, followed by a service pack number and a software build number; for example;
sp1_69. Check the <Ridgeline_install_dir>/backup directory to determine the correct service
pack ID.
This script file will call a script that will restore backed-up files from <Ridgeline_install_dir>/
backup
Ridgeline Installation and Upgrade Guide
45
Chapter 4: Upgrading the Ridgeline Software
4 Restart the Ridgeline server and the database engine, if applicable. See “Starting the Server on Linux
or Solaris” on page 24 for instructions.
Ensure that you clear your browser cache before reconnecting to the Ridgeline server.
Upgrading from EPICenter or Ridgeline Service
Advisor to Ridgeline
To upgrade the EPICenter or Ridgeline Service Advisor software to the Ridgeline software do the
following:
1 If you are installing from CD, you will find three installation executables, one for each platform
(Windows, Linux, and Solaris). If you downloaded from the web site, only the executable for your
platform will be included.
2 Start the installation wizard as follows:
For Windows, run Ridgeline_3-0_win32.exe or Ridgeline_3-0_win64.exe, depending on your
version of the operating system.
For Linux:
a If you downloaded the installation from the web site, change the permissions on the Linux bin
file as follows:
chmod 755 Ridgeline_3-0_linux32.bin
or
chmod 755 Ridgeline_3-0_linux64.bin
(Skip this if you are installing from the CD).
b Run the executable Ridgeline_3-0_linux32.bin or Ridgeline_3-0_linux64.bin, depending
on your version of the operating system.
For Solaris:
a If you downloaded the installation from the web site, change the permissions on the Solaris bin
file:
chmod 755 Ridgeline_3-0_solarisSPARC.bin
(Skip this if you are installing from the CD).
b Run the executable Ridgeline_3-0_solarisSPARC.bin
InstallShield will extract the Ridgeline Installation Wizard. This may take a few minutes.
Ridgeline Installation and Upgrade Guide
46
Upgrading from EPICenter or Ridgeline Service Advisor to Ridgeline
3 The Ridgeline InstallShield wizard welcome screen appears. Click Next to continue.
Figure 17: InstallShield Wizard Welcome Screen
4 Accept the terms of the license Agreement and click Next to continue.
Figure 18: License Agreement
Ridgeline Installation and Upgrade Guide
47
Chapter 4: Upgrading the Ridgeline Software
5 Accept the default installation directory or click Browse to select a different location. Click Next to
continue.
Figure 19: Installation Destination
Ridgeline Installation and Upgrade Guide
48
Upgrading from EPICenter or Ridgeline Service Advisor to Ridgeline
6 Specify (verify or change) the ports to use for communication between the Ridgeline server and the
database (default is 10553), between the server and Ridgeline clients via HTTP (default is 8080), and
between the switches and FreeRADIUS server (default is 10559). You can use any port numbers
(numbers between 1024 and 65535 are recommended), except port numbers already in use by
another process, or ports 514, 3873, 8083, 10550, 10554, 10555, and 10556, which are used by
Ridgeline for internal functions. Click Next to continue.
NOTE
If you intend to keep multiple versions of the Ridgeline server on the same computer, to avoid a port
conflict, each Ridgeline server must be configured to use a unique port number to communicate with the
database, or all but one of the Ridgeline servers must be disabled. If multiple versions of the Ridgeline server
are detected on the computer, the older versions are disabled automatically during installation.
Figure 20: Port Information
Ridgeline Installation and Upgrade Guide
49
Chapter 4: Upgrading the Ridgeline Software
7 Select the settings you want to enable (both are enabled by default):
●
Enable Automatic Updates. This feature configures Ridgeline to automatically retrieve the most
current information about device and slot software and bootrom images from the Extreme
Networks website each time you connect the client to the Ridgeline server.
If you enable this feature, Ridgeline will connect to the Extreme Networks web site at server
start-up and once every 24 hours to obtain a list of the current software releases, and a list of any
available Ridgeline patches. No information is sent to Extreme Networks except an indication
that you are running with an evaluation license, if that is the case.
NOTE
If you disable this feature, you will not able to obtain software update information through the Software
Update feature in the Firmware Manager. You can enable this feature at a later time through Ridgeline
Administration, Server Properties tab, under the External Connections area. Click the checkbox to allow
connection to the Extreme Networks web site.
●
Start Ridgeline 3.0 services automatically. This feature starts Ridgeline services automatically
when Windows starts. On Solaris/Linux systems, Ridgeline services start automatically upon
startup and this setting is not user configurable.
Click Next to continue.
Figure 21: Settings
Ridgeline Installation and Upgrade Guide
50
Upgrading from EPICenter or Ridgeline Service Advisor to Ridgeline
8 Verify the components and installation directory, and click Install to continue.
Figure 22: Installation Summary
The installation process begins.
Figure 23: Installation Progress
Ridgeline Installation and Upgrade Guide
51
Chapter 4: Upgrading the Ridgeline Software
9 Select Yes to migrate the database or No to continue without doing so. Click Next to continue.
When you install the Ridgeline 3.0 software, the installer automatically detects all supported prior
versions of the network management software and prompts you to perform the migration. The
supported versions include: EPICenter 6.0 Service Pack 1 and later releases and Ridgeline Service
Advisor 2.0 and later releases. Upgrades from the 32-bit version of EPICenter to the 64-bit version of
Ridgeline 3.0 are not allowed. If you have one of the supported versions of software installed, you
can migrate your database and other persistent data to the new installation of Ridgeline as part of
the upgrade process. Migrating the database does not affect your previous installation; the old
database is left intact and functional. (On Windows systems, this dialog box appears only if a
previous installation of EPICenter or Ridgeline Service Advisor is detected.) Migration from versions
of EPICenter earlier than 6.0 is not supported.
NOTE
You must reconfigure multi-homed configurations manually after installation. They do not migrate
automatically.
Figure 24: Database Migration
Ridgeline Installation and Upgrade Guide
52
Upgrading from EPICenter or Ridgeline Service Advisor to Ridgeline
The InstallShield wizard displays a message when the installation is complete. Click Finish to exit
the wizard.
Figure 25: Post Installation Summary
10 Click OK to accept the warning messages that displays. The VM tracking feature requires an FTP
server running prior to starting Ridgeline. Refer to the “Managing Virtual Machines” chapter in the
Ridgeline Reference Guide for more information.
Figure 26: VM Tracking Requires an FTP Server Running Warning
Ridgeline Installation and Upgrade Guide
53
Chapter 4: Upgrading the Ridgeline Software
11 Ridgeline prompts you to restart your system. You must either restart your system or start the
Ridgeline services manually before a client can connect to the Ridgeline server. Select one and then
click Finish to complete the installation process.
Figure 27: Reboot
12 Launch the License Manager and install your Ridgeline licenses. You can do this at any time after
you have installed the Ridgeline server. The server can be running while you do this, but this is not
required. See “Adding or Upgrading a License Key” on page 23 for more detailed instructions.
Migrating the Database
You can migrate the database as part of the standard software installation procedure (as shown in
Figure 24 on page 52) or manually, using the procedure described in this section.
NOTE
You must reconfigure multi-homed configurations manually after installation. You cannot migrate them.
The following examples describe how to perform data migration. In these procedures, EPICenter 6.0 SP5
to Ridgeline is used as examples.
For Linux and Solaris, follow the upgrade procedures in “Upgrading from EPICenter or Ridgeline
Service Advisor to Ridgeline” on page 46.”
Ridgeline Installation and Upgrade Guide
54
Migrating the Database
When Ridgeline and a Previous Version are Installed on the
Same System
To migrate data from an earlier version of EPICenter or Ridgeline to the latest version of Ridgeline
when an older version is installed on the same system as the latest version of Ridgeline, do the
following:
WARNING!
This procedure overwrites any database information that is on the latest version of Ridgeline. We
recommend you perform this procedure before you use Ridgeline.
1 Stop the Ridgeline and database services after it is installed on your server.
2 Start the Database Migration Assistant:
a On a Windows system, from the Start menu go to Programs>Extreme
Networks>Ridgeline>Database Migration Assistant.
b On a Solaris/Linux system, go to: <Ridgeline Installed Directory>/database/bin/migratetool.bin.
c
The Database Migration Assistant dialog box opens. See Figure 28.
Figure 28: Database Migration Assistant Initial Dialog Box
3 Choose: Migrate an EPICenter or Ridgeline database on this server to Ridgeline.
4 Click Next. A dialog box opens where you enter the path to the old product directory and the path
to the newest Ridgeline version. See Figure 29.
Ridgeline Installation and Upgrade Guide
55
Chapter 4: Upgrading the Ridgeline Software
Figure 29: Enter Directory Paths of Previous Version and Latest Version
5 Click Migrate. The status screen opens showing the migration progress. See Figure 30.
Figure 30: Database Migration Progress
6 Reboot the server.
Exporting then Importing Data
Migrating data from another server or operating system to a server with Ridgeline installed requires
two operations. First you must export the data from the server where the previous version of the
application is installed then import the data on to the server where the latest version of Ridgeline is
installed.
Exporting Database Information
To export data for migration to Ridgeline on a different server or to Ridgeline on a different operating
system, do the following:
1 Start Ridgeline services on the server with the latest Ridgeline version.
2 Stop services on the server with EPICenter or previous versions of Ridgeline.
3 Open a web browser on the server where the older version of EPICenter or Ridgeline is installed.
Ridgeline Installation and Upgrade Guide
56
Exporting then Importing Data
4 Enter the URL for the server where the latest version of Ridgeline is installed, for example:
http://10.255.25.25:8080/exporter.html
The Ridgeline Welcome screen for the Exporter opens.
Figure 31: Ridgeline Exporter Welcome Screen
5 Click Launch Exporter. The Opening Exporter.jnlp dialog box opens. See Figure 32.
Figure 32: Opening Exporter.jnlp
6 Use the default for: What should Firefox do with this file? Then click OK. The Database Exporter
dialog opens which identifies the tool. See Figure 33.
Ridgeline Installation and Upgrade Guide
57
Chapter 4: Upgrading the Ridgeline Software
You are reminded: Please make sure you are running this tool on the server which has the old
database.
Figure 33: Database Exporter Initial Dialog Box
7 Click Next. The Export database to archive files dialog box opens. See Figure 34.
Figure 34: Enter Paths in Database Exporter
8 Enter the directory path of the older version of the product. The old product version is shown.
9 Enter the directory path where you are migrating the database to.
10 Enter the server IP address or hostname where the new version of Ridgeline is installed.
11 Enter the database port. The default database port is 10553.
12 Click Export. The status screen opens showing the export progress. See Figure 35.
When the process completes, a folder named export is created that contains all the old database
information. You can find it on the default download location. We recommend you place it on your
desktop. The database information remains on the server with the earlier version of the software.
Ridgeline Installation and Upgrade Guide
58
Exporting then Importing Data
Figure 35: Export Database Progress Screen
13 Copy the export folder to the server where the latest version of Ridgeline is installed.
Importing Database Information
CAUTION
The procedure described in this section overwrites any database information on the latest version of
Ridgeline. We recommend that you perform this pro cu du re before you use Ridgeline.
To import database information to the Ridgeline server, do the following:
1 Make sure all Ridgeline servers are stopped.
2 On the Start menu go to Programs>Extreme Networks>Ridgeline>Database Migration Assistant. The
Database Migration Assistant dialog box opens. The Database Migration dialog box opens. See
Figure 36.
Figure 36: Database Migration Assistant Import Database
3 Choose: Import archived database files into Ridgeline.
Ridgeline Installation and Upgrade Guide
59
Chapter 4: Upgrading the Ridgeline Software
4 Click Next. The dialog box opens where you enter the import information for the Ridgeline server.
See Figure 37.
Figure 37: Import Archived Database Files
5 Enter the required information:
●
Import from directory. The directory where the Export folder is located on the exporting server.
●
The Ridgeline directory at Program Files>Extreme Networks>Ridgeline directory
6 Click Next. The status screen opens showing the migration progress. See Figure 38.
Figure 38: Import Migration Progress and Results
7 Reboot the server.
Ridgeline Installation and Upgrade Guide
60