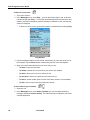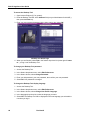
1
USER GUIDE NOTICE The information contained in this document is believed to be accurate in all respects but is not warranted by Mitel Networks™ Corporation. The information is subject to change without notice and should not be construed in any way as a commitment by Mitel Networks or any of its affiliates or subsidiaries. Mitel Networks and its affiliates and subsidiaries assume no responsibility for any errors or omissions in this document. Revisions of this document or new editions of it may be issued to incorporate such changes. Nothing in this document may be reproduced in any manner, whether wholly or in part for any use whatsoever, without written permission from Mitel Networks Corporation. Mitel Networks is a trademark of Mitel Networks Corporation. Other product names mentioned in this document may be trademarks of their respective companies and are hereby acknowledged. IMPORTANT! This telephone is NOT suitable for direct connection to the public-switched telephone network. Connect this telephone to a Mitel Networks system only. Revision B May 2003 ®, ™ Trademark of Mitel Networks Corporation © Copyright 2003, Mitel Networks Corporation All rights reserved CONTENTS About Your 5230 IP Appliance . . . . . . . . . . . . . . . . . . . . . . . . . . . . . . . . . . . . . . . . . . . . . . . . . . About This User Guide . . . . . . . . . . . . . . . . . . . . . . . . . . . . . . . . . . . . . . . . . . . . . . . . . . . . . Conventions . . . . . . . . . . . . . . . . . . . . . . . . . . . . . . . . . . . . . . . . . . . . . . . . . . . . . . . . . . . The 5230 IP Appliance . . . . . . . . . . . . . . . . . . . . . . . . . . . . . . . . . . . . . . . . . . . . . . . . . . . . . Front View . . . . . . . . . . . . . . . . . . . . . . . . . . . . . . . . . . . . . . . . . . . . . . . . . . . . . . . . . . . . Back View . . . . . . . . . . . . . . . . . . . . . . . . . . . . . . . . . . . . . . . . . . . . . . . . . . . . . . . . . . . . . Components . . . . . . . . . . . . . . . . . . . . . . . . . . . . . . . . . . . . . . . . . . . . . . . . . . . . . . . . . . . Features . . . . . . . . . . . . . . . . . . . . . . . . . . . . . . . . . . . . . . . . . . . . . . . . . . . . . . . . . . . . . . User Types . . . . . . . . . . . . . . . . . . . . . . . . . . . . . . . . . . . . . . . . . . . . . . . . . . . . . . . . . . . . Documentation . . . . . . . . . . . . . . . . . . . . . . . . . . . . . . . . . . . . . . . . . . . . . . . . . . . . . . . . . Tips for Your Comfort and Safety . . . . . . . . . . . . . . . . . . . . . . . . . . . . . . . . . . . . . . . . . . . . . 1 1 1 2 2 3 4 4 5 5 6 Getting Started . . . . . . . . . . . . . . . . . . . . . . . . . . . . . . . . . . . . . . . . . . . . . . . . . . . . . . . . . . . . . . . 7 Before you Start . . . . . . . . . . . . . . . . . . . . . . . . . . . . . . . . . . . . . . . . . . . . . . . . . . . . . . . . . . . 7 About Text Input Options . . . . . . . . . . . . . . . . . . . . . . . . . . . . . . . . . . . . . . . . . . . . . . . . . 7 About Resiliency . . . . . . . . . . . . . . . . . . . . . . . . . . . . . . . . . . . . . . . . . . . . . . . . . . . . . . . . 7 Installing the 5230 IP Appliance PDA Applications . . . . . . . . . . . . . . . . . . . . . . . . . . . . . 8 Starting the 5230 IP Appliance PDA Applications . . . . . . . . . . . . . . . . . . . . . . . . . . . . . . . . . 8 Docking your PDA . . . . . . . . . . . . . . . . . . . . . . . . . . . . . . . . . . . . . . . . . . . . . . . . . . . . . . 8 Starting the 5230 PDA Phone Application . . . . . . . . . . . . . . . . . . . . . . . . . . . . . . . . . . . . 8 Exploring the 5230 Applications . . . . . . . . . . . . . . . . . . . . . . . . . . . . . . . . . . . . . . . . . . . . . . 9 The PDA Phone Application . . . . . . . . . . . . . . . . . . . . . . . . . . . . . . . . . . . . . . . . . . . . . . . 9 Making and Receiving Calls . . . . . . . . . . . . . . . . . . . . . . . . . . . . . . . . . . . . . . . . . . . . . . 10 Accessing 5230 Applications . . . . . . . . . . . . . . . . . . . . . . . . . . . . . . . . . . . . . . . . . . . . . 10 Changing PDA Phone Display Options . . . . . . . . . . . . . . . . . . . . . . . . . . . . . . . . . . . 11 Setting Your Preferences . . . . . . . . . . . . . . . . . . . . . . . . . . . . . . . . . . . . . . . . . . . . . . . . 11 Using a Hot Desk Phone . . . . . . . . . . . . . . . . . . . . . . . . . . . . . . . . . . . . . . . . . . . . . . 14 What’s Next? . . . . . . . . . . . . . . . . . . . . . . . . . . . . . . . . . . . . . . . . . . . . . . . . . . . . . . . . . . . . 14 Using the 5230 Feature Keys Application . . . . . . . . . . . . . . . . . . . . . . . . . . . . . . . . . . . . . . . . About the Feature Keys Application . . . . . . . . . . . . . . . . . . . . . . . . . . . . . . . . . . . . . . . . . . Application Modes . . . . . . . . . . . . . . . . . . . . . . . . . . . . . . . . . . . . . . . . . . . . . . . . . . . . . Quick Launch . . . . . . . . . . . . . . . . . . . . . . . . . . . . . . . . . . . . . . . . . . . . . . . . . . . . . . . . . Programming a Feature Key . . . . . . . . . . . . . . . . . . . . . . . . . . . . . . . . . . . . . . . . . . . . . Clearing a Feature . . . . . . . . . . . . . . . . . . . . . . . . . . . . . . . . . . . . . . . . . . . . . . . . . . . . . Category Pages . . . . . . . . . . . . . . . . . . . . . . . . . . . . . . . . . . . . . . . . . . . . . . . . . . . . . . . Call Forward Feature Keys . . . . . . . . . . . . . . . . . . . . . . . . . . . . . . . . . . . . . . . . . . . . . . . . . Call Forward Profiles . . . . . . . . . . . . . . . . . . . . . . . . . . . . . . . . . . . . . . . . . . . . . . . . . . . Other Call Forward Settings . . . . . . . . . . . . . . . . . . . . . . . . . . . . . . . . . . . . . . . . . . . . . . Speed Dial Feature Keys . . . . . . . . . . . . . . . . . . . . . . . . . . . . . . . . . . . . . . . . . . . . . . . . . . . Other Features Keys . . . . . . . . . . . . . . . . . . . . . . . . . . . . . . . . . . . . . . . . . . . . . . . . . . . . . . Account Codes . . . . . . . . . . . . . . . . . . . . . . . . . . . . . . . . . . . . . . . . . . . . . . . . . . . . . . . . Call Park . . . . . . . . . . . . . . . . . . . . . . . . . . . . . . . . . . . . . . . . . . . . . . . . . . . . . . . . . . . . . Call Pickup . . . . . . . . . . . . . . . . . . . . . . . . . . . . . . . . . . . . . . . . . . . . . . . . . . . . . . . . . . . Revision B 15 15 16 16 16 16 17 18 19 21 22 23 24 24 25 i 5230 IP Appliance User Guide Callback . . . . . . . . . . . . . . . . . . . . . . . . . . . . . . . . . . . . . . . . . . . . . . . . . . . . . . . . . . . . . Campon . . . . . . . . . . . . . . . . . . . . . . . . . . . . . . . . . . . . . . . . . . . . . . . . . . . . . . . . . . . . . Clear All Features Feature Key . . . . . . . . . . . . . . . . . . . . . . . . . . . . . . . . . . . . . . . . . . . Do Not Disturb . . . . . . . . . . . . . . . . . . . . . . . . . . . . . . . . . . . . . . . . . . . . . . . . . . . . . . . . Headset . . . . . . . . . . . . . . . . . . . . . . . . . . . . . . . . . . . . . . . . . . . . . . . . . . . . . . . . . . . . . 26 27 28 28 30 Using the Other 5230 Applications . . . . . . . . . . . . . . . . . . . . . . . . . . . . . . . . . . . . . . . . . . . . . . Call History . . . . . . . . . . . . . . . . . . . . . . . . . . . . . . . . . . . . . . . . . . . . . . . . . . . . . . . . . . . . . . Updating Your Call History . . . . . . . . . . . . . . . . . . . . . . . . . . . . . . . . . . . . . . . . . . . . . . . Viewing Your Call History . . . . . . . . . . . . . . . . . . . . . . . . . . . . . . . . . . . . . . . . . . . . . . . . Manipulating a Call History Item . . . . . . . . . . . . . . . . . . . . . . . . . . . . . . . . . . . . . . . . . . . Contacts Tools . . . . . . . . . . . . . . . . . . . . . . . . . . . . . . . . . . . . . . . . . . . . . . . . . . . . . . . . . . . Import Number . . . . . . . . . . . . . . . . . . . . . . . . . . . . . . . . . . . . . . . . . . . . . . . . . . . . . . . . Add to Send It . . . . . . . . . . . . . . . . . . . . . . . . . . . . . . . . . . . . . . . . . . . . . . . . . . . . . . . . . Dial by Contacts . . . . . . . . . . . . . . . . . . . . . . . . . . . . . . . . . . . . . . . . . . . . . . . . . . . . . . . Send It . . . . . . . . . . . . . . . . . . . . . . . . . . . . . . . . . . . . . . . . . . . . . . . . . . . . . . . . . . . . . . . . . Visual Voice Mail . . . . . . . . . . . . . . . . . . . . . . . . . . . . . . . . . . . . . . . . . . . . . . . . . . . . . . . . . Visual Voice Mail Properties . . . . . . . . . . . . . . . . . . . . . . . . . . . . . . . . . . . . . . . . . . . . . . Updating your List of Voice Mails . . . . . . . . . . . . . . . . . . . . . . . . . . . . . . . . . . . . . . . . . . Viewing and Listening to Voice Mails . . . . . . . . . . . . . . . . . . . . . . . . . . . . . . . . . . . . . . . 31 31 32 32 34 35 35 35 35 37 39 39 40 41 Making and Receiving Calls . . . . . . . . . . . . . . . . . . . . . . . . . . . . . . . . . . . . . . . . . . . . . . . . . . . Operation of the 5230 IP Appliance . . . . . . . . . . . . . . . . . . . . . . . . . . . . . . . . . . . . . . . . . . . Operating Modes . . . . . . . . . . . . . . . . . . . . . . . . . . . . . . . . . . . . . . . . . . . . . . . . . . . . . . Making and Receiving Calls . . . . . . . . . . . . . . . . . . . . . . . . . . . . . . . . . . . . . . . . . . . . . . Call Making Features . . . . . . . . . . . . . . . . . . . . . . . . . . . . . . . . . . . . . . . . . . . . . . . . . . . . . . Call Transfer . . . . . . . . . . . . . . . . . . . . . . . . . . . . . . . . . . . . . . . . . . . . . . . . . . . . . . . . . . Conference Call . . . . . . . . . . . . . . . . . . . . . . . . . . . . . . . . . . . . . . . . . . . . . . . . . . . . . . . Handsfree Operation . . . . . . . . . . . . . . . . . . . . . . . . . . . . . . . . . . . . . . . . . . . . . . . . . . . Headset Operation . . . . . . . . . . . . . . . . . . . . . . . . . . . . . . . . . . . . . . . . . . . . . . . . . . . . . Hold . . . . . . . . . . . . . . . . . . . . . . . . . . . . . . . . . . . . . . . . . . . . . . . . . . . . . . . . . . . . . . . . Messaging . . . . . . . . . . . . . . . . . . . . . . . . . . . . . . . . . . . . . . . . . . . . . . . . . . . . . . . . . . . Phonebook . . . . . . . . . . . . . . . . . . . . . . . . . . . . . . . . . . . . . . . . . . . . . . . . . . . . . . . . . . . Record a Call . . . . . . . . . . . . . . . . . . . . . . . . . . . . . . . . . . . . . . . . . . . . . . . . . . . . . . . . . Redial Last Number . . . . . . . . . . . . . . . . . . . . . . . . . . . . . . . . . . . . . . . . . . . . . . . . . . . . Swap . . . . . . . . . . . . . . . . . . . . . . . . . . . . . . . . . . . . . . . . . . . . . . . . . . . . . . . . . . . . . . . . 45 45 45 45 46 46 47 47 48 49 49 50 51 51 52 Appendix A—Additional Information . . . . . . . . . . . . . . . . . . . . . . . . . . . . . . . . . . . . . . . . . . . . Using Your PDA with the 5230 IP Appliance . . . . . . . . . . . . . . . . . . . . . . . . . . . . . . . . . . . . Charging the PDA . . . . . . . . . . . . . . . . . . . . . . . . . . . . . . . . . . . . . . . . . . . . . . . . . . . . . . Data Synchronization . . . . . . . . . . . . . . . . . . . . . . . . . . . . . . . . . . . . . . . . . . . . . . . . . . . Installing/Upgrading the 5230 IP Appliance Applications . . . . . . . . . . . . . . . . . . . . . . . . . . . Changing the Personality Module . . . . . . . . . . . . . . . . . . . . . . . . . . . . . . . . . . . . . . . . . . . . Connecting a Local Power Supply . . . . . . . . . . . . . . . . . . . . . . . . . . . . . . . . . . . . . . . . . . . . Using the Canonical Dialing Format . . . . . . . . . . . . . . . . . . . . . . . . . . . . . . . . . . . . . . . . . . About Dialing Formats . . . . . . . . . . . . . . . . . . . . . . . . . . . . . . . . . . . . . . . . . . . . . . . . . . About Canonical Format . . . . . . . . . . . . . . . . . . . . . . . . . . . . . . . . . . . . . . . . . . . . . . . . . 53 53 53 53 54 55 55 56 56 57 ii Revision B Appendix B—Using the 5230 IP Appliance Without a PDA . . . . . . . . . . . . . . . . . . . . . . . . . . Customizing the 5230 IP Appliance . . . . . . . . . . . . . . . . . . . . . . . . . . . . . . . . . . . . . . . . . . . Display Contrast . . . . . . . . . . . . . . . . . . . . . . . . . . . . . . . . . . . . . . . . . . . . . . . . . . . . . . . Ringer Volume . . . . . . . . . . . . . . . . . . . . . . . . . . . . . . . . . . . . . . . . . . . . . . . . . . . . . . . . The Desktop Tool . . . . . . . . . . . . . . . . . . . . . . . . . . . . . . . . . . . . . . . . . . . . . . . . . . . . . . . . Accessing the Desktop Tool . . . . . . . . . . . . . . . . . . . . . . . . . . . . . . . . . . . . . . . . . . . . . . Call Forward Profile . . . . . . . . . . . . . . . . . . . . . . . . . . . . . . . . . . . . . . . . . . . . . . . . . . . . Voice Mail . . . . . . . . . . . . . . . . . . . . . . . . . . . . . . . . . . . . . . . . . . . . . . . . . . . . . . . . . . . . . . Hot Desking . . . . . . . . . . . . . . . . . . . . . . . . . . . . . . . . . . . . . . . . . . . . . . . . . . . . . . . . . . . . . Feature Access Codes . . . . . . . . . . . . . . . . . . . . . . . . . . . . . . . . . . . . . . . . . . . . . . . . . . . . Call Forward End Chaining . . . . . . . . . . . . . . . . . . . . . . . . . . . . . . . . . . . . . . . . . . . . . . . Call Forward Override . . . . . . . . . . . . . . . . . . . . . . . . . . . . . . . . . . . . . . . . . . . . . . . . . . Call Park . . . . . . . . . . . . . . . . . . . . . . . . . . . . . . . . . . . . . . . . . . . . . . . . . . . . . . . . . . . . . Call Pickup . . . . . . . . . . . . . . . . . . . . . . . . . . . . . . . . . . . . . . . . . . . . . . . . . . . . . . . . . . . Callback . . . . . . . . . . . . . . . . . . . . . . . . . . . . . . . . . . . . . . . . . . . . . . . . . . . . . . . . . . . . . Campon . . . . . . . . . . . . . . . . . . . . . . . . . . . . . . . . . . . . . . . . . . . . . . . . . . . . . . . . . . . . . Hold . . . . . . . . . . . . . . . . . . . . . . . . . . . . . . . . . . . . . . . . . . . . . . . . . . . . . . . . . . . . . . . . Personal Speed Dial . . . . . . . . . . . . . . . . . . . . . . . . . . . . . . . . . . . . . . . . . . . . . . . . . . . . Redial Saved Number . . . . . . . . . . . . . . . . . . . . . . . . . . . . . . . . . . . . . . . . . . . . . . . . . . Trunk Flash . . . . . . . . . . . . . . . . . . . . . . . . . . . . . . . . . . . . . . . . . . . . . . . . . . . . . . . . . . . Revision B 59 59 59 59 59 59 61 61 62 62 62 63 63 63 63 63 64 64 64 65 iii 5230 IP Appliance User Guide iv Revision B About Your 5230 IP Appliance About Your 5230 IP Appliance The Mitel Networks 5230 IP Appliance uses your Personal Digital Assistant (PDA) as an intuitive interface to the Mitel Networks telephone system. With the 5230 IP Appliance PDA Applications installed on your PDA, you can, for example, make calls from your Contacts list, synchronize your data and files, view a list of your voice mails, or share files with other 5230 IP Appliance users, from either your 5230 IP Appliance, or any other 5230 IP Appliance on your network. About This User Guide This user guide contains information on using the features of your 5230 IP Appliance on a Mitel Networks™ 3300 Integrated Communications Platform (ICP), and is organized as follows: • About Your 5230 IP Appliance (this section). • Getting Started (page 7) • Using the 5230 Feature Keys Application (page 15) • Using the Other 5230 Applications (page 31) • Making and Receiving Calls (page 45) • Appendix A—Additional Information (page 53) • Appendix B—Using the 5230 IP Appliance Without a PDA (page 62) Note: This User Guide assumes that you are familiar with the operation of your PDA. If you are not, please take the time to review your PDA User Guide, and familiarize yourself with the basic operation of your PDA and its applications. Conventions • Tap means select an item on the PDA screen using the stylus. • Press means press a key on the 5230 IP Appliance set. • : indicates that you can perform a procedure when your PDA is docked in the Personality Module of a 5230 IP Appliance. • : indicates that you can perform a procedure on the 5230 IP Appliance with the PDA undocked. • : indicates that you can perform a procedure on your PDA when your PDA is undocked. Revision B 1 5230 IP Appliance User Guide The 5230 IP Appliance Front View 5230 IP Appliance with PDA 5230 IP Appliance without PDA Handsfree Speaker (see page 47) Audio Device Controls Volume Up (see page 11 and page 59) Volume Down (see page 11 and page 59) Handsfree microphone/mute (see page 47) 2 Speaker Two speakers for enhanced audio. Personality Module Provides the interface between a PDA and the 5230 IP Appliance. Revision B About Your 5230 IP Appliance Display Two-line display. Softkeys Used to access context-sensitive features. Stylus holder To hold your PDA stylus. Call Indicator Light Flashes when you have an incoming call. Message (see page 49 and page 61) Hold (see page 49) Call Feature Keys Transfer/Conference (see page 46) Cancel (use to end a call or a call making feature) ¡ Dialpad 12-key alphanumeric keypad Back View 5230 IP Appliance Connectors LAN connector RJ-45 (Ethernet) connector. Computer Connector RJ-45 (Ethernet) connector. PDA charger jack Connect ONLY charger power supply that came with PDA. Handset jack RJ-22 connector. Headset jack RJ-22 connector. USB connector (for future use) Revision B 3 5230 IP Appliance User Guide Components The 5230 IP Appliance has three main components: • the 5230 IP Appliance set. • the Personality Module. • the 5230 Applications on your PDA. The 5230 IP Appliance Set On its own, the 5230 IP Appliance provides basic call making features. The Personality Module The Personality Module provides the interface between your PDA model and the 5230 IP Appliance. Personality Modules are tailored to specific models of PDAs (see “Changing the Personality Module” on page 55 for more information). The 5230 Applications The 5230 Applications are the power behind the 5230 IP Appliance: • PDA Phone: lets you access your phone functionality from your PDA when the PDA is docked in a 5230 IP Appliance (see “The PDA Phone Application” on page 9) • Feature Keys: lets you program and use call forward settings, speed dial numbers and other features of the 3300 ICP (see “Using the 5230 Feature Keys Application” on page 15). • Dial by Contacts: lets you call someone directly from your PDA’s Contacts application (see “Contacts Tools” on page 35). • Call History: lets you view and edit a list of the calls you made and received, as well as add information from Call History items to your PDA’s Contacts application (see “Call History” on page 31). • Visual Voice Mail: lets you view a list of your voice mails (see “Visual Voice Mail” on page 39). • Send It: lets you send files to other 5230 IP Appliance users on your network (see “Send It” on page 37). Features The 5230 IP Appliance lets you use all the other features and applications of your PDA, and acts like the PDA’s synchronization cradle. You still can, for example,: 4 • synchronize your PDA with your computer from your 5230 IP Appliance, and from any other 5230 IP Appliance on your network (see “Data Synchronization” on page 53). • charge your PDA by connecting its charger to the back of the 5230 IP appliance (see “Charging the PDA” on page 53). Revision B About Your 5230 IP Appliance User Types There are two basic user types: • Desk Phone user (stationary user): Has a dedicated phone at their desk. Calls to that user’s extension number always ring at that phone. • Hot Desk user (mobile user): Has a dedicated extension number, but no dedicated phone. When a Hot Desk user logs in a hot desk-enabled phone, all calls to that user ring at that phone, until the user logs out. In effect, that phone becomes the user’s phone, with all the user’s personal features enabled. See “Using a Hot Desk Phone” on page 14 for more information. Both types of users can also be Guest Users on any 5230 IP Appliance other than their own, or on which they are not logged on. Guest users can only use the extension number and features programmed on the set they are using, and cannot change any of the phone’s settings (display language, etc.). Unless this set has their extension number as a line appearance, calls to guest users will not ring on this phone. See “User Type Settings” on page 13 for information on setting your user type. Documentation The following customer documentation is available for the 5230 IP Appliance: • Installation Guide (part number 56003848). Shipped with the 5230 IP Appliance. You can order additional copies from your Mitel Networks distributor. • User Guide (this document). You can download additional PDF copies from the Mitel Networks web site (see instructions below). • Quick Reference Card. You can download additional PDF copies from the Mitel Networks web site (see instructions below). • Online Help. Installed on the PDA with the 5230 IP Appliance Applications. You can access it via the Start menu like the rest of the Help files on your PDA. To download user documentation from the Mitel Networks web site Note: If you are viewing an electronic version of this document, and have a connection to the internet, click anywhere in this paragraph to access the Mitel Networks end user documentation web site. 1. With your favorite browser, go to www.mitel.com. 2. Bring your cursor over the word Support, and select Documentation Library. 3. In the drop-down list, select User Guides. 4. Download the desired document (see your browser help for instructions on downloading files from a web site). Revision B 5 5230 IP Appliance User Guide Tips for Your Comfort and Safety Don’t Cradle the Handset! Prolonged use of the handset can lead to neck, shoulder or back discomfort, especially if you cradle the handset between your ear and shoulder. If you use your phone a lot, you may find it more comfortable to use a headset. Use only Mitel Networks headset approved for operation with the 5230 IP Appliance; talk to your authorized Mitel Networks vendor for information on these headsets. For information on using a headset to make calls, see “Headset Operation” on page 48. Protect Your Hearing Your phone has a control for adjusting the volume of the handset receiver or headset (see “Setting Your Preferences” on page 11). Because continuous exposure to loud sounds can contribute to hearing loss, keep the volume at a moderate level. Adjusting the Viewing Angle The 5230 IP Appliance has two viewing angle settings. Use the setting that is most comfortable for you. To change the viewing angle of your phone, remove the stand, and re-insert it in the alternate position. Installing the Stand 1. Press both stand latches () inwards to unlock the stand, then remove the stand. 2. Re-insert the stand in the alternate position, pivot first (). The bottom position (—) is the more vertical position, and the top position (- - -) is the more horizontal position. 3. Press the stand latches () outwards (from inside the stand) to lock the stand in place. 6 Revision B Getting Started Getting Started This section shows you how to set up and start using your 5230 IP Appliance. The basic steps are: 1. Install the 5230 Applications (page 8). 2. Dock your PDA in your 5230 IP Appliance (page 8). 3. Start the 5230 PDA Phone application (page 8). 4. Explore the 5230 PDA Phone application, and set your general preferences (page 9). Before you Start Please follow the instructions in your PDA’s user guide to set up synchronization between your PDA and your computer. Take the time to familiarize yourself with the operation of your PDA, including how to: • navigate through your PDA’s interface • open, minimize and close applications • type and/or write text • use the Contacts application • synchronizing the information and files between your PDA and your computer • set up a partnership between your PDA and your computer for local and remote synchronization Note: We recommend that you do not program automatic synchronization of your PDA to prevent interference between the 5230 PDA Phone application and ActiveSync when starting the 5230 PDA Phone application from a 5230 IP Appliance. About Text Input Options Verify if the Add a space after suggested word option is enabled (Start/Settings, Input/Word Completion). If it is enabled, remember to delete that extra space when entering phone numbers in the 5230 PDA Applications to prevent problems when dialing these numbers. About Resiliency In the event of a switch failure, your phone may be transferred to the control of another switch (resiliency). When this happens, a message appears on your display, and you may not be able to use all the features of your phone. If the transfer to a secondary switch happens during a call, you will hear beeps; your call will continue, but you will not be able to use the keys and features of your phone until the call is over. Revision B 7 5230 IP Appliance User Guide Installing the 5230 IP Appliance PDA Applications The 5230 Applications are installed from your computer, with your PDA in its synchronization cradle (NOT in the 5230 IP Appliance). See “Installing/Upgrading the 5230 IP Appliance Applications” on page 54 for instructions on installing the 5230 PDA Applications. Starting the 5230 IP Appliance PDA Applications Docking your PDA To dock your PDA in a 5230 IP Appliance • Slide your PDA downward in the 5230 Personality Module until it can’t go down any further. Note: Before docking your PDA in a 5230 IP Appliance, remove it from any protective case. Starting the 5230 PDA Phone Application The 5230 PDA Applications are accessed via the 5230 PDA Phone application main screen. To start the 5230 PDA Phone application 1. If the application is not visible, select PDA Phone in the Start menu. The 5230 PDA Phone application becomes the active program. 2. Tap the Connect PDA softkey. The 5230 PDA Phone application connects to the IP telephone switch. Note: You do not need to tap the Connect PDA softkey when you start the 5230 PDA Phone application for the first time, or when starting the application after closing it (using iTask), or after resetting your PDA. 3. If you have a new phone, you may be asked to enter your registration PIN and extension number (DN) the first time you connect your PDA to the phone. See your system administrator for more information. 8 Revision B Getting Started Exploring the 5230 Applications The PDA Phone Application This is the main 5230 IP Appliance PDA application. Use it to: • make and receive calls • access other 5230 Applications • set your general preferences PDA Phone Application—Main Screen Connection Status Area Can be Not Connected, Connected (Desk Phone user), Connected as Guest or Logged In (Hot Desk user). Display When the phone is idle, shows the current time and date. When the phone is ringing, shows the caller name and/or number (if available). When on a call, shows the number and/or name of the caller/ recipient (if available). Softkeys Show context-sensitive features. Tap a feature/application name to activate it. Buttons Top: Redial and Cancel. Bottom: Line appearances. You can have up to three line appearances, including the Prime Line (which is always the right button). These line appearances are programmed by your Administrator Revision B 9 5230 IP Appliance User Guide Provides one-touch access to the 5230 Applications. : Send It (see page 37) : Show Call Forwarding (see page 19) Mitel Toolbar : Feature Keys (see page 15) : Call History (see page 31) : Visual Voice Mail (see page 39) : Dial by Contact (see page 35) Menu Bar Use to access 5230 Applications, show/hide the Mitel Toolbar, change operational settings, view the software version of the 5230 PDA Applications, and to log in and out of a Hot Desking phone. Note: The Visual Voice Mail icon on the Mitel Toolbar flashes when the Message key on the 5230 IP Appliance flashes (to indicate that a new message or voice mail is waiting). Making and Receiving Calls You use the PDA Phone application and the keys on the 5230 IP Appliance to make calls. They function the same way as any standard Mitel Networks IP Phone. See “Making and Receiving Calls” on page 45 for more information. Accessing 5230 Applications You can access the other 5230 Applications from the PDA Phone application by: 10 • tapping the desired application icon on the Mitel Toolbar (to use this method, Show Mitel Toolbar must be selected in the View menu). • selecting the desired application in the View menu. Revision B Getting Started Changing PDA Phone Display Options From the View menu, you can show or hide the following (a check mark beside the option indicates that it is displayed): • Your extension number • The Mitel Toolbar PDA Phone Application—View Menu Setting Your Preferences From the Tools menu, you can set the following preference types: • Launch, notification and hot desk preferences (Options…). See below for more information. • Display scheme (color) for PDA Phone application (Change Skin…). Only change your display scheme when the phone is idle. • User type (Set User Type…). See below for more information. • Switch prompts language (Set Language…). This does not change the language of the 5230 PDA Applications, only the language on the display and the softkeys (the prompts from the switch). This also changes the language on the 5230 IP Appliance display behind the PDA. • Ringer settings (Set Ringer Volume… and Set Ringer Tone…).See below for more information. • Hot Desking preferences (Hot Desk Settings). This option only appears if you are a Hot Desk user. Revision B 11 5230 IP Appliance User Guide PDA Phone Application—Tools Menu Launch, Call Notification and Hot Desk preferences • Connections settings: • • Call Notification settings: • • Launch PDA Phone on incoming call. Automatically starts the PDA Phone application when you receive a call. Dialing Settings: • • Notify me when PDA is connected to a guest phone. Gives you a warning when you dock your PDA as a guest on a 5230 IP Appliance (see “User Types” on page 5 for more information). Launch the PDA Phone on dial.: automatically starts the PDA Phone application when you start dialing a number with the dialpad. Hot Desk settings: • Always Automatically Login: brings up the Hot Desk login window automatically when you dock your PDA in a 5230 IP Appliance. • Notify me when I disconnect my PDA without logging out: warns you when you undock your PDA without logging out. Note: The Hot Desk settings only appear if you are a hot desk user (see “User Types” on page 5). 12 Revision B Getting Started User Type Settings If you do not set your user type, every time you dock your PDA in a 5230 IP Appliance, you will get a message asking you to set your user type. Some features are not available until you set your user type. To set your user type 1. Select Set User Type… in the Tools menu. 2. In the drop down menu, select the appropriate option. Note: You cannot set your user type to Hot Desk unless you have been programmed as a Hot Desk user on the phone’s switch by your system administrator. 3. If you selected I am a hot desk user, enter your hot desk extension number. 4. Tap Save. PDA Phone Application—Main Screen Ringer settings Note: You cannot change ringer settings during a call. Do not undock your PDA while changing ringer settings. Note: If you make a call or receive a new call while changing the ringer volume, the ringer setting will be saved and the Ringer Adjust application terminated. 1. Select Set Ringer Volume… in the Tools menu. 2. Use the and keys on the 5230 IP Appliance to change the volume or tone to the desired setting. Every time you press the or key, the phone plays the new ring volume or tone. 3. When you are finished, tap Done. Note: You can also change the ringer volume when the phone is ringing by using the and keys to adjust the volume. When you answer the call, the setting is saved. Revision B 13 5230 IP Appliance User Guide Using a Hot Desk Phone To Log in a Hot Desk 5230 IP Appliance Note: You can only log in when the phone is idle. Note: You must set your user type to Hot Desk User before you can login as a Hot Desk user (see “User Type Settings” on page 13). 1. Dock your PDA in a Hot Desk 5230 IP Appliance, and tap Connect PDA. 2. In the HotDesk menu, select Login. The Hot Desking login screen is displayed (if you set your PDA to automatically login—see “Launch, Call Notification and Hot Desk preferences” on page 12—the login screen is automatically displayed when you dock your PDA). 3. Tap the Login button.The login process is complete when the connection status changes to Logged In. To Log Out of a Hot Desk 5230 IP Appliance Note: You can only log out when the phone is idle. Note: You can set your PDA to remind you to log out every time you undock your PDA after logging in (see “Launch, Call Notification and Hot Desk preferences” on page 12). • In the Hot Desking menu, select Log out. The logout process is complete when the connection status changes to Connected as Guest. Note: You can also use the login and logout using the softkeys. See page 62 in ”Appendix B—Using the 5230 IP Appliance Without a PDA” for more information. What’s Next? The rest of this User Guide contains the following: 14 • instructions on using the 5230 Feature Keys application (page 15) • instructions on using the other 5230 PDA Applications (page 31) • instructions on using basic and more advanced call making features (page 45) • additional information on using your PDA with the 5230 IP Appliance (page 53) • information on using your 5230 IP Appliance without a PDA (page 59). Revision B Using the 5230 Feature Keys Application Using the 5230 Feature Keys Application The Feature Keys Application provides one touch access to phone numbers, call forward settings and a variety of telephony features. This section is organized as follows • About the Feature Keys Application (below) • Call Forward Settings (page 18) • Speed Dials (page 22) • Other Telephony Features (page 23) Reminder: You must tap the Connect PDA softkey in the PDA Phone application every time you dock your PDA in a 5230 IP Appliance! About the Feature Keys Application Examples of Feature Key Pages You can have up to 15 category pages of Feature Keys, with 10 keys per page, all configurable to your preferences (see “Category Pages” on page 17). To start the Feature Keys application 1. From the PDA Phone application, do one of the following: • Tap in the Mitel toolbar. • Select Feature Keys… in the View menu. Revision B 15 5230 IP Appliance User Guide Application Modes The Feature Keys application has two operating modes: • Edit: Used to program/edit Feature Keys. You can edit Feature Keys in offline mode. • Run: Used to invoke features. You must be docked in a 5230 IP Appliance with the PDA Phone application running to be in Run mode. To change application modes 1. Start the Feature Keys application (see “Starting the 5230 PDA Phone Application” on page 8). 2. In the Modes menu, select Edit or Run. Quick Launch By default, you get a feature confirmation screen when you invoke a feature. You can disable this by selecting the Quick Launch option. To enable/disable Quick Launch 1. Start the Feature Keys application (see “Starting the 5230 PDA Phone Application” on page 8). 2. In the Modes menu, select Quick Launch. A check mark indicates that Quick Launch is active. Programming a Feature Key See the following sections: • “Call Forward Feature Keys” on page 18 • “Speed Dial Feature Keys” on page 22 • “Other Features Keys” on page 23 Clearing a Feature You can erase a feature from a Feature Key. Once you’ve cleared a Feature Key, you cannot use it until you reprogram it. To clear a Feature Key 1. Start the Feature Keys application (see “Starting the 5230 PDA Phone Application” on page 8). 2. In the Modes menu, select Edit. 3. Go to the desired category page, and tap the Feature Key you want to clear. 4. Tap Clear Feature. The Feature Key is cleared, and the current category page window is displayed. 16 Revision B Using the 5230 Feature Keys Application Category Pages With category pages, you can have logical Feature Key groups. You can have up to 15 category pages, with 10 Feature Keys per page. Category pages are listed in the order they are created. Category Pages List To select a category page 1. Start the Feature Keys application (see “Starting the 5230 PDA Phone Application” on page 8). 2. Tap on the name of the current category page (top right) to open the drop down menu. 3. Tap on the name of the category page you want to open. That category page is displayed. To create a category page 1. Start the Feature Keys application (see “Starting the 5230 PDA Phone Application” on page 8). 2. Tap on the name of the current category page (top right). 3. Tap Edit Category…. 4. Tap Add…. 5. Enter a name for the category page (cannot be blank). 6. Select which type of category page you are creating (Speed Dial, Forward Profile, or Generic Feature), then tap OK. Note: The type of category page you choose simply determines the default features keys for the new page. You can add any type of Feature Key to that category page. 7. To exit the Edit Category page, tap Exit. Revision B 17 5230 IP Appliance User Guide To rename a category page 1. Start the Feature Keys application (see “Starting the 5230 PDA Phone Application” on page 8). 2. Tap on the name of the current category page (top right). 3. Tap Edit Category…. 4. Select the category page you want to rename from the pull-down menu. 5. Tap Rename…. 6. Type in the new name, then tap OK. 7. To exit the Edit Category page, tap Exit. To delete a category page Note: Deleting a category page will delete all the Feature Keys on that page. Note: You must have at least one category page (that is, if there is only one category left, you cannot delete it). 1. Start the Feature Keys application (see “Starting the 5230 PDA Phone Application” on page 8). 2. Tap on the name of the current category page (top right). 3. Tap Edit Category…. 4. Select the category page you want to delete from the pull-down menu. 5. Tap Delete…. 6. If you really want to delete this category page, tap OK. If you don’t want to delete this category page, tap Cancel. 7. To exit the Edit Category page, tap Exit. Call Forward Feature Keys You can create various call forward profiles and settings, then select which one is more appropriate for a given situation. For example, when you are in the office, you may want to forward your calls to a colleague if you can’t answer your phone, but when you are on the road, you may prefer to forward your calls to your cellular phone. When you select a call forward profile, your calls will be forwarded to the specified number when you don’t answer your phone, or when you select Forward when receiving a call (see “To receive a call” on page 46). With the Feature Keys application, you can program and use the following: • Call Forward Profiles (see page 19). Each profile lets you set: - No forwarding OR 18 Call Forward Always Revision B Using the 5230 Feature Keys Application OR • - Call Forward Busy for internal callers, and/or - Call Forward Busy for external callers, and/or - Call Forward No Answer for internal callers, and/or - Call Forward No Answer for external callers Other Call Forwarding Settings (see page 21): - Call Forward End Chaining - Call Forward Follow 3rd Party - Call Forward Follow Me/I Am Here - Cancel Call Forward To use (activate) a Call Forward Feature Key 1. Dock your PDA in a 5230 IP Appliance. 2. Start the Feature Keys application (see “Starting the 5230 PDA Phone Application” on page 8). 3. Make sure you are in Run mode. 4. Go to the desired category page. 5. Tap the desired Call Forward Feature Key. That Call Forward setting is activated. Note: You may hear some dial tones and see characters on your display when you activate a Call Forward Feature Key. This is normal. Call Forward Profiles To view the current Call Forward profile 1. Use one of the methods below: • From the PDA Phone application, tap in the Mitel Toolbar. • From the PDA Phone application, select Show Call Forwarding… in the View menu. • From the Feature Keys application, select Show Current Call Forwarding in the Tools menu. 2. The active Call Forward profile is displayed. When you are done, tap Cancel. To program a Call Forward profile Feature Key 1. Start the Feature Keys application (see “Starting the 5230 PDA Phone Application” on page 8). 2. In the Modes menu, select Edit. 3. Go to the desired category page. 4. Tap the Feature Key you want to program as a Call Forward profile. 5. Select Forward Profile in the drop-down list, and tap OK. Revision B 19 5230 IP Appliance User Guide 6. Enter a label for this call forward profile (for example, “Forward to cellphone”). 7. Tap Define Forwarding Settings…. The forwarding settings window opens. Define Call Forward Setting Window 8. Select the desired Call Forward option: • No forwarding. • Always forward. • Forward based on the following. 9. If you selected Forward based on the following:, select which cases you want to enable for this profile: • Busy internal • Busy external • No answer internal • No answer external 10. Unless you selected No forwarding, enter the number(s) to which your calls will be forwarded. To import a number from your PDA’s Contacts application: • Tap the … box. The Contacts application opens. • Tap and hold the desired contact, and select Import Number… in the shortcut menu (you can also select it from the Tools menu). The Import Number window opens. • Select the desired number from the Contact Number drop-down list. • Choose/enter a dialing prefix if needed. • Tap Import. 11. Tap OK, then OK again.Your Call Forward Profile Feature Key is ready to activate. 20 Revision B Using the 5230 Feature Keys Application Other Call Forward Settings Note: Not all settings may be available on your system. Talk to your system administrator for more information. • Call Forward End Chaining (CF-End Chaining): Use this feature to prevent the station to which you are forwarding your calls from forwarding the call to another station. - This setting does not affect any other call forward settings. • Cancel Call Forward End Chaining (Canc End Chaining): Use to re-allow the station to which you are forwarding a call to re-forward the call to another number. • Call Forward Follow 3rd Party (CF-Follow 3rd Pty): Use to set up call forward for a phone from a remote station (for example, you are sitting at phone B, and want to call forward the calls at phone A to phone C). When programming Call Forward Follow 3rd Party, you must enter the number of the phone for which you are forwarding the call (src phone–phone A in the example), and the number to which the calls will be forwarded (dest phone–phone C in the example). • Cancel Call Forward Follow 3rd Party (Canc Follow 3rd): Use to cancel Call Forward 3rd Party. When programming Cancel Call Forward 3rd Party, you must enter the number of the remote station for which you had set Call Forwarding Follow 3rd Party (phone A in example above). • Call Forward I Am Here (CF-I Am Here): Use to forward calls from a remote station to the current 5230 IP Appliance. When programming, you must enter the number of the station from which the calls are being forwarded. • Cancel Call Forward Always (Cancel Follow Me): Cancels Call Forward Always. • Cancel Call Forward Follow Remote (Cancel Follow Rmt): Cancels Call Forward Always for a remote station. When Programming, you must enter the number of the station for which calls were being forwarded. • Cancel Call Forward Busy (Cancel CF Busy): Cancels all Call Forward Busy settings. • Cancel Call Forward No Answer (Cancel CF No Ans): Cancels all Call Forward No Answer settings. • Cancel all Call Forwards (Cancel All CF): Cancels all Call Forward settings. To program a Call Forward Setting Feature Key 1. Start the Feature Keys application (see “Starting the 5230 PDA Phone Application” on page 8). 2. In the Modes menu, select Edit. 3. Go to the desired category page. 4. Tap the Feature Key you want to program as a Call Forward setting. 5. Select the desired Call Forward setting in the drop-down list, and tap OK. 6. If desired, enter a label for this Call Forward Profile. Revision B 21 5230 IP Appliance User Guide 7. If required, enter the number from/to which your calls will be forwarded. To import a number from your PDA’s Contacts application: • Tap the … box. The Contacts application opens. • Tap and hold the desired contact, and select Import Number… in the shortcut menu (you can also select it from the Tools menu). The Import Number window opens. • Select the desired number from the Contact Number drop-down list. • Choose/enter a dialing prefix if needed. • Tap Import. 8. Tap OK.Your Call Forward Setting Feature Key is ready to use. Speed Dial Feature Keys Use Speed Dial keys to store the numbers of people you call often. To use a Speed Dial Feature Key 1. Dock your PDA in a 5230 IP Appliance. 2. Start the Feature Keys application (see “Starting the 5230 PDA Phone Application” on page 8). 3. Make sure you are in Run mode. 4. Go to the desired category page. 5. Pick up the handset (if you don’t, the call will be in handsfree mode). 6. Tap the desired Speed Dial Feature Key. The number is dialed. To create/edit a Speed Dial key 1. Start the Feature Keys application (see “Starting the 5230 PDA Phone Application” on page 8). 2. In the Modes menu, select Edit. 3. Go to the desired category page. 4. Tap the Feature Key you want to program as a Speed Dial. 5. In the drop-down menu, select Speed Dial, then tap OK. 22 Revision B Using the 5230 Feature Keys Application Speed Dial Window 6. Enter a label for this Speed Dial Feature Key (for example: “John Mohammed”, “Home”, “Dentist”). 7. Enter the phone number (20 characters maximum). To insert a pause, enter the letter p. To import a number from your PDA’s Contacts application: • Tap the … box. The Contacts application opens. • Tap and hold the desired contact, and select Import Number… in the shortcut menu (you can also select it from the Tools menu). The Import Number window opens. • Select the desired number from the Contact Number drop-down list. • Choose/enter a dialing prefix if needed. • Tap Import. 8. Tap OK.Your Speed Dial Feature Key is ready to use. Other Features Keys You can program a Feature Key with any one of the following telephony features: • Account Code (see page 24) • Campon (see page 27) • Call Park (see page 24) • Do Not Disturb (see page 28) • Call Pickup (see page 25) • Headset On/Off (see page 30) • Callback (see page 26) • Clear All Features (see page 28) Note: Not all features may be available on your system. Talk to your system administrator for more information. Note: When using a Feature Key, you may hear tones and see characters on your 5230 IP Appliance while the Feature Keys application transmits the information to the switch. This is normal. Revision B 23 5230 IP Appliance User Guide Account Codes Account codes are used to track incoming and outgoing calls. Account codes are three digits in length, from 000 to 999. You can program a Feature Key with an account code for convenience. To use an Account Code Feature Key during a call 1. Start the Feature Keys application (see “Starting the 5230 PDA Phone Application” on page 8). 2. Make sure you are in Run mode. 3. Go to the desired category page. 4. Tap the appropriate Account Code Feature Key. To create/edit an Account Code Feature Key 1. Start the Feature Keys application (see “Starting the 5230 PDA Phone Application” on page 8). 2. In the Modes menu, select Edit. 3. Go to the desired category page. 4. Tap the Feature Key you want to program as a Account Code. 5. In the drop-down menu, select Account Code, then tap OK. 6. Enter a label for this Account Code Feature Key. 7. Enter the account code number. 8. Tap OK.Your Account Code Feature Key is ready to use. Call Park Use this feature to pick-up a call parked by the attendant. To retrieve a parked call using a Feature Key 1. Open the Feature Keys application (see “Starting the 5230 PDA Phone Application” on page 8). 2. In the Modes menu, select Run. 3. Go to the desired category page. 4. Lift the handset. OR Press the key. 5. Tap the desired CP-Rmt Retrieve Feature Key. To program a Call Park Feature Key 1. Start the Feature Keys application (see “Starting the 5230 PDA Phone Application” on page 8). 2. In the Modes menu, select Edit. 3. Go to the desired category page. 24 Revision B Using the 5230 Feature Keys Application 4. Tap the Feature Key you want to program as a Call Park. 5. In the drop-down menu, select CP-Rmt Retrieve, then tap OK: 6. If desired, enter a label for this Feature Key. 7. Tap OK. Your Call Park Feature Key is ready to use. Call Pickup Use this feature to answer a call ringing on another station in your Pickup Group (for more information, talk to your system administrator). To pick up a call using a Call Pickup Feature Key 1. Start the Feature Keys application (see “Starting the 5230 PDA Phone Application” on page 8). 2. In the Modes menu, select Run. 3. Go to the desired category page. 4. Lift the handset. OR Press the key. 5. Tap the desired Call Pickup Feature Key: • To pick up a call from a specific phone in your Pickup Group, tap the corresponding Call Pickup-Direct Feature Key. • To pick up a ringing call in your Pickup Group, tap the Call Pickup-Dialed Feature Key, and dial the extension number of the ringing phone. To program a Call Pickup Feature Key 1. Start the Feature Keys application (see “Starting the 5230 PDA Phone Application” on page 8). 2. In the Modes menu, select Edit. 3. Go to the desired category page. 4. Tap the Feature Key you want to program as a Call Pickup. 5. In the drop-down menu, select the desired Call Pickup setting, then tap OK: • Call Pickup-Direct: used to pick up calls from a specific station in your Pickup Group. • Call Pickup-Dialed: used to pick up a call from any station in your Pickup Group. 6. If desired, enter a label for this Feature Key. 7. If you are programming a Call Pickup-Direct, enter the number of the remote station. To import a number from your PDA’s Contacts application: • Tap the … box. The Contacts application opens. • Tap and hold the desired contact, and select Import Number… in the shortcut menu (you can also select it from the Tools menu). The Import Number window opens. • Select the desired number from the Contact Number drop-down list. Revision B 25 5230 IP Appliance User Guide • Choose/enter a dialing prefix if needed. • Tap Import. 8. Tap OK. Your Call Pickup Feature Key is now available for use. Callback Callback notifies you as soon as the internal extension number you are trying to reach is free. To request and answer a Callback 1. Start the Feature Keys application (see “Starting the 5230 PDA Phone Application” on page 8). 2. In the Modes menu, select Run. 3. Go to the desired category page. 4. Tap the Callback-Setup Feature Key, then hang up. 5. When the party is available, your phone starts ringing, and the display shows CALLBACK XXXX. 6. Lift the handset or headset. OR Press the dialed. key. The number is automatically Note: If you do not “answer” the Callback, or if you successfully call the called back number before getting a Callback ring, the Callback request is cancelled. To cancel Callback requests 1. Start the Feature Keys application (see “Starting the 5230 PDA Phone Application” on page 8). 2. In the Modes menu, select Run. 3. Go to the desired category page. 4. Tap the desired Cancel Callback Feature Key: • To cancel a specific Callback request, tap the associated CB-Cancel Indiv Feature Key. • To cancel all your Callback requests, tap the Callback-Cancel Feature Key. To program a Callback Feature Key 1. Start the Feature Keys application (see “Starting the 5230 PDA Phone Application” on page 8). 2. In the Modes menu, select Edit. 3. Go to the desired category page. 4. Tap the Feature Key you want to program as a Callback. 26 Revision B Using the 5230 Feature Keys Application 5. In the drop-down menu, select the desired Callback setting, then tap OK: • Callback-Setup: used to send a Callback request. • CB-Cancel Indiv: used to cancel a specific Callback request. • Callback-Cancel: used to cancel all Callback requests. 6. If desired, enter a label for this Feature Key. 7. If you are programming a CB-Cancel Indiv Feature Key, enter the extension number of the station to which you will be cancelling a Callback request with this key. To import a number from your PDA’s Contacts application: • Tap the … box. The Contacts application opens. • Tap and hold the desired contact, and select Import Number… in the shortcut menu (you can also select it from the Tools menu). The Import Number window opens. • Select the desired number from the Contact Number drop-down list. • Choose/enter a dialing prefix if needed. • Tap Import. 8. Tap OK. Your Callback Feature Key is now available for use. Campon Use this feature when you get a busy tone so that you can be notified when the busy party becomes available. To use Campon and Call Privacy 1. Start the Feature Keys application (see “Starting the 5230 PDA Phone Application” on page 8). 2. In the Modes menu, select Run. 3. Go to the desired category page. 4. Tap the desired Campon Feature Key: • To send a Campon request, tap the Camp On-Setup Feature Key. • To prevent a Campon tone from interrupting a call, tap the Call Privacy Feature Key. Call Privacy is disabled at the end of the call. To program a Campon Feature Key 1. Start the Feature Keys application (see “Starting the 5230 PDA Phone Application” on page 8). 2. In the Modes menu, select Edit. 3. Go to the desired category page. 4. Tap the Feature Key you want to program as a Campon. Revision B 27 5230 IP Appliance User Guide 5. In the drop-down menu, select the desired Campon setting, then tap OK: • Camp On-Setup: used to send a Campon request. • Call Privacy: used to silence Campon tones when on a call. 6. If desired, enter a label for this Feature Key. 7. Tap OK. Your Campon Feature Key is now available for use. Clear All Features Feature Key Use the Clear All Features Feature Key to cancel the following features: • all your Call Forward settings • all your Do Not Disturb settings • all your Callbacks To use the Clear All Features Feature Key 1. Start the Feature Keys application (see “Starting the 5230 PDA Phone Application” on page 8). 2. In the Modes menu, select Run. 3. Go to the desired category page. 4. Tap the Clear All Features Feature Key. The affected features are cleared. To program a Clear All Features Feature Key 1. Start the Feature Keys application (see “Starting the 5230 PDA Phone Application” on page 8). 2. In the Modes menu, select Edit. 3. Go to the desired category page. 4. Tap the Feature Key you want to program as a Clear All Features. 5. In the drop-down menu, select Clear All Features, then tap OK. 6. If desired, enter a label for this Feature Key. 7. Tap OK. Your Clear All Features Feature Key is ready to use. Do Not Disturb When you enable Do Not Disturb, callers will get a busy tone, and a message indicating you do not wish to be disturbed (for example, XXXX NO DIST). To enable/disable Do Not Disturb 1. Start the Feature Keys application (see “Starting the 5230 PDA Phone Application” on page 8). 2. In the Modes menu, select Run. 3. Go to the desired category page. 28 Revision B Using the 5230 Feature Keys Application 4. Tap the desired Do Not Disturb Feature Key: • To enable Do Not Disturb, tap the Do Not Disturb Feature Key. • To disable Do Not Disturb, tap the DND-Cancel Feature Key. To enable/disable Do Not Disturb for a remote station 1. Start the Feature Keys application (see “Starting the 5230 PDA Phone Application” on page 8). 2. In the Modes menu, select Run. 3. Go to the desired category page. 4. Tap the desired remote Do Not Disturb Feature Key: • To enable Do Not Disturb for a remote station, tap the associated DND-Remote Feature Key. • To disable Do Not Disturb for a remote station, tap the associated DND-Rmt Cancel Feature Key. To program a Do Not Disturb Feature Key 1. Start the Feature Keys application (see “Starting the 5230 PDA Phone Application” on page 8). 2. In the Modes menu, select Edit. 3. Go to the desired category page. 4. Tap the Feature Key you want to program as a Do No Disturb. 5. In the drop-down menu, select the desired Do Not Disturb setting, then tap OK: • Do Not Disturb: used to enable Do Not Disturb for your station. • DND-Cancel: used to disable Do Not Disturb for your station. • DND-Remote: used to enable Do Not Disturb for a remote station. • DND-Rmt Cancel: used to disable Do Not Disturb for a remote station. 6. If desired, enter a label for this Feature Key. 7. If you are programming a remote Do Not Disturb Feature Key, enter the extension number of the remote station. To import a number from your PDA’s Contacts application: • Tap the … box. The Contacts application opens. • Tap and hold the desired contact, and select Import Number… in the shortcut menu (you can also select it from the Tools menu). The Import Number window opens. • Select the desired number from the Contact Number drop-down list. • Choose/enter a dialing prefix if needed. • Tap Import. 8. Tap OK. This Feature Key is now available for use. Revision B 29 5230 IP Appliance User Guide Headset Use this feature to enable and disable headset operation. To enable/disable your headset 1. Start the Feature Keys application (see “Starting the 5230 PDA Phone Application” on page 8). 2. In the Modes menu, select Run. 3. Go to the desired category page. 4. Tap the desired headset Feature Key: • To enable headset operation, tap the Headset On Feature Key. • To disable headset operation, tap the Headset Off Feature Key. Note: We recommend you disable your headset before removing your PDA from the 5230 IP Appliance. If you do not, you may have problems making calls without the PDA. Note: You can set the Headset On feature to automatically disable your headset when you undock your PDA, but you will have to re-enable your headset the next time you dock your PDA. To program a Headset Feature Key 1. Start the Feature Keys application (see “Starting the 5230 PDA Phone Application” on page 8). 2. In the Modes menu, select Edit. 3. Go to the desired category page. 4. Tap the Feature Key you want to program as a Headset. 5. In the drop-down menu, select the desired Headset setting, then tap OK: • Headset On: used to enable headset operation. • Headset Off: used to disable headset operation. 6. If desired, enter a label for this Feature Key. 7. If you are programming a Headset On Feature Key: • If desired, select Turn headset off when PDA is removed. 8. Tap OK. Your Headset Feature Key is ready to use. 30 Revision B Using the Other 5230 Applications Using the Other 5230 Applications This section shows how to use the 5230 IP Appliance Applications, except for the Feature Keys Application (see page 15). The Applications are presented in alphabetical order. Note: Most of the commands that apply to a single item are also available when you tap and hold an item. Call History Note: To use this feature, you must first define your user type (see “Setting Your Preferences” on page 11). Reminder: You must tap the Connect PDA softkey in the PDA Phone application every time you dock your PDA in a 5230 IP Appliance! The Call History application lists all the calls you have made and received with your 5230 IP Appliance. You can view your Call History on your PDA, even when undocked. You can: • Update your Call History (page 32) • View your Call History (page 32) • Manipulate a Call History item (page 34) Note: You can view a maximum of 50 calls at a time in your Call History. To view additional calls, you must delete some of the displayed calls. Note: Multiple calls to/from the same extension on a given day are logged as item in Call History. To start the Call History application 1. From the PDA Phone application, do one of the following: • Tap in the Mitel toolbar. • Select Call History… in the View menu. 2. If your PDA is not docked in a 5230 IP Appliance, you will get a message asking you if you want to work offline. • To work offline, tap Yes. While working offline, some features are not available (unavailable features are greyed out). • To exit the Call History application, tap No. • To work online, dock your PDA in a 5230 IP Appliance (see “To start the 5230 PDA Phone application” on page 8), then go back to step 1. Revision B 31 5230 IP Appliance User Guide Updating Your Call History The telephone switch keeps data on all the calls you make and receive. When you update your Call History, you get the information on the calls you’ve made since you last updated your Call History. Your Call History is automatically updated when you dock your PDA to a 5230 IP Appliance and start the PDA Phone application. To manually update your Call History 1. Start the Call History application (see “To start the Call History application” on page 31). 2. In the Tools menu, select Refresh List. Viewing Your Call History You can view the calls you made and received using the following criteria: • All Calls • New Calls • Incoming Calls • Outgoing Calls • Missed Calls Note: New calls are the calls that appeared the last time you updated your Call History. These New calls become Viewed calls the next time you update your Call History. Missed calls do not include incoming calls while you are on the phone. For each call, you can view the following information: • • Basic information (Call History main window): - New (dark arrow on icon) or Viewed (clear arrow on icon). To change all new calls to Viewed, update your Call History. - Caller/recipient name or number (if available) - Time and date of call Detailed information (View Details window): - Name and number of caller/recipient (if available) - Detailed date and time of call - Type of call (incoming, outgoing or missed) - Duration of last call - Number of times a call was received from a given caller (for Missed and Incoming Calls) on that day - Number of times you called a given recipient on that day You can also view your Contacts information for the caller/recipient if there is an entry in your Contacts for that person. 32 Revision B Using the Other 5230 Applications To view your Call History 1. Start the Call History application (see “To start the Call History application” on page 31). Call History—Main Window The icon on the left indicates the type of call: incoming call (), outgoing call (), missed call (). New calls are indicated by a dark arrow. 2. To change the viewing criteria for your Call History, tap the criteria pull-down menu (), and select the desired criteria. The new setting is saved automatically. To view details on a call 1. Start the Call History application (see “To start the Call History application” on page 31). 2. Select a call in the list, then select View Details… in the Tools menu (you can also tap and hold the call, and select View Details…). Call History—View Call Details 3. To return to the Call History main screen, tap Exit. Revision B 33 5230 IP Appliance User Guide To view Contact information for a caller/recipient 1. Start the Call History application (see “Starting the 5230 PDA Phone Application” on page 8). 2. Tap a call to select it. 3. In the Tools menu, select View Contact…. The Contacts information on the caller/recipient is displayed. 4. Close the Contacts detail window to return to the Call History main screen. Note: If a name in Call History does not match exactly that person’s name in your Contacts, you will not be able to view Contact information for that person (for example, if Call History shows J. Mohammad, and your Contact for him shows Joe Mohammad, you will not be able to see his Contact information from your Call History). Manipulating a Call History Item You can do the following: - add a caller/recipient to your Contacts - dial a caller/recipient - delete calls from your Call History To add a caller/recipient to your Contacts List 1. Tap a call to select it. 2. In the Tools menu, select Add to Contacts. The information is added to your PDA’s Contacts application, and the Contacts detail window is displayed. Note: If you select Add Contact Silently in the Tools menu, the Contacts detail window is not displayed when you add a caller/recipient to the Contacts application. To dial from your Call History 1. Tap a call to select it. 2. In the Tools menu, select Dial…. 3. Enter a prefix if needed, and tap Dial. 4. The PDA Phone application is automatically started, and the call is dialed. To delete a call from your Call History 1. Tap a call to select it. 2. In the Tools menu, select Delete (you can also tap and hold the call, and select Delete). The call is removed from your Call History. To delete all calls in your Call History 1. In the Tools menu, select Delete All. Your Call History is cleared. 34 Revision B Using the Other 5230 Applications Contacts Tools Reminder: You must tap the Connect PDA softkey in the PDA Phone application every time you dock your PDA in a 5230 IP Appliance! The 5230 Application adds the following tools to your PDA’s Contacts application: • Import Number • Add to Send It • Dial Import Number Use this to enter Contact information when programming a Feature Key (see “Using the 5230 Feature Keys Application” on page 15). Add to Send It Use this to send Contact information to another 5230 IP Appliance user (see “Send It” on page 37). To add a contact to the Send It outbox 1. Tap and hold a contact, and select Add to Send It. 2. A confirmation message is displayed. Close it to return to the Contacts screen. Note: If you selected Launch Application in the Send It options, the Send It application is automatically opened when you add a contact to Send It (see page 35 for details). Dial by Contacts This feature lets you dial a number using your Contacts list. To start the Dial by Contacts application 1. From the PDA Phone application, do one of the following: • Tap in the Mitel toolbar. • Select Dial by Contacts… in the View menu. Revision B 35 5230 IP Appliance User Guide To dial by contacts 1. Start your Contacts application. OR Start the Dial by Contacts application (see ”To start the Dial by Contacts application” above). 2. Tap and hold the contact you want to call, and select Dial… (you can also select the contact and choose Dial… in the Tools menu).The Dial by Contacts window opens. Dial by Contacts Window 3. To select a different phone number for this contact, click on the Contact Number drop down menu, and select the desired number. 4. If you need a dialing prefix, check the Prefix box, and enter the prefix. Entering a Dialing Prefix (Free-Form and Canonical Formats) 5. If the number you selected is in canonical format, select the desired dialing profile in the Dialing Locations drop down menu. If this is a local call, tap the Local check box (for more information on the canonical dialing formats and on dialing profiles, see “Using the Canonical Dialing Format” on page 56). 6. Tap Dial. The call is dialed. 36 Revision B Using the Other 5230 Applications Send It Note: Send It only works in a single ICP environment. For more information, talk to your system administrator. Reminder: You must tap the Connect PDA softkey in the PDA Phone application every time you dock your PDA in a 5230 IP Appliance! While on a call, you can send data to another PDA docked in a 5230 IP Appliance on your network. Sending a file does not interrupt the call, but you cannot use PDA applications while the file is being transmitted. Only one call participant at a time can send files. The maximum size of the files you can send and receive depends on the available memory on your PDA. Send It is organized like a mailbox, with an inbox for received files, and an outbox for files to send. To start the Send It application 1. From the PDA Phone application, do one of the following: • Tap in the Mitel toolbar. • Select Send It… in the View menu. To send a file 1. While on a call, start the Send It application (see ”To start the Send It application” above). 2. In the drop down menu, select Outbox. Send It Outbox 3. Select the file(s) you want to send. • To add a file to the Send It outbox, tap Add to List, navigate to the desired folder, and tap the file you want to send. The file is copied in your Send It outbox. Revision B 37 5230 IP Appliance User Guide • To add a contact to the Send It outbox, open your Contacts, tap and hold the desired contact, and select Add to Send It (also available in the Tools menu). The contact is copied to your Send It outbox. Note: You can add files and contacts to your outbox anytime, even with your PDA undocked. 4. Tap Refresh List. The list of callers is updated. 5. Select to which caller(s) you want to send the file(s). 6. Tap Send. You will get a confirmation message when all files are sent. To manage files 1. Start the Send It application (see “To start the Send It application” on page 37). 2. Select Inbox or Outbox in the drop down menu. 3. Select a file, then: • To move the file to another directory, select Move in the Tools menu, and navigate to the desired folder (this will remove the file from the Send It folder). • To add a Contacts file to your Contacts application, select Add to Contacts in the Tools menu (Contacts files have a .ctc suffix). • To delete the file, select Delete in the Tools menu. To delete all the files in your Inbox, tap the Clear List button. To change your Send It preferences 1. Start the Send It application (see “To start the Send It application” on page 37). 2. In the Tools menu, select Options…. 38 • To launch Send It automatically when adding a Contact to Send It (see “To add a contact to the Send It outbox” on page 35), select the Launch Application option. • To get a notification when your receive a file, select the Always Alert me of incoming files option (the notification gives you the choice of refusing the incoming file). Revision B Using the Other 5230 Applications Visual Voice Mail Reminder: You must tap the Connect PDA softkey in the PDA Phone application every time you dock your PDA in a 5230 IP Appliance! The Visual Voice Mail application provides a visual interface to your voice mailbox. You can view a list of your voice mails from your PDA, and manipulate and listen to your voice mails when docked in a 5230 IP Appliance. To start the Visual Voice Mail application 1. From the PDA Phone application, do one of the following: • Tap in the Mitel toolbar. • Select Visual Voice Mail… in the View menu. 2. If your PDA is docked in a 5230 IP Appliance, the login screen appears. Note: You must set your user type to enter Visual Voice Mail (see “Setting Your Preferences” on page 11). • To login to your voice mailbox, enter your mailbox and password, and tap the Login button. You voice mail list is automatically updated. • To work offline (that is, view the previously downloaded list of your voice mails), tap the Work Offline button. • To exit the Visual Voice Mail application, tap the Exit button. If your PDA is not docked in a 5230 IP Appliance, you will get a message asking you if you want to work offline. • To work offline, tap Yes. While working offline, some features are not available (unavailable features are greyed out). • To exit the Visual Voice Mail application, tap No. • To work online: dock your PDA in a 5230 IP Appliance (see “To start the 5230 PDA Phone application” on page 8), then go back to step 1. To exit the Visual Voice Mail application • In the Tools menu, select Logout. Do not exit the application by taping the x at the top right of the screen. Visual Voice Mail Properties You can set the following preferences for your Visual Voice Mail application: • automatically log in to your voice mailbox when docking your PDA in a 5230 IP Appliance. • view the Contacts application window when adding a caller to your Contacts. • program your voice mail mailbox and/or password. Revision B 39 5230 IP Appliance User Guide To set your Visual Voice Mail preferences 1. Start the Visual Voice Mail application (see “To start the Visual Voice Mail application” on page 39). 2. In the Tools menu, select Properties…. 3. Select the desired option(s): • Prompt for voice mail login on PDA insertion. • Show Contact window when adding entries. • Default Mailbox/Passcode. 4. If you select Default Mailbox/Passcode, enter your mailbox and/or password. 5. Tap OK. To choose when to update your list of voice mails 1. Start the Visual Voice Mail application (see “To start the Visual Voice Mail application” on page 39). 2. In the Tools menu, select Auto Download…. 3. Select the desired option: • Only download when I login: Update your list of voice mails only when logging in your voice mailbox. • On PDA insertion in the Phone: Update your list of voice mails when you dock your PDA in a 5230 IP Appliance. • When logged out, download every: Update your list of voice mails at regular interval when docked in a 5230 IP Appliance. 4. If you select the second or third option, enter your voice mailbox password if desired (if you don’t, you will be prompted to enter it whenever the Visual Voice Mail application updates your list of voice mails). 5. If you select the third option, enter also the interval between updates (minutes or hours), and select the interval unit in the drop-down list. 6. Tap OK. Updating your List of Voice Mails To download your list of voice mails • Start the Visual Voice Mail application (see “To start the Visual Voice Mail application” on page 39) while docked in 5230 IP Appliance. To manually update your list of voice mails 1. In the Visual Voice Mail application Tools menu, select Logout. 2. In the Tools menu, select Login…. 3. Enter your password, then tap the Login button.The Visual Voice Mail main window opens, and your list of voice mails is updated. 40 Revision B Using the Other 5230 Applications Viewing and Listening to Voice Mails Note: If the Visual Voice Mail application is idle for more than five minutes, the application will automatically log you out. To view your list of voice mails 1. Start the Visual Voice Mail application (see “To start the Visual Voice Mail application” on page 39). 2. The list of voice mails is displayed. Visual Voice Mail Main Window For each call, the following are displayed: • Status: - new (closed envelope icon) or saved (open envelope icon) - urgent (exclamation mark). • The name or number of the caller (if available). • The date and time the call was received. To change the viewing criteria 1. Tap the criteria pull-down menu, and select the desired criteria. • All • Urgent • New • Saved 2. The new setting is saved automatically. Revision B 41 5230 IP Appliance User Guide To listen to a voice mail 1. Tap a call to select it. 2. In the Messages menu, select Play… (you can also double-tap the call, or tap and hold the call and select Play…). The Visual Voice Mail application accesses your voice mailbox, the 5230 IP Appliance plays the message in handsfree mode, and the Play window is displayed. • To listen to a call in privacy: pick up the handset or headset before selecting Play. Play Window 3. Use the navigation buttons to stop, rewind, fast forward, go to the start or the end of the message. Tap the Pause button to temporarily stop the voice mail playback. 4. When you have finished listening to your voice mail you can: • Tap Save to save the voice mail. • Tap Delete to delete the voice mail from your list and your mailbox. • Tap Next to listen to the next voice mail in the list. • Tap Previous to listen to the previous voice mail in the list. • Tap Dial to call the contact (does not work if the callers number is not available). • Tap OK to return to the Visual Voice Mail main window. To add a caller to your Contacts 1. Select the call. 2. In the Messages menu, select Add to Contacts (you can also tap and hold the message, and select Add to Contacts). The caller information is added to your PDA’s Contacts application. 42 Revision B Using the Other 5230 Applications To view a caller’s Contact information 1. Select a call. 2. In the Messages menu, select View Contact…. 3. The Contacts detail window for that caller is displayed. 4. To return to the Visual Voice Mail application, tap OK. Note: If a name in your Visual Voice Mail list does not match exactly that person’s name in your Contacts, you will not be able to view Contact information for that person (for example, if your Visual Voice Mail list shows J. Mohammad, and your Contact for him shows Joe Mohammad, you will not be able to see his Contact information from your Call History). To save or delete a voice mail 1. Select the call you want to save or delete. 2. In the Messages menu, select Save or Delete. To return a call 1. Select the call you want to return. 2. In the Messages menu, select Dial…. The call is dialed (see “Dial by Contacts” on page 35 for more information). Revision B 43 5230 IP Appliance User Guide 44 Revision B Making and Receiving Calls Making and Receiving Calls This section shows the basic telephony functions of the 5230 IP Appliance, and is organized as follows: • Operation of the 5230 IP Appliance (below) • Call Making Features (page 46) Operation of the 5230 IP Appliance This section shows the basic steps to make and receive calls with your 5230 IP Appliance. Other call making features are detailed in “Call Making Features” on page 46. Operating Modes The 5230 IP Appliance can be used in any of the following operating modes: • Handset mode: when you are using the handset to talk and listen to your party. • Headset mode: when you are using a headset to talk and listen to your party. You activate/deactivate your headset using the Headset On and Headset Off Feature Keys (see “Headset” on page 30). See “Tips for Your Comfort and Safety” on page 6 for more information on headsets. • Handsfree mode: when you are using the phone's integrated microphone and speakers to talk and listen to your party. - To enable handsfree mode, press the that the handsfree microphone is on. key; the key lights up to indicate - To disable handsfree mode, lift the handset or enable the headset; the turns off to indicate that the handsfree microphone is off. - To re-enable handsfree mode, press the key and replace the handset; the key lights up to indicate that the handsfree microphone is on. light Making and Receiving Calls Note: You can set your 5230 PDA Phone application to start automatically when you dial a number and/or when you receive a call. See “Setting Your Preferences” on page 11 for more information. To make a call 1. Lift the handset. OR Put on the headset (if needed, reconnect the quick-connect plug). 2. To use a non-prime line (available with PDa docked only), tap the desired Line button on the PDA. The line button turns red. 3. Dial the number using the dialpad. Revision B 45 5230 IP Appliance User Guide To receive a call 1. When a new call starts ringing, the display shows which line is ringing, with the name/number of the caller (if available). The ringing line button on the PDA flashes red. 2. Lift the handset and start talking to your party. The line button on the PDA turns solid red. • To immediately forward the call to the programmed attendant or voice mailbox, tap/press the Forward softkey. To end a call • Hang up the handset. OR Press the key. OR Press the Cancel button on the PDA. The line button turns grey (idle display). To change the speaker volume • While on a call, press the or key to adjust the volume of the handset, headset or handsfree speaker. The setting is saved for your next call. Call Making Features Note: Not all features may be available on your system. Talk to your system administrator for more information. Call Transfer To transfer a call to an unconnected party 1. While on a call, press the key. The call is put on hold. 2. Call the party to which you want to transfer the call (using any call making feature). • To cancel call transfer, press the key, or the Cancel button on the PDA. • If you want to talk to this person, wait until the connection is established, then hang up to transfer the held call (attended transfer). • If you do not need to talk to this person, hang up. The held call is transferred to the call in progress (blind or unattended call transfer). Note: If the call is unanswered, the call returns to your extension number. To transfer a call to a party already on hold Note: You need at least two line appearances on your 5230 IP Appliance to use this feature. 1. While on a call, press the key. The call is put on hold. 2. Tap the line icon of the call previously on hold, and hang up. The call you put on hold in step 1 is transferred to the call on this line. 46 Revision B Making and Receiving Calls Conference Call Note: To make a conference call with external parties, your phone must be configured to do so by your Administrator. To add a party to a call already in progress 1. While on a call, press the key. The call is put on hold. 2. Call the party you want to add to the call (use any call making feature). 3. Once you have connected with the new party, press the connected to the call in progress. key. The call on hold is To add a party on hold to a call in progress 1. Tap the AddHeld softkey, then tap the line icon of the call on hold. The party on hold is connected to the conference call. To split a conference call Note: This feature is only available to the originator of the conference call. 1. Tap/press the Split softkey. The last party you added to the conference call is put on hold, and you can speak privately with the original party. Handsfree Operation Note: To continue a call in private, simply lift the handset or enable the headset. To make a call in handsfree mode (method 1) 1. Dial the number using the dialpad. 2. When the phone starts ringing, the microphone is on. key lights up to indicate the handsfree To make a call in handsfree mode (method 2) 1. Tap the desired line appearance button on the PDA. 2. Dial the number using the dialpad. When the phone starts ringing, the up to indicate the handsfree microphone is on. key lights To make a call in handsfree mode (method 3) 1. Press the key. 2. To use a non-prime line, tap the desired line appearance button on the PDA. 3. Dial the number using the dialpad. When the phone starts ringing, the up to indicate the handsfree microphone is on. Revision B key lights 47 5230 IP Appliance User Guide To receive a call in handsfree mode 1. Press the The key. OR Tap the flashing line button (docked PDA only). key lights up to indicate the handsfree microphone is on. To end a call in handsfree mode 1. Press the , the key, or the Cancel button on the PDA. The to indicate the handsfree microphone is off. key turns off To disable the handsfree microphone (muting the call) 1. While on a handsfree call, press the the light turns off. key. Your party can no longer hear you, and To re-enable the handsfree microphone 1. Press the key. Your party can hear you again, and the light turns on. Headset Operation Note: We recommend you disable your headset before removing your PDA from the 5230 IP Appliance. If you do not, you may have problems making calls without the PDA. Note: You can set the Headset On feature to automatically disable your headset when you undock your PDA, but you will have to re-enable your headset the next time you dock your PDA (see “Headset” on page 30 for more information). To make a call using the headset 1. Put on the headset (if needed, reconnect the quick-connect plug). 2. If it is not already set, activate the headset with the Headset On Feature Key (see “Headset” on page 30). 3. Dial the desired number. To receive a call using the headset 1. Put on the headset (if needed, reconnect the quick-connect plug). 2. If it is not already set, activate the headset with the Headset On Feature Key (see “Headset” on page 30). 3. Start talking to your party. To end a call in headset mode 1. Press the 48 key, or the Cancel button on the PDA. Revision B Making and Receiving Calls Hold To put a call on hold • Press the key. The call is put on hold, the line icon flashes on the PDA. key lights up, and the associated To retrieve a call from hold • Pick up the handset or headset, and press the off, and you are reconnected to the party. - key. The To pick up the call in handsfree mode, simply press the line appearance. key light turns key or tap the flashing To retrieve a call on hold from another station • If the station has a line appearance for the station that put the call on hold, tap its flashing line icon. To move a call on hold to another line appearance Note: You need at least two line appearances on your 5230 IP Appliance to use this feature. 1. Tap an available line appearance button. 2. Tap the AddHeld softkey. 3. Tap the flashing line appearance button of the call on hold. Messaging Use this feature to leave a message waiting indication on a phone when you hear busy or ringback tone, or to answer a message waiting indication left by another phone. To leave a message waiting indication 1. Press the key. To answer to a message waiting indication 1. Press the key. 2. Press/tap the Yes softkey. Revision B 49 5230 IP Appliance User Guide 3. Do one of the following: • To display the time the message was sent, press/tap the More softkey. • To call the sender, press/tap the Call softkey. • To delete the message, press/tap the Erase softkey. • To exit, press the key, or the Cancel button on the PDA. When viewing the time the message was sent: • To display the name/number of the sender, press/tap the More softkey. • To call the sender, press/tap the Call softkey. • To delete the message, press/tap the Erase softkey. • To exit, press the key, or the Cancel button on the PDA. Phonebook Use this feature to dial a number from the System Directory. To dial from the Phonebook 1. Press the Phonebook softkey. 2. Using the dialpad, enter the last name of the person you want to call. You can enter just part of a last name, or a first name followed by a space and part of a last name. • To enter a letter, press its key until the letter is displayed. For example, to enter the letter K, press the 5 key twice. • If the next letter in the name is on the same key as the letter you just entered, press the → softkey before entering it. • To add a space between the first and last name, press the →softkey. • To add a full stop between a first and last name, press the # key. • Press the ← softkey to delete characters. 3. Press the Lookup softkey. The first entry matching the name you entered is displayed. • If there is more than one entry with the same name, press the Next softkey until you reach the desired entry (if there is no Next softkey, there is only one entry). • To edit your entry, press the Retry softkey, and re-enter the name (see step 2). 4. Press the Call softkey. The number of the selected entry is dialed. 50 Revision B Making and Receiving Calls Record a Call This feature uses your voice mail system to automatically record incoming call (your system must be programmed to automatically record incoming trunk calls). Note: You may be required by law to notify the other party that you are recording the conversation. For more information, talk to your system administrator. Note: This feature is only available on incoming IP trunk calls. The softkeys documented below appear when the feature is available. To Pause Recording • Tap the Pause softkey. To Resume Recording • Tap the Resume softkey. To Stop Recording • Tap the Save softkey to stop and save the recording. • Tap the Erase softkey to stop and discard the recording. Note: Pressing the key or ending the call may also save the recording, depending on how your system is programmed (talk to your system administrator for more details). To Pause the Recording • Tap the Pause softkey. To Listen to a Recording 1. Access your voice mailbox (press or dial your voice mailbox extension number). 2. Follow the prompts to listen to the desired recording. You can also listen to a recorded call via Visual Voice Mail (see “Viewing and Listening to Voice Mails” on page 41). Recorded calls look just like any other call in the list. Redial Last Number To call the last external number you manually dialed • When making a call, tap the Redial softkey instead of dialing a number. Revision B 51 5230 IP Appliance User Guide Swap While on a two-party call, you can call a third party, and switch from one call to another. At no time during the use of this feature can the two parties converse together. To call another party while on a call 1. Press the key. The first call is put on hold. 2. Dial the number of the new party. To move from one call to another • Tap/press the Trade softkey. You can move from one call to another any number of times. To end the calls • 52 Tap/press the Release softkey. OR Hang up. Revision B Appendix A—Additional Information Appendix A—Additional Information Using Your PDA with the 5230 IP Appliance Charging the PDA You can connect your PDA charger to the 5230 IP Appliance (see the illustration “5230 IP Appliance Connectors” on page 3). Every time you dock your PDA to a 5230 IP Appliance with a PDA charger, your PDA recharges itself automatically (just as it does with the synchronization cradle that came with your PDA). Data Synchronization The 5230 IP Appliance also acts as a synchronization cradle for your PDA. See your PDA instruction manual for information on: • synchronizing the information and files between your PDA and your computer • set up a partnership between your PDA and your computer for local and remote synchronization You can still use the 5230 Applications while synchronization takes place. To set the recommended synchronization settings 1. Open the ActiveSync application. 2. In the Tools menu, select Options…. 3. Clear the Enable synchronization when cradled option (this prevents interference between the 5230 PDA Phone application and ActiveSync when starting the 5230 PDA Phone application from a 5230 IP Appliance). 4. Select the Include PC when synchronizing remotely option, and select the computer to which you want to synchronize your PDA (this lets your PDA communicate with your computer when it is docked in a 5230 IP Appliance). Note: Your computer identity is automatically entered the first time you set up synchronization with your computer (from your PDA synchronization cradle). You may have more than one computer listed if you have set up remote synchronization. 5. Tap OK to save your changes. Revision A 53 5230 IP Appliance User Guide To synchronize your PDA from a 5230 IP Appliance Note: To synchronize your PDA with your computer, that computer must be on the same network as the 5230 IP Appliance you are using. 1. Once the 5230 PDA Phone application is connected with the network (date and time shown on display), open the ActiveSync application. 2. Tap Sync. Your PDA synchronizes with your computer. Installing/Upgrading the 5230 IP Appliance Applications 1. If you are upgrading, close all the 5230 PDA Applications or soft-reset your PDA. 2. Insert your PDA in its synchronization cradle (NOT in the 5230 IP Appliance). 3. If it’s not already done, follow the instructions in your PDA documentation to set up your PDA and synchronize it with your computer. 4. Insert the 5230 IP Appliance PDA Applications CD-ROM in your computer’s CD drive. 5. The installation program starts automatically. 6. When you get the Welcome screen, click Next. The License Agreement is displayed. 7. Read the License Agreement. To continue the installation, click Yes. 8. The Select Components window opens. By default, all the applications are selected. If you do not want to install an application, clear its check box. Note: If you do not install the PDA Phone application, you will not be able to make and receive calls with the 5230 IP Appliance, or use any of the other applications. 9. The Destination Folder box shows where the 5230 Applications will be installed on your computer. If you want to install them in a different folder, click Browse and select the desired destination folder. 10. Click Next. The Start Copying window opens. 11. Verify if the installation information is correct. To make changes, click Back, make the desired corrections, and click Next to return to the Start Copying window. 12. Click Next to continue. The installation starts. 13. For each 5230 Application: • The installation program retrieves the required information from your PDA. • The installation program asks you if you want to install the application in the PDA’s default application install directory. To accept, click Yes. To install to a different directory, click No and choose the directory where you want to install the application. • The application is installed on your computer, then on your PDA. 14. When all the applications are installed, click Finish. You do not need to restart your computer. 15. See “Starting the 5230 IP Appliance PDA Applications” on page 8 for information on using your PDA with the 5230 IP Appliance.‘ 54 Revision A Appendix A—Additional Information Changing the Personality Module If you change your PDA to another model, or if you inherit a 5230 IP Appliance from someone with a different PDA model, you will probably need a new Personality Module before you can use the your PDA with your 5230 IP Appliance. Talk to your Mitel Networks vendor to find out which Personality Module you need for your PDA model. Note: Inserting a PDA in the wrong 5230 Personality Module may damage your PDA and/or the 5230 IP Appliance. To change a Personality Module 1. Unplug the LAN cable, the computer cable (if any) and the PDA charger cable at the back of the 5230 IP Appliance (see the figure “5230 IP Appliance Connectors” on page 3). 2. Press downwards on the cradle latch (above model number), and remove the old Personality Module. 3. Insert the new Personality Module in its recess, bottom first. Gently push the top of the cradle in the recess, until the latch clicks in. Inserting a Personality Module 4. Reconnect the LAN cable, computer cable (if any) and the PDA charger cable at the back of the 5230 IP Appliance. You are now ready to use your PDA with the 5230 IP Appliance. Connecting a Local Power Supply The 5230 IP Appliance supports both LAN powering (power supplied through the LAN connection) and local powering of the set. Your 5230 IP Appliance can be powered from any of the following sources: • Line Powering: a power source meeting the requirements of IEEE 802.3af for Power Over LAN, as well as CAN/CSA C22.2 No. 60950-2000 3rd. Ed., UL 60950 3rd. Ed., and/or EN60950:2000 3rd. Ed. for Safety. • Local power supply: a Mitel Networks-supplied DC power adapter (see your Mitel Vendor for part numbers). • Any other Mitel-recommended power source. Revision A 55 5230 IP Appliance User Guide To connect a local power supply 1. Plug the power supply in a suitable power outlet. 2. Connect an RJ-45 (Ethernet) cable between the LAN connector at the back of the 5230 IP Appliance and the phone connector of the power supply. 3. Connect the LAN RJ-45 (Ethernet) cable to the LAN connector of the power supply. To remove a local power supply 1. Remove the RJ-45 (Ethernet) cable between the LAN connector at the back of the 5230 IP Appliance and the phone connector of the power supply. 2. Remove the LAN RJ-45 (Ethernet) cable from the LAN connector of the power supply, and connect it to the LAN connector at the back of the 5230 IP Appliance. 3. Unplug the power supply. Using the Canonical Dialing Format About Dialing Formats A telephone number is made up of the following elements: IDD CC NDD AC SN Abbreviation Name Digit(s) in Example Below IDD International Direct Dialing prefix 00 CC Country Code 1 NDD National Direct Dialing prefix 1 AC Area (or City) Code 613 SN Subscriber Number 592-2122 For example, someone calling Mitel Networks from the UK must dial: 001 1 (613) 592-2122 Note: In this example, the spaces and parentheses are there for visual convenience. You could also write 011.1.613.592.2122, or 01116135922122, or any other way you prefer. Unless you are making an international call, you do not need to enter all these digits. For example, if you are calling a number with the same National Direct Dialing prefix, you only need to dial the area code and the local number. 56 Revision A Appendix A—Additional Information About Canonical Format The canonical address format is a universal telephone number standard for Microsoft operating systems. A number in canonical format looks like this: +CC NDD (AC) SC • + replaces the International Direct Dialing prefix. • the spaces are required. • the Area Code is optional, but must be enclosed by parentheses when used. • the Subscriber Number can contain standard dialing control characters. • any formatting characters in the Subscriber Number (hyphen, period) are ignored. If you have telephone numbers in canonical format in your Contacts, make sure that your PDA’s Dialing Locations are set correctly. Otherwise, your calls may reach unexpected destinations! Setting the PDA’s Dialing Locations 1. In the PDA’s Start menu, select the Settings folder. 2. In the Connections pane, tap Connections. 3. Tap the Dialing Locations tab. 4. In the Location drop-down menu, select the desired dialing profile (tap New to create a new profile). 5. Enter your Area Code and Country Code. 6. Tap the Dialing Patterns button. 7. Enter the dialing information for local, long distance and international calls (see the Help for details). 8. Tap OK, then OK again. Revision A 57 5230 IP Appliance User Guide 58 Revision A Appendix B—Using the 5230 IP Appliance Without a PDA Appendix B—Using the 5230 IP Appliance Without a PDA Customizing the 5230 IP Appliance Display Contrast When using the 5230 without a PDA, you can adjust the contrast of the 5230 IP Appliance display. To change the 5230 IP Appliance display contrast • While the set is idle, press the settings are saved automatically. and keys to adjust the display contrast. The Ringer Volume To change the ringer volume using the 5230 IP Appliance • While the phone is ringing, use the and The volume level is automatically saved. keys to adjust the ringer volume. The Desktop Tool Accessing the Desktop Tool The Desktop Tool lets you change settings for your 5230 IP Appliance from any computer connected to the Internet, using Internet Explorer 5.5 or greater. These settings can also be changed using your PDA. Note: If your network is protected by a firewall, you will not be able to change your phone settings from outside the firewall. You can change the following settings with the Desktop Tool: • Call Forward Always, Busy and No Answer (see “Call Forward Profile” on page 61). • Desktop Tool password. • Desktop Tool display language. • 5230 IP Appliance display language (does not change the language of the 5230 PDA Applications). Revision B 59 5230 IP Appliance User Guide To access the Desktop Tool 1. Open Internet Explorer (5.5 or greater). 2. Enter the Desktop Tool URL in the Address field (see your Administrator for this URL), then press the Enter key. 3. Enter your user name and password in the login screen, then select OK. Desktop Tool Home Page 4. When you are finished, select Exit in the feature drop-down list (at the right of I want to…) to log out of the Desktop Tool. To change your Desktop Tool password 1. Access the Desktop Tool. 2. In the feature drop-down menu, select Edit Preferences. 3. In the feature list box, select Change Password. 4. Enter your old password, your new password, then confirm your new password. 5. Select OK. Your password is changed. To change the Desktop Tool display language 1. Access the Desktop Tool. 2. In the feature drop-down menu, select Edit Preferences. 3. In the feature list box, select Change User Profile Language. 4. In the language drop-down list, select the language you want. 5. Select OK. The Desktop Tool will be displayed in the new language you selected the next time you log in. 60 Revision B Appendix B—Using the 5230 IP Appliance Without a PDA To change the 5230 IP Appliance display language Note: This does not change the language of the 5230 Applications, only the language of the switch prompts on the phone display. 1. Access the Desktop Tool. 2. In the feature drop-down menu, select Edit Preferences. 3. In the feature list box, select Change Set Language. 4. In the language drop-down list, select the language you want. 5. Select OK. Your 5230 IP Appliance display is now in the new language you selected (there may be a slight delay). Call Forward Profile You can also change and activate your Call Forward profile from the Desktop Tool: To enable or disable a Call Forward Profile setting with the Desktop Tool 1. Access the Desktop Tool. 2. In the Features drop-down menu, select Configure/Activate Call Forwarding. 3. Select the Call Forward setting you want to activate/deactivate. 4. Click Activate/Deactivate to toggle its Call Forward setting status. To program a Call Forward Profile setting with the Desktop Tool 1. Access the Desktop Tool. 2. In the Features drop-down menu, select Configure/Activate Call Forwarding. 3. Select the Call Forward option you want to program/edit, then click Edit. 4. Enter the extension number to which the call will be forwarded (if applicable), and select whether this Call Forward setting is active or not. 5. Click the Save button to save your changes, or the Cancel button to exit without saving the changes. Voice Mail To access your voice mailbox when you have a new voice mail • Press the key. Revision B 61 5230 IP Appliance User Guide Hot Desking To Log in a Hot Desk Phone Note: You can only log in when the phone is idle. 1. Press the HotDesk softkey. 2. Press the Login softkey. 3. Enter your Hot Desk User Extension Number 4. Press the OK softkey. To Log Out of a Hot Desk 5230 IP Appliance Note: You can only log out when the phone is idle. 1. Press the HotDesk softkey. 2. Press the Logout softkey. 3. Press the Confirm softkey. Feature Access Codes Feature Access Codes (FACs) are used to access telephony features using the dialpad. Note: Not all features may be available on your system. Talk to your system administrator for information on which features are available, and what their feature codes are. Call Forward End Chaining To enable/disable Call Forward End Chaining 62 • To enable Call Forward End Chaining, dial the Call Forward End Chaining FAC, then hang up. • To cancel Call Forward End Chaining, dial the Cancel Call Forward End Chaining FAC, then hang up. Revision B Appendix B—Using the 5230 IP Appliance Without a PDA Call Forward Override Use this feature to prevent your call from being forwarded by another station. To override a remote station’s call forward 1. Dial the Call Forward Override FAC. 2. Call the extension number of the remote station. The remote station will ring, and your call will not be forwarded. Call Park Use this feature to pick-up a call parked by the attendant. To retrieve a parked call 1. Lift the handset. OR Press the key. OR Activate your headset. 2. Dial the Call Park FAC, the attendant’s Console ID, then the Hold Slot number. Call Pickup Use this feature to answer a call ringing on another station. To pick up a call 1. Lift the handset. OR Press the key. OR Activate your headset. 2. Dial the Call Pickup FAC, then the extension number of the ringing station. Callback To cancel Callback requests • To cancel a specific Call back request: dial, then the extension number of the party you were trying to reach. • To cancel all your Callback requests: dial the Cancel Callbacks FAC. Campon To use Campon • To send a Campon request when you hear a busy tone: press the Wait softkey. • To retrieve a call when you hear a Campon tone: press the Trade softkey. Revision B 63 5230 IP Appliance User Guide Hold To retrieve a call on hold from another station • Dial the Call Hold Remote Retrieve FAC, then the number of the station that put the call on hold. Personal Speed Dial You administrator can allocate you up to 100 Personal Speed Dials, in sets of 10. To create a personal speed dial number 1. Lift the handset. OR Press the key. OR Activate your headset. 2. Dial the Personal Speed Dial–Store FAC, then enter an index number (00 to 09 if you have 10 speed dials, 00 to 19 if you have 20, etc.). If you enter a previously used index number, you will overwrite its value. 3. Dial the number you want to save. • To enter a pause, press the key. • To make a pause longer, press the key as many times a needed. 4. Hang up to save the number. Tip: Write down the index number and the name to which it corresponds, so you don’t forget it or accidentally overwrite it. To use a personal speed dial number 1. Lift the handset. OR Press the key. OR Activate your headset. 2. Dial the Personal Speed Dial–Invoke FAC, then enter the desired index number. The number is dialed. Redial Saved Number You can save a number you dialed, then redial that number at a later time. To save the last manually dialed number 1. Lift the handset. OR Press the key. OR Activate your headset. 2. Enter the Save Last Number FAC. The last number you manually dialed is saved. To redial a saved number 1. Lift the handset. OR Press the key. OR Activate your headset. 2. Enter the Repeat Last Number FAC. The saved number is dialed. 64 Revision B Appendix B—Using the 5230 IP Appliance Without a PDA Trunk Flash Use this feature to access Centrex features (if available) while on an outside call. To flash a trunk while on an outside call 1. Tap/press the key. 2. For a single flash, dial the Trunk Single Flash FAC. OR For a double flash, dial the Trunk Double Flash FAC. 3. Wait for the dial tone, then dial the Centrex feature access code. Revision B 65 5230 IP Appliance User Guide 66 Revision B