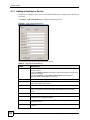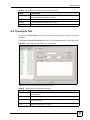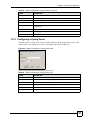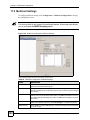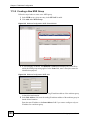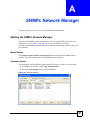
1
NetAtlas Workgroup
Ethernet Switch Manager
User’s Guide
Version 1.03
1/2007
Edition 1
www.zyxel.com
About This User's Guide
About This User's Guide
Intended Audience
This manual is intended for people who want to configure the EMS using the web
configurator. You should have at least a basic knowledge of TCP/IP networking concepts and
topology.
Related Documentation
• Quick Start Guide
The Quick Start Guide is designed to help you get up and running right away. It contains
information on setting up your software.
"
It is recommended you use the web configurator to configure the EMS.
• Supporting Disk
Refer to the included CD for support documents.
• ZyXEL Web Site
Please refer to www.zyxel.com for additional support documentation and product
certifications.
User Guide Feedback
Help us help you. Send all User Guide-related comments, questions or suggestions for
improvement to the following address, or use e-mail instead. Thank you!
The Technical Writing Team,
ZyXEL Communications Corp.,
6 Innovation Road II,
Science-Based Industrial Park,
Hsinchu, 300, Taiwan.
E-mail: [email protected]
NetAtlas Workgroup User’s Guide
3
Document Conventions
Document Conventions
Warnings and Notes
These are how warnings and notes are shown in this User’s Guide.
1
"
Warnings tell you about things that could harm you or your device.
Notes tell you other important information (for example, other things you may
need to configure or helpful tips) or recommendations.
Syntax Conventions
• The NetAtlas Workgroup may be referred to as the “EMS” or the “system” in this User’s
Guide.
• Product labels, screen names, field labels and field choices are all in bold font.
• A key stroke is denoted by square brackets and uppercase text, for example, [ENTER]
means the “enter” or “return” key on your keyboard.
• “Enter” means for you to type one or more characters and then press the [ENTER] key.
“Select” or “choose” means for you to use one of the predefined choices.
• A right angle bracket ( > ) within a screen name denotes a mouse click. For example,
Maintenance > Log > Log Setting means you first click Maintenance in the navigation
panel, then the Log sub menu and finally the Log Setting tab to get to that screen.
• Units of measurement may denote the “metric” value or the “scientific” value. For
example, “k” for kilo may denote “1000” or “1024”, “M” for mega may denote “1000000”
or “1048576” and so on.
• “e.g.,” is a shorthand for “for instance”, and “i.e.,” means “that is” or “in other words”.
4
NetAtlas Workgroup User’s Guide
Document Conventions
Icons Used in Figures
Figures in this User’s Guide may use the following generic icons.
Computer
Notebook computer
Telephone
Server
DSLAM
Firewall
Switch
Router
NetAtlas Workgroup User’s Guide
5
Document Conventions
6
NetAtlas Workgroup User’s Guide
Contents Overview
Contents Overview
Introduction ............................................................................................................................ 27
Introduction ................................................................................................................................ 29
Main EMS Screen ...................................................................................................................... 33
Switch Manager ...................................................................................................................... 41
Switch Manager ......................................................................................................................... 43
Map ............................................................................................................................................ 53
View ........................................................................................................................................... 57
Template ................................................................................................................................... 77
Provisioning ............................................................................................................................... 85
Performance .............................................................................................................................. 89
Fault ......................................................................................................................................... 101
Maintenance ............................................................................................................................ 107
Tools .........................................................................................................................................119
Switch Configuration and Troubleshooting ...................................................................... 123
Device Menu Overview ............................................................................................................ 125
System Configuration .............................................................................................................. 131
Switch Configuration ................................................................................................................ 143
VLAN ....................................................................................................................................... 157
Ethernet Port Configuration ..................................................................................................... 163
Multicast Configuration ............................................................................................................ 179
Configuration .......................................................................................................................... 191
IP Configuration ....................................................................................................................... 199
Troubleshooting ....................................................................................................................... 221
Appendices and Index ......................................................................................................... 225
NetAtlas Workgroup User’s Guide
7
Contents Overview
8
NetAtlas Workgroup User’s Guide
Table of Contents
Table of Contents
About This User's Guide .......................................................................................................... 3
Document Conventions............................................................................................................ 4
Contents Overview ................................................................................................................... 7
Table of Contents...................................................................................................................... 9
List of Figures ......................................................................................................................... 17
List of Tables........................................................................................................................... 23
Part I: Introduction................................................................................. 27
Chapter 1
Introduction ............................................................................................................................. 29
1.1 Overview .............................................................................................................................. 29
1.1.1 EMS Components ...................................................................................................... 29
1.1.2 SNMPc Network Manager .......................................................................................... 30
1.1.3 Device Firmware Versions Supported ........................................................................ 30
1.2 System Requirements and EMS Installation ....................................................................... 30
1.3 Accessing EMS ................................................................................................................... 31
Chapter 2
Main EMS Screen .................................................................................................................... 33
2.1 Main Screen Overview ........................................................................................................ 33
2.2 Access Log .......................................................................................................................... 34
2.3 Database Management ....................................................................................................... 35
2.3.1 Database Synchronization ......................................................................................... 35
2.3.2 Filename Convention ................................................................................................. 35
2.3.3 Database Backup and Restore .................................................................................. 36
2.3.4 Database Log Storage Configuration ......................................................................... 36
2.3.5 Database Scheduled Backup Configuration .............................................................. 37
2.4 SNMP Operation Mode ....................................................................................................... 38
2.5 Accessing the Switch Manager Screen ............................................................................... 39
Part II: Switch Manager ......................................................................... 41
NetAtlas Workgroup User’s Guide
9
Table of Contents
Chapter 3
Switch Manager....................................................................................................................... 43
3.1 Switch Manager Overview ................................................................................................... 43
3.2 Device List and Icon Colors ................................................................................................. 44
3.3 System Message Panel Alarm Status ................................................................................. 45
3.4 System Message Panel Port Status .................................................................................... 45
3.5 Menu Shortcut Buttons ........................................................................................................ 45
3.6 EMS Main Menu Summary .................................................................................................. 46
3.7 Common EMS Command Buttons ...................................................................................... 48
3.8 View the Switch ................................................................................................................... 48
3.9 Switch Information .............................................................................................................. 48
3.10 Configuration Save ............................................................................................................ 50
Chapter 4
Map........................................................................................................................................... 53
4.1 Root Subnet and Device Mapping ....................................................................................... 53
4.1.1 Adding a Submap or Device ...................................................................................... 54
4.1.2 Editing a Node ............................................................................................................ 55
4.1.3 Finding an Object ....................................................................................................... 55
4.1.4 Deleting a Submap ..................................................................................................... 55
4.1.5 Deleting a Device ....................................................................................................... 56
4.1.6 Updating Device Map ................................................................................................. 56
4.1.7 Synchronizing Device Map Database ........................................................................ 56
4.2 Exit ....................................................................................................................................... 56
Chapter 5
View.......................................................................................................................................... 57
5.1 Hardware Status .................................................................................................................. 57
5.2 STP/RSTP ......................................................................................................................... 59
5.2.1 STP Terminology ........................................................................................................ 59
5.2.2 STP Port States .......................................................................................................... 59
5.2.3 STP Status ................................................................................................................. 60
5.3 VLAN Status ........................................................................................................................ 61
5.4 Port Status ........................................................................................................................... 62
5.5 802.1D ................................................................................................................................. 64
5.5.1 MAC Table .................................................................................................................. 64
5.5.2 ARP Table .................................................................................................................. 65
5.6 Multicast Status ................................................................................................................... 67
5.7 Ethernet Port Status ............................................................................................................ 67
5.8 IP Application Status ............................................................................................................ 69
5.8.1 Routing Table Status .................................................................................................. 69
5.8.2 IP Table Status ........................................................................................................... 70
5.8.3 DHCP Server Status .................................................................................................. 71
10
NetAtlas Workgroup User’s Guide
Table of Contents
5.8.4 VRRP Status .............................................................................................................. 72
5.8.5 OSPF Status .............................................................................................................. 73
5.9 Interface Status .................................................................................................................... 75
5.10 Firmware Version ............................................................................................................... 76
Chapter 6
Template ................................................................................................................................. 77
6.1 Template Overview .............................................................................................................. 77
6.2 VLAN Template .................................................................................................................... 77
6.2.1 Creating a New VLAN Template ................................................................................ 79
6.3 IGMP Filtering Profile Template ........................................................................................... 79
6.3.1 Configuring an IGMP Filter Template ......................................................................... 80
6.4 Static Multicast Group Template .......................................................................................... 82
6.4.1 Configuring a Multicast Template ............................................................................... 83
Chapter 7
Provisioning ............................................................................................................................ 85
7.1 Overview .............................................................................................................................. 85
7.2 Applying an IGMP Filter Profile ........................................................................................... 85
7.3 Removing an IGMP Filter Profile ......................................................................................... 87
Chapter 8
Performance ............................................................................................................................ 89
8.1 Interface Performance ......................................................................................................... 89
8.2 RMON Ethernet Statistics .................................................................................................... 90
8.3 RMON History Data ............................................................................................................. 92
8.4 Table Menu Bar ................................................................................................................... 94
8.4.1 Editing a Table Entry .................................................................................................. 95
8.4.2 Expand Dialog Box ..................................................................................................... 96
8.5 Graph Menu Bar Icons ........................................................................................................ 97
8.5.1 Graph Styles ............................................................................................................... 98
8.5.2 Chart Format Display Variable ................................................................................... 98
8.5.3 Graph Labels .............................................................................................................. 99
Chapter 9
Fault ....................................................................................................................................... 101
9.1 Event Log .......................................................................................................................... 101
9.2 Loopback Test ................................................................................................................... 102
9.3 Ping Test ............................................................................................................................ 103
9.4 Traceroute Test .................................................................................................................. 105
Chapter 10
Maintenance .......................................................................................................................... 107
NetAtlas Workgroup User’s Guide
11
Table of Contents
10.1 Firmware Upgrade ........................................................................................................... 107
10.1.1 Procedure to Update Firmware .............................................................................. 107
10.2 Device Reset ................................................................................................................... 108
10.3 NE Configuration Backup and Restore ............................................................................ 109
10.4 Load Factory Default ........................................................................................................110
10.5 Scheduled Network Element Configuration Backup .........................................................111
10.5.1 Configuring Scheduled NE Configuration Backup ..................................................112
10.5.2 Removing a Scheduled NE Configuration Backup ..................................................113
10.6 Scheduled Device Configuration Restore .........................................................................113
10.6.1 Schedule Content Screen .......................................................................................114
10.6.2 Schedule Content Screen .......................................................................................115
10.7 Scheduled FW Upgrade ...................................................................................................116
Chapter 11
Tools....................................................................................................................................... 119
11.1 Accessing the Switch ........................................................................................................119
11.1.1 Telnet .......................................................................................................................119
11.1.2 Web Access ........................................................................................................... 120
11.2 Ping .................................................................................................................................. 120
Part III: Switch Configuration and Troubleshooting ......................... 123
Chapter 12
Device Menu Overview ......................................................................................................... 125
12.1 Device Menu Summary ................................................................................................... 125
12.2 Property Configuration ..................................................................................................... 125
12.3 Introducing the Device Configuration Window ................................................................. 126
12.3.1 Port List Multiple Port Configuration ....................................................................... 127
12.3.2 The Copy to.. Button .............................................................................................. 128
Chapter 13
System Configuration...........................................................................................................131
13.1 System Info ...................................................................................................................... 131
13.2 SNMP .............................................................................................................................. 131
13.2.1 Configuring SNMP ................................................................................................. 132
13.3 Remote Management ...................................................................................................... 133
13.4 Time Setup ...................................................................................................................... 135
13.5 Syslog Setup ................................................................................................................... 136
13.5.1 Configuring a Syslog Server .................................................................................. 137
13.6 RADIUS ........................................................................................................................... 138
13.7 Boot Config ...................................................................................................................... 138
12
NetAtlas Workgroup User’s Guide
Table of Contents
13.8 IP Setup ........................................................................................................................... 139
13.8.1 Configuring an IP Interface .................................................................................... 141
Chapter 14
Switch Configuration............................................................................................................ 143
14.1 Switch Setup .................................................................................................................... 143
14.2 Priority Queue .................................................................................................................. 145
14.3 Multiple/ Rapid STP Configuration .................................................................................. 147
14.4 Link Aggregation .............................................................................................................. 148
14.4.1 Dynamic Link Aggregation ..................................................................................... 149
14.4.2 Link Aggregation ID ................................................................................................ 149
14.4.3 Configuring Link Aggregation ................................................................................. 149
14.5 GARP Timer .................................................................................................................... 151
14.6 Filtering ............................................................................................................................ 152
14.6.1 Creating a New Filter ............................................................................................. 152
14.7 MAC Forwarding .............................................................................................................. 153
14.7.1 Configuring a Static MAC Address Entry ............................................................... 154
14.8 Mirroring .......................................................................................................................... 155
Chapter 15
VLAN ...................................................................................................................................... 157
15.1 Introduction to VLANs ...................................................................................................... 157
15.2 Configuring 802.1Q VLAN ............................................................................................... 157
15.2.1 Configuring an 802.11Q VLAN ............................................................................... 159
15.2.2 Removing a VLAN .................................................................................................. 160
15.3 Introduction to Port-based VLANs ................................................................................... 160
15.3.1 Configuring Port Based VLAN ................................................................................ 161
Chapter 16
Ethernet Port Configuration................................................................................................. 163
16.1 Overview .......................................................................................................................... 163
16.2 Port Setup ........................................................................................................................ 163
16.3 Port VLAN ........................................................................................................................ 165
16.4 Port Link Aggregation ...................................................................................................... 166
16.5 Port STP .......................................................................................................................... 167
16.6 Port 802.1x ...................................................................................................................... 168
16.7 Port Mirroring ................................................................................................................... 169
16.8 VLAN Stacking ................................................................................................................. 170
16.9 Queue Method ................................................................................................................. 171
16.10 Protocol VLAN ............................................................................................................... 172
16.10.1 Configuring a Protocol VLAN ............................................................................... 173
16.11 Port Security .................................................................................................................. 174
16.12 Bandwidth Control ......................................................................................................... 175
NetAtlas Workgroup User’s Guide
13
Table of Contents
16.13 Broadcast Storm Control ............................................................................................... 176
16.14 DiffServ .......................................................................................................................... 177
Chapter 17
Multicast Configuration........................................................................................................ 179
17.1 Overview .......................................................................................................................... 179
17.1.1 IP Multicast Addresses ........................................................................................... 179
17.1.2 IGMP Snooping ..................................................................................................... 179
17.2 Multicast Settings ............................................................................................................ 180
17.2.1 Configuring Port Multicast Settings ........................................................................ 181
17.2.2 Applying a Multicast Template ................................................................................ 182
17.2.3 Displaying IGMP Filter Profile ................................................................................ 183
17.3 MVR ................................................................................................................................. 184
17.3.1 Types of MVR Ports ............................................................................................... 185
17.3.2 MVR Modes ........................................................................................................... 185
17.3.3 Viewing MVR Settings ............................................................................................ 185
17.3.4 Creating a New Multicast VLAN ............................................................................. 186
17.3.5 Creating a New MVR Group .................................................................................. 188
Chapter 18
Configuration ....................................................................................................................... 191
18.1 RMON Overview .............................................................................................................. 191
18.2 History Config .................................................................................................................. 191
18.2.1 Configuring an RMON History ................................................................................ 192
18.3 Event Config .................................................................................................................... 193
18.3.1 Configuring an RMON Event .................................................................................. 194
18.4 Alarm Config .................................................................................................................... 195
18.4.1 Configuring an RMON Alarm ................................................................................. 197
18.4.2 RMON Alarm Event Log ......................................................................................... 198
Chapter 19
IP Configuration .................................................................................................................... 199
19.1 Static Route ..................................................................................................................... 199
19.1.1 Configuring a Static Route ..................................................................................... 200
19.2 DiffServ ............................................................................................................................ 201
19.3 DSCP Setting .................................................................................................................. 202
19.4 IGMP ............................................................................................................................... 203
19.5 DHCP .............................................................................................................................. 204
19.5.1 DHCP modes ........................................................................................................ 204
19.5.2 Configuring DHCP Server .................................................................................... 204
19.5.3 Configuring DHCP Relay ....................................................................................... 206
19.6 DVMRP ............................................................................................................................ 208
19.7 RIP ................................................................................................................................... 209
14
NetAtlas Workgroup User’s Guide
Table of Contents
19.8 OSPF ............................................................................................................................... 210
19.8.1 OSPF Autonomous Systems and Areas .................................................................211
19.8.2 Interfaces and Virtual Links .....................................................................................211
19.8.3 Configuring Basic OSPF Settings ...........................................................................211
19.8.4 Configuring a New OSPF Area .............................................................................. 213
19.8.5 Configuring a New OSPF Virtual Link .................................................................... 214
19.8.6 Configuring a New OSPF Interface ........................................................................ 215
19.9 VRRP ............................................................................................................................... 217
19.9.1 Configuring Interface VRRP Settings ..................................................................... 217
19.9.2 Configuring a VRRP Interface ................................................................................ 218
19.10 IP Multicast .................................................................................................................... 220
Chapter 20
Troubleshooting.................................................................................................................... 221
20.1 Installation Problems ....................................................................................................... 221
20.2 Problems Accessing the EMS ......................................................................................... 221
20.3 Problems Finding a Device .............................................................................................. 222
20.4 Uninstalling the EMS ....................................................................................................... 222
Part IV: Appendices and Index ........................................................... 225
Appendix A SNMPc Network Manager ................................................................................ 227
Appendix B Alarm Types and Causes.................................................................................. 231
Appendix C Legal Information .............................................................................................. 233
Appendix D Customer Support............................................................................................. 235
Index....................................................................................................................................... 239
NetAtlas Workgroup User’s Guide
15
Table of Contents
16
NetAtlas Workgroup User’s Guide
List of Figures
List of Figures
Figure 1 EMS Network Example ........................................................................................................... 29
Figure 2 EMS Server and Remote Clients ............................................................................................ 30
Figure 3 SNMPc: Switch Device List Icon .............................................................................................. 31
Figure 4 NetAtlas Main Screen
.......................................................................................................... 31
Figure 5 EMS: Main Screen .................................................................................................................. 32
Figure 6 Main Screen
........................................................................................................................... 33
Figure 7 Admin: Access Log ................................................................................................................... 34
Figure 8 Admin: Database Management: Backup/Restore ................................................................... 36
Figure 9 Admin: Database Management: Log Storage .......................................................................... 37
Figure 10 Admin: Database Management: Scheduled Backup .............................................................. 38
Figure 11 Admin: SNMP Operation Mode ............................................................................................. 39
Figure 12 Switch Manager: Main Screen .............................................................................................. 40
Figure 13 EMS Main Screen Overview .................................................................................................. 43
Figure 14 Device List and Icon Colors: Example ................................................................................... 44
Figure 15 EMS Main Screen Shortcut Bar ............................................................................................ 45
Figure 16 Switch View ........................................................................................................................... 48
Figure 17 Configuration: System Configuration: System Info. ............................................................... 49
Figure 18 Configuration Save ................................................................................................................ 50
Figure 19 Configuration Save: Result .................................................................................................... 51
Figure 20 Submaps and Device Mapping .............................................................................................. 53
Figure 21 Map: Add Submap/Device ...................................................................................................... 54
Figure 22 Map: Edit Node ....................................................................................................................... 55
Figure 23 Map: Find Object .................................................................................................................... 55
Figure 24 Map: Delete Warning .............................................................................................................. 56
Figure 25 View: Hardware Status .......................................................................................................... 57
Figure 26 View: STP Status .................................................................................................................... 60
Figure 27 View: VLAN Status ................................................................................................................. 61
Figure 28 View: Port Status ................................................................................................................... 63
Figure 29 View: 802.1d: MAC Table ...................................................................................................... 64
Figure 30 View: 802.1d: ARP Table ........................................................................................................ 66
Figure 31 View: Multicast Status ........................................................................................................... 67
Figure 32 View: Ethernet Status ............................................................................................................ 68
Figure 33 View: IP Application Status: Routing Table Status ................................................................. 69
Figure 34 View: IP Application Status: IP Table Status .......................................................................... 70
Figure 35 View: IP Application Status: DHCP Server Status ................................................................. 72
Figure 36 View: IP Application Status: VRRP Status ............................................................................. 73
Figure 37 View: IP Application Status: OSPF Status ............................................................................. 74
Figure 38 View: Interface Status ............................................................................................................ 75
NetAtlas Workgroup User’s Guide
17
List of Figures
Figure 39 View: Firmware Version ......................................................................................................... 76
Figure 40 Template: VLAN Template ..................................................................................................... 78
Figure 41 Template: IGMP Filtering Profile Template ............................................................................ 80
Figure 42 Template: New IGMP Filter ................................................................................................... 81
Figure 43 Template: Multicast Template ................................................................................................ 82
Figure 44 Template: New Multicast ....................................................................................................... 83
Figure 45 Provisioning: IGMP Filter ....................................................................................................... 86
Figure 46 Provisioning: IGMP Filter: Apply to Devices .......................................................................... 86
Figure 47 Provisioning: IGMP Filter: Apply to Devices: Successful ...................................................... 86
Figure 48 Provisioning: IGMP Filter: Remove From Devices ................................................................. 87
Figure 49 Provisioning: IGMP Filter: Remove From Devices: Select Device ........................................ 88
Figure 50 Provisioning: IGMP Filter: Remove From Devices: Successful ............................................. 88
Figure 51 Performance: Interface ........................................................................................................... 89
Figure 52 Performance: RMON: Ethernet Statistics .............................................................................. 91
Figure 53 Performance: RMON: History Data ....................................................................................... 93
Figure 54 Table Menu Bar Icons ............................................................................................................. 94
Figure 55 Edit Table Entry ..................................................................................................................... 95
Figure 56 Expand Field ......................................................................................................................... 97
Figure 57 Graph Menu Bar ..................................................................................................................... 97
Figure 58 Cell Properties Select ............................................................................................................. 98
Figure 59 Chart Color Codes and Line Styles ........................................................................................ 98
Figure 60 Graph Variables ..................................................................................................................... 99
Figure 61 Fault: Event Log ................................................................................................................... 101
Figure 62 Fault: Loopback Test
.......................................................................................................... 103
Figure 63 fault: Loopback: Result ........................................................................................................ 103
Figure 64 Fault: Ping and TraceRoute Test: Ping ................................................................................ 104
Figure 65 Fault: Ping and TraceRoute Test: Trace Route ................................................................... 105
Figure 66 Maintenance: Firmware Upgrade ......................................................................................... 108
Figure 67 Maintenance: Firmware Upgrade: Result ............................................................................ 108
Figure 68 Maintenance: Device Reset ................................................................................................. 109
Figure 69 Maintenance: Device Reset: Result .................................................................................... 109
Figure 70 Maintenance: Configuration Backup/Restore ........................................................................110
Figure 71 Maintenance: Load Factory Defaults .....................................................................................111
Figure 72 Maintenance: Scheduled NE Config Backup ........................................................................111
Figure 73 Maintenance: Scheduled NE Config Backup: Add Devices .................................................113
Figure 74 Maintenance: Scheduled Device Configuration Restore ......................................................114
Figure 75 Maintenance: Scheduled Device Configuration Restore: Add/Modify ..................................115
Figure 76 Maintenance: Scheduled Device Configuration Restore: Add/Modify ..................................116
Figure 77 Maintenance: Scheduled FW Upgrade ................................................................................116
Figure 78 Tool: Telnet .......................................................................................................................... 120
Figure 79 Tool: Web Access ................................................................................................................. 120
Figure 80 Tool: Ping ............................................................................................................................. 121
Figure 81 Device Panel List Menus ...................................................................................................... 125
18
NetAtlas Workgroup User’s Guide
List of Figures
Figure 82 Configuration Window .......................................................................................................... 126
Figure 83 Configuration Window: Port List: Multiple Port Select ......................................................... 127
Figure 84 Applied Results .................................................................................................................... 127
Figure 85 Copy Switch Setting: Example ............................................................................................. 128
Figure 86 Switch Configuration Copy: Success .................................................................................. 129
Figure 87 Copy Port Setting: Example ................................................................................................. 129
Figure 88 Copy Successful ................................................................................................................... 130
Figure 89 SNMP Management Model .................................................................................................. 131
Figure 90 System Configuration: SNMP Conf. ..................................................................................... 133
Figure 91 System Configuration: Remote Management ...................................................................... 134
Figure 92 System Configuration: Time Setup ...................................................................................... 135
Figure 93 System Configuration: Syslog Setup ................................................................................... 136
Figure 94 System Configuration: Syslog Setup: Add .......................................................................... 137
Figure 95 System Configuration: RADIUS .......................................................................................... 138
Figure 96 System Configuration: Boot Config ..................................................................................... 139
Figure 97 System Configuration: Boot Config ..................................................................................... 139
Figure 98 System Configuration: IP Setup .......................................................................................... 140
Figure 99 System Configuration: IP Setup: Add .................................................................................. 141
Figure 100 Switch Configuration: Switch Setup
................................................................................. 143
Figure 101 Switch Configuration: Priority Queue ................................................................................. 146
Figure 102 Switch Configuration: STP Conf. ....................................................................................... 147
Figure 103 Switch Configuration: Link Aggregation ............................................................................ 150
Figure 104 Switch Configuration: GARP Timer ................................................................................... 151
Figure 105 Switch Configuration: Filtering ........................................................................................... 152
Figure 106 Switch Configuration: Filtering: Add
................................................................................. 153
Figure 107 Switch Configuration: MAC Forwarding ............................................................................. 154
Figure 108 Switch Configuration: MAC Forwarding: Add .................................................................... 155
Figure 109 Switch Configuration: Mirroring ......................................................................................... 156
Figure 110 Selecting a VLAN Type ...................................................................................................... 157
Figure 111 VLAN Configuration: 802.1Q ............................................................................................. 158
Figure 112 VLAN Configuration: 802.1Q: New or Modify .................................................................... 159
Figure 113 VLAN Configuration: Port Based ....................................................................................... 161
Figure 114 Ethernet Port Configuration: Port Setup ............................................................................ 163
Figure 115 Ethernet Port Configuration: Port VLAN ............................................................................ 165
Figure 116 Ethernet Port Configuration: Port Link Aggregation ........................................................... 166
Figure 117 Ethernet Port Configuration: Port STP ............................................................................... 167
Figure 118 Ethernet Port Configuration: Port 802.1x ............................................................................ 168
Figure 119 Ethernet Port Configuration: Port Mirroring ........................................................................ 169
Figure 120 Ethernet Port Configuration: VLAN Stacking .................................................................... 170
Figure 121 Ethernet Port Configuration: Queue Method .................................................................... 171
Figure 122 Ethernet Port Configuration: Protocol VLAN ..................................................................... 173
Figure 123 Ethernet Port Configuration: Protocol VLAN Add .............................................................. 174
Figure 124 Ethernet Port Configuration: Port Security ......................................................................... 175
NetAtlas Workgroup User’s Guide
19
List of Figures
Figure 125 Ethernet Port Configuration: Bandwidth Ctrl. .................................................................... 176
Figure 126 Ethernet Port Configuration: Broadcast Storm Ctrl. .......................................................... 177
Figure 127 Ethernet Port Configuration: DiffServ ................................................................................ 178
Figure 128 Multicast Configuration: Multicast Settings ........................................................................ 180
Figure 129 Multicast Configuration: Multicast Settings: Modify ........................................................... 181
Figure 130 Multicast Configuration: Multicast Settings: Load Template .............................................. 183
Figure 131 Multicast Configuration: Multicast Settings: View Profile ................................................... 184
Figure 132 Multicast Configuration: MVR ............................................................................................ 185
Figure 133 Multicast Configuration: MVR: Add MVLAN ...................................................................... 187
Figure 134 Multicast Configuration: MVR: Add MVLAN: Result .......................................................... 187
Figure 135 Multicast Configuration: MVR: Select MVLAN .................................................................. 188
Figure 136 Multicast Configuration: MVR: Add ................................................................................... 188
Figure 137 Multicast Configuration: MVR: Add MVR Group: Result ................................................... 189
Figure 138 RMON Configuration: History Config. ............................................................................... 192
Figure 139 RMON Configuration: History Config.: New ...................................................................... 193
Figure 140 RMON Configuration: Event Config. .................................................................................. 194
Figure 141 RMON Configuration: Event Config.: New ........................................................................ 195
Figure 142 RMON Configuration: Alarm Config. ................................................................................. 196
Figure 143 RMON Configuration: Alarm Config.: New ........................................................................ 197
Figure 144 RMON Configuration: Alarm Config.: New: Browse ........................................................... 197
Figure 145 RMON Configuration: Alarm Config.: Show Log ............................................................... 198
Figure 146 IP Configuration: Static Route ........................................................................................... 199
Figure 147 Routing Configuration: Static Route: Add .......................................................................... 200
Figure 148 IP Configuration: DiffServ .................................................................................................. 201
Figure 149 IP Configuration: DiffServ .................................................................................................. 202
Figure 150 IP Configuration: IGMP ..................................................................................................... 203
Figure 151 IP Configuration: DHCP: Server ........................................................................................ 205
Figure 152 IP Configuration: DHCP: Server: New .............................................................................. 206
Figure 153 IP Configuration: DHCP: Relay ......................................................................................... 207
Figure 154 IP Configuration: DVMRP .................................................................................................. 209
Figure 155 IP Configuration: RIP ......................................................................................................... 210
Figure 156 IP Configuration: OSPF ..................................................................................................... 212
Figure 157 IP Configuration: OSPF: New OSPF Setting ..................................................................... 214
Figure 158 IP Configuration: OSPF: New Virtual Link ......................................................................... 215
Figure 159 IP Configuration: OSPF: New Interface ............................................................................. 216
Figure 160 IP Configuration: VRRP ..................................................................................................... 217
Figure 161 IP Configuration: VRRP: New ........................................................................................... 219
Figure 162 IP Configuration: IP Multicast ............................................................................................ 220
Figure 163 EMS: Remove .................................................................................................................... 222
Figure 164 EMS: Remove: Select Application .................................................................................... 223
Figure 165 Automatic Startup ............................................................................................................... 227
Figure 166 SNMPc Main Windows ....................................................................................................... 228
Figure 167 SNMPc Main Button Bar Icons ........................................................................................... 230
20
NetAtlas Workgroup User’s Guide
List of Figures
Figure 168 SNMPc Edit Button Bar Icons ............................................................................................ 230
NetAtlas Workgroup User’s Guide
21
List of Figures
22
NetAtlas Workgroup User’s Guide
List of Tables
List of Tables
Table 1 Device Firmware Versions Supported ....................................................................................... 30
Table 2 Main Screen Menu Overview .................................................................................................... 33
Table 3 Admin: Access Log ................................................................................................................... 34
Table 4 Admin: Database Management: Backup/Restore ..................................................................... 36
Table 5 Admin: Database Management: Log Storage ........................................................................... 37
Table 6 Admin: Database Management: Scheduled Backup ................................................................ 38
Table 7 Admin: SNMP Operation ........................................................................................................... 39
Table 8 EMS Main Screen Overview ..................................................................................................... 44
Table 9 System Message Panel Alarm Status ....................................................................................... 45
Table 10 EMS Navigation Panel Sub-link Descriptions ......................................................................... 46
Table 11 Common EMS Command Buttons .......................................................................................... 48
Table 12 Configuration: Switch Configuration: System Info. .................................................................. 49
Table 13 Map: Add Submap/Device ...................................................................................................... 54
Table 14 Status: Hardware Status ......................................................................................................... 58
Table 15 STP Path Costs ...................................................................................................................... 59
Table 16 STP Port States ...................................................................................................................... 59
Table 17 View: STP Status .................................................................................................................... 60
Table 18 View: VLAN Status .................................................................................................................. 62
Table 19 View: Port Status ..................................................................................................................... 63
Table 20 View: 802.1d: MAC Table ........................................................................................................ 64
Table 21 View: 802.1d: ARP Table ........................................................................................................ 66
Table 22 View: Multicast Status ............................................................................................................. 67
Table 23 View: Ethernet Status .............................................................................................................. 68
Table 24 View: IP Application Status: Routing Table Status .................................................................. 70
Table 25 View: IP Application Status: IP Table Status ........................................................................... 71
Table 26 View: IP Application Status: DHCP Server Status ................................................................... 72
Table 27 View: IP Application Status: VRRP Status .............................................................................. 73
Table 28 View: IP Application Status: OSPF Status ............................................................................... 74
Table 29 View: Interface Status ............................................................................................................. 75
Table 30 View: Firmware Version .......................................................................................................... 76
Table 31 Template: VLAN ...................................................................................................................... 78
Table 32 Template: IGMP Filter Template .............................................................................................. 80
Table 33 Template: New IGMP Filter ..................................................................................................... 81
Table 34 Template: Multicast ................................................................................................................. 82
Table 35 Template: New Multicast ......................................................................................................... 83
Table 36 Performance: Interface ........................................................................................................... 89
Table 37 Performance: RMON: Ethernet Statistics ................................................................................ 91
Table 38 Performance: RMON: History Data ......................................................................................... 93
NetAtlas Workgroup User’s Guide
23
List of Tables
Table 39 Edit Table Entry ....................................................................................................................... 95
Table 40 Variable Types ........................................................................................................................ 97
Table 41 Edit Table Entry ....................................................................................................................... 98
Table 42 Edit Style Dialog Box ............................................................................................................... 99
Table 43 Graph Variables ...................................................................................................................... 99
Table 44 Fault: Event Log .................................................................................................................... 101
Table 45 Fault: Ping and TraceRoute Test: Ping ................................................................................. 104
Table 46 Fault: Ping and TraceRoute Test: Ping ................................................................................. 105
Table 47 Maintenance: Configuration Backup/Restore ........................................................................110
Table 48 Maintenance: Scheduled NE Config Backup .........................................................................112
Table 49 Maintenance: Scheduled Device Configuration Restore .......................................................114
Table 50 Maintenance: Scheduled Device Configuration Restore: Add/Modify ...................................115
Table 51 Maintenance: Scheduled Device Configuration Restore: Add/Modify ...................................116
Table 52 Maintenance: Scheduled FW Upgrade ..................................................................................117
Table 53 Configuration Window ........................................................................................................... 126
Table 54 Copy Port Setup .................................................................................................................... 130
Table 55 SNMP Commands ................................................................................................................ 132
Table 56 System Configuration: SNMP Conf. ...................................................................................... 133
Table 57 System Configuration: Remote Management ....................................................................... 134
Table 58 System Configuration: Time Setup ....................................................................................... 135
Table 59 System Configuration: Syslog Setup .................................................................................... 136
Table 60 System Configuration: Syslog Setup: Add ............................................................................ 137
Table 61 System Configuration: RADIUS ............................................................................................ 138
Table 62 System Configuration: IP Setup ............................................................................................ 140
Table 63 System Configuration: IP Setup: Add ................................................................................... 141
Table 64 Switch Configuration: Switch Setup ...................................................................................... 144
Table 65 Switch Configuration: Priority Queue .................................................................................... 146
Table 66 Switch Configuration: Multiple STP Conf. ............................................................................. 147
Table 67 Aggregation ID Local Switch ................................................................................................. 149
Table 68 Aggregation ID Peer Switch .................................................................................................. 149
Table 69 Switch Configuration: Link Aggregation ................................................................................ 150
Table 70 Switch Configuration: GARP Timer ....................................................................................... 151
Table 71 Switch Configuration: Filtering .............................................................................................. 152
Table 72 Switch Configuration: Filtering: Add ...................................................................................... 153
Table 73 Switch Configuration: MAC Forwarding ................................................................................ 154
Table 74 Switch Configuration: MAC Forwarding: Add ........................................................................ 155
Table 75 Switch Configuration: Mirroring ............................................................................................. 156
Table 76 VLAN Configuration: 802.1Q ................................................................................................ 158
Table 77 VLAN Configuration: 802.1Q: Modify .................................................................................... 159
Table 78 VLAN Port Type Descriptions ............................................................................................... 160
Table 79 VLAN Configuration: Port Based .......................................................................................... 162
Table 80 Ethernet Port Configuration: Port Setup ............................................................................... 164
Table 81 Ethernet Port Configuration: Port VLAN ............................................................................... 166
24
NetAtlas Workgroup User’s Guide
List of Tables
Table 82 Ethernet Port Configuring: Port Link Aggregation ................................................................. 167
Table 83 Ethernet Port Configuration: Port STP .................................................................................. 167
Table 84 Ethernet Port Configuration: Port 802.1x .............................................................................. 169
Table 85 Ethernet Port Configuration: Port Mirroring ........................................................................... 170
Table 86 Ethernet Port Configuration: VLAN Stacking ........................................................................ 171
Table 87 Ethernet Port Configuration: Queue Method ......................................................................... 172
Table 88 Ethernet Port Configuration: Protocol VLAN ......................................................................... 173
Table 89 Ethernet Port Configuration: Protocol VLAN ......................................................................... 174
Table 90 Ethernet Port Configuration: Port Security ............................................................................ 175
Table 91 Ethernet Port Configuration: Bandwidth Ctrl. ........................................................................ 176
Table 92 Ethernet Port Configuration: Broadcast Storm Ctrl. .............................................................. 177
Table 93 Multicast Configuration: Multicast Settings ........................................................................... 180
Table 94 Multicast Configuration: Multicast Settings: Modify ............................................................... 182
Table 95 Multicast Configuration: Multicast Settings: Load Template .................................................. 183
Table 96 Multicast Configuration: Multicast Settings: View Profile ...................................................... 184
Table 97 Multicast Configuration: MVR ............................................................................................... 186
Table 98 Supported RMON Groups ..................................................................................................... 191
Table 99 RMON Configuration: History Config. ................................................................................... 192
Table 100 RMON Configuration: History Config.: New ........................................................................ 193
Table 101 RMON Configuration: Event Config. ................................................................................... 194
Table 102 RMON Configuration: Event Config.: New .......................................................................... 195
Table 103 RMON Configuration: Alarm Config. ................................................................................... 196
Table 104 RMON Configuration, Alarm Config., New .......................................................................... 197
Table 105 RMON Configuration: Alarm Config.: Show Log ................................................................. 198
Table 106 Routing Configuration: Static Route .................................................................................... 200
Table 107 Routing Configuration: Static Route: Add or Modify ............................................................ 200
Table 108 DiffServ: DSCP Setting ....................................................................................................... 202
Table 109 Default DSCP-IEEE802.1p Mapping .................................................................................. 202
Table 110 DiffServ: DSCP Setting ....................................................................................................... 203
Table 111 IP Configuration: IGMP ........................................................................................................ 204
Table 112 IP Configuration: DHCP: Server .......................................................................................... 205
Table 113 IP Configuration: DHCP: Server: New ................................................................................ 206
Table 114 IP Configuration: DHCP: Relay ........................................................................................... 208
Table 115 IP Configuration: DVMRP ................................................................................................... 209
Table 116 IP Configuration: RIP .......................................................................................................... 210
Table 117 OSPF vs. RIP .......................................................................................................................211
Table 118 IP Configuration: OSPF ....................................................................................................... 212
Table 119 IP Configuration: OSPF: New OSPF Setting ...................................................................... 214
Table 120 IP Configuration: OSPF: New Virtual Link .......................................................................... 215
Table 121 IP Configuration: OSPF: New Interface .............................................................................. 216
Table 122 IP Configuration: VRRP ...................................................................................................... 218
Table 123 IP Configuration: VRRP: New ............................................................................................. 219
Table 124 IP Configuration: IP Multicast .............................................................................................. 220
NetAtlas Workgroup User’s Guide
25
List of Tables
Table 125 General Installation Problems ............................................................................................. 221
Table 126 Problems Accessing the EMS ............................................................................................. 221
Table 127 Problems Accessing the EMS ............................................................................................. 222
Table 128 SNMPc Main Window ......................................................................................................... 228
Table 129 Selection Tool ...................................................................................................................... 229
Table 130 Alarm Types and Causes .................................................................................................... 231
26
NetAtlas Workgroup User’s Guide
P ART I
Introduction
• Introduction (29)
• Main EMS Screen (33)
27
28
CHAPTER
1
Introduction
This chapter introduces and shows you how to access the EMS (Element Management
System).
1.1 Overview
The Element Management System (EMS) retrieves management information from switches
using SNMP protocol.
An EMS is composed of Network Elements (NE) that represent resources in a Network
Management System (NMS). The network elements can represent a physical piece of
equipment on the network, the components of a device on the network, or parts of the network
itself.
The following figure shows a network example.
Figure 1 EMS Network Example
1.1.1 EMS Components
The EMS consists of two components: the EMS server and the EMS remote client. You must
install the EMS server, which provides all the functions to use the EMS. You can install the
EMS remote client on other computers if you want to use EMS on them as well.
You can send SNMP messages to managed devices from an EMS remote client (RC) or
through the EMS server (S). The following figure shows a network example.
NetAtlas Workgroup User’s Guide
29
Chapter 1 Introduction
Figure 2 EMS Server and Remote Clients
RC
S
1.1.2 SNMPc Network Manager
SNMPc is network management software produced by Castle Rock.
You must have SNMPc properly installed before you can use the EMS. Refer to the appendix
in this User’s Guide; go to the Castle Rock web site at www.castlerock.com or see your
SNMPc user's guide.
1.1.3 Device Firmware Versions Supported
The EMS supports the devices and device firmware versions as listed in the following tale.
Table 1 Device Firmware Versions Supported
MODEL
FIRMWARE VERSION
ES-2108
360ABK2C0/370ABK0C0 or later versions
ES-2108G
360ABL2C0/370ABL0C0 or later versions
ES-2108PWR
360ABS2C0/370ABS1C0 or later versions
ES-2024A
360TX1C0/370TX0C0 or later versions
GS-2024
360LT1C0 or later versions
ES-3124
360TP3C0/370TP1C0 or later versions
ES-3124PWR
360TY4C0/370TY0C0 or later versions
ES-3148
360TZ1C0/370TZ0C0 or later versions
GS-4012
360TS3C0/370TS0C0 or later versions
GS-4024
360LL3C0/370LL0C0 or later versions
ES-4124
360AIC0C0/370AIC0C0 or later versions
1.2 System Requirements and EMS Installation
Refer to the quick start guide for a list of system requirements and the installation procedure
for EMS.
30
NetAtlas Workgroup User’s Guide
Chapter 1 Introduction
1.3 Accessing EMS
Follow the steps below to access EMS.
1 In the SNMPc main screen, double-click the switch icon.
Figure 3 SNMPc: Switch Device List Icon
2 Click the Switch Manager icon to display the main EMS screen.
Figure 4 NetAtlas Main Screen
NetAtlas Workgroup User’s Guide
31
Chapter 1 Introduction
Figure 5 EMS: Main Screen
32
NetAtlas Workgroup User’s Guide
CHAPTER
2
Main EMS Screen
This chapter describes the main screens you use to view access logs and maintain databases.
2.1 Main Screen Overview
In SNMPc, double-click on a device icon to display the main screen as shown.
Figure 6 Main Screen
The following table describes the options in the switch manager screen.
Table 2 Main Screen Menu Overview
LABEL
SUB-MENU
DESCRIPTION
Window
Exit
Click Exit to close the switch
manager screen.
Admin
Access Log
Use this screen to display
logs.
Database Management
NetAtlas Workgroup User’s Guide
Backup and Restore (EMS &
SNMPc DB)
Use this screen to backup or
restore a switch’s
configuration to the EMS and
SNMPc database.
Log Storage Configuration
(EMS DB)
Use this screen to enable
logging and specify how
many logs to store in the
EMS database.
Scheduled Backup
Configuration (EMS & SNMPc
DB)
Use this screen to specify
when to store logs in the
EMS and SNMPc database.
33
Chapter 2 Main EMS Screen
Table 2 Main Screen Menu Overview (continued)
LABEL
Help
SUB-MENU
DESCRIPTION
SNMP Operation Mode
Use this screen to specify
whether SNM P messages
can be sent directly from an
EMS remote client computer
or through the EMS server.
On-line Help
Click On-line Help to display
an EMS help file.
2.2 Access Log
To view access logs, click Admin > Access Log.
Figure 7 Admin: Access Log
The following table describes the fields in this screen.
Table 3 Admin: Access Log
LABEL
DESCRIPTION
Log Filter
34
Port
Select a port or All Ports for which you want to view switch login data via the EMS.
Log Type
Select the type of logs which you want to view for the selected switch and port(s).
Login User
Select All Users to view logs for all access attempts to a switch via the EMS. Select
Administrator to view only the EMS administrator access attempts.
Sorted by
Select By Device Name to sort the logs displayed in alphabetical order according to the
names of the switch(es). Select Log Time to sort the logs displayed according to the
times received on the switch(es).
NetAtlas Workgroup User’s Guide
Chapter 2 Main EMS Screen
Table 3 Admin: Access Log (continued)
LABEL
DESCRIPTION
Date
Select a start date and end date from the list boxes to display logs for that period.
Apply
Click Apply to display logs with the criteria set above.
Index
This field displays the log number.
Target
This field displays a reason for the generated log.
Device
Name
This field displays name of the switch that generated the log(s).
Log Type
This field displays the type of log the switch generated.
Log Time
This field displays the time a log was generated by a switch.
Login User
This field displays the EMS user that logged into the switch
Slot
This field is currently not supported.
Port
This field displays the selected switch port number on which the log was generated.
Description
This field displays further information about the log.
Delete
Click Delete to delete a selected log from the list of log entries.
Close
Click Close to close this screen.
2.3 Database Management
The following information is stored in the EMS database.
• Event and access logs
• EMS configuration
• Device configuration and status information
Use the Database Management screens to back up logs and EMS and SNMPc configurations
and restore selected backed up files.
2.3.1 Database Synchronization
The EMS is able to synchronize the device tree and device status information with SNMPc.
This means that when you add a device in EMS, the same change also applies in SNMPc and
the new device icon is created in both the EMS and SNMPc screens. In addition, device status
changes are reflected in both the EMS and the SNMPc screens.
EMS database is synchronized:
• when you launch the Switch Manager screen.
• when you click Map > Sync Map DB in EMS.
• automatically everyday at mid-night (this schedule is not configurable).
2.3.2 Filename Convention
The EMS follows a pre-defined naming convention for backup files. Data is backed up in plain
text format with a “txt” filename extension. The general structure of the filename is
<type>.txt (for example, AccessLog.txt).
NetAtlas Workgroup User’s Guide
35
Chapter 2 Main EMS Screen
2.3.3 Database Backup and Restore
Use the Database Backup/Restore screen to back up current EMS and SNMPc databases or
restore the database information. Backup data is stored as a series of files in the specified
directory on your computer.
Click Admin > Database Management > Backup/Restore (EMS & SNMPc DB) to display
the configuration screen.
Figure 8 Admin: Database Management: Backup/Restore
The following table describes the fields in this screen.
Table 4 Admin: Database Management: Backup/Restore
LABEL
DESCRIPTION
Backup
Select Backup to transfer the database file from the EMS to the computer.
Restore
Select Restore to transfer the backed up files from your computer to the EMS.
SNMPc Backup
Name
Specify a backup file name for the SNMPc database to store on your computer.
Enter a descriptive name for identification purposes.
Directory
This field displays the default directory to back up or restore database files. Specify
the location you wish the EMS to restore from or back up to on your computer or
click Browse to locate it.
Existing
Backups
This field is applicable when you select the Restore option.
This field displays the list of backup files available for restore.
Delete
Click Delete to remove the selected backup file.
Apply
Click Apply to backup or restore the database files.
Close
Click Close to close the screen.
2.3.4 Database Log Storage Configuration
Use the Database Log Storage Configuration screen to maintain logs on the EMS.
Click Admin > Database Management > Log Storage Configuration (EMS DB) to display
the following screen.
36
NetAtlas Workgroup User’s Guide
Chapter 2 Main EMS Screen
Figure 9 Admin: Database Management: Log Storage
The following table describes the fields in this screen.
Table 5 Admin: Database Management: Log Storage
LABEL
DESCRIPTION
Storage
Configuration
Configure the following fields to retain daily records.
Select the first radio button and a number (in thousands) from the drop-down
list box to retain that number of records. All records prior to these records are
cleared every 24 hours.
Or
Select the second radio button and a number (from 7 to 365) in the field
provided. All records up to the start of the period selected are cleared every 24
hours.
Cleared Records
Backup
If you do not configure this section, all records (excluding the latest reserved
records) will be cleared after 24 hours and therefore cannot be retrieved later.
Backup the cleared
records
Select the check box and type the path and file name or click Browse to locate
the folder you wish to save all records after 24 hours. The records are cleared
but saved in the backup file.
Backup Directory
Type the path and file name of the record file you wish to back up to your
computer in the Backup Directory text box or click Browse to locate it.
User info for
Windows
Account
Enter the account user name to log into your Windows computer.
Password
Enter a password in this field for the administrator Account above.
Apply
Click Apply to save changes to the EMS.
Close
Click Close to close the screen.
2.3.5 Database Scheduled Backup Configuration
Use this screen to schedule regular backups for database files. The EMS creates a scheduled
task on your Windows computer for this action. To look at scheduled tasks in Windows 2000,
click Start > Settings > Control Panel > Scheduled Tasks. The steps are similar for other versions
of Windows.
NetAtlas Workgroup User’s Guide
37
Chapter 2 Main EMS Screen
Click Admin > Database Management > Backup and Restore (EMS & SNMPc DB) to
display the following screen.
Figure 10 Admin: Database Management: Scheduled Backup
The following table describes the fields in this screen.
Table 6 Admin: Database Management: Scheduled Backup
LABEL
DESCRIPTION
Backup Schedule
Frequency
Scheduled backups can be performed Daily, Weekly or Monthly. Select a
radio button to schedule database backups starting from the date and time
specified below. The default setting is No Backup.
Starting date
Specify the starting date to begin database backup for the selected device(s).
Select a date from the drop-down list box.
Starting time
Specify the starting time to begin database backup for the selected device(s).
Select a time from the selection box or enter a time (hh:mm:ss AM/PM
format).
Backup Directory
Type the path to which you wish to back up the database files on your
computer in the Backup Directory text box or click Browse to locate it.
User info for Windows
Account
Specify a Windows administrator login account user name.
Password
Enter a password in this field for the administrator Account above.
Apply
Click Apply to save changes to the EMS.
Close
Click Close to close the screen.
2.4 SNMP Operation Mode
When you install EMS remote client on a computer, you can use the SNMP Operation Mode
screen to specify whether you want to allow the EMS remote client computer to send SNMP
messages directly to managed ZyXEL devices or through the EMS server.
Click Admin > SNMP Operation Mode to display the screen as shown.
38
NetAtlas Workgroup User’s Guide
Chapter 2 Main EMS Screen
Figure 11 Admin: SNMP Operation Mode
The following table describes the fields in this screen.
Table 7 Admin: SNMP Operation
LABEL
DESCRIPTION
Client Sends SNMP
Operation via Server
Select this option to set the EMS remote client computer(s) to send SNMP
messages to managed ZyXEL devices through the EMS server.
Select this option if the remote client computer(s) is not in the same subnet as
the managed devices.
Client Sends SNMP
Operation itself
Select this option to allow the EMS remote client computer(s) to send SNMP
messages directly to managed ZyXEL devices.
Select this option if the remote client computer(s) is in the same subnet as the
managed devices.
OK
Click OK to save changes to the EMS.
Cancel
Click Cancel to discard the change and close the screen.
2.5 Accessing the Switch Manager Screen
To display the EMS main screen, click on the device icon in the main screen.
The EMS polls for all the available switches. Select a device icon to display a graphic of the
switch in the Device Panel. You can only display one switch in the Device Panel at one time.
NetAtlas Workgroup User’s Guide
39
Chapter 2 Main EMS Screen
Figure 12 Switch Manager: Main Screen
40
NetAtlas Workgroup User’s Guide
P ART II
Switch Manager
•
•
•
•
•
•
•
•
•
Switch Manager (43)
Map (53)
View (57)
Template (77)
Provisioning (85)
Performance (89)
Fault (101)
Maintenance (107)
Tools (119)
41
42
CHAPTER
3
Switch Manager
This chapter describes the Switch Manager screens and shows you some basic features.
3.1 Switch Manager Overview
To display the Switch Manager screen, double-click the Switch Manager icon in the main
NetAtlas Enterprise EMS screen.
The EMS main screen varies depending on the selected switch model.
Figure 13 EMS Main Screen Overview
1
3
2
4
5
The following table describes the elements in the EMS screen.
NetAtlas Workgroup User’s Guide
43
Chapter 3 Switch Manager
Table 8 EMS Main Screen Overview
ELEMENT
FUNCTION
1
Menu Shortcut Bar
Use these buttons to execute common commands quickly. Hold the
cursor over an icon to see a tool tip.
The CRI, MAJ, MIN and INF buttons are colored if a related event log
has not been acknowledged yet. The event status is updated every 30
seconds.
2
Device List Panel
View devices in a tree structure. The colors of the device icons indicate
the status of the devices. Refer to the document that comes with
SNMPc for more information.
Click on a device to retrieve updated information from the device.
Double-click on a device to update device information to the EMS
database.
3
Alarm Severity Icons
These icons indicate the presence of any alarm/event logs. Click on an
active icon to view the Event Log screen.
4
Device Panel
This is a graphical device display. Double-click on a switch to display
the EMS GUI management window for the switch.
5
System Message Panel
View the alarm statusA and port status of the selected switch.
A.
Not available on all models at the time of writing.
3.2 Device List and Icon Colors
In the Device List and Device panels, the colors of the device indicate the status of the
represented devices stored in the database. The colors and the event status correspond to the
settings in SNMPc. To update the device status, double-click on a device icon.
Figure 14 Device List and Icon Colors: Example
44
NetAtlas Workgroup User’s Guide
Chapter 3 Switch Manager
3.3 System Message Panel Alarm Status
The colors of the alarm icons (in the System Message Panel) indicate the real-time status of
the current selected device. The following table describes the alarm states used.
Table 9 System Message Panel Alarm Status
PANEL ALARMS
ALARM OFF
ALARM ON
ALARM
When this icon is grayed out,
the device fan, temperature
or voltage alarm is off.
The fan, temperature and
voltage alarms are all on. A
serious hardware problem
exists.
FAN
When this icon is grayed out,
the device fans are
functioning properly.
One or more of the device
fans has a problem.
TEMP
When this icon is grayed out,
temperatures at all sensor
points in the switch are within
the threshold temperature
range.
The temperature at a sensor
point in the switch has risen
above or below the threshold
temperature range.
VOL
When this icon is grayed out,
the power supply at all
sensor points in the switch is
within the tolerance range.
The power supply at a sensor
point in the switch has fallen
out of the tolerance range.
If an alarm turns on, click the Port Status tab in the System Message Panel or proceed to
Section 5.1 on page 57 for hardware troubleshooting.
3.4 System Message Panel Port Status
Proceed to Section 5.4 on page 62 for information on the details displayed in this screen.
3.5 Menu Shortcut Buttons
The following is a brief overview of the menu shortcut buttons.
Figure 15 EMS Main Screen Shortcut Bar
Add Submap/
Device
Find Object
Delete Submap/
Device
NetAtlas Workgroup User’s Guide
Interface
Performance
Refresh Map
Event Log
Port Status
45
Chapter 3 Switch Manager
3.6 EMS Main Menu Summary
Map
View
Performance
Template
Provisioning
Fault
Maintenance
Tool
Help
The following table summarizes the sub-links in the navigation panel.
"
Screens, screen labels and fields vary depending on your switch model.
Table 10 EMS Navigation Panel Sub-link Descriptions
LABEL
DESCRIPTION
MAP
Add Submap/Device Select this to add a device or a submap folder to the EMS Device List Panel.
Edit Node
Select this to edit device or sub-map folder properties.
Search Node
Select this to search for a device or a submap folder.
Delete
Select this to delete a submap folder or devices within a folder.
Refresh Map
Select this to update the device status in the EMS device map.
Sync MAP DB
Select this to synchronize the submaps and switches in the EMS with the
folders and switches in SNMPc Network Manager.
Exit
Select this to close the Switch Manager screen.
View
46
Hardware Status
Select this to view the hardware status of a device.
STP Status
Select this to view the Spanning Tree Protocol (STP) status of a device.
VLAN Status
Select this to view the VLAN status of a device.
Port Status
Select this to view the port status of a device.
NetAtlas Workgroup User’s Guide
Chapter 3 Switch Manager
Table 10 EMS Navigation Panel Sub-link Descriptions (continued)
LABEL
DESCRIPTION
802.1d
Select this to view the MAC addresses (and types) of devices attached to
what ports and VLAN IDs or view the MAC addresses – IP address
resolution table.
Multicast Status
Select this to view the multicast traffic status of a device.
Ethernet Status
Select this view Ethernet port statistics.
IP Application
Status
Select this to view IP routing domain status.
Interface Status
Select this to view IP routing interface status.
Firmware Version
Select this to view the firmware versions of the managed devices.
Template
VLAN Template
Select this to configure a VLAN template for upload to multiple devices.
IGMP Filtering
Profile Template
Select this to configure an IGMP filter template for upload to multiple
devices.
Multicast Template
Select this to configure a multicast template for upload to multiple devices.
Provisioning
IGMP Filtering
Provisioning
Select this to apply IGMP filtering templates.
Performance
Interface
Select this to configure interface performance graphs and tables.
RMON
Select this to view RMON Ethernet and history statistics.
Fault
Event Log
Select this to configure an alarm filter.
Loopback Test
Select this to perform a loopback test.
Ping and Traceroute Select this to test connections using a ping or traceroute test.
Maintenance
Firmware Upgrade
Select this to perform a device firmware upgrade.
Device Reset
Select this to reboot a device.
NE Configuration
Select this to back up or restore device configuration.
Backup and Restore
Load Factory
Default
Select this to reset a device back to the factory default settings.
Scheduled NE
Config Backup
Select this when you want to configure a schedule to back up a switch
configuration file.
Scheduled NE
Config Restore
Select this when you want to configure a schedule to restore a switch
configuration file.
Scheduled FW
Upgrade
Select this when you want to configure a schedule to perform firmware
upgrade on a switch.
Tool
Telnet
This link takes you to a screen where you can access a device Telnet
service.
Web Access
This link takes you to a screen where you can access a device Web
configurator.
NetAtlas Workgroup User’s Guide
47
Chapter 3 Switch Manager
Table 10 EMS Navigation Panel Sub-link Descriptions (continued)
LABEL
DESCRIPTION
Ping
This link takes you to a screen where you can ping a device directly through
the EMS.
Help
About
This link takes you to a screen where you can view the version number of
the EMS.
On-line Help
This link opens the EMS user’s guide in PDF format.
3.7 Common EMS Command Buttons
The following table shows common command buttons found on most EMS screens.
Table 11 Common EMS Command Buttons
LABEL
DESCRIPTION
Apply
Click Apply to save the changes back to the switch.
OK
Click OK to save your changes and close the screen.
Cancel
Click Cancel to discard all changes and close the screen.
Close
Click Close to close the screen.
3.8 View the Switch
To display the selected switch, double-click the appropriate switch graphic in the Device List
Panel or on the switch icon in the Device Panel. You can only display one switch in the device
Panel window at a time. Refer to the appropriate chapters or sections for the descriptions of
each menu screen.
The following figure shows an example.
Figure 16 Switch View
3.9 Switch Information
Follow the steps to display information on a switch.
1 Right-click on the switch icon in the Device List Panel.
2 Click Configuration > System > System Info. The switch information window displays
as shown next.
3 Choose a switch from the list located on the left-hand side of the screen.
48
NetAtlas Workgroup User’s Guide
Chapter 3 Switch Manager
Figure 17 Configuration: System Configuration: System Info.
The following table describes the labels in this screen.
Table 12 Configuration: Switch Configuration: System Info.
LABEL
DESCRIPTION
Device Name
This field displays the descriptive name of a device.
Device IP
This field displays the IP address of a device
Name
Enter a descriptive name for identification purposes. If you want to change the
name, enter up to 32 printable characters; spaces are not allowed.
Contact
Enter the name (up to 32 characters) of the person in charge of the selected
switch.
Location
Enter the geographic location (up to 32 characters) of the selected switch.
Ethernet Address
This field displays the switch Ethernet MAC address in six hexadecimal character
pair format.
OS FW Version
This field displays the firmware version of the selected switch.
HW Version
This field displays the hardware version of the selected switch.
Serial No.
This field displays the unique device serial number.
Apply
Click Apply to save the changes back to the switch.
Close
Click Close to close the screen.
NetAtlas Workgroup User’s Guide
49
Chapter 3 Switch Manager
3.10 Configuration Save
You must save the current configuration in the EMS to the selected switch(es) to make the
changes take effect.
"
If an administrator is currently logged into the device via the console port or the
CLI (Command Line Interface), you cannot save the device settings from the
EMS. Do NOT turn off the switch during the updating process, as it may corrupt the
firmware and make your switch unusable.
1 To save the current switch configuration, select and right-click on the switch icon in the
Device List Panel.
2 Click Configuration Save.
3 Choose a switch from the list in the screen. You can select more than one switch by
pressing [CTRL] and click at the same time. Note that switches that are online are
displayed in green. Off line switches are displayed in red.
Figure 18 Configuration Save
4 Click Apply to save the current configuration. All settings configured on the EMS will
be saved to the selected switch(es).
5 A screen displays showing the configuration save result. Click Done to close the screen.
50
NetAtlas Workgroup User’s Guide
Chapter 3 Switch Manager
Figure 19 Configuration Save: Result
NetAtlas Workgroup User’s Guide
51
Chapter 3 Switch Manager
52
NetAtlas Workgroup User’s Guide
CHAPTER
4
Map
This chapter describes the Map screens you use to add, edit or delete device mappings in the
EMS.
4.1 Root Subnet and Device Mapping
The EMS mapping displays logical hierarchy for the ZyXEL switch(es) in the EMS. When
started, the EMS automatically synchronizes device map information with SNMPc and creates
the Root Subnet and the icons for your ZyXEL switch(es) in the Device List Panel.
You can add device or submaps in EMS or SNMPc.
The following figure shows the “Root Subnet” folder. The managed devices are mapped to the
“Root Subnet” folder.
Figure 20 Submaps and Device Mapping
"
You cannot create, edit or delete the Root Subnet.
NetAtlas Workgroup User’s Guide
53
Chapter 4 Map
4.1.1 Adding a Submap or Device
To add a new submap or a new device, select the Root Subnet or a submap icon in the Device
List Panel.
Click Map > Add Submap/Device to display the following screen.
Figure 21 Map: Add Submap/Device
The following table describes the labels in this screen.
Table 13 Map: Add Submap/Device
54
LABEL
DESCRIPTION
Properties
These options are not applicable when you edit the properties of an existing
submap or device.
Select the Submap or Device radio button to add a new submap or device icon to
the Device List Panel.
If you select Submap, only the Name and Description fields display are
applicable; all other fields appear as read-only.
Name
Enter a descriptive name (up to 30 characters) for identification purposes.
IP Address
This field is not applicable when you select Submap.
Enter the IP address of the device.
Login Name
Enter the administrator account user name to log into the switch.
Password
Enter the administrative password (up to 30 characters) you use to log in to the
switch. This password is used by the EMS administrator for device firmware
upload.
Description
Enter a description (up to 30 characters) about the device.
Get Community
Enter the get community, which is the password for the incoming Get- and GetNextrequests from the management station.
Set Community
Enter the set community, which is the password for incoming Set- requests from the
management station.
Trap Community
Enter the trap community, which is the password sent with each trap to the SNMP
manager.
NetAtlas Workgroup User’s Guide
Chapter 4 Map
Table 13 Map: Add Submap/Device (continued)
LABEL
DESCRIPTION
OK
Click OK to save the changes and close the screen.
Cancel
Click Cancel to discard the changes and close the screen.
4.1.2 Editing a Node
Select a device or submap icon in the Device List Panel and then click Map > Edit Node.
Figure 22 Map: Edit Node
Refer to Table 13 on page 54 for the field descriptions.
4.1.3 Finding an Object
To find or locate a device (or node), click Map > Find Object.
Figure 23 Map: Find Object
Enter a descriptive text (for example, the node name) in the Find What field and click OK to
start the search.
4.1.4 Deleting a Submap
To delete a submap, select the submap icon in the Device List Panel and click Map > Delete.
NetAtlas Workgroup User’s Guide
55
Chapter 4 Map
Figure 24 Map: Delete Warning
"
If you delete a submap, all devices under a submap will be removed.
4.1.5 Deleting a Device
To remove a device from the Device List Panel, select the device icon and click Map > Delete.
4.1.6 Updating Device Map
Click Map > Refresh Map to update information in the device panel from the EMS database.
4.1.7 Synchronizing Device Map Database
Click Map > Synch MAP DB to synchronize the device map information in EMS with the
device map information in SNMPc database.
4.2 Exit
Click Map > Exit to close the Switch Manager screen.
56
NetAtlas Workgroup User’s Guide
CHAPTER
5
View
This chapter describes the various View screens.
5.1 Hardware Status
View fan speeds, voltage levels and temperatures of a selected switch in the Hardware
Monitor screen.
Click View > Hardware Status and select a switch from the device list located on the lefthand side of the screen. The device hardware status displays.
"
It may take a few seconds to update the screen.
Figure 25 View: Hardware Status
The following table describes the labels in this screen.
NetAtlas Workgroup User’s Guide
57
Chapter 5 View
Table 14 Status: Hardware Status
LABEL
DESCRIPTION
Device Name
This field displays the descriptive name of a device.
Device IP
This field displays the IP address of a device
Fan RPM
(RPM)
A properly functioning fan is an essential component (along with a sufficiently
ventilated, cool operating environment) in order for the device to stay within the
temperature threshold. Each fan has a sensor that is capable of detecting and
reporting if the fan speed falls below the threshold shown.
Index
This field displays the fan number.
Current
This field displays this fan’s current speed in Revolutions Per Minute (RPM).
Max
This field displays this fan’s maximum speed recorded in Revolutions Per Minute
(RPM).
Min
This field displays this fan’s minimum speed recorded in Revolutions Per Minute
(RPM).
Threshold
This field displays the minimum speed at which a normal fan should work.
Status
NORMAL indicates that this fan is functioning above the minimum speed. ERROR
indicates that this fan is functioning below the minimum speed.
Voltage (V)
Index
This field displays the first voltage sensor number.
Current
This is the current voltage reading in volts.
Max
This field displays the maximum voltage recorded at this sensor in volts.
Min
This field displays the minimum voltage recorded at this sensor in volts.
Threshold
This field displays the minimum voltage percentage at which the switch should work.
Status
NORMAL indicates that the voltage is within an acceptable operating range at this
point; otherwise ERROR is displayed. ABSENT indicates that there is no power
reading at a sensor(s).
Temperature
58
The power supply for each voltage has a sensor that is capable of detecting and
reporting if the voltage falls out of the tolerance range.
The switch has temperature sensors that are capable of detecting and reporting if
the temperature rises above the threshold. You may choose the temperature unit (in
degrees Celsius or Fahrenheit).
Celsius
Select this option to display the temperature in degrees Centigrade.
Fahrenheit
Select this option to display the temperature in degrees Fahrenheit.
Index
This field displays the temperature sensor number.
Current
This shows the current temperature at this sensor.
Max
This field displays the maximum temperature recorded at this sensor.
Min
This field displays the minimum temperature recorded at this sensor.
Threshold
This field displays the upper temperature limit at this sensor.
Status
This field displays NORMAL for temperatures below the threshold and ERROR for
those above.
Polling
The text box displays how often (in seconds) this screen refreshes. You may change
the refresh interval by typing a new number in the text box and then clicking the
Apply button.
Close
Click Close to close the screen.
NetAtlas Workgroup User’s Guide
Chapter 5 View
5.2 STP/RSTP
(R)STP detects and breaks network loops and provides backup links between switches,
bridges or routers. It allows a switch to interact with other (R)STP -compliant switches in your
network to ensure that only one path exists between any two stations on the network.
"
In this user’s guide, “STP” refers to both STP and RSTP.
5.2.1 STP Terminology
The root bridge is the base of the spanning tree; it is the bridge with the lowest identifier value
(MAC address).
Path cost is the cost of transmitting a frame onto a LAN through that port. It is assigned
according to the speed of the link to which a port is attached. The slower the media, the higher
the cost - see the next table.
Table 15 STP Path Costs
LINK SPEED
RECOMMENDED VALUE
RECOMMENDED RANGE
ALLOWED RANGE
4Mbps
250
100 to 1000
1 to 65535
10Mbps
100
50 to 600
1 to 65535
16Mbps
62
40 to 400
1 to 65535
100Mbps
19
10 to 60
1 to 65535
1Gbps
4
3 to 10
1 to 65535
10Gbps
2
1 to 5
1to 65535
On each bridge, the root port is the port through which this bridge communicates with the root.
It is the port on this switch with the lowest path cost to the root (the root path cost). If there is
no root port, then this switch has been accepted as the root bridge of the spanning tree
network.
For each LAN segment, a designated bridge is selected. This bridge has the lowest cost to the
root among the bridges connected to the LAN.
5.2.2 STP Port States
STP assigns five port states (see next table) to eliminate packet looping. A bridge port is not
allowed to go directly from blocking state to forwarding state so as to eliminate transient
loops.
Table 16 STP Port States
PORT STATE
DESCRIPTION
Disabled
STP is disabled (default).
Blocking
Only configuration and management BPDUs are received and processed.
Listening
All BPDUs are received and processed.
NetAtlas Workgroup User’s Guide
59
Chapter 5 View
Table 16 STP Port States
PORT STATE
DESCRIPTION
Learning
All BPDUs are received and processed. Information frames are submitted to the
learning process but not forwarded.
Forwarding
All BPDUs are received and processed. All information frames are received and
forwarded.
5.2.3 STP Status
View current STP information in the STP Status screen. Click Status > STP Status and select
a switch from the device list located on the left-hand side of the screen. The STP status
displays in the table on the right.
Figure 26 View: STP Status
The following table describes the labels in this screen.
Table 17 View: STP Status
LABEL
DESCRIPTION
Device Name
This field displays the descriptive name of a device.
Device IP
This field displays the IP address of a device
Tree
Select the index number of the spanning tree whose status you want to display.
Bridge
Root refers to the base of the spanning tree (the root bridge).
Bridge ID
This is the unique identifier for this bridge, consisting of bridge priority plus MAC
address.
Hello Time
(second)
This is the time interval (in seconds) at which the root device transmits a
configuration message. The root bridge determines Hello Time, Max Age and
Forwarding Delay
Max Age (second) This is the maximum time (in seconds) a switch can wait without receiving a
configuration message before attempting to reconfigure.
60
Forwarding Delay
(second)
This is the time (in seconds) the root switch will wait before changing states (that
is, listening to learning to forwarding).
Cost to Bridge
This is the path cost from the root port on this switch to the root switch.
Port ID
This is the priority and number of the port on the switch through which this switch
must communicate with the root of the spanning tree.
NetAtlas Workgroup User’s Guide
Chapter 5 View
Table 17 View: STP Status (continued)
LABEL
DESCRIPTION
Topology
Changed Times
This is the number of times the spanning tree has been reconfigured.
Time Since Last
Change
This is the time since the spanning tree was last reconfigured.
Polling
The text box displays how often (in seconds) this screen refreshes. You may
change the refresh interval by typing a new number in the text box and then
clicking the Apply button.
Close
Click Close to close the screen.
5.3 VLAN Status
Follow the steps below to view the VLAN status of a switch.
"
The VLAN Status screen only displays static IEEE 802.1q VLAN information.
1 Click View > VLAN Status.
2 Choose a switch from the list located on the left-hand side of the screen.
Figure 27 View: VLAN Status
NetAtlas Workgroup User’s Guide
61
Chapter 5 View
The following table describes the labels in this screen.
Table 18 View: VLAN Status
LABEL
DESCRIPTION
Device Name
This field displays the descriptive name of a device.
Device IP
This field displays the IP address of a device
VLAN ID
This field displays the identification number of the VLAN.
Name
This field displays a unique number for identification purposes.
Elapsed Time
This field displays the time since the VLAN was created.
Status
This field displays Static if the VLAN is active and will remain so after the next reset
of the device. This field displays GVRP if the VLAN is active and will remain so until
removed by GVRP. This field is Other if the VLAN is active, but is not permanent or
created by GVRP.
Previous Page
Click Previous Page to display the previous VLAN ID screen.
Next Page
Click Next Page to display the next VLAN ID screen.
Current Page
This field displays the current page number.
Enter a number and click Show Page to display that page.
VLANs/Page
This field displays the number of VLAN entries to display in one page.
Enter a number (1-99) and click Show Page to display that number of VLAN entries
in a page.
Port List
This table displays port VLAN settings. A tagged port is marked T, an untagged port is
marked U and a port not participating in a VLAN is marked -.
Polling
The text box displays how often (in seconds) this screen refreshes. You may change
the refresh interval by typing a new number in the text box and then clicking the
Apply button.
Close
Click Close to close the screen.
5.4 Port Status
Follow the steps below to view the port status of a switch.
1 Click View > Port Status.
2 To view the port status of a switch choose a switch from the list located on the left-hand
side of the screen.
62
NetAtlas Workgroup User’s Guide
Chapter 5 View
Figure 28 View: Port Status
The following table describes the labels in this screen.
Table 19 View: Port Status
LABEL
DESCRIPTION
Device Name
This field displays the descriptive name of a device.
Device IP
This field displays the IP address of a device
Port
This identifies the Ethernet port.
Link Speed
This field displays the speed (either 10M for 10Mbps, 100M for 100Mbps or 1000M
for 1000Mbps).
State
This field displays the STP state of the port. See the Spanning Tree Protocol
chapter for details on STP port states.
LACP
This field displays whether LACP is activated.
PD
This field displays the power device (PD) module status on the switch. If N/A is
displayed, the switch does not include a PD module.
This field displays On if the switch has a PD and it is in use.
This field displays Off if the switch has a PD, but it is not in use.
TxPkts
This field shows the number of transmitted frames on this port.
RxPkts
This field shows the number of received frames on this port.
Errors
This field shows the number of received errors on this port.
Polling
The text box displays how often (in seconds) this screen refreshes. You may
change the refresh interval by typing a new number in the text box and then clicking
the Apply button.
Close
Click Close to close the screen.
NetAtlas Workgroup User’s Guide
63
Chapter 5 View
5.5 802.1D
Use the 802.1D screens to view a table of MAC address entries or to view a table of IP address
mappings.
5.5.1 MAC Table
Follow the steps below to view the MAC table.
1 Click View > 802.1d.
2 To view the MAC table of a switch choose a switch from the list located on the left-hand
side of the screen.
3 Click the MAC Table tab.
Figure 29 View: 802.1d: MAC Table
The following table describes the labels in this screen.
Table 20 View: 802.1d: MAC Table
64
LABEL
DESCRIPTION
Device Name
This field displays the descriptive name of a device.
Device IP
This field displays the IP address of a device
Sort by
Click one of the following buttons to display and arrange the data according to that
button type. The information is then displayed in the summary table below.
MAC
Click this button to display and arrange the data according to MAC address.
VID
Click this button to display and arrange the data according to VLAN group.
Port
Click this button to display and arrange the data according to port number.
Index
This is the incoming frame index number.
MAC Address
This is the MAC address of the device from which this incoming frame came.
VID
This is the VLAN group to which this MAC address belongs.
NetAtlas Workgroup User’s Guide
Chapter 5 View
Table 20 View: 802.1d: MAC Table (continued)
LABEL
DESCRIPTION
Port
This is the port from which the above MAC address was learned.
Type
This shows whether the MAC address is dynamic (learned by the switch) or static
(manually entered in the Static MAC Forwarding screen).
MAC Amount
This field displays the number of MAC address entries in the MAC table.
Previous Page
Click Previous Page to display the previous screen.
Next Page
Click Next Page to display the next screen.
Current Page
This field displays the current page number.
Enter a number and click Show Page to display that page.
MACs/Page
This field displays the number of MAC address entries to display in one page.
Enter a number (1-99) and click Show Page to display that number of MAC
address entries in a page.
Polling
The text box displays how often (in seconds) this screen refreshes. You may
change the refresh interval by typing a new number in the text box and then
clicking the Apply button.
Close
Click Close to close the screen.
5.5.2 ARP Table
Address Resolution Protocol (ARP) is a protocol for mapping an Internet Protocol address (IP
address) to a physical machine address, also known as a Media Access Control or MAC
address, on the local area network.
Follow the steps below to view the ARP table.
1 Click View > 802.1d.
2 To view the ARP table of a switch choose a switch from the list located on the left-hand
side of the screen.
3 Click the ARP Table tab.
NetAtlas Workgroup User’s Guide
65
Chapter 5 View
Figure 30 View: 802.1d: ARP Table
The following table describes the labels in this screen.
Table 21 View: 802.1d: ARP Table
LABEL
DESCRIPTION
Device Name
This field displays the descriptive name of a device.
Device IP
This field displays the IP address of a device
Index
This is the ARP table entry number.
IP Address
This is the learned IP address of a device connected to a switch port with
corresponding MAC address below.
MAC Address
This is the MAC address of the device with corresponding IP address above.
VID
This is the VLAN group to which this ARP entry belongs.
Type
This shows whether the MAC address is dynamic (learned by the switch) or static
(manually entered in the Static MAC Forwarding screen).
Previous Page Click Previous Page to display the previous screen.
66
Next Page
Click Next Page to display the next screen.
Current Page
This field displays the current page number.
Enter a number and click Show Page to display that page.
ARPs/Page
This field displays the number of ARP entries to display in one page.
Enter a number (1-99) and click Show Page to display that number of ARP entries in
a page.
Polling
The text box displays how often (in seconds) this screen refreshes. You may change
the refresh interval by typing a new number in the text box and then clicking the Apply
button.
Close
Click Close to close the screen.
NetAtlas Workgroup User’s Guide
Chapter 5 View
5.6 Multicast Status
View the IGMP multicast group membership information in the Multicast Status screen.
Click View > Multicast Status to display the screen as shown. Select a switch model in the
device list to display the multicast group membership information.
Figure 31 View: Multicast Status
The following table describes the labels in this screen.
Table 22 View: Multicast Status
LABEL
DESCRIPTION
Device Name
This field displays the descriptive name of a device.
Device IP
This field displays the IP address of a device
Index
This field displays the index number.
VID
This field displays the multicast VLAN ID.
Port
This field displays the port number(s) that belongs to the multicast group.
Multicast Group
This field displays the multicast group address.
Polling
The text box displays how often (in seconds) this screen refreshes. You may
change the refresh interval by typing a new number in the text box and then
clicking the Apply button.
Close
Click Close to close the screen.
5.7 Ethernet Port Status
You can view Ethernet port statistics in the Ethernet Status screen.
Click View > Ethernet Status and select a device to display the information.
NetAtlas Workgroup User’s Guide
67
Chapter 5 View
Figure 32 View: Ethernet Status
The following table describes the labels in this screen.
Table 23 View: Ethernet Status
68
LABEL
DESCRIPTION
Device Name
This field displays the descriptive name of a device.
Device IP
This field displays the IP address of a device
Index
This field displays the index number.
Alignment Errors
This field displays the number of frames received with alignment errors.
FCS Errors
This field displays the number of frames received with Frame Check Sequence
(FCS) errors.
Single Collision
Frames
This field displays the number of frames with 1 collision detected.
Multiple Collision
Frames
This field displays the number of frames with 2 to 15 collisions detected.
SQE Test Errors
This field displays the number of frames with Signal Quality Error (SQC) errors.
Deferred
Transmissions
This field displays the number of frames that were delayed due to deferred
transmission.
Late Collisions
A late collision is counted when a device detects a collision after it has sent the
512th bit of its frame. This field displays the number of times such a collision is
detected.
Excessive
Collisions
This field displays the number of packets with in excess of 15 collisions detected.
Mac Transmission
Errors
This field displays the number of packets with internet MAC sublayer transmission
error.
Carrier Sense
Errors
This field displays the number of times a carrier sense error occurred.
Frame Too Longs
This field displays the number of frames dropped because they were bigger than
the maximum frame size.
Mac Receive
Errors
This field displays the number of frames received with MAC address errors.
NetAtlas Workgroup User’s Guide
Chapter 5 View
Table 23 View: Ethernet Status (continued)
LABEL
DESCRIPTION
Ether Chip Set
This field identifies the Ethernet chipset used for the interface.
Polling
The text box displays how often (in seconds) this screen refreshes. You may
change the refresh interval by typing a new number in the text box and then
clicking the Apply button.
Close
Click Close to close the screen.
5.8 IP Application Status
Use the IP Application Status screens to view the routing table, IP table, DHCP server,
VRRP and OSPF status on layer3 switches (the GS or ES 4000 series).
5.8.1 Routing Table Status
Follow the steps below to view the routing table of a selected device.
1 Click View > IP Application Status.
2 Select a switch from the list located on the left-hand side of the screen.
3 Click the Routing Table Status tab.
Figure 33 View: IP Application Status: Routing Table Status
NetAtlas Workgroup User’s Guide
69
Chapter 5 View
The following table describes the labels in this screen.
Table 24 View: IP Application Status: Routing Table Status
LABEL
DESCRIPTION
Device
Name
This field displays the descriptive name of a device.
Device IP
This field displays the IP address of a device
Index
This field displays the index number.
Destination
This field displays the destination IP routing domain.
Gateway
This field displays the IP address of the gateway device.
Interface
This field displays the IP interface to which this route belongs.
Metric
This field displays the cost of the route.
Type
This field displays the method used to learn the route.
Polling
The text box displays how often (in seconds) this screen refreshes. You may change
the refresh interval by typing a new number in the text box and then clicking the Apply
button.
Close
Click Close to close the screen.
5.8.2 IP Table Status
Follow the steps below to view the IP table of a selected device.
1 Click View > IP Application Status.
2 Select a switch from the list located on the left-hand side of the screen.
3 Click the IP Table Status tab.
Figure 34 View: IP Application Status: IP Table Status
70
NetAtlas Workgroup User’s Guide
Chapter 5 View
The following table describes the labels in this screen.
Table 25 View: IP Application Status: IP Table Status
LABEL
DESCRIPTION
Device
Name
This field displays the descriptive name of a device.
Device IP
This field displays the IP address of a device
Sort by
Click one of the following buttons to display and arrange the data according to that
button type. The information is then displayed in the summary table below.
IP
Click this button to display and arrange the data according to IP address.
VID
Click this button to display and arrange the data according to VLAN group.
Port
Click this button to display and arrange the data according to port number.
Index
This field displays the index number.
IP Address
This is the IP address of the device from which the incoming packets came.
VID
This is the VLAN group to which the packet belongs.
Port
This is the port from which the above IP address was learned. This field displays CPU to
indicate the IP address belongs to the switch.
Type
This shows whether the IP address is dynamic (learned by the switch) or static
(belonging to the switch).
Polling
The text box displays how often (in seconds) this screen refreshes. You may change the
refresh interval by typing a new number in the text box and then clicking the Apply
button.
Close
Click Close to close the screen.
5.8.3 DHCP Server Status
Follow the steps below to view the DHCP server status of a selected device.
1 Click View > IP Application Status.
2 Select a switch from the list located on the left-hand side of the screen.
3 Click the DHCP Server Status tab.
NetAtlas Workgroup User’s Guide
71
Chapter 5 View
Figure 35 View: IP Application Status: DHCP Server Status
The following table describes the labels in this screen.
Table 26 View: IP Application Status: DHCP Server Status
LABEL
DESCRIPTION
Device Name
This field displays the descriptive name of a device.
Device IP
This field displays the IP address of a device
Index
This is the index number.
VID
This field displays the ID number of the VLAN group to which this DHCP settings
apply.
Server Status
This field displays the starting DHCP client IP address.
IP Pool Size
This field displays the size of the DHCP client IP address pool.
Polling
The text box displays how often (in seconds) this screen refreshes. You may
change the refresh interval by typing a new number in the text box and then
clicking Apply.
Close
Click Close to close this screen.
5.8.4 VRRP Status
Follow the steps below to view the VRRP status of a selected device.
1 Click View > IP Application Status.
2 Select a switch from the list located on the left-hand side of the screen.
3 Click the VRRP Status tab.
72
NetAtlas Workgroup User’s Guide
Chapter 5 View
Figure 36 View: IP Application Status: VRRP Status
The following table describes the labels in this screen.
Table 27 View: IP Application Status: VRRP Status
LABEL
DESCRIPTION
Device Name
This field displays the descriptive name of a device.
Device IP
This field displays the IP address of a device
Index
This field displays the index number of a rule.
Network
This field displays the IP address and the subnet mask bits of an IP routing domain
that is associated to a virtual router.
VRID
This field displays the ID number of the virtual router.
VR Status
This field displays the status of the virtual router.
This field is Master indicating that this switch functions as the master router.
This field is Backup indicating that this switch functions as a backup router.
This field displays Init when this switch is initiating the VRRP protocol or when the
Uplink Status field displays Dead.
Uplink Status
This field displays the status of the link between this switch and the uplink gateway.
This field is Alive indicating that the link between this switch and the uplink gateway is
up. Otherwise, this field is Dead.
This field displays Probe when this switch is check for the link state.
Polling
The text box displays how often (in seconds) this screen refreshes. You may change
the refresh interval by typing a new number in the text box and then clicking Apply.
Close
Click Close to close this screen.
5.8.5 OSPF Status
Follow the steps below to view the OSPF status of a selected device.
NetAtlas Workgroup User’s Guide
73
Chapter 5 View
1 Click View > IP Application Status.
2 Select a switch from the list located on the left-hand side of the screen.
3 Click the OSPF Status tab.
Figure 37 View: IP Application Status: OSPF Status
The following table describes the labels in this screen.
Table 28 View: IP Application Status: OSPF Status
LABEL
DESCRIPTION
Device Name
This field displays the descriptive name of a device.
Device IP
This field displays the IP address of a device
OSPF
This field displays whether the OSPF feature is active or not.
Interface
This field displays the OSPF interface status on the switch.
Neighbor
74
Neighbor ID
This field displays the router ID of the neighbor.
Pri
This field displays the priority of the neighbor. This number is used in the designated
router election.
State
This field displays the state of the neighbor (backup or DR (designated router)).
Dead Time
This field displays the dead time in seconds.
Address
This field displays the IP address of a neighbor.
Interface
This field displays the MAC address of a device.
RXmtL
This field displays the count of LS (Link State) retransmits.
RqstL
This field displays the count of LS (Link State) requests.
DBsmL
This field displays the count of DB (Database) summary.
NetAtlas Workgroup User’s Guide
Chapter 5 View
Table 28 View: IP Application Status: OSPF Status (continued)
LABEL
DESCRIPTION
Link State
Database
This field displays the link state database information such as the number of links.
Polling
The text box displays how often (in seconds) this screen refreshes. You may change
the refresh interval by typing a new number in the text box and then clicking Apply.
Close
Click Close to close this screen.
5.9 Interface Status
Follow the steps below to view the IP interface status of a selected device.
1 Click View > Interface Status.
2 Select a switch from the list located on the left-hand side of the screen.
Figure 38 View: Interface Status
The following table describes the labels in this screen.
Table 29 View: Interface Status
LABEL
DESCRIPTION
Device Name
This field displays the descriptive name of a device.
Device IP
This field displays the IP address of a device
Index
This field displays the index number of an entry.
IP Address
This field displays IP address of the switch in the IP domain.
IP Subnet Mask
This field displays the subnet mask of the switch in the IP domain.
VID
This field displays the VLAN identification number of the IP domain on the switch.
NetAtlas Workgroup User’s Guide
75
Chapter 5 View
Table 29 View: Interface Status (continued)
LABEL
DESCRIPTION
Polling
The text box displays how often (in seconds) this screen refreshes. You may
change the refresh interval by typing a new number in the text box and then
clicking Apply.
Close
Click Close to close this screen.
5.10 Firmware Version
You can view the firmware version of all managed devices in the Firmware Version screen.
You can also view firmware version for a single device in the System Info screen (see Figure
17 on page 49).
Click View > Firmware Version to display the screen.
Figure 39 View: Firmware Version
The following table describes the labels in this screen.
Table 30 View: Firmware Version
76
LABEL
DESCRIPTION
Device Name
This field displays the descriptive name of a device.
Device IP
This field displays the IP address of a device
Firmware Version
This field displays the version number of the firmware the device is currently using.
Cancel
Click Cancel to close this screen.
NetAtlas Workgroup User’s Guide
CHAPTER
6
Template
This chapter describes how to configure VLAN, IGMP filtering and multicast templates.
6.1 Template Overview
A template is a pre-configured set of configuration settings. Templates allow you to configure
device VLANs, IGMP filers and multicast groups efficiently. The template can then be
uploaded to one or more devices thus removing the need to configure the corresponding
settings for each device.
6.2 VLAN Template
Refer to Section 15.1 on page 157 for more background information on VLAN.
Click Template > VLAN Template to display the configuration screen. Use this screen to
configure, delete or view a VLAN template.
NetAtlas Workgroup User’s Guide
77
Chapter 6 Template
Figure 40 Template: VLAN Template
The following table describes the labels in this screen.
Table 31 Template: VLAN
LABEL
DESCRIPTION
Device Type
Select a device for which you want to configure a VLAN template.
VLAN Identity
VLAN ID
Enter a unique number to identify the VLAN.
VLAN Name Enter a descriptive name for identification purposes.
78
Egress Ports
A port that is in the egress list in a VLAN. Only select this if the subscriber's DSL
modem or router supports IEEE 802.1Q VLAN.
Select the ports which you want to be egress ports from the list provided.
Forbidden Ports
A port that is blocked from joining a VLAN group. No frames are transmitted through
this port.
A forbidden port cannot be an egress port and cannot add tags to outgoing traffic.
Select the ports which you want to be forbidden ports from the list provided.
Untag Ports
A port that does not tag all outgoing frames transmitted.
An egress port can be untagged.
Select the ports which you want to be untagged ports from the list provided.
New
Click New to create a new VLAN. You must enter a VLAN ID and a VLAN Name to
create a new VLAN. The new VLAN and name is displayed in the left-hand column
in this screen.
Delete
Click on a VLAN in the left-hand column of this screen and then click the Delete
button to remove it from the VLAN template.
NetAtlas Workgroup User’s Guide
Chapter 6 Template
Table 31 Template: VLAN (continued)
LABEL
DESCRIPTION
Modify
Click on a VLAN in the left-hand column of this screen. Change the VLAN Name or
change the configuration of the egress, forbidden and untagged ports. Click the
Modify button to save the changes to the switch.
If you want to change the VLAN ID of a VLAN configuration, you can only delete the
VLAN configuration or create a new VLAN configuration using a different VLAN ID.
Port List
Click on a port in the Egress Ports list to add the selected port to the port list. If a
port is not selected from any of the three port lists, then it is a normal tagged port.
This table displays port VLAN settings. A tagged port is marked T, an untagged port
is marked U and a port not participating in a VLAN is marked -.
Close
Click Close to close the screen.
6.2.1 Creating a New VLAN Template
Follow the steps below to create a new VLAN template for a switch.
1
2
3
4
Click Template > VLAN Template.
A screen displays. Select a switch model in the Device List field.
Enter a unique number (between 1 and 4094) in the VLAN ID field.
Enter a descriptive name (up to 12 characters) in the VLAN Name field for
identification purposes.
5 Configure the port VLAN settings. Select the port(s) in the Egress Ports, Forbidden
Ports and Untag Ports fields. The VLAN port settings automatically displays in the
Port List table.
6 Click New.
7 If the VLAN is created successfully, a screen displays. Click OK.
6.3 IGMP Filtering Profile Template
With IGMP filtering, you can control which IGMP groups a subscriber on a port can join. This
allows you to control the distribution of multicast services (such as content information
distribution) based on service plans and types of subscription.
You can set the switch to filter the multicast group join reports on a per-port basis by
configuring an IGMP filtering profile and associating the profile to a port.
Click Template > IGMP Filtering Profile Template to display the screen as shown.
NetAtlas Workgroup User’s Guide
79
Chapter 6 Template
Figure 41 Template: IGMP Filtering Profile Template
The following table describes the labels in this screen.
Table 32 Template: IGMP Filter Template
LABEL
DESCRIPTION
No.
This field displays the index number.
IGMP Filter
Name
This name identifies the IGMP filter profile.
New/Add
Click New/Add to create an IGMP filter profile.
Delete
Click Delete to remove one or more selected IGMP filter profiles.
Modify
Click Modify to edit a selected IGMP filter profile.
IGMP Filter
Parameters
This table displays the settings of the selected IGMP filter above.
OK
Index
This is the number of the IGMP filter profile.
Start IP
This field displays the starting multicast IP address for a range of multicast IP
addresses to which you want this IGMP filter profile to allow access.
End IP
This field displays the ending multicast IP address for a range of IP addresses to which
you want this IGMP filter profile to allow access.
Click OK to save your changes.
6.3.1 Configuring an IGMP Filter Template
Click New/Add in the IGMP Filtering Template screen to display the screen as shown.
80
NetAtlas Workgroup User’s Guide
Chapter 6 Template
Figure 42 Template: New IGMP Filter
The following table describes the labels in this screen.
Table 33 Template: New IGMP Filter
LABEL
DESCRIPTION
IGMP Filter Name
Type a name (up to 31 printable characters) to identify the IGMP filter profile.
Start Address
Enter the starting multicast IP address for a range of multicast IP addresses to
which you want this IGMP filter profile to allow access.
End Address
Enter the ending multicast IP address for a range of IP addresses to which you
want this IGMP filter profile to allow access.
If you want to add a single multicast IP address, enter it in both the Start IP and
End IP fields.
Add
Click Add to create a new IGMP filter.
Clear
Click Clear to remove the selected IGMP filter template.
IGMP Filter
Parameters
Index
This is the number of the IGMP filter profile. Double-click a profile’s index number
to edit the profile.
Start Address
This field displays the starting multicast IP address for a range of multicast IP
addresses to which you want this IGMP filter profile to allow access.
End Address
This field displays the ending multicast IP address for a range of IP addresses to
which you want this IGMP filter profile to allow access.
Close
Click Close to close this screen.
NetAtlas Workgroup User’s Guide
81
Chapter 6 Template
6.4 Static Multicast Group Template
Use the static multicast filter to allow incoming frames based on multicast MAC address(es)
that you specify. This feature can be used in conjunction with IGMP snooping to allow
multicast MAC address(es) that are not learned by IGMP snooping. Use the static multicast
filter to pass routing protocols, such as RIP and OSPF.
Click Template > Multicast Template to display the screen as shown.
Figure 43 Template: Multicast Template
The following table describes the labels in this screen.
Table 34 Template: Multicast
LABEL
DESCRIPTION
Device Type
Select a device from the drop-down list box to view the device’s VLAN configuration.
Template
No.
This field displays the index number.
Multicast Name
This field displays the descriptive name for the multicast template.
New
Click New to create a new multicast template.
Modify
Click Modify to change the settings of the selected multicast template.
Delete
Click Delete to remove the selected multicast template.
Port List
82
Port
This field displays the port number.
Immed. Leave
This field displays True when the switch is set to remove this port from the multicast
tree when an IGMP version 2 leave message is received on this port.
This field displays False when the feature is disabled.
NetAtlas Workgroup User’s Guide
Chapter 6 Template
Table 34 Template: Multicast (continued)
LABEL
DESCRIPTION
Group Limit
This field shows whether the switch limit the number of multicast groups this port is
allowed to join or not.
Once a port is registered in the specified number of multicast groups, any new IGMP
join report frame(s) is dropped on this port.
Max. Group
Number
This field displays the number of multicast groups this port is allowed to join.
IGMP Filtering
This field displays the name of the IGMP filtering profile to use for this port.
IGMP Querier
Mode
This field displays the IGMP querier mode for this port.
Close
Click Close to close this screen.
6.4.1 Configuring a Multicast Template
To create a new multicast template, click New in the Multicast Template screen.
Figure 44 Template: New Multicast
The following table describes the labels in this screen.
Table 35 Template: New Multicast
LABEL
DESCRIPTION
Profile Name
Enter a descriptive name for the new multicast template.
Port
This field displays the port number.
Immed. Leave
Double-click this field and specify whether the switch is to remove this port from the
multicast tree when an IGMP version 2 leave message is received on this port.
Select True from the drop-down list box to activate the immediate leave feature.
Select False to disable this feature.
NetAtlas Workgroup User’s Guide
83
Chapter 6 Template
Table 35 Template: New Multicast (continued)
84
LABEL
DESCRIPTION
Group Limit
Double-click to configure this field.
Select True to limit the number of multicast groups this port is allowed to join. Once a
port is registered in the specified number of multicast groups, any new IGMP join
report frame(s) is dropped on this port.
Select False to disable this feature.
Max. Group
Number
Double-click this field and enter a number to limit the number of multicast groups this
port is allowed to join. Once a port is registered in the specified number of multicast
groups, any new IGMP join report frame(s) is dropped on this port.
IGMP Filter
Double-click this field to select the name of the IGMP filtering profile to use for this
port.
IGMP Querier
Mode
The switch treats an IGMP query port as being connected to an IGMP multicast router
(or server). The switch forwards IGMP join or leave packets to an IGMP query port.
Select Auto to have the switch use the port as an IGMP query port if the port receives
IGMP query packets.
Select Fixed to have the switch always use the port as an IGMP query port. Select
this when you connect an IGMP multicast server to the port.
Select Edge to stop the switch from using the port as an IGMP query port. The switch
will not keep any record of an IGMP router being connected to this port. The switch
does not forward IGMP join or leave packets to this port.
OK
Click OK to save the settings and close this screen.
Cancel
Click Cancel to discard all changes and close this screen.
NetAtlas Workgroup User’s Guide
CHAPTER
7
Provisioning
This chapter shows you how to use the Provisioning screens to apply templates.
7.1 Overview
After you have created an IGMP filter profile (or template) in the Template screens, you can
use the Provisioning screens to apply or delete IGMP filter profiles to or from a device.
"
You must first create IGMP filtering templates before you can apply them
using the Provisioning screen. Refer to the chapter on creating templates
for more information.
7.2 Applying an IGMP Filter Profile
Follow the steps below to apply an IGMP filter to a device.
1 Click Provisioning > IGMP Filter Provisioning to display the screen as shown.
2 Select Apply IGMP Filters under Action.
3 Select a profile you want to use on the left and click Add. You can view the profile
settings by clicking View IGMP Filter. Refer to the chapter on IGMP filter template
settings for field descriptions.
NetAtlas Workgroup User’s Guide
85
Chapter 7 Provisioning
Figure 45 Provisioning: IGMP Filter
4 Click Apply To Devices to apply the selected IGMP filer profile(s).
5 A screen displays as shown. Select the device(s) to which you want to apply the IGMP
filter(s). To select more than one device, press [SHIFT] or [CTRL] and select at the same
time.
Figure 46 Provisioning: IGMP Filter: Apply to Devices
6 Click Apply to copy the IGMP filter profile settings to the selected device(s).
7 A screen displays showing the profile copy status. Click OK to close this screen.
Figure 47 Provisioning: IGMP Filter: Apply to Devices: Successful
86
NetAtlas Workgroup User’s Guide
Chapter 7 Provisioning
7.3 Removing an IGMP Filter Profile
Follow the steps below to remove an IGMP filter from a device.
1 Click Provisioning > IGMP Filter Provision to display the screen as shown.
2 Select Remove IGMP Filters under Action.
3 Select a profile you want to remove and click Add. You can view the profile settings by
clicking View IGMP Filter. Refer to the chapter on IGMP filter template settings for
field
Figure 48 Provisioning: IGMP Filter: Remove From Devices
4 Click Apply To Devices.
5 A screen displays as shown. Select the device(s) from which you want to remove the
IGMP filter(s). To select more than one device, press [SHIFT] or [CTRL] and select at
the same time.
NetAtlas Workgroup User’s Guide
87
Chapter 7 Provisioning
Figure 49 Provisioning: IGMP Filter: Remove From Devices: Select Device
6 Click OK to remove the IGMP filter profile settings from the selected device(s).
7 A Result screen displays showing the profile removal status. Click Close to close this
screen.
Figure 50 Provisioning: IGMP Filter: Remove From Devices: Successful
88
NetAtlas Workgroup User’s Guide
CHAPTER
8
Performance
This chapter describes the interface performance screen, graph setup and table setup. View
Ethernet history statistics for your switch network.
8.1 Interface Performance
This section shows you how to configure what you want to display in a performance table or
graph.
Click Performance > Interface in the EMS main menu.
Figure 51 Performance: Interface
The following table describes the labels in this screen.
Table 36 Performance: Interface
LABEL
DESCRIPTION
Device Name
This field displays the descriptive name of a device.
Device IP
This field displays the IP address of a device
Interface
Select an interface (or port) from the drop-down list box.
NetAtlas Workgroup User’s Guide
89
Chapter 8 Performance
Table 36 Performance: Interface (continued)
LABEL
DESCRIPTION
Rx Counters
The following fields display the types of packet counters received on this
interface.
Tx Counters
This following fields display the types of packet counters transmitted on this
interface.
Octets
Select this option to show the total number of octets received or transmitted.
Unicast Pkts
Select this option to show the total number of good unicast packets received or
transmitted that were dropped.
Non-unicast Pkts
Select this option to show the total number of good non-unicast packets received
or transmitted that were dropped.
Discard Pkts
Select this option to show the total number of packets received or transmitted that
were dropped.
Error Pkts
Select this option to show the total number of error packets received or
transmitted.
Multicast Pkts
Select this option to show the total number of good multicast packets received or
transmitted.
Broadcast Pkts
Select this option to show the total number of good broadcast packets received or
transmitted.
HC-Unicast Pkts
Select this option to show the number of unicast packets (High Capacity (HC) 64
~ 1518 octets long) dropped because they either had a bad Frame Check
Sequence (FCS) or non-integer number of octets (alignment error).
HC-Multicast Pkts
Select this option to show the number of multicast packets (High Capacity (HC) 64
~ 1518 octets long) dropped because they either had a bad Frame Check
Sequence (FCS) or non-integer number of octets (alignment error).
HC-Broadcast
Pkts
Select this option to show the number of broadcast packets (High Capacity (HC)
64 ~ 1518 octets long) dropped because they either had a bad Frame Check
Sequence (FCS) or non-integer number of octets (alignment error).
Polling
The text box displays how often (in seconds) this screen refreshes. You may
change the refresh interval by typing a new number in the text box and then
clicking Apply.
Close
Click Close to close this screen.
Reset Counters
Click Reset Counters to clear the counters.
Graph
Click the Graph button to create a graph based on the above selections.
Table
Click the Table button to create a table based on the above selections.
Close
Click Close to close the screen.
8.2 RMON Ethernet Statistics
Use this screen to look at network traffic on an Ethernet port since the last time the switch was
reset. To open this screen, click Performance > RMON > Ethernet Statistics.
90
NetAtlas Workgroup User’s Guide
Chapter 8 Performance
Figure 52 Performance: RMON: Ethernet Statistics
The following table describes the labels in this screen.
Table 37 Performance: RMON: Ethernet Statistics
LABEL
DESCRIPTION
Device Name
This field displays the name of each switch. Select a switch to look at statistics for
one of its ports.
Device IP
This field displays the corresponding IP address of the switch.
Port
Select the port at whose statistics you want to look.
Polling
Select how often you want the EMS to update the statistics it displays.
Basic Counters
Drop Events
Select this to display the total number of packets that were dropped.
Octets
Select this to display the total number of octets received.
Collisions
Select this to display the total number of collisions occurred.
Total Packets
Select this to display the total number of all good packets received.
Broadcast
Packets
Select this to display the total number of good broadcast packets received.
Multicast
Packets
Select this to display the total number of good multicast packets received.
Packets of
Variable Size
0 ~ 64 Octets
(Undersize)
Select this to display the number of packets (including bad packets) received that
were between 0 and 64 octets in length.
64 Octets
Select this to display the number of packets (including bad packets) received that
were 64 octets in length.
65 ~ 127 Octets Select this to display the number of packets (including bad packets) received that
were between 65 and 127 octets in length.
128 ~ 255
Octets
Select this to display the number of packets (including bad packets) received that
were between 128 and 255 octets in length.
NetAtlas Workgroup User’s Guide
91
Chapter 8 Performance
Table 37 Performance: RMON: Ethernet Statistics (continued)
LABEL
DESCRIPTION
256 ~ 511
Octets
Select this to display the number of packets (including bad packets) received that
were between 256 and 511 octets in length.
512 ~ 1023
Octets
Select this to display the number of packets (including bad packets) received that
were between 512 and 1023 octets in length.
1024 ~ 1518
Octets
Select this to display the number of untagged packets (including bad packets)
received that were between 1024 and 1518 octets in length. This number also
includes tagged packets received that were 1522 octets in size.
1518 ~Octets
(Oversize)
Select this to display the number of untagged packets (including bad packets)
received that were greater than 1518 octets in length.
Packets with
FCS/Alignment
Errors
CRCAlignErrors Select this to display the number of packets (between 64 ~ 1518 octets long)
(Normal
dropped because they either had bad Frame Check Sequence (FCS) or non-integral
number of octets (alignment error).
Packets,
64~1518)
Fragments
(Undersize
Packets)
Select this to display the number of frames dropped because they were less than 64
octets long, and contained an invalid FCS, including non-integral and integral
lengths.
Jabbers
(Oversize
Packets)
Select this to display the number of frames dropped because they were longer than
1518 octets and contained an invalid FCS, including alignment errors.
Graph
Select this to create a graph based on the above selection(s).
Table
Select this to create a table based on the above selection(s).
Close
Click this to close the screen.
8.3 RMON History Data
Use this screen to look at historical network traffic on an Ethernet port. To open this screen,
click Performance > RMON > History Data.
92
NetAtlas Workgroup User’s Guide
Chapter 8 Performance
Figure 53 Performance: RMON: History Data
The following table describes the labels in this screen.
Table 38 Performance: RMON: History Data
LABEL
DESCRIPTION
Device Name
This field displays the name of each IP DSLAM. Select an IP DSLAM to look at
statistics for one of its ports.
Device IP
This field displays the corresponding IP address of the IP DSLAM.
History Control
Table
Index
This field displays the configuration index number.
Data Source
This field displays the port of the IP DSLAM that the EMS will poll for data.
Bucket Granted
This field displays the number of data samplings the probe allows to stores.
Interval (sec)
This field displays the time between data samplings.
Polling
Select how often you want the EMS to update the statistics it displays.
Basic Counters
Dropped
Events
Select this to display the total number of packets that were dropped.
Octets
Select this to display the total number of octets received.
Collisions
Select this to display the total number of collisions occurred.
Utilization
Select this to display the utilization of the LAN ports.
Packet
Counters
Total Packets
Select this to display the total number of all good packets received.
Broadcast
Packets
Select this to display the total number of good broadcast packets received.
NetAtlas Workgroup User’s Guide
93
Chapter 8 Performance
Table 38 Performance: RMON: History Data (continued)
LABEL
DESCRIPTION
Multicast
Packets
Select this to display the total number of good multicast packets received.
Undersize
Packets (less
than 64 octets)
Select this to display the number of packets dropped because they were too short
(shorter than 64 octets).
Oversize
Packets (longer
than 1518
octets)
Select this to display the number of packets dropped because they were too big
(bigger than the maximum frame size).
Packets with
FCS/Alignment
Errors
CRCAlignErrors Select this to show the number of packets (between 64 ~ 1518 octets long) dropped
(Normal
because they either had bad Frame Check Sequence (FCS) or non-integral number
Packets, 64
of octets (alignment error).
~1518 octets)
Fragments
(Undersize
Packets)
Select this to display the number of frames dropped because they were less than 64
octets long, and contained an invalid FCS, including non-integral and integral
lengths.
Jabbers
(Oversize
Packets)
Select this to display the number of frames dropped because they were longer than
1518 octets (non VLAN) or 1522 octets (VLAN) and contained an invalid FCS,
including alignment errors.
Table
Select this to create a table based on the above selection(s).
Close
Click this to close the screen.
8.4 Table Menu Bar
The following figure displays the table menu bar icons. These icons are common to all screens
that display information in tabular format.
Figure 54 Table Menu Bar Icons
Edit
Controls
Short Search Edit SNMPc
Names
Entry Help
Pause Switch Show Save to
Polling Axis Graph File
94
Poll
Interval
NetAtlas Workgroup User’s Guide
Chapter 8 Performance
8.4.1 Editing a Table Entry
"
You can edit a table entry in all screens that display information in tabular
format.
In any tabulated screen display, click the Edit icon
in the menu bar icon to display the
Edit Table Entry screen and edit any field in a table. There is a set of variable names, value
and set button controls that operate on the fields of the selected table. There is also a set of
function control buttons on the right. For tables that have more than ten entries, the Edit Table
Entry screen supports multiple pages.
Figure 55 Edit Table Entry
Variable Name Variable Values Variable Set Button Previous and Next Page Buttons
Expand
First
Get
Next
Stop
Set All
Done
Help
The following table describes the labels in this screen.
Table 39 Edit Table Entry
COMMAND
DESCRIPTION
Variable Names
The first vertical column contains the variable names; these are the names of fields
in the selected table. These names are set by SNMPc and cannot be changed.
Some tables have variable names with an asterisk to the right of the name. These
variables are used as indices into the table. All index variables must be specified to
perform a Set operation.
Variable Values
The second vertical column contains the variable values in pull down list boxes. You
can change the value by typing into the pull down edit box. If the variable has
integer aliases defined in the MIB, you can select an alias by clicking on the down
arrow and selecting an item from the drop down list. You must enter the variable
value in the proper format. Use the expand button (see next section) to view the
variable type.
NetAtlas Workgroup User’s Guide
95
Chapter 8 Performance
Table 39 Edit Table Entry (continued)
"
COMMAND
DESCRIPTION
Variable Set
Button
Each variable value has a small Set button to the right. Click this Set button to
perform an SNMP set on only one variable. Set buttons are grayed for variables that
are read-only.
Previous/Next
Page Buttons
Each page shows up to ten variables. The page number and total number of pages
are displayed in the top right corner. Use the >> button to move to the next page and
click the << button to move to the previous page.
Expand
Click the Expand button to expand the view of the active variable value edit box.
First click on the edit box, then select the Expand button.
First
Click the First button to obtain the first entry of the table from the node. The variable
values will be updated. You do not need to enter index values - they will be ignored.
Get
Click the Get button to obtain the selected table entry. Enter all of the index values
to select a table entry. If you have already displayed an entry, and perhaps modified
the value boxes, you can Click the Get button to refresh the variable values.
Next
Click the Next button to obtain the next entry of the table from the node, using an
SNMP GetNext operation. The variable values are updated. If there are no more
entries in the table, a message is displayed. You can specify a starting point for the
GetNext by entering index values. You do not need to enter all index values, but if
you enter the Nth index value, you must also enter the 1st through (N-1)th index
values.
Stop
Click the Stop button to abort the current SNMP operation. This button can be used
to stop a command when a node is not responding and you don't want to wait for the
timeout period.
Set All
Click the Set All button to set all writable variable values to the node. You must enter
all of the index values (those with an asterisk to the right of the variable name) to
select the table entry. If you do not know the proper index values, you can first find
the entry you want to change by using the First and Get, Next buttons. Some nodes
do not allow set operations to all variables that are defined as writable in the MIB.
For these nodes, you will have to individually set table entry variables using the
variable Set buttons.
Done
Click this button when you’re done editing this dialog box.
Help
Click this button for online help.
You can only use the variable Set button (via the EMS) to update system
contact, system name, system location and the administrative status of each
port.
8.4.2 Expand Dialog Box
In the Edit Table Entry screen click the Expand button to expand the view of the active
variable value edit box. First click on the edit box, then click Expand.
96
NetAtlas Workgroup User’s Guide
Chapter 8 Performance
Figure 56 Expand Field
The Expand screen shows the variable value in a larger edit box, so you can more easily enter
a long value. It also shows the variable type and a description from the MIB source file.
Possible variable types are shown in the following table.
Table 40 Variable Types
TYPE
DESCRIPTION
Number
This can be an INTEGER, COUNTER, GAUGE or Time Ticks. Data is normally
represented as a decimal number. However, in cases where INTEGER aliases are defined
in the MIB, an ASCII word will be displayed. For example, the value for ifOperStatus is
displayed as UP or DOWN.
HexArr
OCTET PRIM TYPE. Data is formatted as a list of two digit hexadecimal numbers,
representing one byte each, and separated by a single space, for example 22 3E 44 A1 10.
ObjID
OBJECT IDENTIFIER. Data is formatted in MIB dot format, optionally with a leading text
identifier, for example sysObjectID.0 or 1.3.6.1.2.1.1.2.0.
String
This is OCTET PRIM TYPE with printable (ASCII string) data (DisplayString).
IP Addr
IP ADDRESS PRIM TYPE in dotted decimal notation, for example, 128.9.118.0.
8.5 Graph Menu Bar Icons
These graphical menu bar icons are common to all screens that display information in
graphical format.
Figure 57 Graph Menu Bar
Restart Save to Bar
Graph File
Chart
Pause
Graph
Poll
Interval
Line Pie Distribution
Graph Chart
NetAtlas Workgroup User’s Guide
Paging Scroll
Controls Controls
Vertical
Scale
97
Chapter 8 Performance
8.5.1 Graph Styles
Use one of the style buttons to change the graph style to one of the following:
Table 41 Edit Table Entry
STYLE
DESCRIPTION
Line
Each variable is displayed as a line, with time as the horizontal axis. The vertical axis
represents the size of each polled value for each poll interval.
Bar
The cumulative average value for each variable is displayed as a vertical bar.
Pie
All variables are displayed as relative sized portions of a pie diagram. The entire display
represents a single poll interval.
Distribution
Each variable is displayed as a stacked vertical bar. Each segment of the bar represents
the amount of time that the variable value is within a certain range (as a percent). The
legend on the right side of the display shows the corresponding range for each color. The
entire display represents a single poll interval.
8.5.2 Chart Format Display Variable
Choose which variables to display in chart format by doing one of the following:
1 Click a variable cell in a table and click the bar chart icon.
2 Display the chart menu and then deselect variables (all are displayed by default).
3 Right-click a variable’s cell and select Properties.
Figure 58 Cell Properties Select
4 A display properties dialog box opens. Select the Display check box.
Figure 59 Chart Color Codes and Line Styles
98
NetAtlas Workgroup User’s Guide
Chapter 8 Performance
You may also edit the color code and line style for a variable in the dialog box as described in
the following table.
Table 42 Edit Style Dialog Box
FIELD
DESCRIPTION
Display
Check Display to view information about this variable in chart format.
Color
Choose a color from this drop down list.
Style
Choose a line style from this drop down list.
Scale
Select the scaling multiplier from this drop down list. This factor is applied to each value in
the line before it is displayed and can be used to keep all graph lines within a similar range
of values. The range is from 0.0001 to 1000.0.
8.5.3 Graph Labels
In the Interface screen click the Graph button to display the following screen.
Figure 60 Graph Variables
The following table describes the labels in this screen.
Table 43 Graph Variables
LABEL
DESCRIPTION
Style
This is the line style discussed above.
Variable
This is the variable being represented by the line style discussed above.
Scale
This is the scaling multiplier.
Cur
This is the current value of the variable.
Min
This is the minimum value of the variable.
Max
This is the maximum value of the variable.
Ave
This is the average value of the variable.
Total
This is the total value of the variable.
Baseline This is a measure of the typical variable behavior. After a learning period has transpired,
SNMPc can automatically generate baseline alarms when variable values exceed the
baseline.
NetAtlas Workgroup User’s Guide
99
Chapter 8 Performance
100
NetAtlas Workgroup User’s Guide
CHAPTER
9
Fault
This chapter describes the event logs and how to perform loopback tests using the Fault
screens.
9.1 Event Log
To display system event logs click Fault > Event Log to view the following screen.
Figure 61 Fault: Event Log
The following table describes the labels in this screen.
Table 44 Fault: Event Log
LABEL
DESCRIPTION
Device Name
This field displays the name of each IP DSLAM. Select an IP DSLAM to look at
statistics for one of its ports.
Device IP
This field displays the corresponding IP address of the IP DSLAM.
Alarm Filter
Port
To display event logs of a port, select the port from the drop-down list box.
NetAtlas Workgroup User’s Guide
101
Chapter 9 Fault
Table 44 Fault: Event Log (continued)
LABEL
DESCRIPTION
Alarm Type
Select the type of logs from the drop-down list box. Choices are All,
Communication, QualityOfService, ProcessingError, Equipment and
Environmental.
Select All for system event logs generated by all alarm types.
Select Communication for transmission and signal logs.
Select QualityOfService for performance logs.
Select Processing Error for software and configuration problem logs.
Select Equipment for hardware-related logs.
Select Environmental for environmental logs.
See the appendix for a more detailed list of possible alarm causes.
Severity
Select the severity level of the logs you want to display from the drop-down list
box. The choices and associated colors are as follows:
• Critical - Red
• Major - Orange
• Minor - Yellow
• Information - Blue
Sorted by
Select Log Time to sort event logs by the time at which they were generated or
select Device Name to sort event logs by the device from which they were
generated.
Date / To
Specify the time range to display the event logs.
Apply
Click Apply to display event logs generated within the specified time period.
Index
This field displays the index number of the event log.
Clear
This field displays whether this log was cleared.
ClearTime
This field displays when this log was cleared.
ClearUser
This field displays the name of the user who cleared this log.
Ack
This field displays whether a log has been acknowledged so that EMS users will
know when a log has been dealt with by an administrator.
AckTime
This field displays the date and time this log was acknowledged.
AckUser
This field displays the name of the user who acknowledged this log.
Type
This field displays the type of the event log.
Severity
This field displays the severity of the event log.
Device Name
This field displays the name of the device on which the event log was generated.
Port
This field displays the port number on which the event log was generated.
Date Time
This field displays the date and time when the event log was generated.
Description
This field displays some information about the event log.
Acknowledge
Click Acknowledge to acknowledge any selected log messages.
Delete
Click Delete to remove the selected log.
Close
Click Close to close this screen.
9.2 Loopback Test
Follow the steps below to perform an internal loopback test.
1 Click Fault > Loopback Test.
102
NetAtlas Workgroup User’s Guide
Chapter 9 Fault
2 Choose a switch from the list located on the left-hand side of the screen.
3 Choose a port from the list located on the right-hand side of the screen.
4 In the Timeout field, accept the default or specify a connection timeout period (in
seconds).
5 Click Apply to start the loopback test.
Figure 62 Fault: Loopback Test
6 A screen displays showing the test result. Click OK to close the screen.
Figure 63 fault: Loopback: Result
9.3 Ping Test
You can use the Ping screen to test connection from the selected switch to a specified IP
address.
Click Fault > Ping and TraceRoute Test and click the Ping tab to display the screen.
NetAtlas Workgroup User’s Guide
103
Chapter 9 Fault
Figure 64 Fault: Ping and TraceRoute Test: Ping
The following table describes the labels in this screen.
Table 45 Fault: Ping and TraceRoute Test: Ping
LABEL
DESCRIPTION
Device Name
This field displays the name of each switch. Select a switch to look at statistics for
one of its ports.
Device IP
This field displays the corresponding IP address of the switch.
Target IP Address
Enter the IP address of the device to which you want to test the connection from
the selected switch.
Count
Select this option and enter the number of ping test (1-15) to perform.
Delay
Enter the number of seconds (1-30) the switch is to wait between ping tests.
Continue
Select this option to perform ping tests continuously until you click Stop.
Size
Specify the size of the ping packet (0-1472 bytes) to send.
Timeout
Specify the time (1-30 seconds) the switch is to wait for a reply from the remote
device before declaring this a failed ping test.
Start
Click Start to begin the ping connection test.
Stop
Click Stop to end the ping connection test if you select the Continue option.
Clear
Click Clear to reset the fields in this part of the screen.
No.
This field displays the index number.
IP Address
This field displays the destination IP address for this ping test.
bytes
This field displays the number of bytes sent for this ping test.
ms
This field displays the round trip time in mili-seconds (ms).
Status
This field indicates whether this ping test is successful or not.
Approximate
round trip times in
mili-seconds:
104
NetAtlas Workgroup User’s Guide
Chapter 9 Fault
Table 45 Fault: Ping and TraceRoute Test: Ping (continued)
LABEL
DESCRIPTION
Minimum
This field displays the shortest round-trip time (the time it takes to send a packet
from a switch to the destination and back).
Maximum
This field displays the longest round-trip time.
Average
This field displays the average round-trip time.
Exit
Click Exit to close this screen.
9.4 Traceroute Test
You can use the Trace Route screen to test connection from the selected switch to a specified
IP address.
Click Fault > Ping and TraceRoute Test and click the Trace Route tab to display the screen.
Figure 65 Fault: Ping and TraceRoute Test: Trace Route
The following table describes the labels in this screen.
Table 46 Fault: Ping and TraceRoute Test: Ping
LABEL
DESCRIPTION
Device Name
This field displays the name of each switch. Select a switch to look at statistics for
one of its ports.
Device IP
This field displays the corresponding IP address of the switch.
Target IP Address
Enter the IP address of the device to which you want to test the connection from
the selected switch.
Maximum Hop
Count
Specify the maximum number of hops (intermediary devices) you want to trace.
Enter a number between 1 and 10.
NetAtlas Workgroup User’s Guide
105
Chapter 9 Fault
Table 46 Fault: Ping and TraceRoute Test: Ping (continued)
106
LABEL
DESCRIPTION
Timeout
Specify the time (1-60 seconds) the switch is to wait for a reply from the remote
device before declaring this a failed traceroute test.
Start
Click Start to begin the ping connection test.
Stop
Click Stop to end the ping connection test if you select the Continue option.
Clear
Click Clear to reset the fields in this part of the screen.
Hop
This field displays the index number.
Status
This field indicates whether this ping test is successful or not.
Exit
Click Exit to close this screen.
NetAtlas Workgroup User’s Guide
CHAPTER
10
Maintenance
This chapter tells you how to backup and restore your configuration file as well as upload new
firmware and configuration files.
10.1 Firmware Upgrade
You must be logged in with system administrator rights to use this function.
"
Do NOT turn off the switch during the updating process, as it may corrupt the
firmware and make the selected switch unusable.
10.1.1 Procedure to Update Firmware
You can perform firmware upgrade on all switches of the same type simultaneously on the
EMS. To update firmware, first download the latest firmware, then unzip and store it on
your computer. You can use this EMS FTP client to connect to a selected switch.
"
Do NOT turn off the switch during the updating process, as it may corrupt the
firmware and make your switch unusable.
1 Click Maintenance > Firmware Upgrade.
2 Select a device type in the Device Type field.
3 The list displays the switches of the selected type. Select a switch or multiple switches
on which you want to upgrade the firmware.
4 Type the path and file name of the firmware file you wish to upload to the switch in the
FW Image text box or click Browse to locate it. After you have specified the file, click
Apply.
NetAtlas Workgroup User’s Guide
107
Chapter 10 Maintenance
Figure 66 Maintenance: Firmware Upgrade
5 After the file transfer is complete, a screen displays showing the result. Click Done to
close the screen. When the firmware upgrade process is complete, the switch(es)
automatically restarts (the SYS LED blinks).
Figure 67 Maintenance: Firmware Upgrade: Result
6 Wait until the switch(es) has finished rebooting before accessing it again. Check the
firmware version on the switch to make sure that the firmware is updated successfully.
10.2 Device Reset
Use the Reboot System screen to restart a switch without physically turning the power off.
1 Click Maintenance > Device Reset.
2 Select a device from the list and click Apply.
108
NetAtlas Workgroup User’s Guide
Chapter 10 Maintenance
Figure 68 Maintenance: Device Reset
3 A screen displays. Click Done. The switch will restart. This takes up to two minutes.
This does NOT affect the switch’s configuration.
Figure 69 Maintenance: Device Reset: Result
10.3 NE Configuration Backup and Restore
A Network Element (NE) is a network device that provides support or services to the user.
Follow the steps below to backup or restore a switch configuration file to your computer.
1 Click Maintenance > NE Configuration Backup and Restore.
2 Select All Devices or a device model from the drop-down list box and select a switch in
the list box.
3 Under Directory/File Name, type the path and file name of the file you wish to restore
to the switch or backup to your computer in the text box provided or click Browse to
locate it.
4 Select the Save running-config to configuration check box to save the current switch
configuration if you want to back up to your computer.
5 Select Backup to save the configuration to your computer. Or select Restore to restore
the configuration file back to the switch.
6 Click Apply.
NetAtlas Workgroup User’s Guide
109
Chapter 10 Maintenance
7 If you chose Restore, the switch automatically restarts when the configuration file
upload is complete.
8 Click Close to close this screen.
Figure 70 Maintenance: Configuration Backup/Restore
The following table describes the labels in this screen.
Table 47 Maintenance: Configuration Backup/Restore
LABEL
DESCRIPTION
Device Name
This field displays the name of each IP DSLAM. Select an IP DSLAM to look
at statistics for one of its ports.
Device IP
This field displays the corresponding IP address of the IP DSLAM.
Directory/File Name
Type the path and file name of the configuration file you wish to restore to the
switch or backup to your computer in the Directory / File Name text box or
click Browse to locate it.
Save running-config
to configuration
This field is applicable when you select Backup.
Select the Save running-config to configuration text box to save the most
recently updated configuration to a file specified in the Directory/File Name
field.
Backup
Click the Backup radio button to transfer the configuration file from your
switch to a computer.
Restore
Click the Restore radio button to transfer the configuration file from your
computer to a switch.
Apply
Click Apply to backup or restore the switch(es) configuration file.
Close
Click Close to close this screen.
10.4 Load Factory Default
Follow the steps below to reset a switch configuration to the factory defaults.
1 Click Maintenance > Load Factory Default.
2 Select a switch from the list of devices shown.
110
NetAtlas Workgroup User’s Guide
Chapter 10 Maintenance
3 Click Apply to clear all configuration information and return the switch to the factory
defaults.
This may take up to two minutes. If you want to access the switch web configurator
again, you may need to change the IP address of your computer to be in the same subnet
as that of the default switch IP address.
4 Click Close to close this screen.
Figure 71 Maintenance: Load Factory Defaults
10.5 Scheduled Network Element Configuration Backup
Perform configuration backups according to a schedule. Set the frequency, time and date of the
backup and the location where you want to backup the configuration file.
Click Maintenance > Scheduled NE Config Backup to display the configuration screen as
shown.
Figure 72 Maintenance: Scheduled NE Config Backup
NetAtlas Workgroup User’s Guide
111
Chapter 10 Maintenance
The following table describes the labels in this screen.
Table 48 Maintenance: Scheduled NE Config Backup
LABEL
DESCRIPTION
Device Name
This field displays the name of each IP DSLAM. Select an IP DSLAM to look
at statistics for one of its ports.
Device IP
This field displays the corresponding IP address of the IP DSLAM.
Add
Click the Add button to add a switch to the list of devices in the backup
schedule.
Remove
Click the Remove button to remove a switch from the list of devices in the
backup schedule.
Backup Schedule
Frequency
Scheduled backups can be performed on a Daily, Weekly or Monthly basis.
Select a radio button to schedule configuration backups starting at the date
and time specified below.
Select No Backup to disable this feature.
Starting date
Specify the starting date to begin a configuration file backup for the selected
device(s). Select a date from the drop-down list box.
Starting time
Specify the starting time to begin a configuration file backup for the selected
device(s). Select a time from the selection box or enter a time (hh:mm:ss AM/
PM format).
Backup Directory
Type the path and file name of the configuration file you wish to backup to
your computer in the Backup Directory text box or click Browse to locate it.
User info for Windows
To perform scheduled backups, you need to specify your Windows
administrator account information. This allows the EMS to add a scheduled
task in Windows.
Account
Enter the Windows administrator account login username.
Password
Enter a password in this field for the administrator Account above.
Apply
Click Apply to save changes to the EMS.
Close
Click Close to close this screen.
10.5.1 Configuring Scheduled NE Configuration Backup
Follow the steps below to add a device to the list of devices in the Scheduled NE
Configuration Backup screen.
1 Click the Add button in the Scheduled NE Config Backup screen.
2 Select one or more switches whose configuration you want to back up. Click OK.
112
NetAtlas Workgroup User’s Guide
Chapter 10 Maintenance
Figure 73 Maintenance: Scheduled NE Config Backup: Add Devices
10.5.2 Removing a Scheduled NE Configuration Backup
Follow the steps below to remove the selected device(s) from the configuration backup
schedule.
1 Click Maintenance > Scheduled NE Configuration Backup.
2 Select a device or devices you want to exclude from the backup schedule.
3 Click Remove.
10.6 Scheduled Device Configuration Restore
Use this screen to restore the configuration of one or more switches at a scheduled time. Set
the time and date of the restore and the location of the configuration file you want to restore.
Each schedule can restore configuration files for multiple switches, and you can set up
multiple schedules to restore configuration files at more than one scheduled time.
To open this screen, click Maintenance > Scheduled Device Configuration Restore.
NetAtlas Workgroup User’s Guide
113
Chapter 10 Maintenance
Figure 74 Maintenance: Scheduled Device Configuration Restore
The following table describes the labels in this screen.
Table 49 Maintenance: Scheduled Device Configuration Restore
LABEL
DESCRIPTION
Schedule Name This field displays the name of each schedule for restoring configuration files.
Time
This field displays when the configuration files will be restored.
Add
Click this to create a new schedule for restoring configuration files.
Modify
Select an existing schedule, and click this to edit it.
Delete
Select one or more schedules, and click this to remove them.
Close
Click this to close this screen.
10.6.1 Schedule Content Screen
Use the Schedule Content screen to configure a schedule for restoring configuration files.
Click Maintenance > Scheduled Device Configuration Restore. Click Add to create a new
schedule or click Modify to edit the selected schedule.
114
NetAtlas Workgroup User’s Guide
Chapter 10 Maintenance
Figure 75 Maintenance: Scheduled Device Configuration Restore: Add/Modify
The following table describes the labels in this screen.
Table 50 Maintenance: Scheduled Device Configuration Restore: Add/Modify
LABEL
DESCRIPTION
Device List
Device Name
This field displays the name of each switch in the schedule.
Device IP
This field displays the corresponding IP address of the switch.
File
This field displays the full path and name of the configuration file that will be restored
to the switch.
Add
Click this to add one or more switches to the schedule.
Remove
Select one or more switches, and click this to remove them from the schedule.
Schedule Time
Specify when the configuration files should be restored. This is based on the current
date and time of the computer on which the EMS is running, not the current date and
time of the switch(es).
Schedule Name This field is grayed out unless you are creating a new schedule.
Type a name to create a new profile. You can use 1-31 alphanumeric characters,
underscores (_), or dashes(-). Spaces are not allowed.
User info for
Windows
Account
Enter the user name for the Windows account.
Password
Enter the password for the Windows account.
Apply
Click this to save your changes.
Close
Click this to discard any unsaved changes and close this screen.
10.6.2 Schedule Content Screen
Use this screen to add one or more switches to a schedule for restoring configuration files. To
open this screen, click Add when you are creating a new schedule or editing an existing one.
NetAtlas Workgroup User’s Guide
115
Chapter 10 Maintenance
Figure 76 Maintenance: Scheduled Device Configuration Restore: Add/Modify
The following table describes the labels in this screen.
Table 51 Maintenance: Scheduled Device Configuration Restore: Add/Modify
LABEL
DESCRIPTION
Device Type
Select the model of the switch you want to add to the schedule.
Restore
Directory
Enter the full path and name of the configuration file that will be restored to the
switch, or click Browse to locate it.
Device Name
Select one or more switches to which you want to restore the specified configuration
file. Use the Shift key or Ctrl key to select more than one switch.
Device IP
This field displays the IP address of the switch.
OK
Click this to save your changes and return to the previous screen.
Cancel
Click this to discard any changes and return to the previous screen.
10.7 Scheduled FW Upgrade
Use this screen to upload firmware to one or more switches at a scheduled time. Set the time
and date of the upload and the location of the firmware you want to upload to each of them.
Each schedule can upload firmware for multiple switches.
To open this screen, click Maintenance > Scheduled FW Upgrade.
Figure 77 Maintenance: Scheduled FW Upgrade
116
NetAtlas Workgroup User’s Guide
Chapter 10 Maintenance
The following table describes the labels in this screen.
Table 52 Maintenance: Scheduled FW Upgrade
LABEL
DESCRIPTION
Device Name
This field displays the name of each switch in the schedule.
Device IP
This field displays the corresponding IP address of the switch.
Add
Click Add to specify the switch(es) to include in this schedule.
Remove
Click Remove to delete the selected switch from this schedule.
Firmware Upgrade Schedule
Starting Date
Specify the date the firmware should be uploaded. This is based on the current date
of the computer on which the EMS is running, not the current date of the switch(es).
Starting Time
Specify the time the firmware should be uploaded. This is based on the current time
of the computer on which the EMS is running, not the current time of the switch(es).
FW Image
Click Browse to specify the full path and file name of the firmware that will be
uploaded to the switch(es).
User info for
Windows
Account
Enter the user name for the Windows account.
Password
Enter the password for the Windows account.
Apply
Click this to save the settings. When a Success screen displays, click OK.
Close
Click this to close this screen.
NetAtlas Workgroup User’s Guide
117
Chapter 10 Maintenance
118
NetAtlas Workgroup User’s Guide
CHAPTER
11
Tools
This chapter shows you how to access a switch via Telnet or web configurator directly through
the EMS. You may need to do this to test the switch network connection for example.
11.1 Accessing the Switch
Access the switch remotely via Telnet or web browser.
"
When you access a switch via Telnet or the web configurator, you CANNOT
make any changes to that switch using the EMS.
11.1.1 Telnet
Telnet is the login and terminal emulation protocol common on the Internet and in UNIX
environments. It operates over TCP/IP networks. Its primary function is to allow users to log
into remote host systems.
The administrator uses Telnet from a computer on a remote network to access the switch. You
can use remote Telnet access as shown next.
1 Select a switch from the list of devices shown in the Device List Panel.
2 Click Tool > Telnet to open a console session for Telnet access to the switch.
3 Type the switch user name and password to access the CLI.
NetAtlas Workgroup User’s Guide
119
Chapter 11 Tools
Figure 78 Tool: Telnet
4 Refer to the switch User’s Guide for information on the commands used in this screen.
11.1.2 Web Access
Configure the switch using the web configurator as shown.
1 Select a switch from the list of devices shown in the Device List Panel.
2 Click Tool > Web Access to open the switch web configurator password screen. From
here you can log in directly to the switch.
3 Type the switch User name and Password to access the web configurator.
Figure 79 Tool: Web Access
4 Refer to the switch User’s Guide for information on the web configurator main screen.
11.2 Ping
Ping the host to see if the links and TCP/IP protocol on both your computer and the switch is
working. Follow the steps below:
1 Select a switch from the list of devices shown in the Device List Panel.
2 Click Tool > Ping to have the computer ping the IP address of the selected device.
3 The Command Prompt window automatically closes after the computer pings the
selected switch three times.
120
NetAtlas Workgroup User’s Guide
Chapter 11 Tools
"
The device IP address varies according to whether the switch is connected to
the EMS computer using an in-band or an out-of-band IP address.
Figure 80 Tool: Ping
NetAtlas Workgroup User’s Guide
121
Chapter 11 Tools
122
NetAtlas Workgroup User’s Guide
P ART III
Switch
Configuration and
Troubleshooting
Device Menu Overview (125)
System Configuration (131)
Switch Configuration (143)
VLAN (157)
Ethernet Port Configuration (163)
Multicast Configuration (179)
Configuration (191)
IP Configuration (199)
Troubleshooting (221)
123
124
CHAPTER
12
Device Menu Overview
This chapter introduces the device configuration menus.
12.1 Device Menu Summary
To select a device configuration menu, right-click on a device in the Device List Panel.
"
Available screens and fields vary depending on your switch model and the
switch firmware version. Example configuration screens are shown.
Figure 81 Device Panel List Menus
12.2 Property Configuration
See Section 4.1.2 on page 55 for information on the Edit Device screen.
NetAtlas Workgroup User’s Guide
125
Chapter 12 Device Menu Overview
12.3 Introducing the Device Configuration Window
The following example screen displays the main features used to configure EMS-managed
devices. See the individual screen selections for details on switch feature configuration.
Figure 82 Configuration Window
3
1
2
4
5
The following table describes the elements in this screen.
Table 53 Configuration Window
126
LABEL
DESCRIPTION
1
Device Panel
This panel displays all devices (of the same type) currently managed by the
EMS.
The color of the text indicates the device status.
2
Port List Panel
This field displays a list of switch ports. This list displays in the Ethernet Port
Configuration screens only.
To make configuration changes to each port or ports, select a port number or
multiple port numbers (by pressing the [CTRL] key and clicking at the same
time) in the Port List Panel.
3
Copy to..
Click the Copy to.. button to copy the configuration from the switch that you are
currently configuring to the port(s) on the same switch or other switch(es) of the
same model. Port configurations can also be copied to other device ports in the
Ethernet Port Configuration screens.
NetAtlas Workgroup User’s Guide
Chapter 12 Device Menu Overview
Table 53 Configuration Window
LABEL
DESCRIPTION
4
Configuration
Panel
Use this panel to make configuration changes to a device based on a port or
multiple ports selected in the Port List Panel.
If the screen does not have a Port List Panel, then use this panel to make
configuration changes to a device selected in the Device Panel.
Click Apply to save configuration changes.
5
Close
Click Close to close a configuration screen. If you close a screen without first
clicking Apply, configuration changes will not be saved.
12.3.1 Port List Multiple Port Configuration
Configure more than one port at the same time by pressing the [CTRL] key and clicking at the
same time in the Port List panel.
Figure 83 Configuration Window: Port List: Multiple Port Select
Click Apply when you are satisfied with the configuration changes. A screen displays
showing the configuration result.
Figure 84 Applied Results
4 Click Done to close the screen.
NetAtlas Workgroup User’s Guide
127
Chapter 12 Device Menu Overview
12.3.2 The Copy to.. Button
The Copy to.. button allows you to copy the configuration from the switch you are currently
configuring to one or more switches of the same model.
12.3.2.1 Copy Configuration to Other Switches
You can copy the screen settings (in the configuration group listed below) from one switch to
another switch of the same model.
•
•
•
•
System configuration
Switch configuration
Multicast configuration
RMON configuration
Follow the steps below to copy settings between switches.
1 In a configuration screen in the configuration group listed above), click the Copy to ..
button to display the switch select screen as shown.
2 Select one or more switches and click OK to copy the settings.
Figure 85 Copy Switch Setting: Example
3 After the process is complete, a status screen displays. Click Done.
128
NetAtlas Workgroup User’s Guide
Chapter 12 Device Menu Overview
Figure 86 Switch Configuration Copy: Success
12.3.2.2 Copy Configuration to Other Switch Ports
In an Ethernet Port Configuration screen, click the Copy to .. button to copy a port’s
configuration to another port on the same or a different switch.
1 In the Device Panel list, select a device that you want configure.
2 Select a tab in the Configuration Panel.
3 Select a port or multiple ports (by pressing the [CTRL] key and clicking at the same
time) from the Port List Panel.
4 Make your configuration changes in the Configuration Panel and click the Apply button.
5 Click the Copy to.. button. The following screen displays.
Figure 87 Copy Port Setting: Example
Device List
Panel
Port List
Panel
NetAtlas Workgroup User’s Guide
Copy Port
List Panel
129
Chapter 12 Device Menu Overview
The following table describes this screen.
Table 54 Copy Port Setup
LABEL
DESCRIPTION
Device List
Select a device to which you want to copy from the switch you are currently
configuring.
Port List Panel
Select one port or multiple ports (by pressing the [CTRL] key and clicking at the
same time) from the Port List Panel.
Add
Click Add to display the port(s) to which you want to copy from the switch you
are currently configuring.
Remove
Click Remove to move a selected port(s) from the Copy Port List Panel list to
the Port List Panel.
Copy Port List Panel This panel displays the device port(s) to which you want to copy from the switch
you are currently configuring.
OK
Click OK to copy the configuration from the current switch to the device port(s)
displayed in the Copy Port List Panel.
Cancel
Click Cancel to return to the previous screen.
6 Click OK to display the following screen.
Figure 88 Copy Successful
7 Click Done to close the screen.
130
NetAtlas Workgroup User’s Guide
CHAPTER
13
System Configuration
This chapter shows you how to view general system information, configure SNMP, remote
management and time setup.
13.1 System Info
See Section 3.9 on page 48 for information about the switch.
13.2 SNMP
Simple Network Management Protocol is a protocol used for exchanging management
information between network switches. SNMP is a member of TCP/IP protocol suite. A
manager station can manage and monitor the switch through the network via SNMP version
2c. The next figure illustrates an SNMP management operation. SNMP is only available if
TCP/IP is configured.
Figure 89 SNMP Management Model
An SNMP managed network consists of two main components: agents and a manager.
NetAtlas Workgroup User’s Guide
131
Chapter 13 System Configuration
An agent is a management software module that resides in a managed switch (your Ethernet
switch). An agent translates the local management information from the managed switch into a
form compatible with SNMP. The manager is the console through which network
administrators perform network management functions. It executes applications that control
and monitor managed devices.
The managed devices contain object variables/managed objects that define each piece of
information to be collected about a switch. Examples of variables include such as number of
packets received, node port status etc. A Management Information Base (MIB) is a collection
of managed objects. SNMP allows a manager and agents to communicate for the purpose of
accessing these objects.
SNMP itself is a simple request/response protocol based on the manager/agent model. The
manager issues a request and the agent returns responses using the following protocol
operations:
Table 55 SNMP Commands
COMMAND
DESCRIPTION
Get
Allows the manager to retrieve an object variable from the agent.
GetNext
Allows the manager to retrieve the next object variable from a table or list within an
agent. In SNMP, when a manager wants to retrieve all elements of a table from an
agent, it initiates a Get operation, followed by a series of GetNext operations.
Set
Allows the manager to set values for object variables within an agent.
Trap
Used by the agent to inform the manager of some events.
See the switch User’s Guide for a list of supported traps.
13.2.1 Configuring SNMP
To open display the SNMP Config screen, right-click on a switch in the Device List Panel,
and click Configuration > System Configuration > SNMP Conf..
132
NetAtlas Workgroup User’s Guide
Chapter 13 System Configuration
Figure 90 System Configuration: SNMP Conf.
The following table describes the labels in this screen.
Table 56 System Configuration: SNMP Conf.
LABEL
DESCRIPTION
Read Community
Enter the get community, which is the password for the incoming Get- and
GetNext- requests from the management station.
Read/Write Community Enter the set community, which is the password for incoming Set- requests
from the management station.
Trap Community
Enter the trap community, which is the password sent with each trap to the
SNMP manager.
Apply
Click Apply to save your changes back to the switch.
Trap Destination
Enter the IP addresses of up to four stations to send your SNMP traps to.
Apply
Click Apply to save the trap destination changes back to the switch.
13.3 Remote Management
Remote management allows you to determine which services/protocols can access which
device interface (if any) from which computers. You can customize the service port and the
secured client IP address to enhance security and flexibility.
To open this screen, right-click on the switch in the Device List Panel, and click
Configuration > System Configuration > Remote Mgmt..
NetAtlas Workgroup User’s Guide
133
Chapter 13 System Configuration
Figure 91 System Configuration: Remote Management
The following table describes the labels in this screen.
Table 57 System Configuration: Remote Management
LABEL
DESCRIPTION
Services
This panel displays the services that you may use to remotely manage the switch.
Select the check box(es) to allow remote management using the service(s).
Port
Enter the server port number to use with the corresponding service.
Timeout
For HTTP and HTTPS, you can also specify the administrative idle timeout (in
minutes).
Apply
Click Apply to save the changes back to the switch.
Secured Clients Select the check box(es) to enable the client set.
134
Start
To allow a range of computers to use Telnet, FTP, HTTP, ICMP, SSH or HTTPS
services, enter the first IP address in the range here.The default value for a start and
end address is 0.0.0.0, which means you don’t care which host is trying to use a
service (Telnet, FTP, HTTP, SNMP, ICMP, SSH or HTTPS).If you enter an IP
address in this field, the switch will check if the client IP address matches the value
here when a (Telnet, FTP, HTTP, SNMP, ICMP, SSH or HTTPS) session is up. If it
does not match, the session is disconnected immediately.
End
To allow a range of computers to use Telnet, FTP, Web, SNMP or ICMP services,
enter the End IP address in the range here. To allow a single computer to use
Telnet, FTP, HTTP, SNMP, ICMP, SSH or HTTPS services, enter the same IP
address here as in the Start field.
Telnet, FTP,
HTTP, ICMP,
SNMP, ICMP,
SSH, HTTPS
Select the check box to allow the trusted computer(s) in the IP address range
specified above to use this service to manage the switch.
Apply
Click Apply to save the changes back to the switch.
Close
Click Close to close the screen.
NetAtlas Workgroup User’s Guide
Chapter 13 System Configuration
13.4 Time Setup
The switch keeps track of the time and date. There is also a software mechanism to set the time
manually or get the current time and date from an external server when you log in to the
switch. Use the Time Setup screen to update the time and date settings in the EMS and then
save the settings to the switch. The real time is then displayed in the system messages.
To open this screen, right-click on the switch in the Device List Panel, and click
Configuration > System Configuration > Time Setup.
Figure 92 System Configuration: Time Setup
The following table describes the labels in this screen.
Table 58 System Configuration: Time Setup
LABEL
DESCRIPTION
Use Time Server When
BootUp
Select the time service protocol that your time server sends when you start
the switch. Not all time servers support all protocols, so you may have to
check with your ISP/network administrator or use trial and error to find a
protocol that works. The main differences between them are the format.
When you select the Daytime (RFC 867) format, the switch displays the day,
month, year and time with no time zone adjustment. When you use this
format it is recommended that you use a Daytime timeserver within your
geographical time zone.
Time (RFC-868) format displays a 4-byte integer giving the total number of
seconds since 1970/1/1 at 0:0:0.
NTP (RFC-1305) is similar to Time (RFC-868).
None is the default; enter the time manually.
Time Server IP
Address
Enter the IP address of your time server. Check with your ISP/network
administrator if you are unsure of this information.
Current Time
This field displays an updated time only when you reenter this menu.
New Time (hh:mm:ss)
Enter the new time in hour, minute and second format.
NetAtlas Workgroup User’s Guide
135
Chapter 13 System Configuration
Table 58 System Configuration: Time Setup (continued)
LABEL
DESCRIPTION
Current Date
This field displays an updated date only when you re-enter this menu.
New Date
(yyyy:mm:dd)
Enter the new date in year, month and day format.
Time Zone
Select the time difference between your time zone and Universal Time
Coordinate (UTC) formerly known as Greenwich Mean Time (GMT).
Apply
Click Apply to save the changes.
13.5 Syslog Setup
Use this screen to configure syslog settings for a switch. To open this screen, right-click on the
switch in the Device List Panel, and click Configuration > System Configuration > Syslog.
Figure 93 System Configuration: Syslog Setup
The following table describes the labels in this screen.
Table 59 System Configuration: Syslog Setup
LABEL
DESCRIPTION
Syslog Setup
136
Active
Select Active to enable the syslog feature.
Logging Type
This field displays the name of the log type.
Active
Select Active to enable to create and store logs of the selected type.
Facility
Select the log facility. The log facility allows you to log the messages to
different files in the syslog server. See your syslog manual for more
information
Apply
Click Apply to save your changes.
NetAtlas Workgroup User’s Guide
Chapter 13 System Configuration
Table 59 System Configuration: Syslog Setup (continued)
LABEL
DESCRIPTION
Syslog Server Setup
Index
This field displays the index number.
Active
This field indicates whether the syslog server setting is enabled or not.
IP Address
This field displays the IP address of the syslog server.
Log Level
This field displays the severity level of the logs which is to be stored on the
syslog server.
Add
Click Add to configure a new syslog server.
Modify
Click Modify to change the settings of a selected syslog server.
Delete
Click Delete to remove the selected syslog server.
13.5.1 Configuring a Syslog Server
You must specify a syslog server for the switch to send logs. In the Syslog Setup screen, click
Add to create a new syslog server entry or click Modify to edit an existing one.
Figure 94 System Configuration: Syslog Setup: Add
The following table describes the labels in this screen.
Table 60 System Configuration: Syslog Setup: Add
LABEL
DESCRIPTION
Active
Select Active to enable the settings of the syslog server.
Server Address
Enter the IP address of a syslog server in dotted decimal notation.
Log Level
Select the severity level of the logs to be stored on the syslog server.
OK
Click OK to save the changes and close this screen.
Cancel
Click Cancel to discard all changes and close this screen.
Clear
Click Clear to start configuring this screen again.
NetAtlas Workgroup User’s Guide
137
Chapter 13 System Configuration
13.6 RADIUS
RADIUS (Remote Authentication Dial-In User Service) authentication is a popular protocol
used to authenticate users by means of an external server instead of (or in addition to) an
internal device user database that is limited to the memory capacity of the device. In essence,
RADIUS authentication allows you to validate an unlimited number of users from a central
location.
To open this screen, right-click on the switch in the Device List Panel, and click
Configuration > System Configuration > RADIUS.
Figure 95 System Configuration: RADIUS
The following table describes the labels in this screen.
Table 61 System Configuration: RADIUS
LABEL
DESCRIPTION
Authentication Server
IP Address
Enter the IP address of the external RADIUS server in dotted decimal
notation.
UDP Port
The default port of the RADIUS server for authentication is 1812. You
need not change this value unless your network administrator instructs you
to do so.
Shared Secret
Specify a password (up to 32 alphanumeric characters) as the key to be
shared between the external RADIUS server and the switch. This key is
not sent over the network. This key must be the same on the external
RADIUS server and the switch.
Apply
Click Apply to save your changes.
13.7 Boot Config
You can store up to two configuration files on the switch. Only one configuration file is used
at a time. By default the switch uses the first configuration file (with an index number of 1).
You can set the switch to use another configuration file.
Use the Boot Config screen to select which configuration file you want the switch to use after
the next system reboot.
1 Right-click on a switch and click Configuration > System Configuration and the Boot
Config tab.
138
NetAtlas Workgroup User’s Guide
Chapter 13 System Configuration
2 Specify which configuration the switch is to use after a reboot. Select Config 1 or
Config 2.
3 Click Apply to save the setting.
Figure 96 System Configuration: Boot Config
4 When the setting is successful, a result screen displays. Click Done.
Figure 97 System Configuration: Boot Config
5 Reboot the switch to have it use the selected configuration file.
13.8 IP Setup
Use the IP Setup screen to configure the default gateway device, the default domain name
server and add IP domains.
To open this screen, right-click on the switch in the Device List Panel, and click
Configuration > System Configuration > IP Setup.
NetAtlas Workgroup User’s Guide
139
Chapter 13 System Configuration
Figure 98 System Configuration: IP Setup
The following table describes the labels in this screen.
Table 62 System Configuration: IP Setup
LABEL
DESCRIPTION
IP Setup
Domain Name
Server
DNS (Domain Name System) is for mapping a domain name to its corresponding IP
address and vice versa. Enter a domain name server IP address in order to be able to
use a domain name instead of an IP address.
Default
Management
Specify which traffic flow (In-Band or Out-of-band) the switch is to send packets
originating from itself (such as SNMP traps) or packets with unknown source.
Select Out-of-band to have the switch send the packets to the management port
labelled MGMT. This means that device(s) connected to the other port(s) do not
receive these packets.
Select In-Band to have the switch send the packets to all ports except the
management port (labelled MGMT) to which connected device(s) do not receive
these packets.
In-band Management IP Address
Use these fields to set the settings for the in-band management port.
140
DHCP Client
Select this option to have the switch automatically obtain an IP address from a DHCP
server.
Static IP
Address
Select this option to specify a fixed IP address for the switch and configure the fields
below.
IP Address
Enter the in-band management IP address of your switch in dotted decimal notation.
For example, 192.168.0.1.
IP Subnet
Mask
Enter the IP subnet mask of your switch in dotted decimal notation for example
255.255.255.0.
Default
Gateway
Enter the IP address of the default outgoing gateway in dotted decimal notation, for
example 192.168.0.254
VID
Enter the VLAN ID to which this IP address belongs.
NetAtlas Workgroup User’s Guide
Chapter 13 System Configuration
Table 62 System Configuration: IP Setup (continued)
LABEL
DESCRIPTION
Out-of-band Management IP Address
Use these fields to set the settings for the out-of-band management port.
IP Address
Enter the out-of-band management IP address of your switch in dotted decimal
notation. For example, 192.168.0.1.
IP Subnet
Mask
Enter the IP subnet mask of your switch in dotted decimal notation for example
255.255.255.0.
Default
Gateway
Enter the IP address of the default outgoing gateway in dotted decimal notation, for
example 192.168.0.254
Apply
Click Apply to save the settings for this part of the screen.
IP Interface
Index
This field displays the index number of an entry.
IP Address
This field displays IP address of the switch in the IP domain.
Subnet Mask
This field displays the subnet mask of the switch in the IP domain.
VID
This field displays the VLAN identification number of the IP domain on the switch.
Default
Gateway
This field displays the IP address of the gateway device.
Manageable
Add
Click Add to configure a new IP interface.
Modify
Click Modify to change the settings of a selected IP interface.
Delete
Click Delete to remove a selected IP interface.
13.8.1 Configuring an IP Interface
To create a new IP interface, click Add in the IP Setup screen.
Figure 99 System Configuration: IP Setup: Add
The following table describes the labels in this screen.
Table 63 System Configuration: IP Setup: Add
LABEL
DESCRIPTION
IP Address
Enter the IP address of your switch in dotted decimal notation for example
192.168.1.1. This is the IP address of the switch in an IP routing domain.
IP Subnet Mask
Enter the IP subnet mask of an IP routing domain in dotted decimal notation. For
example, 255.255.255.0.
VID
Enter the VLAN identification number to which the IP address belongs.
NetAtlas Workgroup User’s Guide
141
Chapter 13 System Configuration
Table 63 System Configuration: IP Setup: Add
142
LABEL
DESCRIPTION
Default Gateway
Enter the IP address of the gateway device.
Manageable
Select this option to allow device management using this IP address. This means
that you can access the device for management through this IP address.
Clear this check box to disable this feature.
Add
Click Add to save the settings and close this screen.
Cancel
Click Cancel to discard all changes and close this screen.
NetAtlas Workgroup User’s Guide
CHAPTER
14
Switch Configuration
This chapter shows how to configure switch settings such as priority queuing, STP, link
aggregation and GARP timer.
14.1 Switch Setup
Use the switch setup screen to set a VLAN type, a queuing method and enable or disable
features in the Active Control panel.
To open this screen, right-click on the switch in the Device List Panel, and click
Configuration > Switch Configuration > Switch Setup.
Figure 100 Switch Configuration: Switch Setup
NetAtlas Workgroup User’s Guide
143
Chapter 14 Switch Configuration
The following table describes the related labels in the screen.
Table 64 Switch Configuration: Switch Setup
LABEL
DESCRIPTION
VLAN Type
Choose 802.1Q or Port Based from the drop-down list box. The VLAN
Setup screen changes depending on whether you choose 802.1Q or Port
Based VLAN type in this screen. See Section 16.3 on page 165 and the
VLAN chapter for more information on VLANs.
MAC Address Aging Time
MAC address learning reduces outgoing traffic broadcasts. For MAC
address learning to occur on a port, the port must be active.
Enter a time from 10 to 3000 seconds. This is how long all dynamically
learned MAC addresses remain in the MAC address table before they age
out (and must be relearned).
Queuing Method
Select a queuing method. Choices vary depending on your switch
models.
Strict Priority Queuing (SPQ) services queues based on priority only.
When the highest priority queue empties, traffic on the next highestpriority queue begins. The default queuing method is Strictly Priority.
Weighted Fair Scheduling is used to guarantee each queue's minimum
bandwidth based on their bandwidth portion (weight) (the number you
configure in the Weight field). Queues with larger weights get more
guaranteed bandwidth than queues with smaller weights.
Weighted Round Robin Scheduling (WRR) services queues on a
rotating basis based on their queue weight (the number you select from
the drop-down list box for the corresponding queue). Queues with larger
weights get more service than queues with smaller weights.
FE Port SPQ Enable
This field is applicable only when you select WFQ or WRR.
Select a queue (Q0 to Q7) to have the switch use Strictly Priority to
service the subsequent queue(s) after and including the specified queue
for the 10/100 Mbps Ethernet ports. For example, if you select Q5, the
switch services traffic on Q5, Q6 and Q7 using Strictly Priority.
Select None to always use WFQ or WRR for the 10/100 Mbps Ethernet
ports.
Q0-Q3
These fields are applicable only for switches that use WRR and for
switches that assign queue weights for the entire system (not per port).
Use the drop down list boxes to choose queue weights (1-15). Bandwidth
is divided across the different traffic queues according to their weights.
Broadcast Storm Control
These fields are not available on all switch models.
Set the fields below to configure traffic storm control.
Active
Select Active to enable traffic storm control on the switch.
Storm Control Type
Specify the traffic type in this field. Select Broadcast Only, Broadcast
and multicast, Broadcast and unknown unicast or Broadcast,
multicast and unknown unicast from the drop-down list box.
Packet Limit
From the drop-down list box, select the number of packets (of the type
chosen above) a port can receive per second.
Active Control
144
Link Aggregation
Select the check box to activate link aggregation.
Bandwidth control
Select the check box to activate bandwidth control.
Mirroring
Select the check box to activate port mirroring.
802.1x
Select the check box to activate IEEE 802.1x authentication.
Port Security
Select the check box to activate port security.
NetAtlas Workgroup User’s Guide
Chapter 14 Switch Configuration
Table 64 Switch Configuration: Switch Setup (continued)
LABEL
DESCRIPTION
GVRP
Select the check box to permit VLANs groups beyond the local switch on
this port. GVRP (GARP VLAN Registration Protocol) is a registration
protocol that defines a way for switches to register necessary VLAN
members on ports across the network.
802.1q Port Isolation
Port Isolation allows each port to communicate with the CPU port, uplink
ports and stacking ports (if available) but not communicate with each
other. This option is the most limiting but also the most secure.
802.1q Ingress Check
Select this check box to set the switch to discard incoming frames for
VLANs that do not have this port as a member
VLAN Stacking
Select the check box to enable VLAN stacking.
In the SP TPID drop-down list box, select a standard Ethernet type code
to identify the frame and indicate whether the frame carries IEEE 802.1Q
tag information. Or select Others and then enter a four-digit hexadecimal
number from 0x0000 to 0xFFFF. 0x denotes a hexadecimal number. It
does not have to be typed in the Others field.
Bridge control protocol
transparency
Select the check box to allow the switch to handle bridging control
protocols (STP for example). You also need to define how to treat a
BPDU in the Port Setup screen.
Apply
Click Apply to save your changes back to the switch.
14.2 Priority Queue
Queuing is used to help solve performance degradation when there is network congestion.
Configure queuing algorithms for outgoing traffic in the Switch Setup screen. Queuing
algorithms allow switches to maintain separate queues for packets from each individual source
or flow and prevent a source from monopolizing the bandwidth.
Follow the steps below to configure priority queuing.
To open this screen, right-click on the switch in the Device List Panel, and click
Configuration > Switch Configuration > Priority Queue to display the following screen.
NetAtlas Workgroup User’s Guide
145
Chapter 14 Switch Configuration
Figure 101 Switch Configuration: Priority Queue
The following table describes the labels in this screen.
Table 65 Switch Configuration: Priority Queue
146
LABELS
DESCRIPTION
Priority Queue
Assignment
IEEE 802.1p defines up to 8 separate traffic types by inserting a tag into a MAC-layer
frame that contains bits to define class of service. Frames without an explicit priority
tag are given the default priority of the ingress port. Use these fields to configure the
priority level-to-physical queue mapping. On the switch, traffic assigned to higher
index queues gets through faster while traffic in lower index queues is dropped if the
network is congested.
Priority Level
The following descriptions are based on the traffic types defined in the IEEE 802.1D
standard (which incorporates 802.1p). Select a level from the drop-down list box(es).
Level 7
Typically used for network control traffic such as router configuration messages.
Level 6
Typically used for voice traffic that is especially sensitive to jitter (jitter is the variations
in delay).
Level 5
Typically used for video that consumes high bandwidth and is sensitive to jitter.
Level 4
Typically used for controlled load, latency-sensitive traffic such as SNA (Systems
Network Architecture) transactions.
Level 3
Typically used for “excellent effort” or better than best effort and would include
important business traffic that can tolerate some delay.
Level 2
This is for “spare bandwidth”.
Level 1
This is typically used for non-critical “background” traffic such as bulk transfers that
are allowed but that should not affect other applications and users.
Level 0
Typically used for best-effort traffic.
Apply
Click Apply to save your changes back to the switch.
NetAtlas Workgroup User’s Guide
Chapter 14 Switch Configuration
14.3 Multiple/ Rapid STP Configuration
STP (Spanning Tree Protocol) detects and breaks network loops and provides backup links
between switches, bridges or routers. It allows a device to interact with other STP-aware
devices in your network to ensure that only one path exists between any two stations on the
network. Refer to the user’s guide that comes with your switch for more information.
Use the Multiple STP Conf. screen to configure STP and/or multiple STP settings on the
switch.
To open this screen, right-click on the switch in the Device List Panel, and click
Configuration > Switch Configuration > Multiple STP Conf..
Figure 102 Switch Configuration: STP Conf.
The following table describes the labels in this screen.
Table 66 Switch Configuration: Multiple STP Conf.
LABEL
DESCRIPTION
Multiple Rapid Spanning Tree Protocol
Tree
This field displays the index number of a spanning tree.
Active
Select this option to enable the tree.
Bridge Priority
Priority is used in determining the root device, root port and designated port. The
device with the highest priority (lowest numeric value) becomes the RSTP root device.
If all devices have the same priority, the device with the lowest MAC address will then
become the root device. The allowed range is 0 to 65535 (32768 is the default).
The lower the numeric value you assign, the higher the priority for this bridge.
Priority determines the root bridge, which in turn determines Hello Time, Max Age
and Forward Delay.
NetAtlas Workgroup User’s Guide
147
Chapter 14 Switch Configuration
Table 66 Switch Configuration: Multiple STP Conf. (continued)
LABEL
DESCRIPTION
Hello Time
This is the maximum time (in seconds) a device can wait without receiving a BPDU
before attempting to reconfigure. All device ports (except for designated ports) should
receive BPDUs at regular intervals. Any port that ages out STP information (provided
in the last BPDU) becomes the designated port for the attached LAN. If it is a root
port, a new root port is selected from among the device ports attached to the network.
The allowed range is 6 to 40 seconds (20 is the default).
Max Age
This is the time interval in seconds between BPDU (Bridge Protocol Data Units)
configuration message generations (by all devices in RSTP or the root device in STP).
The allowed range is 1 to 10 seconds (2 is the default).
Forwarding
Delay
This is the maximum time (in seconds) a device will wait before changing states. This
delay is required because every device must receive information about topology
changes before it starts to forward frames. In addition, each port needs time to listen
for conflicting information that would make it return to a blocking state; otherwise,
temporary data loops might result. The allowed range is 4 to 30 seconds (15 is the
default).
Rapid Spanning Tree Protocol
Active
Select this option to enable STP.
Bridge Priority
Priority is used in determining the root device, root port and designated port. The
device with the highest priority (lowest numeric value) becomes the RSTP root device.
If all devices have the same priority, the device with the lowest MAC address will then
become the root device. The allowed range is 0 to 65535 (32768 is the default).
The lower the numeric value you assign, the higher the priority for this bridge.
Priority determines the root bridge, which in turn determines Hello Time, Max Age
and Forward Delay.
Max Age
This is the maximum time (in seconds) a device can wait without receiving a BPDU
before attempting to reconfigure. All device ports (except for designated ports) should
receive BPDUs at regular intervals. Any port that ages out STP information (provided
in the last BPDU) becomes the designated port for the attached LAN. If it is a root
port, a new root port is selected from among the device ports attached to the network.
The allowed range is 6 to 40 seconds (20 is the default).
Hello Time
This is the time interval in seconds between BPDU (Bridge Protocol Data Units)
configuration message generations (by all devices in RSTP or the root device in STP).
The allowed range is 1 to 10 seconds (2 is the default).
Forwarding
Delay
This is the maximum time (in seconds) a device will wait before changing states. This
delay is required because every device must receive information about topology
changes before it starts to forward frames. In addition, each port needs time to listen
for conflicting information that would make it return to a blocking state; otherwise,
temporary data loops might result. The allowed range is 4 to 30 seconds (15 is the
default).
Apply
Click Apply to save your changes back to the switch.
14.4 Link Aggregation
Link aggregation (trunking) is the grouping of physical ports into one logical higher-capacity
link. You may want to trunk ports if for example, it is cheaper to use multiple lower-speed
links than to under-utilize a high-speed, but more costly, single-port link.
However, the more ports you aggregate then the fewer available ports you have. A link
aggregation group is one logical link containing multiple ports.
The first port must be physically connected when forming a trunk group.
148
NetAtlas Workgroup User’s Guide
Chapter 14 Switch Configuration
14.4.1 Dynamic Link Aggregation
This feature is not available on all models.
The switch adheres to the IEEE 802.3ad standard for static and dynamic (LACP) port
trunking.
The switch supports the link aggregation IEEE 802.3ad standard. This standard describes the
Link Aggregate Control Protocol (LACP), which is a protocol that dynamically creates and
manages trunk groups.
When you enable LACP link aggregation on a port, the port can automatically negotiate with
the ports at the remote end of a link to establish trunk groups. LACP also allows port
redundancy, that is, if an operational port fails, then one of the “standby” ports become
operational without user intervention
Please note that:
• You must connect all ports point-to-point to the same Ethernet switch and configure the
ports for LACP trunking.
• LACP only works on full-duplex links.
• All ports in the same trunk group must have the same media type, speed, duplex mode and
flow control settings.
Configure trunk groups or LACP before you connect the Ethernet switch to avoid causing
network topology loops.
14.4.2 Link Aggregation ID
LACP aggregation ID consists of the following information:
Table 67 Aggregation ID Local Switch
Local switch [(0000,00-00-00-00-00-00,0000,00,0000)]
0000
00-00-00-00-00
0000
00
0000
System priority
MAC address
Key
Port Priority
Port Number
Table 68 Aggregation ID Peer Switch
Peer switch [(0000,00-00-00-00-00-00,0000,00,0000)]
0000
00-00-00-00-00
0000
00
0000
System priority
MAC address
Key
Port Priority
Port Number
14.4.3 Configuring Link Aggregation
1 First activate link aggregation in the Switch Setup screen.
2 To open the LACP Conf. screen, right-click on the switch in the Device List Panel, and
click Configuration > Switch Configuration > LACP Conf. to display the
configuration screen.
NetAtlas Workgroup User’s Guide
149
Chapter 14 Switch Configuration
"
The number of link aggregation groups varies depending on your switch
models.
Figure 103 Switch Configuration: Link Aggregation
The following table describes the labels in this screen.
Table 69 Switch Configuration: Link Aggregation
TABLE
DESCRIPTION
LACP
System Priority
LACP system priority is a number between 1 and 65,535. The switch with the lowest
system priority (and lowest port number if system priority is the same) becomes the
LACP “server”. The LACP “server” controls the operation of LACP setup. Enter a
number to set the priority of an active port using Link Aggregate Control Protocol
(LACP). The smaller the number, the higher the priority level.
Group Setting
150
Group ID
The field identifies the link aggregation group, that is, one logical link containing
multiple ports
Active
Select this option to activate a trunk group.
Dynamic
(LACP)
Select this check box to enable LACP for a trunk.
Apply
Click Apply to save your changes.
NetAtlas Workgroup User’s Guide
Chapter 14 Switch Configuration
14.5 GARP Timer
Switches join VLANs by making a declaration. A declaration is made by issuing a Join
message using GARP. Declarations are withdrawn by issuing a Leave message. A Leave All
message terminates all registrations. GARP timers set declaration timeout values. See the
chapter on VLAN setup for more background information.
1
2
3
4
In the Device Panel list, select a device and then right-click.
Click Configuration > Switch Configuration > Switch Setup.
Select the GARP Timer check box and then click Apply.
Click Configuration > Switch Configuration > GARP Timer to display the following
screen.
Figure 104 Switch Configuration: GARP Timer
The following table describes the labels in this screen.
Table 70 Switch Configuration: GARP Timer
LABEL
DESCRIPTION
Join Timer
Join Timer sets the duration of the join period timer for GVRP in milliseconds. Each
port has a join period timer. The allowed join time range is between 10 and 6553
centiseconds; the default is 20 centiseconds. See the chapter on VLAN setup for
more background information.
Leave Timer
Leave Timer sets the duration of the leave period timer for GVRP in milliseconds.
Each port has a single leave period timer. Leave time must be at least two times
larger than Join Timer; the default is 60 centiseconds.
Leave All Timer
Leave All Timer sets the duration of the Leave All Period timer for GVRP in
milliseconds. Each port has a single Leave All Period timer. Leave All Timer must be
larger than Leave Timer; the default is 1000 centiseconds.
Apply
Click Apply to save your changes.
NetAtlas Workgroup User’s Guide
151
Chapter 14 Switch Configuration
14.6 Filtering
Filtering means forwarding (not supported on all models) or discarding packets based on the
MAC addresses and VLAN group.
To open the MAC Filtering screen, right-click on the switch in the Device List Panel, and
click Configuration > Switch Configuration > Filtering to display the following screen.
Figure 105 Switch Configuration: Filtering
The following table describes the labels in this screen.
Table 71 Switch Configuration: Filtering
LABEL
DESCRIPTION
Index
This field displays the index number.
Active
This field displays whether the filter is enabled (Yes) or not (No).
Name
This field displays the descriptive name for this filter.
MAC Address
This field displays the MAC address of a device whose traffic is forwarded or blocked.
VID
This field displays the ID of the VLAN group to which the MAC address belongs.
Action
This field displays the action on the matching packets.
Add
Click Add to create a new filter.
Delete
Click Delete to remove the selected filter.
14.6.1 Creating a New Filter
To create a new filter, click Add in the Filtering screen. A configuration screen displays as
shown.
152
NetAtlas Workgroup User’s Guide
Chapter 14 Switch Configuration
Figure 106 Switch Configuration: Filtering: Add
The following table describes the related labels in this screen.
Table 72 Switch Configuration: Filtering: Add
LABEL
DESCRIPTION
Active
Make sure to select this check box to activate your rule. You may temporarily deactivate
a rule without deleting it by deselecting this check box.
Name
Type a descriptive name (up to 32 printable ASCII characters) for this rule. This is for
identification purpose only.
Action
If the options are not applicable, packets that match the MAC address and VLAN ID
specified will be discarded.
Select Discard source to drop frame from the source MAC address (specified in the
MAC field). The switch can still send frames to the MAC address.
Select Discard destination to drop frames intended for the destination MAC address
(specified in the MAC field). The switch can still receive frames originating from the
MAC address.
Select Discard source and Discard destination to block traffic to/from the MAC
address specified in the MAC field.
MAC
Type a MAC address in valid MAC address format, that is, six hexadecimal character
pairs.
VID
Type the VLAN group identification number.
OK
Click OK to save the changes and close this screen.
Close
Click Close to close this screen. All unsaved settings will be lost.
14.7 MAC Forwarding
A static MAC address entry is an address that has been manually entered in the MAC address
learning table. Static MAC addresses do not age out. When you set up static MAC address
rules, you are setting static MAC addresses for a port. Devices that match static MAC address
rules on a port can only receive traffic on that port and cannot receive traffic on other ports.
This may reduce unicast flooding.
To open the configuration screen, right-click on the switch in the Device List Panel, and click
Configuration > Switch Configuration > MAC Forwarding.
NetAtlas Workgroup User’s Guide
153
Chapter 14 Switch Configuration
Figure 107 Switch Configuration: MAC Forwarding
The following table describes the labels in this screen.
Table 73 Switch Configuration: MAC Forwarding
LABEL
DESCRIPTION
Index
Click an index number to modify a static MAC address rule for a port.
Active
This field displays whether this static MAC address forwarding rule is active (Yes) or
not (No). You may temporarily deactivate a rule without deleting it.
MAC Address
This field displays the MAC address that will be forwarded and the VLAN
identification number to which the MAC address belongs.
VID
This field displays the VLAN identification number.
Port
This field displays the port where the MAC address shown in the next field will be
forwarded.
Add
Click the Add button to create a MAC forwarding rule.
Delete
Select the rule(s) that you want to remove in the MAC Forwarding table and then click
the Delete button.
14.7.1 Configuring a Static MAC Address Entry
To add a new rule, click Add in the MAC Forwarding screen.
To change the settings of a rule, select a rule and click Add in the MAC Forwarding screen.
154
NetAtlas Workgroup User’s Guide
Chapter 14 Switch Configuration
Figure 108 Switch Configuration: MAC Forwarding: Add
The following table describes the labels in this screen.
Table 74 Switch Configuration: MAC Forwarding: Add
LABEL
DESCRIPTION
Active
Select this check box to activate your rule. You may temporarily deactivate a rule without
deleting it by clearing this check box.
MAC
Enter the MAC address in valid MAC address format, that is, six hexadecimal character
pairs. Static MAC addresses do not age out.
VID
Enter the VLAN group identification number.
Port
Select a port where the MAC address entered in the previous field will be automatically
forwarded.
OK
Click OK to save the settings.
Close
Click Close to close the screen. All unsaved settings will be lost.
14.8 Mirroring
Port mirroring allows you to copy a traffic flow to a mirror port (the port you copy the traffic
to) in order that you can examine the traffic from the mirror port without interference.
Click Configuration > Switch Configuration > Mirroring to display the configuration
screen.
NetAtlas Workgroup User’s Guide
155
Chapter 14 Switch Configuration
Figure 109 Switch Configuration: Mirroring
The following table describes the labels in this screen.
Table 75 Switch Configuration: Mirroring
156
LABEL
DESCRIPTION
Monitor
Port
The monitor port is the port you copy the traffic to in order to examine it in more detail
without interfering with the traffic flow on the original port(s). Select a port from the dropdown list box.
Mirrored
Port
Select a port from the drop-down list box to mirror the traffic on a port.
Direction
Select the traffic direction from the drop-down list box. Choices are Ingress (incoming) or
Egress (outgoing).
Ingress
You can specify to copy all incoming traffic or traffic to/from a specified MAC address.
Select All to copy all incoming traffic from the mirrored port(s).
Select Destination MAC to copy incoming traffic to a specified MAC address on the
mirrored port(s). Enter the destination MAC address in the fields provided.
Select Source MAC to copy incoming traffic from a specified MAC address on the
mirrored port(s). Enter the source MAC address in the fields provided.
Egress
You can specify to copy all outgoing traffic or traffic to/from a specified MAC address.
Select All to copy all outgoing traffic from the mirrored port(s).
Select Destination MAC to copy outgoing traffic to a specified MAC address on the
mirrored port(s). Enter the destination MAC address in the fields provided.
Select Source MAC to copy outgoing traffic from a specified MAC address on the
mirrored port(s). Enter the source MAC address in the fields provided.
Apply
Click Apply to save the changes.
NetAtlas Workgroup User’s Guide
CHAPTER
15
VLAN
This chapter describes how to view VLAN status, add and edit VLANs and how to use the
VLAN template. The type of screen you see here depends on the VLAN Type you selected in
the Switch Setup screen.
15.1 Introduction to VLANs
A VLAN (Virtual Local Area Network) allows a physical network to be partitioned into
multiple logical networks. Devices on a logical network belong to one group. A device can
belong to more than one group. With VLAN, a device cannot directly talk to or hear from
devices that are not in the same group(s); the traffic must first go through a router.
In MTU (Multi-Tenant Unit) applications, VLAN is vital in providing isolation and security
among the subscribers. When properly configured, VLAN prevents one subscriber from
accessing the network resources of another on the same LAN, thus a user will not see the
printers and hard disks of another user in the same building.
VLAN also increases network performance by limiting broadcasts to a smaller and more
manageable logical broadcast domain. In traditional switched environments, all broadcast
packets go to each and every individual port. With VLAN, all broadcasts are confined to a
specific broadcast domain.
Note that VLAN is unidirectional; it only governs outgoing traffic.
15.2 Configuring 802.1Q VLAN
Follow the steps below to set the 802.1Q VLAN Type on the switch.
1 In the Device Panel list, select a device and then right-click.
2 Click Configuration > Switch Configuration > Switch Setup.
3 Select 802.1Q as the VLAN Type and then click Apply.
Figure 110 Selecting a VLAN Type
4 Click Configuration > VLAN Configuration to display the configuration screen.
NetAtlas Workgroup User’s Guide
157
Chapter 15 VLAN
Figure 111 VLAN Configuration: 802.1Q
The following table describes the labels in this screen.
Table 76 VLAN Configuration: 802.1Q
158
LABEL
DESCRIPTION
Device Name
This field displays the descriptive name for the device.
Device IP
This field displays the IP address of the device.
VLAN ID
This field displays the ID of the VLAN.
Name
This field displays the name of the VLAN.
Status
This field displays Active if the VLAN is active and will remain so after the next reset
of the device. This field is DynamicGVRP if the VLAN is active and will remain so
until removed by GVRP. This field is Other if the VLAN is active, but is not
permanent or created by GVRP.
Start VID
Enter the first VID in the range of VLAN IDs you want to display.
End VID
Enter the last VID in the range of VLAN IDs you want to display.
Numbers of
VLAN(s) per
page (Max 100)
Enter the number of VLAN IDs (between 1 and 100) you want to display at a time.
Refresh
Click Refresh to update the VID list.
New
Click New to create a new VLAN. You must enter a VLAN ID and a VLAN Name to
create a new VLAN. The new VLAN and name is displayed in the left-hand column
in this screen.
Delete
Click on a VLAN in the left-hand column of this screen and then click the Delete
button to remove it from the VLAN template.
NetAtlas Workgroup User’s Guide
Chapter 15 VLAN
Table 76 VLAN Configuration: 802.1Q (continued)
LABEL
DESCRIPTION
Modify
Click on a VLAN in the left-hand column of this screen. Change the VLAN ID, VLAN
Name or change the configuration of the egress, forbidden and untagged ports.
Click the Modify button to save the changes.
Load Template
Use a VLAN template to overwrite existing selected VLANs. Select one or more
VLANs and click the Load Template button. See Section 6.2 on page 77 for more
information.
Port List
Click on a port in the Egress Ports list to add the selected port to the port list. If a
port is not selected from any of the three port lists, then it is a normal tagged port.
Refer to Table 77 on page 159 for the VLAN port type descriptions.
Close
Click Close to close the screen.
15.2.1 Configuring an 802.11Q VLAN
Ports are assigned membership in a VLAN by associating a VLAN ID with the ports.
In the VLAN Configuration screen, click New or Modify to display the setup screen.
Figure 112 VLAN Configuration: 802.1Q: New or Modify
The following table describes the labels in this screen.
Table 77 VLAN Configuration: 802.1Q: Modify
LABEL
DESCRIPTION
VLAN Identity
Active
Select Active to enable this VLAN.
VLAN ID
This field displays a unique number to identify the VLAN.
NetAtlas Workgroup User’s Guide
159
Chapter 15 VLAN
Table 77 VLAN Configuration: 802.1Q: Modify (continued)
"
LABEL
DESCRIPTION
VLAN Name
Enter a descriptive name for identification purposes.
Static VLAN
Click on a port in a list to add the selected port to the port list. If a port is not on
any of the three port lists, then it is a normal tagged port. Refer to the following
table for the VLAN port type descriptions.
Egress Ports
Select the port(s) to belong to this VLAN.
Forbidden Ports
This is a port that is blocked from joining a VLAN group. No frames are
transmitted through this port.
Untag Port
This is a port that does not tag all outgoing frames transmitted.
VLAN Status
Preview
Click on a port in the Egress Ports list to add the selected port to the VLAN
Status Preview list. If a port is not selected from any of the three port lists, then
it is a normal tagged port. Refer to Table 78 on page 160 for the VLAN port type
descriptions.
OK
Click OK to save the changes and close this screen.
Cancel
Click Cancel to close this screen. All unsaved changes will be lost.
A forbidden port cannot be an egress port.
The following table describes the labels in this screen for each VLAN port type.
Table 78 VLAN Port Type Descriptions
LABEL
DESCRIPTION
Egress Ports
A port that is in the egress list in a VLAN. Only select this if the connected
device supports IEEE 802.1Q VLAN.
Forbidden Ports
A port that is blocked from joining a VLAN group. No frames are transmitted
through this port.
Untag Ports
A port that does not tag all outgoing frames transmitted.
Normal Tagged Port
A port that joins a VLAN group using GVRP. Outgoing frames are tagged on
this port.
15.2.2 Removing a VLAN
In the VLAN Configuration screen, select a VLAN and click Delete.
15.3 Introduction to Port-based VLANs
Port-based VLANs are VLANs where the packet forwarding decision is based on the
destination MAC address and its associated port.
Port-based VLANs require allowed outgoing ports to be defined for each port. Therefore, if
you wish to allow two subscriber ports to talk to each other, for example, between conference
rooms in a hotel, you must define the egress (an egress port is an outgoing port, that is, a port
through which a data packet leaves) for both ports.
160
NetAtlas Workgroup User’s Guide
Chapter 15 VLAN
Port-based VLANs are specific only to the switch on which they were created.
The port-based VLAN setup screen is shown next. The CPU management port forms a VLAN
with all Ethernet ports.
15.3.1 Configuring Port Based VLAN
Follow the steps below to set the Port Based VLAN Type on the switch.
1
2
3
4
In the Device Panel list, select a device and then right-click.
Click Configuration > Switch Configuration > Switch Setup.
Select Port Based as the VLAN Type and then click Apply.
Select a device, right-click and click Configuration > VLAN Configuration to display
the screen as shown next.
Figure 113 VLAN Configuration: Port Based
NetAtlas Workgroup User’s Guide
161
Chapter 15 VLAN
The following table describes the labels in this screen.
Table 79 VLAN Configuration: Port Based
LABEL
DESCRIPTION
Timeout
(seconds)
The text box displays how long (in seconds) an SNMP request times out. You may
change the timeout by typing a new number in the text box and then clicking the
Apply button.
Setting Wizard Choose from All connected or Port isolation.
All connected means all ports can communicate with each other, that is, there are no
virtual LANs. All incoming and outgoing ports are selected. This option is the most
flexible but also the least secure.
Port isolation means that each port can only communicate with the CPU
management port and cannot communicate with each other. All incoming ports are
selected while only the CPU outgoing port is selected. This option is the most limiting
but also the most secure.
After you make your selection, click Apply to display the screens as mentioned
above. You can still customize these settings by adding/deleting incoming or outgoing
ports, but you must also click Apply at the bottom of the screen.
162
Incoming
These are the ingress ports; an ingress port is an incoming port, that is, a port through
which a data packet enters. If you wish to allow two subscriber ports to talk to each
other, you must define the ingress port for both ports. The numbers in the top row
denote the incoming port for the corresponding port listed on the left (its outgoing
port). CPU refers to the switch management port. By default it forms a VLAN with all
Ethernet ports. If it does not form a VLAN with a particular port then the switch cannot
be managed from that port.
Outgoing
These are the egress ports; an egress port is an outgoing port, that is, a port through
which a data packet leaves. If you wish to allow two subscriber ports to talk to each
other, you must define the egress port for both ports. CPU refers to the switch
management port. By default it forms a VLAN with all Ethernet ports. If it does not
form a VLAN with a particular port then the switch cannot be managed from that port.
Apply
Click Apply to save the changes, including the “wizard settings”.
Cancel
Click Cancel to start configuring the screen again.
NetAtlas Workgroup User’s Guide
CHAPTER
16
Ethernet Port Configuration
This chapter shows how to configure the Ethernet port settings.
16.1 Overview
Use the Ethernet Port Configuration screens to set port-related settings (such as port VLAN,
STP and security, etc.).
Once you configure a feature on a port, you must enable that feature on the switch in the
Switch Setup screen.
16.2 Port Setup
Use the Port Setup screen to activate and configure switch port settings.
To open this screen, right-click on the switch in the Device List Panel, and click
Configuration > Ethernet Port > Port Setup. Then select a device and the port(s) to which
you want to apply this configuration.
Figure 114 Ethernet Port Configuration: Port Setup
NetAtlas Workgroup User’s Guide
163
Chapter 16 Ethernet Port Configuration
The following table describes the fields in this screen.
Table 80 Ethernet Port Configuration: Port Setup
LABEL
DESCRIPTION
Active
Select this check box to enable a port. The factory default for all ports is enabled. A
port must be enabled for data transmission to occur.
Type
This field displays the port type and port speed.
Port Name
Enter a descriptive name for identification purposes.
Speed/
Duplex
Select the speed and the duplex mode of the Ethernet connection on this port. Choices
are Auto, 10M/Half Duplex, 10M/Full Duplex, 100M/Half Duplex, 100M/Full Duplex
and 1000M/Full Duplex (for Gigabit/mini-GBIC ports only).
Selecting Auto (auto-negotiation) makes one Ethernet port able to negotiate with a
peer automatically to obtain the connection speed and duplex mode that both ends
support. When auto-negotiation is turned on, an Ethernet port on the switch negotiates
with the peer automatically to determine the connection speed and duplex mode. If the
peer Ethernet port does not support auto-negotiation or turns off this feature, the
switch determines the connection speed by detecting the signal on the cable and using
half duplex mode. When the switch’s auto-negotiation is turned off, an Ethernet port
uses the pre-configured speed and duplex mode when making a connection, thus
requiring you to make sure that the settings of the peer Ethernet port are the same in
order to connect.
Flow Control
A concentration of traffic on a port decreases port bandwidth and overflows buffer
memory causing packet discards and frame losses. Flow Control is used to regulate
transmission of signals to match the bandwidth of the receiving port. The switch uses
IEEE 802.3x flow control in full duplex mode and backpressure flow control in half
duplex mode.
IEEE 802.3x flow control is used in full duplex mode to send a pause signal to the
sending port, causing it to temporarily stop sending signals when the receiving port
memory buffers fill. Back Pressure flow control is typically used in half duplex mode to
send a "collision" signal to the sending port (mimicking a state of packet collision)
causing the sending port to temporarily stop sending signals and resend later. Select
Flow Control to enable it.
802.1p
Priority
The switch uses this priority value for incoming frames without an IEEE 802.1p priority
queue tag. The switch uses this priority value internally and does not add an IEEE
802.1p priority tag.
Intrusion Lock Select the Intrusion Lock check box to enable this security feature on a selected port
on the switch. If an Ethernet cable is disconnected from the port, intrusion locking
prevents access once a cable is reconnected. This limits risk from unauthorized
access such as hacking.
Note: You cannot access a port with intrusion locking enabled after a
cable is disconnected and then reconnected. You must clear
and re-select the Intrusion Lock check box to allow access to
the port again.
BPDU
Control
164
Configure the way to treat BPDUs received on this port. You must activate bridging
control protocol transparency in the Switch Setup screen first.
Select Peer to process any BPDU (Bridge Protocol Data Units) received on this port.
Select Tunnel to forward BPDUs received on this port.
Select Discard to drop any BPDU received on this port.
Select Network to process a BPDU with no VLAN tag and forward a tagged BPDU.
NetAtlas Workgroup User’s Guide
Chapter 16 Ethernet Port Configuration
Table 80 Ethernet Port Configuration: Port Setup (continued)
LABEL
DESCRIPTION
Jumbo Frame Jumbo frames are used to forward non-standard packet sizes on your network. These
frames can deliver frames of up to 9216 bytes instead of standard Ethernet frames of
1522 bytes. Fewer packets are required for large data transfer, improving traffic
throughput on the port.
Select this option to allow a port to send and receive jumbo frames.
Note: The peer device must also support non-standard packet traffic.
PD
A powered device (PD) is a device such as an access point or a switch, that supports
PoE (Power over Ethernet) so that it can receive power from another device through a
10/100Mbps Ethernet port.
Select the check box to allow a powered device (connected to the port) to receive
power from the switch.
Apply
Click Apply to save your changes.
16.3 Port VLAN
To open the Port VLAN screen, right-click on the switch in the Device List Panel, and click
Configuration > Ethernet Port > Port VLAN. Then select a device and the port(s) to which
you want to apply this configuration.
Figure 115 Ethernet Port Configuration: Port VLAN
NetAtlas Workgroup User’s Guide
165
Chapter 16 Ethernet Port Configuration
The following table describes the labels in this screen.
Table 81 Ethernet Port Configuration: Port VLAN
LABEL
DESCRIPTION
Ingress
This feature is not supported on all models.
If this check box is selected for a port, the device discards incoming frames for VLANs
that do not include this port in its member set.
PVID
Each port on the switch is capable of passing tagged or untagged frames. To forward a
frame from an IEEE 802.1Q VLAN-unaware switch to an IEEE 802.1Q VLAN-aware
switch, the switch first decides where to forward the frame, and then inserts a VLAN tag
reflecting the default ingress port's VLAN ID, the PVID. The default PVID is VLAN 1 for
all ports, but this can be changed to any number between 1 and 4094.
GVRP
Select the check box to permit VLAN groups beyond the local switch on this port. GVRP
(GARP VLAN Registration Protocol) is a registration protocol that defines a way for
switches to register necessary VLAN members on ports across the network.
Acceptable
Frame Type
Specify the type of frames allowed on a port. Choices are All and Tag Only. Select All
to accept all frames with untagged or tagged frames on this port. This is the default
setting. Select Tag Only to accept only tagged frames on this port. All untagged frames
are dropped.
VLAN
Trunking
Enable VLAN trunking on ports connected to other switches or routers (but not ports
directly connected to end users) to allow frames belonging to unknown VLAN groups to
pass through the switch.
Apply
Click Apply to save the changes.
16.4 Port Link Aggregation
Use the Port Link Aggregation screen to configure a port trunk group and set LACP timeout.
To open the configuration screen, right-click on the switch in the Device List Panel, and click
Configuration > Ethernet Port > Port Link Aggregation. Then select a device and the
port(s) to which you want to apply this configuration.
Figure 116 Ethernet Port Configuration: Port Link Aggregation
166
NetAtlas Workgroup User’s Guide
Chapter 16 Ethernet Port Configuration
The following table describes the fields in this screen.
Table 82 Ethernet Port Configuring: Port Link Aggregation
LABEL
DESCRIPTION
Group
Select the trunk group to which a port belongs.
LACP
Timeout
Timeout is the time interval between the individual port exchanges of LACP packets in
order to check that the peer port in the trunk group is still up. If a port does not
respond after three tries, then it is deemed to be “down” and is removed from the
trunk. Set a short timeout (one second) for busy trunked links to ensure that disabled
ports are removed from the trunk group as soon as possible. Select from 1 second to
30 seconds.
Apply
Click Apply to save the changes.
16.5 Port STP
Use the Port STP screen to set multiple/Rapid STP for the selected port(s).
To open the configuration screen, right-click on the switch in the Device List Panel, and click
Configuration > Ethernet Port > Port STP. Then select a device and the port(s) to which
you want to apply this configuration.
Figure 117 Ethernet Port Configuration: Port STP
The following table describes the fields in this screen.
Table 83 Ethernet Port Configuration: Port STP
LABEL
DESCRIPTION
RSTP
Select this check box to activate Rapid STP (RSTP) on this port.
MRSTP
Select this check box to activate Multiple Rapid STP (MRSTP) on this port.
RSTP
NetAtlas Workgroup User’s Guide
167
Chapter 16 Ethernet Port Configuration
Table 83 Ethernet Port Configuration: Port STP (continued)
LABEL
DESCRIPTION
Priority
Priority is used in determining the root device, root port and designated port. The device
with the highest priority (lowest numeric value) becomes the STP root device. If all
devices have the same priority, the device with the lowest MAC address will then
become the root device. The allowed range is 0 to 255. The lower the numeric value you
assign, the higher the priority for this device.
Path Cost
Path cost is the cost of transmitting a frame on to a LAN through that port. It is assigned
according to the speed of the link. The slower the media, the higher the cost (refer to the
table on path cost in the section on STP).
MRSTP
Priority
Priority is used in determining the root device, root port and designated port. The device
with the highest priority (lowest numeric value) becomes the STP root device. If all
devices have the same priority, the device with the lowest MAC address will then
become the root device. The allowed range is 0 to 255. The lower the numeric value you
assign, the higher the priority for this device.
Path Cost
Path cost is the cost of transmitting a frame on to a LAN through that port. It is assigned
according to the speed of the link. The slower the media, the higher the cost (refer to the
table on path cost in the section on STP).
Tree
Select the index number of the spanning tree to which this port belongs.
Apply
Click Apply to save the changes.
16.6 Port 802.1x
Use the Port 802.1x screen to configure reauthentication for selected ports.
To open the configuration screen, right-click on the switch in the Device List Panel, and click
Configuration > Ethernet Port > Port 802.1x. Then select a device and the port(s) to which
you want to apply this configuration.
Figure 118 Ethernet Port Configuration: Port 802.1x
168
NetAtlas Workgroup User’s Guide
Chapter 16 Ethernet Port Configuration
The following table describes the fields in this screen.
Table 84 Ethernet Port Configuration: Port 802.1x
LABEL
DESCRIPTION
802.1x Active
Select this check box to permit IEEE 802.1x authentication on this port. You
must first allow IEEE 802.1x authentication on the switch before configuring
it on each port.
Reauthentication
Select On from the drop-down list box to periodically prompt a subscriber to
re-enter his or her username and password to stay connected to the port.
Reauthentication Timer
Specify how often a client has to re-enter his or her username and password
to stay connected to the port.
Apply
Click Apply to save the changes.
16.7 Port Mirroring
Port mirroring allows you to copy traffic going from one or all ports to another or all ports in
order that you can examine the traffic from the mirror port (the port you copy the traffic to)
without interference.
You must first select a monitor port. A monitor port is a port that copies the traffic of another
port. After you select a monitor port, configure a mirroring rule in the related fields.
To open the Port Mirroring screen, right-click on the switch in the Device List Panel, and
click Configuration > Ethernet Port > Port Mirroring. Then select a device and the port(s)
to which you want to apply this configuration.
Figure 119 Ethernet Port Configuration: Port Mirroring
NetAtlas Workgroup User’s Guide
169
Chapter 16 Ethernet Port Configuration
The following table describes the fields in this screen.
Table 85 Ethernet Port Configuration: Port Mirroring
LABEL
DESCRIPTION
Mirrored
Select this option to mirror the traffic on a port.
Direction
Specify the direction of the traffic to mirror. Select Egress (outgoing), Ingress (incoming)
or Both from the drop-down list box.
Apply
Click Apply to save the changes.
16.8 VLAN Stacking
A service provider can use VLAN stacking to allow it to distinguish multiple customers
VLANs, even those with the same (customer-assigned) VLAN ID, within its network.
Use VLAN stacking to add an outer VLAN tag to the inner IEEE 802.1Q tagged frames that
enter the network. By tagging the tagged frames ("double-tagged" frames), the service
provider can manage up to 4,094 VLAN groups with each group containing up to 4,094
customer VLANs. This allows a service provider to provide different service, based on
specific VLANs, for many different customers.
A service provider's customers may require a range of VLANs to handle multiple applications.
A service provider's customers can assign their own inner VLAN tags on ports for these
applications. The service provider can assign an outer VLAN tag for each customer.
Therefore, there is no VLAN tag overlap among customers, so traffic from different customers
is kept separate.
To open the VLAN Stacking screen, right-click on the switch in the Device List Panel, and
click Configuration > Ethernet Port > VLAN Stacking. Then select a device and the port(s)
to which you want to apply this configuration.
Figure 120 Ethernet Port Configuration: VLAN Stacking
170
NetAtlas Workgroup User’s Guide
Chapter 16 Ethernet Port Configuration
The following table describes the fields in this screen.
Table 86 Ethernet Port Configuration: VLAN Stacking
LABEL
DESCRIPTION
Role
Select Normal to have the switch ignore frames received (or transmitted) on this port with
VLAN stacking tags. Anything you configure in SPVID and Priority is ignored.
Select Access Port to have the switch add the SP TPID tag to all incoming frames
received on this port. Select Access Port for ingress ports at the edge of the service
provider's network.
Select Tunnel Port (available for Gigabit ports only) for egress ports at the edge of the
service provider's network. In order to support VLAN stacking on a port, the port must be
able to allow frames of 1526 Bytes (1522 Bytes + 4 Bytes for the second tag) to pass
through it.
SPVID
SPVID is the service provider's VLAN ID (the outer VLAN tag). Enter the service provider
ID (from 1 to 4094) for frames received on this port. See the chapter on VLANs for more
background information on VLAN ID.
Priority
Select the priority level of the inner IEEE 802.1Q tag.
"0" is the lowest priority level and "7" is the highest.
Apply
Click Apply to save the changes.
16.9 Queue Method
Queuing is used to help solve performance degradation when there is network congestion.
Depending on your device model, use the Switch Setup screen to configure queuing
algorithms for outgoing traffic (refer to Section 14.1 on page 143).
To open the configuration screen, right-click on the switch in the Device List Panel, and click
Configuration > Ethernet Port > Queue Method. Then select a device and the port(s) to
which you want to apply this configuration.
Figure 121 Ethernet Port Configuration: Queue Method
NetAtlas Workgroup User’s Guide
171
Chapter 16 Ethernet Port Configuration
The following table describes the fields in this screen.
Table 87 Ethernet Port Configuration: Queue Method
LABEL
DESCRIPTION
Q0 - Q7
For Weighted Fair Scheduling, select the queue weight here. Bandwidth is
divided across the different traffic queues according to their weights. Queues with
larger weights get more guaranteed bandwidth than queues with smaller weights.
For Gigabit/ Mini-GBIC ports, if you select 0 for the queue weight, the switch uses
Strictly Priority to service the queue.
GE Port SPQ
Enable
SPQ
Select SPQ (Strict Priority Queuing) to service queues based on priority only.
When the highest priority queue empties, traffic on the next highest-priority queue
begins. The default queuing method is Strictly Priority.
Weighted Fair Scheduling is used to guarantee each queue's minimum
bandwidth based on their bandwidth portion (weight) (the number you configure
in the Weight field). Queues with larger weights get more guaranteed bandwidth
than queues with smaller weights.
WRR
Select WRR (Weighted Round Robin Scheduling) to service queues on a rotating
basis based on their queue weight (the number you select from the drop-down list
box for the corresponding queue). Queues with larger weights get more service
than queues with smaller weights.
Apply
Click Apply to save the changes.
16.10 Protocol VLAN
Protocol based VLANs allow you to group traffic into logical VLANs based on the protocol
you specify. When an upstream frame is received on a port (configured for a protocol based
VLAN), the switch checks if a tag is added already and its protocol. The untagged packets of
the same protocol are then placed in the same protocol based VLAN. One advantage of using
protocol based VLANs is that priority can be assigned to traffic of the same protocol.
Note: Protocol based VLAN applies to un-tagged packets and is applicable only when
you use IEEE 802.1Q tagged VLAN.
To open the Protocol VLAN screen, right-click on the switch in the Device List Panel, and
click Configuration > Ethernet Port > Protocol VLAN. Then select a device and the port(s)
to which you want to apply this configuration.
172
NetAtlas Workgroup User’s Guide
Chapter 16 Ethernet Port Configuration
Figure 122 Ethernet Port Configuration: Protocol VLAN
The following table describes the fields in this screen.
Table 88 Ethernet Port Configuration: Protocol VLAN
TABLE
DESCRIPTION
Index
This is the index number identifying this protocol based VLAN.
Active
This field shows whether the protocol based VLAN is active or not.
Port
This field shows which port belongs to this protocol based VLAN.
Name
This field shows the name the protocol based VLAN.
Ethernet Type
This field shows which Ethernet protocol is part of this protocol based VLAN.
VID
This field shows the VLAN ID of the port.
Priority
This field shows the priority which is assigned to frames belonging to this protocol
based VLAN.
Add
Click Add to create a new protocol VLAN entry.
Modify
Click Modify to change the settings of a selected protocol VLAN.
Delete
Click Delete to remove the selected protocol based VLANs.
16.10.1 Configuring a Protocol VLAN
To create a new protocol VLAN, click Add in the Protocol VLAN screen. Click Modify to
change the settings of the selected entry. The Protocol VLAN Add or Protocol VLAN
Modify screen displays.
NetAtlas Workgroup User’s Guide
173
Chapter 16 Ethernet Port Configuration
Figure 123 Ethernet Port Configuration: Protocol VLAN Add
The following table describes the fields in this screen.
Table 89 Ethernet Port Configuration: Protocol VLAN
TABLE
DESCRIPTION
Active
Check this box to activate this protocol based VLAN.
Port
This read-only field displays the port number to which this protocol VLAN setting is
applied.
Name
Enter up to 32 alphanumeric characters to identify this protocol based VLAN.
Ethernet-type
Use the drop down list box to select a predefined protocol to be included in this
protocol based VLAN or select Others and type the protocol number in
hexadecimal notation. For example the IP protocol in hexadecimal notation is
0800, and Novell IPX protocol is 8137.
Note: Protocols in the hexadecimal number range of 0x0000 to
0x05ff are not allowed to be used for protocol based VLANs.
VID
Enter the ID of a VLAN to which the port belongs. This must be an existing VLAN
which you defined in the Advanced Applications, VLAN screens.
Priority
Select the priority level that the switch will assign to frames belonging to this VLAN.
OK
Click OK to save the settings and close this screen.
Close
Click Close to discard all changes and close this screen.
16.11 Port Security
Port security allows only packets with dynamically learned MAC addresses and/or configured
static MAC addresses to pass through a port on the switch.
For maximum port security, enable this feature, disable MAC address learning and configure
static MAC address(es) for a port. It is not recommended you disable Port Security together
with MAC address learning as this will result in many broadcasts. By default, MAC address
learning is still enabled even though the port security is not activated.
To open the Port Security screen, right-click on the switch in the Device List Panel, and click
Configuration > Ethernet Port > Port Security. Then select a device and the port(s) to
which you want to apply this configuration.
174
NetAtlas Workgroup User’s Guide
Chapter 16 Ethernet Port Configuration
Figure 124 Ethernet Port Configuration: Port Security
The following table describes the fields in this screen.
Table 90 Ethernet Port Configuration: Port Security
TABLE
DESCRIPTION
Active
Select this check box to enable the port security feature on selected ports.
Address Learning MAC address learning reduces outgoing broadcast traffic. For MAC address
learning to occur on a port, the port itself must be active with address learning
enabled. Select the Address Learning check box.
Limited Number
of Learned MAC
Address
Use this field to limit the number of (dynamic) MAC addresses that may be learned
on a port. For example, if you set this field to "5" on port 2, then only the devices
with these five learned MAC addresses may access port 2 at any one time. A sixth
device would have to wait until one of the five learned MAC addresses aged out.
MAC-address aging out time can be set in the Switch Setup screen. The valid
range is from 0 to 16K. 0 means this feature is disabled, so the switch will learn
MAC addresses up to the global limit of 16K.
MAC Freeze
Click MAC Freeze to convert all current dynamic MAC addresses to static MAC
addresses. When you click the MAC Freeze button, the MAC Address Learning
check box is cleared but port security becomes Active.
Apply
Click Apply to save the changes.
16.12 Bandwidth Control
Bandwidth control means defining a maximum allowable bandwidth for incoming and/or outgoing traffic flows on a port.
To open the configuration screen, right-click on the switch in the Device List Panel, and click
Configuration > Ethernet Port > Bandwidth Ctrl.. Then select a device and the port(s) to
which you want to apply this configuration.
NetAtlas Workgroup User’s Guide
175
Chapter 16 Ethernet Port Configuration
Figure 125 Ethernet Port Configuration: Bandwidth Ctrl.
The following table describes the labels in this screen.
Table 91 Ethernet Port Configuration: Bandwidth Ctrl.
LABEL
DESCRIPTION
Enable
Select this check box to enable ingress and/or egress bandwidth control.
You may temporarily deactivate a rule without deleting it by clearing this check box.
Ingress Rate
Type the maximum bandwidth allowed in kilobits per second (Kbps) for traffic coming
into this port.
Commit Rate Specify the guaranteed bandwidth allowed in kilobits per second (Kbps) for the
incoming traffic flow on a port. The commit rate should be less than the peak rate. The
sum of commit rates cannot be greater than or equal to the uplink bandwidth.
Peak Rate
Specify the maximum bandwidth allowed in kilobits per second (Kbps) for the incoming
traffic flow on a port.
Egress Rate
Type the maximum bandwidth allowed in kilobits per second (Kbps) for traffic going out
of this port.
Apply
Click Apply to save the changes.
16.13 Broadcast Storm Control
Broadcast storm control limits the number of broadcast, multicast and destination lookup
failure (DLF) packets the switch receives per second on the ports. When the maximum number
of allowable broadcast, multicast and/or DLF packets is reached per second, the subsequent
packets are discarded. Enable this feature to reduce broadcast, multicast and/or DLF packets in
your network.
To open the configuration screen, right-click on the switch in the Device List Panel, and click
Configuration > Ethernet Port > Broadcast Storm Ctrl.. Then select a device and the
port(s) to which you want to apply this configuration.
176
NetAtlas Workgroup User’s Guide
Chapter 16 Ethernet Port Configuration
Figure 126 Ethernet Port Configuration: Broadcast Storm Ctrl.
The following table describes the labels in this screen.
Table 92 Ethernet Port Configuration: Broadcast Storm Ctrl.
LABEL
DESCRIPTION
Broadcast
Select this option and specify how many broadcast packets the port receives per
second.
Multicast
Select this option and specify how many multicast packets the port receives per second.
DLF
Select this option and specify how many destination lookup failure (DLF) packets the
port receives per second.
Apply
Click Apply to save the changes.
16.14 DiffServ
DiffServ is a class of service (CoS) model that marks packets so that they receive specific perhop treatment at DiffServ-compliant network devices along the route based on the application
types and traffic flow. Packets are marked with DiffServ Code Points (DSCPs) indicating the
level of service desired. This allows the intermediary DiffServ-compliant network devices to
handle the packets differently depending on the code points without the need to negotiate
paths or remember state information for every flow. In addition, applications do not have to
request a particular service or give advanced notice of where the traffic is going.
Enable DiffServ in the DiffServ screen.
1 In the Device Panel list, select a device and then right-click.
2 Click Configuration > Ethernet Port Configuration > DiffServ.
3 Select Active to enable the DSCP-to-IEEE 802.1q mapping. Set the mapping in the IP
Configuration: DSCP screen (refer to Section 19.2 on page 201).
4 Click Apply to save the changes.
NetAtlas Workgroup User’s Guide
177
Chapter 16 Ethernet Port Configuration
Figure 127 Ethernet Port Configuration: DiffServ
178
NetAtlas Workgroup User’s Guide
CHAPTER
17
Multicast Configuration
This chapter shows you how to configure multicast settings and MVR (Multicast VLAN
Registration) groups.
17.1 Overview
Traditionally, IP packets are transmitted in one of either two ways - Unicast (1 sender to 1
recipient) or Broadcast (1 sender to everybody on the network). Multicast delivers IP packets
to just a group of hosts on the network.
IGMP (Internet Group Multicast Protocol) is a session-layer protocol used to establish
membership in a multicast group - it is not used to carry user data. Refer to RFC 1112 and
RFC 2236 for information on IGMP versions 1 and 2 respectively.
17.1.1 IP Multicast Addresses
In IPv4, a multicast address allows a device to send packets to a specific group of hosts
(multicast group) in a different subnetwork. A multicast IP address represents a traffic
receiving group, not individual receiving devices. IP addresses in the Class D range (224.0.0.0
to 239.255.255.255) are used for IP multicasting. Certain IP multicast numbers are reserved by
IANA for special purposes (see the IANA web site for more information).
17.1.2 IGMP Snooping
A switch can passively snoop on IGMP Query, Report and Leave (IGMP version 2) packets
transferred between IP multicast routers/switches and IP multicast hosts to learn the IP
multicast group membership. It checks IGMP packets passing through it, picks out the group
registration information, and configures multicasting accordingly. IGMP snooping allows the
switch to learn multicast groups without you having to manually configure them.
The switch forwards multicast traffic destined for multicast groups (that it has learned from
IGMP snooping or that you have manually configured) to ports that are members of that
group. IGMP snooping generates no additional network traffic, allowing you to significantly
reduce multicast traffic passing through your switch.
For background information on IGMP filtering, refer to Section 6.3 on page 79.
NetAtlas Workgroup User’s Guide
179
Chapter 17 Multicast Configuration
17.2 Multicast Settings
To configure multicast settings, click Configuration > Multicast Configuration to display
the configuration screen.
"
For devices that do not support the multicast feature, this screen only allows
you to configure the IGMP Snooping option.
Figure 128 Multicast Configuration: Multicast Settings
The following table describes the labels in this screen.
Table 93 Multicast Configuration: Multicast Settings
180
LABEL
DESCRIPTION
IGMP Snooping
Select Active to enable IGMP snooping to forward group multicast traffic only to
ports that are members of that group.
Host Timeout
Specify the time (from 1 to 16,711,450) in seconds that elapses before the switch
removes an IGMP group membership entry if it does not receive report messages
from the port.
Leave Timeout
Enter an IGMP leave timeout value (from 1 to 16,711,450) in seconds. This
defines how many seconds the switch waits for an IGMP report before removing
an IGMP snooping membership entry when an IGMP leave message is received
from a host.
802.1p Priority
Select a priority level (0-7) to which the switch changes the priority in outgoing
IGMP control packets. Otherwise, select No-Change to not replace the priority.
IGMP Filtering
Select Active to enable IGMP filtering to control which IGMP groups a subscriber
on a port can join.
NetAtlas Workgroup User’s Guide
Chapter 17 Multicast Configuration
Table 93 Multicast Configuration: Multicast Settings (continued)
LABEL
DESCRIPTION
Unknown
Multicast Frame
Specify the action to perform when the switch receives an unknown multicast
frame. Select Drop to discard the frame(s). Select Flooding to send the frame(s)
to all ports.
Reserved
Multicast Group
Multicast addresses (224.0.0.0 to 224.0.0.255) are reserved for the local scope.
For examples, 224.0.0.1 is for all hosts in this subnet, 224.0.0.2 is for all multicast
routers in this subnet, etc. A router will not forward a packet with the destination IP
address within this range. See the IANA web site for more information.
Specify the action to perform when the switch receives a frame with a reserved
multicast address. Select Drop to discard the frame(s). Select Flooding to send
the frame(s) to all ports.
Apply
Click Apply to save the settings in this part of the screen.
Port
This field displays the port number.
Immed. Leave/
Group Limited
This field displays whether the switch is set to remove this port from the multicast
tree when an IGMP version 2 leave message is received on this port.
This field also displays whether the port is set to join a limited number of groups.
Max Group Num.
This field displays number of multicast groups this port is allowed to join. Once a
port is registered in the specified number of multicast groups, any new IGMP join
report frame(s) is dropped on this port.
IGMP Filtering
Profile
This field displays the name of the IGMP filtering profile this port uses.
The default profile (Default) prohibits the port from joining any multicast group.
IGMP Querier
Mode
This field displays the IGMP querier mode on the port.
Modify
Click Modify to change the multicast settings of the selected port.
Load Template
Click Load Template to display a screen you use to select a multicast template.
View Profile
Click View Profile to display the settings of a selected multicast template.
17.2.1 Configuring Port Multicast Settings
To change the multicast settings of a port, select a port in the Multicast Setting screen and
click Modify. A configuration screen displays.
Figure 129 Multicast Configuration: Multicast Settings: Modify
NetAtlas Workgroup User’s Guide
181
Chapter 17 Multicast Configuration
The following table describes the labels in this screen.
Table 94 Multicast Configuration: Multicast Settings: Modify
LABEL
DESCRIPTION
Port
This field displays the port number.
Immed. Leave
Select this option to set the switch to remove this port from the multicast tree when
an IGMP version 2 leave message is received on this port.
Select this option if there is only one host connected to this port.
Group Limited
Select this option to limit the number of multicast groups this port is allowed to join.
Max Group Num.
Enter the number of multicast groups this port is allowed to join. Once a port is
registered in the specified number of multicast groups, any new IGMP join report
frame(s) is dropped on this port.
Enter 0 to allow a port to join any number of multicast groups.
IGMP Filtering
Profile
Select the name of the IGMP filtering profile to use for this port. Otherwise select
Default to prohibit the port from joining any multicast group.
IGMP Querier
Mode
The switch treats an IGMP query port as being connected to an IGMP multicast
router (or server). The switch forwards IGMP join or leave packets to an IGMP
query port.
Select Auto to have the switch use the port as an IGMP query port if the port
receives IGMP query packets.
Select Fixed to have the switch always use the port as an IGMP query port. Select
this when you connect an IGMP multicast server to the port.
Select Edge to stop the switch from using the port as an IGMP query port. The
switch will not keep any record of an IGMP router being connected to this port.
The switch does not forward IGMP join or leave packets to this port.
OK
Click OK to save your changes and close this screen.
Cancel
Click Cancel to discard all changes and close this screen.
17.2.2 Applying a Multicast Template
After you create a multicast template using the Template screen, you can apply the template to
the switch in the Multicast Setting screen.
"
When you apply a multicast template, all custom port multicast settings will be
erased.
In the Multicast Setting screen, select a device in the device list panel and click Load
Template. A screen displays as shown.
182
NetAtlas Workgroup User’s Guide
Chapter 17 Multicast Configuration
Figure 130 Multicast Configuration: Multicast Settings: Load Template
The following table describes the labels in this screen.
Table 95 Multicast Configuration: Multicast Settings: Load Template
LABEL
DESCRIPTION
Device Type
Select a device type from the drop-down list box.
Template
No.
This field displays the index number.
Multicast
Name
This field displays the name of a multicast template you create using the Template
screen.
PortList
This table displays the template settings. Refer to Figure 128 on page 180 for more
information.
Apply
Click Apply to save the settings and close this screen.
Cancel
Click Cancel to discard the changes and close this screen.
17.2.3 Displaying IGMP Filter Profile
You can create IGMP filter templates in the IGMP Filter Template screen (refer to Section
6.3 on page 79) and apply IGMP filter templates in the Multicast Template screen.
In the Multicast Setting screen, select a port number and click View Profile to display IGMP
filter profile settings.
NetAtlas Workgroup User’s Guide
183
Chapter 17 Multicast Configuration
Figure 131 Multicast Configuration: Multicast Settings: View Profile
The following table describes the labels in this screen.
Table 96 Multicast Configuration: Multicast Settings: View Profile
LABEL
DESCRIPTION
Profile Name
Select a profile name from the drop-down list box.
Start Address
This field displays the starting multicast IP address for a range of multicast IP
addresses to which you want this IGMP filter profile to allow access.
End Address
This field displays the ending multicast IP address for a range of IP addresses to which
you want this IGMP filter profile to allow access.
Close
Click Close to close this screen.
17.3 MVR
Multicast VLAN Registration (MVR) is designed for applications (such as Media-on-Demand
(MoD)) that use multicast traffic across a service provider network.
MVR allows one single multicast VLAN to be shared among different subscriber VLANs on
the network. While isolated in different subscriber VLANs, connected devices can subscriber
to and unsubscribe from the multicast stream in the multicast VLAN. This improves
bandwidth utilization with reduced multicast traffic in the subscriber VLANs and simplifies
multicast group management.
You must enable IGMP snooping to use MVR. However, MVR only responds to IGMP join
and leave control messages from multicast groups that are configured under MVR. Join and
leave reports from other multicast groups are managed by IGMP snooping.
184
NetAtlas Workgroup User’s Guide
Chapter 17 Multicast Configuration
17.3.1 Types of MVR Ports
In MVR, a source port is a port on the switch that can send and receive multicast traffic in a
multicast VLAN while a receiver port can only receive multicast traffic. Once configured, the
switch maintains a forwarding table that matches the multicast stream to the associated
multicast group.
17.3.2 MVR Modes
You can set your switch to operate in either dynamic or compatible mode.
In dynamic mode, the switch sends IGMP leave and join reports through the source port(s) to
the other multicast devices (such as multicast routers or servers) in the multicast VLAN. This
allows the multicast devices to update the multicast forwarding table to forward or not forward
multicast traffic to the receiver ports.
In compatible mode, the switch does not send any IGMP reports through the source port(s). In
this case, you must manually configure the forwarding settings on the multicast devices in the
multicast VLAN.
Refer to the user’s guide that comes with your switch for more background information.
17.3.3 Viewing MVR Settings
Click Configuration > Multicast Configuration > MVR to display the screen as shown.
Figure 132 Multicast Configuration: MVR
NetAtlas Workgroup User’s Guide
185
Chapter 17 Multicast Configuration
The following table describes the labels in this screen.
Table 97 Multicast Configuration: MVR
LABEL
DESCRIPTION
MVLAN
This table displays the settings the multicast VLAN settings.
VLAN
This field displays the multicast VLAN ID.
Active
This field displays whether the multicast group is enabled or not.
Name
This field displays the descriptive name for this setting.
Mode
This field displays the MVR mode.
Source
Port
This field displays the source port number(s).
Receiver
Port
This field displays the receiver port number(s).
Tagging
Port
This field displays the port number(s) that adds the VLAN ID tag to all outgoing frames
transmitted.
802.1p
This field displays the priority level.
Add
Click Add to add a new entry.
Modify
Click Modify to change the settings of the selected MVLAN.
Delete
Click Delete to remove the selected MVLAN.
MVR Group
This table displays the MVR group settings.
Name
This field displays the descriptive name for this MVR group.
Start
Address
This field displays the starting IP address of the MVR group.
End
Address
This field displays the ending IP address of the MVR group.
Add
Click Add to add a new entry.
Modify
Click Modify to change the settings of the selected MVR.
Delete
Click Delete to remove the selected MVR.
17.3.4 Creating a New Multicast VLAN
Follow the steps below to create a new multicast VLAN.
1 In the MVR screen, click Add under MVLAN. A screen displays as shown.
186
NetAtlas Workgroup User’s Guide
Chapter 17 Multicast Configuration
Figure 133 Multicast Configuration: MVR: Add MVLAN
2 Select Active to enable this multicast VLAN setting.
3 In the Name field, enter a descriptive name (up to 32 ASCII characters) for
identification purposes.
4 Specify a VLAN ID in the Multicast VLAN ID field. Enter a number between 1 and
4094.
5 In the 802.1p Priority field, select a priority level (0-7) with which the switch replaces
the priority in outgoing IGMP control packets (belonging to this multicast VLAN).
6 In the Mode field, select Dynamic to send IGMP reports to all MVR source ports in the
multicast VLAN. Select Compatible to set the switch not to send IGMP reports.
7 In the Source Port list box, select the MVR source port that sends and receives multicast
traffic.
8 In the Receiver Port list box, select the port(s) that only receives multicast traffic.
9 In the None list box, select the port(s) not to participate in MVR. No MVR multicast
traffic is sent or received on the port(s).
10 In the Tagging list box, select the port(s) to add the VLAN ID tag to all outgoing frames.
11 Click OK to save the settings and close this screen. Otherwise, click Cancel to discard
the settings and close this screen.
12 A screen displays showing the configuration result. Click Done to close the screen.
Figure 134 Multicast Configuration: MVR: Add MVLAN: Result
NetAtlas Workgroup User’s Guide
187
Chapter 17 Multicast Configuration
17.3.5 Creating a New MVR Group
Follow the steps below to create a new MVR group.
1 In the MVR screen, select one entry in the MVLAN list table.
2 Click Add under MVR Group.
Figure 135 Multicast Configuration: MVR: Select MVLAN
3 A screen displays as shown. The Multicast VLAN ID field displays the VLAN ID to
which this MVR group setting applies. In the Name field, enter a descriptive name for
identification purposes.
Figure 136 Multicast Configuration: MVR: Add
4 In the Start Address field, enter the starting IP multicast address of the multicast group
in dotted decimal notation.
5 In the End Address field, enter the ending IP multicast address of the multicast group in
dotted decimal notation.
Enter the same IP address as the Start Address field if you want to configure only one
IP address for a multicast group.
188
NetAtlas Workgroup User’s Guide
Chapter 17 Multicast Configuration
6 Click OK to save the settings and close this screen. Otherwise, click Cancel to discard
the settings and close this screen.
7 A screen displays showing the configuration result. Click Done to close the screen.
Figure 137 Multicast Configuration: MVR: Add MVR Group: Result
NetAtlas Workgroup User’s Guide
189
Chapter 17 Multicast Configuration
190
NetAtlas Workgroup User’s Guide
CHAPTER
18
Configuration
Use this menu item to look at and configure RMON (Remote Network Monitor) on a switch.
18.1 RMON Overview
Similar to SNMP, RMON (Remote Network Monitor) allows you to gather and monitor
network traffic.
Both SNMP and RMON use an agent, known as a probe, which are software processes
running on network devices to collect information about network traffic and store it in a local
MIB (Management Information Base). With SNMP, a network manager has to constantly poll
the agent to obtain MIB information. With RMON, the probe is located on a remote device
(the MSC), so a network manager (the EMS) does not need to constantly poll the probe for
information. The probe communicates with the network manager via SNMP.
RMON groups contain detailed information about specific activities. The following table
describes the four RMON groups that your IES supports.
Table 98 Supported RMON Groups
GROUP
DESCRIPTION
History
Records network traffic information on a specified Ethernet port.
Alarm
Provides alerts when configured alarm conditions are met.
Event
Defines event generation and resulting actions to be taken based on an alarm.
18.2 History Config
Use this screen to view and configure RMON history configuration settings. To open this
screen, right-click on the switch in the Device List Panel, and click Configuration > RMON
Configuration > History Config. Then, select the switch that you want to configure.
NetAtlas Workgroup User’s Guide
191
Chapter 18 Configuration
Figure 138 RMON Configuration: History Config.
The following table describes the labels in this screen.
Table 99 RMON Configuration: History Config.
LABEL
DESCRIPTION
Index
This field displays the configuration index number.
Active
This field displays Yes if the history setting is enabled. Otherwise, it displays No.
Data Source
This is the port of the IP DSLAM that the EMS will poll for data.
Bucket
Requested
This field displays the number of data samplings the network manager requests the
probe to store.
Bucket Granted
This field displays the number of data samplings the probe allows to stores.
Interval (sec)
This field displays the time between data samplings.
Owner
This field displays the application that creates this entry.
New
Click this to add a new history configuration.
Delete
Click this to remove the selected history configuration.
Modify
Click this to change the setting of the selected history configuration.
18.2.1 Configuring an RMON History
To configure a new RMON history, click New in the History Config. screen.
To change the settings of a selected RMON history, click Modify in the History Config.
screen.
192
NetAtlas Workgroup User’s Guide
Chapter 18 Configuration
Figure 139 RMON Configuration: History Config.: New
The following table describes the labels in this screen.
Table 100 RMON Configuration: History Config.: New
LABEL
DESCRIPTION
Active
Select Yes to enable this rule. Select No to disable this rule.
Data Source
Select the port of the switch that the EMS polls for data. The probe sends data from
this port.
Interval
Enter the time (in seconds) between data samplings.
Bucket
Requested
Specify the number of data samplings (between 1 and 100) the network manager
requests the probe to store.
Owner
Enter a descriptive name of the application that creates this entry. You can use 1-31
printable characters. Spaces are allowed.
OK
Click this to save the settings and close this screen.
Cancel
Click this to discard all changes and close the screen.
18.3 Event Config
Use the Event Config screen to configure the actions that a switch takes when an alarm is
triggered. To open this screen, right-click on the switch in the Device List Panel, and click
Configuration > RMON Configuration > Event Config. Then, select the switch that you
want to configure.
NetAtlas Workgroup User’s Guide
193
Chapter 18 Configuration
Figure 140 RMON Configuration: Event Config.
The following table describes the labels in this screen.
Table 101 RMON Configuration: Event Config.
LABEL
DESCRIPTION
Index
This field displays an event index number.
Active
This field display whether an event is enabled (Yes) or not (No).
Type
This field displays the event type (log, snmp-trap or log&trap).
Community
This field displays the community (or password).
Description
This field displays a description of the event.
Owner
Enter a descriptive name of the application that creates this entry.
New
Click this to add a new event configuration.
Delete
Click this to remove the selected event configuration.
Modify
Click this to change the settings of the selected event configuration.
18.3.1 Configuring an RMON Event
To create a new RMON event, click New in the Event Config. screen.
To change the settings of a selected RMON event, click Modify in the Event Config. screen.
194
NetAtlas Workgroup User’s Guide
Chapter 18 Configuration
Figure 141 RMON Configuration: Event Config.: New
The following table describes the labels in this screen.
Table 102 RMON Configuration: Event Config.: New
LABEL
DESCRIPTION
Active
Select Yes to enable this event. Otherwise, select No.
Type
Select an event type. Choices are Log and Trap.
Select Log to generate a log when an associated alarm is generated.
Select Trap to generate a trap when an associated alarm is generated.
Select both Log and Trap to generate a log entry and trap when an associated
alarm is generated.
Community
This field displays the community (or password). You can use 1-31 printable ASCII
characters. Spaces are allowed.
Description
Enter a description of the event. You can use 1-127 printable ASCII characters.
Spaces are allowed. You can also leave this field blank.
Owner
Enter a descriptive name of the application that creates this entry. You can use 1-31
printable ASCII characters. Spaces are allowed.
OK
Click this to save the settings and close this screen.
Cancel
Click this to discard all changes and close the screen.
18.4 Alarm Config
Use this screen to configure alarms that occur when the sampled data exceeds the specified
threshold. To open this screen, right-click on the switch in the Device List Panel, and click
Configuration > RMON Configuration > Alarm Config. Then, select the switch that you
want to configure.
NetAtlas Workgroup User’s Guide
195
Chapter 18 Configuration
Figure 142 RMON Configuration: Alarm Config.
The following table describes the labels in this screen.
Table 103 RMON Configuration: Alarm Config.
LABEL
DESCRIPTION
Index
This field displays the alarm configuration index number.
Active
This field displays Yes if an alarm configuration is enabled. Otherwise, it displays
No.
Interval (sec)
This field displays the time interval (in seconds) between data samplings.
Sample Type
This field displays the method of obtaining the sample value (Absolute or Delta).
Startup Alarm
This field displays the alarm type (Rising, Falling, R/F) that can be sent when this
alarm is first activated.
Port
This field displays the port number.
Variable
This field displays the name of the MIB field whose data is to be sampled.
Owner
This field displays the name of the application that creates this entry.
New
Click this to add a new history configuration.
Delete
Click this to remove the selected history configuration.
Modify
Click this to change the setting of the selected history configuration.
Show Log
Click this to view logs.
RMON Alarm
Parameters
196
Item
This field indicates the type of alarm.
Threshold
This field displays the threshold setting for the type of alarm. The meaning depends
on the type of alarm.
Index
This field displays the event index number.
Active
This field display whether an alarm is enabled (Yes) or not (No).
NetAtlas Workgroup User’s Guide
Chapter 18 Configuration
Table 103 RMON Configuration: Alarm Config. (continued)
LABEL
DESCRIPTION
Type
This field displays the alarm type (log, snmp-trap or log&trap).
Community
This field displays the community (or password).
Description
This field displays a description of the alarm.
Owner
This field displays the name of the application that creates this entry.
18.4.1 Configuring an RMON Alarm
To create a new RMON alarm, click New in the Alarm Config. screen.
To change the settings of a selected RMON alarm, click Modify in the Alarm Config. screen.
Figure 143 RMON Configuration: Alarm Config.: New
The following table describes the labels in this screen.
Table 104 RMON Configuration, Alarm Config., New
LABEL
DESCRIPTION
Active
Select Yes to enable this alarm. Otherwise, select No.
Variable
Click Browse to select the variable whose data is sampled. The following screen
appears.
Figure 144 RMON Configuration: Alarm Config.: New: Browse
Select the type, port, and variable whose data should be sampled, and click OK.
Interval
Specify the time between data samplings.
NetAtlas Workgroup User’s Guide
197
Chapter 18 Configuration
Table 104 RMON Configuration, Alarm Config., New (continued)
LABEL
DESCRIPTION
Sample Type
Select the method of obtaining the sample value. Choices are Absolute Value and
Delta Value.
Startup Alarm
Select the startup alarm type (Rising Alarm, Falling Alarm, Rising Or Falling
Alarm).
Rising
Condition
Rising
Threshold
Specify a rising threshold (between 0 and 2147483647). When a value that is
greater or equal to this threshold, the probe triggers an alarm.
Rising Event
Click Browse to select an index number of a rising event.
Falling
Condition
Falling
Threshold
Specify the falling threshold (between 0 and 2147483647). When a value that is
smaller or equal to this threshold, the probe triggers an alarm.
Falling Event
Click Browse to select an index number of a falling event.
Owner
Enter a descriptive name of the application that creates this entry. You can use 1-31
printable ASCII characters. Spaces are allowed.
OK
Click this to save the settings and close this screen.
Cancel
Click this to discard all changes and close the screen.
18.4.2 RMON Alarm Event Log
Use this screen to display alarm logs. To open this screen, click Configuration, RMON
Configuration, Alarm Config, Show Log.
Figure 145 RMON Configuration: Alarm Config.: Show Log
The following table describes the labels in this screen.
Table 105 RMON Configuration: Alarm Config.: Show Log
198
LABEL
DESCRIPTION
No.
This field displays an index number.
Event Index
This field displays an event index number.
Log Index
This field displays a log index number.
Time
This field displays the time a log was generated.
Sample Type
This field displays the method of obtaining the sample value.
Close
Click this to close this screen.
NetAtlas Workgroup User’s Guide
CHAPTER
19
IP Configuration
This chapter shows you how to configure the routing functions using the IP Configuration
screens.
19.1 Static Route
Static routes tell the switch how to forward IP traffic when you configure the TCP/IP
parameters manually.
1 In the Device Panel list, right-click on a device.
2 Click Configuration > IP Configuration > Static Route.
Figure 146 IP Configuration: Static Route
NetAtlas Workgroup User’s Guide
199
Chapter 19 IP Configuration
The following table describes the labels in the summary table.
Table 106 Routing Configuration: Static Route
LABEL
DESCRIPTION
Index
This field displays the index number of the route.
Name
This field displays the descriptive name for this route. This is for identification
purposes only.
Active
This field displays Yes when the static route is activated and No when is it
deactivated.
Destination Address This field displays the IP network address of the final destination.
Subnet Mask
This field displays the subnet mask for this destination.
Gateway Address
This field displays the IP address of the gateway. The gateway is an immediate
neighbor of your switch that will forward the packet to the destination.
Metric
This field displays the cost of transmission for routing purposes.
Add
Click the Add button to create a new static route.
Modify
Select the rule(s) that you want to change and click the Modify button.
Delete
Select the rule(s) that you want to remove in the Delete column, and then click
the Delete button.
19.1.1 Configuring a Static Route
Click the Add button or select a static route and click the Modify button in the Routing
Configuration screen to display the following screen.
Figure 147 Routing Configuration: Static Route: Add
The following table describes the labels in this screen.
Table 107 Routing Configuration: Static Route: Add or Modify
200
LABEL
DESCRIPTION
Active
This field allows you to activate/deactivate this static route.
Name
Enter a descriptive name for this route. This is for identification purposes only.
Destination
IP Address
This parameter specifies the IP network address of the final destination. Routing is
always based on network number. If you need to specify a route to a single host, use a
subnet mask of 255.255.255.255 in the subnet mask field to force the network number
to be identical to the host ID.
IP Subnet
Mask
Enter the subnet mask for this destination.
NetAtlas Workgroup User’s Guide
Chapter 19 IP Configuration
Table 107 Routing Configuration: Static Route: Add or Modify (continued)
LABEL
DESCRIPTION
Gateway IP
Address
Enter the IP address of the gateway. The gateway is an immediate neighbor of your
switch that will forward the packet to the destination. The gateway must be a router on
the same segment as your switch.
Metric
The metric represents the “cost” of transmission for routing purposes. IP routing uses
hop count as the measurement of cost, with a minimum of 1 for directly connected
networks. Enter a number that approximates the cost for this link. The number need
not be precise, but it must be between 1 and 15. In practice, 2 or 3 is usually a good
number.
OK
Click OK to save the settings and close this screen.
Cancel
Click Cancel to discard all changes and close this screen.
19.2 DiffServ
DiffServ is a class of service (CoS) model that marks packets so that they receive specific perhop treatment at DiffServ-compliant network devices along the route based on the application
types and traffic flow. Packets are marked with DiffServ Code Points (DSCPs) indicating the
level of service desired. This allows the intermediary DiffServ-compliant network devices to
handle the packets differently depending on the code points without the need to negotiate
paths or remember state information for every flow. In addition, applications do not have to
request a particular service or give advanced notice of where the traffic is going.
Enable this feature in the DiffServ screen. Click IP Configuration > DiffServ to display the
screen as shown.
Figure 148 IP Configuration: DiffServ
NetAtlas Workgroup User’s Guide
201
Chapter 19 IP Configuration
The following table describes the labels in this screen.
Table 108 DiffServ: DSCP Setting
LABEL
DESCRIPTION
Active
Select Active to enable DiffServ on the port.
Apply
Click Apply to save the changes.
19.3 DSCP Setting
You can configure the DSCP to IEEE802.1p mapping to allow the switch to prioritize all
traffic based on the incoming DSCP value according to the DiffServ to IEEE802.1p mapping
table.
The following table shows the default DSCP-to-IEEE802.1P mapping.
Table 109 Default DSCP-IEEE802.1p Mapping
DSCP
VALUE
0–7
8 – 15
16 – 23
24 – 31
32 – 39
40 – 47
48 – 55
56 – 63
IEEE802.1P
0
1
2
3
4
5
6
7
Configure DSCP mappings in the DSCP Setting screen.
Figure 149 IP Configuration: DiffServ
202
NetAtlas Workgroup User’s Guide
Chapter 19 IP Configuration
The following table describes the labels in this screen.
Table 110 DiffServ: DSCP Setting
LABEL
DESCRIPTION
DSCP to 802.1p Mapping
0 … 63
This is the DSCP classification identification number.
To set the IEEE802.1p priority mapping, select the priority level from the drop-down list box.
Apply
Click Apply to save the changes.
19.4 IGMP
IGMP (Internet Group Multicast Protocol) is a session-layer protocol used to establish
membership in a multicast group - it is not used to carry user data. Refer to RFC 1112 and
RFC 2236 for information on IGMP versions 1 and 2 respectively.
Right-click on a device in the Device Panel and click Configuration > IP Configuration >
IGMP to display the configuration screen.
Figure 150 IP Configuration: IGMP
NetAtlas Workgroup User’s Guide
203
Chapter 19 IP Configuration
The following table describes the labels in this screen.
Table 111 IP Configuration: IGMP
LABEL
DESCRIPTION
Active
Select this check box to enable IGMP on the switch.
Note: You cannot enable both IGMP snooping and IGMP at the same time.
Refer to the section on IGMP snooping.
Index
This field displays an index number of an entry.
Network
This field displays the IP domain configured on the switch.
Refer to Section 13.8 on page 139 for more information on configuring IP domains.
Version
Select an IGMP version from the drop-down list box. Choices are IGMP-v1, IGMP-v2 and
None.
Apply
Click Apply to save your changes.
19.5 DHCP
DHCP (Dynamic Host Configuration Protocol RFC 2131 and RFC 2132) allows individual
computers to obtain TCP/IP configuration at start-up from a server. You can configure the
switch as a DHCP server or disable it. When configured as a server, the switch provides the
TCP/IP configuration for the clients. If you disable the DHCP service, you must have another
DHCP server on your LAN, or else the computer must be manually configured.
19.5.1 DHCP modes
Depending on your switch model, your switch can be configured as a DHCP server or DHCP
relay agent.
• If you configure the switch as a DHCP server, it will maintain the pool of addresses and
distribute them to your LAN computers.
• If there is an Ethernet device that performs the DHCP server function for your network,
then you can configure the switch as a DHCP relay agent. When the switch receives a
request from a computer on your network, it contacts the Ethernet device (the DHCP
server) for the necessary IP information, and then relays the assigned information back to
the computer.
19.5.2 Configuring DHCP Server
Follow the steps below to set the switch as a DHCP server.
1 In the Device Panel list, right-click on a device.
2 Click Configuration > IP Configuration > DHCP.
3 Select Server.
204
NetAtlas Workgroup User’s Guide
Chapter 19 IP Configuration
Figure 151 IP Configuration: DHCP: Server
The following table describes the related labels in this screen.
Table 112 IP Configuration: DHCP: Server
LABEL
DESCRIPTION
Server
VID
This field displays the ID number of the VLAN group to which this DHCP settings
apply.
Type
This field displays Server for the DHCP mode.
DHCP Status
This field displays the starting and the size of DHCP client IP address.
Add
Click Add to configure DHCP client pool settings.
Modify
Click Modify to change the settings of the selected DHCP client pool.
Delete
Click Delete to remove the selected DHCP client pool setting.
4 Click Add to configure DHCP client pool information.
NetAtlas Workgroup User’s Guide
205
Chapter 19 IP Configuration
Figure 152 IP Configuration: DHCP: Server: New
The following table describes the labels in this screen.
Table 113 IP Configuration: DHCP: Server: New
LABEL
DESCRIPTION
VID
Enter the ID number of the VLAN group to which this DHCP settings apply.
Client IP Pool
Starting
Specify the first of the contiguous addresses in the IP address pool.
Size of Client
IP Pool
Specify the size, or count of the IP address pool.
IP Subnet
Mask
Enter the subnet mask of the DHCP server.
Default
Gateway
Enter the IP address of the default gateway device.
Primary/
Secondary
DNS Server
Enter the IP addresses of the DNS servers. The DNS servers are passed to the
DHCP clients along with the IP address and the subnet mask.
Apply
Click Apply to save the changes and close this screen.
Cancel
Click Cancel to discard all changes and close this screen.
19.5.3 Configuring DHCP Relay
Configure DHCP relay on the switch if the DHCP clients and the DHCP server are not in the
same subnet. During the initial IP address leasing, the switch helps to relay network
information (such as the IP address and subnet mask) between a DHCP client and a DHCP
server. Once the DHCP client obtains an IP address and can connect to the network, network
information renewal is done between the DHCP client and the DHCP server without the help
of the switch.
206
NetAtlas Workgroup User’s Guide
Chapter 19 IP Configuration
19.5.3.1 DHCP Relay Agent Information
The switch can add information to client DHCP requests that it relays to a DHCP server. This
helps provide authentication about the source of the requests. You can also specify additional
information for the switch to add to the client DHCP requests that it relays to the DHCP
server. Please refer to RFC 3046 for more details.
The DHCP relay agent information feature adds an Agent Information field to the option 82
field of the DHCP headers of client DHCP request frames that the switch relays to a DHCP
server. The following lists the DHCP relay agent option 82 information that the switch sends
to the DHCP server:
•
•
•
•
Slot ID (1 byte)
Port ID (1 byte)
VLAN ID (2 bytes)
System name (up to 32 bytes, this is optional)
Follow the steps below to set the switch as a DHCP server.
1 In the Device Panel list, right-click on a device.
2 Click Configuration > IP Configuration > DHCP.
3 Select Relay.
Figure 153 IP Configuration: DHCP: Relay
NetAtlas Workgroup User’s Guide
207
Chapter 19 IP Configuration
The following table describes the related labels in this screen.
Table 114 IP Configuration: DHCP: Relay
LABEL
DESCRIPTION
Relay
Active
Select this check box to enable DHCP relay.
Remote
DHCP Server
1 .. 3
Enter the IP address of a DHCP server in dotted decimal notation.
Relay Agent
Information
Select the Option 82 check box to have the switch add information (slot number, port
number and VLAN ID) to client DHCP requests that it relays to a DHCP server.
Information
This read-only field displays the system name you configure in the System
Information screen (refer to Section 14.1 on page 143).
Select the check box for the switch to add the system name to the client DHCP
requests that it relays to a DHCP server.
Apply
Click Apply to save the changes.
19.6 DVMRP
DVMRP (Distance Vector Multicast Routing Protocol) is a protocol used for routing multicast
data within an autonomous system (AS). This DVMRP implementation is based on draft-ietfidmr-dvmrp-v3-10. DVMRP provides multicast forwarding capability to a layer 3 switch that
runs both the IPv4 protocol (with IP Multicast support) and the IGMP protocol. The DVMRP
metric is a hop count of 32.
IGMP is a protocol used for joining or leaving a multicast group. You must have IGMP
enabled when you enable DVMRP.
To open the DVMRP screen, right-click on a switch in the Device Panel list and click
Configuration > IP Configuration > DVMRP.
208
NetAtlas Workgroup User’s Guide
Chapter 19 IP Configuration
Figure 154 IP Configuration: DVMRP
The following table describes the labels in this screen.
Table 115 IP Configuration: DVMRP
LABEL
DESCRIPTION
Active
Select Active to enable DVMRP on the switch. You should do this if you want the switch to
act as a multicast router.
Threshold
Threshold is the maximum time to live (TTL) value. TTL is used to limit the scope of
multicasting. You should reduce this value if you do not wish to flood Layer 3 devices
many hops away with multicast traffic. This applies only to multicast traffic this switch
sends out.
Index
Index is the DVMRP configuration for the IP routing domain defined under Network. The
maximum number of DVMRP configurations allowed is the maximum number of IP routing
domains allowed on the switch. See Section 13.8 on page 139 for more information on IP
routing domains.
Network
This is the IP routing domain IP address and subnet mask you set up in IP Setup.
VID
DVMRP cannot be enabled on the same VLAN group across different IP routing domains,
that is, you cannot have duplicate VIDs for different DVMRP configurations.
Active
Select Yes to enable DVMRP on this IP routing domain. Select No to disable this feature.
Apply
Click Apply to save these changes.
19.7 RIP
RIP (Routing Information Protocol allows a routing device to exchange routing information
with other routers.
NetAtlas Workgroup User’s Guide
209
Chapter 19 IP Configuration
To open the RIP screen, right-click on a switch in the Device Panel list and click
Configuration > IP Configuration > RIP.
Figure 155 IP Configuration: RIP
The following table describes the labels in this screen.
Table 116 IP Configuration: RIP
LABEL
DESCRIPTION
Active
Select this check box to enable RIP on the switch.
Index
This field displays the index number of an IP interface.
Network
This field displays the IP interface configured on the switch.
Refer to the section on IP Setup for more information on configuring IP domains.
Direction
The Direction field controls the sending and receiving of RIP packets. When set to:
• Both - the switch will broadcast its routing table periodically and incorporate the RIP
information that it receives.
• Incoming - the switch will not send any RIP packets but will accept all RIP packets
received.
• Outgoing - the switch will send out RIP packets but will not accept any RIP packets
received.
• None - the switch will not send any RIP packets and will ignore any RIP packets received.
Version
Select the RIP version from the drop-down list box. Choices are RIP-1, RIP-2B and RIP2M.
Apply
Click Apply to save the changes.
19.8 OSPF
OSPF (Open Shortest Path First) is a link-state protocol designed to distribute routing
information within an autonomous system (AS). An autonomous system is a collection of
networks using a common routing protocol to exchange routing information.
210
NetAtlas Workgroup User’s Guide
Chapter 19 IP Configuration
OSPF offers some advantages over traditional vector-space routing protocols (such as RIP).
The following table summarizes some of the major differences between OSPF and RIP.
Table 117 OSPF vs. RIP
OSPF
RIP
Network Size
Large
Small (with up to 15 routers)
Metrics
Bandwidth, hop count, throughput, round
trip time and reliability.
Hop count
Convergence
Fast
Slow
19.8.1 OSPF Autonomous Systems and Areas
An OSPF autonomous system can be divided into logical areas. Each area represents a group
of adjacent networks. All areas are connected to a backbone (also known as area 0). The
backbone is the transit area to route packets between two areas. A stub area, at the edge of an
AS, is not a transit area since there is only one connection to the stub area.
19.8.2 Interfaces and Virtual Links
An OSPF interface is a link between a layer 3 device and an OSPF network. An interface has
state information, an IP address and subnet mask associated with it. When you configure an
OSPF interface, you first set an interface to transmit OSPF traffic and add the interface to an
area.
You can configure a virtual link to establish/maintain connectivity between a non-backbone
area and the backbone. The virtual ink must be configured on both layer 3 devices in the nonbackbone area and the backbone.
19.8.3 Configuring Basic OSPF Settings
Follow the steps below to activate OSPF and configure basic settings.
1 In the Device Panel list, right-click on a device.
2 Click Configuration > IP Configuration > OSPF.
NetAtlas Workgroup User’s Guide
211
Chapter 19 IP Configuration
Figure 156 IP Configuration: OSPF
The follow table describes the related labels in this screen.
Table 118 IP Configuration: OSPF
LABEL
DESCRIPTION
Active
OSPF is disabled by default. Select this option to enable it.
Router ID
Router ID uniquely identifies the switch in an OSPF. Enter a unique ID (that uses the
format of an IP address in dotted decimal notation) for the switch.
Redistribute
Route
Route redistribution allows your switch to import and translate external routes learned
through other routing protocols (RIP and Static) into the OSPF network transparently.
Active
Select this option to activate route redistribution for routes learnt through the selected
protocol.
Type
Select 1 for routing protocols (such as RIP) whose external metrics are directly
comparable to the internal OSPF cost. When selecting a path, the internal OSPF cost
is added to the AB boundary router to the external metrics.
Select 2 for routing protocols whose external metrics are not comparable to the OSPF
cost. In this case, the external cost of the AB boundary router is used in path decision
to a destination.
Metric Value
Enter a route cost (between 0 and 16777214).
Apply
Click Apply to save the changes.
OSPF
Configuration
212
Index
This field displays the index number of an area.
Name
This field displays the descriptive name of an area.
Area ID
This field displays the area ID (that uses the format of an IP address in dotted decimal
notation) that uniquely identifies an area.
An area ID of 0.0.0.0 indicates the backbone.
NetAtlas Workgroup User’s Guide
Chapter 19 IP Configuration
Table 118 IP Configuration: OSPF (continued)
LABEL
DESCRIPTION
Authentication
This field displays the authentication method used (None, Simple or MD5).
Stub Network
This field displays whether an area is a stub network (Yes) or not (No).
Add
Click Add to create a new OSPF area.
Modify
Click Modify to change the settings of the selected OSPF area.
Delete
Click Delete to remove the selected OSPF area.
Virtual-Link
Index
This field displays an index number of an entry.
Name
This field displays a descriptive name of a virtual link.
Peer Router ID
This field displays the ID (that uses the format of an IP address in dotted decimal
notation) of a peer border router.
Authentication
This field displays the authentication method used (Same-as-Area, None, Simple or
MD5).
Key ID
When the Authentication field displays MD5, this field displays the identification
number of the key used.
Add
Click Add to create a new OSPF virtual link.
Modify
Click Modify to change the settings of the selected OSPF virtual link.
Delete
Click Delete to remove the selected OSPF virtual link.
Interface
Index
This field displays the index number for an interface.
Network
This field displays the IP interface information.
Area ID
This field displays the area ID (that uses the format of an IP address in dotted decimal
notation) of an area to associate the interface to that area.
Authentication
This field displays the authentication method used (Same-as-Area, None, Simple or
MD5).
Key ID
When the Authentication field displays MD5, this field displays the identification
number of the key used.
Cost
This field displays the interface cost used for calculating the routing table.
Priority
This field displays the priority of the interface.
Add
Click Add to create a new OSPF interface.
Modify
Click Modify to change the settings of the selected OSPF interface.
Delete
Click Delete to remove the selected OSPF interface.
19.8.4 Configuring a New OSPF Area
Follow the steps below to create a new OSPF area.
1 In the Device Panel list, right-click on a device.
2 Click Configuration > IP Configuration > OSPF.
3 Click Add in the OSPF Configuration pane.
NetAtlas Workgroup User’s Guide
213
Chapter 19 IP Configuration
Figure 157 IP Configuration: OSPF: New OSPF Setting
The following table describes the related labels in this screen.
Table 119 IP Configuration: OSPF: New OSPF Setting
LABEL
DESCRIPTION
Name
Enter a descriptive name (up to 32 printable ASCII characters) for identification
purposes.
Area ID
Enter a 32-bit ID (that uses the format of an IP address in dotted decimal notation) that
uniquely identifies an area.
A value of 0.0.0.0 indicates that this is a backbone (also known as Area 0). You can
create only one backbone area on the switch.
Authentication Select an authentication method (Simple or MD5) to activate authentication. Select
None to disable authentication.
Interface(s) and virtual interface(s) must use the same authentication method as the
associated area.
Stub Network
Select this option to set the area as a stub area.
If you enter 0.0.0.0 in the Area ID field, the settings in the Stub Network fields are
ignored.
No Summary
Select this option to set the switch to not send/receive LSAs.
Default Route
Cost
Specify a cost (between 0 and 16777214) used to add a default route into a stub area
for routes which are external to an OSPF domain. If you do not set a route cost, no
default route is added.
Add
Click Add to apply the changes and close this screen.
Cancel
Click Cancel to discard all changes and close this screen.
19.8.5 Configuring a New OSPF Virtual Link
Follow the steps below to create a new OSPF virtual link.
1 In the Device Panel list, right-click on a device.
2 Click Configuration > IP Configuration > OSPF.
3 Click Add in the Virtual Link pane.
214
NetAtlas Workgroup User’s Guide
Chapter 19 IP Configuration
Figure 158 IP Configuration: OSPF: New Virtual Link
The following table describes the labels in this screen.
Table 120 IP Configuration: OSPF: New Virtual Link
LABEL
DESCRIPTION
Name
Enter a descriptive name (up to 32 printable ASCII characters) for identification
purposes.
Area ID
Select the area ID (that uses the format of an IP address in dotted decimal
notation) of an area to associate the interface to that area.
Peer Router ID
Enter the ID of a peer border router.
Authentication
Note: Virtual interface(s) must use the same authentication
method within the same area.
Select an authentication method. Choices are Same-as-Area, None (default),
Simple and MD5.
To exchange OSPF packets with peer border router, you must set the
authentication method and/or password the same as the peer border router.
Select Same-as-Area to use the same authentication method within the area
and set the related fields when necessary.
Select None to disable authentication. This is the default setting.
Select Simple to authenticate OSPF packets transmitted through this interface
using a simple password.
Select MD5 to authenticate OSPF packets transmitted through this interface
using MD5 authentication.
Key ID
When you select MD5 in the Authentication field, specify the identification
number of the authentication you want to use.
Key
When you select Simple in the Authentication field, enter a password eightcharacter long.
When you select MD5 in the Authentication field, enter a password 16-character
long.
Add
Click Add to apply the changes and close this screen.
Cancel
Click Cancel to discard all changes and close this screen.
19.8.6 Configuring a New OSPF Interface
Follow the steps below to create a new OSPF interface.
1 In the Device Panel list, right-click on a device.
NetAtlas Workgroup User’s Guide
215
Chapter 19 IP Configuration
2 Click Configuration > IP Configuration > OSPF.
3 Click Add in the Interface pane.
Figure 159 IP Configuration: OSPF: New Interface
The following table describes the labels in this screen.
Table 121 IP Configuration: OSPF: New Interface
LABEL
DESCRIPTION
Network
Select an IP interface.
Area ID
Select the area ID (that uses the format of an IP address in dotted decimal notation)
of an area to associate the interface to that area.
Authentication
Note: OSPF Interface(s) must use the same authentication method
within the same area.
Select an authentication method. Choices are Same-as-Area, None (default),
Simple and MD5.
To participate in an OSPF network, you must set the authentication method and/or
password the same as the associated area.
Select Same-as-Area to use the same authentication method within the area and
set the related fields when necessary.
Select None to disable authentication. This is the default setting.
Select Simple and set the Key field to authenticate OSPF packets transmitted
through this interface using simple password authentication.
Select MD5 and set the Key ID and Key fields to authenticate OSPF packets
transmitted through this interface using MD5 authentication.
216
Key ID
When you select MD5 in the Authentication field, specify the identification number of
the authentication you want to use.
Key
When you select Simple in the Authentication field, enter a password eightcharacter long. Characters after the eighth character will be ignored.
When you select MD5 in the Authentication field, enter a password 16-character
long.
Cost
The interface cost is used for calculating the routing table. Enter a number between 0
and 65535.
Priority
The priority you assign to the interface is used in router elections to decide which
router is going to be the Designated Router (DR) or the Backup Designated Router
(BDR). You can assign a number between 0 and 255. A priority of 0 means that the
router will not participate in router elections.
NetAtlas Workgroup User’s Guide
Chapter 19 IP Configuration
Table 121 IP Configuration: OSPF: New Interface (continued)
LABEL
DESCRIPTION
Add
Click Add to apply the changes and close this screen.
Cancel
Click Cancel to discard all changes and close this screen.
19.9 VRRP
Virtual Router Redundancy Protocol (VRRP), defined in RFC 2338, allows you to create
redundant backup gateways to ensure that the default gateway of a host is always available.
In VRRP, a virtual router (VR) represents a number of physical layer-3 devices. An IP address
is associated with the virtual router. A layer-3 device having the same IP address is the
preferred master router while the other Layer-3 devices are the backup routers. The master
router forwards traffic for the virtual router. When the master router becomes unavailable, a
backup router assumes the role of the master router until the master router comes back up and
takes over.
19.9.1 Configuring Interface VRRP Settings
Follow the steps below to configure VRRP settings on an interface.
1 In the Device Panel list, right-click on a device.
2 Click Configuration > IP Configuration > VRRP.
Figure 160 IP Configuration: VRRP
NetAtlas Workgroup User’s Guide
217
Chapter 19 IP Configuration
The following table describes the labels in this screen.
Table 122 IP Configuration: VRRP
LABEL
DESCRIPTION
Index
This field displays the index number of an entry.
Network
This field displays the IP address and number of subnet mask bit of an IP domain.
Authentication
Select None to disable authentication. This is the default setting.
Select Simple to use a simple password to authenticate VRRP packet exchanges
on this interface.
Key
When you select Simple in the Authentication field, enter a password key (up to
eight printable ASCII character long) in this field.
Apply
Click Apply to save the changes.
Index
This field displays the index number of an entry.
Active
This field shows whether a VRRP entry is enabled (Yes) or disabled (No).
Name
This field displays a descriptive name of an entry.
Network
This field displays the IP address and subnet mask of an interface.
VRID
This field displays the ID number of a virtual router.
Primary VIP
This field displays the IP address of the primary virtual router.
Uplink Gateway
This field displays the IP address of the uplink gateway.
Priority
This field displays the priority level (1 to 255) of the entry.
Add
Click Add to create a new VRRP interface.
Modify
Click Modify to change the settings of the selected VRRP interface.
Delete
Click Delete to remove the selected VRRP interface.
19.9.2 Configuring a VRRP Interface
1 In the Device Panel list, right-click on a device.
2 Click Configuration > IP Configuration > VRRP.
218
NetAtlas Workgroup User’s Guide
Chapter 19 IP Configuration
Figure 161 IP Configuration: VRRP: New
The following table describes the labels in this screen.
Table 123 IP Configuration: VRRP: New
LABEL
DESCRIPTION
Active
Select this option to enable this VRRP interface.
Name
Enter a descriptive name (up to 32 printable ASCII characters) for identification
purposes.
Network
Select an IP domain to which this VRRP entry applies.
Virtual Router ID
Select a virtual router number (1 to 7) for which this VRRP entry is created.
You can configure up to seven virtual routers for one network.
Advertisement
Interval
Specify the number of seconds between Hello message transmissions. The
default is 1.
Preempt Mode
Select this option to activate preempt mode.
Priority
Enter a number (between 1 and 254) to set the priority level. The bigger the
number, the higher the priority.
This field is 100 by default.
Uplink Gateway
Enter the IP address of the uplink gateway in dotted decimal notation.
The switch checks the link to the uplink gateway.
Primary Virtual IP
Enter the IP address of the primary virtual router in dotted decimal notation.
Secondary Virtual IP
This field is optional. Enter the IP address of a secondary virtual router in
dotted decimal notation. This field is ignored when you enter 0.0.0.0.
OK
Click OK to apply the changes and close this screen.
Cancel
Click Cancel to discard all changes and close this screen.
NetAtlas Workgroup User’s Guide
219
Chapter 19 IP Configuration
19.10 IP Multicast
You can configure the switch to untag (remove the VLAN tags from) IP multicast packets that
the switch forwards. This allows the switch to send packets to Ethernet devices that are not
VLAN-aware.
To display the IP Multicast screen, right-click on a switch in the Device Panel list and click
Configuration > IP Configuration > IP Multicast.
Figure 162 IP Configuration: IP Multicast
The following table describes the labels in this screen.
Table 124 IP Configuration: IP Multicast
220
LABEL
DESCRIPTION
Port
This read-only field displays the port number.
IP Multicast Egress
Untag Vlan ID
The switch removes the VLAN tag from IP multicast packets belonging to the
specified VLAN before transmission on this port.
Enter a VLAN group ID in this field. Enter 0 to set the switch not to remove any
VLAN tags from the packets.
Apply
Click Apply to save the settings.
NetAtlas Workgroup User’s Guide
CHAPTER
20
Troubleshooting
This chapter covers potential problems and the corresponding remedies.
20.1 Installation Problems
Table 125 General Installation Problems
PROBLEM
CORRECTIVE ACTION
The EMS or
PostgreSQL
will not install
properly
Make sure that the computer meets the minimum hardware and software
requirements. See the quick start guide for more information.
Close all programs before the installation.
Remove any previous versions of the EMS software from your computer. See Section
20.4 on page 222 for information on how to do this.
Re-install the EMS.
20.2 Problems Accessing the EMS
Table 126 Problems Accessing the EMS
PROBLEM
CORRECTIVE ACTION
When I click the
Switch Manager
icon, I cannot
access the EMS
Make sure the ODBC driver is configured properly to connect to the EMS
database. Refer to the Quick Start Guide for more information.
Shut down and restart both PostgreSQL and the SNMPc manager.
EMS may already be running. Check your Windows task bar.
NetAtlas Workgroup User’s Guide
221
Chapter 20 Troubleshooting
20.3 Problems Finding a Device
Table 127 Problems Accessing the EMS
PROBLEM
CORRECTIVE ACTION
In the SNMPc
Management
Console I cannot
find my device
Check that you have compiled and added the MIBs correctly.
Check that you have enabled auto-discovery.
Check that the map object properties are correct for initial installation. Make sure
the IP address entered is the IP address of the switch you want to manage via the
EMS.
Check that the ODBC driver is correctly configured.
Make sure that PostgreSQL is running.
Make sure that the computer you have installed the EMS on, is connected to the
network where the switch is located.
Make sure your computer’s Ethernet card is working properly.
If the problem still persists, uninstall and re-install the EMS software.
20.4 Uninstalling the EMS
When you install a new EMS version, the setup program automatically detects and uninstalls a
previous EMS version.
Or you can manually uninstall the EMS. Follow the steps below.
1 Click Start > Settings > Control Panel > Add/Remove Programs. The Add or
Remove Programs dialog box opens.
Figure 163 EMS: Remove
2 Select ZyXEL NetAtlas Workgroup V1.02 and then click Change/Remove (or Add/
Remove depending on your version of Windows).
222
NetAtlas Workgroup User’s Guide
Chapter 20 Troubleshooting
3 Screen displays as shown. Specify whether you also want to remove SNMPc and/or
PostgreSQL. Click Next to continue.
Figure 164 EMS: Remove: Select Application
4 Click Yes when asked to confirm removal. The Uninstall Shield now runs.
5 Click OK when the uninstall has successfully completed. Restart the computer when
prompted.
NetAtlas Workgroup User’s Guide
223
Chapter 20 Troubleshooting
224
NetAtlas Workgroup User’s Guide
P ART IV
Appendices and
Index
SNMPc Network Manager (227)
Alarm Types and Causes (231)
Legal Information (233)
Customer Support (235)
Index (239)
225
226
APPENDIX
A
SNMPc Network Manager
This appendix gives a brief overview of the SNMPc Network Manager.
Starting the SNMPc Network Manager
You must have SNMPc properly installed before you can use the EMS; please refer to the
Castle Rock web site at www.castlerock.com or see your SNMPc user's guide.
You may start the SNMPc Network Manager manually or automatically each time you turn on
your computer.
Manual Startup
Click Start, Programs, SNMPc, Startup System to manually start the SNMPc network
manager. This is the default location of the SNMPc network manager.
Automatic Startup
To automatically start the SNMPc network manager each time you turn on your computer:
1 In SNMPc main window, click Config, System Startup.
2 Select the Auto Startup check box and click Done.
Figure 165 Automatic Startup
NetAtlas Workgroup User’s Guide
227
Appendix A SNMPc Network Manager
SNMPc Main Window
The following figure and table show the elements of the SNMPc main window.
Figure 166 SNMPc Main Windows
1
5
2
3
4
Table 128 SNMPc Main Window
228
ELEMENT
FUNCTION
1
Main Button Bar
Buttons and controls to execute common commands quickly. Hold the
cursor over an icon to see a tool tip.
2
Edit Button Bar
Buttons to quickly insert map elements. Hold the cursor over an icon to
see a tool tip.
3
Selection Tool
Tabbed control for selection of objects within different SNMPc functional
modules.
4
Event Log Tool
Tabbed control for display of filtered event log entries.
5
View Window Area Map View, Mib Tables and Mib Graph windows are shown here.
NetAtlas Workgroup User’s Guide
Appendix A SNMPc Network Manager
Selection Tool
If you can’t see the selection tool, click View, Selection Tool to display it. Use the selection
tool to manipulate objects from one of several databases. Use the drag control at the right of
the selection tool to change its size. Select one of the selection tool tabs to display a tree
control for the database. Right-click on an icon inside a selection tree for database-specific
commands.
Table 129 Selection Tool
TAB
DESCRIPTION
Map
Map Object database, including devices and subnets.
Mib
Compiled SNMP Mibs, Custom Tables and Custom Mib Expressions.
Trend
Report profiles that define long-term polling procedures and scheduled reports.
Event
Event filters used to determine what happens when an event is received.
Menu
Custom menus that appear in the Manage, Tools and Help SNMPc menus.
Event Log Tool
The event log tool displays different filtered views of the SNMPc event log. If you can’t see
the event log tool, click View, Event Log Tool to display it.
• Select the Current tab to show unacknowledged (current) events. These events have a
colored box at the left side of the log entry. The color of map objects is determined by the
highest priority unacknowledged event for that object.
• Select the History tab to show all events, including acknowledged and unacknowledged
events.
• Select one of the Custom tabs and use the right-click Filter View menu to specify what
events should be displayed for that tab.
• Double-click an event entry to display a Map View window with the corresponding
device icon visible.
• To quickly view events for a particular device, first select the device and then use one of
the View Events buttons (or the View, Active Events and View, History Events menus).
This will show the device events in a separate window in the View Windows area.
• To remove one or more events, select the events and click the Delete key.
• To acknowledge (remove current status of) an event, right-click on an event entry and
click Acknowledge.
• To completely clear the event log, click File and Clear Events.
View Window Area
The View Window Area is the main interface for viewing the SNMPc map and command
results. This area uses the Multi-Document-Interface (MDI) specification to display multiple
windows at the same time. Click Window and select Cascade, Tile Horizontally or Tile
Vertically to rearrange the windows in the View Window Area in a way that makes them all
visible.
Windows in this area can be in one of several states:
NetAtlas Workgroup User’s Guide
229
Appendix A SNMPc Network Manager
• A Maximized window uses the entire area and hides any other windows behind it. If you
close a maximized window, the next top-most window will still be displayed in the
maximized state. You need to be careful when using maximized windows because it is
easy to lose track of how many windows you have open and there is an upper limit. Use
the Windows menu to see a list of windows. Click Windows and select either Tile
Horizontally or Tile Vertically to view all windows at the same time.
• An Overlapped window does not take up the entire area. One window will be completely
visible and other windows are partially hidden behind it. This is the most common
situation for the View Window area because it lets you view maps, tables and graphs at the
same time and quickly move between them. Click Windows and select Cascade.
• A Minimized window is displayed as a small title bar with window open/close buttons.
Windows are not typically minimized within the View Window Area because, as with the
maximized case, they can easily be lost behind other windows.
Main and Edit Button Bar Icons
The following figure is a brief overview of the SNMPc main button and edit button bar icons.
Figure 167 SNMPc Main Button Bar Icons
Figure 168 SNMPc Edit Button Bar Icons
"
230
For more detailed information, please see www.castlerock.com.
NetAtlas Workgroup User’s Guide
APPENDIX
B
Alarm Types and Causes
This appendix shows examples of probable alarm types and causes.
Table 130 Alarm Types and Causes
ALARM TYPE
PROBABLE CAUSES
Communications
•
•
•
•
•
•
Loss of signal
Loss of frame
Framing error
Local node transmission error
Remote node transmission error
Call establishment error
•
•
•
•
•
Degraded signal
Communications subsystem failure
Communications protocol error
LAN error
DTE-DCE interface error
Quality of service
•
•
•
•
Response time excessive
Queue size exceeded
Bandwidth reduced
Retransmission rate excessive
•
•
•
•
Threshold crossed
Performance degraded
Congestion
Resource at or nearing capacity
Processing error
•
•
•
•
•
•
Storage capacity problem
Version mismatch
Corrupt data
CPU cycles limit exceeded
Software error
Software program error
•
•
•
•
•
•
Software program abnormally
terminated
File error
Out of memory
Underlying resource unavailable
Application subsystem failure
Configuration or customization error
Equipment
•
•
•
•
•
•
•
Power problem
Timing problem
Processor problem
Dataset or modem error
Multiplexer problem
Receiver failure
Transmitter failure
•
•
•
•
•
•
•
Receive failure
Transmit failure
Output device error
Input device error
I/O device error
Equipment malfunction
Adapter error
Environmental
•
•
•
Temperature unacceptable
Humidity unacceptable
Heating/ventilation/cooling system
problem
Fire detected
Flood detected
Toxic leak detected
•
•
•
•
•
•
Leak detected
Pressure unacceptable
Excessive vibration
Material supply exhausted
Pump failure
Enclosure door open
•
•
•
NetAtlas Workgroup User’s Guide
231
Appendix B Alarm Types and Causes
232
NetAtlas Workgroup User’s Guide
APPENDIX
C
Legal Information
Copyright
Copyright © 2006 by ZyXEL Communications Corporation.
The contents of this publication may not be reproduced in any part or as a whole, transcribed,
stored in a retrieval system, translated into any language, or transmitted in any form or by any
means, electronic, mechanical, magnetic, optical, chemical, photocopying, manual, or
otherwise, without the prior written permission of ZyXEL Communications Corporation.
Published by ZyXEL Communications Corporation. All rights reserved.
Disclaimer
ZyXEL does not assume any liability arising out of the application or use of any products, or
software described herein. Neither does it convey any license under its patent rights nor the
patent rights of others. ZyXEL further reserves the right to make changes in any products
described herein without notice. This publication is subject to change without notice.
ZyXEL Limited Warranty
ZyXEL warrants to the original end user (purchaser) that this product is free from any defects
in materials or workmanship for a period of up to two years from the date of purchase. During
the warranty period, and upon proof of purchase, should the product have indications of failure
due to faulty workmanship and/or materials, ZyXEL will, at its discretion, repair or replace the
defective products or components without charge for either parts or labor, and to whatever
extent it shall deem necessary to restore the product or components to proper operating
condition. Any replacement will consist of a new or re-manufactured functionally equivalent
product of equal or higher value, and will be solely at the discretion of ZyXEL. This warranty
shall not apply if the product has been modified, misused, tampered with, damaged by an act
of God, or subjected to abnormal working conditions.
Note
Repair or replacement, as provided under this warranty, is the exclusive remedy of the
purchaser. This warranty is in lieu of all other warranties, express or implied, including any
implied warranty of merchantability or fitness for a particular use or purpose. ZyXEL shall in
no event be held liable for indirect or consequential damages of any kind to the purchaser.
NetAtlas Workgroup User’s Guide
233
Appendix C Legal Information
To obtain the services of this warranty, contact ZyXEL's Service Center for your Return
Material Authorization number (RMA). Products must be returned Postage Prepaid. It is
recommended that the unit be insured when shipped. Any returned products without proof of
purchase or those with an out-dated warranty will be repaired or replaced (at the discretion of
ZyXEL) and the customer will be billed for parts and labor. All repaired or replaced products
will be shipped by ZyXEL to the corresponding return address, Postage Paid. This warranty
gives you specific legal rights, and you may also have other rights that vary from country to
country.
Registration
Register your product online to receive e-mail notices of firmware upgrades and information
at www.zyxel.com for global products, or at www.us.zyxel.com for North American products.
234
NetAtlas Workgroup User’s Guide
APPENDIX
D
Customer Support
Please have the following information ready when you contact customer support.
Required Information
•
•
•
•
Product model and serial number.
Warranty Information.
Date that you received your device.
Brief description of the problem and the steps you took to solve it.
Corporate Headquarters (Worldwide)
•
•
•
•
•
•
•
Support E-mail: [email protected]
Sales E-mail: [email protected]
Telephone: +886-3-578-3942
Fax: +886-3-578-2439
Web Site: www.zyxel.com, www.europe.zyxel.com
FTP Site: ftp.zyxel.com, ftp.europe.zyxel.com
Regular Mail: ZyXEL Communications Corp., 6 Innovation Road II, Science Park,
Hsinchu 300, Taiwan
Costa Rica
•
•
•
•
•
•
•
Support E-mail: [email protected]
Sales E-mail: [email protected]
Telephone: +506-2017878
Fax: +506-2015098
Web Site: www.zyxel.co.cr
FTP Site: ftp.zyxel.co.cr
Regular Mail: ZyXEL Costa Rica, Plaza Roble Escazú, Etapa El Patio, Tercer Piso, San
José, Costa Rica
Czech Republic
•
•
•
•
•
E-mail: [email protected]
Telephone: +420-241-091-350
Fax: +420-241-091-359
Web Site: www.zyxel.cz
Regular Mail: ZyXEL Communications, Czech s.r.o., Modranská 621, 143 01 Praha 4 Modrany, Ceská Republika
NetAtlas Workgroup User’s Guide
235
Appendix D Customer Support
Denmark
•
•
•
•
•
•
Support E-mail: [email protected]
Sales E-mail: [email protected]
Telephone: +45-39-55-07-00
Fax: +45-39-55-07-07
Web Site: www.zyxel.dk
Regular Mail: ZyXEL Communications A/S, Columbusvej, 2860 Soeborg, Denmark
Finland
•
•
•
•
•
•
Support E-mail: [email protected]
Sales E-mail: [email protected]
Telephone: +358-9-4780-8411
Fax: +358-9-4780 8448
Web Site: www.zyxel.fi
Regular Mail: ZyXEL Communications Oy, Malminkaari 10, 00700 Helsinki, Finland
France
•
•
•
•
•
E-mail: [email protected]
Telephone: +33-4-72-52-97-97
Fax: +33-4-72-52-19-20
Web Site: www.zyxel.fr
Regular Mail: ZyXEL France, 1 rue des Vergers, Bat. 1 / C, 69760 Limonest, France
Germany
•
•
•
•
•
•
Support E-mail: [email protected]
Sales E-mail: [email protected]
Telephone: +49-2405-6909-0
Fax: +49-2405-6909-99
Web Site: www.zyxel.de
Regular Mail: ZyXEL Deutschland GmbH., Adenauerstr. 20/A2 D-52146, Wuerselen,
Germany
Hungary
•
•
•
•
•
•
Support E-mail: [email protected]
Sales E-mail: [email protected]
Telephone: +36-1-3361649
Fax: +36-1-3259100
Web Site: www.zyxel.hu
Regular Mail: ZyXEL Hungary, 48, Zoldlomb Str., H-1025, Budapest, Hungary
Kazakhstan
• Support: http://zyxel.kz/support
• Sales E-mail: [email protected]
236
NetAtlas Workgroup User’s Guide
Appendix D Customer Support
•
•
•
•
Telephone: +7-3272-590-698
Fax: +7-3272-590-689
Web Site: www.zyxel.kz
Regular Mail: ZyXEL Kazakhstan, 43, Dostyk ave.,Office 414, Dostyk Business Centre,
050010, Almaty, Republic of Kazakhstan
North America
•
•
•
•
•
•
•
Support E-mail: [email protected]
Sales E-mail: [email protected]
Telephone: +1-800-255-4101, +1-714-632-0882
Fax: +1-714-632-0858
Web Site: www.us.zyxel.com
FTP Site: ftp.us.zyxel.com
Regular Mail: ZyXEL Communications Inc., 1130 N. Miller St., Anaheim, CA 928062001, U.S.A.
Norway
•
•
•
•
•
•
Support E-mail: [email protected]
Sales E-mail: [email protected]
Telephone: +47-22-80-61-80
Fax: +47-22-80-61-81
Web Site: www.zyxel.no
Regular Mail: ZyXEL Communications A/S, Nils Hansens vei 13, 0667 Oslo, Norway
Poland
•
•
•
•
•
E-mail: [email protected]
Telephone: +48 (22) 333 8250
Fax: +48 (22) 333 8251
Web Site: www.pl.zyxel.com
Regular Mail: ZyXEL Communications, ul. Okrzei 1A, 03-715 Warszawa, Poland
Russia
•
•
•
•
•
•
Support: http://zyxel.ru/support
Sales E-mail: [email protected]
Telephone: +7-095-542-89-29
Fax: +7-095-542-89-25
Web Site: www.zyxel.ru
Regular Mail: ZyXEL Russia, Ostrovityanova 37a Str., Moscow, 117279, Russia
Spain
•
•
•
•
Support E-mail: [email protected]
Sales E-mail: [email protected]
Telephone: +34-902-195-420
Fax: +34-913-005-345
NetAtlas Workgroup User’s Guide
237
Appendix D Customer Support
• Web Site: www.zyxel.es
• Regular Mail: ZyXEL Communications, Arte, 21 5ª planta, 28033 Madrid, Spain
Sweden
•
•
•
•
•
•
Support E-mail: [email protected]
Sales E-mail: [email protected]
Telephone: +46-31-744-7700
Fax: +46-31-744-7701
Web Site: www.zyxel.se
Regular Mail: ZyXEL Communications A/S, Sjöporten 4, 41764 Göteborg, Sweden
Ukraine
•
•
•
•
•
•
Support E-mail: [email protected]
Sales E-mail: [email protected]
Telephone: +380-44-247-69-78
Fax: +380-44-494-49-32
Web Site: www.ua.zyxel.com
Regular Mail: ZyXEL Ukraine, 13, Pimonenko Str., Kiev, 04050, Ukraine
United Kingdom
•
•
•
•
•
•
•
Support E-mail: [email protected]
Sales E-mail: [email protected]
Telephone: +44-1344 303044, 08707 555779 (UK only)
Fax: +44-1344 303034
Web Site: www.zyxel.co.uk
FTP Site: ftp.zyxel.co.uk
Regular Mail: ZyXEL Communications UK, Ltd.,11 The Courtyard, Eastern Road,
Bracknell, Berkshire, RG12 2XB, United Kingdom (UK)
“+” is the (prefix) number you dial to make an international telephone call.
238
NetAtlas Workgroup User’s Guide
Index
Index
Numerics
802.1D 64
A
Access EMS Troubleshooting 222
access logs 34
accessing EMS 31
accessing Switch Manager 39
accessing switches 119
adding a device 53
Address Resolution Protocol (see also ARP) 65
alarm status 45
application status 69
applying templates (provisioning) 85
Area 0 211
Area ID 213, 214
ARP table 65
authentication 214, 215, 216
authentication, OSPF 213
Autonomous system (AS) 208, 211
B
Backbone 211
backup files 35
backup schedules, database 37
bandwidth control 175
broadcast storm control 176
C
chart formats 98
Class of Service (CoS) 177, 201
command buttons explained 48
compatible MVR mode 185
configuration files 138
NetAtlas Workgroup User’s Guide
configuration settings, and template 77
Configure 127
contact information 235
Copy to button 128
copying switch settings 128
copyright 233
customer support 235
D
database backup 36
database synchronization 35
default gateway 206
deleting devices 56
deleting submaps 56
device configuration 125
window overview 126
device list 44
device mapping 53
device reset 108
devices
scheduled firmware upgrade 116
scheduled restore for configuration 113
DHCP 204
client IP pool 206
modes 204
relay agent 204
server 204
setup 204
DHCP (Dynamic Host Configuration Protocol) 204
DHCP server status 71
DiffServ
DSCP 177, 201
discarding packets 152
disclaimer 233
DSCP (DiffServ Code Point) 177, 201
DVMRP
Autonomous system 208
implementation 208
threshold 209
DVMRP (Distance Vector Multicast Routing Protocol)
208
dynamic link aggregation 149
dynamic MVR mode 185
239
Index
E
editing device mapping 55
Element Management System (EMS) 29
EMS
main menu summary 46
EMS components 29
EMS database 35
Ethernet port status 67
IP table status 70
K
key, and OSPF 216
L
F
factory defaults 110
filtering 152
finding objects 55
firmware
scheduled uploads to devices 116
firmware upgrade 107
firmware versions, viewing 76
G
GARP timer 151
graph menu icons 97
graph styles 98
H
hardware status 57
I
icons, colors explained 44
IGMP 203
IGMP profile template 79
IGMP snooping 179, 184
Interface 211
interface performance 89
interface status 75
IP address mappings 64
IP interface 141
IP setup 139
240
link aggregation 148
loading factory defaults 110
logs 136
access 34
configuration 36
event 101
loopback test 102
M
MAC address learning 174
MAC address mappings 64
MAC forwarding 153
MAC forwarding, creating rules 154
maintenance 107
managed devices 29
Media-on-Demand (MoD) 184
menu shortcuts 45
metric 212
Mirror port 155
mirroring 155
multicast
and VLAN 220
multicast group templates 82
multicast status 67
Multicast VLAN Registration (MVR) 184
multicasting overview 179
MVR (Multicast VLAN Registration) 184
MVR modes 185
MVR ports 185
N
NE 109
configuration backup 109
NetAtlas Workgroup User’s Guide
Index
scheduling backups 111
Network Element (see also NE) 109
Network Management System (see also NMS) 29
NMS 29
R
OSPF 210
advantage 211
Area 211
Area 0 211
Area ID 213, 214
authentication 213, 214, 215, 216
Autonomous system 211
Backbone 211
Interface 211
redistribute route 212
router ID 212
Stub area 211
Virtual link 211
OSPF (Open Shortest Path First) 210
OSPF status 73
OSPF vs RIP 211
overview, main screen 33
RADIUS server 138
Rapid Spanning Tree Protocol (See also STP) 59
redistribute route 212
registration
product 234
related documentation 3
remote client 29
remote management 133
resetting devices 108
RMON
alarm 191
event 191
history 191
RMON (Remote Network Monitor) 191
RMON groups 191
RMON history 92
RMON probe 191
RMON statistics 90
router ID 212
routing interfaces 75
routing protocol 212
routing table 69
P
S
performance 89, 91
ping 121
ping test 103
Port mirroring
Mirror port 155
port mirroring 155
port security 174
port status 62
prioritizing traffic 145
product registration 234
protocol based VLAN 172
and IEEE 802.1Q tagging 172
isolate traffic 172
provisioning (applying templates) 85
saving configuration 50
setup 136
shortcuts, menu 45
Simple Network Management Protocol (See also
SNMP) 131
SNMP
agents 132
commands 132
managed devices 132
operation mode 38
SNMP configuration 131
SNMPc Network Manager 30
Spanning Tree Protocol (See also STP) 59
STP 59
STP configuration 147
STP port states 59
STP status 60
Stub area 211, 214
submap 53
switch information 49
Switch Manager 31
overview 43
O
Q
queuing 145
NetAtlas Workgroup User’s Guide
241
Index
switch setup 143
synchronizing device map 56
syntax conventions 4
syslog server 137
syslog setup 136
system info 131
system logs 101
system messages 45
T
table menu icons 94
telnet 119
template explained 77
template, for IGMP profile 79
template, for multicast groups 82
template, for VLANs 78
test
loopback 103
ping 103
traceroute 104, 105
time setup 135
Time To Live (TTL) 209
tools to access the switch 119
traceroute test 105
traffic shaping 175
trunking 148
trunking, dynamic 149
Master router 217
Preempt mode 219
Priority 219
Uplink gateway 219
Uplink status 73
Virtual IP 219
Virtual router 217
Virtual Router ID 219
VRID 73
VRRP status 72
W
warranty 233
note 233
web configurator 119
V
VID 141
viewing the switch 48
Virtual link 211
Virtual router
Status 73
Virtual router (VR) 217
VLAN 151
VLAN number 141
VLAN status 61
VLAN template 78
VLAN, protocol based, See protocol based VLAN
VRID (Virtual Router ID) 73
VRRP
authentication 218
Backup router 217
how it works 217
242
NetAtlas Workgroup User’s Guide