1
CompeGPS Team S.L. http://www.compegps.com http://support.compegps.com TwoNav Sportiva 2.1 User‟s Manual Content Content .......................................................................................................................................... 1 1 Introduction............................................................................................................................. 5 2 Maintenance ........................................................................................................................... 6 3 4 2.1 Battery Recharge........................................................................................................... 6 2.2 Bumps and water........................................................................................................... 6 2.3 Autonomy ...................................................................................................................... 7 2.4 Connection to PC (storage unit) .................................................................................... 7 2.5 Using the electronic compass ....................................................................................... 7 2.6 Updating the software ................................................................................................... 7 General description ................................................................................................................ 8 3.1 The device ..................................................................................................................... 8 3.2 Navigation window......................................................................................................... 8 3.3 Menu ............................................................................................................................ 12 3.3.1 On-road/Off-road ..................................................................................................... 13 3.3.2 Navigate… ............................................................................................................... 13 3.3.3 Data Lists ................................................................................................................. 13 3.3.4 Discover ................................................................................................................... 14 3.3.5 Status....................................................................................................................... 15 3.3.6 Settings .................................................................................................................... 16 3.4 Contextual menus........................................................................................................ 16 3.5 Shifting over lists ......................................................................................................... 17 3.6 Using MicroSD slot ...................................................................................................... 18 Settings ................................................................................................................................ 18 4.1 On-road/Off-road Selector ........................................................................................... 18 4.2 2D/3D/3D+ ................................................................................................................... 20 4.3 Data fields .................................................................................................................... 21 4.3.1 Selection of the data fields ...................................................................................... 23 CompeGPS Team S.L. http://www.compegps.com http://support.compegps.com 4.3.2 Special Functions .................................................................................................... 23 4.4 Record the track .......................................................................................................... 24 4.5 Favourites .................................................................................................................... 24 4.6 Display ......................................................................................................................... 26 4.6.1 Available commands Default/Advanced .................................................................. 26 4.6.2 Automaps ................................................................................................................ 26 4.6.3 Orientate map .......................................................................................................... 27 4.6.4 Auto zoom ............................................................................................................... 28 4.6.5 Night view ................................................................................................................ 28 4.6.6 Re-centring .............................................................................................................. 29 4.6.7 Data Fields .............................................................................................................. 29 4.6.8 Tool bar ................................................................................................................... 32 4.6.9 3D Reliefs ................................................................................................................ 33 4.6.10 3D mode .............................................................................................................. 33 4.6.11 Active POIs .......................................................................................................... 33 4.6.12 Active personal POIs ........................................................................................... 34 4.6.13 Scale bar ............................................................................................................. 34 4.6.14 Pointer ................................................................................................................. 34 4.6.15 List menu ............................................................................................................. 35 4.7 Vehicle ......................................................................................................................... 35 4.8 Navigation .................................................................................................................... 36 4.8.1 Available commands Onroad/Offroad and Default/Advanced................................. 36 4.8.2 Auto route ................................................................................................................ 36 4.8.3 Speed limit ............................................................................................................... 38 4.8.4 Ecocalculator ........................................................................................................... 38 4.8.5 Smoother ................................................................................................................. 38 4.8.6 Tracklog ................................................................................................................... 38 4.8.7 WPT alert ................................................................................................................. 39 4.8.8 Next WPT ................................................................................................................ 39 4.8.9 Altitude ..................................................................................................................... 40 4.8.10 4.9 Bearing ................................................................................................................ 41 System ......................................................................................................................... 41 4.9.1 Volume .................................................................................................................... 41 4.9.2 Brightness ................................................................................................................ 42 4.9.3 Autonomy ................................................................................................................ 42 CompeGPS Team S.L. http://www.compegps.com http://support.compegps.com 5 6 4.9.4 Language ................................................................................................................. 43 4.9.5 Calibrate screen ...................................................................................................... 43 4.9.6 Barometer calibration .............................................................................................. 43 4.9.7 Compass calibration ................................................................................................ 43 4.9.8 Folders ..................................................................................................................... 44 4.9.9 Units......................................................................................................................... 45 4.9.10 Coordinates ......................................................................................................... 45 4.9.11 Time zone ............................................................................................................ 46 4.9.12 Default settings .................................................................................................... 46 4.9.13 Update OS ........................................................................................................... 46 4.9.14 Device ID ............................................................................................................. 46 4.9.15 About ................................................................................................................... 46 4.9.16 Advanced ............................................................................................................. 46 Select destination ................................................................................................................. 47 5.1 “Navigate…” button ..................................................................................................... 47 5.2 Waypoints, routes and tracks Lists .............................................................................. 48 5.3 On the map .................................................................................................................. 48 Following indications ............................................................................................................ 49 6.1 6.1.1 6.2 6.2.1 7 8 On-road Navigation ..................................................................................................... 51 Visual information .................................................................................................... 51 Off-road navigation ...................................................................................................... 52 Visual information .................................................................................................... 53 Radar warnings / POIs ......................................................................................................... 54 7.1.1 Radars ..................................................................................................................... 54 7.1.2 POIs ......................................................................................................................... 54 Data management (waypoints, routes, tracks and maps) ................................................... 54 8.1 Waypoints .................................................................................................................... 54 8.1.1 What is a waypoint? ................................................................................................ 54 8.1.2 Supported formats ................................................................................................... 55 8.1.3 Waypoints list .......................................................................................................... 55 8.1.4 Open and close ....................................................................................................... 56 8.1.5 Create and edit ........................................................................................................ 56 8.1.6 Search loaded waypoint on screen ......................................................................... 58 8.1.7 Properties ................................................................................................................ 58 8.1.8 Navigate .................................................................................................................. 59 CompeGPS Team S.L. http://www.compegps.com http://support.compegps.com 8.1.9 8.2 Waypoints contextual menus .................................................................................. 59 Routes ......................................................................................................................... 60 8.2.1 What is a route? ...................................................................................................... 60 8.2.2 Supported formats ................................................................................................... 60 8.2.3 List of routes ............................................................................................................ 61 8.2.4 Open and close ....................................................................................................... 62 8.2.5 Create and edit ........................................................................................................ 63 8.2.6 Search loaded route on screen ............................................................................... 68 8.2.7 Properties ................................................................................................................ 68 8.2.8 Route Graph ............................................................................................................ 68 8.2.9 Activate a route (navigate) ...................................................................................... 69 8.2.10 8.3 Tracks .......................................................................................................................... 72 8.3.1 What is a track? ....................................................................................................... 72 8.3.2 Supported formats ................................................................................................... 72 8.3.3 Record a track while navigating .............................................................................. 72 8.3.4 Track list .................................................................................................................. 73 8.3.5 Open and close ....................................................................................................... 74 8.3.6 Create and edit ........................................................................................................ 74 8.3.7 Search a loaded track on screen ............................................................................. 80 8.3.8 Properties ................................................................................................................ 81 8.3.9 Track graph ............................................................................................................. 83 8.3.10 Activate a track (Navigate) .................................................................................. 83 8.3.11 Tracks contextual menu ...................................................................................... 84 8.4 9 Routes contextual menus .................................................................................... 70 Maps ............................................................................................................................ 85 8.4.1 Supported formats ................................................................................................... 85 8.4.2 Types of maps ......................................................................................................... 86 8.4.3 Maps lists ................................................................................................................. 86 8.4.4 Open and close ....................................................................................................... 87 8.4.5 Search a loaded map on screen ............................................................................. 87 8.4.6 Properties ................................................................................................................ 88 8.4.7 Multi-Maps ............................................................................................................... 88 8.4.8 Contextual menu of the map ................................................................................... 88 “Simulation” and “Zoom to...” ............................................................................................... 89 9.1 Simulation .................................................................................................................... 89 CompeGPS Team S.L. http://www.compegps.com http://support.compegps.com 9.2 Zoom to… .................................................................................................................... 90 10 Support ............................................................................................................................ 91 11 Limited warranty .............................................................................................................. 91 12 Appendix 1 – Data fields ................................................................................................. 92 13 Appendix 2 – Equivalences of peculiar signs .................................................................. 94 1 Introduction Thank you for purchasing TwoNav, the dual (for outdoor and in-car) GPS navigating system that will help you enjoy the best assistance to orientate you in any type of environment while carrying out any type of activity. Having an appliance which offers directional assistance, both on-road and off-road, can prove invaluable for increasing the safety of these journeys. Despite this, there is the possibility that, under certain circumstances, the user may become distracted by misuse of this technology, whereby it may in the end become a hazard to him or her, and to his or her environment. This possibility of using TwoNav in any type of vehicle makes it particularly important to consider a series of rules and regulations for using it so, far from being a source of potential risks, will contribute to personal safety. Most of these recommendations are concerned with using the system fitted in vehicles, although the bases of them should also be taken into account for journeys on foot. Fitting the appliance correctly: The appliance should be fitted in a place where it will not obstruct the vehicle driver‟s visibility of the road. It should additionally be secured, to ensure it cannot fall off easily and hinder driving. Do not handle the appliance whilst driving: The route planning should be completed before setting out. Any change or clarification required must be made with the vehicle stopped in a safe place, away from traffic (not on the road or kerbs). When on the road, you should be guided by the sound signals: The program‟s voice system will warn you of upcoming manoeuvres and of the distance to when you will have to carry these out. A glance at the visual information may be useful, but you should resort to this only if it can be done safely (with the vehicle appropriately stopped). When driving, you should always keep your eyes on the road. The front-seat passenger can be a great help: The navigator is normally facing the driver. If you have a front-seat passenger, we recommend this person be in charge of handling the appliance, making any clarifications or changes as required. Getting it wrong is not a problem: Neither navigators nor people are infallible machines. In the event an indication cannot be followed and a direction other than the fixed one is taken, the system will automatically calculate a new route, which will adapt to the new situation and will take you to your destination just the same. Maps always contain errors: Despite the tremendous updating work done by Tele Atlas, it is impossible to have 100% accurate information. Recent changes in correct street directions, new streets or restrictions due to road works are examples of circumstances that may partially invalidate the route calculation made by TwoNav. It is CompeGPS Team S.L. http://www.compegps.com http://support.compegps.com very important to be alert to these changes and to adapt to the new situation. As soon as the program detects that it has not been able to follow the preset route, it will calculate a new one, which will take you to your destination just the same. TwoNav assists you in navigation. Traffic regulations have always preference! 2 Maintenance 2.1 Battery Recharge The TwoNav Sportiva Li-on battery is recharged via the USB port. It is normally fitted with 3 power sources: AC/DC charger: Included in the TwoNav Sportiva kit. PC: When connecting the device to a computer, besides allowing you to manage the data present in the memory from the PC, the battery is also charged. Charger for car lighter: Not included in the series. You can operate normally while the TwoNav is connected to the power source, except if it is connected to a PC. While battery is charging, LED besides TwoNav logo will blink. When charge is complete it will be continuously on. Important: When unplugging the device from the power source, TwoNav will inform you of the disconnection. If you do not answer the message within 30 minutes, the system will turn off in order to avoid accidental discharges (you may deactivate this function form „Configuration > System > Autonomy) Warning: Avoid vibrations or rude movements on device while USB port is connected. It may deform USB port, being reparation out of warranty. Do not re-charge battery while driving a motorbike or any other vehicle which is causing vibrations. 2.2 Bumps and water TwoNav Sportiva is a device prepared to resist the strain of an intensive use during the practice of outdoor activities and, therefore, its performance must not be affected by exposure to small bumps or to rain or splashing water. However, in order to make the most of the system‟s performance it is advised, as far as possible, to prevent the device from suffering serious bumps and that its permanent exposure to dust or water. The resistance to water is based on the correct attachment of the rubber covers that give access to the slots and ports of the device. It is therefore important to check that these covers are well sealed prior to beginning our activities. Never soak the device in water, not even when all the covers are well sealed. Avoid vibrations or rude movements on device while USB port is connected. It may deform USB port, being reparation out of warranty. Do not charge the battery during your motorbike trips. USB port would suffer deformation which is not covered by warranty. See next section to know how to optimize autonomy. CompeGPS Team S.L. http://www.compegps.com http://support.compegps.com 2.3 Autonomy TwoNav Sportiva may operate around 6 consecutive hours with the screen ON with no need of recharging the battery and up to 20 hours with the screen OFF and recording the track. The screen uses an important part of the energy resources, so turning it off may make the life of the device longer. The screen of the device will be turned off by default after 1 minute of inactivity. You may also turn the screen of manually by a sustained pressure on the „HOLD‟ button. From “Main Menu > Configuration > System > Autonomy”, you may deactivate or modify this time, as well as enter other options that may improve the autonomy of the device. 2.4 Connection to PC (storage unit) When TwoNav Sportiva is connected to the PC by means of the USB wire, the device becomes a “storage unit”. Two new storage units will then be shown on your PC: Sportiva: inner memory of the device Removable disk: Micro SD card that may be inserted into the device (not included). This way you will be able to transfer data from the PC to the Sportiva and vice versa. Please note that the folders to save data in the TwoNav Sportiva are: Maps: TwoNavData\Maps Data (Waypoints, routes and tracks): TwoNavData\Data 2.5 Using the electronic compass TwoNav Sportiva is fitted with a digital compass so you have accurate information available on the directions to follow even if you are stopped. To be able to use the information supplied by the compass you must follow two steps: 1. Adjusting the compass: Go to „Main Menu > Configuration > System > Calibrate Compass‟. Once inside the adjusting utility, move device rotating in several directions place for a few seconds. 2. Go to „Main Menu > Configuration > Off-road > Bearing‟ and select „Automatic‟. This way, the information coming from the compass will be considered when you are stopped or driving very slowly (in these cases, the GPS information is less reliable to determine orientation). Note: Adjustments must be made outdoors and far from sources of alterations of the magnetic field, such as cars, buildings or electric lines. For further safety, it is recommended to adjust the compass prior to any outings. 2.6 Updating the software The TwoNav software is continually being improved in order to add new functionalities and polish possible errors. TwoNav has to software levels: TwoNav: Executed over the operating system and interacting with user. Operating system: Executed under TwoNav and controlling the more basic operations of the device. CompeGPS Team S.L. http://www.compegps.com http://support.compegps.com Normally, software updates are for TwoNav, but operating system can also have updates. Visit regularly the TwoNav (www.twonav.com) and CompeGPS (www.compegps.com) web pages to be regularly informed about the latest available version for your device and get to know the steps to follow for installing it. 3 General description 3.1 The device ON button: Short press: turn device off Long press: turn device on + block/unblock device MENU button: 3.2 Short press: page Long press: menu Navigation window General/On-road (On-road mode will only be available if V-map is available) CompeGPS Team S.L. http://www.compegps.com http://support.compegps.com 1. Distance to next event: Distance left to next event (roundabout, waypoint, exit). 2. Next manoeuvre: When navigating On-road, the „next event‟ space will display a representation of the next manoeuvre to be done (right turn, left turn, roundabout, diversion, etc.). 3. Tool Bar: Its content can be customized from Tool bar manager 4. Show/Hide tools 5. Mute 6. Orient map (north up/track up)*: The map may be fixed on the north or rotate, depending on our movements. 7. 2D/3D: Changes the perspective between 2D and 3D (+info). 8. Data pages: Enter data pages to check all type of information relating to your present navigation. 9. Data bar: Shows the data that is set from „Settings > Display > Data fields‟ (+info). 10. Show/Hide Data Bar: You may hide the data bar to get a broader view of the map. CompeGPS Team S.L. http://www.compegps.com http://support.compegps.com 11. Time: It is refreshed with the data received from the GPS 12. Speed 13. Distance to Destination 14. Estimated time of arrival to destination 15. Menu button: Goes to TwoNav Main menu. 16. Status icons (enters status window): To indicate the present battery and GPS coverage level. The page „Status‟ is entered by pressing on them. 17. Speed limit of present road: Indicates the legal speed limit of the road on which we are. 18. Re-centring (after sliding the map): Press the „re-centre‟ button to focus on your present position after sliding over the map. 19. POI: V- map point of interest (petrol station, hotel, cash point, etc). 20. Present position: Indicates your position and present course. Its colour changes depending on the configured vehicle or if it is in „Simulation‟ mode. 21. Manoeuvre indication: Illustrates the manoeuvres to be carried out on the map and more accurately. 22. Calculated Route: Shows the automatically calculated route to be followed. 23. Zoom + 24. Zoom 25. Scale ruler: Visual ruler to quickly evaluate distances on the screen. 26. Next Street: Indicates the next street to be taken following navigation. 27. Present Street: Name of the street where you are. Off-road CompeGPS Team S.L. http://www.compegps.com http://support.compegps.com 28. Compass: Shows the orientation of the device. The source of this datum (GPS, electronic compass or „automatic‟) may be set from „menu > Settings > Off-road > Bearing‟. 29. Currently Recorded Track: If the present track is being recorded, we can see its trace marks behind us. 30. Guide line (waypoint direction/track): Joins your present position to the place you are heading for (track or next waypoint) 31. Next waypoint 32. Loaded Track 33. GOTO arrow: Direction on which the next waypoint is. When following a track, it will indicate its direction (see Off-road navigation). 34. Track name / Next Waypoint: Name of the next waypoint or the track being followed. 35. Loaded route 36. Pan/Rotate map: Choose between two types of movements: a. Panning: you may move along the map without changing orientation in order to see some new parts. CompeGPS Team S.L. http://www.compegps.com http://support.compegps.com b. Rotation: it changes the orientation of the map in a clock-wise or anti clock-wise sense (horizontal dragging) or up/down (vertical dragging). You may move the map dragging it by means of the touch screen or the joystick. 37. Altitude 38. Show/hide graph/data bar: You may hide the data bar to get a broader view of the map. When navigating a route or a track, or just recording a track, graph will also be available here and this button will have 3 states: 3.3 Data bar Graph bar Nothing Menu Most of the options of the program may be entered from the TwoNav Main menu. The On-road/Off-road mode selectors can be found in it, as well as the access to the different sections of functions and a direct access to the map. CompeGPS Team S.L. http://www.compegps.com http://support.compegps.com 3.3.1 On-road/Off-road TwoNav features two navigation modes to meet the needs of any environment. Press the corresponding tab on the main menu to activate the most suitable mode for you. For further information, check the section On-road/Off-road selector 3.3.2 Navigate… TwoNav features three basic ways of activating navigation towards a destination: By means of the Navigate button… By means of the waypoints, routes and tracks lists By means of selection on map Check the section Select destination for further information 3.3.3 Data Lists By pressing on the DATA button on the main menu, you will be able to manage the available files on your device. This operation is carried out through the waypoints, routes, tracks and maps lists. The files to be taken into consideration on this lists will be the ones saved in the folders „TwoNavData/Maps‟ (for maps) and „TwoNavData/Data‟ (tracks, routes and waypoints). The general functions of these lists are as follows: CompeGPS Team S.L. http://www.compegps.com http://support.compegps.com Available elements open: The available elements on the data folder can be seen on this list. The open elements will be arranged on the top of the list with a ticked square. o Press on the name of any element to open it. o Press on the left square to close it. Sub-elements: By briefly clicking on the name of an element (waypoints file or route) the waypoints which it contains will be displayed. Press again on the name of the element to hide its contents. Actions on the elements: You can carry out diverse actions on each element. When selecting an element (click briefly on it) the bottom buttons of the list will show the most important functions for this element (see properties, zoom on the element, add waypoints, etc.). To enter the list of all the functions keep the pressure on the element for a while Contextual Menu will open. To get further knowledge of the elements included in the Data section, check the section Waypoints, Routes, Tracks and Maps. 3.3.4 Discover From the option „Discover‟ on the main menu, you may enter useful tools in order to explore the areas you are going to visit: Zoom to...: Choose the element (address, POI, favourite, data or coordinates) that you wish to see on the map and it will be displayed on a new window. (+info) Simulate: You may select two spots (present position, by address, by map, POI, etc.) to execute a simulation of navigation from spot A to spot B. (+info). CompeGPS Team S.L. http://www.compegps.com http://support.compegps.com Stop simulation: It stops the ongoing simulation (both from A-B spots as from any track being animated). 3D Panorama: By using this option you may get an aerial view of the surroundings. In order to do it, 3D mode must be activated. 3.3.5 Status The „Status‟ allows you to know the general status of the TwoNav by displaying fields such as battery level, reception and position of satellites, luminosity of the screen, sound volume or the recording of a track. There are two ways of entering the „Status‟ page: From „Main Menu > Status‟ From the map, with the icons located on the bottom left Once in the „Status‟ page, you may enter to set the parameters it contains by pressing briefly on the percentage bar of each element. You will then enter the following items: Satellites status: enter to see the number of satellites available, their distribution orbiting over the vault and the coverage they reach. To disconnect the GPS press on the button. If the GPS is disconnected, TwoNav will not receive any position signal and many of the options will stop working properly. TwoNav will attempt to fix the current position. If you are anywhere without GPS cover (e.g.: inside a building), the GPS status will be “Without position”; i.e.: TwoNav has successfully established communication with the GPS, but the GPS cannot fix your position because there is no satellite signal. CompeGPS Team S.L. http://www.compegps.com http://support.compegps.com GPS possible states: Disconnected Connecting... Error (not found) Connected without position Connected and with position Simulating Battery: you will be able to see the percentage of load in the battery and, by clicking on it, you may manage the autonomy options of the device. (+info) Brightness: percentage of luminosity displayed by the screen. (+info). Volume: set the general volume and the volume of each audible element individually. (+info). Track: by keeping the „record‟ button pressed, the present track will be saved. When pressing „pause‟ positions will stop being saved until „record‟ is pressed again. (+info). 3.3.6 Settings The page „Settings‟ enters the main options to customize TwoNav for each type of use (see section Settings for more details). These options are grouped in the following sections „Display‟, „Vehicle‟, „Navigation‟, „System‟. 3.4 Contextual menus TwoNav uses Contextual Menus to enter the most adequate functions for each moment and option in an easy and quick manner. CompeGPS Team S.L. http://www.compegps.com http://support.compegps.com To open the Contextual Menu of any element (track, map, waypoint…), press on it for one second. You may open contextual menus on the following settings of the user interface: Navigation window (map): Depending on the element on which you open the Contextual, you may enter different functions. There is a description of the available functions on the menu of each element on the specific sections for waypoints, routes, tracks or maps. Data fields: When opening the Contextual on the data fields (on the data bar or the data pages) you will be able to modify the available fields, set an alarm or enter other functions that may change depending on the field (reset, countdown, etc.). (+info) Lists: The Contextual Menu may be opened to see the different actions to carry out on any given element (waypoints, routes, tracks and maps) by clicking on its name from the data lists. 3.5 Shifting over lists TwoNav uses a system of lists on the various situations: data (tracks, waypoints, routes and maps), data fields, contextual menus, etc. A scroll system has been developed in order to facilitate the shifting through these lists, which allows for the movement around the different options by dragging the pen or finger upwards or downwards. If you execute a brief shift, the last displayed element will become the first on the list. If you execute a long shift, the list will keep scrolling down and it will stop at the end or by pressing on the screen. CompeGPS Team S.L. http://www.compegps.com http://support.compegps.com If you want to move along the lists in a more accurate way, you may use the side arrows to achieve a more controlled movement. 3.6 Using MicroSD slot TwoNav Sportiva allows to extend storage memory with a MicroSD card. By default, MicroSD card data must be placed following the typical TwoNav data organization: Maps: TwoNavData/Maps Data (tracks, rutas, waypoints): TwoNavData/Data If you don't create a TwoNavData/Maps folder and save your maps in it, they will not he shown in TwoNav's maps list. You can modify TwoNav's folders configuration to search for maps in other folders. Just go to 'Settings > System > Folders' and add a new maps folder or modify an existing one. For example, you can choose MicroSD card root so any map in SD card will be read, no matter in which folder it is. Important: It is not possible to have the same map in two map folders at the same time. If you install a mosaic map in MicroSD, be sure that the same map does not exist in internal memory. Only one of them will be considered. 4 Settings TwoNav is set by default so as to meet the needs of most users. However, it is important that you spend some time analyzing which are the best options for the use you want to give to it and to adapt it to the conditions in each moment. 4.1 On-road/Off-road Selector TwoNav has two navigation modes: On-road and Off-road. You can clearly see the mode you are on by looking at the colour of the users interface (green or grey). The functionalities of the CompeGPS Team S.L. http://www.compegps.com http://support.compegps.com program also change in various aspects, which are generally explained in this section and are detailed in other sections of this manual. You may change the TwoNav navigation mode by pressing on the tabs on the top of the Main menu: Off-road : The areas where open air activities are carried out do not usually have usable information for the automatic calculation of the route, and therefore cartography will only be useful as a visual reference. In order to have assistance for orientation you will have to use positional references (waypoints, routes and tracks) that you can create yourself or get from diverse sources, such as friends, web pages or Internet forums. See sections „Waypoints, Routes and Tracks‟. On-road : It uses the information of the road maps (V-maps from CompeGPS) to calculate automatically the route that we must follow to reach our destination. This route will take into consideration the available roads and will give detailed orientation through them using visual and voice indications. See sections „Automaps‟. Important: On-road mode will only be available if you have a routable V-map present in maps folder. Otherwise, On-road tab will be disabled. Depending on the current mode, next features will change: Options: You can have specific options configuration for On-Road and another one for Off-Road. Not all options are profilable. Here you have the list of profilable options: o In „Display‟ options: Automaps Orient (track up / North up) Autozoom Re-center Rotate screen Data fields Tool bar 3D Reliefs options 3D mode Scale bar Pointer options List menu o In „System > Advanced‟ options: Static navigation Data fields: Content of data bar and data pages is different to better fit the needs of each use. A change in one mode will not affect the other, so you can configure a specific set of data fields for On-Road and another one for Off-Road. Tool bar: You can also configure a specific set of tools for each mode. Menu: Availability and order of some functions will change. Check Navigate and Navigation options sections. CompeGPS Team S.L. http://www.compegps.com http://support.compegps.com 4.2 2D/3D/3D+ TwoNav offers three visualizing modes so you have the most adequate perspective in each moment. 2D: Zenith Plan. 3D: Three dimensional flat image, i.e. with no relief, but with a perspective. 3D+: Displays the holography of the terrain in real 3D. This mode will only be available if next requirements are met: Press o Elevation map loaded (CDEM) o Raster map loaded (normally RMAP or ECW) button in tools bar to change mode. By default, this button has 2 positions: 2D 3D/3D+: TwoNav will try to show 3D+ mode. If not possible, 3D (flat) will be shown. From 3D mode options you can configure this button to have 3 positions instead of 2: 2D 3D (flat) 3D+ Notes on 3D+: 1. Remember that it is required to have a raster map and an elevation map (CDEM). Otherwise this mode will not work. 2. In „Off-road‟ mode, when trying to enter 3D+, an available CDEM in the area will be sought and it will open automatically. In On-road mode, you will have to load the CDEM manually. 3. Vectorial maps won‟t be displayed in 3D+ mode. CompeGPS Team S.L. http://www.compegps.com http://support.compegps.com 4.3 Data fields TwoNav contains a multitude of data on your navigation that may be of great interest in your outings (speed, height, distances...). This data is basically found in two spaces: 1. Data bar: The data bar will be displayed at the bottom of the screen during navigation. You will be able to keep it visible or hide it by means of the icon. When navigating a route or a track, or just recording a track, graph will also be available here and this button will have 3 states: Data bar Graph bar Nothing 2. Data pages: The data pages offer you an additional space to the data bar in order to display a larger number of fields in a more clear way. Press the button to enter them. TwoNav contains three pages of data that are displayed in order: 1. Data page: 8 data fields. 2. Compass page: a special field with an illustration of the compass and 6 data fields. CompeGPS Team S.L. http://www.compegps.com http://support.compegps.com 3. Graph page: It contains a special field with an altitude profile. If you are navigating a route or a track, it will be shown with current position marked by a vertical red line. You can zoom using buttons at top right. If not navigating a route or a track, currently recorded track will be shown. 4 data fields related with altitude accompany the graph. Both the data bar as the data pages can be set in order to show the field that interests you most. Besides, most of them have additional functions, such as an alarm programmer. CompeGPS Team S.L. http://www.compegps.com http://support.compegps.com Data fields are configurable to have a different set for On-Road or Off-Road. Changes made in one mode will not affect the other. 4.3.1 Selection of the data fields You can select data fields in two ways: Change just one field: By opening the contextual menu in any field (long click) and selecting „Change this field‟. This will let you choose directly the data to display in that field. Data field manager: From „Main Menu > Settings > Display > Data fields‟. Check the section „Fields‟ for a more detailed description of the functionalities of this editor. You can find the list of the available fields in appendix 1 4.3.2 Special Functions When opening a contextual menu on a data field, you will find the available functions associated to this field. The options are not the same in all fields. Here follows a description of the ones you may find: 1. Data Fields: Enters the editor of the available fields. 2. Don‟t show this field: Eliminates a datum immediately. 3. Program alarm: Define a higher or lower limit as the type of signal (visual or audible) to let you know when exiting this range. In case an audible signal is added, you must choose the sound file you wish to be reproduced. 4. Reset: Typically, you may find it in fields such as the travelled distance meter (odometer) o chronometer. They reset the counter to 0. CompeGPS Team S.L. http://www.compegps.com http://support.compegps.com 5. Reset all: Resets all data fields that can be reset except total odometer 1 and 2. 6. Countdown: You may define the value from which units of distance and time will keep being subtracted (according to field) until reaching 0. 7. Compass calibration: Direct access to the digital compass calibration. 8. Barometer calibration: Direct access to the digital barometer calibration. 4.4 Record the track You may choose if you want to keep saving your present trip in a track or not. Go to the Status window and press the „record‟ key so your movements are added to the currently recorded track. By pressing the Pause key, the positions stop being recorded until you press „record‟ once more. The track being currently recorded will go first place on the track list and its name will be the present date. You can configure accuracy level of recorded track from tracklog options (+info). 4.5 Favourites Besides the possibility of creating geo-referenced points (waypoints), TwoNav also has the possibility of setting up all types of geographical locations, such as Favourites points to which navigate. Your home, a restaurant you like, a spectacular park you have visited, your children‟s school …, may become part of your favourites list. You may enter to set up your Favourites from the main menu: The Favourites list is not set by default, so you have to set it up yourself introducing the elements to make up this list. Therefore, the first time you enter Favourites, you will find the following screen: CompeGPS Team S.L. http://www.compegps.com http://support.compegps.com Press on the „stylus‟ icon to edit this list On the following screen, the „add‟ icon lets you create your first Favourite point Choose the way you want to create your Favourite point: Present position: it will establish your current position as a favourite point, and will ask you directly to add a name or establish it as your home. Present destination: it will establish the present destination of the active navigation. Address: it will let you create by choosing an address (city, street, number). By map: you will be able to create a favourite on the map currently loaded. Press on the wished place and a red cross will indicate the point where this favourite will be established. By waypoint: Choose a waypoint from the available waypoints files in order to establish the favourite point using your coordinates. Your Favourites will be displayed on the map and in the favourites list with the The point established as „Home‟ will be represented by the icon Once a Favourite point is created you will be able to: Edit the characteristics of your Favourite by means of the Add or delete Favourites from your list by means of the Make this Favourite your present destination by means of the tool. tools tool. icon. CompeGPS Team S.L. http://www.compegps.com http://support.compegps.com 4.6 Display 4.6.1 Available commands Default/Advanced Default: Automaps Orientate map Autozoom Night view Re-centring Rotate screen Advanced: 4.6.2 Data fields Tool bar Active POI Active personal POI 3D landscapes 3D mode Scale ruler Pointer List menu Automaps „Menu > Settings > Display > Automaps‟ The easiest way to use the most suitable map for each situation is to activate the function „Automaps‟, so in „On-road‟ mode the Vmap road map will open automatically and in „Off-road‟ mode it will close and the map with the best resolution for our present position will open. The „Automaps‟ option is off when a cross is displayed on the icon: CompeGPS Team S.L. http://www.compegps.com http://support.compegps.com It is recommended to have the Automaps option always on, and more especially on those instances in which you need to make a change in navigation mode during the route. For example, if you switch from Off-road mode to On-road mode and „Automaps‟ is not on, it will mean that the new On-road route won‟t be properly calculated and the Off-road mode will still be displayed on the screen in spite of having the most suitable map for each navigation mode. Check the section „Maps‟ for further information. 4.6.3 Orientate map „Main menu > Settings > Display > Orientate map‟ You may choose between two display modes for the elements loaded on the map window: Orientate map towards course (track upwards): The map will rotate to adapt to your present course, and so the perspective in front of you will be displayed on the screen. No orientate the map (north upwards): Your position will be marked with the pointer in the centre of the screen and the pointer will rotate to show your present course. The map won‟t rotate and the North will always be upwards. CompeGPS Team S.L. http://www.compegps.com http://support.compegps.com You may modify this option from the button bar on the navigation window or from the „display‟ menu. 4.6.4 Auto zoom “Main menu > Settings > Display > Auto zoom” If the Auto zoom mode is active, the program will calculate the most suitable zoom for the present speed. Generally, the higher the speed, the further it will go. Note: „Auto zoom‟ is only active in On-road mode, as topographic maps used in Off-road mode may have different resolutions among them and it is not possible to define an automatic zoom that shows all of them properly. 4.6.5 Night view „Main menu > Settings > Display > Night View‟ In low ambience light conditions, the colours and brightness of the TwoNav screen may dazzle you. TwoNav contains a „night mode‟ that reduces the brightness of the screen and displays a user interface of darker tones. By activating the „At night and tunnels‟ option, TwoNav changes to „night mode‟ automatically at night or when inside a tunnel. CompeGPS Team S.L. http://www.compegps.com http://support.compegps.com The option „At night‟ makes it automatic but only for night and not for tunnels. If „automatic‟ is off, you will be able to select manually if you wish to have the night mode on or not. Note: TwoNav always keeps the time updated as long as the device receives the GPS signal. Usually, inside buildings, there is no reception of satellite signals and so, automatic „Night View‟ may be affected. 4.6.6 Re-centring „Main Menu > Settings > Display > Re-center‟ While navigating you may move the map to see other parts of the grounds, losing the reference of your present position. In these cases, a re-centring button screen. will be displayed on the TwoNav contains an automatic re-centring function, so if the map is not moved manually for 10 seconds, it will centre back to its present position. The time for re-centring may be modified and even turn it off, leaving the option of pressing the re-centring button to go back to your position. Re-centring can be performed with a smooth movement or instantaneously. Enable or disable „smooth re-centre‟ option as you prefer. Note: If the function „auto zoom‟ is activated, when pressing re-centring, the zoom suitable for your present speed will also return, losing then the variation of the zoom level you may have done. 4.6.7 Data Fields „Main Menu > Settings > Display > Data Fields‟ Once inside the editor, take the following steps: 1. Press on the „Type‟ pull-down menu to choose the section to be set. 2. Select the space you wish to edit (bar, page, compass o graph). Each space includes information related to its title. This way, on the compass page, we can find all the data concerning the bearing and on the graph page, all the data concerning altitude (slope, altitude, climb to destination...) among others. The data page manages all generic data, such as time, sunset, chronometer, etc. CompeGPS Team S.L. http://www.compegps.com http://support.compegps.com The data bar manages the elements displayed at the bottom of the page during navigation. 3. You may delete data by pressing on the left „check‟ mark and add other data by pressing on them. See a list of these variables and their meaning in Appendix 1. 4. On the compass and graph pages, a squared icon on the side shows the place corresponding to the enhanced field (normally compass and track graph) that will be enlarged on the screen. You may place another element in the enhance field by moving the order of the fields. On the compass page, the central position corresponds to the fifth element and on the graph page to the third. 5. You may modify the order of the data on screen with the arrows on the right of the window and they will shift the datum up or down one position. Note: By default, only fields of frequent use CompeGPS Team S.L. http://www.compegps.com http://support.compegps.com will be shown, alphabetically ordered. If 'infinite' button is pressed, full list of data fields will be shown. You can also add or remove pages to de default ones using the + or - symbols at top right of the data field manager window. Just press - to remove currently selected data page. Follow next steps to add a new page: 1. Press „+‟ 2. Enter a name for new page 3. Select a template for new data page 4. Choose data fields for it. You can find a list of the available fields in appendix 1 CompeGPS Team S.L. http://www.compegps.com http://support.compegps.com 4.6.8 Tool bar „Main Menu > Settings > Display > Tool bar‟ Tool bar can be customized to show the better combination for user. Tool bar manager works in the same way as data field manager. Next functions can be added to the tool bar: Page: Access data pages 3D mode: Switch 2D-3D/3D+ Orient map: Track up / North up Pan/Rotate: Movement mode Open...: Open file Shutdown screen Close all: Close all open files. Activate GPS: Start/Stop GPS connection Mark WPT: Creates waypoint in current GPS position with default name and icon in one click Mark and edit WPT: Creates a waypoint in current GPS position and access to properties so you can customize it. New waypoint: Create a waypoint choosing where to place it and customizing it properties. Mute Next Waypoint: When navigating a route or a track with waypoints, switch to the next one. Previous Waypoint: When navigating a route or a track with waypoints, switch to the previous one. Note: NextWPT and Previous WPT tools will only be visible when navigating a route or a track which contains waypoints. CompeGPS Team S.L. http://www.compegps.com http://support.compegps.com 4.6.9 3D Reliefs „Main menu > Settings > Off-road > 3D Reliefs‟ TwoNav may use elevation maps (point meshes with information on the height of the ground) to have the altitude data on the references created with the program (e.g. tracks, waypoints, etc.) to habilitate the visualizing mode 3D+ (3D real). Besides remaining subjacent and supply the ground altitude data, the 3D relieves may be seen with the following options: Draw landscapes on the 2D view: It will be seen if a CDEM is loaded, although it will take position in the lowest layer so any other loaded map will be displayed on top. Draw landscape with shadow: This visual option makes the relief drawing more attractive. Flat colour steps: Instead of using a fading colour, just one plain colour for each height interval will be used. This interval can be preset from the unfolding menu just below. 4.6.10 3D mode „Main Menu > Settings > Display > 3D mode You may set the following options for 3D mode: 3D mode: Choose the sequence for o o button in tools bar: 2D-3D+ (if raster map): 2 positions: 2D 3D/3D+: TwoNav will try to show 3D+ mode. If not possible, 3D (flat) will be shown. 2D-3D-3D+: 3 positions: 2D 3D (flat) 3D+ 3D+ mode will only be shown if its requirements are met (see 2D/3D/3D+ section) Altitude exaggeration: Multiplies the altitude of the relief to make a clearer effect in 3D+. Shading: This option will cause the relief to be displayed in a clearer and attractive way, as it features shadow simulations enhancing thus the variations of the grounds. This option is only effective on the 3D+ Field of vision: the field of vision determines the angle from which the map will be seen. When introducing angles over 60º, it is like a camera with wide lenses. Misty horizon: the furthest part to the perspective becomes faded, creating a misty effect between the sky and the map that distinguishes them more clearly. 4.6.11 Active POIs “Main Menu > Settings > Display > Active POIs” CompeGPS Team S.L. http://www.compegps.com http://support.compegps.com By means of the active POIs list you will be able to choose the POIs categories that the map is to show. All the POIs will be shown by default, but if the vision of certain categories is useless for you or even interferes, you may take them off so the map does not show them. When selecting destination or „zoom to‟ you will have all the information of the POIs categories, even those not being shown on the map. 4.6.12 Active personal POIs “Main Menu > Settings > Display > Act.pers.POI” By means of the active personal POIs list you will be able to choose the personal POIs files that will be shown on navigation window. When selecting destination or „zoom to‟ you will have all the information of the POIs files, even those not being shown on the map 4.6.13 Scale bar „Main menu > Settings > Display > Scale Bar” The Scale Ruler draws a metric visual reference over the distances managed by the screen. The scale changes size to represent „rounded‟ measurements. 4.6.14 Pointer „Main Menu > Settings > Display > Pointer‟ The icon signalling your present position can be modified choosing among various designs (you will only be able to change the icon that stands for the vehicle „car‟). When you select the „bicycle‟ and „pedestrian‟ types of vehicle, the colour of the pointer changes to the one preset for these modes. You may also modify the displayed pointer when carrying out a simulation or animation (green by default). Besides, you may find different utilities to help you control your movement better: Fixed ring and parallels: a circumference encircling our position will be drawn and two lines will indicate the course. Fixed ring radium: it determines the size of the circumference surrounding our position. CompeGPS Team S.L. http://www.compegps.com http://support.compegps.com Draw the parallel bow lines: we may choose to display or not the parallel lines of the first option. Variable ring: you may add more rings around your position. You have to define the radium of the inner ring and the number of successive rings which will be equidistant from the first inner ring. See turning radium: when turning, the radium corresponding to the circumference described will be displayed. See bow line: shows the direction line from the point of the position arrow (only in Offroad mode). 4.6.15 List menu ‟Main Menu > Settings > Display > List Menu‟ You may choose between two display modes of the submenus: 4.7 Button menu: This is the traditional mode. If there are more options than the screen can display, the „next‟ button will appear in order to enter it. List Menu: The options will be displayed on a continuous list. To move the list UP and DOWN keep the finger or the stylus on the list and drag. Vehicle “Main Menu > Settings > Vehicle” Choose your transport system to adapt aspects such as the types of roads allowed, the consideration of street direction or the expected average speed. The icon indicating your position will change colour depending on the chosen system of transport. CompeGPS Team S.L. http://www.compegps.com http://support.compegps.com 4.8 4.8.1 4.8.1.1 Navigation Available commands Onroad/Offroad and Default/Advanced On-Road Default: Autoroute Speed limit Ecocalculator Smoother Tracklog Advanced: 4.8.1.2 WPT Alert Next WPT Altitude Bearing Off-Road Default: Tracklog WPT Alert Next WPT Advanced: 4.8.2 Speed limit Ecocalculator Auto route “Main menu > Settings > Navigation > Auto-route” The „On-road‟ navigation mode can be adjusted so the automatic calculation of your routes is done according to your preferences: CompeGPS Team S.L. http://www.compegps.com http://support.compegps.com Fast/Short: The first option will calculate the estimated time of arrival, bearing in mind the speed of each road and will suggest the navigation which takes shorter. The second option will suggest a navigation based on distance, choosing the shortest way, although it may not be the fastest. When the option „by time‟ is activated, a chronometer will be displayed as a key icon. If a rule is displayed, the shortest route in distance will be calculated. Tolls/Highways/Unpaved: Select to choose any of these types of roads. A tick on the icon means that this type of route won‟t be used for the automatic calculation of the route. Re-calculation: Although TwoNav is configured with the most suitable relation for most cases, you may select the time or distance from the programmed route before it is considered that you are not following it and it is recalculated, adapting it to the present position. CompeGPS Team S.L. http://www.compegps.com http://support.compegps.com 4.8.3 Speed limit “Main Menu > Settings > Navigation > Speed limit” This section gives you options related to the speed alerts and traffic radars and can be set according to your preferences: Set a speed limit: the speed limit of each particular road will be considered by default, but you can set a fixed speed limit disregards the limit of each road. Speed warning: If you wish TwoNav to let you know when you drive over the established speed limit, you may choose among the different alert types, such as a speed limit icon, a visual alert or a visual alert plus an audible alert, or on the contrary, choose that it does not inform of it. Radar alert: You may select if you wish to be informed of the presence of radars on your route by activating this option. Radar distance alert: You may select the distance at which you wish to be informed of the presence of a radar within some preset values. Show radars: The exact position of all radars will be indicated by means of an icon on the map. I have a question. Note: For all the radar related functions to be operative you must have a file with this information in „TwoNavData > Radars‟ (+info). 4.8.4 Ecocalculator “Main Menu > Settings > Navigation > Ecocalculator” The Ecocalculator lets you know the CO2 emissions of your car and show it after the Data Bar (Datafields) during navigation if preset. To be able to calculate this emission, TwoNav considers the following parameters: Type of fuel: choose if the fuel is diesel or gasoline and introduce directly the emission per grams of CO2 per kilometre of your vehicle if you know this data. Administrative Power: engine power (CV), choosing among the preset options shown. 4.8.5 Smoother “Main Menu > Settings > Navigation > Smoother” The smoother lets the program calculate an interpolation of movement between the positions that the GPS adopts with the aim of showing a gentler movement to allow for a better perception of the speed at which we are driving in relation with the surroundings. This helps enormously the driver to calculate the distances and the exact moment in which to carry out a manoeuvre. Besides, it also makes a prediction of GPS position, correcting delay on the signal caused by the system, achieving to show current position almost in real time. Smoother is based on route calculated in On-Road mode, so it will only work if a destination is set and route has been automatically calculated on V-map. 4.8.6 Tracklog “Main Menu > Settings > Navigation > Tracklog” CompeGPS Team S.L. http://www.compegps.com http://support.compegps.com While navigating, TwoNav may automatically record the track of your departure and save it in the TwoNavData folder. Set up according to your needs or preferences: Recording interval: Choose the type of recording and interval you wish for the track to be generated for your navigation. o By time: The point of each track will be recorder every X seconds. o By distance: The point of each track will be recorder every X meters. o Automatic: the track will be automatically recorded when changing course and depending on speed. In a straight line, the program will record few points. Track colour*: Choose the colour for the generated track. Thickness*: Choose the thickness of the line representing the track between values of 1 to 7 points. Points shown without reduction*: The recorded track will be visible on the screen. Latest points will be shown as they are recorded (no reduction). You can choose how long will be this latest section of the track which will show all of its track points. Reduction for previous points*: In order to save memory, it is recommended to make a reduction of the rest of the shown track. Choose a reduction % and the shown track (except the latest points) will be reduced. For example, if you choose 80% reduction, only 1 of every 5 points will be shown on screen. Important: This reduction does not affect the recorded track file, which will keep all points. Only concerns to what is displayed on screen at that moment. * Option only shown if „advanced mode‟ is activated. 4.8.7 WPT alert “Main menu > Settings > Navigation > WPT Alert” Activate this option if you wish that, when reaching a waypoint, a sound is heard. Load your SD card (folder: „TwoNavData/Data‟ by default) the sounds that you want in *wav format and select the sound. 4.8.8 Next WPT “Main menu > Settings > Navigation > Next WPT” When navigating a route, you can select the required event to validate a waypoint and switch to next one: Radius of the next WPT: Enter inside the radius of the next waypoint (not any). Radius of any next WPT: Enter inside the radius of any of the next waypoint (next one and any of the succeeding ones are OK but not the previous). Roadbook mode: When entering the radius of any waypoint, it will be set as next. When going out of it, next one will be activated. This mode is thought for roadbooks, because when following a roadbook it is required to show the information of the current waypoint while in its surroundings. This way, instructions for each point can be followed correctly. Bisector inside next WPT: Enter inside the radius of next waypoint and cross the bisector that is formed with the previous and the next. Bisector inside next WPT or 10% of the radius of any WPT: Same as the previous, but if any waypoint is very near (10% of its radius) it will be validated and the next one will be activated. CompeGPS Team S.L. http://www.compegps.com http://support.compegps.com Only buttons bar: Never will automatically change to next waypoint, only manually with 'NextWPT' and 'PreviousWPT' buttons at buttons bar. Also from this options section, a default radius can be assigned for route waypoints, which will be taken when this information is not available. It means, if we defined a radius for a concrete waypoint of the route, it will be respected. But if it doesn't have radius the default one will be used. 4.8.9 Altitude „Main Menu > Settings > Navigation > Altitude‟ TwoNav features three altitude data obtained in different ways: Altitude: this is the data shown in the „altitude‟ field of the data bar, on the graph page and to which the points recorded by the track along the itinerary are kept. GPS Altitude: Direct reading from the GPS. Barometric altitude: Reading from the barometric altimeter of the device. Note: Although the data shown by default is the generic „Altitude‟, the data bar and the data pages can be preset so besides the generic „altitude‟ they also show the GPS or the barometric altitude (see Fields section). The generic „Altitude‟ data can be preset so it observes different values depending on your preferences. From „Menu > Settings > Off-road > Altitude‟ you will be able to select among the following options: GPS: The values from the GPS will be directly taken. Barometric altimeter: The data from this utility will be taken disregards the GPS. It is important to calibrate the barometer in order to achieve reliable data. You may calibrate the barometer in 2 ways: o Manual calibration tool: If you know the present altitude, you can enter it into the TwoNav from „Menu > Settings > Off-road > Calibrate barometer‟. CompeGPS Team S.L. http://www.compegps.com http://support.compegps.com o Automatic calibration tool: If you select the „Automatic‟ option in the „altitude‟ selector menu, TwoNav will continuously calibrate the barometric altimeter using the GPS position along time (see following point). If after some time you select „Barometric altimeter‟, the introduced calibration will be saved with the „automatic‟ option, but it won‟t be updated with the new GPS measurements. Automatic (recommended): the barometric altitude will be used, but the barometer will be automatically calibrated using the altitude data from the GPS by means of an algorithm that optimizes the final result. This is the recommended option for most users, as it minimizes the characteristic error of the altitude data from the GPS and, at the same time it overcomes the limitations of the barometric altimeter regarding atmospheric pressure and temperature, alien to altitude changes. 4.8.10 Bearing „Main Menu > Settings > Navigation > Bearing‟ The „Bearing‟ data determines the orientation of the map when „orientate map‟ (track up) is enabled. (see „orientate map‟ section). TwoNav has three different ways of determining the bearing you are taking during navigation: GPS: The latest positions received from the GPS to calculate the bearing of our present movement will be considered. As soon as we stop, this reference won‟t be reliable, as there will be no movement it can refer to. Compass: The data taken from the electronic compass will be taken in order to determine the orientation of the device. Automatic (recommended): When driving slowly the compass data will be taken. When driving fast the GPS position will be used. Note: Remember to calibrate the compass to get reliable data from it. 4.9 4.9.1 System Volume „Main Menu > Settings > System > Volume‟. On this page you will find the following settable elements: Silence: By activating this option, all the sounds from the device will be turned off, independently of the volume percentage set for every option. General: Regulate the general volume for the audible elements group. All the sounds are regulated by the preset of this option. CompeGPS Team S.L. http://www.compegps.com http://support.compegps.com Voice: Regulate the volume of the alert voices for the next manoeuvre. Alarm: Regulate the volume of the alarms and radar warnings, speed limits and arrival at waypoints. Clicks: Regulate the volume of pulses on the touch screen or buttons. 4.9.2 Brightness ‟ from „Main Menu > Settings > System > Brightness‟ Regulate the amount of light you wish the screen to have and adjust it to each situation. The higher the percentage of brightness is the more highlighted will the contents be. In night mode, the brightness will be automatically reduced to avoid dazzling. 4.9.3 Autonomy „Main Menu > Settings > System > Autonomy‟ In this section you will find utilities that will help you maximize the autonomy of the system: „Shutdown screen‟: determine a time after which the screen will automatically turn off *. Select „never‟ to activate this function. *Note: The option „Turn screen off after‟ won‟t work if the device is connected to an external power source and „car‟ has been selected as vehicle. „Shutdown backlight‟: Just backlight will be turned off, so screen will still be on. Shutting down screen saves more energy than shutting down only backlight. „Disconnect GPS at stops‟: it will detect a stop in your itinerary and will disconnect the GPS. A message will then appear asking if you wish to activate the GPS again. It is important to say yes to this message when setting out again. Protection against accidental unplugging: To prevent the device from discharging if it is disconnected accidentally from the power source (engine turned off, automatic turning off of the PC, etc.), TwoNav detects the unplugging and an alert message appears. If you don‟t answer the message, after half an hour, the system will go off . CompeGPS Team S.L. http://www.compegps.com http://support.compegps.com 4.9.4 Language “Main Menu > Settings > System > Language”. You may modify the language of the texts and voices of the system from this section. Note: The conversion of the voices may take more than one minute. 4.9.5 Calibrate screen „Main Menu > Settings > System > Calibrate Screen‟ The option „Calibrate screen‟ lets you correct all the little maladjustments that the touch screen may have, that is to say, that you press on one spot and the reactions does not appear on this concrete spot, but a little misplaced. When calibrating the screen, the following instructions message will be displayed: “Press and briefly hold stylus on the center of the screen and repeat as the target moves around the screen. Press Esc to cancel” Click briefly with the stylus on the centre of the cross and repeat as the objective moves across the screen. Once the new screen calibration is done, the following message will be displayed: “New calibration settings have been measured. Press Enter key to accept the new setting. Press the Esc key to keep the old settings” Press on the screen to end calibration. 4.9.6 Barometer calibration „Main menu > Settings > Off-road > Calibrate Barometer‟ The errors on the setting of the pressure may cause wrong readings of the altitude. By default, the barometer will be calibrated automatically by means of the altitude data supplied by the GPS using an algorithm that will optimize its function. If you wish, you may calibrate the barometric altimeter manually from „Main Menu > Settings > Off-road > Barometer Calibration‟ introducing the present altitude with the keypad that will be displayed when pressing this option. In order for this manual calibration not to be altered by the automatic calibration process, you must set TwoNav to take the altitude by only taking the barometer reading. 4.9.7 Compass calibration „Main Menu > Settings > Off-road > Compass Calibration‟ CompeGPS Team S.L. http://www.compegps.com http://support.compegps.com Calibration is a necessary procedure for the directions supplied by the electronic compass to be correct. It is an instrument very sensitive to weather and magnetic fields changes, so it has to be recalibrated each time it is going to be used in a new area. Calibration must be carried out in the open air and far from sources of alterations of the magnetic fields, such as cars, buildings or electric lines. For more safety, it is recommended to calibrate the compass before each outing. Once inside the calibration utility, all you have to do is rotate the device in the 3 axes until compass is calibrated. 4.9.8 Folders „Main Menu > Settings > System > Folders‟ In order for your data (maps, waypoints routes and tracks) to be considered by TwoNav when creating lists in the „data‟ section, they have to be inside the folder you have created for this purpose. You may define one or more folders for maps (then, the maps of all folders will be included in this map list) and a folder for data (waypoints, routes and tracks). The folder for maps by default is „TwoNavData/maps‟. The folder by default for the rest of data (waypoints, routes and tracks) is „TwoNavData/Data‟. If there are any other folders inside the one you have selected, they will also be shown in the data list. For example, if we create a folder called „Pyrenees routes‟ inside „TwoNavData/Data‟, and „TwoNavData/Data‟ is set as the only routes, waypoints and tracks folder, we will have the following representation in the routes list: CompeGPS Team S.L. http://www.compegps.com http://support.compegps.com 4.9.9 Units „Main Menu > Settings > System > Units‟ You may determine which type of measurement unit to use in TwoNav: Distances: in kilometres, miles, nautical miles, metres or feet. Altitudes in: metres or feet. Speed in: kilometres/hour, miles/hour, nautical miles or minutes/kilometre. Short distances in: kilometres/hour, miles, nautical miles, metres or feet. Acceleration in: metres/second , gravity or kilometres/hour/second. Vertical speed in: metres/second, feet/minute, metres/minute or metres/hour. Areas in: m , hectares or km . 2 2 2 . 4.9.10 Coordinates „Main menu > Settings > System > Coordinates‟ You may choose the type of coordinates (UTM, Latitude/Longitude, BGN…) and datum (WGS 84, European 1950, Geodetic Datum 1949, etc.) with which you wish to work in TwoNav. This setting will be the one used when introducing any coordinate into the program or when creating elements the kind of waypoints routes or tracks. If an element (map, waypoint, route or track) that uses a system of coordinates of different a datum is opened, TwoNav will detect it and will place it in the correct position. CompeGPS Team S.L. http://www.compegps.com http://support.compegps.com Besides, from this option, you may configure the order in which the degrees will be displayed. By default, TwoNav Works with Lat / Long and Datum WGS84 Coordinates. 4.9.11 Time zone „Main menu > Settings > System > Time zone‟ TwoNav lets you choose the time it is according to the Universal Time Coordinates (UTC) that will appear by default with the time-zone corresponding to the Central European Time (CET). You may also set the Summer Time automatically if you wish, so TwoNav carries out the seasonal time change. Note: TwoNav keeps the time updated as long as the device receives a GPS signal. Usually, inside the buildings, the signal from the satellites is not received unless there is a repeater, so the time and also the, night vision, will be affected. 4.9.12 Default settings „Main menu > Settings > System > Default settings‟ This option lets you re-establish all the settable parameters to its initial status. All the options that have been manipulated will be modified, time zone, volume, folders and other tools that you may have previously established. 4.9.13 Update OS „Main menu > Settings > System > Update OS‟ When an Operating System update is available at www.compegps.com or www.twonav.com , you will have to use this button to complete the update in your device. See instructions in web download area to know the exact steps to follow. 4.9.14 Device ID „Main menu > Settings > System > Device ID‟ The „Device ID‟ is an alphanumeric identifier exclusive to your device. This identifier is necessary in order to activate TwoNav and any map you want to use in the device. 4.9.15 About „Main Menu > Settings > System > About‟ „About‟ shows you which TwoNav version the device is working with. It will be displayed on the top left hand corner of the screen. To know the version of the TwoNav program installed in your device, it is very important to check out doubts or software updating. 4.9.16 Advanced „Main Menu > Settings > System > Advanced‟ TwoNav has and „advanced mode‟ which enables some extra functions that are not frequently used and could add unnecessary complexity to the system. You can enable „advanced mode‟ entering „Settings > System > Advanced‟ section. Then some advanced functions will appear directly inside that section: CompeGPS Team S.L. http://www.compegps.com http://support.compegps.com Reload data when restarting: Load same data which was loaded when closed application last time. Draw map corners: Show frames of available maps on navigation window. Draw arrows over the track: To easily know its direction. Resume navigation at start: Propose same destination which was set when closed application last time. Car+OnRoad->screen on: If it is enabled, „shutdown screen‟ options will not be considered when vehicle is „car‟ and mode is „Onroad‟. Profiles Onroad/Offroad: If disabled, all options, menus and data fields will be the same for Onroad and Offroad. Also some other options will be added in other sections and depending on the current mode (Onroad/Offroad). Check Display and Navigation sections to see the list. 5 Select destination You may select your destination in three different ways: 5.1 “Navigate…” button The most widely used function to select destination is the „navigate…‟ button which is found in the main menu and contains the following options: Home: You can go home directly if you have determined your position from the favourites management. Address: Enter any address (country/city/street/number) as destination. o You can enter ZIP code instead of city name. o You can enter a crossing street name instead of number. Just press on „Intersection - choose‟ button and enter its name or choose it from the list. POI: The V-maps contain an enormous data base of Points of interest (gas stations, hospitals, cash dispensers…). You may search POIs according to various criteria: o Place: The device will consider POIs close to: Your present position Your present destination To the address introduced The location you choose on the map. To a waypoint o Name: Select the category that you are searching for, introduce the wished POI name and it will be searched in all the available ones from the loaded cartography. o Parking: Creates a list of parkings available near from current position. CompeGPS Team S.L. http://www.compegps.com http://support.compegps.com o Gas station: Creates a list of gasoline stations available near from current position. Favourites: You may create your own list of favourite places to be able to enter them quickly. To manage this list, press the „edit‟ button. (+info) History: The recently selected destinations are stored here. By map: Select the exact spot and press OK. Waypoint: Select a waypoint among the ones loaded or created. Route: The chosen route will be activated and it will guide consecutively to the waypoints it contains. Track: The reference of the loaded track will be available and its direction indicated. If you go too far from the track (>50m), the perpendicular direction to the trace of the track will be indicated so you can go back to it. Coordinates: Introduce the exact coordinates for your destination. To stop any type of navigation (On-road or Off-road) running, you must press on the „Stop Navigation‟ option. The order of these buttons in menu is different in On-Road or Off-Road modes to prioritize the most used functions in each mode. You may enter it from the main menu or by opening the contextual menu on map. 5.2 Waypoints, routes and tracks Lists From the „Data‟ section of the main menu you may manage the typical references of „Off-road‟ (waypoint, routes and tracks) positions. One of the available functions for each element is Navigate (Activate). This option will let you head navigation towards the selected element establishing it as the next destination. The easiest way of placing an element as destination is to click briefly on its name and, once selected, press the button. You may also find the option „Activate‟ inside the contextual menu of the element. 5.3 On the map Search on the map the point you wish to establish as destination and open the Contextual Menu on it (by means of a long click). Choose the „Navigate here‟ option and this point will be established as destination. CompeGPS Team S.L. http://www.compegps.com http://support.compegps.com 6 Following indications Once the destination is selected, TwoNav will assist you in reaching it. TwoNav offers two navigation ways that will allow you to adapt to each surroundings in the best possible modes: CompeGPS Team S.L. http://www.compegps.com http://support.compegps.com On Road : Door to door navigation on the CompeGPS V-maps cartographic basis, enjoying the characteristic assistance type of the urban navigators. The route will be automatically calculated through the streets and along the itinerary accurate visual and aural indications will be given on the manoeuvres to carry out. Important: On-road mode will only be available if you have a routable V-map present in maps folder. Otherwise, On-road tab will be disabled. Off Road : It can be used on any type of map (topographic, orthophoto, vectored graph) and it is based on the use of previously created references (waypoints, routes and tracks). The route won‟t be calculated automatically and a straight line will link our present position to our destination. Within the same itinerary, some changes in the mode may be necessary (e.g. if we set out from the city and reach a point far from it in which there is no usable information on the streets). In these cases you may change the mode depending on the information of available maps. CompeGPS Team S.L. http://www.compegps.com http://support.compegps.com 6.1 On-road Navigation The information offered by this navigation mode is more than in Off-road mode, as all the information contained in the V-maps cartographic data base is used to show accurate indications of the next manoeuvres. Besides, audible signals are given in order not to get distracted from the traffic. Important: On-road mode will only be available if you have a routable V-map present in maps folder. Otherwise, On-road tab will be disabled. 6.1.1 Visual information 1. Distance to next event: Distance left to next event (roundabout, waypoint, exit...). 2. Next manoeuvre: When navigating On-road, the „next event‟ space will display a representation of the next manoeuvre to be done (right turn, left turn, roundabout, diversion, etc.). 3. Next Street: Indicates the next street to be taken following navigation. 4. POI: V- map point of interest (petrol station, hotel, cash point, etc). 5. Calculated Route: Shows the automatically calculated route to be followed. 6. Manoeuvre indication: Illustrates the manoeuvres to be carried out on the map and more accurately. 7. Speed limit of present road: Indicates the legal speed limit of the road on which we are. CompeGPS Team S.L. http://www.compegps.com http://support.compegps.com 8. Present Street: Name of the street where you are. When pressing on an element of the map (for instance a Chemist‟s) a yellow square will appear indicating the name of this element plus some other interesting information. This way, you may also check the names of the streets in the area. See the On screen section for complete information on the elements present on the navigation screen. 6.2 Off-road navigation In Off-road mode, the information on streets and roads will not be available for the route to be calculated automatically and to tell you the next manoeuvres with precision. The automatic information will be limited to a straight line, which will join your current position with your destination. Because of this, you will need to pay special attention to the information on the underlying map you have loaded. This situation is comparable to conventional navigation with a topographical map, with the advantage that your current position is marked on the map. The degree of detail of the available information can be enhanced if you prepare the journey in advance, finding reference points (waypoints, routes and tracks) that will help to guide you. A well planned route, with the appropriate information and file attachments on each waypoint, can be equivalent to a route calculated automatically in On-road mode. CompeGPS Team S.L. http://www.compegps.com http://support.compegps.com See the Waypoints, Routes and Tracks section for further information on these elements. 6.2.1 Visual information 1. GOTO arrow: Direction on which the next waypoint is. When following a track, it will indicate its direction (see Off-road navigation). 2. Track name / Next Waypoint: Name of the next waypoint or the track being followed. 3. Loaded route 4. Loaded Track 5. Next waypoint 6. Guide line (waypoint direction/track): Joins your present position to the place you are heading for (track or next waypoint) 7. Currently Recorded Track: If the present track is being recorded, we can see its trace marks behind us. CompeGPS Team S.L. http://www.compegps.com http://support.compegps.com 8. Compass: Shows the orientation of the device. The source of this datum may be set (GPS, electronic compass or „automatic‟) from „menu > Settings > Off-road > Bearing‟. 7 Radar warnings / POIs During your navigation, TwoNav may alert you when you get close to certain points of special interest. 7.1.1 Radars One special case of these types of points is the radars that control traffic speed. TwoNav will consider the points introduced in the „TwoNavData\Radars‟ folder as radars and will alert you with a sound and an image when you get close to one of them (see section Speed limit to get to know the setting options of these warnings). The system includes a radars data base from the AlerteGPS company that may be updated from their web page, www.alerteGPS.com. In it you will find a section devoted to TwoNav products. If you wish to update this information, all you have to do is substitute the original files by the updated ones (in GPX, WPT or BWPT formats) into the „radars‟ folder kept in the „TwoNavData\Radars‟ data folder. 7.1.2 POIs You may also be alerted of other general interest points (POIs) that you may customize yourself. TwoNav will load automatically the waypoints (in GPX, WPT or BWPT format) that you place inside the „TwoNavData\POI‟ folder when starting up the system. These waypoints will not be displayed in the waypoints list, but they will be drawn on the map. You can hide these files on map from active personal POIs tool. BWPT format is recommended, allowing a much quicker access to information. Files in other formats can be converted to BWPT from CompeGPS Land PC software. If you want to be alerted when reaching one of these POIs, each one of them will have to be associated to a sound or image file, which will be reproduced when getting close to the point. You may associate images or sounds in WAV format to the waypoints from the properties of the waypoint window. Warning: Using BWPT files with more than 5000 points may cause system slow down. GPX or WPT files may cause such slow down even with much smaller files. 8 Data management (waypoints, routes, tracks and maps) 8.1 8.1.1 Waypoints What is a waypoint? The waypoint is a point defined by a geographical position, latitude and longitude coordinates and in most cases altitude, used by the GPS navigation tools. TwoNav lets you create, edit and navigate waypoints. CompeGPS Team S.L. http://www.compegps.com http://support.compegps.com The waypoints are kept inside waypoints files (usually in .WPT format), so a waypoint folder may contain just one or more waypoints. They are represented on screen as points to which a name or an icon may be applied. refuge 8.1.2 Supported formats TwoNav can open directly next waypoint formats: *.WPT *.BWPT *.LOC *.GPX More waypoint formats can be imported and converted to these ones from CompeGPS Land/Air. 8.1.3 Waypoints list “Main menu > Data > Waypoints” The management of waypoints is centralized on the waypoints list, but it is also possible to carry out many actions directly from the navigation screen by means of the contextual menu. When entering the waypoints lists, you will be able to see all the waypoints files available in the „TwoNavData/Data‟ folder. See the Data section to get to know the general operation of the lists. If you have selected a waypoints file, the buttons on the bottom of the screen will let you enter the most important functions to carry out on this element: In order: Create a new waypoints file: It will generate and open an empty waypoints file. Create a new waypoint. Zoom here Save If you have selected a specific waypoint from the waypoints file, the buttons will change to adapt to the functionalities of the selected element: In order: CompeGPS Team S.L. http://www.compegps.com http://support.compegps.com Enter the properties of the waypoint window Create a new waypoint within the waypoints file in which the selected waypoint is. Zoom here Navigate By a long click on any open Waypoints file or on a specific Waypoint, you will enter the Contextual Menu with all the available functions for this element. 8.1.4 8.1.4.1 Open and close Open waypoints file From the waypoints list, clicking on the name of one of its available files, it will open. You will know it is open because it will be visible at the top of the list with the left square marked 8.1.4.2 . Close waypoints file Press on the left check mark of the open waypoints file in order to close it. The file will move from the first places on the list and will go back to its alphabetical corresponding position with the other unloaded waypoints files. You may also enter this function from the contextual menu from where you may also delete files from the memory permanently. 8.1.5 8.1.5.1 Create and edit Create waypoints All the waypoints must be contained in a waypoints file. Whenever you create a waypoint, it will be added to the waypoints file that you have loaded on the first place (and will take the first place on the data list). If there are no waypoints files loaded, when creating a waypoint, a new one will be automatically created. You may also create a waypoints file manually from the waypoints list. A waypoint can be created in the following ways: 8.1.5.1.1 Create a waypoint in the present position You may create a waypoint quickly in the exact position where you are. There are two functions to do this: Mark WPT: No access to waypoint properties. Default name and icon will be used. Waypoint properties can be accessed later. Mark and edit WPT: Waypoint properties will be automatically opened allowing to modify its information. A waypoint will be created inside the waypoints file you have previously opened * (the first on the „data‟ list) CompeGPS Team S.L. http://www.compegps.com http://support.compegps.com If there are no waypoints files loaded, TwoNav will create one with a default name (new WPT), which you will be able to modify o the waypoints list. These functions can be added to tool bar by means of the tool manager. „Mark and edit WPT‟ can be also accessed from „Main menu > Data > Mark and edit WPT‟ 8.1.5.1.2 Create a waypoint on the map Open the contextual menu on the point of the map where you wish to generate the waypoint and select „New > Waypoint here‟. A waypoint is created inside the waypoints folder first opened * (the first on the „data‟ list) and the properties window will open so you can modify any of them. 8.1.5.1.3 Create a waypoint from the waypoints list When selecting a waypoints folder from the waypoints list, you will be able to enter the „New waypoint‟ functions (from the contextual menu or directly by means of the list buttons). When selecting it you will be able to create the Waypoint in 5 different ways: Present position: GPS position in which you are when creating it. Present destination: final point of your present navigation. Address: enter the address using the Vmap data base. By map: it will open a window from which you will be able to select on the map the exact point where you want to create the waypoint. Waypoint: in this file you can add a waypoint from a different waypoints file. All you have to do is select the waypoint inside the concrete waypoints file. 8.1.5.2 8.1.5.2.1 Edit waypoints Modify properties Once a waypoint is created you may change several parameters from the waypoints properties window. 8.1.5.2.2 Delete Waypoint You may delete a specific waypoint from its contextual menu, both from the map as from the waypoints list. 8.1.5.3 8.1.5.3.1 Save Save waypoints If you are satisfied of your operations on your waypoints, you may save them by selecting the option Save waypoints from the waypoint or waypoints file contextual menu of the map or waypoints list. The changes you may have made will be saved directly overwriting the old file. Note: the „create waypoint on present position‟ function automatically saves the waypoint file where the present waypoint has been added as a safety measure in order not to lose the waypoints quickly created with this function. CompeGPS Team S.L. http://www.compegps.com http://support.compegps.com 8.1.5.3.2 Save waypoints as If you wish to save the waypoints file by another name, location (folder) or format (*.WPT or *.GPX), you may select the option Save WPT As from the contextual menu of the waypoints in the waypoints list. 8.1.6 Search loaded waypoint on screen To centre the screen on a waypoint: 1. Enter Main Menu by pressing 2. Select „Main Menu > Data > Waypoints > Waypoints list‟ 3. Click on a specific waypoint and choose between: a. Press button b. Enter the waypoint Contextual Menu (long click on its name or the „Menu‟ button) and click on „Zoom here‟. A window will open to show the waypoint on screen with the possibility of zooming in or out. To exit the window press To see the waypoint on the map click 8.1.7 8.1.7.1 and it will return to the waypoints list. Properties Properties of a Waypoints file You may enter the properties of a collection of waypoints from the waypoints list (using the direct button or the contextual menu). The following properties are available: Name of the waypoints: name of the waypoints file. Number of waypoints: number of waypoints included in this waypoints collection. 8.1.7.2 Properties of a waypoint You may enter the properties of just one waypoint from the waypoints list (with the direct button or the contextual menu) or from the navigation screen (by opening the contextual menu on the waypoint in the map). The following properties are available: Short name: shows the concrete name of each waypoint Description: short description of the waypoint View: selection of the items that you wish to see around the waypoint on the map Icon: small image representing the waypoint Coordinates: geographical position of the waypoint Altitude: altitude of the waypoint CompeGPS Team S.L. http://www.compegps.com http://support.compegps.com Colour of Text: colour for the name, description, altitude and other data close to the waypoint that will be displayed on the map Background colour: colour that highlights the waypoint texts on the map Position of Text: position in regards to the waypoint where the texts will be displayed on the map Radius: scope embraced by the waypoint Associations: associates image or sound files to your waypoints to be displayed during navigation of these waypoints. Bearing: orientation in degrees to the position of the waypoint. The data must be introduced in radians and TwoNav will change it automatically into degrees. 8.1.8 Navigate This option will be shown on the Contextual Menu with by a long click on the concrete waypoint from the waypoint list or on the map. Navigation will be activated towards this waypoint from your position. You may also navigate to a waypoint using the “Navigate…” menu. 8.1.9 Waypoints contextual menus Next is a list of all the functions present in the various waypoints contextual menus: To open the contextual menu on an element, all you have to do is keep it pressed for one second. 1. Contextual menu of a file inside the Waypoints list: Properties (+ info) Save Waypoints (+ info) Save Waypoints as (+ info) Close Waypoints (+ info) Rename file Delete file (+ info) New Waypoint (+ info) Zoom here (+ info) Send to 2. Contextual menu of a concrete waypoint inside the Waypoints list: Properties (+ info) Save Waypoints (+ info) Close Waypoints (+ info) Delete Waypoint (+ info) Zoom here (+ info) Send to CompeGPS Team S.L. http://www.compegps.com http://support.compegps.com Navigate… (+ info) 3. Contextual menu of a concrete waypoint on the map: New… Waypoint here (+ info) Begin a route here (+ info) Begin track here (+ info) Properties (+ info) Save Waypoints (+ info) Close Waypoints (+ info) Delete Waypoint (+ info) Navigate… (+ info) To see the options of the contextual menu of a waypoint within a route go to Routes contextual menus‟. 8.2 8.2.1 Routes What is a route? A route is a group of waypoints ordered in a predetermined way. It is a way of navigating that allows for planning a course from one place to another going through various waypoints. The routes are used when it is not possible to reach a place in a direct way (in straight line). The route file will be saved in the *rte format. TwoNav allows you to create routes and navigate them. It also lets you modify many of its parameters. For further information, see Edit a route. 8.2.2 Supported formats TwoNav can open directly next route formats: *.RTE CompeGPS Team S.L. http://www.compegps.com http://support.compegps.com *.GPX More route formats can be imported and converted to these ones from CompeGPS Land/Air. 8.2.3 List of routes “Main menu > Data > Routes” The routes management is centralized in the routes list, although it is also possible to carry out many actions directly from the navigation screen by means of the contextual menu. When entering the routes list you will be able to see all the available routes in the folder „TwoNavData/Data‟. See the Data section to get to know the general operation of the lists. If you have selected a route, the buttons at the bottom of the screen will let you enter the most important functions to be done on this element: From left to right: Create a new route: an empty waypoints file will be generated and opened. Create new waypoint inside the route Zoom here Navigate (activate) If you have selected a concrete waypoint within the route, the buttons will change to adapt to the functionalities of the selected element: CompeGPS Team S.L. http://www.compegps.com http://support.compegps.com From left to right: Enter the waypoint properties window Create a new waypoint within the route in which the selected waypoint is. Zoom here Navigate (activate) By a long click on any open route or on any concrete Waypoint within a route, the Contextual Menu with all the available functions for this element will open. 8.2.4 8.2.4.1 Open and close Open route From the routes list, by clicking on the name of one of the available files, it will open. You will know it is open because it will be located on top of the list with the left square marked 8.2.4.2 . Close route Click on the left check mark of the open route for closing it. The file will lose its place on the first positions of the list and will return to its corresponding alphabetical position among the other unloaded files. You may also enter this function from the contextual menu, from which you will also be able to delete files from the memory permanently. CompeGPS Team S.L. http://www.compegps.com http://support.compegps.com 8.2.5 Create and edit 8.2.5.1 Create a route 8.2.5.1.1 Create a route on the map The fastest and easiest way of creating a route is from the routes editor in the navigation window, on the map. To obtain a correct route you will need a well calibrated map as a reference. Besides, if you want the waypoints of the wished route to have information on the altitude of the ground, an elevations map of the area in CDEM format must be loaded. You may create the route with the following steps: 1. Keep a long pressure on the point in the map where you wish to begin the route. A contextual menu will be displayed. 2. In this menu, select New > Begin route here. In this moment, the menu will close and will go into the routes edit mode. 3. On the map and with the stylus, create the points of the route (clicking on the spots where waypoints must be): CompeGPS Team S.L. http://www.compegps.com http://support.compegps.com While editing, you may move the map by dragging it for adding waypoints in other spots in the map. The dragging movement won‟t add waypoints it will only shift the map. To include a waypoint you must click briefly. You may move the position of the created waypoints by selecting and dragging them (+info) 4. Once you are satisfied with the route, enter the Contextual Menu of route (by means of a long click on the screen) and select Close Edit. See the section edit a route to add new waypoints or modify the existing ones. 8.2.5.1.2 Create a route from the routes list When you enter the routes list and you have selected a route or nothing is selected, a button to create a new route will be displayed . When pressing it, a new route file will be generated and you will be asked how to name it. The file won‟t contain any waypoints and they will have to be added using the 8.2.5.2 8.2.5.2.1 button (+info) Edit a route Add waypoints to the route You may add waypoints to the route from the routes list or directly on the map. 8.2.5.2.1.1 On the map 1. Open the contextual menu on the route and select „Edit route‟ In this moment the menu will close and will go into the routes edit mode. 2. Select (by means of a short click) the waypoint after which you want to add a new waypoint. CompeGPS Team S.L. http://www.compegps.com http://support.compegps.com 3. Press on the spot in the map where you want to generate the new waypoint. 4. Add as many waypoints as you wish. If you want to add waypoints in other places along the route, all you have to do is repeat step 2 and 3. 5. Once you are satisfied with the route, enter the Contextual Menu of the route (by means of a long click on the screen) and select „Close Edit‟. When entering the editor, the selected waypoint will be the last, so if you press on the map, waypoints will be added to the last part of the route. 8.2.5.2.1.2 From the routes list You may enter the „New Waypoint‟ function from the routes list, be it through the contextual menu of the route or by clicking briefly on the name of the route and pressing the button. You will be able to select the position of the new waypoint in 5 ways: Present position: GPS position in which you are at the moment. Present destination: if you have selected a destination. Address: choose country, city, street and number based on the Vmap information. By map: a window will open so you can place the waypoint on the map. Waypoint: it lets you copy a waypoint contained in any available waypoints file. CompeGPS Team S.L. http://www.compegps.com http://support.compegps.com 8.2.5.2.2 Delete waypoints of the route You may delete a waypoint from the routes list or directly from the map. To do so, open the contextual menu on it and select „delete waypoint‟. 8.2.5.2.3 Move the position of the waypoints of the route You may modify the position of any waypoint on the map or by introducing its coordinates: 8.2.5.2.3.1 On the map 1. Open the contextual menu on your route and select „Edit route‟ In this moment, the menu will close and will go into the routes selection mode. 2. Select the waypoint that you wish by means of a brief click. 3. Drag it to the spot you want by keeping the pressure on it. 4. To move another waypoint you must first select it and then drag it. 5. Once you are satisfied with the route, enter the Contextual Menu of the route (by means of a long click on the screen) and select „Close Edit‟. CompeGPS Team S.L. http://www.compegps.com http://support.compegps.com If after selecting a waypoint you click briefly on the map, a new waypoint will be created just after the selected one. 8.2.5.2.3.2 Introduce coordinates In order to modify the coordinates of a waypoint, all you have to do is enter its properties window and introduce the new value, checking that the datum and the projection are correct. 8.2.5.2.4 Change the order of the waypoints in the route To move the added waypoint and approach it or move it further from the beginning of the route, make a long click on the name of the waypoint and select the option „Move Up‟ or „Move Down‟ from the Contextual Menu. 8.2.5.2.5 Invert the route To apply on a route the contrary sense to the one it originally had, open the contextual menu of the route from the routes list and select Tools > Invert the route. This way the sense of the route will be changed and it will begin at the end. 8.2.5.2.6 Convert a route into a track If you wish to change a route into a track format, open the contextual menu of the route from the routes list and select Tools > Change into a track. 8.2.5.3 8.2.5.3.1 Save Save route If you are satisfied with the work on your routes, you may save it by selecting the option Save route from the contextual menu of the route on the map or routes list. The modifications that you may have made will be saved directly overwriting the old file. 8.2.5.3.2 Save route as If you wish to save the route under a different name, location (folder) or (*.RTE or *.GPX) formats, you may select the option Save route As from the contextual menu of the route contained in the routes list. CompeGPS Team S.L. http://www.compegps.com http://support.compegps.com 8.2.6 Search loaded route on screen To centre the screen on a route: 1. Enter Main Menu by clicking on 2. Select „Main Menu > Data> Routes 3. Click on a concrete waypoint and choose between: a. Press the button. b. Enter the Contextual Menu of the waypoint (long click on the name or „Menu‟ button) and then click on „Zoom here‟. A window will open displaying the waypoint on screen with a possibility of zooming in or out. 4. To exit the window, you may choose between: Press Press and return to the navigation window keeping the focus you had on the zoom window. 8.2.7 8.2.7.1 and return to the waypoints list. Properties Properties of a route Different data of a loaded route can be checked (distance, area it encloses, maximum altitude, etc.) and modify some of its parameters (real and pixel colours) from the window of route properties. This window can be entered in two ways: Contextual Menu of the route in the list Contextual Menu of the route on the map In order to modify the editable parameters, click on them. The ones that can be edited will display a keypad, figures and a colour palette. The ones that cannot be edited will be displayed in grey. 8.2.7.2 Properties of a waypoint You may enter the properties of a single waypoint from the routes list (by selecting it and pressing the direct button or from the contextual menu) or also from the navigation screen (by opening the contextual menu of the waypoint on the map). The properties of the waypoints that are contained in a route are the same as the loose waypoints (+info) 8.2.8 Route Graph You can see a graph of the loaded route in two ways: From the routes list: By selecting the „graphs‟ option from the contextual menu of the route. CompeGPS Team S.L. http://www.compegps.com http://support.compegps.com Through the data fields: You may place the field „route graph‟ in any position in the data pages, although it is recommended to use the space of the graph page to do it. (+info) 8.2.9 Activate a route (navigate) You may activate (navigate) a route in three ways: Menu “Navigate…” Contextual Menu of the route within the routes list (long click on the route within the routes list). The routes list also features a direct access button to the navigation function Contextual menu of the route on the map (long click on the route on the map). CompeGPS Team S.L. http://www.compegps.com http://support.compegps.com Once activated, TwoNav will guide you towards the first waypoint along the route. When you reach a waypoint along the route, you will be guided towards the next one, and so on until the end of the route. If you are in Off-road mode, a straight line will be displayed from your position to the next waypoint. If you are in On-road mode, TwoNav will try to automatically calculate the sub-route through the streets in order to orientate you in detail with voice instructions. 8.2.10 Routes contextual menus To open the contextual menu on an element, all you have to do is keep the pressure on it for one second. 1. Contextual menu of a route file within the routes list: Properties of the Route (+info) Save Route (+info) Save Route As… (+info) Close Route (+info) Rename file Delete file (+info) Graphs (+info) Zoom here (+info) Send to Tools (+info) New Waypoint (+info) Activate (+info) 2. Contextual menu of a concrete waypoint within a route file or in the routes list: Properties (+info) Delete Waypoint (+info) Zoom here (+info) Send to Navigate… (+info) Move Up (+info) Move Down (+info) 3. Contextual menu of a route on the map: New… CompeGPS Team S.L. http://www.compegps.com http://support.compegps.com Waypoint here (+ info) Begin route here (+ info) Begin track here (+ info) Properties of the Route (+info) Save Route (+info) Close Route (+info) Edit Route (+info) Activate (+info) 4. Edit contextual menu of a route on the map: Close edit (+info) Delete Point (+info) New… Waypoint here (+ info) Begin route here (+ info) Begin track here (+ info) Properties of the Route (+info) Save Route (+info) Close Route (+info) Edit Route (+info) Activate (+info) 5. Contextual menu of a concrete waypoint on the map: New… (+info) Waypoint here (+ info) Begin route here (+ info) Begin track here (+ info) Properties (+info) Delete Waypoint (+info) Navigate… (+info) CompeGPS Team S.L. http://www.compegps.com http://support.compegps.com 8.3 8.3.1 Tracks What is a track? A track is a group of points ordered by time, where each point contains information on the position, time and date, coordinates and, in most cases, altitudes. Tracks can be split into 2 and 3 dimensional ones, depending on whether they have or not the altitudes of the track points. For further information, check Track tools. Whenever we save the tracks in TwoNav, besides the track points, a series of data is saved that can be modified or inserted from the device, such as the name of the track, remarks, colour of display, among others. For further information check Track properties. 8.3.2 Supported formats TwoNav can open directly next track formats: *.TRK *.IGC *.PLT *.GPX More track formats can be imported and converted to these ones from CompeGPS Land/Air. 8.3.3 Record a track while navigating During navigation, TwoNav will record the track of your outing. This recording will be saved by default in the „TwoNavData/Data‟ folder in *TRK format with a name based on the date, (YYYY-MM-DD)*. You may check if track points are being recorded from the „Status‟ page. By pressing the „record‟ button, the track points will be saved. By pressing the „pause‟ button, the track points won‟t be saved. If you pause the track recording and retake it later, the points that open after the pause will be part of the same track leg. This means that there will only be an open track, but made up of the different legs (+info on legs). If you wish to save the track that is currently being recorded and go on recording into a new file, all you have to do is close the track currently open. Once closed, a new track will be automatically created in which the new track points will be recorded. You may set the recording parameters from „Main menu > Settings > Off-road >Tracklog‟ (+info). CompeGPS Team S.L. http://www.compegps.com http://support.compegps.com *Note: If, in the same day, you have made more than one track, the names will be distinguished by a number at the end that identifies the order in which they were created, (e.g. 2008-12-1501.TRK, 2008-12-15-02.TRK, …). You may rename both the tracks previously saved as the track currently being recorded by using the track properties or save as. 8.3.4 Track list “Main menu > Data> Tracks” Management of tracks is centred in the track list, although it is possible to carry out many actions directly from the navigation screen through the contextual menu. By entering the tracks list you will be able to see all the available tracks in the „TwoNavData/Data‟ folder. See the Data section to get to know about the operation of the general lists. If you have selected a track, the buttons at the bottom of the screen will let you enter the most important functions to carry out on that element: From left to right: Enter the track properties window See the track graph Zoom here Navigate (activate) By means of a long click on any open track, you will enter the Contextual Menu with all the available functionalities for this element. When the list of recorded tracks becomes too long, they will automatically be grouped in folders selected by year and, inside them, by month of creation (e.g. all the tracks created in 2009 will be found in that folder and inside 2009-1, all the tracks created in January 2009). CompeGPS Team S.L. http://www.compegps.com http://support.compegps.com 8.3.5 8.3.5.1 Open and close Open track From the tracks list, by clicking on the name of one of the available folders, it will open. You will know it is open because it will be visible at the top of the list and with the left square marked 8.3.5.2 . Close track Press on the left check mark of the open track in order to close it. The folder will change position from the first place on the list and will go back to its alphabetical position among the other unloaded files. You may also enter this function from the contextual menu, from where you will also be able to delete files from the memory completely. 8.3.6 Create and edit 8.3.6.1 Create a track The way to create a track is from the tracks editor from the navigation window on the map. To obtain a correct track, you must have a well calibrated map as a reference. Besides, if you want the waypoints of the created track to have information on the altitude of the ground, a map of the elevations of the area in CDEM format must be loaded. You may create the track following these steps: 1. By means of a long click on the point of the map where you want to begin the track. A contextual menu will be displayed. CompeGPS Team S.L. http://www.compegps.com http://support.compegps.com 2. On this menu, select New > Begin new track here. In this moment, the menu will close and it will go into the tracks edit mode. 3. On the map and with the stylus, start creating the points of the track (by pressing on the places where there should be points): During editing, you may move the map by dragging it in order to add points in other parts of the map. The dragging movement won‟t add points, it will just move the map. To add a point you must click briefly. You may move the position of the created waypoints by selecting and dragging them (+info) CompeGPS Team S.L. http://www.compegps.com http://support.compegps.com 4. Once you are satisfied with the track, enter the Contextual Menu of the track (by a long click on the screen) and select Close Edit. See the edit track section to add new points or modify the existing ones. Besides the „manually‟ created tracks, TwoNav will keep creating „automatically‟ the track of your outing recording your position according to the settings of tracklog (+info on the recording of the present track). 8.3.6.2 8.3.6.2.1 Edit track Add points to a track You may add points directly on the map: 1. Open the contextual menu on the track and select „Edit the track‟. In this moment, the menu will close and it will go into the track editing mode. 2. Select (by means of a short click) the point of the track after which you want to add a new point. 3. Press on the spot in the map where you wish to generate the new point. 4. Add as many points as you wish. If you want to add points in other spots in the track, all you have to do is repeat steps 2 and 3. CompeGPS Team S.L. http://www.compegps.com http://support.compegps.com 5. Once you are satisfied with the track, enter the contextual menu (by means of a long click on the screen) and select Close Edit. When entering the editor, the point of the selected track will be the last one, so if you press on the map, points will be added to the last part of the track. 8.3.6.2.2 Delete points from track 1. Activate the edit mode: long click on the track on the navigation screen (on the map) and then select „edit track‟. 2. Open the contextual menu on the point you wish to delete and select „delete point‟. 3. Delete as many points as you wish by repeating step 2 while you are in edit mode. 4. Exit the tracks editor (long click on the screen and then select Close Edit) 8.3.6.2.3 Move the position of the track points You may modify the position of the track points directly on the map or by introducing its coordinates: 8.3.6.2.3.1 On the map 1. Open the contextual menu on the track and select „Edit track‟ In this moment, the menu will close and it will go into the routes edit mode. 2. Select the point you wish to move by pressing briefly. 3. Drag it to the place of your choice by keeping the pressure on it. CompeGPS Team S.L. http://www.compegps.com http://support.compegps.com 4. To move another point you must select it first (by pressing briefly) and then drag it. 5. Once you are satisfied with the track, enter the contextual menu (by a long click on the screen) and then select Close Edit. If, once selected a point, you click briefly on the map, a new track point will be created right after the selected one. 8.3.6.2.3.2 Introduce coordinates In order to modify the coordinates of a track point, all you have to do is enter its properties window and introduce the new value, checking that the datum and projection are correct. 8.3.6.3 Track legs TwoNav allows you to work with tracks fractioned in legs. 8.3.6.3.1 8.3.6.3.1.1 Create legs Create legs on an existing track You may split the track in two legs by opening the contextual menu on the point that divides the two selected legs „legs > Change leg here‟. In this moment, the leg closer to the end of the track will change colour to highlight the difference between the two legs. The initial leg will remain the original colour of the track. You may repeat this operation as many times as you want in order to get the amount of tracks you need. 8.3.6.3.1.2 Create new legs on the present track If during the recording of the present track you activate a pause from the status window, when starting recording again, the new points will keep being recorded in the same file as before the pause, but a new leg with the new points will be generated automatically. This way, you will be able to make out easily the parts of the present leg and apply independent modifications on them. If there is a distance from the moment you paused the recording of the track until you activated it again, the empty space passed in this time will be visible on its display. CompeGPS Team S.L. http://www.compegps.com http://support.compegps.com 8.3.6.3.2 Operations with legs If you open the contextual menu on a leg of the track in the navigation window from the „legs‟ option, you will be able to enter the following functions: Leg properties: You may change the colour and thickness of the leg and add a note. Change leg (+info) Delete this leg: the points of this leg will be deleted from the track, leaving an empty space in its place. Save track as: You may save the track independently from the rest of the track. This way, a new track file will be created with just this leg. 8.3.6.4 Reverse track Any track can be reversed so the order of its points is the opposite. This can be especially useful if you have run a distance recording the track as you go and then you wish to go back along the same way. To reverse the track, all you have to do is open the contextual menu on it from the track list and select „Tools > Reverse track‟. 8.3.6.5 Advanced track tools From the track contextual menu in the tracks list, you can enter the „Tools‟ submenu, which includes highly interesting secondary tools for concrete needs: Calculate the altitude of the ground of each point (Import altitudes): If you have 3D relief (CDEM) loaded, TwoNav may assign each point of the track its altitude considering the information of the relief. Delete stopped points from the beginning and the end (Del.strt/end points): The track omits the repetitive points from the beginning and the end, where you were stopped before and after making the track. CompeGPS Team S.L. http://www.compegps.com http://support.compegps.com Reduce the number of points (Reduce num. points): By introducing the number of points, the track is drawn with the points keeping the shape of the track in the most possible faithful manner. Assign time and speed (Assign time/speed): By using this option you may determine a time for departure and a constant speed so TwoNav calculates the estimated time of arrival to each point in the track. If a track does not contain time data, you cannot enter the play function of its contextual menu. Delete the aberrant points (Del. aberrant points): In case a point diverts excessively from the rest, it will be considered an error and deleted. Change the track into a route (Convert TRK to RTE): This option will change the track into a route. The program will ask you to introduce the number of waypoints you want the route to have. The new file of the route will be displayed on the „Main Menu > Data> Routes‟. Invert track: This function reverses the sense of the itinerary of the track, so if you decide to navigate it, it will be in reverse sense. 8.3.6.6 8.3.6.6.1 Save Save track When you are satisfied with your track, you may save it by selecting the option Save track from the contextual menu of the track or track list. The modifications that you have made will be directly saved overwriting the old file. Note: The track being recorded as you go is saved automatically every 5 minutes. When closing the system, a final saving of the present track will be saved. 8.3.6.6.2 Save track as If you wish to save the track under another name, location (folder) or format (*.TRK, *.IGC or *.GPX) you may select the option „Save track as‟ from the contextual menu of the track in the tracks lists. 8.3.7 Search a loaded track on screen To centre a track on the screen: 1. Enter the Main Menu by pressing 2. Select „Main Menu > Data> Tracks 3. Click on the track and choose between: a. Press button. b. Enter the Contextual Menu of the track (long click on its name or „Menu‟ button) and click on „Zoom here‟. CompeGPS Team S.L. http://www.compegps.com http://support.compegps.com A window displaying the track on screen with the possibility of zooming in or out will open. 4. To exit the window you may choose between: Press Press and return to the navigation window keeping the focus you had in the zoom window. 8.3.8 8.3.8.1 and return to the tracks list. Properties Track properties The different data on a loaded track can be consulted (distance, area it encloses, maximum altitude, etc.) and modify some of its parameters (colour, thickness, description…) from the properties window of the track. You may enter this window in 3 ways: Direct button : brief click on the name of the track on the List and then press the button at the bottom of the list. Contextual menu of track in the list Contextual menu of the track in the map Once inside it, you will be able to modify some parameters of the track and consult a great variety of data grouped by sections: CompeGPS Team S.L. http://www.compegps.com http://support.compegps.com General: Name of file (you may also change the track name from the contextual menu of the tracks list or by „save as‟), User name, Outing name, Notes on track. Date and time: Day, Departure time (first track point), Arrival time (last track point), Duration, Difference between local time and UTC (more or less hours in regards to GMT), Time stopped, Time moving. Track points: Number of points, Recording intervals (this value can be set from „Main Menu > Settings > Off-road > Tracklog‟), Extra data fields (additional data that the tracks have besides the coordinates, altitude and time). See: Thickness, real width of track and colour of the track line. GPS: GPS model, series number and if the track features a digital signature. Distances: Projected distance (it is the distance that has been covered on the horizontal, disregards the distance covered in altitude), Distance with altitudes (the real distance covered by outlining the orography of the ground), linear distance (distance on a straight line between the first and the last point of the track), Area (surface enclosed by the track). This last datum is achieved by closing the track with a straight line in case there are no closed tracks). Altitudes: Track with altitudes (if the track features the altitude datum), Maximum altitude, Minimum altitude, Departure altitude (at the track origin), Arrival altitude (at the last point), Gain from the departure (difference between the departure altitude and the maximum reached), Departure-arrival slope, Maximum slope (difference of altitude between the highest and lowest point of the track), Accumulated climb * (total of the different gains in altitude made during the track, i.e. what we have had to climb in reality), accumulated descent*, ( Max. vertical speed (climbing speed), Min. Vertical speed (descent speed), Max. Slope, Min. Slope. Speed: Medium speed and Maximum speed reached in the track. Energy: Mass (weight of the person tracking together with the vehicle, bicycle, motorbike, rucksack, etc.), Energy measured in Joules, Average power measured in vats (consumed along the whole track), Average power on climbs measured in vats (consumed during the track climbs). *Only altitudes changes over 5 metres will be computed in properties, such as accumulated climb/descent. This is in order to prevent the resulting fluctuations of the GPS error margin from adding non real differences of level. As a result, a track that begins and ends in the same place may have an „accumulated climb‟ that does not match the „accumulated descent‟. CompeGPS Land lets you modify the “minimum difference to accumulate difference of level” in order to adjust it to your preferences in the track analysis. 8.3.8.2 Properties of a track point You may enter the properties of a single point in the track from the navigation screen by opening the contextual menu on the point in the map and selecting „edit track point‟. CompeGPS Team S.L. http://www.compegps.com http://support.compegps.com From the window that will open, you may enter: Icon: Choose the icon with which you wish to mark the position on this point of the track Description: You may include a note of your choice for this place. Coordinates: You may consult or modify the coordinates of the point. Day and date Associations: it associates image or sound files to your waypoints so they are displayed during navigation when reaching this point. 8.3.9 Track graph You may visualize a graph of the loaded route in two ways: From the tracks list: By selecting the contextual menu option of the route or by selecting the route and pressing the button. Through the data fields: You may place the „route graph‟ file in any position within the data pages, however, it is recommended to use the space of the graph page for this end. (+info) 8.3.10 Activate a track (Navigate) You may activate (navigate) a track in three ways: Menu “Navigate…” Contextual menu of the track in the tracks list (long click on the track in the tracks lists). The tracks list also features a direct access button to the navigation function. Contextual menu of the track on the map (long click on the track on the map). Once activated, TwoNav will guide you along the track by using two tools: CompeGPS Team S.L. http://www.compegps.com http://support.compegps.com GOTO arrow: In the „next event‟ space, an arrow will be displayed to indicate a direction tangent to the track. It means you can take the direction of this arrow as a reference to keep going your way. Note: If you are over 50 metres far from the track, the GOTO arrow will indicate the perpendicular to the track instead of the tangent. At this distance it will be considered that you are off the way that you should be following and that you must go back to it in the most direct possible way, i.e. perpendicularly. Guide line: Your position will be joined to the track by means a perpendicular line between them. When you are over 50 metres from the track, this line will turn red. Note: If the track you are following has over 100 points, the guide line will indicate the point closest to the track instead of the perpendicular. 8.3.11 Tracks contextual menu To open the contextual menu on an element, keep the pressure on it for 1 second. 1. Contextual menu of a track inside the tracks list: Track properties (+info) Close Track (+info) Delete file (+info) Close all except this one Save Track as… (+info) Rename file (+info) Graph window (+info) CompeGPS Team S.L. http://www.compegps.com http://support.compegps.com Play (+info) Zoom here (+info) Edit the track (+info) Send to Tools (+info) Activate (+info) 2. Contextual menu of a track on the map: Waypoint here (+ info) Begin route here (+ info) Begin track here (+ info) Track properties (+info) Save Track (+info) Close Track (+info) Edit Track (+info) Edit Track point (+info) Activate (+info) Legs (+info) 8.4 New… Leg properties Change leg here Delete this leg Save leg as Play Here (+info) Maps TwoNav lets you manage a great variety of maps in an easy way. You may get more maps to use with TwoNav in various ways, from buying them directly from our web page, to calibrate paper maps with CompeGPS Land. For further information go to www.compegps.com or www.twonav.com. 8.4.1 Supported formats TwoNav can open directly next map formats: *.RMAP (CompeGPS Raster map format) CompeGPS Team S.L. http://www.compegps.com http://support.compegps.com *.ECW (Raster). This format is not compatible with TwoNav Symbian and TwoNav iPhone. *.VMAP/*MPVF (CompeGPS vector map format) *.IMP (calibration file requiring image file) *.MAP (calibration file requiring image file) *.CDEM (3D relief) More map formats can be imported and converted to these ones from CompeGPS Land/Air. 8.4.2 Types of maps There exist 3 different basic types of maps: Vmap: Road maps with which the On-road* works. Topo: Topographic maps from CompeGPS. CDEM relieves: Elevations maps whose only information is the altitude of the grounds. When having a relief loaded we may enter the 3D+ and give altitude to the created waypoints, routes and tracks. Besides these three types of CompeGPS own ones, you may use other types of maps that you may get by other means (air images, topographic maps from other sources, scanned and calibrated paper maps, etc.). *If the TwoNav memory does not contain any other road map, the On-road mode won‟t be activated. Enter the Map Shop in www.twonav.com. 8.4.3 Maps lists Management of the maps is centralized in the maps list, however, it is also possible to carry out many other actions directly from the navigation screen by means of the contextual menu. See the Data section to learn the general operation of the lists. By entering the maps list you will be able to see all the maps available in the „TwoNavData/Maps‟ folder for your present position. If you wish to see the complete list of maps (not just the ones of the present position), activate the „see all‟ button. Each map has an icon to indicate which type of map it is: Vectorial Raster Relief (CDEM) If a map is present in maps folder but it is not activated (license required), a padlock will be added to the icon. CompeGPS Team S.L. http://www.compegps.com http://support.compegps.com If you have selected a map, the buttons at the bottom of the screen will let you enter the most important functionalities this element has: From left to right: See all/See available ones for present position Properties Zoom here Close 8.4.4 8.4.4.1 Open and close Automaps By activating this position, TwoNav will try to load the best map in each moment. In On-road mode, the V-map (road map) of the area will be loaded and the rest will be closed. In Off-road mode, the map with the best resolution (not a V-map) will be loaded and any other Vmap will close. If you want to keep the loaded maps when changing from one mode to another, deactivate the „Automaps‟ function. 8.4.4.2 Open map From the maps list, by pressing on the name of one of the available files, it will open. You will know it is open because it will be placed on the top of the list with the left square marked 8.4.4.3 . Close map Press on the left check mark of the open map for closing it. The file will leave its position on the first places of the list and will return to its alphabetical position among the other unloaded files. You may also enter this function from the contextual menu (in the maps list or on the navigation window) and pressing the „close‟ (X) button from the bottom of the list. 8.4.5 Search a loaded map on screen To centre a map on the screen: 1. Enter the Main Menu by pressing 2. Select „Main Menu > Data > Maps 3. Click on the map and choose between: a. Press the button CompeGPS Team S.L. http://www.compegps.com http://support.compegps.com b. Enter the Contextual Menu of the map (long click on the name or on the „Menu‟ button) and click on „Zoom here‟. A window display in the track on the screen will open with the possibility of zooming in or out. 4. To exit the window you may choose between: Press Press and return to the navigation window keeping the focus you had in the zoom window. 8.4.6 and it will return to the tracks list. Properties You can check different data of a loaded map (description, map type, resolution, extension, etc.) from the properties window of the map. You may enter this window in three ways: Direct button : brief click on the name of the map in the list and press the button at the bottom of the list. Contextual Menu of the map in the list Contextual Menu of the map in the navigation window 8.4.7 Multi-Maps TwoNav lets you load more than one map at the same time. If you have two maps for the same area (e.g. an orthophoto and a topographic map) and load them at the same time, one of them will hide the other. The „Multi-Maps‟ function lets you set this maps superposition by selecting the map you wish to be placed below or above the other. To enter this tool, choose the „Multi-Maps‟ from the Contextual Menu of the map you wish to manage („Main Menu > Data > Maps‟) and select „Bring to the front‟ or „Send back‟ as you prefer. 8.4.8 Contextual menu of the map To open the contextual menu on an element, all you have to do is keep the pressure on it for 1 second. 1. Contextual menu of the map on the navigation screen: New… o Waypoint here (+ info) o Begin route here (+ info) o Begin track here (+ info) Stop Nav.: You may stop your present navigation at any moment by this direct access alternative to „menu > navigate to > Stop nav.‟. Navigate here (+ info) Properties of the map (+ info) Close map (name of map) (+ info) CompeGPS Team S.L. http://www.compegps.com http://support.compegps.com Multi-map, Advanced...: (+ info). 2. Contextual menu of the map in the maps list: Properties of the map (+ info) Close map (+ info) Zoom here (+ info) Multi-Maps, Advanced (+ info) 9 “Simulation” and “Zoom to...” 9.1 Simulation TwoNav lets you see a representation of the itinerary you are going to follow. It will be displayed with the position icon in green to distinguish it from the „present position‟ icon in red. It features two kinds of simulations: A->B (only in „On-road‟ mode): From „Main menu > Discover > Simulate‟, you may choose two points (POIs, addresses, favourites…) so it shows you the proposed route to go from point A to point B. Reproduce track: Open the Contextual Menu in the tracks list or with the track on the map and select „Play‟. An animation of the itinerary will be displayed. During the animation, the simulated position will be shown with a green arrow and will become the CompeGPS Team S.L. http://www.compegps.com http://support.compegps.com prevailing one, so the position will be centred on it and the movement statistics will be related to it. To stop the simulation, you may go to „Main menu > Discover > Stop sim.‟ 9.2 Zoom to… The option „Zoom to…‟ allows you to carry out a quick pre-visualization of the element you wish to see on the map*. There are a great number of elements to visualize: Address: if you have loaded a routable map, with this tool you will be able to see the address chosen by you and it will appear centred on the screen. POI: if you have loaded a routable map, you will be able to carry out a quick visualization of the Points of Interest (POIs), such as petrol stations theatres, etc. Favourites: you may establish places on the map as favourite points, as for example your home. If you have saved places as favourites, you will be able to zoom on them in order to see them centred on the map. Data: You will also be able to see waypoints, routes and tracks on the map. Although you do not need to have loaded the map on which this data was created, as previsualization is based on the geographical coordinates, it is interesting to „zoom to…‟ these element on the map for you to see the details of the ground where they were made. CompeGPS Team S.L. http://www.compegps.com http://support.compegps.com Coordinates: TwoNav allows you to quickly visualize concrete coordinates introduced by you. Remember that to visualize what these coordinates correspond to, you must have loaded a map of that area. *Note: the option „Zoom to‟ shows you the element that you want to see in a window solely for this purpose that is not the same as the navigation window. However, when you carry out a „Zoom to…‟ an element, when returning to the navigation window, the focus will still be on this element. To re-centre the focus on its present position you may use the „Re-centre‟ tools. 10 Support If you have any kind of doubt or problem with the system, you may check the support sections of the CompeGPS (www.compegps.com) or TwoNav (www.twonav.com) pages. To make personalized enquiries you may use the „on-line‟ CompeGPS support system by entering the http://support.compegps.com space. 11 Limited warranty CompeGPS Team SL guarantees that this product is free from defects in material or workmanship for two years from the date of purchase. During warranty period, CompeGPS Team SL commits to repair any defective product or replace it for a functional one, without guarantee about preservation of any data that may be stored in it. CompeGPS Team SL does not guarantee the quality of the included maps, being free of any responsibility that may be derived from them. Wear and tear effects that may happen in some elements (like screen, buttons, rubber caps or moving parts) are out of guarantee. Present warranty will be cancelled if any of the next circumstances happen: 1- Rough handling in any form: strong hits, pricks, torsions, compressions, vibrations etc. Re-charging battery while driving a motorbike or any other vehicle which is causing vibrations is highlighted as a specific case of rough handling. 2- Inappropriate exposure to water (i.e. any type of exposition if rubber caps are incorrectly adjusted or immersions even with caps correctly placed), dust, extreme thermal conditions, corrosion, oxidation or chemical substances 3- Manipulation of the product by non-allowed devices or applications, particularly if trying to install any other software than the authorized (supplied exclusively in CompeGPS Team SL web spaces www.compegps.com and www.twonav.com ) or using illegal activation keys not provided by CompeGPS Team SL. 4- Disassembling, modifying or repairing when not performed by CompeGPS Team SL technical service. CompeGPS Team SL will not be liable for any damage derived from the use or bad use of the product, being free of any obligation if any accident occurs when the device is used in any mean of transport. Any demand must be performed contacting with CompeGPS Team SL by one of these ways: 1- Through the reseller that made the sale of the product. CompeGPS Team S.L. http://www.compegps.com http://support.compegps.com 2- By the CompeGPS‟ on-line free support service, accessing from http://support.compegps.com web page. Once the contact has been confirmed, next steps to execute your guaranty will be communicated to the client. Any demand must come with its correspondent original receipt, where vendor name and address, date and place of purchase and type of product must be specified. Any shipping costs are the sole responsibility of the customer. 12 Appendix 1 – Data fields Next is a list of the items that you can find in the Data page or in the Data bar if it has been set. By default, only fields of frequent use will be shown, alphabetically ordered. If 'infinite' button is pressed, full list of data fields will be shown. More frequent: Accumulated Climb: Total amount climbed from departure to the present position Altitude: Altitude over the sea level Ascent to destination: Difference between the altitude of destination and present altitude Ascent to next: Difference between the altitude of the next waypoint and the present one Bearing Bearing to the next: Course towards which the next waypoint is Chronometer Compass: Address that is followed on the horizontal level (0 = N, 90 =E, 180 = S, 270 = O) Coordinates Deviation from route: Distance to active route Dist. to destination: Distance to destination (last waypoint of the route) Distance to the next: Distance to the to the next waypoint Est. Hour at Dest. : Estimated time of arrival to destination (last waypoint of the route) at present speed Est. Hour at Next : Estimated time of arrival to the next waypoint (at present speed) E.T. Dest: Estimated time to reach destination (last waypoint of the route) (at current speed) E.T. Next: Estimated time to reach next waypoint (at current speed) Goto arrow: Arrow that indicates the direction to the next waypoint Max. sp.: Maximum speed in current flight CompeGPS Team S.L. http://www.compegps.com http://support.compegps.com Mean speed: Mean speed from start to now Odometer Total 1: Accumulated distance of all your outings. It is not automatically reset when turning off the device Partial CO2 emission: CO2 emission from departure. It is reset every time the device is turned off Partial distance: Counter of distance covered from the beginning of departure. It is reset every time the device is turned off Route percentage: % of the route that has been already done. Route graph: Shows the graph of the route as it is being covered Speed: Present speed Slope: Slope of our present movement Time: Present time according to the selected time zone Time stopped: Time gone without advancing Time moving: Time gone while moving Track graph: Shows the track from the data page Less frequent Accumulated Descent: Total of the descents made from departure to the present position Atmospheric pressure: It shows the present atmospheric pressure by means of the barometric altimeter Barometric altitude: Present altitude that the barometric altimeter captures by atmospheric pressure Battery: Remaining energy in PC/PDA Differential GPS: GPS gives differential signal (submetric accuracy) Free Memory: It shows the free memory of the system GPS Altitude: Present altitude that the GPS perceives via satellites GPS Bearing: Direction followed according to the GPS system HDOP: Horizontal Dilution Of Precision (estimated current accuracy of the GPS) L. Alt.: Altitude of the land looking at the loaded DEM file Magnetic bearing: Direction followed according to the inner compass Maximum altitude: Reached in this outing Name of the track file CompeGPS Team S.L. http://www.compegps.com http://support.compegps.com Next WPT: Name of the waypoint you are going to Norm. Acc: Normal acceleration (perpendicular to movement, in circular movements) Number of points: Track points saved up to this moment Number of satellites in use: Satellites fixed in that moment Place: When a vector map is loaded with information about the zone, this will show the name of the element which fits with our current position Precision: GPS error margin Speed limit: It shows the speed limit established for the road Sunrise: Indicates the time of sunrise, considering parameters such as time zone and season of the year Sunset: It tells the time it will get dark considering parameters such as time zone and season of the year Tangential acceleration Total CO2 emission: CO2 emission of all your outings. It does not automatically reset when he device is turned off Total Odom.2: Secondary counter of aggregate distance of all your trips. It is not reseted automatically when device is shutdown Turning radius Vertical speed 13 Appendix 2 – Equivalences of peculiar signs When having to introduce an address into the TwoNav system for searching cities and streets, you may find that you have to introduce signs that do not appear in the system keypad. Next follows a table of equivalences for you to know which sign to introduce to be considered as the „peculiar‟ sign. „A‟ 'À', 'Á', 'Ä', 'Â', 'Å', 'Ã', 'Æ' 'C' 'Ç' 'D' 'Ð' „E‟ 'É', 'È', 'Ë', 'Ê' „I‟ 'Í', 'Ì', 'Ï', 'Î' CompeGPS Team S.L. http://www.compegps.com http://support.compegps.com 'N' 'Ñ' „O‟ 'Ó', 'Ò', 'Ö', 'Ô', 'Ø', 'Õ', 'Œ' 'S' 'Š', 'ß' 'T' 'Þ' „U‟ 'Ú', 'Ù', 'Ü', 'Û' „Y‟ 'Ý', 'Ÿ' 'Z' 'Ž' '-', '_', '\' ' ' (space) Therefore, if you have to introduce „LidlStraße’ you will have to press ‘S’ instead of ß.


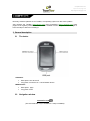
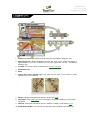
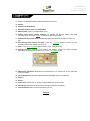
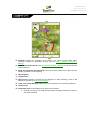
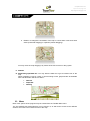

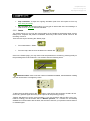
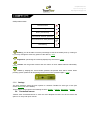


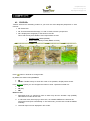
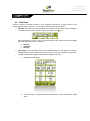

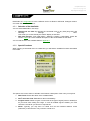
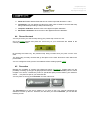
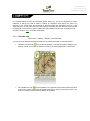
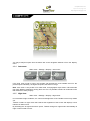

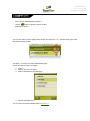
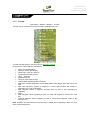


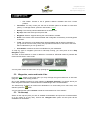
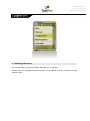

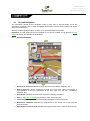
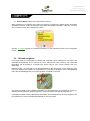


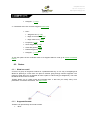

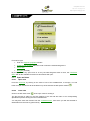
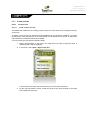
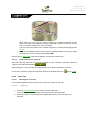
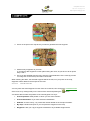
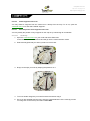


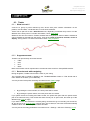

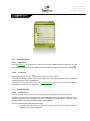


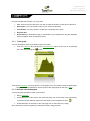
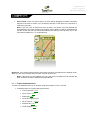


![TwoNav [platform][version]](http://vs1.manualzilla.com/store/data/006163237_1-2ed879c8b9cb83b9cbc3a5d3760a7be6-150x150.png)
![TwoNav [platform][version]](http://vs1.manualzilla.com/store/data/006158074_1-4953c8fbc289832ee2abb2d845854be3-150x150.png)