1
Operating Instructions
<Advanced Features>
Transmission Mode
Communication Information
Other Transmission Features
Reception Features
Copying
Facsimile User Tools
Key Operator Settings
Solving Operation Problems
Maintaining Your Machine
Appendix
For safe and correct use of this machine, please be sure to read the Safety Information in the
Basic Features manual before you use it.
Operating Instructions <Advanced Features>
Type for 3799/F9199/LF510 AG/5510L
Type for 3799nf/F9199nf/LF515e AG/5510NF
Printed in Japan
UE USA H310-8700A
Introduction
This manual describes detailed instructions on the operation and notes about the use of this machine.
To get maximum versatility from this machine all operators are requested to read this manual carefully
and follow the instructions. Please keep this manual in a handy place near the machine.
Notes:
Some illustrations in this manual might be slightly different from the machine.
Certain options might not be available in some countries. For details, please contact your local dealer.
Machine Types:
The model names of the machine do not appear in the following pages. Check the type of your machine
before reading this manual. (For details, see p.17 “Machine Types”, <Basic Features>.)
•
Type1: 3799/F9199/LF510/5510L
•
Type2: 3799nf/F9199nf/LF515e/5510NF
Notes:
Two kinds of size notation are employed in this manual. With this machine refer to the inch version.
Important
Contents of this manual are subject to change without prior notice. In no event will the company be liable for direct, indirect, special, incidental, or consequential damages as a result of handling or operating the machine.
Power Source:
AC120 V, 60 Hz
Please be sure to connect the power cord to a power source as above. For details about power source,
see p.284 “Connecting the Power and Switching On”.
In accordance with IEC 60417, this machine uses the following symbols for the main power switch:
a means POWER ON.
b means POWER OFF.
Copyright © 2002
TABLE OF CONTENTS
How to Read this Manual ...................................................................................... 1
Paper Mark................................................................................................................. 2
Manuals for This Machine .....................................................................................3
Advanced Features (This Manual) ............................................................................. 3
Basic Features ........................................................................................................... 3
NIC FAX Unit Manual (on CD-ROM) (Option for Type1) ........................................... 4
NIC FAX Unit CD-ROM Manual (Option for Type1) ................................................... 4
1. Transmission Mode
Sending at a Specific Time (Send Later) .............................................................5
Sending Confidential Messages........................................................................... 7
User Code Transmission.....................................................................................10
Entering a User Code with a Quick Dial Key............................................................ 12
SUB Code Transmission with the Mode Key ....................................................13
SEP Code Polling Reception .............................................................................. 16
Polling Reception................................................................................................. 19
File Reserve Report (Polling Reception).................................................................. 21
Communication Result Report (Polling Reception).................................................. 21
Polling Transmission........................................................................................... 22
Polling Transmission Clear Report........................................................................... 25
Reduced Image Transmission ............................................................................26
Transfer Request ................................................................................................. 28
Specifying an End Receiver ..................................................................................... 31
Fax Header Print ..................................................................................................32
2. Communication Information
Checking and Canceling Transmission Files....................................................35
Canceling a Transmission or Reception .................................................................. 35
Printing a Stored Message.......................................................................................37
Checking and Editing a File ..................................................................................... 38
Printing a List of Files in Memory (Print TX File List).......................................43
Checking the Transmission Result (TX Status) ................................................44
Checking the Reception Result (RX Status)......................................................45
Printing a Confidential Message ........................................................................46
Confidential File Report............................................................................................47
Printing a Memory-locked Message................................................................... 48
Printing the Journal ............................................................................................. 50
Printing the Journal ..................................................................................................53
Displaying the Files in Memory ..........................................................................56
TX/RX File Save.................................................................................................... 58
Searching Memory for Sent Faxes........................................................................... 59
Searching Memory for Received Faxes ...................................................................62
Disk File Search List/Visual List ............................................................................... 65
Printing Files ............................................................................................................65
Deleting Files ........................................................................................................... 66
i
Box File Manager Functions ...............................................................................67
Printing Personal Box Messages .............................................................................67
Storing Messages in Information Boxes...................................................................69
Printing Information Box Messages .........................................................................70
Deleting Information Box Messages ........................................................................ 71
3. Other Transmission Features
Handy Dialing Functions.....................................................................................75
Chain Dial................................................................................................................. 75
Telephone Directory................................................................................................. 76
Redial ....................................................................................................................... 77
SUB/SID (SUB Code Transmission) ........................................................................ 78
SEP/PWD (SEP Code Polling Transmission) ..........................................................80
Sub-address ............................................................................................................82
UUI ...........................................................................................................................83
On Hook Dial ........................................................................................................ 85
Using On Hook Dial with ISDN................................................................................. 86
Manual Dial ...........................................................................................................88
Selecting the Line ................................................................................................89
Auto Discriminate .....................................................................................................91
How to Select the Line .............................................................................................91
Transmission Features........................................................................................93
Stamp....................................................................................................................... 93
Auto Reduction.........................................................................................................93
ID Transmission ....................................................................................................... 94
Duplex Original Settings........................................................................................... 94
If Memory Runs out While Scanning Is in Progress ..............................................95
Batch Original Documents Transmission .................................................................96
If Scanning Fails .................................................................................................... 97
If Memory Runs out While Scanning Is in Progress ..............................................97
Label Insertion.......................................................................................................... 98
Inserting a Label Using Auto Document ................................................................98
Auto Document ........................................................................................................ 99
No Document, No Dial ...........................................................................................100
Blank Sheet Detect ................................................................................................101
Scanner Cleaning Message ................................................................................... 101
Backup File Transmission ...................................................................................... 102
JBIG Transmission.................................................................................................102
More Transmission Functions.......................................................................... 103
If Memory Runs out While Scanning Is in Progress...............................................103
Checking the Transmission Result......................................................................... 103
Broadcasting Sequence ......................................................................................... 104
Simultaneous Broadcast ........................................................................................104
Sending a Fax Message Immediately ....................................................................104
Broadcasting: Checking Progress.......................................................................... 104
Automatic Redial ....................................................................................................105
Batch Transmission................................................................................................105
Dual Access ........................................................................................................... 105
ECM (Error Correction Mode) ................................................................................ 105
Parallel Memory Transmission............................................................................... 105
ii
Printed Reports .................................................................................................. 107
File Reserve Report (Memory Transmission) ........................................................107
Communication Result Report (Memory Transmission) ........................................107
Communication Failure Report ..............................................................................108
Transmission Result Report (Immediate Transmission) ....................................... 108
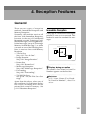
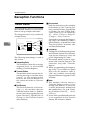
4. Reception Features
General................................................................................................................ 109
Immediate Reception .............................................................................................109
Memory Reception .................................................................................................110
Substitute Reception ..............................................................................................111
Screening Out Messages From Anonymous Senders ........................................112
Selecting the Reception Mode.......................................................................... 113
Fax Mode (Auto Receive Mode) ............................................................................ 113
Telephone Mode ....................................................................................................113
Reception Functions ......................................................................................... 114
Transfer Station...................................................................................................... 114
Transfer Result Report ........................................................................................115
Multi-step Transfer............................................................................................... 115
Remote Transfer ....................................................................................................116
How to make a Remote Transfer Request (push signal).....................................116
Remote Transfer with UUI...................................................................................... 118
How to make a Remote Transfer Request (UUI)................................................. 118
ID Reception ..........................................................................................................119
JBIG Reception ...................................................................................................... 119
Printing Functions ............................................................................................. 120
Center Mark ........................................................................................................... 120
Checkered Mark..................................................................................................... 120
Multi-copy Reception..............................................................................................120
Reception Time ...................................................................................................... 121
Two In One.............................................................................................................121
Image Rotation.......................................................................................................122
Rotate Sort .............................................................................................................122
Page Separation and Length Reduction ................................................................ 123
TSI Print .................................................................................................................123
CIL Print .................................................................................................................123
TID Print .................................................................................................................124
Adjusting the Printing Density ................................................................................ 124
Output density ..................................................................................................... 124
Toner saving........................................................................................................ 124
When There Is No Paper of the Correct Size................................................... 125
iii
5. Copying
Copying............................................................................................................... 127
Making Copies on Special Paper ...........................................................................129
6. Facsimile User Tools
Accessing the User Tools ................................................................................. 131
Counters.................................................................................................................134
Selecting the Display Language............................................................................. 135
Program/Delete Menu ........................................................................................ 136
Multi-step Transfer Group Settings ........................................................................136
Storing and Changing Keystroke Programs...........................................................139
Using a Keystroke Program.................................................................................142
Deleting a Keystroke Program............................................................................. 143
Registering Auto Documents .................................................................................145
Programming and Changing an Auto Document................................................. 145
Deleting an Auto Document ................................................................................... 147
Reports/Lists ...................................................................................................... 149
Setup ................................................................................................................... 151
Adjusting the Display Contrast ............................................................................... 151
Date/Time............................................................................................................... 151
Fax Reset Timer..................................................................................................... 152
On Hook Timer.......................................................................................................153
User Function Keys ........................................................................................... 154
Functions You Can Assign to User Function Keys ................................................ 154
Registering/Editing the Contents of a User Function Key ......................................156
Programming by Specifying a Function Code with the Number Keys ................. 156
Programming a User Function Key on the Job.................................................... 157
Using a User Function Key ....................................................................................158
Deleting Functions Stored in User Function Keys..................................................158
Fax On Demand.................................................................................................. 160
Registering/Editing Fax On Demand Documents ..................................................160
Deleting Fax On Demand Documents ................................................................... 162
Printing Fax On Demand Documents ....................................................................164
Printing the Fax On Demand List ...........................................................................165
Printing the Fax On Demand Access Report .........................................................165
Fax On Demand Recorded Messages................................................................... 166
Recording the Fax On Demand Recorded Messages.........................................167
Checking the Fax On Demand Recorded Messages .......................................... 168
How Callers Use Fax On Demand ...................................................................... 169
When the Password Is Turned On ...................................................................... 170
When the Password Is Turned Off ...................................................................... 170
iv
7. Key Operator Settings
Accessing the Key Operator Tools .................................................................. 171
System Settings ................................................................................................. 175
Economy Transmission..........................................................................................175
Night Timer.............................................................................................................176
User Parameters ....................................................................................................178
How to Set User Parameters............................................................................... 188
Printing the User Parameter List ............................................................................ 189
G3 Analog Line ...................................................................................................... 189
G3 Digital Line........................................................................................................ 192
G4 Digital Line........................................................................................................ 194
Fax On Demand Reception....................................................................................197
Registering ID Codes .............................................................................................199
Registering ..........................................................................................................200
File Retention ......................................................................................................... 201
Transfer Report ...................................................................................................... 202
Network Settings ....................................................................................................204
IP-Fax Parameter Settings.....................................................................................204
System Parameter Transmission ...........................................................................204
Key Layout .............................................................................................................205
Print Position ..........................................................................................................206
Memory File Transfer .............................................................................................207
Deleting Entries...................................................................................................... 209
Deleting Entries ...................................................................................................209
Reset PM Counter.................................................................................................. 211
RDS (Remote Diagnostic System)......................................................................... 212
Initial Set Up ....................................................................................................... 214
Multi-copy Reception......................... (Printing Multiple Copies of Messages
From Certain Senders) ...............................214
Setting up Multi-copy Reception.......................................................................... 214
Deleting Specified Senders .................................................................................216
Printing the Specified Sender List .......................................................................217
Authorized Reception........................ (Blocking Out Messages from Certain Senders) ...217
Setting up Authorized Reception ......................................................................... 218
Deleting Specified Senders .................................................................................219
Printing the Specified Sender List .......................................................................220
Specified Tray ................................... (Having Messages from Certain Senders
Printed on Different Paper) .........................220
Setting up Specified Tray ....................................................................................221
Deleting Specified Senders .................................................................................223
Printing the Specified Sender List .......................................................................223
Forwarding ........................................ (Having Messages From Certain Senders
Forwarded)..................................................223
Setting up Forwarding ......................................................................................... 225
Deleting Forwarding Addresses .......................................................................... 228
Deleting Specified Senders (Forwarding)............................................................229
Printing the Specified Sender List (Forwarding) ..................................................231
v
Memory Lock..................................... (Having Messages from Certain Senders
Stored in Memory Instead of Being
Printed Out)................................................. 233
Setting up Memory Lock...................................................................................... 234
Deleting Specified Senders .................................................................................236
Printing the Specified Sender List .......................................................................236
TX/RX File Save Settings.................. (Having Messages from Certain Senders
Stored in Memory) ......................................236
Setting up TX/RX File Save.................................................................................237
Deleting Specified Senders .................................................................................239
Printing the Specified Sender List .......................................................................239
Deleting Specified Senders............... (General Procedure for Deleting Specified
Senders) .....................................................239
How to Delete Specified Senders........................................................................239
Printing the Specified Sender List ..... (General Procedure for Printing a List of
Registered Specified Senders) ...................241
How to Print Specified Sender List ...................................................................... 241
Backup File Transmission Settings ... (Specifying a Destination to Send
Backups of Faxes) ......................................243
Box Settings ....................................................................................................... 245
Personal Boxes ...................................................................................................... 246
Registering/Editing Personal Boxes.......................................................................247
Deleting Personal Boxes........................................................................................250
Information Boxes .................................................................................................. 251
Registering/Editing Information Boxes ................................................................... 251
Deleting Information Boxes ....................................................................................253
Transfer Boxes.......................................................................................................254
Registering/Editing Transfer Boxes........................................................................255
Deleting Transfer Boxes......................................................................................... 258
Printing the Box List ............................................................................................... 259
8. Solving Operation Problems
Clearing a Paper Jam in the Optional Paper Supply Units ............................ 261
Clearing a Paper Jam in the Optional Paper Tray Unit .......................................... 261
Clearing a Paper Jam in the Optional Bypass Tray Unit ........................................262
Reading Reports ................................................................................................ 264
Error Report ........................................................................................................... 264
Power Failure Report .............................................................................................264
Error Codes ........................................................................................................ 265
vi
9. Maintaining Your Machine
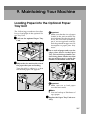
Loading Paper into the Optional Paper Tray Unit........................................... 267
Loading Paper into the Optional Bypass Tray Unit ........................................ 268
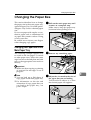
Changing the Paper Size................................................................................... 269
Changing the Paper Size in the Main Paper Tray..................................................269
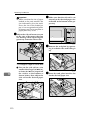
Changing the Paper Size in the Optional Paper Tray Unit .....................................271
Changing the Paper Size in the Optional Bypass Tray Unit...................................273
Cleaning.............................................................................................................. 275
Cleaning the Document Transport Mechanism...................................................... 275
Cleaning the Copy Paper Transport Mechanism ................................................... 277
Main Paper Tray .................................................................................................. 277
Optional Paper Tray Unit .....................................................................................277
Optional Bypass Tray Unit................................................................................... 278
Cleaning the Registration Roller ............................................................................ 279
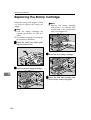
Replacing the Stamp Cartridge ........................................................................ 280
10.Appendix
Installation, Move and Disposal of the Machine ............................................. 281
Machine Environment ............................................................................................ 281
Location.................................................................................................................. 283
Connecting the Power and Switching On...............................................................284
Moving the Machine ............................................................................................... 285
Disposing of the Machine.......................................................................................285
Connecting to a Telephone Line ...................................................................... 286
Connecting the Machine to the Telephone Line.....................................................286
Connecting to an Additional G3 Line...................................................................... 287
ISDN.......................................................................................................................287
Connecting an External Telephone........................................................................287
Connecting the Optional Handset .......................................................................... 288
Installing the Optional Handset............................................................................ 288
Setting up the Optional Handset ............................................................................ 288
Supplies .............................................................................................................. 289
Options ............................................................................................................... 290
40MB Memory Card ............................................................................................... 290
Function Upgrade Unit ...........................................................................................291
Fax On Demand Unit .............................................................................................291
Extra G3 Interface Unit...........................................................................................292
ISDN Unit ............................................................................................................... 292
Handset.................................................................................................................. 292
NIC FAX Unit (Option for Type1) ...........................................................................292
Printer Interface Unit ..............................................................................................293
Other Options......................................................................................................... 293
vii
Specifications..................................................................................................... 294
Acceptable Types of Originals ............................................................................... 296
Acceptable Original Sizes....................................................................................296
Paper Size and Scanned Area ............................................................................ 297
Paper......................................................................................................................298
Recommended Paper Sizes and Types ..............................................................298
Non-recommended Paper ................................................................................... 299
Energy Saving........................................................................................................ 300
Introduction..........................................................................................................300
Entering Energy Saver Mode ..............................................................................301
Exiting Energy Saver Mode .................................................................................302
Selecting the Energy Saver Mode type ...............................................................302
Reception in Energy Saver Mode........................................................................302
Maximum Values................................................................................................ 303
INDEX....................................................................................................... 304
viii
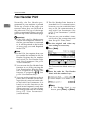
How to Read this Manual
The following set of symbols is used in this manual.
R WARNING:
This symbol indicates a potentially hazardous situation that might result in
death or serious injury when you misuse the machine without following the instructions under this symbol. Be sure to read the instructions, all of which are described in the Safety Information section in the Basic Features manual.
R CAUTION:
This symbol indicates a potentially hazardous situation that might result in minor or moderate injury or property damage that does not involve personal injury
when you misuse the machine without following the instructions under this
symbol. Be sure to read the instructions, all of which are described in the Safety
Information section in the Basic Features manual.
* The statements above are notes for your safety.
Important
If this instruction is not followed, paper might be misfed, originals might be
damaged, or data might be lost. Be sure to read this.
Preparation
This symbol indicates information or preparations required prior to operating.
Note
This symbol indicates precautions for operation, or actions to take after abnormal operation.
Limitation
This symbol indicates numerical limits, functions that cannot be used together,
or conditions in which a particular function cannot be used.
Reference
This symbol indicates a reference.
[
]
Keys that appear on the machine's panel display.
{
}
Keys built into the control panel of the machine.
1
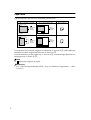
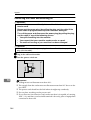
Paper Mark
Paper Directions are shown as following on this book.
Original is
placed
this way
Original is
placed
this way
Tray is
pulled out
this way
Tray is
pulled out
this way
GFKAMI0N
Portrait direction towards originals set direction is shown as K, and landscape
direction towards original set direction is shown as L.
Portrait direction on the paper tray is shown as K, and landscape direction on
the paper tray is shown as L.
❒
Note
represents original or paper.
Reference
For "Auto Document Feeder (ADF)", see p.18 “Guide to Components”, <Basic
Features>.
2
Manuals for This Machine
Two Facsimile Reference manuals are provided, the Basic Features manual and
the Advanced Features manual. For Type 2 machines and Type 1 machines with
options, NIC FAX Unit manual and NIC FAX Unit CD-ROM manual are also
provided. Please refer to the manual that suits your needs.
Instructions for the optional ISDN Unit (ISDN G4 Interface Unit Type510) and the Extra G3 Interface Unit (G3 Interface Unit Type510) are included in the Basic Features and Advanced Features manuals.
Advanced Features (This Manual)
The Advanced Features manual describes more advanced functions, and also
explains settings for key operators.
Basic Features
The Basic Features manual explains the most frequently used fax functions and
operations.
❖ Chapter 1 Getting Started
Describes part names of the machine and control panel. Also lists symbols
and conventions used in this manual.
❖ Chapter 2 Faxing
Explains basic transmission. You can also find out about other types of transmissions and how to switch the reception mode.
❖ Chapter 3 Programming
Explains how to make initial settings, such as the Own Name and Own Fax
Number settings. Also explains the Quick Dial, Speed Dial and Group keys.
These functions allow you to store numbers and save time when dialing. This
chapter also explains how to enter letters and symbols.
❖ Chapter 4 Troubleshooting
Explains clearing document jams, loading paper and changing the volume of
audible signals generated by the machine. When the display or indicator
lights show unusual information, check the list and take appropriate action.
3
NIC FAX Unit Manual (on CD-ROM) (Option for Type1)
The NIC Fax Unit manual explains about the Internet Fax function, IP-Fax function, LAN FAX function and Scanner function.
❖ Chapter 1 Getting Started
Explains names and functions for the control panel and necessary settings.
Software on the CD-ROM and how to install it are also explained.
❖ Chapter 2 Using Internet Fax Functions
Explains the Internet Fax function. You can send and receive documents by email using the Internet.
❖ Chapter 3 Using IP-Fax Functions
Explains the IP-Fax function. You can send and receive documents between
fax machines that are connected to the network using TCP/IP.
❖ Chapter 4 Using LAN FAX Functions
Explains the LAN Fax function. You can send documents that are created using computer applications. Editing the destinations in the Address Book that
are used when sending by LAN Fax is also explained.
❖ Chapter 5 Using Scanner Functions
Explains sending scanned data as an image file attached to e-mail. The Network Delivery Scanner is also explained. You can deliver scanned data using
the delivery server.
❖ Chapter 6 Registering Addresses
Explains how to register the destinations for Internet Fax, IP-Fax and Scanner
using Quick Dial and Speed Dial. How to register an Address Template often
used when specifying destinations is also explained.
❖ Chapter 7 Making Settings through a Web Browser
Explains the items you can check and set using a Web browser on a Network
computer. The Help function is also explained.
❖ Chapter 8 Troubleshooting
Explains error messages and user parameter settings. When the display
shows unusual information, check the list in this chapter and take the appropriate action.
❖ Chapter 9 Appendix
Explains important reports and lists that are printed when using Internet Fax
function or PC FAX function. Specifications are also in this chapter.
NIC FAX Unit CD-ROM Manual (Option for Type1)
4
Introduces the contents of the NIC FAX CD-ROM and the necessary operating
environment for the CD-ROM.
How to access the NIC FAX unit manual in PDF format on the CD-ROM is also
explained.
1. Transmission Mode
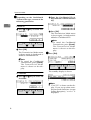
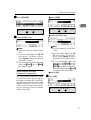
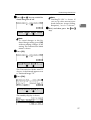
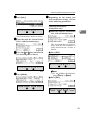
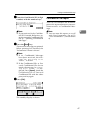
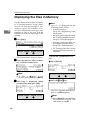
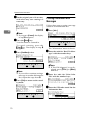
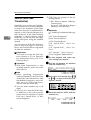
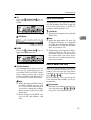
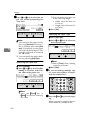
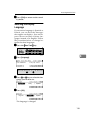
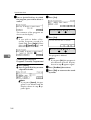
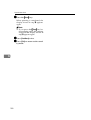
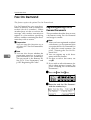
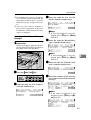
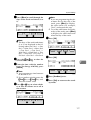
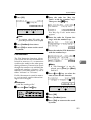
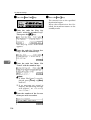
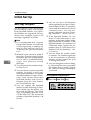
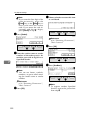
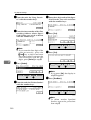
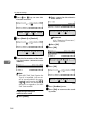
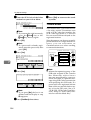
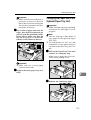
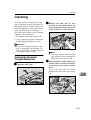
Sending at a Specific Time (Send Later)
Using the Send Later function, you
can delay transmission of your fax
message until a specified time. This
allows you to take advantage of offpeak telephone line charges without
having to be by the machine at the
time of transmission.
Transmitter
B Press [Mode].
The Transmission Mode menu appears.
Receiver
C Enter
the code for "Send Later"
with the number keys.
Send Later
at 21:00(9:00PM)
GFTIME0N
Important
❒ If the Power switch is off for 12
hours or longer, all the stored messages are deleted.
Limitation
❒ This feature is not available with
Immediate Transmission. Specify
Memory Transmission beforehand.
Note
❒ You cannot specify a time more
than 24 hours into the future.
❒ If you wish to use Economy Transmission, program the time when
your phone charges get cheaper.
See p.175 “Economy Transmission”.
A Set
the original and select any
scan settings you require.
D Enter the time with the number
keys. To change AM/PM, press
[AM/PM] or press [Economy TX].
Note
❒ If the current time shown on the
display is not correct, adjust it.
See p.151 “Date/Time” .
❒ The current time appears on the
right side of the display.
❒ When entering numbers smaller than 10, add a leading zero.
❒ If you make a mistake, press the
{Clear}
} key or {Stop}
} key and
try again.
5
Transmission Mode
E Press [OK].
1
The Transmission Mode menu is
shown on the display. A check
mark is added to Send Later.
Note
❒ To cancel Send Later, press
[Cancel] and the display will return to the Transmission Mode
menu.
F Press [Exit].
The standby display is shown.
Note
❒ "Send Later" is shown on the
display. If you set up other
transmission mode functions
(except Polling Reception),
"Others" is displayed.
G Dial,
and then press the {Start}
}
key.
Note
❒ You can cancel transmission of
a message set up for Send Later.
See p.35 “Canceling a Transmission or Reception” .
6
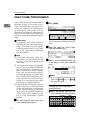
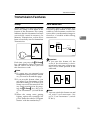
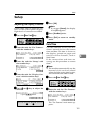
Sending Confidential Messages
Sending Confidential Messages
This feature is called Confidential
Transmission. Use this feature if you
do not want your message to be
picked up casually by anybody at the
other end. The message will be stored
in the memory at the other end. It will
not be printed until the Confidential
ID is entered.
Transmitter
Receiver
Limitation
❒ The destination machine must be
of the same make and have the
Confidential Reception feature.
1
Note
❒ We recommend that you program
the Confidential ID beforehand.
See p.199 “Registering ID Codes”.
❒ An ID can be any 4 digit number
except 0000.
❒ The destination machine must
have enough memory available.
A Set
the original and select any
scan settings you require.
Entering the Confidential ID
GFSINS0N
B Press [Mode].
There are two types of Confidential
Transmission:
❖ Default ID
The other party can print the message by entering the ID that was
previously stored in the other party's terminal using the Confidential ID feature.
❖ ID Override
If you wish to send a confidential
message to a particular person at
the other end, you can specify the
Confidential ID that person has to
enter to see that message. Anybody entering the machine's Confidential ID will not be able to see
the message. Before you send the
message, do not forget to tell the
intended receiver what code must
be entered to print the message.
The Transmission Mode menu appears.
C Enter the code for "Confidential
TX" with the number keys.
7
Transmission Mode
D Depending
on the Confidential
Transmission type, use one of the
following procedures:
1
B Enter the Confidential ID (4digit number) with the number
key.
Default ID
A Press 0 or 1 key to select "Default ID".
B Press [OK].
The Transmission Mode menu
is shown again. A check mark is
added to Confidential TX.
C Press [OK].
The Transmission Mode menu
is shown again. A check mark is
added to Confidential TX.
Note
❒ To cancel the Confidential
Transmission, press [Cancel].
T h e T r an s m i ss i on M od e
menu is shown on the display.
E Press [Exit].
Note
❒ To cancel the Confidential
Transmission, press [Cancel].
Th e T ran sm is sio n M od e
menu is shown on the display.
ID Override
The standby display is shown.
A Press 0 or 1 key to select "ID
Override".
Note
❒ "Conf. TX" is shown on the display. If you set up other transmission mode functions (except
Polling Reception), "Others" is
displayed.
8
Sending Confidential Messages
F Dial,
and then press the {Start}
}
key.
Note
❒ You can cancel transmission of
a message set up for Confidential Transmission. See p.35
“Canceling a Transmission or
Reception” .
1
- Sending confidential faxes to
other makers' machines
Confidential Transmission is only
possible with machines of the same
make that have the Confidential
Transmission feature. However, if
you use the SUB/SID function, you
can send and receive confidential faxes to and from other makers' machines that have the SUB/SID feature.
See p.13 “SUB Code Transmission
with the Mode Key”.
9
Transmission Mode
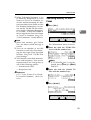
User Code Transmission
User Codes allow you to keep track of
machine usage. If everyone uses a
User Code when they use the fax machine, the codes or the names prog ra m m e d fo r th e c o d e s w i ll be
printed in the Journal and other reports. This will help you to check who
has been using the machine and how
often.
1
Preparation
To register User Codes, create a
Personal Box for each user beforehand. The SUB code you specify
will become the user's User Code.
See p.247 “Registering/Editing
Personal Boxes”.
Note
❒ User Codes (the name of the Personal Box) can be printed on the
fax, lists or reports printed at the
other end.
❒ When the user's name is registered
into a User Code, and the Label Insertion function is assigned to either a Quick Dial key or Speed
Dial, you can have the receiver's
name programmed in a Quick Dial
key or Speed Dial and the user's
name printed on the message
when it is received at the other
end. See p.98 “Label Insertion”.
❒ Instead of the Fax Header, you can
choose the user's name (the name
of the Personal Box) to be printed
at the same position on the message. You can turn this function on
or off with User Parameters. See
p.178 “User Parameters” (switch
20 bit 5).
A Set
the original and select any
scan settings you require.
10
B Press [Mode].
The Transmission Mode menu appears.
C Enter
the code for "User Code"
with the number keys.
D Enter a User Code/SUB Code (up
to 20 digits) with the number
keys.
Note
❒ If you incorrectly enter the code,
press the {Clear}
} key or {Stop}
}
key and try again.
To enter a User Code with a
Quick Dial key
A Press the Quick Dial key the
User Code has been assigned to.
User Code Transmission
B Press [Yes].
F Press [Exit].
1
Proceed to step G.
E Press [OK].
The Transmission Mode menu is
shown again. A check mark is added to "User Code".
Note
❒ When an unregistered User
Code is entered, the following
message appears: " Not programmed." then the display in
step D will reappear.
❒ To cancel the User Code Transmission, press [Cancel]. The
Transmission Mode menu is
shown on the display.
The User Code screen appears.
Note
❒ "User Code" is shown on the
display. If you set up other
transmission mode functions
(except Polling Reception),
"Others" is displayed.
G Dial,
and then press the {Start}
}
key.
Note
❒ You can cancel transmission of
a message set up for Personal
Transmission. See p.35 “Canceling a Transmission or Reception” .
11
Transmission Mode
Entering a User Code with a
Quick Dial Key
1
When a SUB Code (User Code) for a
Personal Box has been assigned to a
Quick Dial key, you can perform User
Code Transmission by just pressing
that key.
Reference
p.247 “Registering/Editing Personal Boxes”
A Set
the original and select any
scan settings you require.
B Press the Quick Dial key the User
Code has been assigned to.
C Press [Yes].
Note
❒ "User Code" is shown on the
display. If you set up other
transmission mode functions
(except Polling Reception),
"Others" is displayed.
12
D Dial,
and then press the {Start}
}
key.
Note
❒ You can cancel transmission of
a message set up for Personal
Transmission. See p.35 “Canceling a Transmission or Reception” .
SUB Code Transmission with the Mode Key
SUB Code Transmission with the Mode Key
Confidential Transmission is only
possible with machines of the same
make that have the Confidential
Transmission feature. However, if
you use the SUB/SID function, you
can send and receive confidential faxes to and from other makers' machines that have the SUB/SID feature.
This feature is used when sending
faxes to other parties' Personal Boxes
or Transfer Boxes.
Reference
p.78 “SUB/SID (SUB Code Transmission)”
p.246 “Personal Boxes”
p.254 “Transfer Boxes”
D Check the display message, then
1
press [OK].
The Transmission Mode menu is
shown again. A check mark is added to "TX With SUB/SID".
E Press [Exit].
A Set
the original and select any
scan settings you require.
B Press [Mode].
The Transmission Mode menu appears.
C Enter
Note
❒ " SUB/SID " is displayed. However, if other settings under the
Mode menu other than Polling
Reception are selected, "Others" is displayed.
F Dial the destination fax number.
the code for "TX With
SUB/SID" with the number keys.
Note
❒ If "TX With SUB/SID" is not displayed, press [↑
↑Prev.] or [↓
↓Next]
until it is.
Note
❒ If you incorrectly enter the
number, press the {Clear}
} key or
{Stop}
} key and try again.
13
Transmission Mode
G Press [SUB/SID].
B Enter the SID code.
1
Note
❒ You can enter up to 20 characters.
H Enter the SUB code.
Note
❒ You can enter up to 20 characters.
❒ You can enter digits 0-9, q,
p and spaces. To enter a
space, press [Space] (the first
character cannot be a space).
❒ If you incorrectly enter the
code, press the {Clear}
} key or
{Stop}
} key and try again.
C Press [OK].
I Press [OK].
❒ You can enter digits 0-9, q, p
and spaces. To enter a space,
press [Space] (the first character
cannot be a space).
❒ If you incorrectly enter the code,
press the {Clear}
} key or {Stop}
}
key and try again.
When entering the SID
(Password) is necessary
You may need to enter the SID
(Password) when sending fax messages with the SUB Code Transmission function to other makers'
machines. If a password is set for the
Transfer Box, enter the SID (Password) in addition to SUB code.
A Press [SID].
If you wish to specify another
destination
A Press [Add].
B Repeat steps F to I.
14
SUB Code Transmission with the Mode Key
J Press the {Start}} key.
Note
❒ You can cancel transmission of
a message set up for SUB Code
Transmission. See p.35 “Canceling a Transmission or Reception” .
1
15
Transmission Mode
SEP Code Polling Reception
If you wish to receive a message
stored in the memory of another party's fax machine, use this feature. The
machine will receive the message
with the SEP and PWD code that
matches the SEP and PWD code you
enter in the procedure below.
1
C Check the display message, and
then press [OK].
Reference
p.80 “SEP/PWD (SEP Code Polling Transmission)”
p.22 “Polling Transmission”
p.251 “Information Boxes”
A Press [Mode].
The Transmission Mode menu appears.
B Enter
the code for "RX With
SEP/PWD" with the number keys.
The Transmission Mode menu is
shown again. A check mark is added to "RX With SEP/PWD".
D Press [Exit].
Note
❒ "SEP/PWD" is displayed. If you
set up other transmission mode
functions (except Polling Reception), "Others" is displayed.
E Dial the destination fax number.
Note
❒ If "RX With SEP/PWD" is not
displayed, press [↑
↑Prev.] or [↓
↓Next] until it is.
16
Note
❒ If you incorrectly enter the
number, press the {Clear}
} key or
{Stop}
} key and try again.
SEP Code Polling Reception
F Press [SEP/PWD].
A Press [PWD].
1
G Enter the SEP code.
Note
❒ You can enter up to 20 characters.
❒ You can enter digits 0-9, q, p
and spaces. To enter a space,
press [Space] (the first character
cannot be a space).
❒ If you incorrectly enter the code,
press the {Clear}
} key or {Stop}
}
key and try again.
When entering the PWD
(Password) is necessary
You may need to enter the PWD
(Password) when receiving fax
messages with the SEP Code Polling Reception function from other
makers' machines. However, the
PWD is not necessary when receiving fax messages from a machine
of the same make.
B Enter the PWD code.
Note
❒ You can enter up to 20 characters.
❒ You can enter digits 0-9, q,
p and spaces. To enter a
space, press [Space] (the first
character cannot be a space).
❒ If you incorrectly enter the
code, press the {Clear}
} key or
{Stop}
} key and try again. The
{Clear}
} key deletes one character at a time, and the {Stop}
}
key deletes the whole line.
C Press [OK].
H Press [OK].
17
Transmission Mode
If you wish to specify another
destination
A Press [Add].
1
B Repeat steps E to H.
I Press the {Start}} key.
Note
❒ You can cancel SUB Code Reception. See p.35 “Canceling a
Transmission or Reception” .
18
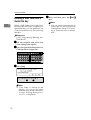
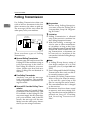
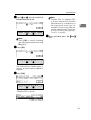
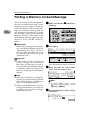
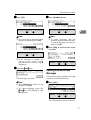
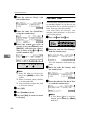
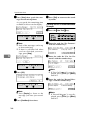
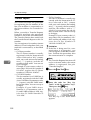
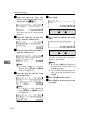
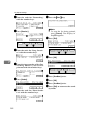
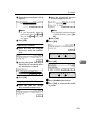
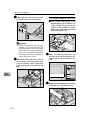
Polling Reception
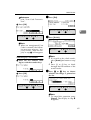
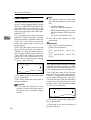
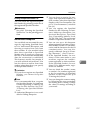
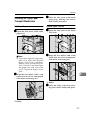
Polling Reception
Use this function if you wish to poll a
message from another terminal. You
can also poll documents from many
terminals with only one operation
(use Groups and Keystroke programs
to fully exploit this feature).
Receiver
(This machine)
Sender
Transmission
Request
GFPOLJ0N
There are two types of Polling Reception.
❖ Secured Polling Reception
If the Polling ID is programmed in
your machine, any messages waiting in the transmitting machine
with the same ID are received. If
the other machine does not have
any messages waiting with the
same Polling ID, any messages that
do not require an ID are received
(Free Polling).
❖ Stored ID Override Polling Reception
You must enter an Override Polling ID unique to this transmission.
This ID overrides the Polling ID.
Your machine will receive any
messages waiting in the transmitting machine with matching IDs. If
no IDs match, any messages that
does not require an ID are received
(Free Polling).
Limitation
❒ Polling Reception requires that the
other machine can perform Polling
Transmission.
1
❒ To receive a message sent by any
Default ID Polling Transmission or
Override ID Polling Transmission,
it is necessary to specify the same
Polling ID as the sender's.
❒ To receive a message sent by Default ID Polling Transmission or
Override ID Polling Transmission,
the sender must use a machine of
the same make that has polling capability. With Free Polling Reception, a message can be also
received from other manufacturer's machines as long as they have
a polling capability.
Note
❒ A Polling ID may be any four digits numbers (0 to 9) and characters
(A to F) except 0000 and FFFF.
Reference
p.22 “Polling Transmission”
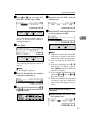
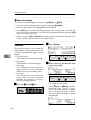
A Press [Mode].
The Transmission Mode menu appears.
19
Transmission Mode
B Enter
the code for "Polling RX"
with the number keys.
1
Note
❒ If "Polling RX" is not displayed,
press [↑
↑Prev.] or [↓
↓Next] until it
is.
B Enter a Polling ID (4 characters) with the number keys and
Quick Dial keys A–F.
Note
❒ If you incorrectly enter the
ID, press the {Clear}
} key or
{Stop}
} key and try again.
D Press [OK].
C Depending on which method you
are using, choose one of the following procedures:
Secured Polling Reception
A Press 0 or 1 key to select "Default ID".
The Transmission Mode menu is
shown. A check mark is added to
Polling Reception.
Note
❒ To cancel Polling Reception,
press [Cancel]. The Transmission Mode menu is shown.
E Press [Exit].
Stored ID Override Polling
Reception
A Press 0 or 1 key to select "ID
Override".
The following display is shown.
Note
❒ "Polling RX" is displayed.
20
Polling Reception
F Dial,
and then press the {Start}
}
key.
Note
❒ You can cancel Polling Reception. See p.35 “Canceling a
Transmission or Reception” .
- Polling Documents from Other
Manufacturers' Fax Machines
Standard Polling Reception only
works with machines of the same
make that have the Polling Reception
feature. However, if the other party's
fax machine supports SEP Transmission, you can receive documents from
them using SUB/SEP Reception.
Reference
p.22 “Polling Transmission”
p.80 “SEP/PWD (SEP Code Polling Transmission)”
p.13 “SUB Code Transmission
with the Mode Key”
File Reserve Report (Polling
Reception)
1
This report is printed after Polling Reception has been set up.
Note
❒ You can turn this function on or off
with User Parameters. See p.178
“User Parameters”(switch 03 bit
3).
Communication Result Report
(Polling Reception)
This report is printed after a Polling
Reception has been completed and
shows the result of the Polling Reception.
Note
❒ You can also check the result of a
Polling Reception with the Journal.
See p.50 “Printing the Journal”.
❒ You can turn this function on or off
with User Parameters. See p.178
“User Parameters”(switch 03 bit
4).
21
Transmission Mode
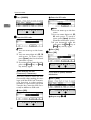
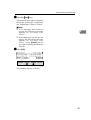
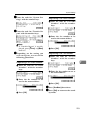
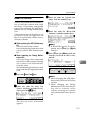
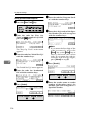
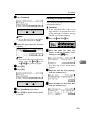
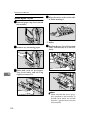
Polling Transmission
Use Polling Transmission when you
wish to leave a document in the machine's memory for others to pick up.
The message will be sent when the
other party calls your machine.
1
Transmitter
(This machine)
Transmission
Request
Receiver
GFPOLS0N
There are three types of Polling
Transmission.
❖ Secured Polling Transmission
The message will only be sent if the
Polling ID of the machine trying to
poll your message is the same as
the Polling ID stored in your machine. Make sure that both machines' Polling IDs are identical in
advance.
❖ Free Polling Transmission
Anybody can poll the message
from your machine. The machine
sends it regardless of whether Polling IDs match.
❖ Secured ID Override Polling Transmission
You must enter an Override Polling
ID unique to this transmission. This
ID overrides in the Polling ID. The
user must supply this ID when they
poll your machine, and if the IDs
match, the message will be sent.
Make sure the other party knows
the ID you are using in advance.
22
Preparation
Before using Polling Reception,
you must store the Polling ID in
your machine. See p.199 “Registering ID Codes”.
Limitation
❒ Polling Transmission is allowed
only if the receiver's machine has
the Polling Reception feature.
❒ With Free Polling, a message can
also be sent to other manufacturer's machines as long as they have
the Polling Reception feature. With
Default ID and Override ID Polling Transmission, a document can
be sent only to a machine of the
same make with the Polling Reception feature.
Note
❒ A Polling ID may be any string of
four-digit numbers (0 to 9) and
characters (A to F) except 0000 and
FFFF.
❒ Free Polling and Default ID Polling
Transmission allow only one file to
be stored in memory each.
❒ Override ID Polling Transmission
allows a file to be stored in memory for each ID; a total of up to 250
files for varying IDs can be stored.
❒ The communication fee is charged
to the receiver.
❒ Documents that have been stored
in memory and are awaiting Polling Transmission can be deleted or
printed out. See p.35 “Checking
a n d C an c e l i n g T r a n s m i s s i o n
Files”.
Polling Transmission
A Set
Free Polling Transmission
B Press [Mode].
A Press 0 or 1 key to select
"Free Poll.".
the original and select any
scan settings you require.
The Transmission Mode menu appears.
C Enter
the code for "Polling TX"
with the number keys.
1
Stored ID Override Polling
Transmission
A Press 0 or 1 key to select "ID
Override".
Note
❒ If "Polling TX" is not displayed,
press [↑
↑Prev.] or [↓
↓Next] until it
is.
D Depending on the Polling Trans-
mission type, use one of the following procedures:
B Enter the four character Polling
ID with the number keys and
Quick Dial keys A-F.
Secured Polling Transmission
A Press 0 or 1 key to select "Default ID".
Note
❒ If you incorrectly enter the
ID, press the {Clear}
} key or
{Stop}
} key and try again.
23
Transmission Mode
SFile] to specify whether to
E Press [S
save the stored original or not.
G Press [Exit].
1
The standby display is shown.
Each time you press the key, the
text at the middle right corner of
the display switches between
"Save" and "Use once".
Note
❒ To delete the document immediately after transmission, select
"Use once". To repeatedly send
the document, select "Save".
❒ You can set "Use once" or "Save"
to be shown first on the display
with User Parameters. See p.178
“User Parameters”(switch 11 bit
7).
F Press [OK].
The Transmission Mode menu is
shown. A check mark is added to
"Polling TX".
Note
❒ To cancel the Polling Transmission, press [Cancel]. The Transmission Mode menu is shown.
24
Note
❒ "Polling TX" is displayed. If you
set up other transmission mode
functions (except Polling Reception), "Others" is displayed.
H Press the {Start}} key.
Your document is scanned in.
Note
❒ You can cancel transmission of
a message set up for Polling
Transmission. See p.35 “Canceling a Transmission or Reception” .
Polling Transmission
- Polling Documents to Other
Manufacturers' Fax Machines
❒ You can also check the result of a
Polling Transmission with the
Journal. See p.50 “Printing the
Journal” .
1
Standard Polling Transmission only
works with machines of the same
make that have the Polling Reception
feature. However, if the other party's
fax machine supports Polling Reception and SEP Transmission, you can
send documents with the Polling ID
to them.
Reference
p.80 “SEP/PWD (SEP Code Polling Transmission)”
p.78 “SUB/SID (SUB Code Transmission)”
Polling Transmission Clear
Report
This report allows you to verify
whether Polling Transmission has
taken place.
Limitation
❒ This report is not printed if User
Parameters are set to allow the
stored documents to be repeatedly
sent ("Save"). See p.22 “Polling
Transmission” .
Note
❒ You can turn this function on or off
with User Parameters. See p.178
“User Parameters” (switch 03 bit
6).
❒ You can set whether a portion of
the sent image is printed on the report with User Parameters. See
p.178 “User Parameters” (switch
04 bit 7).
25
Transmission Mode
Reduced Image Transmission
You can reduce the document image
slightly to 93% of the original image
by using this feature so that there is
extra space on the left edge when the
image is printed out by the other party's fax machine. This space is useful
when making holes for filing purposes.
1
Reference
p.145 “Registering Auto Documents”
p.32 “Fax Header Print”
p.98 “Label Insertion”
p.93 “Auto Reduction”
A Set
the original and select any
scan settings you require.
B Press [Mode].
Limitation
❒ If you set "Auto Reduction (TX)"
off with User Parameters (switch
07 bit 3), the Reduced Image function is not available.
Note
❒ The document image is reduced
vertically in the direction in which
the original is fed into the machine.
❒ Documents attached to a fax message using the Auto Document
function are not reduced.
❒ The Fax Header or Label Insertion
printed out at the other end is not
reduced by this function.
❒ If the Auto Reduction function is
specified, the document image is
reduced to 93% or less of the original.
26
The Transmission Mode menu appears.
C Enter the code for "Reduced Image TX" with the number keys.
Note
❒ If "Reduced Image TX" is not
displayed, press [↑
↑Prev.] or [↓
↓Next] until it is.
Reduced Image Transmission
D Press 0 or 1 key to switch Reduced Image on or off.
Note
❒ "Red.ImgTX ON" is shown. If
you set up other transmission
mode functions (except Polling
Reception), "Others" is shown.
G Dial,
1
and then press the {Start}
}
key.
Note
❒ To cancel changes to the Reduced Image setting, press [OK]
without making changes to the
setting. The Transmission Mode
menu is shown.
E Press [OK].
The Transmission Mode menu is
shown. A check mark appears next
to "Reduced Image TX".
F Press [Exit].
The standby display is shown.
27
Transmission Mode
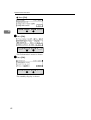
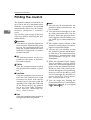
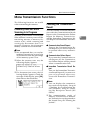
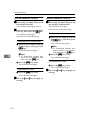
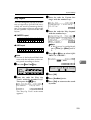
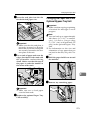
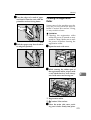
Transfer Request
Transfer Request allows fax machines
to automatically distribute incoming
messages to multiple fax destinations. This feature helps you reduce
costs when you send the same message to more than one place in a distant area, and saves time since many
messages can be sent in a single operation.
1
End Receiver
Requesting
party
Transfer
Station
End Receiver
Transfer
Result Report
End Receiver
GFCYUI0N
The following terminology is used in
this section.
❖ Requesting Party
The machine where the message
originates from.
❖ Transfer Station
The machine that forwards the incoming message to another destination.
❖ End Receiver
The final destination of the message.
Preparation
Before you can use this feature you
must program the Polling ID and
set the Transfer Report. See p.199
“Registering ID Codes” and p.202
“Transfer Report”.
28
Limitation
❒ The Transfer Stations you specify
must be machines of the same
make as this machine and have the
Transfer Station function.
❒ This function is not available unless the End Receiver's fax number
is stored in either a Quick Dial key
or Speed Dial of the Transfer Station.
❒ This function is not available unless the Transfer Station's fax number is stored in either a Quick Dial
key or Speed Dial of the Requesting Party's machine (this machine).
❒ Make sure that the return address
is set up correctly in the Transfer
Station's machine to use this function.
Note
❒ You can specify up to 100 Transfer
Stations and 30 End Receivers in a
Transfer Request.
❒ When you specify Group Dials
stored in the Transfer Station as receivers, one Group Dial is counted
as one End Receiver.
❒ Polling IDs of the requesting party
(this machine) and Transfer Stations must be identical.
A Set
the original and select any
scan settings you require.
Transfer Request
B Press [Mode].
E Press [Recv. Stn].
1
The Transmission Mode menu appears.
F Enter one or more End Receivers.
C Enter the code for "Transfer Request" with the number keys.
Note
❒ If "Transfer Request" is not displayed, press [↑
↑Prev.] or [↓
↓Next]
until it is.
D Enter a Transfer Station.
Note
❒ The numbers must be stored in
Quick Dial keys, Speed Dials or
Groups in the Transfer Station(s).
Reference
p.31 “Specifying an End Receiver”
Note
❒ You cannot specify a Transfer
Station and a normal fax destination at the same time.
❒ Enter the fax numbers of the
Transfer Stations with either
Quick Dial keys, Speed Dials or
the number keys. See p.46 “Dialing”, <Basic Features>.
❒ If you make a mistake, press the
{Clear}
} key or {Stop}
} key and
try again.
❒ To cancel the Transfer Request,
press [Cancel]. The Transmiss ion Mo de men u is sh ow n
again.
G When you have specified all the
End Receivers, press [OK].
Note
❒ To cancel the Transfer Request,
press [Cancel]. The Transmiss ion M od e men u is sh ow n
again.
29
Transmission Mode
H When you have specified all the
Transfer Stations, press [No].
1
J Press the {Start}} key.
Note
❒ You can cancel transmission of
a message set up for Transfer
Request. See p.35 “Canceling a
Transmission or Reception” .
- Transfer Request to Other
Manufacturers' Fax Machines
Note
❒ If you wish to enter an additional Transfer Station, press [Enter]
and repeat steps D to F.
T ran sm is sio n M od e m enu is
shown and a check mark is added
to Transfer Request.
I Press [Exit].
The following display is shown.
Note
❒ "Trans.Req." is shown. If you set
up other transmission mode
functions (except Polling Reception), "Others " is shown.
❒ The numbers of Transfer Stations are displayed.
30
Transfer Request only works with
machines of the same make that have
the Transfer Station function. However, you can specify other manufacturers' fax machines as the Transfer
Station if they support a similar function to this, with the SUB Code Transmission function. Make sure the other
party supports this function before
making a Transfer Request. See p.13
“SUB Code Transmission with the
Mode Key”.
Transfer Request
Specifying an End Receiver
When you make a Transfer Request,
you must specify the final destinations (End Receivers) for your message.
You cannot enter the numbers of the
End Receivers directly. Instead, enter
a simple code that describes where
the numbers are stored in the Transfer Station (in Quick Dial keys, Speed
Dials or Groups).
The numbers must first have been
stored in Quick Dial keys, Speed Dials or Groups in the Transfer Station(s).
❒ You need to install Optional
Function Upgrade Unit to enter
3 digits code for the Speed Dial.
❖ Group Dial
Enter {q}, {p}, {p} followed
by the Group number (2 digits).
For example, to choose the number
stored in Group 04 in the Transfer
Station, enter: {q} {p} {p} {0}
}
{4}
}.
1
❖ Quick Dial
Enter {q} followed by the number (3 digits) of the Quick Dial
where the End Receiver is stored.
For example, to choose the number
stored in Quick Dial 001 in the
Transfer Station, enter:
{q} {0}
} {0}
} {1}
}.
Note
❒ If the End Receivers only support 2 digits for the Quick Dials,
enter the number with 2 digits
like {q} {0}
} {1}
}.
❖ Speed Dial
Enter {q}, {p} followed by the
Speed Dial code (2 or 3 digits).
For example, to choose the number
stored in Speed Dial 012 in the
Transfer Station, enter: {q} {p}
{0}
} {1}
} {2}
}
Note
❒ If the End Receivers only support 2 digits for the Speed Dials,
enter the number with 2 digits
like {q} {p} {1}
} {2}
}.
31
Transmission Mode
Fax Header Print
Normally, the Fa x Head er programmed in your machine is printed
at the top of each of the pages you
transmit when they are received at
the other end. The top of the image
will be overprinted if there is no margin at the top of the transmitted page.
1
Important
❒ In the USA, the Fax Header must
contain the telephone number of
the line your machine is connected
to. It will be printed on the header
of every page you send. Required
in the USA.
Note
❒ In the USA, law requires that your
fax number be included in the fax
Header. Register the fax number
and switch on Fax Header Print
with User Parameters. See p.178
“User Parameters”.
❒ You can turn the Fax Header Print
function on or off by pressing the
User Function key that this function is assigned to. By default, this
function is assigned to {F2}
}. See
p.154 “User Function Keys”.
❒ You can set the machine so that it
prints the Fax Header on the message when it is received on the other end with User Parameters. It is
handy to set this function to the
option more frequently used, then
when necessary, you can change
the setting back with this feature.
See p.178 “Us er Para meters”
(switch 06 bit 0).
32
❒ The Fax Header Print function is
intended for G3 communication,
however, you can switch this function on for G4 communication as
well with User Parameters. See
p.178 “User Parameters” (switch
06 bit 3).
❒ You can set your machine's internal clock to the current time and
date. See p.151 “Date/Time”.
A Set
the original and select any
scan settings as necessary.
B Press [Mode].
The Transmission Mode menu appears.
C Enter
the code for "Fax Header
Print" with the number keys.
Note
❒ If "Fax Header Print" is not
shown, press [↑
↑Prev.] or [↓
↓Next].
Fax Header Print
D Press 0 or 1 key to switch Fax
Header Print on or off.
Note
❒ "Header ON" or "Header OFF"
is shown when the Fax Header
Print function is switched on or
off respectively with User Parameters. If you set up other advanced transmissions functions
(except Polling Reception),
"Others" is shown.
G Dial,
Note
❒ Press [OK] to cancel switching
the setting and return to the step
C display.
1
and then press the {Start}
}
key.
E Press [OK].
The Transmission Mode menu is
shown. A check mark is added to
Options.
F Press [Exit].
"Header OFF" is shown.
33
Transmission Mode
1
34
2. Communication
Information
Checking and Canceling Transmission
Files
You can cancel a transmission or reception that is in progress, or delete
the Transmission files that have been
stored in memory and are awaiting
transmission.
With this feature, you can also print a
file (document), check or edit destination(s), and check or alter the transmission time.
This section describes how you can:
❖ Cancel a Transmission
You can cancel the transmission
files that have been stored in memory and are awaiting transmission,
or the files that have failed to be
transmitted. If you notice an error
in the destination specified or the
document content after scanning a
document into memory, you can
cancel transmission of that document. See p.35 “Canceling a Transmission or Reception”.
❖ Cancel a Reception
You can cancel reception in
progress. See p.35 “Canceling a
Transmission or Reception”.
❖ Print a File
You can print and check the contents of a fax that is stored in memory and has not been sent yet. See
p.37 “Printing a Stored Message”.
❖ Check and Edit a File
You can check or edit destination(s), check options selected or
alter the transmission time.
You can also resend a fax that has
failed to be transmitted. See p.38
“Checking and Editing a File”.
Canceling a Transmission or
Reception
You can cancel the transmission files
that have been stored in memory and
are awaiting transmission, or the files
that have failed to be transmitted. If
you notice an error in the destination
specified or the document content after scanning a document into memory, you can cancel transmission of
that document. This is done by
searching for the document in the fax
machine's memory and deleting it.
Also, you can cancel a reception in
progress.
This function can be performed for
Memory Transmission, Confidential
Transmission, Transfer Request, Polling Reception, and Polling Transmission.
Note
❒ If you cancel a file being sent, the
communication is immediately
stopped and canceled. A page
which has already been sent cannot be canceled.
❒ Files that are produced from
Transfer Request or Forwarding
cannot be canceled.
35
Communication Information
A Press [Info.].
B Press[ Yes].
2
The "Information" menu is shown.
B Enter the code for "Check/Cancel
Files" with the number keys.
C Press 0 or 1 key until the file
The file is erased.
Note
❒ Press [No] to cancel the operation and return to the step C
display.
❒ To delete another file, select
the file by pressing the 0 or
1 key, then repeat the same
steps.
you wish to delete is shown.
Canceling a reception that is in
progress
A Press [Stop].
Canceling a transmission that is
in progress or has been stored in
memory
A Press [Delete].
B Press [Yes].
Transmission is canceled.
36
Checking and Canceling Transmission Files
Note
❒ Press [No] to cancel the operation and return to the step C
display.
❒ To delete another file, select
the file by pressing the 0 or
1 key, then repeat the same
steps.
D Press [Exit].
The standby display is shown.
B Enter the code for "Check/Cancel
Files" with the number keys.
C Press the 0 or 1 key until the file
2
you wish to print is shown.
D Press [Print].
Printing a Stored Message
If you wish to check the contents of a
fax stored in memory and not sent
yet, use this procedure to print it out.
This function can be performed for
files produced by Memory Transmission, Transfer Request, Polling Transmission, files received by Transfer
Request from other Requesting Parties, or files awaiting Forwarding.
A Press [Info.].
E Press the {Start}} key.
The file is printed.
Note
❒ Press [Cancel] to stop printing
the file and return to step D display.
The "Information" menu is shown.
37
Communication Information
F Press [Exit].
2
The "Information" menu is shown
again.
Note
❒ To print another file, select the
file by pressing the 0 or 1 key,
then repeat the same steps.
G Press [Exit].
The standby display is shown.
Checking and Editing a File
Use this procedure to check or edit
destination(s), check options selected
or alter the transmission time.
This function can be performed for
the files produced by Memory Transmission, Confidential Transmission,
Transfer Request and Polling Reception.
You can check or change the following items:
• Destination List
This list shows all the destinations
specified for the transmission.
• Changing a destination
You can change or edit the destinations of the file. However, you cannot change the destinations of files
for Transfer Request or Confidential Transmission.
• Changing the transmission time/
Re-sending a file
You can alter the transmission
time. Also, if there are any failed
transmission files in Memory
Transmission, you can choose to
resend them.
Preparation
Be sure to set the File Retention
function to either "24 hours" or "72
hours" to resend the failed transmission files beforehand. See p.201
“File Retention”.
Note
❒ You cannot set or change the transmission time, or delete or add destinations when the file is being sent
or received.
❒ Files that have been received by
Transfer Request from other Requesting Parties cannot be viewed
or edited.
38
Checking and Canceling Transmission Files
A Press [Info.].
E Depending
on the setting you
wish to check or change, use one
of the following procedures:
Checking destinations
(Destination List)
2
A Enter the code for "Destination
List" with the number keys.
The "Information" menu is shown.
B Enter the code for "Check/Cancel
Files" with the number keys.
C Press the 0 or 1 key until the file
The total number of destinations and the fax number or
each d estination's name is
shown.
B Press [Exit].
you wish to print is shown.
D Press [Check].
Note
❒ To see hidden destinations,
press [↑
↑Prev.] or [↓
↓Next].
C Press [Exit].
39
Communication Information
Changing the transmission time
D Press [Exit].
A Enter the code for "Change
Start Time" with the number
keys.
2
B Enter the transmission time
(four digits) with the number
keys.
Press [AM/PM] to switch between
AM and PM. To clear the entries, press the { Clear}
} key or
{Stop}
} key.
Re-sending a file
A Enter the code for "Retransmit
" with the number keys.
B Press [Yes].
Note
❒ You cannot specify a start
time more than 24 hours into
the future.
❒ The current time does not appear on the display.
❒ To start transmission immediately, press [Immediate]. If
memory contains other files
queued for transmission,
those files are sent first.
C Press [Exit].
40
Note
❒ If you do not wish to send the
file, press [No] to return to
step A.
C Enter the code for "Change
Start Time" with the number
keys.
Checking and Canceling Transmission Files
D Enter the start time with the
number keys.
Changing a destination
You can delete or add destinations.
A Enter the code for "Change
Destination" with the number
keys.
Press [AM/PM] to switch between
AM and PM.
Note
❒ You cannot specify a start
time more than 24 hours into
the future.
❒ To start transmission immediately, press [Immediate]. If
memory contains other files
queued for transmission,
those files are sent first.
E Press [Exit].
F Press [Exit].
2
B Change the destination.
Note
❒ To cancel a destination, press
the {Stop}
} key or {Clear}
} key.
❒ To add a destination, press
[Add] and enter the fax number with the number keys.
Destinations can be specified
only by using the number
keys.
❒ The destination is added to
the end of the list.
❒ If you change a destination of
a file that is automatically being dialed or awaiting redial,
redial is canceled so you will
need to resend that file.
C Press [Exit].
41
Communication Information
D Press [Exit].
2
F Press [Exit].
The "Information" menu is shown.
G Press [Exit].
The standby display is shown.
42
Printing a List of Files in Memory (Print TX File List)
Printing a List of Files in Memory (Print TX
File List)
Print this list if you wish to find out
which files are stored in memory and
what their file numbers are. Knowing
the file number can be useful (for example, when erasing files).
Note
❒ You can also print this list with
Displaying the Files in Memory
function. See p.56 “Displaying the
Files in Memory”.
❒ The contents of a document stored
in memory can also be printed. See
p.37 “Printing a Stored Message” .
A Press [Info.].
The "Information" menu is displayed.
C Press the {Start}} key.
2
The Transmission File List is printed. When the printing is completed, the "Information" menu is
shown.
Note
❒ Press [Cancel] to stop printing
the file list and return to the "Information" menu.
D Press [Exit].
The standby display is shown.
B Enter the code for "Print TX File
list" with the number keys.
43
Communication Information
Checking the Transmission Result (TX
Status)
If you wish to find out whether a file
was sent successfully, you don't have
to always print the Journal. With this
function you can browse through the
last 250 completed transmissions on
the display.
2
Note
❒ If a transmission is completed
while you are using this function,
the result will not be shown until
you exit TX Status and start it
again.
❒ Only the last 250 transmissions are
shown. Earlier transmissions are
not available.
❒ When the optional Function Upgrade card is installed, you can
check up to 1,000 communications.
C When
you have finished, press
[OK].
Note
❒ The results are shown two at a
time with the most recent
above.
❒ Press [↑
↑Prev.] or [↓
↓Next] to scroll
through the list.
D Press [Exit].
A Press [Info.].
The standby display is shown.
The "Information" menu is shown.
B Enter the code for "TX Files Status" with the number keys.
Note
❒ If "TX Files Status" is not shown,
press [↑
↑Prev.] or [↓
↓Next].
44
Checking the Reception Result (RX Status)
Checking the Reception Result (RX Status)
This function lets you check the last
250 messages received without having to print the Journal. You can
browse through the received messages on the display.
C When
you have finished, press
[OK].
2
Note
❒ If a message is received while you
are using this function, the result
will not be shown until you exit RX
File Status and start it again.
❒ Only the last 250 messages are displayed. Earlier messages are not
available.
❒ When the optional Function Upgrade card is installed, you can
check up to 1,000 communications.
A Press [Info.].
The "Information" menu is shown.
B Enter the code for "RX Files Sta-
Note
❒ The results are shown two at a
time with the most recent
above.
❒ Press [↑
↑Prev.] or [↓
↓Next] to scroll
through the messages.
D Press [Exit].
The standby display is shown.
tus" with the number keys.
Note
❒ If "RX Files Status" is not shown,
press [↑
↑Prev.] or [↓
↓Next].
45
Communication Information
Printing a Confidential Message
This feature is designed to prevent
messages being picked up casually by
anyone when they are received. If
someone sends you a message using
Confidential Transmission, it is
stored in memory and not automatically printed. To print the message
you have to enter the Confidential ID
code. When your machine has received a confidential message, the i
indicator lights.
2
Preparation
Before using this function, program your Confidential ID. See
p.199 “Registering ID Codes” .
Important
❒ If the power switch is off for 12
hours or longer, all Confidential
Messages are deleted. In such a
case, use the Power Failure Report
to identify which messages have
been lost. See p.264 “Power Failure
Report” .
Note
❒ When the other party sends you a
fax with SUB code, the message is
printed by Printing Personal Box
Messages function. See p.67
“Printing Personal Box Messages”.
❒ Be sure that the other party enters
a SUB code beforehand using up to
20 characters with digits 0-9, q, p
and spaces.
46
A Make sure that the i indicator is
lit.
B Press [Info.].
The "Information" menu is shown.
C Enter
the code for "Print Conf.
RX" with the number keys.
Note
❒ If "Print Conf. RX" is not shown,
press [↑
↑Prev.] or [↓
↓Next].
Printing a Confidential Message
D Enter the Confidential ID (4-digit
number) with the number keys.
Confidential File Report
You can set whether the machine
prints this report whenever your machine receives a Confidential Message.
Note
❒ If you receive a fax by Confidential ID Override Reception, enter the override Confidential ID.
See p.7 “Sending Confidential
Messages”.
2
Note
❒ You can turn this report on or off
with User Parameters. See p.178
“User Parameters” (switch 04 bit
0).
E Press the {Start}} key.
The received messages are printed.
When printing has finished, the
"Information" menu is shown.
Note
❒ If no Confidential Messages
have been received, the message "No matching file
found. " is shown.
❒ If the Confidential IDs or Personal Confidential IDs do not
match, the message "No matching file found. " is displayed. Press [Cancel], check the
Confidential ID or Personal
Confidential ID with the other
party and try again.
F Press [Exit].
The standby display is shown.
47
Communication Information
Printing a Memory-locked Message
This is a security feature designed to
prevent unauthorized users from
reading your messages. If Memory
Lock is switched on, all received messages are stored in memory and are
not automatically printed. To print
the messages, you have to enter the
Memory Lock ID code. When your
machine has received a message with
Memory Lock, the i indicator
blinks.
2
Preparation
Make sure to program your Memory Lock ID beforehand. See p.199
“Registering ID Codes”. Also, before you start, turn Memory Lock
on with the User Tools. See p.233
“Memory Lock”. .
Important
❒ If the power switch is off for 12
hours or longer, all Confidential
Messages are deleted. In such a
case, use the Power Failure Report
to identify which messages have
been lost. See p.264 “Power Failure
Report” .
Note
❒ Messages received by Polling Reception are automatically printed
even if this feature is switched on.
See p.19 “Polling Reception”.
❒ When your machine does not have
enough free memory, you may not
be able to receive fax messages
with Memory Lock.
48
A Make sure that the i indicator is
blinking.
B Press [Info.].
The "Information" menu is shown.
C Enter
the code for "Print Mem.
Lock" with the number keys.
Note
❒ If "Print Mem. Lock" is not
shown on the display, press
[↑
↑Prev.] or [↓
↓Next].
D Enter the Memory Lock ID (4-digit number).
Printing a Memory-locked Message
E Press the {Start}} key.
The received messages are printed.
When the printing is completed,
the "Information" menu is shown.
Note
❒ If no messages have been received, the following message
appears: "No matching file
found."
2
❒ If the Memory Lock IDs do not
match, the following message
appears: "No matching file
found. " Press [Cancel] and retry after checking the Memory
Lock ID.
F Press [Exit] .
The standby display is shown.
49
Communication Information
Printing the Journal
The Journal contains information on
up to 50 of the last communications
made by your machine. It is printed
automatically after every 50 communications (receptions + transmissions).
You can also print a copy of the Journal at any time by following the procedure below.
2
Important
❒ You cannot re-print the Journal after it has been automatically printed out. We recommend that you
keep the Journal printed out automatically to keep track of communication records.
❖ All
All communication results are
printed in the order of transmission and reception.
❖ File No.
Only the communication result of
the specified file number is printed.
❖ User Code
Only the communication results of
the User Code Transmission or the
transmission done with the Restricted Access function with the
specified User Code (the SUB code
of the Personal Box) are printed.
See p.10 “User Code Transmission” and p.25 “Restricted Access”, <Basic Features>.
❖ Date
Only the communication results of
the specified date are printed.
50
Note
❒ Only the last 50 transmissions are
printed. Earlier transmissions are
not available.
❒ You can browse through up to the
last 250 communications on the
display. With the optional Function Upgrade Unit installed, you
can check up to 1,000 communications.
❒ The sender's name column of the
Journal is useful when you need to
register a Specified Sender.
❒ You can set your machine so that
the Journal is printed automatically after every 50 communications
(receptions + transmissions) with
User Parameters. See p.178 “User
Parameters” .
❒ When the optional Paper Supply
Unit is installed, you can specify
which tray unit the designated reports or lists are printed out from.
However, once a tray unit is specified for the reports or lists printing,
that tray will not be able to print
any fax messages the machine receives. See p.178 “User Parameters” (switch 19 bits 2, 1, 0).
❒ You can assign the Printing the
Journal function to a User Function
key. When shipped, it is assigned
to {F1 Journal}
} key.
Printing the Journal
A Press [Info.].
When choosing "File No."
A Press [OK].
2
The "Information" menu is shown.
B Enter the code for "Print Journal"
with the number keys.
B Enter a 4-digit file number
with the number keys.
Note
❒ If "Print Journal" is not shown,
press [↑
↑Prev.] or [↓
↓Next] .
When choosing "User Code"
C Press 0 or 1 key to select the for-
A Press [OK].
mat you require.
B Enter a User Code (up to 20 digits) with the number keys.
When choosing "All"
A Press [OK].
51
Communication Information
When choosing "Date"
A Press [OK].
2
B Select the month using the
[↑
↑Month ] and [↓
↓Month ], press 1
key, and then enter the date using the number keys.
D Press the {Start}} key.
The Journal is printed.
Note
❒ Press [Cancel] to return to step C.
E Press [Exit].
The standby display is shown.
52
Printing the Journal
Printing the Journal
You can check the communication results on this report.
Note
❒ When choosing "File No.", "User Code" or "Date", Personal Journal is printed.
❒ Communications made after the machine is connected to the line are printed
on the Journal.
❒ You can set the machine to reduce the reports to 91% of the original size when
printing with User Parameters. This allows an extra margin which may be
useful when filing. See p.178 “User Parameters” (switch 04 bit 5).
❒ You can select whether or not undelivered messages are to be included on this
report with User Parameters. When using the Automatic Redial function, the
result of the last dialing is printed.
❒ Normally, when specifying the destination with a Quick Dial key or Speed
Dial, "ADDRESS" on this report shows Own Name or Own Fax Number registered in the receiver's machine. However, you can change the setting with
User Parameters so that the name or number of the destination stored in the
Quick Dial key or Speed Dial in your machine is printed instead. See p.178
“User Parameters” (switch 04 bit 4).
2
❖ All
1. DATE
The date of the transmission/reception
2. TIME
The time when the transmission/reception started
53
Communication Information
3. ADDRESS
The other party's names are printed in
the following priority order:
The Pri- Address
ority
Order
2
1
The Own Name registered in
the other party's machine *1
2
The Own Fax Number registered in the other party's machine *1
3
The name stored in the specified Quick Dial key or a Speed
Dial
4
The fax number entered manually using the number keys
*1
When in the G4 transmission, G4
TID is printed.
When in a transmission, 1 or 2 is printed, however, you can change the priority order to 3, 4, 1, 2 with User
Parameters (switch 04 bit 4). See p.178
“User Parameters”. When in a reception or a polling transmission, 1 or 2 is
printed.
4. MODE
The types of the communication mode
are printed:
"G3-AT", "G3", "G3-1", "G3-2", "PXAT", "PX", "PX-1", "PX-2", "I-PX", "IG3", "G4".
5. The time of the output of the Journal
6. TIME
The time it took to transmit/receive.
When it exceeds 99 minutes 59 seconds, "*" will be printed instead.
7. PAGE
The pages you transmitted or received. When it exceeds 999, "***" will
be printed instead.
54
8. RESULT
OK
Successful communication
E
An error occurred
D
The power was shutdown while
the communication. A part of the
originals has not been transmitted.
9. USER NAME
When in User Code Transmission or
the Restricted Access function turned
on, the name of the users registered
are printed.
10. FAX HEADERS
The names or numbers registered under FAX HEADER 1 and FAX HEADER 2 are printed.
11. This appears when the Journal
was printed manually.
12. FILE
The file number of the fax message
13. The Footnote on the Journal
Explains the codes printed on the
Journal.
Printing the Journal
❖ Date
2
1. The time of the output of the Journal
2. FAX HEADERS
3. The Footnote on the Journal
Explains the codes printed on the
Journal.
The names or numbers registered under FAX HEADER 1 and FAX HEADER 2 are printed.
55
Communication Information
Displaying the Files in Memory
Use this function to display a summary of current memory usage. Items
shown are the percentage of free
memory space, the number of received confidential messages, the
number of files to be sent, and the
number of received messages to be
printed.
2
A Press [Info.].
The "Information" menu is shown.
B Enter the code for "Files in Memory" with the number keys.
Note
❒ "Others" is displayed for the
following kinds of files:
• Auto Documents
See p.145 “Registering Auto
Documents”.
• Incoming messages sent with
the Transfer Request feature
See p.28 “Transfer Request”.
• Messages that have been received into Transfer Boxes
See p.254 “Transfer Boxes”.
• PC Printing data file (when
optional Printer Interface is
installed)
To print the Transmission File
List
A Press [Prt.List].
Note
❒ If "Files in Memory" is not
shown, press [↑
↑Prev.] or [↓
↓Next].
C The
usage is displayed. When
you have finished, press [OK].
B Press the {Start}
} key.
The list is printed, and the display in step C reappears.
Note
❒ Press [Cancel] to stop printing
the Transmission File List
and return to step C.
56
Displaying the Files in Memory
D Press [Exit].
2
The standby display is shown.
57
Communication Information
TX/RX File Save
This feature requires the optional Function Upgrade Unit and Optional 40MB Memory
Card.
When turned on, sent or received
messages are automatically saved to
memory. Once stored you can then
check on previous communications
and print them out as necessary. See
p.236 “TX/RX File Save Settings”.
2
Preparation
You can turn this function on or off
with TX/RX File Save. See p.236
“TX/RX File Save Settings”.
This feature allows you to perform
the followings:
❖ Searching Memory for Sent Faxes
You can search the sent faxes in the
memory by Sender Name / No.,
Date/Time, User Code and File
Number. You can print out a list of
the search result. See p.59 “Searching Memory for Sent Faxes”.
❖ Searching Memory for Received Faxes
You can search the received faxes
in the memory by Sender Name /
No., Date/Time, User Code and
File Number. You can print out a
list of the search result. See p.62
“Searching Memory for Received
Faxes”.
❖ Disk File Search List/Visual List
You can print out a list of the
search result for "Searching Memory for Sent Faxes" and "Searching
Memory for Received Faxes". See
p.65 “Disk File Search List/Visual
List”.
58
❖ Printing Files
You can print out the fax messages
stored in the memory. See p.65
“Printing Files”.
❖ Deleting Files
You can delete the fax messages
stored in the memory. See p.66
“Deleting Files”.
Important
❒ If a TX/RX file is saved in memory,
it does not guarantee that the communication was successful. Messages that were not delivered, or
generated an error are also stored.
Limitation
❒ If any of following features are
used, messages are not stored in
memory:
• Immediate Transmission
• Confidential Transmission
• Polling Transmission
• Confidential Reception
• Memory Lock Reception
• Transfer Request Reception
• Auto Documents
• Forwarding
• Fax On Demand (Option)
TX/RX File Save
❒ When "Substitute Reception" is set
to "Memory Reception if no Own
Name or Own Fax Number received" and the incoming fax does
not have either Own Name or Own
Fax Number information, you cannot use the TX/RX File Save function. Set the "Substitute Reception"
to "Possible", or have the sender of
the fax register his/her Own Name
or Own Fax Number. See p.178
“User Parameters” (switch 05 bit 1).
Note
❒ When free memory goes below
50%, the oldest stored message is
erased.
❒ You can set whether or not this
function to work only when receiving the messages from Specified
Senders. See p.236 “TX/RX File
Save Settings”.
❒ This function stores both transmissions and receptions. Your service
representative can change this to
one of the following options:
• Transmissions Only
• Receptions Only
Reference
p.55 “Own Name/Fax Header/Own Fax Number”, <Basic Features>
Searching Memory for Sent
Faxes
A Press [Info.].
2
The "Information" menu is shown.
B Enter
the code for "TX/RX File
Save" with the number keys.
Note
❒ If "TX/RX File Save" is not displayed, press [↑
↑Prev.] or [↓
↓Next]
until it is.
C Enter
the code for "Search TX
File" with the number keys.
D Press [Search].
59
Communication Information
Note
❒ To print a list of all the sent faxes, press [Prt.List]. The display in
step I will appear.
E Enter the code of the search method you require.
2
Searching By Date/Time
A Select the month using the
[↑
↑Month ] and [↓
↓Month ] and enter the date, year and time using 0 or 1 key and the
number keys. To change
AM/PM, press [AM/PM].
F Do one of the following:
Searching By Sender Name / No.
A Enter the Own Name or Own
Fax Number using the Quick
Dial keys or number keys.
Note
❒ If you make a mistake, press
[Cancel], and the display in
step E appears.
B Press [OK].
Note
❒ Press [ABC/abc] to switch between upper and lower case.
❒ Press [Symbols] if you wish to
enter symbols.
Reference
See p.98 “Entering Characters”, <Basic Features> and
p.55 “Own Name/Fax Header/Own Fax Number”, <Basic Features>.
B Press [OK].
Searching By User Code (SUB
Code)
A Enter the User Code/SUB Code
(up to 20 digits) with the number keys.
Enter the User Code (the SUB
code of the Personal Box).
60
TX/RX File Save
Reference
p.10 “User Code Transmission”.
G Press [Exit].
B Press [OK].
2
H Press [Prt.List].
Note
❒ When an unregistered User
Code is entered, the following message appears: " Not
programmed.", then the display in step B will reappear.
Searching By File Number
A Enter the file number (four
digits) with the number keys.
B Press [OK].
Note
❒ If you wish to do a fresh search,
press [Search] and return to step
E.
❒ Press 0 or 1 key to check
through the file numbers of the
search results.
I Press
0 or 1 key to choose
whether the image is printed on
the list.
Note
❒ To cancel this operation, press
[Cancel]. The display in step C
reappears.
61
Communication Information
J Press the {Start}} key to print the
list.
D Press [Search].
Reference
p.65 “Disk File Search List/Visual List”
K Press [PrevMenu].
L Press [Exit] to return to the stand-
2
by mode.
Searching Memory for
Received Faxes
A Press [Info.].
Note
❒ To print a list of all the received
faxes, press [Prt.List]. The display in step I will appear.
E Enter the code of the search method you require.
F Carry
out one of the following
procedures appropriate to the
search method:
The "Information" menu is shown.
B Enter
the code for "TX/RX File
Save" with the number keys.
Note
❒ If "TX/RX File Save" is not displayed, press [↑
↑ Prev.] [↓
↓Next]
until it is.
C Enter
the code for "Search RX
File" with the number keys.
62
Searching By Sender Name / No.
A Enter the Own Name or Own
Fax Number using the Quick
Dial keys or number keys.
Note
❒ Press [ABC/abc] to switch between upper and lower case.
❒ Press [Symbols] if you wish to
enter symbols.
TX/RX File Save
Reference
See p.98 “Entering Characters”, <Basic Features> and
p.55 “Own Name/Fax Header/Own Fax Number”, <Basic Features>.
B Press [OK].
B Press [OK].
2
Searching By User Code (SUB
Code)
A Enter the User Code/SUB Code
(up to 20 digits) with the number keys.
Searching By Date/Time
A Select the month using the
[↑
↑Month ] and [↓
↓Month ] and enter the date, year and time using 0 or 1 key and the
number keys. To change
AM/PM, press [AM/PM].
Note
❒ If you make a mistake, press
[Cancel], and the display in
step E appears.
Enter the User Code (the SUB
code of the Personal Box).
Note
❒ You can search received faxes with the User Codes when
those codes have been already registered in your fax
machine at the time of the reception with the following
conditions:
• Polling Reception
• Polling Reception with
SEP/PWD (fax messages
with IDs or the documents
stored in Information Boxes)
• SEP Code Polling Reception (fax messages sent
with Polling Transmission
or documents stored in Information Boxes)
63
Communication Information
B Press [OK].
G Press [Exit].
2
Note
❒ When an unregistered User
Code is entered, the following message appears: " Not
programmed.", then the display in step B will reappear.
H Press [Prt.List].
Reference
p.10 “User Code Transmission”
Searching By File Number
A Enter the file number (four
digits) with the number keys.
B Press [OK].
Note
❒ If you wish to do a fresh search,
press [Search] and return to step
E.
❒ Press 0 or 1 key to check
through the file numbers of the
search results.
I Press
0 or 1 key to choose
whether the image is printed.
Note
❒ To cancel this operation, press
[Cancel]. The display in step C
reappears.
64
TX/RX File Save
J Press the {Start}} key to print the
list.
Reference
p.65 “Disk File Search List/Visual List”
K Press [PrevMenu].
L Press [Exit] to return to the stand-
Printing Files
Follow these steps to print files that
have been stored in your machine's
memory.
A Press [Info.].
2
by mode.
Disk File Search List/Visual
List
Print either of these lists for a hard
copy of the search results generated
by the Search TX File and Search RX
File functions. You can choose to have
transmitted and received document
images printed on this list.
If you choose "Without Image", the
Disk File Search List is printed.
If you choose "With Image" the Disk
File Visual List is printed.
Note
❒ Normally, when specifying the
destination with a Quick Dial key
or Speed Dial, "ADDRESS" on this
report shows Own Name or Own
Fax Number registered in the receiver's machine. However, you
can change the setting with User
Parameters so that the name or
number of the destination stored
in the Quick Dial key or Speed Dial
in your machine is printed instead.
See p.178 “Us er Para meters”
(switch 04 bit 4).
The "Information" menu is shown.
B Enter
the code for "TX/RX File
Save" with the number keys.
Note
❒ If "TX/RX File Save" is not displayed, press [↑
↑Prev.] or [↓
↓Next]
until it is.
C Enter
the code for "Print File"
with the number keys.
D Enter the file number of the message (four digits) you wish to
print with the number keys.
Reference
p.44 “Checking the Transmission
Result (TX Status)”
p.45 “Checking the Reception Result (RX Status)”
Note
❒ If there is no matching file, "No
matching file found." is displayed.
65
Communication Information
E Press the {Start}} key to print the
message.
F Press [PrevMenu].
G Press [Exit] to return to the stand-
D Enter the file number of the message (four digits) you wish to delete with the number keys.
by mode.
2
Deleting Files
Follow these steps to delete files that
have been stored in your machine's
memory.
A Press [Info.].
The "Information" menu is shown.
Note
❒ If there is no matching file, "No
matching file found. " is displayed.
E Press [OK].
F Press [Yes].
B Enter
the code for "TX/RX File
Save" with the number keys.
Note
❒ If "TX/RX File Save" is not displayed, press [↑
↑Prev.] or [↓
↓Next]
until it is.
C Enter
the code for "Delete File"
with the number keys.
Note
❒ Press [No] to return to the display in step C.
G Press [PrevMenu].
H Press [Exit] to return to the standby mode.
66
Box File Manager Functions
Box File Manager Functions
See the following pages for how to
register, print and delete messages
stored in box functions.
Preparation
In order to use the Personal Boxes
function or Information Boxes
function, you need to set up Personal Boxes or Information Boxes
in the "Box Settings" beforehand.
See p.245 “Box Settings” .
❖ Printing Personal Box Messages
Print a message received in a Personal Box. See p.67 “Printing Personal Box Messages”.
❖ Storing Messages in Information Boxes
Store a message in an Information
Box. See p.69 “Storing Messages in
Information Boxes”.
Printing Personal Box
Messages
Follow these steps to print a message
received in a Personal Box.
2
Note
❒ When a message has been received
into a Personal Box, the i indicator lights and the Confidential File
Report is printed. This report
shows the name of the Personal
Box in which the message has been
received. See p.47 “Confidential
File Report”.
❒ If you print a Personal Box message, it is deleted.
A Press [Info.].
❖ Printing Information Box Messages
Print a message stored in an Information Box. See p.70 “Printing Information Box Messages”.
❖ Deleting Information Box Messages
Delete a message stored in an Information Box. See p.71 “Deleting
Information Box Messages”.
Reference
p.2 45 “Wha t is the SUB/SEP
Code?”
The "Information" menu is shown.
B Enter the code for "Box File Manager" with the number keys.
p.246 “Personal Boxes”
p.251 “Information Boxes”
Note
❒ If "Box File Manager" is not displayed, press [↑
↑Prev.] or [↓
↓Next]
until it is.
67
Communication Information
C Enter the code for "Print PersonalBox" with the number keys.
D Enter the SUB code of the Person-
2
al Box you wish to print.
F Press the {Start}} key to print the
message.
Note
❒ Press [Cancel] to return to the
display in step D.
❒ To stop printing, press the
{Stop}
} key. The display in step
D will reappear.
E Press [OK].
Note
❒ If a password is required, enter
the password then press [OK].
G Press [PrevMenu].
Note
❒ If there are messages in other
Personal Boxes, the display in
step D will reappear, press [PrevMenu] twice.
H Press [Exit] to return to the standby mode.
❒ If there are no received messages, "No matching file
found. " is displayed then the
screen in step D reappears.
68
Box File Manager Functions
Storing Messages in
Information Boxes
D Enter the SEP code of the Infor-
mation Box you wish to store the
message in.
Follow these steps to store a message
in an Information Box.
Note
❒ Only one message can be stored in
each Information Box.
2
E Press [OK].
❒ To delete a stored message in Information Box, see p.71 “Deleting
Information Box Messages”.
A Press [Info.].
Note
❒ If a password is required, enter
the password then press [OK].
The "Information" menu is shown.
B Enter the code for "Box File Manager" with the number keys.
Note
❒ If "Box File Manager" is not displayed, press [↑
↑Prev.] or [↓
↓Next]
until it is.
❒ When there is already a stored
message in the selected Information Box, the message below
appears. If you wish to overwrite the stored message with
the new message, press [Yes ]. If
you press [No], the display in
step D reappears.
C Enter
the code for "Prog. Info.
File" with the number keys.
69
Communication Information
F Set the original you wish to store,
and select any scan settings as
necessary.
Printing Information Box
Messages
Follow these steps to print a message
stored in an Information Box.
A Press [Info.].
2
Note
❒ If you press [Cancel], the display
in step D reappears.
G Press the {Start}} key.
Your document is scanned in.
To cancel scanning, press the
{Stop}
} key. The display in step D
reappears.
H Press [PrevMenu] twice.
Note
❒ If you wish to continue storing a
message in another Information
Box, repeat the steps from D.
The "Information" menu is shown.
B Enter the code for "Box File Manager" with the number keys.
Note
❒ If "Box File Manager" is not displayed, press [↑
↑Prev.] or [↓
↓Next]
until it is.
C Enter
the code for "Print Info.
File" with the number keys.
I Press [Exit] to return to the standby mode.
D Enter the SEP code stored for the
Information Box.
70
Box File Manager Functions
E Press [OK].
G Press [PrevMenu] twice.
2
Note
❒ If a password is required, enter
the password then press [OK].
Note
❒ To print messages that are
stored in other Information Boxes, repeat the steps from the display in step D.
H Press [Exit] to return to the standby mode.
❒ If no message is stored, "No
matching file found." is displayed and the screen in step D
reappears.
F Press the {Start}} key.
Deleting Information Box
Messages
The message is printed.
Note
❒ Press [Cancel] to return to the
display in step D.
Follow these steps to delete a message
stored in an Information Box.
A Press [Info.].
❒ To cancel printing, press the
{Stop}
} key. The display in step
D reappears.
The "Information" menu is shown.
71
Communication Information
B Enter the code for "Box File Manager" with the number keys.
❒ If no message is stored, "No
matching file found." is displayed and the screen in step D
reappears.
F Press [Yes].
2
Note
❒ If "Box File Manager" is not displayed, press [↑
↑Prev.] or [↓
↓Next]
until it is.
C Enter the code for "Del. Info. File"
with the number keys.
G Press [Yes].
The Information Box message is
deleted.
D Enter the SEP code of the Information Box you wish to delete.
E Press [OK].
Note
❒ If you press [No], the message is
not deleted and the display in
step D reappears.
H Press [PrevMenu].
Note
❒ If a password is required, enter
the password then press [OK].
Note
❒ If messages are stored in other
Information Boxes, the display
in step D appears, press [PrevMenu] twice.
72
Box File Manager Functions
I Press [Exit] to return to the standby mode.
2
73
Communication Information
2
74
3. Other Transmission Features
Handy Dialing Functions
Chain Dial
This feature allows you to compose a
telephone number from various
parts, some of which may be stored as
Quick Dial keys or Speed Dial codes,
and some of which may be entered
with the number keys.
You can program commonly used
area or country codes into Speed Dial
codes or Quick Dial keys.
Note
❒ The maximum number of digits
you can enter is 254.
❒ With Memory Transmission or Immediate Transmission, press the
{Pause/Redial}
} key after entering
digits using the number keys, a
pause will be entered. However,
this is not necessary with On Hook
Dial and Manual Dial.
Example: 01133-1-5551234 (From the
United States to Paris).
Assume that the following Quick Dial
and Speed Dial numbers have already been programmed.
• Quick Dial 001 = 01133 (Overseas
to France)
• Quick Dial 003 = 1 (Paris)
• Speed Dial 001 = 5551234
A Set
the original and select any
scan settings as necessary.
B Press {Quick Dial 001}}.
C Press the {Pause/Redial}} key.
D Press the {Quick Dial 003}} key.
E Press the {Pause/Redial}} key.
F Press the {Speed Dial}} key.
75
Other Transmission Features
G Press {0}}{0}}{1}}.
Note
❒ If you wish to specify another
destination, press [Add], then repeat steps from B.
3
H Press the {Start}} key.
Telephone Directory
This feature lets you find a stored
Speed Dial quickly by just entering a
single letter, for example, the first letter of the name stored for that number.
Limitation
❒ Speed Dial codes cannot be
searched for by symbol or number.
C Press [Tel.Dir.].
D Enter the search letter by pressing
one of the Quick Dial keys (A to
Z).
Note
❒ Key layout of the Quick Dial
keys are either "QWERTY" or
"ABCDE", depending on the
settings you made. See p.205
“Key Layout”.
E Press [OK].
A Set
the original and select any
scan settings you require.
B Press the {Speed Dial}} key.
The names or fax numbers registered in Speed Dials are shown in
numerical order on the display.
F Enter the two-digit code (00 to 99)
or three-digit code (000 to 999) of
the Speed Dial with the number
keys.
76
Handy Dialing Functions
Note
❒ When the optional Function
Upgrade Unit is installed, enter
a Speed Dial code in the range
000 to 999.
❒ If the list does not contain the
d e s i r e d d e s t i n a t io n , p r e s s
[↑
↑Prev. ] or [↓
↓Next ].
❒ If you incorrectly enter the code,
press the {Clear}
} or {Stop}
} key
to try again.
G Press the {Start}} key.
Redial
The machine memorizes the last 10
destinations that have been dialed. If
you wish to send a message to a destination which you faxed to recently,
the Redial feature saves you finding
and entering the number again.
❒ The machine only remembers the
most recent single number that
was dialed with a Quick Dial key
or Speed Dial. If a transmission dialed with the number keys takes
place after a transmission using a
Quick Dial key or Speed Dial, the
previous 10 memorized numbers
are erased.
❒ Even when dialing with the number keys, when the number has
Own Name or Own Fax Number
registered, the name or number
registered appears. See p.55 “Own
N am e/F ax He ade r/Ow n Fax
Number”, <Basic Features>.
❒ The machine remembers the
Group Dials in which only one
destination is stored.
3
A Set
the original and select any
scan settings you require.
B Press the {Pause/Redial}} key
Note
❒ The following kinds of destinations are not memorized:
• Group Dials
• Destinations dialed as End Receivers for Transfer Request
• Destination of Memory File
Transfer
• Destinations dialed using the
external telephone keypad
• Destinations dialed by Redial
(regarded as already memorized)
❒ The machine only remembers the
most recent single number that
was dialed with a Quick Dial key
or Speed Dial.
❒ When redialing the destination
registered in a Quick Dial key or
Speed Dial, the registered name
appears.
The last number dialed appears.
C Enter the code of the number you
wish to redial.
Note
❒ If the list does not contain the
d e s i r e d d e s t in a t i o n , p r es s
[↑
↑Prev. ] or [↓
↓Next ].
D Press the {Start}} key.
77
Other Transmission Features
SUB/SID (SUB Code
Transmission)
Normally you can only use Confidential Transmission or Transfer Request
to send to fax machines of the same
make that have the Confidential Reception or the Transfer Request feature. However, if the other machine
supports a similar feature called
SUB/SID, you can send fax messages
to the other party using this method
instead.
You can also use SUB code Transmission to send messages to Personal
Boxes and Transfer Boxes registered
in other fax machines.
3
Preparation
You need to assign the Dial Options feature to a User Function
key beforehand. See p.154 “User
Function Keys”.
Limitation
❒ SUB Code Transmission is only
available with G3, and is not available with G4.
Note
❒ When specifying Transmission
with the Default ID, the SUB Code
of the Sub Code Transmission with
the Mode key function is not available. See p.13 “SUB Code Transmission with the Mode Key”.
❒ You can enter numbers up to 20
digits.
❒ You can also store the SUB Codes
in addition to the other parties
names and fax numbers in Quick
Dial keys, Speed Dials, or Key
Stroke Programs.
78
❒ SUB Codes are printed on the following reports:
• File Reserve Report (Memory
Transmission)
See p.107 “File Reserve Report
(Memory Transmission)”.
Reference
p.7 “Sending Confidential Messages”
p.28 “Transfer Request”
p.246 “Personal Boxes”
p.254 “Transfer Boxes”
p.63 “Quick Dial”, <Basic Features>
p.76 “Speed Dial”, <Basic Features>
p.87 “Groups”, <Basic Features>
p.136 “Program/Delete Menu”
A Set
the original and select any
scan settings you require.
B Dial the destination fax number
with the number key.
C Press the User Function key ({{F1}}
to {F10}
}) assigned with the Dial
Options feature.
D Enter the code for "SUB" with the
number key.
Handy Dialing Functions
E Enter
the SUB code, then press
B Enter the SID, then press [OK].
[OK].
Note
❒ Make sure to enter the same
SUB code that is stored in the
Personal Box, or the SUB code
of the Transfer Box of the other
parties'.
❒ You can enter up to 20 characters.
❒ You can enter digits 0-9, q, p
and spaces. To enter a space,
press [Space] (the first character
cannot be a space).
❒ If you incorrectly enter the code,
press the {Clear}
} key or {Stop}
}
key and try again.
❒ Make sure that the ID you enter
conforms with the specifications of the other party's fax machine.
Note
❒ You can enter up to 20 characters.
❒ You can enter digits 0-9, q,
p and spaces. To enter a
space, press [Space] (the first
character cannot be a space).
❒ If you incorrectly enter the
code, press the {Clear}
} key or
{Stop}
} key and try again.
❒ Make sure that the ID you
en ter c on forms with th e
specifications of the other
party's fax machine.
C Press [OK].
3
F Press [OK].
When entering the SID
(Password) is necessary
A Enter the code for "SID" with
the number key.
Note
❒ To cancel the operation, press
[Cancel] and the display will return to standby mode menu.
79
Other Transmission Features
G Press the {Start}} key.
Note
❒ When in Immediate Transmission, if the other party does not
support this function, an error
message appears on the display.
SEP/PWD (SEP Code Polling
Transmission)
3
Normally you can only use Polling
Transmission/Reception between fax
machines of the same make that have
the Polling Transmission/Reception
feature. However, if the other machine supports a similar feature
called SEP/PWD, you can send faxes
or receive messages using this polling
method instead.
You can also use SEP Code Polling
Transmission to retrieve documents
stored in information boxes registered in other fax machines.
Preparation
You need to assign the Dial Options feature to a User Function
key beforehand. See p.154 “User
Function Keys”.
Note
❒ The ID can be up to 20 digits long
and consist of digits, spaces, p
and q.
80
❒ You can also store the SEP Codes
in addition to the other parties
names and fax numbers in Quick
Dial keys, Speed Dials, or Key
Stroke Programs.
❒ Messages you send using this feature are marked "SEP" on the reports below:
• File Reserve Report (Memory
Transmission)
See p.107 “File Reserve Report
(Memory Transmission)”.
• File Reserve Report (Polling Reception)
See p.21 “File Reserve Report
(Polling Reception)”.
❒ Make sure that the ID you enter
conforms with the specifications of
the other party's fax machine.
Reference
p.22 “Polling Transmission”
p.19 “Polling Reception”
p.251 “Information Boxes”
p.63 “Quick Dial”, <Basic Features>
p.76 “Speed Dial”, <Basic Features>
p.87 “Groups”, <Basic Features>
p.136 “Program/Delete Menu”
A Press [Mode].
The Transmission Mode menu appears.
B Enter
the code for "Polling RX"
with the number keys.
Note
❒ If "Polling RX" is not displayed,
press [↑
↑Prev.] or [↓
↓Next] until it
is.
Handy Dialing Functions
C Press 0 or 1 key to select "Default ID", and then press [OK].
G Enter the code for "SEP" with the
number keys.
H Enter the SEP code with the number keys, then press [OK].
3
The Transmission Mode menu is
shown. A check mark is added to
Polling Reception.
D Press [Exit].
Note
❒ Make sure to enter the same SEP
code that is stored in the Information Box of the other parties'.
The Polling Reception menu is
shown.
Note
❒ "Polling RX" appears.
E Dial the destination fax number
using the number keys.
F Press the User Function key ({{F1}}
to {F10}
}) assigned with the Dial
Options feature.
❒ You can enter up to 20 characters.
❒ You can enter digits 0-9, q, p
and spaces. To enter a space,
press [Space] (the first character
cannot be a space).
❒ If you incorrectly enter the code,
press the {Clear}
} key or {Stop}
}
key and try again.
❒ Make sure that the ID you enter
conforms with the specifications of the other party's fax machine.
When a password (PWD) is
necessary
A Enter the code for "PWD" with
the number keys.
81
Other Transmission Features
B Enter the PWD code then press
[OK].
Sub-address
The optional ISDN Unit is required to
use this function
3
Note
❒ You can enter up to 20 characters.
❒ You can enter digits 0-9, q,
p and spaces. To enter a
space, press [Space] (the first
character cannot be a space).
❒ If you incorrectly enter the
code, press the {Clear}
} key or
{Stop}
} key and try again.
❒ Make sure that the ID you
en ter con forms w ith th e
specifications of the other
party's fax machine.
I Press [OK].
ISDN allows two or more terminals
(such as a fax and digital telephone)
to be connected to a single line. These
terminals are identified by their subaddress numbers. If the terminals
connected to the line at a destination
are assigned sub-addresses, dialing a
sub-address allows you to direct your
fax message to one or more particular
terminals at the destination.
Preparation
You need to assign the Sub-address feature to a User Function
key beforehand. See p.154 “User
Function Keys”
Limitation
❒ Sub-address can only be used with
ISDN.
Note
❒ You can program a sub-address
number in a Quick Dial key or
Speed Dial.
A Select G4 or ISDN-G3.
Note
❒ To cancel the operation, press
[Cancel] and the display will return to standby mode menu.
J Press the {Start}} key.
The connection is established and
the reception starts.
82
Reference
p.89 “Selecting the Line”
B Set
the original and select any
scan settings you require.
Handy Dialing Functions
C Dial
the fax number with the
number keys.
UUI
This function requires the optional ISDN
Unit.
D Press the User Function key ({{F1}}
to { F10}
} ) in which the Sub-address function has been registered.
"/" appears on the display.
It allows G4 faxes with the UUI (UserUser Information) feature to make
Transfer Requests to this machine using UUI instead of a push signal.
Preparation
You need to store the Tone (UUI)
function in a User Function key beforehand. See p.154 “User Function Keys”.
3
Limitation
❒ UUI is only available with ISDN.
Note
❒ You can store UUI code in a Quick
Dial key or Speed Dial.
E Enter the destination sub-address
A Select G4 or I-G3 line.
with the number keys.
F Press the {Start}} key.
Reference
p.89 “Selecting the Line”
B Set
the original and select any
scan settings you require.
C Enter the fax number.
83
Other Transmission Features
D Press the User Function key ({{F1}}
to {F10}
}) in which the Tone function has been registered.
"•" appears after the fax number
you entered.
3
E Enter the UUI code with the number keys.
F Press the {Start}} key.
84
On Hook Dial
On Hook Dial
You can send a fax message without
lifting the receiver, while still listening to the dial tone.
When a connection is made to another fax machine (you will hear a highpitched tone), press the {Start}
} key.
Note
❒ You cannot use this feature with
the optional Extra G3 Interface
Unit.
❒ You can adjust the volume of the
internal speaker. See p.104 “Adjusting Volume”, <Basic Features>.
❒ The On Hook Dial function is also
available with ISDN. See p.86 “Using On Hook Dial with ISDN”.
A Set
the original and select any
scan settings you require.
B Press the {On Hook Dial}} key.
C Dial.
The fax number you enter is dialed
immediately.
3
Note
❒ If you misdial the number, press
the {Stop}
} key, {On Hook Dial}
} or
{Clear Modes/Energy Saver}
} key
and return to step B.
❒ Press 0 or 1 key to adjust the
monitor volume.
Reference
p.46 “Dialing”, <Basic Features>
p.75 “Handy Dialing Functions”
D When a connection is made to another fax machine (you will hear a
high-pitched tone), press the
{Start}
} key.
You will hear a dial tone from the
machine's internal speaker.
Transmission starts.
After transmission the machine
will return to the standby mode.
Note
❒ If you wish to cancel transmission while it is in progress, press
the {Stop}
} key then remove the
document.
85
Other Transmission Features
Using On Hook Dial with ISDN
B Dial the fax number.
This feature requires the optional ISDN
Unit.
When only connected to an ISDN
line, the On Hook Dial feature becomes available for ISDN.
The following example describes how
to use this feature to connect to a fax
information service.
3
Preparation
You need to set the "Selecting the
line for On Hook Dial" to "ISDN"
with User Parameters. See p.178
“User Parameters” (switch 21 bit
0).
Note
❒ When ISDN is selected for the On
Hook Dial, the optional handset or
an external telephone can only be
used for making phone calls. You
cannot transmit faxes with the
Manual Dial function or receive
faxes with the Telephone Mode.
See p.88 “Manual Dial” and p.113
“Telephone Mode”.
A Press the {On Hook Dial}} key.
Limitation
❒ Do not pause for more than 5
seconds between dialing digits.
If more than 5 seconds passes,
transmission will start automatically.
Note
❒ If you incorrectly enter the
number, press the {On Hook Dial}
} key, the {Stop}
} key or the
{Clear Modes/Energy Saver}
} key
and p erform th e operation
again.
❒ You can also enter the sub-address and UUI. The correct input sequence is as follows: "Fax
number" "/" "Sub-address" "•"
"UUI"
❒ Press 0 to 1 key to adjust the
monitor volume.
Reference
p.82 “Sub-address”
p.83 “UUI”
C Press [Dialing].
Note
❒ Transmission will begin automatically 5 seconds after entering the fax number.
86
On Hook Dial
D Follow the instructions provided
by the other party.
E When you hear a message such as
"Please press the start button",
press the {Start}
} key.
After a while, reception will begin.
When reception has finished, the
machine will return to the standby
mode.
3
87
Other Transmission Features
Manual Dial
The optional handset or an external telephone is required to use this function.
Pick up the handset or the external
telephone and dial. When the line is
connected and you hear a highpitched tone, press the {Start}
} key to
send your fax message. If, on the other hand, you hear a voice at the other
end, continue your conversation as
you would normally over the telephone.
3
Note
❒ Manual Dial does not work with
ISDN lines.
❒ Results of transmissions with this
feature are not mentioned in the
Transmission Result Report.
❒ You can specify destination with
the number keys, Quick Dial key
or Speed Dial.
❒ While using the optional handset
or an external telephone, you can
store the fax documents for the
Memory Transmission if "Storing
fax documents for the Memory
Transmission while using the
Manual Dial function" is set to "Enable" with User Parameters. However, while this feature is set to
"Disable", you cannot transmit faxes using the Manual Dial function.
See p.178 “Us er Para meters”
(switch 09 bit 4).
❒ If you lift the handset immediately
after the machine switches to
Night Timer mode, there will be no
sound for a maximum of 4 seconds. When you can hear sound
again, you can continue.
A Set
the original and select any
scan settings you require.
B Pick up the external telephone.
88
You will hear a dial tone.
C Dial.
The fax number you enter is dialed
immediately.
Note
❒ If you incorrectly enter the
number, replace the external
telephone and try again from
step B.
Reference
p.46 “Dialing”, <Basic Features>
p.75 “Handy Dialing Functions”
D When the line is connected and
you hear a high-pitched tone,
press the {Start}
} key to send your
fax message, and replace the
handset of the external telephone.
Transmission starts.
After transmission the machine
will return to the standby mode.
Note
❒ If someone picks up the phone at
the other end, ask them to do what
is necessary to receive the fax.
❒ If you wish to cancel transmission while it is in progress, press
the {Stop}
} key then remove the
original.
Selecting the Line
Selecting the Line
This feature requires the optional Extra G3 Interface Unit or the optional ISDN Unit.
Installing all of these options expands
the machine's line capacity to a maximum of 3 lines.
The optional Extra G3 Interface Unit
connects to the PSTN, the optional
ISDN Unit to the ISDN.
Note
❒ Only one PSTN line is available
with the base machine without any
options installed.
❒ Up to three lines can be used simultaneously.
❒ One ISDN line allows you to communicate with two communication lines, however, if connected
through PBX, you may only be
able to use one communication
line.
❒ The optional Extra G3 Interface
Unit can be connected to a PSTN
line.
❒ The optional Extra G3 Interface
Unit can be for reception exclusive
use. To change the setups, please
contact your service representative.
❒ The optional ISDN Unit can be
connected to an ISDN line.
❒ When sending a fax and choosing
the line, you can only specify destinations with the number keys and
the Chain Dial feature.
❒ The following display is shown
when neither the optional Extra G3
Interface Unit or optional ISDN
Unit is installed.
❒ You can set the default G3 line or
expanded G3 line as the PABX line
with User Parameters. See p.178
“User Parameters” (switch 13 bit
0), (switch 13 bit 2).
❒ The On Hook Dial function is not
available with the lines expanded
by the optional units. See p.85 “On
Hook Dial”.
❒ Your machine may not respond to
a transmission received through
an ISDN PBX, detecting it as a telephone call, not as a fax message.
You can set "Respond to a transmission received through an ISDN
PBX unconditionally" to "On" with
User Parameters. See p.178 “User
Parameters” (switch 13 bit 6).
❒ The table for the available combination of the connected line type(s)
and the communication type(s) is
as follows:
Option
Component(s)
Connected
Line
Type(s)
Available
Communication
Type(s)
Base
Machine
PSTN
G3
Base MaPSTN +
chine + Op- PSTN
tional Extra (Option)
G3 Interface
Unit
G3 + G3
Base MaPSTN +
chine + Op- ISDN
tional ISDN (Option)
Unit
G3 + G4
3
I-G3 + G4
G3 + G4 +
G4
G4 + G4
ISDN
(Option)
I-G3 + G4
G4 + G4
89
Other Transmission Features
Option
Component(s)
Connected
Line
Type(s)
Available
Communication
Type(s)
Base Machine + Optional Extra
G3 Interface
Unit + Optional ISDN
Unit
PSTN +
PSTN
(Option)
G3 + G3
PSTN +
ISDN
(Option)
G3 + G4
3
❖ G3
G3 is selected by default after power on and a reset.
If the G3 indicator is not lit, press
the {Line Selection}
} key until it is.
Depending on the settings, either
PSTN or ISDN is selected.
G3 + I-G3
I-G3 + G4
G3 + G4 +
G4
G3 + I-G3 +
G4
❖ Auto Display
I-G3 + I-G3
ISDN
(Option)
I-G3 + G4
I-G3 + I-G3
G4 + G4
PSTN +
PSTN
(Option) +
ISDN
(Option)
G3 + G3 +
G4
G3 + G4 +
G4
I-G3 + I-G3
G3 + I-G3 +
G4
• I-G3 : G3 communication using
ISDN (ISDN-G3)
❒ When holding more than one communication at one time, the information of the first communication
established is shown on the display.
❒ Up to three communications can
be held at one time.
❒ You can send two faxes and receive one simultaneously.
90
❖ G3-1 Display
❖ G3-2 Display
❖ ISDN-G3 Display
Selecting the Line
❖ G4
Press the { Line Selection}
} key to
light the G4 indicator. ISDN is selected.
❖ G4 Display
❖ PABX
Press the { Line Selection}
} key to
light the PABX indicator.
❖ G3 Line Selection
G4 communication always uses ISDN, but G3 communication can
use either PSTN or ISDN. Therefore, when connected to both
PSTN and ISDN and selecting G3,
you can choose which line to use.
Note
❒ When the optional ISDN Unit is
installed, the line type for "Auto" is set to PSTN by default. If
you wish to change the settings,
please contact your service representative.
Auto Discriminate
This function is for when G4 is selected. The machine first dials using G4,
but if the destination is PSTN, it
switches automatically to G3.
Limitation
❒ This function requires the optional
ISDN Unit.
3
Note
❒ When the destination G3 uses TA
(Terminal Adapter) or is attached
to a PBX, and connected to ISDN, it
is detected as G4 and the machine
does not switch to G3.
❒ Depending on the signals of the international lines, the Auto Discriminate function cannot detect
the correct line type, thus transmissions to overseas destinations
may not be made.
How to Select the Line
When the optional Extra G3 Interface
Unit or optional ISDN Unit is installed, you can store the Line Select
function in one of the User Function
keys ({
{F1}
} to {F10}
}).
When sending a fax, pressing the
User Function key enables you to select the line.
Preparation
Store the Line Select function in a
User Function key ({
{F1}
} to {F10}
}).
See p.154 “User Function Keys” .
❒ When using G3 with ISDN, you
can use the sub-address and
UUI.
91
Other Transmission Features
A Make sure that the G3 indicator is
lit.
B Press the User Function key ({{F1}}
to { F10}
} ) with the Line Select
function stored in.
3
C Press
0 or 1 key to select the
line.
D Press [OK].
92
Transmission Features
Transmission Features
Stamp
Auto Reduction
When sending a fax message, the machine can stamp a circle mark at the
bottom of the document. This stamp
indicates that the document has been
successfully stored in memory for
Memory Transmission, or that it has
been successfully sent for Immediate
Transmission.
If the other party's fax machine does
not have paper loaded of the same
width as your document, use this feature to have your document image reduced to a suitable width during
transmission.
3
Transmitter
(This machine)
A B
A
Receiver
AB
Reduction
GFREDU0N
GFSTMP1N
Each time you press the {F3 Stamp}
}
key, the indicator light is turned on
and off. Turn it on or off if you wish
this function to work.
Note
❒ If a page was not stamped even
though the Stamp feature is turned
on, you need to resend that page.
❒ If you use this feature often, you
can adjust User Parameters so that
the home setting is on. In this case,
Stamp can easily be turned off for
any single transmission by pressing the {F3 Stamp}
} key. See p.178
“User Parameters” (switch 00 bit
0).
❒ When the stamp starts getting
lighter, replace the cartridge. See
p.234 “Enter the code for "Program
Sender" with the number keys.” .
Important
❒ If you turn this feature off, the
scale of the document is maintained and some parts of the image
may be lost when printed at the
other end.
GFREDU1N
Note
❒ You can switch this feature on and
off with User Parameters. See
p.178 “User Parameters” (switch
07 bit 3).
93
Other Transmission Features
ID Transmission
Duplex Original Settings
If you use this feature, transmission is
limited to destination machines of the
same make and with the same stored
Polling ID. This is useful when sending documents containing confidential or sensitive information.
This feature lets you scan in each side
of a double-sided original, then have
both sides sent in a single operation.
Preparation
You need to program the Polling
ID beforehand. See p.199 “Registering ID Codes” .
3
Limitation
❒ ID Transmission is not available
with the following functions:
• Polling Transmission
See p.22 “Polling Transmission”.
• Backup File Transmission
See p.102 “Backup File Transmission” .
Note
❒ You can turn this feature on or off
with User Parameters. See p.178
“User Parameters” (switch 06 bit
2).
Preparation
You need to store the Duplex Original function in a User Function
key beforehand. See p.154 “User
Function Keys”.
Limitation
❒ This feature is only available with
Memory Transmission.
❒ Document bypass tray is not available with this feature.
Note
❒ You cannot send duplex originals
using Parallel Memory Transmission.
A Make sure the Memory Transmission indicator is lit.
Note
❒ If it is not, press the {Transmission Mode}
} key.
B Press the User Function key ({{F1}}
to {F10}
}) with the Duplex Original function stored in.
C Set
the double-sided original
with the front page face-up.
94
Transmission Features
D Select any scan settings as necessary.
E Dial the destination number.
F Press the {Start}} key.
Scanning the front page will begin.
When scanning has finished, the
following display appears:
Note
❒ If you press [Yes], all scanned
data is deleted.
❒ If you press [No], transmission
of the scanned data starts.
❒ If you do not press either [Yes]
or [No] for a while, the file will
be deleted automatically and
the following display appears.
3
G Set
the original with the back
page face-up.
Note
❒ Set the document within 60 seconds. If time runs out, an error
will occur and transmission will
not take place.
❒ When the memory runs out
while scanning the front page
(the first page), the file will be
deleted and the following display appears.
H Press the {Start}} key.
Transmission starts.
If a Document Jam Occurs
If Memory Runs out While Scanning Is in
Progress
Scanning of documents is interrupted
if the machine's memory runs out (the
remaining amount of memory decreases to 0%) while scanning and
storing the documents data is in
progress.
A When the memory runs out while
scanning the back page (the second page), the following display
appears.
A Check the message on the display, then press [OK].
B Remove the document.
Reference
p.108 “Clearing Original
Jams”, <Basic Features>
95
Other Transmission Features
Batch Original Documents
Transmission
When sending a fax message which
has a large number of pages, you can
divide and scan the original documents in parts to store in the memory,
and then send the whole data in one
transmission.
3
Preparation
Before you can use the Batch Original Documents Transmission
function, you need to program this
function into a User Function key
({
{ F1}
} to {F10}
}). See p.154 “User
Function Keys”.
Limitation
❒ The Immediate Transmission is
not available. Use Memory Transmission.
❒ You cannot use the Document Bypass Tray to feed the documents
when using this function.
Note
❒ You cannot send batch document
data using Parallel Memory Transmission.
B Press the User Function key ({{F1}}
to {F10}
}) that the Batch Original
Documents Transmission function is stored in.
C Set the first stack of documents.
Note
❒ You can set up to 30 pages
(11"×17"), 40 pages (81/2"×14"),
or 75 pages (81/2"×11") of documents at one time.
D Select any scan settings as necessary.
E Dial the destination number.
F Press the {Start}} key.
The machine starts scanning the
documents.
When the scanning of the set documents is complete, the screen below appears.
A Make sure the Memory Transmission indicator is lit.
Important
❒ Do not attempt to add more
documents into the feeder while
the scanning is in progress. Doing so may result in a document
jam.
Note
❒ If it is not, press the {Transmission Mode}
} key.
96
G Set the next stack of documents.
Transmission Features
H Press the {Start}} key.
When the machine finishes scanning the set documents, the screen
below appears.
Note
❒ If you have more documents to
be scanned, repeat the procedure from G.
If Memory Runs out While Scanning Is in
Progress
Scanning of documents is interrupted
if the machine's memory runs out (the
remaining amount of memory decreases to 0%) while scanning and
storing the documents data is in
progress.
A Select whether or not to delete the
3
stored document data.
I When
you finish scanning all
documents, press the {q} key.
Transmission starts.
If Scanning Fails
Scanning of documents is interrupted
if the machine fails to scan some of
the documents and store the document data.
A Select whether or not to delete the
Note
❒ If you press [Yes], all scanned
data is deleted.
❒ If you press [No], transmission
of the scanned data starts.
stored document data.
If a Document Jam Occurs
A Check the message on the display, then press [OK].
Note
❒ If you press [Yes], all scanned
data is deleted.
❒ If you press [No], transmission
of the scanned data starts.
B Remove the document.
Reference
p.108 “Clearing Original
Jams”, <Basic Features>
97
Other Transmission Features
Label Insertion
With this feature you can have the receiver's name programmed in Quick
Dial key or Speed Dial printed on the
message when it is received at the
other end. The name will be printed
at the top of the page and will be preceded by "TO:".
If you program the Label insertion
feature in a Quick Dial key or Speed
Dial, the feature is enabled when you
select "On". This feature cannot be
used if the other party's name is not
programmed.
User Code (the name of the Personal
Box) will be printed preceded by
"FROM:" as well as the name of the receiver when sending faxes with User
Code (SUB Code of the Personal Box)
using User Code Transmission to receivers whose Label Insertion setting
is "On" in your machine.
3
SEP. 1.2002 9:15AM
ABC COMPANY
TO:SEATTLE OFFICE
1
NO.005
P. 1
FROM:DEF
2
GFATEN1N
1. The name stored in the Quick Dial
key or Speed Dial
2. The name of the user (the name of
the Personal Box)
Important
❒ If you turn this function on, any
images located where the name of
the receiver to be printed will be
erased.
Note
❒ This feature does not work with
the following function and condition:
• Transfer Request
See p.28 “Transfer Request”.
• When transmitting the fax with
the Fax Header Print function
"Off"
See p.32 “Fax Header Print”.
❒ You can set this feature for each
destination.
Reference
p.10 “User Code Transmission”
p.246 “Personal Boxes”
p.63 “Quick Dial”, <Basic Features>
p.76 “Speed Dial”, <Basic Features>
Inserting a Label Using Auto Document
The Label Insertion function is available
with the documents stored as Labels
with the Auto Document function. See
p.145 “Registering Auto Documents”.
User Code (the name of the Personal
Box) will be printed preceded by
"FROM:" as well as the name of the receiver when sending faxes with User
Code (SUB Code of the Personal Box)
using User Code Transmission to receivers whose Label Insertion setting
is "On" in your machine.
SEP. 1.2002 9:15AM
ABC COMPANY
TO:SEATTLE OFFICE
1
NO.005
P. 1
FROM:DEF
2
GFATEN1N
1. The name stored in the Quick Dial
key or Speed Dial
2. The name of the user (the name of
the Personal Box)
98
Transmission Features
Preparation
In order to have the receiver's
name printed on the Label, store
the document in memory and register the name of the receiver beforehand. See p.145 “Registering
Auto Documents”.
Note
❒ Although you can specify scan settings when sending an Auto Document, these settings will only
apply to the document you send
along with the Auto Document.
The settings used when you
scanned in and stored the Auto
Document will apply to the Auto
Document itself.
A Set the original you wish to send
along with the Label, and select
any scan settings as necessary.
B Specify the Label to send in one
of the following ways:
• Press the Quick Dial key that
the Label is stored in.
• Press the {Speed Dial}
} key and
enter the code of the Speed Dial
that the Label is stored in.
C Press [Yes].
D Specify the destination fax num-
ber with the Label Insertion is
"On" in one of the following
ways:
• Press the Quick Dial key that
the destination fax number is
stored in.
• Press the {Speed Dial}
} key and
enter the code of the Speed Dial
that the destination fax number
is stored in.
3
E Press the {Start}} key.
Auto Document
This feature allows you to automatically attach the registered document
as the first page to the original you
wish to transmit. It is handy to store
Labels or maps beforehand to use this
function.
You can send an Auto Document
along with another document, or just
send it on its own.
Preparation
You need to register the documents or images to be sent along
with the original using this feature
in advance. See p.145 “Registering
Auto Documents”.
99
Other Transmission Features
3
Note
❒ Although you can specify scan settings when sending an Auto Document, these settings will only
apply to the document you send
along with the Auto Document.
The settings used when you
scanned in and stored the Auto
Document will apply to the Auto
Document itself.
D Dial the destination fax number.
❒ If you send another document
with an Auto Document, the Auto
Document is sent first.
E Press the {Start}} key.
Reference
p.63 “Quick Dial”, <Basic Features>
p.76 “Speed Dial”, <Basic Features>
A Set the original you wish to send
along with the Auto Document,
and select any scan settings as
necessary.
To send just an Auto Document,
start the following procedure from
step B.
B Specify
the Auto Document to
send in one of the following
ways:
• Press the Quick Dial key it is
stored in.
• Press the {Speed Dial}
} key and
enter the code of the Speed Dial
it is stored in.
C Press [Yes].
100
Note
❒ Proceed to step E when you
specified the destination using a
Quick Dial key or a Speed Dial.
No Document, No Dial
If you dial a destination fax number
and for some reason take your document back to your desk and another
person sets a different document,
their document could be sent to the
wrong destination. To avoid such
mistakes, when this feature is turned
on, you cannot dial a destination unless your document is set.
Note
❒ The standby screen when this feature is turned on:
❒ When the machine is shipped, this
feature is turned off by default. If
you wish to turn this feature on,
please contact your service representative.
Transmission Features
Blank Sheet Detect
Scanner Cleaning Message
This feature is designed to help you
avoid making mistakes while scanning in documents.
If you try to scan in an almost completely blank document, an alarm
sounds after Immediate Transmission, and as soon as the document has
been scanned for Memory Transmission.
As the alarm sounds, the screen below appears.
If dirt is stuck to the scanner, the other
party receives fax messages with
black lines. When the scanner is dirty,
the warning message " S ca n n e r
Limitation
❒ This feature is not supported in
Copy mode.
Note
❒ Transmission is not cancelled even
if the machine detects the document is blank.
❒ When in Memory Transmission,
you can cancel the transmission by
pressing the {Stop}
} key while the
message is shown on the display.
❒ You can turn Blank Sheet Detect on
or off with User Parameters. See
p.178 “User Parameters” (switch
11 bit 2).
needs cleaning. Clean the exposure glass." is displayed after scan-
ning is complete. If this message is
displayed, wipe the exposure glass
and white strip to remove the dirt,
and then press [OK].
3
Note
❒ You can select whether this message is displayed or not when the
machine detects that the scanner is
dirty with User Parameters. "On"
(Displayed) is selected by default.
See p.178 “ Us er P arameters”
(switch 20 bit 7).
❒ If the dirty part of the scanner is
small, that is, 0.127 mm (0.005 in.)
or smaller, the machine tries to
erase the black line made when
scanning originals. The black line
is less visible on the received message. However, sometimes very
small parts of the image might be
missing on the received message.
You can turn this function on or off
with User Parameters. It is turned
on by default. See p.178 “User Parameters” (switch 20 bit 4).
❒ Transmission is not interrupted
even if the machine detects that the
scanner is dirty.
101
Other Transmission Features
Backup File Transmission
JBIG Transmission
When turned on, this feature sends a
backup copy of all faxes you send to
destinations that you specify.
If you use JBIG (Joint Bi-level Image
Experts Group) compression you can
send photographic documents at
high speed.
Normally, the JBIG method is used
when sending to other fax machines.
However, if connected to multiple
lines and another JBIG transmission
is in progress, transmission takes
place without using JBIG.
Preparation
You must specify the backup destinations beforehand. See p.243
“Backup File Transmission Settings” .
3
Note
❒ This function works with the following features:
• Memory Transmission
See p.34 “Memory Transmission”, <Basic Features>.
• Transfer Request Transmission
See p.28 “Transfer Request”.
• Confidential Transmission
See p.7 “Sending Confidential
Messages”.
• SUB Code Transmission
See p.13 “SUB Code Transmission with the Mode Key”.
• Mail Transmission (NIC FAX
Unit (Option for Type1) required)
102
Limitation
❒ This feature requires that the other
party's fax machine has both the
JBIG function and ECM function
(G3 communication only).
❒ When connected to multiple lines
and a JBIG transmission is in
progress, JBIG transmission is not
possible until that transmission
has finished.
❒ This feature is not available with
an e-mail transmission when NIC
FAX Unit (Option for Type1) installed.
Reference
p.42 “Scan Settings”, <Basic Features>
More Transmission Functions
More Transmission Functions
The following functions are useful
when transmitting documents.
If Memory Runs out While
Scanning Is in Progress
Scanning of documents is interrupted
if the machine's memory runs out (the
remaining amount of memory decreases to 0%) while scanning and
storing the document data is in
progress. However, the documents
already scanned in are transmitted.
Note
❒ We recommend that you use Immediate Transmission to send a lot
of documents when the percentage
of free memory space is low.
❒ When the memory runs out, the
following display appears:
❒ If a document jam occurs, the following display appears. Check the
message on the display, press [OK],
then remove the document:
Checking the Transmission
Result
You can confirm successful transmission with the Communication Result
Report or the Communication Failure
Report for Memory Transmission,
and the Immediate Transmission Result Report for Immediate Transmission.
3
❖ Communication Result Report
Turn on the Communication Result Report if you want a report to
be printed after every transmission.
❖ Communication Failure Report
If you turn the Communication result Report off, the Communication Failure Report will be printed
when a communication fails.
❖ Immediate Transmission Result Report
Turn on the Immediate Transmission Result Report if you want a report to be printed after every
successful Immediate Transmission.
Note
❒ You can display the communication result on the display. See p.44
“Checking the Transmission Result (TX Status)” and p.45 “Checking the R eception Result (R X
Status)”.
❒ The communication result of
Memory Transmission or Immediate Transmission can be printed on
the Journal. See p.50 “Printing the
Journal”.
103
Other Transmission Features
Broadcasting Sequence
If you dial several destinations for the
same message (Broadcasting), the
messages are sent in the order in
which they were dialed. If the document could not be transmitted, the
machine redials that destination after
the last destination specified for
Broadcasting. For example, if you
specify four destinations, A through
D for Broadcasting, and if the lines to
destinations A and C are busy, the
machine dials the destinations in the
following order: A, B, C, D, A, and C.
3
Note
❒ The dialing order mentioned
above does not apply in the Batch
Transmission mode.
❒ For details about Broadcasting, see
p.29 “Transmission Modes”, <Basic Features>.
Simultaneous Broadcast
Normally, if you dial several destinations, the messages are sent in the ord er in wh ich they were dialed.
However, with this feature, you can
send messages to more than one destination simultaneously, using separate communication lines.
You can complete the entire transmission in a shorter time with this feature
than with Broadcasting.
Note
❒ This feature requires the optional
Extra G3 Interface Unit or the optional ISDN Unit.
❒ Up to two lines can be used simultaneously. When the optional Extra G3 Interface Unit is installed, it
is more efficient to set the line type
of the destination to "Auto" so that
the transmission is made with the
available G3 line.
Sending a Fax Message
Immediately
When you wish to send a fax straight
away, use Immediate Transmission.
If a Memory Transmission is in
progress, the display will switch to
transmission standby and as soon as
the current transmission has finished,
the Immediate Transmission will
start automatically.
If you are already sending to more
than one destination with Memory
Transmission and your document has
already been scanned in, Broadcasting is interrupted to allow the Immediate Transmission to be sent.
However, if a transmission other than
the current transmission is on standby, that document is sent first causing
your Immediate Transmission to take
a little longer.
Broadcasting: Checking
Progress
To check which destinations the fax
message has been sent to so far, print
the TX File List. See p.43 “Printing a
List of Files in Memory (Print TX File
List)”.
104
More Transmission Functions
Automatic Redial
Dual Access
If a document cannot be transmitted
because the line is busy or due to a
transmission error, redialing is done
twice at 5-minute intervals for Immediate Transmission, and four times at
5-minute intervals for Memory Transmission. (The redialing interval and
number of retries may vary according
to country.)
If redialing fails, the machine cancels
the transmission and prints the Communication Result Report or Communication Failure Report.
The machine can scan other messages
into memory even while sending a
fax message from memory, receiving
a message into memory, or automatically printing a report.
Since the machine starts sending the
second message immediately after
the current transmission terminates,
the line will be used efficiently.
Note that during Immediate Transmission, when copying, or when the
User Tools menu is open, the machine
cannot scan in documents.
Batch Transmission
ECM (Error Correction Mode)
If you send a fax message by Memory
Transmission and there is another fax
message waiting in memory to be
sent to the same destination, that
message is sent along with your document. Several fax messages can be
sent with a single call, thus eliminating the need for several separate calls.
This helps you reduce communication costs and transmission time.
Fax messages for which the transmission time has been set in advance are
sent by Batch Transmission when that
time is reached.
This feature automatically resends
data that wasn't transmitted successfully using a system that complies
with international standards.
ECM requires that the destination
machine has the same feature.
Note
❒ You can switch the Batch Transmission function on or off with
User Parameters. See p.178 “User
Parameters” (switch 06 bit 4).
❒ If you store the Batch Transmission
function in a User Function key,
you can turn it on or off by just
pressing that key. The User Function key indicator lights when
Batch Transmission is turned on.
3
Parallel Memory Transmission
With this feature the machine can call
destinations while scanning documents. Compared with normal Memory Transmission (where the machine
calls once all the documents have
been stored), it is quick to verify
whether a connection has been made
or not.
Additionally, as scanning finishes
quicker than in Immediate Transmission, it is useful if you wish to take the
document back to your desk immediately. However, if the connection cannot be made (for example if the line is
busy), normal Memory Transmission
takes place.
105
Other Transmission Features
Limitation
❒ Parallel Memory Transmission is
not available with G4.
Note
❒ Standard Memory Transmission is
used instead of Parallel Memory
Transmission in the following cases:
• When the line is busy and could
not be connected to
• With Send Later
• When you store a document for
Memory Transmission while
another communication is in
progress
• When you send just an Auto
Document
• With Duplex Original
• With Batch Original Documents
Transmission
❒ When the amount of remaining
memory drops below a certain level, the machine switches to ordinary memory transmission and the
parallel memory transmission feature is disabled until more memory becomes available.
❒ If you press the {Stop}
} key, the
document jams, or memory becomes full during Parallel Memory
Transmission, the machine stops
transmitting and prints the Communication Result Report (Memory Transmission). The file is
erased.
❒ You can switch the Parallel Memory Transmission function on or off
with User Parameters. See p.178
“User Parameters” (switch 07 bit
2).
3
106
Printed Reports
Printed Reports
File Reserve Report (Memory
Transmission)
Communication Result Report
(Memory Transmission)
This report is printed after a document is stored in memory. It helps
you review the contents and registered destinations of documents
stored for transmission.
This report is printed when a Memory Transmission is completed, so you
can check the result of the transmission. If two or more destinations are
specified, the report is printed after
the fax message has been sent to all
the destinations. If the machine is set
up not to print this report and the fax
message could not be successfully
transmitted, the Communication Failure Report is printed. See p.108
“Communication Failure Report” .
Note
❒ This report is not printed for messages sent using Parallel Memory
Transmission.
❒ You can turn this report on and off.
By default it is not printed. See
p.178 “User Parameters” (switch
03 bit 2).
❒ Even if the machine is set up not to
print this report, it is still printed if
a document could not be stored.
❒ You can choose whether to include
part of the document image on the
report (part of the image is printed
by default). This feature is not
available for Confidential Transmission. See p.178 “User Parameters” (switch 04 bit 7).
❒ With User Parameters, you can set
the machine to print out this report
when scanning documents is interrupted because the machine's
memory runs out, or if a document
jam occurs. See p.178 “User Parameters” (switch 04 bit 6).
3
Note
❒ You can print the Journal to check
the communication result. See p.50
“Printing the Journal”.
❒ You can turn this report on and off.
See p.178 “ Us er P arameters”
(switch 03 bit 0).
❒ You can program a User Function
key to switch Communication Result Report printing on or off for
each transmission. After the transmission completes, it reverts to the
setting with User Parameters.
When the User Function key is lit,
the report is printed for each transmission. See p.154 “User Function
Keys”.
❒ You can choose whether to include
part of the document image on the
report (part of the image is printed
by default). This feature is not
available for Confidential Transmission. See p.178 “User Parameters” (switch 04 bit 7).
107
Other Transmission Features
❒ Normally, when specifying the
destination with a Quick Dial key
or Speed Dial, "ADDRESS" on this
report shows Own Name or Own
Fax Number registered in the receiver's machine. However, you
can change the setting with User
Parameters so that the name or
number of the destination stored
in the Quick Dial key or Speed Dial
in your machine is printed instead.
See p.178 “Us er Para meters”
(switch 04 bit 4).
3
Communication Failure Report
This report is printed if a memory
transmission failure occurs after a job
is completed. It is only printed if the
Communication Result Report is
switched off, and a communication
failure occurs.
Note
❒ You can choose whether to include
part of the document image on the
report. See p.178 “User Parameters” (switch 04 bit 7).
108
Transmission Result Report
(Immediate Transmission)
If you turn this report on, a report will
be printed after every Immediate
Transmission so you have a record of
whether the transmission was successful or not.
Note
❒ You can switch this report on or off
with User Parameters. See p.178
“User Parameters” (switch 03 bit
5).
❒ You can program a User Function
key to switch Communication Result Report printing on or off for
each transmission. After the transmission completes, it reverts to the
setting made with User Parameters. When the User Function key
is lit, the report is printed for each
transmission. See p.154 “User
Function Keys”.
❒ Normally, when specifying the
destination with a Quick Dial key
or Speed Dial, "ADDRESS" on this
report shows Own Name or Own
Fax Number registered in the receiver's machine. However, you
can change the setting with User
Parameters so that the name or
number of the destination stored
in the Quick Dial key or Speed Dial
in your machine is printed instead.
See p.178 “Us er P arameters”
(switch 04 bit 4).
4. Reception Features
General
There are two types of reception
methods, Immediate Reception and
Memory Reception.
Normally, the machine receives all
the faxes with Immediate Reception,
however, in the case of Confidential
Reception (see p.46 “Printing a Confidential Message”) receiving Memorylocked messages (see p.48 “Printing a
Memory-locked Message”) or when
you turn on one of the following functions, it receives faxes with Memory
Reception.
• Two In One
See p.121 “Two In One”.
• Image Rotation
See p.122 “Image Rotation”.
• Rotate Sort
See p.122 “Rotate Sort”.
• Multi-copy Reception
See p.120 “Multi-copy Reception”.
• Forwarding
See p.223 “Forwarding”.
• TX/RX File Save
See p.236 “TX/RX File Save Settings”.
Apart from the above, when any of
the conditions for Substitute Reception occurs, incoming faxes are not
printed but stored in memory. See
p.111 “Substitute Reception”.
Immediate Reception
Each page of a received fax message is
printed as soon as it is received. This
method is used for standard fax messages.
Receiver (your machine)
Sender
GFCYOJ0N
- Display during reception
The sender's Own Name or Own Fax
Number appears on the first line.
Reference
p.55 “Own Name/Fax Header/Own Fax Number”, <Basic Features>
109
Reception Features
Memory Reception
The machine waits until all pages of
the message have been received into
memory before printing the message.
Receiver (your machine)
Sender
4
GFMEMJ0N
Important
❒ If the power switch is turned off
for 12 hours or longer, documents
saved in memory are deleted.
❒ If this function is turned on, you
may not be able to receive very
large or detailed faxes. If this happens, we recommend that you turn
this function off.
Limitation
❒ The machine may not be able to receive fax messages when available
memory space becomes less than
3%. However, this limitation does
not apply when the Optional 40MB
Memory Card is installed.
Note
❒ If free memory space reaches 0%
during Memory Reception, the
machine can no longer receive the
current fax message and stops
communicating.
❒ When the Image Rotation function
is turned on, the machine receives
faxes with Memory Reception.
110
General
Substitute Reception
If any of the conditions listed below are met, the machine automatically switches
to Memory Reception mode and stores messages in memory instead of printing
them. This reception mode, in which a received fax message is stored in memory
and not printed, is called Substitute Reception. Messages received using Substitute Reception are automatically printed when the problem which caused the
machine to use Substitute Reception is rectified.
The table below lists some problems that could have caused Substitute Reception to take place and their solutions.
Why Substitute Reception
Occurred
Indication/Status
Solution
Paper has run out.
B is lit red.
Add paper. See p.103 “Loading Paper in the Main Paper
Tray”, <Basic Features>.
Toner has run out.
D is lit red.
Replace the toner cartridge.
4
See p.113 “Replacing the Toner Cartridge”, <Basic Features>.
Paper is jammed.
"Open cover marked by
Remove the jammed paper.
the arrow and remove
the document." is dis-
See p.110 “Clearing Paper
Jams”, <Basic Features>.
played.
Cover is open.
"Cover open. Please
shut the cover
marked with the arrow." is displayed.
A cover other than the Auto
Document Feeder (ADF) or
front cover is open. See p.18
“Guide to Components”, <Basic Features>.
The machine is in Energy Sav- "Energy Saver Mode" indicaer Mode.
tor and "Receive File" are lit.
Press the {Clear Modes/Energy
} key.
Saver}
Machine is busy printing with
another function.
The message will be printed
after the current job finishes
automatically.
Another function, such as the
optional printer function, is
currently printing.
Note
❒ You can switch this function on or off with User Parameters. See p.178 “User
Parameters” (switch 05 bit 0).
111
Reception Features
Screening Out Messages From Anonymous Senders
To help you screen out unwanted messages that may fill up your memory, the
machine can be programmed to only use Substitute Reception for messages that
arrive with Own Name/Own Fax Number identification.
Two settings are available:
• "When a name or fax number is received"
• "Free"
Important
❒ If a sender has not programmed their Own Name or Own Fax Number, the
machine may reject an important fax message. We recommend that you ask
important senders to register an Own Name or Own Fax Number in advance.
4
Note
❒ If "When a name or fax number is received" is selected, the machine only
stores messages when the name or fax number is present. You can change this
with User Parameters. See p.178 “User Parameters” (switch 05 bit 1).
Reference
p.55 “Own Name/Fax Header/Own Fax Number”, <Basic Features>
❖ When a Name or Fax Number is received
The machine switches to Substitute Reception only when the sender has programmed their Own Name or Own Fax Number. If the power switch is
turned off for 12 hours or longer, all the messages received are deleted. In
such a case, the Power Failure Report or the Journal can be used to identify
which messages are lost so you can ask the senders to transmit them again.
You can also use this function to screen out unwanted messages, thus conserving memory.
❖ Free
The machine switches to Substitute Reception regardless of whether or not
the sender has programmed their Own Name or Own Fax Number.
112
Selecting the Reception Mode
Selecting the Reception Mode
There are two ways you can set up
your machine to handle incoming
calls:
• Fax mode (Auto Receive Mode)
• Tel mode (optional handset or external telephone required)
Reference
p.53 “Reception Modes”, <Basic
Features>
Fax Mode (Auto Receive
Mode)
Receiving a fax in Telephone Mode
A When the machine rings, pick up
the handset.
B If you hear beeps, press the {Start}}
key.
Note
❒ Remove any originals from the
machine before pressing the
{Start}
} key.
4
C Replace
the handset. The machine will start receiving.
When a telephone call comes in, the
machine receives it automatically as a
fax message. Use this setting for a
dedicated fax line.
Telephone Mode
When a call comes in, you have to
pick up the optional handset or external telephone and decide whether the
call is a fax message yourself. If you
hear a voice, continue your conversation as you would using a normal
telephone. If you hear high pitched
beeps, instruct the machine to receive
the fax by following the procedure
below.
Use this setting if you wish to share
the line between the fax machine and
a telephone.
113
Reception Features
Reception Functions
Transfer Station
Transfer Stations allow you to expand
the standard features of your fax machine to set up complex networks.
The diagram below may make the
concept clearer.
End Receiver
Transfer Station
4
Requesting party
Transfer Result Report
End Receiver
End Receiver
GFCYUK0N
The following terminology is used in
this section:
❖ Requesting Party
The machine where the message
originates from, i.e. the machine
making a Transfer Request.
❖ Transfer Station
The machine that forwards the incoming message to another destin a t i on , i. e . th e m a chi n e t h a t
receives the Transfer Request. In
this section this refers to your machine.
❖ End Receiver
The final destination of the message, i.e. the machine that the
Transfer Station sends to. End Receivers must be programmed into
Quick Dial keys, Speed Dials or
Groups in the Transfer Station
(this machine).
114
Preparation
Store the end receiver fax numbers
beforehand in the Transfer Station's Quick Dial keys, Speed Dials
or Groups. See p.63 “Quick Dial”,
<Basic Features>, p.76 “Speed Dial”, <Basic Features> and p.87
“Groups”, <Basic Features>.
You need to program the Requesting Party's fax number in either a
Quick Dial key or Speed Dial of the
Transfer Station's machine (this
machine) beforehand.
Limitation
❒ Polling IDs of the Requesting Party
and Transfer Station must be identical for this feature to work. See
p.199 “Registering ID Codes”.
❒ The return address must be registered with Transfer Station(s) beforehand. See p.202 “Transfer
Report”.
❒ When programming the Requesting Party's fax number in Speed
Dial, only the numbers "000" to
"099" are available even though
Optional Function Upgrade Unit is
installed.
Note
❒ This machine will not receive a
Transfer Request unless it has
enough free memory to store two
or more destinations dialed from
the number keys. See p.46 “Entering Numbers Directly”, <Basic
Features>.
❒ If one of the specified end receivers
is not registered in the Transfer
Station, the transfer is halted.
Reception Functions
❒ If the Requesting Party specifies a
Group for the End Receivers and
the total number of End Receivers
exceeds 250, the Transfer Station
cannot transfer the message and
sends a Transfer Result Report to
the Requesting Party.
Reference
p.28 “Transfer Request”
Transfer Result Report
This reports whether transmission to
the End Receivers was successful or
not.
When the Transfer Station has transferred the message to all End Receivers, it sends the Transfer Result
Report back to the Requesting Party.
The machine prints the report if it
cannot be sent back to the Requesting
Party.
Preparation
You must program the fax number
of the requesting party in a Quick
Dial key or Speed Dial in the
Transfer Station. Also, the return
address of the machine needs to be
registered beforehand. See p.202
“Transfer Report”.
Note
❒ You can set whether a portion of
the document image is printed on
this report with User Parameters.
See p.178 “Us er Para meters”
(switch 04 bit 7).
- Sending the Transfer Result
Report
This machine compares the fax number of the Requesting Party with the
Requesting Party's number programmed in a Quick Dial key or
Speed Dial, and if the last five digits
of the two numbers match, it sends
the Transfer Result report to the Requesting Party.
• Requesting Party's own dial number:
001813-11112222
• Transfer Station's Quick Dial:
03-11112222
4
Multi-step Transfer
The principles of Transfer Stations
can be used to build up a multi-step
facsimile network where messages
are passed through several Transfer
Stations. By programming the End
Receivers in a Transfer Station Group,
you can enable this machine to transfer messages onto other Transfer Stations.
For more information, contact your
service representative.
Reference
p.136 “Multi-step Transfer Group
Settings”
115
Reception Features
Remote Transfer
This feature allows same make or other make fax machines without the
Transfer Request function to perform
transfer requests to this machine.
Preparation
In order for this machine to perform this function, you need to
register the Remote ID, and the
Transfer Result Report return address in the Quick Dial key or
Speed Dial. See p.199 “Registering
ID Codes”, p.63 “Quick Dial”,
<Basic Features> and p.76 “Speed
Dial”, <Basic Features>.
4
Limitation
❒ The requesting party's fax machine
must be able to send out a push
signal.
❒ The Remote Transfer function only
works with the standard and optional G3 line. The optional ISDN
Unit and NIC FAX Unit (Option
for Type1) are not supported.
Note
❒ You can select whether the machine accepts remote transfers or
not with User Parameters. See
p.178 “User Parameters” (switch
11 bit 0).
How to make a Remote Transfer Request
(push signal)
This procedure describes how to
make a Transfer Request to this machine from the requesting party's machine.
Note
❒ To cancel the operation in
progress, press the {q} key twice.
116
A Set
the original and select any
scan settings you require.
B Dial using On Hook Dial, or lift
the handset and dial.
C When the connected line is a dial
line, the machine switches over so
it can send a push signal.
D When
you hear the reception
tone, press the {q} key.
When the remote transfer is accepted, you will hear a confirmation "peeee" tone.
Note
❒ If remote transfer is turned off
on the machine at the other end,
you will not hear a confirmation
tone and the tone mentioned in
step D will continue.
❒ If the Transfer Request is not accepted, for example if memory
is full or the Remote ID has been
wrongly entered 5 times, you
will hear five "pee-po" tones
and the line will be cut off.
E Enter
the 4-digit Remote ID
stored in the Transfer Station,
then press the {q} key.
When you enter the correct ID, you
will hear a "peeee" tone.
Note
❒ If you do not carry out steps E to
J within 30 seconds, the line
will be cut off.
❒ Enter the next tone within 5 seconds. If you wait too long, you
will hear a "pee pee pee" tone
and you must start the whole
procedure again.
Reception Functions
❒ If you enter the wrong Remote
ID 5 times, the line will be automatically cut off, and if you do
not change this machine's Remote ID, remote transfer will
not be accepted. The figure of 5
carries over from previous nonvalid attempts.
❒ If you enter the wrong ID, you
will hear a "pee pee pee" tone. If
this happens, try again.
F Press {2}} {4}} {q}.
G Press the {p} key 3 times. Speci-
fy the Transfer Result Report return address stored in the
Transfer Station using the procedure below, then press the {q}
key.
If the return address is correct, you
will hear a "peeee" tone.
When the Return Address is
Stored in a Quick Dial Key
A Enter the number (001-144) of
the Quick Dial key.
When the Return Address is
Stored in a Speed Dial
A Press the {p} key, then enter
the Speed Dial code (00-99).
Note
❒ If you hear a "pee pee pee"
tone, press the { p } key 3
times and enter the return
address again.
❒ If you keep getting the error
tone, the return address may
not be registered in the Quick
Dial key or Speed Dial you
are specifying.
❒ When the optional Function
Upgrade Unit is installed, enter a Speed Dial code in the
range 000 to 999.
H Specify
the end receiver then
press the {q} key.
If the end receiver is correct, you
will hear a "peeee" tone.
Specifying the End Receiver with
a Quick Dial Key
A Enter the number (001-144) of
the Quick Dial key.
4
Specifying the End Receiver with
a Speed Dial
A Press the {p} key, then enter
the Speed Dial code (00-99).
Note
❒ When the optional Function
Upgrade Unit is installed, enter a Speed Dial code in the
range 000 to 999.
Specifying the End Receiver with
a Group
A Press the {p} key twice, then
enter the Group number (0109).
Note
❒ Specify an end receiver that
has been stored in a Quick
Dial key, Speed Dial or
Group.
❒ If you hear a "pee pee pee
pee" tone, specify the end receiver again.
117
Reception Features
❒ If you keep on getting the error tone, the end receiver
may not be registered in the
Quick Dial key or Speed Dial
you are specifying.
❒ When the optional Function
Upgrade Unit is installed, enter a Group number in the
range 01 to 30.
I Repeat step H for all end receivers.
Note
❒ If you specify 30 end receivers,
the Transfer Request is accepted
and you will hear a "pee pee pee
pee" tone. In this case, proceed
to step K.
4
J Press the {q} key twice.
The Transfer Request is accepted
and you will hear a "pee pee pee
pee" tone.
K When you hear the reception tone
again, press the {Start}
} key.
Your document will be sent.
Remote Transfer with UUI
This function requires the optional ISDN
Unit.
It allows G4 faxes with the UUI feature to make Transfer Requests to this
machine using UUI instead of a push
signal with the same code. See p.83
“UUI”.
Preparation
You need to store the Tone (UUI)
function in a User Function key beforehand. See p.154 “User Function Keys”.
Note
❒ You can specify up to 30 end receivers with UUI.
❒ You can select whether or not the
machine accepts remote transfers
with User Parameters. See p.178
“User Parameters” (switch 11 bit
0).
How to make a Remote Transfer Request
(UUI)
This procedure describes how to
make a Transfer Request to this machine from the requesting party's machine.
A Set
the original and select any
scan settings you require.
B Select G4 then enter the fax number of the Transfer Station.
C Specify the UUI.
Note
❒ On machines of this type, press
the {User Function}
} key assigned
to Tone (UUI) then enter the
UUI.
118
Reception Functions
D Press the {Start}} key.
- Remote Transfer Example
Input
• Destination (Transfer Station) telephone number = 061234567
• Remote ID = 7777
• Transfer Request Result Report return address = Speed Dial 01
• End Receivers = Quick Dial 002,
Speed Dial 03, Group 04
061234567• { q } 7777 { q } 24
{ q } { p } { p } { p } { p } 01
{q} 002 {q} {p} 03 {q} {p}
{p} 04 {q} {q} {q}
(entering the underlined parts as
the UUI)
4
ID Reception
If you wish to limit reception of messages to those from machines of the
same make and with the same Polling
ID, contact your service representative to enable this feature.
Reference
p.199 “Registering ID Codes”
p.94 “ID Transmission”
JBIG Reception
Use this feature to receive messages
sent to you using the high compression protocol known as JBIG (Joint Bilevel Image Experts Group).
Reference
p.102 “JBIG Transmission”
119
Reception Features
Printing Functions
Center Mark
Checkered Mark
When this function is turned on,
marks are printed halfway down the
left side and at the top center of each
page received. This makes it easy for
you to position the hole puncher correctly when you file received messages.
When this function is turned on, a
checkered mark is printed on the first
page of fax messages to help you separate them.
4
Note
❒ You can turn this feature on or off.
See p.178 “Us er Para meters”
(switch 02 bit 1).
❒ If the size of the image or document is smaller than the upper half
of the paper, the left side center
mark is not printed.
❒ The center mark may deviate a little from the exact center of the
edge.
❒ The center mark is not printed
when you use the machine for
making copies.
Note
❒ You can turn this feature on or off.
See p.178 “ Us er P arameters”
(switch 02 bit 4).
Multi-copy Reception
If you switch this feature on, multiple
copies of each incoming fax message
will be printed. You can also choose
to have multiple copies made of messages from particular senders.
GFPBUS0N
120
Printing Functions
Note
❒ Only one set of prints is made
when using the following features:
❒
❒
❒
❒
• Confidential Reception
• Memory Lock Reception
• Polling Reception
You cannot cancel the job in
progress by pressing the { Stop}
}
key.
The maximum number of copies
that can be made of each message
is 9. If you are using Multi-copy
with Specified Senders, the maximum number is 9.
You can switch it on and set the
number of copies with the Multicopy Reception. See p.214 “Multicopy Reception”.
Note that the machine will use
Memory Reception for Multi-copy.
Two In One
When two messages of the same size
and direction are received consecutively, they are printed on a single
sheet when you turn this feature on.
This can help you economize on paper.
• Two A5 K messages are printed
side by side on a sheet of A4 L.
• Two 81/2 × 11 " K messages are
printed side by side on a sheet of
11 × 17" L
4
GFSYUI0N
Reception Time
You can have the date and time when
a message was received printed at the
bottom of the received image.
Note
❒ When a received message is printed on two or more sheets, the date
and time is printed on the last
page.
❒ The date and time of the output is
also printed on the message received with Memory Reception.
❒ You can turn this feature on or off
with User Parameters. See p.178
“User Parameters” (switch 02 bit
2).
Note
❒ This feature does not work with
messages larger than A4 K, or
81/2"×11"K. When 81/2"×11" K
size paper is loaded in the machine, each page of the received
message is output onto a single
sheet.
❒ This feature is not available with
Polling Reception or when copying.
❒ If the sent pages are of different
width, or were sent with different
scan settings, this feature is not
available.
❒ If paper matching the size and direction of a received document is
not available, Two In One is not
possible.
121
Reception Features
❒ This feature is not available when
the Image Rotation function is
turned on. See p.122 “Image Rotation”.
❒ You can turn this feature on or off
with User Parameters. See p.178
“User Parameters” (switch 10 bit
1).
❒ This feature uses Memory Reception.
Image Rotation
4
If you have installed paper in the tray
sideways K, incoming fax messages
will be rotated automatically to fit on
the paper.
❒ This feature uses Memory Reception.
Rotate Sort
When both 81/2"×11"K and
81/2"×11"L copy paper is loaded, A4
size incoming faxes are delivered alternating by message between K and
L directions.
Note
❒ Rotate Sort is available with the
following functions:
your machine
❒
❒
GFKAIR0N
Note
❒ This feature is not available with
Polling Reception.
❒ You can turn this feature on or off
with User Parameters. See p.178
“User Parameters” (switch 10 bit
2).
❒ Two In One setting is disregarded
when this function is turned on.
See p.121 “Two In One”.
❒ The document may be slightly reduced both vertically and horizontally when printed out.
❒ You can choose to have received
messages printed from a specified
tray. See p.220 “Specified Tray”.
122
❒
❒
❒
❒
❒
• Memory Reception
• Substitute Reception
• Confidential Reception
• Memory Lock Reception
• Lists and Reports
This feature is not available with
Polling Reception.
If the Specified Tray function is
turned on, output may not alternate between K and L.
Two In One output is not available.
If the incoming message is wider
than 81/2" and neither 81/2"×11"K
or 81/2"×11"L paper is loaded, this
feature is not available.
When 11"×17" paper is loaded, if
you receive long documents of
81/ 2" width, they are printed on
11"×17" size paper.
Documents may not be printed
with A4 K after the machine exited from Energy Saver Standby
mode. See p.300 “Energy Saving”.
In order to use this function, Image
Rotation needs to be switched on
with User Parameters. See p.178
“User Parameters” (switch 10 bit
2).
Printing Functions
❒ You can turn this function on or off
with User Parameters. See p.178
“User Parameters” (switch 10 bit
4).
Page Separation and Length
Reduction
ABC
2
2
∗
When the size of a received message
is longer than the paper loaded in the
machine, each page of the message
can be split and printed on several
sheets, or reduced and printed on a
single sheet. For example, when
81/2"×11"L paper is loaded, this feature splits the received message if the
excess length is about 90mm (3.6 in.)
or more, and reduces it if the excess
length is within about 90mm (3.6 in.).
When a message is split, the split
mark (p) is inserted at the split position and about 10mm (0.4 in.) of the
split area is duplicated on the top of
the second sheet.
AB BC
(Document)
• Guideline for split (when message is 90mm or 3.6 in. longer
than paper)
❒ You can adjust the overprinting
length and length of reduction
within the following ranges:
• Guideline for split:0 - 155mm (0
- 6.1 in.)
TSI Print
Usually the sender's Fax Header is
printed on received messages. If the
sender has not programmed their Fax
Header, you will not be able to identify them. However, if you turn this
feature on, the sender's Own Name or
Own Fax Number programmed by
the sender is printed instead so you
can find out where the message came
from.
• TSI = Transmitting Subscriber
Identification
4
Note
❒ You can turn this function on or
off with User Parameters. See
p.178 “User Parameters”(switch
02 bit 3).
CIL Print
GFBUNK0N
Note
❒ Your service representative can
customize this feature with the following settings. Bracketed values
are defaults.
• Reduction (on)
• Print split mark (on)
• Overprinting (on)
• Overprinting length (10mm or
0.4 in.)
This function requires the optional ISDN
Unit.
If turned on, this information is printed on every page.
The CIL (Call Identification Line) refers to the combination of the receiver's own fax number, name, the
sender's own fax number and name,
time, and page number.
123
Reception Features
Note
❒ You can turn CIL on and off with
User Parameters. See p.178 “User
Parameters” (switch 02 bit 5).
TID Print
This function requires the optional ISDN
Unit.
If turned on, this information is printed on every page.
The TID (Transmitter ID) refers to the
name registered by the sender in their
fax header.
4
Note
❒ You can turn TID on and off with
User Parameters. See p.178 “User
Parameters” (switch 02 bit 6).
Reference
p.55 “Own Name/Fax Header/Own Fax Number”, <Basic Features>
Adjusting the Printing Density
You can economize on toner by adjusting the image density used when
generating all printed output (Output
Density), or just for incoming faxes,
reports and lists (Toner Saving).
Output density
This setting specifies the image density used for printing incoming faxes,
reports, lists and copies.
Three levels are available: Dark, Normal, and Light.
124
Note
❒ When the machine is shipped, the
default setting is Normal. You can
change this with User Parameters.
See p.178 “ Us er P arameters”
(switch 12 bits 4,3).
Toner saving
Use this feature to save on over 50%
of the toner used for printing incoming faxes, reports and lists.
Limitation
❒ This feature does not apply to copies, or prints made with the printer
option. However, the optional
Printer Interface has its own toner
saving function.
Note
❒ If this feature is turned on, it invalidates the Output Density feature
and image density is fixed at Normal.
❒ When receiving faxes sent using
Photo (Halftone) mode from this
maker's machines, turn Toner Saving off.
❒ When Toner Saving is turned on,
printed images will come out lighter than usual. To check on the image quality, print out the User
Parameter List. See p.189 “Printing
the User Parameter List”.
❒ If the other party sends you a fax
using the Photo (Halftone) mode,
the printed fax image may differ
from the document image.
❒ You can turn Toner Saving on or
off with User Parameters. See
p.178 “User Parameters” (switch
12 bit 2).
When There Is No Paper of the Correct Size
When There Is No Paper of the Correct Size
If there is no paper in your machine that matches the size of a received message,
the machine chooses a paper size based upon the paper you have available. For
example, if your machine has A4 L and 81/2"×11" L loaded and you receive a
A5 K size message, check the A5 K column of the table below. The paper size
at the top has the highest priority. In this case, since 81/2"×11" L is a higher priority than A4 L, the message is printed on 81/2"×11" L.
❖ Priority Table
Reception Size
×
11"×
17"
L
Priority
1
2
81/2"
×14"
L
81/4"
×13"
L,
×1
8"×
3"L
L
A4L
L 81/2"
×11"
L
81/2"
×11"
K
A4K
K B5K
K
81/2"
×14"
L
81/4" A4L 81/2"
×13"
×11"
L,
L
8"×13
"L
81/2"
×11"
K
A4K B4L
A3L 11"×1 A3L 81/4" A4L A4K 81/2"
*1
7"L
×13" *2
×11"
L,
K *1
8"×13
"L *2
81/2"
×11"
L *1
A4L A4K 81/2"
*1
×11"
L
A3L
L B4L
L
11"×1 A3L B4L
7"L
*2
A5K
K
4
A5K
3
81/2"
×11"
M
81/2"
×11"
M
11"×1 A4L A4K 81/2"
*1, 2
7"L *2
×11"
L *2
A4L A4K 81/2"
×11"
K
A4L 81/2"
*1
×11"
K *1
4
81/2"
×11"
LL
81/2"
×11"
LL
81/2"
×11"
M
A4K 81/2"
×11"
L *2
A4K A4L 81/2"
*1
*1
×11"
L *1
81/2"
×11"
K
A4L
*1
*1
A4
M
A4
M
81/4" A3L A3L 81/2"
×13"
×11"
L,
L *1
8"×13
"L
A4K
5
*1, 2
2
81/2"
×11"
LL
81/2"
×11"
L *2
*1
6
81/2"
×11"
K *1,
A4L A4L A4
L *1 L *1 M
81/2"
×11"
K *1,
2
81/2"
×11"
K *1,
2
81/4"
×13"
L,
8"×13
"L
A3L 81/2"
*1, 2
×14"
L
81/2"
×14"
L
*1
11"×1 11"×1 A3L 81/4"
7"L 7"L
×13"
L,
8"×13
"L
125
Reception Features
Reception Size
×
11"×
17"
L
Priority
7
A3L
L B4L
L
81/2"
×14"
L
81/4"
×13"
L,
×1
8"×
3"L
L
A4L
L 81/2"
×11"
L
81/2"
×11"
K
A4K
K B5K
K
A4L A3L 11"×1 A3L 11"×1
7"L *1
7"L
L *1 *1, 2
*1, 2
8
9
11"×1 81/2"
7"L ×14"
*1, 2
L
B4L
B4L
*1, 2
A5K
K
11"×1 81/2"
7"L ×14"
L
11"×1 A3L
7"L *1
11"×1
7"L
*1, 2
*1
B4L
81/2"
×11"
K *2
A3L
10
A3L A3L A3L B4L
A4K
11
11"×1 11"×1 11"×1 A3L
7"L 7"L 7"L
81/2"
×11"
K
12
A5
M
A5
M
A5
M
11"×1
7"L
B4L
13
81/2"
×11"
M
81/2"
×11"
M
81/2"
×11"
M
A5
M
A3L
14
A4
M
A4
M
A4
M
A4
M
11"×1
7"L
4
*1
*1
The printed image is rotated by the Image Rotation function.
*2 The printed image is reduced in size.
Important
❒ The width of document that fax machines can receive is that of 81/2"×11",
81/2"×14", 11"×17", A4, B4 or A3 size. Any document whose width is less than
81/2"×11" or A4 width is sent as 81/2"×11" or A4 with the length unchanged.
Note
❒ The paper size used to print a received message may be different from the size
of the sent original.
❒ M and LL indicate that the message is split over two pages of paper with
the orientation and size shown (Page Separation).
Reference
p.123 “Page Separation and Length Reduction”
p.122 “Image Rotation”
126
5. Copying
Copying
This section describes how to make
copies.
Important
❒ When making multiple copy sets,
copying starts once all originals
have been scanned into memory. If
memory runs out (free memory
reaches 0%) while scanning in, the
c o p y j o b i s ca n c e l e d a n d t h e
scanned data is deleted from memory. However, copying the
scanned original is possible if you
select Stack as the output order for
multiple copying.
Note
❒ Recommended originals are the
same as recommended documents
for fax transmission. Set the original and select any scan settings in
the same way as for fax transmission.
❒ You cannot set the Resolution to
Super Fine in Copy mode. However, you can do so by installing the
Optional 40MB Memory Card and
enabling Super Fine resolution in
Copy mode with User Parameters.
See p.178 “Us er Para meters”
(switch 20 bit 1).
❒ When turning the "EXTRA SUPER
FINE IN TRANSMISSION MODE"
on with User Parameters (switch
20 bit 1), the machine may not be
able to send or receive fax messages using multiple lines, or copy or
print received messages.
❒ In order to use copy paper that you
cannot load in the main paper tray
or optional Paper Tray Unit(s), you
need to install the optional Bypass
Tray Unit. See p.129 “Making Copies on Special Paper”.
❒ You can set the output order of
multiple sets of copies to Sort
(1,2,3,1,2,3) or Stack (1,1,2,2,3,3)
with User Parameters. See p.178
“User Parameters” (switch 09 bit
7).
❒ If you wish to prevent passersby
from freely making copies, you can
disable the copy feature with User
Parameters. See p.178 “User Parameters” (switch 12 bit 7).
❒ There may be slight difference in
the size and quality of printed image between fax transmission and
copy feature.
❒ The margins of error when copying at 100% magnification are as
follows:
• Horizontal: +2.0%, –2.5%
• Vertical: +1.5%, –2.0%
❒ The copying feature is available
only in standby mode. If the machine is in another operation
mode, make it return to standby
mode. See p.25 “Standby Display”,
<Basic Features>.
127
Copying
A Press the {Copy}} key.
The Resolution automatically
changes to Super Fine.
Note
❒ If you press the {Copy}
} key
again, the machine returns to
standby mode.
5
B Set the original.
Note
❒ If the optional Paper Tray
Unit(s) is installed, the machine
searches the paper sources for
copy paper that has the same
width as your original in the following order, and selects the
paper source: main paper tray,
optional Paper Tray Unit(s), optional Bypass Tray Unit. You
can also select which paper
source to be searched first with
User Parameters. See p.178 “User Parameters”(switch 19 bits
7,6,5).
D Press
0 or 1 key to select the
copy paper size.
Note
❒ You cannot select the paper size
i f t h e o p ti o n al P a p er T ray
Unit(s) or optional Bypass Tray
Unit is not installed.
❒ If you choose copy paper smaller than the originals in width,
copied images will be reduced
in size.
❒ If your original is larger in
length than the copy paper you
select, the excess part of the
original image will not be copied.
E If you are making multiple copies, enter the number of copies
with the number keys.
C Select any scan settings as necessary.
Note
❒ You can specify between 1 and
99 copies.
❒ If you incorrectly enter the
number, press the {Clear}
} key or
{Stop}
} key and try again.
128
Copying
F Press the {Start}} key to start copying.
When copying is complete, standby display reappears.
Note
❒ To stop copying while it is in
progress, press the {Stop}
} key.
Then open the ADF cover and
ADF unit and remove any originals that are left inside.
Reference
p.108 “Clearing Original Jams”,
<Basic Features>
Making Copies on Special
Paper
You can make copies on special paper
that cannot be loaded in the main paper tray or optional Paper Tray Unit
by using the optional Bypass Tray
Unit.
Set the copy paper with the printable
side facing down.
You can use the following types of
special paper:
• Paper that weighs between 60 and
90 g/m2 (16 to 24 lb)
• OHP transparencies
• Adhesive labels
• Postcards
Important
❒ If the paper is curled, flatten it before loading in order to avoid paper jams.
Note
❒ You can load paper in the Bypass
Tray Unit up to approximately 100
sheets (81/2"×11" or smaller size),
or 10 sheets (larger than 81/2"×11"
size). Up to 40 postcards can be
loaded.
❒ Load OHP transparencies one
sheet at a time, and remove them
from the paper tray immediately
after copying is complete.
❒ When making copies on OHP
transparencies, an unusual sound
may be emitted depending on the
type of OHP transparency. To
avoid this, place a sheet of quality
paper on top of the OHP transparency when loading.
❒ Load postcards in the landscape
orientation (L).
❒ Postcards that are curled in the
center may cause a paper jam. Be
sure to flatten them before loading.
5
A Press the {Copy}} key.
B Set
the original, and select any
scan settings as necessary.
129
Copying
C Press 0 or 1 key to select the pa-
per size of the optional Bypass
Tray Unit.
❒ You can enter the paper size
in the following range:
• Width: 100 to 297 mm (3.9
to 11.6 in.)
• Length: 148 to 432 mm (5.8
to 17.0 in.)
C Press [OK].
Specifying the Paper Type
Note
❒ You can enter the paper size by
pressing [Custom]. However,
this is possible only when [Custom] is displayed as the paper
size of the optional Bypass Tray
Unit (the size mark is located at
the "p" mark).
❒ You can specify the paper thickness by pressing [Pap.Type].
5
Specifying the Paper Size
A Press [Custom].
B Press 0 or 1 key to select [Horizontal] or Vertical, and enter
the value of the paper size.
Note
❒ Press the {Clear}
} key or
{ Stop}
} key before entering
the value.
130
A Press [Pap.Type].
B Press 0 or 1 key to select the
desired paper type.
Note
❒ Select [Thick] when making
copies on postcards.
C Press [OK].
D If you are making multiple copies, enter the number of copies
with the number keys.
E Press the {Start}} key to start copying.
When copying is complete, the machine returns to standby mode.
6. Facsimile User Tools
Accessing the User Tools
You can utilize fax features in full by accessing the User Tools and storing fax
numbers of destinations or registering often used functions. You can also enable
various functions such as Printing Reports/Lists, User Function Keys or Fax On
Demand.
You can make settings for the functions described in the table below.
The following options are necessary for using functions with the corresponding
number:
*1 NIC FAX Unit (Option for Type1)
*2 Optional Fax On Demand Unit
Function Name
Program/
Delete
Menu
Description
Reference
Allows you to program a fax number
into a Quick Dial key so that you may
specify the destination simply by
pressing the key.
p.63 “Quick Dial”, <Basic Features>
Registering/Editing Allows you to program multiple fax
and Deleting Groups numbers as a group so that you may
easily specify multiple fax numbers as
destinations.
p.87 “Groups”,
<Basic Features>
Registering/Editing
and Deleting Quick
Dials
Registering/Editing
and Deleting Speed
Dials
Allows you to program a fax number p.76 “Speed Dias a Speed Dial destination so that you al”, <Basic Feamay specify the fax number as a desti- tures>
nation simply by pressing the {Speed
Dial}
} key and then the two-digit or
three-digit (when the optional Function Upgrade Unit is installed) Speed
Dial number.
Storing/Editing and
Deleting Keystroke
Programs
Allows you to program a fax number
or a series of key operations that you
regularly use into a Quick Dial key.
p.139 “Storing
and Changing
Keystroke Programs”
Registering/Editing
and Deleting Auto
Documents
Allows you to store a document that
you often use in memory and send or
print it when needed by using a Quick
Dial key.
p.145 “Registering Auto Documents”
Address Template *1
Allows you to program a string of text
to the {★}
} key of Quick Dial. You can
call out the text when entering texts
such as e-mail addresses.
Chapter 6,
"Registering
Texts" in the
NIC FAX Unit
manual
131
Facsimile User Tools
Function Name
Reports/
Lists
Journal
Description
Allows you to print the Journal manu- p.50 “Printing
ally. You can check information about the Journal”
the recent 50 communications (receptions + transmissions).
Quick Dial
Allows you to print the fax numbers
List/Quick Key Label programed into Quick Dial keys to
check the contents. You can also print
labels for Quick Dial keys.
Setup
p.73 “Quick
Dial Key Label
(Dial Label)”,
<Basic Features>
Group Dial List
Allows you to print and check destina- “Retions registered in Groups.
ports/Lists”
Speed Dial List
Allows you to print and check destina- p.149 “Retions programmed in Speed Dial.
ports/Lists”
Keystroke Program
List
Allows you to print and check contents p.149 “Reof Keystroke Programs.
ports/Lists”
Auto Document
Allows you to print and check documents stored in Auto Document.
Monitor Volume
Allows you to adjust the volume of
p.104 “Adjustsounds emitted from the machine's in- ing Volume”,
ternal speaker such as monitoring
<Basic Features>
sounds, the buzzer, or key sound.
Adjusting the
Display Contrast
Allows you to adjust the contrast of the
control panel display.
p.151 “Adjusting the Display
Contrast”
Date/Time
Allows you to set the machine's internal clock to the current time, which is
used for features such as Send Later.
p.151
“Date/Time”
Summer Time/DST
Allows you to advance the machine's
internal clock or set the clock back to
observe the Summer Time.
p.151
“Date/Time”
6
132
Reference
p.149 “Reports/Lists”
Registering Own
Allows you to register information disName and Fax Head- played on the other party's machine or
er
printed on the header of every fax you
send. You can register one Own Name
(Receive Terminal Identification) and
two Fax Headers (TTI).
p.55 “Own
Name/Fax
Header/Own
Fax Number”,
<Basic Features>
Adjusting the
Scanner RGB *1
Allows you to adjust the color balance
for scanning color originals using the
Network Scanner function.
Chapter 5,
"Scanner RGB"
in the NIC FAX
Unit manual
Fax Reset Timer
Allows you to set the duration of time
before the machine automatically returns to standby mode.
p.152 “Fax Reset Timer”
On Hook Timer
Allows you to set the duration of time
before the On Hook status is cleared
when a fax message is sent using On
Hook Dial.
p.153 “On
Hook Timer”
Accessing the User Tools
Function Name
User Function Keys
Fax On
Demand *2
Description
Reference
Allows you to program each of the
User Function keys ({
{ F1}
} to {F10}
})
with a desired function. You can also
assign a function that you often use, so
that multiple key operations may be
performed by pressing one key.
p.154 “User
Function Keys”
Registering and Edit- Allows you to register or edit docuing Fax On Demand ments offered for the fax information
Documents
service.
p.160 “Registering/Editing
Fax On Demand Documents”
Deleting Fax On Demand Documents
Allows you to delete documents regis- p.162 “Deleting
tered for Fax On Demand.
Fax On Demand Documents”
Printing Fax On Demand Documents
Allows you to print documents registered for Fax On Demand.
p.164 “Printing
Fax On Demand Documents”
Printing the Fax On
Demand List
Allows you to print the list of documents registered for Fax On Demand.
p.165 “Printing
the Fax On Demand List”
Printing the Fax On
Demand Access Report
Allows you to check how many times p.165 “Printing
the Fax On Demand documents have the Fax On Debeen sent successfully/unsuccessfully. mand Access
Report”
Fax On Demand Recorded Messages
Allows you to record the message that
the other party hears when he or she
makes a request for the Fax On Demand service.
6
p.166 “Fax On
Demand Recorded Messages”
Note
❒ The numbers that appear with function names on the display vary depending
on which options are installed.
❒ Access the user tools in standby mode. If the machine is in another operation
mode, return it to standby mode. See p.25 “Standby Display”, <Basic Features>.
133
Facsimile User Tools
- About the Display
You can scroll through items by pressing [↑
↑Prev.] or [↓
↓Next].
You can return to the previous menu by pressing [PrevMenu].
Items on the display are highlighted when selected.
Press [OK] when you finish making settings. The settings that you made are
not stored in the machine if you finish the procedure without pressing [OK]
when accessing User Tools.
• When you press [OK] or [Cancel], the settings that you made are stored or canceled, and the machine returns to standby mode.
•
•
•
•
Counters
This function allows you to check the
total number of transmitted, received,
scanned, and printed pages on the
display.
• Transmissions:
Total number of transmitted pages
• Receptions:
Total number of received pages
• Scanning:
The combined total number of
pages that have been scanned in
when copying and sending faxes.
• Printing:
The combined total number of
pages that have been printed
through fax reception, copying,
and PC printing (option).
6
A Press the {User Tools}} key.
134
B Press [Counter].
C When you have checked the total
pages, press [OK].
The totals are displayed.
Press [↑
↑Prev.] or [↓
↓Next] to switch
between page 1 and 2. Page 1
shows the total number of pages
sent and received, page 2 shows
the total number of pages scanned
and printed.
Accessing the User Tools
D Press [Exit] to return to the standby mode.
Selecting the Display
Language
If your native language is Spanish or
French, you can have the messages
that appear on displays, lists and reports shown in either of these languages instead of in English. Follow
the procedure below to change between the three languages.
A Press the {User Tools}} key.
6
B Press [Language].
C Press 0 or 1 key to select the language you wish to use.
D Press [OK].
The language is changed.
135
Facsimile User Tools
Program/Delete Menu
Multi-step Transfer Group
Settings
This procedure describes how to store
a Transfer Station in a Group. Once
set up, this machine can then forward
incoming transfer requests that specify this Group onto the stored Transfer
Station. The destination stored in the
Group becomes the receiving station
(in this case, store 30 or less items in
the Group). Messages sent via multiple Transfer Stations further enhance
the efficiency of the Transfer Request
feature.
Note
❒ For more details, please contact
your service representative.
6
A Press the {User Tools}} key.
B Enter the code for "Fax Features"
with the number keys.
C Enter the code for "Program/Delete" with the number keys.
136
D Enter the code for "Prog. Group
Dial" with the number keys.
E Enter
the number of the Group
you wish to register or edit with
the number keys.
To Check On Currently
Registered Groups
A Press [Status].
B Enter the number of the Group
you wish to register or edit.
Note
❒ If a free Group is not displayed, press [↑
↑Prev.] or [↓
↓Next] to search for one.
❒ If you press [Cancel], the display in step E reappears.
Program/Delete Menu
F Press 0 or 1 key to select "Multistep Group".
G Press [Next].
H Specify the Transfer Station.
Note
❒ You can enter the Transfer Station fax number using a Quick
Dial key, a Speed Dial or the
number keys.
Note
❒ If the optional ISDN Unit or
the optional Extra G3 Interface Unit is installed, you can
choose which line to use before you enter the fax number by pressing the User
Function key ({
{F1}
} to {F10}
})
which the line selection function is stored in.
I Press [Recv. Stn].
6
J Specify the end receiver in one of
the following ways.
❒ If you make a mistake, press the
{ Clear}
} or {Stop}
} key and try
again.
Choosing the line (the {Line
Selection}
} key)
A Press the {Line Selection}
} Key to
select the line.
For details about how to specify an
end receiver, see p.31 “Specifying
an End Receiver”.
Note
❒ Specify the end receiver stored
in the Transfer Station with the
Quick Dial key, Speed Dial or
Group.
❒ The destination specified as the
end receiver is passed to the
Transfer Station and sent to the
number stored in the Transfer
Station.
137
Facsimile User Tools
K Press [Add RcvStn].
Note
❒ If the name is already stored,
it will be shown on the display. To change it, press
{ Clear}
} and enter another
name.
Reference
p.98 “Entering Characters”,
<Basic Features>
Note
❒ If you do not add any end receivers, proceed to step M.
C Press [OK].
D Press [Exit].
L Specify the remaining end receivers in the same way.
M Press [Others].
6
Storing the Group in a Quick Dial
Key
A Enter the code for "Assign
Key" with the number keys.
Registering/Editing the Group
Name
A Enter the code for "Group
Name" with the number keys.
B Press the Quick Dial key you
wish to store the Group in.
B Enter the Group name.
Note
❒ To search for a free Quick
Dial key, press [Status].
❒ If you make a mistake, press
the {Clear}
} key and try again.
C Press [OK].
138
Program/Delete Menu
D Press [Exit].
N Press [OK]
Note
❒ If you press 0 or 1 key, you
can view and check end receivers already stored.
❒ To delete the displayed end receiver, press the {Clear}
} key.
❒ To cancel programming this
Group, press [Cancel]. The display in step E will reappear.
O Press [PrevMenu] three times.
P Press [Exit] to return to the standby mode.
Storing and Changing
Keystroke Programs
If you regularly send messages to a
particular destination or transmit using the same features, you can save a
lot of repetitive keypad operations by
storing these settings in a Keystroke
Program.
Keystroke Programs can then be recalled by just pressing a Quick Dial
key or Speed Dial. The following procedure can be used to program a new
Keystroke Program or overwrite an
old one.
You can register the following items
in Keystroke Programs:
• Memory Transmission, Immediate
Transmission, Send Later, Fax
Header Print, Confidential Transmission, Transfer Request, Polling
Transmission, Free Polling Transmission, Polling Reception, Own
Name/Own Fax Number, Transfer Stations, End Receivers, User
Codes, Confidential IDs, Polling
IDs, SUB Code Transmission with
the Mode Key, SEP Code Polling
Reception, SEP/SUB/PWD/SID
Codes.
• Program name (up to 20 characters)
6
Note
❒ We recommend that you print the
Keystroke Program List and keep it
when you register or change a function. See p.149 “Reports/Lists”.
❒ You cannot register a program in a
Quick Dial key or Speed Dial already used for another function.
❒ Keystroke Programs can only be
stored in Speed Dials when the optional Function Upgrade Unit is installed.
139
Facsimile User Tools
❒ The maximum number of programs you can register is 144 (244
when the optional Function Upgrade Unit is installed).
A Press the {User Tools}} key.
E Press a Quick Dial key or enter
Speed Dial code you wish to register.
Storing the Program in a Quick
Dial Key
A Press the Quick Dial key you
wish to store or edit the program in.
B Enter the number of the "Fax Features" with the number keys.
The "Fax Features" main menu appears.
C Enter the code for "Program/De-
6
lete" using the number keys.
D Enter
the code for "Store Program" using the number keys.
Note
❒ To check which programs are
currently stored, press [Status].
❒ You can also select the Quick
Dial to store the program in
from the status screen.
Storing the program in a Speed
Dial
A Press [Switch].
Note
❒ If "Store Program" is not displayed, press [↑
↑Prev.] or [↓
↓Next]
until it is.
140
Program/Delete Menu
B Enter the code of the Speed
Dial you wish to store or edit
the program in.
Note
❒ To check which programs are
currently stored, press [Status].
❒ You can also select the Speed
Dial to store the program in
from the status screen.
F Press [Feature].
G Carry out the operations you wish
to store in the program.
A Storing Example of Keystroke
Program
The following example describes
the procedure for storing a Keystroke Program of sending a fax
message to a destination whose fax
number is 0123456789 by using the
Send Later function:
A Press
{0}
}{1}
}{2}
}{3}
}{4}
}{5}
}{6}
}{7}
}{8}
}
{9}
}.
B Press [Mode].
C Enter the code for "Send Later"
using the number keys.
D Carry out the operations for
specifying the Send Later function.
Note
❒ If any program is already
stored, the contents of the
program is shown. To edit it,
press the {Clear Modes/Energy
Saver}
} key, and then perform
the procedure for storing a
new program.
6
Reference
p.5 “Sending at a Specific
Time (Send Later)”
H Press [OK].
Note
❒ The storing procedure varies
depending on the contents of
the program.
❒ If you press the {Clear Modes/Energy Saver}
} key, the whole operation is canceled.
141
Facsimile User Tools
I Press [Name].
L Press [OK].
The program is stored.
Note
❒ Storing of program names can
be skipped. If you wish to skip
it, proceed to step L.
J Enter the program name.
Note
❒ If you press [Cancel], the Keystroke Program is canceled and
the display shown in step E appears again.
M Press [PrevMenu] three times.
N Press [Exit] to return to the stand-
6
by mode.
Note
❒ If a program name is already
registered in the Quick Dial key,
the name is shown on the display. If you wish to change the
program name, press the
{Clear}
} key or the {Stop}
} key
and enter another name.
Reference
p.98 “Entering Characters”,
<Basic Features>
K Press [OK]
The function name and program
name are shown on the display.
142
Using a Keystroke Program
Example: Recalling a program containing fax number "0123456789" and
the Send Later function.
A Set the original.
Note
❒ If the destination, resolution,
contrast and/or halftone are not
registered in the program, carry
out these operations now.
Program/Delete Menu
B Select
the Quick Dial key or
Speed Dial with the program
stored in by pressing the Quick
Dial key, or pressing the Speed
Dial key and entering the Speed
Dial code.
Deleting a Keystroke Program
Note
❒ If you delete a program, the registered program name is also deleted.
A Press the {User Tools}} key.
B Enter the code for "Fax Features"
with the number keys.
6
The "Fax Features" main menu appears.
C Press [OK] .
C Enter the code for "Program/Delete" with the number keys.
D Enter
the code for "Delete Program" with the number keys.
Note
❒ If the step right before pressing
the { Start}
} key is also programmed, you can press the
{Start}
} key to complete the operation without pressing [OK].
D Press the {Start}} key.
Note
❒ If "Delete Program" is not displayed, press [↑
↑Prev.] or [↓
↓Next]
until it is.
The machine starts scanning the
document.
The message will be sent at the
specified time.
143
Facsimile User Tools
E Press a Quick Dial key in which
the program you wish to delete is
stored.
F Press [Yes].
The contents of the program are
shown on the display.
Note
❒ If you wish to delete a Keystroke Program stored in a
Speed Dial, press [Switch]. Then
press the {Speed Dial}
} key and
enter the Speed Dial code.
6
G Press [Yes].
The program is deleted.
Checking the Keystroke
Programs Currently Programmed
A Press [Status]
B Press a Quick Dial key or enter
a Speed Dial code.
Note
❒ If you press [No], the program is
not deleted and the display
shown in step E appears again.
H Press [PrevMenu] three times.
I Press [Exit] to return to the standby mode.
Note
❒ If you press [Cancel], the program is not deleted and the
display shown in step E appears again.
144
Program/Delete Menu
Registering Auto Documents
If you find that you often have to send
a particular page to people (for example, a map, a standard attachment, or
a set of instructions), store that page
in memory as an Auto Document.
This saves re-scanning the document
every time you wish to send it.
Use the following procedure to program a new Auto Document or overwrite an existing one.
Important
❒ If the power switch is off more
than 12 hours, all Auto Documents
stored are deleted. In such a case,
use the Power Failure Report to
identify which messages have
been lost.
Programming and Changing an Auto
Document
You can store the following items in
an Auto Document:
• Document image
• Scan settings (Resolution, halftone,
and Image Density)
• Document name (up to 20 characters)
• Label Insert Size
❒ You can store up to 144 Auto Documents. (244 when the optional
Function Upgrade Un it is installed, and the additional 100 out
of 244 are stored in Speed Dial #000
to #099.)
Reference
p.99 “Auto Document”
A Press the {User Tools}} key.
B Enter the code for "Fax Features"
using the number keys.
6
The "Fax Features" main menu appears.
C Enter the code for "Program/Delete" with the number keys.
D Enter
the code for "Prog. Auto
Doc." with the number keys.
Note
❒ Auto Documents can only be
stored in Speed Dials when the
optional Function Upgrade Unit
is installed.
❒ You can only send one Auto Document per transmission.
Note
❒ If "Prog. Auto Doc." is not displayed, press [↑
↑Prev.] or [↓
↓Next]
until it is.
145
Facsimile User Tools
E Press a Quick Dial key or a Speed
Dial that the Auto Document you
wish to store in.
Note
❒ Press [Status] to check the
documents currently stored.
To store an Auto Document in a
Quick Dial key
❒ You can also select the Speed
Dial to store the Auto Document from the status screen.
A Press the Quick Dial key that
you wish to store the Auto
Document in.
F What
Note
❒ Press [Status] to check the
documents currently stored.
6
you do next depends on
whether the Quick Dial key or
Speed Dial has a destination already registered. Choose one of
the following two procedures:
When the destination is not
registered
A Press [Name].
To store an Auto Document in a
Speed Dial
A Press [Switch].
Note
❒ You can skip entering the
name of the Auto Document,
and proceed to step D.
B Enter the name.
B Enter the code of the Speed
Dial you wish to store the Auto
Document in.
Reference
p.98 “Entering Characters”,
<Basic Features>
C Press [OK].
146
Program/Delete Menu
D Press [Label].
J Press
[Exit] to return to standby
mode.
Deleting an Auto Document
E Press 0 or 1 key to select
"Large(1x2)" or "Normal".
Note
❒ You cannot delete an Auto Document waiting to be transmitted.
Delete it after the transmission, or
delete the Auto Document after
deleting the file waiting to be
transmitted.
A Press the {User Tools}} key.
F Press [OK].
When the destination is registered
A Press [Label].
B Enter the code for "Fax Features"
6
using the number keys.
The "Fax Features" main menu appears.
B Press 0 or 1 key to select
"Large(1x2)" or "Normal".
C Press [OK].
G Set the original.
H Press the {Start}} key to scan in the
original.
When scanning has finished, the
Auto Document is stored.
I Press [PrevMenu] three times.
C Enter the code for "Program/Delete" with the number keys.
D Enter the code for "Delete Auto
Doc." with the number keys.
Note
❒ If "Delete Auto Doc." is not displayed, press [↑
↑Prev.] or [↓
↓Next]
until it is.
147
Facsimile User Tools
E Press a Quick Dial key in which
the Auto Document you wish to
delete is stored.
The stored document is shown on
the display.
Note
❒ If you wish to delete an Auto
Document stored in a Speed Dial, press [Switch]. Then press the
{Speed Dial}
} key and enter the
Speed Dial code.
Note
❒ If you select the Quick Dial key
or Speed Dial in which a fax
number is stored, the following
display appears. Even if you
press [Yes], only the attached
Auto Document will be deleted
but not the fax number.
G Press [Yes] to delete the Auto Document.
6
Checking On Stored Auto
Documents
A Press [Status].
B Scroll through the list with
[↑
↑Prev.] or [↓
↓Next].
Note
❒ If you press [No], the Auto Document is not deleted and the
display shown in step E reappears.
H Press [PrevMenu] three times.
I Press [Exit] to return to the standNote
❒ If you press [Cancel], the display in step E appears.
F Press [Yes].
148
by mode.
Reports/Lists
Reports/Lists
This function allows you to print the
following reports and lists manually.
Select a report or list as needed.
• Journal
See p.50 “Printing the Journal”.
• Quick Dial list/Quick Key Label
See p.73 “Quick Dial Key Label
(Dial Label)”, <Basic Features>.
• Group Dial List
See p.87 “Groups”, <Basic Features>.
• Speed Dial List
See p.76 “Speed Dial”, <Basic Features>.
• Keystroke Program List
See p.139 “Storing and Changing
Keystroke Programs”.
• Auto Document
See p.145 “Registering Auto Documents” .
Note
❒ If the optional Paper Supply Unit
is installed, you can set reports and
lists to be printed from a specific
paper tray with User Parameters.
However, once this setting is
made, any fax messages received
cannot be printed from that paper
tray. See p.178 “User Parameters”
(switch 19 bits 2,1,0).
A Press the {User Tools}} key.
B Enter the number of the "Fax Features" using the number keys.
The "Fax Features" main menu appears.
C Enter the code for "Reports/Lists "
with the number keys.
D Enter the code of the report or list
6
you wish to print.
Note
❒ If you cannot see the item you
need, press [↑
↑Prev.] or [↓
↓Next].
❒ If you incorrectly enter the code,
press [Cancel] and enter the correct number.
❒ After selecting "Journal", choose
"All", "File No.", "User Code" or
"Date".
❒ After selecting "Quick Dial List"
choose "Quick Dial List" or "Dial
Label".
❒ After selecting "Speed Dial List"
choose "Speed Dial Order" or
"Alphabetic Order".
149
Facsimile User Tools
E Press the {Start}} key.
When printing is completed, the
display shown in step D appears
again.
Note
❒ If you press the {Stop}
} key before printing starts, the printing
stops and the display shown in
step D appears again.
F Press [PrevMenu] twice.
G Press [Exit] to return to the standby mode.
6
150
Setup
Setup
Adjusting the Display Contrast
Follow these steps to adjust the contrast of the control panel display.
Eight levels of contrast are available.
A Press the {User Tools}} key.
F Press [OK].
Note
❒ If you press [Cancel], the display
in step D reappears.
G Press [PrevMenu] twice.
H Press [Exit] to return to
standby
mode.
Date/Time
B Enter the code for "Fax Features"
with the number keys.
C Enter
the code for "Setup" with
the number keys.
D Enter the code for "Display Contrast" with the number keys.
E Press 0 or 1 key to adjust the
contrast.
Use this function to set your machine's internal clock to the current
time and date. This time is shown on
the display, printed on pages and
used for various features, such as
Send Later.
If the current date and time are
wrong, use this procedure to correct
them.
6
Note
❒ The machine automatically sets the
internal clock one hour ahead
when daylight saving time begins,
and one hour back when it ends.
A Press the {User Tools}} key.
B Enter the code for "Fax Features"
with the number keys.
The "Fax Features" main menu appears.
151
Facsimile User Tools
C Enter
the code for "Setup" with
the number keys.
D Enter
the code for "Date/Time"
using the number keys.
Fax Reset Timer
This machine automatically returns
to standby display if you do not use
the machine for a certain period of
time. You can select this period.
Y ou can sel e ct 3 0 s ec on ds , on e
minute, three minutes, or five minutes for the period.
A Press the {User Tools}} key.
E Select
the month you wish to
change using the [↑
↑ Month ] and
[↓
↓ Month ] and enter the correct
date or time using 0 or 1 key
and the number keys.
B Enter the code for "Fax Features"
with the number keys.
6
The "Fax Features" main menu appears.
C Enter
the code for "Setup" with
the number keys.
Note
❒ Enter the time in 12-hour format. Press [AM/PM] to select AM
or PM.
❒ When you enter a date, the day
is set automatically.
❒ Your machine excepts the date
in 12 hours format.
F Press [OK].
G Press [PrevMenu ] twice.
H Press the [Exit] to return to standby display.
152
D Enter the code for "Fax Reset Timer" with the number keys.
Note
❒ If "Fax Reset Timer" is not displayed, press [↑
↑Prev.] or [↓
↓Next]
until it is.
Setup
E Press 0 or 1 key to select a period of time.
B Enter the code for "Fax Features"
with the number keys.
The "Fax Features" main menu appears.
C Enter
the code for "Setup" with
the number keys.
F Press [OK].
Note
❒ If you press [Cancel], the display
in step D reappears.
G Press [PrevMenu] twice.
H Press [Exit] to return to
D Enter the code for "On Hook Timer" with the number keys.
standby
mode.
6
On Hook Timer
This machine automatically cancels
the On Hook Dial mode if you do not
dial a number from the number keys
for a certain period of time after
pressing the {On Hook Dial}
} key. You
can select this period.
You can select one minute, three minutes, five minutes or ten minutes for
the period.
Note
❒ If "On Hook Timer" is not displayed, press [↑
↑Prev.] or [↓
↓Next]
until it is.
E Press 0 or 1 key to select a period of time.
A Press the {User Tools}} key.
F Press [OK].
Note
❒ If you press [Cancel], the display
in step D reappears.
G Press [PrevMenu] twice.
H Press [Exit] to return to the standby mode.
153
Facsimile User Tools
User Function Keys
You can program each of the User Function keys ({
{F1}
} to {F10}
}) with a function
that you use frequently. When you wish to use that function, instead of having
to search through several menus to find it, just press the appropriate User Function key. This procedure can be used to edit, delete or change the contents of the
User Function keys.
Functions You Can Assign to User Function Keys
The following table lists the functions you can store in the User Function keys
({
{F1}
} to {F10}
}).
6
154
Function Name
Description
Indicator
Reference
Groups
Allows you to specify the destination
using a Group code.
—
p.50 “Using Groups”,
<Basic Features>
Economy
Transmission
Allows you to specify Economy
Transmission.
✓
p.175 “Economy
Transmission”
Fax Header Print
Allows you to make On/Off setting
for Fax Header Print.
✓
p.32 “Fax Header
Print”
Tone
Allows you to enter Tone/UUI.
—
p.47 “Tone”, <Basic
Features>
Batch
Transmission
Allows you to make On/Off setting
for Batch Transmission.
✓
p.105 “Batch Transmission”
Stamp
Allows you to make On/Off setting
for Stamp.
✓
p.93 “Stamp”
Duplex Original
Allows you to scan a duplex original
for transmission.
✓
p.94 “Duplex Original
Settings”
Forwarding
Allows you to make On/Off setting
for Forwarding.
✓
p.223 “Forwarding”
Sub-address *1
Allows you to enter a Sub-address.
—
p.82 “Sub-address”
Dial Option
Allows you to send or receive fax
messages with an ID
(SUB/SEP/SID/PWD).
✓
p.78 “SUB/SID (SUB
Code Transmission)”,
p.80 “SEP/PWD (SEP
Code Polling Transmission)”
Line Selection *1
Allows you to select the telephone
line for transmission.
✓
p.89 “Selecting the
Line”
Journal
Allows you to print the Journal.
—
p.50 “Printing the Journal”
User Function Keys
Function Name
Description
Internet Fax *1
Allows you to enter texts such as an email address.
—
Chapter 2, "Transmission," Chapter 3,
"Transmission" and
Chapter 5, "Using the
Scanner Functions" in
the NIC FAX Unit
manual
Automatic E-mail
Reception *1
Allows you to make On/Off setting
for Automatic E-mail Reception.
✓
Chapter 2, "Automatic
E-mail Reception" in
the NIC FAX Unit
manual
E-mail Reception
Allows you to receive e-mail manually.
—
Chapter 2, "Manual Email Reception" in the
NIC FAX Unit manual
Allows you to enter destinations for
Internet Fax transmissions using the
Scanner function.
✓
Chapter 5, "Using the
Scanner Functions" in
the NIC FAX Unit
manual
Communication
Result Report
Allows you to select whether to print
the Communication Result Report
(Memory Transmission) or Immediate Transmission Result Report (Immediate Transmission).
✓
p.103 “Checking the
Transmission Result”
Reception Mode
Selection
Allows you to select the Reception
Mode.
—
p.53 “Selecting the Reception Mode”, <Basic
Features>
Batch Original
Documents Transmission
Allows you to send a fax message by
using the Batch Original Documents
Transmission function.
✓
p.96 “Batch Original
Documents Transmission”
*1
Scanner
*1
*1
Indicator
Reference
6
Option(s) required
• "✓" mark in the "Indicator" column indicates that the indicator on the User
Function key is lit when the function is selected.
• The following functions are pre-assigned to User Function keys:
{F1}
}: Journal
{F2}
}: Fax Header Print
{F3}
}: Stamp
{F4}
}: Groups
• The following functions are also pre-assigned to User Function keys if your
machine is Type2:
{F5}
}: Internet Fax
{F10}
}: Scanner
Note
❒ You can check the functions assigned to the User Function keys on the "Quick
Dial Key Label (Dial Label)." See p.73 “Quick Dial Key Label (Dial Label)”,
<Basic Features>.
155
Facsimile User Tools
Registering/Editing the
Contents of a User Function
Key
There are two types of programming
methods.
• Programming the contents of a
User Function key by specifying a
function code with the number
keys
• Programming a User Function key
on the job
Note
❒ The function that is already assigned to a User Function key cannot be assigned to another User
Function key.
6
Programming by Specifying a Function
Code with the Number Keys
A Press the {User Tools}} key.
B Enter the number of the "Fax Features".
The "Fax Features" main menu appears.
C Enter
the code for "User Functions" using the number keys.
156
D Press the User Function key ({{F1}}
to {F10}
}) you wish to use.
Note
❒ If you make a mistake, press
[Cancel], and then press the correct key.
Checking the Contents of User
Function Keys Currently
Programmed
A Press [Status].
B Press the User Function key
({
{F1}
} to {F10}
}) you wish to register or edit.
Note
❒ You can also select the User
Function key to store the prog r a m i n f r o m th e s t a t u s
screen.
❒ If you press [OK], the display
in step D appears.
E Enter the code you wish to regis-
ter into the User Function key using the number keys.
User Function Keys
Note
❒ To see a function number not
displayed on the display, press
[↑
↑Prev.] or [↓
↓Next].
❒ If another function is already
registered, press the {Clear}
} key
or the {Stop}
} key to delete it.
The following example procedure describes how to store the time setting
for Send Later in User Function key
{F5}
}.
A Press [Mode].
F Press [OK].
Note
❒ If you press [Cancel], the function is not stored and the display shown in step D appears
again.
❒ If you press another User Function key here, you can register
or edit another function by following the procedure described
above.
G Press [PrevMenu] twice.
H Press [Exit] to return to the stand-
B Enter
the code for "Send Later"
with the number keys.
6
C Press {F5}}.
by mode.
Programming a User Function Key on the
Job
When carrying out an operation from
the control panel, you can store the
various operations that you have performed so far in a User Function key.
Once stored, just press that User
Function key when the standby display is shown to carry out those operations.
Note
❒ You cannot store the following operations in User Function keys:
• User Function settings
• Quick Dial, Speed Dial, Group
Number, File No, Confidential
ID, Memory Lock ID, or Operations carried out after specifying a User Code (SUB code).
D Press [Yes].
{F5}
} is registered and the display
showing the operation in progress
reappears.
157
Facsimile User Tools
Note
❒ The operation you have stored
is shown as "Custom Functions"
on the display.
Using a User Function Key
A Press the User Function key ({{F1}}
Deleting Functions Stored in
User Function Keys
A Press the {User Tools}} key.
B Enter the code for "Fax Features"
with the number keys.
to {F10}
} ) in which the function
you wish to use is stored.
C Enter
the code for "User Functions" with the number keys.
6
The stored function's display is
shown.
❖ Example: "Journal Print"
D Press the User Function key ({{F1}}
to {F10}
}) that you wish to clear.
Note
❒ If you make a mistake, press
[Cancel] and try again.
Checking the currently stored
function
A Press [Status].
158
User Function Keys
B Press the User Function key
you wish to clear.
Note
❒ You can also select the User
Function key to clear from
the status screen.
❒ If you press [OK], the function is not deleted and the
display in step D reappears.
E Press the {Stop}} key to clear the
User Function.
6
F Press [OK].
Note
❒ If you press [Cancel], the function is not deleted and the display in step D reappears.
❒ To clear other User Function
keys, press the User Function
key ({
{F1}
} to {F10}
}) and proceed
as before.
G Press [PrevMenu] twice.
H Press [Exit] to return to the standby mode.
159
Facsimile User Tools
Fax On Demand
This feature requires the optional Fax On Demand unit.
Fax On Demand lets you store documents in memory with a number attached (the box number). When
another party wishes to receive the
message, they make a transmission
request to your machine specifying
the box number containing the document they wish to receive.
Preparation
You can turn this function on or
off. See p.197 “Fax On Demand Reception”.
Note
❒ You can also choose whether the
requesting party has to specify a
password with User Parameters.
The password is the Remote ID.
See p.178 “User Parameters” and
p.199 “Registering ID Codes”.
6
Registering/Editing Fax On
Demand Documents
This procedure describes how to store
a document using Fax On Demand
and assign it a name.
Note
❒ After you have registered or edited
a document, we recommend that
you print the Fax On Demand List
to verify the stored contents. See
p.165 “Printing the Fax On Demand List”.
❒ You can register up to 99 documents with this feature.
❒ For how to edit a box name, see
step G.
❒ If you wish to edit a document, delete it, then register it again. See
p.162 “Deleting Fax On Demand
Documents”.
A Press the {User Tools}} key.
B Enter the code for "Fax Features"
with the number keys.
160
Fax On Demand
C Enter
the code for "Fax On Demand" with the number keys.
F Press [Name].
D Enter the code for "Program FOD"
with the number keys.
G Enter
a name for this box, then
press [OK].
Note
❒ If "Program FOD" is not displayed, press [↑
↑Prev.] or [↓
↓Next]
until it is.
E Enter the box number to store the
6
document in.
To Check Currently Registered
Documents
A Press [Status].
B Enter the box number to store
the document in.
Note
❒ You can also specify the box
number to program from the
status screen.
❒ If a free box number is not
displayed, press [↑
↑Prev.] or
[↓
↓Next] until one is.
❒ If you press [Cancel], the display in step E reappears.
Note
❒ If this name is already registered, it is displayed. To change
the name, press the {Clear}
} key
or the {Stop}
} key and enter it
again.
Reference
p.98 “Entering Characters”,
<Basic Features>
H Set the original.
I Press
the {Start}
} key to scan in
your original.
When scanning has finished, the
document is stored.
J Press [PrevMenu] three times.
K Press [Exit] to return to the standby mode.
161
Facsimile User Tools
Deleting Fax On Demand
Documents
E Enter the number of the box you
wish to delete.
Follow these steps to delete a document stored using Fax On Demand.
A Press the {User Tools}} key.
To check currently registered
documents
B Enter the code for "Fax Features"
A Press [Status].
B Enter the number of the box to
delete.
with the number keys.
C Enter
6
the code for "Fax On Demand" with the number keys.
Note
❒ If "Fax On Demand" is not displayed, press [↑
↑Prev.] or [↓
↓Next]
until it is.
D Enter the code for "Delete FOD"
with the number keys.
162
Note
❒ You can also specify the box
number to delete from the
status screen.
❒ If a free box number is not
displayed, press [↑
↑Prev.] or
[↓
↓Next] until one is.
❒ If you press [Cancel], the display in step E reappears.
If the Box you specified is empty
A The display below appears,
followed by the display shown
in step E. Enter the box number
again.
Fax On Demand
F Choose one of the following pro-
B Press [Yes].
cedures.
Deleting just the document
A Press [Document].
Note
❒ If you press [No], the display
in step E reappears.
B Press [Yes].
Deleting both document and label
A Press [Both].
6
Note
❒ If you press [No], the display
in step E reappears.
B Press [Yes].
Deleting just the label
A Press [Label].
Note
❒ If you press [No], the display
in step E reappears.
G Press [PrevMenu] three times.
H Press [Exit] to return to the standby mode.
163
Facsimile User Tools
Printing Fax On Demand
Documents
To Check Currently Registered
Documents
Follow these steps to print out a document stored using Fax On Demand.
A Press [Status].
B Enter the number of the box to
delete.
A Press the {User Tools}} key.
B Enter the code for "Fax Features"
with the number keys.
C Enter
6
the code for "Fax On Demand" with the number keys.
Note
❒ You can also specify the box
number to print from the status screen.
❒ If a free box number is not
displayed, press [↑
↑Prev.] or
[↓
↓Next] until one is.
❒ If you press [Cancel], the display in step E reappears.
If the Box you specified is empty
Note
❒ If "Fax On Demand" is not displayed, press [↑
↑Prev.] or [↓
↓Next]
until it is.
A The display below appears,
followed by the display shown
in step E. Enter the box number
again.
D Enter
the code for "Print File"
with the number keys.
F Press the {Start}} key.
E Enter the number of the box you
wish to print.
Note
❒ If you press [Cancel], the display
in step E reappears.
164
Fax On Demand
G Press [PrevMenu] twice.
H Press [Exit] to return to the stand-
E Press the {Start}} key.
by mode.
Printing the Fax On Demand
List
A Press the {User Tools}} key.
Note
❒ If you press [Cancel], the display
in step D reappears.
F Press [PrevMenu] twice.
G Press [Exit] to return to the standby mode.
B Enter the code for "Fax Features"
with the number keys.
C Enter
the code for "Fax On Demand" with the number keys.
Note
❒ If "Fax On Demand" is not displayed, press [↑
↑Prev.] or [↓
↓Next]
until it is.
Printing the Fax On Demand
Access Report
Print this report to find out how many
pages have been sent successfully/unsuccessfully with the Fax On
Demand feature.
6
A Press the {User Tools}} key.
B Enter the code for "Fax Features"
with the number keys.
D Enter
the code for "Print List"
with the number keys.
165
Facsimile User Tools
C Enter
the code for "Fax On Demand" with the number keys.
Note
❒ If "Fax On Demand" is not displayed, press [↑
↑Prev.] or [↓
↓Next]
until it is.
D Enter the code for "Access Report"
with the number keys.
Fax On Demand Recorded
Messages
When a caller requests a Fax On Demand document, the machine plays
back appropriate guidance messages.
This section describes how to record
these messages.
Note
❒ You can record the following seven messages, each of which can be
up to 30 seconds long:
Message
Number
Note
❒ If "Access Report" is not displayed, press [↑
↑Prev.] or [↓
↓Next]
until it is.
6
F Press [PrevMenu] twice.
G Press [Exit] to return to the standby mode.
166
Example
1
Greeting
message
"This is the XYZ
fax information
service."
2
Password
input
guidance
"Please enter the
password followed by a #
(pound sign) character."
3
Box number input
guidance
1
"Press # twice to
get box one, or enter the box number
you need followed
by a # character."
4
Box number input
guidance
2
"If you require another box, enter the
number followed
by a # character. To
finish press #
twice."
5
Transmis- "Please press the
sion guid- Start key to begin
ance
transmission."
6
Re-enter
guidance
"Please enter
again."
7
Redial
guidance
"Please dial again."
E Press the {Start}} key.
Note
❒ If you press [Cancel], the display
in step D reappears.
Message
Type
Fax On Demand
❒ By tailoring message 3, you can direct callers to just download the
document stored in box 1, or have
them choose any of up to five boxes.
❒ You can also choose whether a
password is required with User
Parameters. When turned off, message 2 is skipped.
Recording the Fax On Demand Recorded
Messages
Preparation
Before you begin, plug the microphone into the socket provided on
the right side of the machine.
C Enter
the code for "Fax On Demand" with the number keys.
Note
❒ If "Fax On Demand" is not displayed, press [↑
↑Prev.] or [↓
↓Next]
until it is.
D Enter the code for "Record Message" with the number keys.
Note
❒ If "Record Message" is not displayed, press [↑
↑Prev.] or [↓
↓Next]
until it is.
6
E Enter the code for "Record Guidance" with the number keys.
A Press the {User Tools}} key.
F Enter the number of the message
you wish to record with the number keys.
B Enter the code for "Fax Features"
with the number keys.
Note
❒ If the item you require is not
displayed, press [↑
↑Prev.] or [↓
↓Next] until it is.
167
Facsimile User Tools
G Press [Start] then speak the mes-
sage into the microphone.
As you speak, the remaining time
available is shown on the display.
J Press [Exit] to return to the standby mode.
Checking the Fax On Demand Recorded
Messages
A Press the {User Tools}} key.
Note
❒ Each of the messages can be up
to 30 seconds long.
B Enter the code for "Fax Features"
with the number keys.
❒ If there is still time left when
you have finished your message, press [Stop].
6
C Enter
the code for "Fax On Demand" with the number keys.
H Press [OK].
Note
❒ If "Fax On Demand" is not displayed, press [↑
↑Prev.] or [↓
↓Next]
until it is.
D Enter the code for "Record Message" with the number keys.
Note
❒ Press [Replay] to listen to the
message you have just recorded.
I Press [PrevMenu] four times.
168
Note
❒ If "Record Message" is not displayed, press [↑
↑Prev.] or [↓
↓Next]
until it is.
Fax On Demand
E Enter the code for "Confirm Guidance" with the number keys.
F Enter the number of the message
you wish to confirm with the
number keys.
Note
❒ If the item you require is not
displayed, press [↑
↑Prev.] or [↓
↓Next] until it is.
G Listen to the message.
Note
❒ To stop the message being
played, press [Cancel].
H Press [PrevMenu] four times.
I Press [Exit] to return to the standby mode.
How Callers Use Fax On Demand
Note
❒ Callers must wait until messages
have completely finished playing
before pressing a key.
❒ If the password option is turned on
with User Parameters, you need to
inform the calling party of the
password beforehand.
❒ The Remote ID is used as the password.
❒ Callers can request the contents of
up to 5 boxes in one call.
❒ Message 6 (please enter again) is
played when:
• The box number has not been
entered correctly.
• No key press was detected
within 5 seconds after prompting for the box number (message 3).
• The password has not been entered within 5 seconds.
❒ Message 7 (please call again) is
played when:
• The wrong password has been
entered 3 times in a row.
• An empty box has been selected
3 times in a row.
• Message 3 has been played
three times because no key
press was detected.
• Message 6 has been played
twice because no key press was
detected within 5 seconds.
6
169
Facsimile User Tools
When the Password Is Turned On
When the Password Is Turned Off
A Dial using On Hook Dial, or lift
A Dial using On Hook Dial, or lift
the handset and dial.
You will hear message 1, then 2.
B Enter the password with the number keys, then press the {q} key.
You will hear message 3.
Now do one of the following:
To choose one or more boxes
A Enter the box number with the
number keys, then press the
{q} key.
You will hear message 4.
Note
❒ To download another box,
enter the box number, and
then press the {q} key.
6
B Press the {q} key twice.
You will hear message 5.
To choose box 1 only
A Press the {q} key twice.
You will hear message 5.
C Press the {Start}} key to begin receiving.
170
the handset, and then dial.
You will hear message 1.
Now do one of the following:
To choose one or more boxes
A Enter the box number with the
number keys, and then press
the {q} key.
You will hear message 4.
Note
❒ To download another box,
enter another box number,
and then press the {q} key.
B Press the {q} key twice.
You will hear message 5.
To choose box 1 only
A Press the {q} key twice.
You will hear message 5.
B Press the {Start}} key to begin receiving.
7. Key Operator Settings
Accessing the Key Operator Tools
This section describes settings of functions that are mainly managed by key operators, such as various types of ID codes, type of telephone line the machine is
connected to, User Parameters, or destinations for transmissions.
The functions that are available for setting are listed below. Please see the referenced page for more information.
Necessary Options:
*1 Extra G3 Interface Unit
*2
ISDN Unit
*3 Fax On Demand Unit
*4 NIC FAX Unit (Option for Type1)
*5
Paper Tray Unit, or Optional Bypass Tray Unit
*6
Function Upgrade Unit
*7 40MB Memory Card
Function Name
System
Settings
Description
Reference
Economy
Transmission
Allows you to take advantage of off-peak
line rates. Register the off-peak hours.
p.175 “Economy Transmission”
Night Timer
Allows you to register the time for turning on/off the heater of the fusing unit.
You can cut costs by turning the power off
when nobody uses the machine, such as at
night or holidays.
p.176 “Night
Timer”
User
Parameters
Allow you to customize various settings
to match your needs.
p.178 “User Parameters”
User Parameter Allows you to print and check the details
List
of the User Parameter settings.
p.189 “Printing
the User Parameter List”
G3 Analog Line • G3–1 Analog Line
p.189 “G3 AnaAllows you to register Own Fax Num- log Line”
ber, PSTN Line Type, and PSTN Access Number if the machine is
connected to a G3 analog line.
• G3–2 Analog Line *1
Allows you to register Own Fax Number, PSTN Line Type, and PSTN Access Number if the optional Extra G3
Interface Unit is installed.
171
Key Operator Settings
Function Name
System
Settings
Description
Reference
Allows you to register Own Fax Number,
Sub-address, and CSI if the machine is
connected to a G3 digital line.
p.192 “G3 Digital Line”
*2
Allows you to register Own Fax Number,
Sub-address, and G4 Terminal ID if the
machine is connected to a G4 digital line.
p.194 “G4 Digital Line”
Fax On
Demand
Reception *3
Allows you to specify on/off setting for
Fax On Demand function and the reception conditions.
p.197 “Fax On
Demand Reception”
Registering ID
Codes
Allows you to register ID codes for using
the following features: Polling Transmission/Reception, Transfer Request, ID
Transmission/Reception, Confidential
Transmission (Default ID), Confidential
Reception, Remote Transfer, and Fax On
Demand.
p.199 “Registering ID
Codes”
File Retention
Allows you to specify the duration for
which the machine retains the failed
transmission data in memory.
p.201 “File Retention”
Transfer
Report
Register your fax number to have the
Transfer Result Report sent back from the
Transfer Station when making a Transfer
Request.
p.202 “Transfer
Report”
Network
Settings *4
Allows you to make settings for connecting to a network when the NIC FAX Unit
(Option for Type1) is installed.
See Chapter 1,
"Network Settings" in the
NIC FAX Unit
manual.
IP-Fax
Parameters *4
Specify settings for using the IP-Fax func- See Chapter 1,
tion when the NIC FAX Unit (Option for "IP-Fax ParamType1) is installed.
eter Settings" in
the NIC FAX
Unit manual.
System
Parameter
Transmission
Allows you to have information about the p.204 “System
condition of your machine sent automati- Parameter
cally to the nearest service representative. Transmission”
Key Layout
Allows you to select the key layout of
characters assigned to Quick Dial keys.
p.205 “Key
Layout”
Print Position
Allows you to make margin adjustments
if the image positioning varies depending
on the paper tray used when receiving fax
messages or making copies.
p.206 “Print Position”
Memory File
Transfer
Allows you to specify the fax number of
the destination when you wish to transfer
all files stored in memory to another fax
machine and print the data.
p.207 “Memory
File Transfer”
G3 Digital Line
*2
G4 Digital Line
7
172
Accessing the Key Operator Tools
Function Name
System
Settings
Initial Setup
Description
Reference
Deleting
Entries
Allows you to delete a group of ID codes
or destinations programmed into Quick
Dial keys by specifying their type.
p.209 “Deleting Entries”
Reset PM
Counter
Allows you to reset the counter for origi- p.211 “Reset
nals and printed paper when replacing
PM Counter”
the ADF Maintenance Kit or Fusing Maintenance Unit.
Multi-copy
Reception
Allows you to have the machine print
multiple copies of messages from specified senders or messages from senders
other than those you specify.
p.214 “Multicopy Reception”
Authorized
Reception
Allows you to block out fax messages
from specified senders or messages from
senders other than those you specify.
p.217 “Authorized Reception”
Specified Tray
Allows you to specify the paper tray used
for printing fax messages from specified
senders or messages from senders other
than those you specify.
p.220 “Specified Tray”
*5
Forwarding
Allows you to forward incoming fax mes- p.223 “Forsages to the registered destinations. You warding”
can specify different destinations for each
sender.
Memory Lock
Allows you to have the fax messages from p.233 “Memory
specified senders or messages from send- Lock”
ers other than those you specify stored in
memory without printing.
TX/RX File
Save *6 *7
Allows you to turn on or off this function.
You can also register the sender of fax
messages that you wish to receive.
p.236 “TX/RX
File Save Settings”
Backup File
Transmission
Allows you to register the destination that
the machine automatically sends all messages to for backup purposes.
p.243 “Backup
File Transmission Settings”
7
173
Key Operator Settings
Function Name
Box Settings
Description
Reference
Registering/
Editing/
Deleting
Personal Boxes
Allows you to register, edit, or delete Per- p.246 “Personal
sonal Boxes.
Boxes”
Registering/
Editing/
Deleting Information Boxes
Allows you to register, edit, or delete Information Boxes.
p.251 “Information Boxes”
Registering/
Editing/
Deleting
Transfer Boxes
Allows you to register, edit, or delete
Transfer Boxes.
p.254 “Transfer
Boxes”
Printing the
Box List
Allows you to print the Box List.
p.259 “Printing
the Box List”
Note
❒ The code for each function that appears on the display varies depending on
the installed options or function settings.
7
174
System Settings
System Settings
Economy Transmission
Economy Transmission allows you to
take advantage of off-peak rates by
delaying transmission of messages
until a specified time.
Follow the procedure below to specify the Economy Transmission Time
when the phone rates are lower.
Note
❒ You can specify only one Economy
Transmission Time.
❒ You can change the time setting by
entering the new value in step E of
the procedure described below.
Reference
p.5 “Sending at a Specific Time
(Send Later)”
A Press the {User Tools}} key.
B Enter
the code for "Key Op.
Tools" with the number keys.
Then press the {q} key.
C Enter
the code for "System Settings" with the number keys.
D Enter the code for "Economy TX"
with the number keys.
E Press the {Stop}} key or the {Clear}}
key to clear the current timer setting.
F Enter the Economy Transmission
Time with the number keys. To
change AM/PM, press [AM/PM].
7
Note
❒ You can enter any time between
01:00 and 12:59.
❒ If you make a mistake, press the
{Clear}
} key or {Stop}
} key and
enter the correct value.
G Press [OK].
The "Key Op. Tools" main menu
appears.
Note
❒ If you press [Cancel] , the entered time is canceled and the
display shown in step D appears
again.
H Press [PrevMenu] twice.
I Press [Exit] to return to the standby mode.
175
Key Operator Settings
Night Timer
Use this feature to have the machine
turn its heater on and off automatically at the times that you prescribe. For
example, by having the heater turned
off during the night, on holidays or at
other times when you are absent, you
can cut power costs.
Note
❒ You can program the timer to turn
the heater on or off twice daily
over a 1-week cycle.
❒ Received fax messages are stored
in memory (Substitute Reception)
while the heater is turned off and
not printed until the heater comes
back on.
❒ You can edit previous settings for
this feature by following the procedure described below.
❒ You cannot use the PC Printing
function (option) while the heater
is turned off by the Night Timer.
7
A Press the {User Tools}} key.
B Enter
the code for "Key Op.
Tools" with the number keys.
Then press the {q} key.
The "Key Op. Tools" main menu
appears.
176
C Enter
the code for "System Settings" with the number keys.
D Enter the code for "Night Timer"
with the number keys.
E Press 0 or 1 key to select "On".
To turn the timer Off
A Press the arrow key to select
"Off".
B Press [OK].
C Press [PrevMenu] twice, then
press [Exit].
F Press [Set].
System Settings
G Press [↓↓Next] to scroll through the
days of the week and timers (1 or
2).
Note
❒ If you are programming the other timer also for this day of the
week, press [↓
↓Next] to display
the other timer (for example,
"Set 2") and repeat this step.
❒ To set the other timer for another day of the week, press [↓
↓Next]
to display the other timer and
select the day of the week.
K Press [OK].
Note
❒ The days of the week and timers
(1 or 2) are displayed in the following order: Sun. Set 1 → Sun.
Set 2 → Mon. Set 1 → Mon. Set 2
→ Tue. Set 1 → Tue. Set 2 →
Wed. Set 1 → Wed. Set 2 → Thu.
Set 1 → Thu. Set 2 → Fri. Set 1 →
Fri. Set 2 → Sat. Set 1 → Sat. Set 2.
H Press the {Stop}} key to clear the
L Press [OK].
current timer setting.
7
I Enter the time with the number
keys. To change AM/PM, press
[AM/PM]
Note
❒ You can enter any time between
01:00 and 12:59.
❒ If you make a mistake, press the
{Clear}
} key or {Stop}
} key and
enter the correct value.
J Press 0 or 1 key to select wheth-
M Press [PrevMenu] twice.
N Press [Exit] to return to the standby mode.
er to turn the heater on or off at
the set time.
177
Key Operator Settings
Press {Clear Modes/Energy Saver}
} key
to inactivate the Night Timer temporarily and print the received fax messages if there are any.
Then, if no operation is performed for
about 5 minutes, the Night Timer
turns the heater off again.
- The Message Displayed While
the Heater is Turned Off
While the Night Timer is activated
and the heater is turned off, the message "Currently the machine is
in Energy Saver Mode. Press
[Clear Modes/Energy Saver] key
to use functions." appears on the
display.
User Parameters
The User Parameters allow you to customize various settings to match your
needs.
Set the switches of each parameter to a new value to make changes to the settings.
Preparation
Some User Parameters require installation of optional equipment or operations such as turning a function on or off before changing the switch values.
❖ Switches and Bits
Each User Parameter has a set of switches, and each of the switches consists
of eight bits, whose values are "0" or "1". The right most bit is bit 0 and the left
most is bit 7. You can adjust the settings to match your needs by switching the
value of bits between "0" and "1".
7
Switch 00
bit 7
bit 6
bit 5
bit 4
bit 3
bit 2
bit 1
bit 0
0
0
0
0
0
0
0
0
↓
↓
↓
↓
↓
↓
↓
↓
0
1
0
0
0
0
0
0
Note
❒ The diagram above describes the change of setting for bit 6 of switch 00 from
"0" (Memory Transmission) to "1" (Immediate Transmission).
178
System Settings
❖ User Parameter List
Switch
Bits
Item
Available
Settings
Reference
00
0
Stamp home position
1: On
p.93 “Stamp”
0: Off
3,2,1
Image density adjustment
level home position
000: Normal
001: Lighter
010: Darker
5,4
Resolution home position
00: Standard
01: Detail
10: Super Fine
p.44 “Image
Density”, <Basic
Features>
p.42 “Resolution”, <Basic Features>
11: Extra Super
Fine
6
Transmission Mode home
position
1: Immediate
Transmission
0: Memory
Transmission
7
Halftone home position
1: On
0: Off
01
p.29 “Switching
between Memory Transmission
and Immediate
Transmission”,
<Basic Features>
p.44 “Original
Type”, <Basic
Features>
6
Emit a beep when a commu- 1: On
nication is complete
0: Off
p.104 “Adjusting
Volume”, <Basic
Features>
7
Return the machine to the
home settings after each
communication
p.29 “Switching
between Memory Transmission
and Immediate
Transmission”,
<Basic Features>,
p.42 “Resolution”, <Basic Features> and p.44
“Original Type”,
<Basic Features>
1: On
0: Off
7
179
Key Operator Settings
Switch
Bits
Item
Available
Settings
Reference
02
0
Forwarding Mark
1: On
p.223 “Forwarding”
0: Off
1
Center Mark
1: On
0: Off
2
Print RX Time
3
TSI Print
1: On
p.120 “Center
Mark”
0: Off
p.121 “Reception
Time”
1: On
p.123 “TSI Print”
0: Off
4
Checkered Mark
1: On
0: Off
5
*2
6
*2
CIL Print
1: On
0: Off
TID Print
1: On
0: Off
03
7
p.123 “CIL
Print”
p.123 “CIL
Print”
0
Print Communication Re1: On
sult Report (Memory Trans- 0: Off
mission) automatically
p.107 “Communication Result
Report (Memory Transmission)”
2
Print File Reserve Report
1: On
(Memory Transmission) au- 0: Off
tomatically
p.107 “File Reserve Report
(Memory Transmission)”
3
Print File Reserve Report
(Polling Reception) automatically
1: On
p.21 “File Reserve Report
(Polling Reception)”
Print Communication Result Report (Polling Reception) automatically
1: On
4
0: Off
0: Off
p.21 “Communication Result Report (Polling
Reception)”
5
Print Immediate Transmis- 1: On
sion Result Report automat- 0: Off
ically
p.103 “Checking
the Transmission Result”
6
Print Polling Transmission
Clear Report automatically
1: On
p.25 “Polling
Transmission
Clear Report”
Print Journal automatically
1: On
7
0: Off
0: Off
180
p.120 “Checkered Mark”
p.53 “Printing
the Journal”
System Settings
Switch
Bits
Item
Available
Settings
Reference
04
0
Print Confidential File
Report automatically
1: On
p.47 “Confidential File Report”
Print Fax On Demand Access Report automatically
1: On
*3
0: Off
0: Off
p.165 “Printing
the Fax On Demand Access Report”
3
Print failed transmission re- 1: On
sults in the Journal
0: Off
p.103 “Checking
the Transmission Result”
4
Give priority to the information provided by the receiving party when printing the
Receiver's Name on Communication Result Report
(Memory Transmission),
Immediate Transmission
Result Report, Journal, Disk
File Search List/Visual List,
and Error Report
1: Print the Own
Name or Own
Fax Number of
the receiving
fax machine
5
Reduce the size of the Journal when printing it
1: On
Print File Reserve Report
when memory is full or a
paper jam occurred
1: On
1
6
7
p.50 “Printing
the Journal” p.65
“Disk File Search
List/Visual List”
p.107 “Commu0: Print destina- nication Result
tion names pro- Report (Memory Transmisgrammed into
Quick Dial keys sion)” p.103
or Speed Dials, “Checking the
or the fax num- Transmission
ber that you en- Result” p.264
“Error Report”
tered
0: Off
0: Off
Print a portion of image on 1: On
File Reserve Report, Com0: Off
munication Result Report,
Communication Failure Report, Polling Transmission
Clear Report, and Transfer
Result Report
7
p.53 “Printing
the Journal”
p.107 “File Reserve Report
(Memory Transmission)”
p.25 “Polling
Transmission
Clear Report”
p.107 “File Reserve Report
(Memory Transmission)” p.107
“Communication Result Report (Memory
Transmission)”
p.103 “Checking
the Transmission Result”
p.115 “Transfer
Result Report”
181
Key Operator Settings
Switch
Bits
Item
Available
Settings
Reference
05
0
Substitute Reception
1: On
p.111 “Substitute
Reception”
0: Off
1
Condition for Substitute
Reception
1: If Own Name
or Own Fax
Number is received
p.111 “Substitute
Reception”
0: All incoming
fax messages
3
5,4
High Temperature Standby
mode
Restricted Access
1: On
0: Off
00: Off
01: On
10: On when the
Night Timer is
on
7,6
Energy Saver mode
00: Energy Saver Standby
mode
p.300 “Energy
Saving”
p.25 “Restricted
Access”, <Basic
Features>
p.300 “Energy
Saving”
01: Fax Standby
mode
7
06
0
Print the Fax Header or CIL
on messages at the other
end
1: On
ID Transmission
1: On
*2
2
0: Off
0: Off
3 *2
4
Send the Fax Header with
G4 transmission
1: On
Batch Transmission
1: On
0: Off
0: Off
6
SPID (Own Fax Number 2)
1: On
0: Off
07
2
3
Parallel Memory Transmission
1: On
Auto Reduction
1: On
0: Off
0: Off
182
p.32 “Fax Header Print” p.123
“CIL Print”
p.94 “ID Transmission”
p.32 “Fax Header Print”
p.105 “Batch
Transmission”
p.192 “G3 Digital
Line” p.194 “G4
Digital Line”
p.105 “Parallel
Memory Transmission”
p.93 “Auto Reduction”
System Settings
Switch
Bits
Item
Available
Settings
Reference
08
1,0
Multi-copy Reception
00: Off
p.214 “Multicopy Reception”
01: Copy messages from
specified senders
11: Copy messages from
senders other
than those you
specify
3,2
Authorized Reception
00: Off
01: Receive
messages from
specified senders
p.217 “Authorized Reception”
11: Receive
messages from
senders other
than those you
specify
5,4 *4
Specified Tray Selection
00: Off
01: Messages
from specified
senders
p.220 “Specified
Tray”
7
11: Messages
from senders
other than those
you specify
7,6
Forwarding
00: Off
01: Forward
messages from
specified senders
p.223 “Forwarding”
11: Forward
messages from
senders other
than those you
specify
183
Key Operator Settings
Switch
Bits
Item
Available
Settings
Reference
09
1,0
Memory Lock
00: Off
p.233 “Memory
Lock”
01: Messages
from specified
senders
11: Messages
from senders
other than those
you specify
3,2 *6
TX/RX File Save
00: Off
01: Store messages from
specified senders
p.236 “TX/RX
File Save Settings”
11: Store messages from
senders other
than those you
specify
7
10
4
Store fax documents for the 1: Enable
Memory Transmission
0: Disable
while using the Manual Dial
function
p.88 “Manual
Dial”
5
Forwarding function for
1: On
messages intended for Spec- 0: Off
ified Senders (messages intended for receivers other
than those you specified if
the setting for switch 08 bits
7,6 is "11") that are not registered with a forwarding
destination
p.223 “Forwarding”
6
1: On
Requires the user to press
[Add] when specifying desti- 0: Off
nations using Quick Dial
keys successively
p.49 “Using
Quick Dials”,
<Basic Features>
7
The output order of multiple sets of copies when using the Copying feature
1: Stack
p.127 “Copying”
Two in One
1: On
1
0: Sort
0: Off
2
Image Rotation
1: On
0: Off
4
Rotate Sort
1: On
0: Off
184
p.121 “Two In
One”
p.122 “Image
Rotation”
p.122 “Rotate
Sort”
System Settings
Switch
Bits
Item
Available
Settings
Reference
10
5 *5
Use the optional Bypass
Tray Unit exclusively for PC
Printing
1: On
—
Halftone Mode
1: Speed Mode
7
0: Off
0: Standard
Mode
11
0
Transfer Request
1: On
0: Off
1
*2
2
6
7
p.44 “Original
Type”, <Basic
Features>
p.28 “Transfer
Request”
Selection of tone (PB) or
UUI after tone (·)
1: PB
Alarm for Blank Sheet Detect function
1: On
Print Forwarded Messages
Locally
1: On
Polling Files After Transmission
1: Store in mem- p.22 “Polling
ory
Transmission”
0: UUI
0: Off
0: Off
p.47 “Tone”,
<Basic Features>
p.101 “Blank
Sheet Detect”
p.223 “Forwarding”
0: Delete after
transmission
12
2
4,3
Toner Saver Mode
Print Image Density
1: On
0: Off
p.124 “Toner
saving”
00: Normal
—
7
01: Lighter
10: Darker
7
Copying
1: Disable
p.127 “Copying”
0: Enable
13
1,0
3,2 *1
5 *2
6 *2
Use the main G3 line as an
internal PABX or an outside
line
01: PABX
Use the second G3 line as an
internal PABX or an outside
line
01: PABX
Respond to a transmission
without Own Fax Number
when your Own Fax Number for ISDN is registered
1: Off
Respond to a transmission
received through an ISDN
PBX unconditionally
1: On
00: Outside line
00: Outside line
0: On
0: Off
p.189 “G3 Analog Line”
p.189 “G3 Analog Line”
p.192 “G3 Digital
Line” p.194 “G4
Digital Line”
p.89 “Selecting
the Line”
185
Key Operator Settings
Switch
Bits
Item
19
2,1,0 *4 or *5 The paper tray used for
printing Reports
Available
Settings
Reference
000: Not specified
p.50 “Printing
the Journal”
p.149 “Reports/Lists”
001: Main paper
tray
010: Optional
Paper Tray Unit
(tray 2)
011: Optional
Paper Tray Unit
(tray 3)
100: Optional
Paper Tray Unit
(tray 4)
101: Optional
Paper Tray Unit
(tray 5)
111: Optional
Bypass Tray
Unit
7,6,5 *4 or *5 The paper tray selected automatically when an original is set for making copies
7
001: Main paper
tray
010: Optional
Paper Tray Unit
(tray 2)
011: Optional
Paper Tray Unit
(tray 3)
100: Optional
Paper Tray Unit
(tray 4)
101: Optional
Paper Tray Unit
(tray 5)
111: Optional
Bypass Tray
Unit
186
p.127 “Copying”
System Settings
Switch
Bits
Item
Available
Settings
Reference
20
1*7
Selection of "Ex. Super Fine"
resolution for Copying
1: Enable
p.127 “Copying”
Selection of "Ex. Super Fine"
resolution for transmission
1: Enable
Selection of "Ex. Super Fine"
resolution for reception
1: Enable
Scanner Cleaning function
1: On
2
3*7
4
0: Disable
0: Disable
0: Disable
0: Off
5
7
Use the User Code (name of
the Personal Box) as the Fax
Header
Scanner Cleaning Message
1: On
0: Off
1: Display
0: Not display
21
31
0 *2
7,6
The line selected when you
press the {On Hook Dial}
} key
1: ISDN
0: PSTN
Duration of time before the 00: 15 min.
machine exits High Tem01: 30 min.
perature Standby Mode af10: 60 min.
ter a printing job is complete
11: 120 min.
p.42 “Resolution”, <Basic Features>
p.42 “Resolution”, <Basic Features>
p.101 “Scanner
Cleaning Message”
p.32 “Fax Header Print”
p.101 “Scanner
Cleaning Message”
p.86 “Using On
Hook Dial with
ISDN”
p.300 “Energy
Saving”
7
Necessary Options:
*1 Extra G3 Interface Unit
*2 ISDN Unit
*3
Fax On Demand Unit
*4
Paper Tray Unit
*5 Bypass Tray Unit
*6
Function Upgrade Unit and Optional 40MB Memory Card
*7
40MB Memory Card
Limitation
❒ When setting User Parameters (switch 20 bits 1, 2, 3) for "Enable", the machine may not be able to send or receive fax messages using multiple lines,
or copy or print the received fax messages.
187
Key Operator Settings
How to Set User Parameters
This section describes how to set User
Parameters, using transmission mode
as an example. To change the transmission mode from Memory Transmission to Immediate Transmission,
you need to change the bit 6 of switch
00 from 0 to 1.
D Enter the code for "User Parameters" with the number keys.
E Make sure that switch 00 is displayed.
Important
❒ Do not change any bit switches
other than those listed in the previous section.
Note
❒ You can print the User Parameter
List to check the current settings.
However, only the items of much
importance or the items that you
often use are included in the list.
See p.189 “Printing the User Parameter List”.
Note
❒ To show other switches, press
[↑
↑Switch] or [↓
↓Switch].
F Press number key {6}} to change
the value of bit 6 to 1.
A Press the {User Tools}} key.
7
B Enter
the code for "Key Op.
Tools" with the number keys.
Then press the {q} key.
Note
❒ Each time you press number
key {6}
}, the value switches between 1 and 0.
G Press [OK].
The "Key Op. Tools" main menu
appears.
C Enter
the code for "System Settings" with the number keys.
188
System Settings
Note
❒ If you press [Cancel], the display
in step D reappears.
❒ The bits are displayed in ascending order from right to left,
the right most bit being bit 0.
❒ Some items use multiple bits for
their settings such as "Image
density adjustment level."
D Enter
the code for "Prt. User
Param." with the number keys.
E Press the {Start}} key to print the
list.
H Press [PrevMenu] twice.
I Press [Exit] to return to the standby mode.
Printing the User Parameter
List
Print the User Parameter List manually to check the current User Parameter settings.
A Press the {User Tools}} key.
Note
❒ If you press [Cancel] before
printing starts, the printing
stops and the display shown in
step D appears again.
F Press [PrevMenu] twice.
G Press [Exit] to return to the standby mode.
7
G3 Analog Line
B Enter
the code for "Key Op.
Tools" with the number keys.
Then press the {q} key.
The "Key Op. Tools" main menu
appears.
C Enter
the code for "System Settings" with the number keys.
You need to make settings for the G3–
1 Analog Line before you connect the
machine to a standard G3 analog line,
and for the G3–2 Analog Line to connect to a G3 analog line by installing
the optional Extra G3 Interface Unit.
❖ G3–1 Analog Line
• Own Fax Number (CSI) (up to
20 digits)
Register an international identification number as your Own
Fax Number (Called Station
Identification), which is passed
to the other party when you
send or receive a fax.
• PSTN Line Type
Select whether the connected
line uses tone or pulse dialing.
189
Key Operator Settings
• PSTN Access Number
Use this setting if your machine
is connected to a PBX that requires you to dial certain number such as "0" followed by a
pause to connect to the outside
line. By registering "0" as the
PSTN Access Number, a pause
will be inserted automatically
after the "0" when dialing.
❖ G3–2 Analog Line
• Own Fax Number (CSI) (up to
20 digits)
Register an international identification number as your Own
Fax Number (Called Station
Identification), which is passed
to the other party when you
send or receive a fax.
• PSTN Line Type
Select whether the connected
line uses tone or pulse dialing.
• PSTN Access Number
Use this setting if your machine
is connected to a PBX that requires you to dial certain number such as "0" followed by a
pause to connect to the outside
line. By registering "0" as the
PSTN Access Number, a pause
will be inserted automatically
after the "0" when dialing.
7
Note
❒ The Own Fax Number (CSI) is
passed to the other party when
you send or receive a fax. When
the Own Fax Number is received,
it is shown on the display or printed on reports on the receiver's or
sender's machine. The Own Fax
Number works even if the receiver
or sender uses a different make of
machine.
190
A Press the {User Tools}} key.
B Enter
the code for "Key Op.
Tools" with the number keys.
Then press the {q} key.
The "Key Op. Tools" main menu
appears.
C Enter
the code for "System Settings" with the number keys.
D Enter
the code for "G3 Analog
Line" with the number keys.
Note
❒ If "G3 Analog Line" is not displayed, press [↑
↑Prev.] or [↓
↓Next]
until it is.
E Enter
the code for either "G3-1
Analog Line" or "G3-2 Analog
Line" with the number keys.
System Settings
Note
❒ "G3-2 Analog Line" appears
only when the optional Extra
G3 Interface Unit is installed.
The setting procedure is the
same for both lines.
F Depending
on the setting you
wish to register, use one of the
following procedures:
Registering Own Fax Number
A Enter the code for "Own Fax
Number" with the number
keys.
B Enter your Own Fax Number.
Note
❒ The Own Fax Number (CSI)
can contain a plus sign (+),
numbers and spaces. Register your country code, area
code (minus the leading zero) and your fax number in
that order.
C Press [OK].
B Press 0 or 1 key to select a
PSTN line type.
C Press [OK].
Registering a PSTN Access
Number
A Enter the code for "PSTN Access No." with the number
keys.
Note
❒ The PSTN Access Number
function is not available for
On Hook Dialing, while the
optional Handset is off the
hook, or when dialing using
the external telephone.
7
B Enter PSTN Access Number
with the number key.
Note
❒ You can enter a number between 0 and 9, or 00 and 99.
Selecting a PSTN Line Type
A Enter the code for "PSTN Line
Type" with the number keys.
191
Key Operator Settings
C Press [OK].
Note
❒ If you are making settings for
the "G 3–1 A n a lo g L in e ,"
change the setting for the
standard G3 line to PABX
with User Parameters after
registering the PSTN Access
Number. See p.178 “User Parameters” (switch 13 bits 1,0).
❒ If you are making settings for
the "G 3–2 A n a lo g L in e ,"
change the setting for the second G3 line to PABX with
User Parameters after registering the PSTN Access
Number. See p.178 “User Parameters” (switch 13 bits 3,2).
G Press [PrevMenu] four times.
H Press [Exit] to return to the standby mode.
7
G3 Digital Line
This function requires the optional ISDN
Unit.
192
The following settings are available
for G3 communications over ISDN:
• Own Fax Number 1
E nter the n umber of th e line
(PSTN) the machine is connected
to.
• SPID (Own Fax Number 2)
Enter the second fax number if you
are using two numbers for one
line.
• Sub-address
See p.82 “Sub-address”.
• Own Fax Number (CSI) (maximum 20 characters)
Enter Own Fax Number (Called
Station Identification) that is transferred to the other party during
transmission or reception.
Note
❒ Before storing the sub-address,
store the Sub-address function in a
User Function key. See p.154 “User
Function Keys”.
❒ Own Fax Number (CSI) is an international identification number
that is transferred to the other party during transmission or reception. This information appears on
the display of the other party's fax
machine and is printed on their
lists and reports. The Own Fax
Number (CSI) feature works with
other manufacturer's fax machines
that support this feature.
❒ After registering the Own Fax
Number 1 or 2, you can make settings so that the machine does not
respond to incoming faxes that do
not send their Own Fax Numbers
with User Parameters. See p.178
“User Parameters” (switch 13 bit
5).
Reference
p.89 “Selecting the Line”
A Press the {User Tools}} key.
B Enter
the code for "Key Op.
Tools" with the number keys.
Then press the {q} key.
System Settings
C Enter
the code for "System Settings" with the number keys.
Registering your SPID (Own Fax
Number 2)
A Enter the code for "SPID" with
the number keys.
D Enter
the code for "G3 Digital
Line" with the number keys.
B Enter the fax number.
Note
❒ If "G3 Digital Line" is not displayed, press [↑
↑Prev.] or [↓
↓Next]
until it is.
E Depending
Note
❒ If your fax number is 123–
456–7890, enter "1234567890."
on the setting you
wish to register, use one of the
following procedures:
C Press [OK].
Registering your Own Fax
Number 1
A Enter the code for "Sub-address" with the number keys.
Registering the Sub-address
7
A Enter the code for "Own Fax
Number 1" with the number
keys.
B Enter the sub-address (4–digit
number).
B Enter the fax number.
C Press [OK].
Note
❒ If your fax number is 123–
456–7890, enter "1234567890."
C Press [OK].
193
Key Operator Settings
Registering the Own Fax Number
(CSI)
A Enter the code for "Own Fax
No.(CSI)" with the number
keys.
B Enter the Own Fax Number
(CSI).
Note
❒ Own Fax Number (CSI) can
contain a plus sign (+), numbers and spaces. Register
your country code, area code
(minus the leading zero) and
your fax number in that order.
C Press [OK].
7
F Press [PrevMenu] three times.
G Press [Exit] to return to the standby mode.
G4 Digital Line
This function requires the optional ISDN
Unit.
Register these settings before connecting to the ISDN. You can store the
following items:
• Own Fax Number 1
Enter the number of the line (ISDN) the machine is connected to.
• SPID (Own Fax Number 2)
Enter the second fax number if you
are using two numbers for one
line.
• Sub-address
See p.82 “Sub-address”.
• G4 Terminal ID (TID) (maximum
22 characters)
The G4 Terminal ID (TID) feature
is available only when you are subscribed to an ISDN service. TID is
printed on the fax message received on the other end when you
perform G4 transmission with ISDN.
Note
❒ Before storing the sub-address,
store the Sub-address function in a
User Function key. See p.154 “User
Function Keys”.
❒ Contact your service representative when you register or change
the sub-address.
❒ The G4 Terminal ID (TID) consists
of your country code, Own Digital
Number (fax number) and Terminal Name, and is registered in that
order. Company names are normally used as Terminal Names.
194
System Settings
❒ After registering Own Fax Number 1 or 2, you can make settings so
that the machine does not respond
to incoming faxes that do not send
their Own Fax Numbers with User
Parameters. See p.178 “User Parameters” (switch 13 bit 5).
Reference
p.89 “Selecting the Line”
A Press the {User Tools}} key.
E Depending
on the setting you
wish to register, use one of the
following procedures:
Registering your Own Fax
Number 1
A Enter the code for "Own Fax
Number 1" with the number
keys.
B Enter the fax number.
B Enter
the code for "Key Op.
Tools" with the number keys.
Then press the {q} key.
Note
❒ If your fax number is 123–
456–7890, enter "1234567890."
The "Key Op. Tools" main menu
appears.
C Enter
the code for "System Settings" with the number keys.
7
C Press [OK].
Registering Your SPID (Own Fax
Number 2)
A Enter the code for "SPID" with
the number keys.
D Enter
the code for "G4 Digital
Line" with the number keys.
B Enter the fax number.
Note
❒ If "G4 Digital Line" is not displayed, press [↑
↑Prev.] or [↓
↓Next]
until it is.
Note
❒ If your fax number is 123–
456–7890, enter "1234567890."
C Press [OK].
195
Key Operator Settings
Registering the Sub-address
F Enter the Own digital Number
with the number keys.
A Enter the code for "Sub-address" with the number keys.
B Enter the sub-address (4–digit
number).
Note
❒ Make sure to store Own Digital Number.
G Press [OK].
H Enter the code for "Terminal
Name" with the number keys.
C Press [OK].
Registering the G4 Terminal ID
I Enter the Terminal Name.
A Enter the code for "G4 Terminal ID" with the number keys.
7
B Enter the code for "Country
Code" with the number keys.
C Enter your country code with
the number keys.
D Press [OK].
E Enter the code for "Own Digital No." with the number keys.
Reference
p.98 “Entering Characters”,
<Basic Features>
J Press [OK].
Note
❒ If the entered TID's total
number of characters (country code + Own Digital Number + Terminal Name)
exceeds 22, a message appears asking you to enter the
TID in 22 characters or less,
and then the screen shown in
step I is displayed. Enter a
new Terminal Name, so that
your TID's total number of
characters is within the limit.
K Press [PrevMenu].
F Press [PrevMenu] three times.
G Press [Exit] to return to the standby mode.
196
System Settings
Fax On Demand Reception
D Enter
the code for "Fax On Demand" with the number keys.
This feature requires the optional Fax On
Demand Unit.
You can turn the Fax On Demand
function on or off, set the password
(whether the calling party needs to
specify the password) or select the
line type for the reception.
Note
❒ The Remote ID is used as the password. See p.199 “Registering ID
Codes”.
Note
❒ If "Fax On Demand" is not displayed, press [↑
↑Prev.] or [↓
↓Next]
until it is.
E Press 0 or 1 key to select "On
(with ID)," "On (without ID)," or
"Off."
Reference
p.160 “Fax On Demand”
A Press the {User Tools}} key.
B Enter
the code for "Key Op.
Tools" with the number keys.
Then press the {q} key.
The "Key Op. Tools" main menu
appears.
C Enter
the code for "System Settings" with the number keys.
7
Note
❒ To require the calling party to
specify the password, select "On
(with ID)," and select "On (without ID)" if you do not require a
password.
❒ The Remote ID is used as the
password. See p.199 “Registering ID Codes”.
F Press [Recept.] if you wish to set
the line type for the reception.
Proceed to step L if you are not
specifying the line type.
197
Key Operator Settings
G Press 0 or 1 key to select "By
port".
Note
❒ The following screen is displayed if the optional Extra
G3 Interface Unit is installed:
B Press [OK].
H Press [Port].
Selecting an ISDN Line
A Press 0 or 1 key to select "By
line".
I Enter the code for the line type
with the number keys.
7
B Press [Indial], then select the
own fax number.
Note
❒ "ISDN" appears only when the
optional ISDN Unit is installed.
Selecting a PSTN Line
A Press 0 or 1 key to select the
line.
Note
❒ To set the fax number for Indial, press [Indial] and select
the fax number for reception.
Then press [OK].
C Press [OK].
198
System Settings
J Press [PrevMenu].
Registering ID Codes
ID codes are required when using
transmission modes such as Polling
Transmission or Confidential Messages.
Register the following types of ID
code before using the transmission
modes:
K Press [OK].
L Press [OK].
M Press [PrevMenu] twice.
N Press [Exit] to return to the standby mode.
❖ Confidential ID
This ID is usually required for
printing a message received with
the Confidential Reception feature.
See p.46 “Printing a Confidential
Message”.
❖ Polling ID
This ID is required for using the
Transfer Request (See p.28 “Transfer Request”.) , Transfer Station
(See p.114 “Transfer Station”.), Default ID Polling Transmission (See
p.22 “Polling Transmission” .), Default ID Polling Reception (See
p.19 “Polling Reception”.), ID
Transmission (See p.94 “ID Transmission”.), and the ID Reception
(See p.119 “ID Reception”.) functions. When using the ID Transmission feature, register the same
Polling ID as the other party does.
7
❖ Memory Lock ID
This ID is required for printing a
message received using the Memory Lock feature. Register this ID
when you specify the destinations
for Memory Lock. See p.48 “Printing a Memory-locked Message”.
❖ Remote ID
Register the ID that is used for the
Remote Transfer Request and Fax
On Demand feature. See p.116
“Remote Transfer” and p.160 “Fax
On Demand”.
199
Key Operator Settings
Note
❒ You can check the registered ID
codes on the User Parameter List.
It is recommended that you print
and keep the list after you register
or edit IDs. See p.189 “Printing the
User Parameter List”.
❒ You cannot receive faxes with the
Confidential Reception feature
without registering the Confidential ID beforehand.
❒ A Polling ID can be any combination of four digits (0 - 9) or letters
(A - F) except for 0000 and FFFF.
❒ A Confidential ID and Memory
Lock ID can be any four digit numeric code except for 0000.
❒ You can edit the IDs already registered in the machine following the
same procedure for registering a
new ID. When editing a registered
ID, the current ID is displayed on
the screen. Press the {Clear}
} key or
the {Stop}
} key and enter the new
ID.
7
Registering
Follow the procedure described below to register ID codes:
B Enter
the code for "Key Op.
Tools" with the number keys.
Then press the {q} key.
The "Key Op. Tools" main menu
appears.
C Enter
the code for "System Settings" with the number keys.
D Enter the code for "ID Code" with
the number keys.
Note
❒ If "ID Code" is not displayed,
press [↑
↑Prev.] or [↓
↓Next] until it is.
E Enter the code for "Confidential
ID" with the number keys.
Example: Registering the
Confidential ID
A Press the {User Tools}} key.
F Enter the Confidential ID (4–digit
number).
Note
❒ If you enter the code incorrectly,
press the { Clear}
} key or the
{Stop}
} key and enter the correct
code.
200
System Settings
G Press [OK].
B Enter
the code for "Key Op.
Tools" with the number keys.
Then press the {q} key.
The "Key Op. Tools" main menu
appears.
Note
❒ To register other ID codes, repeat the procedure from step E.
C Enter
the code for "System Settings" with the number keys.
H Press [PrevMenu] three times.
I Press [Exit] to return to the standby mode.
File Retention
The File Retention function allows
you to have the fax file/document retained in memory if a connection
could not be made to the other party
during a Memory Transmission (even
though the number was redialed the
stipulated number of times). This
function is activated when it is set to
either "24 hours" or "72 hours."
If a file/document is stored in memory, you can easily send it without having to scan it in again.
D Enter the code for "File Retention"
with the number keys.
7
Note
❒ If "File Retention" is not displayed, press [↑
↑Prev.] or [↓
↓Next]
until it is.
E Press
0 or 1 key to select the
time or turn off this function.
Reference
p.40 “Re-sending a file”
A Press the {User Tools}} key.
F Press [OK].
G Press [PrevMenu] twice.
H Press [Exit] to return to the standby mode.
201
Key Operator Settings
Transfer Report
This section describes the procedure
for registering the fax number of the
line your machine is connected to as
the return address for Transfer Requests.
When you make a Transfer Request
from this machine, the registered
number is sent to the Transfer Station.
The Transfer Station then sends back
the Transfer Result Report to this fax
number.
You can register a fax number (return
address) for each telephone line your
machine is connected to, as described
below.
• G3 Direct number
The G3 Direct number is usually
registered with the International
Access Code such as "011," country
code, area code (minus the leading
zero), "-" (a pause), and the fax
number in that order. You can use
up to 16 digits.
Example: If your country code is 1,
area code is 222, and fax number is
123–4567, register the G3 Direct
number as "0111222–1234567."
• G3 PABX Number
The fax number for a PABX line is
usually registered with the PABX
Access Number, Department code,
"-" (a pause), and the PABX number in that order. You can use up to
16 digits.
Example: If your PABX Access
Number is 8, Department code is
12, and PABX number is 3456, register the G3 PABX Number as
"812–3456."
7
• G4 Fax Number
The G4 Fax Number is usually registered with the International Access Code such as "011," country
code, area code (minus the leading
zero), "-" (a pause), the fax number,
and the sub-address with a "/"
(slash) if you are using the sub-address in that order. You can use up
to 29 digits.
Example: If your country code is 1,
area code is 222, fax number is 123–
4567 and the sub-address is 01, register the G4 Fax Number as
"0111222–1234567/01."
Limitation
❒ If the line is being used (i.e. communication is in progress), you
cannot register or edit the fax numbers. Perform the procedure after
the communication is complete.
Note
❒ The Transfer Request function will
not be activated unless the return
address is registered. See p.28
“Transfer Request”.
A Press the {User Tools}} key.
B Enter
the code for "Key Op.
Tools" with the number keys.
Then press the {q} key.
The "Key Op. Tools" main menu
appears.
202
System Settings
C Enter
the code for "System Settings" with the number keys.
Registering a G3 PABX Number
A Enter the code for "G3 PABX
Number" with the number
keys.
D Enter the code for "Transfer Report" with the number keys.
B Enter the fax number to be
used as the return address.
Note
❒ If "Transfer Report" is not displayed, press [↑
↑Prev.] or [↓
↓Next]
until it is.
E Depending
on the setting you
wish to register, use one of the
following procedures:
Registering a G3 Direct Number
C Press [OK].
Registering a G4 Fax Number
A Enter the code for "G4 Fax
Number" with the number
keys.
7
A Enter the code for "G3 Direct
Number" with the number
keys.
B Enter the fax number to use as
the return address.
B Enter the fax number to be
used as the return address.
C Press [OK] .
C Press [OK].
F Press [PrevMenu] three times.
G Press [Exit] to return to the standby mode.
203
Key Operator Settings
Network Settings
Use of these settings requires the NIC
FAX Unit (Option for Type1).
Adjust these settings to set up the Internet Fax Feature (Option for Type1).
For details, see Chapter 1, "Network
Settings" in the NIC FAX Unit manual.
IP-Fax Parameter Settings
B Enter
the code for "Key Op.
Tools" with the number keys.
Then press the {q} key.
The "Key Op. Tools" main menu
appears.
C Enter
the code for "System Settings" with the number keys.
Use of these settings requires the NIC
FAX Unit (Option for Type1).
Adjust these settings to set up the IPFax Feature (Option for Type1).
For details, see Chapter 1, "IP-Fax Parameter Settings" in the NIC FAX
Unit manual.
7
D Enter the code for "System Param.
TX" with the number keys.
System Parameter Transmission
This feature sends information about
the condition of your machine to your
nearest service representative. Follow
these steps when your service representative requests you to.
Note
❒ This information is sent to the destination registered in your machine by a service representative.
❒ This information is sent directly
from the machine's memory to
your service representative.
A Press the {User Tools}} key.
204
Note
❒ If "System Param. TX" is not displayed, press [↑
↑Prev.] or [↓
↓Next]
until it is.
E Press the {Start}} key.
The fax number registered by a
service representative appears.
The standby screen is displayed
when the transmission is complete.
System Settings
Key Layout
C Enter
You can change the layout of characters assigned to Quick Dial keys,
which are used for entering characters. Two types of layout are provided, the QWERTY layout and the ABC
layout.
D Enter the code for "Key Layout"
❖ QWERTY Layout
❖ ABC Layout
Note
❒ Set one of the keyboard labels that
come with the machine on the control panel according to choice.
the code for "System Settings" with the number keys.
with the number keys.
Note
❒ If "Key Layout" is not displayed,
press [↑
↑Prev.] or [↓
↓Next] until it
is.
E Press 0 or 1 key to select "QWERTY" or "ABCDEF".
7
A Press the {User Tools}} key.
B Enter
the code for "Key Op.
Tools" with the number keys.
Then press the {q} key.
F Press [OK].
G Press [PrevMenu] twice.
H Press [Exit] to return to the standby mode.
The "Key Op. Tools" main menu
appears.
205
Key Operator Settings
Print Position
If image positioning needs to be adjusted slightly, adjust the margins for
the appropriate tray (the main paper
tray, the optional Paper Tray Units, or
the optional Bypass Tray Unit).
Note
❒ If "Print Position" is not displayed, press [↑
↑Prev.] or [↓
↓Next]
until it is.
E Enter
the code for the tray you
wish to adjust the margins for
with the number keys.
Note
❒ You can adjust the top and left
margins of paper in 9 increments.
❒ You can adjust the position of the
printed image in 0.5mm (0.02 in.)
increments.
A Press the {User Tools}} key.
Note
❒ The main paper tray is displayed as "Tray1", the optional
Paper Tray Units as "Tray2–5",
and the optional Bypass Tray
Unit as "Bypass Tray".
F Enter the code for the margin you
B Enter
the code for "Key Op.
Tools" with the number keys.
Then press the {q} key.
7
The "Key Op. Tools" main menu
appears.
C Enter
the code for "System Settings" with the number keys.
wish to adjust with the number
keys.
Note
❒ You can view the margins by
entering the code for "Test
Print", then pressing the {Start}
}
key.
G Press 0 or 1 key to adjust the
margin.
D Enter the code for "Print Position"
with the number keys.
206
System Settings
H Press [OK].
The margins are set.
Note
❒ If you wish to adjust another
margin for the same tray, repeat
the procedure from step F.
❒ If you wish to adjust a margin
for another tray, press [PrevMenu], then repeat the procedure from step E.
I Press [PrevMenu] four times.
J Press [Exit] to return to the standby mode.
Note
❒ The printed image may not be
complete if the margins are excessively increased or decreased depending on the
received fax. It is recommended
that you check the printed image by printing a sample document when make adjustments.
Memory File Transfer
The Memory File Transfer function
enables you to send all messages currently stored in memory to another
fax and have them printed out there,
if your machine cannot print because
the toner or paper has run out. You
need to specify the forwarding destination when using this function.
Note that all files stored in memory
including Memory–locked messages
are transferred when this function is
activated. Use this function only in an
emergency.
Note
❒ You cannot specify an e-mail address (NIC FAX Unit (Option for
Type1) required) as the forwarding destination.
❒ The Fax Header is not added to the
transferred messages.
❒ All messages are sent in a single
transmission. The Confidential
Messages and Memory-locked
Messages as well as Auto Documents are transferred and printed
at the specified destination.
❒ All documents are not erased from
memory regardless of whether forwarding was successful or not.
❒ Even if a transmission error occurs,
messages are not resent.
❒ Details of the forwarding operation are not printed in the Journal.
7
Reference
p.98 “Entering Characters”, <Basic
Features>
p.123 “CIL Print”
p.46 “Printing a Confidential Message”
p.48 “Printing a Memory-locked
Message”
p.99 “Auto Document”
207
Key Operator Settings
A Press the {User Tools}} key.
B Enter
the code for "Key Op.
Tools" with the number keys.
Then press the {q} key.
The "Key Op. Tools" main menu
appears.
C Enter
the code for "System Settings" with the number keys.
7
D Enter
the code for "Mem. File
Transf" with the number keys.
Note
❒ If "Mem. File Transf" is not displayed, press [↑
↑Prev.] or [↓
↓Next]
until it is.
❒ If no messages are stored in
memory, the following message
will appear." No matching
file found.".
E Enter the number of the fax machine you wish to send to.
208
F Press the {Start}} key.
The transmission to the specified
destination begins.
When the transmission has finished, the machine returns to the
standby mode.
System Settings
Deleting Entries
This feature allows you to delete a group of data stored in the machine such as
ID codes or Quick Dials at once. It is a handy tool when you are moving to an
office in another location or disposing of the machine. The types of data that you
can delete by using this function are listed in the table below.
Item
Data type that you can delete
List that is printed
if any part of the
data cannot be deleted
Registered ID Code Own Name, Fax Header, Own Fax Number, desti- p.189 “Printing the
nations for Backup File Transmission, all data
User Parameter
stored in the following functions: ID Code Registra- List”
tion, G3 Analog Line, G3 Digital Line, G4 Digital
Line
Quick Dial
Quick Dial keys that are not specified in the settings
for Group, Program, Box or Auto Document
p.149 “Reports/Lists”
Speed Dial
Speed Dials that are not specified in the settings for
Group, Program or Box
p.149 “Reports/Lists”
Group Dial
Group Dials that are not specified in the settings for
Program or Box
p.149 “Reports/Lists”
Box
Boxes that do not store any received documents
p.259 “Printing the
Box List”
Programming
Any programs
p.149 “Reports/Lists”
Image Data
Files stored for the Polling Transmission, Auto Doc- p.43 “Printing a
ument, Fax On Demand or Information Boxes fea- List of Files in
tures
Memory (Print TX
File List)”
7
Note
❒ If any part of the data cannot be deleted because it is specified to be transmitted with files stored in memory, the message "Some entries are also programmed in other lists. They could not be deleted." appears and
the list of data is printed.
Deleting Entries
A Press the {User Tools}} key.
To delete entries, perform the following procedure.
Example: When deleting all ID codes
209
Key Operator Settings
B Enter
the code for "Key Op.
Tools" with the number keys.
Then press the {q} key.
F Press [Yes].
The "Key Op. Tools" main menu
appears.
C Enter
the code for "System Settings" with the number keys.
G Press
[Yes] to confirm the dele-
tion.
D Enter the code for "Delete Entries"
with the number keys.
All IDs stored in the machine's
memory are deleted.
7
Note
❒ If "Delete Entries" is not displayed, press [↑
↑Prev.] or [↓
↓Next]
until it is displayed.
E Enter the code for "All IDs" with
the number keys.
Note
❒ If you press [No], the deletion is
cancelled and the display in
step E reappears.
❒ To continue deleting other entries, start the procedure from
step E.
H Press [PrevMenu] three times.
I Press [Exit] to return to the standby mode.
Note
❒ If "All IDs" is not displayed,
press [↑
↑Prev.] or [↓
↓Next] until it
is displayed.
210
System Settings
Reset PM Counter
Follow the procedure described below to clear the counters that count
the sheets of documents and printed
paper when replacing the ADF Maintenance Kit or Fusing Maintenance
Unit.
If the counters are not cleared, it is not
possible to notify the right time for
the next replacement. Make sure to
clear the counters.
❖ When replacing the ADF Maintenance
Kit
Clear the ADF roller counter.
See the Replacing Instructions that
come with the ADF Maintenance
Kit.
❖ When replacing the Fusing Maintenance Unit
Clear the fusing unit counter and
the transfer roller counter (clearing
one counter will automatically
clear the other).
See the Replacing Instructions that
come with the Fusing Maintenance
Unit.
C Enter
the code for "System Settings" with the number keys.
D Enter
the code for "Reset PM
Counter" with the number keys.
Note
❒ If "Reset PM Counter" is not displayed, press [↑
↑Prev.] or [↓
↓Next]
until it is.
E Press [↑↑Prev.] or [↓↓Next] until the
counter you wish to clear is displayed.
7
A Press the {User Tools}} key.
B Enter
the code for "Key Op.
Tools" with the number keys.
Then press the {q} key.
Note
❒ When changing the ADF Maintenance Kit, clear the ADF roller
counter.
❒ When changing the Fusing
Maintenance Unit, clear the fusing unit or transfer roller
counter (clearing one counter
will automatically clear the other).
The "Key Op. Tools" main menu
appears.
211
Key Operator Settings
F Press [Reset].
Note
❒ If you press [OK], the screen in
step D reappears.
G Press [Yes] to clear the counter.
RDS (Remote Diagnostic
System)
If your machine has a problem, a service representative can perform various diagnostic tasks over the
telephone line from the service station to try to find out what is wrong
with your machine. The service representative can also use RDS to change
some of your machine's settings, if
you request it.
A Press the {User Tools}} key.
B Enter
the code for "Key Op.
Tools" with the number keys.
Then press the {q} key.
7
Note
❒ If you press [No], the screen in
step F reappears.
H Press [OK].
The "Key Op. Tools" main menu
appears.
C Enter
the code for "System Settings" with the number keys.
Note
❒ If you wish to clear another
counter, press [↑
↑Prev.] or [↓
↓Next]
to select the item.
I Press [PrevMenu] twice.
J Press [Exit] to return to the standby mode.
212
D Enter the code for "RDS" with the
number keys.
Note
❒ If "RDS" is not displayed, press
[↑
↑Prev.] or [↓
↓Next] until it is.
System Settings
E Press
0 or 1 key to turn this
function on or off.
F Press [OK].
G Press [PrevMenu] twice.
H Press [Exit] to return to the stand-
7
by mode.
213
Key Operator Settings
Initial Set Up
Multi-copy Reception
Use this feature to have the machine
print multiple copies of messages
from Specified Senders. If no Specified Senders are registered, the machine prints multiple copies of all
messages, regardless of sender.
Note
❒ It is recommended that you print
the Specified Sender List and keep
it after registering or editing settings for this function. See p.217
“Printing the Specified Sender
List”.
❒ Multiple copies cannot be made of
messages received using Polling
Reception and Free Polling Reception, as well as Confidential Messages and Memory-locked
Messages.
❒ You can specify the number of copies from 1 to 9.
❒ You can choose to print a specified
number of copies of messages
from Specified Senders, or to print
specified number of copies of messages from senders other than
Specified Senders with User Parameters. See p.178 “User Parameters”(switch 08 bits 1,0).
❒ You can register the Specified
Senders for the following six functions: Multi-copy Reception, Authorized Reception, Specified
Tray, Forwarding, Memory Lock,
TX/RX File Save. The maximum
number of Specified Senders is 50
in total.
7
214
❒ You can use up to 20 characters
when registering one item of Specified Senders for the G3 communication, and 24 characters for the G4
communication. You can also
specify wildcards. See p.98 “Entering Characters”, <Basic Features>.
❒ If the Specified Sender's fax machine is of the same make as your
machine, register the sender's name
registered to their machine. If the
Specified Sender's fax machine is of
a different make, register the fax
number. See p.55 “Own Name/Fax
Header/Own Fax Number”, <Basic Features>.
❒ You can check the sender's name
or sender's fax number registered
to the fax machines of Specified
Senders on the Journal. See p.50
“Printing the Journal”.
❒ You can change the current setting
by following the same procedure
for making a new setting. Change
the values of settings according to
your needs.
Setting up Multi-copy Reception
A Press the {User Tools}} key.
Initial Set Up
B Enter
the code for "Key Op.
Tools" with the number keys then
press the {q} key.
The "Key Op. Tools" main menu
appears.
C Enter the code for "Initial Set Up"
F Enter the code for "Program Sender" with the number keys.
G Enter the 2-digit code of the Specified Sender you wish to register
with the number keys.
with the number keys.
The "Initial Set Up" menu appears.
D Enter
the code for "Multi-copy
Recp." with the number keys.
Note
❒ If you enter the first digit of the
code incorrectly, press th e
{Clear}
} key or the {Stop}
} key to
clear it and enter the correct
code. If you enter the code incorrectly with the two digits,
press [Cancel] in step H.
7
H Press [Sender].
E Press [Sender].
I Enter the sender name or sender
Note
❒ If you do not wish to register a
Specified Sender, proceed to
step O.
❒ If there is no registered Specified Senders, multiple copies of
a l l i n c o m i n g m es s a g es a r e
made.
number of the other party's fax
machine you wish to register as a
Specified Sender.
Note
❒ You can use Alphabets, symbols, numbers, or a space when
entering the sender name or
sender number.
215
Key Operator Settings
Reference
p.98 “Entering Characters”,
<Basic Features>
N Press [Exit].
J Press [OK].
K Choose whether to store this item
as a wildcard.
O Enter the number of copies to be
printed with the number keys.
Reference
p.98 “Entering Characters”,
<Basic Features>
L Press [OK].
7
Note
❒ You can specify the number of
copies from 1 to 9.
❒ Multi-copy Reception is activated when the number of copies is
set to 2 and above, and inactivated when it is set to 1.
P Press [OK].
Q Press [PrevMenu] twice.
R Press [Exit] to return to the standM Press [PrevMenu].
by mode.
Deleting Specified Senders
You can delete registered Specified
Senders as necessary.
Reference
p.239 “Deleting Specified Senders”.
Note
❒ To register another Specified
Sender, repeat the procedure
from step G.
216
Initial Set Up
Printing the Specified Sender List
You can check the registered Specified Senders by printing out the list of
the registered Specified Senders.
Reference
See p.241 “Printing the Specified
Sender List” for the printing procedure.
Authorized Reception
You can block out unwanted fax messages by registering Specified Senders for Authorized Reception and
choosing to receive faxes only from
those senders. If a fax machine other
than those specified as Specified
Senders tries to send you a message,
the line is disconnected immediately
after the connection is established.
This feature is useful, for example, if
you wish to block out junk faxes. You
can also choose to receive faxes from
senders other than those you specify
as the Specified Senders.
Limitation
❒ If you do not register any Specified
Senders, you cannot set up this
function.
Note
❒ It is recommended that you print
the Specified Sender List and keep
it after registering or editing settings for this function. See p.217
“Printing the Specified Sender
List”.
❒ You can choose to receive fax messages from Specified Senders, or
from senders other than Specified
Senders with User Parameters. See
p.178 “User Parameters”(switch 08
bits 3,2).
❒ You can register the Specified
Senders for the following six functions: Multi-copy Reception, Authorized Reception, Specified
Tray, Forwarding, Memory Lock,
TX/RX File Save. The maximum
number of Specified Senders is 50.
❒ You can use up to 20 characters
when registering one item of Specified Senders for the G3 communication, and 24 characters for the G4
communication. You can also
specify wildcards. See p.98 “Entering Characters”, <Basic Features>.
❒ If the Specified Sender's fax machine is of the same make as your
machine, register the sender's
name registered to their machine.
If the Specified Sender's fax machine is of a different make, register the fax number.
❒ You can check the sender's name
or sender's fax number registered
to the fax machines of Specified
Senders on the Journal. See p.50
“Printing the Journal”.
❒ You can change the current setting
by following the same procedure
for making a new setting. Change
the values of settings according to
your needs.
7
❒ Authorized Reception is not available for Polling Reception.
217
Key Operator Settings
Setting up Authorized Reception
A Press the {User Tools}} key.
F Enter the code for "Program Sender" with the number keys.
G Enter the 2-digit code of the SpecB Enter
the code for "Key Op.
Tools" with the number keys then
press the {q} key.
The "Key Op. Tools" main menu
appears.
C Enter the code for "Initial Set Up"
with the number keys.
7
ified Sender you wish to register
with the number keys.
Note
❒ If you enter the first digit of the
code incorrectly, press th e
{Clear}
} key or the {Stop}
} key to
clear it and enter the correct
code. If you enter the code incorrectly with the two digits,
press [Cancel] in step H.
H Press [Sender].
The "Initial Set Up" menu appears.
D Enter
the code for "Authorized
RX" with the number keys.
E Press [Sender].
218
I Enter the sender name or sender
number of the other party's fax
machine you wish to register as a
Specified Sender.
Initial Set Up
Note
❒ You can use letters, symbols,
numbers, or spaces when entering the sender name or sender
number.
Reference
p.98 “Entering Characters”,
<Basic Features>
Note
❒ To register another Specified
Sender, repeat the procedure
from step G.
N Press [Exit].
J Press [OK].
K Choose whether to store this item
as a wildcard.
O Press
0 or 1 key to turn this
function on or off.
Reference
p.98 “Entering Characters”,
<Basic Features>
L Press [OK].
7
P Press [OK].
Q Press [PrevMenu] twice.
R Press [Exit ] to return to the standby mode.
Deleting Specified Senders
M Press [PrevMenu].
You can delete registered Specified
Senders as necessary.
Reference
See p.239 “Deleting Specified
Senders” for the deleting procedure.
219
Key Operator Settings
Printing the Specified Sender List
You can check the registered Specified Senders by printing out the list of
the registered Specified Senders.
Reference
See p.241 “Printing the Specified
Sender List” for the printing procedure.
Specified Tray
This function requires the optional Paper
Supply Unit.
The Specified Tray function enables
you to have messages from Specified
Senders printed using one paper tray,
and messages from other senders to
be printed using another paper tray.
For example, if green paper is set in
the main paper tray, and white paper
is set in the optional Paper Tray Unit,
you can distinguish the senders of the
message at a glance by choosing to
have messages from Specified Senders printed using the main paper tray
and messages from others printed using the optional Paper Tray Unit.
7
Note
❒ It is recommended that you print
the Specified Sender List and keep
it after registering or editing settings for this function. See p.217
“Printing the Specified Sender
List”.
❒ The Specified Tray function is not
available for the optional Bypass
Tray Unit. You need to have the
optional Paper Tray Unit(s). Type1
has two paper tray units as standard.
220
❒ The Specified Tray function is not
activated when receiving messages with Polling Reception or Free
Polling Reception.
❒ Register the Own Name or Own
Fax Number of the other party as
the Specified Sender. If the other
party has not registered their Own
Name or Own Fax Number, you
cannot register them as a Specified
Sender.
❒ You can choose to print messages
from Specified Senders, or messages from senders other than Specified Senders using the main paper
tray with User Parameters. See
p.178 “User Parameters”(switch 08
bits 5,4).
❒ You can register the Specified
Senders for the following six functions: Multi-copy Reception, Authorized Reception, Specified
Tray, Forwarding, Memory Lock,
TX/RX File Save. The maximum
number of Specified Senders is 50.
❒ You can use up to 20 characters
when registering one item of Specified Senders for the G3 communication, and 24 characters for the G4
communication. You can also
specify wildcards. See p.98 “Entering Characters”, <Basic Features>.
❒ When one optional Paper Tray
Unit is installed, load the optional
Paper Tray Unit and the main paper tray with paper of the same
size. When two optional Paper
Tray Units are installed, load the
main paper tray with paper of the
same width as that of the largest
width loaded in the paper supply
units.
❒ If you do not set paper in the way
described above, Substitute Reception may take place even if paper is
set.
Initial Set Up
❒ If the Specified Sender's fax machine is of the same make as your
machine, register the sender's
name registered to their machine.
If the Specified Sender's fax machine is of a different make, register the fax number.
❒ You can check the sender's name
or sender's fax number registered
to the fax machines of Specified
Senders on the Journal. See p.50
“Printing the Journal”.
❒ You can change the current setting
by following the same procedure
for making a new setting. Change
the values of settings according to
your needs.
Setting up Specified Tray
A Press the {User Tools}} key.
B Enter
the code for "Key Op.
Tools" with the number keys then
press the {q} key.
D Enter
the code for "Specified
Tray" with the number keys.
E Press [Sender].
Note
❒ If you do not wish to register a
Specified Sender, proceed to
step O.
❒ If you do not register any Specified Senders, all incoming faxes
will be printed using the main
paper tray.
7
F Enter the code for "Program Sender" with the number keys.
G Enter the 2-digit code of the SpecThe "Key Op. Tools" main menu
appears.
ified Sender you wish to register
with the number keys.
C Enter the code for "Initial Set Up"
with the number keys.
The "Initial Set Up" menu appears.
221
Key Operator Settings
Note
❒ If you enter the first digit of the
c od e incorrectly, press the
{Clear}
} key or the {Stop}
} key to
clear it and enter the correct
code. If you enter the code incorrectly with the two digits,
press [Cancel] in step H.
K Choose whether to store this item
as a wildcard.
H Press [Sender].
Reference
p.98 “Entering Characters”,
<Basic Features>
L Press [OK].
I Enter the sender name or sender
number of the other party's fax
machine you wish to register as a
Specified Sender.
7
M Press [PrevMenu].
Note
❒ You can use letters, symbols,
numbers, or spaces when entering the sender name or sender
number.
Reference
p.98 “Entering Characters”,
<Basic Features>
J Press [OK].
222
Note
❒ To register another Specified
Sender, repeat the procedure
from step G.
Initial Set Up
N Press [Exit].
Forwarding
With this feature, messages from
Specified Senders are printed then
forwarded to a pre-registered destination (Forwarding Address). For example, when you are away on a trip,
you can have messages automatically
sent to where you are staying.
O Press
0 or 1 key to turn this
function on or off.
P Press [OK].
Q Press [PrevMenu] twice.
R Press [Exit] to return to the standby mode.
Deleting Specified Senders
You can delete registered Specified
Senders as necessary.
Reference
See p.239 “Deleting Specified
Senders” for the deleting procedure.
Printing the Specified Sender List
You can check the registered Specified Senders by printing out the list of
the registered Specified Senders.
Reference
See p.241 “Printing the Specified
Sender List” for the printing procedure.
Note
❒ It is recommended that you print
the Specified Sender List and keep
it after registering or editing settings for this function. See p.217
“Printing the Specified Sender
List”.
❒ To use the Forwarding function,
you need to turn on the function
after specifying the Forwarding
Address.
❒ If a sender is specified for both
Memory Lock and Forwarding
functions and the Memory Lock is
turned on, the messages from the
sender are not forwarded.
❒ Messages received with Confidential Reception, Memory Lock, Polling Reception, or Transfer Request
are not forwarded.
❒ Register the Own Name or Own
Fax Number of the other party as
the Specified Sender. If the other
party has not registered their Own
Name or Own Fax Number, you
cannot register them as a Specified
Sender and forwarding is not possible.
❒ You can choose to forward messages from Specified Senders, or
messages from senders other than
Specified Senders using the main
paper tray with User Parameters.
See p.178 “User Parameters”(switch 08 bits 7,6).
7
223
Key Operator Settings
❒ The messages from the Specified
Senders that you registered or
messages from the senders other
than those you registered are forwarded to the specified addresses.
You can choose whether to have
these messages forwarded also to
the Forwarding Address with no
Specified Senders, if there are any,
using User Parameters. See p.178
“User Parameters”(switch 09 bit
5).
❒ You can choose whether the machine prints out the messages it
forwards with User Parameters.
See p.178 “User Parameters”(switch 11 bit 6).
❒ You can register up to 30 Forwarding Addresses.
❒ Each Forwarding Address may be
up to 254 digits.
❒ You can register up to 10 Specified
Senders to each Forwarding Address. The maximum number of
Specified Senders is 50, including
those registered for Multi-copy Reception, Authorized Reception,
Specified Tray, Memory Lock or
TX/RX File Save.
❒ By programming different Specified Senders to each Forwarding
Address, the maximum 50 Specified Senders can be registered.
❒ The maximum number of Specified Senders you can register is 50,
however, if you program the same
Specified Senders to different Forwarding Addresses, up to 300 (30
Forwarding Addresses × 10 Specified Senders per Forwarding Address) of the Specified Senders can
be programmed.
7
224
❒ See the below table for how to
count the number of registered
Specified Senders:
Forwarding Address 1
Forwarding Address 2
The number of
the registered
Specified
Senders
Specified
Sender A
Specified
Sender A
1
Specified
Sender B
Specified
Sender D
Specified
Sender F
Total: 4
-
1
Specified
Sender C
1
Specified
Sender D
1
-
Total: 5
1
Total: 3
The total number of the
programmed Specified Senders: 7
❒ You can have a forwarding mark
stamped on each forwarded documents.
❒ You can change the current setting
by following the same procedure
for making a new setting. Change
the values of settings according to
your needs.
❖ Forwarding Mark
You can have a mark stamped on
documents to indicate that they
have been forwarded.
At the forwarding destination this
can help distinguish between standard faxes and faxes that have
been forwarded.
Initial Set Up
Note
❒ Turn the Forwarding Mark feature on or off with User Parameters. See p.178 “User
Parameters”.
D Enter the code for "Forwarding"
with the number keys.
E Press [Receiver].
Setting up Forwarding
A Press the {User Tools}} key.
B Enter
the code for "Key Op.
Tools" with the number keys then
press the {q} key.
The "Key Op. Tools" main menu
appears.
C Enter the code for "Initial Set Up"
with the number keys.
F Enter the code for "Prog. Receiver" with the number keys.
7
G Enter the item number of the For-
warding Address you wish to register with the number keys.
Note
❒ If you enter the number incorrectly, press [Cancel] and enter
the correct number.
❒ You can store up to 30 Forwarding Addresses.
The "Initial Set Up" menu appears.
225
Key Operator Settings
H Enter the fax number of the For-
K Enter the 2-digit code of the Spec-
Note
❒ If you enter the number incorrectly, press the {Clear}
} key or
{Stop}
} key and try again. The
{Clear}
} key deletes one character at a time, and the { Stop}
}
clears the whole line.
Note
❒ If you enter the first digit of the
code incorrectly, press th e
{Clear}
} key or the {Stop}
} key to
clear it and enter the correct
code. If you enter the code incorrectly with the two digits,
press [Cancel] in step L.
warding Address with the number keys.
❒ If the optional ISDN Unit or optional Extra G3 Interface Unit is
installed, select the line you
wish to use before entering the
fax number. See p.89 “Selecting
the Line”.
❒ When the NIC FAX Unit (Option for Type1) is installed, you
can also enter an e-mail address.
7
I Press [Sender] .
ified Sender you wish to register
with the number keys.
L Press [Sender].
M Enter the sender name or sender
number of the other party's fax
machine you wish to register as a
Specified Sender.
Note
❒ If you do not register any Specified Senders, all incoming faxes
are forwarded.
J Enter the code for "Program Sender" with the number keys.
Note
❒ You can use letters, symbols,
numbers, or spaces when entering the sender name or sender
number.
Reference
p.98 “Entering Characters”,
<Basic Features>
N Press [OK].
226
Initial Set Up
O Choose whether to store this item
as a wildcard.
Reference
p.98 “Entering Characters”,
<Basic Features>
R Press [Exit].
S Press [OK].
P Press [OK].
T Press [PrevMenu] twice.
U Press 0 or 1 key to
turn this
7
function on or off.
Q Press [PrevMenu].
Note
❒ To register another Specified
Sender, repeat the procedure
from step K.
Note
❒ You can choose to forward only
messages from Specified Senders, or forward all messages except those from Specified
Senders. Adjust this setting with
User Parameters. See p.178 “User Parameters”(switch 08 bits
7,6).
V Press [OK].
W Press [PrevMenu] twice.
227
Key Operator Settings
X Press [Exit] to return to the standby mode.
F Enter the code for "Delete Receiver" with the number keys.
Deleting Forwarding Addresses
A Press the {User Tools}} key.
G Enter the item number of the For-
warding Address you wish to delete with the number keys.
B Enter
the code for "Key Op.
Tools" with the number keys then
press the {q} key.
H Press [Yes].
The "Key Op. Tools" main menu
appears.
C Enter the code for "Initial Set Up"
7
with the number keys.
I Press [Yes].
The "Initial Set Up" menu appears.
D Enter the code for "Forwarding"
with the number keys.
E Press [Receiver].
228
Note
❒ If you press [No], the display in
step G appears again.
Initial Set Up
J Press [PrevMenu].
Deleting Specified Senders (Forwarding)
A Press the {User Tools}} key.
K Press [PrevMenu].
B Enter
the code for "Key Op.
Tools" with the number keys then
press the {q} key.
The "Key Op. Tools" main menu
appears.
L Press [OK].
C Enter the code for "Initial Set Up"
with the number keys.
7
The "Initial Set Up" menu appears.
D Enter the code for "Forwarding"
with the number keys.
Note
❒ Select "Off" if you wish to invalidate a setting. If there is no registered Forwarding Address,
the setting automatically changes to "Off."
E Press [Receiver].
M Press [PrevMenu] twice.
N Press [Exit] to return to the standby mode.
229
Key Operator Settings
F Enter the code for "Prog. Receiver" with the number keys.
G Enter the item number of the For-
warding Address whose Specified Sender you wish to delete
with the number keys.
Note
❒ If you enter the first digit of the
c od e incorrectly, press the
{Clear}
} key to clear it and enter
the correct code. If you enter the
code incorrectly with the two
digits, press [Cancel] in step H.
7
J Enter the 2-digit code of the Specified Sender you wish to delete
with the number keys.
K Press [Yes].
L Press [Yes].
H Press [Sender].
Note
❒ If you press [No], the display in
step J reappears.
M Press [PrevMenu].
I Enter the code for "Delete Sender"
with the number keys.
Note
❒ To delete another Specified
Sender, repeat the procedure
from step J.
230
Initial Set Up
N Press [Exit].
Note
❒ Select "Off" if you wish to invalidate the setting.
R Press [PrevMenu] twice.
S Press [Exit] to return to the standby mode.
O Press [OK].
Printing the Specified Sender List
(Forwarding)
You can check which Specified Senders are registered for a Forwarding
Address by printing this list.
Follow the steps below to print this
list.
A Press the {User Tools}} key.
When No Specified Sender Has
Been Registered
A Press [OK].
P Press [PrevMenu] twice.
Q Press [OK].
7
B Enter
the code for "Key Op.
Tools" with the number keys then
press the {q} key.
The "Key Op. Tools" main menu
appears.
C Enter the code for "Initial Set Up"
with the number keys.
The "Initial Set Up" menu appears.
231
Key Operator Settings
D Enter the code for "Forwarding"
with the number keys.
E Press [Receiver].
J Press the {Start}} key.
Note
❒ To stop the list being printed,
press [Cancel]. The display in
step I reappears.
K Press [Exit].
F Enter the code for "Prog. Receiver" with the number keys.
L Press [OK].
7
G Enter the item number of the For-
warding Address you wish to
print out with the number keys.
H Press [Sender].
I Enter the code for "Print Sender
List" with the number keys.
232
M Press [PrevMenu] twice.
N Press [OK].
O Press [PrevMenu] twice.
P Press [Exit] to return to the standby mode.
Initial Set Up
Memory Lock
You can have messages from Specified Senders stored in memory without printing by using the Memory
Lock function. A password is required when printing the Memorylocked messages in order to keep
them confidential and private. If you
do not register any Specified Senders,
all incoming messages are received
using Memory Lock.
Preparation
Be sure to register the Memory
Lock ID before using this function.
See p.199 “Registering ID Codes”.
Limitation
❒ Memory Lock is not activated if
there is no Memory Lock ID registered.
Note
❒ It is recommended that you print
the Specified Sender List and keep
it after registering or editing settings for this function. See p.217
“Printing the Specified Sender
List”.
❒ If a sender is specified for both
Memory Lock and Forwarding
functions and the Memory Lock is
turned on, the messages from the
sender are not forwarded.
❒ You can choose to only lock messages from Specified Senders, or
lock all messages except those
from Specified Senders with User
Parameters. See p.178 “User Parameters” (switch 09 bits 1,0).
❒ You can register the Specified
Senders for the following six functions: Multi-copy Reception, Authorized Reception, Specified
Tray, Forwarding, Memory Lock,
TX/RX File Save. The maximum
number of Specified Senders is 50.
❒ You can use up to 20 characters
when registering one item of Specified Senders for the G3 communication, and 24 characters for the G4
communication. You can also
specify wildcards. See p.98 “Entering Characters”, <Basic Features>.
❒ If the Specified Sender's fax machine is of the same make as your
machine, register the sender's
name registered to their machine.
If the Specified Sender's fax machine is of a different make, register the fax number.
❒ You can print out Memory-locked
messages. See p.48 “Printing a
Memory-locked Message”.
❒ You can check the sender's name
or sender's fax number registered
to the fax machines of Specified
Senders on the Journal. See p.50
“Printing the Journal”.
❒ You can change the current setting
by following the same procedure
for making a new setting. Change
the values of settings according to
your needs.
7
233
Key Operator Settings
Setting up Memory Lock
E Press [Sender]
A Press the {User Tools}} key.
B Enter
the code for "Key Op.
Tools" with the number keys then
press the {q} key.
The "Key Op. Tools" main menu
appears.
C Enter the code for "Initial Set Up"
Note
❒ If you do not wish to register a
Specified Sender, proceed to
step O.
❒ If you do not register any Specified Senders, all incoming faxes
are locked in memory.
F Enter the code for "Program Sender" with the number keys.
with the number keys.
7
The "Initial Set Up" menu appears.
D Enter the code for "Memory Lock"
G Enter the 2-digit code of the Specified Sender you wish to register
with the number keys.
with the number keys.
Note
❒ If "Memory Lock" is not shown,
press [↑
↑Prev.] or [↓
↓Next] until it
is.
234
Note
❒ If you enter the first digit of the
code incorrectly, press th e
{Clear}
} key or the {Stop}
} key to
clear it and enter the correct
code. If you enter the code incorrectly with the two digits,
press [Cancel] in step H.
Initial Set Up
H Press [Sender].
L Press [OK].
I Enter the sender name or sender
M Press [PrevMenu].
number of the other party's fax
machine you wish to register as a
Specified Sender.
Note
❒ You can use letters, symbols,
numbers, or spaces when entering the sender name or sender
number.
Reference
p.98 “Entering Characters”,
<Basic Features>
Note
❒ To register another Specified
Sender, repeat the procedure
from step G.
7
N Press [Exit].
J Press [OK].
K Choose whether to store this item
as a wildcard.
O Press
0 or 1 key to turn this
function on or off.
Reference
p.98 “Entering Characters”,
<Basic Features>
235
Key Operator Settings
Note
❒ You can choose to only lock
messages from Specified Senders, or lock all messages except
those from Specified Senders.
Adjust this setting with User
Parameters. See p.178 “User Parameters”(switch 09 bits 1, 0).
P Press [OK].
Q Press [PrevMenu] twice.
R Press [Exit] to return to the standby mode.
Deleting Specified Senders
You can delete registered Specified
Senders as necessary.
Reference
See p.239 “Deleting Specified
Senders” for the deleting procedure.
7
Printing the Specified Sender List
You can check the registered Specified Senders by printing out the list of
the registered Specified Senders.
Reference
See p.241 “Printing the Specified
Sender List” for the printing procedure.
236
TX/RX File Save Settings
This function requires the optional Function Upgrade Unit and Optional 40MB
Memory Card.
Use this function to have messages
from Specified Senders received using the TX/RX File Save function. If
you do not register any Specified
Senders, all messages will be received
using the TX/RX File Save function.
Note
❒ It is recommended that you print
the Specified Sender List and keep
it after registering or editing settings for this function. See p.217
“Printing the Specified Sender
List”.
❒ Register the Own Name or Own
Fax Number of the other party as
the Specified Sender. If the other
party has not registered their Own
Name or Own Fax Number, you
cannot register them as a Specified
Sender.
❒ You can choose to save only messages from Specified Senders, or
save all messages except those
from Specified Senders with User
Parameters. See p.178 “User Parameters” (switch 09 bits 3,2).
❒ You can register the Specified
Senders for the following six functions: Multi-copy Reception, Authorized Reception, Specified
Tray, Forwarding, Memory Lock,
TX/RX File Save. The maximum
number of Specified Senders is 50.
Initial Set Up
❒ You can use up to 20 characters
when registering one item of Specified Senders for the G3 communication, and 24 characters for the G4
communication. You can also specify wildcards. See p.98 “Entering
Characters”, <Basic Features>.
❒ If the Specified Sender's fax machine is of the same make as your
machine, register the sender's
name registered to their machine.
If the Specified Sender's fax machine is of a different make, register the fax number.
❒ You can check the sender's name
or sender's fax number registered
to the fax machines of Specified
Senders on the Journal. See p.50
“Printing the Journal”.
❒ You can change the current setting
by following the same procedure
for making a new setting. Change
the values of settings according to
your needs.
C Enter the code for "Initial Set Up"
with the number keys.
The "Initial Set Up" menu appears.
D Enter
the code for "TX/RX File
Save" with the number keys.
Note
❒ If "TX/RX File Save" is not
shown, press [↑
↑Prev.] or [↓
↓Next]
until it is.
E Press [Sender].
7
Reference
p.58 “TX/RX File Save”
Setting up TX/RX File Save
A Press the {User Tools}} key.
B Enter
the code for "Key Op.
Tools" with the number keys then
press the {q} key.
Note
❒ If you do not wish to register a
Specified Sender, proceed to
step O.
❒ If you do not register any Specified Senders, all incoming faxes
are received using TX/RX File
Save.
F Enter the code for "Program Sender" with the number keys.
The "Key Op. Tools" main menu
appears.
237
Key Operator Settings
G Enter the 2-digit code of the Specified Sender you wish to register
with the number keys.
Note
❒ If you enter the first digit of the
c od e incorrectly, press the
{Clear}
} key to clear it and enter
the correct code. If you enter the
code incorrectly with the two
digits, press [Cancel] in step H.
H Press [Sender].
K Choose whether to store this item
as a wildcard.
Reference
p.98 “Entering Characters”,
<Basic Features>
L Press [OK].
7
I Enter the sender name or sender
M Press [PrevMenu].
number of the other party's fax
machine you wish to register as a
Specified Sender.
Reference
p.98 “Entering Characters”,
<Basic Features>
J Press [OK].
238
Note
❒ To register another Specified
Sender, repeat the procedure
from step G.
Initial Set Up
N Press [Exit].
Printing the Specified Sender List
You can check the registered Specified Senders by printing out the list of
the registered Specified Senders.
O Press
0 or 1 key to turn this
function on or off.
Reference
See p.241 “Printing the Specified
Sender List” for the printing procedure.
Deleting Specified Senders
Use this procedure to delete Specified
Senders for the following features:
Reference
p.214 “Multi-copy Reception”
Note
❒ You can choose to save only
messages from Specified Senders, or save all messages except
those from Specified Senders.
Adjust this setting with User
Parameters. See p.178 “User Parameters”(switch 09 bits 3, 2).
P Press [OK].
Q Press [PrevMenu] twice.
R Press [Exit] to return to the standby mode.
Deleting Specified Senders
You can delete registered Specified
Senders as necessary.
p.217 “Authorized Reception”
p.220 “Specified Tray”
p.223 “Forwarding”
p.233 “Memory Lock”
p.236 “TX/RX File Save Settings”
7
How to Delete Specified Senders
Note
❒ For information about how to delete Specified Senders for the Forwarding function, see p.229
“Deleting Specified Senders (Forwarding)”.
The example below describes how to
delete Specified Senders for the
Multi-copy Reception feature. The
procedure for other functions is identical except for steps E and L.
A Press the {User Tools}} key.
Reference
See p.239 “Deleting Specified
Senders” for the deleting procedure.
239
Key Operator Settings
B Enter
the code for "Key Op.
Tools" with the number keys then
press the {q} key.
The "Key Op. Tools" main menu
appears.
C Enter the code for "Initial Set Up"
with the number keys.
G Enter the 2-digit code of the Specified Sender you wish to delete
with the number keys.
Note
❒ If you enter the code incorrectly,
press the { Clear}
} key and try
again.
H Press [Yes].
The "Initial Set Up" menu appears.
D Enter
the code for "Multi-copy
Recp." with the number keys.
I Press [Yes].
7
E Press [Sender].
F Enter the code for "Delete Sender"
with the number keys.
240
Note
❒ If you press [No], the display in
step G reappears.
J Press [PrevMenu].
Initial Set Up
Note
❒ To delete another Specified
Sender, repeat the procedure
from step G.
K Press [Exit].
Printing the Specified Sender
List
Follow the steps below to print a single-page list of Specified Senders registered for each of the following
features:
Reference
p.214 “Multi-copy Reception”
L Press [OK].
p.217 “Authorized Reception”
p.220 “Specified Tray”
p.223 “Forwarding”
p.233 “Memory Lock”
p.236 “TX/RX File Save Settings”
How to Print Specified Sender List
Note
❒ Enter "1" if you wish to invalidate the setting.
M Press [PrevMenu] twice.
N Press [Exit] to return the standby
mode.
Note
❒ For information about how to print
Specified Sender List for the Forwarding function, see p.231 “Printing the Specified Sender List
(Forwarding)”.
7
The example below describes how to
print Specified Senders List for the
Multi-copy Reception feature. The
procedure for other functions is identical except for steps E and I.
A Press the {User Tools}} key.
241
Key Operator Settings
B Enter
the code for "Key Op.
Tools" with the number keys then
press the {q} key.
The "Key Op. Tools" main menu
appears.
C Enter the code for "Initial Set Up"
with the number keys.
G Press the {Start}} key.
Note
❒ To cancel printing, press [Cancel]. The display in step F reappears.
H Press [Exit].
The "Initial Set Up" menu appears.
D Enter
the code for "Multi-copy
Recp." with the number keys.
I Press [OK].
7
E Press [Sender].
J Press [PrevMenu] twice.
K Press [Exit] to return to the standby mode.
F Enter the code for "Print Sender
List" with the number keys.
242
Initial Set Up
Backup File Transmission
Settings
By registering a destination for administrative use, you can automatically have backups made of all sent
faxes.
You can register the following items:
• Administrator's Address (2 destinations can be registered).
Store a single fax number, or an email address (NIC FAX Unit (Option for Type1) required).
• Administrator Name
Backup File Transmission applies to
the following features:
• Memory Transmission
p.34 “Memory Transmission”,
<Basic Features>
• Transfer Request Transmission
p.28 “Transfer Request”
• Confidential Transmission
p.7 “Sending Confidential Messages”
• SUB Code Transmission
p.13 “SUB Code Transmission
with the Mode Key”
• E-mail Transmission (NIC FAX
Unit (Option for Type1) required)
Limitation
❒ If memory runs out due to keeping
too many standby messages or
failed messages, transmission cannot take place.
Note
❒ You cannot register the administrator's address to a Quick Dial key
or Speed Dial.
❒ Immediate Transmission is not
available when Backup File Transmission is turned on.
❒ You can check the result of a Backup File Transmission by reading
the Memory Communication Result Report (Memory Transmission).
Reference
p.102 “Backup File Transmission”
A Press the {User Tools}} key.
B Enter
the code for "Key Op.
Tools" with the number keys then
press the {q} key.
The "Key Op. Tools" main menu
appears.
7
C Enter the code for "Initial Set Up"
with the number keys.
The "Initial Set Up" menu appears.
D Enter
the code for "Backup File
TX" with the number keys.
Note
❒ If "Backup File TX" is not
shown, press [↑
↑Prev.] or [↓
↓Next]
until it is.
243
Key Operator Settings
E Press
0 or 1 key to turn this
function on or off.
F Press [Receiv.1] or [Receiv.2].
B Enter a name for the administrator address.
Reference
p.98 “Entering Characters”,
<Basic Features>
C Press [OK].
H Press [OK].
G Enter the fax number of the back-
up destination (Administrator
Address).
7
I Press [OK].
Note
❒ If the NIC FAX Unit (Option for
Type1) is installed, you can enter an e-mail address by pressing the User Function key ({
{F1}
}
to {F10}
}) which the Internet Fax
function is assigned to. See NIC
FAX Unit manual.
Registering/Editing the
administrator name
A Press [Name].
244
J Press [PrevMenu] twice.
K Press [Exit] to return to the standby mode.
Box Settings
Box Settings
See the following pages for how to set
up and delete Personal Boxes, Information Boxes and Transfer Boxes.
This feature provides the following
functions:
❖ Registering/Editing Personal Boxes
Registering or editing Personal
Boxes
See p.247 “Registering/Editing
Personal Boxes”.
❖ Deleting Personal Boxes
Deleting Personal Boxes
See p.250 “Deleting Personal Boxes”.
❖ Registering/Editing Information Boxes
Registering or editing Information
Boxes
See p.251 “Registering/Editing Information Boxes”.
❖ Deleting Information Boxes
Deleting Information Boxes
See p.253 “Deleting Information
Boxes”.
❖ Registering/Editing Transfer Boxes
Registering or editing Transfer
Boxes
See p.255 “Registering/Editing
Transfer Boxes”.
❖ Deleting Transfer Boxes
Deleting Transfer Boxes
See p.258 “Deleting Transfer Boxes”.
❖ Printing the Box List
Print this list to view the contents
of Personal Boxes, Information
Boxes, and Transfer Boxes. See
p.259 “Printing the Box List”.
Note
❒ SUB or SEP codes registered in
Personal Boxes, Information Boxes
or Transfer Boxes cannot be identical.
❒ If memory runs out, you may not
be able to receive messages or register settings. The available memory capacity depends on installed
options.
❒ The combined maximum number
of Personal Boxes, Information
Boxes, and Transfer Boxes that you
can store is 150 (400 when the optional Function Upgrade Unit is installed).
❒ You can deliver documents in an email format to destinations such as
End Receivers by making Box settings with specified Sub-addresses
for ISDN. (Optional ISDN Unit
and NIC FAX Unit (Option for
Type1) required)
7
Reference
p.67 “Box File Manager Functions”
- What is the SUB/SEP Code?
The SUB code or SEP code has a similar function to a password. It is a combination of numbers (0 to 9), symbols
("q" and "p") and spaces. You can
use up to 20 characters when registering a SUB/SEP code.
SUB/SEP codes are used when making Box settings so that the users of
Boxes may send messages to a Box or
retrieve one from a Box by specifying
the SUB/SEP code for the Box.
245
Key Operator Settings
Personal Boxes
This feature lets you set up the machine so that incoming messages addressed to certain users are stored in
memory instead of being printed out
immediately. Each user must be assigned a SUB Code (User Code) that
has been designated as a Personal Box
beforehand. When the other party
sends their message, they specify the
SUB code of the user they are sending
to. When the message is received, it is
stored in the Personal Box with the
matching SUB Code. In order to print
a message received into a Personal
Box, you must enter the SUB code assigned to that Personal Box. This enables several individuals or
departments to share a single fax machine yet be able to differentiate between messages. Furthermore, if you
specify a receiver for the Personal
Box, instead of being stored in memory, incoming messages with this SUB
code appended are forwarded directly to the destination you specify.
7
This machine
Sender
Personal Box
Receiver
SUB:1111
SUB Code : 1111
Receiver : A
A
SUB Code : 2222
Receiver : B
SUB Code : 3333
Receiver : Print
GFSINB0N
246
Note
❒ To be able to receive messages into
a Personal Box, you must inform
the sender of the SUB code registered for that Personal Box, and
ask them to send the message using SUB Code Transmission with
that SUB code. See p.78 “SUB/SID
(SUB Code Transmission)” and
p.13 “SUB Code Transmission
with the Mode Key”.
❒ When messages have been received into Personal Boxes, the
Confidential Reception/Memory
Lock indicator lights and the Confidential File Report is printed. See
p.47 “Confidential File Report”.
❒ If a Personal Box is assigned to a
receiver, incoming messages are
transferred to that receiver. If a receiver is not assigned, see p.67
“Printing Personal Box Messages”
for how to print these messages
out.
Box Settings
Registering/Editing Personal
Boxes
This section describes how to register
Personal Boxes.
You can store the following items:
• SUB Code (required)
Up to 20 characters long and can be
composed of digits 0-9, "q", "p"
and spaces (the first character cannot be a space).
• Name (required)
Up to 20 characters long.
• Password (optional)
Up to 20 characters long and can be
composed of digits 0-9, "q", "p"
and spaces (the first character cannot be a space). By programming
the password, no one without the
password can print out the received messages in the Personal
Box. It is recommended to program the password if you receive
confidential messages.
• Receiver (optional)
You can register one delivery destination for each Personal Box.
Specify the Quick Dial key or
Speed Dial that the delivery destination is stored in.
• Quick Dial key (optional)
If you assign this SUB Code to a
Quick Dial key, press this key to
enter the associated User Code
(Personal Box SUB Code) with a
single key press.
❒
❒
❒
❒
• User Code Transmission
See p.10 “User Code Transmission”.
• Printing the Journal
See p.50 “Printing the Journal”.
• Searching By User Code of
TX/RX File Save
See p.59 “Searching Memory for
Sent Faxes” and p.62 “Searching
Memory for Received Faxes”.
The Fax Header is not printed on
delivered messages. See p.56 “Programming Own Name / Fax
Header”, <Basic Features>.
If a message cannot be delivered, a
Communication Failure Report is
printed and the message is saved
as a Confidential Reception document.
You can specify a Quick Dial key
or Speed Dial containing an e-mail
address as the receiver when the
NIC FAX Unit (Option for Type1)
is installed.
You can edit boxes in the same
way as registering them. However,
to change the SUB Code itself, you
must delete it then register a new
SUB Code.
7
Reference
p.246 “Personal Boxes”
A Press the {User Tools}} key.
Note
❒ When using the following functions, you can use SUB codes registered in Personal Boxes in place of
User Codes.
• Restricted Access
See p.25 “Restricted Access”,
<Basic Features>.
247
Key Operator Settings
B Enter
the code for "Key Op.
Tools" with the number keys.
Then press the {q} key.
G Press [Name].
The "Key Op. Tools" main menu
appears.
C Enter the code for "Box Settings"
H Enter the name of the box.
with the number keys.
D Enter the code for "Personal Box"
with the number keys.
7
E Enter the SUB Code you wish to
register as a Personal Box.
Note
❒ To change a previously stored
name, press the {Clear}
} key or
the {Stop}
} key, then enter a new
one.
Reference
p.98 “Entering Characters”,
<Basic Features>
I Press [OK].
J Press [Others].
Note
❒ If you enter the code incorrectly,
press the { Clear}
} key or the
{Stop}
} key and try again.
F Press [OK].
Note
❒ If a password is already registered, enter the password, then
press [OK].
248
Registering a Password (SID)
A Enter the code for "Program
Password" with the number
keys.
Box Settings
B Enter the password you wish to
register.
B Press the Quick Dial key you
wish to assign the box to.
Note
❒ If you incorrectly enter the
password, press the {Clear}
}
key or the {Stop}
} key, then
try again.
C Press [OK].
Note
❒ To check the current contents
of Quick Dial keys, press [Status].
C Press [OK].
K Press [Exit].
Registering a Receiver
A Enter the code for "Program
Receiver" with the number
keys.
B Specify the Quick Dial key or
Speed Dial in which the delivery destination is stored.
L Press [OK].
7
C Press [OK].
Assigning a Quick Dial Key
A Enter the code for "Assign
Key" with the number keys.
M Press [PrevMenu] three times.
N Press [Exit] to return to the standby mode.
249
Key Operator Settings
Deleting Personal Boxes
E Enter the SUB Code of the Personal Box you wish to delete.
This section describes how to delete
Personal Boxes.
Limitation
❒ If the specified SUB Code is not
registered as a Personal Box, or the
messages of the box are registered,
you cannot delete it.
A Press the {User Tools}} key.
B Enter
the code for "Key Op.
Tools" with the number keys.
Then press the {q} key.
Note
❒ If you incorrectly enter the code,
press the { Clear}
} key or the
{Stop}
} key, then try again.
F Press [OK].
Note
❒ If a password is already registered, enter the password, then
press [OK].
G Press [Yes].
7
The "Key Op. Tools" main menu
appears.
C Enter the code for "Box Settings"
with the number keys.
D Enter the code for "Del. Personal
Note
❒ If you press [No], the box is not
deleted and the display in step
E reappears.
H Press [Yes].
Box" with the number keys.
Note
❒ If you press [No], the box is not
deleted and the display in step
E reappears.
250
Box Settings
I Press [PrevMenu] three times.
J Press [Exit] to return to the stand-
❒ You can print and check the contents of Information Boxes. See
p.70 “Printing Information Box
Messages” .
Information Boxes
Registering/Editing
Information Boxes
by mode.
Use the Information Box feature to set
up the machine as a fax information
service or document server. By scanning documents into Information Boxes, other parties can receive these
messages whenever they request them.
To check on the contents of Information Boxes, use the Print Information
File function .
This machine
Register
Documents
Information Box
SEP Code : 4444
SEP Code : 5555
Print
Receiver
SEP:2222
Transmission
Request
SEP Code : 6666
GFKEIB0N
Note
❒ Register documents for this feature
using the Box File Manager function. See p.69 “Storing Messages in
Information Boxes”.
❒ For the other party to be able to retrieve a message registered in an
Information Box, you need to inform them of the SEP code assigned to that Information Box.
❒ When a SEP Code Polling Reception request is made by another
party, the SEP code they specify is
compared with the SEP code registered in that Information Box. If
the codes match, the message
stored in the Information Box is
sent to the other party automatically. See p.16 “SEP Code Polling Reception” and p.80 “SEP/PWD
(SEP Code Polling Transmission)”.
This section describes how to set up
an Information Box.
You can store the following items:
• SEP Code (required)
Up to 20 characters long and can be
composed of digits 0-9, "q", "p"
and spaces (the first character cannot be a space).
• Password (optional)
Up to 20 characters long and can be
composed of digits 0-9, "q", "p"
and spaces (the first character cannot be a space). By programming
the password, you will required to
enter the password when registering documents or printing the registered documents. See p.69
“Storing Messages in Information
Boxes”, p.70 “Printing Information
Box Messages” and p.80
“SEP/PWD (SEP Code Polling
Transmission)”. However, when
in SEP Code Polling Reception, the
other party does not have to enter
the password. See p.16 “SEP Code
Polling Reception”.
• Name (required)
Up to 20 characters long.
7
Note
❒ You can edit boxes in the same
way as registering them. However,
to change the SEP Code itself, you
must delete it then register a new
SEP Code.
Reference
p.251 “Information Boxes”
251
Key Operator Settings
A Press the {User Tools}} key.
F Press [OK].
Note
❒ If a password is already registered, enter the password, then
press [OK].
B Enter
the code for "Key Op.
Tools" with the number keys.
Then press the {q} key.
The "Key Op. Tools" main menu
appears.
C Enter the code for "Box Settings"
G Press [Name].
H Enter the name of the box.
with the number keys.
7
D Enter
the code for "Prog. Info.
Box" with the number keys.
E Enter the SEP code you wish to
register as an Information Box.
Note
❒ If you incorrectly enter the code,
press the { Clear}
} key or the
{Stop}
} key, then try again.
252
Note
❒ To change a previously stored
name, press the {Clear}
} key or
the {Stop}
} key, then enter a new
one.
Reference
p.98 “Entering Characters”,
<Basic Features>
I Press [OK].
Box Settings
J Press [Password].
Deleting Information Boxes
This section describes how to delete
Information Boxes.
Limitation
❒ If the specified SEP Code is not
registered as an Information Box
or the messages of the box are registered, you cannot delete it.
Note
❒ If you do not wish to register a
password, proceed to step M.
A Press the {User Tools}} key.
K Enter the password you wish to
register.
B Enter
the code for "Key Op.
Tools" with the number keys.
Then press the {q} key.
Note
❒ If you enter the password incorrectly, press the {Clear}
} key or
the {Stop}
} key, then try again.
L Press [OK].
M Press [OK].
7
The "Key Op. Tools" main menu
appears.
C Enter the code for "Box Settings"
with the number keys.
D Enter the code for "Del. Info. Box"
with the number keys.
N Press [PrevMenu] three times.
O Press [Exit] to return to the standby mode.
253
Key Operator Settings
E Enter the SEP Code of the Information box you wish to delete.
J Press [Exit] to return to the standby mode.
Transfer Boxes
Note
❒ If you enter the code incorrectly,
press the { Clear}
} key or the
{Stop}
} key, then try again.
F Press [OK].
Note
❒ If a password is already registered, enter the password, then
press [OK].
G Press [Yes].
This feature turns your machine into
a fax relay station. Documents sent
with a SUB Code that matches the
SUB Code registered as a Transfer
Box are received then relayed to the
registered receiver.
Since documents can be sent to multiple destinations in a single transfer request, you can economize on
communication costs when sending
to remote destinations.
This Machine iTransfer Station j
Requesting party
SUB Code : 7777
End Receiver : A,B,C
SUB:7777
Transfer
Request
SUB Code : 8888
End Receiver : D,E,F
SUB Code : 9999
End Receiver : G,H,I
7
End Receiver
A
Transfer Box
End Receiver
B
End Receiver
C
Print
GFCYUB0N
H Press [Yes].
Note
❒ If you press [No], the box is not
deleted and the display in step
E reappears.
I Press [PrevMenu] three times.
254
Note
❒ Inform the requesting party of the
SUB code assigned to the Transfer
Box. When they wish to have a
message transferred by your machine, ask them to send the message using SUB Code Transmission
and specifying this SUB code. If a
password is also registered, inform
them of this too and ask them to enter it for the SID code. See p.78
“SUB/SID (SUB Code Transmission)” and p.13 “SUB Code Transmission with the Mode Key”.
Box Settings
Registering/Editing Transfer
Boxes
This section describes how to set up a
Transfer Box for forwarding incoming SUB transfer request messages
onto end receivers.
You can store the following items:
• SUB Code (required)
Up to 20 characters long and can be
composed of digits 0-9, "q", "p"
and spaces (the first character cannot be a space).
• Name (required)
Up to 20 characters long.
• Password (optional)
Up to 20 characters long and can be
composed of digits 0-9, "q", "p"
and spaces (the first character cannot be a space). By programming
the password, no one without the
password can access the Transfer
Box. It is recommended to program the password if you wish to
restrict the access to the Transfer
Box.
• End Receiver (required)
You can store 5 end receivers (destinations to which messages will
be forwarded) for each box. Specify end receivers with Quick Dial
keys, Speed Dials, or Groups assigned to Quick Dial keys that
have been registered beforehand.
Limitation
❒ After messages are transferred, a
Transfer Result Report is not sent
back to the sender.
❒ By default, the machine prints out
received messages and the Transfer Result Report that it transfers
after the transfer has finished. If
you wish to turn this feature off,
please contact your service representative.
❒ You can have received messages
sent using Economy Transmission.
Please contact your service representative for details.
❒ When the registered receiver is a
Multi-step Transfer Group Dial,
Multi-step Transfer takes place.
See p.115 “Multi-step Transfer”
and p.87 “Groups”, <Basic Features>.
❒ You can specify a Quick Dial key
or Speed Dial containing an e-mail
address as the receiver when the
NIC FAX Unit (Option for Type1)
is installed.
❒ You can edit boxes in the same
way as registering them. However,
to change the SUB Code itself, you
must delete it then register a new
SUB Code.
7
Reference
p.254 “Transfer Boxes”
A Press the {User Tools}} key.
B Enter
the code for "Key Op.
Tools" with the number keys.
Then press the {q} key.
Note
❒ After messages are transferred
they are deleted.
The "Key Op. Tools" main menu
appears.
255
Key Operator Settings
C Enter the code for "Box Settings"
with the number keys.
D Enter the code for "Prog. Transf.
Box" with the number keys.
Note
❒ If "Prog. Transf. Box" is not displayed, press [↑
↑Prev.] or [↓
↓Next]
until it is.
E Enter the SUB code you wish to
H Enter the name for the Transfer
Box.
Note
❒ To change a previously stored
name, press the {Clear}
} key or
the {Stop}
} key, then enter a new
one.
Reference
p.98 “Entering Characters”,
<Basic Features>
I Press [OK].
J Press [Others].
register as a Transfer Box.
7
Note
❒ If you incorrectly enter the code,
press the { Clear}
} key or the
{Stop}
} key, then try again.
F Press [OK].
Note
❒ If a password is already registered, enter the password, then
press [OK].
G Press [Name].
256
Registering a Password (SID)
A Enter the code for "Program
Password" with the number
keys.
Box Settings
B Enter the password you wish to
register.
Note
❒ If you enter the password incorrectly, press the { Clear}
}
key or the {Stop}
} key and try
again.
C Press [OK].
K Press [Exit].
L Press [OK].
Registering End Receivers
A Enter the code for "Prog. Receiver" with the number keys.
B Enter the number of the end receiver you wish to register with
the number keys.
M Press [PrevMenu] three times.
N Press [Exit] to return to the stand-
7
by mode.
Note
❒ You can register up to 5 end
receivers.
C Specify the Quick Dial key,
Speed Dial or Group in which
the end receiver is stored.
D Press [OK].
E Press [PrevMenu].
257
Key Operator Settings
Deleting Transfer Boxes
E Enter the SUB code of the Transfer Box you wish to delete.
This section describes how to delete
Transfer Boxes.
Limitation
❒ If the specified SUB Code is not
registered as a Transfer Box, or the
messages of the box are registered
you cannot delete it.
A Press the {User Tools}} key.
B Enter
the code for "Key Op.
Tools" with the number keys.
Then press the {q} key.
Note
❒ If you enter the code incorrectly,
press the { Clear}
} key or the
{Stop}
} key and try again.
F Press [OK].
Note
❒ If a password is already registered, enter the password, then
press [OK].
G Press [Yes].
7
The "Key Op. Tools" main menu
appears.
C Enter the code for "Box Settings"
with the number keys.
H Press [Yes].
D Enter the code for "Del. Transfer
Box" with the number keys.
Note
❒ If "Del. Transfer Box" is not displayed, press [↑
↑Prev.] or [↓
↓Next]
until it is.
Note
❒ If you press [No], the box is not
deleted and the display in step
E reappears.
I Press [PrevMenu] three times.
J Press [Exit] to return to the standby mode.
258
Box Settings
Printing the Box List
E Press the {Start}} key.
The list is printed.
Follow the procedure below to print a
list showing the currently registered
Personal Boxes, Information Boxes
and Transfer Boxes.
A Press the {User Tools}} key.
B Enter
the code for "Key Op.
Tools" with the number keys.
Then press the {q} key.
Note
❒ To cancel printing, press [Cancel]. The display in step D will
reappear.
F Press [PrevMenu] twice.
G Press [Exit] to return to the standby mode.
The "Key Op. Tools" main menu
appears.
7
C Enter the code for "Box Settings"
with the number keys.
D Enter the code for "Print Box List "
with the number keys.
Note
❒ If "Print Box List " is not displayed, press [↑
↑Prev.] or [↓
↓Next]
until it is.
259
Key Operator Settings
7
260
8. Solving Operation Problems
Clearing a Paper Jam in the Optional
Paper Supply Units
Clearing a Paper Jam in the
Optional Paper Tray Unit
B Remove any jammed paper slowly.
The Fusing Unit and its surrounding
areas may be very hot. Do not touch
areas other than those indicated in
this manual when clearing a paper
jam. Doing so may result in burns.
Important
❒ Do not attempt to pull out jammed
paper with excessive force. Doing
so may rip the paper or cause the
machine to malfunction.
Note
❒ For instructions on clearing paper
jams in the main paper tray, see
p.108 “Clearing Original Jams”,
<Basic Features>.
C Push the side cover closed until
you hear it click into place.
D Pull out the optional Paper Tray
Unit in the direction of the arrow.
A Open the side cover of the optional Paper Tray Unit in the direction
of the arrow.
261
Solving Operation Problems
E Remove any jammed paper slowly.
F Push in the optional Paper Tray
Unit until it clicks into place.
B Remove any remaining paper.
C Hold
both ends of the Bypass
Tray Unit firmly, and lift it up
slightly to remove it.
Clearing a Paper Jam in the
Optional Bypass Tray Unit
Important
❒ Do not attempt to pull out the
jammed paper with excessive
force. Doing so may rip the paper
or cause the machine to malfunction.
8
A Shift the paper stop lever toward
the machine.
D Remove any jammed paper slowly.
Note
❒ If you find any paper jammed in
the Fusing Unit area, remove it
following the procedure described under p.110 “Clearing
Paper Jams in the Fusing Unit”,
<Basic Features>.
262
Clearing a Paper Jam in the Optional Paper Supply Units
E Hold the Bypass Tray Unit at both
ends, and reattach it to the machine.
G Shift the paper stop lever back to
its original position.
Note
❒ Make sure that the unit is properly attached to the machine. It
should not be tilted, nor should
there be any gap between the
unit and machine.
8
F Even the edges of a stack of paper
and load it into the unit with the
printable surface facing down.
263
Solving Operation Problems
Reading Reports
Error Report
Power Failure Report
The error report is printed after each
unsuccessful communication (both
transmission and reception). The
communication failure may normally
be caused either by your machine, or
the fax machine on the other end.
Noise on the telephone line may also
be one of the causes. If the error report is printed after sending a fax
message, try sending it again. If the
report is printed after a fax message
came in, contact the sender and request them to send it again.
Turning the power off does not erase
the data stored into the machine such
as fax numbers programmed in a
Quick Dial key. However, if the machine is left turned off for 12 hours or
longer, the data stored in the machine's memory with functions such
as Memory Transmission/Reception,
Substitute Reception or Auto Document, or data of other standby documents is deleted. Once the data stored
in memory is deleted, the machine
automatically prints out the power
failure report when you turn it on
again, so that you may check the deleted data.
If the deleted fax message was for
Memory Transmission, check the receiver's information and send it. If it
was stored in Memory Reception or
Substitute Reception functions, contact the sender and request them to
send it again. If it was an Auto Document, register the document once
more.
Note
❒ If the machine continues to print
error reports after retrials, contact
your service representative.
❒ Normally, when specifying the
destination with a Quick Dial key
or Speed Dial, "ADDRESS" on this
report shows Own Name or Own
Fax Number registered in the receiver's machine. However, you
can change the setting with User
Parameters so that the name or
number of the destination stored
in the Quick Dial key or Speed Dial
in your machine is printed instead.
See p.178 “Us er Para meters”
(switch 04 bit 4).
8
Reference
p.265 “Error Codes”
264
Important
❒ Make sure that the available memory level which appears on the display is 100% before turning the
power off.
Error Codes
Error Codes
Fax machines use a telephone line. The same types of problems you experience
while making phone calls (such as noisy lines, crosstalk, disconnection during
conversation, and weak signals) also occur with faxing. Telephone callers can
deal with the problems themselves (for example, by speaking a bit louder), but
fax machines cannot. Therefore some errors and line failures are to be expected.
When an error occurs, an error report is printed. This report includes an error
code. The following table lists common error codes and a few of the possible
causes. If any of these or any other error codes persistently appear and the machine does not work properly, contact your service representative.
Note
❒ When an error occurs, it does not necessarily mean that you are doing anything wrong or that your machine needs service. Only if the problem persists
should you call your service representative.
Code
Possible Cause
0-01
Printer empty or jammed at the other end
0-04
Faulty machine at the other end Poor line condition
0-05
Poor line condition
0-06
Incompatible or faulty terminal at the other end Poor line condition
0-07
The facsimile machine that you were sending to was disconnected during the call,
either due to noisy phone lines, a paper jam or because it ran out of paper. Resend
the page.
0-08
The machine at the other end received the page that you sent but it had errors on
the page. You may wish to resend the page in question. The other party's memory
could also be full. Contact the other party and ask them to make room in their
memory for your message.
0-14
Same as for code 0-06
0-15
The other party does not have the confidential or transfer function. The other party's memory may be full.
0-16
Same as for code 0-04
0-20
Poor line condition
0-21
Same as for code 0-04
0-22
You have just received a fax message, but there were problems because of poor line
condition. Ask the other party to resend.
0-23
Same as for code 0-22
0-24
The memory may be full, and there may be a problem with your printer, such as a
jam or lack of paper or toner. Wait for some space to appear in the memory, and
then solve the problem with your printer. If the memory was not full, substitute
reception may have been disabled; switch substitute reception on with User Parameters.
0-25
8
265
Solving Operation Problems
Code
Possible Cause
0-80~88
Poor line condition Incompatible or faulty terminal at the other end
1-00
Document jam Improperly inserted document
1-01
Document length exceeded the maximum limit Same as for code 1-00
2-xx
Possible fault in your machine
3-xx
There is a problem with the ISDN network. Check the ISDN line connection.
Faulty terminal at the other end.
4-10
ID codes did not match. Co-ordinate ID codes with the other party.
5-20
Insufficient memory to receive the message. When the pages in memory have been
printed, ask the other party to resend.
5-21
5-22
5-23
5-25
Your machine has a problem.
5-30
6-00
Poor line condition or a problem with your machine
6-01
6-02
6-04
8
6-05
Poor line condition, a problem with the machine at the other end, or a problem
with your machine
6-06
A problem with the machine at the other end, or a problem with your machine
6-08
A problem with the machine at the other end
6-09
A problem with the machine at the other end, or a problem with your machine
6-10
9-07
Copy jam at the tray entrance (first, or top, paper feed station)
9-08
Copy jam inside the machine (first, or top, paper feed station)
9-09
Copy jam at the feed-out area
9-10
Toner end. Replace the toner cartridge.
9-17
There is a problem with your printer.
9-20
9-22
9-23
9-24
9-3x
266
There is a problem with the hard disk option.
9. Maintaining Your Machine
Loading Paper into the Optional Paper
Tray Unit
The following procedure describes
how to load paper in the optional Paper Tray Unit.
A Pull out the optional Paper Tray
Unit.
Important
❒ Make sure that the size of paper
loaded in the unit matches the
size indicated by the size mark.
If not, the size of the loaded paper is not recognized correctly
and the printed images may be
incomplete or paper jams may
occur.
C Fan a stack of paper and even the
edges, then load it in the Paper
Tray Unit with the printable surface facing down. Make sure that
the top of the paper is under the
notches in the corner of the unit.
B Adjust the size mark to the size of
the paper that you are loading.
Turn the dial to adjust it, so that
the desired paper size appears.
Important
❒ Make sure not to load paper
over the limit mark.
Note
❒ You can load up to 500 sheets of
copy paper.
D Replace the Paper Tray Unit carefully.
267
Maintaining Your Machine
Loading Paper into the Optional Bypass
Tray Unit
Note
❒ You can load paper in the optional
Bypass Tray Unit up to approximately 100 sheets (8 1 / 2 "×11" or
smaller size), 10 sheet (larger than
81/2"×11" size) or 40 postcards (L
only).
A Shift the paper hold lever toward
the machine.
B Even the edges of a stack of paper
and load it into the unit with the
printable surface facing down.
9
Important
❒ Make sure not to load paper
over the limit mark.
268
C Shift the paper hold lever back to
its original position.
Changing the Paper Size
Changing the Paper Size
This section describes how to change
the paper size in the main paper tray,
optional Paper Tray Unit and optional Bypass Tray Unit to a desired paper
size.
Do not use paper with staples or conductive paper such as aluminum foil
or paper that contains carbon. Doing
so may cause fire.
Be careful not to injure your fingers
when changing copy paper.
A Pull out the main paper tray until
it comes to a complete stop.
Make sure to keep the paper tray
horizontal when pulling it out.
Changing the Paper Size in the
Main Paper Tray
The following example explains how
to switch to A4 size paper. To switch
to other paper sizes, follow the same
steps but move the end plate and side
rails to the appropriate size mark on
the tray.
B Remove any remaining paper.
Important
❒ Make sure that copying or printing
of received fax messages is not in
progress.
Note
❒ You can load up to 500 sheets of
copy paper in the main paper tray.
❒ For information on the size and
orientation of copy paper that you
can load in the paper tray, see
p.298 “Paper”
9
C Adjust the size mark to the size of
the paper that you are loading.
Turn the dial to adjust it, so that
the desired paper size appears.
269
Maintaining Your Machine
Important
❒ Make sure that the size of paper
loaded in the unit matches the
size indicated by the size mark.
If not, the size of the loaded paper is not recognized and printed images may be incomplete or
paper jams may occur.
E Make sure that the side rail is set
correctly to the desired paper size
indicated at the bottom of the paper tray.
D Adjust the side rail nearest to you
to the size of the paper that you
are loading while squeezing the
green tray extension release tab.
F Remove the end plate by squeezing in at both sides and lifting it
up.
To Change to Legal or Letter Size
A First set the side rail to a size
smaller than Legal (81/2×14 in.)
or Letter (81/2×11 in.) to peel off
the sticker at the bottom as
shown below, then adjust the
side rail to the desired paper
size.
9
270
G Insert the end plate into the slot
for the desired paper size.
Changing the Paper Size
Important
❒ Make sure that the end plate is
properly inserted so that the
tabs at the lower end of the plate
are securely fastened to the bottom plate of the tray.
H Fan a stack of paper and even the
edges, then load it in the main paper tray with the printable surface
facing down. Make sure that the
top of the paper is under the
notches in the corner of the tray.
Changing the Paper Size in the
Optional Paper Tray Unit
Important
❒ Make sure that copying or printing
of received fax messages is not in
progress.
Note
❒ You can load up to 500 sheets of
copy paper in the optional Paper
Tray Unit.
❒ For information on the size and
orientation of copy paper that you
can load in the unit, see p.298 “Paper”.
A Pull out the Paper Tray Unit until
it comes to a complete stop.
Make sure to keep the unit horizontal when pulling it out.
Important
❒ Make sure not to load paper
over the limit mark.
I Replace the main paper tray carefully.
9
B Remove any remaining paper.
271
Maintaining Your Machine
C Adjust the size mark to the size of
the paper that you are loading.
Important
❒ Make sure that the size of paper
loaded in the unit matches the
size indicated by the size mark.
If not, the size of the loaded paper is not recognized and printed images may be incomplete or
paper jams may occur.
D Adjust the side rail that is nearer
to you to the size of the paper that
you are loading while squeezing
in the green tray extension release
tab.
To Change to Legal or Letter Size
A First set the side rail to a size
smaller than Legal (81/2×14 in.) or
Letter (81/2×11 in.) to peel off the
sticker at the bottom as shown
below, then adjust the side rail to
the desired paper size.
E Make sure that the side rail is set
correctly to the desired paper size
indicated at the bottom of the
unit.
9
F Remove the end plate by squeezing
in at both sides and lifting it up.
272
Changing the Paper Size
G Insert the end plate into the slot
for the desired paper size.
Changing the Paper Size in the
Optional Bypass Tray Unit
Important
❒ Make sure that copying or printing
of received fax messages is not in
progress.
Important
❒ Make sure that the end plate is
properly inserted so that the
tabs at the lower end of the plate
are securely fastened to the bottom plate of the unit.
H Fan a stack of paper and even the
edges, then load it in the unit with
t h e p r i n t a b l e s ur fa c e f a c i n g
down. Make sure that the top of
the paper is under the notches in
the corner of the unit.
Note
❒ You can load up to approximately
100 sheets (8 1 / 2"×11" or smaller
size), 10 sheets (larger than
81/2"×11" size) or 40 postcards (L
only) in the optional Bypass Tray
Unit.
❒ For information on the size and
orientation of copy paper that you
can load in the unit, see p.298 “Paper”.
A Shift the paper hold lever toward
the machine.
9
B Remove any remaining paper.
Important
❒ Make sure not to load paper
over the limit mark.
I Replace the optional Paper Tray
Unit carefully.
273
Maintaining Your Machine
C Adjust the paper size mark to the
E Even the edges of a stack of paper
Note
❒ To load custom size paper, set
the paper size to the "p" mark.
❒ You can use custom size paper
only for making copies or PC
Printing (option).
Important
❒ Make sure not to load paper
over the limit mark.
size of the paper that you are
loading.
D Adjust the paper guide to the size
of the paper that you are loading.
9
274
and load it into the unit with the
printable surface facing down.
F Shift the paper hold lever back to
its original position.
Cleaning
Cleaning
You may not have satisfactory copying or printing results if the parts of
the machine are not clean. Clean your
machine regularly so that you may always use it in the best condition.
The parts that needs to be cleaned
regularly are listed below.
• Document transport mechanism
• Copy paper transport mechanism
of the optional Paper Tray Unit
Important
❒ Do not use thinner, benzine, alcohol or detergent for cleaning. Doing so may cause the plastic parts
to change shape or color.
Cleaning the Document
Transport Mechanism
A Open the ADF cover.
B Remove
the feed unit by first
pushing it in the direction of the
arrow and then lifting up the end
of the unit that is nearest to you.
Note
❒ You may remove the feed unit
only when you are cleaning it or
replacing it with a new one.
C Wipe the entire surface of the separation roller as well as the rollers
of the feed unit while rotating
them.
Use a soft cloth that has been
dampened with water and wrung
out.
9
275
Maintaining Your Machine
D Replace the feed unit to its original position by first pushing the
far end, and then pushing the
near end into their places.
G Wipe
the exposure glass, the
white strip under the exposure
glass cover, and the six rollers.
Use a dry, soft cloth. If it is very
dirty, wipe with a soft cloth that
has been dampened with water
and wrung out, then wipe the surface with a dry cloth.
E Close the ADF cover, making sure
that it clicks firmly into place.
F While pushing the release lever,
open the ADF unit.
1. White strip
2. Roller
3. Exposure glass
H Close the ADF unit, making sure
that it clicks firmly into place.
9
276
Cleaning
Cleaning the Copy Paper
Transport Mechanism
C Close the side cover of the main
paper tray, making sure that it
locks firmly into place.
Main Paper Tray
Optional Paper Tray Unit
A Open the side cover of the main
A Open the side cover of the Paper
paper tray.
Note
❒ You cannot open the paper tray
side cover when the optional
Bypass Tray Unit is installed.
Remove the optional Bypass
Tray Unit first, and then open
the paper tray side cover. See
p.278 “Optional Bypass Tray
Unit”.
Tray Unit.
B Wipe the five rollers with a soft
cloth that has been dampened
with water and wrung out.
B Wipe the two rollers with a soft
9
cloth that has been dampened
with water and wrung out.
1. Roller
C Close the unit's side cover making sure it locks firmly into place.
1. Roller
277
Maintaining Your Machine
Optional Bypass Tray Unit
A Shift the paper stop lever toward
D Wipe the entire surface of the roller while rotating it.
the machine.
1. Roller
B Remove any remaining paper.
E Hold the Bypass Tray Unit at both
ends, and reattach it to the machine.
C Hold
both ends of the Bypass
Tray Unit firmly, and lift it up
slightly to remove it.
9
Note
❒ Make sure that the unit is properly attached to the machine. It
should not be tilted, nor should
there be a gap between the unit
and machine.
278
Cleaning
F Even the edges of a stack of paper
and load it into the unit with the
printable surface facing down.
Cleaning the Registration
Roller
Some parts of the machine may be
very hot. Do not touch the areas labelled "Caution! Hot surface." Doing
so may result in a burn.
G Shift the paper stop lever back to
its original position.
Limitation
❒ Cleaning the registration roller
while the power is turned on may
result in a burn. Make sure to turn
the power off before cleaning the
registration roller.
A Open the main side cover.
B While rotating the rubber part of
the registration roller, wipe it with
a soft cloth that has been dampened with water and wrung out.
9
1. Registration roller
2. RCaution / Hot surface
C Close the main side cover, mak-
ing sure it locks firmly into place.
279
Maintaining Your Machine
Replacing the Stamp Cartridge
When the stamp mark begins to fade,
it is time to replace the stamp cartridge.
Note
❒ Only use stamp cartridges designed specifically for this machine.
Note
❒ Remove the stamp cartridge
with pincers, or carefully ease
out the end of the stamp head
with your fingernails.
❒ One stamp cartridge can stamp approximately 3,000 times.
A Open the ADF unit while pushing the release lever.
C Insert the new stamp cartridge.
B Pull out the old stamp cartridge.
9
D Close the ADF unit, making sure
that it clicks firmly into place.
280
10. Appendix
Installation, Move and Disposal of the
Machine
This section provides you with information about installation, move and disposal of this machine.
Important
❒ Installation of this machine must be performed by an authorized dealer or
service representative. Never attempt to install the machine by yourself.
Machine Environment
If the machine is installed in an inappropriate location, you may not be able to
make copies or send or receive fax messages properly. Doing so may also cause
the machine to malfunction.
R WARNING:
• Connect the power cord directly into a wall outlet and never use an extension cord.
• Turn off the power and disconnect the power plug (by pulling the plug,
not the cable) if any of the following occurs:
• You spill something into the machine.
• You suspect that your machine needs service or repair.
• The external housing of your machine has been damaged.
R CAUTION:
• Protect the machine from dampness or wet weather, such as rain and snow.
• Do not allow paper clips, staples, or other small metallic objects to fall inside
the machine.
Note
❒ Install the machine on a level surface. Make sure that the difference in height
is less than 2mm (0.08 in.) between the four corners of the machine.
❒ Install the machine on a stable surface. If you need to place it on a table, prepare a sturdy table larger than the size of the machine exclusively for the machine.
❒ To avoid possible build-up of ozone, be sure to locate this machine in a large
well ventilated room that has an air turnover of more than 30m3/hr/person.
281
Appendix
❖ Use this machine in an environment that satisfies the conditions described in the diagram below.
Temperature
89.6 / 32
80.6 / 27
77 / 25
59
50
Acceptable environment
Recommend
environment
/ 15
/ 10
15
30
54
70
80
Humidity(%)
Note
❒ When the machine is subject to a sudden and drastic change in temperature or humidity, condensation in the machine may affect the printing
quality of the copied images or received messages. If this should occur,
wait momentarily, and copy the images again, or ask the sender of the
message to resend.
❖ Recommended Environment
• Temperature 15 – 25°C (59 – 77°F)
• Humidity 30 – 70% RH (do not install near a humidifier)
❖ Acceptable Environment
• Temperature 10 – 32°C (50 – 89.6°F)
• Humidity 15 – 80% RH (do not install near a humidifier)
10
282
Installation, Move and Disposal of the Machine
Location
Allow enough space around the machine for smooth fax or copy operation, and
servicing by a service representative.
• Front: 70cm (2.3ft.)
• Back: 0cm (0.0 in.)
• Left side: 0cm (0.0 in.)
Note
❒ A working space of at least 30cm (1.0ft.) is necessary to install the optional
Bypass Tray Unit, clear jammed paper, or replace the toner cartridge.
• Right: 5cm (2.0 in.)
Note
❒ A working space of at least 5cm (2.0 in.) is necessary to send 11"×17" size
documents by fax or install the optional Printer Interface.
10
283
Appendix
Connecting the Power and Switching On
R WARNING:
• Connect the power cord directly into a wall outlet and never use an extension cord.
• Disconnect the power plug (by pulling the plug, not the cable) if the
power cable or plug becomes frayed or otherwise damaged.
• Turn off the power and disconnect the power plug (by pulling the plug,
not the cable) if any of the following occurs:
• You spill something into the machine.
• You suspect that your machine needs service or repair.
• The external housing of your machine has been damaged.
R CAUTION:
• When you disconnect the power plug from the wall outlet, always pull the
plug (not the cable).
A Plug in the cable to the outlet.
B Turn the power switch on.
10
Important
❒ Voltage must not fluctuate more than 10%.
❒ The supply from the outlet must not fluctuate more than 12V above or below 120V.
❒ The power cord should not be laid where it might trip somebody.
❒ Do not place anything on the power cord.
❒ If you must use an extension cord, make sure that it is capable of carrying
120V / 8A, and that your facsimile terminal is the only piece of equipment
connected to that cord.
284
Installation, Move and Disposal of the Machine
Moving the Machine
R CAUTION:
• Unplug the power cord from the wall outlet before you move the machine.
While moving the machine, you should take care that the power cord will not
be damaged under the machine.
• If you are moving the machine to a distant location such as another floor or
building, contact your service representative. Note that the moving service is
a paid service.
• If the distance to the new location is short, move the machine yourself, following the precautions described below.
• Make sure that the memory level indicated on the display is 100% before
unplugging the power cord.
• Make sure to unplug the power cord from the electrical outlet by holding
the power plug.
• Make sure to close the ADF cover, ADF unit, and side cover.
• Make sure to move the machine carefully, keeping the machine horizontal
at all times. Shaking the machine or tilting it to a large degree may cause
the machine to malfunction.
• After changing the location of the machine, check the contents of the following information registered to the machine. If any of the information is incorrect, register the correct information again.
• If the fax number is changed
Own Fax Number See p.55 “Own Name/Fax Header/Own Fax Number”,
<Basic Features>, p.189 “G3 Analog Line”, and p.202 “Transfer Report”.
• If the Own Name such as company name is changed
Fax Header See p.55 “Own Name/Fax Header/Own Fax Number”, <Basic
Features>.
10
Disposing of the Machine
Contact your service representative when you wish to dispose of the machine.
R WARNING:
• Disposal can take place at our authorized dealer.
R CAUTION:
• For environmental reasons, do not dispose of the machine or expended
supply waste at household waste collection points. Disposal can take place
at an authorized dealer.
285
Appendix
Connecting to a Telephone Line
Connecting the Machine to the
Telephone Line
❖ Connecting to the Telephone Line
R CAUTION:
• To reduce the risk of fire, use
only No. 26 AWG or larger telecommunication line cord.
R ATTENTION:
• Pour réduire le risque d'incendie,
utiliser uniquement des conducteurs de télécommunications 26
AWG ou de section supérieure.
To connect the machine to a telephone line, use a snap-in modular
type connector.
❖ Connector Location
1. Or the optional Handset
Important
❒ By law in the United States, you
must program your phone number
identification (your Own Fax
Number) into your machine before
you can connect the public phone
system. See p.55 “Own Name/Fax
Header/Own Fax Number”, <Basic Features>.
❒ Do not connect the G3 analog line
to the G4 socket.
Note
❒ Connect the optional Handset or
external telephone to the "TEL1"
socket.
10
1. LINE1: Telephone line connection
2. TEL1: For the optional handset or
external telephone
286
Connecting to a Telephone Line
Connecting to an Additional
G3 Line
You can connect the machine to two
G3 lines by installing the optional Extra G3 Interface Unit. Connect the additional G3 line to the "LINE2" socket.
Important
❒ Contact your service representative when connecting to the additional G3 line.
ISDN
You can connect to ISDN by installing
the optional ISDN Unit. Connect the
ISDN cable that comes with the ISDN
Unit to the "ISDN" socket.
Important
❒ Contact your local service representative when connecting to ISDN.
❖ Connecting Location
❖ Connecting Location
Connecting an External
Telephone
You can connect an external telephone as well as the optional Handset
to the machine to make or receive
calls.
10
Note
❒ Depending on the type of external
telephone, it cannot be connected
or some of its functions are not
available.
287
Appendix
Connecting the Optional
Handset
Installing the Optional Handset
A Fix the handset holder to the man-
Setting up the Optional Handset
❖ Selecting the line type
Set the line type switch to the appropriate position.
Tone Dialing: TT
Pulse Dialing: DP
ual pocket using an item such as a
small coin.
TT
DP
Important
❒ Do not screw in screws too
tightly. Doing so may damage
the handset holder or manual
pocket.
ND1X00E0
❖ Adjusting the ringing tone volume
Adjust the ringing tone volume using the volume switch on the
handset as shown below.
0
1 2 3
4 5 6
1. Handset holder
2. Manual pocket
7 8 9
Ringer
B Place the handset on the handset
holder, and feed the handset cord
through the center of the manual
pocket.
10
ND1X00E1
❖ Adjusting the receiver volume
Adjust the receiver volume with
the volume switch on the handset
as shown below.
C Plug
the handset jack into the
"TEL1" socket.
288
Supplies
Supplies
❖ Toner Cartridge
One toner cartridge can print approximately 10,000 sheets (ITU-T #1Chart).
Product Name
Color
Purchase Unit
Toner Cartridge
Black
1 pack
❖ Maintenance Units
The ADF maintenance kit should be replaced after feeding approximately
30,000 sheets of originals.
The fusing maintenance unit should be replaced after printing approximately
60,000 sheets of paper.
Product Name
Content
Purchase Unit
ADF Maintenance Kit
• Feed unit
1 box
• Separation corona
Fusing Maintenance Unit
1 box
• Fusing unit
• Transfer roller
• Gloves
❖ Stamp Cartridge
One stamp cartridge can stamp approximately 3,000 times.
Product Name
Color
Purchase Unit
Stamp Cartridge
Pink
1 pack (4 pieces)
10
289
Appendix
Options
40MB Memory Card
Following features are enhanced when you install the Optional 40MB Memory
Card:
• Increasing the number of documents that you can store in the machine's
memory
• Using the TX/RX File Save function (necessary to install Optional Function
Upgrade Unit)
• Setting the Resolution to Extra Super Fine when copying, and printing the received messages
❖ Optional 40MB Memory Card
You can expand the memory size from the standard 7MB to 40MB. The number of documents that you can store in the machine's memory increases to approximately 1,200 sheets. *1
*1
Assuming that the standard originals are stored with the following settings: Resolution "Standard", Density "Standard", Halftone "OFF".
Limitation
❒ You cannot install the Optional 40MB Memory Card and optional Fax On Demand Unit at the same time.
Note
❒ The Optional 40MB Memory Card must be installed by a service representative.
10
290
Options
Function Upgrade Unit
Optional Function Upgrade Unit enables you to use the TX/RX File Save function. (It is necessary to install the Optional 40MB Memory Card at the same
time.) The unit also expands the functions listed below.
Function
Without Function Upgrade
Unit
Function Upgrade Unit
Installed
Box
150 Boxes
400 Boxes
Group
9 Groups
30 Groups
Originals*1
3,000 Sheets of Originals*1
Memory Transmission
1,200 Sheets of
Auto Document
144 Documents
244 Documents
Programming
144
244
Communication Record in
Memory
250
1,000
Speed Dial
100 Destinations
1,000 Destinations
TX/RX File Save
Not Available
Available*1
The Optional 40MB Memory Card is necessary.*1
Fax On Demand Unit
The optional Fax On Demand Unit enables you to use the fax information service.
Limitation
❒ You cannot install the optional Fax On Demand Unit and Optional 40MB
Memory Card at the same time. You cannot use the two options alternately
by replacing one with the other.
Note
❒ The optional Fax On Demand Unit must be installed by a service representative.
10
291
Appendix
Extra G3 Interface Unit
The optional Extra G3 Interface Unit enables you to connect the machine to another G3 line in addition to the standard connection to a G3 line.
ISDN Unit
You can connect to ISDN and use the functions listed below by installing the optional ISDN Unit.
Function
Reference
Sub-address
p.82 “Sub-address”
UUI
p.83 “UUI”
Handset
❖ Handset
You can make or receive calls by installing the optional Handset and dialing
manually (See p.88 “Manual Dial”).
NIC FAX Unit (Option for Type1)
The NIC FAX Unit (Option for Type1) enables you to send fax messages as email to another fax machine or send them to a personal computer. You can also
receive such e-mail from another fax machine.
The NIC FAX Unit (Option for Type1) enables you to connect the machine to a
LAN environment and use the following functions:
• Internet Fax Function
Enables you to send or receive fax messages as e-mail through the Internet.
The other end must be a fax machine of the same model or compatible to
TIFF-F format. Your machine can also receive fax messages sent as e-mail, or
send them to a personal computer.
• IP-Fax Function
Enables message transmission and reception between fax machines that are
directly connected to a network that uses TCP/IP.
• LAN FAX Function
Enables you to send a document made using a PC application software from
your machine to other fax machines through a telephone line. Your machine
must be connected to a PC through a LAN network.
• Scanner Function
Enables you to scan documents and send them to a folder in a network server
such as ScanRouter V2 Lite server or send it as an attachment to an e-mail.
Scanning in color is also possible.
10
292
Options
Note
❒ Type2 is equipped with the NIC FAX Unit in standard.
Reference
See NIC FAX Unit manual for detailed information.
Printer Interface Unit
The Printer Interface enables you to connect the machine to a personal computer
and use it as a printer. It also enables you to connect the machine to a LAN environment and use it as a network printer.
Reference
See the Optional Printer Interface Unit manual for detailed information.
Other Options
❖ Optional Paper Tray Unit
You can load up to 500 sheets of 81/2"×11" LK or 81/2"×14" L size paper
(Adjustable to A3 L, A4 LK, and A5K). You can use the Specified Tray
function by installing the optional Paper Tray Unit. See p.220 “Specified
Tray”).
❖ Optional Bypass Tray Unit
You can load paper of standard sizes such as A3 L, B4 L, A4 L, 11"×17" L,
81/2"×14" L, and 81/2"×11" LK.
You can also use custom size paper of 100 to 297mm (3.9 to 11.7 in.) in width
and 148 to 432mm (5.8 to 17.0 in.) in length when making copies or using the
machine as a printer.
You can load paper up to 100 sheets (81/2"×11" or smaller size) or 10 sheets
(larger than 81/2"×11" size).
❖ Optional Counter Unit
This is a tamper-proof mechanical counter whose reading cannot be changed
by the user.
10
293
Appendix
Specifications
❖ Power supply:
120V, 60Hz
❖ Power consumption *1 :
Energy Saver Mode:
Average 2W or less (Type1)
Average 6W or less (Type2)
Standby Mode:
Average 30W or less
Transmission:
Average 45W or less
Reception:
Average 450W or less
Maximum 1000W
Copying:
Average 400W or less
Maximum 1000W
*1
When no Option is installed.
❖ Noise Emission
Sound Power Level
Mainframe Only
During Printing
63 db(A) or less
During Coyping
64 db(A) or less
Standby
40 db(A) or less
Sound Pressure Level *1
Mainframe Only
During Printing
57 db(A) or less
The above measurements made in accordance with ISO 7779 are actual values.
10
*1
It is measured at the position of the operator.
❖ Protocol:
G3, G4 (optional ISDN Unit required)
294
Specifications
❖ Transmission time:
G3: Less than 3 seconds at 33,600 bps (JBIG coding)
G4: Less than 2 seconds at 64 kbps (MMR coding)
Note
❒ The values above are measured when sending an A4 size original with
standard resolution (G3: 8×3.85 lines/mm (200×100dpi) with JBIG coding,
G4: 200×100dpi with MMR coding) with Memory Transmission. They indicate the time spent on transmission, and do not include the time spent on
communication control. The actual transmission time varies depending on
the type of original, make of fax machine on the other end, and condition
of the telephone line.
❖ Data compression:
MH, MR, MMR, JBIG
❖ Modulation method
Message Modem
V.34, V.17, V.29, V.27ter (G3), V.33 (G3 non-standard)
Protocol Modem
V.21, V.8 (G3)
❖ Transmission speed:
G3:
33,600/31,200/28,800/26,400/24,000/21,600/19,200/16,800/14,400/12,000/
9,600/7,200/4,800/2,400 bps.
G4: 64 kbps/56 kbps
❖ Scanning resolution:
G3
• Standard: 8×3.85 lines/mm (200×100dpi)
• Detail: 8×7.7 lines/mm (200×200dpi)
• Fine: 8×15.4 lines/mm (200×400dpi)
• Super Fine: 16×15.4 lines/mm (400×400dpi)
• Extra Super Fine: 24×23.1 lines/mm (600×600dpi) (Optional 40MB Memory Card required when in reception)
G4
• Standard: 200×100dpi
• Detail: 200×200dpi
• Super Fine: 400×400dpi
• Extra Super Fine: 600×600dpi (Optional 40MB Memory Card required
when in reception)
10
295
Appendix
Copying
• Standard: 200×100dpi
• Detail: 200×200dpi
• Super Fine: 400×400dpi
• Extra Super Fine: 600×600dpi (Optional 40MB Memory Card required)
Reference
Chapter 9, "Specifications" in the NIC FAX Unit manual
❖ Print Process
Printing on standard paper using the laser
❖ Dimensions (Width×
×Depth×
×Height):
Type1: 505×609×615mm (19.9×24.0×24.2 in.)
Type2: 505×609×480mm (19.9×24.0×18.9 in.)
❖ Weight:
Type1: 40.5kg (89.2 lb.) or less
Type2: 28.6kg (63.0 lb.) or less
Acceptable Types of Originals
Make sure your originals are completely dry before placing them in the machine.
Originals containing wet ink or correcting fluid will mark the scanner and affect
the resulting image.
Acceptable Original Sizes
10
Where Original is
Placed
Acceptable Original
Size
Maximum Number
of Sheets
Automatic Document
Feeder (ADF)
• Maximum:
304×600mm
(12.0×23.6 in.)
60–90g/m2, 16 to 24
• 81/2"×14" 40 sheets lb. paper
(0.05 to 0.2mm)
• 81/2"×11" 75 sheets
• Minimum:
148×105mm
(5.8 ×4.1 in.)
Original Bypass Tray
• Maximum:
304×1200mm
(12.0×47.2 in.)
Paper Thickness
• 11"×17" 30 sheets
1 sheet
50–120g/m2,13 to 32
lb. paper
(0.05–0.3mm)
• Minimum:
148×105mm
(5.8×4.1in.)
Note
❒ When making a copy or sending a fax message of an original whose length
exceeds 11"×17" size, set the original on the original bypass tray one sheet at
a time, supporting it with your hand.
296
Specifications
Paper Size and Scanned Area
4mm
(0.2")
Document width
148~304mm
(5.8"-12.0")
5mm
(0.2")
5mm
(0.2")
Feeding direction
4mm
(0.2")
Document length
105~1,200mm
(4.1"-47.2")
GFGYOM0N
The part shaded will not be scanned, because it is outside the maximum scanning width range.
Note
❒ Images at the edges of the original document (top 5mm (0.2 in.), bottom 4mm
(0.2 in.), left 4mm (0.2 in.), right 5mm (0.2 in.)) may not be scanned even if you
set a standard sized original properly.
❒ There may be some difference in size between the image scanned by your machine and the image printed at the receiving end.
❒ If the width of paper loaded in the other party's fax machine is smaller than
that of your original, your document image is automatically reduced to fit the
loaded paper at the time of transmission. See p.93 “Auto Reduction”
❒ When scanning an original, the machine detects the size of the original in the
following manner. When the original is set on the automatic document feeder
(ADF), the machine scans the original and if that original's width is less than
approximately 230mm (9.1 in.), it assumes that the original is 81/2"×11" or
81/2"×14" size width. And if the width is between 242mm (9.5 in.) and 261mm
(10.3 in.), it assumes the original to be B4 size, and 274mm (10.8 in.) or more,
11"×17" size width. The length of scanning range varies depending on this
size judgement, and the maximum is 600mm (23.6 in.).
10
297
Appendix
Paper
It is recommended that you use your supplier's paper for the best printing results.
• You can use paper of equivalent thickness to your supplier's paper.
Recommended Paper Sizes and Types
The recommended sizes, types and sheets of paper that you can load in the machine are described below.
Important
❒ Follow the precautions listed below when storing paper.
• Avoid storing it in direct sunlight.
• Store it in a dry place (humidity 70% or lower).
• Store it on a level surface.
• Once you open a package, store the remaining sheets in a plastic bag so
that the paper does not absorb moisture.
❒ Paper that has absorbed moisture is often curled and may cause paper jams.
Load this kind of paper face down.
Where Paper is
Loaded
Paper Sizes
Paper Capacity
Paper Type
Main Paper
Tray
81/2"×11" LK or 81/2"×14"L (Adjustable to A3L, A4L, 11"×17"L
81/4"×13"L, 8"×13"L)
500 sheets
Optional Paper
Tray Unit
81/2"×11" LK or 81/2"×14" L (Ad- 500 sheets
justable to A3 L, A4 LK, and
A5K)
Ordinary high
quality paper
(60–90g/m2, 16 to
24lb.)
250 sheets
(11"×17"L)
Optional Bypass Standard size: A3 L, B4 L, A4 L, • 81/2"×11" or
smaller: 100
Tray Unit
11"×17" L, 81/2"×14" L, and
81/2"×11" LK Custom size: Width
sheets
100 to 297mm (3.9 to 11.7 in.),
• Larger than
Length 148 to 432mm (5.8 to 17.0 in.)
81/2"×11": 10
sheets
10
• Postcard: 40
sheets
• Ordinary high
quality paper
(60–90g/m2,
16 to 24 lb.)
• OHP transparencies
• Adhesive label
• Postcards
298
Specifications
Note
❒ You can load only custom sized paper to the optional Bypass Tray Unit when
making copies or using the PC Printing function (option).
❒ Load OHP transparencies to the optional Bypass Tray Unit one sheet at a
time, and remove it from the paper tray immediately after the copying is complete.
❒ Load postcards in landscape orientation (L) in the optional Bypass Tray
Unit.
Non-recommended Paper
Do not use the paper listed below. Using these kinds of paper may cause paper
jams.
• Curled, wavy, creased or dog-eared paper
• Torn paper
• Paper with holes
• Paper with an unsmooth surface
• Paper with an slippery surface
• Thin and soft paper
Important
❒ The printed image may not be clear if the surface of the paper is rough.
❒ Do not use any paper with coating, such as thermo-sensitive paper, art paper,
aluminum foil, carbon paper, or conductive paper. Using such paper may result in malfunction.
10
299
Appendix
Energy Saving
Introduction
When your fax machine prints fax messages, it uses heat to fix the image on paper. This heat is generated using a heating roller which must be hot enough to
fuse toner to the paper properly. Because keeping the roller hot all the time consumes electricity, this machine is provided with an Energy Saver Mode in which
the heating roller is heated to full temperature only when a message needs to be
printed.
Two available types of Energy Saver Mode are described in the table below.
Energy Saver Mode
Machine status in
Energy Saver Mode
How long before
you can print after
exiting Energy
Saver Mode
Power consumption
in Energy Saver
Mode *1
Fax Standby (Heater
half- cool)
The message "Cur-
Within about 35
seconds
Type1: 30W
Within about 52
seconds
Type1: 2W *2
rently the machine is in
Energy Saver
Mode." appears on the
Type2: 30W
display. The machine
maintains the heater in
the preheated mode.
Energy Saving Standby (Heater off)
The message "Cur-
rently the machine is in
Energy Saver
Mode." appears on the
Type2: 6W *3
display. The power of the
heater is turned off.
*1
When options are not installed.
3.5W when the Optional ISDN Unit is installed. 6W when the NIC FAX Unit
(Option for Type1) is installed.
*3
7.5W when Optional ISDN Unit is installed.
Values vary according to options installed and settings of User Parameters.
In Energy Saving Standby mode, letting the heating roller cool to room temperature will reduce the amount of electricity the fax machine consumes. However,
the fax machine will not print incoming messages right away, it will store them
in memory and print them out after the roller warms up.
In Fax Standby mode, letting the heating roller cool halfway reduces the amount
of electricity the fax machine consumes, but not as much as letting it cool to room
temperature. On the other hand, since warming up takes only a short time, incoming fax messages can be printed right away.
*2
10
300
Specifications
Note
❒ You can still send fax messages stored in memory while the machine is in Energy Saver Mode.
❒ Even in Energy Saving Standby mode, indicators that blink or light during
communication or reception still work. When the Substitute Reception, Memory Lock or Confidential message indicator lights, exit Energy Saver Mode
and take appropriate action.
❒ You can specify High Temperature Standby mode in combination with either
Energy Saver Standby mode or Fax Standby mode. If High Temperature
Standby mode is turned on, the machine starts a new print job in less time
than the wait time described in the table above, provided it is initiated within
the time specified with User Parameters (switch 31 bits 7,6) after the previous
print job is complete. You can make necessary settings with User Parameters.
See p.178 “User Parameters” (switch 05 bit 3).
❒ You can specify the duration of time before the machine exits High Temperature Standby mode with User Parameters. See p.178 “User Parameters”
(switch 31 bits 7,6).
❒ While the Night Timer is activated, the machine stays in the Energy Saver
Standby mode. If a fax message comes in while the heater is turned off, it is
stored in the machine's memory (Substitute Reception), and printed after the
specified time is reached. See p.176 “Night Timer”.
Entering Energy Saver Mode
The machine enters Energy Saver Mode when:
• Nobody uses the machine for about 5 minutes.
• The user holds down the {Clear Modes/Energy Saver}
} key for about 2 seconds.
Note
❒ If you wish to change the five minute period to one or three minutes, or if you
do not want your machine to enter the Energy Saver Mode automatically,
please contact your service representative.
10
- When the machine does not enter Energy Saver Mode
The machine does not enter Energy Saver Mode when:
• The optional Handset is not placed correctly
• The main paper tray is not loaded into the machine
• Either the ADF unit, ADF cover or the side cover is open.
• An original is jammed
• The machine is out of order
• There is no paper loaded into either the main paper tray or the optional Paper
Tray Unit
301
Appendix
Exiting Energy Saver Mode
Your machine exits Energy Saver Mode when a fax is received.
To exit Energy Saver Mode manually:
• In Energy Saving Standby mode, press the {Clear Modes/Energy Saver}
} key.
• In Fax Standby mode, press any key.
• Place an original.
• Pick up the optional Handset.
• Pull out the main paper tray.
• Open the ADF unit or ADF cover.
• Open the side cover.
Selecting the Energy Saver Mode type
To select the Energy Saver Mode type, adjust the bit switch below with User Parameters. See p.178 “User Parameters” (switch 05 bit 6).
❖ Switch 05 Bit 6
• Energy Saving Standby: To let the heating roller cool to room temperature,
set bit 6 to 0.
• Fax Standby: To let the heating roller cool halfway set bit 6 to 1.
Reception in Energy Saver Mode
Once in Energy Saver Mode, you can still receive messages. When a message is
received, the machine prints it and returns to Energy Saver Mode.
10
302
Maximum Values
Maximum Values
The following table describes the maximum value for each item.
Item
Standard
With options
installed
Memory
7MB
40MB
The number of pages that you can store in
memory (Using ITU-T #1Chart, Resolution:
Standard, Original Type: Halftone Off)
approximately 560
pages
approximately 1,200 *1
/3,000 pages *2
Total number of Memory Transmission files
500
The number of destinations you can specify
for one file
250
Total number of destinations that you can
specify for all files
500
The number of Quick Dials you can register
144
The number of Speed Dials you can register
100
1,000 *3
The number of Group Dials you can register
9
30 *3
The number of destinations you can specify by
the number keys
100
1,000 *3
The number of destinations you can register in
a Group
250
The number of programs you can register
144
244 *3 (100 files are registered to Speed Dial
codes.)
The number of User Codes you can register
150
400 *3
The number of digits for Dials
254
The number of Auto Document files
144
244 *3 (100 files are registered to Speed Dial
codes.)
The number of communication results that can
be displayed
250
1,000
The number of communication records that
you can store in memory
250
1,000
2,000
10
The number of Specified Senders you can reg- 50
ister or add
*1
*2
*3
When the Optional 40MB Memory Card is installed
When the Optional 40MB Memory Card and optional Function Upgrade Unit are installed
When the optional Function Upgrade Unit is installed
303
INDEX
A
Accessing the Key Operator Tools, 171
Adjusting the Display Contrast, 151
Adjusting the Printing Density, 124
Authorized Reception, 217
Authorized Reception, Setup, 218
Auto Discriminate, 91
Auto Document, 99
Automatic Redial, 105
Auto Reduction, 93
B
Backup File Transmission, 102
Backup File Transmission Settings, 243
Batch Original Documents Transmission, 96
Batch Transmission, 105
Blank Sheet Detect, 101
Box File Manager Functions, 67
Box Settings, 245
Broadcasting
Checking Progress, 104
Broadcasting Sequence, 104
C
Canceling a Transmission or Reception, 35
Center Mark, 120
Chain Dial, 75
Changing
Paper Size, 269, 271, 273
Changing a destination, 41
Changing the Transmission Time, 40
Checkered Mark, 120
Checking and Canceling Transmission Files, 35
Checking and Editing a File, 38
Checking Destinations (Destination List), 39
Checking the Reception Result (RX Status), 45
Checking the Transmission Result, 103
Checking the Transmission Result
(TX Status), 44
Cleaning the Copy Paper Transport
Mechanism, 277
Cleaning the Document Transport
Mechanism, 275
304
Cleaning the Registration Roller, 279
Communication Failure Report, 103, 108
Communication Information, 35
Communication Result Report
(Memory Transmission), 107
Communication Result Report
(Polling Reception), 21
Confidential File Report, 47
Confidential ID, 199
Connecting the Power and Switching On, 284
Connecting to a Telephone Line, 286
Copying, 127
Counters, 134
D
Date/Time, 151
Deleting a Keystroke Program, 143
Deleting an Auto Document, 147
Deleting Entries, 209
Deleting Fax On Demand Documents, 162
Deleting Files, 66
Deleting forwarding addresses, 228
Deleting Information Boxes, 253
Deleting Information Box Messages, 71
Deleting Personal Boxes, 250
Deleting Specified Senders, 216, 219, 223,
236, 239
Deleting Transfer Boxes, 258
Disk File Search List, 65
Disk File Visual List, 65
Displaying the Files in Memory, 56
Display Language, 135
Document Feeder
Acceptable originals, 296
Dual Access, 105
Duplex Original Settings, 94
E
ECM (Error Correction Mode), 105
Economy Transmission, 175
End Receiver, 28, 114
Energy Saving, 300
Error Codes, 265
F
K
Fax Header, 32
Fax Mode (Auto Receive Mode), 113
Fax On Demand, 160
Fax On Demand Recorded Messages, 166
Fax Reset Timer, 152
File Reserve Report
(Memory Transmission), 107
File Reserve Report (Polling Reception), 21
File Retention, 201
Forwarding, 223
Forwarding Mark, 224
Free Polling Transmission, 22, 23
G
G3, 90
G3 Analog Line,
G3 Digital Line,
G4, 91
G4 Digital Line,
General, 109
Group Dial List,
189
192
194
149
H
Handset
Installation, 288
Handy Dialing Functions, 75
Key Layout, 205
Key Operator Settings, 171
Keystroke Program, 139
Keystroke Program List, 149
L
Label, 98
Label Insertion, 98
Language Selection, 135
Loading Paper, 267
M
Machine Environment, 281
Maintaining, 267
Manual Dial, 88
Manuals for This Machine, 3
Memory Card, 290
Memory File Transfer, 207
Memory Lock, 233
Memory Lock ID, 199
Memory Reception, 110
More Transmission Functions, 103
Multi-copy Reception, 120, 214
Multi-step Transfer, 115
Multi-step Transfer Group Settings, 136
N
I
ID Override Polling Transmission, 23
ID Reception, 119
ID Transmission, 94
Image Rotation, 122
Immediate Reception, 109
Immediate Transmission Result Report, 103
Information Boxes, 251
IP-Fax Parameter Settings, 204
J
Network Settings, 204
Night Timer, 176
No Document, No Dial, 100
Noise Emission, 294
O
On Hook Dial, 85
On Hook Timer, 153
Other Transmission Features, 75
Output density, 124
Jams, Clearing, 261
JBIG Reception, 119
JBIG Transmission, 102
Journal, 50, 53, 149
305
P
PABX, 91
Page Separation and Length Reduction, 123
Paper, 267, 268
Paper Specifications, 298
Parallel Memory Transmission, 105
Personal Boxes, 246
Polling ID, 199
Polling Reception, 19
Polling Transmission, 22
Polling Transmission Clear Report, 25
Power, 284
Printed Reports, 107
Printing
Center Mark, 120
Checkered Mark, 120
Printing a Confidential Message, 46
Printing a List of Files in Memory
(Print TX File List), 43
Printing a Memory-locked Message, 48
Printing a Stored Message, 37
Printing Fax On Demand Documents, 164
Printing Files, 65
Printing Functions, 120
Printing Information Box Messages, 70
Printing Options
Center Mark, 120
Checkered Mark, 120
CIL Print, 123
TID Print, 124
TSI Print, 123
Printing Personal Box Messages, 67
Printing the Box List, 259
Printing the Fax On Demand Access
Report, 165
Printing the Fax On Demand List, 165
Printing the Journal, 50, 53
Printing the Specified Sender List, 217,
220, 223, 236, 239, 241
Print Position, 206
Program/Delete, 136
Programming and Changing an Auto
Document, 145
306
Q
Quick Dial List, 149
R
RDS (Remote Diagnostic System), 212
Reception Features, 109
Reception Functions, 114
Reception Time, 121
Redial, 77
Reduced Image Transmission, 26
Registering Auto Document, 145
Registering/Editing Fax On Demand
Documents, 160
Registering/Editing Information Boxes, 251
Registering/Editing Personal Boxes, 247
Registering/Editing Transfer Boxes, 255
Registering ID Codes, 199
Remote Transfer, 116
Remote Transfer with UUI, 118
Replacing the Stamp Cartridge, 280
Reports, 103
Error Report, 264
Power Failure Report, 264
Reading Reports, 264
Reports/Lists, 149
Requesting Party, 28, 114
Re-sending a file, 40
Reset PM Counter, 211
Rotate Sort, 122
S
Scanner Cleaning Message, 101
Scanning area, 297
Searching Memory for Received Faxes, 62
Searching Memory for Sent Faxes, 59
Secured ID Override Polling
Transmission, 22
Secured Polling Reception, 19, 20
Secured Polling Transmission, 22, 23
Selecting the Line, 89
Selecting the Reception Mode, 113
Sending a Fax Immediately, 104
Sending Confidential Messages, 7
Send Later, 5
SEP Code Polling Reception, 16
SEP Code Polling Transmission, 80
Setting up Forwarding, 225
Setting up Memory Lock, 234
Setting up Multi-copy Reception, 214
Setting up Specified Tray, 221
Setting up TX/RX File Save, 237
Setup, 151
Simultaneous Broadcast, 104
Solving Operation Problems, 261
Specifications, 294
Specified Tray, 220
Specifying an End Receiver, 31
Speed Dial List, 149
Stamp, 93
Stored ID Override Polling Reception, 19, 20
Storing and Changing Keystroke
Programs, 139
Storing Messages in Information Boxes, 69
Sub-address, 82
SUB Code Transmission, 78
SUB Code Transmission with the Mode Key, 13
Substitute Reception, 111
Switches and Bits, 178
System Parameter Transmission, 204
System Settings, 175
T
Telephone Directory, 76
Telephone Mode, 113
Toner saving, 124
Transfer Boxes, 254
Transfer Report, 202
Transfer Request, 28
Transfer Result Report, 115
Transfer Station, 28, 114
Transmission Features, 93
Transmission Mode, 5
Transmission Result Report, 108
TTI → Fax Header Print, 32
Two In One, 121
TX/RX File Save, 58
TX/RX File Save Settings, 236
U
User Code Transmission, 10
User Function Keys, 154
User Parameter List, 179
User Parameters, 178
UUI, 83
307
MEMO
308
UE
USA H310