1
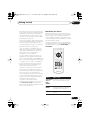
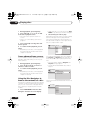
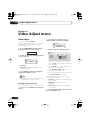
XV-HTD340.book 63 ページ 2003年12月27日 土曜日 午前10時30分
Initial Settings menu
11
Chapter 11
Initial Settings menu
Using the Initial Settings menu
The Initial Settings menu gives you complete
control in setting up your DVD system,
including video output settings and parental
lock settings, among others.
If an option is grayed out it means that it
cannot be changed at the current time. This is
usually because a disc is playing. Stop the
disc, then change the setting.
1 Press HOME MENU and select ‘Initial
Settings’ from the on-screen display.
Initial Settings
2 Use the cursor buttons and ENTER to
select the setting and option you want to
set.
All the settings and options are explained on
the following pages.
• In the table below, the default setting is
shown in bold: other settings are shown in
italics.
• Some settings, such as TV Screen, Audio
Language and Subtitle Language may be
overridden by the DVD disc. Often these
settings can also be made from the DVD
disc menu.
Video Output settings
Setting
Option
What it means
TV Screen
4:3 (Letter Box)
(See also Screen sizes
and disc formats on
page 77.)
Set if you have a conventional 4:3 TV. Widescreen movies are
shown with black bars top and bottom.
4:3 (Pan & Scan)
Set if you have a conventional 4:3 TV. Widescreen movies are
shown with the sides cropped so that the image fills the screen.
16:9 (Wide)
Set if you have a widescreen TV.
Interlace
Set if your TV is not compatible with progressive scan video.
Progressive
Set if your TV is compatible with progressive scan video (see
your TV’s instruction manual for details). Press ENTER once
more to confirm (or RETURN to cancel).
Note that progressive scan video is only output from the
component video jacks and that there is no output from the
composite and S-video jacks when this setting is selected.
Component Out
(See also Connecting
using the component
video output on
page 14.)
63
En