1
Instant Broadband™ Series
EtherFast
Cable/DSL Routers
®
Use this User Guide to install the following Linksys product(s):
BEFSRU31
BEFSR41 v2
BEFSR11
EtherFast Cable/DSL Router with USB Port and 10/100 3-Port Switch
EtherFast Cable/DSL Router with 10/100 4-Port Switch
EtherFast 1-Port Cable/DSL Router
User Guide
COPYRIGHT & TRADEMARKS
Copyright © 2001 Linksys, All Rights Reserved. Instant Broadband is a registered
trademark of Linksys. Microsoft, Windows, and the Windows logo are registered trademarks of Microsoft Corporation. All other trademarks and brand names are the property of their respective proprietors.
LIMITED WARRANTY
Linksys guarantees that every Instant Broadband EtherFast Cable/DSL Router will be
free from physical defects in material and workmanship for one year from the date of
purchase, when used within the limits set forth in the Specification section of this User
Guide. If the product proves defective during this warranty period, call Linksys
Customer Support in order to obtain a Return Authorization number. BE SURE TO
HAVE YOUR PROOF OF PURCHASE ON HAND WHEN CALLING. When returning a
product, mark the Return Authorization number clearly on the outside of the package
and include your original proof of purchase. RETURN REQUESTS CANNOT BE
PROCESSED WITHOUT PROOF OF PURCHASE. All customers located outside of the
United States of America and Canada shall be held responsible for shipping and handling charges.
IN NO EVENT SHALL LINKSYS’ LIABILITY EXCEED THE PRICE PAID FOR THE PRODUCT FROM DIRECT, INDIRECT, SPECIAL, INCIDENTAL, OR CONSEQUENTIAL DAMAGES RESULTING FROM THE USE OF THE PRODUCT, ITS ACCOMPANYING SOFTWARE, OR ITS DOCUMENTATION. LINKSYS OFFERS NO REFUNDS FOR ITS PRODUCTS. Linksys makes no warranty or representation, expressed, implied, or statutory,
with respect to its products or the contents or use of this documentation and all accompanying software, and specifically disclaims its quality, performance, merchantability,
or fitness for any particular purpose. Linksys reserves the right to revise or update its
products, software, or documentation without obligation to notify any individual or entity.
Please direct all inquiries to:
Linksys P.O. Box 18558, Irvine, CA 92623.
FCC STATEMENT
The Instant Broadband EtherFast Cable/DSL Router has been tested and complies with
the specifications for a Class B digital device, pursuant to Part 15 of the FCC Rules.
These limits are designed to provide reasonable protection against harmful interference
in a residential installation. This equipment generates, uses, and can radiate radio frequency energy and, if not installed and used according to the instructions, may cause
harmful interference to radio communications. However, there is no guarantee that
interference will not occur in a particular installation. If this equipment does cause
harmful interference to radio or television reception, which is found by turning the
equipment off and on, the user is encouraged to try to correct the interference by one
or more of the following measures:
•
•
•
•
Reorient or relocate the receiving antenna
Increase the separation between the equipment or device
Connect the equipment to an outlet other than the receiver’s
Consult a dealer or an experienced radio/TV technician for assistance
UG-BEFSR11/41/U31-010521A-AC
Instant Broadband Series
Table of Contents
Introduction
The Linksys EtherFast Cable/DSL Router
Features
Package Contents for the 1-Port Router (BEFSR11)
Network Requirements
Package Contents for the 3-Port Router (BEFSRU31)
Network Requirements
Package Contents for the 4-Port Router (BEFSR41)
Network Requirements
1
1
1
2
2
3
3
4
4
Getting to Know the 4-Port
EtherFast Cable/DSL Router
The 4-Port Router’s Rear Panel
The 4-Port Router’s Front Panel LEDs
5
5
6
Getting to Know the 1-Port
EtherFast Cable/DSL Router
The 1-Port Router’s Rear Panel
The 1-Port Router’s Front Panel LEDs
8
8
9
Getting to Know the 3-Port
EtherFast Cable/DSL Router
The 3-Port Router’s Rear Panel
The 3-Port Router’s Front Panel LEDs
11
11
13
Connecting the Cable/DSL Router
to Your Network
Overview
LANs and WANs
IP Addresses: A Quick Lesson
Connecting Your Hardware Together & Booting Up
Uplinking: Connecting More Devices to Your Router
15
15
15
16
18
20
Configuring the BEFSRU31’s USB Port
Windows 98 Configuration
Windows 2000 Configuration
Windows Millennium Configuration
21
21
25
29
EtherFast Cable/DSL Routers
Configuring Your Network with the
Cable/DSL Router
Configuring PCs to Connect to the Cable/DSL Router
Configuring the Cable/DSL Router
31
31
33
The Cable/DSL Router’s Web-based Utility
Quick and Easy Router Administration
Setup
Password
Status
DHCP
Logging
Help
IP Filtering
IP Forwarding
Dynamic Routing
Static Routing
DMZ Hosting
MAC Address Cloning
36
36
37
39
40
41
42
43
45
47
49
50
52
53
Troubleshooting
Common Problems
Frequently Asked Questions
54
54
56
Glossary
60
Appendix
How to Ping Your ISP’s E-mail & Web Addresses
Installing the TCP/IP Protocol
Twisted-Pair Cabling
Crimping Your Own Network Cables
4-Port Router Specifications
4-Port Environmental Specifications
1-Port Router Specifications
1-Port Environmental Specifications
3-Port Router Specifications
3-Port Environmental Specifications
Customer Support
73
73
76
78
79
80
80
81
81
82
82
83
Instant Broadband Series
Introduction
EtherFast Cable/DSL Routers
Package Contents for the 1-Port Router (BEFSR11)
The Linksys EtherFast Cable/DSL Router
Congratulations on the purchase of the EtherFast Cable/DSL Router from
Linksys! The EtherFast Cable/DSL Router is the perfect solution for connecting a network of PCs to a high-speed broadband Internet connection and to an
Ethernet network backbone. Configurable as a DHCP server, the EtherFast
Cable/DSL Router is the only visible network device on the Internet. The
Router also serves as your Internet NAT firewall, protecting your network’s
PCs from being accessed by external users. All incoming data packets are monitored and filtered. The Router can also be configured to block internal users'
access to the Internet with IP Filtering, as well as to play Internet games, videoconference, and much more.
Now all of your PCs can enjoy lightning-fast broadband Internet connections
and share internal network data. Link them all together and network faster than
you ever thought possible.
Features
• Connect a Broadband Modem to an Ethernet Network Backbone
• Equipped With a 3 or 4-Port 10/100 Switch (BEFSRU31 & BEFSR41 v2
only)
• Connects Up to 254 PCs to the Internet with Just One IP Address
• NAT Firewall Protects Your PCs From Outside Intruders on the Internet
• Configurable Through a PC’s Web Browser Using Netscape Navigator 4.0 or
Internet Explorer 4.0 or Higher
• Supports IPSec Pass-Through for Virtual Private Networking (VPNs)*
• Administer Your Router Remotely Over the Internet
• 10/100 Switch Speeds Up Your Gaming and Multimedia Connections
(BEFSRU31 & BEFSR41 v2 only)
• Configurable as a DHCP Server on Your Network
• Compatible with Virtually All Standard Internet Applications
• Administrators Can Block Specific Internal Users' Internet Access
• DMZ Hosting Feature Enables Internet Multimedia Applications
Such as Video-Conferencing and Internet Gaming
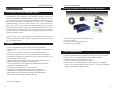
• One EtherFast 10/100 1-Port Cable/DSL Router
• One Power Adapter
• One User Guide and Registration Card
• One Tech Helper CD-ROM
Network Requirements
• One RJ-45 broadband Internet connection through a cable or DSL modem
• One PC with a 10/100 Mbps Ethernet card or adapter installed
• TCP/IP network protocol installed on each PC
• UTP CAT 5 network cables with RJ-45 connectors
• Internet Explorer 4.0 and higher or Netscape Navigator 4.0 and higher
(Version 5.5 for Internet Explorer and Version 4.7 for Netscape Navigator
highly recommended for optimal results)
*Limited IPSec Support
1
2
Instant Broadband Series
Package Contents for the 3-Port Router (BEFSRU31)
Package Contents for the 4-Port Router (BEFSR41)
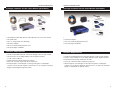
• One EtherFast Cable/DSL Router with USB Port & 10/100 3-Port Switch
• One USB Cable
• One 3.5” Floppy Disk for USB Setup
• One Power Adapter
• One User Guide and Registration Card
• One Tech Helper CD-ROM
• One EtherFast Cable/DSL Router with 10/100 4-Port Switch
• One Power Adapter
• One User Guide and Registration Card
• One Tech Helper CD-ROM
Network Requirements
• One RJ-45 broadband Internet connection through a cable or DSL modem
• One PC with a 10/100 Mbps Ethernet card or adapter installed,
or a PC with a USB port
• TCP/IP network protocol installed on each PC
• UTP CAT 5 network cables with RJ-45 connectors
• Internet Explorer 4.0 and higher or Netscape Navigator 4.0 and higher
(Version 5.5 for Internet Explorer and Version 4.7 for Netscape Navigator
highly recommended for optimal results)
3
EtherFast Cable/DSL Routers
Network Requirements
• One RJ-45 broadband Internet connection through a cable or DSL modem
• One PC with a 10Mbps or 10/100 Mbps Ethernet card or adapter installed
• TCP/IP network protocol installed on each PC
• UTP CAT 5 network cables with RJ-45 connectors
• Internet Explorer 4.0 and higher or Netscape Navigator 4.0 and higher
(Version 5.5 for Internet Explorer and Version 4.7 for Netscape Navigator
highly recommended for optimal results)
4
Instant Broadband Series
Getting to Know the 4-Port
EtherFast Cable/DSL Router
EtherFast Cable/DSL Routers
4-Port Router’s Front Panel LEDs
The 4-Port Router’s Rear Panel
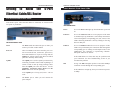
Your Router’s ports, where network cables are connected, are located on the
rear panel of your Router.
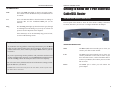
The LAN Indicators
Power
Green. The Power LED lights up when the Router is powered
on.
Link/Act
Green. The Link/Act LED serves two purposes. If the LED
is continuously lit up, the Router is successfully connected to
a device through the corresponding port (1, 2, 3 or 4). If the
LED is flickering, the Router is actively sending or receiving
data over that port.
Full/Col
Green. The Full/Col LED also serves two purposes. If this
LED is lit up continuously, the connection made through the
corresponding port is running in Full Duplex mode. If the
LED flickers, the connection is experiencing collisions.
Infrequent collisions are normal.
The 4-Port Router’s Ports
WAN
The WAN (Wide Area Network) port is where you
connect your cable or DSL modem.
Ports 1-4
These four LAN (Local Area Network) ports connect to network devices, such as PCs, print servers,
and remote hard drives. If port 1 is being used, the
Uplink port will not work because these two shared
ports have internally shared wiring.
Uplink
The Uplink port is used to expand your network by
connecting to another switch or hub. Uplinking to a
switch or a hub is done by simply running a cable
from the Uplink port to the other device. See the
Uplinking: Connecting More Devices to the
Router section for more on uplinking.
If this LED flickers too often, there may be a problem with
your connection. See the Troubleshooting section if you
encounter this problem.
100
Orange. The 100 LED lights up when a successful 100Mbps
connection is made through the corresponding port.
If this LED does not light up, then your connection speed is
10 Mbps.
If the Uplink port is being used, Port 1 will not
work.
Power
5
The Power port is where you will connect the
power adapter.
6
Instant Broadband Series
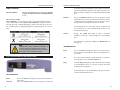
The WAN Indicators
Link
Green. The Link LED lights up when a successful connection is made between the Router and your broadband device
or network.
Act
Green. The Act LED flickers when the Router is sending or
receiving data over the broadband WAN port (to the
Internet).
Diag
EtherFast Cable/DSL Routers
Getting to Know the 1-Port EtherFast
Cable/DSL Router
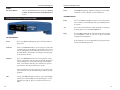
The One-Port Router’s Rear Panel
The rear panel of the Router is where all of the Router’s cabling connections
are made, and where you can reset or configure the Router’s LAN port.
Red. The Diag LED lights up when the Router goes through
its self-diagnosis mode during every boot-up. It will turn off
upon successful completion of the diagnosis.
If this LED stays on for an abnormally long period of time,
see the Troubleshooting section.
The Reset Button* The Reset button can be used in one of two ways.
1. If your Router is having problems connecting to the Internet, press the Reset
button for just a moment with a paper clip or a pencil tip. This clears up any
jammed connections, and is similar to pressing the Reset button on your PC
to reboot it.
2. If you are experiencing extreme problems with your Router and have tried
all other troubleshooting measures, press the Reset Button and hold it down
until the red Diag LED on the front panel turns on and off completely.
This will restore factory defaults and clear all of the Router’s settings, including the IP addresses you entered.
* The Reset Button is located on the front panel of the 4-Port Router, and the rear panel of the 3Port Router and the 1-Port Router.
7
The One-Port Router’s Ports
WAN
The WAN (Wide Area Network) port is where you
connect your cable or DSL modem.
LAN
The LAN (Local Area Network) port is where you
connect your Router to a PC, hub, or switch. If you
have more than one PC, connect an Ethernet hub or
switch to your Router, then connect your PCs to that
hub or switch.
Power
The Power port is where you will connect the
power adapter.
8
Instant Broadband Series
EtherFast Cable/DSL Routers
Buttons & Switches
The Reset Button
is continuously lit up, the Router is successfully connected to
a device through the LAN port. If the LED is flickering, the
Router is actively sending or receiving data through the LAN
port.
Details on the Reset button are found in the Getting
to Know the 4-Port EtherFast Cable/DSL Router
section.
Full/Col
The Crossover Switch
When“uplinking,” or connecting two pieces of network hardware together,
such as a hub and a switch, a general rule of thumb is to plug one end of a
network cable into a straight-through port, and the other end into a crossover
port. Standard ports are straight-through ports, and uplink ports are crossover
ports.
The
1 Port
Green. The Full/Col LED also serves two purposes. If this
LED remains lit, a LAN port connection is being successfully maintained. If the LED flickers, the connection is experiencing collisions. Infrequent collisions are normal.
If this LED flickers too often, there may be a problem with
your connection. See the Troubleshooting section if you
encounter this problem.
10/100
Orange. The 10/100 LED lights up when a successful
100Mbps connection is made through the corresponding
port.
If a connection is running at 10Mbps, the 10/100 LED will
not light up.
Note: The diagram above is for reference
purposes only. Every network is different. If
you do not make a connection to a hub or
switch by using the settings above, change
the position of the Crossover Switch.
The 1-Port Router’s Front Panel LEDs
The WAN Indicators
Link
Green. The Link LED lights up when a successful connection is made between the Router and your broadband device
or network.
Act
Green. The Act LED flickers when the Router is sending or
receiving data over the broadband WAN port.
Diag
Red. The Diag LED lights up when the Router goes through
its self-diagnostic mode. It will turn off upon successful
completion of the diagnosis.
If this LED stays on for an abnormally long period of time,
see the Troubleshooting section.
The LAN Indicators
Power
Link/Act
9
Green. The Power LED lights up green when the Router is
powered on.
Green. The Link/Act LED serves two purposes. If the LED
10
Instant Broadband Series
Getting to Know the 3-Port
EtherFast Cable/DSL Router
EtherFast Cable/DSL Routers
USB ports do not work on PCs running
Windows 95 or Windows NT.
The 3-Port Router’s Rear Panel Ports
USB Compatibility with Your PC
To use the USB port on the 3-Port Router, you must have Windows 98, 2000, or
Millennium installed on your PC. USB cannot run in a Windows 95 or NT environment.
Also, your PC must have a USB port installed and enabled. Some PCs may have a disabled USB port. If your port doesn’t seem to be working, there may be jumpers on the
motherboard or a menu option in the BIOS to enable a PC’s USB port.
The 3-Port Router’s Ports
11
Ports 1-3
These three LAN ports connect to your PCs, hubs,
switches, print servers, or any other device with an
Ethernet port.
Uplink
The Uplink port connects to another hub or switch
for port expansion when you run out of open ports
for your network devices. Since the Uplink port
and the standard port right next to it share internal
wiring, you can only use one of the two ports at a
time.
WAN
This WAN port connects to your cable or DSL
modem. Your modem connection will not work
from any other port.
Power
The Power port is where you will connect the power
adapter.
USB
The USB port (Type B - slave) can connect to a
USB-ready PC or a USB hub. This allows you to
enjoy an immediate, plug-and-play connection
without even installing a network adapter for your
PC. To work with USB ports, your PC must be running Windows 98, 2000, or Millennium.
Other motherboards have USB interfaces, but no ports. You can install your own USB
port and attach it to your PC’s motherboard using hardware purchased at retail computer stores. See your PC’s User Guide for instructions.
This USB icon denotes the presence of a USB port or connector.
Your 3-Port Router comes with a USB cable that has two different types of connectors. Type A, the master connector, is shaped like a rectangle and plugs into
your PC’s USB port. Type B, the slave connector, resembles a square and connects to the USB port on the rear panel of your Router.
USB Type A
USB Type B
12
Instant Broadband Series
EtherFast Cable/DSL Routers
Buttons
The Reset Button
Details on the Reset button are found in the Getting
to Know the 4-Port EtherFast Cable/DSL Router
section.
USB
The USB LED lights up when the USB port is successfully
connected to a PC, USB hub, or other USB device.
The WAN Indicators
The 3-Port Router’s Front Panel LEDs
Link
Green. The Link LED lights up when a successful connection is made between the Router and your broadband device
or network.
Act
Green. The Act LED flickers when the Router is sending or
receiving data over the broadband WAN port.
Diag
The LAN Indicators
Red. The Diag LED lights up when the Router goes through
its self-diagnostic mode. It will turn off upon successful
completion of the diagnosis.
Power
Green. The Power LED lights up green when the Router is
powered on.
If this LED stays on for an abnormally long period of time,
see the Troubleshooting section.
Link/Act
Green. The Link/Act LED serves two purposes. If the LED
is continuously lit up, the Router is successfully connected to
a device through the corresponding RJ-45 port (1, 2, or 3). If
the LED flickers, then that port is sending or receiving data
to and from the network.
Full/Col
Green. The Full/Col LED also serves two purposes. If this
LED is continuously lit up, the connection made through the
corresponding port is successfully running in Full Duplex
mode. If the LED is flickering, the connection is experiening collisions. Infrequent collisions are normal.
If this LED flickers too often, there may be a problem with
your connection. See the Troubleshooting section if you have
problems.
100
13
Orange. The 100 LED lights up when a successful 100Mbps
connection is made through the corresponding port. If this
LED does not light up, then your connection speed is 10
Mbps.
14
Instant Broadband Series
Connecting the Cable/DSL Router to
Your Network
Overview
Unlike a hub or a switch, the Cable/DSL Router’s setup consists of more than
simply plugging hardware together. Since the Router acts as a DHCP server,
you will have to set some values for the Router and also configure your networked PCs to accept the IP addresses that the Router assigns them.
You will need the following data from your ISP (Internet Service Provider) to
install the Cable/DSL Router:
• Your broadband-configured PCs’ Computer Name and Workgroup Name
• Your broadband-configured PCs’ fixed
Internet IP Address
• Your Subnet Mask
Only if applicable
• Your Default Gateway
• Your Primary DNS Server IP address(es)
}
The installation technician from your ISP should have left this information with
you after installating your broadband connection. If not, you can call your ISP
to request the data.
Once you have the above values, you can begin the Installation and Setup of
your EtherFast Cable/DSL Router.
LANs and WANs
Simply put, a router is a network device that connects two networks together.
In this instance, your EtherFast Cable/DSL Router connects your Local Area
Network (LAN), or the group of PCs in your home or office, to the Wide Area
Network (WAN), that is, the Internet. Your Router processes and regulates the
data that travels between these two networks.
Think of your Router as a network device with two sides: the first side is made
up of your private Local Area Network (LAN) of PCs, which this User Guide
sometimes calls the “internal LAN.” The other, public side is the Internet, or
the Wide Area Network (WAN), outside of your home or office.
15
EtherFast Cable/DSL Routers
Your Router’s firewall (NAT) protects your network of PCs with security so
users on the public, Internet side cannot “see” your PCs. This is how your
internal LAN, or network, remains private.
Remember that your Router’s ports connect to two sides: your 10/100 LAN
port(s) and the Internet WAN port. The LAN port(s) transmit data at 10Mbps
or 100 Mbps, whereas the broadband port, or WAN port, transmits data at 10
Mbps, because 10Mbps is currently the maximum speed for cable and DSL
service.
IP Addressing: A Quick Lesson
What’s an IP Address?
IP stands for Internet Protocol. Every
device on an IP-based network, including
PCs, print servers, and routers, requires an
IP address to identify its “location,” or
address, on the network. Since the Internet
is simply one huge global network, every
PC that logs on to the Internet also requires
an IP address.
There are two ways of assigning an IP
address to your network devices.
Static IP Addresses
Since your Router is a device that connects two networks, it needs two IP
addresses - one for the LAN side, and
one for the WAN side. In this User
Guide, you’ll see references to the
“WAN IP address” and the “LAN IP
address.”
Since the Router has firewall security
(NAT), the only IP address that can be
seen from the Internet for your network is the Router’s WAN IP address.
However, even this WAN IP address
for the Router can be blocked, so that
your Router and network seem invisible to the Internet - see the Blocking
WAN Requests description under IP
Filtering.
A static IP address is a fixed IP address
that you assign manually to a PC or other
device on the network. Since a static IP
address remains valid until you disable it,
static IP addressing insures that the device assigned it will always have that
same IP address. Static IP addresses are commonly used with network devices
such as server PCs or print servers.
If you use your Router to share your cable or DSL Internet connection, contact
your ISP to find out if they have assigned a static IP address to your account.
If so, you will need that static IP address when configuring your Router.
16
Instant Broadband Series
Dynamic IP Addresses
Connecting Your Hardware Together and Booting Up
A dynamic IP address is automatically assigned to a device on the network,
such as PCs and print servers. These IP addresses are called “dynamic”
because they are only temporarily assigned to the PC or device. After a certain
time period, they expire and may change.
1. Before you begin, make sure that all of your hardware is powered off,
including your Router, PCs, hubs, switches, and the cable or DSL modem.
If a PC logs on to the network (or the Internet) and its dynamic IP address has
expired, the DHCP server will assign it a new dynamic IP address.
DHCP (Dynamic Host Configuration Protocol) Servers
PCs and other network devices using dynamic IP addressing are assigned a new
IP address by a DHCP server. DHCP frees you from having to assign IP
addresses manually every time a new user is added to your network.
DHCP servers can either be a designated PC on the network or another network
device, such as the Cable/DSL Router.
By factory default, a DHCP server (LAN side) is enabled on your Router. If
you already have a DHCP server running on your network, you must disable
one of the two DHCP servers. If you run more than one DHCP server on your
network,you will experience network errors, such as conflicting IP addresses.
To disable DHCP on your Router, see the section on DHCP in The Cable/DSL
Router’s Web-based Utility.
Even if you assign a static IP address to a PC, other PCs can
still use DHCP’s dynamic IP addressing, as long as the static IP is not within DHCP range of the LAN IP Address.
If the dynamic IP addressing fails to provide a dynamic IP
address for any reason, please refer to the Troubleshooting
Section.
17
EtherFast Cable/DSL Routers
2. A. If you have the 4-Port Cable/DSL Router, connect one end of a network
cable to one of the LAN ports (labeled 1, 2, 3, or 4) on the back of the
Router, and the other end into a standard port on a network device, e.g., a PC,
print server, hub, or switch. See the Twisted-Pair Cabling section for
details on network cabling.
A standard port is any port other than the WAN port
and the Uplink port. It’s a straight-through port.
Repeat the above step to connect more PCs or network devices to the Router.
2. B. If you are connecting the 1-Port Router to just one PC, plug one end
of a network cable into the Router’s LAN port and the other end into the PC’s
network adapter port. Set the Crossover Switch to crossover mode (X). If
the crossover mode does not light up a Link LED, see the chart in the
Getting to Know the 1-Port EtherFast Cable/DSL Router section.
If you are connecting the 1-Port Router to a hub or switch, plug one end
of a network cable into the Router’s LAN port, and the other end into to a
standard port on your network’s hub or switch. Set the LAN port’s Crossover
Switch to its straight-through (II) mode. Please refer to the chart in the
Getting to Know the 1-Port EtherFast Cable/DSL Router section.
If your hub or switch has no more standard ports available, connect the
Router using its LAN port to the Uplink port on the hub or switch. Set the
Crossover Switch to straight-through mode (II) for this set-up.
2. C. If you have the 3-Port Cable/DSL Router, connect one end of a network cable from the one of the Router’s LAN ports (labeled 1, 2, or 3) to a
port on a PC, hub, switch, or other network device.
The 3-Port Router features one USB plug-and-play port that connects
instantly to any USB-ready PC or hub. This allows you to connect to and
access your Router without even installing any network cards.
18
Instant Broadband Series
3. Connect the network cable from your cable or DSL modem to the WAN
port on your Router’s rear panel. This is the only port that will work for your
modem connection.
4. Connect the power adapter to the Power port on the rear panel of the
Router, then plug the power adapter into a power outlet.
Note: It is highly recommended that you plug your
Router into a power strip with surge protection.
• The Power LED on the front panel will light up green as soon as the power
adapter is connected properly.
• The Diag LED will light up red for a few seconds when the Router goes
through its self-diagnostic test. This LED will turn off when the self-test
is complete.
EtherFast Cable/DSL Routers
Uplinking: Connecting More Devices to Your Router
If your Router’s LAN ports are all full and you still have PCs and/or devices
to connect, connect a hub or a switch to your Router.
To do so, use the Router’s Uplink port to connect to a standard port on a hub
or switch. If you have a PC/device connected to the port right next to the
Uplink port (on the 3- and 4-Port Routers), disconnect that PC/device and
plug it into an open port on the new hub or switch.
Since the Uplink port shares internal wiring with the port right next to it, you
can only use only one of these two ports at a time: these ports are called
shared ports.
If your new hub or switch also has an Uplink port, it too can be uplinked
when you next run out of ports, and so on.
5. Power on the cable or DSL modem.
6. Press the Reset button on the Router’s front panel with a paper clip or a
pencil. Hold the button in until the Diag LED lights up and then turns off.
This will restore the Router’s factory default settings.
Technical Checkpoint:
Did you remember to check for Link LEDs for all your connections?
Use the Router’s Uplink port to connect to a standard port on a hub or
switch. This leaves you with new, open ports on the hub or switch, to which
you can add more PCs and/or network devices.
See your nearest Linksys retailer or visit www.linksys.com for complete
product lines of 10/100 Mbps hubs and switches.
If all of your Link LEDs are not lighting up, make sure that all your
cables are securely plugged in, and that all of your hardware is powered
on properly.
The Router’s hardware installation is now complete!
Continue with the next section to configure
the Router with your PCs.
19
20
Instant Broadband Series
Configuring the BEFSRU31’s
USB Port
EtherFast Cable/DSL Routers
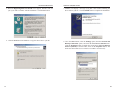
3. Select “Search for the best driver for your device (Recommended).”
Click the Next button.
Use the enclosed USB cable to connect your PC to the Router: the Type A
end connects to your PC’s USB port, while Type B connects to the Router’s
USB port. Now that all of your Router’s hardware is connected together, you
must enable the PC that will connect to the Router through its USB port.
Since your USB connection acts as a network adapter for your PC, there’s no
need for you to install a network adapter for that PC. Just follow the directions
below to enable your PC’s USB connection to the Router:
• If you are running Windows 98, continue on this page, below.
• For other Windows operating systems, please refer to the apropriate section
as listed in the Table of Contents.
After you finish this configuration, make sure that TCP/IP is
installed on your PC(s). For instructions on installing TCP/IP, see
the Installing the TCP/IP Protocol section in the Appendix.
4. Select “Floppy disk drives” and click the Next button to start the search
for your driver.
You can also connect your Router’s USB port to other USB devices besides
USB-ready PCs, such as USB hubs.
USB Configuration for Windows 98
1. With the router connected to your PC’s USB port, start up your PC in
Windows 98 and insert the driver diskette.
2. Windows will display a message saying that it has detected new hardware.
Click the Next button.
21
22
Instant Broadband Series
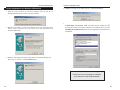
5. A new window will appear, saying that Windows is now ready to install
the best driver for this device. Click the Next button to continue.
6. Windows will begin copying the files to your PC. Do not click the Cancel
button or press the Esc key during this process.
If Windows asks for your Windows operating system files before copying,
direct your PC to the location of those files, e.g,
c:\windows\options\cabs, or D:\Win98 (assuming that your
CD-ROM drive is named D).
EtherFast Cable/DSL Routers
7. Windows will notify you that it has completed copying the driver files to
your PC. Click the Finish button.
8. Windows will ask you if you want to restart your PC. Click the Yes button
so your new installation will take effect.
If it does not ask you, click the Start button, select Shut Down, then select
Restart and click the Yes button.
Your USB installation is now complete.
Go to the Configuring Your Network with the
Cable/DSL Router section to configure your
network to work with the Router.
23
24
Instant Broadband Series
USB Configuration for Windows 2000
EtherFast Cable/DSL Routers
3. When Windows asks you where to search for driver files, select “Floppy
disk drives” and click the Next button.
1. With the Router connected to your PC’s USB port, start up your PC in
Windows 2000 and insert your driver diskette. Windows will show a message notifying you that the PC has found new hardware. Windows’ Hardware
Wizard will show a message to say that it is ready to start installing the driver files to your PC. Click the Next button.
4. Windows will show a message saying that it has found the driver files.
Click the Next button.
2. Select “Search for a suitable driver for my device (Recommended)” and
click the Next button.
25
26
Instant Broadband Series
5. When the Digital Signature Not Found screen appears, Windows will ask
you if you want to continue with the installation. Click the Yes button.
6. Click the Next button for Windows to copy the driver files to your PC.
27
EtherFast Cable/DSL Routers
7. Windows will display a message saying that it has finished installing the
driver files on your PC. Click the Finish button to complete the installation.
8. Go to the Start button, select the Settings option, then the Network and
Dial-up Connections option, and click the Local Area Connection icon.
Click the Properties button to display the screen below. Highlight Internet
Protocol (TCP/IP) as shown below, click on the Properties button, and
make sure that TCP/IP is set to Obtain an IP Address automatically.
28
Instant Broadband Series
USB Configuration for Windows Millennium
EtherFast Cable/DSL Routers
4. Windows will ask you to restart your PC. Click the Yes button.
1. With the router connected to your PC’s USB port, start up your PC in
Windows Millennium and insert your driver diskette.
2. Windows will notify you that new hardware has been detected (shown
above). Select “Automatic search for a better drive (Recommended)” and
click the Next button.
5. When your PC is finished restarting, click the Start button, select Settings,
Control Panel, and Network. Make sure that TCP/IP is installed for your
PC as shown on the screen below. If TCP/IP is not installed, please go to the
Installing the TCP/IP Protocol section in the Appendix for instructions on
installation.
3. Windows will display a message saying that it has finished installing the
driver files on your PC. Click the Finish button.
Your USB installation is now complete.
Continue on to the next page to configure
your network to work with the Router.
29
30
Instant Broadband Series
Configuring Your Network with the
Cable/DSL Router
EtherFast Cable/DSL Routers
4. Click the Properties button, then choose the IP Address tab. Select Obtain
an IP address automatically. Click the OK button.
You have now completed the PC’s client settings, so it can connect to the
Router.
Configuring PCs to Connect to the Cable/DSL Router
Now you may have to configure your other PCs to accept the IP addresses that
your Router will provide. If you have not set a static IP or dynamic IP address,
please follow the directions below. Otherwise, skip to the next section titled
Configuring Your Cable/DSL Router.
Note: Make sure that a network card or adapter has been successfully
installed in each PC you plan on configuring before continuing.
Note: These instructions apply only to Windows 95, Windows
98, and Windows ME machines. For TCP/IP setup under
Windows NT or 2000, see your Windows manual.
1. Click the Start button, select Settings, then Control Panel.
2. Double-click on the Network icon.
3. In the Configuration window, select the TCP/IP protocol line associated
with your network card/adapter. If there is no TCP/IP protocol line listed for
your card/adapter, go to the Installing the TCP/IP Protocol section in the
Appendix to install the TCP/IP protocol now.
5. Click the OK button. Windows may ask for original Windows installation
files. Direct your PC to the location of the files, e.g., D:\win98,
D:\win9x, D:\win95, or c:\windows\options\cabs.
6. Windows will ask you to restart the PC. Click the Yes button.
7. Repeat these steps for each PC on your network.
When all of your PCs are configured,
the TCP/IP setup and configuration are complete.
Continue on to the next section
to complete your network setup.
31
32
Instant Broadband Series
Configuring the Cable/DSL Router
EtherFast Cable/DSL Routers
3. The Cable/DSL Router’s Setup page will appear.
Now that your TCP/IP setup is complete, you can begin configuring your
Router.
Note: Your screen
may vary slightly
from the screen
shown here.
IMPORTANT! If you have previously enabled any Internet-sharing proxy
server software on any of your PCs, you must disable it now.
Some examples of proxy server software are Internet LanBridge,
Wingate, and Sygate. To disable your proxy server software:
• If you are running Netscape Navigator: Click Edit >> Preferences >>
Advanced >> Proxies> and click Direct Connection to the Internet.
• If you are running Internet Explorer, click Start>> Settings>> Control
Panel>> Internet Options>> Connections>> LAN Settings. Remove
the checks from all three boxes. Click the OK button to continue.
Also, you must disable any Internet log-on software (such as Ivasion
Winpoet or Enternet 300) and any firewall software (such as ZoneAlarm
and Watchdog) on all of your PCs.
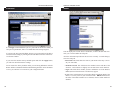
1. Open your web browser and type http://192.168.1.1 in the browser’s Address field. This number is the Router’s default IP address. Press the
Enter key.
2. A username and password prompt will appear. Leave the User Name field
empty and type “admin,” which is the default password, into the Password
box. Click the OK button.
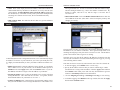
4. Configure the following values:
Host Name & Domain Name These fields allow you to give the Router a
Host and Domain name. Some ISPs require these names as identification.
You may have to check with your ISP to see if your broadband Internet service has been configured with Host and Domain names. In most cases, leaving these two fields blank will still work.
LAN IP Address These values refer to your internal network settings.
Unless you have specific internal needs, there should be no reason to change
these values. For the internal LAN side, the Router’s default values are as
follows:
• Private IP Address:
192.168.1.1
33
34
Instant Broadband Series
• Subnet Mask:
255.255.255.0
WAN IP Address These values refer to the external network (the Internet)
you connect to every time you access your Internet connection.
Most broadband ISPs assign their clients to a different IP address each time
they log on. If this is the case with your ISP, select Obtain an IP Address
Automatically and go to step 5.
If your ISP assigns you a fixed, static IP address, select Specify an IP
Address and enter the appropriate values into the IP Address, Subnet
If you need to enable PPPoE support, choose PPPoE. If you
do enable PPPoE, remember to remove any existing PPPoE
applications already on any of your PCs. More information
on PPPoE can be found under the Setup heading in the next
section.
EtherFast Cable/DSL Routers
The Cable/DSL Router’s Web-based
Utility
Quick & Easy Router Administration
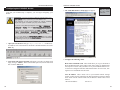
The EtherFast Cable/DSL Router uses a web browser-based administrative
Utility that is programmed into a chipset. All administrative tasks for the
Router are performed through this Setup Utility. The Utility can be accessed
through any PC on the network by typing http://192.168.1.1 into the
web browser’s Address field (even if that PC does not yet have Internet access),
shown below.
Mask, Default Gateway Address and DNS (Required) fields as provided
by your ISP.
5. When you have properly configured the Setup window, click the Apply button, then click the Continue button.
6. Select the DHCP tab. For more information on this feature, refer to the
apropriate section under The Cable/DSL Router’s Web-based Utility.
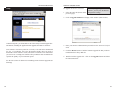
After entering the address value into the web browser, a password request page
will pop up as shown below. Leave the User Name field blank and type
“admin” into the Password field. Then click the OK button.
7. DHCP is already enabled on your Router by factory default. By leaving the
setting on Enable, the Router is configured to automatically assign IP
addresses to each of your PCs.
If you already have a DHCP server on your network, select Disable for the
DHCP Server option. If you do so, you must use your existing DHCP server’s LAN IP address, or you may need to assign your Router a new static
LAN IP address.
In the Number of DHCP Users field, you may enter the number of PCs you
plan on networking to the Router. If you add more PCs to your network in
the future, don’t forget to change this value.
8. Click the Apply button and then click the Continue button.
9. Reset the power on the cable or DSL modem, and restart the PC so
the new Router settings will take effect.
35
In this section, you’ll find brief descriptions of each web page in the Utility and
each page’s key functions. More detailed explanations and instructions can be
found by clicking each page’s Help button in your Router’s Setup Utility.
To apply any of the settings you change on a page, click the Apply button, and
then click the Continue button. To clear any values you’ve entered on any
page, click the Cancel button.
36
Instant Broadband Series
EtherFast Cable/DSL Routers
• WAN IP Address This is the IP address that your Router has, when seen
from the external WAN, or the Internet.
Setup
• Subnet Mask This is the Router’s Subnet Mask, as seen by external users
on the Internet (including your ISP). If you select Obtain an IP address
automatically, your ISP will assign these values.
• Default Gateway Address Your ISP will provide you with the Default
Gateway IP Address. If you select Obtain an IP address automatically,
your ISP will assign these values.
Note: The Setup
page in this picture may differ
slightly from the
one you see.
• DNS (Domain Name Server) IP Address Your ISP will provide you with
at least one DNS Server IP Address. If you select Obtain an IP address
automatically, these values will be assigned by your ISP.
You can check whether the values you entered for the above
settings are correct by testing your Internet access.
• PPPoE (Point-to-Point Protocol over Ethernet) Some DSL-based ISPs
use PPPoE to establish communications with their end-users. If you are
using a DSL line, check with your ISP to see if they use PPPoE. If they do
use PPPoE, you must enable it. To enable PPPoE:
1. Click on the PPPoE option in the Login section of the Setup screen.
2. Enter the User Name you use to log on to your Internet connection.
3. Enter your corresponding Password.
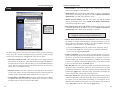
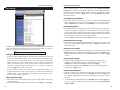
The Basic Setup screen is the first screen you see when you access the Setup
Utility. If you have already installed and set up your Router, you have already
seen this screen and properly configured all of the screen’s values.
• Host Name & Domain Name These fields allow you to supply a host and
domain name for the Router. Some ISPs require these names as identification. You may have to check with your ISP to see if your Broadband Internet
service has been configured with a host and domain name. In most cases,
leaving these fields blank will work.
• Firmware Version This entry shows the version and date of the firmware
you are using. Future versions of the Router’s firmware will be posted and
available for download on the Linksys Web site at www.linksys.com.
• LAN IP Address and Subnet Mask The values for the Router’s IP Address
and Subnet Mask are shown here. The default value is 192.168.1.1 for the
IP address and 255.255.255.0 for the Subnet Mask.
37
• Connect on Demand If you aren’t actively using the Internet, you can configure your Router to cut your connection with your ISP after a certain period of time. If you have been disconnected due to inactivity, Connect on
Demand enables your Router to automatically re-establish your connection
as soon as you attempt to access the Internet again. If you wish to activate
Connect on Demand, choose the Enable option.
• Max Idle Time Max Idle Time is the number of minutes that passes before
the Router drops your Internet connection, due to inactivity. If you want
your Internet connection to remain on at all times, enter zero (0) in this field
and click the Apply button. Otherwise, enter in the number of minutes you
want to elapse before your Internet access disconnects.
• Keep Alive Option This option keeps your PPPoE-enabled Internet access
connected indefinitely, even when it sits idle. It keeps the connection alive
by sending out a few data packets periodically, so your Internet service
thinks that the connection is still active. To use this option, click on the box
next to Keep Alive to select it, and click the Apply button.
38
Instant Broadband Series
Password
EtherFast Cable/DSL Routers
Status
It is strongly recommended that you set a password for the Router. When you
first power up the Router, there is no default Password setting assigned.
If you leave the password field blank, all users on your network will be able to
access the Router simply by entering the unit's IP address into their web browser's location window.
All of the information provided on this screen is read-only. To make changes,
select the Setup tab.
If you select the Restore Factory Default option and click the Apply button,
you will clear all of the Router’s settings.
• Host Name This field shows the name of your Router. This entry is necessary for some ISPs.
Do not restore the factory defaults unless you are having difficulties with the
Router and have exhausted all other troubleshooting measures. Once the Router
is reset, you will have to re-enter all of your configuration data.
• Firmware Version This field shows the installed version and date of the
firmware. Version dates are slightly more accurate than version numbers.
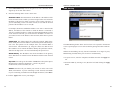
Status
39
This tab displays the current status of the Router; it reflects the data and selections you’ve entered under the Setup tab.
• Login This field shows whether you have enabled the use of the Router’s
PPPoE (Point-to-Point Protocol over Ethernet) support.
• LAN These fields display the current IP Address and Subnet Mask of the
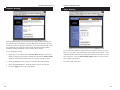
Router, as seen by users on your internal network. DHCP Server shows
the status of the Router's DHCP server function, which is either enabled or
disabled.
40
Instant Broadband Series
• WAN These fields display the WAN IP Address, WAN Subnet Mask and
WAN Default Gateway IP address of the Router, as seen by external users
on the Internet. The DNS (Domain Name System) IP Address fields show
the IP address(es) of the DNS currently used by the Router. Multiple DNS
IP settings are common. In most cases, the first available DNS entry
is used.
• DHCP Clients Table This table lists the PCs that were given IP addresses
by the Router.
EtherFast Cable/DSL Routers
not be greater than 253. In order to determine the DHCP IP Address range,
add the starting IP address (e.g. 100) to the number of DHCP users. By
default as shown, add 100 to 50, and the range is 192.168.1.100 to
192.168.1.150.
• DHCP Clients Table Click on the DHCP Clients Table button to show the
current DHCP Client data. (This data is stored in temporary memory and
changes periodically).
Logging
DHCP
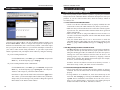
The Log feature provides you with a log of all incoming and outgoing URLs or
IP addresses for your Internet connection. The Logviewer keeps track of all
incoming and outgoing activity that can be saved in a text file. The IP address
points to the location where Logviewer is running.
A DHCP (Dynamic Host Configuration Protocol) server automatically assigns
IP addresses to each PC on your network for you. Unless you already have one,
it is highly recommended that you leave your Router enabled as a DHCP server.
• DHCP Server DHCP is already enabled by factory default. If you already
have a DHCP server on your network, set the Router's DHCP option to
Disable and click the Apply button, then the Continue button. If you disable DHCP, remember to assign a static IP address to your Router.
• Starting IP Address Enter a value for the DHCP server to start with when
issuing IP addresses. This value must be (192.168.1. 2) or greater, because
the default IP address for your Router is 192.168.1.1.
• Number of DHCP Users (Optional) Enter the maximum number of PCs
that you want the DHCP server to assign IP addresses to. This number can41
Outgoing Access Log lists all the URLS or IP addresses of Internet sites that
users on your network have accessed, and Incoming Access Log gives you a log
of all incoming Internet traffic.
This data can also be accessed by other network users if the file is shared out.
1. To activate logging, select Enable next to "Access Log."
2. Specify the IP address of the PC that you want to send the log to. Make
sure that this PC is using a static IP address. Click the Apply button and then
the Continue button when you're done. You may download the Logviewer
software at www.linksys.com for more information.
3. Click on Outgoing Access Log or Incoming Access Log to view each log.
4. To disable Logging, select Disable in the Log window, then click the Apply
button and the Continue button.
42
Instant Broadband Series
Help
EtherFast Cable/DSL Routers
To upgrade the Router’s firmware:
NOTE: By upgrading the Router’s
firmware, you may lose the Router’s
1. Select the Help tab (shown on the configuration settings.
previous page).
2. Click on Upgrade Firmware to display a new window (shown below):
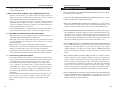
Under the Help tab, you’ll find links to all of the Utility’s internal support documentation, including the application that upgrades the Router’s firmware.
New firmware versions are posted at www.linksys.com and can be downloaded
for free. If your Router can access the Internet already, there’s no need to
download a newer firmware version, unless that version has a new feature that
you want to use. Loading new firmware onto your Router does not enhance the
speed or the quality of your connection speed.
3. Enter your Router’s administration password into the Password Confirm
field.
4. Click the Browse button to find the firmware upgrade file that you downloaded from the Linksys Web site.
5. Double-click the Upgrade file. Click on the Upgrade button and follow
the instructions there.
See the next section for directions on enabling remote firmware upgrades (IP
Filtering).
Dynamic Routing
43
44
Instant Broadband Series
IP Filtering
EtherFast Cable/DSL Routers
in the command prompt. To set the MAC filter, click the Edit MAC Filter
Setting button. When a second window appears, select the range in the dropdown box, and at the MAC number prompt, enter the 12-digit MAC address
you want to filter. Click the Apply button and the Continue button, before
closing the window.
SPI (Stateful Packet Inspection)
• This feature checks the state of of a packet to verify that the destination IP
address matches the source IP of the original request. To use the firewall,
click the Enable button; otherwise select Disable to use the NAT firewall.
Blocking WAN Requests
• By enabling the Block WAN Request feature, you can prevent your network
from being “pinged,” or detected, by other Internet users. The Block WAN
Request feature also reinforces your network security by hiding your network
ports. Both functions of the Block WAN Request feature make it more difficult
for outside users to work their way into your network.
• Click the Apply button and then the Continue button to save your changes.
IP Filters block specific internal users from accessing the Internet and enable
VPN (Virtual Private Network) sessions. You can set up filters by using IP
addresses or network port numbers (or a range of ports).
Note: Only one VPN session may be conducted at a time.
Setting Up Filters
• To set up a filter using IP addresses, enter the range of IP addresses you wish
to filter into the IP address fields. Users who have filtered IP addresses will
not be able to access the Internet at all. If you only want to filter one IP
address instead of a range of IP addresses, enter the same value into both
fields. For instance, if you wish to filter the PC with the IP address of
192.168.1.5, enter 5 into both fields on one line: 192.168.1.5~ 192.168.1.5.
Click the Apply button when you’re done.
• To filter users by network port number, enter a network port number or a
range of network ports. Enter the port numbers you want to filter into the port
numbers fields. Users connected to the Router will no longer be able to
access any port number listed there.
Editing MAC Filter Setting
• This feature filters the network adapter’s specific MAC address from going
out to the Internet.
• To check your network adapter’s MAC address, run “winipcfg” or “ipconfig”
45
Using Multicast Pass Through
• This feature allows for mulitple transmissions to specific recipients at the
same time. Select Enable to support the feature, or Disable to keep the router
from multicasting.
Using IPSec Pass Through
• This feature lets you use IPSec Pass Through. To use this feature, click on the
Enable button next to “IPSec Pass Through,” then click on the Apply button.
• To disable IPSec Pass Through, click on Disable and then click on the Apply
button.
Using PPTP Pass Through
• Point-to-Point Tunneling Protocol is the method used to enable VPN
(Virtual Private Networking) sessions. To enable this feature, click on
Enable next to PPTP Pass Through, and then click Apply.
• To disable this feature, click on Disable next to PPTP Pass Through, and
then click the Apply button.
Using Remote Management
• This feature allows you to manage your Router from a remote location, via the
Internet. To enable this feature, click on Enable, then click the Apply button. Remote Management must be activated before you leave to a remote
location.
• To disable Remote Management, click on Disable, then click the Apply button. If you wish to use this feature on the browser, enter http:\\<WAN IP
Address>:8080.
46
Instant Broadband Series
EtherFast Cable/DSL Routers
• To disable this feature, click on Disable, then click the Apply button.
To add a server using Forwarding:
Using Remote Upgrade
• This feature allows you to upgrade your Router’s firmware from a remote
location. To enable Remote Upgrade, click on Enable, then click on the
Apply button. Remote Management must be activated before you leave to a
remote location.
1. Enter the port number or range of ports used by the server. On the same
line, select the protocol UDP, TCP, or Both, and enter the LAN IP address
of the server that you want the Internet user(s) to access.
Using MTU (Maximum Transmission Unit)
• This feature allows for the transmission of the largest packet size over the
network. Select Enable and enter the value desired. It is recommended that
you leave this value at the 1200 to 1500 range. For most DSL users, it is recommended to use 1492. By default, MTU is set at 1500 when disabled.
Using Port Triggering
2. Configure as many entries as needed—the Router supports up to 10 ranges
of ports. Click the Apply button when you’re done.
IP Forwarding
Port triggering allows the Router to watch outgoing data for specific port numbers. The IP address of the computer that sends the matching data is remembered by the Router, so that when the requested data returns through the firewall, the data is pulled back to the proper computer by way of IP address and
port mapping rules.
1. Enter the application name of the trigger.
2. Enter the port range used by the application.
Forwarding sets up public services on your network, such as web servers, ftp
servers, or email servers. When users send this type of request to your network via the Internet, the Router will forward those requests to the appropriate PC. Before using Forwarding, the Router's DHCP function must be disabled under the DHCP tab and the Router must be assigned a new static LAN
IP address because the IP address may change when using the DHCP server.
47
3. Enter the incoming port range used by the application.
4. Click the Apply button to continue.
48
Instant Broadband Series
Dynamic Routing
EtherFast Cable/DSL Routers
Static Routing
With Dynamic Routing, you can automatically adjust to physical changes in
the network's layout. The Router, using the RIP protocol, calculates the most
efficient route for the network’s data packets to travel between the source and
the destination, based upon the shortest paths. The RIP protocol regularly
broadcasts routing information to other routers on the network.
1. Select the correct working mode. Gateway Mode should be used if your
Router is hosting your network's connection to the Internet. Router Mode
should be selected if the Router exists on a network with other routers.
If your Cable/DSL Router is connected to more than one network, you may
have to set up a static route between the two networks. A static route is a predetermined pathway that network data packets must travel to reach a specific
host or network. Click the Show Routing Table button to view the current
static routing configuration.
2. Select the protocol (TX) by which you transmit data on the network.
To create a static route entry:
To set up dynamic routing:
3. Select the protocol (RX) by which the Router receives network data.
4. Click the Apply button to save your changes.
Static Rou
49
50
Instant Broadband Series
1. Select Static Route Entry from the drop-down list. The Cable/DSL Router
supports up to 20 static route entries.
EtherFast Cable/DSL Routers
DMZ Hosting
2. Enter the following data to create a static route:
Destination LAN IP The Destination LAN IP address is the Address of the
remote network or host to which you want to assign a static route. Enter the
IP address of the host for which you wish to create a static route here. If
you are establishing a route to an entire network, be sure that the network
portion of the IP address is set to zero (0).
For example, the Router’s standard IP address is 192.168.1.1. Based on this
address, the address of the network to which the Router is connected is
192.168.1, with the last digit (1, in this case) determining the Router’s place
on the network. Therefore, you would enter the IP address 192.168.1.0 if
you wanted to route to the Router’s entire network, rather than to just the
Router.
Subnet Mask The Subnet Mask (also called the Network Mask) determines which portion of an IP address is the network portion and which portion is the host portion. In the example above, the Network Mask is
255.255.255.0. This determines (by using the values 255) that the first
three numbers of an network IP address identify this particular network,
while the last digit (from 1 to 254) would identify the specific host.
Default Gateway This IP address must be the IP address of the gateway
device that allows for contact between the Router and the remote network
or host.
Hop Count This value gives the number of nodes that a data packet passes
through before reaching its destination. A node is any device
on the network, such as switches, PCs, etc.
The DMZ Hosting feature allows one local user to be exposed to the Internet
to use a special-purpose service such as Internet gaming and video-conferencing.
Whereas IP Forwarding can only forward a maximum of 10 ranges of ports,
DMZ hosting forwards all the ports for one PC simultaneously.
• To expose one PC, enter the computer’s IP address and click the Apply button.
• Deactivate DMZ by entering a zero (0) in the field and clicking the Apply
button.
Interface Interface tells you whether your network is on the LAN or the
WAN, or the Internet. If you’re connecting to a sub- network, select LAN.
If you’re connecting to another network through the Internet, select WAN.
3. Click the Apply button to save your changes.
51
52
Instant Broadband Series
EtherFast Cable/DSL Routers
Troubleshooting
MAC Address Clone
Note: This is a
sample screen.
Please enter
the MAC
Address for
your Network
Card/Adapter
into this field.
Clicking on the "MAC Address" tab (next to WAN IP Address) displays your
Router's MAC address, which is a 12-digit code assigned to a unique piece of
hardware for identification, like a social security number. Some ISPs require
that you register the MAC address of your network card/adapter connected to
your cable or DSL modem during installation. If your ISPs require MAC
address registration, find your adapter's MAC address by doing the following:
• If you are running Windows 98:
Click the Start button, select Run, type in "command," and press the
Enter key. At the DOS prompt, type "winipcfg."
Common Problems and Solutions
This section provides possible solutions to problems regarding the installation
and operation of the Cable/DSL Router. Read below description to solve your
problems. If you can’t find an answer here, check the Linksys website at
www.linksys.com.
1. I can’t connect to the Cable/DSL Router.
• Check to see that the Cable/DSL Router is properly installed, the LAN
connections are OK (Link LEDs should be on), and it is powered ON.
• Make sure that your PC and the Router are on the same network segment.
If you are not sure, initiate the DHCP function and let the PC get the IP
address automatically.
• Make sure that your PC is using an IP address between 192.168.1.2 to
192.168.1.254 and thus compatible with the Cable/DSL Router default
IP address of 192.168.1.1.
• Also, the Subnet Mask must be set to 255.255.255.0 to match the
Cable/DSL Router’s Subnet Mask. You can check these settings for the
Router by going to Start and Run, then type in “winipcfg” and press
Enter.
2. The Diag LED stays lit when it should not be lit.
• The Diag LED lights up when the Router is first powered up. Meantime,
the system will boot up itself and check for proper operation. After finishing the checking procedure, the LED turns off to show the system is
working fine. If the LED remains lit after this time, the device is not
working properly. Try to re-flash the firmware by assigning a static IP
address to the computer, then upgrade the firmware again. For example,
on one PC, use the following IP settings:
IP Adress: 192.168.1.50, Subnet: 255.255.255.0, Gateway: 192.168.1.1.
• If you are running Windows 2000 or Millennium:
Click the Start button, select Run, type in "command," and press the
Enter key. At the DOS prompt, type "ipconfig/all." The "Physical
Address" with 12 digits is your Router’s MAC address.
Enter those 12 digits into the fields below, and click the Apply button.
This “clones” your network adapter’s MAC address onto your Router,
and prevents you from having to call your ISP to change the registered
MAC address to the Router’s MAC address.
53
If that doesn’t help, contact your dealer for more information.
3. I can’t browse through the Cable/DSL Router.
• Check if both ends of the network cable and power adapter are properly
connected. Check if the status LEDs on the front panel are functioning
properly.
• If using Windows 95 or Windows 98, check the TCP/IP setup on the
client side. Run "winipcfg" by clicking on the Start button, then selecting Run. The PC should have an IP address of 192.168.1.xxx ("xxx" is
from 2 to 254.) Subnet Mask is 255.255.255.0, the default gateway IP
should be the Router’s IP Address, and DNS (in "More".)
54
Instant Broadband Series
• Same as above, check the same setup values in the Status Monitor page
of the Cable/DSL Router.
4. When I enter a URL or IP address, I get a “Request timed out” error.
• Check to see if other PCs give you the same error message. If they do,
make sure that your workstations’ IP settings are correct: IP address,
Subnet Mask, Default Gateway and DNS Server data.
• If the PCs are configured correctly but still not working, check the
Cable/DSL Router. Make sure that it is connected and powered on.
Connect to the Router and check its settings. If you cannot connect to it,
check the LAN and power connections.
• If the Cable/DSL Router is configured correctly, check your Internet connection. (DSL/cable modem, etc.) to see that it is working correctly.
5. I can’t obtain an IP address from my cable or DSL modem.
• Make sure that all of your cabling is properly connected and that all of
the Router’s WAN and LAN LEDs are lighting up.
• Power down your cable or DSL modem for a few seconds. Turn it back
on. After the modem goes through its self-test, check to see if you now
have an IP address.
• Make sure that your cable or DSL modem is DHCP-capable.
• You may have to enter the Host or Domain name in the Setup page of the
Router’s web-based utility. Go to page 34 for more information.
• Your ISP may require MAC Addresses. Check with your ISP. This address
can be obtained in the Status screen of the Router’s Web-based Utility.
6. I can’t access my email or the Internet.
• Some ISPs,especially cable providers, configure their networks so that
you don’t have to enter a full Internet address into your web browser or
e-mail application to reach your home page or receive your e-mail.
• If your Internet home page address is something very simple, such as
“www”, instead of “www.linksys.com”, or your e-mail server’s address
is something like “e-mail” or “pop3”, instead of “pop.mail.linksys.com,”
you won’t be able to properly configure your Cable/DSL Router until
you determine the actual Internet addresses of your Web and e-mail
connections.
• You must obtain this information before connecting the Router to your
network. To do so, you can ask your ISP, or turn to page 59 to learn
how to find this data yourself by “pinging” your Router for an IP
address.
55
EtherFast Cable/DSL Routers
Frequently Asked Questions
How many IP addresses can the Cable/DSL Router support? The Router supports
a maximum of 253 IP addresses.
Is IPSec Pass-Thru supported by the EtherFast Cable/DSL Router? Yes, it is a builtin feature that the Router automatically enables.
Where is the Cable/DSL Router installed on the network? In a typical environment, the Router is installed between the Cable/DSL Modem and the LAN.
Plug the Cable/DSL Router into the cable or DSL modem's Ethernet port.
Does the Cable/DSL Router support IPX or AppleTalk? No. TCP/IP is the only protocol standard for the Internet and has become the global standard for communications. IPX, a NetWare communications protocol used only to route
messages from one node to another, and AppleTalk, a communications protocol used on Apple and Macintosh networks, can be used from LAN to LAN
connections, but those protocols cannot connect from WAN to LAN.
Does the WAN connection of the Cable/DSL Router support 100Mbps Ethernet?
Since broadband Internet connections like cable and DSL do not exceed
10Mbps, the Cable/DSL Router’s current hardware design only supports
10Mbps Ethernet on its WAN port. It does support 100Mbps through the
built-in auto-sensing Fast Ethernet 10/100 Switch on the LAN side of the
Router.
What is Network Address Translation (NAT) and what is it used for? Network
Address Translation (NAT) translates multiple IP addresses on the private
LAN to one public address that is sent out to the Internet. This adds a level of
network security since the addresses of PCs connected to the private LAN is
never transmitted over the Internet. Furthermore, NAT allows the Cable/DSL
Router to be used with low-cost Internet accounts, such as DSL or cable
modems, where only one TCP/IP address is provided by the ISP. The user may
have 253 private addresses behind this single address provided by the ISP.
Does the Cable/DSL Router support any operating system other than Windows 95,
Windows 98, Windows 2000, or Windows NT? Yes, but Linksys does not provide
technical support for setup, configuration or troubleshooting of any nonWindows operating systems at this time.
56
Instant Broadband Series
Does the Cable/DSL Router support ICQ send files? Yes, with the following fix:
ICQ menu-> preference -> connections tab-> check "I am behind a firewall
or proxy," and set the firewall time-out to 80 seconds in the firewall setting.
The Internet user can then send a file to a user behind the Router.
How do I get Napster to work with the Router? Napster is fully compatible with
the Router and requires no special settings.
I set up an Unreal Tournament server, but others on the network cannot join. What
do I do? If you are running a dedicated Unreal Tournament server, you must
create a static IP address for each of the network’s PCs and forward ports
7777, 7778, 7779, 7780, 7781, and 27900 to the IP address of the server. If
you want to use the UT Server Admin, forward another port (8080 usually
works well), then in the [UWeb.WebServer] section of the server.ini file, set
the ListenPort to 8080 (to match the mapped port above) and ServerName to
the IP assigned to the Router from your ISP.
Can multiple gamers on the LAN log on to one game server and play simultaneously with just one public IP address? It depends on which network game
you’re playing, and/or what kind of game server you are using. For example,
Unreal Tournament does support multi-login with just one public IP address.
How do I get Half-Life: Team Fortress to Work with the Router? The default client
port for Half-Life is 27005. The PCs on your LAN must have "+clientport
2700x" to the HL shortcut command line; the x would be 6, 7, 8, and on up.
This lets multiple PCs connect to the same server.
One exception: Version 1.0.1.6 won't let multiple PCs with the same CD key
connect at the same time, even if they’re on the same LAN (not a problem
with Version 1.0.1.3). For hosting games, the HL server does not need to be
in the DMZ. Just forward port 27015 to the local IP of the server PC. There
remains, however, a problem with people being booted after a few minutes
with an "illegible server” message.
How can I block corrupted FTP downloads? If you are experiencing corrupted
files when you download a file with your FTP client, try using another FTP
program.
EtherFast Cable/DSL Routers
My Web pages hang (distorted), I get corrupted downloads, or nothing but junk
characters are being displayed on the screen. What do I do? Force your NIC
to 10Mbps or half duplex mode, and turn off the "Autonegotiate" feature on
it temporarily. (To do this, go to the Network Control Panel, in your Ethernet
Adapter's Advanced Properties tab). Check with your NIC provider for more
information.
If all else fails in the installation, what can I do? Reset the Router by holding
down the Reset button for at least three seconds and reset your cable or DSL
modem by powering the unit off and then on. Obtain and flash (upload) the
latest firmware release available on the Linksys website, www.linksys.com.
How will I be notified of new Router firmware upgrades? All Linksys firmware
upgrades are posted on the Linksys website at www.linksys.com, where they
can downloaded for free. The Router's firmware can be upgraded with TFTP
programs. If your Router’s Internet connection is working well, there is no
need to download a newer firmware version, unless that version contains new
features that you would like to use. Downloading a more current version of
Router firmware will not enhance the quality or speed of your Internet connection, and may disrupt your current connection stability.
Does the Cable/DSL Router support IPsec? A new IPsec Pass Through features
is now available in firmware versions 1.30 and later, which can be downloaded at www.linksys.com.
Does the Router function in a Macintosh environment? Yes, but the Router's setup
pages are accessible only through Internet Explorer v4.0 or Netscape
Navigator v4.0 or higher for Macintosh PCs.
What type of firewall does the Router have? The Cable/DSL Router uses NAT
(Network Address Translation) and TCP/IP port inspections.
I cannot get the web configuration screen for the Router. What can I do? You may
have forgotten to remove the proxy server settings on your Internet browser,
e.g., Netscape Navigator or Internet Explorer. Or, remove the dial-up settings
on your browser. Check your browser documentation.
What is DMZ Hosting? Demilitarized Zone (DMZ) allows one IP address (or
computer) to be exposed to the Internet. Some applications require multiple
TCP/IP ports to be open. It is recommended that you set your computer with
a static IP address if you want to use DMZ Hosting.
57
58
Instant Broadband Series
If DMZ Hosting is used, does the exposed user/PC share the public IP address with
the Router? No.
Does the Router pass PPTP packets or actively route PPTP sessions? The Router
allows PPTP packets to pass through.
Is the Router cross-platform compatible? Any platform that supports Ethernet
and TCP/IP is compatible with the Router.
How many ports can be simultaneously forwarded? Theoretically, the Router can
establish 520 sessions at the same time, but you can only forward 10 ranges
of ports.
Does the Router replace a modem? Is there a cable or DSL modem in the Router?
No, this version of the Router must work in conjunction with a cable or DSL
modem.
Which modems are compatible with the Router? This Router is compatible with
virtually any cable or DSL modem that supports Ethernet.
EtherFast Cable/DSL Routers
Glossary
10BaseT - An Ethernet standard that uses twisted wire pairs.
100BaseTX - IEEE physical layer specification for 100 Mbps over two pairs of
Category 5 UTP or STP wire.
1000BASE-T - provides half-duplex (CSMA/CD) and full-duplex 1000Mb/s
Ethernet service over Category 5 links as defined by ANSI/TIA/EIA-568-A.
Topology rules for 1000BASE-T are the same as those used for 100BASE-T.
Category 5 link lengths are limited to 100 meters by the ANSI/TIA/EIA-568A cabling standard. Only one CSMA/CD repeater will be allowed in a collision
domain.
Adapter - Printed circuit board that plugs into a PC to add to capabilities or
connectivity to a PC. In a networked environment, a network interface card
(NIC) is the typical adapter that allows the PC or server to connect to the
intranet and/or Internet.
What are the advanced features of the Router? The Router's advanced features
include IP Filtering, IP Forwarding, Dynamic Routing, Static Routing, DMZ
hosting, and MAC Address Cloning.
Auto-negotiate - To automatically determine the correct settings. The term is
often used with communications and networking. For example, Ethernet
10/100 cards, hubs and switches can determine the highest speed of the node
they are connected to and adjust their transmission rate accordingly.
What is the maximum number of VPN sessions allowed by the Router?
One VPN session at a time.
Backbone – The part of a network that connects most of the systems and networks together and handles the most data.
How big is the memory buffer on the Router? 512KB.
Bandwidth - The transmission capacity of a given facility, in terms of how
much data the facility can transmit in a fixed amount of time; expressed in bits
per second (bps).
How can I check whether I have static or DHCP IP Addresses? Consult your ISP
to obtain this information.
How do I get mIRC to work with the Router? Under the Fowarding tab, set port
forwarding to 113 for the PC on which you are using mIRC.
Bit – A binary digit. The value — 0 or 1—used in the binary numbering system. Also, the smallest form of data.
Boot – To cause the computer to start executing instructions. Personal computers contain built-in instructions in a ROM chip that are automatically executed
on startup. These instructions search for the operating system, load it and pass
control to it.
Bottleneck – A traffic slowdown that results when too many network nodes try
to access a single node, often a server node, at once.
59
60
Instant Broadband Series
Bridge - A device that interconnects different networks together.
Broadband - A data-transmission scheme in which multiple signals share the
bandwidth of a medium. This allows the transmission of voice, data and video
signals over a single medium. Cable television uses broadband techniques to
deliver dozens of channels over one cable.
Browser - A browser is an application program that provides a way to look at
and interact with all the information on the World Wide Web or PC. The word
“browser” seems to have originated prior to the Web as a generic term for user
interfaces that let you browse text files online.
Cable Modem - A device that connects a computer to the cable television network, which in turn connects to the Internet. Once connected, cable modem
users have a continuous connection to the Internet. Cable modems feature
asymmetric transfer rates: around 36 Mbps downstream (from the Internet to
the computer), and from 200 Kbps to 2 Mbps upstream (from the computer to
the Internet).
CAT 3 - ANSI/EIA (American National Standards Institute/Electronic
Industries Association) Standard 568 is one of several standards that specify
“categories” (the singular is commonly referred to as “CAT”) of twisted pair
cabling systems (wires, junctions, and connectors) in terms of the data rates
that they can sustain. CAT 3 cable has a maximum throughput of 16 Mbps and
is usually utilized for 10BaseT networks.
CAT 5 - ANSI/EIA (American National Standards Institute/Electronic
Industries Association) Standard 568 is one of several standards that specify
“categories” (the singular is commonly referred to as “CAT”) of twisted pair
cabling systems (wires, junctions, and connectors) in terms of the data rates
that they can sustain. CAT 5 cable has a maximum throughput of 100 Mbps
and is usually utilized for 100BaseTX networks.
CAT 5e - The additional cabling performance parameters of return loss and farend crosstalk (FEXT) specified for 1000BASE-T and not specified for
10BASE-T and 100BASE-TX are related to differences in the signaling implementation. 10BASE-T and 100BASE-TX signaling is unidirectional-signals
are transmitted in one direction on a single wire pair. In contrast, Gigabit
Ethernet is bi-directional-signals are transmitted simultaneously in both directions on the same wire pair; that is, both the transmit and receive pair occupy
the same wire pair .
61
EtherFast Cable/DSL Routers
CPU (Central Processing Unit) - The computing part of the computer. Also
called the “processor,” it is made up of the control unit and ALU.
CSMA/CD (Carrier Sense Multiple Access/Collision Detection) - The LAN
access method used in Ethernet. When a device wants to gain access to the network, it checks to see if the network is quiet (senses the carrier). If it is not, it
waits a random amount of time before retrying. If the network is quiet and two
devices access the line at exactly the same time, their signals collide. When the
collision is detected, they both back off and each wait a random amount of time
before retrying.
Daisy Chain - Connected in series, one after the other. Transmitted signals go
to the first device, then to the second and so on.
Database - A database is a collection of data that is organized so that its contents can easily be accessed, managed, and updated.
Data Packet - One frame in a packet-switched message. Most data communications is based on dividing the transmitted message into packets. For example,
an Ethernet packet can be from 64 to 1518 bytes in length.
Default Gateway - The routing device used to forward all traffic that is not
addressed to a station within the local subnet.
DHCP (Dynamic Host Configuration Protocol) - A protocol that lets network
administrators manage centrally and automate the assignment of Internet
Protocol (IP) addresses in an organization’s network. Using the Internet’s set of
protocol (TCP/IP), each machine that can connect to the Internet needs a
unique IP address. When an organization sets up its computer users with a connection to the Internet, an IP address must be assigned to each machine.
Without DHCP, the IP address must be entered manually at each computer and,
if computers move to another location in another part of the network, a new IP
address must be entered. DHCP lets a network administrator supervise and distribute IP addresses from a central point and automatically sends a new IP
address when a computer is plugged into a different place in the network.
DHCP uses the concept of a “lease” or amount of time that a given IP address
will be valid for a computer. The lease time can vary depending on how long a
user is likely to require the Internet connection at a particular location. It’s especially useful in education and other environments where users change frequently. Using very short leases, DHCP can dynamically reconfigure networks
in which there are more computers than there are available IP addresses.
62
Instant Broadband Series
DHCP supports static addresses for computers containing Web servers that
need a permanent IP address.
DMZ - (Demilitarized Zone) allows one IP address (or computer) to be
exposed to the Internet. Some applications require multiple TCP/IP ports to be
open. It is recommended that you set your computer with a static IP address if
you want to use DMZ Hosting.
DNS - The domain name system (DNS) is the way that Internet domain name
are located and translated into Internet Protocol (IP) addresses. A domain name
is a meaningful and easy-to-remember “handle” for an Internet address.
Ethernet - IEEE standard network protocol that specifies how data is placed
on and retrieved from a common transmission medium. Has a transfer rate of
10 Mbps. Forms the underlying transport vehicle used by several upper-level
protocols, including TCP/IP and XNS.
Fast Ethernet - A 100 Mbps technology based on the 10Base-T Ethernet
CSMA/CD network access method.
Domain - A subnetwork comprised of a group of clients and servers under
the control of one security database. Dividing LANs into domains improves
performance and security.
Firewall - A firewall is a set of related programs, located at a network gateway
server, that protects the resources of a network from users from other networks.
(The term also implies the security policy that is used with the programs.) An
enterprise with an intranet that allows its workers access to the wider Internet
installs a firewall to prevent outsiders from accessing its own private data
resources and for controlling what outside resources to which its own users
have access.
Download - To receive a file transmitted over a network. In a communications
session, download means receive, upload means transmit.
Basically, a firewall, working closely with a router, examines each network
packet to determine whether to forward it toward its destination.
Driver - A workstation or server software module that provides an interface
between a network interface card and the upper-layer protocol software running
in the computer; it is designed for a specific NIC, and is installed during the
initial installation of a network-compatible client or server operating system.
Firmware - Programming that is inserted into programmable read-only memory (programmable read-only memory), thus becoming a permanent part of a
computing device.
DSSS (Direct-Sequence Spread-Spectrum) - DSSS generates a redundant bit
pattern for each bit to be transmitted. This bit pattern is called a chip (or chipping code). The longer the chip, the greater the probability that the original data
can be recovered. Even if one or more bits in the chip are damaged during
transmission, statistical techniques embedded in the radio can recover the original data without -the need for retransmission. To an unintended receiver, DSSS
appears as low power wideband noise and is rejected (ignored) by most narrowband receivers.
63
EtherFast Cable/DSL Routers
Fragmentation - Breaking a packet into smaller units when transmitting over
a network medium that cannot support the original size of the packet.
FTP (File Transfer Protocol) - A protocol used to transfer files over a TCP/IP
network (Internet, UNIX, etc.). For example, after developing the HTML
pages for a Web site on a local machine, they are typically uploaded to the
Web server using FTP.
Dynamic IP Address - An IP address that is automatically assigned to a client
station in a TCP/IP network, typically by a DHCP server. Network devices that
serve multiple users, such as servers and printers, are usually assigned static IP
addresses.
FTP includes functions to log onto the network, list directories and copy files.
It can also convert between the ASCII and EBCDIC character codes. FTP
operations can be performed by typing commands at a command prompt or
via an FTP utility running under a graphical interface such as Windows. FTP
transfers can also be initiated from within a Web browser by entering the
URL preceded with ftp://.
Dynamic Routing - The ability for a router to forward data via a different route
based on the current conditions of the communications circuits. For example,
it can adjust for overloaded traffic or failing lines and is much more flexible
than static routing, which uses a fixed forwarding path.
Unlike e-mail programs in which graphics and program files have to be
“attached,” FTP is designed to handle binary files directly and does not add
the overhead of encoding and decoding the data.
64
Instant Broadband Series
Full Duplex - The ability of a device or line to transmit data simultaneously in
both directions.
Gateway – A device that interconnects networks with different, incompatible
communications protocols.
Half Duplex - Data transmission that can occur in two directions over a single
line, but only one direction at a time.
Hardware - Hardware is the physical aspect of computers, telecommunications, and other information technology devices. The term arose as a way to distinguish the “box” and the electronic circuitry and components of a computer
from the program you put in it to make it do things. The program came to be
known as the software.
Hub - The device that serves as the central location for attaching wires from
workstations. Can be passive, where there is no amplification of the signals; or
active, where the hubs are used like repeaters to provide an extension of the
cable that connects to a workstation.
IEEE - The Institute of Electrical and Electronics Engineers. The IEEE
describes itself as “the world’s largest technical professional society — promoting the development and application of electrotechnology and allied sciences for the benefit of humanity, the advancement of the profession, and the
well-being of our members.”
The IEEE fosters the development of standards that often become national and
international standards. The organization publishes a number of journals, has
many local chapters, and several large societies in special areas, such as the
IEEE Computer Society.
IP Address - In the most widely installed level of the Internet Protocol
(Internet Protocol) today, an IP address is a 32-binary digit number that identifies each sender or receiver of information that is sent in packet across the
Internet. When you request an HTML page or send e-mail, the Internet
Protocol part of TCP/IP includes your IP address in the message (actually, in
each of the packets if more than one is required) and sends it to the IP address
that is obtained by looking up the domain name in the Uniform Resource
Locator you requested or in the e-mail address you’re sending a note to. At the
other end, the recipient can see the IP address of the Web page requestor or the
e-mail sender and can respond by sending another message using the IP address
it received.
65
EtherFast Cable/DSL Routers
IPCONFIG – A Windows NT or 2000 utility that provides for querying, defining and managing IP addresses within a network. A commonly used utility for
configuring networks with static IP addresses.
IPSec - IPSec (Internet Protocol Security) is a developing standard for security at the network or packet processing layer of network communication. A big
advantage of IPSec is that security arrangements can be handled without
requiring changes to individual user computers.
IRQ (Interrupt ReQuest) - A hardware interrupt on a PC. There are 16 IRQ
lines used to signal the CPU that a peripheral event has started or terminated.
Except for PCI devices, two devices cannot use the same line.
ISP - An ISP (Internet service provider) is a company that provides individuals
and companies access to the Internet and other related services such as Web site
building and virtual hosting.
LAN - A local area network (LAN) is a group of computers and associated
devices that share a common communications line and typically share the
resources of a single processor or server within a small geographic area (for
example, within an office building).
Latency - The time delay between when the first bit of a packet is received and
the last bit is forwarded.
MAC Address - The MAC (Media Access Control) address is your computer’s
unique hardware number.
Mbps (MegaBits Per Second) - One million bits per second; unit of measurement for data transmission.
mIRC - mIRC runs under Windows and provides a graphical interface for logging onto IRC servers and listing, joining and leaving channels.
Motherboard - A motherboard is the physical arrangement in a computer that
contains the computer’s basic circuitry and components.
NAT - NAT (Network Address Translation) is the translation of an Internet
Protocol address (IP address) used within one network to a different IP address
known within another network. One network is designated the inside network
and the other is the outside.
66
Instant Broadband Series
NetBEUI (NetBIOS Extended User Interface) - The transport layer for
NetBIOS. NetBIOS and NetBEUI were originally part of a single protocol
suite that was later separated. NetBIOS sessions can be transported over
NetBEUI, TCP/IP and SPX/IPX protocols.
NetBIOS - The native networking protocol in DOS and Windows networks.
Although originally combined with its transport layer protocol (NetBEUI),
NetBIOS today provides a programming interface for applications at the session layer (layer 5). NetBIOS can ride over NetBEUI, its native transport,
which is not routable, or over TCP/IP and IPX/SPX, which are routable protocols.
NetBIOS computers are identified by a unique 15-character name, and
Windows machines (NetBIOS machines) periodically broadcast their names
over the network so that Network Neighborhood can catalog them. For
TCP/IP networks, NetBIOS names are turned into IP addresses via manual
configuration in an LMHOSTS file or a WINS server.
There are two NetBIOS modes. The Datagram mode is the fastest mode, but
does not guarantee delivery. It uses a self-contained packet with send and
receive name, usually limited to 512 bytes. If the recipient device is not listening for messages, the datagram is lost. The Session mode establishes a
connection until broken. It guarantees delivery of messages up to 64KB long.
Network - A system that transmits any combination of voice, video and/or data
between users.
Network Mask - Also known as the “Subnet Mask”.
PCI (Peripheral Component Interconnect) - A peripheral bus commonly used
in PCs, Macintoshes and workstations. It was designed primarily by Intel and
first appeared on PCs in late 1993. PCI provides a high-speed data path
between the CPU and peripheral devices (video, disk, network, etc.). There
are typically three or four PCI slots on the motherboard. In a Pentium PC,
there is generally a mix of PCI and ISA slots or PCI and EISA slots. Early
on, the PCI bus was known as a “local bus.”
PCI provides “plug and play” capability, automatically configuring the PCI
cards at startup. When PCI is used with the ISA bus, the only thing that is
generally required is to indicate in the CMOS memory which IRQs are
already in use by ISA cards. PCI takes care of the rest.
PCI allows IRQs to be shared, which helps to solve the problem of limited
IRQs available on a PC. For example, if there were only one IRQ left over
after ISA devices were given their required IRQs, all PCI devices could share
it. In a PCI-only machine, there cannot be insufficient IRQs, as all can be
shared.
PCMCIA - The PCMCIA (Personal Computer Memory Card International
Association) is an industry group organized in 1989 to promote standards for a
credit card-size memory or I/O device that would fit into a personal computer,
usually a notebook or laptop computer.
Ping - (Packet INternet Groper) An Internet utility used to determine whether
a particular IP address is online. It is used to test and debug a network by sending out a packet and waiting for a response.
NIC (Network Interface Card) - A board installed in a computer system, usually a PC, to provide network communication capabilities to and from that computer system. Also called an adapter.
Plug-and-Play - The ability of a computer system to configure expansion
boards and other devices automatically without requiring the user to turn off
the system during installation.
Notebook (PC) - A notebook computer is a battery-powered personal computer generally smaller than a briefcase that can easily be transported and conveniently used in temporary spaces such as on airplanes, in libraries, temporary
offices, and at meetings. A notebook computer, sometimes called a laptop computer, typically weighs less than five pounds and is three inches or less in thickness.
Packet Filtering - Discarding unwanted network traffic based on its originating address or range of addresses or its type (e-mail, file transfer, etc.).
Port - A pathway into and out of the computer or a network device such as a
switch or router. For example, the serial and parallel ports on a personal computer are external sockets for plugging in communications lines, modems and
printers.
Partitioning - To divide a resource or application into smaller pieces.
67
EtherFast Cable/DSL Routers
Port Mirroring - Port mirroring, also known as a roving analysis port, is a
method of monitoring network traffic that forwards a copy of each incoming
and outgoing packet from one port of a network switch to another port where
the packet can be studied. A network administrator uses port mirroring as a
diagnostic tool or debugging feature, especially when fending off an attack. It
68
Instant Broadband Series
enables the administrator to keep close track of switch performance and alter it
if necessary. Port mirroring can be managed locally or remotely.
PPPoE (Point to Point Protocol over Ethernet) - A method used mostly by DSL
providers for connecting personal computers to a broadband modem for
Internet access. It is similar to how a dial-up connection works but at higher
speeds and quicker access.
PPTP (Point-to-Point Tunneling Protocol) - A protocol (set of communication
rules) that allows corporations to extend their own corporate network through
private “tunnels” over the public Internet. Effectively, a corporation uses a
wide-area network as a single large local area network. A company no longer
needs to lease its own lines for wide-area communication but can securely use
the public networks. This kind of interconnection is known as a virtual private
network.
EtherFast Cable/DSL Routers
is made up of control programs such as the operating system and database
management system (DBMS). Application software is any program that
processes data for the user.
A common misconception is that software is data. It is not. Software tells the
hardware how to process the data.
SOHO (Small Office/Home Office) - Market segment of professionals who
work at home or in small offices.
Static IP Address - A permanent IP address that is assigned to a node in an IP
or a TCP/IP network.
Static Routing - Forwarding data in a network via a fixed path. Static routing
cannot adjust to changing line conditions as can dynamic routing.
PrintServer - A hardware device that enables a printer to be located anywhere
in the network.
Storage - The semi-permanent or permanent holding place for digital data.
RIP (Routing Information Protocol) - A simple routing protocol that is part of
the TCP/IP protocol suite. It determines a route based on the smallest hop count
between source and destination. RIP is a distance vector protocol that routinely broadcasts routing information to its neighboring routers and is known to
waste bandwidth. AppleTalk, DECnet, TCP/IP, NetWare and VINES all use
incompatible versions of RIP.
STP (Shielded Twisted Pair) - Telephone wire that is wrapped in a metal sheath
to eliminate external interference.
RJ-11 (Registered Jack-11) - A telephone connector that holds up to six wires.
The RJ-11 the common connector used to plug a telephone into a wall.
Swapping - Replacing one segment of a program in memory with another and
restoring it back to the original when required.
RJ-45 (Registered Jack-45) - A connector similar to a telephone connector that
holds up to eight wires, used for connecting Ethernet devices.
Switch – 1. A data switch connects computing devices to host computers,
allowing a large number of devices to share a limited number of ports. 2. A
device for making, breaking, or changing the connections in an electrical circuit.
Router - Protocol-dependent device that connects subnetworks together.
Routers are useful in breaking down a very large network into smaller subnetworks; they introduce longer delays and typically have much lower throughput
rates than bridges.
Server - Any computer whose function in a network is to provide user access
to files, printing, communications, and other services.
Subnet Mask - The method used for splitting IP networks into a series of subgroups, or subnets. The mask is a binary pattern that is matched up with the IP
address to turn part of the host ID address field into a field for subnets.
TCP (Transmission Control Protocol) - A method (protocol) used along with
the Internet Protocol (Internet Protocol) to send data in the form of message
units between computers over the Internet. While IP takes care of handling the
actual delivery of the data, TCP takes care of keeping track of the individual
units of data (called packet) that a message is divided into for efficient routing
through the Internet.
Software - Instructions for the computer. A series of instructions that performs a particular task is called a “program.” The two major categories of
software are “system software” and “application software.” System software
69
70
Instant Broadband Series
TCP/IP - Transmission Control Protocol/Internet Protocol (TCP/IP) is the
basic communication language or protocol of the Internet. It can also be used
as a communications protocol in a private network (either an intranet or an
extranet). When you are set up with direct access to the Internet, your computer is provided with a copy of the TCP/IP program just as every other computer
that you may send messages to or get information from also has a copy of
TCP/IP.
TFTP (Trivial File Transfer Protocol) - A version of the TCP/IP FTP protocol
that has no directory or password capability.
Throughput - The amount of data moved successfully from one place to another in a given time period.
Topology - A network’s topology is a logical characterization of how the
devices on the network are connected and the distances between them. The
most common network devices include hubs, switches, routers, and gateways.
Most large networks contain several levels of interconnection, the most important of which include edge connections, backbone connections, and wide-area
connections.
EtherFast Cable/DSL Routers
VLAN (Virtual LAN) - A logical association that allows users to communicate as if they were physically connected to a single LAN, independent of the
actual physical configuration of the network.
Virtual Server - Multiple servers that appear as one server, or one system
image, to the operating system or for network administration.
Wake-on-LAN - Wake on LAN is a technology that allows a network professional to remotely power on a computer or to wake it up from sleep mode.
WAN - A communications network that covers a wide geographic area, such as
state or country.
WEP (Wired Equivalent Privacy) - A data privacy mechanism based on a 64bit shared key algorithm, as described in the IEEE 802.11 standard.
WINIPCFG - Configuration utility based on the Win32 API for querying,
defining and managing IP addresses within a network. A commonly used utility for configuring networks with static IP addresses.
Workgroup - Two or more individuals that share files and databases.
TX Rate – Transmission Rate.
Upgrade - To replace existing software or firmware with a newer version.
Upload - To receive a file transmitted over a network. In a communications session, upload means transmit, download means receive.
URL (Uniform Resource Locator) - The address that defines the route to a file
on the Web or any other Internet facility. URLs are typed into the browser to
access Web pages, and URLs are embedded within the pages themselves to
provide the hypertext links to other pages.
UTP - Unshielded twisted pair is the most common kind of copper telephone
wiring. Twisted pair is the ordinary copper wire that connects home and many
business computers to the telephone company. To reduce crosstalk or electromagnetic induction between pairs of wires, two insulated copper wires are
twisted around each other. Each signal on twisted pair requires both wires.
Since some telephone sets or desktop locations require multiple connections,
twisted pair is sometimes installed in two or more pairs, all within a single
cable.
71
72
Instant Broadband Series
Appendix
How to Ping Your ISP’s E-mail & Web Addresses
Almost all Internet addresses are configured with words and characters, i.e.,
www.linksys.com, www.yahoo.com, etc. However, these Internet addresses are
actually assigned to IP addresses, numerical values which are the true addresses on the Internet.
For example, www.linksys.com is actually 206.135.116.3. Type it into your web
browser and you will bring up the Linksys home page every time.
However, IP and web addresses are sometimes long and hard to remember.
Because of this, certain ISPs will shorten their server addresses to single words
or codes on their customers’ web browser or e-mail configurations.
If your ISP’s e-mail and Web server addresses are configured with single words
(“www”, “e-mail”, “home”, “pop3”, etc.) instead of complete Internet addresses or IP addresses, your Router may have problems sending or receiving email
and accessing the Internet. This happens because your Router has not been configured by your ISP to accept their abbreviated server addresses.
The solution is to find the true web addresses behind your ISP’s code words.
You can find these IP and web addresses of your ISP’s servers by “pinging”
them.
If you do not have your ISP’s web and e-mail IP addresses, you must either get them from your ISP or follow these
steps prior to connecting your Cable/DSL Router to your
network.
73
EtherFast Cable/DSL Routers
Step One: To Ping an IP Address
The first step to determining your ISP’s web and e-mail server address is to
ping its IP Address.
1. Power on the PC and the cable or DSL modem, and restore the network configuration set by your ISP if you have since changed it.
2. Click Start, then Run, and type "command" to bring up the DOS window.
3. At the DOS command prompt, type "ping mail" (assuming that the
location for which you’re trying to find an IP address is configured as
“mail”). Press Enter. Information such as the following data, taken from
a ping of Microsoft Network’s email server, will be displayed.
C:\>ping mail
Pinging mail [24.53.32.4] with 32 bytes of data:
Reply
Reply
Reply
Reply
from
from
from
from
24.53.32.4:
24.53.32.4:
24.53.32.4:
24.53.32.4:
bytes=32
bytes=32
bytes=32
bytes=32
time<10ms
time<10ms
time<10ms
time<10ms
TTL=128
TTL=128
TTL=128
TTL=128
Ping statistics for 24.53.32.4:
Packets: Sent = 4, Received = 4, Lost = 0 (0%
loss),
Approximate round trip times in milli-seconds:
Minimum = 0ms, Maximum = 0ms, Average = 0ms
4. Write down the IP address returned by the ping command. (In the
example above: 24.53.32.4.) This IP address is the actual IP address of
the server “mail”, or any other word or value you have pinged.
74
Instant Broadband Series
EtherFast Cable/DSL Routers
Step Two: Pinging for a Web Address
Installing the TCP/IP Protocol
While the IP address returned above would work as your e-mail server
address, it may not be permanent. IP addresses change all the time. Web
addresses, however, usually don’t. Because of this, you’re likely to have less
problems by configuring your system with web addresses rather than IP
addresses. Follow the instructions below to find the web address assigned to
the IP address you just pinged.
Follow these instructions to install the TCP/IP protocol on one of your PCs
only after a network card has been successfully installed inside the PC. These
instructions are for Windows 95, Windows 98, and Windows ME. For TCP/IP
setup under Windows NT, see your Windows NT manual.
1. At the DOS command prompt, type “ping -a 24.53.32.4”, where
24.53.32.4 is the IP address you just pinged. Information such as the following data will be displayed.
2. Double-click on the Network icon to bring up your Network window.
Select the Configuration tab.
1. Click the Start button. Choose Settings and then Control Panel.
C:\>ping -a 24.53.32.4
Pinging mail.msnv3.occa.home.com [24.53.32.4] with
32 bytes of data:
Reply
Reply
Reply
Reply
from
from
from
from
24.53.32.4:
24.53.32.4:
24.53.32.4:
24.53.32.4:
bytes=32
bytes=32
bytes=32
bytes=32
time<10ms
time<10ms
time<10ms
time<10ms
TTL=127
TTL=127
TTL=127
TTL=127
Ping statistics for 24.53.32.4:
Packets: Sent = 4, Received = 4, Lost = 0 (0%
loss),
Approximate round trip times in milli-seconds:
Minimum = 0ms, Maximum = 0ms, Average = 0ms
2. Write down the web address returned by the ping command. (In the
example above: mail.msnv3.occa.home.com.) This web address is the web
address assigned to the IP address you just pinged. While the IP address
of “mail” could change, it is likely that this web address will not.
3. Click the Add button.
4. Double-click on Protocol.
5. Highlight Microsoft under the list of manufacturers.
3. Replace your ISP’s abbreviated server address with this extended web
address in the corresponding Internet application (web browser, e-mail
application, etc.).
Once you have replaced the brief server address with the true server address,
your Router should have no problem accessing the Internet through that
Internet application.
75
76
Instant Broadband Series
6. Find and double-click TCP/IP in the list to the right (below).
7. After a few seconds, the main Network window will appear. The TCP/IP
Protocol should now be listed.
8. Click the OK button. Windows may ask for original Windows installation
files. Supply them as needed, e.g., D:\win98, D:\win95,
c:\windows\options\cabs.
EtherFast Cable/DSL Routers
Twisted-Pair Cabling
There are different grades, or “categories,” of twisted-pair cabling. Category 5
is the most reliable and most highly recommended. Category 3 is a good second choice. Straight-through cables are used for connecting computers to a
hub. Crossover cables are used for connecting a hub to another hub (there is an
exception: some hubs have a built-in uplink port that is crossed internally,
which allows you to link or connect hubs together with a straight-through cable
instead).
You can buy pre-made Category 5
cables, or cut and crimp your own.
Category 5 cables can be purchased or
crimped as either straight-through or
crossover. Inside a Category 5 cable are
8 thin, color-coded wires inside that run
from one end of the cable to the other.
All 8 wires are used. In a straightthrough cable, wires 1, 2, 3, and 6 at one
end of the cable are also wires 1, 2, 3,
and 6 at the other end. In a crossover
cable, the order of the wires change
from one end to the other: wire 1
becomes 3, and 2 becomes 6. See the
diagrams on the next page for more
detailed information on straightthrough and crossover
cabling.
To determine which wire is wire number 1, hold the cable
so that the end of the plastic RJ-45 tip (the part that goes
into a wall jack first) is facing away from you. Face the clip
down so that the copper side faces up (the springy clip will
now be parallel to the floor). When looking down on the
copper side, wire 1 will be on the far left.
9. Windows will ask you to restart the PC. Click the Yes button.
The TCP/IP Installation is now complete.
77
78
Instant Broadband Series
Crimping Your Own Network Cables
• Straight-Through Cabling
EtherFast Cable/DSL Routers
4-Port Router Specifications
Model Number
Standards
Protocol
Ports
Speed
Cabling Type
Topology
LED Indicators
BEFSR41 v2
IEEE 802.3 (10BaseT), IEEE 802.3u (100BaseTX)
CSMA/CD
(LAN) Four 10/100 RJ-45 switched ports
(WAN) One 10Base-T Ethernet RJ-45 port
for the cable or DSL modem
(LAN) 10/100Mbps, (WAN) 10Mbps,
(10BaseT) UTP Category 3 or better
(100BaseTX) UTP Category 5 or better
Star
Power,
(LAN) Link/Act, Full/Coll, 100
(WAN) Link, Act, Diag
4-Port Environmental Specifications
• Cross-Over Cabling
79
Dimensions
Unit Weight
Power Input
Certifications
Operating Temperature
Storage Temperature
Operating Humidity
Storage Humidity
186mm x 154mm x 48mm (7.31” x 6.16” x 1.88”)
13.4 oz. (0.42 Kg)
External, 9V AC, 1 Amp
FCC Class B, CE Mark Commercial
0°C to 40°C (32°F to 104°F)
-20°C to 70°C (-4°F to 158°F)
10% to 85%, Non-condensing
5% to 90%, Non-condensing
80
Instant Broadband Series
1-Port Router Specifications
3-Port Router Specifications
Model Number
Standards
Protocol
Ports
Model Number
Standards
Speed
Cabling Type
Topology
LED Indicators
81
EtherFast Cable/DSL Routers
BEFSR11
IEEE 802.3 (10BaseT), IEEE 802.3u (100BaseTX)
CSMA/CD
(LAN) One 10BaseT/100BaseTX RJ-45 port
(WAN) One10BaseT Broadband Uplink port
(WAN) 10Mbps (10BaseT Ethernet)
(LAN) 10Mbps (10BaseT Ethernet) or
100Mbps (100BaseTX Fast Ethernet)
(10BaseT) UTP Category 3 or better
(100BaseTX) UTP Category 5 or better
Star
Power,
(LAN) Link/Act, Full/Coll, 100
(WAN) Link, Act, Diag
Protocol
Ports
Speed
Cabling Type
Topology
LED Indicators
BEFSRU31
IEEE 802.3 (10BaseT), IEEE 802.3u
(100BaseTX)
CSMA/CD
(LAN) Three 10/100 RJ-45 Switched ports
(WAN) One 10Base-T Ethernet RJ-45 port
for the cable or DSL modem
(LAN)10/100Mbps
(WAN) 10Mbps
(10BaseT) UTP Category 3 or better
(100BaseTX) UTP Category 5 or better
Star
Power
(LAN) Link/Act, Full/Coll, 100
(WAN) Link, Act, Diag
(USB) USB
1-Port Environmental Specifications
3-Port Environmental Specifications
Dimensions
Unit Weight
Power Input
Certifications
Operating Temperature
Storage Temperature
Operating Humidity
Storage Humidity
Dimensions
Unit Weight
Power Input
Certifications
Operating Temperature
Storage Temperature
Operating Humidity
Storage Humidity
186mm x 154mm x 48mm (7.31” x 6.16” x 1.88”)
12.6 oz. (0.35kg)
External, 7.5V DC, 7Amps
FCC Class B, CE Mark Commercial
0°C to 40°C (32°F to 104°F)
-20°C to 70°C (-4°F to 158°F)
10% to 85%, Non-condensing
5% to 90%, Non-condensing
186mm x 154mm x 48mm (7.31” x 6.16” x 1.88”)
13.4 oz. (0.42 Kg)
External, 9V AC, 1 Amp
FCC Class B, CE Mark Commercial
0°C to 40°C (32°F to 104°F)
-20°C to 70°C (-4°F to 158°F)
10% to 85%, Non-condensing
5% to 90%, Non-condensing
82
Instant Broadband Series
Customer Support
For help with the installation or operation of your Instant Broadband
EtherFast Cable/DSL Router, contact Linksys Customer Support at one of the
phone numbers or Internet addresses below.
Sales Information
Tech Support
RMA Issues
Fax
Email
Web site
FTP site
800-546-5797 (1-800-LINKSYS)
866-242-8558
949-261-1288
949-261-8868
[email protected]
http://www.linksys.com
fttp://ftp.linksys.com
www.linksys.com
© Copyright 2001 Linksys, All Rights Reserved.
83