1
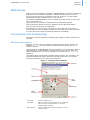
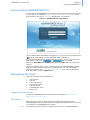
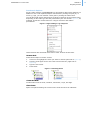
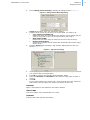
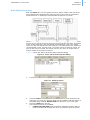
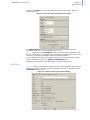
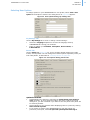
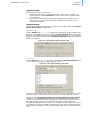
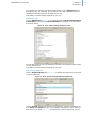
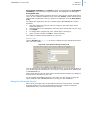
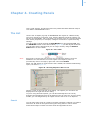
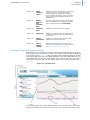
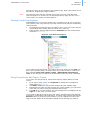
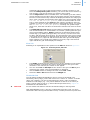
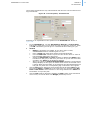
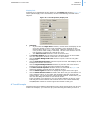
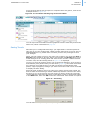
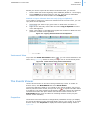
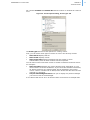
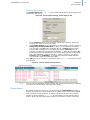
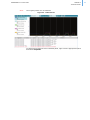
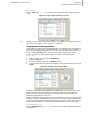
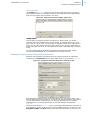
addVANTAGE Pro 6.2 User Guide
CHAPTER 4
The Trend Viewer
Create a Trend from a Template
If you have to create a large number of identical panels on different areas, you
can use the Trend from template function and save yourself some work:
1.
2.
3.
4.
Create a panel in a single area by using one of the methods previously
described, then add the tags you need and configure the panel’s properties.
Save the panel in its area. This will be used later as a template panel.
Right-click the areas where you want the have the copied Trends and select
Create New Node Window Trend from Template. A File Open dialog is
displayed.
Navigate to the area where you saved the template panel and select it, then
click OK.
The system creates a Trend panel with the same properties as the panel used as
the template in each area you selected. If a tag does not exist in the respective
area, it won’t be included in the panel. The new panels will borrow the name of
the original panel used as the template. If a panel with this name already exists
in an area, the newly created panel will have a running number appended, for
example, Weather (2).
Note:
The term “template” is used only for better understanding the concept of
creating panels from existing panels. Any panel can be used as a template.
From Trends to Tables
To switch from a graphical view to a tabular view of data, click the Table view
button previously described (
, page 32).
While the legend to the left and the tool bar remain the same, your trend lines
will disappear and every value of the time span you selected will appear as a
table, as shown in Figure 42. Please note that this usually requires several
screens, since a single day of 15-minute data already consists of 96 entries. You
can therefore navigate back and forth in time by either clicking the page number
or the navigation arrows on the bottom left of the table viewer.
Figure 42. Table View
You can click the Graphical view button (
display.
) to return to the graphical
You can now edit data in the table view. One way to do this is to double-click a
value in the table, type what you want the value to be, and press Enter. The
value displays in the table and the cell is highlighted in red. If you change your
mind, you can right-click in the cell and select Remove manual values.
39