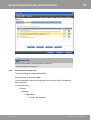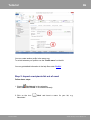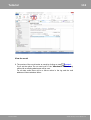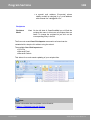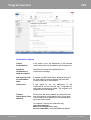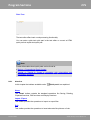
1
SmartSerialMail
©1996-2015 by Joachim Marder e.K.
test. buy. enjoy.
2
Table of Contents
1.
Overview
7
2.
What's new?
8
3.
Copyright & Contact
9
3.1
4.
Third-Party Licences .................................................................................................... 10
FAQ
12
4.1
FAQ Common ................................................................................................................ 13
4.2
FAQ Registration .......................................................................................................... 17
4.3
FAQ Retrieving Mail ..................................................................................................... 18
4.4
FAQ Editing Mail .......................................................................................................... 20
4.5
FAQ Sending Mail ......................................................................................................... 25
4.6
Common error entries (Log) ........................................................................................ 30
4.7
Email Provider .............................................................................................................. 33
5.
System Requirements and Installation
36
5.1
Installation of SmartSerialMail ................................................................................... 37
5.2
Uninstalling SmartSerialMail ...................................................................................... 42
5.3
Database Connection ................................................................................................... 44
5.4
Firewall .......................................................................................................................... 47
5.4.1
Kerio ....................................................................................................................... 48
5.4.2
ZoneAlarm .............................................................................................................. 49
5.4.3
Norton Internet Security ......................................................................................... 50
5.4.4
Norton 360° ............................................................................................................ 51
5.4.5
Kaspersky Internet Security .................................................................................... 52
5.4.6
Panda Internet Security .......................................................................................... 54
5.4.7
BitDefender Internet Security ................................................................................. 55
5.4.8
Windows Firewall ................................................................................................... 59
5.4.9
Comodo Internet Security ....................................................................................... 59
5.4.9.1
6.
Basics
Delete Firewall-Rule ............................................................................................................................... 61
65
6.1
Personalizing Email Content ....................................................................................... 66
6.1.1
Placeholder examples ............................................................................................ 68
6.1.1.1
6.1.1.2
6.1.1.3
6.1.1.4
6.1.1.5
6.1.1.6
6.1.1.7
6.1.1.8
SmartSerialMail
Example 1: Use the recipient's name or other information in your email content ................... 68
Example 2: Use recurring content in different emails ..................................................................... 69
Example 3: Use an individual salutation .......................................................................................... 69
Example 4: Use individual links .......................................................................................................... 70
Example 5: Use individual pictures .................................................................................................... 70
Example 6: Send different attachments depending on the recipient ............................................ 71
Example 7: Automatically insert content depending on language or category .......................... 71
Example 8: Base content on the selected profile .............................................................................. 72
©1996-2015 by Joachim Marder e.K.
3
Table of Contents
6.2
Recipient Lists and Sending ........................................................................................ 73
6.2.1
Recipient Lists and Sending Examples ................................................................... 74
6.2.1.1
6.2.1.2
6.2.1.3
Example 1: How to create blacklists ................................................................................................... 74
Example 2: How to apply filters ........................................................................................................... 74
Example 3: Use a table from an external database ......................................................................... 75
6.3
List Management ......................................................................................................... 76
6.3.1
List Management Examples ................................................................................... 76
6.3.1.1
6.3.1.2
6.3.1.3
6.3.1.4
7.
Example 1: How to deal with bounced emails .................................................................................. 76
Example 2: Managing Subscriptions .................................................................................................. 77
Example 3: Managing Confirmations ................................................................................................. 78
Example 4: Managing Cancellations .................................................................................................. 79
Tutorial
80
7.1
Tutorial 1: Getting started .......................................................................................... 82
7.2
Tutorial 2: Managing what comes back ................................................................... 102
7.3
Tutorial 3: Insert a personalized attachment .......................................................... 107
7.4
Tutorial 4: Import content from Word .................................................................... 114
7.5
Tutorial 5: Edit recipient lists .................................................................................... 115
7.6
Tutorial 6: Create a newsletter with subscription and cancellation
functions ..................................................................................................................... 121
Tutorial 7: Use recursive placeholders ..................................................................... 124
7.7
8.
Program Sections
126
8.1
Home ........................................................................................................................... 127
8.1.1
Menubar ............................................................................................................... 128
8.1.1.1
8.1.1.2
Home ....................................................................................................................................................... 129
Help ......................................................................................................................................................... 129
8.2
Profile .......................................................................................................................... 131
8.2.1
Menubar ............................................................................................................... 132
8.2.1.1
8.2.1.2
8.2.2
8.2.2.1
8.2.2.2
8.2.2.3
8.2.2.4
8.2.2.5
Home ....................................................................................................................................................... 132
Help ......................................................................................................................................................... 133
Current Profile ...................................................................................................... 134
Sender Information .............................................................................................................................. 136
Send Mode ............................................................................................................................................. 143
Returns and Blacklists ........................................................................................................................ 150
Tracking and Web ................................................................................................................................ 155
Statistics ................................................................................................................................................ 163
8.2.3
New Sender Profile with the Wizard .................................................................... 163
8.3
Recipients ................................................................................................................... 167
8.3.1
Menubar ............................................................................................................... 170
8.3.1.1
8.3.1.2
8.3.1.3
8.3.1.4
8.3.1.5
8.3.2
SmartSerialMail
Home ....................................................................................................................................................... 170
Import / Export ..................................................................................................................................... 172
Edit .......................................................................................................................................................... 173
Status ...................................................................................................................................................... 175
Help ......................................................................................................................................................... 176
Current List ........................................................................................................... 177
©1996-2015 by Joachim Marder e.K.
4
Table of Contents
8.3.2.1
8.3.2.2
8.3.2.3
Recipients .............................................................................................................................................. 179
Alias Placeholder ................................................................................................................................. 179
Statistics ................................................................................................................................................ 180
8.3.3
Import Wizard ....................................................................................................... 181
8.3.4
Remove Duplicates .............................................................................................. 189
8.3.5
Blacklist ................................................................................................................ 190
8.3.6
Link to extern tables ............................................................................................. 191
8.4
Content ....................................................................................................................... 192
8.4.1
Menubar ............................................................................................................... 196
8.4.1.1
8.4.1.2
8.4.1.3
8.4.1.4
8.4.1.5
8.4.1.6
8.4.1.7
8.4.1.8
8.4.1.9
8.4.1.10
8.4.2
8.4.3
Home ....................................................................................................................................................... 197
Import / Export ..................................................................................................................................... 199
Edit .......................................................................................................................................................... 200
Placeholder ........................................................................................................................................... 203
Options .................................................................................................................................................. 210
Attachments .......................................................................................................................................... 212
Table Tools ............................................................................................................................................ 214
Picture .................................................................................................................................................... 217
Format .................................................................................................................................................... 218
Help ......................................................................................................................................................... 219
Advanced Mail Options Dialog ............................................................................ 220
Current Content .................................................................................................... 222
8.4.3.1
8.4.3.1.1
8.4.3.1.2
8.4.3.1.3
8.4.3.1.4
8.4.3.1.5
8.4.3.2
8.4.3.3
8.4.3.4
HTML ....................................................................................................................................................... 223
Designer ........................................................................................................................................... 226
Source Code ..................................................................................................................................... 227
Compatibility .................................................................................................................................. 227
Used Images .................................................................................................................................... 228
Links .................................................................................................................................................. 228
Plain Text ............................................................................................................................................... 229
Attachments .......................................................................................................................................... 229
Alias Placeholers ................................................................................................................................. 230
8.5
Preview ....................................................................................................................... 230
8.5.1
Menubar ............................................................................................................... 231
8.5.1.1
8.5.1.2
8.5.2
Home ....................................................................................................................................................... 232
Help ......................................................................................................................................................... 234
Current Preview .................................................................................................... 235
8.5.2.1
8.5.2.2
8.5.2.3
8.5.2.4
8.5.2.4.1
8.5.2.4.2
8.5.2.4.3
HTML ....................................................................................................................................................... 238
Plain Text ............................................................................................................................................... 239
Spam ....................................................................................................................................................... 239
Links and Placeholder ......................................................................................................................... 240
HTML Links ....................................................................................................................................... 241
Available Placeholder ................................................................................................................... 241
Placeholder Log .............................................................................................................................. 241
8.6
Sending ....................................................................................................................... 242
8.6.1
Menubar ............................................................................................................... 244
8.6.1.1
8.6.1.2
Home ....................................................................................................................................................... 244
Help ......................................................................................................................................................... 246
8.6.2
Task Log ............................................................................................................... 247
8.7
Listmanagement ......................................................................................................... 250
SmartSerialMail
©1996-2015 by Joachim Marder e.K.
5
Table of Contents
8.7.1
Menubar ............................................................................................................... 251
8.7.1.1
8.7.1.2
8.7.2
Home ....................................................................................................................................................... 252
Help ......................................................................................................................................................... 253
Current Profile ...................................................................................................... 255
8.7.2.1
8.7.2.2
8.7.2.3
8.7.2.4
8.7.2.5
8.7.2.6
Profile Properties ................................................................................................................................. 256
Bounced Mail ........................................................................................................................................ 261
Subscriptions ........................................................................................................................................ 263
Confirmations ....................................................................................................................................... 266
Cancellations ........................................................................................................................................ 268
Log ........................................................................................................................................................... 271
8.8
Quick Parts ................................................................................................................. 272
8.8.1
Menubar ............................................................................................................... 275
8.8.1.1
8.8.1.2
8.8.1.3
8.8.1.4
8.8.1.5
8.8.1.6
8.8.1.7
8.8.1.8
8.8.1.9
8.8.2
8.8.3
Home ....................................................................................................................................................... 276
Import / Export ..................................................................................................................................... 278
Edit .......................................................................................................................................................... 279
Options .................................................................................................................................................. 282
Placeholder ........................................................................................................................................... 284
Table Tools ............................................................................................................................................ 290
Picture .................................................................................................................................................... 292
Format .................................................................................................................................................... 293
Help ......................................................................................................................................................... 294
Naming Conversion .............................................................................................. 295
Current Quick Part ................................................................................................ 297
8.8.3.1
8.8.3.1.1
8.8.3.1.2
8.8.3.1.3
8.8.3.1.4
8.8.3.2
HTML ....................................................................................................................................................... 298
Designer ........................................................................................................................................... 300
Source Code ..................................................................................................................................... 300
Used Images .................................................................................................................................... 301
Links .................................................................................................................................................. 301
Plain Text ............................................................................................................................................... 301
8.9
File ............................................................................................................................... 302
8.9.1
Database .............................................................................................................. 304
9.
Advanced
9.1
309
Tracking with SmartSerialMail ................................................................................. 310
9.2
SmartSerialMail Opt-In Form .................................................................................... 311
9.2.1
Requirements ....................................................................................................... 312
9.2.2
Overview: Opt-In Methods ................................................................................... 312
9.2.3
Tutorial: How to include the Opt-In form ............................................................. 314
9.2.4
SmartSerialMail Configuration ............................................................................. 318
9.2.5
Opt-In Templates ................................................................................................. 318
9.2.6
Advanced Settings ................................................................................................ 320
9.2.7
Create your own form ........................................................................................... 323
9.3
Amazon Simple Email Service (SES) .......................................................................... 324
9.4
Signing outgoing e-mails with S/MIME ................................................................... 326
9.5
Installing a connection to a MSSQL Database ......................................................... 328
SmartSerialMail
©1996-2015 by Joachim Marder e.K.
6
Table of Contents
Index
SmartSerialMail
330
©1996-2015 by Joachim Marder e.K.
7
Overview
1
Overview
With SmartSerialMail you are able to send large numbers of serial mails very
quickly.
Editing text or inserting images is almost as simple as in a common word
processor.
You can give every e-mail a personal touch by the use of quick parts and you
are even able to send personalized attachments.
In every mail is only one recipient shown.
Furthermore with SmartSerialMail you can manage:
· Returns
· Bounced mails
· Subscriptions and
· Cancellations
and update your lists of recipients accordingly.
Multi-threading technology offers optimized sending of your newsletter and
optimal usage of your internet connection.
SmartSerialMail
©1996-2015 by Joachim Marder e.K.
What's new?
2
8
What's new?
See "What's new?" online.
SmartSerialMail
©1996-2015 by Joachim Marder e.K.
Copyright & Contact
10
Copyright & Contact
3
Copyright & Contact
Copyright ©1996-2015 by Joachim Marder e.K.
JAM Software GmbH
Am Wissenschaftspark 26
54296 Trier
Germany
FAX:
+49 651-145653-29
WWW:
http://www.jam-software.com
Support:
http://www.jam-software.com/customers/
contact.php
Email:
[email protected]
Commercial
number:
3.1
registerHRB: 4920 (AG Wittlich)
VAT ID No.:
DE234825349
Managing Director:
Joachim Marder
Third-Party Licences
KompoZer
This software uses some third-party code provided by http://kompozer.net,
which is licensed under the Mozilla Public License 1.1.
You can find a copy of the this license in your SmartSerialMail folder, after you
completed the installation successfully.
Newsletter Templates
The newsletter templates are originally taken from www.newslettertemplates.com and are licenced under the Creative Commons AttributionShareAlike 3.0 Unported License.
You may obtain a copy of this license under: http://creativecommons.org/
licenses/by-sa/3.0/.
WkHtmlToPdf
This software uses some third-party software provided by http://
wkhtmltopdf.org, which is licensed under the GNU LESSER GENERAL
PUBLIC LICENSE.
You can find a copy of the this license in your SmartSerialMail folder inside the
SmartSerialMail
©1996-2015 by Joachim Marder e.K.
Copyright & Contact
11
"wkhtmltopdf" folder, after you completed the installation successfully.
SmartSerialMail
©1996-2015 by Joachim Marder e.K.
FAQ
13
FAQ
4
FAQ
FAQ Content:
Common
Registration
Retrieving mail
Editing mail
Sending mail
Common error entries
E-mail Provider
4.1
FAQ Common
Q:
How much is a single workspace license? Will I get a CD or do I
have to download the program with a product key?
A:
Usually, our customers download the software in the customers
area. If you want to have a CD, we will gladly provide you with a
CD for a small fee. Please refer to our price list for further
information.
Q:
How can I order SmartSerialMail and how will it be delivered?
A:
You may order online at https://www.jam-software.com. You will find
a fax order form there as well. We accept purchase orders from
companies and will invoice them on NET30 terms.
After your order is processed, you will get a username and password
for our customers area. There you can download the full version
and view the installation key.
If you choose to receive the software on CD, shipping costs will be
added to your order. You will then receive the software by airmail
within 2-7 days, depending on where you are located.
Q:
What is the difference between the evaluation copy and the full
version? Will there be additional features?
A:
The evaluation copy allows you to test the software before you buy it.
The evaluation time is limited to 30 days. Further usage of the
software after this period is not permitted and violates the law. In
order to allow our customers to fully test our software products,
our evaluation versions usually do not contain significant
SmartSerialMail
©1996-2015 by Joachim Marder e.K.
14
FAQ
limitations. But the software may remind you from time to time to
purchase it after you have finished testing it.
Q:
Can I connect SmartSerialMail to an Exchange Server?
A:
SmartSerialMail can be connected to all SMTP servers, and so – of
course – also to Exchange.
You can find further information in the SmartSerialMail Help under:
'Profile - Advanced Outgoing Server Options'.
Q:
I have the trial version installed and want to buy the full
version. How can I keep the data that I already have
entered?
A:
All settings and data you entered in the trial version will be available
in the full version.
Q:
I am a registered user of SmartSerialMail and I moved from
WinXP to Vista on another machine. I re-installed the
software but I need to recover my old settings. Where are
they stored?
A:
You can find all your settings in a file named ssm4.mdb.
This file is located in your WinXP user profile.
C:\Documents and Settings\username\Application
Software\SmartSerialMail.
Under Vista, look here :
C:\users\username\AppData\Roaming\JAM
\SmartSerialMail
Data\Jam
Software
If you copy this file into the corresponding directory on the new PC
all of your profiles, list of recipients and mail will be available
again.
Q:
I have downloaded SmartSerialMail 4, but every time that I load
up the program I get the error message:
“SmartSerialMail Version 3.x has been found on your system.
Do you wish to import the data? This may take several
minutes.”
All older versions have been uninstalled and yet I still get
this error message. How do I get rid of it so that the new
version starts up correctly?
A:
You have three options:
SmartSerialMail
©1996-2015 by Joachim Marder e.K.
15
FAQ
1) Import the old data.
2) Copy the following lines into a new file and save it as
“imported.reg”.
---Copy after this marker--REGEDIT4
[HKEY_CURRENT_USER\Software\JAM
\SmartSerialMail]
“imported_v3x”=”1”
---Copy until before this marker---
Software
After you have saved it double click the file.
3) Select “Never” in the drop down box.
Q:
I’m a registered user of SmartSerialMail. I wish to install it in a
temporary computer and transfer program and data when
the permanent computer becomes available. How do I
“remove” the software from the temp one and install it to
the new/permanent computer, without losing all my contacts
information?
A:
You can find the database files in your user profile. Depending on the
version of Windows you are using this is either:
On Windows XP:
C:\Documents and Settings\your_username\Application Data\JAM
Software\SmartSerialMail
On Windows Vista:
C:\users\your_username\AppData\Roaming\JAM
\SmartSerialMail
Software
Copy the files in that directory into the corresponding directory on
the new PC. All your Settings/Profiles/Mail and Lists will be
available then.
Q:
I’m a registered user of SmartSerialMail. My computer has
crashed lately and I had to retrieve the set up files from your
customer area again. But I don't know my installation key
anymore. Can you please help me?
A:
If you log into the customer area, you will find you installation key in
SmartSerialMail
©1996-2015 by Joachim Marder e.K.
16
FAQ
the upper left.
Note:
The installation key is only available in the maintenance period you choose.
Q:
What is the precise difference between a single user licence
and a 5-user licence?
A:
Single user licenses are meant for single workspaces and personal
use, multi-user licenses allow you to use multiple installations of
the software at the same time. Multi-user licenses are cheaper
than the same number of single user licenses.
For further information on licenses please visit: https://www.jamsoftware.de/customers/licenseAgreement.php.
Q:
After a successful update of SmartSerialMail I can not send
mails. What can I do?
A:
It could be, that you have to update your firewall rules after an
update, to allow SmartSerialMail the sending of messages again.
Please read the tutorial for firewall.
Q:
What's a 'screenshot', and how can I produce one?
A:
A 'screenshot' is an image file containing a 'photo' of your current
screen display. Usually, it shows the currently active dialog of
your application and allows us to help you more effective.
To take a screenshot proceed as follows:
1. Click on the window / dialog you want to send us, to put it in the
front. If possible, maximize it.
2. Press the Alt-key and the PrintScreen-key at the same time. The
image below shows, where you can find the keys on your
keyboard:
SmartSerialMail
©1996-2015 by Joachim Marder e.K.
17
FAQ
Now the screenshot is stored in the Windows clipboard storage.
To insert the screenshot into your support request mail follow these
steps:
· Right-click into the text area of the mail,
· Choose 'Paste' from the context menu,
· The screenshot is shown in the mail.
If that doesn't work, you can paste it as well into a Microsoft Word
document:
· Open a new Word document,
· Right-click on the new sheet,
· Select 'Paste' from the context menu,
· The screenshot is shown in the document.
4.2
FAQ Registration
Q:
I just purchased your product. How can I now activate my trial
version?
A:
You will have to download the full version of the software from our
customer's area at http://www.jam-software.com/customers/. The
login data may be found in the mail or in the printed license which
you have received after the purchase. In case you do not have your
login data anymore, you may request them to be sent to the mail
address you already used when purchasing the software.
If you choose to receive the software on CD, shipping costs will be
added to your order. You will then receive the software by air-mail
SmartSerialMail
©1996-2015 by Joachim Marder e.K.
18
FAQ
within 2-7 days, depending on where you are located.
Q:
What is the difference between the evaluation copy and the full
version? Will there be additional features?
A:
The evaluation copy allows you to test the software before you buy it.
The evaluation time is limited to 30 days. Further usage of the
software after this period is not permitted and violates the law. In
order to allow our customers to fully test our software products,
our evaluation versions usually do not contain significant
limitations. But the software may remind you from time to time to
purchase it after you have finished testing it.
Q:
A while ago I downloaded and tested SmartSerialMail a little bit.
Now, the company has a purchase decision to make, and I
want to test the software once again. But the test period has
expired… Is there any possibility to test the software a
second time?
A:
Please contact our support team. We will provide you with a new key
for a second test period.
Q:
Why don't you use activation keys for unlocking a demo version
into a full version?
A:
We don't use activation keys, because they can be easily found /
distributed on the web. Everyone can try our software for free for a
limited time with the demo version. If you are satisfied, we will
provide you with the full version after purchase (on a CD or via
download) and with your private installation key needed for
installation. You should keep both in a safe place.
Q:
What is the precise difference between a single user license
and a 5-user license?
A:
Single user licenses are meant for single workspaces and personal
use, multi-user licenses allow to use multiple installations of the
software at the same time. Multi-user licenses are cheaper than
the same number of single user licenses.
For further information on licenses please visit: https://www.jamsoftware.com/customers/licenseAgreement.php?language=EN.
4.3
FAQ Retrieving Mail
Q:
SmartSerialMail
How can I remove invalid addresses (Delivery Status
Notification Failure)?
©1996-2015 by Joachim Marder e.K.
19
FAQ
A:
Please use the “bounced mail” function located in step “
Listmanagement”.
You can find further information in the SmartSerialMail Help under:
'bounces'.
Q:
How can I remove a subscriber automatically, if I receive an
unsubscribe mail from this subscriber?
A:
Please use the “cancellations” function placed in step “
Listmanagement”.
You can find further information in the SmartSerialMail Help under:
'cancellations'.
Q:
How can I extract first name and/or last name from a
subscription?
A:
If a mail address contains a name, it will be listed fully in the
„last_name“ column of your list of recipients.
You can find further information in the SmartSerialMail Help under: '
2. Recipients'.
Q:
How can I connect SmartSerialMail to my web page? I want to
give my customers the opportunity to register and to
unsubscribe.
A:
A subscribe/unsubscribe option for newsletters on a web page is
usually connected to a database, that collects the data (like the
mail addresses). In this case, SmartSerialMail can access the
database and import the specific data into the list of recipients.
For creating and maintaining such a database using web site,
please contact your web administrator / web designer.
Another possibility without using a database is to let the web page
send a “subscription mail” or an “unsubscribe mail” to a special
mailbox. You can process the incoming messages in this mailbox
using the “Return” functions of SmartSerialMail.
You can find further information in the SmartSerialMail Help under: '
6. Returns'.
Q:
I’ve performed a mail sending for a customer of mine, and
wanted the bounced mail to be returned to me. But instead
the bounces were sent back to my customer. How can I
avoid this failure in the future?
A:
Bounces will always bounce back to the From Address of the mail.
You can insert your own address into the FROM: field and insert your
SmartSerialMail
©1996-2015 by Joachim Marder e.K.
20
FAQ
customers address into the REPLY: field of the mail. Bounces
then will be sent to your mail address, but if a recipient uses the
reply function, the mail will be sent to your customer.
You can find further information in the SmartSerialMail Help under: '
1. Profile' .
Q:
If I want to collect bounces, only very few bounces will be
recognized as being bounces. How can I alter this
behaviour?
Your message did not reach some or all of the intended
recipients.
Sent: Fri, 2 Nov 2007 09:50:11 +0100
Subject: my-subject
The following recipient(s) could not be reached:
[email protected]
Error Type: SMTP
Remote server (208.36.123.17) issued an error.
MailServer sent: RCPT TO:
Remote server replied: 550 : User unknown
A:
4.4
Most providers don’t adhere to standard formats for bounced mail,
so the format of the bounce mail is the cause for not recognizing
a mail as bounced mail. There is very little we can do about this
fact. If you send us a bounce notification you got in original format
as attachment, we will see, what we can do to provide correct
identification of these kind of bounces in the future.
FAQ Editing Mail
Q:
How can I avoid that my messages sent via SmartSerialMail are
tagged as SPAM?
A:
If a mail is identified as SPAM or not, is not in our hands. If it was, then
a spammer would use this functionality as well.
There are certain things you should keep in mind to minimize the
risk of being accused of spamming:
1. Only send to recipients who have stated that they want to receive
mail from you.
2. Make sure, you are not blacklisted as a SPAM source.
3. Send content, that is not typical for SPAM; e.g. Images only – texts
with keywords like Viagra - upper case subject lines ...
SmartSerialMail
©1996-2015 by Joachim Marder e.K.
21
FAQ
4. Keep your lists clean – i.e. remove bounced mail addresses and
cancellations.
5. Keep the mail simple and avoid too complex HTML, Flash or
scripts in your mail.
Q:
Can I send EML files with SmartSerialMail?
A:
Yes, you can. Click in Step '
3. Content' on the “Open” button (on
the right of the toolbar) and choose the desired file for import into
the editor.
Q:
I want to add an attachment to my newsletters. Is this possible?
A:
Yes, it is possible. Click in step '
3. Content' in the “Attachment”
area on “Add file…” and choose the file(s) to attach.
Q:
How do I import an HTML file so it will appear as the body of the
mail message?
A:
In the toolbar of step '
3. Content' you can find a button ”Open”
which can open/import HTML files to use them as the body of the
mail.
Q:
How can I create HTML messages? Especially messages with
embedded images?
A:
There are two options:
1. You can use the button ”Open” in the toolbar of step '
3.
Content', which can open/import HTML files to use them as the
body of the mail.
2. You can use the integrated HTML editor of step '
3. Content',
write your mail comfortably as you wish and click on the button
“Insert picture” for importing any picture you like.
Q:
How can I provide a HTML part replacement for my mail, in the
case the recipient can’t / won’t read HTML mail ?
A:
SmartSerialMail offers the option to convert an HTML mail
automatically into ASCII text. You may also define a substitute text
for embedded images, if you want to. All these possibilities are
available in the editor of SmartSerialMail in Step '
3. Content'.
SmartSerialMail
©1996-2015 by Joachim Marder e.K.
22
FAQ
You can find further information in the SmartSerialMail Help under: '
3. Content'.
Q:
I want to define more than the three default quick parts “Mail”,
“First name” and “Family name”. Is this possible ?
A:
Yes, it is possible. Just right click on the list of recipients and choose
“Add new column” from the context menu. Now, you can use your
newly added quick part in Step '
3. Content', whenever you click
on “Insert field”.
Even more comfortable and more flexible is the use of quick parts.
Please refer to the online help for more details.
You can find further information in the SmartSerialMail Help under: '
3. Content'
and 'quick parts'.
Q:
I’ve imported from an Excel sheet a list which shall distinguish
between three salutation possibilities: male, female and
undetermined. I want the software to generate the following
salutations :
Dear Mr John Doe (for male)
Dear Mrs Jane Doe (or female)
Dear art lover (in any other case)
Is this possible?
A:
There is no possibility for performing this kind of rule application in
SmartSerialMail yet. But there is another way to achieve the
desired result :
· Open the Excel spreadsheet in Excel;
· Choose under menu “Edit” the “Replace” function, and replace
‘male’ with ‘Dear Mr. John Doe’, etc.
· Store your list under a different name (if you want to keep the
original list);
· Start SmartSerialMail;
· Right click on the list of recipients and choose “Add a new
column”.
· Name this column, e.g. "Salutation"
· Import your new list
· Insert the tags %Salutatuion% {%First_name%} {%Last_name%}
in the proper spaces of your mail.
SmartSerialMail
©1996-2015 by Joachim Marder e.K.
23
FAQ
That should do it.
Q:
Can I import my MS Access tables together with my queries?
A:
As far as the import assistant is concerned, there is no difference
between a table or a query. If you import from a MDB-file, you will
find your queries as well as your tables.
Q:
Does SmartSerialMail allow me to use dynamic tags in the mail
body? For instance, when sending out a newsletter to my
business clients, I'd like to address my clients with a personal
salutation, e.g. Dear {ClientName}. I even like to customize
my mail in more places. E.g.:
Dear {ClientName},
Please login to our site (hyperlinked as http://www.mypage.com.au?ref={ClientName}) with following username and
password:
Your username: {Username}
Your password: {Password}
A:
Yes, it is possible to use “dynamic” tags (“quick parts”). If you have
ClientName, Username and Password in your list of recipients, you
can insert markers e.g.
%username% and %password% into the message at any point
using the “Insert Field” button on the page “
Content”.
You can find further information in the SmartSerialMail Help under: '
3. Content'
and 'quick parts'.
Q:
How can I add a default value for a function, e.g. if I want to
insert the {%First_name%} in my message and some
addressee has this field empty then I want to use the word
“friend”. Where can I make/change this setting?
A:
This is currently not possible. We have such a feature on our to do list
for a later version.
Q:
While creating a message, I have the chance to enter the
“profile_signature” field. But I can't see how to add my
signature to a profile.
A:
You can find the signature in the Options menu on the page '
Content'.
Q:
Can I add personalized links into my mail newsletter?
SmartSerialMail
3.
©1996-2015 by Joachim Marder e.K.
24
FAQ
A:
You can add personalized links to your newsletter with the integrated
quick part system of SmartSerialMail.
· Add a column in your list of recipients, containing the user specific
data for the personalized link è a quick part for the new column is
shown under '
3. Content' - '
Insert quick part',
· Create under 'quick parts' a quick part with the general link in it and
write the quick part for the personalized link right behind it, e.g.
http://www.generallink.com/%quick part%,
· Insert the new quick part under '
3. Content' in your text where
the personalized link should be shown.
You can find further information in the SmartSerialMail Help under: '
3. Content'
and 'quick parts'.
Q:
How can I delete the frame around a picture with a hyperlink?
A:
Go to step "3.Content" and change view to source code. Now search
the area where the picture is included. There you have to insert
Border=”0” like in the following example.
<img src='your Image' border='0' />
Q:
How can I delete the line under a text with a hyperlink?
A:
Go to step „3.Content“ and change view to sourc ecode. Now search
the area where the text is included. There you have to insert
style='text-decoration: none' like in the following example.
<a style='text-decoration: none' href='…'
Q:
Why does my content look different in the preview and in my
mail client?
A:
SmartSerialMail offers a compatibility-check which is accessible
when creating content.
Despite this check it is possible that the representation of content is
not the same in different e-mail-clients.
For more information please refer to: 'Content->Compatibility'
SmartSerialMail
©1996-2015 by Joachim Marder e.K.
25
FAQ
4.5
FAQ Sending Mail
Q:
How long does it take (on average) to send 10.000 messages?
A:
How long transmission will take depends on several factors, among
others:
· The speed and load of your PC;
· The speed and load of your internet connection (esp. the
upstream rate of your connection);
· The speed and load of the accepting mail server (as well as
potential limitations set by your service provider, e.g. 10
messages per connection);
· The total size of the message, including all images and
attachments;
· Firewalls, anti-virus scanner and other proxies reading / filtering
the data transfer.
Step '
4. Preview' in the program will give you a rough
estimation of how long your transmission will take, assuming an
optimal internet connection.
Q:
To how many recipients can SmartSerialMail send a message
at once, is there a limit?
A:
SmartSerialMail has no limit for recipients. The only possibility for a
limit is that your provider uses one.
To send to a big list of recipients you can set the time delay in the
sending options at point '
Profile'. This causes a delay after a
user defined number of mails.
If your provider has a limit of 10 mails per minute for example, you
can set sending of 10 mails and a delay of 1 minute.
Q:
Can SmartSerialMail deliver the mail directly to the receiving
mailbox?
A:
This feature can be found in "Send Mode" at point '
Profile'.
In the "Outgoing Server Options" you can then select "Direct
Delivery".
Q:
How do we know whether the mail is successfully sent or not?
A:
When SmartSerialMail says it has sent the mail, the SMTP server
has accepted the mail for delivery. If it doesn't get delivered it
SmartSerialMail
©1996-2015 by Joachim Marder e.K.
26
FAQ
most likely has been moved to a junk folder.
Q:
If the mail is not sent, is there any way of resending the failed
mails?
A:
If a mail cannot be sent, it is marked as “Error” to signal the failure. If
the problem has been fixed, the status can be changed to
“unsent” in step '
2. Recipients' and resent.
Q:
I can only use the Gmail SMTP server successfully. May I know
what other free SMTP server can be used, such as Yahoo,
Hotmail, Netscape, AOL and etc.? I have tried using Yahoo
and Hotmail but was not successful. Can you give me
advice, what their settings are?
A:
You can find out the settings of different providers on the webpages
of the providers. Please keep in mind that especially freemail
providers are often blacklisted and mail coming from such
sources are directly marked as junk.
Q:
Whenever SmartSerialMail tries to send messages, I receive
an error message.
A:
Please check your settings to allow sending via SMTP. If you have a
firewall installed on your system, please make sure to add
SmartSerialMail to the list of allowed applications in your firewall.
Q:
I receive an error message after a certain number of message
are sent. (e.g. „connection closed gracefully“)
A:
Some SMTP servers limit the number of messages sent per time
interval. Please use the option "Processing with a time delay" in
the "Sending Options" of Step '
1. Profile' and reduce the
number of mail messages sent per time interval. The optimal
settings for this options can only be determined by experience
and will differ for every provider.
Q:
When I try to send a message, I receive the error message:
'Could not send message. Unable to relay for' (address of
receiver).
A:
The SMTP server you try to use does not forward your message.
Perhaps you have chosen the wrong server, misspelled the
servers name, your user name or your password. Your settings
for sending mail should be the same as in your normal mail client
(e.g. Outlook).
SmartSerialMail
©1996-2015 by Joachim Marder e.K.
27
FAQ
You can find further information in the SmartSerialMail Help under:'
1. Profile'
Q:
I’ve downloaded the demo / full version of SmartSerialMail, but
I can send mail to addresses of my domain only. So just my
colleagues (…@my-corporation.com) receive my mail
messages; all other addresses result in the error message
“Relay access denied”. Why ?
A:
"Relay access denied" means, your SMTP server restricts you to
sending mail within your own domain. If this occurs, in most
cases you haven’t provided authentication for using this SMTP
server or the server is ill-configured.
To provide authentication for using the full SMTP service:
· Open the dialog “Advanced SMTP Server Options” in step '
Profile',
1.
· Activate the authentication (“Server requires authentication”),
· Enter your username and password for the SMTP server.
If this doesn’t work, ask your service provider, why the SMTP
server restricts you from relaying.
Q:
I use the McAfee Security Center and my recipients receive
broken HTML mail messages. The mail starts with two lines
containing 'DATA'.
A:
Please deactivate scanning of outgoing mail in the McAfee Security
Center:
· Right click on the red McAffee icon in the system tray.
· Go to 'Virus Scan', click on 'Options'. This will bring up a new
window.
· Go to the second tab which is labeled 'Mail'.
· Uncheck 'Outbound Mail Messages' in 'Scan Options'
Q:
I received error messages similar to 'Could not add image: xxx'
during sending of HTML mail.
A:
Please ensure that the path to the image is absolute as in 'c:\images
\aImage.jpg' and NOT relative as in 'aImage.jpg'. Also
SmartSerialMail does NOT currently support UNC paths like \
\server1\images\aImage.jpg
Q:
I use AOL as a service provider, but I receive the error
SmartSerialMail
©1996-2015 by Joachim Marder e.K.
28
FAQ
message
'AOL has identified this mail to be unsolicited bulk mail' most
the time.
A:
AOL scans all mail sent via port 25. Use port 587 (message
submission port) instead, to avoid this problem. Open the
"advanced outgoing server options” dialog in step '
1. Profile'
and set the port of your SMTP server to 587.
Q:
The connection test to Freenet and gmx.net addresses fails.
Outgoing mail servers : mx.freenet.de and mail.gmx.net
A:
Almost all public / free SMTP server demand authentication, so you
have to activate this feature in SmartSerialMail and provide a
username as well as a password.
· Open the dialog “Advanced SMTP Server Options” in step '
Profile',
1.
· Activate the authentication (“Server requires authentication”),
· Enter your username and password for the SMTP server.
Often, these servers are also limited to a certain amount of mail
messages per session / connection. You should use the
“Processing with a time delay” option in Step '
1. Profile' for
failure free transmission of your messages.
Q:
I have no problems sending mail to small groups, but I get
error messages, if I try to send mail to larger groups (e.g.
250 recipients).
“SMTP Server error: Socket Error #10054. Connection reset
by peer. ---“
I know from past mailings, that the mail addresses are all
valid. What does it mean ?
A:
This error message could appear under many conditions. Most of
the time it means, that your provider limits the amount of mail you
can send via this server in a certain period of time. E.g. you may
send only 20 mail messages every 20 minutes. Please ask your
provider about the details of these limitations.
You can use the “Processing with a time delay” option in Step '
1. Profile' for failure free transmission of your messages.
You can find further information in the SmartSerialMail Help under:'
1. Profile'
SmartSerialMail
©1996-2015 by Joachim Marder e.K.
29
FAQ
Q:
My registered version of SmartSerialMail worked well until I
installed Norton Internet Security 2008 yesterday.
Something tries to block the outgoing mails from
SmartSerialMail. When I test, my connection mails are
perfectly send.
A:
This is a well-known issue with Norton. The Norton software installs
a mail proxy, which accepts the mails for scanning instead of the
SMTP server. SmartSerialMail marks the messages as "Sent",
but the proxy doesn’t transmit the messages to the SMTP server.
It discards the messages as being SPAM.
We recommend that you deactivate the proxy. Unfortunately,
proxies can prevent the transmission of messages, but most of
the time you can be quite sure, that the messages were sent, if
they are marked so.
Q:
The SMTP server I'm using (Lyris mail engine) sends bounced
mail back a little different than most mail packages. Is there
a way to customize what constitutes a bounce and how it's
formatted?
A:
This depends on the bounced mail. If you send us such a bounced
mail, intact, as attachment we can have a closer look.
Q:
What do such an error report mean?
“Error : Could not send message. (You have exceeded
message sending limit, and I will not accept any messages
from you within 15 minutes)”
Is it some kind of program limitation or something else?
A:
This is not a limitation from SmartSerialMail. This is a typical provider
limitation with a sending quota. e.g. maximum 20 mails per hour.
Contact your provider and ask him for a different access.
You can use the “Processing with a time delay” option in Step '
Profile' for failure free transmission of your messages.
1.
Q:
I'm trying to send a bulk mailing to my exhibitors - I'm getting
the following error message
“Error : Could not send message. (... Relaying temporarily
denied. Cannot resolve PTR record for XXX.XXX.30.60)”
Is this your error or have I screwed something up?
A:
This is an internal error with the provider’s mail server. Consult your
provide and state your problem.
SmartSerialMail
©1996-2015 by Joachim Marder e.K.
30
FAQ
4.6
Common error entries (Log)
Q:
What does '..too many connections' mean?
A:
See 'Socket Error # 10068 Too many users'.
Q:
What does 'Socket Error # 10053 Software caused connection
abort' mean?
A:
A connection abort was caused by the server or some software in
between (e.g. firewall, proxy). Turn off any proxy (check if your
antivirus software installed a proxy) and firewall for testing.
Q:
What does 'Socket Error # 10054 Connection reset by peer'
mean?
A:
A connection was forcibly closed by a peer. This normally results
from a loss of the connection on the remote socket due to a
timeout or a reboot.
Q:
What does 'Socket Error # 10055 No buffer space available'
mean?
A:
An operation on a socket or pipe was not performed because the
system lacked sufficient buffer space or because a queue was
full.
This error indicates a shortage of resources on your system. It
can occur if you're trying to run too many applications (of any
kind) simultaneously on your machine. If it persists, exit Windows
or reboot your machine to remedy the problem.
Q:
What does 'Socket Error # 10060 Connection timed out' mean?
A:
A connect or send request failed because the connected server did
not properly respond after a period of time. Check that the
destination address is a valid IP address. If you used a host
name, did it resolve to the correct address?
Q:
What does 'Socket Error # 10061 Connection refused' mean?
A:
No connection could be made because the target machine actively
refused it.
This usually results from trying to connect to a service that is
inactive on the foreign host.
So either you went to the wrong host, or the service (SMTP,
POP3, IMAP) you're trying to contact isn't available. Check the
destination address you are using. If you used a host name, did it
SmartSerialMail
©1996-2015 by Joachim Marder e.K.
31
FAQ
resolve to the correct address? It's also possible that the remote
services use a different port number.
Q:
What does 'Socket Error # 10068 Too many users' mean?
A:
The server quota ran out. The server refused connection because
there are currently too many users connected to the server. Try
again later.
Q:
What does 'Socket Error # 11001 Host not found' mean?
A:
No such host is known. The name you have used is not an official
host name or alias. This is not a software error, another type of
name server request may be successful.
Check, if you have a name server(s) and/or host table configured.
If you are using a name server(s), check whether the server
host(s) are up (e.g. try to ping the server(s)). You could also try to
resolve another host name you know should work, to check that
the name resolution server application is running.
Q:
What does 'Socket Error # 11004 Valid name, no data record of
requested type' mean?
A:
The requested name is valid, but does not have an internet IP
address at the name server. This is not a temporary error. This
means another type of request to the name server will result in an
answer.
This error is similar to the 'Socket Error # 11001 Host not found'.
Q:
I receive an error message, after a certain number of message
are send. (e.g. „connection closed gracefully“)
A:
Some SMTP servers limit the number of messages sent per time
interval. Please use the option "Processing with a time delay" in
the "Sending Options" of step '
1. Profile' and reduce the
number of mail messages sent per time interval. The optimal
settings for this options can only be determined by experience
and will differ for every provider.
Q:
I use AOL as a service provider, but I receive the error
message 'AOL has identified this mail to be unsolicited bulk
mail' most the time.
A:
AOL scans all mail sent via port 25. Use port 587 (message
submission port) instead, to avoid this problem. Open the
“Advanced Outgoing server options” dialog in step '
1. Profile'
and set the port of your SMTP server to 587.
Q:
The connection test to Freenet and gmx.net addresses fails.
SmartSerialMail
©1996-2015 by Joachim Marder e.K.
32
FAQ
Outgoing mail servers: mx.freenet.de and mail.gmx.net
A:
Almost all public / free SMTP server demand authentication, so you
have to activate this feature in SmartSerialMail and provide a user
name as well as a password.
Often, these servers are also limited to a certain amount of mail
messages per session / connection. You should use the
“Processing with a time delay” option in Step '
1. Profile' for
failure free transmission of your messages.
Q:
I have no problems sending mail to small groups, but I get
error messages, if I try to send mail to larger groups (e.g.
250 recipients).
“SMTP Server error: Socket Error #10054. Connection reset
by peer. ---“
I know from former mailings, that the mail addresses are all
valid. What does it mean ?
A:
Although this error message could appear under many conditions,
most the time -as in the described scenario- it simply means, that
your provider limits the amount of mail you can send via this
server in a certain period of time. E.g. you may send only 20 mail
messages every 20 minutes. Please ask your provider about the
details of these limitations.
You should use the “Processing with a time delay” option in Step '
1. Profile' for failure free transmission of your messages.
Q:
When I try to test the connection with a SMTP server, I get the
following error:
Socket error: 10060.
I have checked everything but can't get rid of this error.
A:
This happens, if the server does not respond your connection
request in time. There are many possible causes for a delayed /
not existing server reaction :
· the server is unknown / server address is wrong or misspelled;
Check the servers address, try it’s IP address to be sure.
· a virus scanner or a firewall proxy delays the request too long. Try
to establish a connection, after disabling your firewall and virus
scanner. If this works, enable one application after another. When
you have identified the blocker, add a rule that allows
SmartSerialMail to send mail.
· your internet connection is too slow;
· the server is overloaded;
SmartSerialMail
©1996-2015 by Joachim Marder e.K.
33
FAQ
4.7
Email Provider
Sending mass emails from a web mail account
You may send your emails via a webmail provider like Microsoft (hotmail) or
Google (gmail). Most of these webmailers provide access via a web interface
(using your web browser) or via email client applications (e.g. Outlook). In any
case your webmail provider offers you an incoming- and outgoing email server.
Because they are often used for spam emails, most webmail providers have
set sending limits.
Note:
We don't guarantee the accuracy of the table below. For further information
please contact your webmail provider.
Provider
Policies
Google
(Gmail)
Gmail Policies No more than 500 recipients are
allowed per message when
using the web interface and no
more than 100 recipients when
using a client application.
SMTPServer:
smtp.gmail.c
om
Server-Port:
587
Security:
TLS
Server
requires
authenticatio
n: yes
MSN
Hotmail
(Hotmail,
Policies
Outlook.com
)
SMTPServer:
smtpmail.outlook.
com
Server-Port:
SmartSerialMail
E-Mail Sending Limit
E-Mail
Limit
Size
25MB including
attachments.
(Google Help)
(According to the GMail FAQ,
the fee-based business version
enables you to send emails to
3,000 recipients: Business/
Education.)
Only 100 emails a day are
allowed.
300 emails may be sent if you
verify your account with your
mobile phone number.
25MB including
attachments.
(Microsoft
Answers)
(Hotmail FAQ)
©1996-2015 by Joachim Marder e.K.
34
FAQ
587
Security:
TLS
Server
requires
authenticatio
n: yes
Yahoo!
SMTPServer:
smtp.mail.ya
hoo.com
Server-Port:
465
Security:
SSL
Server
requires
authenticatio
n: yes
Lycos
Yahoo! Spam Only 500 emails per day are
Guideline
allowed.
25MB including
attachments.
Each message has a maximum
of 100 recipients.
(Yahoo FAQ)
(Yahoo FAQ)
Lycos
Terms
MailOnly 500 emails per day are
allowed.
(Lycos FAQ)
35MB including
attachments.
(Lycos FAQ)
AOL
AOL Policies
Only 500 emails per connection
are allowed.
16MB including
attachments.
Each message has a maximum
of 100 recipients.
(AOL FAQ)
(AOL Help)
GMX
SMTPServer:
mail.gmx.co
m
Server-Port:
587
Security:
TLS
Server
requires
authenticatio
n: yes
SmartSerialMail
GMX Policies
Since the maximum number of
recipients and e-mails per day is
set dynamically by the
MailSecurity-Team please
contact GMX.net, to inquire
about the current status.
50MB including
attachments.
(GMX.com
Website)
(GMX Help)
A maximum of 11 recipients per
hour is allowed if you use a
client application. More
recipients are allowed if you use
the web interface (unknown
©1996-2015 by Joachim Marder e.K.
35
FAQ
number).
SmartSerialMail
©1996-2015 by Joachim Marder e.K.
System Requirements and Installation
37
System Requirements and Installation
5
System Requirements and Installation
Supported Operating Systems
· Windows 7 (32 Bit / 64 Bit)
· Windows Vista (32 Bit / 64 Bit)
· Windows XP (32 Bit / 64 Bit)
· Windows Server 2012 (64 Bit)
· Windows Server 2008 R2 (64 Bit)
· Windows Server 2008 (32 Bit / 64 Bit)
· Windows Server 2003 (32 Bit / 64 Bit)
Please note:
Please ensure that all available updates and patches have been installed.
· Microsoft Data Access Components Version 2.6 or newer
· Microsoft Internet Explorer Version
5.5 or better
· 512 MB RAM
· minimum 60 MB available Hard Disc.
· screen resolution of 1024 x 768 and higher with 256 colors.
· Microsoft Data Access
Components Version 2.6 or later
· Microsoft Internet Explorer Version
5.5 oder later
Minimum requirements for imports from:
· Microsoft Office Documents or
Office Outlook: Office 2003 or
newer
· Microsoft Outlook Express / Windows Mail: Version 6 or newer
· Microsoft Access 2007: Office 2007
5.1
Installation of SmartSerialMail
1. Close all programs
SmartSerialMail
©1996-2015 by Joachim Marder e.K.
System Requirements and Installation
38
2. Start SmartSerialMail-Full.exe or SmartSerialMail-Demo.exe
(depending on your version) and follow the instructions.
3. Click 'Yes' to allow SmartSerialMail to install.
4. Choose your language version of SmartSerialMail. Click 'OK'.
5. The Welcome page appears. Click 'Next'.
SmartSerialMail
©1996-2015 by Joachim Marder e.K.
System Requirements and Installation
39
6. Accept our license agreement if you agree. Click 'Next'.
7. Only for the Full Version: Enter your installation key and click
'Next' to proceed.
You will find your installation key in the customer area of the JAM
Software website.
Username and password for this area have been sent to you by
mail after ordering our product.
If you should be unable to login, please contact our support.
8. Choose a folder for the installation of SmartSerialMail. Make sure
there is enough space on your hard drive. Click 'Next'.
SmartSerialMail
©1996-2015 by Joachim Marder e.K.
System Requirements and Installation
40
9. Choose a folder in the Start Menu for SmartSerialMail to appear in.
Click 'Next'.
10. Choose additional features or icons (optional).
SmartSerialMail
©1996-2015 by Joachim Marder e.K.
System Requirements and Installation
41
11. The Setup program will copy all necessary files to your hard drive
and create a new program group in the Start Menu.
12.You can decide whether you would like to start SmartSerialMail
directly or read the Help-file first. Click 'Finish' to complete.
SmartSerialMail
©1996-2015 by Joachim Marder e.K.
42
System Requirements and Installation
5.2
Uninstalling SmartSerialMail
Click the Start button, choose 'Settings', and then click 'Control Panel'.
Double-click the 'Add/Remove Programs' icon.
Choose SmartSerialMail and click on 'Remove'.
Follow the directions in the dialog boxes.
You will be asked if you really want to remove SmartSerialMail. Click 'Yes' if you
want to remove it.
SmartSerialMail
©1996-2015 by Joachim Marder e.K.
43
System Requirements and Installation
You will be asked if you want to delete all application settings as well as the
SmartSerialMail database, e.g. all saved profiles and recipients.
Note:
If you click 'Yes', the data will be deleted irrevocably!
SmartSerialMail will be uninstalled.
SmartSerialMail
©1996-2015 by Joachim Marder e.K.
44
System Requirements and Installation
After the uninstalling process is complete, you will be informed that
SmartSerialMail has been successfully uninstalled.
5.3
Database Connection
Please note:
This feature is only available in the Enterprise Edition.
You can find a detailed comparison between the Small Business Edition and
the Enterprise Edition here.
To use a MSSQL database instead of an Access database or to move your
local database use the 'manage database' function.
You will find it in the main menu's database branch.
SmartSerialMail
©1996-2015 by Joachim Marder e.K.
45
System Requirements and Installation
A configuration dialog will open, enabling you to manage the database settings
for your Access or MSSQL database.
To change the location of the local database simply change the path in the
filename field or browse for a database.
Another database type can be selected out of the database type drop down
box.
To check if your settings are correct use the 'Test Connection' button.
In the lower part of the window you can choose to copy your data to the new
database.
This can be useful if you want to use already existing e-mails or recipient lists
in the new database.
SmartSerialMail
©1996-2015 by Joachim Marder e.K.
46
System Requirements and Installation
Note:
SmartSerialMail can also be used with an MSSQL database. The database has
to be created before SmartSerialMail tries to access the database for the first
time.
To configure an MSSQL database connection use the corresponding dialog.
Enter the name of your server and database and choose an authentication
method.
The SQL server authentication requires a username and a password.
Only after entering correct the correct username and password will you be able
to see and select the available databases in the drop down box.
The 'Test Connection' button can be used to check if the connection to an
MSSQL database can be established.
In the lower part of the window you can choose to copy your data to the new
SmartSerialMail
©1996-2015 by Joachim Marder e.K.
47
System Requirements and Installation
database.
This can be useful if you want to use already existing e-mails or recipient lists
in the new database. .
5.4
Firewall
To use SmartSerialMail, it is recommended that you allow communication via
the following protocols:
·
·
·
·
DNS
SMTP
POP3
IMAP
Hint:
DNS: Needed to find the mailserver over the Internet.
SmartSerialMail
©1996-2015 by Joachim Marder e.K.
48
System Requirements and Installation
SMTP: Needed to send emails.
POP3/IMAP: Needed to collect emails from a mailserver.
If your mailserver requires SSL or TLS you should activate the POP3S/IMAPS
and SMTPS protocols.
Hint:
SSL/TLS: provide secure communications via the Internet
POP3S/IMAPS , SMTPS: enhances POP3/IMAP or SMTP with an encryption.
5.4.1
Kerio
In the standard configuration of Kerio firewall, SmartSerialMail should work
properly.
If there are any problems during sending or creating of new profiles please
check the settings of Kerio firewall. You will find them under the following path
in the Administration Area:
· Kerio WinRoute Firewall
· Configuration
· Traffic Policy
Create a new rule to allow DNS, SMTP, POP3, POP3S and SMTPS (as in the
picture).
SmartSerialMail
©1996-2015 by Joachim Marder e.K.
49
System Requirements and Installation
Please note:
If you are using SmartSerialMail 5 you need repeat those steps for
"SmartSerialMailServiceApp.exe".
5.4.2
ZoneAlarm
Confirm the information and warning windows and save the entry
Check the settings in the ZoneAlarm control center.
You will find them under the following path:
· Program Control
· Programs
· SmartSerialMail
The following settings have to be made for SmartSerialMail to work properly:
· Trust Level: Super
· Access trusted: Allow
· Access Internet: Allow
· Send Mail: Allow
· All other settings can stay on the „ask“ property
SmartSerialMail
©1996-2015 by Joachim Marder e.K.
50
System Requirements and Installation
Please note:
If you are using SmartSerialMail 5 you need repeat those steps for
"SmartSerialMailServiceApp.exe".
5.4.3
Norton Internet Security
Configure settings for SmartSerialMail
You will find them under the following path in the Control Panel of Norton
Internet Security:
· Internet
· Settings
· Smart Firewall
· Program Control
Select 'Allow' for SmartSerialMail to ensure correct functionality of the
program.
SmartSerialMail
©1996-2015 by Joachim Marder e.K.
51
System Requirements and Installation
Please note:
If you are using SmartSerialMail 5 you need repeat those steps for
"SmartSerialMailServiceApp.exe".
5.4.4
Norton 360°
Configure settings for SmartSerialMail
You can find them under the following path in the Control Panel of Norton 360°:
· Settings
· Firewall
· Program Rules
Select 'Allow' for SmartSerialMail in the 'Program Rule' tab to ensure correct
functionality of the program.
SmartSerialMail
©1996-2015 by Joachim Marder e.K.
52
System Requirements and Installation
Please note:
With SmartSerialMail 5 you need to do the same with
"SmartSerialMailServiceApp.exe"
5.4.5
Kaspersky Internet Security
The main settings are made automatically.
Check settings for SmartSerialMail
You can find them under the following path in the Control Panel of Kaspersky
Internet Security.
· System Security
· Firewall
· Settings
· Applications
· Folder "Jam Software"
SmartSerialMail
©1996-2015 by Joachim Marder e.K.
53
System Requirements and Installation
Depending on the security level of Kaspersky Internet Security the following
window could be shown at the beginning of installation. Please select "Yes" to
install SmartSerialMail.
SmartSerialMail
©1996-2015 by Joachim Marder e.K.
System Requirements and Installation
54
Please note:
With SmartSerialMail 5 you need to do the same with
"SmartSerialMailServiceApp.exe"
5.4.6
Panda Internet Security
The main settings are made automatically.
Please check the following firewall settings after the first run of
SmartSerialMail.
You can find them under these path
· Protection
· Firewall
· Rules
· Settings
Set 'Allow outbound connections' for SmartSerialMail.
SmartSerialMail
©1996-2015 by Joachim Marder e.K.
55
System Requirements and Installation
Please note:
With SmartSerialMail 5 you need to do the same with
"SmartSerialMailServiceApp.exe"
5.4.7
BitDefender Internet Security
The main settings of BitDefender Internet Security are made automatically.
Before the first start of SmartSerialMail please open your Firewall configuration
and switch to 'Advanced View'.
First you need to change the settings under 'Antivirus'.
SmartSerialMail
©1996-2015 by Joachim Marder e.K.
56
System Requirements and Installation
Click on the 'Custom Level' button and uncheck 'Scan outgoing mail'.
SmartSerialMail
©1996-2015 by Joachim Marder e.K.
57
System Requirements and Installation
Start SmartSerialMail.
Depending on your firewall settings, the Firewall will show one of the
messages below during the first start of SmartSerialMail.
The firewall has made all settings for
SmartSerialMail automatically.
SmartSerialMail is now allowed to send
emails.
SmartSerialMail
©1996-2015 by Joachim Marder e.K.
58
System Requirements and Installation
If this message is shown you need to
allow SmartSerialMail to send manually.
Click on the 'Allow' button to allow usage
of SmartSerialMail in your Firewall
Afterwards, check your settings in the 'Firewall' of BitDefender. Open the tab
'Rules'.
The rule for SmartSerialMail in your firewall should look like the picture above.
SmartSerialMail
©1996-2015 by Joachim Marder e.K.
59
System Requirements and Installation
Please note:
If you are using SmartSerialMail 5 you need repeat those steps for
"SmartSerialMailServiceApp.exe".
5.4.8
Windows Firewall
The Windows Firewall may be automatically configured by SmartSerialMail in
the last step of the installation.
5.4.9
Comodo Internet Security
Depending on your firewall settings, the Firewall could show one of the
messages below during the installation.
To secure a proper installation and trouble-free use of SmartSerialMail you
should allow all shown messages and press 'Remember my answer'.
SmartSerialMail
©1996-2015 by Joachim Marder e.K.
System Requirements and Installation
SmartSerialMail
60
©1996-2015 by Joachim Marder e.K.
61
System Requirements and Installation
If there are any problems with sending after updating SmartSerialMail or your
firewall please read 'Delete Firewall-Rule'.
Please note:
If you are using SmartSerialMail 5 you need repeat those steps for
"SmartSerialMailServiceApp.exe".
5.4.9.1
Delete Firewall-Rule
Open Comodo Internet Security and click the Button 'Firewall'.
Choose 'Advanced' and click on 'Network Security Police'.
SmartSerialMail
©1996-2015 by Joachim Marder e.K.
62
System Requirements and Installation
You will see the following window, which should contain an entry for
SmartSerialMail.
This entry has to be deleted. Select the entry and click on the 'Remove' button
on the right side of the window.
SmartSerialMail
©1996-2015 by Joachim Marder e.K.
63
System Requirements and Installation
Now click 'OK' and close the window of Comodo Internet Security.
Start SmartSerialMail and click the 'Connection Test' button in step '1.
Sender'.
Your Firewall will show the following message. Please click 'Allow' to insure
that SmartSerialMail can send out messages.
SmartSerialMail
©1996-2015 by Joachim Marder e.K.
System Requirements and Installation
SmartSerialMail
64
©1996-2015 by Joachim Marder e.K.
Basics
66
Basics
6
Basics
In this category you will find detailed information on the basic functions and
concepts of SmartSerialMail
Placeholder - Personalizing the E-Mail-Content
Learn about the "Placeholder" concept in SmartSerialMail.
Recipientlists and Sending - Sending E-Mails
Learn about the handling of recipientlists and the sending.
Listmanagement
Learn how to manage bounce-mails, subscriptions and cancellations.
6.1
Personalizing Email Content
What are placeholders?
"Placeholder" is a term used for a function enabling the user to dynamically
generate content.
Instead of writing an email to each recipient you create an email template and
use placeholders for all parts you want to personalize.
The recipient lists contains certain information for each recipient, e.g. name,
title, email address, customer number.
SmartSerialMail uses template and recipient list to create an email for each
recipient. All placeholders are replaced by information from the recipient list.
Where can I use placeholders in SmartSerialMail?
The most common use of placeholders is to personalize the content (HTML as
well as text-only) of an email.
You can also use placeholder in HTML links, e.g. for link-tracking or providing
personalized links to your website.
Placing placeholders in file names and paths of attachments will also enable
you to attach individual offers or invoices to your email.
Placeholders can also be used for files and pictures. Depending on user profile
or customer different company logos or product pictures can be embedded in
your email.
What kind of placeholders does SmartSerialMail offer?
SmartSerialMail
©1996-2015 by Joachim Marder e.K.
67
Basics
Fields of the recipient list
The most common kind of placeholders are the columns of the recipient list.
Each column of the list can be used as placeholder. An email address is
required for each recipient. Additional columns can be added and later used for
personalization of emails. You can, for example, address your customers with
their first and last names as well as their title.
See an example of use here: Example 1: "Use the recipient's name or other
information in your email content"
Details from the sender profile
Different values of the sender profile can be used as placeholders.
A profile contains a display name, later shown as the email's sender. Instead of
writing out your name in full in the email content, you can simply use the
corresponding placeholder. This is especially useful if you use more than one
profile and want to make sure that the correct name is used in each email.
See an example of use here: Example 8: "Create content depending on the
selected profile"
Quick parts
A quick part can contain text or pictures.
This type of placeholder is mainly used to quickly and easily organize recurring
content. You can, for example, create quick part for your sign-offs and your
company logo and re-use it in different email contents.
See an example of use here: Example 2: "Use recurring content in different
emails"
Functions and conditional placeholders
Use function and conditional placeholders to create more complex email
personalizations.
You can, for instance, address the recipient by title or gender or insert content
depending on the language your customer prefers to use.
A complete list of all placeholder functions can be found in "Content->Toolbar>Placeholder".
See an example of use here: Example 3: „Use an individual salutation" and
here: Example 7: „Example 7: Automatically send content depending on
language or category“
Alias placeholders
SmartSerialMail
©1996-2015 by Joachim Marder e.K.
68
Basics
Alias placeholders enable you to create recurring texts for profiles and
contents. You can, for example, enter the names of contact persons of the
company address as alias placeholders in your profile and use them in
different email contents.
Alias placeholders can also be used as placeholders for more complex
functions and conditional salutations. Instead of entering the long placeholder in
your email content you can create an alias for the complex function in the alias
placeholder menu. If you want to use the complex placeholder in your email,
simply enter the alias. This simplifies the HTML code of your email and enables
you to easily re-use the placeholder.
Link shortcuts
Link shortcuts are used in combination with list management for registrations
and cancellations as well as confirmation emails. Use there placeholders to
enter links for registering or canceling a newsletter in your emails without
having to create alias placeholders.
See an example of use here: Example 4: „Use individual links“
6.1.1
Placeholder examples
In this topic you will find application examples with step-by-step tutorials
1. "Use the recipient's name or additional information in email content"
2. "Use recurring content in different e-mails"
3. "Use an individual salutation"
4. "Use individual links"
5. "Use individual pictures"
6. "Different attachments depending on the recipient"
7. "Automatically insert content depending on language or category"
8. "Base content on the selected profile"
6.1.1.1
Example 1: Use the recipient's name or other information in your email
content
Prerequisites:
A recipient list with first name and last name or additional information of the
recipients.
Example:
SmartSerialMail
©1996-2015 by Joachim Marder e.K.
69
Basics
You want to address every recipient with their name. You use a recipient list
containing the name of the recipient in addition to the email address.
Implementation:
· Klick in the email content and select the place where you want to use the
recipient's name.
· Select the column you wan to use in the "Placeholders" menu under
"Recipient list" (in this case: last name).
· The placeholder for the selected column will be inserted in the email content.
6.1.1.2
Example 2: Use recurring content in different emails
Prerequisites:
Several emails using the same content.
Example:
You use an individual e-mail template for your spring, summer, autumn and
winter newsletter. The same footer is used in every template.
Implementation:
· Select "Quick Parts" in the navigation and klick "New".
· Enter a name for the quick part, e.g. "Footer". The name will later be used as
placeholder when inserting the quick part.
· Create content for the quick part.
· Move to "Email Content" and klick on the position you want to enter the quick
part. Navigate to "Quick Parts" in the "Placeholder" menu and select the
placeholder you want to insert.
6.1.1.3
Example 3: Use an individual salutation
Prerequisites:
A recipient list with a column on which all possible salutations can be based.
Example:
You want to correctly address your recipients by gender. Your recipient-list
contains a column “Gender” with the values “male” or “female” depending on
the recipient.
Implementation:
SmartSerialMail
©1996-2015 by Joachim Marder e.K.
70
Basics
· Right-click on the position in your content where you want to insert the
greeting.
· Select the column of your recipient list you want to use for the greeting under
"Conditional Placeholders" in the "Placeholder" menu.
· Enter the salutation you want to use in the dialog box.
· Insert a salutation for each value the column can contain in your recipient list,
e.g. "Dear Mr.", "Dear Ms.", or "Dear".
6.1.1.4
Example 4: Use individual links
Prerequisites:
A recipient list with a column containing parts of the internet addresses to
which you want to link
Example:
Depending on the interests of your customers you want to link to specific parts
of your website. Your recipient list contains a column “Product category” with
the values “garden”, “gift ideas”, etc. Your website can be accessed with these
categories, for example www.my-shop.org/garden/ and www.my-shop.org/giftideas/.
Implementation:
· Right-click on the position in your contents where you want to insert the link.
· In the menu “Insert link” type in “{%Product category%} as name. This will
ensure that the name of the selected product category will be used for the
link.
· Now fill in the desired address in the field “Location”. Make sure to use the
same placeholder “{%Product category%}” to generate the corresponding
links. In this example the “Location” is “www.my-shop.org/{%Product
category%}”.
· In the finished email each customer will see a link to their preferred product
category.
6.1.1.5
Example 5: Use individual pictures
Prerequisites:
A recipient list with a column which contains parts of the picture names you
want to use.
Example:
You want to use different pictures depending on the interests of your
customers. Your recipient list contains a column “product categories” with
values such as “fiction” or “professional literature”. Depending on product
SmartSerialMail
©1996-2015 by Joachim Marder e.K.
71
Basics
category you want to include different logos in your email. The names of the
logos are “logo_fiction.jpg” and “logo_professional-literature.jpg”.
Implementation:
· Place the cursor at the position at which you want to insert a picture.
· Click on “Image” in the menu "Edit" to insert a picture.
(Example: "D:/product pictures/fiction.jpg")
· Select the picture in the content by clicking on it.
You should now be able to see “Image Source” in the menu “Picture Tools”.
· In this field you have to replace the name of the picture with the placeholder
for the desired category from your recipient list. In this case this leads to the
path: "D:/product pictures/{%product category%}.jpg"
· Every recipient will now see the picture corresponding to the product
category in the recipient list.
6.1.1.6
Example 6: Send different attachments depending on the recipient
Prerequisites:
A recipient list with a column from which the different contents can be derived.
Example:
You want to send an invoice to your customers. Your recipient list contains a
column “invoice number” with the invoice number for each recipient. You have
created a PDF file for each recipient. The names of the PDF files contain the
invoice number. For example: “Invoice #12345.pdf”
Implementation:
· Select the tab “Attachments” in the Window "Contents" and click “Browse …”
· Now choose one of the invoice files and confirm your selection.
(Example: “D:/invoices/Invoice #54321.pdf”)
· Highlight the number of the PDF file and open the context menu by rightclicking on the selection. Select “Recipients Fields” in the menu
"Placeholder" and select the column with the information of the recipient you
want to insert. The final step is to click "Replace" to apply your changes.
· This will attach the file corresponding to on the invoice number to each
customer's email.
(Example: “D:/invoices/Invoice #{%invoice-number%}.pdf”)
6.1.1.7
Example 7: Automatically insert content depending on language or category
Prerequisites:
A recipient list with a column from which all contents can be derived.
SmartSerialMail
©1996-2015 by Joachim Marder e.K.
72
Basics
Example:
You want to send your emails in several languages. Your recipient list contains
a column “Language” with the values “EN” or “DE” depending on the desired
language of the email content.
Implementation:
· Right-click at the position in the content at which you want to insert the
language-specific content.
· Select “Conditional Placeholders” in the menu "Placeholders" and select the
name of the column corresponding to the desired content.
(Example: "Language")
· Enter the value for which you want to use the language-specific content in
the upper field.
(Example: "DE")
· The lower field defines the content to be substituted for the placeholder. You
can also enter quick parts here.
(Example: "Text_DE")
· In the finished email the placeholder will be replaced with the corresponding
content.
6.1.1.8
Example 8: Base content on the selected profile
Prerequisites:
Several different profiles.
Example:
You use different sender profiles for different clients. You want to use different
quick parts in your email content depending the currently selected profile.
Implementation:
· To create different quick parts for each profile, navigate to "Quick Parts".
· Check the box "Save as global quick part" to decide whether the quick part
shall be available in all profiles or if only the currently selected profile.
· Uncheck the box if a quick part shall be used only in a single profile.
· In each profile you can insert the quick parts in the content via the context
menu > placeholders. The placeholders will be replaced by the quick part's
content during preview and sending.
SmartSerialMail
©1996-2015 by Joachim Marder e.K.
73
Basics
6.2
Recipient Lists and Sending
Recipient lists
SmartSerialMail sends serial emails to lists of recipients. A separate email is
created for each recipient. In addition to the email address a recipient list can
contain any number of columns. You can use each column of the list to further
personalize your email via placeholders.
You can create any number of recipient lists and use them in different sending
operations.
What is the status-column used for?
At the end of a sending operation SmartSerialMail will automatically add the
“status” column showing the sending status of each email to a recipient list.
Here you can see, for example, whether an email has been sent or could not
be sent due to an error.
What are blacklists (exclude- or blocklists)?
In addition to the “normal” recipient lists SmartSerialMail offers a second list
type: blacklists. Blacklists enable you to make sure that specific recipients
never receive emails, for example to manage cancellations of newsletters. If an
email address appears on a blacklist, no email will be sent to the recipient,
even if their email appears on the recipient list used for the sending operation.
Sending Operations
A sending operation in SmartSerialMail consists of a profile, a recipient-list and
an email content.
SmartSerialMail uses the selected content to create a separate e-mail for every
recipient. Placeholders are replaced in the content by values from the recipient
lists. The profile defines how the email will be sent.
SmartSerialMail will mark each sent email in the recipient list. Here you can
easily see which recipient has already received a mailing.
If you change anything in content, profile, or recipient lists during a sending
operation, those changes will only be applied if you stop the operation and restart it again.
What should I check before sending?
Please check whether the desired profile, the correct recipient-list, and the
content you want to send have been selected. You can always check the
currently selected elements (profile, recipient, content) at the lower window
border.
Make sure to take a look at the preview before sending.
SmartSerialMail
©1996-2015 by Joachim Marder e.K.
74
Basics
6.2.1
Recipient Lists and Sending Examples
In this topic you will find examples of application for recipient lists and step-bystep tutorials
1. "How do I use blacklists?"
2. "How do I filter a recipient list (list segmentation)?"
3. "How do I use data from an external database directly?"
6.2.1.1
Example 1: How to create blacklists
Prerequisites:
A recipient list you want to use as a blacklist (block list).
Example:
You want to exclude certain recipients from future sending operations.
Implementation:
· Select an existing recipient list containing the recipients you would like to
exclude from all sending operations or create a new recipient list.
· Select the option "Blacklist" under "List Type" in the "Edit" menu to transform
the list into a blacklist.
· From now on, the email addresses on this list are excluded from all sending
operations, even if they appear on another recipient list.
6.2.1.2
Example 2: How to apply filters
Prerequisites:
A recipient list containing a column containing the values you would like to use
for segmentation.
Example:
You want to send emails to the first 20 recipients of your lists whose last
names start with the letter "M".
Implementation:
· Select the recipient list you would like to filter.
SmartSerialMail
©1996-2015 by Joachim Marder e.K.
75
Basics
· Click "New Filter" in the "Home" menu to create a new filter.
· Enter a name for the filter. The filter will now be shown as a sub-item of the
recipient list.
· You can now configure the filter to show the first 20 entries starting with "M":
o Select the "Last Name" column.
o Select "starts with" and enter "M" in the edit field.
o To show only the first 20 entries, check the option "Limit the amount of
recipients for this filter." and enter the value "20" in the edit field.
· The original recipient list is now filtered to show only the first 20 entries
starting with an "M". If you start a sending task, only those 20 recipients will
receive an email.
6.2.1.3
Example 3: Use a table from an external database
Prerequisites:
You want to connect a table in your database directly to SmartSerialMail.
Example:
You already have an Microsoft Access database containing the email
addresses of your customers. Now you want to use these addresses in
SmartSerialMail without having to import the data for each sending operation.
Implementation:
· Click on "New Link to Table" in "Recipients" menu "Home". You will be
prompted to enter a name for the new list.
· Select the type of List in the "List Properties" dialog. You can use the list as
an recipient list or as a blacklist.
· Enter a name for the external table link.
· The "List Properties" Dialog Window appears:
o Please select the "Build..." Button to specify the database connection to
your Access file.
o When you have specified the connection click on "Open Connection".
o Now select the "Table" and assign the necessary columns from your
external table.
Please note the conventions: "Primary Key" (needs to be a unique integer
value), "Status Column" (needs to be a integer column).
All other columns need to be string values.
o Click "OK".
The list from your external table will now be shown in SmartSerialMail. Editing
the list will directly affect your database.
SmartSerialMail
©1996-2015 by Joachim Marder e.K.
76
Basics
You can edit the properties of the external table connection by clicking "Edit
Table Options" in the "Home" menu.
Please note:
Since the selected database is linked to SmartSerialMail, changes applied to
the list in SmartSerialMail will change your database!
6.3
List Management
List management helps you to keep your recipient-lists up-to-date.
With this feature you can decide how to treat bounced mail, registration,
cancellation and confirmation. E-mail addresses can be added and deleted
automatically from recipient-lists.
What is bounced-mail?
Bounced mails are automated replies to e-mails that could not be delivered.
In general there are two types of bounced-mail: permanent and temporary.
SmartSerialMail solely handles permanent bounced-mail. Temporary errors –
that can for example occur when the inbox-folder of the recipient is full – are
ignored.
How are registration, deregistration and acceptance
processed?
SmartSerialMail recognizes these e-mails by their subject. You are able to
define keywords for each category (registration, cancellation, confirmation), the
subject of incoming e-mails will be scanned. If a match occurs SmartSerialMail
handles the recipient’s e-mail address as defined.
6.3.1
List Management Examples
In this topic you will find application examples with step-by-step tutorials
1. Example 1: How to deal with bounce emails
2. Example 2: Managing Subscriptions
3. Example 3: Managing Confirmations
4. Example 4: Managing Cancellations
6.3.1.1
Example 1: How to deal with bounced emails
Prerequisites:
You have already sent email to the recipients of a list and have created a
blacklist.
SmartSerialMail
©1996-2015 by Joachim Marder e.K.
77
Basics
Example:
After a sending operation you receive error messages concerning
undeliverable emails (bounced emails). You now want to create a blacklist
containing those email addresses to reduce the number of errors in your next
sending operation.
Implementation:
· Switch to "List Management".
· Select the profile for which you want to create the bounce email rule in the
"Profile" menu.
· Klick on the tab "Undelivered email" in the "List Management" menu. Check
the box "undelivered email" to make sure that SmartSerialMail reacts to
bounce emails.
· You can now decide whether SmartSerialMail shall add the email addresses
of the bounced emails to a separate list (select this option to create a
blacklist) or remove them from an existing recipient list. In this example we
will collect all bounced emails in a blacklist.
· Check "Collect into" and select the list to which you want to add the bounced
mails. In this example, a list named "Blacklist" already exists. All bounce
mails will now be added to the "Blacklist" automatically.
· In a final step you can decide whether undeliverable emails shall be kept on
the server or deleted/forwarded to another address.
Please note:
SmartSerialMail only processes permanently bounced emails. Temporary
errors (e.g. those caused by a full inbox or an out of office-message) will be
ignored.
6.3.1.2
Example 2: Managing Subscriptions
Prerequisites:
You want SmartSerialMail to process subscriptions automatically and collect
the email addresses in a recipient list.
Example:
Your customers subscribe to a newsletter via email. You want SmartSerialMail
to filter out these emails and automatically add the sender addresses to a
recipient list.
SmartSerialMail
©1996-2015 by Joachim Marder e.K.
78
Basics
Implementation:
· Switch to "List Management".
· Select the profile for which you want to create a subscription rule under
"Profile".
· Klick on the tab "Subscriptions" in the "List Management" menu. Check the
box "Collect Subscriptions" to make sure that SmartSerialMail reacts to
subscriptions.
· You can now decide whether SmartSerialMail shall add the email addresses
of subscription emails to a separate list or add them to an already existing
list. In this example we want to collect the addresses in a list we will later use
for managing our subscribers.
· Check "Collect into" and select the list to which you want to add the
subscribers. In this example, a list named "Subscriptions" already exists. All
subscribers will be added to the "Subscriptions" automatically.
· In a final step you can decide whether subscription emails shall be kept on
the server or deleted/forwarded to another address.
6.3.1.3
Example 3: Managing Confirmations
Prerequisites:
You want SmartSerialMail to process subscriptions automatically and collect
the email addresses in a recipient list.
Example:
Your customers confirm their subscription to a newsletter via email (double
opt-in). You want SmartSerialMail to filter out these emails and automatically
add the sender addresses to a recipient list.
Implementation:
· Switch to "List Management".
· Select the profile for which you want to create a confirmation rule under
"Profile".
· Klick on the tab "Confirmations" in the "List Management" menu. Check the
box "Collect Confirmations" to make sure that SmartSerialMail reacts to
subscriptions.
· You can now decide whether SmartSerialMail shall add the email addresses
of confirmations emails to a separate list or add them to an already existing
list. In this example we want to collect the addresses in a list we will later use
for managing our subscribers.
· Check "Collect into" and select the list to which you want to add the
subscribers. In this example, a list named "Confirmations" already exists. All
SmartSerialMail
©1996-2015 by Joachim Marder e.K.
79
Basics
confirmations will be added to the "Confirmations" automatically.
· In a final step you can decide whether confirmation emails shall be kept on
the server or deleted/forwarded to another address.
6.3.1.4
Example 4: Managing Cancellations
Prerequisites:
You want SmartSerialMail to process cancellations automatically and collect
the email addresses in a recipient list.
Example:
Your customers cancel their subscription to a newsletter via email (double optin). You want SmartSerialMail to filter out these emails and automatically add
the sender addresses to a recipient list.
Implementation:
· Switch to "List Management".
· Select the profile for which you want to create a cancellation rule under
"Profile".
· Klick on the tab "Cancellations" in the "List Management" menu. Check the
box "Collect Cancellations" to make sure that SmartSerialMail reacts to
cancellations.
· You can now decide whether SmartSerialMail shall add the email addresses
of cancellation emails to a separate list or add them to an already existing
list. It is also possible to remove the addresses from an already existing
recipient list. In this example we want to remove the addresses from an
existing list so a newsletter is no longer sent to the customer.
· Check "Remove from:" and select the list from which you want to remove the
addresses. In this example, a list named "Newsletter" already exists. All
addresses will be removed from the list "Newsletter" automatically.
· In a final step you can decide whether cancellation emails shall be kept on
the server or deleted/forwarded to another address.
SmartSerialMail
©1996-2015 by Joachim Marder e.K.
Tutorial
81
Tutorial
7
Tutorial
Welcome to our SmartSerialMail Tutorial.
Here you get a brief introduction to the use of SmartSerialMail.
Tutorial 1: From first start until sending messages
You will learn step-by-step :
1. how to create sender profiles;
2. how to import a recipients list out of Excel;
3. how to create a new message;
4. how to check the message;
5. how to send the message;
Tutorial 2: Managing, what comes back
You learn how to manage what comes back.
Tutorial 3: Insert a personalized attachment
You learn how to insert a personalized attachment.
Tutorial 4: Import content from Word
You learn how you can import content from Word to your newsletter.
Tutorial 5: Edit recipients lists
You learn how to:
1. Insert entries to your recipients list
2. Merge recipients lists
3. Substract recipients lists
4. Remove duplicates
5. Make a Blacklists
Tutorial 6: Create a Newsletter with subscription and cancellation
functions
SmartSerialMail
©1996-2015 by Joachim Marder e.K.
82
Tutorial
You learn how to use the subscription and unsubscription function of
SmartSerialMail.
7.1
Tutorial 1: Getting started
Step 1: Create a sender's profile
Follow these steps:
1. Start SmartSerialMail and choose '
2. Click '
Profile' in the navigation.
New' to open the profile wizard and create a new profile.
The Profile Wizard helps you to create a sender profile.
In the first step you have to insert your name and mail address.
Furthermore, you have the possibility to change to the manual configuration
mode to set the server settings on your own.
SmartSerialMail
©1996-2015 by Joachim Marder e.K.
83
Tutorial
Otherwise SmartSerialMail tries to find the required settings automatically.
Click 'Next' to proceed.
SmartSerialMail now tries to determine the configuration of your provider.
In the picture below you can see an overview of all collected data, which will be
saved in SmartSerialMail.
Finally enter here your username and password for the selected mail-account.
SmartSerialMail
©1996-2015 by Joachim Marder e.K.
Tutorial
84
Click on 'Close' to get back to the main window of SmartSerialMail.
SmartSerialMail
©1996-2015 by Joachim Marder e.K.
85
Tutorial
3. As 'Reply Address' enter the address where you want to receive the
returns.
If not specified, the 'From Address' will be used for returns.
4. In 'Advanced Sender Information' you can apply additional settings to your
current profile.
5. Click on the button '
Test Connection' in the 'Home' toolbar to check if
your settings work.
A test e-mail will be sent to the 'From Address'.
SmartSerialMail
©1996-2015 by Joachim Marder e.K.
86
Tutorial
You can create another profile in the same way.
To switch between your profiles use the 'Profile menu' on the left.
You can get detailed information in the help files under 'Profile'.
Step 2: Import a recipients list out of excel
Follow these steps:
1. Choose '
Recipients' in the navigation.
Select the toolbar 'Home' if not selected already.
2. Click on the icon '
'Newsletter'.
SmartSerialMail
New' and insert a name for your list, e.g.
©1996-2015 by Joachim Marder e.K.
87
Tutorial
3. Select the toolbar 'Import Export' and click on the button '
Wizard' to open the 'Import Wizard'.
Import
4. Choose as source type 'Microsoft Excel File'.
SmartSerialMail
©1996-2015 by Joachim Marder e.K.
88
Tutorial
5. Use the ' Open' button to browse your file system and select a file or type
the path into the text field.
With the ' Edit' button you can open and edit the selected file.
Note:
Close the file to ensure a correct import.
SmartSerialMail
©1996-2015 by Joachim Marder e.K.
Tutorial
89
6. In this picture you can see an exemplary 'Open-Dialog'.
SmartSerialMail
©1996-2015 by Joachim Marder e.K.
Tutorial
90
7. Choose the spreadsheet, which you want to import from.
SmartSerialMail
©1996-2015 by Joachim Marder e.K.
91
Tutorial
8. State at which row the import has to start. This is important to avoid
importing headlines as recipients.
SmartSerialMail
©1996-2015 by Joachim Marder e.K.
92
Tutorial
9. Select which columns should be imported and which headline each will
have.
Note:
'Mail address' is a mandatory field. If you don't set 'Mail address' you
can not send E-Mails to this list.
SmartSerialMail
©1996-2015 by Joachim Marder e.K.
93
Tutorial
10.Select if you want to import duplicate entries or not, or if already existing
entries shall be updated (non existing entries will be imported as well).
SmartSerialMail
©1996-2015 by Joachim Marder e.K.
94
Tutorial
11.The recipients will be imported. Finally you can see in the log window if all
entries have been imported correctly.
Choose 'Save' to save the log as text file.
Choose 'Close' to finish Import.
SmartSerialMail
©1996-2015 by Joachim Marder e.K.
Tutorial
95
12.After the successful import you will see the recipient list.
SmartSerialMail
©1996-2015 by Joachim Marder e.K.
96
Tutorial
You can get detailed information in the help files under 'Recipients'.
Step 3: Create a new message
Follow these steps:
1. Choose '
Content' in the navigation.
2. Click on the icon ' New' and insert a name for your new message, e.g.
'customer newsletter'.
SmartSerialMail will save the message under the given name for reference.
3. Insert a 'Subject' for your message, e.g. 'customer newsletter'
SmartSerialMail
©1996-2015 by Joachim Marder e.K.
97
Tutorial
4. You can import a complete text in the editor, e.g. a word-file.
To do so, select the 'Import / Export' toolbar and click on the button '
Import' and choose the corresponding file from your working directory.
You can get detailed information under 'Tutorial 4: Import content from
Word'.
It is also possible to insert and edit your text as in a common word
processor.
5. To give every e-mail a personal touch you can insert a quick part, e.g. for the
last name ({%Last_name%}).
For this select the 'Placeholder' toolbar and click on the button '
Conditional Placeholder'.
SmartSerialMail
©1996-2015 by Joachim Marder e.K.
98
Tutorial
Note:
Please note that this feature is available in SmartSerialMail Enterprise Edition
only.
6. To add attachments, first switch to the tab 'Attachments' in the editor, then
select the 'Attachment' toolbar and click on the button '
choose the corresponding file from your working directory.
Add File' and
Note:
For large files it could be better to provide the file on a server and only send
the link in the mail.
You can get detailed information in the help files under 'Content'.
Step 4: Check the message
Follow these steps:
1. Choose '
2. '
SmartSerialMail
Preview' in the navigation.
HTML' tab shows you the preview of your mail in HTML format.
©1996-2015 by Joachim Marder e.K.
99
Tutorial
3. On the left side of the preview the size and the estimated sending time is
shown.
Note:
All values shown here are approximations only. The true duration of
transmission depends on too large a number of factors, as it could be
determined exactly, without knowing all influencing factors.
4. To be sure that the e-mail will be displayed correctly, you can open it in the
standard e-mail client of windows.
For this, click the ' Show Preview' button in the 'Preview in Mail Client'
on the 'Home' toolbar.
Note:
On most systems this will be Outlook Express / Windows Mail (on Vista
systems), even if you are working with a different mail client.
SmartSerialMail
©1996-2015 by Joachim Marder e.K.
100
Tutorial
5. You can also send a test mail to your own e-mail address.
For this, click the ' Send' button in the 'Send Preview Mail' group on the
'Home' toolbar.
Note:
The message will not be sent to an address on your recipient list but only
send to the e-mail address you typed in.
6. Correct, if necessary, all problems and errors, you see in the list.
7. Click on the '
format.
Plain Text' tab to get a preview of your mail in plain text
You can get detailed information in the help files under 'Preview'.
SmartSerialMail
©1996-2015 by Joachim Marder e.K.
101
Tutorial
Step 5: Send the message
Follow these steps:
1. Choose '
Sending' in the navigation.
2. Click on the '
New' button to create a new sending task.
3. If you want to start an existing task again you can select the task in the
'Send Mail' menu on the left.
4. Choose the profile, recipient list and mail you want to send.
5. Select ' Start' if the sending should start directly or ' Start
Scheduled' for scheduled sending task at a specific date and time.
SmartSerialMail
©1996-2015 by Joachim Marder e.K.
102
Tutorial
Note:
Please note that this feature is available in SmartSerialMail Enterprise Edition
only.
6. Every transmission is logged.
If an error occurs, the log file can help you to find out what went wrong.
You can save the log to a TXT-file or print it.
7. The specific recipients list of the task is saved.
You can check which status the recipients have after sending.
You can get detailed information in the help files under 'Sending'.
7.2
Tutorial 2: Managing what comes back
Follow these steps:
1. Choose 'List Management' in the navigation.
SmartSerialMail
©1996-2015 by Joachim Marder e.K.
103
Tutorial
2. Select an existing profile in the '
Profile' menu on the left.
3. Specify under 'Incoming Server Options' the details of the POP3/
Exchange account you receive your e-mails from.
Note:
If you access this POP3/Exchange account with other mail clients too, you
have to make sure that these client(s) are set to leave the messages on the
server.
4. Click on the button '
settings are correct.
Test Connection' in the toolbar to check that your
5. The 'General Settings' actually complement the special settings for the
specific returns.
If you make specific settings they will override the general settings.
SmartSerialMail
©1996-2015 by Joachim Marder e.K.
104
Tutorial
6. Under the tab 'Bounced Mail' you can collect the bounced mail into a
special list or let SmartSerialMail remove the addresses from your recipients
list.
Here you can make your special settings about how to process the bounced
mail.
7. Under the tab 'Subscriptions' you can collect incoming subscriptions into a
special list.
SmartSerialMail scans the subject line of all received mail and tags the mail
as subscription, if the subject contains a specified term (usually a word like
'subscribe').
Here you can make your special settings about how to process
subscriptions.
SmartSerialMail
©1996-2015 by Joachim Marder e.K.
105
Tutorial
8. Under the tab 'Cancellations' you can manage your incoming cancellations.
SmartSerialMail scans the subject line of all received e-mail and tags a mail
as cancellation if the subject contains a specified term (usually a word like
'unsubscribe').
You can collect the addresses of the cancellations in a special list or let
SmartSerialMail remove the addresses from your recipients list.
Here you can make your special settings about how to process
cancellations.
SmartSerialMail
©1996-2015 by Joachim Marder e.K.
106
Tutorial
9. Click on the button '
10.Click on the button '
Outlook.
SmartSerialMail
Collect from server' to collect your returns.
Collect from Outlook' to collect your returns from
©1996-2015 by Joachim Marder e.K.
107
Tutorial
Note:
Collecting e-mails from Outlook is not supported prior to Outlook 2003.
Deleting e-mails from Outlook is not supported yet.
You can get detailed information in the help files under 'Returns'.
7.3
Tutorial 3: Insert a personalized attachment
Note:
This feature is only available in the Enterprise Edition.
You can find a detailed comparison between the Small Business Edition and
the Enterprise Edition here.
Follow these steps:
1. Choose '
Recipients' in the navigation.
2. Create a new recipient list or choose one of the existing lists.
The list should contain one column with unique information to allocate the
SmartSerialMail
©1996-2015 by Joachim Marder e.K.
108
Tutorial
attachments to the correct recipient.
In this example the unique column is the name of the customer.
Create the attachments
3. Create the attachments and save all of them in the same folder on your PC.
The folder containing the attachments should look like this one.
SmartSerialMail
©1996-2015 by Joachim Marder e.K.
Tutorial
109
Add the attachments
4. Create a Newsletter in step ' Content'.
Then select the 'Attachment' tab.
SmartSerialMail
©1996-2015 by Joachim Marder e.K.
110
Tutorial
5. On the right side of the tab you can choose the file to attach by clicking the
'Browse...' button.
All files should have the value of the unique column from the recipient list in
their name (as in this example Atkins, Bloggs, Miller, etc.).
6. To keep the attachment variable for every recipient you have to insert the
matching custom field in the name of the file.
I this example the path to the file is: 'C\Offers\SpecialOffer_Miller.pdf'. If you
want to attach individualized files for each recipient you have to highlight the
part you want to change for all recipients. For example the first or last name.
Now that you have selected the part of the path you want to replace with the
corresponding placeholder select the 'Placeholder' toolbar and replace the
unique part in the filename with a quick part placeholder.
SmartSerialMail
©1996-2015 by Joachim Marder e.K.
111
Tutorial
7. The last step is to click on 'Replace' to save the changes you made.
The outcome of this process could be as follows: 'C\Offers
\SpecialOffers_{%Last_Name%}.pdf'.
Note:
It is only possible to attach individual files. It is not possible to individualize the
content of attached files with placeholders.
SmartSerialMail
©1996-2015 by Joachim Marder e.K.
112
Tutorial
8. In the option 'Missing elements' you can decide how SmartSerialMail will
treat e-mails with missing attachments.
Do not send mail: a mail with a missing attachment won't be sent.
Ignore and send mail: a mail with a missing attachment will be sent
anyway.
SmartSerialMail
©1996-2015 by Joachim Marder e.K.
113
Tutorial
View the result
9. The preview of the e-mail works as usual by clicking on step ' Preview'.
If you set the option 'Do not send mail' in the 'Attachment toolbar', only
mails with an existing attachment will be sent.
For all other mails there will be a failure notice in the log and the mail
address will be marked as failure.
SmartSerialMail
©1996-2015 by Joachim Marder e.K.
114
Tutorial
10. Start the sending by switching to '
Send Mail'.
You can get more information in the help files under 'Content'.
7.4
Tutorial 4: Import content from Word
Follow these steps:
Note:
If you copy contents from Word and paste it into SmartSerialMail, there can be
problems with display images. These problems come from the method of
saving to the clipboard. For that reason the function "Import" exists.
1. Choose '
Content' in the navigation.
2. Switch to the 'Import / Export' toolbar and click on the button '
Import
Word' and choose the file which you want to import from your working
directory.
SmartSerialMail
©1996-2015 by Joachim Marder e.K.
115
Tutorial
7.5
Tutorial 5: Edit recipient lists
In the following description you are always in the menu "
the toolbar "Edit".
SmartSerialMail
Recipients" and
©1996-2015 by Joachim Marder e.K.
116
Tutorial
1. Choose '
Recipients' in the navigation.
2. Select the 'Edit' toolbar.
1. Insert entries into your recipients list
Follow these steps:
1. Choose the relevant list.
2. Click on '
Insert Row' in the 'Row' area.
3. Now you can insert the e-mail address of the recipient you want to send to.
Press Return to complete your entry.
SmartSerialMail
©1996-2015 by Joachim Marder e.K.
117
Tutorial
2. Merge recipient lists
Follow these steps:
1. If you already have a recipients list and you want to add entries, choose this
list. If not, create a new one and choose it.
2. Click on '
Include List of Recipients'. Choose the list you want to
import in the Drop-Down-Menu.
Repeat this step until you merged all lists you want.
SmartSerialMail
©1996-2015 by Joachim Marder e.K.
118
Tutorial
Now you have all recipients, from the lists you have chosen, in one list.
3. Subtract Recipient lists
If you have recipient lists with the same entries, you can delete the
duplicates automatically.
Follow these steps:
1. Choose the list you want to delete entries from.
2. Click on '
Exclude List of Recipients'. Choose the list you want to
remove from the list you have chosen in step one in the Drop-Down-Menu.
SmartSerialMail
©1996-2015 by Joachim Marder e.K.
119
Tutorial
All entries existing in both lists are now removed from your recipients list.
4. Remove Duplicates
With the tool ' Remove Duplicates' you can find and manage all multiple
addresses in the current list of recipients.
1. Select the 'Edit' toolbar and click '
Remove Duplicates'.
2. All e-mail addresses which appear more than once in your recipient list
are shown.
3. By default one of each duplicate is preselected.
By clicking on the selection boxes you can change the selection.
Click 'Select all' to choose all addresses in the list.
4. Click 'Block Selected' to block all selected addresses.
These recipients won't get any mail until you change the status again.
5. Click 'Remove Selected' to delete all selected addresses.
After confirmation of the security query the data will be finally deleted.
SmartSerialMail
©1996-2015 by Joachim Marder e.K.
120
Tutorial
6. Click 'Close' to finish search of duplicates.
5. Create a Blacklist
Choose the relevant list.
1. Select the 'Edit' toolbar.
2. Change the 'List Type' from Normal to '
Blacklist'.
From now on, SmartSerialMail compares, in each sending process, if the
entries in the selected recipient list match with the entries on the blacklist.
The recipients which are on both lists will be skipped.
Note:
You can also add complete domains to your Blacklist.
To do so, make an entry like: *@domain.com in your list. This will cause all
mail addresses of this domain to be skipped in the sending process.
E.g.: *@example.com will be added to the Blacklist.
[email protected] and [email protected] are listed in one of your
recipient lists.
Both addresses will now be skipped in the sending process.
SmartSerialMail
©1996-2015 by Joachim Marder e.K.
121
Tutorial
You can get detailed information in the help files under 'Blacklist'.
7.6
Tutorial 6: Create a newsletter with subscription and
cancellation functions
Note:
Please note that this feature is available in SmartSerialMail Enterprise Edition
only.
Follow these Steps:
Note:
To use the templates "Subscription" and "Unsubscription", you need to
adjust the settings for Returns.
Important points are:
'Incoming Server Options'
'Subscriptions'
SmartSerialMail
©1996-2015 by Joachim Marder e.K.
122
Tutorial
Note:
'Unsubscriptions'
1. Choose '
Content' in the Navigation.
2. Write your Newsletter
Tip:
Use 'Templates' for frequently used words.
3. Click on 'Placeholder'.
4. Insert the templates "A link for subscriptions" ({%link_subscription%})
and/or "A link for unsubscription" ({%link_unsubscription%})
where subscription and/or unsubscription should be possible.
SmartSerialMail
©1996-2015 by Joachim Marder e.K.
123
Tutorial
5. If you choose 'HTML Tab in ' Preview', you can see the e-mail address
and the subject for "subscribtion" or "cancellation".
SmartSerialMail
©1996-2015 by Joachim Marder e.K.
124
Tutorial
Note:
In Tutorial 2: Managing what comes back you see how to handle subscriptions
and cancellations
7.7
Tutorial 7: Use recursive placeholders
Please note:
Please note that this feature is available in SmartSerialMail Enterprise Edition
only.
Example: {r} {%salutation_{%language%}%} {/r}
This placeholder requires:
You create a column "language" in the recipient list containing the entries "DE"
and "EN". You create for templates with the names "salutation_DE" and
"salutation_EN" for both cases. Here you enter the text which is to be inserted
in the respective case.
Follow these steps:
1. Select "
Content" in the Navigation.
2. Right-click at the position where you want to add the placeholder.
3. Navigate in the opening context menu to Placeholder->Functions and
choose "Recursive Placeholder" from the list. A dialog to insert
placeholders should now show up.
4. In the first step, please enter the name for the outer value. This is the
beginning of the template, which is to be used in this placeholder function
(example: "salutation_").
The end of the template name will automatically be replaced with the
respective column entry of your recipient list, which will be defined in the next
step.
After you finished this step, please click on "Next".
5. In this step you will define the name of the inner value, which represents the
end of the template, defined in the first step.
Select the text (default is "INNERVALUE") and right-click on it. In the context
SmartSerialMail
©1996-2015 by Joachim Marder e.K.
125
Tutorial
menu select "Recipients Fields" and click on the column name of the
recipient list you want the template to be dependent on. (example:
"language").
After you finished this step, please click on "Next".
6. In the following dialog you will get the possibility to create a new quick part of
the created placeholder. This step is optional.
7. If you followed this example this placeholder appears in the text at the
position of the cursor:
{r} {%salutation_{%language%}%} {/r}
The following diagram visualizes the structure of a recursive placeholder:
Please note:
The template names must be adjusted to the possible entries in the referred
column. It is recommended to separate beginning and end of the template
name with a "_" (underscore), as seen in the example at the top.
SmartSerialMail
©1996-2015 by Joachim Marder e.K.
Program Sections
127
Program Sections
8
Program Sections
Home
Overview page of SmartSerialMail.
Profile
Settings for your sender profiles.
Recipients
Settings for your lists of recipients and blacklists.
Content
Creation and import of messages.
Preview
Preview of your message in several versions (HTML, plain text, without styles,
without images) and overview including the probable sending time.
Send Mail
Sending the message to the selected list of recipients.
Listmanagement
Collect bounced emails.
Quick parts
Create and organize quick parts.
File
Management of SmartSerialMail.
8.1
Home
The "Home" screen offers a quick overview over your existing projects
consisting of:
-
SmartSerialMail
available profiles
available recipient lists and
available emails.
©1996-2015 by Joachim Marder e.K.
128
Program Sections
Below is a list of the most important steps to help you get started. The
corresponding links will lead you to the relevant chapters of the online manual.
On the right side, you will find the latest news on SmartSerialMail as well as
your licensing information and a link to our customer area.
Note:
A short tutorial can be found in: Tutorial -> Tutorial 1: Getting Started
8.1.1
Menubar
In this chapter the main toolbars of SmartSerialMail will be explained.
Home
The 'Home' toolbar contains the standard operations which can be accessed
in the most of the steps.
Help
SmartSerialMail
©1996-2015 by Joachim Marder e.K.
129
Program Sections
This toolbar contains all Help, Update and Support functions, e.g. open help,
check for updates or extension of the support period.
8.1.1.1
Home
The 'Home' toolbar contains the standard operations which can be accessed
in the most of the steps.
Here you will find the general operations like 'Save', 'New' or 'Print', the
clipboard operations and useful tools like 'Undo' and 'Redo' as well as
'Connection Test'.
General
Save
Saves the changes in the current step.
New
Creates an empty project in the current step.
Save as
Creates a copy of the current content.
Delete
Deletes the current project in the current step.
Rename
Renames the the current project.
Print
Prints the current project.
Database
8.1.1.2
Manage
Database
Change the used database. You have to declare the
type and the path of your database here.
Backup
Database
Saves the database to a specified folder.
Restore
Database
Opens the database from a specified folder.
Help
The "Help" toolbar contains any Help and Support functions of
SmartSerialMail.
It's separated in two categories, one Help part, which, among other things,
SmartSerialMail
©1996-2015 by Joachim Marder e.K.
130
Program Sections
contains manuals, problem solutions and
useful information of the product, and an Update part which enables you to
check if new updates are available or to extend the
maintenance of this software.
Help
Help
Opens the online help of SmartSerialMail.
Open PDF
manual
Opens the PDF Help of SmartSerialMail.
Frequently
Asked
Questions
Opens the FAQ section online.
Hide Hints
Actiavtes / deaktivates tooltips in SmartSerialMail
Updates
About
Shows information about SmartSerialMail, including
the version or the installation key.
Check for
Update
Opens the JAM Software homepage in your
webbrowser enabling you to extend your
maintenance period.
What is new?
Opens the list of the latest changes online.
Lizenz
Change
Installationk
ey
SmartSerialMail
Allows you to change the license key
©1996-2015 by Joachim Marder e.K.
131
Program Sections
Extend
maintenance
8.2
Opens the JAM Software homepage in your
webbrowser enabling you to extend your
maintenance period.
Profile
In ' Profile' you can specify the sender profile and the corresponding SMTP
account.
Profile
Profile Menu
On the left side of SmartSerialMail you will find the
profile menu. All existing profiles are listed here. To
select one of the profiles, simply click on the name of
the profile.
Options
Sending Options
SmartSerialMail
In the Sender Information Options you can set details
of the sender. Here you can define from which email
address your emails shall be sent. In addition you
can specify which sender address shall be shown to
the recipients of your emails.
©1996-2015 by Joachim Marder e.K.
132
Program Sections
8.2.1
Send Mode
In the Send Mode options, you can specify outgoing
server options and set speed and delay for your
sending tasks.
Returns and
Blacklists
To process returns, certain server settings need to
be entered.
Tracking and
Web
To use images from your webserver via the Internet
you need to configure your server settings. Also you
can enable and set parameters for link tracking here
or create your own alias placeholders.
Statistics
text here
Menubar
In this chapter the main toolbars of SmartSerialMail will be explained.
Home
The 'Home' toolbar contains the standard operations which can be accessed
in the most of the steps.
Help
This toolbar contains all Help, Update and Support functions, e.g. open help,
check for updates or extension of the support period.
8.2.1.1
Home
The 'Home' toolbar contains the standard operations which can be used in
most of the steps.
You will find the general operations like Save, New or Print on the Home Tab.
In addition you can find the clipboard Operations and helpful operations like
Undo and Redo here. The Connection Test for the profile is located on the
Home tab.
General
SmartSerialMail
Save
Saves the current profil.
New
Creates a new profil.
Save as
Creates a copy of the current profil.
Delete
Deletes the current profil.
©1996-2015 by Joachim Marder e.K.
133
Program Sections
Rename
Renames the current profil.
Print
Prints the opened profil.
Wizard
New
A step-by-step assistance for creating new profiles.
Clipboard
Paste
Pastes the contents of the clipboard.
Copy
Copies the selected content to the clipboard.
Cut
Cuts the selected content to the clipboard.
Connection
Test
Tests the connection to the server in the selected profile.
Connectio
n
8.2.1.2
Help
The "Help" toolbar contains any Help and Support functions of
SmartSerialMail.
It's separated in two categories, one Help part, which, among other things,
contains manuals, problem solutions and
useful information of the product, and an Update part which enables you to
check if new updates are available or to extend the
maintenance of this software.
Help
Help
SmartSerialMail
Opens the online help of SmartSerialMail.
©1996-2015 by Joachim Marder e.K.
134
Program Sections
Open PDF
manual
Opens the PDF Help of SmartSerialMail.
Frequently
Asked
Questions
Opens the FAQ section online.
Hide Hints
Actiavtes / deaktivates tooltips in SmartSerialMail
Updates
About
Shows information about SmartSerialMail, including
the version or the installation key.
Check for
Update
Opens the JAM Software homepage in your
webbrowser enabling you to extend your
maintenance period.
What is new?
Opens the list of the latest changes online.
Lizenz
8.2.2
Change
Installationk
ey
Allows you to change the license key
Extend
maintenance
Opens the JAM Software homepage in your
webbrowser enabling you to extend your
maintenance period.
Current Profile
Sender Information
Sender Information
SmartSerialMail
The sender information contain all data
needed to identify the sender.
©1996-2015 by Joachim Marder e.K.
135
Program Sections
Advanced Sender
Information
In this section you can set advanced sender
information like read notification and delivery
receipt, e-mail sensitivity and priority or CC
and BBC options.
Send Mode
Outgoing Server
Options
In the outgoing server options you can define
which server shall be used for sending
emails.
Advanced Outgoing
Server Options
If you have chosen SMTP as outgoing
server, you can specify security parameters
and the server port here. Else this section is
not available.
Sending Options
In the sending options you can define how
emails shall be sent.
Advanced Sending
Options
The advanced sending options allow you to
set some actions for starting and finishing a
sending task.
Returns and Blacklists
Collect Subscriptions
Decide whether subscriptions shall be
collected and set the subject that marks an
email as a subscription.
Collect Confirmations
Decide whether confirmations shall be
collected and set the subject that marks an
email as a confirmation.
Collect Cancellations
Decide whether cancellations shall be
collected and set the subject that marks an
email as a cancellation.
Blacklist Settings
Decide if you want to use category-based
blacklists. If enabled, only the blacklists in the
same category as a recipient list are used.
Incoming Server
Options
Here you can define which server shall be
used for incoming emails.
Advanced Incoming
Server Options
In this section you can set advanced server
SmartSerialMail
©1996-2015 by Joachim Marder e.K.
136
Program Sections
options like server port and security protocol.
Tracking and Web
Tracking Options
Enable or disable link tracking and set the
appropriate parameters.
Alias Placeholder
Create your own alias placeholder to use
them in your mails.
Webspace Options
Configure your FTP server.
Statistics
8.2.2.1
Outgoing E-Mails
Shows statistics of outgoing e-mails.
Incoming E-Mails
Shows statistics of incoming e-mails.
Both (Outgoing and
Incoming)
Shows statistics of outgoing and incoming emails.
Outgoing E-Mails by
Tracking Campaign
Shows statistics of outgoing e-mails by
tracking-campaign.
Sender Information
In the sending options you can define which email address will be used for
sending your emails and which sender address shall be shown. In addition
SmartSerialMail
©1996-2015 by Joachim Marder e.K.
137
Program Sections
you can configure the way and speed outgoing mails are to be sent.
From Address:
This is the address your emails will be sent
from.
It will also serve as the return address if no
other address in the "reply address" is
specified.
Enter a valid e-mail address, for example
'[email protected]'.
As long as the field remains empty, a short
help text will be displayed.
The software automatically checks whether
the address is valid. Three symbols can be
displayed here:
The e-mail address is formally
correct
Please note:
SmartSerialMail will only test if the
address was entered in the
correct format. The email address
will not be verified!
The email address you entered is
formally correct, but some
programs/providers may regard it
as incorrect.
No email address was entered or
SmartSerialMail
©1996-2015 by Joachim Marder e.K.
138
Program Sections
the email address is formally
incorrect.
Display Name:
The name the recipient will see in the 'From'
field of his or her email program.
If the field is empty, the recipient will see the
email address you used to send the emails.
As long as the field remains empty, a short
help text will be displayed.
Please note:
The entry is optional, but recommended.
Reply Address:
The address to the recipient's response is
sent.
This field is left blank, the response is sent
to the 'From Address'.
The software automatically checks whether
the address is valid. Three symbols can be
displayed here:
The e-mail address is formally
correct
Please note:
SmartSerialMail will only test if the
address was entered in the
correct format. The email address
will not be verified!
The email address you entered is
formally correct, but some
programs/providers may regard it
as incorrect.
No email address was entered or
the email address is formally
SmartSerialMail
©1996-2015 by Joachim Marder e.K.
139
Program Sections
incorrect.
Signing outgoing e-mails
with S/MIME
Note:
Please note that this feature is available in
SmartSerialMail Enterprise Edition only.
Note:
By activating this option, "SMTP server" is
the only available option in "Outgoing Mail
Server Options" in the profile settings.
To sign your outgoing e-mails with S/MIME
(Secure / Multipurpose Internet Mail
Extensions), check the corresponding box in
the "Sender Information" in the profile
settings.
A step-by-step tutorial for activating this
option you can find here:
Tutorial:
Signing outgoing Email with S/MIME
S/MIME is a standard for encrypting and
signing e-mails, a sort of digital signature. It
assures your recipients that the received emails in fact are yours.
Further Information concerning S/MIME you
can find here:
Microsoft - Information on S/MIME
Note:
Consider, that at least one certificate has to
be installed on your computer to use this
option. Otherwise you are advised that no
certificate is installed on your computer.
In Windows, you find an overview of your
certificates by entering "certmgr" in the
search bar in the start menu and pressing
Enter.
SmartSerialMail
©1996-2015 by Joachim Marder e.K.
140
Program Sections
Note:
To install a certificate on your computer, you
first have to download it from your provider.
For further help on this topic, contact your email provider or your administrator.
Request a Read
Notification
The recipient is prompted by his or her email
program to confirm receipt of the email.
Please note:
The recipient can decide not to send a read notification.
Request
Receipt
a
Delivery
The receiving server will be prompted to
confirm the receipt of the email.
Please note:
Some servers may not support sending
delivery receipts.
Supress Auto-Response
Try to suppress automatic replies (i.e. "outof-office" replay).
Please note:
Some servers may ignore this option..
Sensitivity
Defines the level of sensitivity.
Priority
Defines the priority level.
SmartSerialMail
©1996-2015 by Joachim Marder e.K.
141
Program Sections
Custom Headers
Opens a text box to manually edit the
header of the message.
CC address:
A copy of every message is sent to this
address. The original recipient will see this
address.
Please note:
The CC Address function will send a copy
of each outgoing email. If you e.g. send an
email to a recipient list with 100 entries,
100 CC-emails will be sent to the CC
address.
The software automatically checks whether
the address is valid. Three symbols can be
displayed here:
The email address is formally
correct
Please note:
SmartSerialMail will only test if the
address was entered in the
correct format. The email address
will not be verified!
The email address you entered is
formally correct, but some
programs/providers may regard it
as incorrect.
No email address was entered or
the email address is formally
incorrect.
BCC-address:
A copy of all E-Mails is send to the BCC
addresses.
The BCC recipient is not visible for other
recipients of the E-Mail.
SmartSerialMail
©1996-2015 by Joachim Marder e.K.
142
Program Sections
Please note:
The BCC address function will send a
copy of each outgoing email. If you e.g.
send an email to a recipient list with 100
entries, 100 BCC-emails will be sent
additional to the BCC address.
The software automatically checks whether
the address is valid. Three symbols can be
displayed here:
The email address is formally
correct
Please note:
SmartSerialMail will only test if the
address was entered in the
correct format. The email address
will not be verified!
The email address you entered is
formally correct, but some
programs/providers may regard it
as incorrect.
No email address was entered or
the email address is formally
incorrect.
SmartSerialMail
©1996-2015 by Joachim Marder e.K.
143
Program Sections
8.2.2.2
Send Mode
The outgoing mail server options specify on which server the emails are
sent.
In the advanced options you can specify the account the mails shall be sent
from.
SMTP-Server
Emails are send via a SMTP / Exchange
server.
Enter the name of your outgoing mail server.
If you do not know the name, please check
the configuration of your email program or
SmartSerialMail
©1996-2015 by Joachim Marder e.K.
144
Program Sections
contact your ISP.
As long as the field remains empty, a short
help text will be displayed.
The software automatically checks whether
the server address is valid. Two symbols
can be displayed here:
The servername
correct
is
formally
Please note:
SmartSerialMail will only test if the
server address was entered in the
correct format. The server
address will not be verified!
No email address was entered or
the email address is formally
incorrect.
EWS / Office365
E-Mail are send via EWS (Exchange Web
Services).
Enter the name of the Exchange Server.
Direct Delivery
Please note:
This feature is only available in the
Enterprise Edition.
You can find a detailed comparison between
the Small Business Edition and the
Enterprise Edition here.
Using this option the emails are not send
through a SMTP server. SmartSerialMail
tries to submit the emails directly to the
recipients mail server.
Please note:
You do need a static IP address and a valid
MX entry to use this option.
Please make sure that you entered a correct
HELO name for sending the emails or leave
SmartSerialMail
©1996-2015 by Joachim Marder e.K.
145
Program Sections
Please note:
the field empty.
Enable File-Backup
File-Backup will additionally save each sent
email as a file. You may use placeholders in
path or filename.
Additionally to all other placeholders you
may use {%task_title%} for the title of the
sending task, {%subject%} for the email
subject and {%recipient%} for the email.
Save as File
Please note:
This feature is only available in the
Enterprise Edition.
You can find a detailed comparison between
the Small Business Edition and the
Enterprise Edition here.
Using this option the emails are not send
by SmartSerialMail. The emails are saved
as EML files to a selected location.
You might use this function in connection
with a MS Exchange "pick-up-folder" to
send out emails.
Please note:
In SmartSerialMail the emails are marked
as "send" at the time the EML file is
written.
In the "Advanced Outgoing Server Options" you can change server settings
such as the port and the server authentication.
Server Port
SmartSerialMail
Number that is used to communicate with
©1996-2015 by Joachim Marder e.K.
146
Program Sections
your SMTP/Exchange server. The default
number is 25
Please note:
Change the number only if your provider explicitly specifies a diffe
port!
Default Port
Resets the server port to the default value
(25).
Security
This option must be selected if the SMTP/
Exchange server requires SSL or TLS
authentication. Choose the type of
authentication required by the server from
the drop down menu.
If you do not know whether the SMTP/
Exchange server requires SSL or TLS
authentication, please ask your Internet
provider.
Server requires a POP
authentication before
sending
This option needs to be enabled if the server
requires authentication via POP3/Exchange.
If you do not know if the server requires
authentications via POP3/Exchange, please
ask your Internet provider.
Please note:
When this option is enabled, the POP data
has
to
be
entered
under
"
Listmanagement"!
Server requires
authentication
This option needs to be enabled if your
server requires authentication.
If you do not know if the server expects
authentication, please ask your Internet
provider.
SmartSerialMail
©1996-2015 by Joachim Marder e.K.
147
Program Sections
Please note:
If this option is enabled, you have to enter
your user name and password for the
server!
User Name
Enter the user name for your SMTP/
Exchange server. If you do not know your
username, please ask your Internet provider.
Password
Enter the password for your SMTP/
Exchange server. If you do not know your
password, please ask your Internet provider.
As long as the field remains empty, a short
help text will be displayed.
Please note:
If you do not need a password, please
disable the option 'server requires SMTP
authentication'.
Note:
This feature is available in the Enterprise Edition only.
You will find is a detailed comparison of the Small Business Edition and the
Enterprise Edition here.
Sequential Processing
SmartSerialMail
The messages are sent sequentially.
©1996-2015 by Joachim Marder e.K.
148
Program Sections
Parallel Processing
As many messages as possible will be sent
simultaneously.
You can determine the number of sending
processes.
Example: sending a list of 100 recipients
with 2 threads.
2 emails are sent at the same
time.
Send a list of 100 recipients with 5
threads.
5 are sending emails at the same
time.
Limitation per Sending
Task
Using this options causes the sending task
to finish when reaching the limit.
With a Time Delay
Here you can specify the time interval
between sending individual messages
blocks.
Example: 5 messages are sent per block
with a 2 minute break in between.
Delivery of 5 messages.
2 minute break.
Delivery of 5 messages.
2 minute break.
Note:
This feature is available in
the Enterprise Edition only.
SmartSerialMail
©1996-2015 by Joachim Marder e.K.
149
Program Sections
Note:
You will find is a detailed
comparison of the Small
Business Edition and the
Enterprise Edition here.
Check recipient list
against blacklists before
starting the sending
task
Remove email addresses from recipient
list, which are contained in a blacklist,
before starting a sending task.
Set all recipients to
"unsent" before starting
a sending task
The status of all recipients will be set to
"unsent" before the start of every sending
task.
Set all erroneous
entries to "unsent" after
sending
If errors occurred in a sending task,
respective entries will be set to "unsent"
after finishing or aborting the sending task.
SmartSerialMail
©1996-2015 by Joachim Marder e.K.
150
Program Sections
8.2.2.3
Returns and Blacklists
To handle Returns, certain server settings must be made in order to access
the emails.
Collect Subscription:
SmartSerialMail
Define, whether subscriptions shall be
collected.
©1996-2015 by Joachim Marder e.K.
151
Program Sections
Handle as Subscribtion if
subject contains:
Specify, which words have to appear in the
email subject in order for it to be counted
as a subscription.
Patterns
This field displays
all entered search
patterns.
Textbox
This box shows the
selected or a newly
entered pattern.
Adds a pattern.
Deletes
the
selected pattern.
OK
Closes the dialog
and
saves
all
changes.
Cancel
Closes the dialog
without
saving
changes.
Go to 'Returns Section',
'Subscription Management'
You return to point "5. Returns".
Collect Confirmations:
Define, whether confirmations shall be
collected.
Handle as Confirmation if
subject contains:
Specify, which words have to appear in the
email subject in order for it to be counted
as a confirmation.
SmartSerialMail
©1996-2015 by Joachim Marder e.K.
152
Program Sections
Patterns
This field displays
all entered search
patterns.
Textbox
This box shows the
selected or a newly
entered pattern.
Adds a pattern.
Deletes
the
selected pattern.
OK
Closes the dialog
and
saves
all
changes.
Cancel
Closes the dialog
without
saving
changes.
Go to 'Returns Section',
'Confirmation Management'
You return to point "5. Returns".
Collect Cancellations:
Define, whether
collected.
Handle
cancellation
subject contains:
if
cancellation shall be
Specify, which words have to appear in the
email subject in order for it to be counted
as a cancellation.
Patterns
This field displays
all entered search
pattern.
Textbox
This box shows the
selected or a newly
entered pattern.
Adds a pattern.
Deletes
the
selected pattern.
OK
SmartSerialMail
Closes the dialog
and
saves
all
©1996-2015 by Joachim Marder e.K.
153
Program Sections
changes
Cancel
Closes the dialog
without
saving
changes
Go to`'Returns Section',
'Cancellation Management'
You return to point "5. Returns".
Use Category based
Blacklists
Decide whether to use category based
blacklists. If enabled, only those blacklists
will be used, which belong to the same
category as the recipient list.
Server Name:
This is the address emails will be sent to.
Please enter a valid e-mail address, for
example "mail.provider.com".
As long as the field remains empty, a short
help text will be displayed.
The software automatically checks whether
the address is valid. Three symbols can be
displayed here:
The server address is formally
correct
SmartSerialMail
©1996-2015 by Joachim Marder e.K.
154
Program Sections
Please note:
SmartSerialMail will only test if
the address was entered in the
correct format. The email
address will not be verified!
The email address you entered is
formally correct, but some
programs/providers may regard it
as incorrect.
No server address was entered
or the server address is formally
incorrect.
User Name:
Enter the username for authentication on
the outgoing server.
Password:
Enter the password for your outgoing mail
server. If you do not know your password,
please ask your Internet provider.
As long as the field remains empty, a short
help text will be displayed.
Type:
Select the type of the server.
· POP3/Exchange
· IMAP/Exchange
Server Port
Number that is used to communicate with
your SMTP/Exchange server. The default
number is 25
Please note:
Change the number only if your provider
specifies explicitly a different port!
SmartSerialMail
©1996-2015 by Joachim Marder e.K.
155
Program Sections
Default Port
Resets the server port to the default value
(25).
Security
This option must be selected if the SMTP/
Exchange server requires SSL or TLS
authentication. Choose the type of
authentication required by the server from
the drop down menu.
If you do not know whether the SMTP/
Exchange server requires SSL-/TLSauthentication, please ask your Internet
provider.
8.2.2.4
Tracking and Web
SmartSerialMail
©1996-2015 by Joachim Marder e.K.
156
Program Sections
Enable Link Tracking
Activate the option ”Link Tracking” to have
SmartSerialMail help you with the creation of
your tracking links.
Tracking Type
Select the tracking type you want to use.
Depending on the tracking solution you use
on your
website
different
tracking
parameters will be required.
Service Url
Enter the link to the statistics page provided
by your tracking solution. A link to your
tracking statistics will be provided in the task
overview for each sending task using link
tracking.
Link Tracking Parameters
A pre-configuration of tracking parameters
will be offered here (depending on the
selected tracking solution).
The link tracking parameters show which
information can be added to a link to be read
by your tracking software.
The syntax is as follows: each parameter is
followed by a “=” and its name in
SmartSerialMail
(i.e.:
“PARAMETER=NAME”). Each parameter/
information pair is separated by a “;”.
A “*” in front of the name used in
SmartSerialMail shows that this parameter
will be the same in the entire email.
SmartSerialMail will create a content alias
placeholder for such a parameter.
“**” in front of the name used in
SmartSerialMail means that this parameter
will be used throughout the entire profile.
SmartSerialMail will create an alias
SmartSerialMail
©1996-2015 by Joachim Marder e.K.
157
Program Sections
placeholder in the profile.
This means that you only have to change
the alias placeholder if you want to change
all links.
Website Url
To make sure that SmartSerialMail detects
for which links tracking parameters will be
required, you will have to enter the URL to
your website. If no URL is entered,
SmartSerialMail will check all links found in
your email for tracking parameters. If a URL
is entered, SmartSerialMail will only check
links leading to the corresponding website.
After entering all relevant information you can have SmartSerialMail create
the required alias placeholders and add the tracking code to the links by
clicking “Edit Tracking Parameters” under “Links” in the content tab.
Name
The name of the placeholder, which will be
replaced by the value.
Value
The value of the placeholder.
New
Enter name and value for the placeholder
and click "New" to create a new alias
placeholder.
Delete
Deletes the chosen placeholder from the
list.
Apply
Apply the changes to the chosen alias
SmartSerialMail
©1996-2015 by Joachim Marder e.K.
158
Program Sections
placeholder.
Cancel
Cancel the edit of the chosen placeholder
and restore its old values.
FTP Server Name:
Set the name of the FTP Server.
e.g: "ftp://yourdomaine.com"
Server Port:
Number that is used to communicate with
the FTP server. The default number is 21
Please note:
Change the number only if your provider
specifies explicitly a different port!
Default Port:
Resets the server port to its default value
(21).
Passive Mode:
Define if you want to send emails in the
passive mode.
User Name:
Please note:
You have to enter your username and
password for the server!
Password:
SmartSerialMail
Enter the password for your SMTP/
Exchange server. If you do not know your
©1996-2015 by Joachim Marder e.K.
159
Program Sections
password, please ask your Internet provider.
As long as the field remains empty, a short
help text will be displayed.
Please note:
You have to provide your username and
password for the server!
Test FTP Connection:
By clicking the button 'Test FTP connection',
you can test the FTP server settings.
Please note:
If the connection failed, please check your
settings.
Document Root:
Set the relative file path to the document
root.
Web Server URL:
Set the Web server URL of your server.
Images Outsourcing:
SmartSerialMail enables you to save images embedded in an HTML email to
your webserver automatically.
Rather than sending the images themselves with each email, only a link to the
uploaded pictures will be sent.
This is useful for various reasons:
· The email will be smaller, since the images themselves will not be sent.
· By accessing your webserver statistics, you can determine how often the
images were downloaded.
To use this function (Toolbar Picture) you need enter your webspace
configuration under 'Internet Options'.
The following information depend on your webspace. Please contact your
SmartSerialMail
©1996-2015 by Joachim Marder e.K.
160
Program Sections
internet hoster.
1. The name of the FTP server must be entered. The domain should be called
with the FTP (e.g. 'ftp://yourdomain.com') and be entered in the "FTP Server
Name field."
2. The used server port and the connection mode must be selected (default
port for FTP is port 21, in most cases the "Passive Mode" shall be selected).
3. The username and password for FTP access must be defined.
4. The path to the "Document Root" must be entered relative to the FTP
access directory.
5. The Web server URL
www.yourdomain.com').
must
be
specified
set
(e.g.
'http://
Please note:
The document root is the root directory where the site files for a certain domain
are located.
You can copy files to a webserver via FTP.
To enable SmartSerialMail to use FTP to copy images to your web server in a
way that makes them downloadale, you need to enter the "Document Root"
relative to the FTP access directory.
An example:
Your web server is reachable under "www.yourdomain.com".
Let's assume your website is located in the directory „./www/“ when accessed
via FTP.
In this case, a file „./www/index.htm“
"www.yourdomain.com/index.html".
would be reachable under
If you want to make your images under "www.yourdomain.com/
newsletterimages/" available, you have to enter the following settings:
"FTP Server Name":
SmartSerialMail
"
f
t
p
:
/
/
i
h
r
©1996-2015 by Joachim Marder e.K.
161
Program Sections
e
d
o
m
a
i
n
.
d
e
"
„Document Root“:
„
.
/
w
w
w
/
n
e
w
s
l
e
t
t
e
r
b
i
l
d
e
r
/
“
„Webserver Url”:
“
w
w
w
.
i
h
r
e
d
o
m
a
SmartSerialMail
©1996-2015 by Joachim Marder e.K.
162
Program Sections
i
n
.
d
e
/
n
e
w
s
l
e
t
t
e
r
b
i
l
d
e
r
/
“
To automatically upload the images proceed as follows:
1. Create an HTML e-mail containing images that can be uploaded to the FTP
server.
2. Go to "used images".
3. Click the button "Select All Frames" in the toolbar.
4. Click the button "upload Images" to upload your images to the FTP server.
After the upload is completed you can send your email as usual.
Please note:
Note that SmartSerialMail will automatically use the uploaded images and not
the images on your computer. If you modify an image you will have to upload
it again.
SmartSerialMail
©1996-2015 by Joachim Marder e.K.
163
Program Sections
8.2.2.5
8.2.3
Statistics
Outgoing E-Mails
Shows statistics of outgoing e-mails.
Incoming E-Mails
Shows statistics of incoming e-mails.
Both (Outgoing and
Incoming)
Shows statistics of outgoing and incoming emails.
Outgoing E-Mails by
Tracking Campaign
Shows statistics of outgoing e-mails by
tracking-campaign.
New Sender Profile with the Wizard
The Profile Wizard helps you to create a sender profile.
In the first step you have to enter your name and mail address.
You may switch to manual configuration mode to set the server settings
personally.
Otherwise SmartSerialMail will attempt to find the required configuration
automatically.
Click 'Next' to proceed.
SmartSerialMail
©1996-2015 by Joachim Marder e.K.
Program Sections
164
SmartSerialMail now searches for the configuration of your provider.
SmartSerialMail
©1996-2015 by Joachim Marder e.K.
165
Program Sections
In the picture below you can see an overview of your user profile.
Finally enter here your username and password for the selected mail-account.
SmartSerialMail
©1996-2015 by Joachim Marder e.K.
Program Sections
166
Click 'Close' to get back to the main window of SmartSerialMail.
SmartSerialMail
©1996-2015 by Joachim Marder e.K.
167
Program Sections
8.3
Recipients
At '
SmartSerialMail
Recipients' you can manage your lists of recipients and Blacklists.
©1996-2015 by Joachim Marder e.K.
168
Program Sections
Hint:
To add the name and mail address of a recipient fast and easy,
proceed as follows:
1. Copy the name and address into the Windows clipboard.
2. Right-click anywhere in the table and choose '
the Home Toolbar.
Paste' on
3. Save the list.
4. The address will be shown.
Mail address - Color Legend
black
red
This mail address is valid.
This mail address is invalid and contains errors,
e.g. a missing "@" or domain like ".com".
This refers to either :
grey
SmartSerialMail
· an enumeration of several (valid) mail
addresses,
e.g.
"[email protected],
[email protected], [email protected]"
©1996-2015 by Joachim Marder e.K.
169
Program Sections
· a special mail address (Punycode) whose
validity couldn't be checked, e.g. a mail address
with umlauts like "valid@mäil.com"
Recipients
Recipient
Menu
List
On the left side of SmartSerialMail you will find the
recipient list menu. In this menu all recipient lists are
listed. To change the recipient list just click on the
corresponding entry in the list.
The five most recent One-Click Imports are saved to a list and can be
restarted with a simple click without using the wizard.
The available One-Click Imports are:
· CSV File
· Microsoft Excel
· Microsoft Outlook
This allows for a much easier updating of your recipient lists.
Note:
Further information about recipients can be found at:
· Basics -> Recipient Lists and Sending
SmartSerialMail
©1996-2015 by Joachim Marder e.K.
170
Program Sections
Note:
· Tutorial -> Tutorial 5: Edit recipient lists
8.3.1
Menubar
In this chapter the toolbars used exclusively in step '
explained.
Recipients' are
Home
The 'Home' toolbar contains the standard operations which can be accessed
in the most of the steps.
Import / Export
This toolbar provides all functionality to import and export existing recipientlists.
Edit
This toolbar provides the operations to manage your recipients such as
'remove duplicates' and 'remove invalid mail addresses'.
Status
Use the 'status' toolbar to define the status of your recipients.
Help
This toolbar contains all Help, Update and Support functions, e.g. open help,
check for updates or extension of the support period.
8.3.1.1
Home
The 'Home' toolbar provides general functionality.
General
SmartSerialMail
Save
Saves the changes of the current recipients list.
New
Creates a new empty recipients list.
Save as
Creates a copy of the currently selected
recipients list.
©1996-2015 by Joachim Marder e.K.
171
Program Sections
Delete
Deletes the currently selected recipients list.
Rename
Renames the currently selected recipients list.
Print
Prints the currently selected recipients list.
History
Opens the change-history. With this option you
can restore previous versions from a backup.
Edit
Find
Find
Finds the search term in the context.
Find next
Finds the next occurrence of the search term.
Find previous
Finds the previous occurrence of the search term.
Replace
Find the search term and replaces with another
term.
Undo
Undo the last change.
Redo
Redo the last change.
Select All
Selects the whole section of text.
Clear Selection
Clears the selection.
Filter Lists
SmartSerialMail
©1996-2015 by Joachim Marder e.K.
172
Program Sections
New Filter
Creates a new Filter for the selected recipients
list. This filter allows the limitation of the shown
recipients of this list by applying a filter rule, e.g.
show all e-mail addresses that ends with
"@jam-software.com"
Verknüpfung zu externen Tabellen
8.3.1.2
New Table Link
Sets a new link to an already existing database.
Edited or newly added data in this database are
automatically updated in SmartSerialMail.
Edit
Options
Edits an already existing link to a database.
Table
Import / Export
To open the import wizard click on the 'Import' button.
To import recipients from CSV, Excel or Outlook you can use the
corresponding buttons. The same principle applies to exporting CSV or
HTML.
The five most recent One-Click Imports are saved to a list and can be
restarted with a simple click without using the wizard.
The available One-Click Imports are:
· CSV File
· Microsoft Excel
· Microsoft Outlook
This allows for a much easier updating of your recipient lists.
SmartSerialMail
©1996-2015 by Joachim Marder e.K.
173
Program Sections
Import
Import Wizard
Opens the Import Wizard where you can import
data from several formats like
· text files
· CSV files
· Microsoft Excel files
· Database connection
MSSQL etc.)
(e.g.
MySQL,
· Microsoft Access files
· Microsoft Outlook 2003 and higher
· Microsoft Outlook Express 6.0 and higher
CSV File
Imports recipients from a Comma Separated
Value File (CSV).
Microsoft Excel
Imports recipients from a Microsoft Excel File.
Microsoft
Outlook
Imports recipients from Microsoft Outlook.
Database Table
Imports recipients from a Database Table
Exportieren
8.3.1.3
CSV Export
Exports the recipient list
Separated Value File (CSV).
as
a
Comma
HTML Export
Exports the recipient list as an HTML file.
Excel-Export
Exports the recipient list as an Excel file.
Edit
The 'Edit' toolbar facilitates easier management of recipient lists. This toolbar
allows you to manage your recipients, such as remove duplicates and remove
invalid mail addresses.
SmartSerialMail
©1996-2015 by Joachim Marder e.K.
174
Program Sections
You can also include or exclude recipients which are on another list or copy the
list to an existing or a new list.
The column group on the left provides the functionality to insert, rename or
remove a column. The row group beside provides the functionality to insert and
remove rows.
On the right you can define whether the current list is a normal list or a
blacklist.
Column
Insert
Inserts a new column to the current list.
Rename
Renames the selected column.
Remove
Removes the selected column(s).
Row
Insert
Inserts a new row.
Remove
Removes the selected row(s).
Copy Row(s)
Copies the selected row(s).
Paste Row(s)
Pastes row(s) from clipboard.
Invalid Entries
Remove
Duplicates
Opens the dialog to remove duplicates in the
recipient list.
Remove Invalid Removes all recipients without an email address.
Mail-Addresses
Remove Empty Removes all recipients with an invalid email
address.
Mail-Addresses
Go Next Invalid Jumps to the next recipient with an invalid email
SmartSerialMail
©1996-2015 by Joachim Marder e.K.
175
Program Sections
Mail-Addresses
address.
Go Next Unsent
Mail-Addresses
Jumps to the next recipient address with an unsent
email.
List Operations
Include List of
recipients
Adds the recipients from another list to the current
recipient list.
Exclude List of
recipients
Removes the recipients from another list to the
current recipient list.
Copy to
Copies the existing list to an existing or a new list.
Check
list
against Blacklist
Compares the current list with all available
blacklists. The state of matching items will be
changed to 'blocked'.
List Type
8.3.1.4
Normal
Marks the list as normal recipient list. This is the
defualt option.
Blacklist
Marks the list as a Blacklist. This option excludes
the recipients on the list from sending.
Status
To set the status of the recipients you can use the 'Status' toolbar. It is visible
in step '
Recipients'.
Set Status for Selected
SmartSerialMail
As Sent
The selected recipient's status will be marked as
sent. The recipient will be skipped in the next
sending process.
As Blocked
The recipient's status will be marked as blocked.
No email will be sent to the recipient until you
©1996-2015 by Joachim Marder e.K.
176
Program Sections
change the status again.
As Unsent
The recipient's status will be marked as unsent.
An email will be sent to the recipient in the next
sending process.
Set Status for all
All
Sent
Unsent
as All recipients with the status sent are marked as
unsent. An email will be sent to the recipients in
the next sending process.
All Errors
Unsent
as All recipients with the status error are marked
as unsent. An email will be sent to the recipients
in the next sending process.
All blocked as All recipients with the status blocked are marked
Unsent
as unsent. An email will be sent to the recipients
in the next sending process.
8.3.1.5
Mark all Blocked
All recipients will be marked as blocked. No
email will be sent to the recipients until you
change the status again.
Mark all Unsent
All recipients will be marked as unsent. An email
will be sent to the recipients in the next sending
process.
Help
The "Help" toolbar contains any Help and Support functions of
SmartSerialMail.
It's separated in two categories, one Help part, which, among other things,
contains manuals, problem solutions and
useful information of the product, and an Update part which enables you to
check if new updates are available or to extend the
maintenance of this software.
Help
Help
SmartSerialMail
Opens the online help of SmartSerialMail.
©1996-2015 by Joachim Marder e.K.
177
Program Sections
Open PDF
manual
Opens the PDF Help of SmartSerialMail.
Frequently
Asked
Questions
Opens the FAQ section online.
Hide Hints
Actiavtes / deaktivates tooltips in SmartSerialMail
Updates
About
Shows information about SmartSerialMail, including
the version or the installation key.
Check for
Update
Opens the JAM Software homepage in your
webbrowser enabling you to extend your
maintenance period.
What is new?
Opens the list of the latest changes online.
Lizenz
8.3.2
Change
Installationk
ey
Allows you to change the license key
Extend
maintenance
Opens the JAM Software homepage in your
webbrowser enabling you to extend your
maintenance period.
Current List
Using "Recipients" you can manage your active recipient-list..
Import
SmartSerialMail
Import an existing recipient-list from a file.
©1996-2015 by Joachim Marder e.K.
178
Program Sections
Export
Export your recipient-list to a file.
Use "Alias Placeholder" to create new placeholder.
Name
The name of the placeholder, which will be
replaced by the value.
Value
The value of the placeholder.
New
Enter name and value for the placeholder
and click "New" to create a new alias
placeholder.
Delete
Deletes the chosen placeholder from the list.
Apply
Apply the changes to the chosen alias
placeholder.
Cancel
Cancel the edit of the chosen placeholder
and restore its old values.
Using the tab "Statistics", you get the possibility to get a visualization of the
data used in your recipient list.
Status
Shows a statistic of the sending-status to the
corresponding recipient-list.
Last_Name
Shows how often a last name occurs in your
recipient list.
First_Name
Shows how often a first name occurs in your
recipient list.
SmartSerialMail
©1996-2015 by Joachim Marder e.K.
179
Program Sections
8.3.2.1
Recipients
Using "Recipients" you can manage your active recipient-list.
8.3.2.2
Import
Import an existing recipient-list from a file.
Export
Export your recipient-list to a file.
Alias Placeholder
Use "Alias Placeholder" to create new placeholder.
SmartSerialMail
©1996-2015 by Joachim Marder e.K.
180
Program Sections
8.3.2.3
Name
The name of the placeholder, which will be replaced
by the value.
Value
The value of the placeholder.
New
Enter name and value for the placeholder and click
"New" to create a new alias placeholder.
Delete
Deletes the chosen placeholder from the list.
Apply
Apply the changes to the chosen alias placeholder.
Cancel
Cancel the edit of the chosen placeholder and
restore its old values.
Statistics
Using the tab "Statistics", you get the possibility to see a visualization of
the data used in your recipient list.
Status
Shows a statistic of the sending-status to the
corresponding recipient-list.
Last_Name
Shows how often a last name occurs in your
SmartSerialMail
©1996-2015 by Joachim Marder e.K.
181
Program Sections
recipient list.
First_Name
Shows how often a first name occurs in your
recipient list.
Tip:
An individual statistic is created for each column in your recipient-list.
8.3.3
Import Wizard
The SmartSerialMail Import Wizard helps you to import data. Follow the step by
step instructions.
You can import data from the following sources:
·
Non-formatted text file
·
Comma Separated Values file (CSV)
·
Microsoft Excel file
·
Database Connection
e.g. MySQL, MSSQL etc.
·
Microsoft Access file
·
Microsoft Outlook 2003 or higher
·
Microsoft Outlook Express 6.0 or higher
Below, the import process is explained using a XLS-import (MS Excel) as an
example.
1. Choose '
Import' in the Import Toolbar
2. Choose the import source.
SmartSerialMail
©1996-2015 by Joachim Marder e.K.
182
Program Sections
3. Use the ' Open' button to browse your file system and select a file or type
the path into the text field.
With the ' Edit' button you can open and edit the selected file.
Note:
Close the file to ensure a correct import.
SmartSerialMail
©1996-2015 by Joachim Marder e.K.
Program Sections
183
4. In this picture you can see an exemplary 'Open Dialog'.
5. Choose the spreadsheet you want to import.
SmartSerialMail
©1996-2015 by Joachim Marder e.K.
184
Program Sections
6. Please state at which row the import shall start. This is important to avoid
importing headlines as recipients.
SmartSerialMail
©1996-2015 by Joachim Marder e.K.
185
Program Sections
7. Select which columns should be imported and which headline each will
have.
SmartSerialMail
©1996-2015 by Joachim Marder e.K.
186
Program Sections
8. Select whether you want to import duplicate entries or not, or if already
existing entries shall be updated (non existing entries will be imported as
well).
SmartSerialMail
©1996-2015 by Joachim Marder e.K.
187
Program Sections
9. The recipients will be imported. The log window allows you to check if all
entries have been imported correctly.
Choose 'Save' to save the log as a text file.
Choose 'Close' to finish Import.
SmartSerialMail
©1996-2015 by Joachim Marder e.K.
Program Sections
188
10. After the successful import you see the recipient list.
SmartSerialMail
©1996-2015 by Joachim Marder e.K.
189
Program Sections
8.3.4
Remove Duplicates
The ' Remove Duplicates' tool helps you find and manage all addresses
appearing more than once in the current list of recipients.
1. Select the 'Edit' toolbar and click '
Remove Duplicates'.
2. All e-mail addresses which appear more than once in your recipient list
are shown.
3. By default one of each duplicate is preselected.
By clicking on the selection boxes you can change the selection.
Click 'Select all' to choose all addresses in the list.
4. Click 'Block Selected' to block all selected addresses.
No emails will be sent to these recipients until you change the status
again.
5. Click 'Remove Selected' to delete all selected addresses.
After confirmation of the security query the data will be finally deleted.
6. Click 'Close' to finish the duplicate search.
SmartSerialMail
©1996-2015 by Joachim Marder e.K.
190
Program Sections
8.3.5
Blacklist
A Blacklist is a list of recipients which whill be skipped in the sending process.
Reasons can be:
· the address caused a bounced message in a previous sending event,
· the recipient has canceled the newsletter, but the address hasn't been
deleted yet.
To change status from recipient list to Blacklist act as follows:
1. Select the relevant list.
2. Select the 'Edit' toolbar.
3. Change the 'List Type' from Normal to '
Blacklist'.
From now on, SmartSerialMail compares in each sending process whether
the entries in the selected recipient list match the entries on the Blacklist.
Recipients which appear on both lists will be skipped.
Note:
You can also add complete domains to your Blacklist.
To do so, make an entry like: *@domain.com in your list. This will cause all
mail addresses of this domain to be skipped in the sending process.
E.g.: *@example.com will be added to the Blacklist.
[email protected] and [email protected] are listed in one of your
recipient lists.
Both addresses will now be skipped in the sending process.
SmartSerialMail
©1996-2015 by Joachim Marder e.K.
191
Program Sections
8.3.6
Link to extern tables
Note:
Please note that this feature is available in SmartSerialMail Enterprise Edition
only.
This functions allows you to create links to already existing databases. If
information in this databases is changed or adjusted, the recipient lists in
SmartSerialMail are automatically updated.
The following example illustrates the use of this function with the help of an
already existing Access database.
1. Navigate to ' Recipients'.
Table" from the toolbar.
and choose the function "New Link to
2. Enter a name for the link.
3. Choose, to which list type the imported table corresponds. Then click
"Create...".
SmartSerialMail
©1996-2015 by Joachim Marder e.K.
192
Program Sections
4. In the new window, choose the type of the database from where the table is
to be imported.
5. Choose "Connection" from the top menu in this window.
6. In the field "Use data source name", enter the path to the database, where
the table is included. If the source is a file path, also provide the ending of the
file. Afterwards, enter the login information to use for the authentication in this
database. Click OK.
7. Click "Open connection".
8. Then specify in the lines beneath, which columns in the imported table
correspond to which columns in the recipient list in SmartSerialMail. All of this
information is required.
9. Click OK. The information is now imported to SmartSerialMail from the
chosen table of the extern database.
10. At any time you are able to edit the created link, if, for example, the storage
location of the database is changed. For that purpose, choose the link from the
recipient list and click "Edit Table Options" in the toolbox at the top.
8.4
Content
At the step '
SmartSerialMail
Content' you can edit the mail's subject and body.
©1996-2015 by Joachim Marder e.K.
193
Program Sections
C
o
n
t
e
n
t
Content Menu
On the left side of SmartSerialMail
you will see the message menu.
Here all created messages are
listed. To the select the message,
click on the name of the message in
the list.
HTML
SmartSerialMail
©1996-2015 by Joachim Marder e.K.
194
Program Sections
The designer in SmartSerialMail offers the opportunity to create or modify
an HTML email.
Several options will help you create an HTML email:
Insert images or tables to spice up your email or use conditional
placeholders and placeholders to easily and comfortably personalize your
emails.
With the ability to turn off the HTML preview mode you can decide if users
may use the editor or if they may only work in the HTML source code of an
email.
Please note that changes made in the designer will automatically change
the source code.
The integrated compatibility check allows you to check if your email will be
displayed correctly in a variety of email applications.
In HTML-view, you are able to chose one of the following subcategories:
· Designer
· Source Code
· Compatibility
· Used Images
· Links
Plain Text
SmartSerialMail
©1996-2015 by Joachim Marder e.K.
195
Program Sections
The text editor offers basic word processing functionality.
An email consists of a plain text part and an HTML part. SmartSerialMail
enables you to choose whether you want to want to create the plain text part
automatically from your email or enter it manually.
You can enter a plain text email in the text editor or let SmartSerialMail
create plain text content from any HTML email.
Attachments
You can attach files to your emails using the 'Attachments' menu.
Use placeholders to send individual attachments to each recipient.
SmartSerialMail
©1996-2015 by Joachim Marder e.K.
196
Program Sections
Alias Placeholder
Create your own placeholders.
Note:
Further information about content can be found at:
· Basics -> Placeholders -> Personalizing Email Content.
· Tutorial -> Tutorial 4: Import content from Word
8.4.1
Menubar
In this chapter the toolbars used in step '
Content' are explained.
Home
The 'Home' toolbar contains the standard operations like Saving, Deleting,
Clipboard functions, Edit functions and Display functions.
Import / Export
This toolbar provides the operations to import or export files.
Edit
This toolbar provides the operations to insert elements like pictures or links.
SmartSerialMail
©1996-2015 by Joachim Marder e.K.
197
Program Sections
Placeholders
This toolbar provides the operations to insert elements like quick parts.
Options
This toolbar provides Clean Up, Convert, Image, Mail and View functions for the
Content.
Attachments
The 'Attachment' tab provides the functionality to attach a file or directory to an
email as well as delete and compress attachments.
Table Tools
In this tab you can modify the table, insert and delete rows and columns, split
or merge cells and change the alignment of text or objects in the table
Picture
This tab provides Image options and Image Upload functions.
Format
Provides options for general Imageoptions like Image Source, Alternate Text,
Layout, Size oder Border.
Help
This toolbar contains all Help, Update and Support functions, e.g. open help,
check for updates or extension of the support period.
8.4.1.1
Home
The 'Home' toolbar contains the standard operations which can be used in
most of the steps.
Here you can find the general operations like Save, New or Print on the Home
Tab.
General
SmartSerialMail
Save
Saves the changes of the current Content.
New
Creates a new empty Content.
Save as
Creates a copy of the current Content.
Delete
Deletes the current Content.
Rename
Renames the current Content.
©1996-2015 by Joachim Marder e.K.
198
Program Sections
Print
Prints the current Content.
History
Opens the change-history. With this option you
can restore previous versions from a backup.
Clipboard
Paste
Pastes the content of the clipboard (optionally
as plain text only).
Copy
Copies selection to the clipboard.
Cut
Cuts selection to the clipboard.
Edit
Find
Find
Finds the search term in the context.
Find next
Finds the next occurrence of the search term.
Find previous
Finds the previous occurrence of the search term.
SmartSerialMail
Replace
Finds the search term and replaces it with
another.
Undo
Undo the last change.
Redo
Redo the last change.
Select All
Selects the whole section of text.
Clear Selection
Clears the selection.
©1996-2015 by Joachim Marder e.K.
199
Program Sections
Editor
Edit External
8.4.1.2
Open content in external editor, set in options.
Import / Export
The "Import file" and "Export file" groups contain all functions regarding
importing or exporting email content.
In addition you can find the clipboard operations and things like Undo and
Redo here.
Import from Template
Imports the content of the mail from a
selection of templates.
Import
Import File
Imports a text, html, e-mail, Microsoft
Word document or Microsoft Publisher
document to SmartSerialMail.
Import Word
Imports content from a Microsoft Word
file.
Import EML
Imports content from
Outlook EML filei.
Import HTML
Imports content from a HTML file.
a Microsoft
Export File
SmartSerialMail
Export
Exports content as HTML file.
Export with Images
Exports content as an HTML file
including all images.
Save as Template
Saves the content as template for use
in "Import from Template".
©1996-2015 by Joachim Marder e.K.
200
Program Sections
Save as PDF
8.4.1.3
Saves the content as PDF.
Edit
The 'Edit' toolbar helps you create an email. It enables you to insert hyperlinks
as well as other elements into your email.
Editor
Edit External
Open content in external editor, set in
options.
Font
Change the font of the text.
Font Size
Change the font size of the text.
Bold
Applies the bold formatting.
Italic
Applies the italic formatting.
Underline
Applies the underlined formatting.
Strikethrough
Applies the strikethrough formatting.
Subscript
Applies the subscript formatting.
Superscript
Applies the superscript formatting.
Highlight
Formats the marked text as if it had
been marked with a highlighter.
Font color
Changes the color of the selected text.
Font
Page Properties (available through click on
SmartSerialMail
)
©1996-2015 by Joachim Marder e.K.
201
Program Sections
Title
Here you can define a title for your
page.
Background Image
Here a background image can be set
for the page.
Default Font
This defines the default font for the
page.
Default Colors
Here you can set the default colors for
text, the background, links, visited links
and active links.
Paragraph
SmartSerialMail
Bullet point
Start an enumeration.
Numbering
Start a numbered list.
Increase indent
The indent level of the paragraph
larger.
©1996-2015 by Joachim Marder e.K.
202
Program Sections
Decrease indent
Decrease the indent level of the
paragraph.
Align left
Align text left.
Align center
Align text center.
Align right
Align text right.
Align justify
Spaces out all words in all lines such
that the first and last words align with
the respective margins.
Insert Line
Insert a vertical line.
HTML
Show tags
Displays the tags
content.
in the current
Show border
Displays the guides of the table.
Hyperlink
Insert Link
Inserts a hyperlink at the position of the
cursor.
Insert Bookmark
Inserts a bookmark at the position of
the cursor.
Elements
SmartSerialMail
Add File
Adds a file as an attachment.
Image
Inserts an image at the position of the
cursor.
©1996-2015 by Joachim Marder e.K.
203
Program Sections
Table
8.4.1.4
Inserts a table at the position of the
cursor.
Placeholder
Placeholder
Recipient
s Field
Inserts a predefined placeholder referring to columns of
the current recipients list at the position of the cursor.
Quick
Parts
Inserts a quick part at the position of the cursor.
Profile
Value
Inserts a predefined placeholder referring to the profile at
the position of the cursor.
Functions
Inserts a predefined placeholder referring to functional
values, e.g. date or time, at the position of the cursor.
Overview over the individual functions:
· Date {%Date()%}:
Defines a placeholder, which will be automatically
replaced by the current date formatted as dd.mm.yyyy in
the email.
Example: Returns the current date in standard format
(dd.mm.yyyy), e.g. 24.12.2012.
· Time {%Time()%}:
Defines a placeholder, which will be automatically
replaced by the current time formatted as hh.mm.ss in the
email.
Example: Returns the current time in standard format
(hh::nn:ss), e.g. 08:05:10.
Note:
Please note that this feature is available in
SmartSerialMail Enterprise Edition only
SmartSerialMail
©1996-2015 by Joachim Marder e.K.
204
Program Sections
Overview over the individual functions:
· Recursive Placeholder {r}placeholderorfunction{/r}:
Defines a recursive placeholder function which may be
used to insert templates in dependence of particular
conditions. It is also possible to join more than one
placeholder function. SmartSerialMail processes the
chosen placeholder/placeholderfunctions from the inside to
the outside.
Example:
{r} %salutation_({%Gender})% {/r}
You have a column named "Gender" in your recipient list.
Through the template in this example you set the salutation
of your mail dependent on the gender of the recipient.
For this function to be working correctly, a column named
"Gender" has to exist in the recipient list. Also templates
with the names "salutation_?" have to exist, which have to
cover up all of the possible entries in the column "Gender".
You replace the question marks in the template names
with the possible column entries. In this case, three entries
are possible in the column "Gender": "m", "f" or the column
is empty, if you don't know the gender of the recipient. So
you create three templates with the names "salutation_m",
"salutation_f" and "salutation_", where you enter the text
which is to be inserted in the respective case.
· If...then... {%
IfThen(PLACEHOLDER,MATCH,OUTPUT)%}{/r}:
Checks if PLACHOLDER equals the value of MATCH
and prints OUTPUT.
Example: {r}IfThen({%Titel%} , Dr., Doctor)%{/r},
prints "Doctor" if the column "Title" matches the value
"Dr.", otherwise nothing will be printed.
· Concat {%
concat(PLACEHOLDER,PLACEHOLDER)%}{/r}:
Concats two values and prints the result.
· Contains {r}{%contains(placeholder, contains)%}{/r}:
SmartSerialMail
©1996-2015 by Joachim Marder e.K.
205
Program Sections
Overview over the individual functions:
Defines a placeholder function which checks for a given
placeholder if it contains a specific value(contains). If it
does, the function will return the value "True", otherwise
the value "False".
Example: {r}{%contains({%First_name%}, Dr.)%}{/r},
here SmartSerialMail checks if the first name of the
current recipient contains the title "Dr.", in this case
SmartSerialMail returns "True", otherwise "False".
· Is Empty {r}{%isEmpty(PLACEHOLDER)%}{/r}
Prints "True" if PLACEHOLDER is empty, otherwise
"False" is printed.
· Replace {r}{%replace(placeholder, search,
replace)%}{/r}:
Defines a placeholder function which looks up a specific
value(search) in a given placeholder and replaces all
occurrences of it a by another value(replace).
Example: {r}{%replace({%First_name%}, Max,
Tom)%}{/r}, here SmartSerialMail seeks for "Max" in the
first name of the current recipient an replaces it with
"Tom".
· Substring {r}{%substr(placeholder, start, length)%}{/
r}:
Defines a placeholder function which extracts a substring
from a given placeholder beginning at a desired start
position with a specific length.
Example: {r}{%substr({%First_name%}, 5, 3)%}{/r},
here SmartSerialMail returns the next 3 characters
beginning from the 5th letter of the first name of the current
recipient, e.g. for "Johnson" SmartSerialMail would return
"son".
· Trim {r}{%trim(placeholder)%}{/r}:
Defines a placeholderfunction which trims all whitespaces
at the beginning and the end of a given placeholder.
SmartSerialMail
©1996-2015 by Joachim Marder e.K.
206
Program Sections
Overview over the individual functions:
Example: {r}{%trim({%Email%})%}{/r}, here
SmartSerialMail removes all potential occurring blanks
before and after the e-mail address of the current
recipient, e.g. " [email protected]" wird zu
"[email protected]"
· Uppercase {r}{%uppercase(placeholder)%}{/r}:
Defines a placeholder function which converts all
lowercase characters of a given placeholder into
uppercase characters.
Example: {r}{%uppercase({%First_name%})%}{/r},
here SmartSerialMail converts all lowercase letters in the
first name of the current recipient into uppercase letters,
e.g. "Max" would be converted to "MAX".
· Lowercase {r}{%lowercase(placeholder)%}{/r}:
Defines a placeholder function which converts all
uppercase characters of a given placeholder into
lowercase characters.
Example: {r}{%lowercase({%First_name%})%}{/r},
here SmartSerialMail converts all uppercase letters in the
first name of the current recipient into lowercase letters,
e.g. "Max" would be converted to "max".
· Date (formatted) {r}{%date(dateformat)%}{/r}:
Defines a placeholder function which returns the current
date formatted with the desired date format,
e.g. dd.mm.yyyy.
Possible formatting strings:
y
= Current Year with last 2 digits
yy
= Current Year with last 2 digits
yyyy
= Current Year as 4 digits
m
= Current Month number no-leading 0
mm
= Current Month number as 2 digits
mmm
= Current Month using short day names (Jan)
mmmm
= Current Month using long day names
(January)
d
= Current Day number no-leading 0
dd
= Current Day number as 2 digits
SmartSerialMail
©1996-2015 by Joachim Marder e.K.
207
Program Sections
Overview over the individual functions:
ddd
dddd
(Sunday)
ddddd
dddddd
.
= Current Day using short day names (Sun)
= Current Day using long day names
= Current Day in short date format
= Current Day in long date format
= Current Date separated by "."
Example:
{r}{%date(mm.dd.yyyy)%}{/r}, here SmartSerialMail
returns the current date formatted as mm.dd.yyyy,
e.g. 12.24.2012.
Some more examples:
d.m.y
= 1.1.12
dd.mm.yy
= 01.01.12
ddd d mmm yyyy = Sun 1 Jan 2012
dddd d mmmm yyyy = Sunday 1 January 2012
ddddd
= 01.01.2012
dddddd
= 01 January 2012
· Time (formatted) {r}{%time(timeformat)%}{/r}:
Defines a placeholder function which returns the current
time formatted with the desired time format,
e.g. hh:nn:ss.
Possible formatting strings:
h = Current Hour number no-leading 0
hh = Current Hour number as 2 digits
n = Current Minute number no-leading 0
nn = Current Minute number as 2 digits
s = Current Second number no-leading 0
ss = Current Second number as 2 digits
z = Current Milli-sec number no-leading 0s
zzz = Current Milli-sec number as 3 digits
t = Current time in short time format
tt = Current time in long time format
: = Current time separated by ":"
am/pm
= Use after "h" gives 12 hours + am/pm
a/p
= Use after "h" gives 12 hours + a/p
ampm
= Gives 12 hours as 2 digits for hh and with
no-leading 0 for h
SmartSerialMail
©1996-2015 by Joachim Marder e.K.
208
Program Sections
Overview over the individual functions:
Examples: {r}{%time(hh:nn)%}{/r}, here
SmartSerialMail returns the current time formatted as
hh:nn, e.g. 01:02.
Some more examples:
hham/pm = 01am
t
= 01:02
tt
= 01:02:03
hh:nn:ss:zzz = 01:02:03:004
· Days since {r}{%
since(PLACEHOLDER,DATEFORMAT)%}{/r}:
Returns the number of days since the date given in
PLACEHOLDER.
Via DATEFORMAT forat of the date is specified (see
date()).
· MD5 Hash {r}{%md5(placeholder)%}{/r}:
Defines a placeholder function which calculates the hash
value of a given placeholder using the Message-Digest 5
algorithm.
Example: {r}{%md5({%Email%})%}{/r}, here
SmartSerialMail returns the MD5 hash value ensuing from
the e-mail address of the current recipient.
· Encode Base64 {r}{%
EncodeBase64(PLACEHOLDER)%}{/r}:
Tranforms a text in PLACEHOLDER into a Base64
encoded Text.
· Decode Base64 {r}{%
DecodeBase64(PLACEHOLDER)%}{/r}:
Transforms a already Base64 encoded Text in
PLACEHOLDER into normal text.
· Encode HTML Entities {r}{%
EncodeHTML(PLACEHOLDER)%}{/r}:
Replaces all relevant characters in PLACEHOLDER by
their HTML-Entities.
SmartSerialMail
©1996-2015 by Joachim Marder e.K.
209
Program Sections
Overview over the individual functions:
· Decode HTML Entities {r}{%
DecodeHTML(PLACEHOLDER)%}{/r}:
Replaces all HTML-Entities in PLACEHOLDER by
normal charters.
· {r}{%PrintIfNotEmpty(PLACEHOLDER,
PLACEHOLDER)%}{/r}:
Prints the value of second PLACEHOLDER, in case first
PLACEHOLDER is not empty (not only spaces).
· {INCLUDE #FILENAME#}{/INCLUDE}:
Includes a file (HTML or Text) into the content.
· {SAVE_AS #FILENAME#}{/SAVE_AS}:
Saves the content, depending on filename extension as
PDF or as JPG.
· {FOREACH #One;two;three#}Output: #VALUE# {/
FOREACH} :
Creates output for each element in the list with
#VALUE# as the current element.
Links
Inserts a predefined placeholder
unsubscribe the newsletter.
to subscribe
or
Note:
To use the placeholders "Subscription" and
"Unsubscription", you need to adjust the settings for
Returns.
Important points are:
'Incoming Server Options'
'Subscriptions'
'Unsubscriptions'
SmartSerialMail
©1996-2015 by Joachim Marder e.K.
210
Program Sections
8.4.1.5
Condition
al
Placehold
er
Inserts a placeholder with conditions which refer to the
columns of the current recipients list.
Alias
Insert an alias placeholder to the content
Quick part
as file
Insert a Quick part as file (pdf, png, html).
You have to enter the value to match, the content for this
case, and a default content for not matching entries.
Options
The 'Options' toolbar provides operations to simplify handling content.
Use the Clean Up feature to remove formatting, styles and unknown tags from
your email.
In the Convert Content operations you can switch from automatically
generating Plain Text to manual mode. You can also generate plain text from
HTML and HTML from plain text.
In the Mail Options you can choose your mail type (HTML or Plain Text).
The View tab allows you to switch between text, html or source view and the
HTML tab to reveal tags or show table borders.
Clean Up
Remove
Formatting
Removes all formatting information from the mail.
Remove
Styles
Removes all style information from the mail.
Remove
Unknown
Tags
Removes unknown tags from the mail.
Image Files
Change
Image Base
Path
SmartSerialMail
Changes base path of all images.
You can use this function if you have moved already
inserted images to another folder.
©1996-2015 by Joachim Marder e.K.
211
Program Sections
Copy Images
Copies all images from your email into a new folder.
Please note that base path changes, too.
Convert Content
Generate
Generates the Plain Text part out of the HTML part.
Plain
from Only available if "Auto Generate Plain from HTML" is
deactivated.
HTML
Generate
Generates the HTML part out of the Plain Text part.
HTML from Only available if "Auto Generate Plain from HTML" is
deactivated.
Plain
Auto
Automatically generates the Plain Text from HTML
content of the mail. This is the default option.
Generate
Plain
from
HTML
Mail Option
Mail is HTML
Defines the email as HTML.
Mail is Plain Defines the email as Plain Text. Not HTML part will
be created.
text
General
Options
In the 'Advanced Mail Options Dialog' you can
change certain options of the mail.
Advanced
See "General Options".
Mail Options
Dialog
SmartSerialMail
©1996-2015 by Joachim Marder e.K.
212
Program Sections
Missing Elements
Do not Send If this option is checked, SmartSerialMail will not
send the mail if an attachment is missing
Mail
Ignore
and if this option is checked, SmartSerialMail will send
the mail even if an attachment is missing
send Mail
View
HTML
Shows the HTML view of the mail.
Plain text
Shows the Plain Text view of the mail.
Source code
Shows the Source Code of the mail.
Attachment
Shows all attachments to the mail in a table view.
HTML
8.4.1.6
Show
tags
Displays the tags in the current content.
Show
borde
r
Displays the guides of the table.
Attachments
The 'Attachment' toolbar is available if you choose the attachment section in
step ' Content'.
The tab provides the functionality to attach a file or directory to an email as well
as delete and compress attachments.
In addition you can choose how to handle missing files and choose whether the
emails with missing attachments should be sent or not.
Add
SmartSerialMail
©1996-2015 by Joachim Marder e.K.
213
Program Sections
Add File
Attaches a file to your e-mail.
Personalized attachments can also be added
using this button.
Note:
Personalized attachments are only available in
the Enterprise Edition.
You can find a detailed comparison between the
Small Business Edition and the Enterprise Edition
here.
Add Directory
Attaches a directory to the message.
Attachment Operations
Remove
Removes the selected attachments from this
mail.
Compress
If this option is set, the selected attachments will
be compressed via ZIP prior to sending.
Note:
This feature is only available in the Enterprise
Edition.
You can find a detailed comparison between the
Small Business Edition and the Enterprise Edition
here.
Missing Elements
Do not
Mail
Send If this option is checked, SmartSerialMail will not
send the mail if an attachment is missing
Ignore and send if this option is checked, SmartSerialMail will send
the mail even if an attachment is missing
Mail
SmartSerialMail
©1996-2015 by Joachim Marder e.K.
214
Program Sections
Placeholder
Recipients
Fields
Inserts a predefined placeholder referring to the
columns of the current recipients list at the
position of the cursor.
Quick Parts
Inserts a quick part at the position of the cursor.
Profile Value
Inserts a predefined placeholder referring to the
profile at the position of the cursor.
Functions
Inserts a predefined placeholder referring to
functional values, e.g. date or time, at the position
of the cursor.
Links
Inserts a predefined placeholder to subscribe or
unsubscribe the newsletter.
Note:
To use the placeholders "Subscription" and
"Unsubscription", you need to adjust the
settings for Returns.
Important points are:
'Incoming Server Options'
'Subscriptions'
'Unsubscriptions'
Conditional
Placeholder
Inserts a placeholder with conditions referring to
the columns of the current recipients list.
You have to enter the value to match, the content
for this case, and a default content for not
matching entries.
Alias
8.4.1.7
Insert an alias placeholder to the content
Table Tools
After inserting a table in your content, you can access the table options in the
'Table Tools' toolbar.
SmartSerialMail
©1996-2015 by Joachim Marder e.K.
215
Program Sections
In this tab you can modify the table, insert and delete rows and columns, split
or merge cells and change the alignment of text or objects in the table.
Table
Modify Table
Opens an Options dialog to modify the selected
table.
Rows and Columns
Delete
Deletes the currently selected row or column.
Insert
Above
Row Inserts a row above the currently selected line.
Insert
Below
Row Insert a row below the currently selected line.
Insert
Right
Column Inserts a column on the right side of the currently
selected column.
Insert
Left
Column Inserts a column on the left side of the currently
selected column.
Merge
Merge Cells
Merges the currently selected cells.
Split Cells
Splits the currently selected cells.
Text Layout
Text Layout
In this group you can choose how text and
images should be arranged in the table.
Your options are:
SmartSerialMail
©1996-2015 by Joachim Marder e.K.
216
Program Sections
· Top and Left
· Top and Center
· Top and Right
· Middle and Left
· Middle and Center
· Middle and Right
· Bottom and Left
· Bottom and Center
· Bottom and Right
Font
SmartSerialMail
Font
Change the font of the text.
Font Size
Change the font size of the text.
Bold
Applies the bold formatting.
Italic
Applies the italic formatting.
Underline
Applies the underlined formatting.
Strikethrou
gh
Applies the strikethrough formatting.
Subscript
Applies the subscript formatting.
Superscript
Applies the superscript formatting.
Highlight
Formats the marked text as if it had been marked
with a highlighter.
Font color
Changes the color of the selected text.
©1996-2015 by Joachim Marder e.K.
217
Program Sections
Paragraph
Bullet point
Start an enumeration.
Numbering
Start a numbered list.
Incrase ident
The indent level of the paragraph larger.
Decrase ident
Decrease the indent level of the paragraph.
Align left
Align text links.
Align center
Align text center.
Align right
Align text right.
Align justify
Spaces out all words in all lines such that the first
and last words align with the respective margins.
HTML
8.4.1.8
Show tags
Displays the tags in the current content.
Show border
Displays the guides of the table.
Picture
With the 'Picture' toolbar you can manage all images used in an email.
You can also upload images to an FTP server and send embedded links
instead of the original images, thus reducing the size of the email.
Image Files
SmartSerialMail
Change
Image Base
Path
Replaces the base path for all used images.
Copy
Copies all used images.
©1996-2015 by Joachim Marder e.K.
218
Program Sections
Images
Upload Images
8.4.1.9
Upload
selected
Images
All selected images will be uploaded to the server
defined in the web space options.
Mark all
images
All pictures in the table are selected.
Go to FTP
configuratio
n
Go to the web space options in "Profile".
Format
The 'Format' toolbar contains operations which can be used for formatting
images.
You can replace the selected image, change the alignment and the alternate
text, resize the image and set an image border in this toolbar. It also shows
the base path of your image.
Picture General
Replace
Image
Replaces the current image with another image.
Image
Source
Shows the base path of the current image.
Alternat
e Text
This text is shown in the Plain Text part.
Layout
Image
Layout
SmartSerialMail
In this group you can choose how your text and images
should be arranged in the table.
©1996-2015 by Joachim Marder e.K.
219
Program Sections
Your options are:
· Top
· Right
· Center
· Left
· Bottom
Size
height
Shows the height of the image in pixels.
width
Shows the width of the image in pixels.
Reset
Image
Resets the size of the image.
Border
width
Sets the width of the border.
8.4.1.10 Help
The "Help" toolbar contains any Help and Support functions of
SmartSerialMail.
It's separated in two categories, one Help part, which, among other things,
contains manuals, problem solutions and
useful information of the product, and an Update part which enables you to
check if new updates are available or to extend the
maintenance of this software.
Help
SmartSerialMail
Help
Opens the online help of SmartSerialMail.
Open PDF
manual
Opens the PDF Help of SmartSerialMail.
©1996-2015 by Joachim Marder e.K.
220
Program Sections
Frequently
Asked
Questions
Opens the FAQ section online.
Hide Hints
Actiavtes / deaktivates tooltips in SmartSerialMail
Updates
About
Shows information about SmartSerialMail, including
the version or the installation key.
Check for
Update
Opens the JAM Software homepage in your
webbrowser enabling you to extend your
maintenance period.
What is new?
Opens the list of the latest changes online.
Lizenz
8.4.2
Change
Installationk
ey
Allows you to change the license key
Extend
maintenance
Opens the JAM Software homepage in your
webbrowser enabling you to extend your
maintenance period.
Advanced Mail Options Dialog
In the Advanced Mail Options Dialog you can change certain options of the
mail.
SmartSerialMail
©1996-2015 by Joachim Marder e.K.
221
Program Sections
Mail Options
Character set
This setting can help email programs to display the
content of the mail correctly.
Note:
Not all email programs use this information and some of them will
override it with the recipient's local system settings.
Profile Options
Append Signature
SmartSerialMail
If this option is set, the signature below will be attached
at the bottom of each mail sent by this user. A good
location for company name, phone number or web
address.
©1996-2015 by Joachim Marder e.K.
222
Program Sections
Note:
SmartSerialMail provides a more comfortable way to embed such data in
your mail by using quick parts.
Do
not
mail...
backup
Note:
This option is only relevant if you use the JAM Software Exchange Server
Toolbox.
If this option is set, there is no backup made via the
Exchange Server Toolbox.
8.4.3
Current Content
HTML
The designer in SmartSerialMail offers the opportunity to create or modify
an HTML email.
Several options will help you create an HTML email:
Insert images or tables to spice up your email or use conditional
placeholders and placeholders to easily and comfortably personalize your
emails.
With the ability to turn off the HTML preview mode you can decide if users
may use the editor or if they may only work in the HTML source code of an
email.
Please note that changes made in the designer will automatically change
the source code.
The integrated compatibility check allows you to check if your email will be
displayed correctly in a variety of email applications.
In HTML-view, you are able to chose one of the following subcategories:
· Designer
· Source Code
· Compatibility
· Used Images
· Links
Plain Text
SmartSerialMail
©1996-2015 by Joachim Marder e.K.
223
Program Sections
The text editor offers basic word processing functionality.
An email consists of a plain text part and an HTML part. SmartSerialMail
enables you to choose whether you want to want to create the plain text part
automatically from your email or enter it manually.
You can enter a plain text email in the text editor or let SmartSerialMail
create plain text content from any HTML email.
Attachments
You can attach files to your emails using the 'Attachments' menu.
Use placeholders to send individual attachments to each recipient.
Alias Placeholder
Create your own placeholders.
8.4.3.1
HTML
Designer
Determines whether an HTML mail may be edited in
the designer or whether it may only be edited in the
source code.
Editor
SmartSerialMail
The comfortable editor is one of the main
©1996-2015 by Joachim Marder e.K.
224
Program Sections
components of SmartSerialMail. Here you can
create, for example, newsletters containing images,
tables or quick parts before you send them via
SmartSerialMail.
Opens the external editor set in 'Options' in the
'File' menu, in which you can edit or create your
content externally.
Hint:
The preview may be different from the version received by your recipients!
For further information please refer to: 'Content->Compatibility'
Source Code
Determines whether an HTML mail can be edited
in the designer or whether it may only be edit in the
source code.
Editor
Here you can design the email in HTML code.
Opens the external editor set in 'Options' in the
'File' menu, in which you can edit or create your
content externally.
Compatibility
Email Client selectionWith SmartSerialMail you can check your email's
SmartSerialMail
©1996-2015 by Joachim Marder e.K.
225
Program Sections
field
compatibility with different email clients. You can
select an email client here.
HTML/CSS Tag
Shows corrupted HTML/CSS tags.
Description
Shows to which extend your email is supported by
the selected client.
Occurrence
Links to the incompatibility in the source code.
Client Typ
Shows the group the incompatibility belongs to. The
groups are listed in the email client selection field.
Used Images
Browse
Opens a dialog in which you can select a file
manually.
Replace selected
Klick here to replace the selected image with the
content of the text box.
Table
Lists all images used in the email. You can jump to
the image location in the source code by doubleclicking on an entry.
Links
Replace Links
Click here to replace the selected link with the
contents of the text box.
Replace Parameters
Click here to replace the old parameters with the
changed ones.
SmartSerialMail
©1996-2015 by Joachim Marder e.K.
226
Program Sections
Edit
Parameters
Table
TrackingEdit the tracking parameters of the chosen link.
Lists all links used in the email. You can jump to the
link location in the source code by double-clicking on
an entry.
8.4.3.1.1 Designer
Determines whether an HTML mail may be edited in
the designer or whether it may only be edited in the
source code.
Editor
The comfortable editor is one of the main components
of SmartSerialMail. Here you can create, for example,
newsletters containing images, tables or quick parts
before you send them via SmartSerialMail.
Opens the external editor set in 'Options' in the 'File'
menu, in which you can edit or create your content
externally.
Hint:
The preview may be different from the version received by your recipients!
For further information please refer to: 'Content->Compatibility'
SmartSerialMail
©1996-2015 by Joachim Marder e.K.
227
Program Sections
8.4.3.1.2 Source Code
Determines whether an HTML mail can be edited in
the designer or whether it may only be edit in the
source code.
Editor
Here you can design the email in HTML code.
Opens the external editor set in 'Options' in the
'File' menu, in which you can edit or create your
content externally.
8.4.3.1.3 Compatibility
Email Client selectionWith SmartSerialMail you can check your email's
compatibility with different email clients. You can
field
select an email client here.
HTML/CSS Tag
Shows corrupted HTML/CSS tags.
Description
Shows to which extend your email is supported by the
selected client.
Occurrence
Links to the incompatibility in the source code.
Client Typ
Shows the group the incompatibility belongs to. The
groups are listed in the email client selection field.
SmartSerialMail
©1996-2015 by Joachim Marder e.K.
228
Program Sections
8.4.3.1.4 Used Images
Browse
Opens a dialog in which you can select a file
manually.
Replace selected
Klick here to replace the selected image with the
content of the text box.
Table
Lists all images used in the email. You can jump to the
image location in the source code by double-clicking
on an entry.
8.4.3.1.5 Links
Replace Links
Click here to replace the selected link with the
contents of the text box.
Replace Parameters Click here to replace the old parameters with the
changed ones.
Edit
TrackingEdit the tracking parameters of the chosen link.
Parameters
Table
SmartSerialMail
Lists all links used in the email. You can jump to the
link location in the source code by double-clicking on
an entry.
©1996-2015 by Joachim Marder e.K.
229
Program Sections
8.4.3.2
Plain Text
The text editor offers basic word processing functionality.
An email consists of a plain text part and an HTML part. SmartSerialMail
enables you to choose whether you want to want to create the plain text
part automatically from your email or enter it manually.
You can enter a plain text email in the text editor or let SmartSerialMail
create plain text content from any HTML email.
8.4.3.3
Attachments
You can attach files to your emails using the 'Attachments' menu.
SmartSerialMail
©1996-2015 by Joachim Marder e.K.
230
Program Sections
Use placeholders to send individual attachments to each recipient.
8.4.3.4
Alias Placeholers
With the use of alias placeholders you are able to create recurring texts
for profiles and for contents on your own. You can use the name of
correspondents or the company’s address as an alias placeholder to use
it in several e-mails.
Furthermore alias placeholders are used as placeholders for complex
functions and conditional salutations. Instead of using the text for a
conditional salutation or a complex function you only specify the name of
the alias placeholder which contains the directives for the salutation or the
function. With this feature your e-mails stay organized even by using
complex personalization. In addition alias placeholders are easier to
reuse.
8.5
Preview
'
Preview' displays your message in different versions and helps you
ensure a perfect look in every mail client.
Preview Information (left)
SPAM Report
This is your SPAM score, which indicates the
probability of your mail being marked as SPAM.
Click on "Report" to show detailed information on the
SPAM Report.
SmartSerialMail
©1996-2015 by Joachim Marder e.K.
231
Program Sections
Note:
The SPAM score is an approximation and might
differ from your actual SPAM scoring.
Size Summary
The Body size includes the size of the content as
well as the size of the information required to encode
it.
The Header size includes the size of the subject as
well as the size of the information required to encode
it.
The Attachment size includes the size of the
attached files as well as the size of the information
required to encode it.
The Total mail size adds up the various sizes, to
give you the total size of one single message.
Note:
These values are approximations. The exact size
will vary when using quick parts and custom fields.
Estimated Sending Upstream Internet Connection Speed: Select the
upstream connection speed for your internet
Time
connection as a base for transmission duration
estimation.
Minimum time to send one message: The minimum
time it will take to transmit one message.
Minimum time to send job: The minimum time it will
take to transmit the all of your messages.
Note:
These values are approximations. The real time for
transmission depends on a large number of factors
and cannot be determined exactly.
The selection of Upstream Internet Connection
Speed does not effect the speed of sending.
8.5.1
Menubar
In this chapter the toolbars used exclusively in step '
SmartSerialMail
Preview' are explained.
©1996-2015 by Joachim Marder e.K.
232
Program Sections
Home
This toolbar enables you to browse the preview of the mail for each of the
recipients in the current list.
Help
This toolbar contains all Help, Update and Support functions, e.g. open help,
check for updates or extension of the support period.
8.5.1.1
Home
This toolbar is only visible in step ' 4.Preview'.
It enables you to preview the mail for each of the recipients in the current list. In
addition you can send a preview e-mail to a specified mail address. You can
view the preview in a mail client and modify the preview in SmartSerialMail by
changing the preview options.
'
Hide Pictures' shows how the mail looks like if the recipient doesn’t allow
displaying pictures and ' Remove Styles' shows your mail without style
definitions. Both of the options are only used for the preview, the content will
not be changed.
Navigator
Shows the preview for the first recipient.
Shows the preview for the recipient ten entries
back from the currently selected.
Shows the preview for the previous recipient.
Shows the preview for the next recipient.
Shows the preview for the recipient ten entries
from the currently selected.
Shows the preview for the last recipient.
Send Preview Mail
SmartSerialMail
©1996-2015 by Joachim Marder e.K.
233
Program Sections
E-Mail Address
Type in or select a mail address to send the
preview email to.
Send
Sends the preview email to the specified mail
address.
Note:
The message will be sent to the mail address not
to the recipients in your recipients lists.
Export Preview
Save as EML
Saves the current Preview as EML file.
This includes information like recipients (incl. Cc
recipients), sender and email subject. You can
open
the
exported
email
outside
of
SmartSerialMail, e.g. with Outlook.
Note:
Only Outlook 2010 or higher holds native support
for opening EML-files.
Save as HTML
Saves the current Preview as HTML file.
Only the pure HTML part is exported, i.e. no
further information like recipients, sender or email subject are saved.
Save as PDF
Saves the current preview as PDF.
Print
Prints the current preview.
Preview in Mail Client
Show Preview
SmartSerialMail
Shows a preview of the email in your email client
(e.g. Outlook).
©1996-2015 by Joachim Marder e.K.
234
Program Sections
Note:
On most systems this will be Outlook Express or
Windows Mail (Vista), even if you use another
mail program.
Preview Options
8.5.1.2
Remove Styles
Simulates the email if the recipient's client blocks
styles.
Hide Picture
Simulates the email if the recipient's client blocks
pictures.
Help
The "Help" toolbar contains any Help and Support functions of
SmartSerialMail.
It's separated in two categories, one Help part, which, among other things,
contains manuals, problem solutions and
useful information of the product, and an Update part which enables you to
check if new updates are available or to extend the
maintenance of this software.
Help
Help
Opens the online help of SmartSerialMail.
Open PDF
manual
Opens the PDF Help of SmartSerialMail.
Frequently
Asked
Questions
Opens the FAQ section online.
Hide Hints
Actiavtes / deaktivates tooltips in SmartSerialMail
Updates
SmartSerialMail
©1996-2015 by Joachim Marder e.K.
235
Program Sections
About
Shows information about SmartSerialMail, including
the version or the installation key.
Check for
Update
Opens the JAM Software homepage in your
webbrowser enabling you to extend your
maintenance period.
What is new?
Opens the list of the latest changes online.
Lizenz
8.5.2
Change
Installationk
ey
Allows you to change the license key
Extend
maintenance
Opens the JAM Software homepage in your
webbrowser enabling you to extend your
maintenance period.
Current Preview
The Overview presents the following information:
· missing quick parts
· missing Attachments
SmartSerialMail
©1996-2015 by Joachim Marder e.K.
236
Program Sections
Overview
Missing
Attachments
Note:
This box will only be visible if an attachment is missing.
Reasons could be:
· the file location is not correct
· the file name is not correct
Click 'Change File' and select the correct file.
Missing
parts
quick
Note:
This box will only be visible if a quick part is missing.
Check if the quick part is defined or if the quick parts
SmartSerialMail
©1996-2015 by Joachim Marder e.K.
237
Program Sections
name is correct.
HTML
Preview the HTML-part of the e-mail.
Hint:
The preview may be different from the version received by your recipients!
For further information please refer to: 'Content->Compatibility'
Plain Text
SmartSerialMail
©1996-2015 by Joachim Marder e.K.
238
Program Sections
In this view you are able to view the mail as "plain text"
Spam
The Spam-Report uses the program "SpamAssassin" to rate your
Newsletter.
This rate is expressed as a spam score.
Note:
This feature is only available in the Enterprise Edition.
You will find a detailed comparison between the Small Business Edition and
the Enterprise Edition here.
The score shows whether your newsletter will get identified as spam or not.
If you have reached a high spam score, the probability that your email will
get classified as spam is high.
Links and Placeholder
This menu shows you an overview on the links and placeholders used in the
chosen mail.
You can double-click the link/placeholder in the list to follow it to its
destination.
You can create your own placeholders.
You find more Information for the subtopics by following the links below:
· HTML Links
· Available Placeholder
· Placeholder Log
8.5.2.1
HTML
SmartSerialMail
©1996-2015 by Joachim Marder e.K.
239
Program Sections
Preview the HTML-part of the e-mail.
Hint:
The preview may be different from the version received by your
recipients!
For further information please refer to: 'Content->Compatibility'
8.5.2.2
Plain Text
In this view you are able to view the mail as "plain text"
8.5.2.3
Spam
The Spam-Report uses the program "SpamAssassin" to rate your Newsletter.
This rate is expressed as a spam score.
Note:
This feature is only available in the Enterprise Edition.
SmartSerialMail
©1996-2015 by Joachim Marder e.K.
240
Program Sections
Note:
You will find a detailed comparison between the Small Business Edition and
the Enterprise Edition here.
The score shows whether your newsletter will get identified as spam or not.
If you have reached a high spam score, the probability that your email will get
classified as spam is high.
Note:
The spam score calculated with SpamAssassin may differ from the
spam score of an email provider.
8.5.2.4
Links and Placeholder
This menu shows you an overview on the links and placeholders used in the
chosen mail.
You can double-click the link/placeholder in the list to follow it to its destination.
You can create your own placeholders.
HTML Links
SmartSerialMail
©1996-2015 by Joachim Marder e.K.
241
Program Sections
Link destination
The destination to which the link points.
Link content
The content of the link as it is shown in the mail.
Link
The part of the HTML code in the mail containing the
link.
Parameter
Optional parameters of the link.
Available Placeholder
Placeholder
The name of the placeholder.
Replacement
The value of the placeholder.
Placeholder Log
Placeholder
The name of the placeholder.
Replacement
The value of the placeholder.
8.5.2.4.1 HTML Links
Link destination
The destination to which the link points.
Link content
The content of the link as it is shown in the mail.
Link
The part of the HTML code in the mail containing the
link.
Parameter
Optional parameters of the link.
8.5.2.4.2 Available Placeholder
Placeholder
The name of the placeholder.
Replacement
The value of the placeholder.
8.5.2.4.3 Placeholder Log
Placeholder
The name of the placeholder.
Replacement
The value of the placeholder.
SmartSerialMail
©1996-2015 by Joachim Marder e.K.
242
Program Sections
8.6
Sending
At '
Sending' you can send out your prepared mails or create a scheduled
mailing.
Note:
Please respect the Anti-SPAM-laws in your country and in the country your
mail server is located.
Sending
Profile
Menu
SmartSerialMail
On the left side of SmartSerialMail you will find the content
menu. In this menu all created emails are listed. To select
an email just click on the entry in the list.
©1996-2015 by Joachim Marder e.K.
243
Program Sections
Sending Profile and Status
Profile
Here you can choose the profile to use from which you want
to send your e-mails. Additionally a detailed overview over
the chosen profile is shown including the corresponding
from address or the configured mail server.
Recipients
Here you can choose the recipients list to which you want to
send your e-mails. Additionally list information like sent
elements or potential errors and problems are shown as
well as the used blacklists.
SmartSerialMail
©1996-2015 by Joachim Marder e.K.
244
Program Sections
Content
Here you can choose the content of your e-mail. Additionally
some detailed information about the chosen message like
subject or message size is shown.
Note:
Further information about sending can be found at: Basics -> Recipient
Lists and Sending
8.6.1
Menubar
In this chapter the toolbars used exclusively in step '
explained.
Sending' are
Home
This toolbar enables you to send mail, create new sending tasks and handle
the task log.
Help
This toolbar contains all Help, Update and Support functions, e.g. open help,
check for updates or extension of the support period.
8.6.1.1
Home
The sending toolbar is only used in step ' Send Mail' .
It enables you to send mail, create new sending tasks and handle the task log.
You will also find the Connection Test for the profile on the sending toolbar.
Tasks
SmartSerialMail
Save
Saves all changes.
New
Creates a new task.
©1996-2015 by Joachim Marder e.K.
245
Program Sections
Delete
Deletes the selected task.
Resync
Resynchronizes the state of the recipients with
the recipients list.
Clean up and Task
Delete all
Deletes all aborted or finished tasks.
Send Mail
Start
Starts sending the selected project.
Abort
Aborts the sending operation.
Scheduled Sending
Start Scheduled
Starts the sending operation at the selected date
and time.
Date
Sets the date the sending operation will start.
Hinweis:
Date and time are a continuous time specification.
If the date and time set are in the past, the sending operation will
start immediately.
Time
Sets the time the sending operation will start.
Hinweis:
Date and time are a continuous time specification.
If the date and time set are in the past, the sending operation will
start immediately.
SmartSerialMail
©1996-2015 by Joachim Marder e.K.
246
Program Sections
Connection
Test Connection Tests the server connection of the selected
profile.
Report
8.6.1.2
Save to File
Saves the current log to a file.
Excel-Export
The current report file is saved as a Microsoft
Excel file.
Print
The current report file is printed.
Help
The "Help" toolbar contains any Help and Support functions of
SmartSerialMail.
It's separated in two categories, one Help part, which, among other things,
contains manuals, problem solutions and
useful information of the product, and an Update part which enables you to
check if new updates are available or to extend the
maintenance of this software.
Help
SmartSerialMail
Help
Opens the online help of SmartSerialMail.
Open PDF
manual
Opens the PDF Help of SmartSerialMail.
Frequently
Asked
Questions
Opens the FAQ section online.
Hide Hints
Actiavtes / deaktivates tooltips in SmartSerialMail
©1996-2015 by Joachim Marder e.K.
247
Program Sections
Updates
About
Shows information about SmartSerialMail, including
the version or the installation key.
Check for
Update
Opens the JAM Software homepage in your
webbrowser enabling you to extend your
maintenance period.
What is new?
Opens the list of the latest changes online.
Lizenz
8.6.2
Change
Installationk
ey
Allows you to change the license key
Extend
maintenance
Opens the JAM Software homepage in your
webbrowser enabling you to extend your
maintenance period.
Task Log
The Task Log shows all occurrences during mail transmission.
Every log starts with the job description:
· time and date of email transfer
· user address
· used SMTP server
· used list of recipients
· number of recipients
· name of the email
· subject of the email
SmartSerialMail
©1996-2015 by Joachim Marder e.K.
248
Program Sections
A line separates this paragraph from the rest of the log content.
The second paragraph shows when the sending operation was initialized and
when it started and ended.
For every email, the sending time and the sending duration are presented.
Note:
For a compilation of possible error messages in the log check your settings
and take a look at the common error entries in the FAQ.
A line separates this paragraph from the rest of the log content.
The third paragraph shows
· the number of sent emails
· the number of skipped emails
· the number of emails that couldn't be sent
· the total time of email transfer
SmartSerialMail
©1996-2015 by Joachim Marder e.K.
249
Program Sections
Sending Log Options
Print
Prints the selected log.
Clear
Clears the current log.
Note:
After confirmation of the security query the data will be irrevocably
deleted.
Copy
Copies the selected part of the log.
Save
Saves the selected part of the log to a TXT-file.
Note:
By right-clicking in the log window you can filter the entries.
SmartSerialMail
©1996-2015 by Joachim Marder e.K.
250
Program Sections
Note:
SmartSerialMail automatically deletes all entries which are older than 30
days.
If the number of entries reaches more than 500,000 SmartSerialMail deletes
old entries.
8.7
Listmanagement
List-management helps you to keep your recipient-lists up-to-date.
With this feature you can decide how to treat bounced mail, registration,
cancellation and confirmation.
Note:
This feature is only available in the Enterprise Edition.
You will find a detailed comparison between the Small Business Edition and
the Enterprise Edition here.
Returns:
All emails arriving in the inbox of your email account will be referred to as
'Returns'. Such a 'Return' could be :
1. a bounced mail (a 'return to sender' notification of the mail system, because
the email couldn't be delivered to the original recipient),
2. a subscription,
3. a confirmation,
4. a cancellation,
5. any other email.
Bounced mail:
Bounced mail (or simply 'bounces') are emails that cannot be delivered (for
several reasons) to the intended recipient. (The email 'bounces, against a
metaphorical 'wall' of a not responding email account and comes back to you
with a 'return to sender' remark). An invalid or incorrect written recipient mail
address is the most common cause for a mail to bounce.
How are registration, deregistration and acceptance
SmartSerialMail
©1996-2015 by Joachim Marder e.K.
251
Program Sections
processed?
SmartSerialMail recognizes these e-mails by their subject. You are able to
define keywords for each category (registration, deregistration, acceptance),
the subject of incoming e-mails will be scanned. If a match occurs
SmartSerialMail handles the recipient’s e-mail address as defined.
Subscriptions:
Subscriptions request the delivery of your newsletter to a certain email
address. SmartSerialMail will automatically add the sender of the mail
subscription to your recipients list of this newsletter.
Confirmations:
Confirmations request the user to confirm his subscription to your newsletter.
SmartSerialMail will automatically add the sender of the mail confirmation to
your recipients list of this newsletter.
Cancellations:
Cancellations demand a stop of your newsletter delivery to a certain email
address. SmartSerialMail will delete the sender of this cancellation from your
list of recipients of this newsletter.
Note:
Further information about listmanagement can be found at: Basics ->
Listmanagement
8.7.1
Menubar
In this chapter the toolbars used exclusively in step '
explained.
Listmanagement' are
Home
This toolbar enables you to collect bounces from the server and a local
installation of Microsoft Outlook.
Help
This toolbar contains all Help, Update and Support functions, e.g. open help,
SmartSerialMail
©1996-2015 by Joachim Marder e.K.
252
Program Sections
check for updates or extension of the support period.
8.7.1.1
Home
This toolbar is only visible in step '
Listmanagement' .
Note:
This feature is only available in the Enterprise Edition.
You will find a detailed comparison between the Small Business Edition and
the Enterprise Edition here.
It allows you to collect bounces from the server and a local installation of
Microsoft Outlook.
In addition, there are functions to handle the log and save the changes.
The Connection Test for the profile can be accessed via the Receiving
toolbar, too.
General
Note:
Here only the "Save" function is available.
The functions New, Clone, Delete, Rename and Print of the profile are only
available under ' Profile'.
Save
Saves the changes in '
New
Creates a new profile.
Save as
Creates a copy of the current profile.
Delete
Deletes the current profile.
Rename
Renames the current profile.
Print
Prints the current profile
Listmanagement'.
Collect Bounces
Collect
SmartSerialMail
Collects bounced emails from the server.
©1996-2015 by Joachim Marder e.K.
253
Program Sections
from
Server
Collect
from
Outlook
Collects bounced mail from a local installation of Outlook.
Note:
To use this function Outlook 2003 or higher or Outlook Express 6 or
higher is required.
Deletion of the mails from mail programs is not supported.
Abort
Aborts the collection of bounced mail.
Log
Clear
Clears the log file.
Note:
Deletion starts after confirming the security query.
Refresh
Refreshes the log window.
Copy
Copies the current log to clipboard.
Save
Saves the current log to file.
Print
Prints the current log.
Connection
Test
Connecti
on
8.7.1.2
Tests the connection to the server in the selected profile.
Help
The "Help" toolbar contains any Help and Support functions of
SmartSerialMail
©1996-2015 by Joachim Marder e.K.
254
Program Sections
SmartSerialMail.
It's separated in two categories, one Help part, which, among other things,
contains manuals, problem solutions and
useful information of the product, and an Update part which enables you to
check if new updates are available or to extend the
maintenance of this software.
Help
Help
Opens the online help of SmartSerialMail.
Open PDF
manual
Opens the PDF Help of SmartSerialMail.
Frequently
Asked
Questions
Opens the FAQ section online.
Hide Hints
Actiavtes / deaktivates tooltips in SmartSerialMail
Updates
About
Shows information about SmartSerialMail, including
the version or the installation key.
Check for
Update
Opens the JAM Software homepage in your
webbrowser enabling you to extend your
maintenance period.
What is new?
Opens the list of the latest changes online.
Lizenz
Change
Installationk
SmartSerialMail
Allows you to change the license key
©1996-2015 by Joachim Marder e.K.
255
Program Sections
ey
Extend
maintenance
8.7.2
Opens the JAM Software homepage in your
webbrowser enabling you to extend your
maintenance period.
Current Profile
Profile Properties
In the Profile Properties you can define general settings for sorting and
processing received emails.
Bounces
'Bounced Mail' shows your options for managing bounces.
If an email cannot be delivered, the mailing system will automatically send
the email back to the sender.
This automatic response mail is called a 'bounced mail' (or simply a
'bounce').
It contains the failed recipient address and in most cases the reason for
failure.
Subscriptions
In this tab you can manage your subscriptions.
SmartSerialMail scans the subject line of a received email and tags this mail
as subscription, if the subject
contains a specified term (usually a word like 'subscribe').
In case of a subscription, the subscriber's email address will be added to
the recipients list of the current
profile and is ready to be used for your next newsletter or email.
Confirmations
SmartSerialMail
©1996-2015 by Joachim Marder e.K.
256
Program Sections
In this tab you can manage your confirmations.
SmartSerialMail scans the subject line of a received mail and tags this mail
as confirmation if the subject
contains a specified term (usually a word like 'confirmation').
Cancellations
In this tab you can manage your cancellations.
SmartSerialMail scans the subject line of a received mail and tags this mail
as cancellation if the subject
contains a specified term (usually a word like 'unsubscribe').
Log
In the log you can see the processed transactions and analyze potential
sources of errors.
Any retrieve of returns will be logged.
8.7.2.1
Profile Properties
In the Profile Properties you can define general settings for sorting and
processing received emails.
Note:
Returns are only available in the Enterprise Edition.
You will find a detailed comparison between the Small Business Edition and
the Enterprise Edition here.
Specify the details of the POP3/Exchange account you receive your mails
from.
Note:
If you access this POP3/Exchange account with other mail clients too, you
have to make sure that these client(s) are set to leave the messages on the
server.
SmartSerialMail
©1996-2015 by Joachim Marder e.K.
257
Program Sections
Note:
SmartSerialMail downloads all mail from the selected folder and checks each
mail in regards to the rules you defined. This process may take some time.
We recommend that you sort the mail in your mail account before importing it
into SmartSerialMail.
Create a folder and move the mails you want to import into the new folder. Now
select the folder to import from.
General Settings
If you have not defined special settings on how to process bounced mail,
subscriptions or cancellations the general settings will apply to all kinds of
returns.
This only offers a very limited processing of your incoming mail.
In any other case, the specific settings will override the general settings.
The general settings actually complement the special settings for bounces,
subscriptions
or cancellations, in order to handle mail not belonging to one of these three
groups.
SmartSerialMail
©1996-2015 by Joachim Marder e.K.
258
Program Sections
Profile
Profile Menu
On the left side of SmartSerialMail you will find the
profile menu. In this menu all created profiles are
listed. To change the profile just click on the entry in
the list.
Incoming Server Options
Server Name
SmartSerialMail
Enter the name of your POP3/Exchange server.
Contact your internet service provider or take a look
into the configuration of your mail client if you need to
obtain information about it.
In the blank box a short help text is shown.
©1996-2015 by Joachim Marder e.K.
259
Program Sections
The name in this box will be checked during input
and one of the following two icons will be shown:
The server name or address is formally correct.
Note:
SmartSerialMail will only test if the server address was entered in
the correct format. The server address will not be verified
The server name or address is not set or formally incorrect
User Name
Enter your user name for the POP3/Exchange
server. Contact your internet service provider if you
need to obtain information about it.
As long as the field remains empty, a short help text
will be displayed.
Password
Enter your password for the POP3/Exchange
server. Contact your internet service provider if you
need to obtain information about it.
As long as the field remains empty, a short help text
will be displayed.
Typ
TRANSLATE: Wählen Sie den Typ Ihres
Posteingangsservers aus.
Die zur Verfügung stehenden Servertypen sind:
· POP3/Exchange
· IMAP/Exchange
Advanced Incoming Settings
Server Port
SmartSerialMail
This option sets the port used to communicate with
your POP3/Exchange server.
©1996-2015 by Joachim Marder e.K.
260
Program Sections
Note:
The default POP3/Exchange server port without
explicit SSL/TLS is 110, with explicit SSL/TLS it is
995.
Default Port
Set server port to the default port,
Security
This option has to be set if the SMTP server requires
the SSL/TLS authentication.
Contact your internet service provider if you need to
obtain information about it.
General Settings
Leave unhandled
messages on
server
Leaves messages which could not be handled as
defined in the special settings on the mail server.
Delete unhandled
messages on
server
Deletes messages which could not be handled as
defined in the special settings from the mail server.
Forward
unhandled
messages to
address
Forwards messages which could not be handled as
defined in the special settings to the specified
address. The original messages stay on the server.
The address in this box will be checked during input
and one of the following three icons could be shown:
The address is formally correct.
Note:
SmartSerialMail will only test if the address was entered in the
correct format. The email address will not be verified!
The email address you entered is formally correct, but some
programs/providers may regard it as incorrect.
No email address was entered or the email address is formally
incorrect.
Remove
SmartSerialMail
Deletes the forwarded mails from the server.
©1996-2015 by Joachim Marder e.K.
261
Program Sections
unhandled
messages after
forwarding
8.7.2.2
Bounced Mail
'Bounced Mail' shows your options for managing bounces.
Note:
Returns are only available in the Enterprise Edition.
You can find a detailed comparison between the Small Business Edition and
the Enterprise Edition here.
If an email cannot be delivered, the mailing system will automatically send the
email back to the sender.
This automatic response mail is called a 'bounced mail' (or simply a 'bounce').
It contains the failed recipient address and in most cases the reason for failure.
SmartSerialMail
©1996-2015 by Joachim Marder e.K.
262
Program Sections
Bounced Mail Options
Collect Bounced
Mail
If this option is set, the addresses of the bounced
mails will be eliminated from your actual profile and
further processed as stated.
Collect into:
If this option is set, the addresses of the bounces will
be collected into a separate list and further
processed as stated. The original list of recipients
won't be changed.
Remove from:
If this option is set, the addresses of the bounces will
be deleted right away from your list of recipients.
Note:
We recommend to collect the addresses of the
bounces into a separate list for later processing.
Failure analysis and data security is much easier
this way.
Collect temporary
Bounce Mail
If this option is set also the temporary bounce mails
will be collected.
Use this option with caution!
How to Process the Bounced Mail
Leave processed
messages on
server
Leaves the processed mail on the mail server.
Delete processed
messages from
server
Deletes the processed mail from the mail server.
Forward
processed
messages to
address
Forwards the processed mail to a mail address
before deleting them from the server.
The address in this box will be checked during input
and one of the following three icons will be shown:
The address is formally correct.
SmartSerialMail
©1996-2015 by Joachim Marder e.K.
263
Program Sections
Note:
SmartSerialMail will only test if the address was entered in the
correct format. The email address will not be verified!
The email address you entered is formally correct, but some
programs/providers may regard it as incorrect.
No email address was entered or the email address is formally
incorrect.
Remove messages
after forwarding
from server
8.7.2.3
If this option is set, the forwarded mails will be
deleted from the mail server.
Subscriptions
In this tab you can manage your subscriptions.
Note:
Returns are only available in the Enterprise Edition.
You will find a detailed comparison between the Small Business Edition and
the Enterprise Edition here.
SmartSerialMail scans the subject line of a received email and tags this mail as
subscription, if the subject
contains a specified term (usually a word like 'subscribe').
In case of a subscription, the subscriber's email address will be added to the
recipients list of the current
profile and is ready to be used for your next newsletter or email.
SmartSerialMail
©1996-2015 by Joachim Marder e.K.
264
Program Sections
Subscriptions Options
Collect
Subscriptions
If this option is set, the addresses of the bounced
mail will be eliminated from your actual profile and
further processed as stated.
Handle as
subscription if
subject contains:
Specifies the keyword for identification of a
subscription message.
Collect into list:
If this option is set, the addresses of the
subscriptions will be collected into a separate list,
where they are available for the next newsletters.
Trusted
Subscriptions
From Address:
Emails from this return address are allowed to add
new subsciptions (email address only), those have
to be contained in an additional {SmartSerialMailData}tag in the email content.
For example, if the email contains the tag
{SmartSerialMailData}
[email protected]{/
SmartSerialMailData}, SmartSerialMail will add the
email address [email protected] to the
collecting recipients list (the sender e-mail address
will be ignored in this case).
SmartSerialMail
©1996-2015 by Joachim Marder e.K.
265
Program Sections
How to Process
Subscriptions
Please take a look at the General Settings.
Leave processed
messages on
server
Leaves the processed mail on the mail server.
Delete processed
messages from
server
Deletes the processed mail from the mail server.
Forward
processed
messages to
address
Forwards the processed mail to a mail address
before deleting them from the server.
The address in this box will be checked during input
and one of the following 3 icons could be shown:
The address is formally correct.
Note:
SmartSerialMail will only test if the address was entered in the
correct format. The email address will not be verified!
The email address you entered is formally correct, but some
programs/providers may regard it as incorrect.
No email address was entered or the email address is formally
incorrect.
Remove messages
after forwarding
from server
If this option is set, the forwarded mails will be
deleted from the mail server.
Automatic parsing for additional subscriber information
SmartSerialMail allows the collection of additional subscriber information.
By default SmartSerialMail only reads the email address and writes it back to
the recipients list selected for collecting subscriptions.
To use this feature, there has to be one or more tags of the form
{SmartSerialMailData}Spaltenname1=Wert1,
Spaltename2=Wert2, ... {/
SmartSerialMail
©1996-2015 by Joachim Marder e.K.
266
Program Sections
SmartSerialMailData}
in the collected e-mail. With the help of these tags SmartSerialMail is able to
add additional information to the recipients list selected
for collecting subscriptions.
Please note: the corresponding rows has to exist in the collecting recipients
list!
Hierzu
Example:
Let's assume that the recipients list in which we collect new subscriptions
contains the rows "First Name", "Last Name" and "Email
Address".
Now collect new subscriptions and receive a subscription by "Mr. John Doe".
If the answer email additionally contains the following tag:
{SmartSerialMailData}First_Name=John,Last_Name=Doe{/
SmartSerialMailData}
In this case SmartSerialMail fills in the email address of the sender in the row
"Email Address" of the recipients list.
Thanks to the additional information in the {SmartSerialMailData}-tag in the
email content SmartSerialMail is also able read out the
first name "Joe" and the last name "Doe" and to fill out
the
respective rows of the collecting recipients list.
8.7.2.4
Confirmations
In this tab you can manage your confirmations.
Note:
Returns are only available in the Enterprise Edition.
You can find a detailed comparison between the Small Business Edition and
the Enterprise Edition here.
SmartSerialMail scans the subject line of a received mail and tags this mail as
confirmation if the subject
contains a specified term (usually a word like 'confirmation').
SmartSerialMail
©1996-2015 by Joachim Marder e.K.
267
Program Sections
Confirmations Options
Collect
Confirmations
If this option is set, the addresses of the returned
confirmation mails will be added to the recipients list.
Handle as
confirmation if
subject contains:
Specifies the keyword for identification of a
confirmation message.
Add security code
to confirmation
links:
If enabled, an MD5-Hash will be added at the end of
the mail subject to assure that the right user has
confirmed the link for subscription.
Collect into:
If this option is set, the addresses of the
confirmations will be collected into a separate list
and further processed as stated. The original list of
recipients won't be changed.
Trusted
Subscription From
Address:
Emails from this return address are allowed to add
new subsciptions (email address only), those have
to be contained in an additional {SmartSerialMailData}tag in the email content.
For example, if the email contains the tag
{SmartSerialMailData}
[email protected]{/
SmartSerialMailData}, SmartSerialMail will add the
SmartSerialMail
©1996-2015 by Joachim Marder e.K.
268
Program Sections
email address [email protected] to the
collecting recipients list (the sender e-mail address
will be ignored in this case).
How to Process
Subscriptions
Please take a look at the General Settings.
Leave processed
messages on
server
Leaves the processed mail on the mail server.
Delete processed
messages from
server
Deletes the processed mail from the mail server.
Forward
processed
messages to
address
Forwards the processed mail to a mail address
before deleting them from the server.
The address in this box will be checked during input
and one of the following three icons could be shown:
The address is formally correct.
Note:
SmartSerialMail will only test if the address was entered in the
correct format. The email address will not be verified!
The email address you entered is formally correct, but some
programs/providers may regard it as incorrect.
No email address was entered or the email address is formally
incorrect.
Remove messages
after forwarding
from server
8.7.2.5
If this option is set, the forwarded mails will be
deleted from the mail server.
Cancellations
In this tab you can manage your cancellations.
Note:
Returns are only available in the Enterprise Edition.
You can find a detailed comparison between the Small Business Edition and
the Enterprise Edition here.
SmartSerialMail
©1996-2015 by Joachim Marder e.K.
269
Program Sections
SmartSerialMail scans the subject line of a received mail and tags this mail as
cancellation if the subject
contains a specified term (usually a word like 'unsubscribe').
Cancellation Options
Collect
Cancellations
If this option is set, the addresses of the bounced
mail will be sorted out from your actual profile and
further processed as stated.
Handle as
cancellation if
subject contains:
Specifies the keyword for identification of a
cancellation message.
Collect into:
If this option is set, the addresses of the
cancellations will be collected into a separate list and
further processed as stated. The original list of
recipients won't be changed.
Remove from:
If this option is set, the addresses of the
cancelaltions will be deleted right away from your
list of recipients.
SmartSerialMail
©1996-2015 by Joachim Marder e.K.
270
Program Sections
Note:
We recommend to collect the addresses of the
cancellations into a separate list for later processing.
Failure analysis and data security is much easier
this way.
Trusted
Cancellations
From Address:
E-mails from this return address are allowed to
cancel subscriptions, those have to be contained in
an additional {SmartSerialMailData}-tag in the e-mail
content.
For example, if the e-mail contains the tag
{SmartSerialMailData}
[email protected]{/
SmartSerialMailData}, SmartSerialMail will remove
the email address [email protected] from
the collecting Recipients List (the sender e-mail
address will be ignored in this case).
How to Process
Unsubscriptions
Please take a look at the General Settings.
Leave processed
messages on
server
Leaves the processed mail on the mail server.
Delete processed
messages from
server
Deletes the processed mail from the mail server.
Forward
processed
messages to
address
Forwards the processed mail to a mail address
before deleting them from the server.
The address in this box will be checked during input
and one of the following three icons could be shown:
The address is formally correct.
Note:
SmartSerialMail will only test if the address was entered in the
correct format. The email address will not be verified!
The email address you entered is formally correct, but some
programs/providers may regard it as incorrect.
SmartSerialMail
©1996-2015 by Joachim Marder e.K.
271
Program Sections
No email address was entered or the email address is formally
incorrect.
Remove messages
after forwarding
from server
8.7.2.6
If this option is set, the forwarded mails will be
deleted from the mail server.
Log
In the log you can see the processed transactions and analyze potential
sources of errors.
Any retrieve of returns will be logged.
Note:
If an error is shown in the log, check your settings and have a look at
the common error entries in the FAQ.
Note:
Returns are only available in the Enterprise Edition.
You will find a detailed comparison between the Small Business Edition and
the Enterprise Edition here.
SmartSerialMail
©1996-2015 by Joachim Marder e.K.
272
Program Sections
Log
Clear
Clears the log file.
Note:
Deletion starts after confirming the security query.
8.8
Refresh
Refreshes the log window.
Copy
Copies the current log to clipboard.
Save
Saves the current log to file.
Print
Prints the current log.
Quick Parts
Here you can manage your commonly used text passages including images.
Note:
This feature is only available in the Enterprise Edition.
You can find a detailed comparison between the Small Business Edition and
the Enterprise Edition here.
Editing text or inserting images works just like in a common word processor.
Insert the quick part under '
part should be shown.
Content' where the text passage of your quick
You can type it manually or by click on '
Check the quick part under '
SmartSerialMail
Insert quick part'.
Preview'.
©1996-2015 by Joachim Marder e.K.
273
Program Sections
Quick Part functions
Quick part Menu
On the left side of SmartSerialMail you will find the
quick part menu. In this menu all created quick parts
are listed. To select a quick part just click on the
corresponding entry in the list.
Description:
Enter a short description of the quick parts content
and/or purpose here.
The description is then shown under '
Insert quick part'.
Content' - '
This box is optional. As long as the box remains
empty, a short help text will be displayed.
Category:
Assign the quick part to a category.
For each category a folder is created under '
Content' - '
Insert quick part' where the
corresponding quick parts are shown.
This box is optional. As long as the box remains
empty, a short help text will be displayed.
Save
SmartSerialMail
as
global If this option is set, the quick part is available in all
©1996-2015 by Joachim Marder e.K.
274
Program Sections
quick part
sender profiles and messages.
If this option is not set, use of the quick part is
restricted to the current sender profile.
HTML
The designer in SmartSerialMail offers the opportunity to create or modify
an HTML quick part.
Several options will help you create an HTML quick part:
Insert images, links or tables to spice up your quick part to easily and
comfortably personalize your emails.
With the ability to turn off the HTML preview mode you can decide if you
may use the editor or if you may only work in the HTML source code of an
email.
Please note that changes made in the designer will automatically change
the source code.
In HTML-view, you are able to chose one of the following subcategories:
· Designer
· Source Code
· Used Images
· Links
SmartSerialMail
©1996-2015 by Joachim Marder e.K.
275
Program Sections
Plain Text
The text editor offers basic word processing functionality.
You can enter a plain text quick part in the text editor or convert a HTML
quick part into a plain text quick part.
Note:
Further information about quick parts can be found at:
· Basics -> Personalizing Email Content
· Tutorial -> Tutorial 6: Create a newsletter with subscription and
cancellation functions
8.8.1
Menubar
In this chapter the toolbars available under '
Quick parts' are explained.
Home
The 'Home' toolbar contains the standard operations like Saving, Deleting,
Clipboard functions, Edit functions and Display functions.
Import / Export
This toolbar provides the operations to import or export files.
Edit
This toolbar provides the operations to insert elements like pictures or links.
SmartSerialMail
©1996-2015 by Joachim Marder e.K.
276
Program Sections
Options
This toolbar provides Clean Up, Convert, Image, Mail and View functions for the
Content.
Placeholders
This toolbar provides the operations to insert elements like quick parts.
Table Tools
In this tab you can modify the table, insert and delete rows and columns, split
or merge cells and change the alignment of text or objects in the table
Picture
This tab provides Image options and Image Upload functions.
Format
Provides options for general Imageoptions like Image Source, Alternate Text,
Layout, Size oder Border.
Help
This toolbar contains all Help
8.8.1.1
Home
The 'Home' toolbar contains the standard operations which can be used in
most of the steps.
Here you can find the general operations like Save, New or Print on the Home
Tab.
General
SmartSerialMail
Save
Saves the the current quick part.
New
Creates a new empty quick part.
Save as
Creates a copy of the currently selected quick
part.
Delete
Deletes the currently selected quick part.
Rename
Renames the currently selected quick part.
Print
Prints the currently opened quick part.
History
Opens the change-history. With this option you
can restore previous versions from a backup.
©1996-2015 by Joachim Marder e.K.
277
Program Sections
Clipboard
Paste
Pastes the content of the clipboard (optionally as
plain text only).
Copy
Copies the selection to the clipboard.
Cut
Cuts the selection to the clipboard.
Edit
Find
Find
Finds the search term in the context.
Find next
Finds the next occurrence of the search term.
Find previous
Finds the previous occurrence of the search term.
Replace
Finds the search term and replaces it with
another.
Undo
Undo the last change.
Redo
Redo the last change.
Select All
Selects all in the selected field or context.
Clear Selection
Clears the selection.
HTML
SmartSerialMail
©1996-2015 by Joachim Marder e.K.
278
Program Sections
Show tags
Displays the tags in the current content.
Show border
Displays the guides of the tables.
Editor
Edit External
8.8.1.2
Open content in external editor, set in options.
Import / Export
The "Import file" and "Export file" groups contain all functions regarding
importing or exporting quick parts.
In addition you can find the clipboard operations and things like Undo and
Redo here.
Import from Template
Imports the content of the mail from a
selection of templates.
Import
Import File
Imports a text, html, e-mail, Microsoft
Word document or Microsoft Publisher
document to SmartSerialMail.
Import Word
Imports content from a Microsoft Word
file.
Import EML
Imports content from
Outlook EML filei.
Import HTML
Imports content from a HTML file.
a Microsoft
Export File
SmartSerialMail
Export
Exports content as HTML file.
Export with Images
Exports content as an HTML file
©1996-2015 by Joachim Marder e.K.
279
Program Sections
including all images.
8.8.1.3
Edit
The 'Edit' toolbar helps you create an email. It enables you to insert hyperlinks
as well as other elements into your email.
Editor
Edit External
Open content in external editor, set in
options.
Font
Change the font of the text.
Font Size
Change the font size of the text.
Bold
Applies the bold formatting.
Italic
Applies the italic formatting.
Underline
Applies the underlined formatting.
Strikethrough
Applies the strikethrough formatting.
Subscript
Applies the subscript formatting.
Superscript
Applies the superscript formatting.
Highlight
Formats the marked text as if it had
been marked with a highlighter.
Font color
Changes the color of the selected text.
Font
Page Properties (available through click on
SmartSerialMail
)
©1996-2015 by Joachim Marder e.K.
280
Program Sections
Title
Here you can define a title for your
page.
Background Image
Here a background image can be set
for the page.
Default Font
This defines the default font for the
page.
Default Colors
Here you can set the default colors for
text, the background, links, visited links
and active links.
Paragraph
SmartSerialMail
Bullet point
Start an enumeration.
Numbering
Start a numbered list.
Increase indent
The indent level of the paragraph
larger.
©1996-2015 by Joachim Marder e.K.
281
Program Sections
Decrease indent
Decrease the indent level of the
paragraph.
Align left
Align text left.
Align center
Align text center.
Align right
Align text right.
Align justify
Spaces out all words in all lines such
that the first and last words align with
the respective margins.
Insert Line
TRANSLATE: Eine Linie in die nächste
Zeile einfügen.
HTML
Show tags
Displays the tags
content.
in the current
Show border
Displays the guides of the table.
Hyperlink
Insert Link
Inserts a hyperlink at the position of the
cursor.
Insert Bookmark
Inserts a bookmark at the position of
the cursor.
Elements
SmartSerialMail
Add File
Adds a file as an attachment.
Image
Inserts an image at the position of the
cursor.
©1996-2015 by Joachim Marder e.K.
282
Program Sections
Table
8.8.1.4
Inserts a table at the position of the
cursor.
Options
The 'Options' toolbar provides operations to simplify handling content.
Use the Clean Up feature to remove formatting, styles and unknown tags from
your quick part.
The Import Export group contains all functions regarding importing or
exporting email content.
In the View tab you can switch between text, html or source view.
The HTML tab allows you to reveal tags or show table borders.
Clean Up
Remove
Formatting
Removes all formatting information from the
quick part.
Remove Styles
Removes all style information from the quick part.
Remove
Unknown Tags
Removes unknown tags from the quick part.
Image Files
Change
Image
Base Path
Changes the base path of all images.
Copy Images
Copies all images from your email into a new
folder.
You can use this function if you have moved
already inserted images into another folder.
Please note that base path changes, too.
Convert Content
Auto
SmartSerialMail
Generate
Automatically generates the Plain Text from
©1996-2015 by Joachim Marder e.K.
283
Program Sections
Plain from HTML
HTML content of the mail. This is the default
option.
Generate Plain Generates the Plain Text part out of the HTML
part
from HTML
Generate HTML Generates the HTML part out of the Plain Text
part
from Plain
Mail Options
Note:
These functions are not available under '
Quick parts'.
Mail is HTML
Defines the email as HTML
Mail is Plain text
Defines the mail as Plain Text mail. No HTML
part will be created.
General Options
In the 'Advanced Mail Options Dialog' you can
change certain options of the mail.
Advanced Mail see "General Options"
Options Dialog
Missing Elements
Do not
Mail
Send If this option is checked, SmartSerialMail will not
send the mail if an attachment is missing
Ignore and send if this option is checked, SmartSerialMail will
send the mail even if an attachment is missing
Mail
SmartSerialMail
©1996-2015 by Joachim Marder e.K.
284
Program Sections
View
HTML
Shows the HTML view of the email.
Plain text
Shows the Plain Text view of the email.
Source code
Shows the Source Code of the email.
Attachment
Shows all attachments to the mail in a table view.
Note:
This function is not available under '
parts'.
Quick
HTML
8.8.1.5
Show
tags
Displays the tags in the current content.
Show
bord
er
Displays the guides of the table.
Placeholder
Placeholder
SmartSerialMail
Recipient
s Field
Inserts a predefined placeholder referring to columns of
the current recipients list at the position of the cursor.
Profile
Value
Inserts a predefined placeholder referring to the profile at
the position of the cursor.
Functions
Inserts a predefined placeholder referring to functional
values, e.g. date or time, at the position of the cursor.
©1996-2015 by Joachim Marder e.K.
285
Program Sections
Overview over the individual functions:
· Date {%Date()%}:
Defines a placeholder, which will be automatically
replaced by the current date formatted as dd.mm.yyyy in
the email.
Example: Returns the current date in standard format
(dd.mm.yyyy), e.g. 24.12.2012.
· Time {%Time()%}:
Defines a placeholder, which will be automatically
replaced by the current time formatted as hh.mm.ss in the
email.
Example: Returns the current time in standard format
(hh::nn:ss), e.g. 08:05:10.
· Recursive Placeholder {r}placeholderorfunction{/r}:
Defines a recursive placeholder which may be used in
correlation with other placeholders to combine more than
one (placeholder-)function. SmartSerialMail processes the
chosen placeholder/placeholderfunctions from the inside to
the outside.
Example:
Assuming you have a recipients list with an additional row
called "language" in which, depending on the recipient,
contains either "english" or "german". Additonally you have
created two quick parts called "salutation_english" with
content "Sir/Madam", as well as "salutation_german" with
content "Herr/Frau".
You're now able to use a recursive placeholder like "{r}
{%salutation_{%language%}%}{/r}" in your mail
content. It will provide the proper salutation for the
matching language.
For this SmartSerialMail will first analyze the innermost
placeholder "{%language%}" and substitutes it with the
language of the current recipient in the chosen recipients
list. So SmartSerialMail will now get
"{r}{%salutation_english%}{/r}" or "{r}{%
SmartSerialMail
©1996-2015 by Joachim Marder e.K.
286
Program Sections
Overview over the individual functions:
salutation_german%}{/r}" as interim result.
In the following step the actual placeholder, which is now
"salutation_english" or "salutation_german" will be
replaced as usual.
As output we'll now get "Sir/Madam" or "Herr/Frau",
depending on the dissolved placeholder.
· Contains {r}{%contains(placeholder, contains)%}{/r}:
Defines a placeholder function which checks for a given
placeholder if it contains a specific value(contains). If it
does, the function will return the value "True", otherwise
the value "False".
Example: {r}{%contains({%First_name%}, Dr.)%}{/r},
here SmartSerialMail checks if the first name of the
current recipient contains the title "Dr.", in this case
SmartSerialMail returns "True", otherwise "False".
· Replace {r}{%replace(placeholder, search,
replace)%}{/r}:
Defines a placeholder function which looks up a specific
value(search) in a given placeholder and replaces all
occurrences of it a by another value(replace).
Example: {r}{%replace({%First_name%}, Max,
Tom)%}{/r}, here SmartSerialMail seeks for "Max" in the
first name of the current recipient an replaces it with
"Tom".
· Substring {r}{%substr(placeholder, start, length)%}{/
r}:
Defines a placeholder function which extracts a substring
from a given placeholder beginning at a desired start
position with a specific length.
Example: {r}{%substr({%First_name%}, 5, 3)%}{/r},
here SmartSerialMail returns the next 3 characters
beginning from the 5th letter of the first name of the current
recipient, e.g. for "Johnson" SmartSerialMail would return
"son".
· Trim {r}{%trim(placeholder)%}{/r}:
SmartSerialMail
©1996-2015 by Joachim Marder e.K.
287
Program Sections
Overview over the individual functions:
Defines a placeholderfunction which trims all whitespaces
at the beginning and the end of a given placeholder.
Example: {r}{%trim({%Email%})%}{/r}, here
SmartSerialMail removes all potential occurring blanks
before and after the e-mail address of the current
recipient, e.g. " [email protected]" wird zu
"[email protected]"
· Uppercase {r}{%uppercase(placeholder)%}{/r}:
Defines a placeholder function which converts all
lowercase characters of a given placeholder into
uppercase characters.
Example: {r}{%uppercase({%First_name%})%}{/r},
here SmartSerialMail converts all lowercase letters in the
first name of the current recipient into uppercase letters,
e.g. "Max" would be converted to "MAX".
· Lowercase {r}{%lowercase(placeholder)%}{/r}:
Defines a placeholder function which converts all
uppercase characters of a given placeholder into
lowercase characters.
Example: {r}{%lowercase({%First_name%})%}{/r},
here SmartSerialMail converts all uppercase letters in the
first name of the current recipient into lowercase letters,
e.g. "Max" would be converted to "max".
· Date (formatted) {r}{%date(dateformat)%}{/r}:
Defines a placeholder function which returns the current
date formatted with the desired date format,
e.g. dd.mm.yyyy.
Possible formatting strings:
y
= Current Year with last 2 digits
yy
= Current Year with last 2 digits
yyyy
= Current Year as 4 digits
m
= Current Month number no-leading 0
mm
= Current Month number as 2 digits
mmm
= Current Month using short day names (Jan)
mmmm
= Current Month using long day names
SmartSerialMail
©1996-2015 by Joachim Marder e.K.
288
Program Sections
Overview over the individual functions:
(January)
d
dd
ddd
dddd
(Sunday)
ddddd
dddddd
.
= Current Day number no-leading 0
= Current Day number as 2 digits
= Current Day using short day names (Sun)
= Current Day using long day names
= Current Day in short date format
= Current Day in long date format
= Current Date separated by "."
Example:
{r}{%date(mm.dd.yyyy)%}{/r}, here SmartSerialMail
returns the current date formatted as mm.dd.yyyy,
e.g. 12.24.2012.
Some more examples:
d.m.y
= 1.1.12
dd.mm.yy
= 01.01.12
ddd d mmm yyyy = Sun 1 Jan 2012
dddd d mmmm yyyy = Sunday 1 January 2012
ddddd
= 01.01.2012
dddddd
= 01 January 2012
· Time (formatted) {r}{%time(timeformat)%}{/r}:
Defines a placeholder function which returns the current
time formatted with the desired time format,
e.g. hh:nn:ss.
Possible formatting strings:
h = Current Hour number no-leading 0
hh = Current Hour number as 2 digits
n = Current Minute number no-leading 0
nn = Current Minute number as 2 digits
s = Current Second number no-leading 0
ss = Current Second number as 2 digits
z = Current Milli-sec number no-leading 0s
zzz = Current Milli-sec number as 3 digits
t = Current time in short time format
tt = Current time in long time format
: = Current time separated by ":"
am/pm
a/p
SmartSerialMail
= Use after "h" gives 12 hours + am/pm
= Use after "h" gives 12 hours + a/p
©1996-2015 by Joachim Marder e.K.
289
Program Sections
Overview over the individual functions:
ampm
= Gives 12 hours as 2 digits for hh and with
no-leading 0 for h
Examples: {r}{%time(hh:nn)%}{/r}, here
SmartSerialMail returns the current time formatted as
hh:nn, e.g. 01:02.
Some more examples:
hham/pm = 01am
t
= 01:02
tt
= 01:02:03
hh:nn:ss:zzz = 01:02:03:004
· MD5 Hash {r}{%md5(placeholder)%}{/r}:
Defines a placeholder function which calculates the hash
value of a given placeholder using the Message-Digest 5
algorithm.
Example: {r}{%md5({%Email%})%}{/r}, here
SmartSerialMail returns the MD5 hash value ensuing from
the e-mail address of the current recipient.
Links
Inserts a predefined placeholder
unsubscribe the newsletter.
to subscribe
or
Note:
To use the placeholders "Subscription" and
"Unsubscription", you need to adjust the settings for
Returns.
Important points are:
'Incoming Server Options'
'Subscriptions'
'Unsubscriptions'
Condition
al
Placehold
er
SmartSerialMail
Inserts a placeholder with conditions which refer to the
columns of the current recipients list.
You have to enter the value to match, the content for this
case, and a default content for not matching entries.
©1996-2015 by Joachim Marder e.K.
290
Program Sections
8.8.1.6
Table Tools
After inserting a table in your content, you can access the table options in the
'Table Tools' toolbar.
In this tab you can modify the table, insert and delete rows and columns, split
or merge cells and change the alignment of text or objects in the table.
Table
Modify Table
Opens an Options dialog to modify the selected
table.
Rows and Columns
Delete
Deletes the currently selected row or column.
Insert
Above
Row Inserts a row above the currently selected line.
Insert
Below
Row Insert a row below the currently selected line.
Insert
Right
Column Inserts a column on the right side of the currently
selected column.
Insert
Left
Column Inserts a column on the left side of the currently
selected column.
Merge
Merge Cells
Merges the currently selected cells.
Split Cells
Splits the currently selected cells.
Text Layout
SmartSerialMail
©1996-2015 by Joachim Marder e.K.
291
Program Sections
Text Layout
In this group you can choose how text and
images should be arranged in the table.
Your options are:
· Top and Left
· Top and Center
· Top and Right
· Middle and Left
· Middle and Center
· Middle and Right
· Bottom and Left
· Bottom and Center
· Bottom and Right
Font
SmartSerialMail
Font
Change the font of the text.
Font Size
Change the font size of the text.
Bold
Applies the bold formatting.
Italic
Applies the italic formatting.
Underline
Applies the underlined formatting.
Strikethrou
gh
Applies the strikethrough formatting.
Subscript
Applies the subscript formatting.
Superscript
Applies the superscript formatting.
Highlight
Formats the marked text as if it had been marked
with a highlighter.
Font color
Changes the color of the selected text.
©1996-2015 by Joachim Marder e.K.
292
Program Sections
Absatz
Bullet point
Start an enumeration.
Numbering
Start a numbered list.
Incrase ident
The indent level of the paragraph larger.
Decrase ident
Decrease the indent level of the paragraph.
Align left
Align text links.
Align center
Align text center.
Align right
Align text right.
Align justify
Spaces out all words in all lines such that the first
and last words align with the respective margins.
HTML
8.8.1.7
Show tags
Displays the tags in the current content.
Show border
Displays the guides of the table.
Picture
With the 'Picture' toolbar you can manage all images used in an email.
You can also upload images to an FTP server and send embedded links
instead of the original images, thus reducing the size of the email.
Image Files
Change
Image Base
SmartSerialMail
Replaces the base path for all used images.
©1996-2015 by Joachim Marder e.K.
293
Program Sections
Path
Copy
Images
Copies all used images.
Upload Images
8.8.1.8
Upload
selected
Images
All selected images will be uploaded to the server
defined in the web space options.
Mark all
images
All pictures in the table are selected.
Go to FTP
configuratio
n
Go to the web space options in "Profile".
Format
The 'Format' toolbar contains operations which can be used for formatting
images.
You can replace the selected image, change the alignment and the alternate
text, resize the image and set an image border in this toolbar. It also shows
the base path of your image.
Picture General
Image
Replace
Replaces the current image with another image.
Image
Source
Shows the base path of the current image.
Alternati
v Text
This text is shown in the Plain Text part.
Layout
SmartSerialMail
©1996-2015 by Joachim Marder e.K.
294
Program Sections
Image
Layout
In this group you can choose how your text and images
should be arranged in the table.
Your options are:
· Top
· Right
· Center
· Left
· Bottom
Size
height
Shows the height of the image in pixels.
width
Shows the width of the image in pixels.
Reset
Image
Resets the size of the image.
Border
width
8.8.1.9
Sets the width of the border.
Help
The "Help" toolbar contains any Help and Support functions of
SmartSerialMail.
It's separated in two categories, one Help part, which, among other things,
contains manuals, problem solutions and
useful information of the product, and an Update part which enables you to
check if new updates are available or to extend the
maintenance of this software.
Help
Help
SmartSerialMail
Opens the online help of SmartSerialMail.
©1996-2015 by Joachim Marder e.K.
295
Program Sections
Open PDF
manual
Opens the PDF Help of SmartSerialMail.
Frequently
Asked
Questions
Opens the FAQ section online.
Hide Hints
Actiavtes / deaktivates tooltips in SmartSerialMail
Updates
About
Shows information about SmartSerialMail, including
the version or the installation key.
Check for
Update
Opens the JAM Software homepage in your
webbrowser enabling you to extend your
maintenance period.
What is new?
Opens the list of the latest changes online.
Lizenz
8.8.2
Change
Installationk
ey
Allows you to change the license key
Extend
maintenance
Opens the JAM Software homepage in your
webbrowser enabling you to extend your
maintenance period.
Naming Conversion
Every quick part begins and ends with the percent symbol % without spaces.
Example:
The to insert a quick part named 'address' enter %address% in your email
SmartSerialMail
©1996-2015 by Joachim Marder e.K.
296
Program Sections
content.
The content of the quick part %address% will be inserted in the email
wherever %address% was entered under ' Content'.
Important:
The prefix 'profile' is reserved for future extensions of SmartSerialMail and
mustn't be used.
Predefined (global) quick parts are :
{%Last_name%}
Inserts the last name of the current recipient.
{%First_name%}
Inserts the first name of the current recipient.
{%Email%}
Inserts the mail address of the current recipient.
Predefined (global) functions are :
{%Date()%}
Inserts the current date.
{%Time()%}
Inserts the current time.
Predefined (profile dependent) quick parts are :
{%Profile_Name
%}
Inserts the name of the current sender profile.
{%
Profile_FromName
%}
Inserts the name stated as 'Display Name' in the
current senders profile.
{%Profile_From
%}
Inserts senders mail address as defined in the
current senders profile.
{%
Profile_ReplyTo
%}
Inserts senders reply to mail address as defined in
the current senders profile.
SmartSerialMail
©1996-2015 by Joachim Marder e.K.
297
Program Sections
8.8.3
{%
Profile_Signatur
e%}
Inserts senders mail signature as given in the
current senders profile.
{%
Link_Subscriptio
n%}
Inserts the
subscriptions.
{%
Link_Unsubscript
ion%}
Inserts the mail address for newsletter cancellations.
mail
address
for
newsletter
Current Quick Part
HTML
The designer in SmartSerialMail offers the opportunity to create or modify
an HTML email.
Several options will help you create an HTML email:
Insert images or tables to spice up your email or use conditional
placeholders and placeholders to easily and comfortably personalize your
emails.
With the ability to turn off the HTML preview mode you can decide if users
may use the editor or if they may only work in the HTML source code of an
email.
Please note that changes made in the designer will automatically change
the source code.
In HTML-view, you are able to chose one of the following subcategories:
· Designer
· Source Code
· Used Images
· Links
Plain Text
The text editor offers basic word processing functionality.
An email consists of a plain text part and an HTML part. SmartSerialMail
enables you to choose whether you want to want to create the plain text part
automatically from your email or enter it manually.
You can enter a plain text email in the text editor or let SmartSerialMail
SmartSerialMail
©1996-2015 by Joachim Marder e.K.
298
Program Sections
create plain text content from any HTML email.
8.8.3.1
HTML
Designer
Determines whether an HTML mail may be edited in
the designer or whether it may only be edited in the
source code.
Editor
The comfortable editor is one of the main
components of SmartSerialMail. Here you can
create, for example, newsletters containing images,
tables or quick parts before you send them via
SmartSerialMail.
Opens the external editor set in 'Options' in the
'File' menu, in which you can edit or create your
content externally.
Source Code
Determines whether an HTML mail can be edited
in the designer or whether it may only be edit in the
SmartSerialMail
©1996-2015 by Joachim Marder e.K.
299
Program Sections
source code.
Editor
Here you can design the email in HTML code.
Opens the external editor set in 'Options' in the
'File' menu, in which you can edit or create your
content externally.
Used Images
Browse
Opens a dialog in which you can select a file
manually.
Replace selected
Klick here to replace the selected image with the
content of the text box.
Table
Lists all images used in the email. You can jump to
the image location in the source code by doubleclicking on an entry.
Links
Replace Links
Click here to replace the selected link with the
contents of the text box.
Replace Parameters
Click here to replace the old parameters with the
changed ones.
Edit
Parameters
Table
SmartSerialMail
TrackingEdit the tracking parameters of the chosen link.
Lists all links used in the email. You can jump to the
link location in the source code by double-clicking on
an entry.
©1996-2015 by Joachim Marder e.K.
300
Program Sections
8.8.3.1.1 Designer
Determines whether an HTML mail may be edited in
the designer or whether it may only be edited in the
source code.
Editor
The comfortable editor is one of the main components
of SmartSerialMail. Here you can create, for example,
newsletters containing images, tables or quick parts
before you send them via SmartSerialMail.
Opens the external editor set in 'Options' in the 'File'
menu, in which you can edit or create your content
externally.
8.8.3.1.2 Source Code
Determines whether an HTML mail can be edited in
the designer or whether it may only be edit in the
source code.
Editor
Here you can design the email in HTML code.
Opens the external editor set in 'Options' in the
'File' menu, in which you can edit or create your
content externally.
SmartSerialMail
©1996-2015 by Joachim Marder e.K.
301
Program Sections
8.8.3.1.3 Used Images
Browse
Opens a dialog in which you can select a file
manually.
Replace selected
Klick here to replace the selected image with the
content of the text box.
Table
Lists all images used in the email. You can jump to the
image location in the source code by double-clicking
on an entry.
8.8.3.1.4 Links
Replace Links
Click here to replace the selected link with the
contents of the text box.
Replace Parameters
Click here to replace the old parameters with the
changed ones.
Edit
Parameters
Table
8.8.3.2
TrackingEdit the tracking parameters of the chosen link.
Lists all links used in the email. You can jump to the
link location in the source code by double-clicking on
an entry.
Plain Text
SmartSerialMail
©1996-2015 by Joachim Marder e.K.
302
Program Sections
The text editor offers basic word processing functionality.
You can enter a plain text quick part in the text editor or convert a HTML
quick part into a plain text quick part.
8.9
File
Data
SmartSerialMail Data
Settings
Current Database
Information
SmartSerialMail saves all data (profile,
recipients and content) to a database. You can
maintain, backup and restore the database
here.
Manage Database
Shows the database
dialog.
Backup Database
An access database
can be backed up to a
backup directory on the
local computer.
Restore Database
Select a previously
selected
access
database to restore the
database.
Presents a list of general information about the
currently selected database.
Database Type
Main
Location
The type of database.
DatabaseThe file path to the
location of the main
database.
Log Database Location The file path to the
location of the log
database.
SmartSerialMail
©1996-2015 by Joachim Marder e.K.
303
Program Sections
Options
Enable Spam Report in
Preview
Define whether the spam report should be
enabled in the preview.
Request status change
for already sent lists
Define whether the change in status for an
send list will be requested.
Request start sending on
entering "Send Mail"
Define whether an automatic sending request
shall be displayed after entering step '5.
Sending'.
Shutdown Sending
Application when idle
Define whether the sending application shall be
terminated after a sending operation.
Show Sending Applaction
Tray Icon
Switches the tray icon of the sending operation
on and off.
Copy attachments to
database
Define whether attachments of your e-mails
should be copied to the database or not.
Note:
If you use personalized attachments for many
recipients the size of your database can
increase tremendously. This will cause very
slow loading times or even sending or saving
errors. In this case it's best to turn this option
off.
Enable parallel
processing of sending
tasks
Define whether multiple sending operation can
be performed simultaneously.
External HTML Editor
Here you can set an external editor which is
accessible in '
Content' and allows you to
edit and create your e-mail content if you not
choose to use the build-in HTML editor.
Path to save HTML
content for external
editing
Sets the saving path for your HTML content for
external editing.
View
SmartSerialMail
©1996-2015 by Joachim Marder e.K.
304
Program Sections
Theming
Choose the color theme for SmartSerialMail:
· blue
· silver
· black
The blue color theme is the default selection.
Help
8.9.1
Support
Access the SmartSerialMailhelp, extend your
maintenance and check for updates.
About SmartSerialMail
General information about SmartSerialMail
such as the license number and customer ID.
You can extend your maintenance here.
Database
All data generated by SmartSerialMail (content, recipients, quick parts) is saved
to a database.
Backup Database.
Note:
This feature is only available when using an
Access database.
You should back up your SmartSerialMail databases regularly, in order to
protect against data loss.
From a backup you can restore the entire database easily.
Please make sure that all changes are saved and no sending tasks are running
before creating a backup.
To create a backup of your database proceed as follows:
1. Go to the "File" Menu.
2. Select "Data".
3. Click the button "Backup database".
4. Select a folder to which the backup should be saved.
5. Click "Select folder".
When the information window "Backup was successfully created" appears you
have created a backup copy of their database.
SmartSerialMail
©1996-2015 by Joachim Marder e.K.
305
Program Sections
Restore Database.
Note:
This feature is only available when using an
Access database.
In the event of data loss you can restore your database from a backup copy, if
one exists.
Please make sure that all changes are saved and no sending tasks are running
before creating a backup.
To restore your database from a backup proceed as follows:
1. Go to the "File" Menu.
2. Select "Data".
3. Click the Button "Restore Database".
4. Select the folder in which you previously saved the backup.
5. Click "Select Folder".
When the information window "Database recovery was successful" appears
you have restore your database.
Manage Database
General
Test Connection
Test the connection to your database.
Copy your current data to
the new database
If you select this option, all current data
(profiles, content, recipient lists etc.) will be
copied to the new database.
If you do not select this option, SmartSerialMail
will set up an empty database.
OK
All settings are saved and executed.
Cancel
The settings are not saved.
Database system
SmartSerialMail
©1996-2015 by Joachim Marder e.K.
306
Program Sections
Database Type
Select the type of database you are using:
Access
Select the Access file
you want to use under
the option 'File Name'.
MSSQL
An MSSQL database
provides
two
authentication options
to gain access to an
MSSQL server.
Connection
Server Name
Enter the name of the server the database is
located on.
Database
Enter the name of the database located on the
server.
Authentication
Windows
Your Windows
authentication is used
to log on to the server.
You do not need to
enter user name or
password.
SQL Server
Please enter username
and password of the
MSSQL account used
to authenticate access
to the server.
User Name
Enter a username with access to the selected
MSSQL database.
Password
Enter the password corresponding to the
username.
Filename
Filename
Enter the file path to the Access database to
use it.
Connection String
Textfield
SmartSerialMail
This text box shows you the connection string.
©1996-2015 by Joachim Marder e.K.
307
Program Sections
MSSQL Database
You can use an Access or MSSQL database to save your data.
An MSSQL database can be located on a server.
Files on an MSSQL database can be used by different users simultaneously.
To enable the use of an MSSQL database, an MSSQL database server with a
appropriate instance is required.
For an easy setup of an MSSQL database, SmartSerialMail comes with a
suitable installer.
Using this installer, you don't have to care about instance name of the
database or other administrative data.
If you want to use this installer, follow this tutorial: Tutorial 8: Installing a
connection to a MSSQL Database.
If you already have installed a database, follow these steps to connect
SmartSerialMail with an MSSQL database:
1. Go to the "File" Menu.
2. Select "Data".
3. Click on the "Manage Database" button.
4. In the next dialog choose "MSSQL Database" under "Database system"
at "Database Type".
5. Open the list of "Server Names".
6. Select your Server.
7. Open the List of "Server Instances".
8. Select your instance.
9. Select:
Windows Authentication
Your Windows authentication is used to
log on to the server. You do not need to
enter user name or password.
SQL Server Authentication
Please enter username and password
of the MSSQL account used to
authenticate access to the server.
10. Test your connection to the MSSQL server.
11. Choose whether the current data shall be copied to the new database or
not.
12. Confirm by clicking the "OK" button or abort the dialog by click the
"Cancel" button.
Access Database
SmartSerialMail
©1996-2015 by Joachim Marder e.K.
308
Program Sections
At the first start of SmartSerialMail an Access database is created.
Under database management you can replace this Access database with an
MSSQL database or another Access database.
If necessary, you can also terminate your connection to the MSSQL database
and use an Access database.
To connect SmartSerialMail with another Access database proceed as follows:
1. Go to the "File" Menu.
2. Select "Data".
3. Click on the "Manage Database" button.
4. In the next dialog choose "Access Database" under "Database system" at
"Database Type".
5. Click on the Open button to select the Access file to be used.
6. Test your connection with the "Test Connection" Button.
7. Choose whether the current data shall be copied to the new database or not.
8. Confirm by clicking the "OK" button or abort the dialog by click the "Cancel"
button.
SmartSerialMail
©1996-2015 by Joachim Marder e.K.
Advanced
310
Advanced
9
Advanced
In this section we address the advanced topics of SmartSerialMail.
Tracking with SmartSerialMail
SmartSerialMail Opt-In Form
This part includes all subjects which are related to the the supplied
SmartSerialMail Opt-In form.
It contains instructions how to configure, include and customize the form.
Amazon Simple Email Service (SES)
Signing outgoing E-Mails with S/MIME
Configure a connection to a MSSQL Database
9.1
Tracking with SmartSerialMail
Statistics regarding your mailings can be compiled in two different ways: The
open rate of your newsletters can be tracked with the help of images, tracking
solutions can collect data about clicked links in your content.
Track Open Rates
Tracking open rates means tracking how often your mailing has been opened
by recipients. To count how often an email has been opened you will have to
include an image in your email which is used only in said email and in no other
content. By monitoring the access rates your webserver provides you can
assess how often your email has been read.
This kind of tracking is not really exact for a variety of reasons. Not all users
load images in emails – in fact many users have configured their email
software not to load images automatically. In the case of many big online email
hosters, images are always cached; an image appearing in many different
emails will be loaded from the original server once and used again and again
when displaying the emails.
For these reasons, tracking open rates will always produce inaccurate results.
Most times link tracking is the better solution.
Track Links
SmartSerialMail
©1996-2015 by Joachim Marder e.K.
311
Advanced
Link tracking, i.e. measuring how often a link in your mailing has been clicked,
is a mighty tool. However, a link tracking solution (such as Google Analytics or
Piwik) needs to be installed on your website.
The tracking software presents different analysis options and enables you to
track conversions or goals, i.e. how many customers used the link to your
special offer and how many of those who clicked the link actually bought the
product.
To differentiate between the links in your mailing, a tracking code has to be
added to each link. Depending on the tracking software you use, different
codes are provided.
Tracking support in SmartSeriaMail
SmartSerialMail will help you implement both kinds of tracking.
To track open rates you need an image which is stored on your webserver and
accessible via internet. If you already have uploaded such images to your
website, you can insert them in your email content.
If not you can simply use images from your computer in the content and upload
them to your server via SmartSerialMail. The direct upload feature is not only
useful to generate statistics about image access, it also helps you keep your
emails small. Images stored on your webserver or on the internet in general will
not be sent with your emails but loaded only on the recipient’s machine.
To implement link tracking you will have to add link tracking codes to your email
content. SmartSerialMail offers a comfortable overview over all links used in
your email and helps you entering the required information for each link.
Activate the option ”Link Tracking” to have SmartSerialMail help you with the
creation of your tracking links. Select the tracking type you want to use.
Depending on the tracking solution you use on your website different tracking
parameters will be required.
9.2
SmartSerialMail Opt-In Form
Our supplied Opt-In form enables you to easily include a Opt-In form to your
website, through which users can subscribe to your e-mail service (e.g. a
newsletter).
The Opt-In form guarantees thereby, that the data of the subscriber is correctly
forwarded to your SmartSerialMail inbox, from they can be collected
automatically.
Requirements
Here you can check if you fulfill the necessary requirements for the Opt-In form
to work flawlessly on your website.
Overview: Opt-In Methods
SmartSerialMail
©1996-2015 by Joachim Marder e.K.
312
Advanced
An overview over some commonly used Opt-In methods.
Tutorial: How to include the Opt-In form
Instructions on how to include the SmartSerialMail Opt-In form on your website.
SmartSerialMail Configuration
Settings in SmartSerialMail to automatically collect subscriptions created by
the Opt-In form.
Opt-In Templates
Customization options of the SmartSerialMail Opt-In form and the subscription
and confirmation e-mail templates.
Advanced Settings
Advanced settings of the SmartSerialMail Opt-In Formular.
Create your own form
Describes the possibility and the necessary adjustments
scripts of the SmartSerialMail Opt-In form for your own form.
9.2.1
to use the php
Requirements
To use our Opt-In form you have to fulfill the following necessary
requirements:
· Your web server needs to be able to send e-mails
· PHP Version 4 or higher has to be installed
· SmartSerialMail has to be configured correctly, see the section
"SmartSerialMail Configuration" for details
9.2.2
Overview: Opt-In Methods
In this section you'll get an overview about the most commonly used Opt-In
methods and some of their legal issues for several countries.
SmartSerialMail
©1996-2015 by Joachim Marder e.K.
313
Advanced
Single Opt-In / Unconfirmed Opt In
Here the data submitted by the Opt-In form of a potentiell subscriber is directly
and without confirmation send to your SmartSerialMail inbox.
SmartSerialMail collects these subscriptions and transmits the included data
automatically into the configured recipients list.
This Opt-In method is not allowed in some countries (e.g. Germany), because
of the possible misuse for spam or unallowed advertising, since in this case a
third person could register the e-mail address
and the true owner will be subscribed to e-mail service (e.g. newsletter) without
his personal agreement.
Confirmed Opt-In
This is similar to the Single Opt-In / Unconfirmed Opt-In method with the
difference that after the direct automatic entry of the subscriber an additional
notification e-mail is send to the entered e-mail address.
It informs the owner of the e-mail inbox about the fact that he was entered for a
e-mail service (e.g. newsletter) and contains an Opt-Out or Cancellation link,
through which he could sign out it's e-mail address.
If he don't reacts to this mail and clicks on the link he will automatically receive
e-mails through the subscription for which he was entered. This Opt-In is also
not permitted in some countries like Germany because of the
possible misuse for spam or unallowed advertising, but in countries like the
USA this is a widely used and valid Opt-In method.
Double Opt-In
The Double-Opt-In method is two-step process. After the filled out Opt-In form
is submitted by a potentiell subscriber, a confirmation mail is been send
containing a link through which the owner of the submitted e-mail
address must declare his agreement to the subscription. When he clicks the
link he lands on a confirmation website and an e-mail with the data from the
form is transmitted to the SmartSerialMail inbox.
SmartSerialMail collects these subscriptions and enters the included data
automatically in the set recipients list. This method has the advantage that the
SmartSerialMail
©1996-2015 by Joachim Marder e.K.
314
Advanced
user who submitted the Opt-In form is verified as the true owner of
the e-mail address. Im some countries like Germany this is the only valid
method through which subscribers can subscribe to your e-mail service (e.g.
newsletter).
Additionally you should also send the IP-address of the one who submitted the
Opt-In data in the confirmation request mail. This is already automatically done
by the SmartSerialMail Opt-In form.
If you choose to use your own template for the confirmation mail you can add
the IP-address by adding the corresponding placeholder provided by the
SmartSerialMail Opt-In form script (see Opt-In Templates for more
information on this topic).
9.2.3
Tutorial: How to include the Opt-In form
Step 1: Configuration of the Opt-In form
Please follow these steps:
1. Before you can inlcude the form on your website, we first have to
configure the Opt-In form. In order to do this, please open the file
"user_config.php" located in the "optinssm"-folder (you can find this
folder in your SmartSerialMail installation folder). In this file we can
adjust the form fields which the SmartSerialMail Opt-In form will display
and their labels, you can also change the SmartSerialMail inbox form
which you want to collect your subscriptions.
Open the file with any editor of your choice, e.g. "WordPad".
2. First of all you can set the e-mail address of your SmartSerialMail inbox.
For this you have to adjust the following line of code, by changing the email address accordingly:
This is the e-mail address to which any of your subscription
confirmations will be send and from which you can later on let
SmartSerialMail automatically collect them.
SmartSerialMail
©1996-2015 by Joachim Marder e.K.
315
Advanced
Note:
You have to set "Trusted Subscriptions From Address" to the e-mail
address from which your mailserver sends the subscriptions to your
inbox. Otherwise SmartSerialMail could probably collect the wrong
subscriber data.
(For more information
>"Subscriptions")
see
chapter
"List
Management"-
3. In the next line you can configure the Opt-In form fields. This happens
by adding (or removing) comma seperated elements to the
“optin_form_fields”-array of the following form:
“SmartSerialMail placeholder variable name", e.g. "First_Name"
followed by an "equal"-sign and a "greater"-sign "=>” and the "FieldDescription", e.g. "Your first name:":
Please be aware, that the variable names of your SmartSerialMail
placeholder have to be exactly the same as the ones you use in
SmartSerialMail, and that they have to exist respectively.
If you for example have a recipients list which additionally has a row
which holds the phone number of your subscribers named "Phone_Number",
you have to it to the “optin_form_fields”-array as follows:
This w ill autom atically add a field w ith the nam e "Phone_Num ber" and the label
"Your phone num ber:" to the Opt-In form :
SmartSerialMail
©1996-2015 by Joachim Marder e.K.
316
Advanced
The order of the elements in the “optin_form_fields”-array is the same
as the order in which the Opt-In form will be created. This means, if your array
contains the fields Email, First_Name, Last_Name,
the Opt-In form will look like this:
so sieht Ihr Opt-In Formular später wie folgt aus:
If you have added all desired fields you can now pass to step 2 and
include the form in the website of your choice.
Step 2: Inclusion of the Opt-In form in your website
Please follow these steps:
1. Log in to your webserver via web-interface or ftp access. You can use
any ftp client software, like the free of charge program FileZilla. If you
have any questions concerning this, please contact your provider
directly.
Copy the whole content of the "optinssm"-folder to the folder of your
web server which contains the website in which you want to integrate
the Opt-In form (e.g. "htdocs"):
SmartSerialMail
©1996-2015 by Joachim Marder e.K.
317
Advanced
2. Copy the following code to the position in your html or php file, at which
you want to include the Opt-In form:
<?php include("./optinssm/subscription_form/subscription_form/
subscription_form.php")?>
Note:
If you changed the name of the folder which contains the Opt-In form or
it is located in another directory than "optinssm", you have to adapt the
link accordingly.
3. Change the file extension of your site from ".htm" or ".html" to ".php" if
necessary (right-click on the file, then choose "Properties):
4. If you now open the website in which you included the form with your
browser, the Opt-In form should be displayed:
Note:
Thanks to the transparent background color the Opt-In form will
automatically adapt to the design of your website.
SmartSerialMail
©1996-2015 by Joachim Marder e.K.
318
Advanced
9.2.4
SmartSerialMail Configuration
To enable SmartSerialMail to automatically collect subscriptions created by the
Opt-In form and to add their subscriber information to the recipients list, you
have to configure the returns options in SmartSerialMail as follows:
At first you have to set the field "Handle as subscription if subject
contains:" auf "Subscribe me" or to the subject you may have set in the
"default_settings.php" file (See section Advanced Settings for more
information).
Now enter enter the e-mail address from which your web server sends the
subscription mails to the "Trusted Subscriptions From Address:"-field:
At last choose the list in which you want to collect the subscriptions. Now
SmartSerialMail should be able to collect all subscriptions that were send by
the Opt-In form.
For more information about the collection of subscriptions, please read the
chapter Subscriptions.
9.2.5
Opt-In Templates
Customization of the Confirmation and Subscription email
You can change the appearance of the confirmation and subscription e-mail
which is send by the SmartSerialMail Opt-In form by editing the
“ssm_confirm.tpl” or “ssm_subscribe file in the "optinssm/templates/"
folder.
You can use the following placeholder in your confirmation/subscription e-mail
templates:
SmartSerialMail
©1996-2015 by Joachim Marder e.K.
319
Advanced
· {%Date()%}, this placeholder will be replaced by the current date.
· {%Time()%}, this placeholder will be replaced by the current time.
· {%First_Name%}, this placeholder will be replaced by the first name of the
subscriber.
· {%Last_name%}, this placeholder will be replaced by the last name of the
subscriber.
· {%Email%}, this placeholder will be replaced by the e-mail address of the
subscriber.
· {%Link_Subscription%}, this placeholder will be replaced by the subscription
link.
Note:
The placeholder described above are exactly the same as the ones used by
SmartSerialMail (see Quick Parts).
·
{%User_Ip%}, this placeholder will be replaced by the IP addess of the
user, who submitted the Opt-In form on your website.
·
{%SSM_Inbox%}, this placeholder will be replaced by the e-mail address of
your SmartSerialMail inbox, which is set in the “user_config.php” file (see
also Tutorial: How to include the Opt-In form).
·
{%Subject%}, this placeholder will be replaced by the subject which is set
for the confirmation or subscription mail in the “default_settings.php” file
(see also the section Advanced Settings).
Note:
The placeholder {%First_Name%} and {%Last_name%} can only be used if
they are also set in the “optin_form_fields”-array of the “user_config.php”
file.
See also Tutorial: How to include the Opt-In form.
It's possible to add completely new templates to this folder. In order to do this,
you only have to adjust the path to the corresponding template file in the
“default_settings.php” file, which is located in the "optinssm/config/" folder
(for more details on this topic see section Advanced Settings).
Customization of the SmartSerialMail Opt-In form
SmartSerialMail
©1996-2015 by Joachim Marder e.K.
320
Advanced
If you'd like to change the appearance of the SmartSerialMail Opt-In form, you
can do so by editing the HTML template "subscription_form.html" and the
CSS file "default.css" in the
"optinssm/subscription_form/" folder. If you like you can also use your own
CSS file (read the section Advanced Settings for more details).
To adjust the content all the placeholders described above can be used as
well. Additionally the following placeholders are used, too:
· [CSS], this placeholder will be replaced by the link to the CSS style sheet
which should be used. You can also edit the file “default_settings.php” to
use your own CSS file.
(read more about this in section Advanced Settings).
Note:
Delete the [CSS] placeholder only if you don't want to use CSS or to use the
already existing CSS style sheet of your website!
·
[Optin_Form_Fields], this placeholder will be replaced by the form fields of
your SmartSerialMail Opt-In form. You can edit the fields and their labels in
the “user_config.php” file.
(for more information read Tutorial: How to include the Opt-In form).
Note:
Only delete the [Optin_Form_Fields} placeholder if you want to create your own
form!
All templates are written in HTML. You can edit them like your webpages with
any text or HTML editor of your choice.
The standard CSS file “default.css” in the folder "optinssm/
subscription_form/" can be adjusted to change the appearance of the
SmartSerialMail Opt-In form.
If you want to know more about and how to use CSS, you can find a tutorial
regarding this topic on the following website: http://www.w3.org/Style/CSS/
learning.
9.2.6
Advanced Settings
In the folder "optinssm/config/" you will find a file named
“default_settings.php”. Here you can change the subject and the template of
SmartSerialMail
©1996-2015 by Joachim Marder e.K.
321
Advanced
the subscriber or confirmation e-mail, the path of the used CSS file and set the
automatically used prefix for the SmartSerialMail Opt-In form field names.
To edit the settings open the file with a text editor of your choice, like e.g.
"WordPad".
Editing of the subject and the template path of the
confirmation and subscription e-mail
The “default_settings.php”-file contains 3 sections. In the first section you
can change the settings of the subscription and confirmation e-mail, which is
send by the SmartSerialMail Opt-In form:
The constant "CONFIRMATION_SUBJECT" sets the subject of the
confirmation e-mail, which the subscriber gets after submitting the Opt-In form
with his data. The path which is set for the constant
"CONFIRMATION_TEMPLATE" defines the place at which the template for
the confirmation e-mail is located (by default this is the "ssm_confirm.tpl"
template which is located in the “optinssm/templates/” folder).
You can edit this if you like to use your own template (read more about this in
the section Opt-In Templates).
The constant "SUBSCRIPTION_SUBJECT" sets the subject of the
subscription e-mail, which is send to the SmartSerialMail inbox. Based on this
subject SmartSerialMail also detects subscription requests (For more
information see section SmartSerialMail Configuration). The path which is
set for the constant "SUBSCRIPTION_TEMPLATE defines the place at
which the template for the subscription e-mail is located (by default this is the
"ssm_subscribe.tpl" template which is located in the “optinssm/templates/”
folder).
SmartSerialMail
©1996-2015 by Joachim Marder e.K.
322
Advanced
You can edit this if you like to use your own template (read more about this in
the section Opt-In Templates).
Note:
If you'd like to change the appearance or content of the subscription or
confirmation e-mail, you can find instructions on how to do this in section OptIn Templates.
The constant "CONFIRMATION_TEXT" defines the text of the website to
which subscribers land after clicking on the confirmation link included in the
confirmation e-mail.
Tip:
It's also possible to use HTML or PHP code,
e.g. you can set the constant as follows to
redirect the subscriber to your own
confirmation website:
const CONFIRMATION_TEXT = "<?php
header('Location: http://yourwebsite.com/
your_confirmation_website.html'); ?>";
Editing the path of the used CSS file
In the next section you can set the path of the CSS file, which is used for the
SmartSerialMail Opt-In form:
By default the "default.css"-file is used which is located in the "optinssm
\subscription_form" folder. If you like to use your own CSS file you can set
the path to it here.
Read also the section Opt-In Templates for more information.
Editing the automatically added prefix of the form field
names
SmartSerialMail
©1996-2015 by Joachim Marder e.K.
323
Advanced
In the last section you can define the prefix which is automatically added to all
field names of the SmartSerialMail Opt-In form which are defined in the
“optin_form_fields”-array(for more information see Tutorial: How to
include the Opt-in form):
This prefix prevents possible conflicts with other field names of your website. If
you like to use your own form you HAVE to set this to an empty string as
follows::
Otherwise the SmartSerialMail Opt-In form won't work correctly. You can find
an instruction on how to use your own form in the section Create your own
form.
9.2.7
Create your own form
If you want to use your own Opt-In form you have to keep the following things in
mind:
First, it's absolutely necessary to set the constant "FIELDVAR_PREFIX" to an
empty string or this prefix will automatically added to the field name of your
form
In order to do so, open the file “default_settings.php” in the “optinssm/
config/”-folder, locate the FIELDVAR_PREFIX constant and change it as
follows:
After creating your own form you have to adjust the “user_config.php” as
descibed in Tutorial: How to include the Opt-In form and to add your fields
to the “optinssm_fields”-array.
At last set your form "action" to “./optinssm/php_scripts/opt-in.php" or the
link to the "opt-in.php"-script, if the folder was renamed or is located in another
directory.
After that set "method" zu "post":
Now your form should be able execute the SmartSerialMail Opt-In scripts and
to redirect the SmartSerialMail subscriptions correctly to your SmartSerialMail
inbox.
SmartSerialMail
©1996-2015 by Joachim Marder e.K.
324
Advanced
9.3
Amazon Simple Email Service (SES)
The Amazon SES (Amazon Simple Email Service) is an online service
enabling users to send emails. SmartSerialMail can send emails via Amazon
SES via an SMTP protocol.
The SES is a great tool for developers or companies aiming to send out a great
number of emails without having to support their own server infrastructure.
Amazon offers comprehensive documentation regarding the creation of an
SES/AWS account (http://aws.amazon.com/documentation/ses/).
The first part of this chapter illustrates how to use an existing Amazon SES
account to send emails with SmartSerialMail.
Read the second part of this chapter to learn how to receive your Amazon SES
SMTP server login credentials.
1. Connect SmartSerialMail to an Amazon SES SMTP
server
Please note:
You should be able to reach the Elastic Compute Cloud (EC2) via port 25, the
same port it uses to accept emails for sending. If you encounter problems with
the connection, you can use the ports 587 or 2587.
SmartSerialMail
©1996-2015 by Joachim Marder e.K.
325
Advanced
2. How do I receive my Amazon SES SMTP server login
credentials?
Please note:
Please use the comprehensive instructions provided by Amazon
(http://aws.amazon.com/documentation/ses/) to learn how to use the Amazon
SES efficiently.
When using the Amazon SES you should make sure that your emails reach
their prospective recipients.
For example, if you manage your own DNS server (Domain Name Service)
and use SPF (Sender Policy Framework) or sender ID records, you might want
to authenticate your domain with Amazon and implement the necessary
changes in your DNS records to make sure your emails will not be falsely
marked as spam. (Please find more detailed instruction in the documentation.)
If you are using an external email provider such as Yahoo, please contact the
provider to find out whether all necessary precautions have been taken.
1. Use your browser to access "https://
<AWSAccountNumber>.signin.aws.amazon.com/console" and log in
using your AWS account or your AWS identity.
2. Click on the Amazon SES button.
3. In the following window select "SMTP settings" (left side of the page, topic:
"Navigation").
SmartSerialMail
©1996-2015 by Joachim Marder e.K.
326
Advanced
4. Click on “Create My SMTP Credentials”.
5. Create your AIM user account to generate your login credentials.
6. Download your login credentials by clicking "Download Credentials".
9.4
Signing outgoing e-mails with S/MIME
Please note:
Please note: This feature is available in SmartSerialMail Enterprise Edition only.
SmartSerialMail
©1996-2015 by Joachim Marder e.K.
327
Advanced
Please note:
To sign your emails with S/MIME you will have to download the S/MIME
certificate from your email provider.
You will find an overview of your certificates under Windows by entering
"certmgr" in the search bar in the start menu and pressing Enter.
Follow these steps:
To download a digital S/MIME certificate, contact your email provider or your
administrator for further help.
1. Download the digital certificate and use the Windows Certificate Import
Wizard, which is executed by opening the downloaded certificate file. The
wizard will guide you through the import process of the certificate.
2. Start SmartSerialMail and select "
SmartSerialMail
Profile" in the Navigation.
©1996-2015 by Joachim Marder e.K.
328
Advanced
3. In the "Sender Information" check the box "Sign outgoing emails with S/
MIME".
Please note:
To use this option, at least one S/MIME certificate has to be installed on the
computer.
4. Select the certificate you want to use in the next window and click "OK".
5. Enter the address of the SMTP server in the preferences under "Outgoing
Mail Server Options". You will find this address on the internet site of your
email provider.
Please note:
After activating this option, "SMTP server" will be the only available selection
under "Outgoing Mail Server Options" in the profile settings.
9.5
Installing a connection to a MSSQL Database
Configure a connection to an MSSQL database
installed by the "JAM Software MSSQL Express
Installer":
Please note:
MSSQL Server 2012 has to be installed on your system to follow the steps
below. If this is not the case, please navigate through the Windows start menu
to Programs->SmartSerialMail and execute „MSSQL Express Installer“. Follow
the instructions of the installer to install MSSQL Server 2012.
Follow these steps:
1. Open SmartSerialMail and click File->Data->Manage Database.
2. In the new window, select „MSSQL Database“ as the database type.
3. SmartSerialMail will automatically detect the local instance of MSSQL Server
and will set the default settings for the connection.
If you kept the default database settings, you will not need to change the
configuration.
4. If you want to use the data from the previously connected database, please
select the option "copy the current database to the new database".
5. Click on "OK" to apply the settings.
The default values of the "JAM Software MSSQL Express Installer"
database are:
SmartSerialMail
©1996-2015 by Joachim Marder e.K.
329
Advanced
• Name of the MSSQL instance: "SSM_INSTANCE"
• Name of the database: "SSM_DB"
• MSSQL username: "ssm_user"
• Passwort "ssm_user": "smartSerial4Mail_835"
• Passwort for "SA" user: "ssm4smart_54"
Hint: For productive use you should change the password for the "SA"-User
and the MSSQL user "ssm_user".
We recommend using the "MSSQL Database Management Studio" for such
changes. You can download the software here:
http://www.microsoft.com/en-us/download/details.aspx?id=43351
Configure a connection to a your own MSSQL
database:
1. Open SmartSerialMail and click File->Data->Manage Database.
2. Select „MSSQL Database“ as the database type.
3. Please select the desired authentication mode and enter the required
settings.
Please select the database server and the desired database.
4. If you want to use the data from the previously connected database, please
select the option "copy the current database to the new database".
5. Click "Ok" to apply the settings.
Saving your data:
Follow these steps:
1. Start SmartSerialMail and navigate to File->Data->Backup database. A
new dialog appears.
2. Select the storage location you want to save the backup file to and click
"Save".
Restoring your data:
Follow these steps:
1. Start SmartSerialMail and navigate to File->Data->Restore database. A
new dialog appears.
2. Select the backup file you want to use to restore your data and click "Open".
SmartSerialMail
©1996-2015 by Joachim Marder e.K.
330
Index
-AActivation 13
Activation key 17
Address
delete 18
delist 18
sort 18
Address list 167, 179
Advanced
SmartSerialMail Opt-In Form 310, 311
Advanced Mail Options 220
Amazon 324
Amazon SES 324
Amazon Simple Email Service 324
AOL 25, 30
Attachment 71
Add Directory 192
Add File 192
Compress attached files 192
Dialog 192
Personalized Attachment 192
Remove 192
Authentication 25
Automatic parsing for additional subscriber
information 263
-Bbasics 66
Blacklist 190
Blacklist Settings 150
Blacklists 74, 167, 179
Bounce 18
Bounced mail 76, 102, 250, 256, 261
Bounces 76, 261, 272
Collect bounced mail 261
Collect into 261
Delete processed messages from server 261
Forward processed messagages to address 261
Leave processed messages on server 261
Remove from 261
Remove messages after forwarding from server
261
-CCancellation 79
Cancellations 76
Certificate 136, 326
SmartSerialMail
Changes in this version 8
Collect bounces and (un-)subscriptions 256
Collect bounces and (un-)subscriptions from Outlook
256
Collect Cancellations 150
Collect Confirmations 150
Collect Subscriptions 150
Color legend 167
Common errors 30
compatibility 227
Computer 13
Concat 203
Conditional placeholder 69, 71
Confirmation 78
Confirmations 76
Connection closed gracefully 25, 30
Contact 10
Contains 203
Content 192
Database Operations 192
File Operations 192
Content creation 298
Content from Microsoft Word 114
Contents 7
copy attachments to database 302
Copyright 10
create 74
Create newsletter 121
Creating a sender's profile 82
customer's area 37
-DDatabase 75
Database Connection 44
Database Navigator 230
Database Operations 167
Date 203
Date (formatted) 203
Days since 203
deal with bounced mail 76
Decode Base64 203
Decode HTML Entities 203
default value 20
Delivery Receipt 136
Demo 17
different from preview 25
different version 13
Direct Delivery 143
Direct sending 25
drop-down box 256
Duplicates 181, 189
©1996-2015 by Joachim Marder e.K.
331
Index
Duplicates 181, 189
Remove 189
History 8
HTML 20, 220
-E-
-I-
Edit recipient lists 115
EML 20
Encode Base64 203
Encode HTML Entities 203
EWS 143
Examples 66, 68, 68, 69, 69, 70, 70, 71, 71, 72, 74
Exchange 13
Exchange Server Toolbox 220
Extended Sender Information
BCC 131
CC Address 131
CC Name 131
Collapse 131
Custom Headers 131
Expand 131
Priority 131
Sensitivity 131
external database 191
External editor 197
If...then... 203
Import 181
Import from Template 197
Import Wizard
Comma Separated Values File
Database Connection 181
Microsoft Access File 181
Microsoft Excel File 181
Microsoft Outlook 181
Non formatted text file 181
Incomng Server Options 150
Individual links 70
Individual pictures 70
Individual salutation 69
Install 13
Installation 13, 37
Is Empty 203
-FF.A.Q. 13
File system operations
Filter 171
filter usage 74
Format 20
From Address 136
Full 17
Full Version 37
-GGeneral Settings 256
Delete unhandled message from server after
forwarding 256
Delete unhandled messages from server 256
Forward unhandled messages to Address 256
Leave unhandled messages on server 256
Gmail 33
Google-Analytics 310
-HHelp
129
SmartSerialMail
-JJAM Software
167
181
10
-LLanguage specific content 71
link external table 75
Link Tracking 155, 310
Links 298
Listmanagement 76
Listmanagement examples 76
Log 271
Lowercase 203
-MMail address color 167
Mail Options 220
Mail provider 33
Mail Server Options
Advanced Settings 131
SMTP Server 131
Test Connection 131
Maintenance 129
Managing What Comes Back
McAfee 25
102
©1996-2015 by Joachim Marder e.K.
332
Index
MD5 Hash 203
Missing Attachments 235
Missing Templates 235
multi-part 20
-NName 18
Norton 25
-Q-
-OOffice365 143
Open Rate 310
Open-Dialog 181
optin 311
Opt-In 311
optin form 311
Opt-In form 311
Ordering 10
Outgoing Server Options
Outlook 33, 256
Overview 7, 235
quick part 272, 276
Quickpart 68, 72
Quickparts 69
-R143
-PPassword 13
PC 13
Personalize 66
personalized attachment 107
Piwik 310
Placeholder 20, 66, 68, 179
Example 1 68
Example 2 69
Example 3 69
Example 4 70
Example 5 70
Example 6 71
Example 7 71
Example 8 72
plain-text part 220
POP3 256
POP3 Server
Advanced Settings 256
Password 256
Test Connection 256
User name 256
Preview 230
Preview in Mail Client
Operations 230
Priority 136
SmartSerialMail
problems 13
Productcategory 70
Profile
Properties 256
Profile Options 220
Profile specific 72
Program sections 127
Purchase 13
Purchasing 10
Read Notification 136
Recipient 68, 71
Blocked 167, 179
Change Status 167, 179
drop-down box 167, 179
Filter Lists 171
Import 167, 179
List Operations 167, 179
Search 167, 179
Sent 167, 179
Tools 167, 179
Unsent 167, 179
Recipient name 68
Recipientlists 73, 74
Recurring content 69
Recursive Placeholder 203
Recursive placeholders 124
Register 17
Registration 10
Relay access denied 25
Replace 203
Replacement 20
Returns 250, 256
-SSample content 197
Send Mail 242
Send Preview Mail to.... 230
Sender
Display Name 131
From Address 131
Information 131
©1996-2015 by Joachim Marder e.K.
333
Index
Sender
new profile 131
Reply address 131
Sender Profile
New 163
wizard 163
Sending 73, 74, 242
Sending limit 25, 33
Sending options
parallel processing 143
sequential processing 143
with a time delay 131
with time delay 143
Sending task 242
Sending Time 235
Sensitivity 136
SES 324
Settings 13
Signature 20, 220
Simple Email Service 324
Size Summary 235
SmartSerialMail Opt-In Form
Advanced Settings 320
Create your own form 323
Opt-In Templates 318
Overview: Opt-In Methods 312
Requirements 311, 312
SmartSerialMail Configuration 318
Tutorial: How to include the Opt-In form 314
SMIME 136, 326
SMTP 25, 131
smtp settings 33
SMTP-Server 143
Socket error 30
Sourcecode 298
statistics 163, 180
subscription 256
Subscriptions 76, 77, 250, 263
Collect into list 263
Collect Subscription Notices 263
Delete processed messages from server 263
Forward processed messagages to address 263
Leave processed messages on server 263
Remove messages after forwarding from server
263
Subscribe to list if subject contains 263
Substitute 20
Substring 203
System Requirements 37
SmartSerialMail
-TTemplate 20, 197
Templates 179
Category 272
Content 197
Description 272
import 197
Save as global template 272
Text substitution 20
Text tag 20
Text-Only View 301
The Menus 127
Time 203
Time (formatted) 203
Tracking Options 155, 310
Tracking Type 155, 310
Transfer 13
Trim 203
Tutorial
Tutorial 1 82
Tutorial 2 102
Tutorial 3 107
Tutorial 4 114
Tutorial 5 115
Tutorial 6 121
Tutorial 7 124
Tutorial: Signing outgoing e-mails with S/MIME
tutorials 81
326
-Uunable to relay 25
Uninstallation 42
Unlock 17
Unsubscribe 18
Unsubscription 18
Unsubscriptions 250, 268
Collect into 268
Collect Unsubscription Notices 268
Delete processed messages from server 268
Forward processed messagages to address 268
Leave processed messages on server 268
Options 268
Remove from 268
Remove messages after forwarding from server
268
Unsubscribe from list if subject contains 268
Update 13, 129
Uppercase 203
©1996-2015 by Joachim Marder e.K.
334
Index
Used Pictures
298
-VVariables 66
Version 17, 129
visualization 163, 180
-WWebspace Options
What's new? 8
155
-YYahoo
33
SmartSerialMail
©1996-2015 by Joachim Marder e.K.