1
Dialock Personnel
Table of contents
Table of contents....................................................................................................................1
1. Overview of the manual ..................................................................................................3
2. Overview of the Software ................................................................................................4
2.1.
Product information...............................................................................................4
2.2.
Functions................................................................................................................4
2.3.
Additional modules................................................................................................5
3. Installation........................................................................................................................6
4. Terminologies ..................................................................................................................7
5. Configuration of the program .........................................................................................8
5.1.
Selection of basic settings....................................................................................8
5.2.
View/hide the command bar .................................................................................8
5.3.
General settings.....................................................................................................8
5.4.
Advanced settings .................................................................................................9
5.4.1.
5.4.2.
5.4.3.
5.4.4.
5.4.5.
5.4.6.
5.4.7.
Set the functions for cashless payment ........................................................................................... 9
Setup rooms .................................................................................................................................. 10
Enter public holidays...................................................................................................................... 11
Daylight Saving Time (DST) .......................................................................................................... 11
Install the automatic backup .......................................................................................................... 11
Restore a backup........................................................................................................................... 12
Online settings ............................................................................................................................... 12
5.5.
Setup the printer ..................................................................................................12
5.6.
Dialock Service program.....................................................................................13
6. Operation........................................................................................................................14
6.1.
Basic operating principles ..................................................................................14
6.2.
Access/shutdown the program ..........................................................................14
6.3.
Login/logout a user..............................................................................................15
6.4.
Administrate groups............................................................................................15
6.4.1.
6.4.2.
6.5.
6.5.1.
6.5.2.
6.5.3.
6.5.4.
6.5.5.
6.5.6.
6.5.7.
Define/indicate groups ................................................................................................................... 15
Show the map of groups ................................................................................................................ 15
Program keys and access information ..............................................................15
Read out keys................................................................................................................................ 16
Create a new key........................................................................................................................... 16
Access the locking map ................................................................................................................. 18
Change a key................................................................................................................................. 18
Allocate a substitute key ................................................................................................................ 18
Delete a key................................................................................................................................... 18
Transfer cash amounts .................................................................................................................. 19
1
Table of contents
6.6.
6.6.1.
6.6.2.
6.6.3.
6.6.4.
6.6.5.
6.6.6.
6.6.7.
6.7.
System functions .................................................................................................19
Display the list of rooms................................................................................................................. 19
Protocol of operations .................................................................................................................... 19
Cash Balance ................................................................................................................................ 20
MDU-Function................................................................................................................................ 20
Terminal Log Protocol (Terminal audit trails) ................................................................................. 20
Key Balance................................................................................................................................... 20
Read keycode................................................................................................................................ 20
How to backup data/ restore data ......................................................................20
Index ......................................................................................................................................22
Copyright ..............................................................................................................................23
2
Overview of the manual
1. Overview of the manual
In this chapter you learn about the layout of the manual and how to use it effectively.
Overview of the contents of the individual chapters:
Chapter 2: Overview of the Software Dialock Personnel, the functions of the basic program
and the additional modules.
Chapter 3: Instructions on how to install the software. The initial installation is carried out by
Dialock specialists, so that you can also skip this chapter.
Chapter 4: Introduction of the terminologies and the writing methods which are used in the
instructions to configure and operate the program.
Chapter 5: Instructions to adapt the program to your requirements (program configuration).
Here you will learn for example, how to enter the quantity of the existing rooms.
Chapter 6: Detailed explanation how to operate the program. If any terminologies are not
clear in this chapter, please check chapter 4.
3
Overview of the software
2. Overview of the Software
2.1.
Product information
Dialock Personnel for Windows is an efficient, easy to use program. Basic knowledge of
Windows is sufficient to operate the program. With Dialock Personnel you program
electronic keys in the Dialock identification and locking system. With the keys (e. g. cards,
key fobs, or clips) you assign access authority (locking rights) to rooms.
Various access authorisations for user groups and individuals can be assigned. For
example, you assign group locking authorisations to a department for the joint offices, and
an additional authorisation to the manager for his own office. In the following chapters these
access authorisations are defined as group and individual locking authorisations. The
locking authorisations can be limited to a certain time period, it is possible for example to
allocate different locking authorisations for day and night.
The keys can be re-programmed as often as required. You simply enter information into the
program, e.g. when a key should allow the user access to which rooms, and how long the
key is valid. With the encoding station the information is written to the transponder key.
Together with the locking map Dialock Personnel creates an overview of the programmed
keys and their respective authorisations. The program stores this information in a file which
you can access at any time and print out if required.
Apart from the basic program to administrate the keys and rooms there are additional
modules which can be activated according to your requirements: "Cash", "Online" and "XPK"
(extended-personnel-key).
2.2.
Functions
Locking map
The locking map gives you in matrix format (chart format) an overview of all keys assigned
and the rooms to which the user has access with these keys.
The names of the keys are listed in the lines of the matrix, the columns show the rooms.
Coloured squares show which keys are assigned to which rooms.
The colour additionally defines the group or individual locking authorisation: blue squares
signify the individual locking authorisation, yellow squares group locking authorisations, and
orange squares are standing for XPK-rights.
Matrix, room list, and key list could be printed by clicking onto the respective input field.
Map of groups
The map of groups shows the authorisations for the defined groups in matrix format.
As with the locking map the groups are listed in the lines of the matrix and the rooms are
listed in the columns.
Yellow squares show which groups have access to which rooms.
Programming of the keys
The information a key should receive (name, locking authorisation ...) is entered in the
program Dialock Personnel. To write this information to the key you have to place the key on
the Encoding Station.
Validity period of the keys
The validity period of a key is also defined by the program. You have the choice between
unlimited validity or validity limited to a certain time period.
Online-Help
4
Overview of the software
Dialock Personnel has an Online-Help, which can be accessed in the program and is shown
on the screen. Help topics can be listed by their contents or alphabetically.
2.3.
Additional modules
Cash-less payment
With the additional module "Cash" keys can be used as cash-less payment method as well
as in their normal locking function.
With the Encoding Station you can write amounts of money to the keys but also display the
amount currently stored on the key. During the use at cash points a pre-set amount is
deducted by the Cash Terminal from the key.
This payment function is for example effective for the use of
•
vending machines
•
drink and food dispensers
•
canteen
•
leisure facilities
•
tanning beds
Online Module
The additional module "Online" is available to comfortably program wall terminals connected
in an access control network.. With this additional module, a PC can be connected directly
with up to 50 Dialock Wall-Terminals. Via this connection you can, among other things,
permanently update access rights but also lock and unlock the locking units from the PC.
Remote Module
The Remote Module expands the capabilities of the Online Module. Remote Module
ntegrates a TCP/IP interface to interconnect up to 2500 wall terminals in a network
administrated by the Dialock Software.
XPK Module (Extended Personnel Key Module)
The additional module "XPK" enables a comfortable way to administrate individual locking
authorisations.
5
Installation
3. Installation
The initial installation and system commissioning are carried out by Dialock specialists.
System conditions:
•
Microsoft Windows XP or Windows Vista
•
Pentium 300-MHZ-Processor or faster
•
128 MB RAM or more
•
1.5 GB free hard disk space or more
•
CD-ROM- or DVD-ROM Drive
•
internet access
•
one free USB port to connect the Encoding Station
Keep the Encoding Station unplugged
•
the software tells you when to connect the USB cable
To install the Software
1. Place the CD-ROM in the CD-ROM drive.
The installation is started automatically.
2. Follow the instructions on the screen
3. Connect the Encoding Station to the PC
6
Terminlogies
4. Terminologies
This chapter gives you a quick overview of the basic terminologies and functions of the
program. This information is required for all further chapters.
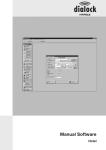
Menu bar and menu items
If you access Dialock Personnel the menu bar appears on the screen. The title bar shows
“Dialock Personnel”.
In the Menu bar the menu items are listed from left to right.
The terminologies which are listed when clicking on a menu item are also called menu
items.
The request in the instruction to click on "Program > Extended Settings" means, that you
have to click first on the menu item "Program" in the menu bar and then on the menu item
"Extended Settings" to carry out the function.
Some menu items can also be activated by keyboard shortcuts (hot keys). For example,
instead of clicking on "Keys" and then "Read key" you can press the key F3. The keyboard
shortcuts are shown next to the respective menu items.
Command bar
The command bar facilitates the quick and efficient operation of the program.
It lists menu items with easy-to-remember icons and offers quick access to the most
important functions.
Message fields, dialogue fields, registers, and further elements on the screen
A message field contains information about processes in the program.
In a dialogue field you can enter information and change settings
A dialogue field can contain the following elements:
•
Button
Via a button you open a further dialogue field or you exit the dialogue field.
•
Control box
You activate or deactivate the functions by clicking in the box. When you have activated
a function the box shows a tick.
•
Input field
If you click in an input field either a cursor appears and you enter the text or numbers,
or a further window opens where you can choose, for example, a date.
•
Dropdown list field
From a dropdown list field you select an element by clicking first into the list field and
then onto the element.
A selection of various dialogue fields, which are placed behind each other like index cards is
called index. Index cards contain the same elements as dialogue fields.
7
Configuration of the program
5. Configuration of the program
Dialock Personnel is configured by the Dialock specialist during the initial startup. You can
change the settings to adapt the program to your needs.
Please only make changes if you are certain about the effects they may cause!
In order to configure Dialock Personnel you need a login-key with administration
authorisations, for example the Master Key. The Master Key is generated during the first
access to the program by the Dialock specialist. Afterwards, you can assign administration
rights to additional keys (see section "Create a new key").
You select the language, the COM Port and the transponder type (key type) in the dialogue
window "Base settings".
Further settings such as the layout of the user interface or the type and number of rooms are
entered in the dialogue window "Advanced settings".
5.1.
Selection of basic settings
The "Base settings" are configured by the Dialock specialist during the initial startup. You
can access this menu any time if it is necessary to change the settings.
The pre-set transponder type (key type) in the basic settings is "DCK". Please do not
change this setting unless you use a different type of transponder.
5.2.
1.
To open the dialogue window "Base settings", click on "Program > Base Settings".
2.
Select the language in the dropdown list field "Language".
The program appears with all messages in the language you selected. The local
currency is not entered here but in the system settings of Windows (Regional Options,
please see the Windows user manual).
3.
Select the COM Port to which the Encoding Station is connected in the dropdown list
field "COM Port" or click on "COM Port auto-detect" if the system has to recognise the
COM Port itself.
4.
Select the transponder type In the dropdown list field "Type of transponder", (standard
setting is type "DCK").
5.
Select your data transfer device in the dropdown list field "Data transfer device" (e.g.
"MDU").
6.
Click on "Okay".
View/hide the command bar
The command bar allows quick and direct access to the most important functions of the
program. These functions are listed on the command bar and are marked with easy-toremember icons.
1.
Click on "View".
2.
Activate or deactivate the menu item "Command bar".
.
5.3.
General settings
The following settings are entered on the index card "General":
•
name of your company
•
automatic logout after a period of inactivity
8
Configuration of the program
•
•
•
maximum number of keys
control function
view/ hide menu items of the command bar
1.
To access the index card click on "Program > Advanced Settings".
2.
In the index select "General".
3.
Enter the settings as described below.
4.
Save your settings by clicking on "Okay".
Enter the object/company name
Ö Enter the company name in the input field "Name of object/company".
The name appears in the title bar of print outs.
Setting the timeout for automatic logout
After this period, Dialock Personnel automatically logs off the operator for security reasons.
If you leave the PC unattended no unauthorised party can access the program after this
period. To log in again a key with user authorisation (Login-Key) is required.
Ö
Specify the required time in the input field "Timeout for automatic logout [min]" (to
deactivate the automatic logout function: enter 0 minutes).
Enter the maximum number of keys
In total, you can issue this maximum number of keys to users. If there is no need to use
more than 1000 keys it is recommended to keep the pre-set figure. The maximum number of
keys which can be issued in one Dialock system is 30.000.
Ö
In the input field "max. keys" enter the maximum number of keys.
Log all operations in protocol
This program is able to record all programming processes to allow you to check these afterwards at any time.
Check for already programed keys
The program checks for example if keys you want to issue are already in use.
TrayICON
In use Dialock Personnel shows an icon in the notification area beneath the windows-clock.
TV7 Features
•
Display reading unit ID
The Terminal audit trails show the ID of the reading unit (e.g. at doors with inside and
outside reading unit)
•
Extended Personnel Key
This function is only avaiable if you use the additional XPK-module. It sets the possibility to use Extended Personnel Keys.
Show/ hide individual menu items in the command bar
Activate or deactivate the corresponding control box in the list field "Buttons in command
bar".
MDU authorisation from login level
This dropdown list field defines the level of user authorisation that is necessary to transfer
Data between Dialock Personnel und MDU.
5.4.
Advanced settings
5.4.1. Set the functions for cashless payment
This function requires the additional module "Cash".
The following settings are entered onto the index card "Cash".
9
Configuration of the program
1.
2.
3.
4.
In order to access the index card click on "Program > Advanced Settings".
In the index, select "Cash".
Enter the settings as described below.
In order to save your settings click on "Okay".
Set the kind of Cash-System
In the dropdown list field "Cash System" you can select not to use the Cash-System, to use
the Standard-System, or a Tariff System.
In the Standard System the same tariff applies to all users.
In the Tariff System up to four tariff groups can be defined, such as for example "Normal",
"Trainees", "Visitors", "Children". While programming, a key is allocated to one of these tariff
groups. For members of different tariff groups the system charges different amounts for
chargeable facilities.
Dialock uses the currency set in the system settings of Windows (Regional Options, please
see the Windows user manual).
Ö
Select the desired system in the dropdown list field "Cash System".
Select the minimum amount for payments
The "Cash-Unit" is the smallest chargeable amount. The smallest possible cash unit is 0.01.
If you have set the system settings of Windows to Dollar, 0.01$ appears in the input field.
This unit is useful if you charge individual pennies, otherwise e.g. 0.05 or 1.00 are suitable.
In the input field "1 Cash Unit", enter the required unit.
Set standard figures and multipliers in the cash dialogue field
For pay in and debit there is a cash dialogue field each. This field contains a key field, input
fields with standard figures for payin and debit as well as input fields with multipliers (to
convert amounts into foreign currencies, for example).
In the configuration mode, the key field is without any function. You can only enter standard
figures and multipliers.
1.
Click on "Pay in" or "Debit".
2.
In order to enter standard figures and multipliers click in the respective fields.
Enter tariffs in the tariff system
Enter tariffs (such as "Trainees") into the input fields (tariff 1-4).
5.4.2. Setup rooms
At the initial startup the Dialock specialist configures these settings in the application Dialock
Service. There are various types of rooms (i.e. office, conference room) and a list of the
existing rooms created.
Please only make changes if you are certain about the effects they may cause!
This information is entered on the index card "Rooms".
1.
In order to access the index card click on "Program > Advanced Settings".
2.
In the index select "Rooms".
Enter a path for the room data files
The path defines where the room data base is stored. You can use the pre-set path or select
another path.
10
Configuration of the program
Ö
If you want to change the path select a new one by clicking in the input field "Path
for room data files"
Define room types
1.
2.
Click on the Button "Configure" in the field "Types of rooms".
The application Dialock Service starts automatically.
Edit roomnames and roomnumbers
1. Click on the Button "Configure" in the field "Naming of rooms (numbers)".
2. The application Dialock Service starts automatically.
5.4.3. Enter public holidays
You can enter public holidays and delete individual or past public holidays. These public
holidays can be transferred to the terminal with the MDU, for example.
1.
Click on "Program > Advanced Settings" and select "Holidays" in the index.
2.
Click on "Dialock Service Program" to launch the application.
Enter public holidays into the list
Ö Click on "Add" or "Insert interval" and select the date in the calendar.
Delete past public holidays
Ö Click on "Delete passed dates".
Delete any public holidays
Ö
Highlight the date and click on the respective switch field.
Transfer the settings to the Terminals
To transfer holidays and daylight saving time data to the terminals, you can use an MDU or
a parameter key. Please use the corresponding button.
To exit Dialock Service click on "Okay".
5.4.4. Daylight Saving Time (DST)
These settings are configured by the Dialock specialist during initial startup. You can change
the point in time to change to and from DST.
1.
Click on "Program > Advanced Settings" and select "Holidays" in the index.
2.
Click on "Dialock Service Program" to launch the application.
3.
Choose a DST scheme or define the points in time manual.
Transfer the settings to the terminals
To transfer DST data and holidays to the terminals you can use
an MDU or a parameter key. Please use the corresponding button.
To exit Dialock Service click on "Okay".
5.4.5. Install the automatic backup
In order to not lose your data (i.e. room allocation, key data, configuration, protocols) during
a system crash (i.e. following a power cut), an automatic backup onto a hard or floppy disc is
carried out when the system is shut down. The data saved can be re-stored after a system
failure.
11
Configuration of the program
We recommend a backup on an independent storage medium or a network .drive.
You have the following options:
•
Backup only once a day
The settings are saved automatically only once a day (at the programs first shut down).
•
Save only changed files
Only changed settings will be saved.
•
Auto-Backup with inquiry (e.g.. floppy disk or USB flash drive)
You are asked to enter a disc when shutting down the program. If you have specified
the disc drive as path, Dialock Personnel saves the data on this drive.
1.
2.
3.
4.
Click on "Program > Advanced Settings" and select "Backup" in the index.
Activate or deactivate the according check box
Enter the path for the backup in the input field.
In order to save your settings, click on "Okay".
5.4.6. Restore a backup
In case of a system crash the data of the last backup (room allocation, configuration and
protocols) can be restored.
1. Click on "Program > Data restore".
2. In order to restore the backup click on "Yes".
5.4.7. Online settings
You can change settings for the additional Online- or Remote-Module, in the Index card
"Online". These settings are configured by the Dialock specialist during initial startup.
Click on "Program > Advanced settings" and select "Online" in the index.
•
Chose a folder for the netstack buffer in the input field "Path of netstack buffer".
•
"Delete key"/"Block key" specifies if locking authorisations in terminals get deleted or
blocked. (Recommended setting is "Block key". Lost keys could otherwise, after
deleting a substitute key, be recognized as valid).
•
"Read TV7 protocol" selects if additional protocol information (e.g. reading unit ID) of
the modern TV7-terminals are read.
In order to save your settings click on "Okay".
5.5.
Setup the printer
In order to setup a printer click on "Program > Printer setting".
Ö The Windows screen "Print setup" appears. Please see your Windows user manual for
the further procedure.
12
Configuration of the program
5.6.
Dialock Service program
This menu item launches the application Dialock Service. Basic settings of your Dialock
identification and locking system are changed in Dialock Service. Detailed knowledge and a
key with administrator login-right are necessary.
Ö
Contact trained personnel.
1.
2.
Click on "Extras > Dialock Service Program".
The application Dialock Service starts automatically.
Please only make changes if you are certain about the effects they may cause!
13
Operation
6. Operation
6.1.
Basic operating principles
User authorisations for operators
In order to access the program you need a key with user authorisations (Login-Key).
This could be the Master-Key .generated by the Dialock specialist during the initial setup.
Additional keys can be created as Login-Keys (see section "Create a new key").
Information on the keys
Information is transferred onto the keys with the Encoding Station.
Every physical key (e.g. card, key fob, or plastic clip) contains four "logical keys", which are
also called the "pages of the key" in the program. One individual key can for example allow
access at different times to varying rooms.
Information to the logical keys can be accessed by placing the key on the Encoding Station
and click on "Read Key".
After the key has been read, you receive all information regarding access authorisations and
times which are stored on the key, as well as the validity of the key.
Validity of keys
You can generate keys for a defined period or with infinite validity. If you generate a
substitute key for a logical key, the previous key is immediately blocked in the database and
at online terminals. Offline Terminals don't accept the previous key after the first usage of
the substitute.
Locking rights (access authority)
Dialock Personnel knows three different kinds of locking rights
•
Individual locking rights
Individual rights are locking rights for one terminal. A logical key could have individual
rights to several terminals. Every change in individual rights must be transferred
manually via data transfer device (e.g. MDU), to every affected offline terminal.
•
Group locking rights
A group right. contains locking rights for several terminals, one group right per logical
key is possible.
•
XPK locking rights (with the additional module XPK (Extended Personnel Key) An XPK
right is a locking right for one terminal. One XPK right is possible per logical key.
Privileged keys
Privileged keys are able to activate terminals for the data transfer with the MDU. If you
generate a key you can decide whether it has to be a privileged key.
6.2.
Access/shutdown the program
Access the program
1. Start the program from Windows ("start > All programs > Dialock > Personnel").
2. On request place a Login-Key on the Encoding Station
Ö Does the message "Key is not authorised" appear?
This key has no user authorisation (no login-key).
Replace the key with a Login-Key and click on "Login"
Shut down the program
1. In order to end the program click on "Exit program"
14
Operation
2.
When the dialogue field "Data Backup" appears, click on “Okay” or insert a disc and
then click on Okay...
Ö Unsaved data are stored.
.
6.3.
Login/logout a user
In order to login you need a key with user authorisation (login key).
To avoid unauthorized usage of Dialock Personnel, it is recommended to logout of the
application if you leave the PC unattended.
You can set the time until Dialock Personnel performs an automatic Logout
(Timeout).
Login
Ö
Click on "Program > Login" or the button "Login" in the command bar.
Logout
Ö
6.4.
Click on "Program > Logout" or the button "Logout" in the command bar.
Administrate groups
If you select a group when issuing a key the key automatically receives the locking rights of
this group. Please see below how to define and indicate groups, what groups there are, and
what locking rights a group has.
6.4.1. Define/indicate groups
A group is defined by a name and the locking rights for selected rooms. This information can
be found in the group list.
1.
2.
3.
4.
Click on "Groups > Define".
Select the number by clicking on it and enter the group name into the column "name".
Click on "Roomlist" and select the rooms, to which this group should have access.
In order to print a list of groups/keys in the groups, or to transfer the group data to a
data transfer device (e.g. MDU), click on the respective button.
Show the group list
Ö
. Click on "Groups > Show".
6.4.2. Show the map of groups
In the map of groups you get a complete view of which group has access to which rooms.
The map of groups is shown in matrix format (chart format).The groups are listed in the rows
of the matrix, the rooms are listed in the columns. Yellow squares show which group has
locking authorisation for which rooms. If you move the mouse within the matrix you see a
grid which makes it easier for you to see the allocation of groups and rooms. In addition, the
group and room of the field in which you move the mouse is shown in a text field in the
upper left corner.
If required you can print the matrix.
•
•
6.5.
Click on "Groups > Map of groups".
In order to print the matrix, the roomlist, or the list of groups click on the respective
button.
Program keys and access information
You can re-program the keys as often as required. The previous setting is deleted. The
program guides you with screen messages.
15
Operation
All information which is transferred to a key (access authorisations, cash amounts ...) is
entered into the dialogue field on the screen.
For time and date specification the program automatically uses the system time of the
computer. You set the system time in Windows (please see the Windows user manual).
In order to write the entered information to the key, you have to place the key on the
Encoding Station as soon as the program asks you to do so.
6.5.1. Read out keys
1.
2.
3.
Place the key on the Encoding Station.
Click either on "Keys > Read Key" or click on "Read Key" in the command bar.
A message field with information read from the key appears.
Ö
Does the dialogue field "Page selection" appear?
There is more than one logical key in use: Select the page of the key by clicking in
a text field.
6.5.2. Create a new key
The data you write to the key includes locking rights (group, individual, or XPK locking
rights) and the validity of the key.
If you have the additional module "Cash", please see in the section "transfer cash amounts",
how to transfer sums of cash-units onto and from the key
Select and define the key
Each key receives an identification number and a name when it is created.
1. Click on "Keys > New Key".
2. If you wish to allocate a different key number than the one suggested by the system
click on the symbol of the key list and select the number.
3. Enter the name in the text field "Name"(The user’s name is a sensible choice for the
name of the key).
Allocate locking authorisations
On one key, you can program group, individual or XPK locking rights (with the additional
module XPK). A department manager has, for example, access to all rooms of his
department (group locking rights XY) and additionally to his office (XPK locking right
department manager Z).
For the group locking right, you select from the groups which you have defined (see section
"Define/indicate groups"). The key is then automatically authorised for the same rooms as
the group.
For XPK and individual locking rights you select rooms directly from the room list.
1. In order to assign a group locking right click on the text field "Locking group" and select
the group.
2. In order to assign individual locking rights click on the symbol "list of rooms" and select
rooms, using the left mouse button.
Ö Every change in individual rights must be transferred manually via a data transfer
device (MDU) to every affected offline terminal.
3. In order to assign an XPK locking right click on the symbol "list of rooms" and select
rooms, using the right mouse button.
Privileged keys
Privileged keys have the authorisation to enable the terminals to interchange data with an
MDU. When issuing a key you decide if it will be a privileged key.
16
Operation
Ö
In order to assign a privileged key activate the control box "Privileged".
Please consider the safety conditioned restrictions:
•
Only the first logical key is accepted as privileged
•
The privilege takes effect associated with the locking rights in the same logical key.
Assigning user authorisation) (Login-Keys)
You can assign user authorisation ("Login right") to Dialock Personnel.
The program can be used by various operators who must -for security reasons- not have
access to all functions of the program.
You can assign user authorisation on six hierarchical levels:
•
No right to use
•
Info (to read information only)
•
Cash (only Cash-functions)
•
Keys + Cash (key-programming including Cash-functions)
•
Supervisor (all authorisations for key-programming and protocol functions)
•
Administrator (all authorisations)
Avoid misuse by unauthorised parties
Ö Assign the administrator authorisation only once or twice to reliable employees if
possible.
Ö Keep the Master Key in a safe place!
Ö
Click in the dropdown list field "Login right" and select the access authorisation
Select Options (only available if customized Options are defined)
If there are customized Options for Terminals, you can assign one of this aditional functions
(e.g. different type of locking for several persons) to the key.
Set the learning mode (not available when using an MDU)
A key in learning mode can be set directly at the terminals. In order to avoid this, the key has
to be fixed.
Whether a key is in learning mode or fixed is decided by you when the key is issued.
Afterwards the status of the key can be changed by clicking on the respective buttons in the
command bar.
Ö
Activate control box "Learning" or "fixed".
Enter the validity
The validity of a key refers to the weekdays and time when the key has locking
authorisations to the selected rooms, as well as to the time after which a key becomes
invalid.
1.
2.
3.
In order to select the weekdays activate the respective control boxes ("HD" means
validity on public holiday).
In order to set the time, click in the input fields of the time and set the time with the slide
rules. ("00:00 - 00:00" selects the whole day)
Select the general validity.
Ö Click on "unlimited".
- or –
Ö Click on "until" and select the date in the calendar.
Generate the key
•
Click on "Okay".
•
After request place the physical key (e.g. card)) on the Encoding Station.
•
If necessary chose a logical Key (page of the key).
•
Take the key of the Encoding Station if the program asks you to do so.
17
Operation
If the logical key to write on is already used you get an allusion.
With exception of the Master Key it is possible to generate a replacement for an accidentally
overwritten key.
6.5.3. Access the locking map
The locking map, similar to the map of groups, gives you an overview of all programmed
keys and their locking rights.
The keys are listed in the rows of the matrix, the rooms in the columns. Coloured squares
show which keys are authorised for which rooms. The colours of the squares define the type
of lock rights. Blue squares signify individual locking rights, yellow squares indicate group
locking rights and orange squares are standing for XPK-rights.
If you move the mouse within the matrix you see a grid which makes the allocation of keys
and rooms easier. In addition, the key and room of the field you move the mouse in are
shown in the top left corner.
You can print this matrix if required.
1.
Click on "Keys > Locking map".
2.
In order to print the matrix, click on "Matrix" in the field "Print".
6.5.4. Change a key
The key data of an existing key can easily be changed. If the key you want to change is not
available, only the name of the key can be changed. The information stored remains
unchanged.
1.
Place the key on the Encoding Station and click on "Keys > Edit key" or use the button
"Edit key" in the command bar.
Ö
2.
If the key is not available select the key from the key list. In this case, you can only
change the name of the key.
The same dialogue field as for the creation of a new key appears. Proceed as described
under "Create new key".
6.5.5. Allocate a substitute key
When required, e.g. when a key is lost, you assign a replacement key.
1.
Click on "Keys > Substitute key".
2.
Select the key to be replaced from the key list.
3.
Place the replacement key on the Encoding Station.
The new key contains all data of the original key.
The predecessor key is immediately inoperative at online-terminals.
Offline-terminals accept the previous key until their first use with the substitute.
6.5.6. Delete a key
1.
2.
3.
Place the key on the Encoding Station.
Click on "Keys > Clear Key".
The dialog field "Really clear key?" appears.
Ö If you click "Yes" any information stored is deleted from the key.
18
Operation
4.
The dialog field "Delete Key also from database" appears.
Ö If you click "No" you keep the data in the database, for example to generate a
substitute key.
6.5.7. Transfer cash amounts
You can credit or debit cash amounts to keys at any time.
The amounts are entered in the dialogue field "Cash input for adding value (debit)". You
either use the key field or click on the switch fields with fixed amounts. The key field is based
on the smallest unit which has been set as cash-unit during the configuration.
6.6.
1.
Click on "Cash > Cash accounting" or click on "Cash accounting", "Cash pay in" or
"Cash pay out" in the command bar.
2.
In order to erase the total amount from the key, click on "Debit all".
3.
In order to transfer an amount to or from a key click on "Add to value" or "Debit". The
dialogue field "Cash input for adding value (debit)" appears.
4.
Enter the amount via the key field or click on an amount (switch field).
5.
Click on "Okay" to save the changes
System functions
6.6.1. Display the list of rooms
With the room list you have a constant overview of all rooms and their online status. You can
print out the room list or search for individual rooms by entering the room number.
1. Click on "Extras > List of rooms".
2. Release the required function by clicking on the respective text field.
3. In order to exit the list of rooms, click on "Okay".
6.6.2. Protocol of operations
In the dialogue field "Protocol of operations" processes with keys, cash processes and
system processes of a month are listed.
•
With a filter you limit the number of displayed processes.
•
Via control boxes you can limit the viewed time interval.
•
For personnel key entries you can limit the displayed processes to individual keys.
Ö
Click on "Program > Protocol".
Limit the selection of entries
Select entries in the dropdown list field "Filter".
Ö Click on "Actualize".
Limit the time interval of the displayed entries
1. Click in the control box "Date" or "Time".
2. Click in the input field.
Ö Select the date from the calendar or set the time with the slide rules.
3. Click on "Actualize".
Display entries for keys only
1. In the dropdown list field "Filter", select "Only personnel key entries".
Ö In order to display entries for one key only, click in the control box "Key no.". and
select the key from the key list.
2. Click on "Actualize".
19
Operation
6.6.3. Cash Balance
In the dialogue field "Cash balance" you can see the balance of transfers to and from the
key accounts. The sums can be deleted, if necessary.
1. Click on "Cash > Balance".
2. To delete a sum click on "Reset".
Ö The sum is deleted and the date is updated.
6.6.4. MDU-Function
With this function you start the communication of the Encoding Station with a data transfer
unit via the infrared interface. This function requires administrator authentication.
Connect the MDU to the Encoding Station
1st Switch the MDU to IRcom-mode ("MDU functions > IRcom")
2nd Place the MDU in front of the Encoding Station
3rd Click on "Extras > MDU".
4th Dialock Service starts the dialogue field "MPU".
5th You can use the connection to:
•
Synchronise PC and MDU by clicking on "Data synchronisation between PC and
MDU".
•
View the data inside the MDU by clicking on "MDU Info".
•
Configure the MDU by clicking on "MDU settings".
6.6.5. Terminal Log Protocol (Terminal audit trails)
These functions require administrator rights. Using the application Dialock Service, you can
load, print or store terminal log protocols.
1.
Click on "Extras > Terminal Protocols".
2.
Dialock Service launches.
6.6.6. Key Balance
The balance of processes for keys is shown in a dialogue field.
Ö
Click on "Extras > Key Balance".
How to delete Key Balances
Ö
Click on "Reset".
A new counting starts.
6.6.7. Read keycode
Each physical key has a secure manufacturer’s read-only code, this unique number is
shown in a message field.
Ö
Click on "Extras > Read keycode" and place the key on the Encoding Station.
A message field shows you the unique number
6.7.
How to backup data/ restore data
You can backup your data from (i.e. protocols, settings) and restore data to the program.
The path has to be entered as described in the section "Install the automatic backup". We
recommend an automatic backup on an independent storage medium or a network drive.
In order to store data, click on "Program > Data backup".
Ö
Click on OK (respectively insert the disc and click on OK).
20
Operation
In order to scan in stored data, click on "Program > Data restore".
Ö
Click on OK (respectively insert the disc and click on OK).
21
Software Manual
Index
access authority 14
Access the program 14
Authorisations 14
Backup (automatic) 11
Backup manually 21
Cash amounts (transfering) 19
Cash less payment 5
Cashless payment 9
Cash-System 10
Command bar 8
Company name 9
Dialogue field 7
Group list 15
Group locking rights 14
Holidays 11
Individual locking rights 14
Keys 14
Learning mode 17
List of rooms 19
Locking authorisations (allocate) 16
Locking map 4, 18
Locking rights 14
Login-Key (generating) 17
Map of groups 4, 15
Maximum number of keys 9
MDU authorisation 9
Menu bar 7
menu items 7
Message field 7
New key 16
Objekt name 9
Online Module 5
Predecessor key 19
Privileged keys 17
Programming of the keys 4
Register 7
Remote Module 5
Room setup 10
Roomnames 11
Roomnumbers 11
Shut down the program 14
Substitute key 18
Timeout 9
TV7 Features 9
User authorisation (assigning) 17
Validity 17
Validity of keys 14
Validity period of the keys 4
XPK locking rights 14
XPK Module 5
Copyright
The reprint of the software manual, even extracts, or copying of the illustrations and drawings as well as copying
of the layout are prohibited. No liability is accepted for printing errors or errors occurred during the creation of the
software manual.
We reserve the right for technical changes and changes of availability.
Status 12.2008
Sphinx Electronics GmbH & Co KG
Tullastraße 3
D-79341 Kenzingen
Email: [email protected]
A Häfele Group company