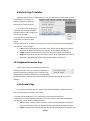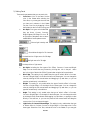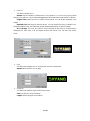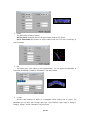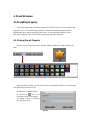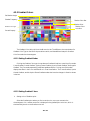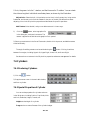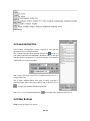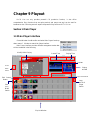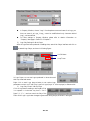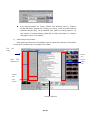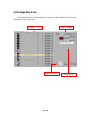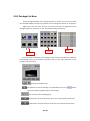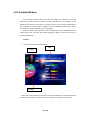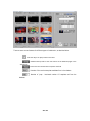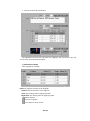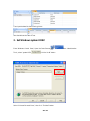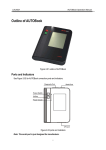
1
D3-CG Live User Guide 2011-07 1 / 251 D3-CG Live User Guide .................................................................................................................. 1 Copyright .......................................................................................................................................... 7 PREFACE............................................................................................................................................. 8 Chapter Contents ............................................................................................................................ 8 About this Manual..................................................................................................................... 8 Other Related Documents ......................................................................................................... 9 Highlights of D3-CG Live ......................................................................................................... 9 Chapter 1 Basics ............................................................................................................................. 12 1. Basic Concepts .................................................................................................................... 13 1.1 Types of I/O Interface ............................................................................................... 13 1.2 Peripherals................................................................................................................. 14 1.3 Basic Concepts in Graphics, Title and Animation Production .................................. 15 2. Basic Operations of D3-CG Live......................................................................................... 15 2.1 Using a Mouse .......................................................................................................... 15 2.2 Using a Keyboard...................................................................................................... 16 2.3 Using Mouse and Keyboard Together ....................................................................... 17 3. Logging In and Out System ................................................................................................ 17 4. System and Extension Menus ............................................................................................. 19 4.1 System Menus ........................................................................................................... 19 4.2 Extension Menus ....................................................................................................... 22 5. Workflows for Production and Play using D3-CG Live ...................................................... 27 5.1 Producing Primitives ................................................................................................. 27 5.2 Applying Effects........................................................................................................ 28 5.3 Adjusting Time Line .................................................................................................. 29 5.4 Making Playlist ......................................................................................................... 30 5.5 Play ........................................................................................................................... 30 Chapter 2 System Settings .............................................................................................................. 32 1. Setting Project Properties .................................................................................................... 32 1.1 Setting Format ........................................................................................................... 32 2. System ................................................................................................................................. 33 2.1 Setting Preview Background ..................................................................................... 33 2.2 Work Path Setting...................................................................................................... 34 2.3 Real-time Profile ....................................................................................................... 35 2.4 Displaying Path of Selected Object........................................................................... 35 2.5 Display Outline of All Object ................................................................................... 36 2.6 Render AVI Alpha ..................................................................................................... 36 2.7 Set AVI Encode Para ................................................................................................. 36 2.8 Set Layer ................................................................................................................... 36 2.9 Set Video Card .......................................................................................................... 37 2.10 Define Txt Flag ....................................................................................................... 37 2.11MOS Setup ............................................................................................................... 38 2.12Set Scroll Replace Format ........................................................................................ 39 2.13 Stop all theplayer..................................................................................................... 39 2.14 Clear screen ............................................................................................................. 39 2 / 251 2.14 Preview.................................................................................................................... 40 2.15 Preview Mode ......................................................................................................... 40 2.16 Color Bar ................................................................................................................. 40 2.17 Test Type ................................................................................................................. 40 Chapter 3 Producing Scenes ........................................................................................................... 41 1. Edit Windows ...................................................................................................................... 41 1.1 Main Editor ............................................................................................................... 41 1.2 Buttons in Editing Toolbar ........................................................................................ 42 1.3 Aligning..................................................................................................................... 45 2. Property Windows ............................................................................................................... 49 2.1 General Properties ..................................................................................................... 50 2.2 Effects Properties ...................................................................................................... 60 2.3 Text Properties .......................................................................................................... 83 2.4 Light Source Properties ............................................................................................. 84 3. Time Line Windows ............................................................................................................ 85 3.1 About Time Line ....................................................................................................... 85 3.2 Editing Time Line ..................................................................................................... 88 3.3 Buttons in Time Line Play Toolbar ........................................................................... 98 4. Preset Windows ................................................................................................................. 100 4.1 Presetting Property .................................................................................................. 100 4.2 Palette ...................................................................................................................... 101 4.3 Template Manager ................................................................................................... 111 4.4 Textures Manager .................................................................................................... 112 4.5 Table ........................................................................................................................ 114 4.6 Property ................................................................................................................... 114 5. Scene List Box .................................................................................................................. 115 5.1 Scene List Box Interface ......................................................................................... 115 5.2 Other Features ......................................................................................................... 117 6. Producing 2D Primitives ................................................................................................... 117 6.1 Title Characters ....................................................................................................... 118 6.2 Art Title ................................................................................................................... 122 6.3 Polygons .................................................................................................................. 125 6.4 Ellipses .................................................................................................................... 127 6.5 6.5 Images ............................................................................................................... 128 6.6 Animations .............................................................................................................. 130 6.7 Curves ..................................................................................................................... 133 6.8 Template .................................................................................................................. 136 6.9 Freecurve ................................................................................................................. 139 6.10 Capturing Background .......................................................................................... 139 7. Producing 3D Primitives ................................................................................................... 140 7.1 Convert 2D Object into 3D Object.......................................................................... 140 7.2 Box .......................................................................................................................... 141 7.3 Balls ........................................................................................................................ 143 7.4 Cylinders ................................................................................................................. 144 3 / 251 7.5 Tablet ....................................................................................................................... 146 7.6 Histograms(bar) ...................................................................................................... 149 7.7 Pie Charts ................................................................................................................ 152 7.8 Importing Third-party Models ................................................................................ 156 Chapter 4 Scroll File Production ................................................................................................... 158 Section 1 Basic Flow to Produce Roll File ........................................................................... 158 1.1 Create a Roll File .................................................................................................... 158 1.2 Input Roll Contents ................................................................................................. 158 1.3 Set Color Property of Roll Character ...................................................................... 159 1.4 Character Alignment in Roll File ............................................................................ 159 1.5 Add Image In Roll File ............................................................................................ 160 Section 2 Roll Editing Property Settings............................................................................... 160 2.1 Settings for Editing and Producing Roll File .......................................................... 160 2.2 Right Click Menu Settings ...................................................................................... 161 2.3 Roll File Play Settings ............................................................................................. 164 Section 3 Utilization of Roll Template .................................................................................. 165 3.1 Produce Scroll Template ......................................................................................... 165 3.2 Edit Roll Text .......................................................................................................... 165 3.3 Generate Roll File ................................................................................................... 166 3.4 Other Buttons .......................................................................................................... 166 Chapter 5 Subtitle File Production............................................................................................ 169 Section 1 General Flow to Produce Roll File ........................................................................ 169 1.1 Add Subtitle File ..................................................................................................... 169 1.2 Adjust Text Font Property ....................................................................................... 169 1.3 Adjust Play Position of Subtitle File ....................................................................... 170 1.4 Add Effects for Subtitle File.................................................................................... 170 1.5 Produce Character Effect for Subtitle File .............................................................. 171 1.6 Play ......................................................................................................................... 172 Section 2 Subtitle Editor ....................................................................................................... 173 2.1 Tool Buttons ............................................................................................................ 173 2.2 Main List Interface for Subtitle File ........................................................................ 174 Section 3 Advanced Settings ................................................................................................. 176 3.1 DLX Format ............................................................................................................ 176 3.2 Rectangle Manager.................................................................................................. 177 Chapter 6 Clock Production .......................................................................................................... 178 Section 1 Clock Window....................................................................................................... 178 1.1 Basic Interface......................................................................................................... 178 1.2 Play Type Interface.................................................................................................. 179 Section 2 Produce Clock and Logo Template ....................................................................... 182 2.1 Steps to Create Time Template File......................................................................... 182 Digital Clock Template ................................................................................................. 183 Analog Clock Template ................................................................................................. 183 Pad Timer Template ...................................................................................................... 184 Bar Timer Template ....................................................................................................... 184 4 / 251 2.2 Play Clock ............................................................................................................... 184 2.3 How to Play Count-down ........................................................................................ 184 Chapter 7 Image Processing .......................................................................................................... 186 Section 1 Save Image ............................................................................................................ 186 Section 2 Save Current Clip Image ....................................................................................... 186 Section 3 Save Current Object Image ................................................................................... 186 Section 4 Invert Alpha Channel for TGA Image ................................................................... 187 Section 5 Convert TGA Sequence To Animation .................................................................. 187 Section 6 Generate TGA String in Frame Mode ................................................................... 188 Section 7 Generate TGA String in Field Mode ..................................................................... 188 Section 8 Modify File Path of Object ................................................................................... 188 Chapter 8 Filter Function .............................................................................................................. 189 Section 1 Classes of Filters ................................................................................................... 189 1.1 Image Color............................................................................................................. 189 1.2 Blur ......................................................................................................................... 189 1.3 Distortion ................................................................................................................ 189 1.4 Style ........................................................................................................................ 189 1.5 Render ..................................................................................................................... 189 1.6 Wipe Out ................................................................................................................. 189 Section 2 Filter Adjustment ................................................................................................... 190 Chapter 9 Playout .......................................................................................................................... 191 Section 1 Main Player ........................................................................................................... 191 1.1 Main Player Interface .............................................................................................. 191 1.2 LOGO Player .......................................................................................................... 195 1.3 Scroll Player ............................................................................................................ 197 Section 2 Subtitle Play .......................................................................................................... 201 2.1 title Player ............................................................................................................... 201 2.2 Title Player .............................................................................................................. 202 2.3 Subtitle Player ......................................................................................................... 203 Section 3 Zone Player ........................................................................................................... 208 3.1. Zone Player ....................................................... 208 3.2 Zone Player Interface .............................................................................................. 208 3.3 Footage Play Zone................................................................................................... 209 3.4 LOGO Play Zone .................................................................................................... 217 3.5 Scroll Play Zone ...................................................................................................... 217 Chapter 10 Play Control................................................................................................................ 218 Section 1 VTR Play Control ................................................................................................. 218 1.1 Use VTR Link to Set In/Out Points for Subtitle ..................................................... 218 1.2 Play VTR Linked Subtitle ....................................................................................... 219 Section 2 GPI Trigger Play ................................................................................................... 219 Appendix 1 .................................................................................................................................... 220 List for Shortcut Keys ........................................................................................................... 220 1. Functional Keys .................................................................................................... 220 2. Shortcut Keys for Shot Editing Window ............................................................... 220 5 / 251 3. Shortcut Keys in Timecode Window..................................................................... 222 4. Shortcut Keys for Text Editor ............................................................................... 226 5. Shortcut Keys for Roll Editor................................................................................ 226 6. Shortcut Keys for Subtitle Editor .......................................................................... 227 7. Shortcut key for Main Player ................................................................................ 228 8. Shortcut Keys for Shot List ................................................................................... 229 9. Shortcut key for Subtitle Player ............................................................................ 229 10. Shortcut Keys in VTR Window..................................................................... 229 Appendix II ................................................................................................................................... 231 Support Multi-Language Environment ................................................................................. 231 1. Install Corresponding Character Database ............................................................ 231 2. Modify Setup.inf file and Load Corresponding Character Database .................... 231 3. Modify Region Settings and Load Corresponding Character Database ................ 232 Appendix III .................................................................................................................................. 234 Link Database ....................................................................................................................... 234 1. Create a database ................................................................................................... 234 2. Set Windows system ODBC ................................................................................. 236 3. Link the database................................................................................................... 238 4. Play and Modify the data ...................................................................................... 243 Appendix IV.................................................................................................................................. 244 Use ‘Scroll Text Provider’ Plug-in in Zone Player................................................................ 244 Appendix IV.................................................................................................................................. 247 Connect Excel .................................................................................................................... 247 6 / 251 Copyright Copyright of this Manual belongs to Dayang Technology Development Inc. Beijing, P. R. China, which is a component of the D3-CG Live family of graphic, title and animation Play products and is sold along with the formal versions of the D3-CG Live products produced by the Corporation. All of the D3-CG Live products contain a copy of the Manual. All unauthorized duplication or dissemination of any text, content or image contained in the Manual for any reason via any medium (electronic or mechanic) is prohibited. © Dayang Technology Development Inc. Beijing, P. R. China. All rights reserved. 2007.3 Further notices from the Corporation regarding any change in the contents of the Manual are excusable. Dayang, D3-CG and D3-CG Live are registered trademarks of Dayang Technology Development Inc. in China and/or other countries (regions). This manual may concern the patents (or patents in process), registered trademarks (or trademarks in process), copyright or other intellectual property rights of Dayang Technology Development Inc. Unless the written permission of Dayang Technology Development Inc. is given, this manual shall not award any agreement on the use of the patents (or patents in process), registered trademarks (or trademarks in process), copyright or other intellectual property rights. Names of products or companies mentioned in this manual may be trademarks of their respective owners. Document No: DY09-09271-CN01A0928 Printed in Beijing 7 / 251 PREFACE Chapter Contents About this Manual Other Related Documents Highlights of D3-CG Live About this Manual As a component of the D3-CG Live family of graphic, title and animation Play software, this Manual is sold along with the D3-CG Live products and is contained in the formal versions of the software. The Manual is developed for those who learn and use the D3-CG Live software to help the learners and users understand the features, functions and usage of the software. It is suited for all the D3-CG Live systems produced by Dayang Technology. In this Manual, you will find information on the functions, features and usage of the D3-CG Live products. It will also guide you through the workflow of using the software to produce graphics, subtitles and images, apply special effects and adjust Time Line. Detailed instructions are given to illustrate the powerful production and Play features of the software and on how to achieve various effects using the D3-CG Live. 8 / 251 Other Related Documents For assisting users in further understanding and learning how to use the D3-CG Live software and attaining support and help, Dayang Technology has included the following learning documents and tools in the product in addition to the User’s Manual: System Installation Guide (in the Software Package) Online Help (in the Online Help Document) User’s Manual patches published by Dayang Technology regularly (please access www.dayang.com.cn) Highlights of D3-CG Live The D3-CG Live Standard Definition Title Generator is a capable device for field production, online broadcast, relaying vehicle and post-production title composition. The device is equipped with RedBridgeⅡ video card and appropriate analog and digital interfaces, supporting simultaneous input and output of CVBS, YUV, Y/C, SDI and other signals. Based on the GPU+Acc frame and the DirectX 3D technology, D3-CG Live has powerful real-time 3D rendering functions and provides users with abundant real-time, amazing 3D objects and effects. Additionally, the dual channel main broadcast interface and multiple channel title Play interface meet a user’s demands for flexibility and simplicity in field work. Major Features Enhancing precisions of digital signal channel and mixer to 10Bit results in no lost SDI background signals when passing through cards and boards. Enhancing precisions of analog signal channel and mixer to 12Bit offers improved quality of video signals, the true broadcast standard. Support multiple language interface and edits. Professional, personalized interface design assures flexible, swift operation. Graphic, Title and Image Production Support facet, perimeter, 3D edge, gradient, perimeter 3D edge, and perimeter gradient 6-layer graphics. Lyric-beat-point response is rapid, and support one-to-one edit process. Support Freecurve curves, and curve shapes drawn using a mouse. The user can fix and import text using the Text Editor to customize a polygon. The Pre-set function for primitive of image file allows pre-setting of all kinds of commonly-used pictures, such national flags of countries worldwide. Functional extensions for image files 9 / 251 Still rotation and beveling of image. Support for any changes in the alpha value of an image file. Real-time broadcast of animation files of customized sizes. 3D Graphics and Image Production (D3-CG Live 3D Support) 3D Pilot 3D navigator, dragging 3D modeling, Quick Create 3D objects. Multiple parameters are provided for 3D objects, including 3D properties, 3D material, 3D light effect, etc. Support beveling, filleting and trimming of 3D objects. Introducing the concept of 3D Object Group and one-key production of multiple 3D objects gives rise to efficient, flexible operation. Built-in 3D Form Generator supports connection of 3D forms with external database to allow real-time updating according to changing data source. Support importation of files of 3dMax and DirectX formats and keyframe and skeleton animations. Effects Abundant in-and-out and stillness effects are pre-set. Offer transitional effects between multiple scenes. Offer plenty of 2D and 3D real-time effects, such as fantasy, folding, porcelain, distortion, soft motion, ball transformation, column transformation, explosion, overlapping, rolling and volume light, which are updated with different versions. One-key application of effect frees the user from adjusting of parameters. Advanced Composition of Time Line Edit all objects (title, image, animation, AVI file, subtitle and scroll) on one timeline. Adjust the sequence of different object layers at will. Control all motion tracks and effects precisely using keyframe. Copy, add and paste keyframes as you want they. Zoom Time Line vertically or horizontally. Absorb the current timecode automatically. Hide and display Time Line. Track markers. Locate on a timeline precisely. Work with keyframes and effects in combination. Template-Based Quick Obtaining and Replacing Find and select obtainable templates using an ID number, and replace and Play the contents of a primitive or template quickly. Replace and Play template contents directly using external data. Provide over 70 applied templates in 3 categories. Main Player 10 / 251 Find and play scenes quickly based on ID numbers. Make possible simultaneous Play and editing, viz. editing unPlayed scenes without changing the Play interface when broadcasting. Built-in Animation Superscript Player and Scroll Player are well suited for online graphics and image packing. Dual channel monitoring interface of PVM and PRM secure Play. Title Player Give rise to real-time manual broadcast of multiple tasks (including background subtitle, lyric, clock, scroll and multi-animation LOGO) at the mean time. True unlimited overlay makes it possible for you to adjust the Play layer sequence on the player at will. Customize hotkeys for controlling the in-and-out screens of objects. Control display of 18 LOGO simultaneously using LOGO Player. Clock Player is equipped with features such as timing, counting down, integral and semi-integral announcement. Play lyrics manually, automatically and linked with background music, match lyric positions, and adjust characters and in-and-out effects using Lyric Player. Change scroll contents, rolling rate and head and rear LOGO, and impression during broadcast in a real-time fashion using Scroll Player. Independent PRM Channel Offer extra digital PRM and mixed PRM channels, in addition to complete output channels. External Controls Support GPI trigger. VTR synchronized play allows frame-accuracy for subtitle play. You will find more… Thanks to the amazing features, the Dayang D3-CG Live products will be up to any demand in your graphics, animation and image production and Play, offering perfect experiences in your field work and post-production program packaging and bringing your programs up to a new level. 11 / 251 Chapter 1 Basics Highlights Understanding the basic concepts and knowledge on graphics, animation and image. Understanding the basic operations of D3-CG Live software Understanding the workflow of production and Play using D3-CG Live software Before we get started with the D3-CG Live software, let’s first look at some basic ideas about graphics, animation and image, including some terms that you will frequently come up with in the later chapters as well as the overall framework of the software. If you are new to D3-CG Live, you will find this chapter very helpful. 12 / 251 1. Basic Concepts 1.1 Types of I/O Interface The quality of captured and Played video is dependent on the type of video signal you choose when connecting your video devices. The interfaces that D3-CG Live supports include: CVBS S-Video(Y/C) Separate YUV(YCrCb) USB SDI HD-SDI CVBS (Composite Video Broadcast Signal) CVBS is the most commonly used video signal and the quality is the lowest. The signal transfers all color and brightness data via a couple of cables. Nearly all video devices are equipped with CVBS Output. This format uses a single RCA or BNC connector. Typically CVBS video signals are used for fault solution, menu output for video recorders, and preview. CVBS signal is no more used for editing because of its problems with field sequence and string color. S-Video S-Video (i.e. Y/C) transfers the brightness and color data through two video cables, respectively. An additional 4-core DIN socket is used as the connection. Compared with CVBS, S-Video is preferable in both terms of image clarity and color. Component YUV (YCrCb) Many of the professional analog video devices are equipped with Component YUV (YCrCb) input and output. Using three cables to transfer its brightness, red color difference and blue color difference data results in high color quality and accuracy. Use of YCrCb for connection often requires another video cable to transfer the sync signals, or simply taking the Y signal for sync. USB USB2.0 is the standard PC interface. Today almost every PC is given USB2.0 interfaces with a 480Mbps rate. SDI (Serial Digital Interface) SDI is the standard for uncompressed digital video format (ITU-R 601 Standard). Using one video cable, SDI transfers the uncompressed digital component signals, which give rise to high video quality and multiple generation replication capacity. Many devices now can transfer video and audio data simultaneously via one single SDI cable. HD-SDI (High Definition- Serial Digital Interface) HD-SDI is a higher version of SDI with greater band width, which is designed for the 13 / 251 extremely high transfer rate of uncompressed high definition video. Like SDI, HD-SDI can Play both video and audio data through one cable simultaneously. 1.2 Peripherals Optional devices you may considered: NTSC or PAL video monitor An additional computer monitor Sync generator 1.2.1 NTSC or PAL Video Monitor Both NTSC and PAL are video standards. NTSC is the abbreviation of the National Television Systems Committee of the United States, which, as a TV and video standard, is widely used in most American countries, Taiwan, Japan and Korea. PAL, namely Phase Alternating Line, is the standard of many European countries, Brazil, Algeria and China. (SECAM is a video standard based on PAL, used in France, Poland, Haiti and Vietnam, which the D3-CG Live System does not support) Since all graphics, images and animations will be eventually broadcast, we find it suggestible that you should view the output effects on a NTSC or PAL video monitor during pre-production, because the colors are different when shown on a computer or video monitor and the Scan most video monitors equipped with can help you see the output effect properly. For video monitors, CVBS, S-Video, YCrCb or SDI may be good options. The higher the input quality is, the clearer the image will turn out. In case you simply wish to view the video signals like an ordinary audience, CVBS is good enough; but if what you need to do is correcting colors or other tasks requiring higher image quality, a high definition broadcast monitor with at least YCrCb interfaces, which has been calibrated for color and brightness, should be a necessity. 1.2.2 Sync Generator A sync generator works to yield continuous black screen video signals, which are used for all the devices within a synchronic system. If you are working with several video devices in your studio, particularly when the D3-CG Live is connected to a Switch, we strongly recommend that all the devices should be locked to the sync generator. In this way, you can avoid many problems resulted from non- synchronization, such as image rolling, shaking and distortion. 14 / 251 1.3 Basic Concepts in Graphics, Title and Animation Production 1.3.1 Primitive, Scene and Playlist The most fundamental element in a title generator is primitive. One or more primitive compose a scene, several scenes make up a playlist, and one or more playlists can be saved as a project file, namely the prj file that is special to Dayang systems. In the D3-CG Live System, primitives include are two- or three-dimensional. Different primitives are given different adjustment parameters. Only the 3D Title Generator, that is the ones with the 3D sign among our products, can produce 3D primitives. 1.3.2 Play and Title Play The D3-CG Live System has two play modes, the Main Play and the Title Play. When a playlist is ready, you need to enter the play interface. Main Play is to Play manually or automatically all scenes in a certain sequence. Title Play means to tile all the scenes on the playlist on the interface by type, including lyric, clock, LOGO and scroll, to control and Play multiple tasks synchronically. 2. Basic Operations of D3-CG Live All operations of the D3-CG Live System can be performed using a standard 3-button mouse, and shortcuts are available for most features. After you have acquainted yourself with the shortcuts (see the attachment Default System Shortcuts List), you will be able to enhance your production and Play efficiency tremendously using the mouse in combination with a keyboard. To help you understand the system operations better, we will introduce two types of basic operations of the D3-CG Live System and the commonly used terms in the Manual. 2.1 Using a Mouse Mouse is the most commonly used operational tool. Except for alphabet input, it can perform all other operations. We recommend the 3-button mouse with a roller for better performance. Operations using a mouse are divided into eight types as follows: 15 / 251 Name Name in Instructions Short Illustration When the cursor is on the target object, single Left mouse single Single click the left button of your mouse. Typically click click used to select an object, execute a menu or button command, etc. Left mouse double Double click click When the cursor is on the target object, double click the left button quickly. Used to edit title character and template, etc. When the cursor is on the target object, single click the left button and hold, move the cursor Left mouse dragging Dragging in the target direction, and then release the left button. Used to create a primitive, adjust primitive position and size, etc. Right mouse single Right click mouse Right mouse double click When the cursor is on the target object, single click the right button. Used to open the extension menus. When the cursor is on the target object, double / click the right button quickly. Used to select a scene in the Main Play window for editing. When the cursor is on the target object, single Right mouse dragging / click the right button and hold, move in the target direction, and then release the button. Typically used to zoom the Time Line. When the Slide Bar appears in the window, use Roller sliding / the roller to view the contents up and down/left and right. When the cursor is on the target object, single Roller (middle mouse) Middle click the middle button (in most mice, the single click mouse roller is used as the middle button). Typically used to select clips. 2.2 Using a Keyboard Most of the mouse operations are supported with keyboard shortcuts, using which can 16 / 251 enhance your efficiency enormously. The System has two types of shortcut operations. Type Operation Expression used in the Manual Press the appropriate key Represented with the appropriate key characters on the once keyboard, e.g. F2, F3 Combined-key Press multiple keys on the Represented with two or more key characters with + in operation keyboard at the same time between, e.g. CTRL+N, CTRL+O One-key operation Two ways to learn about the shortcuts: See the Shortcuts section in Help. See the Index of Shortcuts attached to the Manual. 2.3 Using Mouse and Keyboard Together Pressing a function button and then using the mouse is called a keyboard/mouse combination operation. In this Manual, the combination operations are described as ‘Key Character+Mouse Operation’, for example CTRL+Single Click, SHIFT+Dragging. Combinations are mostly used to perform the additional features, such as selecting multiple primitives and special operations. 3. Logging In and Out System Double click the shortcut for D3-CG Live, or choose Start>Program>D3-CG Live SD>D3-CG Live SD to start the System. 17 / 251 First appears the Login interface. After entering the software, a Format Setup window pops up, where you can decide the System Mode, Anti-flickering Quality and Task Length as you need. Usually, the setup is only performed the first time you use the System, and remains for later use unless you wish to change. When the Setup is done, single click Yes and enter the normal Edits interface. You may exit the System by executing the command File>Exit in the Main Menu, or by single clicking on the upper right corner of the main interface and confirming Exit when the Exit warning box appears. In case the System detects any unsaved edited project files, it yields a message for saving the project files. By selecting Yes, you save your files and then exit, while No means your give up the edits and exit. By selecting Abort, you cancel the Exit process. 18 / 251 4. System and Extension Menus In D3-CG Live, most of the features can be found in the System Menus. Other common commands are given in the right mouse Extension Menus for function modules. 4.1 System Menus 4.1.1 File • New File creates a new project file. • Open opens a project file. • Save saves the current opened project file. • Save As saves the current project file being edited with a new name and opens the new file. • Save File Set As store the project file and other related files to a specified directory, which makes file backup and transfer easier. • Save As XCG2.99 Format saves the current project file in the format readable to the XCG2.99 version. • Project Properties opens the Format Setup window for setting project properties such as format and anti-flickering quality. • Rendering All Clips compresses all the scenes in the current project into files, respectively. • Compress Prj to Disk compress all the clip to a whole Video file • Recent File shows the project files that you have edited recently. • Exit exits the D3-CG Live System. 4.1.2 Tools The Toolsbox Menus concentrate the frequently used tools of the System to help the user work with ease. • Scroll Edit starts editing a scroll. • Subtitle Edit brings out the window for editing subtitles for subtitle edits and Play. 19 / 251 • Save Image saves the current scene clip being edited as an image, which can be partially or fully saved as a compressed or uncompressed file. • Save Current Shot saves the current scene clip being edited as a full screen image. • Save Selected Object saves the selected Object in the current scene being edited as an image. • Invert TAG Alpha Channel converts the full transparent TGA image into an untransparent one. • Convert TGA Sequence To Animation produces a Disk Animation file from a Sequence Image String file. • Make Frame TGA File List generates a TGA Sequence Image from the current scene by frame. • Make Field TGA File List generates a TGA Sequence Image from the current scene by field. • Change Object Path changes the path of an image, animation, scroll and dialogue file. 4.1.3 Screen • Horizontal baseline creates a Horizontal Baseline in the Edits window. • Vertical Baseline creates a Vertical Baseline in the Edits window. • Horizontal Align aligns the selected Objects to the Baseline by upper, middle and lower positions using the Baseline as reference. • Vertical Align aligns the selected Objects to the Baseline by left, middle and right positions using the Baseline as reference. • Horizontal Align To Safeline aligns the selected Objects by upper, middle and lower positions using the vertical side of the Safeline as reference. • Vertical Align To Safeline aligns the selected Objects by left, middle and right positions using the vertical side of the Safeline as reference. 4.1.4 View • VTR Toolbar opens the VTR Tools window. • GPI Trigger Window opens the window for setting GPI. • Clock Logo Window opens the window for setting and playing the Clock. • Effects Management Window opens the effect window to add the effect to the object 20 / 251 4.1.5 Filter • Image Color: Image Color Lenses. • Blur: Softening Lenses • Distortion: Distortion Lenses. • Style: Style Lenses. • Render: Rendering Lenses. • Wipe Out: Wipe Out Lenses. 4.1.6 System • Setup Preview BK sets the Background Mode and draws the Safeline of the main edit window. • Work Path Setting sets the default paths of files created in the System. • Realtime profile displays the results of the Realtime Statistical Analysis during play. • Display Tracks of Selected Objects displays the motion path of the selected Object in the Dynamic PRM window. • Display Outline of All objects displays the appearance contour of the selected Object in the Dynamic PRM window. • Render AVI Alpha renders the Alpha Channel separately when rendering the file. • Set AVI Encode Para sets the format for AVI Coding. • Set Layer • Set Video Card • Clear Screen clears the Output screen. • Preview plays the preview on the Clip Editor in Motion Mode. • Preview Mode plays the contents in the PRM window in the Monitor synchronically. • Color Bar outputs color bars. • Test Type outputs test patterns. 4.1.7 Windows • Main Editor enters the main edit interface. • Main Player enters the main play interface. • Title Player enters the title play interface. 21 / 251 4.1.8 Help • Help Topics opens Help. • About views D3-CG Live version and other relevant information. 4.2 Extension Menus The Extension Menus contains most of the frequently used commands. Using the menus well allows you to work with the features of the module with great ease. 4.2.1 Right Mouse Menu of Main Still Edits Window • Cut cuts the selected primitive. • Copy copies the selected primitive. • Paste pastes the copied primitive in the blank area. • Delete removes the selected primitive. • Select All selects all the primitives in the current scene. • Send to Back moves the selected primitive from the current layer to the bottom layer. • Bring Forward One Layer moves the selected primitive from one layer up. • Send Back One Layer moves the selected primitive one layer down. • Bring to Front moves the selected primitive from the current layer to the top layer. • Horizontal Align aligns the selected Objects by upper, middle and lower positions using the Rectangular Box or the Baseline as reference. The lasted selected Object is the reference object. • Vertical Align aligns the selected Objects by left, middle and right positions using the Rectangular Box 22 / 251 or the Baseline as reference. The lasted selected Object is the reference object. • Same Unify Color unified the colors of the selected Objects, which are the same type. • Same Font Name unifies the fonts of the selected title characters. • Same Font Size unifies the fonts and sizes of the selected title characters. • Same color font unifies the fonts and colors of the selected title characters. • Same Effect unifies the effects of the selected Objects, which are the same type. • Same All Para unifies all the properties of the selected Objects, which are the same type. • Set Leading sets the row spacing between the selected Objects, viz. Vertical Spacing. • Set Kerning sets the spacing between the selected Objects, viz. Horizontal Spacing. • Restore Rotate restores the rotation properties of the selected Object. • Restore Skew restores the beveling properties of the selected Object. • Restore Twist restores the distortion properties of the selected Object. • Setup Rotate sets the rotation properties of the selected Object. • Setup Skew sets the beveling properties of the selected Object. • Set Twist set the distortion properties of the selected Object. • Group groups multiple selected Objects into a template. • Ungroup de-groups the grouped template into separate objects. • Title ->Template converts the title characters into a template. • Template >Title converts the title characters in a template back into characters. • Split Title changes the title characters in multiple lines into a number of single-line characters. • TVwall Output align the selected Objects in the specified numbers of lines and rows and fill up the screen. • Replace Template replaces the contents of Play in the named object. • Lock locks the selected Object. • Show Object Track reveals the hidden object track on the Time Line. • Set Object as Background sets the selected Object as background object. • Select Obj Name names the current selected Object. • Add to Lib adds the current selected Object to the Texture Library as a texture. 4.2.2 Right Mouse Menu of Main Dynamic Edits Window • Add Keyframe adds one keyframe at the X Frame after the current timecode. • Set Keyframe at Current Timeline adds one keyframe at the current timecode. 23 / 251 • Delete Current Keyframe deletes the keyframe at the current timecode. • Restore Current Frame restores the keyframe at the current timecode. • Default Frame Interval Between Keyframes sets the default number of interval frames when adding a keyframe. • Moving sets the current working status as Move Mode. • Resizing set the current working status as Zoom Mode. • Rotating sets the current working status as Rotation Mode. • Skewing sets the current working status as Beveling Mode. • Twisting sets the current working status as Distortion Mode. • Cut cuts the selected primitive. • Copy copies the selected primitive. • Paste pastes the copied primitive in the blank area. • Delete deletes the selected primitive. • Select All selects all the primitives in the current scene. • Send to Back moves the selected primitive from the current layer to the bottom layer. • Bring Forward One Layer moves the selected primitive one layer up from the current layer. • Send Back One Layer moves the selected primitive one layer down from the current layer. • Bring to Front moves the selected primitive from the current layer to the top layer. • Group groups multiple selected Objects into a template. • Ungroup de-groups the grouped template into separate objects. • Arrange Object As TVwall adjusts the positions and sizes of the selected Objects by the specified row and line numbers. • Adjust Render Rect adjusts the position and size of the Rendering Rectangle. • Display Render Rect shows the Rendering Rectangle in the Edits window. • Delete Render Rect deletes the Rendering Rectangle and returns to Full-screen 24 / 251 Rendering. • Lock locks the selected Object. • Show Object Track reveals the hidden object track on the Time Line. 4.2.3 Right Mouse Menu of Time Line Select a task in the Time Line list: • Master Task sets the selected task as the Main Task. • Bring to Front moves the selected task to the top. • Bring Forward One Layer moves the selected task one level up. • Send Back One Layer moves the selected task one level down. • Send to Back moves the selected task to the bottom. • Delete deletes the selected task. • Reset deletes the keyframes of all the objects in the selected task. • Reset stunt deletes the effects of all the objects in the selected task. • Adjust Gap adjusts the number of effect interval frames of the selected Object in the task. • Select All selects all the objects in the task. Select an object in the Time Line List area: • Bring to Front moves the selected Object to the top level of the task. • Bring Forward One Layer moves the selected Object task one level up. • Send Back One Layer moves the selected Object one level 25 / 251 down. • Send to Back moves the selected Object to the bottom level of the task. • Reset deletes all the keyframes of the selected Object. • Reset stunt deletes all the effects of the selected Object. • Adjust Gap adjusts the number of the effect interval frames of the selected Object. Select an Effect Track in the Time Line List area: • Reset deletes all the keyframes of the selected Effect Track. • Next Keyframe moves the Timecode Line to the timecode position of the next keyrame. • Previous Keyframe moves the Timecode Line to the timecode position of the last keyrame. Select a task in the Time Line Operation area: • Adjust Task Length adjusts the In Timecode, Out Timecode and Length of the Task. • Reset deletes all keyframes of the selected Object. • Reset stunt deletes all the object effects in the selected Task. • Add Beat Point adds a manual beat point at the current position of the Timecode Line. • Del Beat Point delete the selected beat point. • Bundle binds the timecode in the task with timecode of the object contained in the task. • Set Shot Window sets the Task Cut Rectangle. • Hide hides all the objects in the selected task when there is more than one task, viz. not displaying the objects in the Edits window. • Manual sets Manual Beat Point in the task. Select an object in the Time Line operation area: • Reset removes the keyframes of all objects in the selected task. • Reset stunt removes the effects of all objects in the selected task. • Adjust Gap adjusts the number of the effect interval frames of the selected Object. 26 / 251 • Add Beat Point adds a manual beat point at the current position of the Timecode Line. • Del Beat Point removes the selected beat point. • Hide hides all the objects in the selected task when there is more than one task, viz. not displaying the objects in the Edits window. • Lock locks the selected object. • Manual sets the Manual Beat Point of the selected object. Select an Effect Track in the Time Line operation area: • Add Keyframe adds a keyframe at the position of the single right mouse click on the current Effect Track. • Del Keyframe removes the selected keyframe. • Next Keyframe moves the timecode line to the position of the next keyframe. • Previous Keyframe moves the timecode line to the position of the last keyframe. In the Time Line window, clicking the right mouse button at different locations produces different extension menus, which we will talk about in detail in Chapter 3. Here is a tip. When you have trouble about what to do next, try looking for the feature you need in the extension menu. 5. Workflows for Production and Play using D3-CG Live In the D3-CG Live System, it typically takes the following steps to produce and Play graphics, images and titles, namely producing primitives, adding effects, adjusting Time Line, producing playlist, and finally playing. Now we use some instances to illustrate this process briefly. 5.1 Producing Primitives After entering the System, you can start producing primitives in the Main Edits window. 1. Single click a Primitive Type in the Object List with the left mouse button, for example Title Character. 2. Enter the Main Edits window, drag to create a rectangular box with the left mouse button, the size of which is enough for a title character, and then type in the content, for example D3-CG Live. Left click in the space and exit. 3. Use the mouse to adjust the position and size of the title 27 / 251 character in the Main Edits window. 4. Make sure the title character is selected, and then adjust the properties in the Adjust Property window, including Color, Font, Line Spacing, Row Spacing, etc. 5.2 Applying Effects When the primitive is ready, you can ad effects to it as you need, including In Effect, Stillness Effect, and Out Effect. 1. Select the primitive, enter the Adjust Effect interface, and select the appropriate Effects as illustrated. Like in the right illustration, In Effect: Fantasy Motion; Stillness Effect: Flashing; Out Effect: Ball Transformation. 2. Three effect icons appear on the Time Line of the selected object as shown below. Now click , and then adjust the Parameters of the applied Effects in the Adjust Effect window. Also, you can adjust the In Waiting Time, In Speed and Manual Mode of the Effects if necessary. The In Waiting Time is the effect interval, In Speed the length of effect, and Manual Mode is to add a manual beat point to the Time Line. 28 / 251 3. After you finish adjusting the effects, you may click the Preview the play effect in the main edit window; or you may click the Play button, and view button, and watch the effect on the monitor. 5.3 Adjusting Time Line After applying the effects, if you want the title characters to starting moving or rotating, you can add some Track Effects using the Time Line, including Offset, Resize, Alpha, Rotate and Filter. 1. Select the primitive, and open the Effect Track of the primitive in the Time Line window, as shown below: 2. Click the Dynamic/Still Switch button in the upper left corner of the Main Edits window, and enter the Dynamic Edit mode. 29 / 251 3. Add a keyframe on the Offset track. 4. Then move the Timecode Line to 1 second, move the Title Character in the Main Edits window, and another keyframe is produced. 5. After the simple steps we described above, you have finished adding the Offset Timecode effect. You can also use the method to add other Track Effects. 5.4 Making Playlist When one scene is done, you can move on to the next one. Click the button in the right of the Scene List, add a scene, and then produce primitive objects in the new scene and add effects. In this way, you make a Scene List. 5.5 Play When all the needed scenes are prepared, you can enter the Play interface and move on with the playing. Select Windows>Main Player in the Menu column, and enter the Main Player window as below. 30 / 251 Choose different Play mode as you need, for example Auto-/Manual Play, Play List/Single Scene. You can also choose to enter the Adjust mode during Play, make some simple adjustments to the scenes after the scenes to be played in the Edits window, and then play them. 31 / 251 Chapter 2 System Settings 1. Setting Project Properties 1.1 Setting Format A System Mode Set dialog box appears when you start the subtitle software, where you can set the properties of subtitle project; or you may select Project Property in the File menu to call for the System Mode Set dialog box. System Mode: 23 options including PAL, NTSC2997, NTSC30, SECAM, 1080i_25, 1080i_2997, 1080i_30, 720p_2398, 720p_24, 720p_50, 720p_5994, 720p_60, 1080p_2398, 1080p_24, 1080p_25, 1080p_2997, 1080p_30, 1080PsF_2398, 1080PsF_24, 1080PsF_25, 1080PsF_2997, 1080PsF_30, and Custom. You can set your own Scan Width, Scan Height, and Frames/Sec under the Custom option. Display Quality: 3 modes including Average, Medium and Excellent. LOW: Anti-aliasing is not done for the primitive edges, and the small character are kept clear. Medium: Anti-aliasing is done for the primitive edges, the small characters are kept clear, and the large characters are free of flickering. High: Anti-aliasing is done to even greater extent, and the large characters are kept from flickering. Scan Width: Only adjustable under Custom mode. 32 / 251 Scan Height: Only adjustable under Custom mode. Frames/Sec: Only adjustable under Custom mode. Preview: Click the button before this option, and the content on the PRM window is played backward on the monitor synchronically. Removing the selecting, the still image is shown on the monitor only when you double click the Portrait in the Clip List with the left mouse button, and the content is shown on the monitor only when playing. Play Backward can also be set by checking the Play Backward option in the System Management menu. Save Buffer: Save the still maps of all objects in the Project File for enhancing speed when reading the file next time. SD 16:9 Mode: Show scene content using the 16:9 Display SD. The aspect ratio of scene is 720*406. This mode is suited for subtitle production when the video is matted. SD F16:9 Mode: Under this mode, the scene content can be shown in 16:9 SD, where the aspect ratio is 720*432, which is suited for converting SD file into HD file. Task Length: Define the default length of task in the scene. The unit is frame. The default value is 299 Frames (12 s). Press and hold the left mouse button in the Edit column, and drag the cursor up and down, or type in the length in the Edit column to change the value. Bk Movies: Define the time interval between clips. The unit is frame. Press and hold the left mouse button in the Edit column, and drag the cursor up and down, or type in the interval value in the Edit column to change the value. Icon Size: Set the zoom rate for the scene portrait in the Clip List and the Still Image in the PRM window. The default value is 1:8, while the maximum is 1:3 and minimum 1:20. 2. System 2.1 Setting Preview Background Select Set PRM Window Background in the System Management menu, set the background mode for the Main Edits window, and draw the Safe Line. 33 / 251 This interface is divided into left and right parts. The left side is for setting the Background Mode, while the right for setting the Safe Line. In setting the Background Mode, you have three types of background: Empty BG, Color BG, and Image BG. Select one type using three radio buttons. Furthermore, you can choose to use grids under the three background modes. Empty BG: Background color is not set for the PRM window. Color BG: Set any background color for the PRM window. Use the left mouse button to select the Color Box on the right of a background color, and set the color in the Palette. It can be a monocolor, a gradient color, a template gradient color, or a texture. The color in the Color Box is the background color of the PRM window. Image BG: Left single click the button, and select the Image File you need in the dialog box. Grid: Click • in the Edit Box, and the System gives a pull -down box, where five types of grids are shown (10, 20, 32, 48, 64), which means displaying one grid every X pixels (X=10, 20, 32, 48, 64). Select the format you need. Left single click the Color Box on the right, and set the color of the grid in the Monocolor Tab in the Palette. Shot Clip Color: Set the color of the Clip Rectangular Box. Left single click the Clip Rectangle Color box in the Color Box, and set the color of the Clip Rectangle in the Monocolor Tab in the Palette. Render Rect Color: Set the color for Clip Dynamic Rendering. Left single click the Render Rectangle Color box in the Color Box, and set the color of the Render Rectangle in the Monocolor Tab in the Palette. Clear Screen Rect: set the color for clear screen Selected line color: set the line color for the selected one object Capture BG: Use the active image on the current monitor as the background of the PRM window. When you left single click the Capture BG button, a Save As dialog box pops up, where you can save the image on the current monitor as an Image file for later use. This option is valid only when the Import Video option is selected in Set Project Property. After checking the Draw Safe Line, you can set the Safe Line, and have it displayed in the PRM window. Safe Line Color: Left single click the Color box for Safe Line, and set the color for Safe Line in the Monocolor Tab in the Palette. Safe Line Position: Press the left mouse button and drag the Safe Line in the four edit boxes, and change the position of the Safe Line; or type in the position values in the edit box. After you finish the settings, click OK button, and save and apply the settings to the PRM window. By clicking CANCEL button, you give up all the settings. 2.2 Work Path Setting Select Set Work Path in the System Management menu. 34 / 251 Set the default paths for files generated by the System. The file types generated by the System include: Profile file, Project file, Cg2K Project, Xeffect File, Text File, image file, news file, Subtitle file, scroll file, animation file, Karaoke file, weather forecast file, stock exchange file, time play file, diagram file, object play file, football file, basketball file, volleyball file, ping pong file, badminton file, tennis file, baseball file, boxing file, bowling file, general game file, weight lifting file, athlete file, swimming file, gymnastics file, shooting file, audio file, multiple list play file, template file, etc. Before a work path is set, all the files are located using their default paths. After the setup, the System places the file using the appropriate path. How to use: 1. Click the icon in the Edit Path box, select the path you need in the dialog box, and click the Yes button. 2. Clicking Change Drive Letter icon changes the drive letter of all work paths. 3. Clicking Default Path icon sets the work path as the system default. 2.3 Real-time Profile Select Real-time Stat Result Window in the System Management menu. This option displays the results of the Real-time Statistical Analysis during Play. Check before the option to select it, and click the Play button in the Time Toolbar. The results will be shown in the display box when the Play is over. If you don’t check before the option, the results won’t be shown when the Play finishes. 2.4 Displaying Path of Selected Object Check the Display Selected Object Path option in the System Management menu, and the path of the select object is shown in the Dynamic PRM window. 35 / 251 2.5 Display Outline of All Object Check the Preview Rendering Effect option in the System Management menu. When you select the option, you can preview the Play effect on the Clip Editor in the dynamic mode. The Preview button is the Preview scene option in the Time Toolbar. 2.6 Render AVI Alpha Check the Render AVI Channel File in the System Management menu. When you select this option, you can render the Alpha Channel separately when rendering a file. 2.7 Set AVI Encode Para Select the Set AVI Coding Parameter in the System Management menu. The System supports more than ten AVI coding formats. You can set the parameters for AVI coding here, and the AVI files subsequently renders will be in the set format. 2.8 Set Layer Select Set Layer option in the System Management menu. Set the layer sequence of different players to be Played on the screen in this window. The upper players are on first, and the lower ones later. 36 / 251 2.9 Set Video Card Select Set Video Card in the System Menu. Select Single Mode or Multiple Mode. If you choose Multiple Mode, you can choose Mail or Preview. The Main. 2.10 Define Txt Flag Use th is func tion to defin e the beg inn ing and end marke rs fo r eac h paragraph whe n imp orting n ews tex t file. Temp la te fo r N -line format can b e chosen to de fine the na me of sho t for ne ws N line. In News P la yer modu le, th e s yste m p ro vides the func tion to impo rt text, i.e. user doe s not need to in put news ite m on loca l co mputer bu t inpu t text accord ing to spe cified fo rma t on an y co mpu te r, sa ve inp ut text as a tex t file an d impo r t i t to loca l co mpu ter. And then , con ten ts o f n ews ite m can be gene ra ted in to ne ws 37 / 251 file acco rding to the marke r n a me in text file . In th is wa y, mark er na me is introduce d. “ Mark Na me” is the na me o f an ob jec t o f which the con te nts need to be rep lac ed, i.e. an ob jec t o f which ma rke r na me is defined is rep laced with needed con ten t, wh ile this mark na me can b e u ser-defined . Impo rt format o f text file will be introduce d later to enab le you to understand the me anin g of “Mark Name” be tte r. 2.11MOS Setup Set the path for the template, when import the news form MOS 38 / 251 2.12Set Scroll Replace Format The Scroll support the defined format, can replace the symbol to the pic or video. For example, the content of txt is: $2$Dayang’CG is very good. The result of play is “2.BMP” Dayang’CG is very good. Using script format: the function of the replace is on Replace Flag: the symbol of the replace. Picture path: the path of the picture W&H: the wide and high of replaced pic Ext Type: Support the format of pic Import: Import the configuration Export: Export the configuration to a txt 2.13 Stop all theplayer Stop the all player except the clock player, the hot key is “Ctrl+Break” 2.14 Clear screen Clear the saving screen, the hot key is “F2” 39 / 251 2.14 Preview The similar to the function of the project property 2.15 Preview Mode Channel:The sense preview is on the SDI Preview. Back:The sense preview is on the SDI Preview and the windows Windows:The sense preview is on widnows 2.16 Color Bar Play the Color bar, stop play is F2 2.17 Test Type 40 / 251 Chapter 3 Producing Scenes A subtitle scene is composed of one or more subtitle objects, a scroll, a subtitle, an animation superscript and a clock, and their entering and exiting screen and motions along with their linkage make up a scene. 1. Edit Windows 1.1 Main Editor 1.1.1 Entering Main Editor Select the Main Editor option in the menu pane, and open the Main Editor. The interface of the Main Editor has eight parts, as shown below. The features of each part will be described in later section. Menu Box Main Edit Window Edit Tool Box Primitive Production Tool Property Window Scene List Box 41 / 251 Timecode,Pre-set/Management Timecode Track Tool 1.1.2 About Edit Windows Main Edit Display Ratio In the middle of the interface is the system edit space, also called the Main Editor Window. All of the primitives produced by the System are shown here. The Main Editor is made up of the Main Editor Window and the Display Ratio Column in the Still Mode. The percentage in the Display Ratio Box is the ratio, at which the object is displayed in the Clip Editor against the actual size of it. Left single click the Column, and a list containing a number of percentages will pop up. Check the one you need. Apply all: Apply the current percentage to all shots 1.2 Buttons in Editing Toolbar In the upper part of the Main Edit Space is the Edit Tool buttons of the System, shown below. We now describe the buttons in several sections according to their different features. 42 / 251 1.2.1 Buttons for Switching between Still and Dynamic Edits The button in the red frame is the Dynamic/Still Switch, which is very important in the System. Only when you have set it in the Dynamic Mode can you proceed with the editing of special effects of Time Line keyframes. 1.2.2 Select Buttons for Still Edits Move Rotate Resize Skew Twist Redo Adjust Curve Mode Bring Forward One Layer Undo Send Back One Layer Bring to Front Send to Back Move moves the selected primitive. Note: Zoom resizes the selected primitive. Note: Pressing CTRL+TAB buttons switches between horizontal and vertical zooming. Rotate rotates the selected primitive. Note: Pressing CTRL+TAB buttons switches between rotation round the X, Y and Z axes. Resize bevels the selected primitive. Pressing CTRL+TAB buttons switches between beveling by the X and Y axes. Skew distorts the selected primitive. Pressing CTRL+TAB buttons switches between distortion by the X and Y axes. Note: For all the five operations above, you can press the CTRL+TAB combination to force execute the horizontal or vertical operations on a primitive. Adjust Curve Mode: A curve adjustment tool. You can make adjustments to the curve by selecting this tool. It is used in all operations containing curve adjustment, such as adjusting Artistic Character Path, Curve Shape, and displacement, size and α channel on the Time Line. Undo undoes the last operation. Redo recovers the last operation. Bring Forward One Layer moves the selected object one layer up. Send Back One Layer moves the selected layer one layer down. Bring to Front moves the selected object to the top layer. Send to Back moves the selected object to the bottom layer. 43 / 251 1.2.2 Select Buttons for Dynamic Edits A B C D E F G H I J K L M N O P (A:Move;B:Resize;C:Rotate;D:Original Matrix;E:Full Tool;F:Infinitesimal Tool; G:Adjust Curve Mode;H:Undo;I:Redo;J:Restore Offset;K:Restore Resize;L:Restore Rotate;M:Restore Skew;N:Restore Twist;O:Restore Matrix;P:Auto-Make Key frame) As you see in the illustration above, in the Dynamic Mode, the lining of the Tool buttons is slightly different from the Still Mode. There are a few additional buttons. Now let’s look at the features of the new buttons in the Dynamic Mode. Move: Select this tool, click the object you want to move, and a selecting frame appears round the object, indicating the object is now selected. Now point and hold the cursor on the object, drag the object, and you can move it anywhere in the Clip Editor window you wish. Using the CTRL+TAB buttons can change the mode of dragging, moving the object in the X, Y, Z or any direction. Resize. Point the cursor on the object, drag in different directions, and you can enlarge or reduce the size of the object. By using the CTRL+TAB combination, you can zoom the object by the X, Y, Z or any direction. Rotate: Select this tool, drag the object with mouse, and rotate it any way you want. Original Matrix: Select the tool, drag the object, and change the angle of the reference face. Full Tool enlarges the selected object to full-screen. Infinitesimal Tool reduces the selected object to infinitely small. Adjust Curve Mode : Selecting this tool, you can perform Bezier adjustments to the curve. It is particularly useful in adjusting artistic character, curve, displacement, size and α channel. Undo removes all keyframes on the displacement track of the current object to restore its previous status. Redo removes all keyframes on the size track of the current object to restore its previous status. Restore Rotate restores the status of the current object before the rotation. Restore Skew Tool restores the status of the current object before the beveling. Restore Twist restores the status of the current object before the distortion. Restore Matrix Change restores the initial status of the reference face. Auto-Make Key frame: It is the Auto-generate mode when this option is pressed, viz. generating key points at the current frame automatically when the size and displacement statuses of an object are changed in the dynamic page. The Auto-generate mode is off when the option is not pressed, viz. keyframes are not automatically generated on the timecide track when changing the object size and displacement in the dynamic page, and only the stillness parameters of the object are changed. 44 / 251 1.3 Aligning 1.3.1 Baseline Alignment Display the baseline, and align the selected objects horizontally or vertically. a) Horizontal baseline Select the Display Horizontal Baseline option in the pull-down menu of the window, and a horizontal baseline is created in the Main Editor window. You can use the cursor to select and drag the baseline up and down; or double click the Horizontal Baseline Marker, and change the position of the baseline by typing in values in the dialog box. Horizontal Baseline Marker E.g. Now we create three title characters and align them horizontally in four steps: 1) Single click the Display Horizontal Baseline option in the menu, and a Horizontal Baseline Marker appears in the upper left corner of the Main Editor window. 2) Press the left mouse button, drag the cursor up and down, and place the baseline where you want to do the alignment. 3) Use the combination of Left Mouse Button+CTRL to select all the three objects. 4) Select the Horizontal Alignment command in the menu, and four alignment modes appear, including Top, Center, Bottom, and Base Bottom. Top moves the three objects vertically below the baseline, and aligns the upper edges of the objects with the Horizontal Baseline. Center moves the three objects vertically where their horizontal middle lines match the Horizontal Baseline. Bottom moves the three objects vertically above the baseline where their lower edges coincide with the Horizontal Baseline. Base Bottom moves the three objects vertically until their baselines match the 45 / 251 Horizontal Baseline. Before alignment After alignment b) Vertical Baseline Select the Display Vertical Baseline option in the pull-down menu of the window, and a horizontal baseline is created in the Main Editor window. You can use the cursor to select and drag the baseline left and right; or double click the Horizontal Baseline Marker, and change the position of the baseline by typing in values in the dialog box. Vertical baseline marker E.g. Now we create three title characters and align them vertically in four steps: 1) Single click the Display Vertical Baseline option in the menu, and a Vertical Baseline Marker appears in the upper left corner of the Main Editor window. 2) Press the left mouse button, drag the cursor left and right, and place the baseline where you want it. 3) Use the combination of Left Mouse Button+CTRL to select all the three objects. 4) Select the Vertical Alignment command in the menu, and four alignment modes appear, including Left, Center, Right, and Base Left. Left moves the three objects horizontally left to the baseline, and aligns the left edges of the objects with the Vertical Baseline. Center moves the three objects horizontally where their vertical middle lines match the Vertical Baseline. Right moves the three objects horizontal right to the baseline where their right edges 46 / 251 coincide with the Vertical Baseline. Base Left is usually used for vertical characters, which moves the three objects horizontally until their baselines match the Vertical Baseline. Before After c) Horizontal Align To Safeline Select the Horizontal Align To Safeline option in the pull-down menu of the window. Use the horizontal edge of the Safeline as baseline, and align the selected objects by Top, Center and Bottom . E.g. Now we have three objects in the main edit window scattered in different positions, and we align them vertically in two steps: 1) Use the Left Mouse Button+CTRL combination, and select all three objects. 2) Select the Horizontal Align To Safeline command in the menu, and three alignment modes appear, including Top, Center and Bottom . Top moves the three objects vertically below the upper edge of the Safeline where the upper edges of the objects coincide with the upper edge of the Safeline. Center moves the three objects vertically to the horizontal center of the Safeline. Bottom moves the three objects vertically above the lower edge of the Safeline where the lower edges of the objects match the lower edge of the Safeline. 47 / 251 d) Vertical Align To Safeline Select the Vertical Align To Saftline option in the pull-down menu of the window. Use the vertical edge of the Safeline as baseline, and align the selected objects by left, Center and right. E.g. Now we have three objects in the main edit window scattered in different positions, and we align them vertically in two steps: 1) Use the Left Mouse Button+CTRL combination, and select all three objects. 2) Select Vertical Align To Saftline command in the menu, and three alignment modes appear, including left, Center and right. Left moves the three objects horizontally to the right of the left edge of the Safeline where the left edges of the objects coincide with the left edge of the Safeline. Center moves the three objects horizontally to the vertical center of the Safeline. Right moves the three objects horizontally to the left of the right edge of the Safeline where the right edges of the objects match the right edge of the Safeline. 1.3.2 Alignment Extension Keys Single click the right mouse button to produce the Extension Keys box, and you can perform alignment of objects by selecting Horizontal Align or Vertical Align. What makes this operation different from the alignments we describe above is that it aligns multiple objects, and uses the last selected object as the reference. a) Horizontal Align E.g. Here we have three objects in the main edit window scattered in different positions. Now let’s align them horizontally in two steps: 1) Use the Left Mouse Button+CTRL combination, and select all three objects. 2) Select the Horizontal Alignment command in the menu, and four alignment modes appear, including Top, Center, Bottom, and Base Bottom. Top moves the other two objects vertically with the last selected object as reference until the moved objects are in alignment with the upper edge of the reference object. Center moves the other objects vertically with the last selected object as reference until 48 / 251 the moved objects are in alignment with the middle of the reference object. Bottom moves the other objects vertically with the last selected object as reference until the moved objects are in alignment with the lower edge of the reference object. BaseBottom moves all three objects vertically with the last selected object as reference until the baselines of all the objects are in alignment. Before After b) Vertical Align E.g. Here we have three objects in the main edit window scattered in different positions. Now let’s align them vertically in two steps: 1) Use the Left Mouse Button+CTRL combination, and select all three objects. 2) Select the Vertical Align command in the menu, and four alignment modes appear, including Left, Center, Right, and Base Left. Left moves the other two objects horizontally with the last selected object as reference until the moved objects are in alignment with the left edge of the reference object. Center moves the other two objects horizontally with the last selected object as reference until the moved objects are in alignment with the middle of the reference object. Right moves the other two objects horizontally with the last selected object as reference until the moved objects are in alignment with the right edge of the reference object. Base Left moves all three objects horizontally with the last selected object as reference until the baselines of all the objects are in alignment. It is often used for vertical characters. Before alignment 2. Property Windows 49 / 251 After alignment The Property windows are the most frequently used in an editing procedure. All property parameters such as color, size, font, position, effect, text edit and light effect have to be adjusted in these windows. In this section, we will look at the Property windows in detail. 2.1 General Properties The tab of the General Properties page is located in the right of the main edit window, where you can set and adjust the properties for primitive production such as Color, Character Size, Alignment and so on. The windows for producing a 2D and a 3D primitive are different, which we describe separately below. 2.1.1 General Properties of 2D Primitive The Object Property tab of the Property box is divided into two parts, Set Colors and Special Properties. 2.1.1.1 Setting Colors In this page, you can adjust the Color Properties of facet, perimeter, side line, and gradient of characters and primitives. Note that the properties are in effect as soon as set. We will describe how to adjust the colors in detail in the section about the Palette. This page also contains Color Pre-set to help the user save the primitive color data, which can be transferred between primitives. Click the button, enter a name in the dialog box, click Yes, and save the current color data in the Color Pre-set box. Click the button, and remove the saved pre-set color in the dialog box. Click the button, and then overlay, rename or find primitive color data by its name in the dialog box. Overlay replaces the selected color pre-set in the Color Pre-set window with the color properties of the object you made. Rename changes the name of the selected color 50 / 251 pre-set in the Color Pre-set window. Search locates the color pre-set in the Color Pre-set box by the name you entered. 2.1.1.2 Setting General Property Parameters In the Properties box interface, you can set the facet, 3D edge, gradient, perimeter, perimeter 3D edge, and perimeter gradient. Extend Window Current Color Select Shadow Mode Extend Window: Clicking this icon spreads the window for setting parameters specifically. Each parameter has a different setup window. Select: This icon determines if a parameter is in effect. It is in effect when the icon is selected. Current Color: Current Color adjust. Shadow Mode: If the currently set color is a gradient one, you can click the Gradient Mode icon to change it. There is a dot on the upper left of the arrow, which is for the Paste Mode of a texture to an object, viz. whether the pasting starts from the upper left or the middle. means the texture starts from the lower left corner when pasted to the object. means the texture is symmetrically pasted to the object. means the texture starts from the middle point when pasted to the object. means the texture starts from the upper left corner when pasted to the object. means the texture starts from the upper right corner when pasted to the object. means the texture starts from the lower right corner when pasted to the object. means the texture is enlarged or reduced to match the size of the object. Being selected is indicated by a green frame round the selected object. At the same time, the System produces the Palette automatically, where you can adjust the colors, which are displayed in the Color Box in a real-time fashion when you work on the setup. 51 / 251 1) Setting Facet There are six parameters that you can work with. Color Box: Color of the facet. Set the color in the Palette after selecting the Color Box; or you may put the color that you have set in advance in the Palette into the Color Box by dragging it from the Palette into the Color Box using your left mouse button. Art Style: Five types are included and they are None, Convex, Concave, Bright Edge and 3D Edge. Click on ▼ at right side of dropdown box to select needed effect from dropdown menu. : Choose light intensity and color. : Set width and height for 2D character. : Set the direction of light source for 3D edge : Set light source for 3D edge : Set the position of light source Art Style: Including the four types of No Effect, Concave, Convex and Bright Edge. You can choose the one you want by clicking the • icon in the pull -down box in the right of the Artistic Effect Type window using the left mouse button. Blur Edge: This setting is only usable when the type of artistic effect is Concave, Convex or Bright Edge. It is the Blur Value for the three types. You can change the value by holding the left mouse button and dragging it up and down, or you can type the value directly in the edit box. Height: This setting is only usable when the type of artistic effect is Concave, Convex or Bright Edge. It is the height for the three types. You can change the value by holding the left mouse button and dragging it up and down, or you can type the value directly in the edit box. Angle: This setting is only usable when the type of artistic effect is Concave, Convex or Bright Edge. It is the angle for the three types. You can change the value by holding the left mouse button and dragging it up and down, or typing the value directly in the edit box, or you can also press the left mouse button and drag the cursor on the Circle to change the angle. Light Color of Convex/Concave Edge: This setting is only usable when the type of artistic effect is Concave, Convex or Bright Edge. It is the edge color for the three types. Select the Color Box, and set the color in the Palette; or you may put 52 / 251 the color that you have set in advance in the Palette into the Color Box by dragging it from the Palette into the Color Box using your left mouse button. 2) Setting 3D Edges There are three parameters that you can work with. Color Box: Color of 3D edge. Set the color in the Palette after selecting the Color Box; or you may put the color that you have set in advance in the Palette into the Color Box by dragging it from the Palette into the Color Box using your left mouse button. Width: Width of 3D edge. You can change the value by pressing the left mouse button and moving the cursor up and down, or typing the value directly in the edit box using the keyboard. Orientation: Orientation of 3D edge. You can change the value by holding the left mouse button and dragging it up and down, or typing the value directly in the edit box, or you can also press the left mouse button and drag the cursor on the Circle to change the angle. 2) Setting Shadow There are four parameters that you can work with. Color Box: Color of gradient. Set the color in the Palette after selecting the Color Box; or you may put the color that you have set in advance in the Palette into the Color Box by dragging it from the Palette into the Color Box using your left mouse button. Offset: Offsets of gradient and facet. You can change the values by pressing the left mouse button and moving the cursor up and down, or typing the values directly in the edit box using the keyboard. T Degree: Blur value of gradient. You can change the value by pressing the left mouse button and moving the cursor up and down, or typing the value directly in the edit box using the keyboard. Orientation: Orientation of gradient. You can change the value by holding the left mouse button and dragging it up and down, or typing the value directly in the edit box, or you can also press the left mouse button and drag the cursor on the Circle to change the angle. 53 / 251 3) Setting Perimeter The Set Perimeter box also includes Color Box, Width, Art Style, Blur Edge, Height, Angle, and Light Color of Concave/Convex Edge, which can be set the way similar to the setup for facet. The only difference is the additional Hollow option for perimeter setup. Selecting this option (when the icon next to the Hollow option is blue) makes the perimeter hollow, while not selecting it makes the perimeter solid. E.g. First click off the Display button for the character facet, leaving only the perimeter, and then click the Hollow option. Now you see the difference. 2.1.1.3 Advanced Settings Working with the Advanced Settings can make your object effects prettier and look more real. The Advanced Settings primarily include: Set Front Light, Set Side Light, Set Shade, Set Materials, and Set Special Effects. 1) Solid Edge of Edge There are three parameters that you can work with. 54 / 251 Color Box: Color of 3D edge. Set the color in the Palette after selecting the Color Box; or you may put the color that you have set in advance in the Palette into the Color Box by dragging it from the Palette into the Color Box using your left mouse button. Width: Width of 3D edge. You can change the value by pressing the left mouse button and moving the cursor up and down, or typing the value directly in the edit box using the keyboard. Orientation: Orientation of 3D edge. You can change the value by holding the left mouse button and dragging it up and down, or typing the value directly in the edit box, or you can also press the left mouse button and drag the cursor on the circle to change the angle. 2) Shadow of Edge There are four parameters that you can work with. Color Box: Color of gradient. Set the color in the Palette after selecting the Color Box; or you may put the color that you have set in advance in the Palette into the Color Box by dragging it from the Palette into the Color Box using your left mouse button. Offset: Offsets of gradient and facet. You can change the values by pressing the left mouse button and moving the cursor up and down, or typing the values directly in the edit box using the keyboard. T Degree: blur of gradient. You can change the values by pressing the left mouse button and moving the cursor up and down, or typing the values directly in the edit box using the keyboard. Orientation: Orientation of 3D edge. You can change the value by holding the left mouse button and dragging it up and down, or typing the value directly in the edit box, or you can also press the left mouse button and drag the cursor on the circle to change the angle. 3) Setting Face and Side Lights The Front and Side Lights are set the same way. Here is a general description. Light: Select the Light Effect box, and then set the effect in the Light Effect page in the Palette. Use the slide triangle in the Light Effect page to set effect degree. Click the right mouse button in the Light Effect box if you want to remove the effect. Ambient: To set the ambient color of light effect, select the Light Source Color box, and then set the color in the Monocolor page in the Palette. 55 / 251 Reflect Select the Reflection Color box, and then set the color in the Monocolor tab in the Palette. Degree: To set light intensity, press the left mouse button in the edit box for General Light Intensity, and change the value by dragging the cursor up and down; or you may type the value directly in the edit box using the keyboard. 4) Setting Channel Click the Color Box in the Set Shade option, and the Shade page of the Palette menu pops up. Select a shade, and the System will fill the Shade box with the select shade. You can change the display degree of the selected shade using the slide triangle in the Shade box. Click the right mouse button in the Shade box if you want to remove the shade. 5) Setting Material Click the Color Box in the Set Materials option, and the Materials page of the Palette menu pops up. Select a shade, and the System will fill the Materials box with the select material. You can change the display degree of the selected material using the slide triangle in the Materials box. Click the right mouse button in the Materials box if you want to remove the material. 6) Setting Special Effects The System is devised with three special efffects, including Normal, Emboss, and Costomized BG. Usually, the Normal effect is the most common choice, and the Emboss, and Costomized BG. are for adding some special rendering effects to the original characters. Emboss The object takes on the relievo effect when you choose the Relievo option in the Special Effect box. With this effect, the color of the relievo is set the same as the background color, and the original colors of the primitives are invalidated. Also, you can set the distance between object edges and the relievo background by clicking the icon on the left of the Adjust Parameter option. The System then produces a setup interface, where you can adjust the position and edges of the yellow rectangle. When you are working on the setup, note that the yellow rectangle has to be larger than the original edges. You may enter the values in the Input box on the right side to change the size and position of the rectangle. To adjust the color properties of the relievo, click the icon on the left of the Background option. Then a Set Relievo Properties interface pops up, where you can set the relievo color properties the same way as setting the color properties. The Previous setting only works for the setting of facet and perimeter parameters. 56 / 251 Customized BG The Customized BG is set in a similar way to the Emboss, but the effect is quite different. The Customized BG adds a background behind the original graphics, allowing you to produce an underline below the subtitle easily, instead of doing it in two separate steps of first making the subtitle and then underlining. To remove the normalization effect, single click the Normalize icon. The System will produce Alignment Mode options, and hide the Adjust Parameters automatically. Also you can use the Adjust Position option on the right to set the position of the background color. The other setups are the same as Set Color Properties. You can change the appearance by adding shade, and change the background color properties using Set Color. 2.1.1.4 Primitive General Property Both 2D and 3D primitives use a General Property window under their Property tabs. Left/Top/Width/Height sets the position parameters of an object in the Clip Edit window. Hold your left mouse button, drag up and down in the edit box, and change the line and row spacing; or simply type the values in the edit box. Note: Clicking the right mouse button on the Left/Top/Width/Height options can switch between the Left/Top /Width/Height and Right/Lower/Width/Height modes. Play Mode sets the Play Mode for object, including the four modes of foreground, background, overlay and copy mixing. Hide hides the selected object. When selected, the object is hidden in PRM. Otherwise, it is shown. Lock locks the selected object. When selected, the object is locked and cannot be moved. 57 / 251 Otherwise, it is movable. 2.1.2 3D Primitive Properties When you have selected a 3D object, the corresponding properties are displayed in the Property tab. Typically, the properties of a 3D object include Select Facet, Object Color, Object Texture, Position and Size, which may vary a little from one object to another. Please refer to the special a properties for production of different 3D objects. 2.1.2.1 Selecting Face For different face of a 3D object, you have two ways to choose any of the facets: One way is to use your mouse to click a facet in the Edit interface, and the selected face will be framed with green lines. The other way is to select your facet to be edited in the Property tab, as illustrated in the picture. Select the name of the intended facet in the pull-down box of the Select Facet window. The icon in the corner of the pull-down menu applies the properties of the selected facet to all facets when selected, including the color, texture and other related properties. 2.1.2.2 Changing Colors Here you can create and adjust the colors and reflection light of a 3D object in the Color window. Select a 3D object, click the Color Block in the Property box, and you now can choose a color in the Palette as the color of the object when the Palette tab is on. Click the Mirror Reflection Color Block in the Property box, and select a color in the Palette as the mirror reflection color of your 3D object when the Palette is on. Also you can adjust the intensity of reflection light by changing the value on the left. 58 / 251 Select a facet of the 3D object, click the remove the pre-set color in the Color Pre-set box icon in the lower right corner, and add or 2.1.2.3 Textures You can apply textures to a 3D object in two ways: One is to click the icon, and select and open a graphics file as texture in the dialog box that pops up. Then the box is given the texture of the graphic. The other way is to select a pre-set texture in the Pre-set Texture option. Double click the pre-set texture, and it is directly applied to the box. Please see the section on texture management for details. The angle of the texture applied can be changed using the icon. Click the icon, and you can switch between four angles for texture addition, including Upper-Left, Upper-Right, Lower-Left, and Lower-Right. If you want to apply the same texture to all the facets, you don’t have to do it one by one. Simply set one facet, and then press the button. Now all the facets are done. 59 / 251 2.2 Effects Properties The System offers two types of special effects, the In-and-Out Effects and the Stillness Effects. The In-and-Out (Swicth) Effects include Cut, Fire Ghost, Interleave, InterLeaving, Offset, Rad blur,Screw, Soft ,Strecth, Turn In,Zoom Blur,Ball, Cylinder, Distort, Explode, Blur, Fade, Fly, Zoom, Wipe,Mosaic,pageCurl,Pucker,Rotate, Resize, Broken, Tile, Welter and the Stay Effects include BallLight, ColorEx, Color, Comer Tail, Distort, Emit Fire, Fly Light, Flicker, Lens, Mod Light, Overlap, Ripple, Soft, V Light, Wave and Zoom Blur. In this section, we will talk about the management and application of effects in detail. 2.2.1 Managing Effects 1) Select the Effect tab. 2) Apply effects to an object or scene. Select an object for setting effects in the main edit window, or a scene on the Time Line, choose an effect in the In Effect box (by clicking the small icon before the name of the effect. It turns green when selected), and then go on with the stillness and Out effects. 3) (Note: Stillness effects are not usable for a scene) In case the object needs more than one stillness effect or has to go out and then come back in when Played, you can first prepare the effects you need on another object, and then copy them to the intended object using CTRL+C and CTRL+V. 2.2.2 Setting Effects You can start to set an effect by selecting it in the Effect tab and then clicking the icon, or double clicking the effect on the Time Line for setup after you have selected an effect for your object. We will come back to this topic in detail later. 60 / 251 2.2.2.1 General Settings for Effect Plug-ins In the Set Plug-in windows for all effects, there are options to adjust the timecodes (including Flying Image and Growth). Now we take Flying Image for example to describe the setting of timecode. (The procedures are basically the same for other effects) As you can see in the picture, every Set Plug-in window has the items shown above, which you can use to set the start and end timecodes for an effect. In the box, In Timecode means the timecode where the effect start, and Out Timecode where it finishes. When they are set, the System automatically calculates the total length of the effect. Additionally, there is a switch to control the linkage between the In and Out Timecodes. When the switch icon is pressed (becoming concave), the In and Out Timecodes are linked. Adjustments to the in Timecode will change the Out Timecode automatically to maintain the total length. When it is not selected (staying flat), the two timecodes are not linked. Changing the In Timecode will not affect the Out Timecode, and the length of the effect will change accordingly. Also you can choose the subtype of an effect. When you use the Manual Mode, the System adds a manual beat point automatically at the In Point of the effect. You can control the object effect using the space bar on your keyboard. Both 2D and 3D effects have six columns of settings in their tabs: 1. In Effect Waiting Time and In Speed: Double click the edit box, and you can swicth between Display Frame and Display Timecode modes. You may change the values in the edit box by typing in numbers on the keyboard or dragging the left mouse button up and down in the edit box. If you want to work manually, check the Manual option. 2. In-effect Content: To choose the effect you need, use the left mouse button to click the Select icon next to the effect. Select the icon if you want to edit the effect, or double click the effect on the Time Line. 61 / 251 3. Stillness Effect Waiting Time and Stillness Speed: Double click the edit box, and you can swicth between Display Frame and Display Timecode modes. You may change the values in the edit box by typing in numbers on the keyboard or dragging the left mouse button up and down in the edit box. If you want to work manually, check the Manual option. 4. Stillness Effect Content: To choose the effect you need, use the left mouse button to click the Select icon next to the effect. Select the icon if you want to edit the effect, or double click the effect on the Time Line. 5. Out Effect Waiting Time and Out Speed: Double click the edit box, and you can swicth between Display Frame and Display Timecode modes. You may change the values in the edit box by typing in numbers on the keyboard or dragging the left mouse button up and down in the edit box. If you want to work manually, check the Manual option. Out Effect Content: To choose the effect you need, use the left mouse button to click the Select icon next to the effect. Select the icon if you want to edit the effect, or double click the effect on the Time Line 2.2.2.2 Specific Settings for In-and-Out Effects The In-and-Out effects are different for 2D, 3D objects and scenes. Let’s look at them specifically. 1) 2D Object In-and-Out Effects Cut One of the most basic effects. Set the In Time, Out Time, and Length in the dialog box, and the effect is ready. 62 / 251 Fire This effect plays an object in and out with a blaze..You can set the Particle Number, Particle Size, Particle Life, Particle Velocity, Particle Alpha,and so on. Ghost This effect plays an object in and out like a gradient. You can work with the parameters of Level, Transparency, Template, Direction, Offset, Interval, and Fade Time. InterLeaving This effect splits an object into parts, which move in and out in opposite directions. You can work with the parameters of 0 Split X, 0 Split Y, 1 Split X, 1 Split Y, 0 Blur, 1 Blur, 0 Slide Image Mode, 1 Dash Mode, and Return. 63 / 251 Offset Using this effect, you can make an object move from position to position. Spread the Time Line, and set the offset of object by adding keyframes. Rad Blur You can work with two parameters for the Radial Blur effect, the Blur Samples and FadeTime. 64 / 251 Rot Blur This effect plays an object in and out with it rotating. You can work with the parameters of Number of Circle, Clockwise, Blur Samples, and Fade Time. Screw Using this effect, you can make an object transform from the smallest spiral to the original size, or the other way around. There are three parameters of Rotation, Clockwise, and Granularity. Soft This effect plays an object in and out by soft transformation. You can adjust the parameters of Amplitude, Wavelength, Frequency, Stay Time,Range and Fine. 65 / 251 Stretch This effect plays an object in and out while stretching it. Show Range: The range of object display when stretched. Fine: The fineness of object when stretched. Turn In This effect plays an object in and out by moving and turning over the object at the same time. You can work with the parameters of Number of Loop, Clockwise, X Displacement, Y Displacement, Template, and Fade. Zoom Blur This effect plays an object in and out like a gradient. You can work with the parameters of Number of Levels, Transparence, Template, X Offset, and Y Offset. 66 / 251 Ball This effect plays an object in and out by transforming it in the shape of a ball. You can work with the four parameters of Fine,Mode , Texture Extend and Fade Time. Cylinder This effect plays an object in and out by transforming it in the shape of a cylinder. You can work with the Three parameters of Fine,Mode and Fade Time. Distort This effect plays an object in and out by twisting it from the left and right sides or the upper and lower sides. You can work with the parameters of Rotation, Fine, and Fade Time. 67 / 251 Explode This effect switches by exploding an object. You can work with the five parameters of Radius, Number of Horizontal Shatters, Number of Vertical Shatters, Explode Energy, and Fragment Shape. Blur The Blur effect makes an object blurry. You can work with the parameter of Blur Samples. Fade This effect makes an object change from fully transparent to fully solid, or the other way around. You can set the effect by change the α value on the Time Line. Fly With this effect, an object flies in from different directions in a certain way. 68 / 251 Zoom With this effect, an object grow from small to big from different directions in a certain way. Wipe With this effect, an object slides in slowly from different directions in a certain way. Blur: Width of slide-in edge. X_Factor: Horizontal repetition factor. Y_Factor: Vertical repetition factor. You can set the effect by typing values directly in the edit box, or by holding and dragging the left mouse button up and down in edit box. 69 / 251 Mosaic This effect plays an object in or out by mask transformation. Page Curl This effect plays an object in and out by rolling its page. Radius sets the curvature radius of roll page. Show Range set the display range of roll page between 0 and 2. Direction set the angle of roll page in 360 degrees. Light Color selects the lighting color for rolling. Lighting set the presence or absence of lighting. Specular set the light color of the highlighted area. Specular Power sets the intensity of high light between 0 and 128. Color Back sets whether to apply color to the back of a roll page. Color selects the back color of a roll page. Fineness sets the fineness of an object when rolled. Fade Time sets the fade-in and -out time for an object when rolled. Pucker This effect plays an object in or out by folding it left or right, or up or down. You can set the Number of Folds parameter. 70 / 251 Rotate This effect plays an object in and out by rotating an object. X/Y/Z Circle sets the numbers of rotating circles round the X/Y/Z axis for one effect play. X/Y/Z Clockwise sets whether the rotation is clockwise or anti-clockwise. You can set the Number of Rotation by typing values directly in the edit box, or by holding and dragging the left mouse button up and down in edit box. Choose the option you want for Clockwise Rotation setup. Resize This effect zooms an object in or out. Open the Time Line, and resize an object by adding size keyframe. 71 / 251 Broken Square This effect plays an object in and out by fragmenting it. Now you have four In-and-Out directions of fragments: Up-Down, Down-Up, Left-Right, and Right-Left. Show Range sets the range of display. Speed sets the In and Out speed of a fragmented object within a given time. H Squares sets the number of horizontal fragments. V Squares sets the number of vertical fragments. Angle sets the angle of fragmentation. Fragmen Shape sets the shape of fragments. Tile With this effect, an object begins to form from one direction with procelain pieces. The parameters include Row Number, Col Number, Action Time, Rotation Mode, Clockwise, and Inverse. Welter With this effect, an object rolls in and out. Perspective sets the parameters of the perspective trapezoid when the object rolls. Image Quality increases image quality with its value. 72 / 251 2) In-and-Out Effects for 3D Object For now there is only one In-and-Out effect for 3D objects. More are expected as the software is upgraded. Rotate&Template This effect plays an object in and out by rotating and zooming it at the same time. You can set its X/Y/Z Rotation Number, and X/Y/Z Zoom Rate. 3) Scene In-and-Out Effects The In-and-Out effects for scenes include Relevant PageFade, Relevant Push Image, Relevant Tile, Relevant Page Wipe, Ball Transformation, Cylinder Transformation, Distort, Explode, Blur, Fade in/out, Fly,Zoom, Wipe, Mosaic, Page Curl, Pucker, Rotate, Resize, Breaken Square,Tile, and Wilter. The effects can be set when playing a list of multiple scenes. Setting an Out effect for the current scene invalidates the In effect of the next scene for playing. You can set the in speed of a scene in the In Speed window, which can be seen as the length of the effect. Most of the effects have been described above. Now we shall look at the four Relevant effects. PageFade When you apply this effect as the Out effect for the current scene, it fades out while the next scene fade in when the project is Played. 73 / 251 Page Push When you apply this effect as the Out effect for the current scene, the next scene pushes the current one out the way you have selected when the project is Played. Page Tile When you apply this effect as the Out effect for the current scene, it moves out in pieces of broken porcelain while the next scene flies in in porcelain pieces when the project is Played. The parameters you can work with include Row Number, Col Number, Action Time, Rotation Mode, Rotation Clockwise, and Inverse. 74 / 251 Page Wipe When you apply this effect as the Out effect for the current scene, it slides out while the next scene slides in when the project is Played. The parameters you can work with include Blur, X_Factor, and Y_Factor. 2.2.2.3 Specific Properties of Stay Effects The stay effects are used for 2D and 3D objects, which are different from each other. Let’s look at them in detail. 1) Ball Light Effect for 2D Still Object The Ball Light effect flies ball light across the surface of an object. Times sets the times of ball light flying across the surface on one effect play. Color sets the color of ball light. You can choose Monocolor, Gradient Color, Template Gradient Color, and Template. See the Setting Palette section for specific setups. Light Intensity sets the intensity of ball light. You can set it by typing values directly in the edit box, or by holding and dragging the left mouse button up and down in edit box. Light Diameter sets the ball diameter. You can set it by typing values directly in the edit box, or by holding and dragging the left mouse button up and down in edit box. Focus sets the light focus. You can set it by typing values directly in the edit box, or by holding and dragging the left mouse button up and down in edit box. Limit sets the area that the light affects. 75 / 251 Color Ex This effect changes colors. Remain sets the number of frames when a color remains. You can set it by typing values directly in the edit box, or by holding and dragging the left mouse button up and down in edit box. Original Color select the colors of object to be swicthed. You can set this parameter in the Palette. Replaced Color sets the color after the switch. You can choose Monocolor, Gradient Color, Template Gradient Color, and Template. See the Setting Palette section for specific setups. Src Clr Range: This is an error value X, which switches all the colors of an object with a difference 1±X from the R, G, B and Alpha values of the Source Color into the Color Switch value. Color This effect also changes color of an object, but the color cannot be set. Repeat sets the times of color change. Comet Tail This effect can make the object a tail like the comet. Color: Set the color of the Comet tail Length: Set the Length of the comet tail 76 / 251 Distort This effect changes the shape of an object. You can work with the three parameters of Rotation, Fineness and Speed. Emit Fire The object stay with a fire circle. You can set the Particle Number, Size, Velocity, Life, Alpha and Emit Count. 77 / 251 Fire The object stay with a fire. You can set the Particle Number, Size, Velocity, Life, Alpha and Emit Count. Flag The Waving Flag effect plays an object like a flag waving in the wind. You can work with the five parameters of Fineness, Frequency, Wavelength, Amplitude and Lighting. Fly Light This effect plays light belts across the surface of an object. Times sets the times of light belt flying across in one effect play. Light Color sets the color of light belt. Light Decrease sets the color of reduction light. Light Intensity sets the intensity of light. Light Width sets the width of light belt. Limit sets the area to be affected by light. Focus sets the light focus. You can set the colors of the light beld and the reduction light as Monocolor, Gradient Color, Template Gradient Color, and Texture. See the Setting Palette section for specific setups. 78 / 251 Flicker The Flashing effect makes color flash. Times sets the times of flash in one effect play. You can set it by typing values directly in the edit box, or by holding and dragging the left mouse button up and down in edit box. Color sets the color of flash. You can set it as Monocolor, Gradient Color, Template Gradient Color, and Texture. See the Setting Palette section for specific setups. Light Intensity sets the intensity of flash light. Lens The Lens produces an effect of lens crossing the surface of an object. You can set the radius of lens. 79 / 251 Mod Light Mode Light produces the effect of light in various shapes flying across the surface of an object. Blur sets the size of an object’s soft edges. Template sets the ratio of soft edges. X_Factor sets the horizontal repetition factor. Y_Factor sets the vertical repetition factor. Light Color sets the color of light. Times sets the times of light flying across the surface of an object. Overlap With this effect, an object becomes three identical objects, which turn around each other. You can set the seven parameters of Horizontal Action Range, Vertical Action Range, Transparence, Stay Angle, Angle, Stay Time, and Fade Time. Ripple This is an effect like ripples made by raindrops falling into water. You can work with the five parameters of Number, Rings, Radius, Weight and Density. 80 / 251 Rotate This effect plays stillness in rotation. X/Y/Z Cycle set the angles, at which an object rotates round the X/Y/Z axis. X/Y/Z Clock Wise sets whether an object rotates round the X/Y/Z axis clockwisely or anti-clockwisely. Soft This effect plays a still object by soft transformation. You can adjust the parameters of Amplitude, Wavelength, Frequency, Attenuation Time, and Fineness. V Light Volume Light produces an effect of a sexangular shiner sliding over an object. The parameters you can work with include Light Color, Light Intensity, Light Length, X Range, Y Range, X Offset, Y Offset ,Generation Time, and Times. 81 / 251 Wave This is a wavy effect. Times sets the times of an object waving. Wave Length sets the length of wave. Amplitude sets the amplitude of object waving. Rand Wave sets whether the wave form is random. Zoom Blur This effect makes an object blur like a gradient. You can work with the nine parameters of Number of Levels, Transparence, Template, X Range, Y Range, X Offset, Y Offset, Generation Time, and Times. 82 / 251 2) Stillness Effects for 3D Object For now there is only one stillness effect for 3D objects. More are expected as the software is upgraded. Rotate The Rotation effect plays an 3D object in and out round the X/Y/Z axes. You can set the object’s times of rotation round the axes. 2.3 Text Properties The Edit Text tab is on the right side of the Effects tab, which is a useful editing tool for users to work with massive texts. 2.3.1 General Features New: opens a blank text file. You can edit the content in the Edit window. Open: opens an existing text file. Save: saves an edited text as a file. Save As: saves an edited text as a different file. Reading Direction: The Sytem provides typing and reading from the right side. Click this icon, and the content in the Edit window is displayed from right. Word Wrap wraps a text by the word count entered in the textbox. Space is also calculated as a word. 83 / 251 : click the button to make the txt window float The Text Editor is particularly efficient in making scrolls. The related features are described in detail in the section on scroll. 2.4 Light Source Properties The Light Source tab is on the right of the Text tab for adjusting the 3D light effects of a scene. There are three light sources altogether, Light Source 1, Light Source 2, and Light Source 3. Each of them can be lit and shut by clicking the small bulb-like icon in the picture. When the bulb is orange, the light source is on; when grey, off. 2.4.1 Editing Light Sources First, select the light source you want to edit by clicking the small round point before the Light Source bulb. It is green when selected. And then you can drag the appropriate Light Source marker on the ball on the right side. The three light sources are represented by the red, green and blue marker, respectively. You can drag the selected marker anywhere you like manually, and the ball represents the relative position in a 3D space. 2.4.2 Setting Light Colors Click the color block beside the Light Color, and the Palette tab pops up. You can choose a color in the Pallete as the light color of the scene. 84 / 251 2.4.3 Adjusting Light Distance and Degree Behind the Light Color, there are two slide bars, Distance and Degree. You can change the values by dragging your mouse. The value goes up when you drag it to the right. 2.4.4 Environment Light Texture If you think it is quite complicated to adjust 3D light effect and plan to grant light effect of an image to a scene or 3D object, please mark Environment Light & Shadow, and then choose needed image file in Light & Shadow file column. However, light adjustment modes for three light sources are invalid. Import or delete light & shadow file via Add and Delete buttons at right lower corner in Light & Shadow file column. 3. Time Line Windows 3.1 About Time Line Horizontally, the Time Line window is divided into three columns: Column 1: Directory Tree lists the Names of all tracks, including the names of the objects in a task. Column 2: Features Panel manages the Object Track, including Display, Hide, Lock, etc. Column 3: Time Line Edits sets the parameters for the In-and-Out effects, object path, etc. Here, a task can be a Project Group, which may include several primitives. The Task Layer controls whether a primitive is displayed, and sets the Start and End Time of the current Task Layer. Multiple tasks, which compose a clip, are shown in the current scene. 85 / 251 Directory Tree Features Panel Edit Area 3.1.1 Directory Tree 3.1.1.1 General Properties The features of a Directory Tree include: Name an object: All names of objects are in the Name box. Double click an object name in the box, and type in the name you need. Track labels: The Name box contains the names of all tracks, including the Object Names in a task, as well as an object’s Displacement, Size, α Channel, Rotation and Lens Track. Select a track by clicking the Track Name, and you can spread a Directory Tree by clicking the plus sign. Remove objects: You can remove objects in a task. Use the CTRL+DEL combination when you have selected an object. Extension Features: Select an object, click the right mouse button, and you will see in the extension menu: 1) Bring to Front moves the select object or task to top. 2) Bring Forward One Layer moves the selected object or task one level up. 3) Send Back One Layer moves the selected object or task one level down. 4) Send to Back moves the selected object or task to bottom. 5) Reset deletes the keyframes on all the tracks of a selected object. 86 / 251 6) 7) Reset stunt deletes the effects on all the tracks of a selected object. Adjust Gap the effect intervals for multiple objects on the effect track in the order of selection. Keyframe Curve Edits: Double click on the Offset,Resize,Alpha,Rotate or the Filter option, and enter their individual edit status. Double clicking again brings back to the keyframe status. 3.1.1.2 Tool Buttons in Name Box The tool buttons from left to right are: Add Task adds a new task to the current scene. Multiple tasks can be shown on the screen at the same time while independent from each other, that is selecting an object on the current task layer doesn’t affect the objects on other task layers. Delet Task removes the currently selected task layer. Send Task Down Ward moves the the currently selected task layer down. Bring Task Up Ward moves the currently selected task layer up. Send Task to Last moves the currently selected task layer to bottom, viz. the bottom layer. Bring Task to First moves the currently selected task layer to top, viz. the top layer. Show All Track shows all the tracks in the Time Line window, including the hidden ones. Function Panel displays the Features Panel in the Time Line window, which is the second column in the window. The panel is shown when the icon is pressed, and hidden when it is not selected. 3.1.2 Function Panel The Function Panel manages track properties and sets some object properties. The task and object icons from left to right are: Hide Tack hides the selected track. 87 / 251 Show Preview Effects displays objects when Play or in the Edit Clip window. Note that this option is not usable for a task. Auto Control plays objects or tasks manually. It is the Automatic Mode when this option is selected, and the Manual Mode otherwise. It takes three conditions to play an object or task manually: Beat points added to the appropriate track, the Manual/Automatic Switch on the Time Toolbar set as Manual, and the object or task set as Manual. Lock Object changes from when clicked with the left mouse button, indicating locking the object in the Edit Clip window, which now can’t be selected or edited. Set Saving Screen has the same use as the options in the right-mouse menu of the Property box. Select it, and then you can work with the features. Move to Last/Next Keyframe adds/deletes a keyframe at the current timecode line, and moves to the next keyframe. 3.2 Editing Time Line The Edit Timecode area contains the main features of the Time Line window. In this area, you can work with an object’s keyframes and effects. 3.2.1 Zooming Time Line If you have problems see the small effects or find the keyframes too close to each other in the Timecode window when you are working on some fine adjustments to an object, you can use the zoom the display by infinite cascade horizontally or vertically to make your mouse moves more accurate and easier. The System maintains the timecode line visable in the center of the Timecode page when using the Horizontal Zoom. Horizontal Zoom: Drag the grey button in the blue circle in the illustration below with the left mouse button, and you can zoom in or out the Time Line horizontally. Vertical Zoom: When your mouse cursor changes into the shape in the blue frame below, you can drag your mouse, and zoom the Time Line vertically. 88 / 251 Auto-adjust Horizontal Range: Double clicking the grey Time Line guider, can auto-adjust the Time Line to the range where the whole task length is visable. Double clicking again returns to the previous status. 3.2.2 Working with Time Line Effects Add effects: Select an object you want to add an effect to, drag the timecode line where you want the effect, and then click the effect in the Effects tab. The effect is now added behind the time line in its default length. You can also copy the effects on the Time Line of another object, and paste them on the selected object track. See the section on Time Line shortcuts for details. Delete effects: Select the effect you want to delete, press the DEL button, and the effect is removed; or you can select the effect again in the Effects tab, which work to remove it. Move effects: Place the cursor on the effect you want to move. When the cursor reaches the edge of the effect, press the left mouse button and drag, and set the time for the effect to emerge and end on the Time Line. When the cursor is in the middle of the effect, press the left mouse button and drag, and change the position of the effect on the Time Line. Also, you can use the Adjust Effect Interval command to set the number of interval frames between multiple selected effects on the Time Line. Set effects: Select the effect you want to adjust, press Enter, and then set the parameters in the Set Plug-in dialog box. See the Set Effects section for details. Note that there are options for subtype and In-and-Out timecodes. The index number of a subtype is its place in the sequence in the Manage Effect window, while the In-and-Out timecodes set the In and Out time of the effect accurately on the Time Line. Restore Effects: This operation removes all effects on the current effect track. Select the target effect track, click the right mouse button, and select the Restore Effects command. In theory, you can add as many effects as you like to an effect track. In case there are a number of continuous or non-continuous switch effects on an effect track, the System automatically deem the first effects as In effect, the second as Out effect, the third as In effect, and the like. A stillness effect behind an In effect is valid, while it is invalid when falling behind an Out effect. 89 / 251 3.2.3 Working with Keyframes A keyframe is a key point on the motion or changing track of an object. In edit, keyframes are massively used, as makes this section particularly important. 3.2.3.1 Adding Keyframes 1. Place the current frame mark line on the intended position, and select the Add Keyframe icon (in the second column of the Time Line window) for the appropriate object Offset (or Resize, Alpha, filter or rotation) track. 2. Press the Insert button when you have selected the Offset (or Resize, Alpha, filter or rotation) track, and the System changes the current frame into a keyframe for the Offset (or Resize, Alpha, filter or rotation) track. 3. Click the right mouse button on the Time Line where you intend, and select the Add Keyframe command. 4. Add keyframes to displacement or size track using the timecode tack and the Dynamic Clip Editor (click the icon in the Toolbar, and switch the Clip Editor to Dynamic mode) window together: Press the Generate Keyframe Automatically button, place the current frame mark line on the intended position, select the object to add the keyframe to, drag, and the current frame turns into a keyframe. You can add multiple displacement and size keyframes using this method. 5. Click the right mouse button when you have selected an object in the Dynamic Clip Editor window, and then select Add Keyframe or Set Current Time Keyframe. The System will add keyframes to the Offset , Resize, Alpha, filter or rotation track. See the sections on the main menu and the extension menus for details. 6. You can move the current displacement path line of a selected object using SHIFT+CTRL+Mouse Dragging in the Dynamic Clip Editor window. 3.2.3.2 Deleting Keyframe 1. Place the Time line on the keyframe you like to delete, select the Delete Keyframe icon (in the second column of the Time Line window) for the appropriate object displacement parameter, and the keyframe is removed. 2. Select the keyframe on the Time Line (the dot representing the keyframe turns black), and then press the DEL button. 3. Click the right mouse button at the keyframe’s position on the Time Line, and select the Delete Keyframe command. 90 / 251 3.2.3.3 Moving Keyframe Place the cursor on the point of the displacement keyframe, hold and drag the left mouse button, and move the position of the keyframe on the Time Line. Using the CTRL+Left/Right/Up/Down Arrows, you can perform fine adjustment to the keyframe position on the selected track. 3.2.3.4 Setting Keyframe Parameters Select the intended keyframe, double click, and set the appropriate parameters in the Set Keyframe Parameters dialog box. Offset Track Keyframe: Index number of a keyframe on the displacement track. Keyframe Time: Time position of a keyframe on the Time Line. In Speed, Out Speed, In Affected Area, Out Affected Area: Parameters for adjusting an object’s displacement curve. X: Offset in the X direction in relation to the stillness status (Frame 0). The displacement A is converted into pixel A* (scan width). Y: Offset in the Y direction in relation to the stillness status (Frame 0). The displacement A is converted into pixel A* (scan height). Z: Offset in the Z direction in relation to the stillness status (Frame 0). Resize Track Keyframe: Index number of a keyframe on the size track. Keyframe Time: Time position of a keyframe on the Time Line. CX: Increase in the X direction in relation to the stillness status (Frame 0). The displacement A is converted into pixel A* (object width). CY: Increase in the Y direction in relation to the stillness status (Frame 0). The displacement A is converted into pixel A* (object height). CZ: Increase in the Z direction in relation to the stillness status (Frame 0). Alpha Track Keyframe: Index number of a keyframe on the α channel track. Keyframe Time: Time position of a keyframe on the Time Line. ALPHA: Transparency. Rotate Track Keyframe: Index number of a keyframe on the rotation track. Keyframe Time: Time position of a keyframe on the Time Line. 91 / 251 In Speed, Out Speed, In Affected Area, Out Affected Area: Parameters for adjusting an object’s rotation curve. X: Rotation in the X direction in relation to the stillness status (Frame 0). The displacement A is converted into pixel A* (scan width). Y: Rotation in the Y direction in relation to the stillness status (Frame 0). The displacement A is converted into pixel A* (scan height). Z: Rotation in the Z direction in relation to the stillness status (Frame 0). 3.2.3.5 Setting Keyframe Change Curve The curve on the changes between keyframes is actually the Bezier Curve. You can adjust the displacement track keyframe curve in the Edit Clip window or in the Adjust Curve window for the Time Line (double click the first column of the Time Line window), but the effects are different. Changes made to the size, α channel and rotation curves can be done only on the Time Line. You can also edit the paths. A key point is actually an anchor point on a displacement track. Select the Adjust Curve Mode icon in the Toolbar, click the anchor point on the path, and the direction lines and points emerge on both ends. Now drag the direction point, and change the shape of the curve path. Click the anchor point again, the direction lines and points disappear, and the path turns back into a straight line. Click and release the icon. Now you can change the anchor point’s position and the curve path’s shape (release the icon when the direction lines and points are there, if you intend to change the shape of the curve path). 3.2.4 Editing Audio Track Editing of audio track includes adding, deleting and adjusting audio files, as shown below: 3.2.4.1 Adding Audio File Right click the audio track, select Add Audio File, and a dialog box pops up, where you may choose the audio file you want to add. Currently supported formats: *.MP3, *.WAV, *.WMA, *.AVI. 3.2.4.2 Deleting Audio File Select an audio track clip, right click it, and choose Delete Audio File to remove it. 92 / 251 3.2.4.3 Adjusting Audio File To adjust an audio file, you may do it in two ways, by single clicking it and choosing Adjust Audio Parameters, or double clicking the audio track clip. chooses the path and name of the audio file. Click for adjustment. sets the time to start playing the audio file. sets the finishing time for the audio file. By default, the In Time and Out Time settings are locked. When you choose either of them, the other one changes accordingly. Click Locked to unlock the parameters. Unlocked the length of sound fade-in, that is the time for the sound to fade in. the length of sound fade-out, that is the time for the sound to fade out. locks Fade-in Length and In Time. locks the Fade-out Length and Out Time. the start point of the audio file. 93 / 251 the end point of the audio file. adjusts the gain of the audio file. 3.2.5 Tips for Using Time Line 3.2.5.1 Adjusting Task Length Double clicking the Task Length bar produces the Adjust Task Length box, where you can set the Task In Time, Task Out Time and Task Length. means the icon is selected, when the task length remains locked and unchanged. means the icon is not selected, when the task length is changeable. Follow Object button changes the length of a task to meet the length of a selected object in case they have different lengths. 3.2.5.2 Locating Timecode Line Accurately Locating the time line is a most frequent operation when using the Time Line. The System offers accurate locating features for time line. The Current Frame Time box is in the blue circle in the illustration, shown in its time display mode, which can be changed by dragging the mouse in the edit box or typing in the values directly. Double clicking the edit box changes the display into the frame display mode, which is also changeable by dragging the mouse in the edit box or typing in the values directly. 3.2.5.3 Adjusting Object In&Out Points in Full For adjusting an object on the Time Line, the System can adjust the In and Out points in full, allowing you to define the points and connect object playout accurately. Double click the object’s 94 / 251 In and Out time range on the timecode line (the area contains all the ranges of effects and timecode frames), and the System produces the Adjust Object In and Out Points box, where two times can be set, the Object In Time and the Object Out Time, which are linked (one changes accordingly when the other is changed, with the difference between the two remaining unchanged). You can set the parameters by dragging the mouse in the edit box or typing in the values directly. Also you can edit the effects on the object’s effect track, choosing different In, stillness and Out effects, and editing the waiting time and speed (stillness time). 3.2.5.4 Adhering to Current Time Line Automatically 1) Use Select Effect in the Effect window. 2) Drag the selected effect close to the time line on the Time Line using the mouse. 3) The effect adheres to the current position of the time line automatically. Very often you need to move effects on the effect track when working with the Time Line. Using the unique Automatic Adhere feature, you can set the specific position of an effect in the Time Line window. Note that this feature is only for single selected objects, such as effect, single keyframe, and full movement of effect track. 3.2.5.5 Hiding and Showing Tracks When dealing with complicated clips and scenes, you may find that looking for the Time Line for an object by dragging the roller in the window a terrible trouble. In this case, you may hide the used tracks for now, and bring them back on when they are needed. a) Hide Object Track Click the Hide Track button in the Toolbar of the Time Line window for the appropriate object, and the selected Time Line is hidden. b) Show Object Track 95 / 251 Click the Show All button in the Toolbar of the Time Line window, and all the hidden tracks are displayed. 3.2.5.6 Adjusting Windows using Curves You can use the Pre-set Effect and Adjust Time Line Curve windows to perform fine adjustments to effect tracks, making your keyframe settings on the Offset, Resize, Alpha,Filter and rotation tracks more accurate. Double click the tracks, and then enter the Adjust Curve Parameters status. 1) Adjusting Offset Curve When the Offset curve is displayed, you can see the curves for the X/Y/Z Offset coordinates on the Time Line. The Y Axis is values between -2000 and 2000 in the unit of pixel. The salient point gives the values of the keyframes at this point, and you can select the salient point by pressing the left mouse button, and change the salient point value by dragging up and down; or you can simply enter the value in the edit box below. 2) Adjusting Resize Curve When the Resize curve is displayed, you can see the curves for the X/Y/Z Resize times on the Time Line. The Y Axis is values between 0 and 10 in the unit of pixel with the X, Y and Z values. The salient point gives the times of the keyframes at this point, and you can select the salient point by pressing the left mouse button, and change the salient point value by dragging up and down; or you can simply enter the value in the edit box below. 96 / 251 3) Adjusting Alpha Curve When the Alpha curve is displayed, you can see the curve on the Alpha changes between keyframes. The Y Axis is values between 0 and 1, where 0 means transparent while 1 non-transparent, with the X, Y and Z values. The salient point gives the α value of the keyframe at this point, and you can select the salient point by pressing the left mouse button, and change the salient point value by dragging up and down; or you can simply enter the value in the edit box below. 4) Adjusting Rotate Curve When the Rotate curve is displayed, you can see the curves for the X/Y/Z Rotate curves on the Time Line. The Y Axis is values between -1000 and 1000 with the X, Y and Z values. The salient point gives the rotation values of the keyframes at this point, and you can select the salient point by pressing the left mouse button, and change the salient point value by dragging up and down; or you can simply enter the value in the edit box below. 5) How to Adjust a Curve Clicking the left mouse button anywhere on a curve adds a keyframe. Selecting a salient point and pressing the DEL button delete the point. In the Adjust Curve interface, the parameter settings for the curves are shown under the Time Line. : Y Axis Zoom. From left to right, the buttons are: Reduce Unit Height in Duplication, Increase Unit Height in Duplication, and Use Common Range Template. The last button is only usable for adjusting the displacement curve. When it is released, the Y Axis range becomes between -1000000 and 1000000. 97 / 251 : Select Keyframe: Select the keyframe according to the value as the current keyframe, and displays the timecode in the timecode box on the right. You can edit it using mouse. : Display button: For the displacement polylines, when the icons are pressed they represent: ALL shows all three X, Y and Z Polylines; OffsetX shows the X Polyline only; OffsetY shows the Y Polyline only; and OffsetZ shows the Z Polyline only. For the size polylines, they represent: ALL shows all three X, Y and Z Polylines; TemplateX shows the X Polyline only; TemplateY shows the Y Polyline only; and TemplateZ shows the Z Polyline only. The In and Out Speeds and Ranges are the speeds and ranges for setting the curve changes. 3.3 Buttons in Time Line Play Toolbar This part is mostly used for producing the dynamic effects of primitives and for the options on Play. You can work with the time features using the Time toolbar: 1. View each frame of a clip or preview the clip when used along with the Main Editor. 2. Play project files. 3. Compress and play project files. Now, let’s look at the features one by one: 3.3.1 Timeline Controls Toolbar The buttons in the toolbar above are for manipulating the timeline on the Time Line. Their features from the left to the right are: : Start Frame 98 / 251 : Previous Frame : Next Frame : End Frame : Scene Preview : Stop stops the scene that is being played, and returns the time line back to the start frame. : Compress to disk (supports dym\pbf\flc\avi format.) : Loop : Auto-Manual Switch : Play Disk File plays the disk files produced after rendering. : Play plays the current clip from the current frame. : Project Play plays the current clip from the current frame until the entire project file is finished. : Take :Stop Stop the scene that is being played by clicking this button. 99 / 251 4. Preset Windows 4.1 Presetting Property The Pre-set Property tab is located on the right of the Time Line tab. It is for pre-setting and storing the color, size, font and shape properties of a primitive. Different primitives result in different tabs, which match the primitive you choose. You can save the properties of some well-done, frequently-used, or worth-saving objects using this tab for later use. 4.1.1 Saving Pre-set Property Here we only use one primitive as an example, and the operations for other primitives are alike. When a primitive is ready, you can add it to the Pre-set Properties window if you like to keep its properties for later use. Do it by: a) Selecting a finished primitive; b) Clicking the icon in the right lower corner of the window; c) Entering a name in the dialog box, and clicking Yes. 100 / 251 4.1.2 Deleting Pre-set Properties In case you want to delete the save properties, first select the icon of the target properties, click the button in the lower right corner of the window, and click Yes. 4.1.3 Replacing Pre-set Primitive Properties If you need to replace, rename or find an existing pre-set property, do it by: Clicking the icon, and replacing, renaming or finding the color info of a primitive by its name: 1. Overwrite replaces all color properties of an object with the selected color pre-sets in the Pre-set Color window. 2. Rename changes the name of the selected color pre-set. 3. Search locates the appropriate color pre-set by the name you entered. 4.2 Palette You need to work with colors a lot in producing primitives, for which this System is equipped with powerful color production and adjustment features. You can prepare whatever colors you like in the Palette, and apply them to you images. You can also find such effects as light, channel and materials, allowing you to make your color from good to better. As a general feature for title generation systems, the Palette will be used thoughout the following chapters. Now let’s take a close look, and do please note some key uses. 101 / 251 4.2.1 Palette Interface The Palette tab is in the right of the Pre-set Properties tab, where the features are offered for Monocolor, Gradient Color, Template Gradient Color, Texture, Material, Shade and Light Effect production and adjustment. Click the Monocolor icon with your left mouse button, and you can switch between the three interfaces for Monocolor, Gradient Color, Template Gradient Color. Click the Texture icon, and you can swicth between the interfaces for Texture, Material, Shade, and Light Effect. Now let’s look at them one by one. 4.2.2 Monochrome Color and Effect Box Red Adjusting Bar Pipette Tool Blue Adjusting Bar Green Adjusting Bar Chromatogram Transparency Adjusting Bar Color Spectrum Adjusting Bar Pre-set Window There is a monocolor palette in the Monocolor tab of the Palette. A monocolor has 32 digitals, which is made up of 8-digital R, G, B and ALPHA values. 102 / 251 How to: Method 1: Drag the adjusting points under the color (red, green, blue) and transparency adjusting bars, and the effects of adjustment is shown in the Color and Effect box in a real-time fashion. Method 2: Change the values in the digital edit boxes on the right side of the color adjusting bars, or drag the cursor up and down in the boxes. Method 3: Point the mouse cursor on the Chromatogram, and click and suck the intended color when the motion arrow becomes a pipette. Method 4: Click the Pre-set box switch, and bring out the Pre-set box. Click a pre-set color in the box. Method 5: Press the ALT button, and suck a color using the mouse cursor; or click the pipette tool, and use it to suck the color. How to Pre-set Click the Pre-set box switch, and bring out the Pre-set box. Set the effects you like, click the button, and add the pre-set. In case you like to delete a pre-set, click the button. Click a existing pre-set, then click the Replace button, and the System replaces the pre-set with the effect in the current Effect box. Click a pre-set icon, and the System displays the selected pre-set color in the Color and Effect box automatically. 103 / 251 4.2.3 Gradient Colors Set Shadow Angle Shadow Frequency Shadow Color Bar Shadow Point Shadow Point color Box Shadow Color Type Pre-set Property The Gradient Color tab is similar to the Monocolor tab. The difference is an extra button for Gradient Color Type on the left of the pre-set box swicth, and the additional setup for Gradient Color Bar under the chromatogram. 4.2.3.1 Setting Gradient Modes Clicking the Gradient Color type icon produces a Gradient Mode box, containing five modes: Linear Gradient, Central Gradient, 4-point Central Gradient, 4-point Planar Gradient, and Angular Gradient. The five modes represent five different gradient effects. Clicking one of the modes displays the effect in the Color and Effect Box in a real-time fashion. The Linear Gradient, 4-point Central Gradient, and the 4-point Planar Gradient modes also have the changes in direction shown in the box. 4.2.3.2 Setting Gradient Colors Setting color of Gradient point Select the Gradient point where you like to set the color, move your mouse to the chromatogram, click, and the monocolor is displayed in the gradient point color box, which is simultaniously shown on the Gradient color bar. 104 / 251 Click shadow point Click the needed color on To add, remove and move a gradient point Click the right mouse button on the lower edge of the Gradient color bar, and add a Gradient point at the clicking position. Select the Gradient point, drag it with the left mouse button, and move the point as you like, moving the gradient point changes the ransition process of gradient. Select the gradient point, press the DEL button on the keyboard, and delete it. To change the position of Median Point Click the diamond button on the upper edge of the gradient color bar, and hold and drag the left mouse button left and right. To set gradient Frequency Change the frequency values by holding and dragging the left mouse button in the Edit gradient Frequency box; or simply typing the values in the edit box; or by clicking the up/down arrows in the box with the left mouse button. To set gradient Color Orientation You have five gradient modes to work with: Linear Gradient, Central Gradient, 4-point Central Gradient, 4-point Planar Gradient, and Angular Gradient. 1) Linear gradient 105 / 251 When the gradient color is set, select the Linear Gradient mode. Now choose the start and end positions for your linear gradient in the Color and Effect box. Hold the CTRL+Left Mouse buttons, move the cursor to the intended end position, and the System will form a straight line between the point where you started and the one where you ended in the box. This line represents the direction of the linear gradient. Now release the mouse, and the gradient color will change in the direction you chose. 2) Central gradient The Central Gradient changes from the start point outwards in a circle, which is a mixed circular transition between colors. To set the effect, move the key point on the gradient color bar, and change the transition. 3) 4-point Central gradient This gradient starts to change from outside inward in a square, which is a mixed rectangular transition between colors. When you choose the gradient, four key points appear in the Effect box. Hold CTRL+Left Mouse buttons, click one of the key points, move the mouse, release it, and you have a transformed rectangle. The gradient color transforms with your move, making the 4-point Central Gradient. 4) 4-point Planar gradient This gradient changes with the four corner points of a rectangle in center. When chosen, this mode produces four key points in the Effect box. Hold CTRL+Left Mouse buttons, click one of the key points, move the mouse, release it, and you have a transformed rectangle. The space outside the rectangle is in transparent color. 5) Angular gradient The Angular Gradient changes round the start point anti-clockwisely in circle, which is a mixed angular transition between colors. You can set it by moving the key point on the gradient color bar. How to Pre-set 106 / 251 Click the Pre-set box switch, and bring out the Pre-set box, as shown in the picture above. The button in the upper left corner can be switched. When the interface is like the left picture, you can pre-set the gradient color; when it is like the right one, you can select the gradient color. To pre-set a gradient color, click the Pre-set box switch, and bring out the Pre-set box. Set the effects you like, click the click the button, and add the pre-set. In case you like to delete a pre-set, button. Click a existing pre-set, then click the Replace button, and the System replaces the pre-set with the effect in the current Effect box. Click a pre-set icon, and the System displays the selected pre-set color in the Color and Effect box automatically. To select the color of a gradient point, select a gradient point where you like to change the color, and then select a color in the Pre-set box. Note: a. In pre-setting gradient color, the pre-sets are displayed according to their individual gradient color type. b. For every gradient mode, you can set eight gradient points, but only four of the points are valid in the 4-point Planar Gradient mode, which although can have eight gradient points altogether. The settings of Gradient Frequency are valid only in the Linear, Central and Angular modes. 4.2.3.3 Template Gradient Color Switch color Gradient template Pre-set Box Window 107 / 251 These are templates produced on the basis of gradients to make your work easier. The settings are similar to those for the gradient color. The difference is that when you have set the needed gradient color, you need to click the Swicth to Templates, choose a template you like from the Preview window below (by single clicking it), and then the selected template is applied to the gradient color. Gradient color bar: Since this is the template gradient color, you have only two gradient points to adjust on the gradient color bar. Pre-set box window: The Pre-set box window on the Template Gradient Color page is divided into two parts: a. When you click the Switch Template button, the Pre-set window displays the template types, and the selected one is circled by a green frame. If you like to add the template, click the in the lower right corner of the window; select the template you want to delete, click the button, and you can delete a template; the button doesn’t work here. b. When you click the Switch Template button again, the Pre-set window displays the Color Pre-sets for Template Gradient Colors. The settings are the sames as the gradient color settings. 4.2.4 Textures On the Textures page, you can drag the roller below the page and view all texture protraits. The and buttons are for adding and deleting texture files, repsectively. Double clicking one of the portrait adds the appropriate texture. Click the button, and brings out the Open dialog box. You can add one or more intended image files from selected path(s). Click Open, add the file, and retrun to the Textures main page. Click Cancel, and you quit the operation and return to the main page. In case the selected file is 108 / 251 not located in the default directory, the System copies the file to the system directory automatically when you add it. Click the button, and you delete the selected texture image. However, this move only removes the icon on the page, instead of deleting the image file from the hard disk. If you want to delete the file, you have to do it using the directory on the System’s Resource Manager. 4.2.5 Channel The Channel effect is Unique to this System. It displays a produced primitive under a shade. The original properties of the primitive are kept in the white portions while removed in the black ones. Double clicking a intended shade adds it to the primitive. adds a Channel file. deletes a Channel file. 109 / 251 4.2.6 Light Effect The Light Effect give a prodcued primitive some effect like lighting using the black-white relations of the light effect portraits. Double clicking a intended light effect adds it to the primitive. adds a Light Effect file. deletes a Light Effect file. 4.2.7 Material The Materal makes a produced primitive look more real using the black-white effects of the materials. Double clicking a intended material effect adds it to the primitive. adds a Materials file. deletes a Materials file. 110 / 251 4.3 Template Manager The Template Manager tab is on the right side of the Palette, which is for editing and adjusting template files and scenes. Its interface is divided into the left and right parts. The left column displays the Template Prject Groups, and the right column displays the clips contained in the selected Template Project Group. 4.3.1 How to Use 1) To edit a template file, use the right mouse menu in the Project File List area, where you can perform such features as Create, Add, Open, Delete, Rename and Set Default Type. The projects set as the default type are displayed in the list in the Select Template pull-down menu next to the toolbar. 2) To edit the scene in a template file, use the right mouse menu in the Scene List area, where you can perform such features as Create, Delete, Edit, Rename and Finish Edit. When the Edit command is checked, the System adds the clip to the end of the current project file. You can perform various edit operations to the scene. When the Finish Edit command is checked, the System saves the edit results in the template scene, and removes the scene from the current project file. Also, you can start editing by double clicking the scene. 3) You can use the left mouse button to drag a scene in the Scene List area to the Clip List or main edit windows. 4.3.2 Template-based Replacement 1) Place the template file into the main edit window as described above. 2) Click the right mouse button in the main edit window, and choose Replace Template. 111 / 251 3) Change the template contents in the dialog box. 4) The item is not shown if you check the Replace box. 5) Using the Link button, you can replace the template contents using external data in a real-time fashion. See the attachment on database operations for details. 4.4 Textures Manager The Texture Manager tab is located in the right of the Template Manager tab. It is for saving, adding, importing and exporting primitive textures. The interface is divided into two parts, as shown below. The left part is the list of the names of texture groups, and the right part the texture contents. 4.4.1 Texture Management Box Right click in the space of the list area in the left of the Texture Management window, and use the right mouse pull-down menu to manage textures. New creates a texture group. Here you can also name the texture group. Add Pictures adds pictures to the selected group in the list area. Export Texture Lib saves a group of textures under a specified path as a .dat file. Import Texture Lib imports an exported .dat texture file to the specified texture group. Right click on the name of a texture group in the left column, and a right mouse pull-down menu appears, where you can use the New, Delete and Rename features. Open creates a Texture content. New creates a new Texture content. Delete deletes the selected Texture group. 112 / 251 Rename changes the name of a Texture group. Note: Use it to change a Chinese name in the Chinese version of the System while an Englsih one in the English version. 4.4.2 Texture Storage Area Right click in the space of the storage area in the right column, and use the View, New and End Edit menus. Right click in the space of the storage area in the right column, and you will see the options of View, New, Delete, Edit Clip, Rename and End Edit. View offers four view modes of Large Icons, Small Icons, List and Details. New creates a new texture content. Delete deletes a texture content. Edit Clip edits the selected texture in the main edit window. Rename changes the name of the selected texture. End Edit exits the edit status. When the edits are done, the System saves the settings in the Texture window. 4.4.3 Add to Lib All objects produced in the main edit window can be added to the Texture Library as textures. To add a texture, select the intended object in Edit window, click the right mouse button, and select Add to Texture Library in the menu. Objects created in Main Editing window can be added to Texture Library as texture via following way: Choose an object that will be used as texture in Editing window, such as an image or a video file, and then choose “Add to Texture Library” from right click menu to add it to Texture Library. Image and dynamic video file can be added to Texture Library. 4.4.4 Editing Textures When none of the objects is selected in the Edit window, select the texture you like to edit in the Texture Management, double click the selected texture, create a new scene with it, edit the texture in the new scene, right click the texture in the Texture Management, and select End Edit. 113 / 251 4.5 Table The Table tab is located on the right of the Texture Manager tab, which is used to set the properties related with the 3D object groups of pie chart, histogram and draw as well as for data management. The specific operations will be described in the sections about 3D object group production. 4.6 Property The Property tab is located on the right of the Table tab, which is used to set some properties. Set the properties of the currently selected scene, including: Shot Name is the name of the clip. You can enter the name in the box directly. Clip Type sets the type of the scene, including five types: Scene, Lyric, Scroll, Superscript, and Clock. It prepares for the title player. VTR Time is used with VTR, setting the start time of VTR. You can also obtain the current timecode by clicking the button. Loop Times sets the repeating times of scene or footscript for title player. DYM Name is the file name when clips are rendered into compressed files. It work here obly to display. See the introduction to the Time Toolbar for compression features. Subtitle binds a lyric file with a scene, mostly used for title player. 114 / 251 5. Scene List Box 5.1 Scene List Box Interface The Scene List box is in the right of the main edit window. A complete prj file is composed of one or more scenes, and the system playlist is in the order of the scenes in the scene list. Each scene is a multiple-task list in reality. 5.1.1 Function Buttons in Scene List Box adds a new scene. deletes the selected scene. imports shots single clicked, a dialog box for importing clips appears. Select the open a project file (.prj). 115 / 251 to When the project file is open, all the scenes it contains are listed in the dialog box in the order of their index numbers. Select the scene you like to import (support multiple selections using SHIFT, CTRL), and then you can choose Inert Before or Insert After, specifying whether the imported scene is placed before or after the current scene in the clip list. : Reset Alias:Reset the number of the all shots in the shot list, according to order up and down Resort by type: resort the shots in the list, according to the type Resort by Name: resort the shots in the list, according to the first letter of the name. Render Selected Clips Quickly: render the clips, when the pic or video is changed. Render Selected Clips Forcibly: render the clips, whether the pic or video is changed. 116 / 251 : render the cll changed clips in the list : give the clips a name by the content of tithle on the top layer 5.2 Other Features Switching between two scenes: Select a scene, hold the left mouse button, and drag it to another scene. Copying, cutting and pasting objects from one scene to another: Select the objects you want to copy in a scene, use the CTRL+C combination for copying or the CTRL+X combination for cutting the objects to another scene, and press CTRL+V to paste them. Click the scene icon, it will show in the preview screen. If the focus is in the clip list, use the Left/Right arrow to switch between clips; if it is not in the clip list, switch using the CTRL+SHIFT+ Left/Right arrow. ALT+R jumps to the specified clip byname. Note that this option is used based on the clip index numbers. ALT+H exchange the current scene with the scene under the specified clip byname. ALT+M moves all the currently selected scenes after the scene under the specified clip byname. Ctrl+Keypad + adds a timecode clip Ctrl+Keypad - deletes the selected clip. CTRL+ALT+Left Mouse Dragging copies the current scene and pastes it between two scenes. ALT+W copies the current scene and pastes it after the entered scene name. F9 render the cll changed clips in the list Ctrl+A select all the clips in the list 6. Producing 2D Primitives 2D primitives are used in template production a lot. Select a 2D object in the toolbar, and the appropriate Property page will appear. Now, let’s look at the special properties of each type of 2D primitive. 117 / 251 6.1 Title Characters 6.1.1 Producing Title Characters It takes three steps to produce a title charater: Step 1: Enter the Input status. Method 1 Select the Title Character Tool , and drag to form a rectangular box in the Main Editor window. Now the cursor is flickering on the left side of the box, and type in the title characters DAYANG. Method 2 Select the Title Character Tool , type DAYANG in the Edit Text box of the Property, and drag your mouse to form a rectangular box. The title characters are displayed in the Main Editor window. Method 3 Type DAYANG in the Text Editor tab of the Property box, select the tab, then select the Title Character button, and then drag to form a rectangular box in the Main Editor window. Now the title characters are in the window. To change the content of the title characters, one method is to select the title characters, and then make your changes in the Edit Text box in the Object Property tab of the Property window. The other way is to double click the title characters, enter the edit status, and then change the content. Step 2: Exit the Input status (2 methods) 1. Right click in the rectangular box of the title characters, and select the Exit command in the right mouse menu. 2. Left click in the space in the Main Editor window other than the rectangular box. 118 / 251 6.1.2 Editing and Processing Title Characters In the title character Property box, you can set the Display Status, Play Mode, Description, Left, Up, Width, Height, Full Render, Fixed Character Frame, Font, Character Height, Character Width, Bold, Incline, Row Spacing, Line Spacing, and Alignment. Additionally, you can perform adjustments to title characters, and insert special characters. You can set the following properties of title character: Left/Top/Height sets the position of title characters in the PRM window. You can switch to the Right/Low/Width/Height mode by right clicking on the upper left box. Play Mode: You can work with the four modes of Foreground, Background, Overlay and Overlay Mixing. Display Mode: You can work with the two options of Hide and Lock, as illustrated. : Checking before the Full Rendering option to select it. Typeset :the button, and select a mode. The modes include Display Lines from Left (Text lined horizontally, and displayed from left to right), Display Lines from Right (Text lined horizontally, and displayed from right to left), Display Rows from Left (Text lined vertically, and displayed from left to right), Display Rows from Right (Text lined vertically, and displayed from right to left), Vertical Head Alignment, Vertical Center Alignment, Vertical Bottom Alignment, and Baseline Alignment. LOC Fonts : Click the • button, and select in the pull-down list box. English Fonts: 119 / 251 Click the • button, and select in the pull-down list box. Character Height & Width: Hold and drag the left mouse button up and down in the edit box, and change the line and row spacing; or simply type the values in the edit box. Click on the Character Height and Charater Width items, bring out a List box containing several options, select one of the options, and set equilateral characters. You can bring out the Character Width and Height Options list box by right clicking in the edit box for Character Width and Height. Character & Line Spacing: Hold your left mouse button, drag up and down in the edit box, and change the line and row spacing; or simply type the values in the edit box. Line & Row Spacing: Hold your left mouse button, drag up and down in the edit box, and change the line and row spacing; or simply type the values in the edit box. Bold: Select this option by pressing the Italic: Select this option by pressing the Insert char: Press the button. button. button, and the System produces a Character dialog box. Select the special characters you need in the box. Width Factor: Coefficient to adjust the boldness of the small characters. Its value represents the coefficient of character perimeter expansion outward, if the size is for fonts ≤ 32 ×32 in the SD, fonts ≤ 100×100 in the HD Quality: set the blink qulity of the title, if the size is for fonts ≤ 32 ×32 in the SD, fonts ≤ 100×100 in the HD Font Clear: if the size of the title is small, can set font clear Align: Four alignment modes include Left, Center, Right and Spread Alignments. 120 / 251 Fixed Character Frame: Select the button, and you can keep the original width of the title characters unchanged when replacing them. Edit Text Box: Using this box, you can Add, Delete and Adjust title characters. Reading Direction: Click the button, the pattern in the button changes, and the display direction of the characters in the edit box changes with the pattern. Select All: When none of the characters are selected in the Edit Text box, pressing the button selects all the characters in the box. It is invalid when any of the characters is selected. Note: The System can process the characters in a title character object all at a time or set the Font, Height, Width, Bold and Incline properties of each character separately. To set the properties above, first select all the characters in the Edit Text box, or press the Select All button, and then set the properties. In case you wish to work with only some of the characters, select only those intended. 6.1.3 Adjusting Title Characters with Random Curve 1) Enter a title character, like an A. 2) Double click SHIFT+Left Mouse to enter the Adjust status. 3) Drag the key points (the green little boxes) with your mouse to change the character shape. 121 / 251 4) INSERT+Left Mouse Single Clicking Key Point adds a key point between the clicked point and the last key point. 5) DELETE+Left Mouse Single Clicking Key Point deletes the clicked key point. 6) TAB+Left Mouse Single Clicking Key Point converts the curve at the clicked key point between polyline and camber line. 6.2 Art Title 6.2.1 Producing Art Ttile Steps to produce an artistic character: 1) Select the Artistic Character Tool . 2) Select the Type of artistic character. After you select the Artistic Character Tool in the Toolbar, select a transformation type in the Object Property tab. 3) Enter the character content in the Text Property tab, select all the content, or enter the content in the Edit Text box. 4) Edit and process: Drag to form a rectangular box in the main edit window, where the artistic character is displayed, double click the character, and then perform the editing and processing. 5) Set the general properties for every facet of the artistic character (Font Facet, 3D Edges, Shadow, Perimeters, 3D Perimeters, Perimeter Shadow), such as Color, Artistic Type, Lighting, Material, Channel, and Special Effects. 6) Set the special properties such as the Name, Display Status, Play Mode, Transformation Type, Rotation by Normal Line, Font, Character Width and Height for the artistic character. 122 / 251 6.2.2 Setting Special Property of Art Title Full Render: Check before Full Render to select the option. Art Style: Types of transformation include Arc, Any Bezier Curve, Upper Bezier Curve, Symmetric Bezier Curve, and fluctuate consistent Bezier Curve. Type set: Select the mode by pressing the button, and the artistic characters are aligned in the reversed direction. LOC Fonts: Click the • button, and select in the pull-down list box. ENG Fonts: Click the • button, and select in the pull-down list box. Insert Chat: Click the button, and select in the pull-down list box. Bold: Select the mode by pressing the button. Italic Select the mode by pressing the button. Height & Width: Hold your left mouse button, drag up and down in the edit box, and change the line and row spacing; or simply type the values in the edit box. Click on the Character Height and Charater Width items, bring out a List box containing several options, select one of the options, and set equilateral characters. Kerning: Hold your left mouse button, drag up and down in the edit box, and change the line and row spacing; or simply type the values in the edit box. Whole: Select the option by checking before it. Text Edit Box: Using this box, you can Add, Delete and Adjust title characters. 123 / 251 Reading Direction: Click the button, the pattern in the button changes, and the display direction of the characters in the edit box changes with the pattern. Select All: When none of the characters are selected in the Edit Text box, pressing the button selects all the characters in the box. It is invalid when any of the characters is selected. 6.2.3 Instance of Art Title Production Preparations: Enter the character content in the Text Property tab, select the Artistic Character Tool in the Toolbar, select a transformation type in the Special Property tab, drag to form a rectangular box in the main edit window, where the artistic character is displayed, double click the character, and then you can begin editing the transformation. When you choose the Arc Curve Transformation , you can adjust the alignment of the characters along the arc. As shown in the picture, there are three adjustment points. When the cursor is over one of the points, press the left mouse button, drag the point, and perform your adjustment. In case you choose the Any Bezier Curve Transformation , you can adjust the alignment of the characters in a straight line or along any curve. 1) In performing a straight line adjustment, as shown in the picture, there are two adjustment points. When the cursor is over one of the points, press the left mouse button, drag the point, and perform your adjustment. 1 2 3 1 2 2) To perform a Bezier curve adjustment, you have to press the button in the Edit status. Then add as many anchor points on the adjustment line as needed by left clicking on the line. The anchor point has a direction line and two direction adjusting points. Drag the direction adjusting points, and change the radian of the arc between the anchor point and the adjusting point. If you click the anchor point now, the direction line and adjusting points disappear, and the arc returns to what it was like before the radian change. Release the 124 / 251 button, and enter the Adjust status. You can drag the direction adjusting points to change the radian of the curve, and change the positions of the points on the curve by dragging the anchor points. 3) Click the DEL button, and delete the currently selected anchor point. When you choose the Upper Edge Bezier Curve Transformation , a Bezier curve appears on the upper edge of the artistic character. You can change the radian of the curve by dragging the direction adjusting points, and change the positions of the points on the curve by dragging the anchor points. Changes in the curve shape lead to changes in the shape of the upper edge. When you choose the Lower Edge Bezier Curve Transformation , a Bezier curve appears on the lower edge of the artistic character. You can change the radian of the curve by dragging the direction adjusting points, and change the positions of the points on the curve by dragging the anchor points. Changes in the curve shape lead to changes in the shape of the lower edge. When you choose the Symmetric Upper-Lower Edge Bezier Curve Transformation ,a Bezier curve appears on the lower edge of the artistic character. You can change the radian of the curve by dragging the direction adjusting points, and change the positions of the points on the curve by dragging the anchor points. Changes in the curve shape lead to changes in the shapes of the upper and lower edges symmetrically. When you choose the Straightforward Upper-Lower Edge Bezier Curve Transformation , a Bezier curve appears on the lower edge of the artistic character. You can change the radian of the curve by dragging the direction adjusting points, and change the positions of the points on the curve by dragging the anchor points. Changes in the curve shape lead to straightforward changes in the shapes of the upper and lower edges. 6.3 Polygons 6.3.1 Producing Polygons Steps to produce a polygon: 1) Select the Polygon Tool . 2) Hold the left mouse button, and drag to form a rectangular box. 125 / 251 3) Set the general properties for every facet of the polygon (Font Facet, 3D Edges, Shadow, Perimeters, 3D Perimeters, Perimeter Shadow), such as Color, Artistic Type, Lighting, Material, Channel, and Special Effects. 4) You can also set the special properties such as the Name, Display Status, Play Mode, Shape and Additional Channel for the polygon. 6) The System also supports settings customized by the user. 6.3.2 Setting Special Property of Polygon Shape: Press the appropriate button for the shape you need. The shapes include Rectangle, Triangle, Quadrangle, Pentagon, Sexangle, Thick Arrow, Narrow Arrow, and Custom Polygon. Custom Polygon Options: All the custom polygon are displayed here. To customize a polygon, open the file at \D-Box-CG-SD\sys\PologonDef.txt, which describes how to define a format file for a custom polygon, along with an instance for your reference. It is worth noting that, to define a polygon, you have to enter the name of the polygon behind the @ sign, for example Pentagon_1, followed by the number of apexes (5). Then enter the normalization coordinates for the apexes. The X and Y values must be separated with a comma, and the apex coordinates separated with spaces. The file has to be adjusted and saved before the D³-CG Live software is started. Adjustments made after the soft is started are invalid. Square: When this button is pressed, the System makes the produced polygon equilateral. Fit Texture sets the size of polygon as the size of texture. Channel File: Click the • button, and select in the pull-down list box, including the image files offered with the System. 126 / 251 6.4 Ellipses 6.4.1 Producing Ellipses Steps to produce an ellipse: 1) Select the Ellipse Tool . 2) Hold the left mouse button, and drag to form an ellipse. 3) Set the general properties for every facet of the ellipse (Font Facet, 3D Edges, Shadow, Perimeters, 3D Perimeters, Perimeter Shadow), such as Color, Artistic Type, Lighting, Material, Channel, and Special Effects. 4) Set the special properties. You can set the Name, Display Status, Play Mode and Shape for the ellipse, the Start Angle, End Angle and Shape for any ellipse, and the additional channel file and whether it is perfectly round. 6.4.2 Setting Special Property of Ellipses Shape: Press the appropriate button for the shape you need. The System provides eight shapes, including Ellipse, Semiellipse, 45° Arc, 90° Arc, 270° Arc, 45° Sector, 90° Sector, and 270° Sector. Start & End Angle: The Start Angle is the angle of the start side of a custom ellipse of any degree, while the End Angle is that of the end side. You can edit the angles in three ways: Dragging the pointer on the direction plate with your left mouse button, dragging the left mouse button up and 127 / 251 down in the edit box under the direction plate, or typing the values directly in the edit box. Ellipse Shape: The button is a switch. By click it, you can switch between 90° Arc and 90° Sector. When it is the 90° Sector, the edited object is a sector; when it is the 90° Arc, the object is an arc. Perfect Circle makes the ellipse perfectly circle when selected. Channel File: Click the • button, and select in the pull-down list box, , including the image files offered with the System. 6.5 6.5 Images 6.5.1 Producing Images Steps to produce an image: 1. Select the Image File Tool . 2. Select the image file you need, hold the left mouse button, and drag to form a rectangular box. 3. Set the special properties. You can set the Name, Display Status, Play Mode and Location Reading for the image file, and select any other image file. 6.5.2 Setting Special Properties of Image File Select Image File: Click the button, and select the file you need in the dialog box. Select the file you want to open, click Yes (or select the Yes button using the TAB key on your keyboard, and then press Enter), and open the file. In case you don’t want to open it, click Cancel (or select the Cancel button using the TAB key on your keyboard, and then press Enter) 128 / 251 FixRead Type: Use this option to select the location type for image files. They are only functional when you change the image files. When changing an image file, the System replaces the file according to the location type you chose. Location Type: Click the • button, and select in the pull-down list box. Original Size: Select the file for location reading, click the Location Reading button, and the selected image is placed in the upper left corner of the screen in its original size. hotkey is ‘G’ Rotate: Drag the sector, and change its size; or type the value directly in the edit box, and change the displayed image. Skew: You can change the values in the box and adjust the beveling effect for an object. Up-down & Left-right Exchange exchanges the upper side of an image with the lower side, or the left side with the right side symmetrically. Flutter sets the image file as stillness waving flag mode when checked. Channel File selects the needed channel file and applies it to an image file. Alpha: produces semi-transparent effects for an image file by entering a value (an integral 129 / 251 between 0~100) in the edit box or by dragging the mouse adjusting slide. 6.6 Animations 6.6.1 Editing Animations Steps to edit an animation file: 1) Select the Animation File Tool . 2) Select the animation file you need, hold the left mouse button, and drag to form a rectangular box. 3) Set the special properties. You can set the Name, Display Status and Play Mode for the animation, and select any other animation file. 6.6.2 Setting Special Property of Animation To select an Animation file: Click the button, and select the file you need in the dialog box. In & Out Time: Set the In and Out times for a selected animation file. Place the cursor in the Display Time box, and use the up/down arrows to adjust the times. Each animation has to have its own start and end times, and the In time must be set between the start and end times. Number of Times sets the times of playout of an animation file. Original Size displays an animation in its original size. 130 / 251 Normal Movie plays the animation as a common animation. Background Movie: When played as a background animation, an animation runs more smoothly than when played as a common animation, which is especially true for the larger files. In working with a background animation, you can choose Manual Pause with Clip, which means there are manual points in the scene, and the play is in manual mode. Selecting the Play Affected by Manual Beat Point option makes the animation pauses with other objects in a scene. Without selecting the option, the animation doesn’t stop until its own end. When played, the background animation is on the first layer if the animation is on the first layer. Otherwise, the animation is played on the last layer. 6.6.3 Internal Cycle of Animation With the Internal Cycle feature, you may set part of an animation to run in cycle on the timecode track. Internal Cycle is one of the attributes of background animation, which cannot be set unless the Background Animation option is checked. Internal Cycle offers three basic parameters, Start Point, End Point, and Times of Cycle. If you have set a manual beat point in the process of internal cycle, you may choose to stop running the animation or continue. The animation will be paused at the beat point if the Pause at Manual Beat Point option is checked. Otherwise, the cycle won’t stop at the beat point and continues to run. sets whether to pause at the manual beat point. When checked, it’ll pause the animation at the point; otherwise, it won’t pause it. The animation is in the internal cycle mode when the option is selected; otherwise, it’s only a regular background animation. sets the start point of the internal cycle. Enter the number of frames in the box. sets the out point of one internal cycle, viz. where this cycle ends. Enter the number of frames in the box. sets the out point of the entire cycle. It is the same as the Cycle End Point if the time of internal cycle is only 1. The default display is in HR:MIN:SEC:FRM, and double click it to change the display into number of frames. 131 / 251 sets the times of animation internal cycle. When the Animation Internal Cycle option is checked, it changes from Times for regular animation into Times of Internal Cycle. 6.6.4 Convert TGA Sequence To Animations Steps to convert an animation 1) Select the Toolbox option in the menu, and select the Convert TGA Sequence To Animation 2) When you have selected the command, the System produces a dialog box for composing sequence animation. Click the Add button, and select a sequence image; click the Delete button, and you can delete the image you don’t need; in case you want to change the file order, drag the files with your left mouse button; click the Generate button, and you can generate an animation file in the format you specify containing all the images in the current list in their current order. 3) Check the Preview option, and view the selected image file; 4) You can define the size of an animation by editing the Width and Height values, but the default size is recommended. 5) Click the Exit button, and exit the Compose Sequence Animation dialog box. 132 / 251 6.7 Curves 6.7.1 Producing Curves Steps to produce a curve 1) Select the Curve Tool . 2) Select Edit Closed Curve or Edit Open Curve in the Object Property box. 3) Single click anywhere in the main edit window, and start editing the Bezier curve. 4) Set the general properties for every facet of the curve (Font Facet, 3D Edges, Shadow, Perimeters, 3D Perimeters, Perimeter Shadow), such as Color, Artistic Type, Lighting, Material, Channel, and Special Effects. 5) Set the special properties. You can set the Name, Display Status, Play Mode, and Pen Width for the curve, and pre-set curve objects. 6.7.2 Setting Special Property of Curve Pen Width changes the width of an open curve. Select a curve, and edit the parameter by dragging the mouse cursor up and down in the edit box, or by typing the value directly in the edit box. Closed & Unclosed sets whether the curve is closed or open. Import Data File: Click the Open button, and select a curve data file in the Open File dialog box. The System forms a series of curve and title characters in the main edit window according to the data in the file. Curve Generation Mode controls the mode for generating the curve based on the data file, including the two modes of Force Curve Generation and Force Polyline Generation. Force Curve Generation controls the System to force generate the original polylines into curves. 133 / 251 Force Polyline Generation controls the System to force generate the original curves into polylines. Horizontal Overturn turns over a curve horizontally by 180 degrees. Vertical Overturn turns over a curve vertically by 180 degrees. 6.7.3 Producing Closed Curves 1) Click the Curve button, and select the Closed Curve mode in the Object Property tab. 2) Left click anywhere in the main edit window, and a point appears in the window, which is the first key point for the closed curve. Now move the cursor to another position, hold the left mouse button, move the mouse, and the second key point appears, which is automatically connected to the first point to form a curve. A direction line is produced at the second key point, which moves with the mouse cursor, and the curvature of the newly formed curve also changes with the direction line. In this way, you can produce a number of key points. When the curve key points are ready, right click anywhere in the window, and exit the curve editing status. Then the System connects the curve into a surface automatically, and a closed curve is done. 3) Edit & Adjust: Select the newly made closed curve, double click it, and enter the adjusting status. Click any of the key points, and perform your adjustments. Click the Adjust Curve Mode button, and you can change the curvature; a direction line appears at the selected key point, and adjust the curvature or change the curve into a straight line by adjusting the direction adjusting points. Note: The Adjust Curve Mode button switches between the Straight Line Mode and the Curve Mode. That is, if the key point is originally in the Curve Mode (there is a direction line on the key point), you switch it to the Straight Line Mode and remove the direction line by pressing the button. By pressing it again, it’s switched back to the Curve Mode and the direction line reappears. 134 / 251 6.7.4 Producing Unclosed Curves 1) Click the Curve button, and select the Open Curve mode in the Object Property tab. 2) Left click anywhere in the main edit window, and a point appears in the window, which is the first key point for the closed curve. Now move the cursor to another position, hold the left mouse button, move the mouse, and the second key point appears, which is automatically connected to the first point to form a curve. A direction line is produced at the second key point, which moves with the mouse cursor, and the curvature of the newly formed curve also changes with the direction line. In this way, you can produce a number of key points. When the curve key points are ready, right click anywhere in the window, and exit the curve editing status. Then the System connects the curve into a surface automatically, and a closed curve is done. 3) Edit & Adjust: Select the newly made open curve, double click it, and enter the adjusting status. Click any of the key points, and perform your adjustments. Click the Adjust Curve Mode button, and you can change the curvature; a direction line appears at the selected key point, and adjust the curvature or change the curve into a straight line by adjusting the direction adjusting points. Note: The Adjust Curve Mode button switches between the Straight Line Mode and the Curve Mode. That is, if the key point is originally in the Curve Mode (there is a direction line on the key point), you switch it to the Straight Line Mode and remove the direction line by pressing the button. By pressing it again, it’s switched back to the Curve Mode and the direction line reappears. 6.7.5 Curve Data File The format of curve data file is as follows: data abc 523 548 524 548 526 549 527 550 528 551 529 552 530 554 135 / 251 curve abc 100 100 300 200 400 300 500 400 600 500 300 550 200 350 char 1 Ocean 100 200 . . . . end Beginning with ‘data’ means it is a polyline. ‘abc’ indicates that the curve pre-set info such as color property under the name of abc was used when importing the D-BOX-CG-SD to the curve. The data in the next line are the X, Y coordinates of each salient point of the polyline on PRM, which are separated with comma. Beginning with ‘curve’ indicates a curve. ‘abc’ means that the curve pre-set info such as color property under the name of abc was used when importing the D-BOX-CG-Live to the curve. The data in the next line are the X, Y coordinates of each salient point of the curve on the Main Edit interface, which are separated with comma. Beginning with ‘char’ indicates title character. Behind it are the properties of the title character such as font. In the example, ‘1’ is the name of the pre-set in the Pre-set tab for title properties, viz. using the pre-set for such title character properties as font. What follows is by the title character content. The numbers in the next line are the X, Y coordinates on PRM, which are separated with comma. The file ends with the ‘end’. 6.8 Template Template are a type of new objects composed of multiple (two or more) primitives. Via a template, you can work with a number of primitives as one object, applying the same In-and-Out effects or timecode track effects to them. Additionally, template have some special property settings, which make possible the effect of different primitives played in and out at different times. 136 / 251 6.8.1 Producing Template Steps to produce a template 1、 Produce multiple objects (at least two); 2、 Select the objects one by one for grouping; 3、 Single click Right Mouse, and then select Grouping option in the pull-down menu. If you want to save a prepared template, select the template, select the Pre-set Property page, click the + button (Add Template) in the page, and the System produces the Add Template menu automatically. Now enter the template name, click OK, and the template is saved in the pre-set. 6.8.2 Obtaining Template Steps to obtain a template 1) Select Template Tool ; 2) Double click the selected Pre-set Type in the Property Pre-set Box; 3) Press Left Mouse in the Main Edits window, and drag to form a rectangular box. 4) Set the special properties. You can set the Name, Display Status and Play Mode for the template, select Per-item and Status, and pre-set the template. 6.8.3 Ungroup Template Steps of Ungroup 1. Select the Template for Ungroup; 2. Single right click; 137 / 251 3. Select Ungroup option in the pull-down menu. 6.8.4 Setting Special Property of Template By-item, Full, Open, Closed: The above four statuses can form into form valid combinations: Whole-Close Status, Whole-Open Status, 1by1-Close Status, and 1by1-Open Status. 1) Whole Closed Status All the dynamic properties of individual objects in the template are invalid, and the template moves according to its own dynamic properties. 2) Whole-Open Status The template moves as a whole, the dynamic properties of objects in the template are superimposed to the template, and you can select the Scattered In and Out or Scattered In and Full Out modes. When it is Scattered In and Out, the effect tracks of sub-objects and the displacement, size and Alpha tracks of the main object are all functional. When it is the Scattered In and Full Out, the effect tracks of the sub-objects are disabled, and only the displacement, size and Alpha tracks of the main object are functional. 3) 1by1-Closed Status The objects in the template move according to the dynamic property order of the template, while their own dynamic properties are disabled. 4) 1by1-Open Status The dynamic properties of the objects in the template are superimposed to the template, and are run in order. 6.8.5 Editing Template In case you like to edit the template again, double click the selected template, and enter the edit status, where you can perform Adjust, Add Object, and other operations. Double clicking anywhere in the PRM window brings you out of the edit status, and the template is displayed. If the template contains a title character sub-object, you can press and hold the SHIFT button on the 138 / 251 keyboard, double click the title character, enter the WYSIWYG editor, and then adjust the title character. Note: This operation does not actually de-group the template. Instead, it produces a temporary de-grouping status of the selected template for temporary adjustments. The template returns to its original status when the adjustments are done. 6.9 Freecurve Freecurve curves have the same special properties as curves, which are produced similarly. The only difference is the way to draw a curve. Curve primitives are produced by adding key points one by one in the Main Editor window using the mouse, which are automatically connected by the System. You can adjust the key point positions and curvature after the curve is made. Freecurve Curve primitives are directly drawn in the Main Editor window using the mouse, and the System records the drawing process automatically. Therefore, the shape of the resulted curve completely depends on your mouse movement. 6.10 Capturing Background One of the tool buttons is the Capture Background feature. Pressing the button captures the background frame on the monitor as an image, which is savable. The storage formats include TGA, BMP, JPEG, PCX, GIF, TIF, etc. 139 / 251 7. Producing 3D Primitives 7.1 Convert 2D Object into 3D Object 7.1.1 Conversion Types 2D objects created with 2D tools such as Title Character, Article Character, Polygon, Ellipse, Curve, Handwriting Curve can be converted into 3D objects. 7.1.2 How to Convert When stretching 2D objects, please select 2D object needing to be converted and Select the Extrude and 3DTex. In this interface, please input thickness for 2D object and mark Stretch to convert it into 3D object, mark 3D Texture to add image or dynamic video material for 2D object. Plane, Arc or Anti-Arc can be selected as corner type and the precision, width and height of corner can be adjusted. When marking , the width and height of corner can be adjusted correlatively. If 2D object is a polygon or ellipse, you may need to input the value of Diameter to build needed objects such as 3D Square Hole or 3D Circle Hole. 7.1.3 Editing 3D Characters 3D Axes: You can see eight points framing a rectangular area when a 3D character is selected, along with a 3D coordinate system, which is made up of the X, Y and Z coordinate axes in the form of red, green and blue arrows. The axes indicate the spatial position of the character, and you can use the coordinate system to adjust the position. Adjust 3D Character Angle: Select the Rotation button in the Tool box, drag the circles, and rotate the character. The red circle stands for rotation by the X Axis, the green circle for Y rotation, and the blue one for Z rotation. You can rotate the circles along their individual coordinate planes, as shown by the illustration. 140 / 251 Adjust Color: Select the 3D character, click and select a color block in the Property box, bring out the Palette tab, and choose a color from the Palette for the color of the 3D character. See the sections about adjusting colors in the 3D primitive properties and the Palette for specific operations. Add Texture: Select a 3D character, and you can add a texture to it in two ways: 1) Click the button, select a graphics file in the dialog box, and open it as texture. The texture is applied to the 3D character when the graphics file is opened. 2) Select a pre-set texture in the Pre-set Texture box, double click the pre-set, and add the texture to the 3D character directly. The angle for adding a texture can be swicthed using the button. Clicking it switches between four angles, including Upper Left, Upper Right, Lower Left, and Lower Right. See the sections on textures in the 3D primitive properties and texture management for details. 7.2 Box 7.2.1 Producing Box 1) Click the button. 2) Drag the mouse cursor in the main edit window, and form a box. 7.2.2 Special Properties of Box You can set the properties for box as shown below, including Position, Play Mode, Hide and Lock, Length, Width and Height, etc. The special box properties of Length, Width and Height can be set in the box shown in the left picture. The features of Adjust Position, Play Mode, Hide and Lock are the same as those for 2D primitive production. See the sections on 2D primitive production for details. 141 / 251 7.2.3 Editing Box 3D Axes: You can see eight points framing a rectangular area when a 3D character is selected, along with a 3D coordinate system, which is made up of the X, Y and Z coordinate axes in the form of red, green and blue arrows. The axes indicate the spatial position of the box, and you can use the coordinate system to adjust the position. Adjust Box Angle: Select the Rotation button in the Tool box, drag the circles, and rotate the box. The red circle stands for rotation by the X Axis, the green circle for Y rotation, and the blue one for Z rotation. You can rotate the circles along their individual coordinate planes, as shown by the illustration. Select Box Facet: You can select a facet of the box in two ways: Select the facet you want to add a texture to in the Property tab, as shown in the picture. In the Select Facet pull-down column, you can find the names of the facets. The icon in the corner of the pull-down menu applies the properties of the selected facet to all facets when selected, including the color, texture, etc. The other way is to click one of the facets in the edit interface using the mouse. The selected facet is circled with green lines. Adjust Color: Select a facet of the box, click and select a color block in the Property box, bring out the Palette tab, and choose a color from the Palette for the color of the selected facet. See the sections about adjusting colors in the 3D primitive properties and the Palette for specific operations. Add Texture: You can add a texture to the selected box facet in two ways: 1) Click the button, select a graphics file in the dialog box, and open it as texture. The texture is applied to the box when the graphics file is opened. 2) Select a pre-set texture in the Pre-set Texture box, double click the pre-set, and add the texture to the box directly. 142 / 251 The angle for adding a texture can be swicthed using the button. Clicking it switches between four angles, including Upper Left, Upper Right, Lower Left, and Lower Right. In case you need to apply the same texture to all the facets, you don’t have to do it facet by facet. Simply set one of the facets, then click the button, and the texture is applied to every facet. If you want to add a prepared object texture to the Texture Management window, click the right mouse button, and select the Add to Texture Library option. See the section on Adding Texture of Texture Management for details. 7.3 Balls 7.3.1 Producing Balls 1) Click the button. 2) Drag the mouse cursor in the main edit window, and form a ball. 7.3.2 Special Properties of Ball You can set the properties for box as shown in the left picture, including Position, Play Mode, Hide and Lock, Length, Radius and Piece Number, etc. Radius set the radius of a ball. Frags sets the curvature fineness for the ball’s edge. 7.3.3 Editing Balls 3D Axes: You can see eight points framing a rectangular area when a 3D character is selected, along with a 3D coordinate system, which is made up of the X, Y and Z coordinate axes in the form of red, green and blue arrows. The axes indicate the spatial position of the ball, and you can use the coordinate system to adjust the position. Adjust Ball Angle: Select the Rotation button in the Tool box, drag the circles, and rotate the ball. The red circle stands for rotation by the 143 / 251 X Axis, the green circle for Y rotation, and the blue one for Z rotation. You can rotate the circles along their individual coordinate planes, as shown by the illustration. Adjust Color: Select the ball, click and select a color block in the Property box, bring out the Palette tab, and choose a color from the Palette for the color of the ball. See the sections about adjusting colors in the 3D primitive properties and the Palette for specific operations. Add Texture: Select the ball, and you can add a texture to it in two ways: 1) Click the button, select a graphics file in the dialog box, and open it as texture. The texture is applied to the ball when the graphics file is opened. 2) Select a pre-set texture in the Pre-set Texture box, double click the pre-set, and add the texture to the ball directly. The angle for adding a texture can be swicthed using the button. Clicking it switches between four angles, including Upper Left, Upper Right, Lower Left, and Lower Right. See the sections on textures in the 3D primitive properties and texture management for details. 7.4 Cylinders 7.4.1 Producing Cylinders 1) Click the button. 2) Drag the mouse cursor in the main edit window, and form a cylinder. 7.4.2 Special Properties of Cylinder You can set the properties for cylinders as shown in the left picture, including Position, Play Mode, Hide and Lock, Radiuses, Height, Fineness, etc. Height sets the height of a cylinder. Frags sets the curvature fineness of the cylinder’s edges. 144 / 251 By setting the internal and external diameters, you can turn a cylinder object into a barrel or taper. When you make a hollow cylinder or a taper, the Upper O R and the Lower O R control the diameters of the upper and lower external circular faces, while the Upper I R and the Lower I R set the diameters of the upper and lower internal circular faces. e.g. It’s a taper when the Upper O R is 0. It’s a trapeziform taper when the Upper O R is different from the Lower O R. You can produce hollow trapeziform tapers or hollow barrels when the Upper I R and the Lower Internal R are given values. Note: Values of the Upper and Lower I R. Select Cylinder Faces: You can select a facet of the cylinder in two ways: Click the intended facet on the graphics using the mouse. The selected subgraph is circled with green lines. Select it in the Select Facet box of the Property tab. The icon in the corner of the pull-down menu applies the properties of the selected facet to all facets when selected, including the color, texture, etc. 7.4.3 Editing Cylinder 3D Axes: You can see eight points framing a rectangular area when a 3D character is selected, along with a 3D coordinate system, which is made up of the X, Y and Z coordinate axes in the form of red, green and blue arrows. The axes indicate the spatial position of the column, and you can use the coordinate system to adjust the position. Adjust Column Angle: Select the Rotation button in the Tool box, drag the circles, and rotate the column. The red circle stands for rotation by the X Axis, the green circle for Y rotation, and the blue one for Z rotation. You can rotate the circles along their individual coordinate planes, as shown by the illustration. Adjust Color: Select the column, click and select a color block in the Property box, bring out the Palette tab, and choose a color from the Palette for the color of the column. See the sections about adjusting colors in the 3D primitive properties and the Palette for specific operations. 145 / 251 Add Texture: Select a column, and you can add a texture to it in two ways: 1) 1) Click the button, select a graphics file in the dialog box, and open it as texture. The texture is applied to the column when the graphics file is opened. 2) Select a pre-set texture in the Pre-set Texture box, double click the pre-set, and add the texture to the column directly. The angle for adding a texture can be swicthed using the button. Clicking it switches between four angles, including Upper Left, Upper Right, Lower Left, and Lower Right. See the sections on textures in the 3D primitive properties and texture management for details. 7.5 Tablet 7.5.1 Producing Tablets 1) Click the button. 2) Drag the mouse in the Main Edit area, set the line and row numbers, the waiting time and playout time for the In-and-Out and overturn effects, and select the In-and-Out and waiting effects in the dialog box. Create a Tablet object by click Yes when the settings are ready. 7.5.2 Special Properties of Tablets You can set the properties for Tablets as shown below, including Position, Play Mode, Hide and Lock, Font, Character Effect, Alignment, etc. Type set 2-facet or 3-facet Tablets. Row adjusts the number of rows of Tablets. Preferably, the total Tablet number can be exactly divided by the row number. Length, Width & Thickness: The Length and Width are the length and width of each Tablet 146 / 251 block, and the Thickness is valid only for the 2-facet Tablets but invalid for the 3-facet ones. Row & Line Spacing adjusts the row and line spacing of the Tablet matrix. Press the button, bring out the dialog box for Tablet Play Property, and you can set the play effects for Tablets, as illustrated: In the Tablet Play Property box, you can set the In, Out and Waiting Statuses and Effects. In Delay sets the In Waiting Time, In Time, Interval and Effect. The Interval option sets the interval time between each Tablet when entering a scene. Flip Delay sets the overturn Waiting Time, Overturn Time, Interval and Effect. The Interval option is the interval time between the overturn of each Tablet block. Out Delay sets the Out Waiting Time, Out Time, Interval and Effect. The Interval option sets the interval time between each Tablet when exiting a scene. You can observe the adjustment results on the timecode track. 7.5.3 Editing Tablet 3D Axes: You can see eight points framing a rectangular area when a 3D character is selected, along with a 3D coordinate system, which is made up of the X, Y and Z coordinate axes in the form of red, green and blue arrows. The axes indicate the spatial position of the Tablet, and you can use the coordinate system to adjust the position. Adjust Tablet Angle: Select the Rotation button in the Tool box, drag the circles, and rotate the Tablet. The red circle stands for rotation by the X Axis, the green circle for Y rotation, and the blue one for Z 147 / 251 rotation. You can rotate the circles along their individual coordinate planes, as shown by the illustration. Adjust Color: Select the Tablet, click and select a color block in the Property box, bring out the Palette tab, and choose a color from the Palette for the color of the Tablet. See the sections about adjusting colors in the 3D primitive properties and the Palette for specific operations. Select Tablet Faces: Tablet have many facets, and you can select a facet in two ways: 1) Click one of the facets in the edit interface using the mouse. The selected sub graph is circled with green lines. 2) Select the facet you want in the Property tab. In the Select Facet pull-down column, you can find the names of the facets. The icon in the corner of the pull-down menu applies the properties of the selected facet to all facets when selected, including the color, texture, etc. Add Texture: Select a Tablet facet, and you can add a texture to it in two ways: 1) Click the button, select a graphics file in the dialog box, and open it as texture. The texture is applied to the facet when the graphics file is opened. 2) Select a pre-set texture in the Pre-set Texture box, double click the pre-set, and add the texture to the facet directly. The angle for adding a texture can be swicthed using the button. Clicking it switches between four angles, including Upper Left, Upper Right, Lower Left, and Lower Right. See the sections on textures in the 3D primitive properties and texture management for details. 7.5.4 Setting Tablet Table Tab Click the Table tab in the Pre-set Management window, and then you can set the Tablet Table, as shown below: 148 / 251 1) Caption0/Caption1 sets the title characters on the two sides of each subgraph. Double click this option, and you can change the character content. 2) Font0/Font1 sets the fonts of the title characters on the two sides of each subgraph. Select the font icon, and change the Font property in the Addtibute window. 3) The buttons increase/reduce table lines. 7.6 Histograms(bar) 7.6.1 Producing Histograms 1) Click the button. 2) Drag the mouse in the Main Edit area, set the number of sub graphs, waiting time of growth effect, growth time, effect interval, finish waiting time, finish time, and the Out effect interval in the Set Histogram dialog box. Create a histogram by click Yes when the settings are ready. 7.6.2 Special Properties of Histogram(bar) You can set the properties for histograms as shown in the left picture, including Position, Width and Height, Play Mode, Hide and Lock, Type, Radius, Distance, Fineness, etc 149 / 251 . Type sets Square Histogram or Cylinder Histogram. Radius changes the side length when it’s a square histogram, and changes the diameter in case of a cylinder histogram. Distance adjusts the distance between columns. Frags adjusts the fineness of the column edges. Press the button, bring out the dialog box for Histogram Play Property, and you can set the play effects, as illustrated: Set Growth Status: You can work with the parameters of Growth Waiting Time, Growth Time, and Interval. The Interval is the interval time between the start of each column’s growth. Set Finish Status: You can work with the parameters of Finish Waiting Time, Finish Time, and Interval. The Interval is the interval time between each column’s start of retraction. You can observe the adjustment results on the timecode track. 7.6.3 Editing Histograms(bar) 3D Axis: You can see eight points framing a rectangular area when a 3D character is selected, along with a 3D coordinate system, which is made up 150 / 251 of the X, Y and Z coordinate axes in the form of red, green and blue arrows. The axes indicate the spatial position of the histogram, and you can use the coordinate system to adjust the position. Adjust Histogram Angle: Select the Rotation button in the Tool box, drag the circles, and rotate the histogram. The red circle stands for rotation by the X Axis, the green circle for Y rotation, and the blue one for Z rotation. You can rotate the circles along their individual coordinate planes, as shown by the illustration. Adjust Color: Select the histogram, click and select a color block in the Property box, bring out the Palette tab, and choose a color from the Palette for the color of the histogram. See the sections about adjusting colors in the 3D primitive properties and the Palette for specific operations. Select Subgraph: You can select a subgraph in two ways: 1) Click a subgraph in the graphics using the mouse. The selected subgraph is circled with green lines. 2) Select the facet you want in the Property tab. In the Select Facet pull-down column, you can find the names of the facets. The icon in the corner of the pull-down menu applies the properties of the selected facet to all facets when selected, including the color, texture, etc. Add Texture: Select a facet of the histogram, and you can add a texture to it in two ways: 1) 1) Click the button, select a graphics file in the dialog box, and open it as texture. The texture is applied to the facet when the graphics file is opened. 2) Select a pre-set texture in the Pre-set Texture box, double click the pre-set, and add the texture to the facet directly. The angle for adding a texture can be swicthed using the button. Clicking it switches between four angles, including Upper Left, Upper Right, Lower Left, and Lower Right. See the sections on textures in the 3D primitive properties and texture management for details. 151 / 251 7.6.4 Setting Histogram Table Tab Click the Table tab in the Pre-set Management window, and then you can set the Histogram Table, as shown below: 1) Value: It refers to the height. That is, the peak height of growth effect when the subgraph is played. Click the value, make it changeable, and then enter a new angle value. 2) Value Start: It refers to the height of the subgraph when the growth effect begins. Click the value, make it changeable, and then enter a new angle value. 3) Caption: This option is used to change the title character content of the subgraph. Click the value, make it changeable, and then enter content. 4) Font: It sets the properties of title character, such as font and color. Select and set it in the Property tab. 5) The buttons increase/reduce table lines. 7.7 Pie Charts 7.7.1 Producing Pie Charts 1) Click the button. 2) Drag the mouse in the Main Edit area, set the number of sub graphs, waiting time of growth effect, growth time, effect interval, finish waiting time, finish time, and the Out effect interval in the dialog box. Create a pie chart by click Yes when the settings are ready. 152 / 251 7.7.2 Special Properties of Pie Chart You can set the properties for pie charts as shown in the left picture, including Position, Width and Height, Play Mode, Hide and Lock, Type, Radius, Distance, Fineness, etc. Type sets clockwise pie chart or anti-clockwise pie chart. Radius sets the radius of the pie chart circle. Frags sets the fineness of the pie chart’s edge. Press the button, bring out the dialog box for Pie Chart Play Property, and you can set the play effects, as illustrated: Set Growth Time: You can work with the parameters of Growth Waiting Time, Growth Time, and Interval. The Interval is the interval time between the start of each column’s growth. Set End Time: You can work with the parameters of Finish Waiting Time, Finish Time, and Interval. The Interval is the interval time between each column’s start of retraction. You can observe the adjustment results on the timecode track. 153 / 251 7.7.3 Editing Pie Charts 3D Axes: You can see eight points framing a rectangular area when a 3D character is selected, along with a 3D coordinate system, which is made up of the X, Y and Z coordinate axes in the form of red, green and blue arrows. The axes indicate the spatial position of the pie chart, and you can use the coordinate system to adjust the position. Adjust Pie Chart Angle: Select the Rotation button in the Tool box, drag the circles, and rotate the pie chart. The red circle stands for rotation by the X Axis, the green circle for Y rotation, and the blue one for Z rotation. You can rotate the circles along their individual coordinate planes, as shown by the illustration. Adjust Color: Select the pie chart, click and select a color block in the Property box, bring out the Palette tab, and choose a color from the Palette for the color of the selected facet. See the sections about adjusting colors in the 3D primitive properties and the Palette for specific operations. Select Subgraph: You can select a subgraph in two ways: 1) Click a subgraph in the graphics using the mouse. The selected subgraph is circled with green lines. 2) Select the facet you want in the Property tab. In the Select Facet pull-down column, you can find the names of the facets. The icon in the corner of the pull-down menu applies the properties of the selected facet to all facets when selected, including the color, texture, etc. Add Texture: Select a facet of the pie chart, and you can add a texture to it in two ways: 1) Click the button, select a graphics file in the dialog box, and open it as texture. The texture is applied to the facet when the graphics file is opened. 2) Select a pre-set texture in the Pre-set Texture box, double click the pre-set, and add the texture to the facet directly. 154 / 251 The angle for adding a texture can be swicthed using the button. Clicking it switches between four angles, including Upper Left, Upper Right, Lower Left, and Lower Right. See the sections on textures in the 3D primitive properties and texture management for details. 7.7.4 Setting Pie Chart Table Tab Click the Table tab in the Pre-set Management window, and then you can set the Pie Chart Table, as shown below: 1) Value: It refers to the maximum angle of the In effect of the subgraph. 0 means the subgraph is played from the start angle, and it has turned 40 degrees when it stops. Click the value, make it changeable, and then enter a new angle value. 2) Value Start: It is the start angle when the subgraph is played. Click the value, make it changeable, and then enter a new angle value. 3) Caption: This option is used to change the title character content on the pie chart. Click the value, make it changeable, and then enter content. 4) Font: It sets the properties of title character, such as font and color. Select and set it in the Property tab. 5) Thick: It is the thickness of the subgraph. Click the value, make it changeable, and then enter a new value. 6) X Offset: It is the distance of the subgraph from the central point in the X direction. 7) Y Offset: It is the distance of the subgraph from the central point in the Y direction. 8) Z Offset: It is the distance of the subgraph from the central point in the Z direction. 155 / 251 7.8 Importing Third-party Models 7.8.1 Importing 3D Models 1) Click the button. 2) Select a file in the Property page, drag the mouse cursor in the main edit window, and form a rectangular box, where you can import a 3D model. 7.8.2 Special Properties for Importing 3D Models You can set the properties for 3D models as shown in the left picture, including Position, Width and Height, Play Mode, Hide and Lock, etc. You can also open a new file, and replace the current file with it. Animation: Checking the square before the Animation option imports a 3D modle along with its original properties such as the keyframes. To be simple, if the 3D model is an animation, not selecting this option results in a still 3D model, while checking it imports the 3D animation model. Animation rate: You can use this option to adjust the frame rate of a 3D model. Changing this value adjusts the play speed for the animation. 7.8.3 Editing 3D Models 3D axes: You can see eight points framing a rectangular area when a 3D character is selected, along with a 3D coordinate system, which is made up of the X, Y and Z coordinate axes in the form of red, green and blue arrows. The axes indicate the spatial position of the model, and you can use the coordinate system to adjust the position. Adjusting angles of a 3D model: Select the Rotation button in the Tool box, drag the circles, and rotate the 3D model. The red circle stands for rotation by the X Axis, the green circle for Y rotation, and the blue one for Z rotation. You can rotate the circles along their 156 / 251 individual coordinate planes, as shown by the illustration. 157 / 251 Chapter 4 Scroll File Production Roll Play is widely used. Our system provides a type of .rol file, so that user can produce, edit and adjust roll file directly in Editing window. D³-CG Live provides powerful roll editing functions. It not only can realize common up/down and left/right roll play, but also can add multiple primitive elements such as image, polygon, ellipse and etc. in roll file. This chapter will explain how to create roll file and some unique functions under roll editing mode. Section 1 Basic Flow to Produce Roll File 1.1 Create a Roll File Click at “Roll Editing” under “Tool Box” menu and Tablet a rectangle with mouse in Main Editor window to enter Roll Editing interface to create a roll file. 1.2 Input Roll Contents Following ways can be adopted to input characters: In Roll Editing status, directly input characters in input box via keyboard. On “Text Editor” label page, open a txt file, choose needed text, press “Ctrl+C” to copy it and then press Ctrl+V in Roll Editing box to paste it to Roll Editor. Right click in Roll Editor to call out right click menu, choose “Import” and select needed txt file from Import Text dialog box to import the selected txt file to Roll Editor. Replace original roll characters in a roll file: Directly input a paragraph of characters or open a txt file on “Text Editor” label page and choose needed characters and then double click at characters needing to be replaced in Roll Editor to replace them. Drag: Directly drag needed characters in “Text Editor” to Roll Editor. Release mouse at target position in Text Editor (vertical coordinate is valid for vertical alignment and horizontal coordinate is valid for horizontal alignment). 158 / 251 1.3 Set Color Property of Roll Character The ways to set color property for roll characters in roll file are similar to that for setting color property of other primitive elements. Attention: please make sure to choose characters needing to be modified at first to enable the modification to be effective. 1.4 Character Alignment in Roll File Character arrangement is generally needed and following methods can be adopted except for manual arrangement. Method 1: The system automatically arranges characters sequentially after inputting characters or importing files. If the position of a line needs to be changed, choose the line, move your mouse to target position and release your mouse. Method 2: Choose a line needing to be moved and press Ctrl plus up/down/left/right arrows on keyboard to move the selected line. Method 3: Arbitrarily click at horizontal or vertical template on Editing box to display a gray baseline that is used to align characters or objects. Choose lines needing to be aligned and right click to select corresponding alignment method. Or press left key of mouse to choose a line and move mouse to move the selected line and selected objects will be sucked to the side of baseline when it is close to baseline. You also can press Ctrl key to choose and move multiple lines simultaneously. Choose base point on baseline and move mouse to move baseline. Select base point on baseline and right click to choose a mode to delete baseline. Method 4: Choose lines of which line spacing needs to be modified, click at “Increase Line Spacing” button or “Reduce Line Spacing” button Roll Editor to change line spacing. Click on increased or reduced for each click; click on selected line and its following line and click on line and its following line. 159 / 251 at upper right corner in button to set line spacing value that is button to simultaneously move down to simultaneously move up selected 1.5 Add Image In Roll File In Roll Editing status, move cursor to the position where roll object needs to be added, click on , choose needed image in Property box and directly draw a box at the place where cursor is. Size of the box is that of image and image size can be adjusted if needed. Section 2 Roll Editing Property Settings 2.1 Settings for Editing and Producing Roll File Font: Set Chinese and English font for roll file. Click on• to call out dropdown list to choose needed font. Bold: Press it down to display the selected characters in bold mode. Italic: Press it down to display the selected characters in italic mode. Special Character: To insert special characters. Font Width and Font Height: Set font width and height. In Editing Box, press down left key of mouse and drag it up/down to change the value of font width or height or directly input appropriate values in Editing Box. In addition, click at Width or Height to call out a list box and choose an appropriate value from the list box to set character of which the height and width are similar, as indicated in left figure. Font Spacing: In Editing Box, drag mouse up/down to change font spacing or directly input appropriate values in Editing Box. :Text Direction: Vertical alignment or horizontal alignment. :Character Input: Input character from left to right or from right to left. :Whole: Set whether the font of selected line is similar to that of the first character in this line and whether to execute overall rendering. Underline: Set color for underline. Two arrows representing gradient modes of gradient color 160 / 251 or texture are displayed at right side of Underline Color Box when the color is set as gradient color or texture. Height: The height of underline. Distance: Spacing between underline and roll character. Image: Click at Browse button at right side and choose an image file to display selected characters as selected image file. Right click at Name column to cancel image display mode. 2.2 Right Click Menu Settings In Roll Editing status, right click to call out right click menu as shown in right figure. Open: Open a rol. File that is an editable file. Save: Save this file with current name. The extended name is .rol and it is an editable file. Save as: Click at it to call out “Save as” dialog box and choose appropriate folder and input new name to save the file. The extended name is .rol and it is an editable file. Export: Click at it to call out “Save as” dialog box and choose appropriate folder and input new name to save the file. The extended name is .vis that is a vertical alignment file and .vic that is horizontal alignment file. Import: Click at it to call out “Open” dialog box and choose a .txt file to import the selected text file to roll file. Undo:Cancel last operation. Redo: Redo canceled operation. Copy: To save the selected object to system clipboard. Cut: To save the selected object to system clipboard and delete it from current clip. Paste: Paste object stored in clipboard to current clip. Send to Back: Move the selected objects to bottom layer 161 / 251 (it can be used to call out primitive elements from roll file). Bring to Front: Move selected objects to top layer (it can be used to call out primitive elements from roll file). Equal Width: Set the width of selected object to be the same as that of main object. It can be used to call out primitive elements from roll file Equal Height: Set the height of selected object to be the same as that of main object. It can be used to call out primitive elements from roll file Equal Size: Set the size of selected object to be the same as that of main object. It can be used to call out primitive elements from roll file Center Horizontally: Horizontally display selected object at the center in current WYSWYG window Center Vertically: Vertically display selected object at the center in current WYSWYG window. Equal Leading: Space selected characters evenly. Set Leading: Set the space between two adjacent character lines. Reverse Display Mode: Change display mode of selected line to enable original horizontal alignment to be changed as vertical alignment and original vertical alignment to be changed as horizontal alignment. Reverse Text Line: Reversely align characters for each selected line. Shortcut key is Ctrl+F. Append Empty Page: Add a blank screen to the end of roll. Sort Transversely: Arrange roll objects horizontally. Sort Lengthways: Arrange rolling vertically. Inversion Input Direction: Arrange characters from right to left according to their input sequence. Shortcut key is Ctrl+I. Move Line With Image: Choose it to enable graphics to move with character after modifying the alignment mode of characters on the top of primitive element. Horizontal Alignment: Five options are provided. Top Alignment: Align selected objects or characters with the top of main object. Center Alignment: Align selected objects or characters according to the center of main object. 162 / 251 Bottom Alignment: Align selected objects or characters with the bottom of main object. Zoom Top Alignment: Align selected rolling characters with the top of main object without changing the position of their bottom borderline. Zoom Bottom Alignment: Align selected rolling characters with the bottom of main object without changing the position of their top borderline. Vertical Alignment: Five options are provided. Left Alignment: Align selected objects or characters with the left of main object. Center Alignment: Align selected objects or characters according to the center of main object. Right Alignment: Align selected objects or characters with the right of main object. Zoom Left Alignment: Align selected rolling characters with the left of main object without changing the position of their right borderline. Zoom Right Alignment: Align selected rolling characters with the right of main object without changing the position of their left borderline. Horizontal Alignment To Baseline: Five options are provided. Baseline Top Alignment: Take selected horizontal baseline as standard to horizontally align the objects on the top and selected status of horizontal baseline is valid. Baseline Center Alignment: Take selected horizontal baseline as standard to horizontally align the objects at center and selected status of horizontal baseline is valid. Baseline Bottom Alignment: Take selected horizontal baseline as standard to horizontally align the objects at bottom and selected status of horizontal baseline is valid. Zoom Top Alignment: Take current vertical baseline as standard to align the selected objects on the top without changing bottom position of the selected objects. Zoom Bottom Alignment: Take current vertical baseline as standard to align the selected objects on the bottom without changing top position of the selected objects. Vertical Alignment To Baseline: Five options are provided. Baseline Left Alignment: Take selected vertical baseline as standard to vertically align the objects on the left and selected status of vertical baseline is valid. Baseline Center Alignment: Take selected vertical baseline as standard to vertically align the objects at the center and selected status of vertical baseline is valid. Baseline Right Alignment: Take selected vertical baseline as standard to vertically align the objects on the right and selected status of vertical baseline is valid. Zoom Left Alignment: Take current vertical baseline as standard to align the selected objects on the left without changing right position of the selected objects. Zoom Right Alignment: Take current vertical baseline as standard to align the selected objects on the right without changing left position of the selected objects. Exit: Exit Roll Editor. 163 / 251 Search word: search key words. 2.3 Roll File Play Settings Scroll File: Call out a produced roll file. Scrolling Direction: Include up, down, left and right scrolling. Scroll with Single Line: Mark Marquee mode to play roll file in marquee mode. Marquee mode is single line roll and roll direction that can be selected depends on character direction in roll file. If characters are arranged horizontally, left or right marquee can be chosen; if characters are arranged vertically, up or down marquee can be selected. Please press down Marquee button and choose corresponding roll direction to execute single line roll play. Race Lines: Input a number in Editing box to specify the number of lines that can be played in marquee mode simultaneously. BG Color: Set background color to play a roll file. Please refer to the settings for Color Palette about how to adjust background color. Roll Speed: It means roll speed in pixel. Roll speed and roll time are linked. If roll speed changes, roll time changes automatically. Loop Times: Set the times for roll play. Fade-in / Fade-out: Set fade-in/fade-out effect for the boundary of roll file. Input figure in pixel. Scroll Time: Set total play time for a roll file. Roll speed and roll time are linked. If roll time changes, roll speed also changes automatically. F Frame: Waiting time before playing roll file. Drag mouse up/down in Editing Box to change the value of stillness time or directly input appropriate values in Editing Box. It is linked with roll time and time code track. L Frame: Set stillness time for the last screen of roll file. Drag mouse up/down in Editing Box to change the value of stillness time or directly input appropriate values in Editing Box. It is linked with roll time and time code track. Stillness time for the first and last roll frame also can be set on time code track via following ways: press Shift key and place cursor at In or Out point of roll object and drag mouse. Dragged yellow area is stillness time of the first or last roll frame on screen, as shown in following figure 164 / 251 Section 3 Utilization of Roll Template Roll template function enables production of roll file to be more convenient and simpler. 3.1 Produce Scroll Template Produce a roll template at first. The way to produce a roll template is similar to that for producing a roll file. There is no special requirements on the contents of roll template, what we need to do is to produce a group of characters, as indicated in following figure. Longer post name is better and separate names with space. It may be better to produce two lines of names so that roll spacing can be set when executing replacement play. Save this roll template as scrolltemplate-1.rol file. 3.2 Edit Roll Text Roll file can be edited with notepad. As shown in following figure, post and name are input in two different lines and separate different names with a space and no space can be added in the middle of a name. Edited text file is saved as “text01.txt”. 165 / 251 3.3 Generate Roll File Enter Property Window/Text Property Interface at first and then generate roll file according to template. Step 1 Quote Template: Set a specified directory via and all roll files under the directory are displayed in dropdown menu on the right side. We choose scrolltemplate-1.rol and then the path of this template is displayed on the top of Text Editor. Step 2 Import Text: Open Text Editor in Property box and click at “T” to import test01.txt. Step 3: Add a template before each group of name. As shown in following figure, place cursor before each group of text and click on to import roll template and add template path. Step 4: Click on roll file generating button on the right side to generate a new roll file. 3.4 Other Buttons TGA: Import an image in any format. 166 / 251 :Set spacing between two connecting templates. Number in editing box is spacing value. Press down this button to set this value in text replacement file and release this button to cancel the settings. :Display Alignment Mode: Press this button down to display alignment mode in text editing (as shown in following figure). <ALIGN>L-L means to display title in left alignment mode and align title lines on the left; <SPACE>48 refers to spacing between two different adjacent groups. <SPACE>48 : Button to generate roll file based on the settings. : Replace title and title line according to the set alignment mode. “Title” represents the alignment mode for each name and “Title Line” refers to the alignment mode for each line of name. Title Center Line Center Title Center Line Right 167 / 251 : When the number of replacement characters is larger than that of template characters, “Decentralized Alignment” and “Decentralized Center Alignment” are different. The width of replaced characters is similar to that of template if clicking on Decentralized Alignment button; while the width of replaced characters is different from that of template but font spacing is the same as template and replaced characters are aligned at the center of template when clicking on Decentralized Center Alignment button. Sign to choose next roll template. Sign to choose previous roll template. Delete sign in roll template. 168 / 251 Chapter 5 Subtitle File Production Section 1 General Flow to Produce Roll File 1.1 Add Subtitle File Choose “Edit Subtitle” from “Toolbox” in system menu to enter Subtitle Editing interface. Content of subtitle can be directly input in Main Editing interface of Subtitle Editor or imported from external file. Open a text file in “Text Editor” in Property Box and then copy it to Main Subtitle Editor or copy it via clipboard of Windows. 1.2 Adjust Text Font Property After inputting subtitle text, please set font property for subtitle text. Double click at font button in “Text Property Setting Area” and set title property in called out Font Property setting box. At first, choose the first character in this window and the selected character is circled with a green box. Then adjust font property for subtitle text on “Object Property” label page in Property window. The adjustment way is similar to that for adjusting the property of title character. 169 / 251 And then, specify whether all characters in this line use similar font property as this character (it is the first character currently). Click on button (“Following characters use selected property”) at lower right part of Font Property Adjustment Window to enable following characters to use justly selected font property. If different characters in the same line need to adopt different font properties, please choose each character one by one in “Font Property Adjustment” window to set its font properties. ATT: Overall Rendering button cannot be selected when setting font property. In default, this button is in selected status (green). 1.3 Adjust Play Position of Subtitle File After setting font property for subtitle file, please set its play position. Click at position column to call out “Adjust Cut Rectangle” dialog box. Drag and modify rectangle box where subtitle is displayed or directly input specified value in Editing Box below. A rectangle box will be displayed on monitor when adjusting rectangle to be convenient for positioning subtitle more accurately. If multiple lines are on screen simultaneously, the window can display the positions for multiple sentences. The position of each line can be set independently via dropdown menu and alignment relation between multiple subtitle lines can be modified via Alignment Settings. Click on “OK” after modification to exit the dialog box. 1.4 Add Effects for Subtitle File Double click at blank area under “Effect” to call out “Effect Adjustment Window” on the right side (as indicated in right figure) to display all In, Out and Stillness effects. After choosing an effect, subtitle effect is also displayed in Subtitle Effect box, as indicated in following figure. If the property of an effect needs to be modified, for example modifying the direction of wipe effect, click on button to modify it. If the process of In effect of an object needs to be modified, please directly adjust the values of In Delay and In Speed in Effect Adjustment Window. 170 / 251 1.5 Produce Character Effect for Subtitle File When editing subtitle file with D³-CG Live series software, word-for-word In and Out effects can be adjusted. 1、 Create new subtitle file and choose a fixed effect as In and Out effects, such as explode or wipe and so on. 2、 Right click at blank area at the right side of subtitle character to respectively add an icon on the left and right of Font icon in Font column. 3、 The left icon is used to adjust effect parameter for subtitle board. Right click at it to call out a dialog box for adjusting effect parameter of subtitle board and following parameters can be set . In Open State/Out Open State: If only choosing “In Open State”, current sentence is in dispersedly and out as a whole; if only choosing “Out Open State”, current sentence is in as a whole and out dispersedly; if choosing both, current sentence is in and out dispersedly; if none is selected, current sentence is in and out as a whole. In Stunt Space: It means the interval between in effects of the first and second characters. Stay Stunt Space: It means the interval between Out time of In Effect and In time of Stillness Effect of all characters. Out Stunt Space: It means the interval between Out time of Stillness Effect and In time of Out Effect of all characters. Per Len of In/Stay/Out Stunt: It means the length of In/Stillness/Out effect for each character. Auto Left Stunt: Automatically align In, Stillness and Out Effects of all characters according to In effect interval and there is no interval between In, Stillness and Out effects for each character, i.e. intervals for Stillness/Out Effect does not 171 / 251 work. Stunt Total Len: It is the length from the first to the last character and calculated according to above parameters. Stunt Dynamic adjust: Two choices are provided. Select “Current Line” to enable above parameter modification to only work on current line; choose “Last Line” to enable above parameter modification to work on all lines from current to the last. A sentence may not be Played completely because of above modification to parameters. Therefore, it is suggested to use “Dynamic Update Effect” button , in Subtitle Toolbar, which can dynamically update total length of effect according to character length of each sentence to guarantee each sentence to be Played completely. 4、 Icon on the right means that current subtitle sentence is Played in Subtitle Board mode, i.e. it is in word-for-word in and out status. Right click on this icon to enable it to become from and the icon on the left side disappears, which means that current board is in the status of In and Out as a whole. 1.6 Play Subtitle file can be Played in five modes including Auto, Manual, Delay, VTR Control and GPI Trigger. Auto: Choose Auto button in Subtitle window and click on Play button to Play subtitle file sequentially according to the set In/Out time code, font settings and special effects. Click on Pause button to pause if needed and click on Pause button once again to continue play. Click on Stop button to stop playing. Manual: Choose Manual button in Subtitle Window and click on Play button. The system displays “Press Space key to continue, press ESC+Shift key to exit and press "+” key in small keyboard to continue!” Press ESC+Shift key to exit play status; press Space key to Play current subtitle sentence in Main according to the set font style and special effect; press “+” key on small keyboard to Play current characters in subtitle. ATT: Skip function is provided, i.e. when pausing a play, you can choose any subtitle sentence following current sentence to Play it. Delay: Select Delay button in Subtitle window and click on Play button. The system can play out subtitle file in manual mode and record delay in In/Out time code column. And then, choose Manual button once again to play the subtitle file according to recorded In/Out time code. If VTR Link play is selected simultaneously, the system can automatically record time code information on VTR when playing subtitle file. 172 / 251 VTR Control: Choose VTR Link button in Subtitle window and click on Play button to synchronously play subtitle file with VTR according to the set In/Out time code. GPI Trigger: Choose GPI Trigger button in Subtitle Window and click on Play button to trigger to play subtitle file with GPI signal. ATT: Subtitle file is Played from current selected subtitle sentence that can be selected via Up/Down arrows or mouse. Section 2 Subtitle Editor 2.1 Tool Buttons Tool buttons are displayed on the top of Subtitle Editor. DLG Manager Change Font Direct Dynamic Update effect Rect Manage Front GPI Control play VTR Control play Change Display Mode Stop Pause Play Delay Play Manual play Auto play Save As Save Txt File Open Txt File Creat New Text File Creat New Text File: Create a new subtitle file. Open Txt File: Open a subtitle file, txt file and DXL subtitle file. Save Txt File: Save edited subtitle file to current file. Save as: Save subtitle file as a new file under a specified folder. Auto Play: Automatically Play subtitle file according to pagination setting parameters of subtitle file. Manual Play: Manually control the in and out of each roll to play subtitle file. Delay Play: In Manual mode, record In/Out Delay of each roll for subtitle file over again. Play: Play produced subtitle file. Pause: Pause playing a subtitle file that is being Played. Stop: Stop playing subtitle file. Change Display Mode: :When the button is released, time on the left of Subtitle Editor displays delay. In Delay refers to time interval after previous subtitle sentence disappears and before current subtitle sentence is displayed and Out Delay means time interval after current subtitle sentence enters and before it begins to disappear. :When the button is pressed down, time on the left of Subtitle Editor displays time code. And each In/Out time code refers to absolute time from counting to the in or out of current subtitle 173 / 251 sentence. Each subtitle sentence has an In time code (in delay) and an Out time code (out delay). Two editing ways are provided: 1. Double click at in/out time code (delay) editing column and directly input time code with keyboard. 2. Double click at in/out time code (delay) editing column and drag mouse up/down in editing column to change the value of time code. VTR Control Play: Press this button to enable current subtitle editing to be in VTR Link status. GPI Control Play: Press this button to enable current subtitle editing to be in GPI Trigger status. Font: Change the font displayed in Subtitle Editor. Rect Manage: Click on it to enter Rectangle Preset Window to preset the position of subtitle sentences. The window contains two columns, and left column displays the names of preset rectangles and right column displays all presets under current class. Dynamic Update Effect: After adding word-for-word in/out effect for subtitle file, this function can dynamically update total duration of effect according to the length of each sentence to guarantee to play each sentence normally. Character Font Direct: Set whether to display characters in Subtitle Editor from left to right or from right to left. DLC Manager: Generate a file list for multiple subtitle files to be convenient for storage and Play. 2.2 Main List Interface for Subtitle File 1 2 3 4 ①: In time for current line, i.e. the time at which current line is in. ②: Out time for current line, i.e. the time at which current line is out. ③ Text Editing area to edit concrete contents of a subtitle file. ④ Text Property Setting area: set font property, in/out effect and Play position for each line. 174 / 251 Use Property of Previous Line: Title in this line continue to use title property of previous line. Overall Rendering: Property of all titles in this line is consistent with that of the first character. Following Characters Use Selected Property: Choose the first character in current line and click on this button to enable property of all following characters to be the same as that for this selected character. “Main List Pagination” and “Subtitle Pagination”: Pagination for subtitle file means to divide subtitle file into multiple pages to Play them page by page, so one page may contain multiple lines of subtitle sentence. “Main List Pagination” and “Subtitle Pagination” buttons are provided in the interface. Input a figure (the figure specifies the number of lines displayed on one page) in corresponding Editing box and click on corresponding button to divide corresponding main list and subtitle into several pages, so that the system can Play subtitle file according to the settings for main list pagination and subtitle pagination. Main List Pagination can be automatically executed to enable each page to contain fixed number of lines. If some pages may contain different number of pages, right click at “In Delay” and “Out Delay” to cancel time code and carry out pagination manually. “Main List Editing Box” and “Subtitle Editing Box”: Set number of pages for main list (subtitle) and the number of words for main list (subtitle) line. Main List Pagination and Word Number of Main Line share a same editing box. “Word Number in Main List Line” and “Word Number in Subtitle Line”: When copying word contents to Subtitle Editing box from external file, you can use these two functions that respectively correspond to main list content and subtitle content to be convenient for breaking line. Input a figure (it means word number in a line) in corresponding Editing Box and click this button to break main list/subtitle into different lines. Chinese and English punctuations are included in the set word number. “Main TGA Sequence” and “Subtitle TGA Sequence”: The system provides a function to 175 / 251 generate TGA image on page basis so that TGA image sequence can be generated for main list and subtitle. Click on “Main TGA Sequence” or “Subtitle TGA Sequence” button to call out “Generate GTA Sequence” dialog box where beginning and end lines, background color and TGA file name can be set. Click on “Start” button to generate TGA sequence file according to the settings. Section 3 Advanced Settings 3.1 DLX Format DLX file is one of subtitle file formats and contains time code, text, font and positions for subtitle file. Two versions are provided and import supports both of them but export only supports version 2. Difference between these two file formats is their In/Out time formats. Version 1 uses frame number to display In/Out time, while version 2 adopts time code to indicate In/Out time. Concrete information for this file format is as followings: 1. SystemMode: Input shot width and height, frame number per second and version information, separate them with comma. 2. Language: Input language information. 3. StartTime: Beginning time corresponding to subtitle. 4. MainLine: Number of main lines. 5. AddLine: Number of added lines. 6. Concrete Contents: General format is a|b|c|d|e|f|g|h that corresponds to in file. And “a” means In time, “b” refers to Out time, “c” represents text (255), “d” is position, “e” is alignment mode, “f” represents font, “g” means color and “h” sets number of lines. Contents for “d” to “h” can be left as blank if the line adopts similar settings as previous line. Position "d" has four parameters that respectively represent left, top, width and height of rectangle and these parameters are separated by comma. Alignment Mode “e” contains 11 parameters and they are “RL: row display from left, RR: row display from right, LL: list display from left, LR: list display from right”, “L: left alignment, R: right alignment, C: center alignment, SA: scatter alignment”, “MT: vertical top alignment, MC: vertical center alignment, MD: vertical bottom alignment” (only one parameter between quotation mark can be selected). Separate parameters with comma. Font “f” has 6 parameters that are font name, font style, font width and height, line spacing and column spacing. Parameters are separated with comma. Color “g” matches with font and is simultaneously displayed with font. It is hexadecimal value. 176 / 251 Multi-Line Settings “h” can set two lines of text or more as an subtitle sentence. If this parameter is set, In/Out time for following n lines are consistent. 3.2 Rectangle Manager In above, we have introduced how to enter Rectangle Preset window, in following text, we will explain how to utilize it. 1. Right click at blank area on left column and choose New command to create new rectangle preset group. Choose a preset group and right click to call out right click menu that contains Open, Delete and Rename commands that aim at rectangle preset class. If choosing New and Rename commands, the system calls out Rectangle Setting dialog box. Input Chinese or English name in rectangle box and click on OK. 2. Right click at blank area on right column to call out right click menu that contains View and New commands. Choose a preset rectangle and its right click menu contains View, Delete, Edit, Rename, and End Editing commands that aim at each rectangle preset. And View menu includes four options: Large Icon, Small Icon, List and Detailed Information. Please mark needed option. When choosing New or Edit commend, the system pops up a dialog box for “Adjust Cut Rectangle” and its adjustment method is similar to that for adjusting the position of subtitle character on monitor. 3. Preset rectangle can be directly dragged to position column in Subtitle Editor. 4. When editing preset rectangle, in Cut Rectangle Adjustment window, you can choose “Save Current Rectangle to Rectangle Preset Template” from right click menu to save produced rectangle to Rectangle Preset Management window. 177 / 251 Chapter 6 Clock Production Section 1 Clock Window Choose “View/Clock Window” from menu bar to call out following Clock and Channel Logo interface. 1.1 Basic Interface “Load a Project To be”: Choose a template for clock and channel logo. “Template Name”: Click at dropdown menu to choose a needed board. “Current ”: Display time Played on monitor. “Clock Type”: Set contents and types to play time and five choices are provided “digital, analog, pad timer, bar timer” “PreCutIn”: play the time template on the screen, but just display the fist frame according to the current time. “Play”: Play time on the screen, channel logo and dynamic background. “Stop”: Stop playing. “Pause”: Pause playing. “Hide”: Stop running clock and channel logo on monitor, but system clock and channel logo still run. “PreCutIn”: Play produced contents that will be Played on monitor before playing them. “Advance>>”: Advanced setting button to edit dynamic background and modify contents in clock and channel logo template. 178 / 251 1.2 Play Type Interface 1.2.1 System If choosing “System” as play type, Play current system time. This label page provides two radio buttons, one check button and two dropdown menus to set play style. and : Choose to Play digital or analog clock. Time Format: Set time display format when Playing time and default time format is “Minute : Second”. Following formats can be selected from dropdown menu: Minute : Second Hour: Minute: Second Minute: Second: Frame Hour: Minute: Second: Frame Second Second: Frame Frame Day: Hour: Minute: Second Day: Hour: Minute: Second: Frame Year/Month/Day Hour: Minute: Second: Frame Year/Month/Day Hour: Minute: Second :Choose whether to Play count down clock. Mark it to choose it. After marking Count Down, “End time for Count Down” needs to be set at first to Play it. 179 / 251 Timing : selected to play time according to the OS system time on the clock or HalfClock Clock:The time will display on the clock, for example 9:00 HalfClock: The time will display on the half clock, for example 9:30 Pre: The clock will be played on 30 seconds before the clock or half clock 1.2.2 Time If choosing “Time” for play type, Clock and Channel Logo Player Plays count up/down time from the time set in “Start Time”. This interface is similar to that for “System” label page. In the interface, you can choose needed time format from dropdown menu of “Time Format” and mark “Count Down”. Their settings and functions are similar to that for “System” label page. Start Time: Set time displayed when beginning to execute timing play. You can use the time function to count up or down. Timer player provides three ways: direct, One Item, List. Direct : the time will be played directly, not according to the set time One Item: the time will be played according to the set time, for example List: the time will be played according to the time list, and click the time to set the list of 1.2.3 Advance Interface In Advanced Settings window, user can edit dynamic background and modify contents in clock and channel logo template. 180 / 251 1.2.3.1 Dynamic Background Play A. Choose Shot Play or Animation Play or nothing. If no play mode is selected, only contents in clock and logo template are Played. When choosing Shot Play, specify a project file needing to be broadcasted in Project File box and choose a shot to play out this shot together with clock and channel logo. If choosing Animation Play, specify an animation file and adjust its position to play this animation together with clock and channel logo. B. Choose a layer, from dropdown menu, at which dynamic background is played out. C. Play Mode contains two options - Loop Play (without interval) and Interval that means interval-based loop play. 1.2.3.2 Background Replace Content It displays contents of objects that are named in template shot selected on Dynamic Background Play Label Page. Click on “>>” button and choose Replace commend to replace relative contents. Database also can be linked on this page according to following ways: 1. Open ODBC Data Source Manager from Control Panel, add data source in system DSN and name it. Please refer to “How to Set ODBC Data Source” for the information on how to set DSN name. 2. Click on “>>” button and choose “Log in Database” commend to log in database. DSN name is 181 / 251 data source name set in above step. 3. A button is displayed on the right side of title character in Object List area. Click on this button to call out Data Linkage Setting dialog box (ATT: for image, roll or animation objects, please press Ctrl at first and then click on this button), input search condition and click on “OK” button. Type search conditions for objects that will be played out automatically one by one. 4. Now, the system can Play data that conforms to the set conditions in database via replacement play. If database changes, Played data also changes automatically. 5. Click on “>>” button to open it. An instruction is displayed (link sign + shot name). If this instruction is not marked and data link is set for one of objects with similar name (in the same or different shot) in a template file, the data link for other objects with similar name is also the same as this object; it is contrary if it is marked. 6. “Load Link” button: Click on it to open saved data link file. 7. “Save Link” button: Save currently opened database as data link file. 1.2.3.3 Template Replace Content Label Page This page displays icons of selected shots, names and contents of all named objects in clock and logo template file. Modify relative contents, click on “Replace” button to replace relative information and click on “Save” button to save this clock and logo template file. Section 2 Produce Clock and Logo Template Before Playing clock and logo, you need to produce clock and logo templates first. 2.1 Steps to Create Time Template File 1. Create a new project file, name it, such as Time.prj and save it under \D3-CG-SD\Profile. 2. Multiple shots can be created in this project and each shot can be a clock and logo template. When you finish this project file and choose it in ‘Clock Logo’ window, all clock templates 182 / 251 produced before will be shown in “Template Name” pull-down menu. There’re two types of clock included- Digital and Analog. Digital Clock Template Design of Digital Clock Template: Place an object such as polygon or image file and name it as “Time Background”; place a title character or art character and name it as “Time”; Switch to ‘Property’ tab page, choose ‘Clip’ from the pull-down menu, give it a name, like ‘Digital’, and save it. Analog Clock Template Design of Analog Clock Template: Place an object such as ellipse or image file and name it as “Dialer”; place three pointers (polygon type of thick/thin arrows or user-defined pointer can be used) and respectively name them as “Hour Hand”, “Minute Hand” and “Second Hand”; Switch to ‘Property’ tab page, choose ‘Clip’ from the pull-down menu, give it a name, like ‘Analog’, and save it. 183 / 251 Pad Timer Template Place an ellipse and name it as “Dialer”; Place another ellipse and enable its size and position to be the same as the first one and name it as “Process”; Switch to ‘Property’ tab page, choose ‘Clip’ from the pull-down menu, give it a name, like ‘Pad Timer xxx’, and save it. Bar Timer Template Place an Polygon and name it as “TimeBack”; Place another Polygon and name it as “Process”; Switch to ‘Property’ tab page, choose ‘Clip’ from the pull-down menu, give it a name, like ‘Bar Timer xxx’, and save it. 2.2 Play Clock 1. Choose a needed board from dropdown menu of “Time Board Name”. 2. Five page labels on the right side represent five play types. Choose needed one. 3. Choose a digital or analog clock in “Style” column. 4. “View Time” displays time Played on monitor. 5. Click on “Play” button to play it. 2.3 How to Play Count-down 1. In the item of ‘Load a Project To be’, click browse button to select the .prj file which includes the clock templates. And then from Template Name pull-down menu, choose a clock template you wanna playout, for example, Digital. 184 / 251 2. Switch to ‘Time’ tab page, and tick ‘Count down’. 3. Set the time format you want and also give a start time. 4.Click ‘PreCutIn’ to put the clock displaying on monitor. 5. Then, click on “Play” to play it. 185 / 251 Chapter 7 Image Processing Image Processing is also commonly used in Graphics & Title System. In D3-CG Live system, created graphic and title can be saved as various commonly-used image files and image sequence can also be finished as animation file. Section 1 Save Image Save part area in current clip as image file. Choose “Save Image” to call out Save Image dialog box and choose an area needing to be saved in Preview Window to save it as an image. Operating Steps: Choose “Save Image” option to call out Save Image dialog box. Input file name behind “File Name”, choose file path and image format (multiple image formats are supported). Choose compression mode. Choose save mode. When choosing “Full Screen” mode, the system saves whole object in Main Editor window as image. If choosing Local mode, press left key and draw a rectangle in Main Editor. Area covered by rectangle will be saved as an image. Relative values about image range are displayed in Image Position. Double click to confirm image range and click on “OK” button to save it and exit. Or input specified values in Image Position to specify a range needing to be saved as an image. Section 2 Save Current Clip Image Save full screen of current clip as image file. Click on it to call out “Save as” dialog box. Choose file path, input file name and choose image format from dropdown menu to save current clip image. Section 3 Save Current Object Image Save currently selected object as image file. Click on it to call out “Save as” dialog box. Choose file path and input file name to save current object. 186 / 251 Section 4 Invert Alpha Channel for TGA Image Convert Alpha value of an image from 0 to 255. Choose this commend to call out above dialog box and set information on driver, path and file. Choose “Display All” or “Transparent” to display files under specified path in selected mode. Multiple files can be selected simultaneously. After finishing selection, click on Convert button to convert them. Section 5 Convert TGA Sequence To Animation Generate disk animation file from a series of image sequence file. And format can be selected. Choose this commend to call out “Sequence Animation Finishing” dialog box. Click on “Add” button to choose sequence images; click on “Delete” button to delete unneeded image; drag an image file to adjust its position; click on “Generate” button to generate all images in current list into an animation file in specified format according to the set sequence; highlight “Preview” button to view selected image file; edit values for Height and Width to define the size of animation; click on “Exit” button to exit Sequence Animation Finishing dialog box. 187 / 251 Section 6 Generate TGA String in Frame Mode Output dynamic images for current shot as TGA sequence string (frame mode). Section 7 Generate TGA String in Field Mode Output dynamic images of current shot as TGA sequence string (field mode). Section 8 Modify File Path of Object Paths for image, animation, roll and dialog files can be modified. However, if paths for all image, animation, roll or dialog files contained in a project file are modified, the project file cannot read these files. Therefore this function is provided to solve the problem. Mark checkboxes before image, animation, roll and dialog files to replace the paths for these files. Input old path in Original Path and type modified path in New Path. This dialog box also contains Checkout button. Click on “Checkout” button to check whether an object in a task is displayed and save the information. When opening an existing project file, the system also checks it automatically. 188 / 251 Chapter 8 Filter Function D³-CG Live supports static filter function for object and 6 classes of static filters are provided and they are Image Color, Soft, Distortion, Style, Rendering and Wipe. Each class contains multiple small filters. Section 1 Classes of Filters 1.1 Image Color Image Color class provides various filter effects including HSV Adjustment, RGB Adjustment, Black & White Picture, Mask & Color Extract, Equalize, Contrast, Gray Level, Layer, Color Offset, Area Reverse, Sharpen, Sunshine, Fade, Passivation, Paper and etc. 1.2 Blur It contains various soft filter effects including Soft Channel, Soft Fast, Gauss Soft, Soft Movement, Soft Emission and etc. 1.3 Distortion It provides various distortion effects including Color Glass, Mirror, Lens, Polar Coordinate Conversion, Tile, Window Blind, Sawtooth Ripple and etc. 1.4 Style It contains effects of Diffuse and Dissolve, Find Edges, Mosaic, Noise, Wind and more. 1.5 Render It contains effects for Halo and Light. 1.6 Wipe Out It contains filter effects of Line Wipe, Fan Wipe, Blind Wipe and more. 189 / 251 Section 2 Filter Adjustment Each filter can be adjusted. The following will introduce how to adjust filter by taking “Sawtooth Ripple” filter as an example. Import an image, choose “Filter” – “Distortion” – “Sawtooth Ripple” from menu to call out “Sawtooth Ripple” property adjustment window where relative parameters can be adjusted to achieve needed ripple effect. Drag triangle below each parameter ruler or directly input appropriate value in Parameter Editing box to change the value of each parameter. Drag radius of phase angle to directly change phase angle. Choose or unselect Antialiasing to control filter effect. If filter of an individual object needs to be modified, open Filter for individual object in Timecode Window and double click at filter effect to call out Filter Setting interface. Choose Filter in Timecode Window and select “Delete” from right click menu to delete a filter. 190 / 251 Chapter 9 Playout D3-CG Live not only provides powerful CG production function, it also offers comprehensive Play functions that are quite practical and easy-to-use and can be used for broadcast on-site. Following text will explain the powerful Play functions of D3-CG Live. Section 1 Main Player 1.1 Main Player Interface Choose Window from Menu Bar and select Main Player from drop down menu of Window to enter Main Player interface. Main Player interface provides different arrangement modes that will be introduced in the following. Modify While Playing Current Time Palying Time Preview Window Playing window Status Switch Edit Control Button Play Control Buttons Logo and Roll Player Switch Shot Display Mode Switch 191 / 251 Clip List Window Click on “Window Status Switch” button, “Logo and Roll Player Switch” button or “Shot Display Mode Switch” button to switch to following Main Player interface. Preview Playing window Playing Control Button Clip List Window LOGO Player Roll Player After creating a shot in Main Editor window, enter Main Player interface where you can see the created shot in Shot Display Window, Logo shot in Logo Player and roll shot in Roll Player. 1.1.1 Play Control Buttons 192 / 251 : Play currently shots; :Play the whole project. Realtime Play or Realtime and DYM Play can be selected. Realtime Play means to play objects and effects in a clip, while Realtime and DYM Play means to play DYM if clip contains DYM and only play clip if there is no DYM. : Stop playing current shot and play next shot. : Stop current playing. :ID search play. Choose shot ID needing to be played via small keyboard, press Enter to enable it enter Preview window, press Space key to enter to-play status and then press Space key to play it. : Press this button down to execute loop play for shot or project file. : Auto/Manual switch button. If encountering manually set in/out point when executing manual play, information box “Continue play or stop?” is displayed. : If pressing this button in Manual status, an information box is called out at play interval between two continuous clips to ask you whether to continue. Choose continue to play or stop according to actual needs. : Press this button down to enable external VTR device to control play time. : Press this button down to enable external GPI trigger to control play time. : Press this button down to stop playing background music. 193 / 251 1.1.2 Shot List This part contains two label pages, one is shot LIST label page and the other is shot ICON preview label page. LIST label page displays name of all shots, in/out speed, in/out effect for shot switch and etc. that can be modified. Drag a clip on ICON label page and Clip List label page to change its sequence. Modify In/Out Speed: Double click at time below In/Out speed and input new time. Modify In/Out Effect: Click at a concrete effect below In/Out Effect to open Effect Selection menu and choose needed effect. 1.1.3 Modify While Playing If a shot that will be Played has a spelling mistake when Main Player is Playing a project, user can modify this spelling mistake without stopping Main Player according to following ways: Switch to Temporary Editing interface from Main Player; Double click at a shot needing to be modified to enable this shot to enter Temporary Editing window; Modify this shot in Temporary Editing window; Click on save button Now, the software plays modified shot. If Main Player plays shots manually, to-play-shot can be modified and saved when stopping after modification; Main Player. If the shot needs to be previewed, click on “Take to Preview” button view modified shot in Preview window on the right side. 194 / 251 to 1.2 LOGO Player D3-CG Live series of graphics & title products can meet the requirements of broadcast line. Logo Player and Roll Player for channel package are built in Main Player. Now, we will introduce how to use Logo Player at first: 1) Logo Production Create an animation in Main Editing window via Time Line Key Frame, Animation Import or File Import Tool from third party, as shown in the figure: 195 / 251 In Property Window, choose “Logo” from dropdown menu and name it as Logo_xxx. Here, we name it as Logo_1.Logo_ cannot be modified and only characters behind Logo_ can be modified. For other settings in Property Window, please refer to relative information on “Property” label page in Section 3 of Chapter 3. 2) Logo Play Settings for Main Player After all logos have been produced via adding shots, enter Main Player interface and click on to extend Logo Player, as shown in following figure: LOGO Name Loop Times In Logo Player, we can see Logos produced in three shots and their loop times and names. Right click on each Logo playout button to set various Logo parameters such as Loop Times, Play Layer for Logos (layer “0” is the top layer) or Delete a shot. 3) Logo Play Control in Main Player Click on Logo button needing to be Played to Play it or operate it via shortcut key that is “Ctrl + figure” (1, 2, 3…) and can control the Play of the first to ninth Logo. Logo button changes to green when being Played, as shown in the figure. 196 / 251 1.3 Scroll Player 1) Roll Production Please refer to “Roll Production” for concrete roll production ways. Here, we call out a roll: Enter Main Editing interface, click on Roll button , then click on button on the right of Property label page and import a produced roll template in called out window. 2) In Property Window, choose “Roll” from dropdown menu and name it as Scroll_xxx. Here, we name it as Logo_1. Scroll_ cannot be modified and only characters behind Scroll_ can be modified. Set Loop Times. For other settings in Property Window, please refer to relative information on “Property” label page in Section 3 of Chapter 3. Roll Play Settings in Main Player 197 / 251 After all rolls have been produced via adding shots, enter Main Player interface and click on to extend Roll Player, and relative buttons and their functions are as followings: Play Select Roll Scroll Option Delay Stop Update Auto Update Pos Import Roll data Roll 198 / 251 Content Scroll Option Choose Scroll1or Scroll2, The sum of the Scroll is Two ,you can control each of the two solely. Choose roll template needing to be Played from Roll Selection dropdown menu; Input roll information in Roll Information editing area or right click on to import roll information via external data. Click on Roll Position Adjustment button to drag cut rectangle in called out dialog box to set roll position; Set the selected roll mode as Continuous Roll so that roll information cannot be stopped unless Roll Play button is clicked. Commonly, it is used together with Import External Data (link txt file) and Auto Refresh functions. When choosing Continuous Roll and playing roll information, line spacing and loop times cannot be modified in real time. Roll Speed sets roll speed for roll information. When Playing roll information, drag this value up/down to change roll speed stepless. Right click at roll speed to switch to Roll Time which means to finish Playing roll information within the set time (minute/second/frame), and right click at it once again to switch back to “Roll Speed” to set roll speed to control the Play of roll information. If controlling the Play of roll information via Roll Time, Continuous Roll cannot be selected and the set time cannot be adjusted when roll information is being Played. : It is used to set stillness time for each screen of roll information, in second. : It is used to set line spacing when adopting Marquee mode to Play roll information. : It is used to set loop times for current roll Play if Continuous Roll is not selected. :It is used to set background color for roll Play. Click on color box and drag ARGB bar to set background color for roll Play (ARGB color) in called out Color Setting Window. Background color for roll Play can be modified in real time if choosing Continuous Roll. Roll + Logo Settings: When Playing roll information, it is often needed to add Logo at the head or end of roll 199 / 251 information, which can be realized in Roll Player easily. Mark Click on icon area on the right and choose Logo Choose inserted position ; from called out dialog box; (In Sentence Head, In Sentence End, In Line Head, In Head and End); Set the size and alignment mode of Logo (Width, Height, Top Alignment, Bottom Alignment and Center Alignment) All of above Logo inserting operations can be modified in real time in Continuous Roll status. Simultaneously utilize Import External Data and Auto Update. Concrete operation is as following: : Choose external data and modify text contents in external txt file to replace information in continuous roll or link other txt file to replace contents in continuous roll. If choosing to update roll information automatically, contents in continuous roll can be updated automatically after external txt file linked with this roll is modified and the modification is saved. 200 / 251 Section 2 Subtitle Play 2.1 title Player Choose “Window” from Menu Bar and select “Subtitle Player” from dropdown menu of Window to enter Subtitle Player interface. Interface of Subtitle Player is as followings: Subtitle Player is composed of five Players including Subtitle Player, Title Player, Logo Player, Clock Player and Roll Player. Operations of Logo Player and Roll Player have been introduced in detail in Main Player and this section mainly explain how to operate Title Player, Subtitle Player and Clock Player. Subtitle Player Clip Player Logo Player Scroll Player 201 / 251 2.1.1 Set Layer Choose “Set Overlay Sequence” from dropdown menu of “System Management” menu on Menu Bar and set overlay sequence for various players via Up/Down arrows on the left of called out dialog box. And Subtitle Player is always at the first (the top) layer and cannot be adjusted and overlay sequence for other Player can be adjusted via Up/Down arrows. 2.2 Title Player 1) Title Production Title production is also shot production. For concrete production ways, please refer to relative information in Shot Production. Enter Main Editing interface and produce one or more shots via “Title Character”, “Rectangle” tool to produce a title, as indicated in following figure: 202 / 251 1. Select “Shot” from dropdown menu in Property window and name it, such as Title 1. Choose a subtitle file to activate Subtitle Player when Playing this title. For other settings in Property Window, please refer to relative information on “Property” label page in Section 3 of Chapter 3 . 2) Clip Player After finishing the production of all titles by adding shots, enter Subtitle Player interface, and relative buttons and their functions are as followings: Choose a shot and click on When playing project sequentially, click on to play it; button to call out cue . Press Right arrow on keyboard to continue to information play. When playing a shot bound with a subtitle file, Subtitle Player is activated. Continue to play according to cue information . Press button to stop playing. 2.3 Subtitle Player 1) Subtitle Edit For concrete information on how to produce subtitle, please refer to relative information in “Subtitle Production”. Here, we mainly introduce how to invoke a subtitle file and play it. Click on button in Main Player interface, click on in Property Editing column and choose a subtitle file in called out dialog box. Drag mouse in Main Editing area to export this subtitle file. Double click at this subtitle file to edit it. For detailed editing and production process, please refer to relative information on “Subtitle Production”. 203 / 251 After exporting subtitle file, choose “Subtitle” from dropdown menu in “Property” window and name it. Naming rule is Dialog_×××. Dialog_ cannot be modified and only characters behind Dialog_ can be modified. Here, name it as Dialog_Subtitle 1. For other settings in Property Window, please refer to relative information on “Property” label page in Section 3 of Chapter 3. 2) Subtitle Player Plays Subtitle After producing a subtitle file, enter Subtitle Player in Subtitle Play Interface to Play subtitle. Following will introduce how to Play subtitle file in detail. File List Area Effects And Main Time Code Column Position Adjust Area Assisted Time Code Column Assisted Edit Area 204 / 251 File List Area: Choose a subtitle file needing to be Played from File List Area on the left to display the contents of selected subtitle file in Editing Area where user can edit subtitle file such as modifying its play time, text contents and more. Modify Time: double click at In/Out Delay and input new time; or press down Record Delay button and manually set In/Out point for each sentence (please refer to Utilization of Subtitle Window). Modify text content: choose characters needing to be modified or added/deleted to modify it. User also can import a subtitle file: right click at blank area, choose “Import” from right click menu and select needed subtitle file. Link Play for Subtitle and Shot Subtitle file can be linked with common shot to play them together. Shot and subtitle are linked when being Played. For example, user needs to manually set In/Out points of subtitle to Play it on screen when playing shot. After setting link play to play subtitle in Manual mode while playing shot, user needs to manually control to Play subtitle when subtitle needs to be Played. Two link ways are provided: One way is to choose shot and subtitle file needing to be linked with shot, press down button to set Link Play for shot and subtitle; right click at button to enable it to be to remove link play. The other way is to directly select a subtitle file on Property label page. When switching to Subtitle Player, selected subtitle and shot are linked. However, this type of link play cannot be removed. ATT: Linked subtitle file can be set as roll file and the beginning of each roll sentence are In point during link play process. It is also often encountered when Playing synopsis of English Song. Play Control Buttons Bind On/Off Auto Play : Press it down to start binding and this button become to green. : Choose Auto Play button in Subtitle window and click on Play button to Play subtitle file sequentially according to the set In/Out time code, font settings and special effects. Click on Pause button to pause playing if needed and click on Pause button once again to continue to play. Click on Stop button to stop playing. Manual Play : Choose Manual Play button in Subtitle Window and click on Play button. The system displays “Press Space key to continue, press ESC+Shift key to exit and press “+” key in small keyboard to continue!” Press ESC+Shift key to exit play status; press Space key to Play current subtitle sentence according to the set font style and special effect. Press “+” key on small keyboard to Play 205 / 251 assistant subtitle. VTR Controlled Play : Choose VTR Link button in Subtitle window and click on Play button to synchronously play subtitle file with VTR according to the set In/Out time code. GPI Controlled Play : Choose GPI Trigger button in Subtitle Window and click on Play button to trigger to play subtitle file according to GPI signal. Change Character Display Direction: Press this button down to enable characters to be displayed in vertical mode. Change Reading Sequence: Press this button down to enable characters to be displayed in right alignment mode. Play : Start to play subtitle. Stop : Stop playing subtitle. Effect and position adjustment boxes are located on the right of subtitle. If an effect needs to be modified, double click at corresponding effect icon, set In/Out and Stillness time of effects in called out dialog box, or modify In/Out effect and stillness effect. Modify Effect: Modify delay and time of in effect for subtitle in “In Delay” and “In Speed” adjusting window, click on effect character such as “Mask” to choose needed effect in called out Select Effect column. Click on icon behind effect character to choose different subclass under the effect class. The operations for out effect and stillness effect are similar. Adjust Position: Subtitle Position Modifying area is on the right of Effect Modifying area. Right click on and drag cut rectangle in called out interface to adjust the position of subtitle; or set the values of position 206 / 251 parameters to accurately determine the position of subtitle. Choose an alignment mode to set the alignment mode of subtitle in cut rectangle. 207 / 251 Section 3 Zone Player 3.1. Zone Player Click the Window menu, and then select Zone Player to enter the Zone Player Interface. 3.2 Zone Player Interface The Zone Player Interface is divided into three parts: Footage Play Zone, LOGO Play Zone, and Scroll Play Zone. Footage Play Zone LOGO Play Zone Scroll Play Zone 208 / 251 Preview Windows 3.3 Footage Play Zone The Footage Play Zone includes three parts: Footage List Area, Footage Content Edit Area, and Footage Playout Control Area. Playout List Area Shot Play Property 209 / 251 Control Content Edit Area 3.3.1 Footage List Area All the footage prepared in the editing interface is shown in the List Area. Select the intended footage from the list, and then you can change the content or run playout. Right click in the List Area, and you can choose the way of alignment for the footage: Large Icon, Small Icon, or List. The default setting is Small Icon. List Small Large In the List Area, information such as Playout Layer, Shortcut and Name is shown for each footage, and you can perform operations such as Lock, Play and Pause on the footage, as shown below: displays the playout layer. sets whether to lock the footage. It is locked when the icon is , where you cannot make any adjustments to the footage. the shortcut to show footage play. Play button, the same functions as the one in the Playout Control Area. Stop button, the same function as the one in the Playout Control Area. 210 / 251 3.3.2 Content Edit Area In the Footage Content Edit Area, you may adjust the contents of the title characters, artistic characters, pictures, graphs, 3D objects in the footage. To For substitute the contents of an object, you have to name it first. Content substitution is only available for named objects. Objects currently supporting substitution include: title character, artistic character, picture, and graph. Now, let’s look at an instance of object naming and content substitution in the Content Edit Area. (To learn more about naming of object, refer to the section on primitive production) Instance: To name an object as shown below: Title Picture Piegraph Now, return to the Zone Player Interface, choose the footage you edited from the List, and then you can edit the contents of the named object in the Content Edit Area. 211 / 251 There are some common features for different types of substitution, as described below: :hides the object on playout when checked. :Database Setup. Refer to the instructions on the database plugin in the attachment. :Disconnect the link between template and field :Number of the row that template read data from in the database : Number of jump . Interlaced number CG template read from the database 212 / 251 Edit the contents for substitution The adjustable contents from top down are: Piegraph, Title and Picture. You may see the name of the appropriate object. 1) Substitution of Graph Take piegraph for example: Index: The segment number on the piegraph. Caption: The title character of the segment. Value: The finishing value of segment growth. Begin Value: The starting value of segment growth. adds a segment. removes a segment. clears the form of all records. 213 / 251 2) Substitution of Title Character and Artistic Character Double click the text box, and then you can edit and change the content. 3) Substitution of Picture displays the thumbnail of the picture. Click the button to select the picture for substitution. shows the path of the picture. 3.3.3 Footage Shot Play Property The Footage Playout Control Area is for controlling footage to play or pause, setting the playout shortcut, configuring the database, and running other operations relating to playout. sets the playout shortcut. You may set a separate playout 214 / 251 shortcut for each footage. To prevent misoperations, combinations such as ‘Ctrl+1’ are suggested. sets the playout layers. You may set a separate playout layer for each footage. The higher the layer number is, the lower the layer is located. configures the database plugin, as shown below: DB Plugin: Selects the database plugin. The currently available plugins include ODBC, RSS, Scroll TEXT, Stock Exchange, and Weather Forecast. See the attachment for details. DB Table: After selecting the database, you may go on to configure the tables in the database. Field Filter: After selecting the database plugin and tables, you may see the fields in the tables. Choose the ones you need. Setup: Click the button, and then you may configure the name, username, password, and whether to update every time for the data source. Use DB Cache: It keeps a copy of the data in the local memory, often used for remote databases. Use DB-Refresh Notify: Select the option, and it will load the data automatically according to the ‘Auto Refresh Interval’ time, and update the data for playout. Loop: Select this option, and it will substitute the data for playout based on the line number on loop playout, viz. Multiple Line Loop Playout. Otherwise, the loop playout will not follow the line numbers. Record Count in Cache: 0 means all the records are saved in the internal memory, while a value more than 0 saves the equal number of data items. Auto Refresh (sec.): Sets the interval for automatic refreshing. 215 / 251 sets the times of loop playout for each footage. sets the In and Out mode for footage. Stunt means to use the original effect of the object when the footage comes in or goes out. Manual is needed if you have added manual beat points to the footage. Cut switches the footage quickly instead of using its original special effect when the footage comes in or goes out. sets whether content substitution is activated when the footage is run in cycle. Check it, and it supports content substitution on loop playout of footage. : Manual select data to publish. You select the choice and click the manual table : Manual table. Click the right table enter the manual publishing interface. : Open the main editor. When you play a footage, you need modify the other shot, click the ‘CG’ button and enter the main editor to modify or add shot. Then click the closed button to return the zone player. :Load the modified footage. You return the zone player after you have modified the shot, and click the load button to load the modified shot. 3.3.4 Playout Control Area : Lock all footages. If the footage is locked, the content of the footage will not be changed. : Unlock all the footages. You may locate the intended footage by entering the footage number and then hitting the Enter button on your keyboard. :Cue button.Click the button to make the selecting footage ready Play button. Click the button after selecting your footage to play it. 216 / 251 Stop button. Click the button to stop playing the footage. Refresh button. Click this button after changing the contents of the title character, graph or picture in the footage, and the new content will be played when you run it next time. 3.4 LOGO Play Zone Similar to LOGO Player of Main Player. Please refer to the appropriate instructions on the LOGO Player of Main Player. 3.5 Scroll Play Zone Similar to Scroll Player of Main Player. Please refer to the appropriate instructions on the Scroll Player of Main Player. 217 / 251 Chapter 10 Play Control Section 1 VTR Play Control VTR Play Control function is mainly used to produce and Play subtitle. It is composed of CG device, one player, one VTR, one monitor and one 422 control line. 1.1 Use VTR Link to Set In/Out Points for Subtitle Before producing, please make sure player and CG device have been connected correctly via 422 control line and set player in “Remote” status. 1. Open Subtitle Player, choose VTR button, select “Record Delay Play” button and click on “Play” button to wait for player to play. 2、 Open “Display VTR Toolbar” under “View” menu. Choose type of used player in VTR Type. Now, user can control player to play, pause, stop, fast forward and fast rewind via various buttons. Click on “Play” button to play video. 218 / 251 3、 Adopt Record Delay mode to edit subtitle and set In/Out point in Subtitle Editor based on played video. This subtitle file not only records in/out points of each sentence of subtitle, it also records link relation between subtitle and played video via VTR. 1.2 Play VTR Linked Subtitle 1. Open Subtitle Player, choose VTR button, select “Auto Play” button and click on “Play” button to wait for player to play. 2、 Open “Display VTR Toolbar” and click on “Play” to play video. 3、 Because CG device and VTR are linked, subtitle is also be Played when playing video. In/out points of subtitle are Played automatically according to original records. Section 2 GPI Trigger Play Set GPI trigger port and delay. Two ports COM1 and COM2 are provided. Delay value can be modified via number keys or up/down arrows on keyboard or drag mouse up/down. 219 / 251 Appendix 1 List for Shortcut Keys 1. Functional Keys F1: Call out corresponding online help F2: Clear screen. F3: Cue the clips in the zone player F4: When VK_F4PINGPANG in SETUP.INF under SYS directory is ON, the function for this functional key is to clear screen and copy all contents in current Clip Editor window to monitor when pressing it for odd times and clear screen when pressing it for even times; when VK_F4PINGPANG is OFF, the function of this key is to clear screen and copy all contents in current Clip Editor window to monitor. F5: Play clips from current frames F6: Pause playing in the zone player; Play the whole project in the main player, main editor, title palyer F7: Stop the current clips and play the next, when play the whole project. F9: Refresh the clip icon in the list F11: Switch to curve adjustment status. F12: Set monitor as color screen. 2. Shortcut Keys for Shot Editing Window CTRL+N: Create a new project file CTRL+O: Open a project file 220 / 251 CTRL+S: Save current project file as current name CTRL + Click: Choose multiple objects simultaneously. CTRL+SHIFT+Drag: Move multiple objects simultaneously in Static Preview status, move selected objects to current movement track in Dynamic Preview status. CTRL+TAB+Drag: Switch between Horizontal Move, Vertical Move, Z-Coordinate Move and Move Arbitrary. TAB: Sequentially select objects for current task DEL: Delete selected object. CTRL+A: Choose all objects in current task, including hidden/displayed and locked/unlocked objects. CTRL+SHIFT+A: Choose all unhidden and unlocked objects in current task CTRL+Z: Cancel last operation. CTRL+Y: Resume last operation. CTRL+C: Copy selected objects CTRL+X: Cut selected objects CTRL+V: Paste object in clipboard SHIFT+Click: Zoom object in proportion (ATT: Drag 4 corners of object rectangle box) • ↓→← : Finely adjust the position of selected object. Please do not move mouse when adjusting Plus Sign (non small keyboard): In current task, move selected object up Minus Sign (non small keyboard): In current task, move selected object down Right Middle Bracket: In current task, move selected object to top layer Left Middle Bracket: In current task, move selected object to bottom layer In addition, we can use shortcut keys to align objects when displaying vertical and horizontal baseline and choosing two or more objects. Concrete hotkeys are as followings. B: Bottom alignment between selected objects and baseline U: Top alignment between selected objects and baseline 221 / 251 L: Left alignment between selected objects and baseline R: Right alignment between selected objects and baseline E: Vertical center alignment between selected objects and baseline H: Horizontal center alignment between selected objects and baseline J: Bottom alignment between the baseline of selected objects and baseline K: Left alignment between the baseline of selected objects and baseline Shift+B: Bottom alignment between selected objects and safe line Shift+U: Top alignment between selected objects and safe line Shift+L: Left alignment between selected objects and safe line Shift+R: Right alignment between selected objects and safe line Shift+E: Vertical center alignment between selected objects and safe line Shift+H: Horizontal center alignment between selected objects and safe line Alt+Select: Select locked objects Alt+Shift+Select: Suck color of selected position PAGEUP + Up/Down/Left/Right Arrow: Zoom in selected objects PAGEDOWN + Up/Down/Left/Right Arrow: Zoom out selected objects I: Display horizontal baseline O: Display vertical baseline Ctrl+T: Open image file Ctrl+F: Open animation file 3. Shortcut Keys in Timecode Window Home: Time Toolbar returns to frame 0 Ctrl+Click+ “-“: Merge extended object tracks in recursion mode so that all sub-items under this task can be extended according to the level of objects when clicking on “+” next time. Ctrl+Click: Switch between Select/Unselect a Track. Multiple continuous tracks can be selected. 222 / 251 Double Click: Call out corresponding dialog box to edit selected contents (key frame, effect, task bar or effect track) Ctrl+Alt+Click: Click on a common object when pressing Ctrl and Alt keys to extend all tracks of this selected object; Double click on a board object when pressing Ctrl and Alt keys to extend object level tracks of board and select object tracts in board Ctrl+Shift+Click (click on tracks on the right of all in/out points, effects or key frame): Choose all in/out points, effects or key frames on this track. Click on tracks continuously to select multiple tracks simultaneously. Ctrl+Shift+Click (click on tracks between all in/out points, effects or key frame): Move all selected in/out points, effects or key frames. Ctrl+A+Click (click all tracks): Choose all effects and key frames on a track and its sub-tracks. For example, click on task track to choose all key frames and effects of all objects on this task track; click on object track to select all key frames and effects of this object; click on size track to choose all key frames on this track. Ctrl+DEL: Delete currently selected object. Ctrl+C: Copy all selected effects and key frames (one or more objects) Ctrl+D: Copy all selected effects and key frames on all selected tracks (one or more objects) and record its absolute position on Time Line. Ctrl+X: Cut all selected effects and key frames (one or more objects) Ctrl+V: Paste copied or cut effects or key frames on corresponding track of selected object. ATT: a) If using “Ctrl+C” commend to copy effect or key frame, the leftmost of the pasted effect or key frame is aligned with the left of current time line and other effects or key frames keep their relative position. b) If using Ctrl+D commend to copy, the pasted effects or key frames hold their original position. Ctrl+E: Paste copied or cut effects or key frames on current track and its sub-tracks (one or more) Ctrl+I: Move to In point of selected task. If there are multiple tasks, move to In point of the first selected task. Ctrl+O: Move to Out point of selected task. If there are multiple tasks, move to Out point of the first selected task. Ctrl + → : Finely adjust all selected tasks, effects or key frames one frame forward 223 / 251 Ctrl + ← : Finely adjust all selected tasks, effects or key frames one frame backward Ctrl + • : Move selected tasks, effects or key frames five frames forward Ctrl + ↓ : Move selected tasks, effects or key frames five frames backward Ctrl + Home: Left align all selected effects or key frames with time line Ctrl + End: Right align all selected effects or key frames with time line Shift +Click: Choose all tracks between current selected track to next select track Shift + • : Move selected object one layer up. If two or more objects are selected, move the first selected object one layer up. Shift + ↓ : Move selected object one layer down. If two or more objects are selected, move the first selected object one layer up. Shift + Home: Move selected object to top layer. If two or more objects are selected, move the first selected object to top layer. Shift + End: Move selected object to bottom layer. If two or more objects are selected, move the first selected object to bottom layer. Shift + PgUp: Move selected object one layer up. If two or more objects are selected, move the first selected object one layer up. Shift + PgDn: Move selected object one layer down. If two or more objects are selected, move the first selected object one layer down. Shift + ← /→ : When selecting multiple effects and key frames (tracks on which these effects and key frames are located are also selected simultaneously), press “shift+← ” to move selected effects and key frames to the right of current time line and enable leftmost selected effect and key frame to align with time line without changing their positions related to time line no matter where they are; press “shift+→ ” to move selected effects and key frames to the left of current time line and enable rightmost selected effect and key frame to align with time line without changing their positions related to time line no matter where they are. The positions of unselected effects and key frames do not change. When selecting single effect or key frame (tracks on which effect and key frame are located are also selected simultaneously): Press “shift+← ” to move selected effect and key frame to the right of current time line and enable the selected effect and key frame to align with time line on the left; other effects and key frames are moved together without changing their positions related 224 / 251 selected effect or key frame; press “shift+→ ” to move selected effect and key frame to the left of current time line and enable the selected effect and key frame to align with time line on the right; other effects and key frames are moved together without changing their positions related selected effect or key frame. When choosing a track: For all effects and key frames on selected track, press “shift+← ” to move all selected effects and key frames to the right of current time line and enable leftmost selected effects and key frames to align with time line without changing their positions related to time line no matter where they are; press “shift+→ ” to move selected effects and key frames to the left of current time line and enable rightmost selected effect and key frame to align with time line without changing their positions related to time line no matter where they are. Alt + ← : Fold selected object track. If the track is in folded status, move up to select previous track Alt + → : Extend selected object track. If the track is in Extended status, move down to select previous track Insert: Add manual in/out point or key frame on the selected track of current frame. Del: Delete all selected key frames and effects Home: Move time line to the head of clip End: Move time line to the end of clip Left/Right Arrow: Move time line left or right Up/Down Arrow: Move time code five frames forward/backward PAGEUP: When choosing effect track, press PageUp to move time line forward according to the left/right boundary of effect on track and manual in/out points. When selecting key frame track, only move time line forward according to the key frames on selected track. PAGEDOWN: When choosing effect track, press PageDown to move time line backward according to left/right side of effect on track and manual in/out points. When selecting key frame track, only move time line backward according to the key frames on selected track. CTRL+Left/Right Arrow: Finely adjust the positions of all key frames on current tracks CTRL+ALT+Click: Click at effect track of an object on board to choose effect tracks of all of its sub-objects. Ctrl + Drag Effective Area on Selected Track: Move selected track. Press down Ctrl key, click 225 / 251 to select object track, move mouse to effective area on selected track while pressing Ctrl key and press left key of mouse to move effects, key frames and in/out points on the selected track together. 4. Shortcut Keys for Text Editor CTRL+C: Copy selected characters CTRL+X: Cut selected characters CTRL+V: Paste characters in clipboard 5. Shortcut Keys for Roll Editor Ctrl+S: Save current roll file CTRL+O: Open a roll file Ctrl+Left Arrow: Move selected object to the left Ctrl+Right Arrow: Move selected object to the right Ctrl+Up Arrow: Move selected object up Ctrl+Down Arrow: Move selected object down CTRL+A: Choose all characters Ctrl+Z: Undo Ctrl+Y: Redo Ctrl+X: Cut CTRL+C: Copy CTRL+V: Paste CTRL+F: Reversely arrange line characters Ctrl+I: Switch to Reverse Input mode, i.e. newly input character is displayed before current character at all time 226 / 251 CTRL+Click: Choose multiple objects simultaneously and the last selected object is main selected object Shift+Click: Choose multiple objects simultaneously and the first selected object is main selected object Ctrl+L: Align selected objects with main selected object on the left Ctrl+T: Align selected objects with main selected object on the top Ctrl+R: Align selected objects with main selected object on the right Ctrl+B: Align selected objects with main selected object at bottom Ctrl+M: Align selected objects with main selected object horizontally CTRL+SHIFT+A: Choose all lines CTRL+SHIFT+HOME: Choose all lines before current line CTRL+SHIFT+End: Choose all lines behind current line PageUp: Move roll file up PageDown: Move roll file down CTRL+G and CTRL+ Enter: Vertically align two characters in two different lines. Utilization: Place cursor to the left of the first character needing to be aligned, press Ctrl+G to display an alignment line on the left of this character, place cursor to the left of the second character needing to be aligned and press Ctrl+G to align them. Ctrl+Q: Choose all contents at Object layer Ctrl+Click: Choose one or more objects or character lines at text layer, press left key of mouse and drag selected contents CTRL+SHIFT+Up/down Arrow: Choose one or more roll lines Alt+Click: Choose objects at object layer 6. Shortcut Keys for Subtitle Editor Space: Continue to play next item of main list dialog “+” on small keyboard: Continue to play next item of subtitle dialog 227 / 251 DEL: Delete selected effects. When executing manual play, simultaneously delete out effect of current item and in effect of next item. CTRL+DEL: Delete all effects (in/out effects) in selected column Tab: When executing Manual or Record Delay play, the system simultaneously Plays current and next subtitle sentence in main list. End: When executing Manual or Record Delay play, the system directly print screen to play current subtitle sentence and ignore effect. PageUp: When executing Manual play, the system ignores out effect of current subtitle sentence and directly play next subtitle sentence CTRL+G: Skip Function. In Editing or Manual Play status, click Left Arrow to focus on Subtitle window and click on Ctrl+G to skip to specified subtitle sentence. PAGEDOWN: When executing Manual Play, clear subtitle sentences on current screen via this shortcut key Backspace Key: If subtitle sentence has no effect or only has In effect when executing Manual or Record Delay play, add a blank line before next subtitle sentence via this key SHIFT+ESC: When executing Manual or Record Delay play, stop playing subtitle that is being Played currently and exit play status via this shortcut key. Click: When executing Manual or Record Delay play, click at yellow information area on upper left corner of Subtitle Editing window to continue to play next sentence Right Click: When executing Manual or Record Delay play, click at yellow information area on upper left corner of Subtitle Editing window to clear subtitle sentence on current screen Left Arrow: Resume control focus to Main Text Column and choose next subtitle sentence with down arrow. F10: Shortcut key for play Ctrl+C on the left of Font Column: Paste font properties, effects, position settings for current line to another selected line via Ctrl+V 7. Shortcut key for Main Player Number Keys on Small Keyboard: Switch between different shots Enter: Preview 228 / 251 Space: Play shot ESC: Stop current playing. 8. Shortcut Keys for Shot List CTRL+SHIFT+Left/Right Arrow: Switch shots in Clip List ALT+R: Skip to specified clip alias ALT +H: Exchange current shot with the shot of specified clip alias ALT +M: Move all of currently selected shots before the shot of specified clip alias CTRL+ALT+Drag: Copy current shot to a position between two shots. Choose a shot at first, press Ctrl+Alt keys without releasing left key of mouse and drag mouse to copy current shot to a position between two shots. ALT +W: Copy current shot behind input shot name "+” on small keyboard: Add a time code clip “-“ on small keyboard: Delete selected clips Double click at Icon in Clip List: Set “ENABLEDBLTOCARD” option in setup.inf to specify whether to Play clip on screen when double clicking at Icon. If setting it as On, “double click on screen” is allowed. Double click right key of mouse to off screen CTRL+ : Rearrange sequential number of clips and update all roll, subtitle, image and animation files in a shot. This function is mainly used to update objects when the contents of objects have changed but the names of these 4 types of files have not changed in Clip Explorer. 9. Shortcut key for Subtitle Player CTRL+1 to CTRL+9: In Subtitle Player, these shortcut keys is respectively used to Play the first to the ninth Logo shots in Logo Player 10. Shortcut Keys in VTR Window N: Start M: Pause: 229 / 251 , : Forward .; Backward /:Stop 230 / 251 Appendix II Support Multi-Language Environment This CG system supports multi-language environment, such as Simplified/Traditional Chinese, English, Mongolian, Korean, Kazakh Language, Thai and Farsi, and more. Interface Language can be changed by modifying dictionary that is located under “Plug_In\Dictionary”. Modify “ForceLanguage” commend line in “Dictionary.sys” as “ForceLanguage,XXXX,1”, and “XXXX” is dictionary for needed language. Three methods can be utilized to modify the type of input language. Following text will introduce how to choose needed language in Simplified Chinese environment: 1. Install Corresponding Character Database For example, Mongolian, Korean, Uigur and Kazakh, Thai, Farsi and more. 2. Modify Setup.inf file and Load Corresponding Character Database For example, Korean, Uigur and Kazakh, SETUP.INF file can be modified according to following ways 1) SUPPORT_WEIHA = OFF //Option:WEI or HA or OFF Set whether to start Uigur and Kazakh input method. “OFF” means not to start, “HA” means to start Kazakh input method and “Wei” means to start “Uigur” input method. In Kazakh input status, input characters are displayed from right to left in various Text Editor and Kazakh and Uigur fonts are utilized. 2) SUPPORT_KOREA = OFF //Option:ON or OFF Set whether to use Korean input method. “ON” means to use and “OFF” means not to use. Various Text Editors use Korean font. 231 / 251 3. Modify Region Settings and Load Corresponding Character Database For example Farsi Modify Region Settings according to following information in Control Panel 1) Choose Region and Language Option 2) Choose “Farsi” in “Select an option matching with the first option” in “Region Option” label page, as shown in the figure: 232 / 251 3) Choose “United Arab Emirates” in “Position” column. 4) In Language label page, mark checkbox before “Complicated character and right-to-left language setup file” in “Additional Language Support” as shown in the figure: And then click on “Detailed Information” button to call out following interface: Modify default input language as Farsi Language –Farsi. 5) Choose “Farsi” from dropdown menu under “Choose a language to enable it to match with language version of Unicode program” in “Advanced” label page and mark “Default User Account Settings”, as shown in the figure: 233 / 251 Commonly, if there is no such language plugin in your disk, the system pops up an information box to ask you to insert corresponding CD. Restart your system after finishing installation. Modify language in System Display Language Column as Farsi and choose corresponding font in order to input Farsi characters in CG system. Appendix III Link Database You can use ‘ODBC’ connect database, such as txt, excel, access, sql server. We take MS Access 2007 for example. 1. Create a database Create a Database file; take MS Access 2007 for example: Create a new Access file, in the right side, you may input the file name and select the path where you want to save it, and then click ‘create’. 234 / 251 Right-click on the ‘Table1’ area, and select ‘Design View’ from the menu; The Field Name and the Data Type should be like this: 235 / 251 Then input the data like the following picture Save the table as the name of Test. 2. Set Windows system ODBC Enter Windows Control Panel, Open the Data Sources Tools, ,select “system DSN” , click the “Add” button Select “Microsoft Access Driver”, then click “Finished” button. 236 / 251 from Administrative Select the Database file according to the Directory, and click “OK” button. Setup the Data Source Name. Input “text” as the Data Source Name, and click “OK” button. 237 / 251 You will see the Data Sources named “text”, and click “OK” button. 3. Link the database Make a bar with the number of two. (please refer to “D3-CG Live user guide”) 238 / 251 Give the bar a name like the fallowing picture Chose the Zone Player Setup Field Connect DB Click the ‘Connect DB’ button, popup the ‘Setup Dynamic Data Link’ box. Chose the ‘ODBC Data Provider’ from ‘DB Plugin’ 239 / 251 Click the button of Setup, choose “text” as the DSN Name, click ‘OK’ 240 / 251 Chose the table of Text from DB Table. Chose filed from the Filed Filter. Click the button of Setup Field, popup DBSet box, set the list and field like the following picture. After finished, click “OK” 241 / 251 You will see the changes in the replace area in the zone player 242 / 251 4. Play and Modify the data Set the loop as ‘o’ (infinite loop), click ‘play’ button, you can see the bar in the monitor. Open the file named “text”, and modify the date like the fallowing picture Save and closed the file we modified, and you will see the result in the monitor 243 / 251 Appendix IV Use ‘Scroll Text Provider’ Plug-in in Zone Player Create a scroll file and name it in the right side, for example: Scroll. Configure database plug-in. Switch to ‘Zone Player’, click ‘Connect DB’ button to configure database plug-in. In the pop-up window, select ‘Scroll Text Provider’ from the pull-down menu of DB Plug-in; and then click ‘setup’ to select data resources by linking a .txt file. The .txt file like Scroll.txt shown here should be created in advance. 244 / 251 Configure database table. In the pull-down menu of DB Table, there’re two options. ‘BlockText’ is to read all contents in Scroll.txt file as one row, and ‘LineText’ is to read the contents of each row one by one according to ‘Enter’ mark. In this instance, we choose LineText for example. Then, match this template with data resources. Click the ‘Setup Field’ button in the upper right side, and in the popped-up window, select ‘Line Text’ separately. 245 / 251 When you finish above settings, you may playout it. In order to play it continuously, it is suggested to set Loop as 0, and also tick Apply in Cycle. During the playing, you may modify the original .txt file (Scroll.txt), and save it. Then click ‘update’ button, the scroll will be replaced with the updated contents. 246 / 251 Appendix IV Connect Excel 1. Create a excel, enter the content by row, like this 2. Select the rows of A and B , click “Insert\Name\Define” to give the row a name, we define the row as “Name3”. 247 / 251 3. Save the excel as “example” and close it. Open the “Data Sources (ODBC)”, and choose the “system DSN”. Click button of Add to create new data source. 4. Choose “Excel 97-2000” from the database version, and click “select workboot” to Select the “example.xls”. Finally give the data source a name as “database”, click “OK”, you will find the database in the system DSN in the ODBC Data Source Administrator. 248 / 251 5. Open the D3-CG Live, create two title and give them a name as “aa” and “bb” separately. Enter the “zone player”, click the “Connect DB” button, open “set dynamic data link” 249 / 251 Choose “ODBC Data Provider” in the “DB Plugin”, and click “Setup” button Choose the “system DSN” in the DSN Type, and choose the “database” in the DSN Name, click OK to finish it. Choose “Name3” in the DB table from the “Setup Dynamic Data Link”, and select the “AAA” and “FFF” in the Field Filter. Click OK to finish it 250 / 251 Click “Setup Field”, select link field for title. And click OK to finish it. Select Loop Times as “0”, and click play button , you will see the result in the monitor. 251 / 251