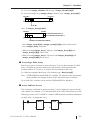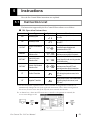
1
PREFACE
Thank you for purchasing Pro-face ladder logic programing software “Pro-Control
Editor Ver. 3.0” for use with Pro-face GLC series of graphical logic controllers.
To ensure the safe and correct use of this product, be sure to read all related materials
carefully and keep them nearby so that you can refer to them whenever required.
NOTE
(1) The copyrights to all programs and manuals included in the “Pro-Control
Editor Ver. 3.0” (hereinafter referred to as “this product”) are reserved by
Digital Electronics Corporation. Digital grants the use of this product to
its users as described in the “Software Operating Conditions section”.
Any actions violating the abovementioned conditions are prohibited by
both Japanese and foreign regulations.
(2) The contents of this manual have been thoroughly inspected. However, if
you should find any errors or omissions in this manual, please contact
your local sales representative.
(3) Regardless of the above clause, Digital Electronics Corporation shall not
be held responsible for any damages or third party claims resulting from
the use of this product.
(4) Differences may exist between the descriptions found in this manual and the
actual functioning of this software. Therefore, the latest information on this
software is provided in the form of data files (i.e. Readme.txt files, etc.) and/
or separate documents. Please refer to these sources as well as this manual
prior to use.
(5) Even though the information contained in and displayed by this product
may be related to intangible or intellectual properties of Digital Electronics Corporation or third parties, Digital Electronics Corporation shall not
warrant or grant the use of said properties to any users or other third parties.
©Copyright 2000 Digital Electronics Corporation. All rights reserved.
Digital Electronics Corporation November 2000
For the rights to trademarks and trade names, see “TRADEMARK RIGHTS”.
Pro-Control Ver.3.0 User Manual
1
TRADEMARK RIGHTS
The company names and product names used in this manual are the trade names,
trademarks (including registered trademarks), and service marks of their respective
companies.
This product omits individual descriptions of each of these rights.
Trademark / Tradename
Microsoft, MS, MS-DOS, Windows, Windows 95,
Windows 98, Windows NT, Windows Explorer
Intel, Pentium
Flex Network
Pro-face
IBM compatible
Adobe, Acrobat
Right Holder
Microsoft, U.S.
Intel, U.S.
Digital Electronics Corporation
(in Japan and other countries)
IBM, U.S.
Adobe Systems Corporation
The following terms used in this manual differ from the above mentioned formal
trade names and trademarks.
Term used in this manual
Windows 95
Windows 98
MS-DOS
Windows NT
Acrobat Reader
Formal Tradename or Trademark
Microsoft ® Windows® 95 Operating System
Microsoft ® Windows® 98 Operating System
Microsoft® MS-DOS® Operating System
Microsoft® Windows NT® Operating System
Adobe® Acrobat® Reader
APPLICABLE PRODUCTS
The products used with the Pro-Control Editor Ver. 3.0 software are as follows:
■ Applicable Units
GLC100 Series, GLC300 Series, GLC2400 Series units
■ Applicable Software
Screen Creation Software - GP-PRO/PBIII for Windows Ver. 5.0 or later
Communication Software - Pro-Server with Pro-Studio for Windows Ver. 3.0 or later
2
Pro-Control Ver.3.0 User Manual
HOW TO USE THIS MANUAL
This manual is “Pro-Control Editor Ver 3.0 User Manual” which describes how to
use the “Pro-Control Editor Ver 3.0” software (hereafter referred to as “this product”).
The Pro-Control Editor Ver. 3.0 CD-ROM includes the following PDF manuals.
• Pro-Control Ver. 3.0 User Manual (This manual)
• Pro-Control Editor Ver. 3.0 Operation Manuall
To read these PDF data, Acrobat Reader 4.0 is needed. A PDF manual allows you
to display manual data quickly and easily on your PC via “Bookmarks”. It can also
be distributed via e-mail etc. as a data file due to its small size.
The following table provides a list of the manuals related to this product. Please
refer to these manuals when you have questions.
Pro-Control User Manual
(this manual)
Describes the software settings used for GLC series units.
Describes the procedures for installation and operation of
this product. Includes a tutorial lesson, and an extensive
Data
warning/error message list.
Included
This product’s Help data contains:
in this
1. Pro-Control Help (Describes the features, functioning,
product
and operation of this product)
Online Help
2. DIO Driver Help (Describes DIO driver operation)
3. Flex Network Driver Help (Describes Flex Network
Driver operation)
GLC series units’ hardware users manual.
GLC series User Manual
Operation
Describes the procedures for the installation, operation,
Manual
and functioning of GP-PRO/PBIII.
Tag Reference Includes detailed descriptions on the “Tags” used to
specify functions used on the GP unit.
GP-PRO/PBIII Manual
*1
Describes both the pre-made Parts included with GPRelated Manuals
Parts List
PRO/PBIII and the symbols that can be called up.
Data
PLC Connection Describes how to make connections between GP series
Manual
units and other manufacture’s PLCs.
2-Way
Operation
Describes the procedures for the operation, and
Communicator
Manual
functioning of 2-Way Communicator Software.
Software *2
Pro-Control Editor Operation
Manual
In addition to these manuals, information on additional/updated functions may be
provided as data files (i.e, ‘readme. txt’ attached to a floppy disk, or a CD-ROM).
Please also refer to them.
*1: The GP screen creation software for this product is GP-PRO/PB III for Windows
Ver. 5.0 or higher. The Manual for GP-PRO/PB III for Windows Ver. 5.0 (except for
the installation guide) is contained in the CD-ROM in PDF format.
*2: The 2 Way Communicator software for this product is Pro-Server with Pro-Studio
for Windows Ver. 3.0 or higher. The Manual for Pro-Server with Pro-Studio for
Windows Ver. 3.0 is contained in the CD-ROM in PDF format.
Pro-Control Ver.3.0 User Manual
3
TABLE OF CONTENTS
Preface ......................................................................................................................... 1
Trademark Rights ........................................................................................................ 2
Applicable Products .................................................................................................... 2
How to Use this Manual .............................................................................................. 3
Table of Contents ......................................................................................................... 4
Manual Symbols and Terminology .............................................................................. 6
Product Usage Precautions .......................................................................................... 7
CHAPTER 1 - Overview
1.1 Prior to Operating the GLC .......................................................................... 1-1
1.2 System Design ................................................................................................. 1-3
1.2.1 Usage Patterns ..................................................................................... 1-3
1.2.2 Usage Options...................................................................................... 1-4
CHAPTER 2 - GLC Overview
2.1 Operating the GLC ........................................................................................ 2-1
2.1.1 GLC Scan Overview ............................................................................ 2-1
2.1.2 Controller Feature Overview ............................................................... 2-2
2.1.3 RUN Mode .......................................................................................... 2-4
CHAPTER 3 - Variables
3.1 Variable Types ................................................................................................ 3-1
3.2 Accessing Variables ........................................................................................ 3-2
3.3 Variable Names .............................................................................................. 3-4
CHAPTER 4 - System Variables
4.1 System Variable List ...................................................................................... 4-1
CHAPTER 5 - Instructions
5.1 Instruction List ............................................................................................... 5-1
4
Pro-Control Ver.3.0 User Manual
CHAPTER 6 - LS Area Refresh
6.1 Overview ......................................................................................................... 6-1
6.2 LS Area Refresh Settings .............................................................................. 6-2
6.2.1 System Data Area ................................................................................ 6-3
6.2.2 Special Relays ...................................................................................... 6-5
6.3 GLC and PLC Data Sharing ......................................................................... 6-6
6.3.1 Read Area ............................................................................................ 6-7
6.3.2 LS Area Refresh Cautions ................................................................... 6-7
CHAPTER 7 - I/O Drivers
7.1 Overview ......................................................................................................... 7-1
7.2 DIO Driver ...................................................................................................... 7-2
7.2.1 DIO Unit Self-Diagnosis ..................................................................... 7-2
7.2.2 I/O Monitor (I/O connection check) .................................................... 7-4
7.2.3 Troubleshooting ................................................................................... 7-5
7.3 Flex Network I/F Driver ................................................................................ 7-9
7.3.1 Flex Network I/F Unit Self-Diagnosis ................................................. 7-9
7.3.2 I/O Monitor (I/O connection check) .................................................. 7-12
7.3.3 Troubleshooting ................................................................................. 7-17
CHAPTER 8 - Error Messages
8.1 Error Message List ........................................................................................ 8-1
8.2 Error Codes .................................................................................................... 8-3
8.3 Program Errors .............................................................................................. 8-4
Index
Pro-Control Ver.3.0 User Manual
5
MANUAL SYMBOLS AND TERMINOLOGY
This manual uses the following symbols and terminology.
If you have any questions about the contents of this manual, please contact your local
GLC distributor.
Also, if you have any question about your personal computer, Windows 95, Windows
98, or Windows NT, please contact your local distributor or manufacturer.
■ Safety Symbols and Terms
This manual uses the following symbols and terms for important information related to the correct and safe operation of this product.
Symbol
Description
Incorrect operation resulting from negligence of this instruction
may cause death or serous injury.
Incorrect operation resulting from negligence of this instruction
may cause injury or damage to equipment.
Failure to observe this instruction may cause abnormal operation
of equipment or data loss.
Instructions / procedures that must be performed to ensure
correct product use.
Actions / procedures that should not be performed.
■ General Information Symbols and Terms
This manual uses the following symbols and terms for general information.
Symbol
Description
Provides hints on correct use, or supplementary
information.
Indicates related (manual name, page number)
information.
*1, *2, (etc.)
Indicates footnotes.
Software used for editing, transferring, and monitoring of
Pro-Control Editor
a GLC ladder logic program.
Controller
Indicates the GLC unit’s built-in control features.
GP-PRO/PBIII (screen The screen creation software GP-PRO/PBIII for Windows
creation software) Ver. 5.0 or later.
Indicates the “GLC series” of graphic logic controller
GLC
manufactured by the Digital Electronics Corporation.
PLC
Abbreviation for Programmable Logic Controller
6
Pro-Control Ver.3.0 User Manual
PRODUCT USAGE PRECAUTIONS
WARNING
Do not use the GLC unit for control in situations where a lifethreatening accident or major machine damage could occur.
■ Disk Media Usage Precautions
To prevent disk (i.e. CD-ROM or floppy) damage or data loss, please observe the
following instructions:
• Be sure to remove the disk media from its disk drive prior to turning the PC ON or OFF.
• Do not remove the disk media from its drive while the drive operation lamp is lit.
• Do not touch the disk media’s (CD-ROM or floppy disk) recording surface.
• Do not place the disk(s) where they may be exposed to extremely high or low
temperatures, high humidity, or dust.
• Do not place a floppy disk near stereo speakers, TVs or any device producing a
magnetic field.
Pro-Control Ver.3.0 User Manual
7
8
Pro-Control Ver.3.0 User Manual
Chapter 1 - Overview
1
1
1.1
Overview
Prior to Operating the GLC
The following steps are required prior to using the GLC.
1 Preparation
Before using the GLC, check that all required hard
ware is present and read all specification, wiring, and
installation information.
GLC Users Manual (sold separately)
2 Design
Design the GLC screen images, tag layout and logic
program.
3 Screen Editor
Install the screen editor software in your personal
Software
computer.
Installation
GP-PRO/PBIII for Windows Operation Manual (included in screen editor package)
4 Logic Program
Install the logic program development softDevelopment
ware in the personal computer where the
Software
screen editor software has already been installed.
Installation
Pro-Control Editor Operation Manual
(included in the Pro-Control Editor package)
5 Logic Program
Use the logic program development software
Creation
to create the logic program, and set up the operation modes.
Pro-Control Editor Operation Manual
(included in the Pro-Control Editor package)
6 Symbol Import/
Register (import) symbols and create screens with
Screen Creation/
screen editor software. Transfer the data to the GLC unit.
Active Image
GP-PRO/PBIII for Windows Operation
Setup/
Manual (included in the screen editor package)
Screen Data
Transfer
7 Logic Program
Use the logic program development software to
Transfer/Monitor transfer the program to the GLC unit. The transferred
logic program can be checked via the logic program
development software’s monitor feature.
Pro-Control Editor Operation Manual
(included in the Pro-Control Editor package)
8 Initial Settings
Enter the GLC’s initial settings, according to the type
of usage desired.
GLC Users Manual (sold separately)
GP-PRO/PB III for Windows PLC Connection
Manual (included in the screen editor package)
9 Operation
Connect the GLC and expansion unit, as well as
peripheral devices required, and start operation.
GP-PRO/PBIII for Windows PLC
Connection Manual (included in the screen editor
package) and each expansion unit’s User’s Manual.
Pro-Control Ver.3.0 User Manual
1-1
Chapter 1 - Overview
1.2
System Design
1.2.1
Usage Patterns
The GLC can be used in either of the following systems.
■ Stand-Alone System
The expansion unit can be attached to the GLC to perform I/O control.
expansion unit
GLC
I/O devices
■ Direct PLC Connection
Connecting the GLC to a PLC allows you to send data between the GLC and a
PLC. At the same time, the Expansion unit can also be attached to the GLC to
perform I/O control.
To each manufacturer’s PLC via
RS-232C or RS-422
To GLC
expansion unit
HOST PLC
GLC
CPU
I/O devices
1-2
Link
Unit
I/O Unit(s)
Pro-Control Ver.3.0 User Manual
Chapter 1 - Overview
1.2.2
Usage Options
The following peripheral devices can be used being connected with the GLC 100
and GLC 300 units:
GLC Operation
GLC Screen creation and programming
! GLC Unit
GLC100-LG41-24V
GLC100-SC41-24V
GLC300-TC41-24V
Flex Network Cable
(see cable list*1)
Bus Conversion Unit
GLC300-BCB41
(Required only for GLC300
series)
Flex Network
I/F Unit
GLC100-FN11
GLC100-FN41
Flex Network I/O Unit
DIO Unit
GLC100-ST41/
GLC100-RT41
(1)
GP Screen Data
Transfer Cable
GPW-CB02
Personal Computer*1
Logic Program Development Software
“Pro-Control Editor”
GLCCNT-ED01E-V30
Memory Loader II
GP070-LD01-0,
Rev. D or later
(2)
(2)
(2)
Screen Editor Software
“GP-PRO/PB III for Windows
Ver. 5.0 or higher”
GPW-PB01W-V50
RS-232C Cable
GP410-IS00-0
RS-422 Cable
GP230-IS11-0
GP230-IS12-0
RS-422 Connector
Terminal Block
Conversion Adapter
GP070-CN10-0
(3)
Host Controller
(4)
PLC, Personal Computer, etc.
Items shown with the codes (1) to (4) should be connected to the following devices.
GLC Interfaces
(1) Tool Connector
(2) Serial Interface
PLC/Personal Computer Interfaces
(3) RS-232C Port
(4) RS-422 Port
*1 Personal computer running English Windows95/98/NT4.0
*2 GPW-CB-SET can also be used.
*3 Flex Network Cables
Model
FN-CABLE2050-31-MS
FN-CABLE2200-31-MS
Pro-Control Ver.3.0 User Manual
Vender
Digital Electronics Corporation 50 m
Digital Electronics Corporation 200 m
Unit
1-3
Chapter 1 - Overview
The following peripheral devices can be used being connected with the GLC2400 unit.
!Operation Environment
GLC Screen Creation and Programming
GLC Operation
To Ethernet
GLC2400-TC41-24V
(1)
(2)
Flex Network
Communication
Cable
(see cable list *6 )
(3)
Flex Network
I/O Unit
Printer Cable
PSM-PRCB00
Printer *1
(Commercial Type)
When using
Internal 2-port Function
(4)
Transfer Cable
GPW-CB02
Barcode Reader
(see recommended
products table *3 )
(5)
(6)
(7)
(8)
GPP Software
Package made
by Mitsubishi
Electronics Co.Inc. *2
Personal
Computer
Barcode Reader, Two dimentional Code Reader
(see recommended products table *3 )
CF Card
GP077-CF10
GP077-CF20
CF Card Reader
GP077-CFAD10
Speaker
(Commercial Type)
(9)
RS-232C Cable
GP410-IS00-O *4
RS-422 Cable
GP230-IS11-O *4
GP230-IS12-O *4
(for MultiLink)
Host Controller
(10)
RS-422 Connection Terminal
Conversion Adaptor
GP070-CN10-O *4
2-port Adaptor ll
Cable
GP070-MDCB11
Mitsubishi PLC A,
QnA, FX Series 2port Adaptor ll
GP070-MD11
Pro-Control I/F Cable for
Mitsubishi PLC A
GP430-IP10-O
Pro-Control I/F Cable for
Mitsubishi PLC, FX Series
GP430-IP11-O
1-4
Personal
Computer
(11)
PLC/Temperature
Controller/
Inverter, etc.
(11)
(11)
Pro-Control Ver.3.0 User Manual
Chapter 1 - Overview
! Screen Creation and Programming Environment
GLC2400-TC41-24V
To Ethernet
Logic Program
Development Software
“Pro-Control Editor”
GLCCNT-ED01W-V30
(1)
(4)
Transfer Cable
GPW-CB02
(6)
CF Card
GP077-CF10
GP077-CF20
GLC Interfaces
(1) Ethernet Interface
(2) Flex Network Interface
(3) Printer Interface
(4) Tool Connector
(5) Expansion Serial Interface
(6) CF Card Interface
Personal
Computer *5
Screen Editor Software
“GP-PRO/PB III for Windows Ver.
5.0 or higher”
GPW-PB01W-V50
(7) Sound Interface
(8) Serial Interface
PLC Interfaces
(9) RS-232C Port
(10) RS-422 Port
(11) Programming Console Port
*1 This system can be used with NEC PC-PR201/PL command compatible machines, EPSON ESC/
P24-J84 (C) command compatible machines, and HP Laser Jet PCL 4 command compatible machines. It cannot be used with special-purpose printers for Windows. Printers with the above commands (or the equivalent) can be used. In some cases, it is possible to use a printer which has drivers
for both Windows and DOS. For details, please inquire with the printer manufacturer or your sales
representative.
*2 For compatible PLC and compatible software,
GR-PRO/PB III for Windows PLC Connection Manual (Included in
GP screen creation software)
*3 Recommended bar code reader
Made by Optoelectronics Co., Ltd.
Made by Imex Co., Ltd.
Pen-T ype
BR-331 PC2
Scanning Width
60 mm
80 mm
100 mm
Touch Scanner type
OPT -1105-RSK 98 set
OPT -5105-RSK 98 set
OPL-6735-RSK 98 set
Made by Imex Co., Ltd.
Scanning Width Touch Scanner T ype
65 mm
TCD-5510M
82 mm
TCD-5510L
105 mm
TCD-5510W
*4 Certain PLCs can not be connected using this cable.
GR-PRO/PB III for Windows PLC Connection Manual (Included in
GP screen editor software)
*5 PC operating with Windows 95/98/NT 4.0/2000
*6 Equipment
<Connectors>
Model
I/F Connector
MCV1,5/6-GF-3,81
DataTransfer Cable Connector MC1,5/6-STF-3,81
Manufacturer
Phoenix Contact
Phoenix Contact
<Cables>
Model
FN-CABLE2050-31-MS
FN-CABLE2200-31-MS
Pro-Control Ver.3.0 User Manual
Vendor
Digital Electronics Corporation 50 m
Digital Electronics Corporation 200 m
Length
1-5
Chapter 1 - Overview
1-6
Pro-Control Ver.3.0 User Manual
2
GLC Overview
2.1
Operating the GLC
The GLC contains both screen display and I/O control features. These features and
their respective modes are described below.
GLC Features
Operation
Mode
- Screen Display
Controller
RUN Mode
Constant Scan Mode
Features
I/O Control
Logic Program
Runs the Logic Program
RUN Mode
at the designated time.
- Data Transfer
with PLC
Percent Scan Mode
temperature controller,
Designates the percent of
inverter, etc.
a single scan used by the
controller's program.
OFFLINE Mode
- Initial Settings
- Screen Data Transfer
- Self Diagnosis
STOP Mode
- Halt Logic Program
Mode
(Allows the editing, writing,
etc. of the Logic Program)
When OFFLINE mode is entered, the Controller will stop. Re-entering RUN mode
will reset the Controller feature.
Pro-Control Ver. 3.0 User Manual
2-1
Chapter 2 - GLC Overview
2.1.1
GLC Scan Overview
GLC Scan time includes ladder circuit execution time, screen processing time,
SIO communication time and touch panel processing time as follows.
GLC ladder circuit execution controller
Scan executes whole process from read, ladder
circuit execution to output.
Logic time
Scan
time
Graphic
processing
time
Executes during the time of scan set time minus logic
time (contact scan).
(Including SIO communication and touch panel
processing)
2.1.3 RUM Mode
2.1.2
Controller Feature Overview
The Controller feature functions as follows. The facing page provides detailed
descriptions of each step.
Initial Processing
Loading
[RESET]
[RESET]
[PAUSE]
Temporary
Stop
[Perform 1 Scan]
[RESET]
Running
[STOP]
[Continue]
[RUN]
First Scan
[Perform 1 Scan]
First Scan
STOP
[STOP]
[STOP]
2-2
Pro-Control Ver.3.0 User Manual
Chapter 2 - GLC Overview
■ Initial Processing
This is the original state of the engine use to perform the Logic Program. Once initialization is finished, the Controller enters the “Loading” state.
■ Loading
Here, the actual reading in of the Logic Program is performed. After a check is performed to determine whether the Logic Program is successfully loaded or not, error
processing is performed if an error has occurred. If Loading is successful, the program
enters the [STOP] state. If the [Power ON Operation Mode] is set to [START], the
[RUN] instruction is automatically performed.
■ STOP
In this condition the Controller is waiting to receive another instruction. Once the
[RESET], [Perform 1 Scan], [Continue], or [PAUSE] instructions are received, the
Controller changes to that condition.
The [RESET] instruction will change the program to the [Loading] condition.
The [RUN] instruction will change the program to the [Running] condition.
The [Perform 1 Scan] instruction will perform the program once.
■ First Scan
Executes the I/O Read, performs any Logic Program that is higher the START level, and
executes the I/O write.
■ Running
This is the Logic Program performance engine’s continuous performance condition.
Executes the I/O Read, performs the Logic Program, executes the I/O write, and updates
the System Variables. (#AvglogicTime, #AvgscanTime, etc.)
The [RESET] instruction will change the program to the [Loading] condition.
The [STOP] instruction will change the program to the [STOP] condition.
The [PAUSE] instruction will change the program to the [Temporary Stop] condition.
■ Temporary Stop
The logic program execution engine is temporarily stopped in this state. To avoid an I/O
watchdog timeout, the system executes an I/O read and I/O write. However, the logic
program is not executed, so the output state does not change. When a command is
received, the system switches to the appropriate state.
The [RESET] instruction will change the program to the [Loading] condition.
The [Perform 1 Scan] instruction will perform the program once.
The [STOP] instruction will change the program to the [STOP] condition.
The [Continue] instruction will change the program to the [Running] condition.
Pro-Control Ver.3.0 User Manual
2-3
Chapter 2 - GLC Overview
2.1.3
RUN Mode
RUN Mode uses the following steps.
Constant Scan/
Percent Scan
RUN Mode
No
Yes
Perform Logic
Program
END Processing
(Renew System Variables, etc.)
64 Scan
No
Yes
Scan Time Adjustment
Scan
Completed
■ Standard Scan Mode
■ Pause Mode
■ Scan Time Adjustment
This adjustment is performed every 64 scans. The various types of adjustments are
described below for Constant Scan Time, and Percent Scan Time.
◆ Constant Scan Time Mode
GLC scan time = (#AvgLogicTime x 100) / 50
◆ Percent Scan Time Mode
GLC scan time = (#AvgLogicTime x 100) / #PercentAlloc
For information about #AvgLogicTime, or #PercentAlloc,
Chapter 4 - System Variables
The GLC’s ScanTime includes the following error:
GLC 100 - approx. 0.2%, GLC 300 - 0.2%, GLC2400 - 0.2%
2-4
Pro-Control Ver.3.0 User Manual
Chapter 2 - GLC Overview
!Constant Scan Time Mode
Constantly executing the program during the scan time set.
<Priority is set for processing speed>
Here, the screen is used mainly for data display and less for operation, with control (logic program) being the priority.
Logic time
Processing
Reading I/O input information
time for logic
program
Operating logic program
1 START
2
(variable)
3
Start
Stop
Operation
Operation
4 END
5 PEND
Scan time
(fixed)
Writing I/O input information
Graphic processing time
= Scan time logic time
Graphic processing time = Setting time for constant scan time mode (ms) - logic
time (variable)
e.g.) If constant scan time is set to 100 ms and logic executing time is 30 ms
Graphic processing time = 100 ms - 30 ms
= 70 ms
* The longer the logic time, the shorter the Graphic processing time to spare
Note: Though GLC display response will be slower, logic program will execute
constantly.
If the logic execution time exceeds 50% of the setting time
(example: 100 ms), the system adjusts automatically so that the
logic time becomes 50% of the scan time.
Pro-Control Ver.3.0 User Manual
2-5
Chapter 2 - GLC Overview
!Percent Scan Time Mode
This mode varies the scan time according to the percentage set by the logic time
<Priority is set for screen display>
Set the priority to the operation speed and switching speed of the display and
varies the scan time according to the control time (logic program).
Reading I/O input information
Logic time
Processing
Scan time;
Logic set time
+ screen pro-
1 START
Operating logic program
2
Start
time for logic
program
3
(Set by percentage, variable)
4 END
5 PEND
Stop
Operation
Operation
Writing I/O output information
cessing time =
100% (variable)
Graphic processing time
= Total scan time
- Logic time (set
by %)
Scan time = Logic time / Percent scan set time (%)
e.g.) If percent scan time is set to 10% and logic executing time is 20 ms
Scan time = (20 ÷ 10) × 100
= 200 ms
Graphic processing time = 200 ms - 20 ms
= 180 ms
* When logic time increases, display processing time increases, resulting in increased
scan time.
Note: The longer the logic time, the longer the time allocated to display processing;
therefore the display is updated more quickly on the GLC, but the logic pro
gram processing cycle slows.
• There is no change in the processing time for one instruction
in the logic program.
• The scan setting (%) cannot be set over 50%.
2-6
Pro-Control Ver.3.0 User Manual
3
Variables
This chapter explains the different types of variables used by the Pro-Control software.
3.1
Variable Types
The Pro-Control software uses three different types of variables - Discrete, Integer and Real.
Within each of these variable types, arrays can also be defined and used. Theoretically,
the maximum size (number of elements) of an array can be up to 65535, however, the
actual number of elements that can be used by any application will be limited by the
size of the GLC’s variable storage area. In the GLC the amount of memory available
for variables is limited to 32Kbytes. Please be sure to design your system so the
number of variables used in memory does not exceed the GLC’s limit. Please refer to
the following table for information about the amount of memory used by each variable.
Variable T ype
M em ory Used (unit:byte)
Discrete
12
Discrete Array
Integer
Integer Array
Real
Real Array
Timer
Counter
20+12 (for each element)
8
20+8 (for each element)
16
20+16 (for each element)
48
80
It is possible to set for each variable whether data is retained or cleared when data
is reloaded (during GLC shutdown or startup), or when STOP mode changes to
RUN mode.
! Discrete Variables
These variables are used to define a discrete condition, i.e. ON or OFF, using a
single bit and the values “0” or “1”.
! Integer Variables
These variables use 32 bits to define integer values from -2147483648 to
214783647.
! Real Variables
These variables use 64 bits to define floating decimal point values from +/-2.25e308 to +/-1.79e+308, and “0”.
Pro-Control Ver. 3.0 User Manual
3-1
Chapter 3 - Variables
3.2
Accessing Variables
This section explains how to access variable array elements, bits, bytes and words.
This feature is only available via the Pro-Control program, not GP-PRO/PBIII for
Windows.
■ Array Variables
An array is a method of declaring and handling multiple elements with a single
variable name.
For example, imagine the drawers of desk or cabinet.
ALLM
[0]
1
2
3
4
5
6
7
8
[9]
The array variable ALLM[10] means that cabinet ALLM has
10 drawers prepared, numbered from [0] to [9]. Each drawer
corresponds to a memory location in the PLC. When using 10
locations of ALLM memory, firstdeclare ALLM[10], and then
indicate the individual drawers as ALLM[0]...ALLM[9].
■ Accessing a Discrete Array
To access the elements of a discrete array, a modifier [n] must be attached to each
element. To access the modifier, it is assigned an element number, however the
first element number in an array must be “0”.
Ex. To access discrete array variable Discrete_Array’s 5th element, you would
enter Discrete_Array[4].
■ Accessing an Integer/Integer Array
Integers and Integer Arrays can be accessed via array elements, bits, bytes and
words. To access using bits, bytes and words, the following suffix are used. The
modifier [m] is used to denote the position of the element in the array being
accessed.
Access Item/Unit
Suffix
Bit
Byte
Word
.X [m]
.B [m]
.W [m]
Also, as with the Discrete Array, the modifier [n] can also be used to access any of
the array’s elements. This method is can also be combined with the bit, byte and
word access method. Thus, in order to access the Integer Array variable
Integer_Array’s n+1 element’s m+1 bit, the wording Integer_Array[n].X[m] is
used.
3-2
Pro-Control Ver. 3.0 User Manual
Chapter 3 - Variables
Ex. To access Integer_Variables 7th bit, type “Integer_Variables.X[6]”.
To access the integer array Integer_Array’s 62nd bit, type “Integer_Array.X[61]”.
32nd B it
31
63 62 61
First B it
0
32
…
…
64th B it
33rd B it
62nd B it
Also, for Integer_Array[1].X[29]:
32nd Bit
31
31 30 29
…
…
64th Bit
First Bit
0 First Element (Element No. 0)
0 Second Element (Element No. 1)
33rd Bit
62nd Bit = First Element's 29th Bit
Since Integer_Array.X[61] = Integer_Array[1].X[29]‚ both can be used to
access Integer_Array’s 62nd bit.
• When accessing Integer_Array’s 6th byte‚ both Integer_Array.B[5] and
Integer_Array[1].B[1] can be used.
• When accessing Integer_Array’s 5th word‚ both Integer_Array.W[4] and
Integer_Array[2].W[0] can be used.
■ Accessing a Real Array
Real Arrays can be accessed via array elements. To access the elements of a Real
array, a modifier (n) must be attached to each element, which represents the
element number,”0”, however, is used for the first element in the array.
Ex. When accessing the Real array’s 5th element, type “Real_Array[4]”.
Note: GP-PRO/PB III can handle 2048 GLC variables. The elements of the array become
single variables. For example, an array with 5 elements becomes 5 variables.
Up to 2048 GLC variables can be used in GP-PRO/PBIII for Windows.
■ Array Indirect Access
The element no. indicated in square brackets [ ] can be indirectly expressed with a
real variable. For example, if 1 is substituted for N in a MOV instruction (as in the
following circuit), and 1 is added to 2 with an ADD instruction and then substituted
in A[N], then 3 is assigned to A[1].
MOV
ADD
1
1
Pro-Control Ver. 3.0 Users Manual
N
A[N]
2
3-3
Chapter 3 - Variables
3.3
Variable Names
Variable names can be designated by the user. When designating variable names,
please be aware of the following limitations.
• Variable names can be up to 20 bytes (10 characters)
• No differentiation is made between upper and lower case characters. However,
the order in which words are registered will determine if they are valid or not.
Ex.) If the word “TANK” is entered prior to “tank”, the word “tank” can be
entered, however it will be invalid.
• Variable Names can use numbers, except for the first character.
• The underscore cannot be used 2 or more in series like this: “_ _”.
• Only the underscore “_” special character can be used.
• Since it is a reserved character, the # sign cannot be used.
• Since the names LS and LSS are reserved for use by the GLC’s system in the
System Data Area, the Read Area, and for Special Relays, they cannot be used
for variable names.
Refer to Chapter 6 - LS Area Refresh
For information about Variable Settings, refer to Pro-Control
Editor’s Operation Manual.
3-4
Pro-Control Ver. 3.0 User Manual
4
System Variables
The following table provides a list of the Controller’s predefined System Variables.
4.1
System Variable List
System Variables are used to display the Controller’s current condition, and effect its
operation. System variables perform like normal variables, however, since they are
reserved they cannot be automatically created and deleted.
Group
Explanation
Initial
Value
Variable Name
#AvgLogTime
Displays the average Logic T ime once
every 64 scans. (Unit:ms)
0
Integer
#AvgScantime
Displays the latest Logic Time (Read,
Perform, Write, GP processing)
(Unit:ms)
0
Integer
#EditCount
Currently not used by GLC
-
Integer
0
Discrete
0
Integer
-
Integer [10]
0
Integer
-
Integer
0
Integer
0
Integer
-
Integer
-
Discrete
Integer
Integer
Integer
System Variable
#Fault
#ForceCount
#IOStatus
Data
#LogicT ime
#PlatForm *1
#ScanCount
#ScanTime
#Status
#StopPending
#Version
#WCLScan
#WCLStatus
*1
Used to stop the performance of an
Error Handler sub-routine.
Counts the no. of times a variable is
forcefully changed.
Shows the I/O Driver's condition.
Displays the latest Logic Scan Time
(Read, Perform, Write) Unit:ms
Indicates the Controller's Platform
Excluding the current scan, counts the
number of scans performed.
Displays the latest Logic Scan Time
(Read, Perform, Write, GP processing)
(Unit:ms)
Indicates the Controller's current
status.
Currently not used by GLC
Displays the Controller's version data.
Currently not used by GLC
Currently not used by GLC
This system variable is not supported by the GLC100 Series units.
Pro-Control Ver. 3.0 User Manual
4-1
Chapter 4 - System Variables
Group
System Variable
#FaultCode
#FaultRung
Errors
#IOFault
#Overflow
#Command
#DisableAutoStart
#FaultOnMinor
Settings #PercentAlloc
#PercentMemCheck
#StopScans
#TargetScan
#WatchdogTime
Explanation
Displays the latest Error code.
Displays the rung where the error
occurred.
Turns ON when an Error occurs.
Turns ON when an overflow occurs
due to arithmetic commands or to
conversion of a variable from Real to
Integer.
Changes the Controller's mode.
Defines the mode entered when the
GLC starts up.
Setting to control the completion of
the logic performed when a minor
error occurs.
Defines the Percent Scan's
percentage. (Unit: % )
Currently not used by the GLC.
Currently not used by the GLC.
Sets the Constant Scan Time. (Unit:
ms)
Sets the Watchdog Timer's value.
(Unit: ms)
Initial
Value
Variable
Name
-
Integer
-
Integer
-
Discrete
0
Discrete
0
Integer
-
Discrete
0
Discrete
0
Integer
-
Integer
Integer
-
Integer
-
Integer
For details on system variables, see “Pro-Control Help”.
4-2
Pro-Control Ver.3.0 User Manual
5
Instructions
Here, the Pro-Control Editor instructions are explained
5.1
Instruction List
The Instructions supported by the Pro-Control Editor software are as follows.
■ Bit Operation Instructions
Instruction
Type
NO
Normally Open
NC
Normally Closed
Symbol
Allows power to pass when the contact
turns ON.
OUT/M *1
Output Coil/Retention
Coil
/
NEG/NM *1
Negated Coil/Negated
Retention Coil
/
SET/SM *1
Latch Coil/ Latch
Retention Coil
/
RST /RM *1
Unlatch Coil/ Unlatch
Retention Coil
/
PT
Positive T ransition
NT
Negative Transition
Function
Allows power to pass when the contact
turns OFF.
Turns physical output devices or
internal discrete variables and
expressions ON or OFF.
Turns a variable OFF if the coil
receives power, and ON if it doesn't.
Turns a variable ON if the coil receives
power.Stays ON until receiving another
explicit instruction.
Turns a variable OFF if the coil
receives power. Stays OFF until
receiving another explicit instruction.
Allows power to pass if the variable was
OFF during the previous scan, but is
ON now.
Allows power to pass if the variable was
ON during the previous scan, but is
OFF now.
*1 For the instructions explained above, when a variable is designated as retained, it is
automatically changed to one of the right side instructions. Thus, when entering data in
this screen, be sure to use one of the left side (non-retained) instructions.
Ex: As shown here, when an OUT instruction’s variable is designated as retained, the
screen icon changes to M.
Pro-Control Ver. 3.0 User Manual
5-1
Chapter 5 - Instructions
■ Arithmetic Operation Instructions
Instruction
Type
AND
Logical Multiply
OR
Logical Add
XOR
Exclusive Logical
Add
NOT
Bit Negation
Symbol
Function
A and B -> C
Normal Continuity
A or B -> C
Normal Continuity
A xor B -> C
Normal Continuity
A -> C
Normal Continuity
■ Movement Instructions
Instruction
MOV
Type
Move
Symbol
Function
IN -> OUT Normal Continuity
Array A
BMOV
Block Move
B ->
Array E
C ->
D ->
Norm al
C ontinuity
Array D
B ->
FMOV
File Move
A
C
Norm al
C ontinuity
5-2
ROL
Rotate Left
A
N Shift
-> C Normal Continuity
ROR
Rotate Right
A
N Shift
-> C Normal Continuity
SHL
Shift Left
A
N Shift
-> C Normal Continuity
SHR
Shift Right
A
N Shift
-> C Normal Continuity
0
Pro-Control Ver. 3.0 User Manual
Chapter 5 - Instructions
■ Mathematical Instructions
Instruction
Type
Symbol
Function
ADD
Add
A + B -> C Normal Continuity
SUB
MUL
DIV
MOD
Subtract
Multiply
Divide
Residual Processing
A - B -> C Normal Continuity
A x B -> C Normal Continuity
A ÷ B -> C Normal Continuity
A % B -> C Normal Continuity
INC
Increment
A + 1 -> A Normal Continuity
DEC
Decrement
A - 1 -> A Normal Continuity
EQ
GT
LT
Equal To (=)
Greater T han (>)
Less T han (<)
Greater T han or Equal
To (>=)
Less T han or Equal
To (<=)
Not Equal (!=)
When A = B, Continuity
When A < B, Continuity
When A > B, Continuity
GE
LE
NE
When A > or = B, Continuity
When A < or = B, Continuity
When A not= B, Continuity
■ Timer and Counter Instructions
Instruction
Type
Symbol
Function
TON
Time ON-Delay
Refer to Pro-Control Help
TOF
Timer OFF-Delay
Refer to Pro-Control Help
Timer Pulse
Refer to Pro-Control Help
CTU
Count UP
Refer to Pro-Control Help
CTD
Count DOWN
Refer to Pro-Control Help
CTUD
Count UP/DOWN
Refer to Pro-Control Help
TP
The GLC’s ScanTime includes the following error:
GLC 100 - approx. 0.2%, GLC 300 - 0.2%
Pro-Control Ver3.0 User Manual
5-3
Chapter 5 - Instructions
■ Convert Instructions
Instruction
Type
BCD
BCD Conversion
BIN
Binary Conversion
Instruction
JMP
Jump
JSR
Jump to Subroutine
RET
5-4
Type
Symbol
Symbol
->>label name
-<RETURN>->>Subroutine
Return from Subroutine
Name<<-
Function
A -> BCD conversion -> B
Normal Continuity
A -> Binary conversion -> B Normal
Continuity
Function
Jumps to a label
Jumps to subroutine
Returns to called JSR
command.
Pro-Control Ver. 3.0 User Manual
6
L/S Area Refresh
6.1
Overview
■ L/S Area Refresh Feature
The GLC unit, like the GP uses the LS Area's System Data Area to control the changing
of screens, the sounding of buzzers, etc. These are processed as GP Display features.
Thus, when you wish to use the above screen change and buzzer functions with the GP's
Control functions, i.e. the LS Area's "mapped" functions, the LS Area must be registered
as a variable, with the Control and Display features operating via the sharing of LS area
data.
This is defined as the "LS Area Refresh".
It is also possible to use an area outside of the System Data Area if the GLC Controller
features or Display features need to share data.
Display Features
Controller Features
LS Area
D
I
S
P
L
A
Y
/
T
O
U
C
H
System Data Area
Other Shared Area
User Area
Variable Area
LS Area
Refresh
CONTROLLER
MEMORY (For User
defined variables,
etc.)
System Data Area
Other Shared Area
Special Relays
Pro-Control Ver. 3.0 User Manual
L
O
G
I
C
P
R
O
G
R
A
M
Special Relays
6-1
Chapter 6 - L/S Area Refresh
6.2
LS Area Refresh Settings
In order to use the logic program to designate the LS Area, the desired variable must
first be registered in the Pro-Control Editor. The following text will explain this
procedure.
■ Variable Registration
Click on the Pro-Control Editor [Data] menu's [Variable Type] selection and the
following dialog box will appear.
The variables handled in the LS Area are registered as an internal integer and array.
In this example the size of a System Area array is 20 words, and any additional data
that will be shared is added to that amount. Ex. If the user wishes to have 16 words
of data shared outside of the System Data Area, the calculation would be 16 words
of data, plus the System Data Area's 20 words, for a total of 36 words.
The Special Relay Area is called the LSS area.
6.2.1
System Data Area
The System Data area's structure is shown in the following chart.
This area is used for changes in screens, or to turn the GLC's backlight ON/OFF,
via the refreshing of data via the controller's ladder logic program.
Refer to the GP-PRO/PBIII PLC Connection Manual (included
with screen creation software)
This area can be used by the GLC's internal integer array variables,
that are registered via the Pro-Control Editor software.
6-2
Pro-Control Ver.3.0 User Manual
Chapter 6 - LS Area Refresh
■ Direct Access Method
Addresses and variable names used here assume all the System Data Area items
designated in the GLC's initial settings are selected.
Area
LS
Var.
Function Address Name
LS0000
Contents
LS[0] Display Screen Number 1 to 8999
GLC
Error Status
"
Each bit changes to reflect
the GP error status. When an
error occurs, the bit is set
ON.
PLC
E
x
c
l
u
s
i
v
e
W
r
i
t
i
n
g
A
r
e
a
LS0001
Bit
LS[1]
A bit that has turned ON
remains ON until the power
is turned OFF and back ON,
or until RUN mode is reentered from OFFLINE
mode.
0,1
Detail
(However, 1 to 1999
when using BCD input)
Not used
2
System ROM/RAM
3
Memory Checksum
4
SIO Framing
5
SIO Parity
6
SIO Over-run
7,8
Not used
9
Memory requires
Initialization
10
Timer Clock Error
11
PLC
12 to 15 Not used
LS0002
LS0003
LS0004
LS0005
Current YEAR,
BCD 2 digits
Current MONTH,
LS[3]
BCD 2 digits
Current DAY,
LS[4]
BCD 2 digits
Current TIME,
LS[5]
BCD 4 digits
LS[2]
LS0006
LS[6] Status
LS0007
LS[7] Reserved
Last two digits
01 to 12 (month)
01 to 31 (date)
00 to 23 hr, 00 to 59 min
0,1
2
3
4 to 6
7
8
Reserved
Now Printing
Writes a set value
Reserved
PLC monopoly
K-tag entry error
Display
9
0: Possible
1: Not Possible
10 to 15 Reserved
For more information, see PLC Connection Manual.
Refer to the PLC Connection Manual 1.1.4 Contents and Range
of System Data Area.
Pro-Control Ver. 3.0 User Manual
6-3
Chapter 6 - L/S Area Refresh
Area
LS
Function Address
Var.
Name
LS0008
LS[8]
Change Screen Number
LS0009
LS[9]
Screen Display On/Off
LS0010
LS[10]
LS0011
LS[11]
LS0012
LS[12]
LS0013
LS[13]
PLC
"
GLC
E
x
c
l
u
s
i
v
e
Contents
Clock's YEAR set value,
BCD 2 digits (+flag)
Clock's MONT H set value,
BCD 2 digits
Clock's DATE set value, BCD
2 digits
Clock's TIME set value,
BCD 4 digits
R
e
a
d
i
n
g
A
r
e
a
Bit
(However, 1 to 1999 when
using BCD input)
FFFFh: Screen clears almost
immediately. 0h: Screen turns ON.
All other bits are reserved.
Last 2 digits (bit #15 is the clock's data
1 to 8999
write change flag )
01 to 12
01 to 31
00 to 23 Hr: 00 to 59 Min
0
1
2
3
4
5
LS0014
LS[14]
Control
6
7
8
9,10
11
LS0015
LS[15]
LS0016
LS[16]
LS0017
LS[17]
LS0018
LS[18]
LS0019
LS[19]
Reserved
Window Control
Window Registration
Number
Window Display Position
(X coordinate data)
Window Display Position
(Y coordinate data)
Detail
12 to 15
Set to 0
0
Backlight OFF
Buzzer ON
Starts printing
Reserved
Buzzer
0: Enabled, 1: Disabled
AUX Output
0: Enabled, 1: Disabled
Reserved
PLC monopoly
0: Disabled, 1: Enabled
VGA Display
0: Disabled, 1: Enabled
Reserved
Hard copy output
0: Enabled, 1: Disabled
Reserved
Display - 0: OFF, 1: ON
Changing the order of
window overlapping
1
0: Possible
1: Not Possible
2 to 15 Reserved
Global Window registration number
selected by Indirect setup (Bin/BCD)
Global Window display coordinates
selected by Indirect setup (Bin/BCD)
For more information, see PLC Connection Manual.
Refer to the PLC Connection Manual 1.1.4 Contents and Range
of System Data Area.
6-4
Pro-Control Ver.3.0 User Manual
Chapter 6 - LS Area Refresh
■ Memory Link Method
Addresses and variable names used here assume all the System Data Area items
designated in the GLC's initial settings are selected.
LS
Address
LS0001
Var.
Name
LS[1]
LS0002
LS[2]
Detail
Function
Status
Error Status
Each bit changes according to the
GP error function. When an error
occurs, the corresponding bit will
turn on.
LS0003
LS0004
LS0005
LS0006
LS0007
LS0008
LS0010
LS0011
Bit
Particulars
0, 1
2
3
4 to 7
8
9 to 15
0, 1
Reserved
Now Printing
Writes a set value
Reserved
K-tag entry error
Reserved
Unused
2
System ROM/RAM
3
Screen Memory Checksum
4
SIO Framing
5
SIO Parity
6
SIO Overrun
LS[3]
7, 8 Unused
A bit that has turned ON remains
Initialization of Internal Memory Checksum
9
ON until the power is turned OFF
Necessary
and back ON, or until RUN mode
10 Timer Lock Error
is re-entered from OFFLINE mode. 11 to 15 Unused
LS[4]
Clock Data
0 to 7 Stores the last 2 digits of the Calendar year
"Year
/
Month
/
(Year)
8 to 15 Unused
LS[5]
Clock Data Day / Hour /
0 to 7 Stores 01 to 12 (Month) as 2 BCD digits
(Month)
8 to 15 Unused
Minute " Data is
LS[6]
Clock Data
0 to 7 Stores 00 to 31 (Day) as 2 BCD digits
stored in BCD's
(Day)
8 to 15 Unused
LS[7]
Clock Data 2digits.
0 to 7 Stores 00 to 23 (Hour) as 2 BCD digits
(E.g.)
(Hour)
8 to 15 Unused
LS[8]
Clock Data 98/02/01 17:15
0 to 7 Stores 00 to 59 (Minute) as 2 BCD digits
(Minute)
8 to 15 Unused
LS[10] Interrupt Output If you Write in word data, the bottom 8 bits will be output as an interup
(Touch OFF) code after T ouch OFF. However FFh will not be output.
LS[11]
Control
0
Backlight
1
Buzzer ON
2
Starts Printing
3
Reserved
4
Buzzer - - - 0:enabled 1: disabled
5
AUX Output - - - 0:enabled 1: disabled
6
Interrupt Output when touching panel to turn
7
Reserved
8
VGA display - - - 0: Disabled 1: Enabled
9, 10 Reserved
11 Hard copy output - - - 0: Enabled 1:
12 to 15 Reserved
For more information, see PLC Connection Manual.
Refer to the PLC Connection Manual 3.1.2 Contents and Range
of System Data Area.
Pro-Control Ver. 3.0 User Manual
6-5
Chapter 6 - L/S Area Refresh
LS
Address
Var.
Name
Detail
Function
Bit
Particulars
LS0012
LS[12] Screen Display
FFFFh : Screen clears almost immediately
LS0013
ON/OFF
LS[13] Interrupt Output
LS0015
LS[15] Screen Display No.
LS0016
LS[16] Window Control
LS0017
LS[17] Window Registration No.
LS0018
LS[18] Window Display Position
(X-coordinate)
LS[19] Window Display Position
(Y-coordinate)
0h: Screen turns ON
Using a T ouch T ag or other method to write absolute value
data from GP causes an output of the interrupt code using the
contents of the bottom 8 bits ( Will not out put FFh)
Write the Screen No. in
0 to 14 Screen change number, 1
binary to change the
to 8999.
screen display
15 Forced Screen Change
0
Display - - 0: OFF 1: ON
1
Changing ghe order of
window overlapping - 0: Possible 1: Not
Possible
2 to 15 Reserved
Global Window registration number selected indirectly
(BIN/BCD)
Global Window display position reached indirectly (BIN/BCD)
LS0019
For more information, see PLC Connection Manual.
Refer to the PLC Connection Manual 3.1.2 Contents and Range
of System Data Area.
6-6
Pro-Control Ver.3.0 User Manual
Chapter 6 - LS Area Refresh
6.2.2
Special Relays
Special Relays have the following structure.
This area can be used by the GLC's internal integer array variables
(LSS), which are registered via the Pro-Control Editor software.
For information about the Special Relays, refer to:
GP-PRO/ PBIII PLC Connection Manual (included with
screen creation software)
! Direct Access Method
Do NOT use any areas designated as Reserved.
LS
Address
LS2032
LS2033
LS2034
LS2035
LS2036
LS2037
LS2038
LS2039
LS2040
LS2041
LS2042
LS2043
LS2044
LS2045
LS2046
LS2047
Var.* Name
Contents
LSS[0]
LSS[1]
LSS[2]
LSS[3]
LSS[4]
LSS[5]
LSS[6]
LSS[7]
LSS[8]
LSS[9]
LSS[10]
LSS[11]
LSS[12]
LSS[13]
LSS[14]
LSS[15]
Shared Relay Data
Base Screen Data
Reserved
Binary Counter - 1 second
Tag Scan T ime
Data Transfer Scan Time
Tag Scan Counter
Data Transfer Error Code
Token Pass Speed (Max.)
Token Pass Speed (Current)
Reserved
* When using the GLC to access.
! Memory Link Method
Do NOT use any areas designated as Reserved.
LS
Address
2032
2033
2034
2035
2036
2037
2038
2039
2040
2041
2042
2043
2044
2045
2046
2047
Var. Name
Contents
LSS [0]
LSS [1]
LSS [2]
LSS [3]
LSS [4]
LSS [5]
LSS [6]
LSS [7]
LSS [8]
LSS [9]
LSS [10]
LSS [11]
LSS [12]
LSS [13]
LSS [14]
LSS [15]
Share Relay Data
Reserved
Binary Counter - 1 second
Tag Scan T ime
Reserved
Tag Scan Counter
Reserved
* When using the GLC to access.
Pro-Control Ver. 3.0 User Manual
6-7
Chapter 6 - L/S Area Refresh
6.3
GLC and PLC Data Sharing
The System Data Area can use up to 20 words, and the Write Area can use up to 16.
Each area's addresses are decided depending on the size setvv for that area. However, the GLC's Controller feature's Read Area must always start from LS0020
(LS[20]).
Display processing
function
Controller
PLC
System Data
System Data
LS[0]
Area
LS0000
Area
Top
Address*1
System Data
Area
LS[19]
LS[20]
Read Area
LS[35]
LS0019
LS0020
nWord*2
Read Area
Read Area
(Data)
LS0035
LSS[0]
mWord*3
LS2032
Special Relay
LSS[15]
Special Relay
LS2047
LS Area refresh provides
data sharing
SIO Data Transfer
provides data sharing
When data is updated for the same variable in the Control area's
Logic Program, GLC's Tags and External PLC's Logic Program, the
timing will determine which data is remaining.
When the Read Area is used efficiently and the GLC and PLC share data, the GLC
can be used as the PLC's slave device, which also allows the use of a FA type POP
unit, or an I/O data collection unit.
Writes GLC Data
GLC
I/O Unit
External
PLC
Reads PLC Data
*1 Start Address defined in Initial Settings.
*2 n = 0 to 20 Depends on the System Data Area setting items selected in Initial Settings .
*3 m = 0 to 16 Depends on size of Read Area designated in Initial Settings.
6-8
Pro-Control Ver.3.0 User Manual
Chapter 6 - LS Area Refresh
6.3.1
Read Area
This area is used when performing regular data transfer with the PLC, regardless
of the currently displayed screen data.
This area is also used when sharing data between the PLC and the GLC.
This area's size can be set from 0 to 16 words. Please use the GLC's OFFLINE
menu to set the Initial Settings area's Read Area Size.
Refer to GLC Series Users Manual (Sold Separately)
When using this area, be sure to first register all variable names used for the
Integer Arrays via the Pro-Control Editor software. Be sure to make the size of the
array equal to "20" + "GLC's Initial Setting Read Area Size".
When writing data to this area in the GLC, be sure that data written
from Tags, and data written from the Controller's Logic Program do
not overlap or conflict.
6.3.2
LS Area Refresh Cautions
The LS Area Refresh feature is used when you wish to use the Controller feature to
control the system area, or to view Read Data from an External PLC. Digital recommends that you use your data send/receive related Initialize area or Operation Designation Change parameter settings to control the refreshing of data in this area, rather
than refreshing LS0000 to LS0035 and LS2032 to LS2047's data intermittently via
the Controller feature.
Please be aware that increasing the frequency of LS Area data refreshing can lead to
errors like "External PLC Communication Error".
Pro-Control Ver. 3.0 User Manual
6-9
Pro-Control Ver. 3.0 User Manual
6-10
7
7.1
I/O Drivers
Overview
To perform external I/O, the GLC’s expansion unit must be attached and its related
I/O drivers must be installed. For detailed I/O Driver information,
refer to Pro-Control Editor Operation Manual.
When an I/O error occurs and the Controller stops, please create the following Logic
Program. There is, however, a lag of approximately one scan, from when the error is
detected until the Logic Program stops.
In the following example, an I/O error is detected with #IOFault, and logic execution
is stopped by assigning 1 to #Command.
When an I/O error occurs, #IOFault will turn ON. For detailed error information,
refer to the #IOStatus data.
Pro-Control Ver. 3.0 User Manual
7-1
Chapter 7 - I/O Drivers
7.2
DIO Driver
This section explains the GLC OFFLINE screen’s DIO menu. Be sure the DIO unit
is securely attached prior to using any of the DIO unit’s features.
For instructions on how to move to the OFFLINE menu screen,
GLC Series Users Manual (Sold separately)
7.2.1
DIO Unit Self-Diagnosis
This area explains how to use the DIO unit’s Self-diagnosis feature.
for detailed information, refer to the GLC Series Users Manual
(Sold separately)
Touch the OFFLINE screen’s Controller Menu to call up the [DIO Menu] area
GLC 100 Series
GLC 300 Series
Next, touch the DIN/DOUT key to call up the following screen.
GLC 100 Series
GLC 300 Series
Touching either the Set or Start keys will start the self-diagnosis.
This check sends an output signal from the output unit to the input unit. Therefore,
prior to performing this check, be sure to attach the DIN/DOUT loopback cable.
When switching to the offline mode or resetting from the logic
program RUN state, the I/O signal may turn to OFF. Please be aware
of the possibility of the I/O signal turning to OFF.
7-2
Pro-Control Ver.3.0 User Manual
Chapter 7 - I/O Drivers
◆ Loopback Cable Creation
Use the following diagram when creating your DIN/DOUT loopback cable.
COM
24V
COM
24V
NC
NC
NC
NC
DOUT15
DIN15
DOUT14
DIN14
to
DOUT1
DIN1
DOUT0
DIN0
A1
B1
A2
B2
A3
B3
A4
B4
A5
B5
A6
B6
to
+
DC24V
to
A19
B19
A20
B20
Recommended Products
Connection Type
Maker
Soldered Type
Fujitsu
Crimped Type
Fujitsu
Terminal Block Unit
Mitsubishi
Type
Yokogawa
Pro-Control Ver.3.0 User Manual
Model Number
FCN-361J040-AU
FCN-360C040-B
FCN-363J040
FCN-363J-AU/S
FCN-360C0404-B
A6TBX36
AC**TB
(** = cable length)
TA40-ON
(Connector)
(Cover)
(Terminal Block Unit)
(Cable)
7-3
Chapter 7 - I/O Drivers
7.2.2
I/O Monitor (I/O Connection Check)
On the DIO driver menu touch [I/O Monitor] to call up the following screens.
<When [I/O] Monitor has been selected>
GLC 100 Series
GLC 300 Series
Select the Module No., either 0, or 1. (The “0” unit is the unit attached directly to
the GLC, and the “1” unit is attached to the back of the “0” unit.
Select the Input Variable Type, either Discrete or Word.
Select the Output Variable Type, either Discrete or Word.
For example, if you entered a Module No. of “0”, an Input Variable Type of
“Discrete” and an Output Variable Type of “Word”, and touched the screen’s
upper right corner “RUN” button, the “I/O Monitor” screen would appear.
GLC 100 Series
GLC 300 Series
When the Input Variable Type is “Discrete”, the input terminal (S-No.) will appear
in reverse color. When the Output Variable Type is [WORD], use the ten-key input
pad to enter your data. When using a GLC100 series unit, simply touch the data
entry field and the ten-key input pad will appear. After finishing your data entry,
touch the [OUT] square to output your data. All data entry is in decimal values.
*1 The I/O Monitor feature cannot be used with the CGP070-D112 unit.
7-4
Pro-Control Ver.3.0 User Manual
Chapter 7 - I/O Drivers
7.2.3
Toubleshooting
This area explains how to solve possible DIO unit problems.
■ DIO Unit Input Errors
Error Type
Input monitor lamp is
ON, but no input can
be performed.
Input monitor lamp is
OFF and no input can
be performed.
Possible Cause
DIO Unit is defective
Replace DIO Unit
Program is incorrect
Correct program
DIO Unit is defective
Replace DIO Unit
Common line wiring check.
Input common line is incorrectly
Common line breakage check.
wired.
Common terminal looseness check.
External imput power is
Provide the correct voltage.
incorrect.
DIO unit is not correctly
Attach the DIO unit securely.
attached.
Connector is not securely
Attach the connector securely.
attached.
All input lines do not
DIO Unit is defective
turn OFF
Designated Input lines DIO Unit is defective
do not turn ON.
Program is incorrect
Input wiring is incorrect.
External unit is defective.
Input ON period is too short.
Designated Input lines DIO Unit is defective
do not turn OFF.
Program is incorrect
Input area randomly External Input voltage is
turns ON or OFF.
incorrect
Input terminal screws are loose.
Program is incorrect
Connector is not securely
attached.
Noise is causing unit misoperation.
Pro-Control Ver.3.0 User Manual
Solution
Replace DIO Unit
Replace DIO Unit
Correct the program.
Check common line wiring.
Check common line breakage.
Check common terminal for
looseness.
Replace the unit.
Lengthen the Input ON time.
Replace DIO Unit
Correct the program.
Provide the correct voltage.
Tighten the terminal screws.
Correct the program.
Attach the connector securely.
Reduce the noise level.
Attach a surge killer.
Use a shielded cable.
7-5
Chapter 7 - I/O Drivers
■ DIO Unit Output Errors
Error Type
Possible Cause
Ouput monitor lamp is
ON, but no ouput can DIO unit is defective
be performed
Output common line is
incorrectly wired.
Load current is incorrect.
Connector is not securely
attached.
Ouput monitor lamp is DIO unit is defective
OFF and no ouput can Program is incorrect.
be performed
Output area is completely OFF.
DIO unit is not correctly attached.
Output lines do not turn
DIO unit is defective
OFF
Designated output
DIO unit is defective
lines do not turn ON
Ouput wiring is incorrect.
External unit is defective.
Designated output
DIO unit is defective
lines do not go OFF
Current leakage, residual voltage
causes causes incorrect
recurrence.
Output area randomly Load voltage is incorrect
turns ON/OFF
Output terminal screws are loose.
Program is incorrect. Output
commands are overlapping.
Connector is not securely
attached.
Noise is causing unit misoperation.
7-6
Solution
Replace DIO unit
Output line wiring check.
Output line breakage check.
Output terminal looseness check.
Provide the correct current.
Attach the connector securely.
Replace DIO unit
Correct program.
Attach the DIO unit securely.
Replace DIO unit
Replace DIO unit
Check output line wiring.
Check output line breakage.
Check output terminal for looseness.
Replace unit.
Replace DIO unit
Change design of external device. I.e.
Attach dummy resistor, etc.
Correct voltage load.
Tighten the terminal screws.
Correct the program.
Attach the connector securely.
Reduce the noise level.
Attach a surge killer.
Use a shielded cable.
Pro-Control Ver.3.0 User Manual
Chapter 7 - I/O Drivers
■ Error Codes
I/O errors are Read/Write errors. When I/O errors occur, the Controller writes an
error code to the #IOStatus variable. The Logic program continues to operate. The
following explanation of possible error causes and solutions for when the DIO unit
is attached to the GLC.
◆ Setting Errors
Error Code
501
Contents
Internal variable error allocated to I/O
terminal.
506
External variable error allocated to I/O
terminal.
Output variable error allocated to I/O
terminal.
Discrete variable error allocated to analog
terminal.
Integer variable error allocated to discrete
terminal.
Variable type not supported by driver.
801
Terminal numbers are duplicated.
802
Multiple modules are used.
803
Module number has exceeded 1.
804
Unit number starts from 1.
502
503
504
505
Pro-Control Ver.3.0 User Manual
Solution
Reset the variable used.
Correct the variable type.
2 or more terminals are using the
same terminal number, possibly
causing transfer failure.
Download the WLL file again.
2 DIO units are using the same
module number. Reset these
numbers so they do not overlap.
Set a module number from 0 to 1.
Set the DIO unit nearest the GLC
rear face to "0".
7-7
Chapter 7 - I/O Drivers
◆ Initialization Errors
Error Code
821
822
823
Contents
Solution
The number of DIO units registered in the
Correct the number of
WLL file and the actual number of DIO units
connected DIO units.
connected is different.
No module "0".
No DIO unit is near the GLC unit.
Confirm that the DIO unit is
securely connected to the GLC
and correct the DIO driver
settings.
Analog unit setting error
Check to see if communication
line is disconnected, power is
not supplied to the I/O unit, or
the I/O unit is malfunction.
◆ Run Time Errors
Error Code
840
841
842
843
Contents
Solution
Module "0" Read-out data is incorrect. After
2 successive Read attempts, the GLC has Lengthen the time of the Input
detected that value of the DIO unit nearest signal 's ON period.
the GLC's rear face is incorrect.
Module "1" Read-out data is incorrect. After
2 successive Read attempts, the GLC has
detected that value of the DIO unit nearest
the GLC's rear face is incorrect.
Module 0 output data is incorrect. Incorrect
output data was detected by an internal
loopback check from the DIO unit near the
GLC.
Module 1 output data is incorrect. Incorrect
output data was detected by an internal
loopback check from the DIO unit near the
GLC.
Lengthen the time of the Input
signal 's ON period.
Ensure that there are no noiserelated or other ill effects.
Ensure that there are no noiserelated or other ill effects.
◆ Internal Errors
Error Code
850
Driver Error.
…
A major system error has occurred.
864
7-8
Contents
Solution
Record the Error Number and
contact your local Digital dealer
for service.
Pro-Control Ver.3.0 User Manual
Chapter 7 - I/O Drivers
7.3
Flex Network I/F Driver
Here, the GLC's OFFLINE mode Flex Network driver menus are described.
Prior to executing any Flex Network Driver menu instructions, be sure to download the Flex Network driver from Pro-Control Editor software in your PC. Also,
be sure to confirm that the Flex Network I/F unit has been already been attached
to the back of your GLC unit.
To change to the GLC’s OFFLNE mode,
Your GLC unit’s Users Manual (sold separately).
7.3.1
Flex Network I/F Unit Self-Diagnosis
Select [FLEX NETWORK DRIVER] in the GLC OFFLINE mode’s [CONTROLLER MENU]. The following [FLEX NETWORK DRIVER MENU] window will
then appear.
<To select communication check>
GLC 100 Series
GLC 300/GLC 2400 Series
When the Logic Program changes from the RUN condition to either
the OFFLINE mode or RESET, The GLC or the I/O signal will be performed as shown below, regardless of the Output Hold Setting. Be
sure to consider this when changing to either the OFFLINE or RESET modes.
GLC
Condition
Analog Output
I/O Signal
No Analog Output
RUN
OFFLINE
RUN
Output from Logic
Program
No Analog Output
Output from Logic
Program
Please remember that the Reset mode's I/O signal OFF timing is not
fixed.
Pro-Control Ver.3.0 User Manual
7-9
Chapter 7 - I/O Drivers
Here, the number of the Flex Network I/O units that have been connected to the Flex
Network I/F units, as well as the S-Nos. that have been connected to each I/O unit
will be checked.
Via the communication check operation, the following items can be checked:
- Currently connected I/O units
- Currently malfunctioning I/O units (connection section)
<Communication Check Procedure>
(1) Press the [COMMUNICATION CHECK] button, and the [COMMUNICATION
CHECK SETTINGS] window will appear.
(2) Set [Communication Speed] to either [6] or [12]. Setting the communication
speed faster may cause the unit to be easily influenced by noise. Normally, set
this speed to 6Mbps.
GLC 100 Series
GLC 300 Series/GLC 2400
Press the [NEXT] button, and the [COMMUNICATION CHECK] window will
appear.
GLC 100 Series
GLC 300 Series/GLC 2400
Press the [START] button to begin the communication check.
The currently connected I/O unit's S-No. will be displayed in reverse color.
To return to the [FLEX NETWORK MENU] window, press the [RET] button.
7-10
Pro-Control Ver.3.0 User Manual
Chapter 7 - I/O Drivers
<To select Error S-No. Display>
When a code No. 841 error occurs while the logic program is being executed, the SNos. of the I/O units that have been excluded from the communication circuit and
malfunctioning I/O units will be checked.
7.4 Flex Network I/F Unit Troubleshooting.
Touch the [CONTROLLER MENU] window's [FLEX NETWORK DRIVER] selection, and the [FLEX NETWORK DRIVER MENU] will appear.
Press the [FLEX NETWORK DRIVER MENU]'s [ERROR S-NO. DISPLAY], the
[ERROR S-NO. DISPLAY] window will appear and the error check will begin.
The currently connected I/O unit's S-No.s will appear, and the I/O unit S-No. with
the error will be shown in reverse color.
GLC 100 Series
Pro-Control Ver.3.0 User Manual
GLC 300 Series/GLC 2400
7-11
Chapter 7 - I/O Drivers
7.3.2
I/O Monitor (I/O Connection Check)
(1) Select the [CONTROLLER MENU] window's [FLEX NETWORK DRIVER],
and the [FLEX NETWORK DRIVER MENU] will appear.
(2) Select the [FLEX NETWORK DRIVER MENU] window's [I/O MONITOR], and
the following [I/O MONITOR SETUP] window will appear.
◆ I/O Monitor Settings (when [VARIABLE TYPE] is set to [DISCRETE]):
GLC 100 Series
GLC 300/GLC 2400 Series
• Communication speed
Set [TRANSFER SPEED] to either [6] or [12] mbps. Setting the communication speed faster may cause the unit to be easily influenced by noise. Normally,
set this speed to 6Mbps.
• S-No. (Station no.)
Select [S-No.] from 1 to 63.
• Model
Select from “FN-X16TS”, “FN-XY08TS”, “FN-Y08RL”, “FN-Y16SK”, “FNY16SC”, “FN-AD04AH”, and “FN-DA04AH”.
• Variable type
Select [VARIABLE TYPE] from [DISCRETE] and [WORD].
* Only the [Word] setting can be used for “FN-AD04AH” and “FN-DA04AH”.
(3) Press the [NEXT] button, and the following [I/O MONITOR] window will
appear.
This window's items will vary depending on the selected [VARIABLE TYPE].
7-12
Pro-Control Ver.3.0 User Manual
Chapter 7 - I/O Drivers
<FN-X16TS/FN-XY08TS/FN-Y08RL/FN-Y16SK/FN-Y16SC>
◆ I/O Monitor (when [VARIABLE TYPE] is set to [DISCRETE]):
The INPUT area terminal numbers where data has been entered will appear in
reverse color. Touching an Output area terminal number will output the data and
reverse that number’s color.
GLC 100 Series
GLC 300/GLC 2400 Series
The windows shown above display the maximum input/output points of an I/O
unit in the Flex Network system. The number of input/output points will vary
depending on each I/O unit model. Use each unit within the range of its I/O
points, beginning from "0".
When using an input-only I/O unit, use only input area of the window, and when
using an output-only I/O unit, use only the output area. When using a unit with
inputs and outputs, use both the input and output area.
◆ I/O Monitor (when the [VARIABLE TYPE] is set to [WORD]):
The input data will be displayed in the input section, if any. Enter the necessary
data in the output section via the ten-key pad. When using the GLC100 Series,
touch the data display position, and a ten-keypad will appear. After entering data,
press the [OUT] button to output the data. Data will be displayed in the decimal
system.
GLC 100 Series
Pro-Control Ver.3.0 User Manual
GLC 300/GLC 2400 Series
7-13
Chapter 7 - I/O Drivers
Enter data within the output range, according to the number of the
I/O points in each I/O unit.
I/O Points
8
16
I/O Range
0 to 255
0 to 65535
Data will be output to the I/O unit for the number of I/O points
according to the [MODEL] selected on the [I/O MONITOR SETUP]
window.
<Output Example>
If data that cannot be expressed in the 8-bit system is entered in
an 8-point output I/O unit, excess data will be ignored.
15
I/O Monitor
0
0
0
0
0
0
0
1
8 Point
Output Unit
1
0
0
0
0
0
1
0 Entering “386”
1
0
0
0
0
0
1
0
Outputs “130”
<For FN-AD04AH/FN-DA04AH>
◆ I/O Monitor (Channel setting):
The system switches successively throughsuccessivelythrough the selectable
settings when the channel area is pressed.
GLC 100 Series
GLC300/GLC2400 Series
When the [NEXT] button is pressed, the system switches to the next [I/O MONITOR]
screen. The screen is different for FN-AD04AH and FN-DA04AH.
7-14
Pro-Control Ver.3.0 User Manual
Chapter 7 - I/O Drivers
<For FN-AD04AH>
◆ I/O Monitor
This displays input data.
GLC 100 Series
GLC 300/GLC 2400 Series
Pressing the [RET(URN)] button returns control to the [I/O MONITOR] screen.
A/D Conversion Table
Input range setting
0 ~ 5V
1 ~ 5V
0 ~ 10V
-5 ~ 5V
-10 ~ 10V
0 ~ 20mA
4 ~ 20mA
Input range
0 ~ 4095
0 ~ 4095
0 ~ 4095
-2048 ~ 2047
-2048 ~ 2047
0 ~ 4095
0 ~ 4095
Settings other than maximum/minimum, A/D conversion sample count and the file
type operate with the set content stored on the I/O unit side. To change the set content
saved on the I/O unit side, change the set content from the Pro-Control Editor, and
download the logic program to the GLC. After that, run the logic program, and the
settings will become effective.
Pro-Control Ver.3.0 User Manual
7-15
Chapter 7 - I/O Drivers
<For FN-DA04AH>
◆ I/O Monitor
Enter data with the keypad. With the GLC100 unit, touching the screen’s data
display will call up the keypad. After entering all data, push the [OUT] button to
output the data. All data is displayed in decimal’.
GLC 100 Series
GLC 300/GLC 2400 Series
• Touch the up and down arrow to increase/decrease the range value.
Each time the value is changed, the new value is output to the I/O
unit.
• Pressing the [RET(URN)] button will clear the current data, even if
the output hold setting in the I/O unit is ON.
D/A Conversion Table
Input range setting
0 ~ 5V
1 ~ 5V
0 ~ 10V
-5 ~ 5V
-10 ~ 10V
0 ~ 20mA
4 ~ 20mA
7-16
Input range
0 ~ 4095
0 ~ 4095
0 ~ 4095
-2048 ~ 2047
-2048 ~ 2047
0 ~ 4095
0 ~ 4095
Pro-Control Ver.3.0 User Manual
Chapter 7 - I/O Drivers
7.3.3
Troubleshooting
The following explanation explains possible problems that may occur when using
the Flex Network I/F unit, and their solutions.
■ Flex Network I/F unit I/O Errors
For a detailed explanation of Uniwire unit I/O errors, please refer to the Flex Network unit’s Users Manual.
■ Error Codes
I/O errors include those occurring during writing and reading. When one of these
errors occurs, the controller writes an error code to #IOStatus.
◆ Setting Errors
Error Code
501
502
503
504
505
506
801
802
803
804
Contents
Internal variable error mapped to I/O
terminal.
Solution
Reset the variable used.
External variable error mapped to I/O
terminal.
Output variable error mapped to I/O
terminal.
Discrete variable error mapped to
analog terminal.
Integer variable error mapped to
discrete terminal.
Variable type not supported by driver.
Correct the variable type.
2 or more terminals are using the same
terminal number, possible causing
Terminal numbers are duplicated.
transfer failure. Download the WLL file
again.
2 or more areas are using the same
Multiple S-No. exist.
area number, possibly causing transfer
failure. Download the WLL file again.
When the number of transfer points is
128, use 0 to 7F for the Input Area.
S-No. is outside of accepted range.
When 256 points are used, use 0 to FF
for this area. Check that all settings are
within their respective ranges.
Two or more I/O units are using the
same S-No. The analog unit has SS-No. range overlap at the analog unit.
Nos. for 4 stations. Reset so there is no
S-No. overlap.
Pro-Control Ver.3.0 User Manual
7-17
Chapter 7 - I/O Drivers
◆ Initialization Errors
Error Code
Contents
Solution
821
There is no Flex Network unit attached.
822
Intial Error.
Initialization failed to synchronize the Flex
Network I/F unit and the unit's driver.
823
Analog unit setting error
The ID number read from the Flex
Network unit is not correct. Occurs
when the unit is not attached.
A hardware error may have occurred.
For details, refer to the Flex Network
unit's Users Manual.
Check to see if communication line is
disconnected, power is not supplied to
the I/O unit, or the I/O unit is
malfunctioning.
◆ Run Time Errors
Error Code
841
842
Contents
There is an I/O unit error. (loose
connector, malfunction, etc.)
Disconnected output signal line of sensor
for input to the analog unit (A/D conversion
unit)
Solution
Check all related wiring.
Flex Network User Guide
This is likely due to disconnection in the
output signal line. Check the output
signal line of the sensor.
◆ Internal Errors
Error Code
850
…
859
7-18
Contents
Driver Error.
A major system error has occurred.
Solution
Reset the GLC. If an error code still
appears, try to identify if the error is due to
the GLC itself, or to a related/connected
device. Write down the error code and refer
to your GLC Users Manual.
Pro-Control Ver.3.0 User Manual
8
8.1
Error Messages
Error Message List
This chapter explains the error messages that can appear on the GLC unit. The error
messages explained here are those related to the Pro-Control program only.
For further information concerning GLC error messages, refer to
GLC Series User’s Manual (Sold separately)
Error Message
"Invalid ladder file"
"Fatal Error:
Drive check Failed"
"Global Data Area
Too Small"
"Can't Set Priority"
Cause
The GLC's WLL file is
damaged.
Solution
Download another copy of the
WLL file from the Pro-Control
Editor.
Check that the I/O driver
The GLC's current I/O driver is designated in the WLL file and
incorrect.
the driver installed in the GLC
are the same.
Download the WLL file again. If
The dowloaded file's data may this does not fix the problem,
be damaged.
contact your local Proface
dealer.
The GLC's system file is
Check the the GP Type set in
incorrect. The file may have
the original screen creation
been damaged during
software file is "GLC" and redownloading.
transmit the file.
Write down the error message
A fatal error has occurred in the
details and consult your local
"Exception nnn:[mmm:ooo]"
lader logic program.
Proface dealer.
"Watchdog Error"
Pro-Control Ver. 3.0 User Manual
Reset the Watchdog time so
that it is longer than the
Constant Scan Time. If doing
The Constant Scan T ime is
so exceeds the Watchdog
longer than the Watchdog time.
Timer's limit, then the Constant
Scan Time (program) should
be changed.
8-1
Chapter 8 - Errors
Error M essage
"Bad Var: xxx"
"Bad Array: xxx"
"Bad T ype xxx"
"Unknown register type"
"Register is missing"
"S100 file index is
out of range"
"Too many entries
in the S100 file"
"S100 file is missing"
"Over Compile count MAX"
"Logic Program is Empty"
"No backup logic
program in FEPROM"
"SRAM checksum error"
"SRAM data broken"
"Exception 65532 [xxxx : xxx] "
"Exception 65533 [xxxx : xxx] "
"Exception 65534 [xxxx : xxx] "
"Exception 65535 [xxxx : xxx] "
8-2
Cause
Solution
Unable to find variable "XXX".
Try either of the following:
Either the WLL file has not been
-Download the WLL file again.
downloaded, or the screen creation -Download the original screen
software is using a variable that does creation software's project file again.
not exist in the WLL file.
The number of elements used in the
screen creation software's array
variables and those used in the WLL
file's array variables are different.
The GLC variable "XXX"'s type is
different from the screen creation
software's variable type.
After re-importing the WLL file's data to
the screen creation software, download
the WLL file and the project file again to
the GLC.
Either download the WLL file again, or
re-import the variables to the project file,
then download the project file to the GLC
again.
This variable type does not exist.
Cannot find variable used for Writing.
Cannot find variable used for Reading. After re-importing the variables to the
screen creation software's project file,
Too many variables are being used. download both the WLL and the project
file to the GLC again.
Limit is 2048.
Cannot find S100 (variable storage
file).
Too many Tags or Parts are being
used.
Reduce the number of Tags or Parts and
then download the project to the GLC
again.
WLL file has not been downloaded to Download WLL file again from ProControl Editor.
the GLC, or the WLL file in the GLC
(FEPROM) is damaged. (GLC2400
only)
WLL file has not been copied to
Copy WLL file to FEPROM using GLC
FEPROM after online editing. This
offline menu.
message is a warning message.
(GLC2400 only)
WLL file stored in SRAM is damaged. Download WLL file again from Pro(GLC2400 only)
Control Editor.
The battery for SRAM back-up may
Execute from the WLL file in FEPROM.
have run out. T his message is a
Using online edit, check that no changes
warning message. (GLC2400 only)
have been made in the logic program.
GLC heap memory is insufficient.
Setup the GLC unit again with GPMemory for storing programs and
Pro/PB III after reducing the logic
variables is sufficient, however logic program size, or the number of variables
program memory is insufficient.
and labels. Also reduce the number of
array variable elements, or shorten the
name of variables and labels.
Pro-Control Ver. 3.0 User Manual
Chapter 8 - Errors
8.2
Error Codes
The following table shows about the error of #FaultCode written in when errors
occur.
Error Code
Level
0
Normal
1
Minor
2
Major
3
Major
4
5
6
7
8
Major
Major
Major
Major
9
Major
10
11
12
13
14
Minor
-
Pro-Control Ver. 3.0 User Manual
Cause
No errors
The calculation result, or the result of the conversion
of a Real variable to an Integer variable has resulted in
an overflow.
A reference was used for an area outside the array's
range.
A reference was used for a bit outside the Integer's (32
bit) range
The stack has overflowed.
Incorrect command code is being used.
Reserved for System.
The Scan time is now longer than the Watchdog time.
Reserved for System.
Software Error.
Depending on type of problem, system may need to be
restarted.
Reserved for System.
Reserved for System.
BCD/BIN Conversion Error
Reserved for System.
Reserved for System.
8-3
Chapter 8 - Errors
8.3
Program Errors
The following table explains the Pro-Control Editor’s program operation errors.
Error Type
Solution
Control Memory power is
cut
Battery Alarm
Exchange Unit
Keep Area data is not
preserved
Memory Alarm
Exchange Unit
Program transfer mistake.
Keep area in memory should store the
program. T he program has not been
transferred to the Execute area.
Use Pro-Control Editor to
restart the control feature.
refer to the
Pro-Control Editor Operation
manual
Program Malfunction
Soon after entering RUN
mode unit changes to
STOP mode
Pro-Control Editor cannot
enter Monitoring mode
WLL files cannot be
downloaded from ProControl Editor
The project (.prw) file
cannot be downloaded from
the screen creation
software.
8-4
Possible Problem
When output data performs RUN/ST OP
switchover, Keep Clear control feature Turn off the control feature.
becomes enabled.
Modify the program.
Check the contents of the
A Command Execution Alarm has
#FaultCode data.
occurred. Or, a major fault has
Also check if the System
occurred.
variable #Command has been
written to.
The data transfer cable used to send
data from the screen creation software
to the GLC unit may be loose or
disconnected.
Also, the PC or GLC's power may have
dropped, causing excessive noise and
possibly destroying the content
Please contact your local GLC
distributor for assistance.
Pro-Control Ver. 3.0 User Manual
Index
Index
A
Accessing a Discrete Array 3-3
Accessing a Real Array 3-3
Accessing an Integer/Integer Array 3-3
APPLICABLE PRODUCTS 2
Applicable Software 3
Applicable Units 3
Arithmetic Operation Commands 5-3
B
Bit Operation Commands 5-1
Bus Conversion Unit 1-5
C
Constant Scan Time Mode 2-4
Controller’s current condition 4-1
Convert Commands 5-4
copyrights 1
D
DIO Unit 7-2
DIO Unit Input Errors 7-5
DIO Unit Output Errors 7-5
Direct Access Method 6-3, 6-5
Direct PLC Connection 1-3
Discrete 3-1
Discrete Variables 3-1
Disk Media Usage Precautions 7
E
Error Codes 7-7, 7-9, 8-3
Error Message List 8-1
F
First Scan 2-3
foreign regulations 1
G
General Information Symbols and Terms 7
GLC and PLC Data Sharing 6-5
GLC Series Expansion Units 1-5
GLC Users Manual 1-1
GP Screen Data Transfer Cable 1-5
GP-PRO/PBIII for Windows Operation Manual 1-1
I
I/O Drivers 7-1
I/O error 7-1
ID (Terminal numbers) data 7-9
Initial Processing 2-3
Initial Settings 1-3
Initialization Errors 7-7, 7-10
Pro-Control Ver.3.0 User Manual
installation information 1-1
Integer 3-1
Integer Variables 3-1
intellectual properties 1
Internal Errors 7-7, 7-10
L
L/S Area Refresh Feature 6-1
limitations 3-3
Loading 2-3
local distributor 7
Logic Program 1-1
logic program development 1-1
Loopback Cable Creation 7-3
LS Area 1-7
LS Area Refresh Cautions 6-6
M
Mathematical Commands 5-3
Memory Link Method 6-3, 6-4
Memory Link method 1-5
Mitsubishi Electric 1-1, 1-3, 1-5, 2-4
Movement Commands 5-3
O
OFFLINE menu 7-9
P
peripheral device 1-3
PLC specifications 1-7
PLC-GP Connection 1-1, 4-2
PLC’s Data Read Area 1-7
PREFACE 1, 7
Preparation 1-1
Pro-Control Editor Operation Manual 1-1
Pro-Control Editor Ver 1.5 3
Program Errors 8-4
R
Readme.txt 1
Real 3-1
Real Variables 3-1
registered trademarks 2
RS-422 ConnectorTerminal Block 1-5
Run Time Errors 7-7, 7-10
Running 2-3
S
Safety Symbols and Terms 7
Scan Time Adjustment 2-4
Setting Errors 7-7, 7-9
i
Index
SIZING button 7-9
Stand-Alone System 1-3
STOP 2-3
System Variable List 4-1
T
Temporary Stop 2-3
Timer and Counter Commands 5-3
Tool connector 1-5
TRADEMARK RIGHTS 3
U
Uniwire I/F unit I/O Errors 7-9
V
Variable Names 3-3
variable storage area 3-1
ii
Pro-Control Ver.3.0 User Manual