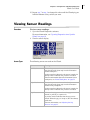
1
Labware Stacker and Rack-Handling User Guide Original Instructions s1 Notices © Agilent Technologies, Inc. 2011 Warranty No part of this manual may be reproduced in any form or by any means (including electronic storage and retrieval or translation into a foreign language) without prior agreement and written consent from Agilent Technologies, Inc. as governed by United States and international copyright laws. The material contained in this document is provided “as is,” and is subject to being changed, without notice, in future editions. Further, to the maximum extent permitted by applicable law, Agilent disclaims all warranties, either express or implied, with regard to this manual and any information contained herein, including but not limited to the implied warranties of merchantability and fitness for a particular purpose. Agilent shall not be liable for errors or for incidental or consequential damages in connection with the furnishing, use, or performance of this document or of any information contained herein. Should Agilent and the user have a separate written agreement with warranty terms covering the material in this document that conflict with these terms, the warranty terms in the separate agreement shall control. User Guide Part Number G5407-90001 Edition Revision 01, December 2011 Updates: title page, Safety Notices, compliance declarations, general safety warnings, and ActiveX. Revision 00, November 2003 Contact Information Agilent Technologies Inc. Automation Solutions 5301 Stevens Creek Blvd. Santa Clara, CA 95051 USA Technical Support: 1.800.979.4811 or +1.408.345.8011 [email protected] Customer Service: 1.866.428.9811 or +1.408.345.8356 [email protected] European Service: +44 (0)1763208826 [email protected] Documentation feedback: [email protected] Web: www.agilent.com/lifesciences/ automation Acknowledgements Microsoft® and Windows® are either registered trademarks or trademarks of the Microsoft Corporation in the United States and other countries. Technology Licenses The hardware and/or software described in this document are furnished under a license and may be used or copied only in accordance with the terms of such license. Restricted Rights Legend If software is for use in the performance of a U.S. Government prime contract or subcontract, Software is delivered and licensed as “Commercial computer software” as defined in DFAR 252.227-7014 (June 1995), or as a “commercial item” as defined in FAR 2.101(a) or as “Restricted computer software” as defined in FAR 52.227-19 (June 1987) or any equivalent agency regulation or contract clause. Use, duplication or disclosure of Software is subject to Agilent Technologies’ standard commercial license terms, and non-DOD Departments and Agencies of the U.S. Government will receive no greater than Restricted Rights as defined in FAR 52.22719(c)(1-2) (June 1987). U.S. Government users will receive no greater than Limited Rights as defined in FAR 52.227-14 (June1987) or DFAR 252.227-7015 (b)(2) (November 1995), as applicable in any technical data. Safety Notices A WARNING or !!INJURY HAZARD!! notice denotes a hazard. It calls attention to an operating procedure, practice, or the like that, if not correctly performed or adhered to, could result in personal injury or death. Do not proceed beyond a WARNING notice until the indicated conditions are fully understood and met. A CAUTION or !!DAMAGE HAZARD!! notice denotes a hazard. It calls attention to an operating procedure, practice, or the like that, if not correctly performed or adhered to, could result in damage to the product or loss of important data. Do not proceed beyond a CAUTION notice until the indicated conditions are fully understood and met. Agilent Technologies Letter to our Customers Dear Customer, The Agilent Technologies acquisition of Velocity11 resulted in the following changes: • Creation of Agilent Technologies Automation Solutions, formerly Velocity11 • Renaming of some Velocity11 products • New Customer Service and Technical Support contact information • New website address for product information Please make a note of the following changes as they impact this user guide. Velocity11 product name changes Velocity11 product name Changes to … Access2 Automated Microplate Loader Automated Centrifuge Loader Element Automation System BioCel 900 System IWorks Device Driver Programming Interface VWorks DCL Interface PlatePierce Seal Piercing Station Microplate Seal Piercer VCode Barcode Print and Apply Station Microplate Barcode Labeler Velocity11 Robot 3- Axis Robot VHooks Integration Interface VWorks Hooks Interface VPrep Pipetting System Vertical Pipetting Station VSpin Microplate Centrifuge Microplate Centrifuge VStack Labware Stacker Labware Stacker New contact information Documentation feedback: [email protected] Technical Support: 1.800.979.4811 or +1.408.345.8011 [email protected] Customer Service: 1.866.428.9811 or +1.408.345.8356 [email protected] European Service: +44 (0) 1763208826 [email protected] Web: http://www.agilent.com Agilent Technologies, Inc., Automation Solutions, 5301 Stevens Creek Blvd., Santa Clara, CA 95051 USA Labware Rack Handling Guide This guide explains how to handle the labware racks safely. The topics are: Figure Three models of labware racks Standard Top-load Front-load • About the labware racks • Carrying the racks • Lifting the racks • Loading labware into the racks • Accessing product user documentation • Contacting Velocity11 About the labware racks The BenchCel® Microplate Handling Workstation and the VStack® Labware Stacker use labware racks to store the stacks of labware (microplates, tipboxes, and tube racks) that are processed during a protocol run. Figure BenchCel Workstation with front-load labware racks All the rack models have the following basic parts: • Carrying handle. The standard rack has a polished top bar that can be used as a carrying handle. The top- load and front- load racks have fold- down carrying handles. Rack • Tabs. A pair of vertical tabs are located at the bottom sides of the rack. The tabs insert into slots on the device when you mount the rack. • Stacker grippers. A gripper is located on the interior bottom of each tab. The pair of grippers hold a microplate during the labware loading, unloading, downstacking, and upstacking processes. A clamp in the device opens and closes the grippers. Figure Stacker head Standard rack containing labware Handle Tab A stacker gripper (hidden) is located on interior of each tab. Labware For a description of the BenchCel device or VStack device, see the BenchCel User Guide or VStack User Guide. The labware racks are available in three models: standard rack, top- load rack, and front- load rack. 22825.00.00.00_RackHandlingGuide_June08 Copyright© 2008 Velocity11, An Agilent Technologies Company All rights reserved. Carrying the racks Figure Lifting a standard rack WARNING Do not hold a rack by the interior edges. The interior edges can have sharp surfaces that can cause cuts if handled improperly. CAUTION A rack that is fully loaded with labware can be heavy. Grasp the rack handle firmly to prevent the rack from slipping or tilting. Interior edges can be sharp To carry a rack: Firmly grasp the rack by the handle. Figure Carrying a front-load rack Handle Loading labware into the racks Interior edges can be sharp Before loading the labware into a rack: • Position the rack so that the opening is facing you. • Determine how the microplates should be oriented in the rack. For example, if the BenchCel orientation- sensing feature is enabled, make sure the A1 wells are oriented in the rack as specified. Loading labware in standard and top-load racks IMPORTANT See your BenchCel User Guide or VStack User Guide for the details on how to release a rack for removal or to prepare for loading a mounted rack. Lifting the racks To load labware into a standard or top-load rack: 1 If possible, remove the rack from the device, and place the rack on a flat, level surface. Make sure to use the proper lifting technique when mounting a rack on a device or removing a rack from a device. 2 Using both hands, carefully slide a small stack of WARNING Avoid touching the interior edges of a rack when lifting the rack. The interior edges can have sharp surfaces. labware down through the top of the rack. You can use one hand to support underneath the labware stack, while the other hand holds the top of the labware to keep it level. See the following figure. IMPORTANT See your BenchCel User Guide or VStack User Guide for the procedure to mount a rack on the device or to release a rack from the device. WARNING Use care to avoid sliding your hand on the interior edges in the rack. The edges can have sharp surfaces. To lift a rack: Use both hands to grasp the rack securely around the four corners near the base, as the following figure shows. 2 Figure Loading labware in a front-load rack Loading a standard rack The doors on the front- load rack provide easy access for loading labware into the front of a rack that is mounted on a device. Figure Door mechanism on the front-load rack Interior edges can be sharp Door Door Thumb tab Door-release button Stacker gripper (hidden) Stacker gripper To load labware in a front-load rack: IMPORTANT Before you attempt to load the labware in a mounted rack, ensure the device is ready for loading. For example, the clamps in the BenchCel stacker head must be closed (extended). See your device user guide for details. 3 (Standard racks only) When you reach the bottom of the open slot, transfer your hand positions so that you continue supporting the labware through the bottom slot. Figure 1 On each side of the rack, slide the Door- release Supporting labware through the bottom slot (black) buttons forward, while pushing outward on the thumb tabs. The rack doors open. Figure Opening the front-load rack 2 Place the labware directly through the open rack doors so that the bottom labware rests on the rack stacker grippers. Ensure the labware is level and securely in the rack. 3 To close the doors, press the thumb tabs inward until the doors snap shut. Stacker grippers on tab interior (hidden) To unload labware from a front-load rack: IMPORTANT Before you attempt to unload the labware from a mounted rack, ensure the device is ready for unloading. For details, see your device user guide. 4 Ensure that the bottom labware in the stack rests on the rack stacker grippers. To unload labware from a standard or top-load rack: With your hands positioned as shown in the previous figures, carefully slide the labware in small stacks up and out of the top of the rack. 1 To open the rack doors, slide the black Door- release buttons forward on each side of the rack, while pressing outward on the thumb tabs. 2 Carefully, lift the labware out through the front of the rack. 3 Accessing product user documentation Contacting Velocity11 Velocity11 product user documentation is available in the following formats: • Technical Support: 1.800.979.4811 or +1.650.846.6611 • Online help available within the software • Email: [email protected] • PDF files on the software CD • Printed books • Customer Service: 1.866.428.9811 or +1.650.846.6601 • Web: http://www.velocity11.com You can also search the online help or download the latest version of any PDF file from the Velocity11 website at: http://www.velocity11.com/support/knowledge_base Velocity11, an Agilent Technologies Company 3565 Haven Avenue, Menlo Park, CA 94025 USA +1.650.846.6600 Contents Chapter 1. Introduction About this Guide . . . . . . . . . . . . . . . . . . . . . . . . . . . . . . . . . . . . . . . . . . . . Computer and Laboratory Requirements . . . . . . . . . . . . . . . . . . . . . . . . . . . General VStack Hazard Warnings . . . . . . . . . . . . . . . . . . . . . . . . . . . . . . . . VStack Overview . . . . . . . . . . . . . . . . . . . . . . . . . . . . . . . . . . . . . . . . . . . . Chapter 2. Installation Unpacking the VStack . . . . . . . . . . . . . . . . . . . . . . . . . . . . . . . . . . . . . . . VStack Parts . . . . . . . . . . . . . . . . . . . . . . . . . . . . . . . . . . . . . . . . . . . . . . Mounting the VStack . . . . . . . . . . . . . . . . . . . . . . . . . . . . . . . . . . . . . . . . Connecting To Power and Air . . . . . . . . . . . . . . . . . . . . . . . . . . . . . . . . . . About VStack Networking Communications . . . . . . . . . . . . . . . . . . . . . . . . Installing the Network Card . . . . . . . . . . . . . . . . . . . . . . . . . . . . . . . . . . . Installing the DHCP Server . . . . . . . . . . . . . . . . . . . . . . . . . . . . . . . . . . . . Connecting the VStack To the Network . . . . . . . . . . . . . . . . . . . . . . . . . . . Turning On the VStack . . . . . . . . . . . . . . . . . . . . . . . . . . . . . . . . . . . . . . . Installing Software . . . . . . . . . . . . . . . . . . . . . . . . . . . . . . . . . . . . . . . . . . Loading and Releasing a Rack . . . . . . . . . . . . . . . . . . . . . . . . . . . . . . . . . Placing a Plate . . . . . . . . . . . . . . . . . . . . . . . . . . . . . . . . . . . . . . . . . . . . Verifying Network Communication . . . . . . . . . . . . . . . . . . . . . . . . . . . . . . . Identifying VStacks . . . . . . . . . . . . . . . . . . . . . . . . . . . . . . . . . . . . . . . . . Changing the Device Id . . . . . . . . . . . . . . . . . . . . . . . . . . . . . . . . . . . . . . Deleting Old VStacks . . . . . . . . . . . . . . . . . . . . . . . . . . . . . . . . . . . . . . . . Chapter 3. 2 4 5 6 10 12 15 17 18 20 22 24 25 25 28 30 31 32 33 34 Configuration and Manual Operation Opening Diagnostics for a Specific VStack. . . . . . . . . . . . . . . . . . . . . . . . . Selecting a Plate Type . . . . . . . . . . . . . . . . . . . . . . . . . . . . . . . . . . . . . . . Adding a Plate Type To the Labware Database . . . . . . . . . . . . . . . . . . . . . . Testing Plate Handling . . . . . . . . . . . . . . . . . . . . . . . . . . . . . . . . . . . . . . . Adjusting the Grip Pressure . . . . . . . . . . . . . . . . . . . . . . . . . . . . . . . . . . . Adjusting the Plate Specific Grip Offset . . . . . . . . . . . . . . . . . . . . . . . . . . . Viewing Sensor Readings . . . . . . . . . . . . . . . . . . . . . . . . . . . . . . . . . . . . . Configuring Plate Orientation Checking . . . . . . . . . . . . . . . . . . . . . . . . . . . Operating the VStack Manually . . . . . . . . . . . . . . . . . . . . . . . . . . . . . . . . . 36 38 39 40 41 42 43 45 52 Displaying a Message. . . . . . . . . . . . . . . . . . . . . . . . . . . . . . . . . . . . . . . . About Teachpoints . . . . . . . . . . . . . . . . . . . . . . . . . . . . . . . . . . . . . . . . . . Changing the Presentation Teachpoint . . . . . . . . . . . . . . . . . . . . . . . . . . . . About the Motor Page . . . . . . . . . . . . . . . . . . . . . . . . . . . . . . . . . . . . . . . . Chapter 4. 54 54 56 57 Maintenance and Troubleshooting VStack Error Messages. . . . . . . . . . . . . . . . . . . . . . . . . . . . . . . . . . . . . . . 60 Maintenance Schedule . . . . . . . . . . . . . . . . . . . . . . . . . . . . . . . . . . . . . . . 66 Chapter 5. ActiveX Commands About VStack ActiveX . . . . . . . . . . . . . . . . . . . . . . . . . . . . . . . . . . . . . . . . 69 Introduction 1 This chapter introduces the VStack®, lists the system requirements, gives general safety information and provides an important overview of the product. 2 Chapter 1: Introduction VStack User Guide About this Guide Intended Audience This guide is intended to be read by: ❑ Everyone who uses the VStack ❑ Lab personnel who install and configure the VStack ❑ Developers who integrate the VStack into third-party systems VStack Software Version This version of the VStack User Guide guide is only for use with VStack ActiveX software version 4.0. You can find the version number after installation. To find the version number of your VStack ActiveX software: 1. In your Windows® operating system, search for the file named VStackBioNet.ocx. 2. Right-click the file and select Properties. 3. Click the Version tab. The version number is displayed. You only need to consider the first two parts of the version number. Chapter 1: Introduction VStack User Guide Lab Automation System Documentation The VStack is never used as a stand-alone device; it is always incorporated into a larger lab automation system that requires its own documentation. If your lab automation platform is the Velocity11® BioCel®, read this guide in combination with the BioCel User Guide. If your lab automation platform is a third-party system, read this guide in combination with the documentation that is available for your system. Other Documentation In addition to this guide, read Getting Started and parts of the Database and Security User Guide. Getting Started gives Velocity11 support information, explains how to use the online help versions of Velocity11 documentation and provides general safety guidelines. The Database and Security User Guide gives information about the labware editor. Content Summary This guide covers: ❑ ❑ ❑ ❑ ❑ How to install the VStack hardware How to connect the VStack to the network How to install and use VStack ActiveX software Maintenance and troubleshooting ActiveX commands, which allow control of the VStack by third-party systems 3 4 Chapter 1: Introduction VStack User Guide Computer and Laboratory Requirements Computer Requirements Laboratory Requirements ❑ ❑ ❑ ❑ PC running Windows 2000 or XP At least a Pentium 166 processor 32 MB RAM 10 BaseT Ethernet port ❑ Bench space: 8.5 inches x 8.0 inches x 7.5 inches (21.60 cm x 20.30 cm x 19.05 cm) (L x W x H) ❑ Electrical supply: 110–240 VAC, 50 –60 Hz ❑ Air supply: 50–80 psi at <1 cfm (minimum 15 psi) !! DAMAGE HAZARD !! Operating the VStack at the wrong voltage may seriously damage the instrument. !! IMPORTANT !! All labware (including deepwell and PCR plates) used in the VStack must conform to the SBS microplate standards. Please visit www.sbsonline.org/msdc/crevs.html for current SBS standards, or contact your labware’s manufacturer. Chapter 1: Introduction VStack User Guide General VStack Hazard Warnings Before installing and using the VStack Before installing and using the VStack, make sure you are aware of the potential hazards and understand how to avoid being exposed to them. You must be properly trained in the correct and safe installation and operation of the device. EU installations only. Be aware that the VStack is considered partly completed machinery that is required to be installed with other equipment such that the fully assembled machinery complies with the essential health and safety requirements (EHSRs) of the Machinery Directive 2006/42/EC. Intended product use !! INJURY HAZARD !! Do not remove the VStack exterior covers or otherwise disassemble the robot. Doing so can expose you to hazards that could cause serious injury and damage the Labware Stacker. !! INJURY HAZARD !! Using controls, making adjustments, or performing procedures other than those specified in the user guide can expose you to moving parts and hazardous voltage. Agilent Technologies products must only be used in the manner described in the Agilent Technologies product user guides. Any other use may result in damage to the product or personal injury. Agilent Technologies is not responsible for any damages caused, in whole or in part, by improper use of the products, unauthorized alterations, adjustments or modifications to the products, failure to comply with procedures in Agilent Technologies product user guides, or use of the products in violation of applicable laws, rules or regulations. Except as otherwise expressly provided in Agilent Technologies product user guides, any alteration, adjustment, or modification to the products will void the product warranty. The VStack is not intended or approved for diagnosis of disease in humans or animals. You assume full responsibility for obtaining any regulatory approvals required for such use and assume all liability in connection therewith. Injury hazards !! INJURY HAZARD !! Never lean against the VStack. !! INJURY HAZARD !! Keep far enough away from the VStack while it is in motion so you do not catch your hands, clothing, jewelry and so on, in the mechanism. !! INJURY HAZARD!! Do not start the VStack controlling software while you are near the VStack’s plate stage. The stage moves when you turn on the VStack. Chapter 1: Introduction VStack User Guide Damage hazards !! DAMAGE HAZARD !! Always make sure that the plate stage is empty before you start to load or release a rack. !! DAMAGE HAZARD !! Do not use harsh abrasives, corrosive cleaning agents or metal brushes to clean VStack components or accessories. Do not use any concentration of household bleach or sodium hypoclorite on the VStack. Do not allow cleaning agents to contact electrical, or sensitive mechanical components. Safety labels Warnings in the user documentation or on the device must be observed during all phases of operation, service, and repair of this device. Failure to comply with these precautions violates safety standards of design and the intended use of the product. Agilent Technologies assumes no liability for the customer’s failure to comply with these requirements. The following table lists the common symbols you might find on the device. The symbol on the label indicates the risk of danger. A description of the warning and information that will help you avoid the safety hazard are provided in this guide. Symbol Description Indicates that you must read the accompanying instructions (for example, the safety guide) for more information before proceeding. Indicates hazardous voltages. Indicates pinch, crush, and cut hazard. Indicates laser hazard. Indicates hot surface hazard. Indicates protective conductor terminal, which is bonded to conductive parts of an equipment for safety purposes. Indicates that you must not discard this electrical/ electronic product in domestic household waste. Chapter 1: Introduction VStack User Guide Safety and regulatory compliance The VStack complies with the applicable EU Directives. See the Declaration of Conformity or Declaration of Incorporation, as applicable, for details. The Labware Stacker is designed to comply with the standards listed in the following table. Regulatory Compliance Standard EMC European Union EMC Directive 2004/108/EC IEC 61326-1:2005 / EN 61326-1:2006 Canada ICES/NMB-001:2004 Australia/New Zealand AS/NZS CISPR 11:2004 Safety European Union Machinery Directive 2006/42/EC Low Voltage Directive 2006/95/EC IEC 61010-1:2001 / EN61010-1:2001 Canada CAN/CSA-C22.2 No. 61010-1-04 USA ANSI/UL 61010-1:2004 Electromagnetic compatibility If the VStack causes interference with radio or television reception, which can be determined by turning the device off and on, try one or more of the following measures: • Relocate the radio or television antenna. • Move the device away from the radio or television. • Plug the device into a different electrical outlet, so that the device and the radio or television are on separate electrical circuits. • Make sure that all peripheral devices are also certified. • Make sure that appropriate cables are used to connect the device to peripheral equipment. • Consult your equipment dealer, Agilent Technologies, or an experienced technician for assistance. Changes or modifications not expressly approved by Agilent Technologies could void the user's authority to operate the equipment. Sound emission declaration Sound pressure: Lp < 70 dB according to EN 27779:1991. Schalldruckpegel: LP < 70 dB nach EN 27779:1991. 6 Chapter 1: Introduction VStack User Guide VStack Overview Product Description The VStack is a microplate stacker used in lab automation systems to dispense and receive plates. It holds deepwell and shallow-well plates, pintools, tipboxes and lids. Typically, several VStacks are used in a single lab automation system. VStack Network The VStack communicates with the lab automation system using an Ethernet network and DHCP server, which dynamically recognizes VStacks as they are added to, and removed from, the system. Software Overview The VStack has few hardware controls; it is controlled almost entirely by ActiveX commands issued by software installed on a computer. You can interact with the VStack by: ❑ Writing a protocol that is then run automatically on a lab automation platform, according to a programmed schedule controlled by platform software ❑ Sending individual commands, in real time, directly to the VStack from software supplied with your VStack The VStack is intended to be routinely used for automated runs, but you also need to control it directly. Automated Control When using the VStack during an automated protocol run, it is controlled by platform software. If you are using Velocity11’s BioCel, the platform software is VWorks™. If you are running the VStack in a system developed by your own organization, the platform software will have been custom-written using a program such as C++ or Visual Basic. Manual Control You need to control the VStack outside a protocol run to: ❑ Recover from run errors ❑ Test Ethernet communications ❑ Troubleshoot problems ❑ Set plate stage positions To do this, Velocity11 provides software with a user interface, called VStackBioNet Testcontainer software. In addition, Velocity11 provides a labware editor and database that you use to define labware dimensions. The labware editor is accessed through the VStackBioNet Testcontainer software or VWorks. Chapter 1: Introduction VStack User Guide Interaction of Software Components PC Labware editor ActiveX commands VStack firmware TCP/IP commands ActiveX commands Switching hub VStack firmware TCP/IP commands Network card TCP/IP commands VWorks ActiveX, including Diagnostics ActiveX commands ActiveX commands ActiveX Software Labware database in Windows Registry Third-party protocol-running software VStackBioNet Testcontainer software ActiveX is a set of technologies that allows software components to interact with each other regardless of the language in which the components were created. Using the VStack ActiveX, simple commands can be used to initiate complex operations in networked VStacks. The VStack’s ActiveX software includes: ❑ VStack Diagnostics software ❑ Methods, which control individual operations ❑ Properties, which set the values used in methods, such as speed = fast ❑ Events, which are notifications that methods are complete or have errors To allow you to develop your own controlling software, the chapter called “ActiveX Commands” on page 67, provides the ActiveX methods, events and properties. 7 8 Chapter 1: Introduction VStack User Guide VStack Diagnostics VStack Diagnostics is a window that is part of the ActiveX software. From the VStack Diagnostics window, you can: ❑ Perform simple VStack operations, such as Downstack, Upstack and Release Stack ❑ Enter properties, such as the plate specific grip offset, the type of plate to use and the text to show on the VStack display ❑ View sensor readings ❑ Access the labware editor ❑ Set teachpoint offsets, which provide positional information to the robot Labware Database The labware editor is used to enter the dimensions of each type of plate used with the VStack. This information, required for proper plate handling, is stored in the labware database, which is maintained in the Windows registry. The same labware database is also used with other Velocity11 products. For this reason, the details of the labware database are given in a separate publication, the Database and Security User Guide. Installation 2 This chapter explains how to install the VStack®. The installation process includes: Step Procedure 1. “Unpacking the VStack” on page 10 2. “Mounting the VStack” on page 15 3. “Connecting To Power and Air” on page 17 4. “Installing the Network Card” on page 20 5. “Installing the DHCP Server” on page 22 6. “Connecting the VStack To the Network” on page 24 7. “Turning On the VStack” on page 25 8. “Installing Software” on page 25 9. “Loading and Releasing a Rack” on page 28 10. “Verifying Network Communication” on page 31 10 Chapter 2: Installation VStack User Guide Unpacking the VStack Parts Inspection As you unpack the VStack, inspect all parts for possible shipping damage. If anything is missing or appears to be damaged, contact the Velocity11 Service Center as soon as possible. !! IMPORTANT !! Save the carton and packing materials in case you ever need to ship the VStack. Please note that Velocity11 is not responsible for damage if the VStack is incorrectly packaged and moved by someone other than a Velocity11 employee. North American VStack Package The North American VStack package contains: ❑ A VStack and rack ❑ A Power cord ❑ An Ethernet cable, 8 feet ❑ Polyurethane tubing, 10 feet, 1/4-inch diameter ❑ Polyurethane tubing, 10 feet, 1/8-inch diameter ❑ The following fittings: ❑ ❑ ❑ ❑ 1/4-inch quick connect–1/4-inch NPT 1/4-inch quick connect–1/8-inch NPT 1/4-inch quick connect–1/8-inch quick connect 1/4-inch quick connect T 1/8-inch quick connect T An ActiveX CD-ROM The VStack User Guide Getting Started The Database and Security User Guide Chapter 2: Installation VStack User Guide European VStack Package The European VStack package contains: ❑ A VStack and rack ❑ A country-specific power cord ❑ ❑ ❑ ❑ ❑ ❑ ❑ ❑ ❑ An Ethernet cable, 8 feet Polyurethane tubing, 3 meters, 6-mm diameter Polyurethane tubing, 3 meters, 4-mm diameter Polyurethane tubing, 3 meters, 1/8-inch diameter The following fittings: 6-mm quick connect–4-mm quick connect 4-mm quick connect–1/8-inch quick connect 6-mm quick connect T 4-mm quick connect T 1/8-inch quick connect T An ActiveX CD-ROM The VStack User Guide Getting Started The Database and Security User Guide 11 12 Chapter 2: Installation VStack User Guide VStack Parts Main Parts: Diagram The main parts of the VStack are shown in the following diagram. It will help you to be familiar with these terms as you read this guide. Rack Gripper Display Air pressure regulator Load/Release button Plate stage Base Chapter 2: Installation VStack User Guide Main Parts: Description The main parts of the VStack are described in the following table: Part Description Air pressure regulator Controls the pressure of the air that is used to close the grippers. The two similar controls to the left and right are flow controls that affect the speed with which the grippers move in and out. You should not need to adjust the flow controls. Base Base of the VStack, which has dowel pin holes and screw holes for attaching the VStack to a custom-prepared lab bench or base plate. Display Displays a text string when the void DisplayMessage ActiveX method runs. You can run this method manually to test the display through the VStack Diagnostics software. For more information, see “Displaying a Message” on page 54. This method can also be called during a run by the run-controlling software. For example, on the Velocity11® BioCel®, VWorks™ uses this method to deliver the name of the type of plate that should be loaded into each VStack. Gripper When loaded, grips the bottom microplate, holding up the rest of the stack of plates. During operation it releases the bottom plate to the plate stage when dispensing plates and grips the plate on the plate stage when receiving plates from the robot. Load/Release button Pressing the button loads or releases a plate. When the plates are released, you can remove the rack. Plate stage Moves up and down to move plates between the rack and Presentation teachpoint. For more information about the Presentation teachpoint, see “About Teachpoints” on page 54. Rack Stores microplates. Can be removed from the VStack to add, remove and transport plates. 13 Chapter 2: Installation VStack User Guide VStack External Connections The VStack has the following external connections: ❑ Quick-connect air input port, 1/8-inch ❑ Serial port ❑ Power receptacle ❑ Ethernet port These connections are shown in the following diagram. Air input port Vstack connections 00024 LNK ACT PWR Ethernet port Serial port On/Off switch 00024 14 Power receptacle The serial port is used by Velocity11 to install firmware on the VStack. Chapter 2: Installation VStack User Guide Mounting the VStack About Mounting the VStack For the robot to move plates to and from the plate stage, the threedimensional position of the plate stage must be fixed and known to the controlling software of the lab automation system. This requires that the VStack is mounted on a stable base that does not move in relation to the robot. You can mount the VStack directly on a benchtop or on a mounting plate that also holds other components of your system. You should have the benchtop or mounting plate accurately drilled to create dowel pin holes, and tapped to create screw threads, according to the dimensions given in this section. When you are planning where to install your VStack, make sure you choose a place that allows access on all sides for cleaning and maintenance. This procedure assumes that you have already prepared your bench area and have had the necessary holes drilled, and screw threads tapped, in your benchtop or mounting plate. Note: Velocity11 does not provide dowel pins or screws. You will need to obtain pins and screws that are the correct length for your particular lab setup. To mount the VStack: 1. Measure your prepared mounting holes to make sure that they will accommodate the VStack. Dimensions in the diagram below are in inches. 1/4" dowel pin hole (x3) Vstack Base pin pattern screws 00020 00020 M6 flathead (x4) 3.918 3.500 Vstack Base pin pattern 00021 1.909 .500 00021 2.500 2.092 0 2.092 0 2.500 Procedure 15 16 Chapter 2: Installation VStack User Guide 2. Place two 1/4-inch dowel pins in the dowel pin holes of your benchtop. You do not need to use all three dowel pin positions. 3. Pick up the VStack and align the dowel pin holes in its base with the dowel pins of your benchtop. 4. Place the VStack on the benchtop, making sure that the dowel pins fit properly into each hole. 5. Screw two M6 flathead screws into two of the screw holes, making sure they screw completely into the base. You do not need to use all screw positions. 6. Check that the VStack is firmly mounted to your benchtop by trying to gently rock it. Chapter 2: Installation VStack User Guide Connecting To Power and Air Introduction This section explains how to connect your VStack to the power and air supplies. Connect the power cord first, followed by the air line. Connecting the Power Cord Review electrical requirements in “Laboratory Requirements” on page 4 before proceeding. To connect the power cord: 1. Plug one end of the power cord into the power port at the back of the VStack. 2. Plug the other end of the power cord into an appropriately grounded electrical socket. Connecting the Air Line !! INJURY HAZARD !! Working with open, charged air lines can result in injury if the end of the line whips around rapidly. Switch the compressed air line off before installing the VStack. If you have questions about setting up your air line, contact your facilities department or the Velocity11 Customer Service Center. !! DAMAGE HAZARD !! Make sure that air coming into the VStack is properly filtered for moisture and aerosol impurities; there is no air filter on the VStack. Dirt in unfiltered air can build up in air valves eventually causing a malfunction. To connect the air line: 1. Cut the supplied 1/8-inch tubing to the length you need for the air line. Cut the tubing with a sharp craft knife, and make sure that the edge of the tubing is square and clean. 2. Plug one end of the 1/8-inch tubing into your lab’s air supply. You can also use 1/4-inch tubing from your lab’s air supply with an adapter to switch to 1/8-inch tubing. If your house air uses a threaded nozzle, attach the 1/8-inch NPT fitting to your house air. 3. Push the other end of the 1/8-inch tubing into the air input port on the back of the VStack. 4. Tug gently on the air line. If you feel resistance, the line is in place. 5. Turn on the air and make sure that the air pressure does not exceed 120 psi. The air pressure at the gripper is internally regulated to 40 psi, although it may be changed for particular plate types. For more information about adjusting the pressure, see “Adjusting the Grip Pressure” on page 41. 17 18 Chapter 2: Installation VStack User Guide About VStack Networking Communications Introduction A VStack receives its operational commands from a computer to which it is networked. The network used for communication is a standard Ethernet network, consisting of a network card in the controlling computer and an Ethernet cable between the computer and VStack. If you want to have more than one VStack in your system, the network must include an Ethernet switch to serve as an adapter between the single Ethernet cable attached to your computer and the Ethernet cables of the multiple VStacks. !! INJURY HAZARD !! Run your VStacks on a dedicated lab automation network and not a general organizational network. It is unsafe to allow control of VStacks from computers on a general network because remote computer operators may accidentally initiate an operation that causes the plate stage to move unexpectedly when lab personnel are nearby. DHCP Server Kit If you do not have an existing network for your VStacks, you will need to set one up, even if you are only using one VStack. Note: The exception to this is if you are using one VStack and the controlling computer does not need to be connected to your organization’s network. In this case, you can use the computer’s existing network card and a crossover cable to connect to the VStack. To set up the network, you can buy the DHCP Server Kit from Velocity11, which includes: ❑ ❑ ❑ ❑ About IP Addresses A networking card An Ethernet cable An Ethernet switch DHCP server software IP addresses allow computers and other devices to be identified on a network so information can be specifically routed to them. When setting up the VStack network, there are two implementations of IP addresses to consider: ❑ The automatically assigned IP address of each VStack ❑ The manually assigned IP address of the network card on the controlling computer that interfaces with the VStack network Automatically Assigned IP Addresses Each VStack on a network must have a unique IP address to allow the controlling computer to specifically send commands to it. IP addresses are assigned automatically by a DHCP server that you install on the controlling computer. Chapter 2: Installation VStack User Guide Manually Assigned IP Addresses When the DHCP server starts, it reads an initialization file that points the server to the network card through which the computer will serve addresses. When you install the network card, you must assign the IP address and subnet mask so that it matches the information in the initialization file. Overview of Setting Up the Network To set up a network for your VStack or VStacks, perform the following procedures: Step Procedure 1. “Installing the Network Card” on page 20 2. “Installing the DHCP Server” on page 22 3. “Connecting the VStack To the Network” on page 24 4. “Turning On the VStack” on page 25 5. “Installing Software” on page 25 6. “Verifying Network Communication” on page 31 19 20 Chapter 2: Installation VStack User Guide Installing the Network Card Introduction This section assumes that you have purchased the DHCP Server Kit from Velocity11. The network card supplied with your DHCP Server Kit must be installed for your VStack to be able to communicate with the controlling computer, assuming that you want to use your existing network card to communicate with your organization’s network. Installation Procedure Note: You may need additional administrator privileges on the controlling computer to install the network card. Please check with your network administrator if you think you may not have sufficient privileges. To install and configure the network card: 1. Install a new network interface card: a. Locate the PCI Adapter (network card) included in the kit. b. Follow the instructions included with the card to install it. 2. Set the IP address of the card: a. Click Start > Settings > Network and Dial-up Connections. b. Right-click the icon for the new local area connection (probably Local Area Connection 2), and click Properties. c. Double-click Internet Protocol (TCP/IP). Chapter 2: Installation VStack User Guide d. Enter the values shown in the following screenshot. e. Click OK. f. Close the Network and Dial-up Connections window. 21 22 Chapter 2: Installation VStack User Guide For more information about the IP address of the network card, see “About IP Addresses” on page 18. Installing the DHCP Server Introduction This section assumes that you have purchased the DHCP Server Kit from Velocity11. The DHCP server automatically assigns IP addresses to VStacks when they are turned on so they can be identified on the network. The server will run on Windows® XP, NT and 2000. Installation Procedure Note: You may need additional administrator privileges on the controlling computer to install the DHCP server. Please check with your network administrator if you think you may not have sufficient privileges. To install and start the DHCP Server service: 1. Create the following directory on the controlling computer: C:\Program Files\Velocity11\DHCP server 2. Extract the files from the DHCP Server CD-ROM into this new folder. 3. Double-click the file named dhcpsrv.exe. The DHCP Server window opens. 4. Click Yes. This installs the DHCP server as a service on your computer. The DHCP Server window opens and displays the status as Running. Chapter 2: Installation VStack User Guide 5. Click the close box to close the window. The DHCP Server service will now automatically run every time you turn on the controlling computer. Stopping and Starting the Service You can stop and start the DHCP Server service from within Windows by navigating to Start > Programs > Administrative Tools > Services. Consult your Windows documentation for more information. You can also start and stop the service using the executable. To stop and start the DHCP Server service: 1. Navigate to C:\Program Files\Velocity11\DHCP server. 2. Double-click the file named dhcpsrv.exe. 3. Click Stop to stop the service, and Start to start the service. 23 24 Chapter 2: Installation VStack User Guide Connecting the VStack To the Network Introduction This section assumes that you have purchased the DHCP Server Kit from Velocity11. Connecting a VStack To the Network To connect the VStack to the network, you must connect the: ❑ Ethernet switch to the PC ❑ VStack to the Ethernet switch To connect the Ethernet switch to the PC: 1. Locate the 8-port Ethernet switch included in the DHCP Server Kit. 2. Connect the included power cord to the switch. 3. Locate the Ethernet cable included in the DHCP Server Kit. 4. Plug one end of the cable into any of the eight ports in the Ethernet switch. 5. Plug the other end into the new network card in the PC. To connect the VStack to the Ethernet switch: 1. Locate another Ethernet cable included with the Accessories. 2. Plug one end of the cable into any of the eight ports on the Ethernet switch. 3. Plug the other end into the Ethernet port of the VStack. Connecting Multiple VStacks You can connect up to six more VStacks to the network using the 8-port switch. Up to 25 VStacks can be used on this network if you add more 8port switches. Chapter 2: Installation VStack User Guide Turning On the VStack Introduction Turn on the VStack after setting up the network and before installing the ActiveX software. Turning on the VStack To turn on the VStack: 1. Toggle the power switch to the on position. The motor moves to the home position and the VStack processor obtains an IP address. The text on the display reads “Finding Server.” Installing Software Introduction For general information about the software that controls the VStack, see “VStack Overview” on page 6. Installation Procedure To install the ActiveX software: 1. Insert the CD-ROM labelled VStackBioNet ActiveX into your PC. 2. In Windows, navigate to the CD-ROM drive and open it to view the files on the drive. 3. Double-click the Setup.exe file. The InstallShield Wizard starts. 4. Click Next. The Customer Information dialog box opens. 25 26 Chapter 2: Installation VStack User Guide 5. Enter your name, and your company’s name. 6. Click Next. The Choose Destination Location dialog box opens. Unless you specify a different location, the installation program will install the ActiveX in a folder it creates, which is C: Program Files\Velocity11\VStack. 7. If you want to choose a different destination folder: a. Click Browse. b. Navigate to and select the folder. Chapter 2: Installation VStack User Guide c. Click Next. The Select Program Folder dialog box opens. d. In the Program Folders text box, type a name for the shortcut you want to be created in the Start > Programs menu, or leave the default name. 8. Click Next. 9. The Setup Status screen opens. 10. When the text InstallShield Wizard Complete opens, click Finish. 27 28 Chapter 2: Installation VStack User Guide Loading and Releasing a Rack Loading and Releasing Defined When you stack plates into a rack, the bottom plate sits on the gripper. When you install a rack into a VStack, the bottom plate drops, controlled by the plate stage, to be held on the side by the gripper. The rack is also held so it will not rock. This process is called loading. When the plate stage moves the bottom plate up so it rests on the gripper the rack becomes free to move. This process is called releasing. Note: The VStack will not operate until the rack is loaded. !! INJURY HAZARD !! Keep far enough away from the VStack while it is in motion so that you do not catch your hands, clothing, jewelry, and so on, in the mechanism. S Loading a Rack To load a rack: 1. Place a rack on the base unit, lowering it so that the rectangular tabs drop into the slots in the gripper unit. The rack can be placed with the open corner at the front or back. 00029 vstack vstack separated 00029 Chapter 2: Installation VStack User Guide Tab 00037 Vstack locked stack top view 00037 00038 Vstack unlocked stack top view 00038 2. Either: Press the load/release button on top of the base unit. Click Release Stack in the VStackBioNet Diagnostics window (see “Opening Diagnostics for a Specific VStack” on page 36). The VStack loads the rack. Releasing a Rack To release a rack: 1. Either: Press the load/release button on top of the base unit. Click Release Stack in the VStackBioNet Diagnostics window. !! DAMAGE HAZARD !! Always remove the rack from the base unit before attempting to move the VStack. 2. Lift the rack up and off the base. 29 Chapter 2: Installation VStack User Guide Placing a Plate Plate Orientation To place a plate on the plate stage: 1. Place the plate so that the A1 well is at the far left as viewed by the robot. A1 Well 00034 30 00034 Vstack placing plate Chapter 2: Installation VStack User Guide Verifying Network Communication Procedure After installing the ActiveX software, follow this procedure to verify that the computer and VStack are communicating correctly. To verify that the Computer and VStack are communicating: 1. Navigate to Start > Programs > Velocity11 and select VStackBioNet. The VStackBioNet Testcontainer software opens. 2. Click Display Diagnostics. If the Discovered BioNet Devices window opens and the VStack has a status of Matched, you know that your computer is communicating with the VStack. For more information about identifying VStacks on the network, see “Identifying VStacks” on page 32. 3. Click OK. 4. If you want to verify that you are communicating with a particular VStack click Move Here at the Orientation Sensor teachpoint of the VStackBioNet Diagnostics dialog box. The plate stage will move to the Orientation teachpoint. For more information, see “Opening Diagnostics for a Specific VStack” on page 36s. 31 32 Chapter 2: Installation VStack User Guide Identifying VStacks Introduction A VStack’s IP address may change as you turn the VStack on and off. To allow you to select a particular VStack to communicate with, there must be another way to identify a specific VStack. The Device Id, which does not change when the VStack is turned on and off, is used for this purpose. Device Ids are assigned in the order that VStacks are first added to the network. You should either keep a record of which Device Id corresponds to which VStack, or rename the Device Ids to values that are easily recognizable, see “Changing the Device Id” on page 33. Procedure To identify the VStacks on your network: 1. Turn off all VStacks at their on/off switches. 2. Turn on one VStack. 3. Navigate to Start > Programs > Velocity11 and select VStackBioNet. 4. Click Display Diagnostics. One or more VStacks appear in the dialog box, but only one has a Status of Matched. 5. Note the Device Id of the VStack. 6. Turn on another VStack, click Cancel in the Discovered BioNet Devices dialog box, and click Display Diagnostics again. Note the Device Id of the new VStack. 7. Repeat step 6 on other VStacks in turn, recording their Device Ids. Chapter 2: Installation VStack User Guide Changing the Device Id Introduction The Device Id identifies a VStack on the network. You can change the Device Id to an easily recognizable name or number, such as the VStack’s serial number, or a simple identifying number that you have applied to the outside of the VStack. Procedure Note: Device Ids are specific to a computer. If you change a Device Id, the change will not be transferred to other computers used to control the VStacks on the network. You must change the Device Id on each computer. To change the Device Id: 1. Navigate to Start > Programs > Velocity11 and select VStackBioNet. The VStackBioNet Testcontainer software opens. 2. Click Display Diagnostics. 3. Click to select the VStack from the list. 4. Click the number in the Device Id column. The cursor appears. 5. Type in the new Device Id. 33 34 Chapter 2: Installation VStack User Guide Deleting Old VStacks Introduction If you remove a VStack from the network it will still show up in the Discovered BioNet Devices window (see “Identifying VStacks” on page 32). The entry will be reused if you add the VStack back later. If you do not plan to add the VStack back into the network, you may want to delete the entry. Procedure To delete an unused device: 1. Navigate to Start > Programs > Velocity11 and select VStackBioNet. 2. Click Display Diagnostics. 3. Click in the Status column to reveal a drop-down list. 4. From the list box, select Delete. Note: Other commands in this list box are for service use only. Configuration and Manual Operation 3 This chapter shows you how to set up a VStack® and perform manual, real-time operations. If your lab automation system is already set up and you only need to check that a particular plate works with a particular stacker, follow the procedures in this table. Step Procedure 1. “Opening Diagnostics for a Specific VStack” on page 36 2. “Selecting a Plate Type” on page 38 3. “Testing Plate Handling” on page 40 If you have just installed the VStack you will need to completely configure it, using the procedures in the above table, as well one or more of the following procedures, depending on your situation: ❑ ❑ ❑ ❑ ❑ ❑ “Adding a Plate Type To the Labware Database” on page 39 “Adjusting the Grip Pressure” on page 41 “Adjusting the Plate Specific Grip Offset” on page 42 “Configuring Plate Orientation Checking” on page 45 “Displaying a Message” on page 54 “Changing the Presentation Teachpoint” on page 56 In addition, you may need to perform some procedures given in the Database and Security User Guide. This guide will direct you to those procedures at the appropriate places. After your VStack is set up and routinely running protocols, you may occasionally need to make minor adjustments using these same procedures. 36 Chapter 3: Configuration and Manual Operation VStack User Guide Opening Diagnostics for a Specific VStack Introduction Velocity11 provides the VStackBioNet Diagnostics software for configuration and manual control of the VStack. Many configuration procedures first require you to open the VStackBioNet Diagnostics software for a specific VStack. Procedure Note: If you are using the VStack on the BioCel, refer to the BioCel User Guide for how to open the VStack Diagnostics software from within VWorks. To open the VStack Diagnostics software: 1. Navigate to Start > Programs > Velocity11 and select VStackBioNet. This opens the VStackBioNet Testcontainer software. The Cycle Test button in the VStackBioNet Testcontainer dialog box is used during manufacturing to test the VStack. It has no purpose during normal use. 2. Click Display Diagnostics. The Discovered BioNet Devices window appears. For more information, see “Verifying Network Communication” on page 31. 3. Select your VStack from the list. 4. Click OK. The VStackBioNet Diagnostics window opens. Chapter 3: Configuration and Manual Operation VStack User Guide 37 38 Chapter 3: Configuration and Manual Operation VStack User Guide Selecting a Plate Type Introduction For the VStack to correctly handle a plate during manual, real-time operation, you must select the type of plate you intend to use from the labware database. If the type of plate you intend to use is not already defined in the labware database, you will need to create an entry for the plate and then configure the entry’s properties before returning to this section and selecting the plate type. For more information, see “Adding a Plate Type To the Labware Database” on page 39. Procedure To select a plate for a manual operation: 1. Open the VStackBioNet Diagnostics window. For directions, see “Opening Diagnostics for a Specific VStack” on page 36. 2. In the Plate Selection group box of the Diagnostics page, select a plate from the list box. 3. Select one of the following options. Option Description Normal The plates you plan to use are not sealed and have no lids. Lidded The plates have lids. Sealed The plates are sealed. 4. If you want the VStack to sense the orientation of the plate, select the Orientation Checking check box. If this option is not selected, the plate stage still moves to the Orientation teachpoint during upstack and downstack operations, but the orientation is registered as correct regardless of the actual orientation of the plate. 5. Click Apply to save the changes. What To Do Next If you are setting up the VStack for the first time, read through the remainder of this chapter and check all configuration settings before testing plate handling. If your VStack is already set up and you are just checking plate handling after making an adjustment or selecting a new plate type, follow the procedure in “Testing Plate Handling” on page 40 next. Chapter 3: Configuration and Manual Operation VStack User Guide Adding a Plate Type To the Labware Database Background For correct operation of the VStack the software controlling the robot must be given the dimensions of the type of plate you intend to use. This information is held in the labware database. If the type of plate you want to use is already defined in the database, you can ignore this section. If the type of plate you want to use is not already defined start by following the procedure in this section. Opening the Labware Editor Note: If you are using the VStack on the BioCel, refer to the BioCel User Guide for how to open the labware editor from within VWorks. Then refer to the Database and Security User Guide for how to use the labware editor. To open the labware editor: 1. Open VStackBioNet Diagnostics window. For directions, see “Opening Diagnostics for a Specific VStack” on page 36. 2. In the Plate Selection group box, click Edit. 3. Refer to the Database and Security User Guide for directions for adding a plate type. The Database and Security User Guide will direct you back to this guide for some of the procedures you need to perform. 39 40 Chapter 3: Configuration and Manual Operation VStack User Guide Testing Plate Handling Introduction After selecting the plate type you want to use, perform some downstacking and upstacking operations with the plate to make sure that the plate is handled correctly by the VStack. If the VStack performs without error, it is ready for use with an automated protocol. If you receive errors: ❑ Check the labware editor parameters for the labware you are using. For more information, see the Database and Security User Guide. ❑ Check the troubleshooting information given in “Maintenance and Troubleshooting” on page 59. ❑ Modify the grip pressure, as described in “Adjusting the Grip Pressure” on page 41. Downstacking Plates To downstack a plate: 1. Open VStackBioNet Diagnostics. For directions, see “Opening Diagnostics for a Specific VStack” on page 36. 2. Select your plate type from the list box, and click Apply. 3. Load a rack containing plates. Make sure that your plates are properly positioned in the rack. For more information, see “Placing a Plate” on page 30. 4. Click Release Stack to lock the rack into place. 5. Click Downstack. 6. Remove the plate from the stage. 7. Click Downstack, and repeat until you are satisfied that the downstacking operation is working correctly. Upstacking Plates To upstack a plate: 1. Place a plate on the stage. 2. Click Upstack. 3. Repeat until you are satisfied that the upstacking operation is working correctly. Chapter 3: Configuration and Manual Operation VStack User Guide Adjusting the Grip Pressure Definition The grip pressure determines the force with which the VStack grips the plates. It is a property of a specific VStack and not the type of plate. You can see the sensor reading for grip pressure in the VStackBioNet Diagnostics window. For more information about sensor readings, see “Viewing Sensor Readings” on page 43. When To Adjust the Grip Pressure If the plates you are using are flimsy, they may distort when held with the default pressure of 40 psi so you should lower the grip pressure. If the stack of plates you are using is heavy because there are many plates in the stack, and perhaps because they are made of a heavy material and contain a lot of liquid, the bottom plate may fall out of the gripper. In this case, increase the grip pressure. The grip pressure, however, should not exceed the maximum pressure specified in “Laboratory Requirements” on page 4. Grip Pressure Adjustment To adjust the grip pressure: 1. Locate the air pressure regulator. For more information, see “VStack Parts” on page 12. 2. Using your fingers, or a pair of pliers, unscrew the locking ring by turning it counterclockwise. 3. Adjust the grip pressure by turning the regulator clockwise to increase the pressure and counterclockwise to decrease the pressure. !! DAMAGE HAZARD !! than 15 psi. Do not set the grip pressure lower 4. Toggle the grippers 2–3 times to allow the pressure to adjust. 5. Lock the locking ring by turning it clockwise. 41 42 Chapter 3: Configuration and Manual Operation VStack User Guide Adjusting the Plate Specific Grip Offset Definition The VStackBioNet Diagnostics software’s Plate specific grip offset specifies the distance below the standard Grip teachpoint. When To Adjust Adjust this value only if the VStack is not gripping the plates at the correct position. The Plate Specific Grip Offset Is a Proxy The Plate specific grip offset is a property of the plate and not a property of the VStack. It is actually a proxy of the labware editor’s Stacker gripper offset property, meaning that if you change the value of the plate specific grip offset, the same change is made in the labware editor for that particular type of plate. The reverse is also true. For more information about the labware editor, see the Database and Security User Guide. Procedure To change the plate specific grip offset: 1. Place at least two plates in the rack. 2. Load the rack onto the VStack. For more information, see “Loading and Releasing a Rack” on page 28. 3. Open the VStackBioNet Diagnostics software. For more information, see “Opening Diagnostics for a Specific VStack” on page 36. 4. Select the appropriate plate type. 5. Load the rack by clicking Release Stack. 6. Look at the grippers from the side through the rack. If the grip position is where you want it, do not change the gripper offset. If it is not, continue with step 7. 7. Click Release Stack to move the plate out of the grippers. 8. Change the Plate specific grip offset value, which is in millimeters, and click Apply. Enter a number higher than the set value to grip the plate above the current grip point. Enter a number lower than the set value to grip the plate below the current grip point. 9. Click Release Stack to load the plate into the grippers. Chapter 3: Configuration and Manual Operation VStack User Guide 10. Repeat step 7 to step 9 to change this value until the VStack grippers hold the labware at the position you want. Viewing Sensor Readings Procedure To view sensor readings: 1. Open the VStack Diagnostics software. For more information, see “Opening Diagnostics for a Specific VStack” on page 36. 2. View the sensor display. Sensor Types The following sensors are used on the VStack. Sensor Description Left Notch Detects the presence of a notch in the left corner of the plate when the plate stage is at the Orientation Sensor teachpoint. A white number indicates the absence of a notch. An orange number indicates the presence of a notch. For more information about the Orientation Sensor teachpoint, see “About Teachpoints” on page 54. Right Notch Detects the presence of a notch in the right corner of the plate when the plate stage is at the Orientation Sensor or Grip teachpoint. A white number indicates the absence of a notch. An orange number indicates the presence of a notch. Grip Pressure Indicates the grip pressure when the grippers are closed, in pounds per square inch. A positive number indicates that the grippers are closed. When the grippers are open, the value always reads zero. For more information, see “Adjusting the Grip Pressure” on page 41. 43 44 Chapter 3: Configuration and Manual Operation VStack User Guide Sensor Description Rack Present A white number indicates that a rack is loaded on the VStack. An orange number of less than 20 indicates that there is no rack loaded on the VStack. Plate Present A white number indicates that a plate is in the VStack grippers. An orange number indicates that no plate is present in the grippers. Stage Position This sensor is the large, unlabeled value. It indicates the plate stage position in relation to the home position at the bottom. The measurements are in millimeters, with positive values meaning above the home position. Chapter 3: Configuration and Manual Operation VStack User Guide Configuring Plate Orientation Checking About Orientation Sensing The VStack has two sensors that sense the presence of a notch in the left or right far corners of a plate (from the robot’s perspective). Although there are only two notch sensors, the software is aware of the existence of four plate corners, so that if a plate with two notches is on the stage, and no notches are detected, you will receive an error message telling you to turn the plate around 180°. The controls that affect orientation checking are listed in the following table. The default values will not support accurate orientation checking so they must be correctly set for your VStack and plates. Control Description Where Set Orientation checking check box Turns orientation checking on and off for both manual operations and protocol runs using the VStack. VStack BioNet Diagnostics Note: There is no relationship between this check box and the Check orientation check box in the labware editor, which is used only for Velocity11’s BenchCel. For more information, see the Database and Security User Guide. Plate specific orientation sensor offset Adjusts the height of the plate stage for the selected plate type, relative to the Orientation sensor teachpoint. Either: Note: This property is a proxy for the Orientation ❑ Labware editor sensor offset in the labware editor. When you change the value here, the value of the Orientation sensor offset also changes. The reverse is also true. For convenience you may decide to only adjust this value in the labware editor. Adjusting this value avoids having to adjust the actual Orientation Sensor teachpoint. ❑ VStack BioNet Diagnostics equivalent property, Orientation sensor offset !! IMPORTANT !! Do not change the value of this teachpoint. Sensor intensity Adjusts the relative brightness of all sensor lamps. The default value is 50%. Labware editor For more information, see the Database and Security User Guide. Orientation Sensor threshold Sets the Orientation sensor reading that defines the boundary between the indicated presence and absence of a plate notch. A sensor value below the threshold indicates the presence of a notch, and a sensor value above the threshold indicates the absence of a notch. The default threshold is 0 units, which must be changed for correct orientation checking. For more information, see the Database and Security User Guide. Labware editor 45 46 Chapter 3: Configuration and Manual Operation VStack User Guide You may need to adjust one or more of these settings to optimize orientation checking accuracy. !! IMPORTANT !! The Orientation sensor teachpoint also affects orientation checking, but does not change its value. Chapter 3: Configuration and Manual Operation VStack User Guide Overview of Setting Up Orientation Checking Turn on orientation checking Change the default Orientation sensor offset The overall process of setting up orientation checking is shown in the following diagram. Upstack and downstack a few plates to test Repeat for each type of plate on each VStack Set the Orientation sensor threshold Yes Place plate on stage and examine sensor readings Is difference between left and right notch sensors > 100? Yes Yes No Are sensors both at their top limit (about 230) or bottom limit (0)? No Adjust the Orientation sensor offset No Yes Adjust the Sensor intensity Does that create a difference of >100? Use this diagram in combination with the following procedures to set up orientation checking. 47 48 Chapter 3: Configuration and Manual Operation VStack User Guide ❑ ❑ ❑ ❑ ❑ ❑ “Turning On Orientation Checking” on page 48 “Changing the Default Orientation Sensor Value” on page 49 “Placing a Plate and Examining Sensor Readings” on page 50 “Adjusting the Sensor Intensity” on page 50 “Adjusting the Orientation Sensor Threshold” on page 50 “Adjusting the Orientation Sensor Offset” on page 50 The overall goal is to obtain Left Notch and Right Notch sensor values that are widely separated, and an Orientation sensor threshold that lies roughly half way between those values. Turning On Orientation Checking Note: If orientation checking is turned off, the plate stage still moves to the Orientation teachpoint during upstack and downstack operations, but the orientation is registered as correct regardless of the actual orientation of the plate. To turn on plate orientation checking: 1. Open the VStack Diagnostics software. For more information, see “Opening Diagnostics for a Specific VStack” on page 36. 2. In the Plate Selection group box, select the Orientation Checking check box. 3. Click Apply to save the changes. Chapter 3: Configuration and Manual Operation VStack User Guide Changing the Default Orientation Sensor Value The default setting for the plate specific orientation sensor offset (and therefore also the labware editor’s orientation sensor offset) is zero. You must change this value for orientation sensing to work. You can calculate an initial value by taking the average of the height of the plate plus the height of the plate’s skirt (x+y)/2 where x and y are dimensions shown in the following diagram). x y Vstack Sensor offset dimensions 00023 00023 This value may not need to be further adjusted. To enter the initial plate specific orientation sensor offset value: 1. Open the VStack Diagnostics software. For more information, see “Opening Diagnostics for a Specific VStack” on page 36. 2. Enter the value for the Plate specific orientation offset. 3. Click Apply to save the changes. 49 50 Chapter 3: Configuration and Manual Operation VStack User Guide Placing a Plate and Examining Sensor Readings Before making further adjustments to sensor settings, place the plate you want to use on the VStack and examine the current readings. To examine the sensor readings: 1. Open the VStackBioNet Diagnostics software. For directions, see “Opening Diagnostics for a Specific VStack” on page 36. 2. Make sure that the plate you plan to use has only one notch, positioned in either of the far corners, and is selected in the Plate Selection list box. If the plate type does not appear in the Plate Selection list box, add definitions for the plate in the labware editor. For more information, see “Adding a Plate Type To the Labware Database” on page 39. 3. Click Apply. 4. Place the plate on the plate stage. For information about plate orientation, see “Placing a Plate” on page 30. 5. In the Teachpoints section next to the Orientation Sensor value, click Move Here to move the stage to the Orientation sensor position. 6. Examine the sensor readings and refer to the flowchart in “Overview of Setting Up Orientation Checking” on page 47 for what to do next. Adjusting the Sensor Intensity The sensor intensity is adjusted using the labware editor. See the definition of this property in the Database and Security User Guide. Also, see the flowchart in “Overview of Setting Up Orientation Checking” on page 47 for when to adjust this property. Adjusting the Orientation Sensor Threshold The Orientation sensor threshold is adjusted using the labware editor. See the definition of this property in the Database and Security User Guide. Also, see the flowchart in “Overview of Setting Up Orientation Checking” on page 47 for when to adjust this property. Adjusting the Orientation Sensor Offset When you added a labware entry, the plate specific orientation sensor offset was set to zero. Earlier, you entered a default value calculated from plate measurements (“Changing the Default Orientation Sensor Value” on page 49). If this value is not accurate enough for your specific plate type and VStack, you will have been directed here from the overview flowchart. Follow this procedure to obtain a more accurate offset value. Note that this property can be changed in either of two places. The plate specific orientation sensor offset is a proxy of the labware editor’s Chapter 3: Configuration and Manual Operation VStack User Guide orientation sensor offset. When you make a change in one place, the change is automatically copied to the other place. The procedure in this section explains how to change the plate specific orientation sensor offset. For more information about the orientation sensor offset, see the Database and Security User Guide. To adjust the plate specific orientation sensor offset: 1. Remove the rack from the VStack. For more information see, “Loading and Releasing a Rack” on page 28. 2. Place a plate that has a single notch on the plate stage. For more information see, “Placing a Plate” on page 30. 3. In the VStackBioNet Diagnostics dialog box, click Move Here for the Orientation sensor teachpoint. The plate stage moves to the Orientation sensor position. 4. In the Jog Controls group box, set the slider to a value of one (1 mm), and click Down until the left and right sensor readings are both zero. At this point, the light beam shines above the plate. The Rack Present sensor should also read zero. 5. Click Up until the sensor corresponding to the corner with the notch has a white value. This position indicates that the top of the plate is just aligned with the top of the sensor’s vertical range. 6. Write down the value of the stage position, the large number in the sensor display. 7. Continue to click Up until both left and right notch values are large and white. At this point, the light beams on both sides are hitting the top of the plate skirt and reflecting back. 8. Record the stage position value. 9. Calculate the average of the two values you recorded. This represents the mid point of the valid sensor range. 10. Click Move Here for the Orientation Sensor teachpoint to move the plate stage to the teachpoint. 11. Compare the stage position value of the teachpoint with the value that you calculated in step 9. The difference represents the Plate specific orientation offset you should apply to achieve an optimal reading position. 12. Enter the value for the Plate specific orientation offset. For example, if the Orientation Sensor teachpoint stage position value is 65 mm and the calculated value is 70 mm, enter an offset value of 5 mm. 13. Click Apply to save the changes. 51 52 Chapter 3: Configuration and Manual Operation VStack User Guide Operating the VStack Manually Introduction Once your VStack is configured, you can operate it manually using VStackBioNetDiagnostics software. If you configured the VStack you will have already used some of these controls. Procedure To perform a manual operation: 1. Open the VStackBioNetDiagnostics software. For more information, see “Opening Diagnostics for a Specific VStack” on page 36. 2. Click one of the following buttons. Command Description Toggle Gripper Opens or closes the grippers. Do not use the Gripper Delay slider without proper instruction from a Velocity11 representative. The default value is 250. This value synchronizes the closing of the gripper with the movement of the plate stage and you should not have to change it. Operations Group Box Downstack Transfers plates from the rack to the plate stage. Upstack Transfers plates from the plate stage to the rack. Release Stack Allows you to lock or unlock the rack from the base. Home Moves the plate stage to the home position and then the presentation position. Jog Controls Group Box Up Moves the plate stage up by the distance in millimeters set in the adjacent slider control. Down Moves the plate stage down by the distance in millimeters set in the adjacent slider control. The In Motion light indicates that the plate stage is moving. The Busy light indicates that the VStack is performing an operation and cannot perform another operation until the current one is complete. Chapter 3: Configuration and Manual Operation VStack User Guide 53 54 Chapter 3: Configuration and Manual Operation VStack User Guide Displaying a Message Introduction The VStack display shows text messages. Long messages are scrolled across the display. You can display your own message on the VStack display. Procedure To display a message: 1. Open the VStack Diagnostics software. For more information, see “Opening Diagnostics for a Specific VStack” on page 36. 2. Type your message in the VFD Display text box. 3. Click Set. About Teachpoints Teachpoints Defined A teachpoint is a position to which the plate stage moves when commanded. As the plate stage only moves in a vertical plane, teachpoints are defined by a single number, which is the height of the stage above the home position, in millimeters. The home position lies at the bottom of the stage’s range of movement and has a positional value of 0 mm. Teachpoints are specific to a particular VStack. Teachpoint Locations There are four teachpoints, described in the following table. Teachpoint Definition Default Value (mm) Stack Release The height at which the plate stage releases the rack. 100.00 The height at which the grippers grip the plate during an upstack or downstack operation. 84.00 The height at which the VStack senses orientation notches on a plate. 68.00 Grip Orientation Sensor !! IMPORTANT !! Do not change this value !! IMPORTANT !! Do not change this value for VStacks used on the BioCel. !! IMPORTANT !! Do not change this value for VStacks used on the BioCel. Chapter 3: Configuration and Manual Operation VStack User Guide Teachpoint Definition Default Value (mm) Presentation The height at which the stage presents a plate for pick-up by a robot. 2.00 See “Changing the Presentation Teachpoint” on page 56 for information about changing this value. Teachpoint Values !! IMPORTANT !! Do not change this value for VStacks used on the BioCel. Teachpoint values are displayed in the Teach Points group box of the VStackBioNet Diagnostics window. 55 56 Chapter 3: Configuration and Manual Operation VStack User Guide Changing the Presentation Teachpoint Introduction The Presentation teachpoint specifies the height above the home position at which the VStack presents plates. This teachpoint should only be changed if a particular configuration requires a Presentation teachpoint that is different from the 2.00 mm default. !! IMPORTANT !! the BioCel. Do not change this value for VStacks used on Note that the labware editor includes a property called Presentation offset. This property is used by the BioCel’s VWorks. For more information, see the Database and Security User Guide. Procedure Note: When controlling the VStack from other computers, the default teachpoint will appear, unless it is changed on each computer. To change the Presentation teachpoint: 1. Open the VStack Diagnostics software. For more information, see “Opening Diagnostics for a Specific VStack” on page 36. 2. Click Move Here for the Presentation teachpoint. This moves the plate stage to the presentation position. 3. Move the plate stage up or down using the jog controls. The increment control allows you to move the plate stage up or down in large or small moves. Adjust the increment control to the desired increment and click Up or Down to move the plate stage. Increment 4. When the plate stage is at the desired height, click Teach Here. 5. At the Modify Teach Point dialog box, click OK to accept the changes or Cancel to cancel the operation and return to the previous screen. Chapter 3: Configuration and Manual Operation VStack User Guide The Presentation teachpoint is now saved. About the Motor Page Motor Page Screenshot !! IMPORTANT !! The Motor page is intended for use during manufacture and you should not use it without supervision by a Velocity11® service representative. If you accidentally change a value, refer to the screenshot below for the default value to change it back to. 57 58 Chapter 3: Configuration and Manual Operation VStack User Guide Maintenance and Troubleshooting 4 This chapter: ❑ Describes the common VStack® errors, and their possible causes and solutions ❑ Gives a maintenance schedule that you can use to keep the VStack in excellent working condition Note: The error messages described in this chapter are generated by the VStack ActiveX. If you are using the VStack with the BioCel’s VWorks, the error messages you receive may be slightly different. 60 Chapter 4: Maintenance and Troubleshooting VStack User Guide VStack Error Messages Introduction In this section, the text of the error message is written as a heading, which is followed by a description of the error, possible causes, and solutions. Labware Definition Errors If the labware definitions are not set appropriately for the plate you are using, you may get an error of some kind, depending on the specific problem. If you receive a VStack error, make sure you consider the labware settings in the labware editor. Cannot Perform Operation Without First Loading Rack The VStack failed to sense a rack when you clicked the Upstack button, even though a rack was present. Possible Cause Solution The rack is not properly positioned in the VStack. Check that the rack is positioned correctly in the rack grippers and click OK. For more information, see “Loading and Releasing a Rack” on page 28. The Rack Present sensor has failed. In the VStack Diagnostics window, make sure that the Rack Present sensor reads a value greater than 20 when a rack is loaded. For more information, see “Opening Diagnostics for a Specific VStack” on page 36. If the sensor reads a value of less than 20, and the rack is properly loaded, the sensor has malfunctioned. Contact the Velocity11 Service Center for help. Chapter 4: Maintenance and Troubleshooting VStack User Guide Could Not Perform Operation With Plate on Stage The VStack sensed a plate on the stage when you clicked the Release Stack or Downstack button. Possible Cause Solution There is a plate on the stage. Remove the plate and click OK. The sensor threshold is set too low. In the labware editor, set the sensor threshold to the appropriate value for that plate type and attempt the operation again. For more information, see the Database and Security User Guide. One or both of the notch sensors has failed. In the VStack Diagnostics window, both notch sensors should read values close to zero when there is nothing in front of them. If not, the sensor has malfunctioned. Contact the Velocity11 Service Center for help. For more information, see “Opening Diagnostics for a Specific VStack” on page 36. 61 62 Chapter 4: Maintenance and Troubleshooting VStack User Guide No Plate on Stage The VStack failed to sense a plate when you clicked the Upstack button. Possible Cause Solution There is no plate available to upstack. Place a plate on the stage, click OK, and attempt the command again. The sensor threshold is set too high. Adjust the sensor threshold value. For more information, see the Database and Security User Guide. One or both of the notch sensors has failed. If the sensor intensity is set correctly, and the notch sensor values do not change when a plate is on the stage in the orientation sensor position, one or both of the notch sensors have failed. Contact the Velocity11 Service Center for help. No Plate Available The VStack failed to sense a plate when you clicked the Downstack button. Possible Cause Solution A rack is present (loaded or unloaded) but it contains no more plates. Add more plates. A rack is present and it contains plates, but it is not loaded at the time you press the Downstack button. Load the rack. The VStack is not correctly configured. For example, you are using a black plate and the sensor intensity is set too low. Follow the directions in “Configuration and Manual Operation” on page 35 to configure the VStack. The plate present sensor has failed. Contact the Velocity11 Service Center for help. Chapter 4: Maintenance and Troubleshooting VStack User Guide Plate Is Rotated 180° The VStack sensed a notch in the incorrect position. Possible Cause Solution The plate is rotated by 180° so that the notch is not in the specified position. Rotate the plate to the specified position and click OK. For more information, see the Database and Security User Guide. The notches are set incorrectly in the labware editor. In the labware editor, make sure that the correct notch location is checked, then make sure that the plate is oriented correctly. Note: If the problem persists and the run must continue, turn off orientation checking. For more information, see “Selecting a Plate Type” on page 38. The orientation sensors are not configured properly. Make sure that the sensor intensity and sensor threshold configurations are correct. For more information, see the Database and Security User Guide. One or both of the notch sensors has failed. If the sensor values do not change with the presence or absence of a plate in the orientation sensor position, then one or more sensors may have failed. Please contact Velocity11’s Service Center for assistance. 63 64 Chapter 4: Maintenance and Troubleshooting VStack User Guide Plate on Stage Is the Wrong Type The VStack sensed a type of plate that is different from the type of plate selected. Possible Cause Solution The incorrect plate was selected. In the Plate Selection group box, select the plate type you are using. The notches are set incorrectly in the labware editor. Choose the correct plate in the Plate Selection menu. Edit the notch location or locations of that plate. For more information, see the Database and Security User Guide. The plate is rotated 180º so that the notch is not in the specified position. Rotate the plate to the specified position and click OK. For more information, see the Database and Security User Guide. The orientation sensors are not configured properly. Make sure that the sensor intensity and sensor threshold configurations are correct. For more information, see the Database and Security User Guide. One or both of the notch sensors has failed. If the sensor values do not change with the presence or absence of a plate in the orientation sensor position, one or more sensors may have failed. Contact the Velocity11 Service Center for help. Chapter 4: Maintenance and Troubleshooting VStack User Guide Rack Not Present The VStack failed to sense a rack when you clicked the Release Stack, Upstack or Downstack buttons. Possible Cause Solution The rack is not properly positioned in the VStack, or there is no rack. Check that the rack is positioned correctly in the rack grippers and click OK. For more information, see “Loading and Releasing a Rack” on page 28. The Rack Present sensor has failed. Stage Position Error In the VStack Diagnostics window, make sure that the Rack Sensor reads a value greater than 20 when a rack is loaded. If it does not, the sensor has failed. The VStack stage failed to move to the commanded position. Possible Cause Solution Something is obstructing the VStack stage and preventing it from reaching its commanded location. Check for debris that may be blocking the VStack stage. The stacking thickness is not set correctly in the labware editor. Measure the thickness of the plate and make sure that the correct value is entered. For more information, see the Database and Security User Guide. The plate is not sitting properly on the plate stage. Reset the plate and click OK. A mechanical or communications failure has occurred. Click OK and see if the VStack will recover. 65 66 Chapter 4: Maintenance and Troubleshooting VStack User Guide Maintenance Schedule Schedule Maintenance tasks for the VStack are listed in the following table. Maintenance Task Time Schedule Symptoms Wipe grippers with Ethanol As needed Grippers appear dirty or are sticking to plates Replace gripper pads As needed Gripper pads are damaged or worn If you have any questions about maintenance, please call the Velocity11 Service Center. ActiveX Commands 5 &ORADESCRIPTIONOF the ActiveX CONTROLS used to operate the VStack when integrated with a third-party systemSEETHE3TACKER ActiveX 5SER'UIDE T h i sp a g ei si n t e n t i o n a l l yl e f tb l a n k . Index VStack User Guide Index A Downstack command, 52 downstacking a plate, 40 ActiveX, 7 events, 73 finding the version, 2 methods, 70 properties, 68 air connecting to, 17 default pressure, 17 input port, 14 maximum pressure, 17 operating pressure, 4 air pressure regulator, 13 grip pressure, 41 Grip Pressure sensor, 43 Grip teachpoint, 54 gripper location, 13 B H base, 13 boolean Busy ActiveX property, 69 boolean CheckPlateSensor ActiveX method, 72 boolean GripperState ActiveX property, 68 boolean IsRackLoaded ActiveX method, 72 boolean IsRackPresent ActiveX method, 72 boolean IsStageEmpty ActiveX method, 71 boolean Open ActiveX method, 70 boolean OpenIP ActiveX method, 71 boolean OrientationChecking ActiveX property, 69 boolean Vacuum ActiveX property, 69 BSTR PlateName ActiveX property, 68 Busy light, 52 hazards. see safety Home command, 52 C communication verification, 31 computer requirements, 4 D damage hazards, 5 Device Id about, 33 changing, 33 DHCP server installing, 22 IP address, 19 subnet mask, 19 Diagnostics software, 52, 54, 56 opening, 36 display, 13 documentation to read, 3 dowel pins, 15 Down command, 52 E error messages, 60 Ethernet port, 14 Ethernet switch, 24 events, ActiveX, 73 G I In Motion light, 52 IP address, 18 IPictureDisp* ControlPicture ActiveX property, 68 J jog controls, 52 L laboratory requirements, 4 labware database, 8 labware editor, opening, 39 Left Notch sensor, 43 load/release button, 13 loading a rack, 28 long SensorFrequency ActiveX property, 68 longGripDelay ActiveXProperty, 68 M maintenance schedule, 66 manual operation, 52 Motor tabbed page, 57 mounting the VStack, 15 N network connecting VStacks, 24 identifying VStacks, 32, 34 verifying communication, 31 network card installation, 20 7 Index VStack User Guide networking kit, 18 O Orientation Sensor teachpoint, 54 P Plate Present sensor, 44 plate stage, 13 plate testing, 40 plate type selection, 38 power connecting to, 17 operating voltage and current, 4 receptacle, 14 Presentation teachpoint, 55 changing, 56 preventive maintenance, 66 R rack, 13 loading and releasing, 28 Rack Present sensor, 44 Release Stack command, 52 releasing a rack, 28 Right Notch sensor, 43 S safety general hazards, 5 injury hazards, 5 screws, 15 selecting a plate type, 38 sensor Grip Pressure, 43 Left Notch, 43 Plate Present, 44 Rack Present, 44 Right Notch, 43 Stage Position, 44 types, 43 viewing readings, 43 serial port, 14 short Downstack ActiveX method, 70 short Home ActiveX method, 71 short Jog ActiveX method, 71 short PlateDimensionSelect ActiveX property, 68 short ReleaseStack ActiveX method, 70 short Upstack ActiveX method, 70 software Diagnostics, 8 installing, 25 overview, 6 Stack Release teachpoint, 54 Stage Position sensor, 44 starting. see VStack, 25 switch, 24 system requirements. see computer requirements, 4 T teachpoint about, 54 Grip, 54 Orientation Sensor, 54 Presentation, 55 changing, 56 Stack Release, 54 testing plates, 40 Toggle Gripper command, 52 U Up command, 52 Upstack command, 52 upstacking a plate, 40 V void AboutBox ActiveX method, 72 void Close ActiveX method, 70 void DisplayMessage ActiveX method, 71 void SetButtonMode ActiveX method, 71 void ShowDiagsDialog ActiveX method, 72 VStack basic description, 6 external connections, 14 identifying on network, 32, 33 manual operation, 52 overview, 6 parts description, 13 parts diagram, 12 parts inspection, 10 turning on, 25 unpacking, 10 VStack error messages, 60 VStackBioNet.ocx. see ActiveX, 2 Agilent Technologies User Guide G5407-90001 Revision 01, December 2011