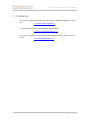
1
Modelmaker Short User Manual by theboxbuilder (Version 1.1 EN) Modelmaker/Short User Manual _____________________________________________________________________________________________________________________ Index 1. Description ............................................................................. 2 2. Design ....................................................................................... 2 2.1 Design selection............................................................................... 4 2.1.1 Browser ................................................................................................. 4 2.1.2 Groups .................................................................................................. 4 2.1.3 Filters .................................................................................................... 4 2.2 Design process ................................................................................ 4 2.2.1 Selection of material ........................................................................ 6 2.2.2 Entering the basic dimensions ........................................................... 7 2.2.3 Export ................................................................................................. 8 2.2.4 Desing information ............................................................................. 8 2.2.5 Details ................................................................................................ 8 2.2.6 Accessories ........................................................................................ 9 2.2.7 Modifications .................................................................................... 13 3. Manufacturing .................................................................... 14 3.1 Layout selection ............................................................................. 14 3.2 Layout modifications ...................................................................... 15 4. 3D Presenter ....................................................................... 16 4.1 Downloading the 3D viewer ........................................................... 16 4.2 3D viewing parameters .................................................................. 17 4.3 Adding graphics to the 3D.............................................................. 17 4.4 Downloading compatible VRML file ............................................... 18 5. Saving designs.................................................................... 19 5.1 "Customers Designs" Directory...................................................... 19 5.1.1 Clients management ........................................................................... 19 5.2 "Desings" Directory ........................................................................ 19 6. Settings .................................................................................. 20 6.1 General Information ....................................................................... 20 6.2 Changing the language.................................................................. 20 6.3 Sheet Size...................................................................................... 20 6.4 Licenses......................................................................................... 20 6.5 Invoices.......................................................................................... 20 7. Contacts ................................................................................. 21 __________________________________________________________________________________________________________ Page 1 of 22 Modelmaker/Short User Manual _____________________________________________________________________________________________________________________ 1. Description Modelmaker is an application for structural packaging desing. With regard to its use, the application´s most important feature is that it operates on ASP. ASP technology is abdsed on the use of applications via Internet , withaout having to buy software, installations or updates. To use the application you have to access the www.theboxbuilder.com website and sign in as a client with your user name and password. You can then begin to use the application Once you have logged in to the appication there are two separate areas where you can work. The first, which is accessible to all users of the application, contains the designs which Modelmaker makes available to its clients. Templates library Accessories library Latest designs All the designs that you can see and use in these sections are freely available to all users of Modelmaker. The second area is for accessing each user’s private work and information. That covers: o o o o Favorites library Customers designs Designs Settings All the designs and information in these sections is private and only the specific user can access it. __________________________________________________________________________________________________________ Page 2 of 22 Modelmaker/Short User Manual _____________________________________________________________________________________________________________________ 2. Design The following image shows the work environment in Modelmaker’s library of standard designs. To start creating a new design, the first step is to select the design that you require. Figure 1: Library of standard designs 1 2 3 __________________________________________________________________________________________________________ Page 3 of 22 Modelmaker/Short User Manual _____________________________________________________________________________________________________________________ 2.1 Design selection In order to make it easier to find the design you require in the library, the application includes a series of tools such as filters and browsers. These tools can be used individually or together. At the top of the screen there are two icons that allow you to decide whether to view the designs in 2D or 3D. You can change from one way of viewing to the other at any time. NOTE: All of Modelmaker’s designs are programmed for specific materials. The color of the design as shown in the library indicates the types of cartonboard for which each standard design is programmed. These are: Light Gray: Designs for folding carton and corrugated board up to a thickness of 1.6mm. Brown: Designs for corrugated board of a thickness of 3 mm and greater. You can change the cartonboard to be used for your box at any time, as long as it belongs to the group for which the design is programmed. The system makes all necessary changes to make the design suitable for the characteristics of the new type of cartonboard. 2.1.1 Browser Each design is allocated a FEFCO or ECMA code. These are two of the most widely used international standards. Each design also has a BOX BUILDER code. When any of these three codes are entered in the browser window (1), you shall be taken directly to the corresponding standard design. You are also able to enter part of the code, in which case the application will show you all the standard designs which contain it. 2.1.2 Groups All of the groups of designs available can be seen on the left hand side of the library (2). If you move the mouse over them, you will see a 3D image of an example design from each group. If you only wish to see the designs from one specific group, you can click on the group to see its contents. To view all of Modelmaker’s designs again, click on the group “All”. 2.1.3 Filters These are found on the right of the screen (3). There are two different types of filters. One is based on the package’s gluing system and the other on the material with which you wish to design your box. By choosing from the options provided by each filter and clicking on “OK”, the system will only show you the designs that meet your requirements. The “Reset filters” button lets you view all of the designs without any filtering. __________________________________________________________________________________________________________ Page 4 of 22 Modelmaker/Short User Manual _____________________________________________________________________________________________________________________ 2.2 Design Process Once you have found the required design, you move on to the design process by clicking on it. The image below shows the design environment in which you can adapt the box in accordance with your needs. Figure 2: Designs Environment Basics Optionals There are now two areas of work, namely basic and optional, each with a range of options with which to modify the design. The “Optional” column can only be used once the “Basics” column has been filled in with the material and basic dimensions for your box. __________________________________________________________________________________________________________ Page 5 of 22 Modelmaker/Short User Manual _____________________________________________________________________________________________________________________ 2.2.1 Selection of material Clicking in “material” takes you to the screen where you can select, from a menu, the type of cartonboard that you wish to use. It is very important to choose a suitable type of material at this stage as modifications and design tolerances depend on it. Figure 3: Selection of material The above images shows the application´s help facility for material selection. __________________________________________________________________________________________________________ Page 6 of 22 Modelmaker/Short User Manual _____________________________________________________________________________________________________________________ 2.2.2 Entering the basic dimensions Once the material has been selected, you then enter the basic dimensions for the design. You first have to click on “Basic Dimensions”, where you see the different options offered by the system. There are three options: Inside dimensions: By inside dimensions we mean the internal capacity of the assembled box. The system shall make the necessary additions to each figure depending on the type of design and the characteristics of the cartonboard. Crease to Crease dimensions: In this case the system shall neither increase nor decrease the figure introduced. The exact crease-to-crease dimensions shall be respected. Outside dimensions: By Outside dimensions we mean the external dimensions of the assembled box. The system shall make the necessary subtractions from each figure depending on the type of design and the characteristics of the cartonboard. Figure 4: Type of dimensions Once you have selected one of the options for “Type of dimensions”, the system shall ask you to enter the basic dimensions of the box. You can use the help image on the lower part of the screen to introduce the necessary information, while the real box that you are constructing can be seen on the right-hand side of the screen. The back and forward arrows let you move to other screens where you can modify the dimensions of gluing flaps, side flaps, etc. Figura 5: Navigation bar __________________________________________________________________________________________________________ Page 7 of 22 Modelmaker/Short User Manual _____________________________________________________________________________________________________________________ 2.2.3 Export Simply concluding the above two steps gives you the option of downloading the design on different formats (cf2, dxf, eps and Pdf). Figure 6: Downloadable files 2.2.4 Design information This section is not obligatory. Information you have entered, such as basic dimensions and type of material, appear automatically, and there are also blank spaces where you can enter additional information, such as Reference, Name, Description… 2.2.5 Details This section lets you modify specific aspects of Modelmaker’s standard design. These details are different depending on the type of design you have chosen. The application gives you the option of changing the default setting details for others that you can choose from. Simply click on them to change them. The “Back” and “Next” icons let you see the different options. __________________________________________________________________________________________________________ Page 8 of 22 Modelmaker/Short User Manual _____________________________________________________________________________________________________________________ 2.2.6 Accessories By accessories we mean small design features such as windows, hangers and displays, all aimed at improving the box you are creating. The accessory must already be designed in order to use it during the design process for the box. Before clicking on “Accessories” in the “Optional” column, you must first go to “Accessories” in the “Library” tab and design the accessory that you wish to use. The image below shows how to access the accessory design process Figure 7: Accessories design process __________________________________________________________________________________________________________ Page 9 of 22 Modelmaker/Short User Manual _____________________________________________________________________________________________________________________ 2.2.6.1 Accessory design After entering “accessories” in the “Library” tab you come to a screen with two columns. On the left are the groups available on the website, while on the right there are filters that can be used to make the search for the accessory that you wish to design easier. The process works in a very similar way to the templates´design process. Figure 8: Accessories library __________________________________________________________________________________________________________ Page 10 of 22 Modelmaker/Short User Manual _____________________________________________________________________________________________________________________ Choose an accessory by clicking on it. You will then see 3 icons, of which 2 are optional (Center of Gravity and Units) and one obligatory (basic dimensions). Figure 9: Accesory design Basics Optionals To enter the dimensions for the accessory selected, click on “Basic Dimensions”. You can then save the accessory. If you wish to create a more elaborate design, you have to click on the icons defined as optional: “Center of Gravity” lets you choose a reference point for the accessory, which will be taken into account when placing it on the template. “Units” lets you replicate the accessory designed, thus creating a matrix with the required number of rows and columns. This matrix has the same characteristics as a simple accessory and can be added to any template. __________________________________________________________________________________________________________ Page 11 of 22 Modelmaker/Short User Manual _____________________________________________________________________________________________________________________ 2.2.6.2 Accessory placement Once the accessory has been saved, you can use it and place it on the design you wish by clicking on “Accessories” during the design process. Depending on the type of box, the system will let you add one or more accessories to different parts of the box. Figure 10: Accesory placement NOTE: The accessory will be placed in accordance with the reference point selected as center of gravity in the previous section. If you wish to rotate or move the accessory once it has been placed on the design, you can do so in the next section (“Modifications”). __________________________________________________________________________________________________________ Page 12 of 22 Modelmaker/Short User Manual _____________________________________________________________________________________________________________________ 2.2.7 Modifications At this stage of the design process you can customize small details of the design. The system allows you to change some figures regarding specific parts of the design. Figure 11: Modifications If you have placed an accessory on the box, you can now make all the necessary adjustments to place it exactly where you want. NOTE: The modification of some details may harm the performance of the box. Modelmaker does not guarantee that the changes made to the design in this section will work properly. __________________________________________________________________________________________________________ Page 13 of 22 Modelmaker/Short User Manual _____________________________________________________________________________________________________________________ 3. Manufacturing When you have finished designing your box, you are able to arrange as many boxes as you wish in a sheet, as well as modifying some aspects of their arrangement. 3.1 Layout selection To obtain the layout that you wish without difficulties, the system shall help you by proposing various alternatives for the placement of the boxes, including their rotation. Figure 12: Layout Selection It also allows you to enter the sheet size, whether a standard sheet size or a customized one. __________________________________________________________________________________________________________ Page 14 of 22 Modelmaker/Short User Manual _____________________________________________________________________________________________________________________ 3.2 Layout modifications To select one of the arrangements offered by the system, simply click on it. You will see a new window where you can do all the calculations required: add boxes, change the size of the sheet (including the margins), rotate the design, leave gutters between designs, etc. Figure 13: Layout Modificactions As the sheet can be adjusted to the arrangement, the amount of cartonboard that you need and, therefore, the cost can be calculated. You are also provided with additional information, such as the percentage of waste on the sheet. The final design can be downloaded however you require (CF2, DFX, EPS, PDF) in order to continue working on other applications. __________________________________________________________________________________________________________ Page 15 of 22 Modelmaker/Short User Manual _____________________________________________________________________________________________________________________ 4. 3D Presenter This section of the system lets you see, via a 3D animated video, how the box is glued and assembled. The video can be downloaded to your computer on VRML format. Figure 14: 3D Module External image VRML format 4.1 Downloading the 3D viewer To see the animated 3D design, it is essential to have a suitable viewer installed. The viewer must be installed on the application user’s computer. The viewer allows you to watch the 3D animation, both from inside the application and outside using exported VRML files. You can use any viewer that works with VRML. The Box Builder recommends Parallel Graphics’ Cortona viewer, which can easily be downloaded for free at: www.parallelgraphics.com/products/cortona __________________________________________________________________________________________________________ Page 16 of 22 Modelmaker/Short User Manual _____________________________________________________________________________________________________________________ 4.2 3D viewing parameters The parameters of use of the animated 3D file depend on the viewer that you have chosen. The Cortona viewer contains a toolbar with which you can zoom in, zoom out, rotate, or view the 3D animation step by step or continuously. 4.3 Adding graphics to the 3D To get the best possible idea of what the final product will look like, the system lets you add the graphic that is going to appear on the outside of the box. Figure 15: Adding graphics to the 3D You simply have to click on the “Find” button to access any folder on your PC and select the image you require. NOTE: The graphic must be a low resolution *.bmp or a *.jpg file (maximum 3.9 mb). The system will center the image on the box design, for which it is essential that the graphic you add has the same margin on all four sides (0, 1, 5 mm) so that it fits perfectly when placed in the center of the design. __________________________________________________________________________________________________________ Page 17 of 22 Modelmaker/Short User Manual _____________________________________________________________________________________________________________________ 4.4 Downloading a compatible VRML file The animated 3D designs you can watch are on *.VRML format. If you wish, you can download the animated 3D design with the above extension, with or without printing. The downloaded file retains all its characteristics and, as it is not a big file, can be sent to your final client by email. The file will give the client a much better idea of the exact nature of the final product. __________________________________________________________________________________________________________ Page 18 of 22 Modelmaker/Short User Manual _____________________________________________________________________________________________________________________ 5. Saving designs In order to manage the storage of your own designs as you wish, the application provides you with two private environments. The designs from either of these two environments can be reused, downloaded, moved or used however you require. 5.1 “Customers Designs” Directory This space is used in much the same way as “Designs,” but allows you to organize your work based on your clients. You can create, modify and erase clients in order to organize your work in terms of the client for which it has been designed. Figure 16: “Customers Designs” Directory 5.1.1 Client management Client management is as simple as going to Clients’ Designs, Client Records, and clicking on New Client. You can fill in the information you need and click OK. Your private file then has a new client in which you can save your designs. You can erase, edit or modify client information at any time. 5.2 “Designs” Directory “Designs” is a space for you to create folders as required, name them, organize them or erase them. It is a space where you organize your work as you wish. Figure 17: “Desings “ Directory It is divided into two parts. In one section you can save the templates that you have designed, while the other is for your accessories, thus giving a logical order to the storage system. __________________________________________________________________________________________________________ Page 19 of 22 Modelmaker/Short User Manual _____________________________________________________________________________________________________________________ 6. Settings 6.1 General Information The “General Information” section contains all information pertaining to your company. You can change the information at any time. This section also allows you to change the default password that the system assigns you when you contract our services. 6.2 Changing the lenguage Modelmaker can be used in four different languages, namely English, Spanish, French and German. This section allows you to select, at any time, the language in which you wish to work. 6.3 Sheet Sizes In “Sheet sizes,” the system allows you to select different sheet sizes in accordance with your needs. These sizes shall be used in the manufacturing module to calculate the optimal arrangement of designs on the sheet. 6.4 Licenses The “Licenses” section lets you see all of the licenses that you have purchased, along with the purchase and expiration dates. This section allows you to change the type of license that you have by selecting a longer term license. n “Licenses” you can also cancel the automatic renewal of the licenses, which is processed automatically by the system. 6.5 Invoices “Invoices” gives you a list of all the invoices for your purchase of licenses from The Box Builder. You can see them on the screen or download them on PDF format. __________________________________________________________________________________________________________ Page 20 of 22 Modelmaker/Short User Manual _____________________________________________________________________________________________________________________ 7. Contacts If you have any suggestions regarding this Users’ Manual or Modelmaker application, contact us at: [email protected] For any operational problems in the application, send an email to: [email protected] If you have any suggestions regarding Modelmaker application’s range of designs, send an email to: [email protected] __________________________________________________________________________________________________________ Page 21 of 22