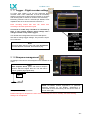
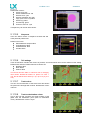
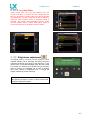
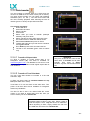
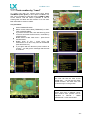
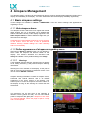
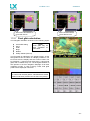
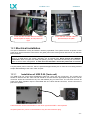
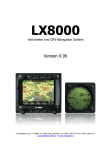
1
LX Zeus v 3.0 25.6.2014 LX Zeus LX Zeus Mobile, 2.8, 4.3, 5.5, 7.0 and 8.0 User’s manual ( Version 3.0) Tkalska 10 SI 3000 Celje Tel: 00 386 3 490 46 70 Fax: 00 386 3 490 46 71 www.lxnavigation.si -1- LX Zeus v 3.0 1 25.6.2014 SYSTEM DESCRIPTION .................................................................................................................- 7 - 1.1 Screen size options ....................................................................................................................- 7 1.1.1 LX Zeus 2.8 ..............................................................................................................................- 7 1.1.2 LX Zeus 4.3 ..............................................................................................................................- 7 1.1.3 LX Zeus 5.5 ..............................................................................................................................- 7 1.1.4 LX Zeus 7.0 ..............................................................................................................................- 7 1.1.5 LX Zeus 8.0 ..............................................................................................................................- 8 1.1.6 LX Zeus Mobile ........................................................................................................................- 8 1.2 Hardware concept ......................................................................................................................- 8 1.2.1 USB and SD port ......................................................................................................................- 9 1.2.2 Connections .............................................................................................................................- 9 1.3 Software ......................................................................................................................................- 9 - 1.4 Technical data ...........................................................................................................................- 10 - 1.5 Operation and controls ............................................................................................................- 11 - 1 ........................................................................................................................................................- 11 1.4.1 System push buttons (5) ........................................................................................................- 11 1.4.2 Navigation push buttons (3) ...................................................................................................- 13 1.4.2.1 Custom creation of bottom rows (NAV BOX row) .........................................................- 14 1.4.2.2 Bottom row layout ..........................................................................................................- 15 1.4.3 First navigation subpage ........................................................................................................- 15 1.4.4 Second navigation subpage ...................................................................................................- 15 - 1.5 Rotary Switches........................................................................................................................- 15 1.5.1 Zoom Rotary switch ...............................................................................................................- 16 1.5.1.1 Additional functions of Zoom .........................................................................................- 16 1.5.2 Audio volume rotary switch ....................................................................................................- 16 1.6 Automatic jump out of edit ......................................................................................................- 17 - 1.7 Display organisation and management .................................................................................- 17 1.7.1 Display organization ...............................................................................................................- 17 1.7.1.1 Indicators .......................................................................................................................- 17 1.7.1.2 Bottom row customization .............................................................................................- 18 1.7.1.3 Header customization ....................................................................................................- 19 2 SETUP ............................................................................................................................................- 19 - 2.1 Pilot specific settings...............................................................................................................- 20 2.1.1 Pilots.......................................................................................................................................- 20 2.1.2 Audio settings .........................................................................................................................- 20 2.1.3 Voice ......................................................................................................................................- 21 2.1.4 Vario settings .........................................................................................................................- 21 2.1.5 Indicators ................................................................................................................................- 22 2.1.5.1 Secondary indicators .....................................................................................................- 23 2.1.6 Flarm ......................................................................................................................................- 23 2.1.7 Logger - Flight recorder settings ............................................................................................- 24 2.1.8 Airspace management ...........................................................................................................- 24 2.1.9 Wind .......................................................................................................................................- 25 2.1.10 Graphics (User Interface) ..................................................................................................- 26 2.1.10.1 Map settings ..................................................................................................................- 26 2.1.10.2 Fonts .............................................................................................................................- 27 2.1.10.3 TP/APT settings .............................................................................................................- 27 2.1.10.4 Task settings .................................................................................................................- 27 2.1.10.5 Airspaces .......................................................................................................................- 28 -2- LX Zeus v 3.0 25.6.2014 2.1.10.6 Tail settings ...................................................................................................................- 28 2.1.10.7 Track colour ...................................................................................................................- 28 2.1.10.8 Track to destination colour ............................................................................................- 28 2.1.10.9 View SUBP 3 .................................................................................................................- 29 2.1.10.10 Auto close inactivity time out .....................................................................................- 29 2.1.10.11 Statistics colours .......................................................................................................- 29 2.1.11 Layout ................................................................................................................................- 29 2.1.11.1 Customization process of moving and resizing .............................................................- 30 2.1.11.2 Copy NAV BOXes .........................................................................................................- 34 2.1.12 Brightness adjustment .......................................................................................................- 34 2.2 System Setup ............................................................................................................................- 35 2.2.1 Units .......................................................................................................................................- 35 2.2.2 Glider (glider polar selection) .................................................................................................- 35 2.2.2.1 Speed indicator settings ................................................................................................- 35 2.2.2.2 Flaps position settings ...................................................................................................- 35 2.2.2.3 Voice module .................................................................................................................- 36 2.2.2.4 TE level ..........................................................................................................................- 36 2.2.3 Check list ................................................................................................................................- 37 2.2.4 Data transfer ..........................................................................................................................- 38 2.2.4.1 Transfer of Airport data .................................................................................................- 38 2.2.4.2 Transfer of Turn Point data ...........................................................................................- 38 2.2.4.3 Transfer of Airspace files ...............................................................................................- 39 2.2.4.4 Transfer of Flarm net files .............................................................................................- 39 2.2.4.5 Transfer Charts..............................................................................................................- 39 2.2.4.6 How to delete files (APT, TP, AS) .................................................................................- 39 2.2.5 Service ...................................................................................................................................- 40 2.2.5.1 Screen rotation ..............................................................................................................- 40 2.2.5.2 Compass calibration ......................................................................................................- 40 2.2.5.3 AHRS Level adjust (Pitch and Roll)..............................................................................- 40 2.2.6 Locale .....................................................................................................................................- 41 3 3.1 NAVIGATION MODES ...................................................................................................................- 42 APT mode (navigation to airports) .........................................................................................- 42 - 3.2 How to select an airport? ........................................................................................................- 42 3.2.1 APT selection from NEAR function ........................................................................................- 43 3.3 Navigation in APT / TP or TSK mode......................................................................................- 43 3.3.1 Sort by filter ............................................................................................................................- 43 3.3.2 Main graphic navigation page ................................................................................................- 43 3.3.3 Second navigation page (subpage) .......................................................................................- 44 nd 3.3.4 Third navigation page (2 subpage) ......................................................................................- 44 3.3.5 Use of Remote Stick in APT...................................................................................................- 45 3.4 Turn point mode .......................................................................................................................- 45 3.4.1 Creation of User Turn points ..................................................................................................- 46 3.4.1.1 Creation of a Turn point by hand ...................................................................................- 46 3.4.1.2 Storing of actual position during flight ...........................................................................- 46 3.4.1.3 Edit TP ...........................................................................................................................- 46 3.4.1.4 Add Marker ....................................................................................................................- 47 3.4.1.5 Delete TP .......................................................................................................................- 47 3.4.2 Selection of a Turn Point ........................................................................................................- 47 3.4.2.1 Selection from Near .......................................................................................................- 47 3.4.3 Navigation to a Turn Point......................................................................................................- 48 3.4.3.1 Use of Remote stick ......................................................................................................- 48 3.5 Task Mode .................................................................................................................................- 48 3.5.1 Task organization ...................................................................................................................- 48 3.5.1.1 Task declaration ............................................................................................................- 48 -3- LX Zeus v 3.0 25.6.2014 3.5.2 Task selection ........................................................................................................................- 48 3.5.3 Task creation by “hand” .........................................................................................................- 49 3.5.3.1 Create and Edit Zones .................................................................................................- 50 3.5.4 Task Start (ARM), Restart, Next TP, Clear, Save, Team Code .............................................- 51 3.5.4.1 Task Start ......................................................................................................................- 51 3.5.4.2 Task Restart function.....................................................................................................- 51 3.5.4.3 Over Turn point..............................................................................................................- 52 3.5.4.4 Saving TSK to USB ......................................................................................................- 52 3.5.4.5 Clear TSK .....................................................................................................................- 52 3.5.4.6 Team Code ...................................................................................................................- 53 3.5.5 MOVE Function (during flight) ................................................................................................- 53 3.5.6 Task Zoom .............................................................................................................................- 53 3.5.7 Use of Remote Stick ..............................................................................................................- 54 4 AIRSPACE MANAGEMENT ..........................................................................................................- 55 - 4.1 Basic airspace settings............................................................................................................- 55 4.1.1 Hide airspace above ..............................................................................................................- 55 4.1.2 Define appearance of airspaces regarding zoom ..................................................................- 55 4.1.2.1 Warnings .......................................................................................................................- 55 4.1.3 Disabling of airspace sections................................................................................................- 56 5 GPS SIGNAL MANAGEMENT ......................................................................................................- 57 - 5.1 Colibri II plug .............................................................................................................................- 57 - 5.2 Flarm plug .................................................................................................................................- 57 - 5.3 GPS signal for navigation ........................................................................................................- 57 - 6 6.1 LX ZEUS AND COLIBRI II .............................................................................................................- 58 Colibri II power management ..................................................................................................- 58 - 6.2 Colibri II - Zeus interaction ......................................................................................................- 58 6.2.1 Commands and declaration transfer to Colibri II....................................................................- 58 7 LX ZEUS AND FLARM ..................................................................................................................- 59 - 7.1 Flarm external displays............................................................................................................- 59 - 7.2 Task declaration into Flarm .....................................................................................................- 59 - 7.3 Transferring files from Flarm ..................................................................................................- 60 - 7.4 Flarm Red Box / Mini Box update ...........................................................................................- 60 - 7.5 Flarm PIN OUT ..........................................................................................................................- 60 - 8 LX ZEUS AND GARRECHT ..........................................................................................................- 60 - 8.1 LX ZEUS and Garrecht TRX-1090 ADSB / TRX-2000.............................................................- 60 - 8.2 LX ZEUS and Garrrect TRX-1500 ............................................................................................- 61 - 9 9.1 REMOTE CONTROL ......................................................................................................................- 61 Use of Remote Stick .................................................................................................................- 61 -4- LX Zeus v 3.0 25.6.2014 9.2 Remote in second seat ............................................................................................................- 61 - 10 SECOND SEAT UNIT ....................................................................................................................- 62 - 10.1 Connection of Vario and Remote ............................................................................................- 62 10.1.1 Secondary Vario setup ......................................................................................................- 62 10.2 Interaction LX Zeus – LX Zeus Second seat ..........................................................................- 62 10.2.1 TSK / TP / APT exchange ..................................................................................................- 62 10.2.2 Downloading flights from Second seat ..............................................................................- 63 11 FLYING WITH LX ZEUS ................................................................................................................- 63 - 11.1 Flight preparation on ground ..................................................................................................- 63 11.1.1 Before take off....................................................................................................................- 63 11.1.1.1 Setting of the take-off elevation .....................................................................................- 63 11.1.1.2 QNH setting ...................................................................................................................- 63 11.1.1.3 Task declaration process ..............................................................................................- 64 11.2 During flight ..............................................................................................................................- 64 11.2.1 Set MacCready, Ballast, Bugs and QNH ...........................................................................- 64 11.2.2 Statistics .............................................................................................................................- 65 11.2.2.1 Thermal Analysis ...........................................................................................................- 65 11.2.2.2 OLC Calculation ............................................................................................................- 66 11.2.2.3 Baro trace graph ............................................................................................................- 66 11.2.2.4 Task Statistics ...............................................................................................................- 66 11.2.2.5 Route .............................................................................................................................- 67 11.2.3 Special functions ................................................................................................................- 67 11.2.3.1 Event function ................................................................................................................- 67 11.2.3.2 Marker setting ................................................................................................................- 67 11.2.4 Task Start..........................................................................................................................- 68 11.2.4.1 Start Conditions / Limitations .........................................................................................- 68 11.2.4.2 Task Restart ..................................................................................................................- 69 11.2.4.3 Restart Leg ....................................................................................................................- 69 11.2.5 Task Finish.........................................................................................................................- 69 11.2.6 Flying AAT (Assigned Area Task)......................................................................................- 69 11.2.7 Final glide calculation ........................................................................................................- 70 11.2.8 Finish line crossing ............................................................................................................- 71 11.2.9 Thermal assistant ..............................................................................................................- 71 11.2.10 Flarm management ............................................................................................................- 71 11.2.11 Artificial horizon – AHRS ...................................................................................................- 72 11.3 After landing .............................................................................................................................- 73 11.3.1 Downloading of flights ........................................................................................................- 73 11.3.1.1 Downloading Colibri II flights .........................................................................................- 73 11.3.1.2 Downloading of flights recorded by Zeus ......................................................................- 74 11.3.1.3 Downloading flights stored in Flarm ..............................................................................- 74 11.3.1.4 Colibri II – Zeus interaction after landing .......................................................................- 74 11.3.2 Recommendations for safe operation ................................................................................- 74 11.4 12 ICAO charts ...............................................................................................................................- 75 INSTALLATION ..............................................................................................................................- 76 - 12.1 Mechanical installation ............................................................................................................- 76 12.1.1 Installation of Vario unit .....................................................................................................- 76 12.2 Screen rotation .........................................................................................................................- 76 - 12.3 Electrical installation................................................................................................................- 77 -5- LX Zeus v 3.0 25.6.2014 12.3.1 Installation of USB D 60 (Vario unit) ..................................................................................- 77 12.3.1.1 USB-D 60 wiring ............................................................................................................- 78 12.4 Installation of second seat units .............................................................................................- 79 12.4.1 Electrical installation ..........................................................................................................- 79 13 EXPLANATION OF TERMS ..........................................................................................................- 80 - 12.1 Text explanations of NAV BOXes ................................................................................................- 80 14 ZEUS MOBILE ...............................................................................................................................- 81 - 15 FAQ (FREQUENTLY ASKED QUESTIONS) ................................................................................- 82 - -6- LX Zeus v 3.0 25.6.2014 1 System description The system consists of a minimum of two units. One of them is a gliding computer and another unit is a 57 mm vario. The vario unit is also available as an 80 mm option. The gliding computer has a sunshine readable and anti-reflective 5.5 inch colour display and a high power Linux running computing device. The vario is a standalone unit and has its electronics based on high precision digital sensors and transducers. The connection between vario and computer unit is via LX system bus. System extensions (second seat unit, remote control, compass ....) are also possible after connecting the LX system bus solution. All connections are plug and play, what means no specialists are required to install the system. Note! Pictures used in this manual may slightly differ from the LX Zeus original screens. 1.1 Screen size options LX Zeus comes in five different screen size variants, which makes it possible to install the LX Zeus system into practically any instrument panel. The complete electronics and also all functions are the same for all variants. The only difference is, that 2.8 and 4.3 variants uses a 2x4 push button organization and other options have a 5x3 push button organization. Every unit except the 2.8 model, is delivered with a suitable steel template which makes possible to prepare new cut out by hand after using of hand tools. There are two orientations possible*: landscape or portrait orientation. This can be specified during ordering. The user can also change the orientation in the system settings. *Zeus 2.8 is only available in landscape orientation. 1.1.1 LX Zeus 2.8 This version of Zeus can be installed into any normal 80 mm panel cut out and therefore does not require an instrument panel upgrade. Display orientation is only landscape. 1.1.2 LX Zeus 4.3 The display diagonal of the system is 4.3 inch and has following outline dimensions: 83x136x52 mm 1.1.3 LX Zeus 5.5 This is the most common used variant and comes with 5.5 inch display. Layout size is: 106x146x52 mm 1.1.4 LX Zeus 7.0 This version size can be fitted in the majority of instrument panels used in modern gliders. The display size is 7 inch and the unit layout is: 110x190x52 mm -7- LX Zeus v 3.0 25.6.2014 1.1.5 LX Zeus 8.0 This is the biggest LX Zeus model and its display diagonal is 8 inch. 161x218x52 mm 1.1.6 LX Zeus Mobile LX Zeus Mobile is a derivate from LX Zeus 4.3. The unit uses a 4.3 inch display, the same as by Zeus 4.3. The unit is prepared to be installed as an integral part of the panel, but can be also used as a mobile device installed on panel by using a gooseneck. A vario unit is also a part of delivery and its default configuration is a black box solution. An upgrade to color display and the needle is possible at any time. 1.2 Hardware concept The system is designed to offer flexible solutions of system configurations, so the pilot is able to provide some kind of custom design. At the back side of the unit there are plenty of connectors which make it possible to connect (plug and play) a various palette of GPS signal sources, as the unit does not have integral GPS receiver. Units as Colibri, LX 20, VL and any other GPS source which are capable of delivering NMEA data at nearly any baud rate, are compatible. A special plug is provided for Colibri II connection and in that case Colibri II is also powered from Zeus. Using of Colibri II offers some important benefits for the pilot. The benefits are: automatic switch on of Colibri II as Zeus is powered on. automatic power off after Zeus will be switched off and the system is no longer in flying mode; if flight status is detected, Colibri II will continue logging its own internal battery. downloading of flights via Zeus USB stick When two GPS sources are connected at the same time, both signals are combined and losing one of the GPS sources will not degrade system availability. Colibri II is used as an IGC flight recorder in the case of an IGC approved solution. In that case a high level of communication is established between Colibri II and Zeus and the pilot is able to operate the system in the same way as by an integral flight recorder. The Colibri II unit can operate in portrait and also in landscape orientation. Changing orientation is very easy and can be done by pilot. See Colibri II user manual for more information. Commercially available versions: LX Zeus IGC: package consists of LX Zeus Computer Colibri II high level approved flight recorder with ENL, OAT sensor, USB key, main power cable with switch, USB D 60 vario unit and USB D cables LX Zeus Flarm: LX Zeus Computer, Flarm which is not IGC (optionally can be IGC), Flarm dipole antenna, SD card for Flarm, Flarm cable to Zeus, Flarm SD cable to Zeus, Flarm GPS antenna, OAT sensor, USB key, main power cable with switch, USB D 60 vario unit and USB D cables LX Zeus Flarm IGC: LX Zeus Computer, Flarm which is not IGC (optionally can be IGC), Flarm dipole antenna, SD card for Flarm, Flarm cable to Zeus, Flarm SD cable to Zeus, Flarm GPS antenna, Colibri II high level approved flight recorder with ENL, OAT sensor, USB key, main power cable with switch, USB D 60 vario unit and USB D cables LX Zeus: LX Zeus Computer, USB key, main power cable with switch, USB D 60 vario unit and USB D cables Rotary switches and push buttons There are 8 push buttons and two rotary switches on the front of the unit. Also the rotary switches have a double push function (short and long press). On one side there are five push buttons which all have a double push function (short and long press) and on the other side there are three push buttons with one push function. Buttons are labelled and this makes unit manipulation very easy. (Zeus 2.8 has a 4x4 push button organization. -8- LX Zeus v 3.0 25.6.2014 Both rotary switches are multifunctional as follows: Default functions: audio volume adjustment function zoom selector In edit: zoom: scrolling and press confirmation volume: bigger steps of scrolling and escape/cancel by pressing 1.2.1 USB and SD port An A-size USB port is situated on the front panel. The port is exclusively used for data transfer and firmware updates. The customer can also easily do the firmware updates. The SD port is only used when a Flarm is connected (Flarm Red Box, Swiss Flarm and optionally Flarm Mini Box). The SD port makes direct communication with Flarm possible, which means downloading of flights stored in Flarm, uploading of declaration and also Flarm updating. 1.2.2 Connections On the back side of the unit there are following connectors: 4x 485 system bus (Zeus 2.8 has 2x 485)* 2x CAN bus** Colibri II port (5V and data)*** Flarm port (12 V power and data)**** 2x Flarm display outputs 1x Flarm SD 1x OAT plug to connect OAT sensor Zeus 5.5/7.0 with AHRS: 1x Pst connector 1x Ptot connector 1x USB (not in use) * 485 connects LX Zeus to: USB D 60 Vario unit Remote control stick Secondary Vario indicators Compass module Voice module ** CAN bus: Connects Second seat unit *** Colibri II port: Makes possible to arrange direct connection of LX Zeus to Colibri II only via cable (special cable required, is included when purchased together) **** Flarm port can be also used to connect any other GPS source which has an IGC standard connector. For instance: Colibri LX 20, VL… If Flarm is connected, two Flarm displays can be connected to the system by using Display 1 and Display 2 plugs. The SD connector is directly connected to the micro-SD card reader on the front of the Zeus. 1.3 Software SW package is completely developed by LX Navigation and is running on Linux operation system. The logic used kept the well-known LX Navigation philosophy, but some new approaches have been involved. The SW is continuously developed and upgrades are regularly published. Upgrades of SW can easily be done by user without requiring any passwords. Contact your dealer to get notified of future updates. -9- LX Zeus v 3.0 25.6.2014 1.4 Technical data Computer module 4.3, 5.5, 7.0, 8.0: 4.3, 5.5, 7.0 or 8.0 inch sunshine readable anti-glare display Landscape or portrait orientation Power requirements: typically 400 mA at 12 V (may vary due to backlight intensity settings) 8 push buttons 2 rotary switches with push functions USB size A port SD card reader (for Flarm only) Computer module Zeus 2.8: 2.8 inch sunshine readable antiglare display Power requirements: typically 300 mA at 12 V Layout: 80 mm size, landscape only orientation 8 push buttons 2 rotary switches with push functions USB size A port SD card reader (for Flarm only) Vario module (USB D 60): 57 mm air norm (60x60 mm) Optionally 80 mm Mechanical needle with colour display Power consumption: 120 mA at 12 485 bus compatible unit - 10 - LX Zeus v 3.0 25.6.2014 1.5 Operation and controls 8 push buttons and two rotary switches are used to control the Zeus. LX Navigation Remote Stick can also be used to control the unit. Push buttons are divided into two groups. Group of 5 buttons situated between the two rotary switches are meant for system inputs. All five buttons support two functions; long or short press. Short press activates the top labelled function and long press (approximately 2 seconds) activates secondary function, which is labelled below the top one. Next three push buttons are used during navigation to switch between navigation modes. These buttons do not support long press functions. 1.4.1 System push buttons (5) Vario / Flarm TSK / Move Stat / Event Select / Near Setup / Info VARIO / FLARM button VARIO (short press): input of MC, Ballast and Bugs FLARM (long press): activation of Flarm radar screen TSK / MOVE button TSK: task management, for next actions use press buttons near to the labels MOVE: executing of move function by AAT - 11 - LX Zeus v 3.0 25.6.2014 STAT / EVENT button STATISTICS: flight and task statistics EVENT: activation of Event function in Colibri II SELECT / NEAR button SELECT: selection of APT, TP and TSK and Airspace NEAR: activation of near function (Landable points / Markers, Turnpoints, Airspaces…) SETUP / INFO button SETUP: direct access to Setup menu INFO: information about GPS source, and other data, system configuration (latest software version), selected pilot with all data, glider configuration and sunrise/sunset time. - 12 - LX Zeus v 3.0 25.6.2014 1.4.2 Navigation push buttons (3) Three buttons are used to leaf through the navigation menus of LX Zeus. APT button (Airport, Turn point, Task) After each press the next mode will be selected. This will only change the main page. SUBP button (Subpage) SUBP (subpage): after every push, subpage of APT, TP or TSK screen will open. The procedure is circular. st 1 subpage is divided into two parts. The upper part consists of vertical terrain profile and lower part consists of Airport / TP data and TSK statistics. nd 2 subpage is divided into map and 3D terrain display or Artificial horizon (AHRS), if it is the part of the system. - 13 - LX Zeus v 3.0 25.6.2014 1-4 button 1-4: LX Zeus uses the bottom row for NAV BOX presentation. Infinite variants are fully programmable and selectable by the 1-4 push button. The colours, transparency and presentation of the bottom NAV BOX container is a matter of custom design. See more in Setup Layout. Actual bottom row variant is shown by a number (1-4) which is located in the right lower corner of ZEUS screen. 1.4.2.1 Custom creation of bottom rows (NAV BOX row) Any NAV BOX position can be custom designed. The procedure starts after a long press on Zoom button. A yellow marked window shows ready status. Rotate Zoom to find position for your NAV BOX and press Zoom. A list of possible NAV BOX information will open. Rotate Zoom to find NAV BOX of interest and confirm it with press on Zeus. Note! To select next bottom row which is still empty simply position yellow window to the last position (full right) and press on 1-4 button. Note! Editing of bottom row is also possible during flight. - 14 - LX Zeus v 3.0 1.4.2.2 25.6.2014 Bottom row layout Bottom row can be positioned on the bottom of the display and as well on the top (in fact any position can be chosen). The info row can be used as single row, double or triple row. For more information see Setup/Layout. Examples of bottom row layouts 1.4.3 First navigation subpage First navigation subpage is available after press on SUBP button and this is valid for all three navigation modes. The page is divided into two sections. Upper section is reserved for vertical terrain profile, the lower part shows APT and TP data. Subpage at TSK shows task’s statistics by legs. Vertical terrain profile shows glider position regarding to the terrain and the airspace. Final glide profile for MC 0 and actual MC is also visualized as a cone. The terrain is shown in all 3 pages (TP, APT, TSK). The profile of terrain is bearing to selected TP, APT and with all TPs on the TSK. The terrain mode also shows the airspaces in a vertical profile with different colours. With Zoom knob you can adjust scale. 1.4.4 Second navigation subpage This page shows 3D terrain data regarding to glider present position. If the artificial horizon is integrated in the Zeus, then the second navigation page will be an artificial horizon (AHRS). 1.5 Rotary Switches Both rotary switches are multifunctional; their basic functions are audio volume adjustment and zoom adjustment. The push function on the rotary switches also offers significant help connected with editing and selection. - 15 - LX Zeus v 3.0 25.6.2014 1.5.1 Zoom Rotary switch Its direct function is the selection of zoom factor (scale of the map) in graphic page. After every change a new scale factor will be selected and the actual scale is shown as 1: xxxxxx and not in kilometres or Nm (as it was in older LX Navigation units). 1.5.1.1 Additional functions of Zoom After press has been activated the function of Zoom rotary switch will change and the switch will become most common used switch for LX Zeus operation during editing and selection processes. Any input and also scrolling can be done after using of Zoom switch. Note! Press on Zoom should be used after any attempt to make inputs. After press immediate inputs are possible when rotating the knob. Example 1: update of MC press Vario button select item (MC, Bal..) by Zoom knob (rotate) press on Zoom knob adjust new value, rotating Zoom or Volume press on Zoom to confirm it press on Volume knob to escape 1.5.2 Audio volume rotary switch A bar will show audio volume status after rotation. - 16 - LX Zeus v 3.0 25.6.2014 1.5.2.1.1 Additional functions The main secondary function of volume rotary switch is its press function. When pressed in edit mode will execute jump out of the menu. The push function isn’t active in navigation menus (APT, TP and TSK). After activation all already done edit inputs will remain, so the button is not a cancel button. By pressing the volume button in TP, APT in TSK menu, the shortcut to select the TP, APT or TSK will open. Scrolling audio switch will increase volume by 5%. During input of numbers and letters, rotating will delete wrong input character and move cursor one position back. 1.6 Automatic jump out of edit If you get lost in edit, simply don’t touch any command for approximately 15 seconds and the unit will change back to the last selected menu. This time out in seconds can be set in Setup/User interface/Auto close inactivity time out. 1.7 Display organisation and management Additionally to geographic map there are also several extra indicators which make the display information much more effective than a fixed predetermined solution. How to create custom design is explained in Setup/Layout. Customization of the display doesn’t require any special tools or a computer; all this can be done in the Zeus by using the rotary switches and push buttons. 1.7.1 Display organization LX Zeus display consists of the following: geographic map bottom row (navigation boxes) indicators (header is also an indicator) 1.7.1.1 Indicators Indicators are elements of the display, which can be edited (existence, size, position, transparency). See Setup/Layout for details. Header Available indicators are: Header Speed indicator Sliding speed indicator Variometer (bar) Variometer (needle) Wind indicator Final glide indicator Thermal assistant Compass Compass needle Compass assistant Airspace warnings Start conditions (limitations) Map scale Wind Speed ind. Vario Final glide - 17 - LX Zeus v 3.0 25.6.2014 AHRS Flaps position 1.7.1.2 Bottom row customization Bottom row consists of NAV BOXes which are all custom specific, which means that the pilot is able to create his own configuration. The procedure is extremely simple and also executable during flight. The configuration may differ regarding to mode of operation. The procedure starts with long press on zoom. After long press the first NAV BOX becomes a frame. Rotating of the zoom button can move the position of the frame. As the correct frame position is reached, pressing zoom again will open a list of available NAV BOXes. Available NAV BOXES are: Indicated air speed True air speed Ground speed Vario Average vario Netto vario Average netto vario Relative vario Altitude QFE Altitude QNH Altitude QNH in ft Altitude IGC Altitude GPS Flight level Thermal gain Thermal last 30 Thermal average Thermal all Set MacCready Sink speed Final glide (selected MC) Final glide (MC 0.0) Time on task Time on leg Time to go Required speed Task speed Task remaining distance Task delta time Team code Team bearing Team distance Leg speed Recommended flaps position Wind speed Wind direction Air temperature Distance to selected TP/APT Off course distance OLC distance OLC home distance OLC speed Horizontal distance from airspace - 18 - LX Zeus v 3.0 25.6.2014 Vertical distance from airspace Arrival altitude Estimated time en route Current efficiency TP/APT/Task Required efficiency TP/APT/Task Track TP/APT/Task Bearing TP/APT/Task Radial TP/APT Compass heading Digital clock Analog clock Flying time ETA (current speed) TP/APT/Task ETA (average speed) TP/APT/Task ETA (MacCready speed) TP/APT/Task GPS position Battery GPS signal To terminate the process, press the volume button. There is infinite number of bottom rows available, selectable with 1-4 push button. To create a new row simply move the frame to the last position, press 1-4 and a new row will open. The display configuration may consist of one, two or three bottom rows. See Setup/Layout for details. 1.7.1.3 Header customization Customization of the header should be done in the similar way as by bottom row. After a long press on volume the customization can start. Size of indicators can be adjusted by rotating Volume button. Box types can be selected after press on Zoom button. Rotating the zoom button will give the option to select the position for the indicator. 2 Setup Setup menu is available after short press on SETUP labelled push button. The menu is divided into two sections (Pilot and System settings). System settings are settings that are valid for the whole system and are not pilot specific data. Pilot connected items may vary from pilot to pilot and depend on individual requirements. Suitable symbols with text will help you to find the menu of interest. use Zoom button and rotate it to find out menu of interest (selected menu size will increase) use push function of Zoom to enter menu. - 19 - LX Zeus v 3.0 25.6.2014 2.1 Pilot specific settings The data stored in this part of Setup are pilot specific data. After pilot selection during booting the data of individual pilot becomes active. All settings are saved to the personal saved pilot profile and are active when the pilot is selected (reserve altitude, logger settings, NAV BOX line, layout settings, task colours etc…) 2.1.1 Pilots Pilots name and certain personal data can be stored. All stored pilot names will be offered during booting. Selection of one pilot is mandatory. The system offers one name called as DEFAULT - can be used as a default pilot. Furthermore plenty of empty positions are offered and this can be used for pilot names input. Additionally to the name some additional parameters can be entered, such as pilot’s weight, default ballast and reserve altitude – all that will be calculate into final glide. Limiting altitude means setting of altitude limit that will turn on the altitude warning alert. You can also save user (pilot) settings to the USB stick and import user by pressing the buttons: Import user (VARIO/FLARM) and Save user (TSK/MOVE). There is also an option to put a password to each pilot profile, to prevent, that other pilots flying with the same unit will be able to change settings to the pilot (this function was especially developed for flying in the aeroclub). After press on clear password a password will be removed, also valid for delete user. Note! All settings active at the moment of new pilot creation under “Pilot” will be adopted. 2.1.2 Audio settings This menu defines audio configuration. The audio generator is a part of the vario unit (USB D 60), but settings are stored in LX Zeus. Speed command mode: Defines audio in SC, there are several variants the most common used setting is both which means no beep indication by positive deflections. Use Test vario option to play the audio variant. It is important to change over to SC before test; otherwise vario audio variant will be reproduced. Speed command volume: Defines audio volume in SC, may be increased decreased… Vario tone: Defines audio in vario mode, you can adjust frequencies and also types of audio, use Test vario after adjustment The frequencies set are also valid for SC audio. Alarm: The audio generator is also capable to generate some alarms (warnings), combining two frequencies. Set frequencies and time intervals and use Test to check. - 20 - LX Zeus v 3.0 25.6.2014 2.1.3 Voice In case that LX Voice Module is a part of the system following settings can be arranged. Enable or disable all functions is possible after press on screen buttons. Voice unit should be selected at SETUP / GLIDER – voice unit present (icon – CHECK) Volume: Voice volume: defines volume of expressed messages Vario mixer: defines volume proportion Audio/Voice General Information: Enable or disable general information about pilot, plane and elevation… Task Information: Enable or disable information about task, turn point, final glide and time Warnings: Enable or disable warnings Flarm: Enable or disable information about Flarm and warnings 2.1.4 Vario settings Settings in this menu define vario characteristics and some other important inputs connected to vario and speed command. Vario: vario filter defines dynamic of vario needle. Lower number means faster reaction and vice versa. smart vario* Integration time (display on vario unit) vario scale, three options (2.5, 5 and 10 m/s) (5, 10 and 20 kts, if defined in Units) Other: Silence range, defines no audio area around zero by speed command SC switching threshold, changeover speed which will change from Vario to SC in case of Auto setting ETA (Estimate Time of Arrival) calculation, you can choose between several options Automatic SC switching, defines automatic change over to SC way of External switch mode*, determinates external SC switch status which change over to SC - 21 - LX Zeus v 3.0 25.6.2014 *LX Zeus has a connection for an external speed command switch, which is wired to the vario unit (USB D 60). With using an external switch it is possible to switch between SC and Vario manually. Setting the External switch mode to ON means that closing of the switch will cause SC mode, and setting External switch mode to OFF means that closing the switch will select Vario mode. There is a third option by setting External switch mode to Toggle and connecting a push button. Now each press will toggle between SC and Vario (obligatory setting when using the LX Remote). Wire SC, Marked cable Schield Wire Wire Wire Wire Shield Shield Shield Shield Open Closed Closed Open Wire Setting: ON Setting: OFF Setting: ON Setting: OFF Status: VAR Status: SC Status: SC Status: VAR SC, Marked cable Shield 2.1.5 Indicators By Indicator, the vario indicator with its mechanical needle and colour graphic display is meant. One indicator is incorporated into USB D 60 vario unit. The system is also capable to drive secondary indicators. Secondary indicators may be simple repeaters or may also indicate different data sets, all depends on indicator address. Vario unit is always addressed as Number 1, secondary indicators can be addressed from 1 up to four. SC* dot ind. Upper num. indicator Needle Lower num. indicator Needle status indicator In general every indicator consists of: mechanical needle, SC dot, needle status indicator, upper / lower digital indicator, battery indicator and GPS signal indicator. It is important to point out that the settings should be done separately for vario and SC mode of operation. A radial moving dot serves as a continuous speed to fly indicator, this cannot be changed. Some explanations of terms: Vario needle : means needle function in vario mode, alternatives; vario, Netto*, SC, Relative** SC needle: means needle function in SC mode, alternative; Netto, Relative, Vario Vario upper nr: display indication by option: integrator, time, flight time, leg time Vario lower nr: display indication by option: altitude, distance, glide difference, true air speed, leg speed, QNH, flight level SC upper nr: display indication by option: integrator, time, flight time, leg time - 22 - LX Zeus v 3.0 25.6.2014 SC lower nr: display indication by option: altitude, distance, glide difference, true air speed, leg speed, QNH, flight level Note! Setting Altitude QNH means Altitude indication in ft, doesn’t matter what is set in Units. * Vertical speed of air mass ** Vertical speed – 0.8 m/s 2.1.5.1 Secondary indicators Secondary indicators should be connected via 485 system bus. There are three 9P connectors at the back of the unit. All contacts are absolutely parallel, so it doesn’t matter which one is occupied. The unit can be also used as 485 system bus splitter. To define indicator number use DIP switches which you find at the back of the unit. Note! Units having Adr1 will simply repeat what is displayed on the vario. Higher addresses make different sets possible. Number Switch IND 1 IND 2 IND 3 IND 4 x x x x x x x x Note! Indicators which operate in second seat, should be connected to second seat with 485 bus After indicator functions have been defined, switch the unit off and then on again, this procedure will memorize the settings and you will be able to adjust settings on Zeus. 2.1.6 Flarm In the Flarm menu it’s possible to select or deselect the Flarm privacy mode, and also showing objects on the map at specified zoom level. - 23 - LX Zeus v 3.0 25.6.2014 2.1.7 Logger - Flight recorder settings LX Zeus uses Colibri II as an IGC approved flight recorder. Both units collaborate so that all necessary settings can be sent to flight recorder (Colibri II) via Zeus and meaning that no actions on Colibri II are necessary. Recording interval is set to 9 seconds per default; event repetitions are set to 20 and event fix interval to 1. Extra recording means that user can select also recording of Ground speed into log file. This menu is usable only if Colibri II is connected to Zeus. If you change settings, these settings won’t change in Flarm or any other Loggers. In a double seat configuration the second seat pilot is also able to change logger settings. The process is equal as on first seat. Note! Pilot and glider data are sent after task Declaration process has been executed. See section flying. 2.1.8 Airspace management All settings connected to AS management are available in this menu. Note! Hide airspace above option will remove airspace sections which are higher than set. This will reduce load on graphic page significantly. 1000 m Example of Hide airspace above Show on zoom, defines appearance of particular airspace sections on the display. Appearance is connected to zoom.AS warning can be set as active or as not active (). Default warnings for airspaces are set to 2 km horizontally and 100 m vertically, but these warning settings can be adjusted. - 24 - LX Zeus v 3.0 25.6.2014 2.1.9 Wind LX Zeus is able to measure wind under different methods. The method can be selected in Wind menu. Wind calculation results are shown as a standalone indicator in main graphic page and also as NAV BOX if set. Pilot can choose between two circling methods, which measures wind during circling and two straight model methods during straight flight Circling method Speed difference is based on ground speed (GS) oscillation due to wind influence in circling. The method is active exclusively during climbing process. During straight flight the wind data remain unchanged. The process is started (automatically) after circling is detected. After two* circles wind indication (direction and speed) will be updated. The method is based on fact that the ground speed is affected by wind. GS is maximal by tailwind and minimal by head wind. This phenomenon is used by GS difference calculation method. To increase reliability two turns are necessary for a new result. To get result the pilot should do two turns as a minimum, more turns will improve result. Note that up to 90 degrees more is required, as some time is needed to detect circling status. It is important to keep constant speed during circling. Position drift calculates wind regarding to position offset during circling. Such a method needs more circles (from 4 up to 8). Number of circles should be set in Drift circles option. If both methods, straight model and position drift are selected Zeus indicates a combined result. Straight model None: if you select none, you will have the wind from the latest circling method Compass: Compass module should be connected to the unit on 485 bus. Wind calculation is based on well-known wind triangle method. Airspeed, ground speed and wind create a triangle of vectors. A compass device offers magnetic heading, which defines direction of airspeed vector. To measure wind by compass a straight flight with speed and direction as stable as possible is required * Compass is a standalone electronic device which can be connected to LX Zeus 485 bus. Integrated AHRS option also offers the same functions. The unit’s task is delivering of magnetic course to Zeus computer. Head/Tail – no circling method needed (shows difference between GS and IAS) Time for straight flight: time in seconds that will be taken for one measurement (valid for straight model). Longer period means better result. Valid only for Compass method and not for Component. Drift circles: means how many circles are required to calculate the position drift. Compass assistant: is a special symbol that appears on the display and helps to keep flight parameters (speed and direction) stable during calculation. Manual wind settings Set manually - user can set manually wind speed and direction - 25 - LX Zeus v 3.0 25.6.2014 Influence of wind in final glide The actual wind data (speed and direction) influences the final glide calculation. In task mode the final glide indication is based on remaining distance over all TP until finish (not over already flown turn points). Wind influence for individual legs is based on actual wind data. Using of component method will define wind direction on actual track and this value will be taken into final glide calculation. 2.1.10 Graphics (User Interface) In User interface the pilot can adjust most of graphics, except for the layout which has its own menu. All settings are saved to currently selected pilot profile. 2.1.10.1 Map settings Under map settings menu user can select map palette colours, glider image, and orientation and “Flarm” distance circles on the map. 2.1.10.1.1 Map palette To change map colours regarding to pilot personal requirements, use this menu. There are 12 different map schemes offered. The last option is to disable map (very useful if you want to see only airspaces and task data). 2.1.10.1.2 Glider image Glider image icon can be in all colours and can also be adjusted by size. Default: Colour white Size 40 (maximum size can be 60) - 26 - LX Zeus v 3.0 25.6.2014 2.1.10.1.3 Map Orientation The map orientation of LX Zeus can be used in three different ways as follows: North up (North is always on the top of the screen) Track up (The glider always points to the top of the screen) Combination of track up and north up regarding to flight status (circling, straight flight) 2.1.10.1.4 “Flarm” distance circles In this section it is possible to select number, size and colour of distance circles on the map. 2.1.10.2 Fonts Users can define font size for cities on the map. Default size is 14 px. Font size can be selected between 10 and 24 px. 2.1.10.3 TP/APT settings In this menu you can adjust appearance and length of labels of TP and APT on the map at different zooms. Show TP/APT till zoom (adjust visibility of TP/APT at wanted size ratio) Show TP labels till zoom (adjust visibility of TP labels at wanted size ratio) TP labels length (adjust number of label characters shown on the map) Show APT labels till zoom (adjust visibility of APT labels at wanted size ratio) APT labels length (adjust number of label characters shown on the map, ICAO code can be also selected) 2.1.10.4 Task settings Start lines/zones, turnpoint zones and finish lines/zones can be given different default colours from a large palette. It’s also possible to change their outlines and fills. There is a different colour possible for active or inactive zones. - 27 - LX Zeus v 3.0 25.6.2014 Default task colours: Active zone: pink Active start/finish line: red Inactive zone: cyan Inactive start/finish line: teal Legs yet to cover: royal blue Active leg: yellow Covered leg: green Course to next TP: cyan Transparency can be set at all colours. 2.1.10.5 Airspaces User can define colours of airspace sections that will meet personal preferences. Default colours are: Selected/active airspace Blue Controlled area: Red Prohibited area: Red All other: Blue 2.1.10.6 Tail settings Track of last flown minutes and colours of positive, zero and neutral vario can be defined in this setting. Default is 60 minutes. Default vario track colours are: Negative: Blue Zero: White Positive: Red The tail will become wider or narrower due to changing vario values. Default tail width is 2 pixels. For each 1 m/s, the tail will become wider by 2 px, up to 12 px (to 5 m/s). 2.1.10.7 Track colour This is in fact an extension of the track vector and shows the pilot where his flight will continue. Default track colour is Green. 2.1.10.8 Track to destination colour This is the line that connects the actual position of the glider with the destination point (track to destination colour). Default track colour is Cyan. - 28 - LX Zeus v 3.0 2.1.10.9 25.6.2014 View SUBP 3 Subpage number 3 can be enabled or disabled. 2.1.10.10 Auto close inactivity time out LX Zeus is monitoring push buttons and rotary switches during editing process. If no action will be detected the program will change back to the last used navigation page in a predefined time slot. The time is flexible and can be adjusted from 6 up to 60 seconds and also be disabled (off). If the time is set to off, than the page will disappear only by pressing the Volume knob (escape button). Default time is 30 seconds. 2.1.10.11 Statistics colours The colours of statistics page graphs can be custom designed. Default colours are: Background: White Text: Black Graph normal colour: Grey Graph highlight colour: Green 2.1.11 Layout Indicators LX Zeus offers a very useable feature that makes it possible to change the main graphic page by pilots personal preferences. As mentioned in previous section the main display consists of: Map map Can't be disabled bottom row indicators The main difference between indicators/widgets and rest two options (bottom row and header row) is that indicators can also be disabled and moved or resized. Bottom row Layout edit procedure: go to setup / Layout press Zoom knob on Layout check one two or all three panels to edit (TP,APT,TSK) rotate zoom button to select Edit and press Zoom now a screen will open with an orange frame (orange frame means what is selected – map, row or indicator) select indicator, row or map you want to edit by rotating Zoom (selection means frame) - 29 - LX Zeus v 3.0 25.6.2014 IAS indicator selected Header selected 2.1.11.1 Customization process of moving and resizing Move of display element Select indicator Short press Zoom (a significant cursor symbol will appear in the middle of the indicator) use zoom and volume buttons to move the indicator Resize (expand or compress) next press on zoom will open similar window but now with a cross through the selected indicator use zoom and volume buttons to resize it terminate the process after pressing the volume button (a layout saved message will appear) Note! After saving the new layout it may occur that nothing changed on the screen, because you are at the wrong navigation screen (if you changed the TP and you are at the APT screen then it seems that nothing has changed). Press an APT button to select the customized screen. Terminate proces Cross-ready to be resized - 30 - LX Zeus v 3.0 25.6.2014 2.1.11.1.1 Selecting/Deselecting and editing of indicators Editing process: Selected indicator to be customized Select the indicator that you want to customize (an orange frame will appear). Make a LONG press on Zoom knob (if you won’t make a long press than you will get the option to move or resize it!) Indication, that the button wrong press was made - SHORT and not LONG After a LONG press a Properties/Actions menu will open – correct! Select the colour you want to change (rotate Zoom) and make a SHORT press on Zoom - a new window (Edit Background colour) will open Now you can change the colour simply pick one from the palette and press Zoom, or you can change the colour by using RGB code. If you have picked one from the palette and you want to add transparency, simply go back again. Edit Background colour window (press Zoom) and go to transparency (press Zoom). Rotate zoom to change the transparency you want, confirm it by pressing Zoom and press Volume to escape. - 31 - LX Zeus v 3.0 To terminate the customization press Volume first to escape from Edit Background menu and then again press Volume to escape from Properties/Actions menu. An edited indicator will appear on the screen that you have customized. 25.6.2014 Edited indicator Note! To escape from Edit Background colour menu you don’t necessarily have to press Volume, you can simply wait 15 seconds and the screen will go back to first (Properties/actions) menu Selecting/deselecting process: go to Layout in Setup, press Zoom, select the screen that you want to edit and go to Edit (press Zoom) Make a LONG press on Zoom and the window Properties/Actions will open Select row: Select Indicators and press Zoom and a window Select indicators for chosen panels will open Now select the indicators that you want to have on the screen, or deselect that you don’t require. Select and deselect them by rotating and pressing the Zoom knob. Selected Compass indicator New indicator To escape, press Volume and the selected indicator will appear on the screen - 32 - LX Zeus v 3.0 25.6.2014 Properties/Actions window This window appears by LONG press on Zoom knob. In this window colours can be adjusted for selected indicator and also some other settings such as: Number of rows for NAV BOX bottom row Scale size for Sliding speed indicator By pressing on the rows below Actions you can: Select indicators to be seen on the screen Restore your layout to default settings Continue with editing indicators Save layout and exit with new settings Map and bottom row are not indicators Indicators The following indicators can be selected: Header – upper row Speed indicator – IAS Sliding speed indicator – not the whole IAS – the shown scale can be customized Variometer – sliding variometer Variometer classic – rounded variometer Wind indicator – shows direction and speed Final glide indicator (selected MC) Final glide indicator (MC 0.0) Thermal assistant Compass – rounded compass Compass needle Compass assistant Airspace warnings Limitations (start conditions) Map scale AHRS Flap position Note! Restore to default will Restore back to factory settings. Map – NAV BOX transparency Map can be only resized. If you want to have your NAV BOXes transparent, than the map should be maximum stretched and the bottom row should be set to transparent. - 33 - LX Zeus v 3.0 2.1.11.2 25.6.2014 Copy NAV BOXes Under Layout user can copy NAV BOXes from one screen to another or to have nav box configuration the same on all screens (TP/APT/TSK). User should prepare its NAV BOXes on one screen that is also a reference panel for other screens. When a reference panel is selected, user should check destination panels, where the NAV BOXes will be copied. After that a press on Copy from reference to destination will be needed. 2.1.12 Brightness adjustment The display used in LX Zeus is a high quality sunshine readable display and its backlight will satisfy the pilot’s requirements during the majority of the flight time. In the special case of increased backlight need, the pilot is able to increase the intensity for a limited time (30 minutes). After 30 minutes the backlight will go back to default. After press (zoom) on Brightness icon, a change will happen followed by a clear message. Note! Not valid for LX Zeus 4.3. Zeus 4.3 does not have the brightness adjustment option. - 34 - LX Zeus v 3.0 25.6.2014 2.2 System Setup The parameters set in this section are valid for all pilots and are therefore global. 2.2.1 Units A huge palette of units can be defined in this menu. By pressing the TSK/MOVE or SELECT/NEAR buttons you will press the screen buttons ‘Set metric’ or ‘Set imperial’ and all units will change to metric or imperial. 2.2.2 Glider (glider polar selection) Nearly all glider polars are stored in the LX Zeus memory. Additionally to these standard polars it is also possible to creat custom polars, by changing the parameters. In the glider menu it is possible to add all information about glider such as: Competition ID Registration number Equipment weight Polar 1, Polar 2 (not possible from sec. seat unit) Speed indicator settings Flaps position settings Voice unit present TE level (not possible from second seat unit) Polar 2 is very usable if you have a glider with different wingspan (example: ASG 29 – 15 m, ASG 29 – 18 m). After Zeus is turned on, an option to select your polar will appear. 2.2.2.1 Speed indicator settings The user can adjust speed markings of IAS indicator on Zeus. 2.2.2.2 Flaps position settings For gliders with flaps, Zeus offers an indicator on the screen that will remind pilot to change flap position. User must define speeds and number of positions in this menu. An indicator can be selected in Layout as a Flap position indicator or as a Nav box – Recommended flap position. - 35 - LX Zeus v 3.0 2.2.2.3 25.6.2014 Voice module If installed, the voice module should be marked as checked (installed), otherwise the voice module will not work. 2.2.2.4 TE level TE value***, set TE compensation style, 0% for tube compensation TE filter***, only valid by electronic TE compensation The LX system incorporates two configurable electronic filters in the circuitry. The first filter adjusts the time constant and is adjustable between 0.5 and 5 seconds. The 0.5 setting is the fastest while the 5 setting provides maximum damping. The second filter, called the Smart Vario, is a dynamic filter and controls the rate at which the vario indication moves. When set to OFF, there is no restriction on the rate of movement of the vario indication other than the setting of the time constant filter. When set to 1, the vario indication will not move faster than 1 m/s (2 kts) per second, while when set to 4, the vario indication will not move faster than 4 m/s (8kts) per second. It should be noted that when set to 4, the vario indication will move four times faster than when set to 1. Summary: The Smart Vario should not be used in isolation but in conjunction with the setting of the time constant filter. When the Smart Vario is activated, the time constant filter may need further adjustment to provide optimum indications. RAW VARIO FILTERED VARIO FILTER 0.5 to 5 SmartVario FILTER 1 to 4 or OFF VARIO INDICATION ***LX Zeus has the capability to offer variometer total energy compensation in two ways. Selection of compensation method is done after selection of the % figure. 000% means total energy compensation by using a TE tube. When using this solution the unit does not process compensation, this depends entirely on the TE tube and its installation. After an input of a percentage that is other than zero the special software routines will be activated and will provide an electronic compensation process. The default value is 100% but this can be varied following a test flight. Note! Electronic and pneumatic TE compensation requires different connection of tubes. The TE compensation can be fine-tuned during flight with the following procedure. It is essential that this is only done in smooth air; it is not possible to tune the TE accurately when there is a lot of thermal activity. Select 100 % and default TEF (TE filter) Accelerate up to approximately 160 km/h (75 kts) and keep the speed stable for a few seconds Gently reduce the speed to 80 km/h (45 kts) Observe the vario indicator during the manoeuvre. At 160 km/h (75 Knots) the vario will indicate about –2 m/s (-4kts). During the speed reduction the vario should move towards zero and should never exceed zero (slightly positive indications are acceptable). If the vario shows a climb, then the compensation is too low, increase the TE%; and vice versa. Repeat this procedure and make further adjustments if necessary. The TEF (TE filter) is the compensation delay. Larger numbers will increase the delay and vice versa. During the first test is recommended to use TEF 4. Electronic TE is only effective when the pitot and static sources are co-located and the pneumatic lines to the instrument are approximately the same length. The best sensor to use is the combined pitot/static - 36 - LX Zeus v 3.0 25.6.2014 Prandtl tube. If problems are experienced with the electronic TE compensation, then the most likely cause is the glider's static source. The static source can be checked by changing the connection of the pneumatic tubes for electronic compensation, and then setting the TE: to 0%. In still air, accelerate to approximately 160 km/h (75 Knots) and reduce the speed. Observe the vario indicator. If the static source is good, then the vario should immediately start to move showing a climb. If the needle initially shows increased sink and then moves to a climb, the static source of the glider is unsuitable and there is no way to provide successful TE compensation electronically. The use of a dedicated and accurate fin mounted pitot/static source such as a Prandtl tube might help. There are two ways by which the vario units can be corrected for total energy; electronic TE compensation based on speed changes with time; and pneumatic compensation with a TE probe. When using pneumatic compensation by use of a TE probe the quality of the TE compensation depends entirely on the location, size and dimension of the TE tube. The installation must be leak-proof. Note! If electronic TE compensation is selected, then the TE (Pst) port should be connected to a good static pressure source. If pneumatic compensation is selected, then the TE (Pst) port should be connected to the TE probe. TE (Pst) port on vario Compensation with TE probe Electronic compensation 2.2.3 Check list In the Check list menu you can prepare your own .txt file with whatever you might find useful. You can prepare checklists, notes, input frequencies etc… File .txt can be uploaded with the USB stick by pressing the screen button LOAD (button SELECT/NEAR). Notes can be also written directly in Zeus by using Zoom and Volume knob. Screen button MODE is to change between uppercase letters, lowercase letters, numbers, symbols, navigate etc… Using navigate means that you can move at the text by using both rotary switches. Characters can be deleted by pressing the Volume button. To confirm the written text, you should press mode, change to symbols, find enter symbol and then confirm it by Zoom press. Screen button METHOD is to change between replace and insert characters into written text. Copy to USB is to copy your current note to USB stick and the file will appear on the stick in .txt format. Load is to upload .txt file from USB stick. Save & Exit – it will save the current notes and also exit to setup menu. - 37 - LX Zeus v 3.0 25.6.2014 2.2.4 Data transfer The only solution to transfer data to LX Zeus and vice versa is via USB stick. One stick is also part of delivery. The stick should contain one LX Folder with following subfolders (APT, TP, AS…). The stick that comes with the unit is already prepared. After selecting the item of interest (press on Zoom) the procedure will start. The transfer procedure: Insert USB stick Press SETUP button Select Transfer Press Zoom Select what you want to transfer (example airfields), and press Zoom Select “transfer file from USB” and press Zoom All .af files stored on USB stick will be shown Select file of interest and press on Zoom Transfer will follow and you will receive a window and a green check Go to Select, press Zoom and select the file The file is now activated (green check at select row) 2.2.4.1 Transfer of Airport data LX Zeus is capable to accept airport data in LX Navigation format (.af). The data is available on www.lxnavigation.com. The database is free and no code is required. The airport files include regular airport data of one continent. 2.2.4.2 Important! Only one .af file can be active at the same time, so activate the file after transfer, after using of Select function. A green check means active file. Transfer of Turn Point data The turn point data should be included in a file with extension .cup. LX Zeus can store nearly an unlimited number of .cup files (with 2000 TPs in a file). Three files of TP can be active at the same time. Turn points of all three files will be available for navigation without any limitations. The first TP file is also a so called TASK file, which means, if you want to import tasks from file, then you have to select your file at TP/Task file. Important! Importing tasks to Zeus is very easy. Simply create a task and export it as a .cup and save it to USB stick. When importing to Zeus, simply transfer the file from the USB stick and select it at TP/TASK file. - 38 - LX Zeus v 3.0 2.2.4.3 25.6.2014 Transfer of Airspace files Use Airspace option of Transfer menu. The files should be in .cub format. The actual airspace data are available for free on www.lxnavigation.com. The airspace files normally cover the whole continent. At the same time, 3 airspace sections can be active. Loading of airspace files created for events is also possible. Airspace character characters + .CUB. 2.2.4.4 length can be maximum 11 Transfer of Flarm net files Files with extension .fln include Flarm customized IDs. That makes it possible to identify gliders in the vicinity with their original IDs (usual competition numbers). The file is available on http://www.flarmnet.org. 2.2.4.5 Transfer Charts ICAO charts can also be used on the Zeus. The ICAO charts should be ordered and purchased from LX Navigation. The file for the charts has to be .ras format. Charts will be activated after importing a license file, which you will receive from LX Navigation after payment. The license file should be transferred via the USB stick. At row: view installed charts you will see if your file is licensed. ICAO charts are made by the Deutsche Flugsicherung. This is the reason that charts have are not free. 2.2.4.6 How to delete files (APT, TP, AS) If there are some files stored in LX Zeus memory which are not actual, they can be removed using Delete internal file command. The command is executable for Airports, Turn points and Airspace. - 39 - LX Zeus v 3.0 25.6.2014 2.2.5 Service The menu is mainly used for maintenance except: Compass calibration Level adjustment by units with AHRS With admin password you can set your Zeus back to factory settings with the password 46486. This will also delete all flights from Colibri II. Useful passwords: System reset 46486 Grab image 315 Delete all flights 99999 AHRS disable 2478 Factory reset WARNING! All files (TP, AS, APT) will be deactivated and also pilots will be set to UNKNOWN – all pilot’s settings will go back to factory settings (save your setting to the USB stick at SETUP MENU/PILOT – save user 2.2.5.1 Screen rotation Screen can be rotated after inserting a correct password. When a password is entered a reboot of the unit is needed. Password: 9109 2.2.5.2 Compass calibration Compass module has to be connected to the main unit (in case of double seater, connect to first seat) on 485 bus. Install a module horizontally without any pitch, after that enter to the compass calibration menu. Position your compass to north and press SET, after that you will have to position your compass to all magnetic directions seen on the screen. When you are sure that your compass is positioned to a correct direction you should press SET. When a window with sentence Calibration completed press a screen button SAVE and you will exit back to a setup menu. 2.2.5.3 AHRS Level adjust (Pitch and Roll) If the AHRS is not aligned with the glider, then it has to be adjusted. Changes in pitch are caused by changes of aircraft mass and changes of airspeed. This reference pitch corresponds to one airspeed (indicated airspeed actually) and one aircraft mass. When the glider flies faster or slower, or if the glider is heavier or lighter, then the pitch angle deviates from the reference. - 40 - LX Zeus v 3.0 25.6.2014 Adjustment procedure is: The internal reference level of Zeus instrument is most likely to be different. So you need to adjust it. On the ground, put your aircraft in the position, which you think that matches the position for the reference airspeed. (Do not worry, if this is slightly wrong.) Adjust the Zeus to this level after press on button…. Make a test flight with your aircraft. Aircraft should be as close to the reference mass as possible. Fly at the reference airspeed and observe the pitch indicated by Zeus. Record this pitch on paper. This observed pitch is the error, which needs to be corrected. Repeat the Zeus level adjustment, but now put your airplane in such position (lift or lower nose or tail wheel), that pitch on Zeus indicates the same angle as you have observed during your previous flight. Be careful, to keep wings level. This is now your reference position. Keep this position of aircraft (do not move it) and adjust Zeus to be perfectly levelled. Instrument procedure: Go to SETUP / SERVICE / Level adjust When the glider is in position to be calibrated press on screen button adjust (VARIO/FLARM) Wait until status bar reach 100 % A significant message SUCCESS will appear If you are satisfied with new settings, then press screen button save (STAT/EVENT) A message Parameters saved will appear 2.2.6 Locale Here UTC offset to get local time, date format, time format and Position format and language can be adapted to local preferences. A restart is needed for applying this settings. - 41 - LX Zeus v 3.0 25.6.2014 3 Navigation modes LX Zeus offers three modes for navigation. These modes are: APT: navigation to Airports which are stored in APT memory TP: navigation to turn points (TP) TSK: task navigation after a task has been entered Any of the three modes are selectable after sequenced pressing on A-P-T push button. 3.1 APT mode (navigation to airports) LX Zeus is capable to store more airport data files in .af format (LX Navigation airport format). At the same time only one file can be active. Selection of the file of interest should be carried out in Setup/Transfer section Airfields. st nd APT mode consists of three navigation pages (1 is map navigation page, 2 is subpage with information rd about selected airport and glide path, 3 is a map and a 3D view (if not selected then a vertical profile). Any of them is directly selectable by SUBP button. Note: the third subpage (3D terrain) can be disabled (see Setup User interface). Airports are marked with a symbol (filled black line means airport with asphalt, a line without fill is a grass runway): The RWY orientation matches the real situation. Extended Airport data are available in the lower section of the second navigation page. After pressing 1-4 button the supplemental information page in form of a vertical profile will open. 3.2 How to select an airport? Airport selection is active from any mode of operation and also from any subpage. Use press on Select button (short press) and select menu will open. Use screen button APT by short press at TSK/MOVE and selection dialogue will start. Now scroll with a Zoom knob to select a filter such as: Country, Name, Distance Track or Arrival altitude to reduce number of offered Airports. If you use filter sort by distance, then it is not possible to use a name filter; only country filter is then possible. After the airport of interest is found confirm the choice with short press on Zoom. The APT screen will open with track to destination. - 42 - LX Zeus v 3.0 25.6.2014 Note! When using Name filter, input first letters of the airport name. Use Zoom to scroll and press for confirmation. You don’t need to input all characters, just first two or three and after that you can go on by pressing Zoom. Input of more characters reduces the number of possible airports. 3.2.1 APT selection from NEAR function LX Zeus also offers NEAR function. After activation, which can be done by a long press on SELECT/NEAR button, nearest Landable points will be offered. The list includes airports from the Airport database and also turn points that are declared as landable. Note! Selection is limited to 200 nearest points 3.3 Navigation in APT / TP or TSK mode There are three navigation pages possible (APT, TP or TASK) and also 2 subpages are possible all selectable by SUBP button. 3.3.1 Sort by filter Every turn point can be selected by using the following filters: Name (alphabetical sorted from number-A-Z) Distance (closest TP will be shown as the first) Track (TPs -30 to +30 degrees from current track will be shown) Arrival Altitude 3.3.2 Main graphic navigation page Distance APT /TP or TSK name Status indicators Steering com. Variometer bar Course line IAS bar Track Final glide indicator Bearing Bottom row – NAV BOXes - 43 - LX Zeus v 3.0 25.6.2014 The bottom row consists of NAV BOXes. Bottom row variants are selectable by 1-4 push button. Any NAV BOX content is custom programmable after using a very simple procedure. Editing NAV BOXes: Long press Zoom (orange frame will appear) Move orange frame by rotating zoom to free space, or replace current NAV BOX by short press on Zoom Select the NAV BOX you want with rotating zoom and confirm it by Zoom press If the row is full, press 1-4 push button and add new NAV BOX with the same procedure 3.3.3 Second navigation page (subpage) Second navigation page is divided into two sections; the upper section consists of a vertical profile. The vertical profile will show you the terrain, glide path distance, Airspaces (yellow and red), selected TP/APT and a cone. The cone depends on the MacCready setting. The lower line is a MC setting 0 and upper line is your currently set MC. If the glider icon is between upper and lower line it means that you are still below glide path for your set MC, but you will still reach your destination with a lower MC setting. If the glider is below the lower line you are too low and you won’t reach your destination even on MC 0. The lower section shows APT / TP data such as: Grass or asphalt runway with directions Elevation QNH alt Flight level QFE alt Frequency of the APT Your current radial Your current distance from selected APT / TP At TSK the lower section is a statistic page with: Legs Speed Distance flown Duration Vario average Circling on task in percentage 3.3.4 Third navigation page (2nd subpage) The third navigation page shows terrain data that is split to a map and an AHRS (artificial horizon). If the AHRS is not purchased as a part of the Zeus system, then it is a vertical profile. Note! This 3rd page can be disabled after command is executed in Setup/User Interface. - 44 - LX Zeus v 3.0 25.6.2014 3.3.5 Use of Remote Stick in APT All basic APT functions including fast selection of APT can be done by using the LX Remote Stick. Zoom IN/OUT: Use buttons Minus and Plus on the Remote Stick Select ATP screen: Use APT button and press it until you will have the indication on the top in left corner APT Select second page: Use SUB and you will the second or third page of the screen Change information at second page between APT info and Terrain: Use 1-4 button, you can also Zoom In/out with Minus / Plus Select APT: Press X button Use MINUS to go to Country, Name or Sort by distance filter Use Check/confirmation button to select your filter (Example Name filter: press Check, press Plus to change the character and press confirmation, go down with Plus and select your APT with Check button) Change MC: Press MC Press Minus / Plus button Press X to escape 3.4 Turn point mode The structure of the mode is similar to APT, the only important difference is, that the navigation is towards turn points that are included in turn point files. The turn point files (.cup) should be uploaded by USB stick. See Setup/Transfer for details. Practically an unlimited number of .cup files can be uploaded. Turn points can have different attributes and therefore also symbols that represent that turn points are different. Turn point TP as grass airfield st nd TP mode consists of three navigation pages (1 is map navigation page, 2 is subpage with information rd about selected airport and glide path, 3 is a map and an AHRS – if no AHRS, then vertical profile. Any of them is directly selectable by SUBP button. Note: the third subpage can be disabled (see Setup User interface). Extended TP data are available in the lower section of the second navigation page. The upper part of the nd display (2 –subpage) is vertical profile. Note! Up to three turn point files can be active at the same time. To get the screen buttons for TP The activation should be provided in Setup/Transfer. Turn options, Zoom should be pressed at points included in all three files will be available for TP screen (not at APT, TSK). navigation. The first is TP/TSK file, which will import also tasks. - 45 - LX Zeus v 3.0 25.6.2014 3.4.1 Creation of User Turn points User turn points are turn points that are created by the pilot after using commands of LX Zeus. Such turn points are marked with U and a PILOT icon in front of its name. 3.4.1.1 Creation of a Turn point by hand Press on Zoom button and following menu with screen buttons will open. Run Add TP after pressing on STAT/EVENT push button. Following should be imputed: Name Details (not obligatory) Type (grass, field, tower…) Longitude, Latitude Elevation Next three inputs may not be highlighted due to the type or turn point you are adding. Finish the process with Add turn point. 3.4.1.2 Note! Type option offers plenty turn point designators. The designator defines the symbol that will appear on the display. Landable points will also be listed in NEAR function. Storing of actual position during flight The procedure is identical as described in the previous section, the only difference is that Longitude and Latitude input doesn’t matter, as the actual position is already offered. 3.4.1.3 Edit TP Press Zoom button, select screen button Edit TP (press TSK/MOVE push button), and a new window Edit turn point will open. - 46 - LX Zeus v 3.0 3.4.1.4 25.6.2014 Add Marker The philosophy of a marker is to mark a position that you want to have as your backup. For example, you are flying towards non-landable area and you see the last landable field below you. At this landable field position you can drop a marker. You will be able to navigate to your marker, which you can select at NEAR/TP, or select TP. You can have only one marker at once. If you will drop another marker, the first one will be replaced. The marker can be also changed to TP via EDIT TP. It can be also deleted via DELETE TP. 3.4.1.5 Delete TP Only user created turn points and marker can be deleted. To delete TP you should press Zoom, select screen button DELETE TP and a new window will open. Select the TP by rotating the Zoom knob and confirm it with short press. 3.4.2 Selection of a Turn Point The selection process is similar to APT. Use SELECT button to start the process and press at screen button TP. Country, Name and sort by distance, track, arrival altitude filters will expedite selection. Turn points are visualized by symbols. Important! Turn points without country designators are selectable only when using Country “All” option. This is also valid for user turn points. It is advised to manually check and correct your files before uploading them to Zeus, to ensure maximum software potential. 3.4.2.1 Selection from Near LX Zeus Near function offers Turn point selection based on distance. Respected that there is also Country filter active, use All if you want to get all turn points listed. - 47 - LX Zeus v 3.0 25.6.2014 3.4.3 Navigation to a Turn Point Navigation towards turn point doesn’t differ to navigation to an airport, so refer 3.3 for details. 3.4.3.1 Use of Remote stick Use of Remote Stick is the same as for the APT, read more at 3.3.5 3.5 Task Mode Task is a complex process that guides the pilot around the turn points of the task. Each task consists of turn points, start point and the finish point. Additionally take-off and landing can put in, but those points don’t have any influence on task execution. 3.5.1 Task organization Zeus has storing capacity for 101 tasks. 50 tasks can be imported in one .cup file and such tasks are called imported (IMP), next 50 can be created by user in LX Zeus (by hand) and those tasks are called User (USR). After creating or selecting TSK, the TSK is automatically declared. Note! Tasks that you want to upload to Zeus should be a part of a .cup file and should be selected in SETUP/TRANSFER as TP/TSK file. It is very important that when you make a task that you put a name to a task, otherwise the Zeus won’t recognize it. 3.5.1.1 Task declaration Declaring the task is an automatic process. After a task is constructed and exit is pressed (Volume knob) a very clear message on the LX ZEUS screen appears: TASK DECLARED! This means that LX ZEUS will start sending the declaration data to loggers. The declaration is sent to Colibri II automatically – with all TPs, edited zones, limitations etc... Colibri II has the priority and will receive the data first. After this, declaration data will be sent to FLARM. The process will take about 30 seconds. After the process is finished all LED lights will switch off on the FLARM display and the red POWER light will start blinking. This means that the process of sending task declaration to FLARM is finished. 3.5.2 Task selection To select task from LX Zeus active task store use Select button and select screen button TSK. Use Zoom knob to select task of interest. During the selection process all task relevant data will be present. Confirm selected task by pressing Zoom knob and you will get another window with task details. Exit by pressing on Volume twice, or wait until the window will escape automatically (if you have auto close inactivity timeout set). User task Imported task - 48 - LX Zeus v 3.0 25.6.2014 3.5.3 Task creation by “hand” To create new task you should press push button TSK/MOVE (short press) or short press on Zoom. The task can be created by hand after using of NEW or EDIT screen buttons. Edit will make it possible to edit an existing task and New will offer creation of a new task. Both tasks will be saved in USER. The procedure: Press TSK/MOVE button Select screen button NEW (TSK/MOVE) or EDIT Task (VARIO/FLARM). If you have an AAT task, then add time by press on Zoom and rotate Zoom/Volume, terminate by pressing Zoom. Rotate zoom to add Task name – press Zoom and add name. Rotate zoom to TPs – press zoom and select/insert TP or APT. Only TPs can be deleted (start and finish not). If you agree with the task then press Volume to confirm – you will get the message that the task is declared. Note! The task can also be seen at full ZOOM OUT – you will get the TASK ZOOM function. The task zoom will be active only if on the ground! Note! Active zone has a different colour than inactive zone (colours can be adjusted in SETUP / USER INTERFACE / TASK COLOURS Task Zoom - 49 - LX Zeus v 3.0 3.5.3.1 25.6.2014 Create and Edit Zones ZONE function makes it possible to create any known geometry for turn points, start and finish. The zone can be edited by selecting TSK EDIT/ select TP / ZONE. The creation consists of input of sector angles radius and orientation. After a press on Next zone or Previouse zone buttons the user can change zone settings very quickly without any additional actions. Minimum calculated distance between turn points Maximum calculated distance between turn points Auto next input defines change over philosophy over turn point. AUTO means automatic change over immediatelly after sector will be reached. This function is default active as sector radius is below 10 km (assumed racing task). Bigger sectors offer a non automatic change over (assumed AAT task). If Auto next NO is active, MOVE function (for AAT) will become active and that makes possible to modify the task distance even before flight. MOVE during active TSK is also possible. Long press on push button TSK/MOVE will open a move window. You can move your ‘custom turn point’ by rotating Zoom and Volume. During move you will see the imporant information next to your moved TSK (Total distance, Required speed, final glide at MC 0 and selected MC). Note! Default task zones can be adjusted in SETUP / USER INTERFACE. User is able to adjust default start, waypoint and finish zone to make task creation even easier. When a new task will be created these zones will be in use as a default. Note! AAT task – if the sector is bigger than 10 km, than AUTO next won’t be active. If the sector is smaller than 10 km, then you have to uncheck MOVE in ZONE menu - 50 - LX Zeus v 3.0 25.6.2014 3.5.4 Task Start (ARM), Restart, Next TP, Clear, Save, Team Code Automatic and manual starts are possible by using functions ARM and NEXT TP. All functions are available by pressing Zoom or push button TSK/MOVE 3.5.4.1 Task Start To start automatically use the ARM command which is offered after a press on TSK button. Arm means that the task will be automatically started after crossing the start line. During flight you can also disarm your task. Activation of ARM and also DISARM are clearly shown on the display by the message and an ARMED icon. If you forget to press ARM and you are already on the task, then you have the second option to press NEXT TP. Next TP command will change over to next TP every time when activated, doesn’t matter if the glider is in the sector or not. It will also take your latest starting line crossing time, so that task statistics will be correct. 3.5.4.2 Task Restart function After task has been started (method doesn’t matter) a task restart can be executed at any time. Use Restart button in the TSK menu. Restart button will become active after task starts. After restart all task statistics data will be zeroed and ARM status will become active, which makes it possible to provide next automatic start. - 51 - LX Zeus v 3.0 3.5.4.3 25.6.2014 Over Turn point Change over to next turn point may be automatic or manual. Automatic changeover will happen when Auto next of individual zone is set to auto. If the zone is not AUTO NEXT, then you will get the message INSIDE zone. If you want to go to next, press TSK/MOVE and press screen button NEXT TP. Default setting for Auto next: R1 below 10 km Auto next active (automatic change over) R1 above 10 km manual change over necessary Note! Manual changeover is possible exclusively by Next TP command. Next TP is always active and it will execute changeover to next TP at anytime. Activation of this command when you are still out of the sector will degrade statistic data. Solutions: deleting of the TP that will not be rounded, or extending the zone/sector. 3.5.4.4 Saving TSK to USB LX ZEUS offers the option to save created or edited tasks to USB. A USB stick has to be inserted in the USB port. After creation of a Task, press volume knob to escape and confirm task. After that press TSK button and press SAVE TO USB, which is near to the SETUP/INFO button. The Task will be saved to the USB stick as a .cup file with all the tasks TPs and zones. 3.5.4.5 Clear TSK When in the creation or editing menu of a task, the whole task can be erased with two pushes. First press CLEAR TASK, which is near SETUP/INFO button and then press YES to confirm your choice or NO to terminate the process without erasing the task. - 52 - LX Zeus v 3.0 3.5.4.6 25.6.2014 Team Code Team code is a feature enabling you to visualize the position of your wingman and keeping it secret. Short pressing TSK button, a TEAM CODE icon is visible on the right side, near the 1-4 button. Press 1-4 button and a menu requiring team code and reference point will appear. To use this feature three NAV BOXes have to be switched on; TEAM CODE, TEAM BEARING and TEAM DISTANCE. Before take-off, flying partners have to decide which reference point will be chosen. For better indication (more accurate) a reference point which is 50-150 km away from every position in the flight should be chosen (for example the task that is flown should be in the 50-150 km radius of the reference point; if the task is bigger a second reference point should be chosen and entered after passing a certain distance). In flight, when partners are interested about their location, team codes should be exchanged (via radio) which are visible in TEAM CODE NAV BOX. Partners are able to see bearing and distance to each other in the TEAM BEARING and TEAM DISTANCE NAV BOXes. The feature works on the principal of the polar coordinate system. Baseline condition to be fulfilled is a reference point. When this is chosen, LX ZEUS calculates distance and bearing from reference point to pilot’s location and codes it into TEAM CODE. First two characters mean the angle and the last two the radius from the reference point. When this information is given to a partner with the same reference point chosen, LX ZEUS can calculate direct bearing and distance to the other partner. The process works either way between partners. 3.5.5 MOVE Function (during flight) When flying an AAT, big sectors are set and therefore the pilot has to decide where to turn to next point. Function MOVE helps the pilot to find optimal solution. After long press on TSK/MOVE button the so called MOVE function will become active. Use Zoom and Volume knobs to move the turn point. All task relevant data that are affected by the move command are shown next to the zone. During straight flight far from zone the track will appear in the zone in MOVE function. When the glider will be in the zone, the real-time picture (glider with its track) will also be shown in MOVE function. Bearing Track 3.5.6 Task Zoom By rotating zoom knob to the left will show the whole task (task zoom) on the screen. Task zoom will show all turn points (moved and modified) with airspaces. Task zoom is not visible while flying, only on the ground. - 53 - LX Zeus v 3.0 25.6.2014 3.5.7 Use of Remote Stick All basic functions including selection of TSK can be done by using the LX Remote Stick. To select TSK, the TSK screen should be active (upper left corner TSK sign). Press X on the Remote Stick and you will get the window with user and imported tasks. To select use Minus / Plus and confirm with Check symbol. Do the same procedure to change anything on the TSK. Zoom IN/OUT: Use buttons Minus and Plus on the Remote Stick Select TSK screen: Use APT button and press it until you will have the indication on the top in left corner TSK Select second page: Use SUB and you will the second or third page of the screen Change information at second page between APT info and Terrain: Use 1-4 button, you can also Zoom In/out with Minus / Plus Change MC: Press MC Press Minus / Plus button Press X to escape - 54 - LX Zeus v 3.0 25.6.2014 4 Airspace Management The airspace used in LX Zeus can be managed by pilot to achieve optimal relation between loading of the display and readability of the display. Too much information will reduce display readability significantly. 4.1 Basic airspace settings Those settings are available in SETUP / AIRSPACES. User can select warnings and appearances regarding to zoom. 4.1.1 Hide airspace above The airspace sections which are much higher than actual glider position are not so important, but if disabled will reduce information density of the display significant. Use Hide airspace above to define altitude margin that you still need for a safe flight. Horizontal and vertical distance warnings can be set also in this section. Zeus will warn a user at predefined distance warning. Default settings are 100m vertically and 2 km horizontally. 4.1.2 Define appearance of airspaces regarding zoom After using of Show on zoom function you can define by which zoom the airspace will become visible on the display. Two extreme situations are described with always and never. Factory default settings are always. 4.1.2.1 Warnings If set disabled () the airspace warnings will not appear at all, setting checked () will produce airspace warning information. Warning box is an indicator of the display, so the pilot is able to move the box and also to customize colours. This can be done at SETUP / LAYOUT Airspace warning information consists of Airspace name, horizontal and vertical distance and is as default positioned in the upper section of the display. The nearest point to enter the airspace becomes visible on the display As long as the warning isn’t critical the text will be blue. The airspaces can be also seen at the subpage in different colours (yellow and red). You can see vertical profile of airspace with glide path. Airspace is also seen in a second subpage, where the page is split to a map and a vertical profile. - 55 - LX Zeus v 3.0 25.6.2014 Explanation of airspace warnings The picture is showing that the glider is in the CTR LJUB airspace. It shows that the glider is horizontally 7.4 km INSIDE and vertically 308 m BELOW. The warning is BLUE, because the glider is in fact out of the airspace (below). If the glider is in an airspace warning will be RED and will be written horizontally and vertically IN. 4.1.3 Disabling of airspace sections In flight airspace warning will appear as it is on the picture on the right. Warning can be easily disabled after a long press on one of the screen buttons. User can also disable airspace on the ground after a long press on SELECT/NEAR button to engage NEAR function or short press on SELECT and click the screen button AIRSPACES. Airspaces are sorted by distance. In the upper dialogue a name of the airspace is shown, horizontal distance, operating altitude from and to in metres and also as a Flight level. By rotating the Zoom button, each airspace can be selected and shown on a map. By rotating the Volume button a different zoom will appear. After a press on Zoom button or press on screen button EDIT, additional options can be modified such as: Airspace type Airspace class Disable airspace until specified date A screen button DISABLED ONLY will show only disabled airspaces, which can be also modified. A dialogue to edit airspace after a press on EDIT button - 56 - LX Zeus v 3.0 25.6.2014 5 GPS signal management LX Zeus has two inputs for GPS signal which are available on the back of the unit. Both solutions are realized by 6P telephone type connectors which are marked as: Colibri II Flarm 5.1 Colibri II plug Colibri II plug can be used exclusively to connect Colibri II units. The plug delivers also power (5V) for Colibri II and receives its data directly without any data interface. The communication way is bidirectional. Every unit equipped with Colibri II comes with suitable connection cable (USB mini/ 6P telephone). 5.2 Flarm plug Flarm marked input makes plug and play solution, to connect any unit that has an IGC standard compatible connector. The port also delivers 12V. Following units can be connected with the plug and play solution: Colibri, LX 20 – 2000, VL, LX Flarm RB, LX Flarm MB, Flarm (Swiss) Note! Colibri II is powered from LX ZEUS. Also all the declaration and settings are sent from LX ZEUS to Colibrii II, so user doesn’t need to do any actions on Colibri II. Note! LX Zeus is able to adapt baud rate to any value between 4800 and 38400 automatically, so baud rate of GPS source connected to Flarm input does not matter. 5.3 GPS signal for navigation Both GPS input connectors are wired to LX Zeus microcontroller module that prepares an integral GPS signal for the main computer. So, the computer will be supplied with valid GPS signal as long as one GPS receiver delivers valid data. A symbol that is positioned in the right upper corner of the display shows GPS signal status: red GPS BAD green GPS OK white symbol with means no GPS data present - 57 - LX Zeus v 3.0 25.6.2014 6 LX Zeus and Colibri II Colibri II and LX Zeus build a compact system that offers that all commands connected with flight recorder can be sent from Zeus. LX Zeus is master and Colibri II is slave. This organization philosophy makes it possible to install Colibri II in a place where the pilot is not able to provide manipulation and also does not need to see the display. As long as it’s a position which ensures good GPS reception. It is absolutely necessary to use Colibri II version 1.90 or higher. Colibri II has also an ENL sensor built IN, so each unit comes with ENL. 6.1 Colibri II power management Immediately after LX Zeus receives is powered, the Colibri II will automatically switch ON, without any pilot interaction. After landing Colibri II will remain ON, as long as Zeus will be powered. When Zeus will be switched off, Colibri II will remain on for a limited time and will switch off after approximately 5 minutes (some beeps from Colibri II will be heard as a signal, which mean that Colibri II will switch off). Colibri II is charged permanently from Zeus and this ensures that the Colibri II battery will be always full. When for some reason battery power is lost on Zeus during flight, Colibri II will continue to record the flight for up to 15 more hours. 6.2 Colibri II - Zeus interaction After connection between Colibri II and LX Zeus is established both units start to communicate using a special LX protocol where the baud rate is 115 000 baud per second. The connection is established fully automatic without pilot interaction. 6.2.1 Commands and declaration transfer to Colibri II After power ON and connection between both units is established following data is sent to Colibri II: pilot data: immediately after pilot name selection during booting (also pilot 2 name in case of a twin) recording interval which is set in Zeus at the moment other data connected with recording (Event…) data of actual selected task (the task will become declared) Important! Any change on task, doesn’t matter USER or IMPORTED will immediately update Colibri II task. As long as on ground, the new data will be written also into declaration of Colibri II flight recorder. The same will happen with the pilot. After take-off the task update will also work, but the declaration in the flight recorder will remain unchanged (IGC rule). Password 46486: Password 46486 will also delete all flights from Colibri II Event command will be sent to Colibri II immediately after EVENT command will be executed on Zeus. Event command can be used also from a second seat unit. - 58 - LX Zeus v 3.0 25.6.2014 7 LX Zeus and Flarm Flarm should be connected to FLARM marked plug of the LX Zeus. Flarm will also receive power via that plug. If Flarm is also connected to the aircraft power network via its own power input wires, a short break circuit problem does not occur due to a built in diode. This separates both power supplies. Up to two Flarm external displays can be connected to the plugs marked as Flarm external display. SD card slot on LX Zeus front is directly connected to Flarm SD interface (valid for RB), without Zeus interaction. The SD card may be used for: Flarm firmware update (Red box or Mini box) Downloading of flights stored in Flarm (Red box or Mini box) On the backside of LX Zeus there is enough space to install LX Red box as an integral part of the system. All connections are plug and play. Non-integral solutions can of course also be used. Original Flarm (Swiss) can be also used. Zeus will show objects from Flarm on its display and will also provide power for Flarm. Declaration will be also sent from Zeus to Original Flarm. SD card slot cannot be used for Original Flarms. GPS signal priority If there are both units (Colibri II and Flarm) connected to Zeus, Zeus will take a better GPS signal reception. 7.1 Flarm external displays LX Zeus HW makes it possible to connect up to two Flarm external displays. Both plugs are controlled from Flarm directly without any Zeus influence. The Zeus system also provides 3V power for Flarm displays. 7.2 Task declaration into Flarm In case of an IGC approved version of Flarm, which is connected to Zeus Flarm port, an automatic declaration process is executed. The process is identical as with Colibri II, that means the actual task and pilot data will be sent also towards Flarm. In general the task which was active (selected) in TSK menu will be written as declared. The process will take about 30 seconds. After the process is finished all LED lights will switch off on the FLARM display and the red POWER light will start blinking. This means that the process of sending task declaration to FLARM is finished. Declaration warning! SD card should be inserted into SD slot without any CONFIG (.cfg) file on the card! If .cfg is on the card, then this file will have priority and the declaration will be wrong. There will be .cfg declaration instead of Zeus declaration Important! Logger settings (recording interval…) will not be sent to Flarm, use SD or Flarm Tool (see: www.lxnavigation.com – support / manuals: LX Flarm update instructions. - 59 - LX Zeus v 3.0 25.6.2014 7.3 Transferring files from Flarm Transfer of files from FLARM to Micro SD card is a very easy process. Micro SD card has to be inserted into Micro SD port, which is found on LX ZEUS front panel. After the flight is finished wait for three minutes, then turn LX ZEUS OFF and ON again. After switching on, a red POWER LED light on the FLARM display blinking can be seen, all other LED lights are off. This means that all the flights that were not already on the Micro SD card are transferring themselves. After the red POWER LED light stops blinking, remove the Micro SD card and all the flight are there. If the micro SD card has not been used for a while, FLARM will automatically transfer all flights that are not already on the Micro SD card, from its internal memory to the micro SD card. If there are a lot of flights to transfer, the process may take up to 20 minutes! Flarm will always store maximum 20 flights, so, if a st 21 flight is recorded, then the oldest flight will be removed automatically. Note! The micro SD port is an extension of the FLARM system and settings cannot be changed via LX ZEUS! 7.4 Flarm Red Box / Mini Box update Flarm Red Box and Mini Box can be updated via SD card or PC by using Flarm Tool software. Read update procedure at: www.lxnavigation.com – section SUPPORT / MANUALS: LX Flarm update instructions. 7.5 Flarm PIN OUT Bellow you can find information about pin out on Flarm connector – it is standard IGC connector. 8 LX ZEUS and Garrecht Garrecht units can be simply connected to LX ZEUS without any software requirements. Declaration to flarm will be sent directly from LX Zeus. Updating Garrecht units is not possible via LX Zeus. Connection schematics are written bellow. 8.1 LX ZEUS and Garrecht TRX-1090 ADSB / TRX-2000 - 60 - LX Zeus v 3.0 25.6.2014 8.2 LX ZEUS and Garrrect TRX-1500 A special cable is needed for that connection. This cable can be ordered at LX Navigation under following code: LX-TRX1500. 9 Remote control LX Zeus can be also operated by remote control stick. The stick is a standard LX Navigation product which differs from sticks used by LX 7000/7007 series only in labelling. Therefore the upgrade of an existing stick is very easy. Remote stick should be connected to one 485 plug and no special initialization is necessary. 9.1 Use of Remote Stick Plus and minus buttons have the same function as rotary Zoom knob. Enter () and escape (X) buttons have the same functions as Zoom press and Volume press. Zoom IN/OUT: Use buttons Minus and Plus on the Remote Stick Select screens (APT, TP, TSK): Use APT button and press it until you will have the indication on the top in left corner APT, TP, TSK Select second page: Use SUB and you will the first and second subpage of the screen Change information at second page between info and vertical profile: Use 1-4 button, you can also Zoom In/out with Minus / Plus Change MC: Press MC Press Minus / Plus button Press X to escape Select TP, APT: Press X button Use MINUS to go to Country, Name or Sort by distance filter Use Check/confirmation button to select your filter (Example Name filter: press Check, press Plus to change the character and press confirmation, go down with Plus and select your TP, APT with Check button) 9.2 Remote in second seat Remote stick for second seat is the same as for the first seat (no different firmware as by LX 7000/7007). The unit should be connected to second seat unit to 485 bus. - 61 - LX Zeus v 3.0 25.6.2014 10 Second seat unit Second seat device is connected to the master unit via CAN bus (not important which one). The connection also includes power for second seat. This means that second seat unit does not need an additional power supply. An external toggle switch makes it possible to switch off the unit during single pilot operation period. Otherwise all commands are the same as by main unit. GPS inputs are inoperative, so there is no sense in connecting GPS sources to those plugs, the same is true for Flarm display plugs. All LX Zeus sizes can be also used as a repeater in case of panel space problems. Flarm, Colibri II, Voice module, Magnetic Compass should be connected to the first seat. 10.1 Connection of Vario and Remote Vario indicator (not USB D unit) should be connected to 485 bus of second seat device (this is not the same as by LX 7000/7007). The same is valid for remote. Both vario indicators and remotes are compatible with existing units connected to LX 7000/7007. Remote doesn’t require any setup. 10.1.1 Secondary Vario setup Function of vario indicator connected to second seat unit, should be defined in Setup of second seat unit. Indicators (upper and lower indicator) on vario second seat can be adjusted from LX Zeus second seat. Automatic SC switching and External switch mode cannot be adjusted form second seat unit. 10.2 Interaction LX Zeus – LX Zeus Second seat LX Zeus in the front seat and LX Zeus situated in second seat are two units with identical HW configuration, but the second seat unit is prepared to play slave role to some extent. The initialization for second seat should be done during production process in the factory. The units are connected via CAN marked connectors, which are to be found on the back of both units. In general the second seat unit does more or less an independent job but receives all navigation and air data from the master. All secondary interfaces such as a Remote Stick, etc, are to be connected to the second seat unit. Following parameters are exchanged between both units: Item To first seat Sec. pilot name Y Y Sec. pilot mass Y Y TSK /TP/APT exchange Team code Y Y Y Y Y Y Logger setting Y 10.2.1 To second seat Automatic Manual Y TSK / TP / APT exchange The TSK / TP / ATP can be exchanged from first to second and vice versa. The pilot, who wants to send the task / turn point / airport, should press Zoom knob and select screen button SEND TASK / SEND TP / SEND APT. The other Zeus will receive it immediately. Zeus will send the whole task with its statistics, moved zones, limitations etc… When a task is sent from second seat to first seat the declaration is also sent to Colibri II. - 62 - LX Zeus v 3.0 10.2.2 25.6.2014 Downloading flights from Second seat Downloading flights is possible only from the First seat unit. 11 Flying with LX Zeus It is recommended to prepare the unit for every flight before take-off to ensure a stress-free and joyful flight. This is especially important before any contest, record or badge flights. 11.1 Flight preparation on ground It is suggested to check following: Data base status Prepare task (use new or edit options, or select imported task) 11.1.1 Before take off Switch the unit ON at least 3 minutes before take-off (this will ensure sufficient GPS reception and will create a base line of the baro trace) Select correct pilot (many settings belongs to pilot) Check task if it is correct after using of Task edit The task actual during take-off will be declared in Colibri II and Flarm Switch on second seat unit in case of double seated glider 11.1.1.1 Setting of the take-off elevation LX Zeus requires take off elevation input at initial Setup. The elevation of the last landing place is offered. If this doesn‘t match the elevation of actual take off place an adaptation is necessary. User can also set QNH, select pilot (profile settings), polar (if 18m glider then probably 2 polars inside) and set ballast. On second seat unit is possible to select only a flying pilot, other data has to be selected at the first (main) seat unit 11.1.1.2 QNH setting The pilot should input actual QNH value of the airport where he will take off. This action should be carried out on ground, after take off the menu will not open any more. After input of QNH on ground the pilot will be able to adjust altitude reading during flight, if QNH will change. Note! QNH setting doesn’t replace setting of elevation during booting, this should be carried out every time otherwise the unit will not switch to navigation mode. QNH setting isn’t obligatory and may be neglected. - 63 - LX Zeus v 3.0 11.1.1.3 25.6.2014 Task declaration process The task declaration process is fully automatic and doesn’t need any pilot interaction. Actual task and pilot data will be written into both flight recorders immediately after selection. The declaration data will not change during flight, even if task data will change due to select or edit process (IGC rule). The action is accompanied by a message on the display. Declaration Declaration 11.2 During flight The Zeus HW and SW concept is so far optimized that pilot doesn’t spend too much time to operate the unit during flight. It is important to point out that there are many short cuts, which enable direct and fast access to most important functions. The pilot isn’t obliged to terminate edit process until end due to Auto close feature, which closes the process after some seconds of no active commands. A very significant indication that shows that the unit has changed to flying mode is Log Book replacement with statistics page after pressing on STAT button. 11.2.1 Set MacCready, Ballast, Bugs and QNH After short press on VARIO button a new window will appear – MacCready. The menu will give options, to adjust MacCready, Ballast, Bugs and QNH. Setting MacCready, Ballast and Bugs will have affect on the glider polar: MC speed, sink speed, cruise speed and also the efficiency will change. Bugs setting will decrease the efficiency, which will affect the final glide calculation. Example: efficiency is 30 bugs setting is 10% Equation: Fbugs = f x (1-bugs [fraction]) = 30 x (1-0.10) = = 30 x 0.9 = 27 QNH setting: The pilot should input actual QNH value of the airport where he will take off. This action should be carried out on ground, after take off the menu will not open any more. After input of QNH on ground the pilot will be able to adjust altitude reading during flight, if QNH will change. Note! QNH setting doesn’t replace setting of elevation during booting; this should be carried out every time otherwise the unit will not switch to navigation mode. QNH setting isn’t obligatory and may be neglected. - 64 - LX Zeus v 3.0 25.6.2014 11.2.2 Statistics The statistics page will open after press on STAT button. Statistics page offers following statistics data: Thermal analysis (1 and 2) OLC; calculation of OLC points Baro; shows baro trace from take off until present position Task; presents task statistics data divided by legs Route; shows Task and distance flown Note! When the task has not been started yet, the statistics data is limited to take-off and flight duration. The statistics page colour structure can be adapted under pilot personal requirements, after using of; Setup/User Interface/Statistics colours Note! If task consists of more than three legs, use zoom to select legs of interest. End Flight function will close the flight, so don’t use it during flight. After execution the flight will end and the flight recorder (Colibri II) will be forced to close the flight. 11.2.2.1 Thermal Analysis There are two pages of thermals statistics, which are selectable by pressing the VARIO/FLARM push button: Thermals 1 Thermals 2 Thermals 2 The page shows all thermals of the flight, as a reference the actual MC setting is shown. The value corresponds to thermal vario of individual climb. This means from entering and leaving the thermal. The thermal is shown if you gain at least 100 m of altitude. The dotted red line through the columns shows the MC setting. This assists you in determining a good MC setting. Thermals 1 Every column means a thermal. The column is sliced into various colours and widths. The colours are blue, yellow and red. These colours depend on the current MacCready setting. If the thermal strength is bellow MC setting, then the column is blue, if it is above then the colour is red. The yellow colour is around MC setting (plus / minus 20% of MC). - 65 - LX Zeus v 3.0 11.2.2.2 25.6.2014 OLC Calculation OLC calculation is calculation of OLC points according to OLC rules. Current rules can be read on http://www.onlinecontest.org/olc2.0/gliding/cms.html?url=rules . In general the scoring software selects a departure point within the powerless part of the flight and fixes up to 5 way points (turn points) and a finish point in such a way that the following two conditions are fulfilled: The raw point score (1 point per km) from the departure point via all waypoints to the finish point is a maximum. The departure altitude is not more than 1000 m higher than the finish altitude. To stimulate „area“ flying, a so-called FAI bonus is granted. For this purpose, the scoring program checks whether FAI triangles can be fitted into the flight route and, if so, determines the largest such triangle for calculating the FAI bonus. There are three NAV BOXes showing how many OLC km were made (so far). One is OLC and means the kilometres made to current point in flight. The other one is OLC HOME and means how many kilometres will be made if the take-off point is reached. The third NAV BOX is OLC speed, which indicates your speed over the whole OLC distance flown. 11.2.2.3 Baro trace graph A baro trace from take off until actual position will open after press on button next to Baro. Customisation of colours is possible at SETUP/USER INTERFACE/ STATISCTICS COLORS. 11.2.2.4 Task Statistics The page will open after press on the button that you will find close to Task window. The statistics data is shown for the whole flown task and also for individual legs. Speed: average speed Dist: distance flown Dur: duration V Avg: vario average (based on leg resp. on task) Circ: percentage of time spent in circling Note! Use Zoom to scroll through the legs, as the display is capable to show only 4 legs. An infinite number of legs can be shown. Statistics can be seen also at the first subpage in TSK mode. - 66 - LX Zeus v 3.0 11.2.2.5 25.6.2014 Route Route option is a feature showing the path already flown and current task, so detours made can be seen. 11.2.3 Special functions 11.2.3.1 Event function This function is active only if Colibri II is a part of the system. A long press on EVENT button will send a command to Colibri II flight recorder to activate so called event function. This is in fact recording in shorter intervals as default for a limited time (default: event fix interval: 1s; event repetitions: 20). The conditions are to be set in Setup/Logger of Zeus. The action is accompanied with a clear message. 11.2.3.2 Marker setting If the pilot wants to mark a position of interest, for example a suitable outlanding place, thermal hot spot…), this can easily be done by activating of Marker function. The process is very fast and doesn’t intensively occupy the pilot. To mark a position pilot should do as follows: Select screen TP, press Zoom Select screen button Add marker. The marker is visualized as a yellow triangle positioned on the graphic page. Only one marker can be active at the same time. To set a new one simple repeat the procedure. The marker will be stored as user turn point designated as #MARKER. If the edit function is used #MARKER can be converted into normal TP. #MARKER can also be deleted after using the Delete TP command. In case of navigation data necessity towards #MARKER point, simply select #MARKER after using of the Select TP command. Marker function is possible only on TP screen - 67 - LX Zeus v 3.0 11.2.4 25.6.2014 Task Start Task start is a quite complex procedure, especially with a high density of gliders where many of them intend to start at nearly the same time. As the pilot intends to perform task start in an instance, a very simple operation should be carried out: press on TSK button and confirm ARM option A very significant message ARMED will appear on the display. Armed word will remain on line until first line crossing. After crossing line, the task will start automatically without any further pilot interaction. Task start is accompanied with a very significant message: Note! ARM command can be executed at any time, even on ground. Disarm function will reset Arm command. In case that the pilot forgot to ARM start and has crossed the line, execution of NEXT TP function will solve the problem. Navigation to first turn point will be offered and the statistic page will become available. It will take the last start line crossing time for a valid start. This also ensures correct statistics data. 11.2.4.1 Start Conditions / Limitations Some competition rules prescribe some limits (restrictions), which should be respected before start and also at line crossing. After short press on TSK/MOVE a screen button Limitations will appear. Press SUBP to enter limitation option. Limitations are divided to: Gate time Before start Start conditions Gate time means the time when the start line will be opened. Calculated time will be time set in Zeus (UTC or UTC offset time). Zeus time is default set to the UTC time. Time can be changed in SETUP/LOCALE/UTC offset. Below start altitude and time can be set. The glider should be below selected altitude the time you set. Start conditions can be limited to start altitude and ground speed. Limitation indicator will appear on the screen (only at TSK screen). Stop, because the start limit GS speed is too fast. B =before start, S = start conditions - 68 - LX Zeus v 3.0 11.2.4.2 25.6.2014 Task Restart After a bad start and intention to perform a new start, the pilot is able to execute the so called Restart function. After a press on TSK/MOVE button you will find screen button RESTART. After pressing restart, the task will be reset (doesn’t matter on which leg) and a new start can be performed. Also the task statistics will be reset. Note! After RESTART, the unit will change immediately into ARM status, which means ready for next start. 11.2.4.3 Restart Leg Restart leg is possible during active leg. After press on TSK/MOVE button you will find screen button RESTART LEG. 11.2.5 Task Finish Task finish will be detected after the glider will pass the finish line. The situation will be accompanied with a very clear message and also with Task speed. 11.2.6 Flying AAT (Assigned Area Task) AAT (Assigned Area Task) is a modern manner of task flying on competitions. The basic idea is to set relative big sectors around turn points and this makes it possible that the pilot decides how deep into the sector he will fly. The main objective is to gain a highest possible average speed, while choosing your own route of flight, limited in the given AAT sectors. Create an AAT: TSK/MOVE; New task or Edit task Task time – MUST BE SET! Set sector geometry – go to TP, select Zone, edit R1(10 km and more) and A1 (180) Move function: makes possible to adapt AAT distance and also get informed about important task parameters as for instance: remaining distance, required speed…. Task time Move function is also available after long press on TSK/MOVE push button. Use Zoom and Volume rotary switches. Note! If task time will not be set, there will be a lack of many statistics data, for instance: task delta time, task remaining time…. Note! If sector radius is bigger than 10km, the unit will recognize this as an AAT and will set manual change over to next turn point. Using smaller sectors by AAT requests manual setting of No Auto next. - 69 - LX Zeus v 3.0 Auto next X becauseR1 is more than 9.5 km 25.6.2014 Auto next because R1 is less than 9.5 km 11.2.7 Final glide calculation The final glide calculation is based on the following inputs: Note! Actual MC setting Final glide may be Wind also visualized as Polar NAV BOX. Bugs Ballast Safety altitude (reserve) The final glide is indicated in the graphics page. As the final glide box has the nature of a display indicator it can be moved over the display and also custom colours can be assigned. (–) figures mean below and (+) above final glide, both in meters resp. in ft. The final glide situation is also present in the first navigation Subpage of all three navigation modes. In case of flying a task, final glide profile will be displayed until finish. Note! In Task mode the final glide is calculated from actual position until finish (overall not over flown turn points). - 70 - LX Zeus v 3.0 25.6.2014 11.2.8 Finish line crossing Modern competition rules use longer finish lines and also finish cylinders. Zeus is always calculating the shortest way to reach the finish and therefore offers the shortest distance to reach the finish. By final glide calculation is also taken in account that shorter distance. 11.2.9 Thermal assistant The thermal assistant analyses the thermal while circling. The size of the dot indicates the strength of the thermal – bigger dot means stronger lift. Dots are different colours and depend from MC set. Red colour means values above MC, blue values below MC and yellow dots show lifts plus/minus 20% of MC setting. If the indicator shows mostly red colours, then we should increase MC, if colours are blue, then the MC should be decreased. White dot shows the maximum of the thermal. A symbol of a glider will appear on the right or left side of the circle. The glider on the right side means, that you are circling left and the thermal is on your left side. In Setup/Layout the size and position of a thermal assistant can be customized (see picture beside). Default position is left corner bellow IAS. 11.2.10 Flarm management Unit will show Flarm objects if a Flarm is connected. There are two screens that are able to display Flarm objects. Objects will be seen on MAP as a glider icons and at Flarm radar, which can be opened after long press on VARIO/FLARM push button. Number of shown objects is infinite. Objects on the map will appear automatically with data about object’s current vario and altitude difference. At the Flarm radar page, objects can be customized (Call signs and colour). Three objects can be selected at once, but there will be infinite objects on the radar. Zoom can be also adjusted at radar. Procedure: Long press on VARIO/FLARM will open a Flarm radar. Rotate Volume to adjust Zoom on Flarm Radar Rotating Zoom knob will move an orange frame to select/store 3 objects on the bottom in a box Press Zoom to select the object in a range Long press on Zoom will open a dialogue with more details about selected object. Rotate zoom to select the details you want to see or modify - 71 - LX Zeus v 3.0 25.6.2014 Press Volume to Escape from dialogues Red glider is selected, zoom can be adjusted Edit dialogue will open after a long press on the selected flarm object. Flarm details can be seen if a FlarmNet file is installed in Zeus 11.2.11 Artificial horizon – AHRS Artificial horizon (AHRS) is offered as an integral part of the system, no external boxes necessary. It is not possible for Zeus 4.3. Artificial horizon as a box is also possible. Simply connect it with CAN cable to first seat unit (Plug and Play). Important! Orientation of AHRS box is very important. It has to be installed as it is shown on the label of box unit (little black glider icon) Pressure connection: Pst – connect static pressure Ptot – connect dynamic pressure - 72 - LX Zeus v 3.0 25.6.2014 11.3 After landing It is recommended to keep the instrument ON for a few minutes after landing; this will ensure base line of baro trace. Simply wait until a very significant message on the display will appear (calculating security). It shows that flight recorder is terminating the flight and data security operation of flight recorder is in progress. After calculation of security, statistics page will be replaced with Log book and the unit is now ready to be switched OFF, or flight download process can start. 11.3.1 Downloading of flights LX Zeus can fully interact with Colibri II in case that Colibri is used as a flight recorder. This means that downloading Colibri II flights is possible after operation on LX Zeus. The flights stored in Colibri II will finally be stored on a USB stick. By no connection between Zeus and Colibri II, the unit (Zeus) will offer its own “flights”, which are not IGC approved. The structure meets IGC standard and therefore such flights could be evaluated by any program that accepts .IGC data format. In case of Flarm (RB IGC version) connected to LX Zeus, its flights will be stored to Flarm SD card, without any Zeus interaction. The procedure is automatic, and the new flight will be stored after next power on. Downloading of Flarm flights Downloading of Colibri II flights and also Zeus flights Do not connect PC or PDA to USB Note! st Downloading flights from second seat is not possible – only from 1 seat. 11.3.1.1 Downloading Colibri II flights After finishing of the security calculation process, downloading of flights can start. Downloading of flights stored in Colibri II is possible exclusively by using of a USB stick. The procedure: Insert USB stick Press STAT button (log book will open) Select flight of interest Execute Save to USB command shows Colibri II flight - 73 - LX Zeus v 3.0 25.6.2014 The process will take a couple of seconds or minutes a significant message will show termination. Note! In case of troubles (error messages USB not detected…..), switch Zeus OFF, remove USB stick, switch Zeus new ON and try again Password 46486! This password will delete all flights stored in Colibri II and also all pilot history in ZEUS! The flight is now available on USB stick in LX folder Flights. Flight data is stored in .IGC format and therefore immediately ready for evaluation. The data security level meets the IGC high level approval standard. 11.3.1.2 Downloading of flights recorded by Zeus LX Zeus is also storing flights in its internal flight recorder memory. The flights become available and also downloading will be possible if Colibri II is not connected to the system. In that case the flights in the logbook will be designated with a . The procedure is the same as described in 10.3.1.1, the only difference is, that such flights don’t have valid digital signature (not valid as IGC flights). shows Zeus flight 11.3.1.3 Downloading flights stored in Flarm If an IGC approved Flarm Red Box unit is connected to LX Zeus, it’s possible to directly download a flight via the SD card slot, which is positioned on the front panel of LX Zeus. The SD card slot is wired directly to Flarm Red Box SD card reader without any Zeus interaction. General rule by Flarm is, that flight will be stored to SD card after next power on. So, power LX Zeus off and new on to download the latest flight. It is suggested to keep SD card all the time in Zeus SD slot, to avoid long waiting times by downloading of many flights that are not on the SD card yet. If the card is empty, than the first power ON will download ALL FLIGHTS stored in the Flarm and this will take a lot of time. It will download all 20 flights stored in Flarm. Flarm will always store maximum 20 st flights, so, if you will make 21 flight, than the oldest flight will be removed automatically. 11.3.1.4 Colibri II – Zeus interaction after landing After landing is detected, Zeus will wait for 2 minutes and if during this period no movement will be detected the procedure to close the flight will start. After time out (2 minutes) the unit is ready to offer download of flights stored in Colibri II. Recommended! Keep Zeus on until above-mentioned process is finished. Note! Separate switching off of Colibri II isn’t necessary. After Zeus will be powered OFF, the Colibri II will remain ON for a limited time (approximately 5 minutes) and will then switch off automatically. This is not valid if the Colibri is in flight mode while running on the internal battery. Zeus losing power in flight will not result in Colibri switching off. 11.3.2 Recommendations for safe operation Connect Colibri II to Zeus before Zeus is powered on Never switch Colibri II OFF by hand if connected to Zeus* Leave Zeus ON until flight in Colibri II will finish (2 minutes after landing) Keep Flarm SD card inserted, so that only the last flight should be copied - 74 - LX Zeus v 3.0 25.6.2014 *In case you have switched Colibri II off by hand, turning ON by pressing of Colibri II push button will not work. You should power OFF and ON ZEUS. Colibri will switch on automatically as the power from Zeus will be applied. 11.4 ICAO charts LX Zeus offers use of ICAO charts from Deutsche Flugsicherung. Charts can be ordered via [email protected]. Please read Data transfer (section 2.2.4) for installation process. The charts will be shown by rotating Zoom knob to the left. There are 3 zoom steps available for ICAO charts. Zoom steps from left to right: Task zoom (vector maps) Icao zoom 1 Icao zoom 2 Icao zoom 3 Map zoom 1:2500000 Map zoom 1:2000000 Map zoom 1:1000000 Map zoom 1:500000 Map zoom 1:250000 Map zoom 1:62500 Map zoom 1:30000 Map zoom 1:15000 Note! End of the chart will be shown as white background on the screen. If the glider will be located out of the chart, than the ICAO chart won’t appear – vector maps will replace it. - 75 - LX Zeus v 3.0 25.6.2014 12 Installation 12.1 Mechanical installation As the larger unit dimensions does not match air norm standard, a new cut out in the panel should be made. There are two ways how to prepare the panel. The first option is to buy a new panel from the manufacturer, and the second solution is to upgrade your existing panel. A panel upgrade can also be done by user; in that case some experience in fiber glass technology will help. Instructions how to rebuild the panel can be obtained from LX Navigation. Every unit also comes with an iron template which makes it possible to manufacture LX Zeus cut out by hand. In case of a CNC solution, please ask for .dwg file. Reinstallation after panel upgrade 12.1.1 Installation of Vario unit The unit occupies one 57 mm standard cut out. The maximal dimensions of the unit are 60x60 mm and don’t exceed dimensions of classic pneumatic instruments. In case of space problems, the unit can be separated into two parts, which are connected via a cable. Note! Respect labels near pneumatic connectors, during pneumatic tube connection process. 12.2 Screen rotation Software rotation can be easily done in SETUP / SERVICE menu, when a password 9109 is entered. Buttons must be rotated by hand. Follow procedure below: 1. 2. 3. 4. 5. Open the unit (remove all screws and a cover) Move rounded rubber to the middle Take out the button and rotate it to the proper position Put button back on blue button (be careful that blue button is inside of the black hose) Put rounded rubber back to the first position (be careful on side with Rotary knobs rubber must not be fully pushed to the end) - 76 - LX Zeus v 3.0 At this side the rounded rubber is touching the back plate of display, do not push it too tight 25.6.2014 At this side the rounded rubber is pressed fully to the plate. 12.3 Electrical installation This part of installation is easy and doesn’t need any specialists. The system receives its power via two power lines, which should be connected to 12V glider power source and ground. Red wire is 12V and blue wire is Ground. Important! There is no fuse built in the system, obligatory use 3A external fuse. Never remove the CAN BUS Terminator, which occupies one CAN port (factory pre-set). Terminator should only be removed in case of second seat configuration. In that case the terminator should be positioned on second seat unit. A 2-pole plastic power connector, which is positioned approximately 20 cm from the unit casing ensures simple disassembling of the unit in case of repair. 12.3.1 Installation of USB D 60 (Vario unit) The USB D 60 unit comes with prefabricated cable set, which has two connectors. The 15-pole type should be inserted into the vario unit and should be secured with the appropriate spring locks. The 9P connector should be inserted into any free 485-marked plug on Zeus back. The unit also receives its power from Zeus. Speaker output is terminated with one chinch female connector; a male connector is part of the speaker. CAN terminator can be inserted either to the left or right CAN PORT = Not important. 9P (485 system bus) can be connected also to any free 485 connector plug. - 77 - LX Zeus v 3.0 12.3.1.1 25.6.2014 USB-D 60 wiring - 78 - LX Zeus v 3.0 25.6.2014 12.4 Installation of second seat units The second seat unit shares the same logic as the master, so no difference with mechanical installation works. 12.4.1 Electrical installation The second seat unit doesn’t need external power, as it is powered via the system bus (CAN). For CAN connection two 8P connectors are provided on master and also on repeater. The interconnection of both units is extremely simple and easy, all what is necessary is to insert CAN marked cable in one of two CAN marked plugs. The same is valid for first and for second seat. Second seat unit comes with two red wires, which are terminated with a toggle switch. It is recommended to install the switch somewhere in the rear panel, as this will make possible to switch off second seat unit during single pilot operation. ON/OFF Note! Never remove CAN terminator which occupies one CAN plug of the second seat unit. Note! Interfaces which interact with the second seat, should also be connected to second seat 485 bus: Remote control Vario indicators Compass module, Voice module should be connected only to first seat and of course they will also work on the second seat! - 79 - LX Zeus v 3.0 25.6.2014 13 Explanation of terms 12.1 Text explanations of NAV BOXes Item Above ground level Air temperature Altitude IGC Altitude GPS Altitude QFE Altitude QNH Altitude QNH (ft) Analog clock Arrival altitude Average vario Average netto vario Battery Bearing TP/APT/T Compass heading Cur. eff. TP/APT/TSK Compass Heading Digital clock Dist. to sel. TP/APT Empty ETA (average speed) ETA (current speed)…. ETA MacCready speed Final glide Final glide (MC 0.0) Flight level Flying time GPS position GPS signal Ground speed Horizontal distance from airspace Indicated Air Speed Leg speed Netto vario OLC OLC home OLC speed Off course distance Radial TP/APT Recommended flaps position Relative vario ETE – estimated time enroute Required eff. TP/APT….. Required speed Set MacCready Description Altitude above ground level OAT Altitude recorded by flight recorder (1013 based) Altitude recorded by GPS QFE altitude based on approaching point Altitude over sea level Altitude over sea level in ft Analog clock symbol AGL height (+reserve) on arrival at selected TP Integrator (average of last x seconds – set in SETUP / VARIO SC / Integration scale) Average of air mass vertical movement during the whole flight Battery symbol Bearing to TP/APT or TP of task Heading that is calculated from compass (if compass module is installed) Efficiency calculated during last time period Digital clock symbol Distance to TP/APT NAV BOX will remain empty ETA based on average sped reached Estimate time of arrival based on actual speed ETA based on MC setting Altitude difference regarding to f.g. line Altitude difference regarding to f.g. line at MC 0.0 Actual flight level indication Time spent in the air Indication of coordinates GPS status symbol Speed over ground Glider position horizontally from the airspace NAV BOX designator AGL Temp Alt IGC GPS Alt Alt QFE Alt QNH Alt QNH Clock symbol Arri Alt V Avg AVG netto Battery symbol BRG HDG E HDG Time Dist No designator ETA Avg ETA Sp ETA MC FG FG(MC 0.0) FL Flying Coordinates GPS Symbol GS AS hor Airspeed not altitude corrected Leg speed on task Shows air mass vertical movement Olc point scored to current location Olc points that will be scored if takeoff position is reached. Speed when flying a cross country flight under the rules of OLC Off course indicator Radial from TP/APT to the glider position Recommended flaps at pre-set speed range IAS Leg speed V Netto OLC OLC Home Netto vario – 0.7 Remaining time to selected TP/APT or until end of TSK V relative ETE OLC sp Off co QDR Flaps Required efficiency to reach TP/APT/TSK Req E Required speed to finish AAT in time Actual MC setting Req Sp MC - 80 - LX Zeus v 3.0 Sink Speed Task delta time Task remaining distance Task speed Team Bearing Team Code Team Distance Thermal all Thermal average Thermal gain Thermal last 30 Time on leg Time on task Time to go Track TP/APT/TSK True Air Speed Vario Vertical distance from airspace Wind direction Wind speed Estimated sink rate (polar, speed, bugs, MC) Early or late arrival on AAT Distance to go until finish Speed achieved on task Bearing to your team partner Coded location of your team partner Distance to your team partner Altitude gain during whole flight Average climbing during last whole thermal (usable for MC setting) Altitude gained during last climb Altitude gain during last 30 seconds of climbing Time spent on leg Time spent on task Time until the end of TSK Ground track to TP/APT or TP of task Airspeed corrected with altitude Momentary variometer value Glider position vertically from the airspace Wind direction calculated by Zeus Wind speed calculated by Zeus 25.6.2014 Sink Sp TDT Task RD Task Sp Team BRG Team code Team Dist Th All Th Avg Th Gain Th L30 On Leg On Task TTG TRK TAS Vario AS ver Wind Dir Wind Sp 14 Zeus Mobile The unit is very similar to Zeus 4.3. Zeus Mobile is meant to be installed on the panel with gooseneck – no panel upgrade is needed. It can be also installed as integral part of the panel. Zeus Mobile can be used for single seaters only. There is no double seater option. Vario unit as a black box solution (doesn’t occupy any space of the instrument panel), has the vario indicator as a part of the graphic page (custom design possible), but it can also be additionally ordered in either 57 mm or 80 mm vario indicator option. Zeus Mobile also has two GPS inputs (Colibri II and NMEA). At LX Junction box following units can be connected: LX Remote Stick GPS (Flarm, Colibri, Volkslogger, LX GPS mouse…) USB-D unit (vario black box) Connection scheme: - 81 - LX Zeus v 3.0 25.6.2014 15 FAQ (frequently asked questions) 1. Can I connect Swiss Flarm and how it will work? Flarm can be connected to LX Zeus NMEA (flarm) port. Zeus will see flarm objects and will send declaration to flarm (task and pilot’s settings) 2. Volkslogger, Colibri and other loggers - how to connect and what is the advantage? Loggers can be connected to NMEA (flarm) port. Zeus will take GPS signal from them and give them 12 V power. 3. What do I get if I buy LX ZEUS IGC FLARM Zeus comes together with Vario, Speaker, Oat sensor, Colibri II, FLARM (not IGC) and Flarm LED display, USB key and SD card. You have also an option to take FLARM IGC. 4. Zeus shows Voltage .0.0 V? Voltage is measured on Vario unit, so this means that there is a problem with connection ZEUS – Vario. Check connection – cable and both units. 5. Voltage – what is the operating Voltage? 6. ADSB and Powerflarm on Zeus – how to connect, what kind of warnings, warnings with Voice modules? ADSB can be simply connected to LX ZEUS on FLARM port. Zeus will provide all Flarm warnings – same as Flarm Red Box or Mini Box. 7. OUDIE – is it possible to connect, what cable, where to connect? Only with a special cable in case that flarm unit is connected to LX Zeus. 8. AIRSPACE Warnings and a Voice module? The voice module will also give voice-warnings of airspace. 9. ENL and Zeus? If an IGC Zeus is ordered, then the ENL sensor is the part of the system for FREE (built in Colibri II) 10. AHRS – is it adjustable so that it can be set on the ground? Yes, of course. For explanation of the procedure, check the relevant chapter in this manual. 11. CONDOR simulator – can you connect Zeus and play with it? Not possible by default (must be specified when ordered). There will be only GPS data, no baro data. 12. Can I use OAT sensor from LX 7007, LX 7007 C and LX 5000? Not possible 13. Can I use remote from LX 5000, LX 7007 / C? The Remote Stick can be used from LX5000 (not valid for keyboard), 7000, 7007 and 7007 C. Only the button-descriptions have changed with the new Zeus functions. A rubber can be changed to modify the buttons. This can be done by the user. - 82 -