Transcript
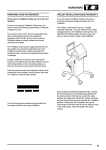
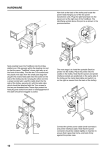
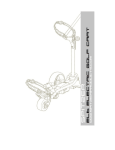
HARDWARE
Load paper into the printer. The paper feeder on
your TestBook printer is designed to handle a stack
of dry paper no more than 5mm high. If too much
paper is put in, or if the paper is damp, the feeder
may jam.
Paper should therefore be stored in a warm, dry
place, such as an office, rather than in the
workshop.
Any paper left in the feeder tray at the end of a
working shift should be removed and put back into
store until needed again. If left out overnight it will
absorb moisture from the air as the temperature
falls.
TROLLEY INSTALLATION GUIDE (TESTBOOK 2)
If you are using a TestBook Trolley, this gives a
convenient, purpose-designed location for your
TestBook.
The Trolley is delivered to you as a virtually
complete assembly - you only need to fit the
TestBook, its printer, the trolley door and you will be
ready to begin using TestBook.
Attach the two additional CD caddy holders - these
will be found in the small box at the bottom of the
trolley box.
They snap into place below the two pre-installed
caddy holders - line up the plastic tabs into the
grooves and push each caddy holder firmly into
place. The holders should then be flush to one
another in two rows of two.
You should now have a fully operational TestBook
trolley unit that only requires the mains cord to be
plugged into a mains supply socket in order to start
work. Please note, however, that the internal battery
(discussed in a later section) is supplied in a
discharged state. To fully charge it, you should leave
TestBook plugged into the mains, (but with
TestBook itself turned off) overnight before starting
to use it.
11