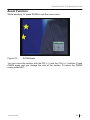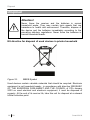
1
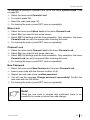
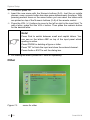
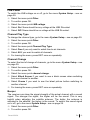
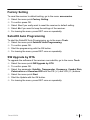
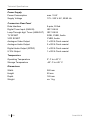
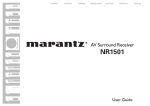
Digital Satellite Receiver
Details see page 46
MX 04
User Manual
Version: 09.01.2008
Preface
Preface
Dear Customer,
thank you for buying the Smart MX 04 Free-To-Air Digital Satellite Receiver.
Please read this user manual carefully before using this device.
This operating manual will help you in the
• appropriate,
• safe and
• favorable
usage of the digital satellite receiver, in short, the receiver. We assume that
the user of the receiver has overall knowledge regarding the handling of audio
and video equipment.
Each person who
• installs,
• connects,
• operates,
• cleans or
• disposes of
this receiver must be familiar with the entire content of this operating manual.
Always keep this operating manual in the proximity of the receiver.
Please keep this instruction manual for consulting near by the receiver.
WELA electronic Handels GmbH
Use Raps!
After switching on the receiver for the first time or after default
reset you will be asked if you would like to use RAPS. Select
yes by pressing OK on the remote control.
For more information see chapter RAPS on page 46.
2
EN
Smart MX 04
Contents
Contents
Preface ............................................................................................................. 2
Contents........................................................................................................... 3
Safety Instructions.......................................................................................... 6
Electrical Connection ........................................................................................ 6
Correct Battery Handling................................................................................... 7
Appropriate Usage .......................................................................................... 7
Scope Of Supply ............................................................................................. 8
Description....................................................................................................... 8
Control Elements / Functions ........................................................................ 9
Front Side.......................................................................................................... 9
Remote Control ............................................................................................. 10
Rear Side With Modulator (optional)............................................................... 12
Inserting Of Batteries ...................................................................................... 13
Replacing Of Batteries .................................................................................... 13
Safety Instructions........................................................................................... 13
Connecting The Receiver ............................................................................. 14
Connecting The Satellite Antenna .................................................................. 14
Connecting The TV-Set................................................................................... 15
Connecting A Dolby-Digital Device ................................................................. 15
Operation......................................................................................................... 15
Start Operating The Receiver....................................................................... 16
Switching On The Receiver............................................................................. 16
Operating At The Front Panel ...................................................................... 17
Navigation In The Menus.............................................................................. 18
Insert Code..................................................................................................... 18
Edit Channel .................................................................................................. 19
TV Channel List............................................................................................... 19
Radio Channel List.......................................................................................... 21
Delete All ......................................................................................................... 21
Smart MX 04
EN
3
Contents
Installation ..................................................................................................... 22
Antenna Connection........................................................................................ 22
Satellite List ..................................................................................................... 22
Antenna Setup ................................................................................................ 22
Single Satellite Search .................................................................................... 26
Multi Satellite Search ...................................................................................... 27
TP List ............................................................................................................. 28
System Setup................................................................................................. 29
Language ........................................................................................................ 29
TV System....................................................................................................... 31
Local Time Setting .......................................................................................... 34
Timer Setting ................................................................................................... 35
Parental Lock .................................................................................................. 38
OSD Setting .................................................................................................... 40
Favorite ........................................................................................................... 41
Other ............................................................................................................... 42
Tools............................................................................................................... 44
Information ...................................................................................................... 44
Factory Setting ................................................................................................ 45
SatcoDX Auto Programming ........................................................................... 45
SW Upgrade by OTA ...................................................................................... 45
RAPS .............................................................................................................. 46
What is RAPS? ............................................................................................... 46
Install or update RAPS automatically.............................................................. 47
Adjust Local TV Channel................................................................................. 49
Allow Erotic Channels ..................................................................................... 49
Show Pay-TV Channels .................................................................................. 50
Hiding Channel lists ........................................................................................ 51
Hide Some Languages.................................................................................... 52
Activate And Deactivate The Automatical Checking Of The RAPS List ......... 53
Manual Updating Of The RAPS List ............................................................... 54
Change RAPS Settings Belated...................................................................... 54
4
EN
Smart MX 04
Contents
Games ............................................................................................................ 56
Tetris ............................................................................................................... 56
Othello ............................................................................................................. 56
Operation With The Remote Control........................................................... 58
Switch The Receiver On And Off .................................................................... 58
Change The Volume ....................................................................................... 58
Change The Channel ...................................................................................... 58
Teletext............................................................................................................ 58
Electronic Program Guide ............................................................................... 59
Favorite List..................................................................................................... 59
Find A Channel ............................................................................................... 60
Zoom Function ................................................................................................ 61
Satellite Overview ........................................................................................... 62
TV Switch ........................................................................................................ 62
Sleep Timer ..................................................................................................... 62
Program Information ....................................................................................... 63
Mosaic ............................................................................................................. 64
Pause Function ............................................................................................... 64
Switching Channels......................................................................................... 64
Audio Settings ................................................................................................. 65
Muting.............................................................................................................. 65
Storing Of Product ........................................................................................ 66
Cleaning ......................................................................................................... 66
Troubleshooting ............................................................................................ 67
Disposal ......................................................................................................... 68
Technical Specifications .............................................................................. 69
Supplier .......................................................................................................... 71
Warranty......................................................................................................... 71
Declaration of Conformity ............................................................................ 71
Smart MX 04
EN
5
Safety Instructions
Safety Instructions
Attention!
Please read the safety instructions carefully before operating
the receiver.
Please follow all warnings and instructions on the equipment
and in the operating manual.
Electrical Connection
• Do not expose the receiver to rain as well as any kind of humidity to avoid
risk of fire and electric shock.
• Connect the receiver only to a professionally installed mains socket of
175–240 V, 50–60 Hz.
• Never open the casing. Otherwise there is a risk of electric shock.
• Ensure that the power source (socket) is easily accessible.
• Pull out the mains plug from the socket if the equipment is not in use for a
longer period of time. Always pull out only at the mains plug.
• If foreign substances or fluids access the receiver, immediately pull out the
mains plug from the socket. Ask a qualified person to check the equipment
before operating it once again. Otherwise there is a risk of electric shock.
• The total power consumption by the antenna connection of the receiver
"LNB IN“ must not exceed 400 mA.
• Do not bend or crimp the mains cable.
• Never touch the mains cable with humid hands. Otherwise there is a risk
of electric shock.
• If the mains cable is damaged, the receiver must be repaired by an expert
before reusing it. Otherwise there is a risk of electric shock.
• Never allow children to operate the receiver or to play with the antenna
unit unless supervised.
• Always ask qualified personnel to carry out maintenance jobs. Otherwise
you are putting yourself and others at risk.
• Disconnect the receiver from the power source in case of operational
disruptions.
• Never cover ventilation slits. Ensure adequate ventilation.
6
EN
Smart MX 04
Appropriate Usage
• Do not expose the apparatus to dripping or splashing. Do not place waterfilled objects like vases on or atop of the receiver. Otherwise, there is a
risk of electric shock.
• Place the receiver on a stable and smooth base.
• Avoid proximity to heat sources, like e. g. heaters, naked flames, like e. g.
candles, devices with strong magnetic fields, like e. g. loudspeakers.
• Avoid direct sunlight and places with an extremely high amount of dust or
high humidity.
• Do not place any heavy objects on the receiver.
• Humidity may settle in the receiver if is brought from cold into hot
surroundings. In this case, please wait for about two or three hours before
operating the equipment.
• Never cover ventilation slits. Ensure adequate ventilation by maintaining a
safety distance of 5 cm to other objects.
• Arrange the mains and antenna cable in such a manner that no one steps
or trips over them.
• Use the apparatus only in moderate climates (not in tropical climates).
Correct Battery Handling
• Batteries may contain toxic agents. Ensure that batteries are not within the
reach of children. Children may eat and swallow batteries.
• Leaking batteries may cause damages at the remote control. Batteries
may contain toxic agents that are hazardous to the environment.
Therefore, dispose of the batteries immediately according to the prevailing
statutory regulations. Never throw the batteries in normal household
waste.
Appropriate Usage
The digital satellite receiver receives digital channels in a covered area. It is
exclusively meant for this purpose and should only be used for the same. This
also includes paying attention to all information in this operating manual
especially that of safety instructions.
Any other usage is considered to be improper and may lead to material
damages and even personal injuries.
The manufacturer does not bear any liability for damages caused due to
improper usage.
Smart MX 04
EN
7
Scope Of Supply
Scope Of Supply
Please check the scope of supply after purchase. If any part is missing, please
contact your dealer.
• The Satellite Receiver Smart MX 04,
• Remote Control,
• 2 pieces of batteries (type AAA) for the remote control,
• Instruction Manual.
Description
With the Smart MX 04 Free-To-Air Digital Satellite Receiver you can receive
Free-To-Air channels. There are hundreds of free digital TV and Radio
channels which can be received.
The digital satellite receiver Smart MX 04 has a mains connection of
175 - 250 V AC, 50/60 Hz.
The most common digital broadcasting stations of the mostly used satellites
are pre-programmed. You can receive the digital channels broadcasted
through these satellites as soon as you have connected the receiver to a
satellite antenna and oriented it to one of these satellites.
All functions of the Receiver can be operated with the remote control. All
receiver settings can be done easily using the user interface (menu) on the
TV-monitor. The user interface supports multiple languages.
8
EN
Smart MX 04
Control Elements / Functions
Control Elements / Functions
Front Side
Figure 1:
No.
Control Elements at the front side
Symbol
Description
1
2
Display
PR ▼
3
PR ▲
4
5
On/Off switch
Standby LED
Channel display
Button to switch the channels downwards step by
step
Button to switch the channels upwards step by
step
Switch between power and standby
Indicator of standby
Smart MX 04
EN
9
Remote Control
Remote Control
10
EN
Smart MX 04
Remote Control
No.
Button
Description
3
4
Standby
Numeric
buttons (0~9)
TV/Radio
EPG
5
VOL (+/-)
6
7
8
FAV
Find
TXT
Switches between operation and standby mode.
For direct choice of channels or for numeric or
alphanumeric figures.
Switches between TV and radio mode.
Shows detail information for individual channels.
Press again for going back to previous mode.
Turns up/down volume or changes the page of
channel list.
Shows current favorite channel list.
Find a channel.
Displays teletext information, if the broadcaster
supports it.
Shows the programmed satellites.
Switches on and off the TV scart output.
Sleep Timer.
Displays the program information on the screen.
Displays several channels on the screen.
Pauses to freeze the screen.
Changes between different audio modes.
Magnification of display details.
Switches between the satellites.
Switches between the satellites.
Back to former status.
Changes channels or moves the cursor upwards
and downwards in the menu.
Displays the channel list and selects the item on
the menu.
Moves to main menu during TV viewing.
Change to the previous selected channel.
Turns sound on or off.
1
2
9
10
11
12
13
14
15
16
17
17
18
19
SAT
TV/AV
SLEEP
INFO
Mosaic
Pause
Audio
ZOOM
Up
Down
EXIT
PR (+/-)
20
OK
21
22
23
MENU
PR
Mute
Smart MX 04
EN
11
Remote Control
Rear Side With Modulator (optional)
Figure 2:
No.
1
2
3
4
5
6
7
8
9
10
11
12
13
14
12
EN
rear side of receiver
Symbol
Description
POWER
VIDEO
AUDIO-L
SPDIF
VCR
TV
LNB OUT
LNB IN
RF-IN
RF-OUT
RS232
AUDIO-R
0/12V
175 - 250 V AC,
50/60 Hz
On / Off switch for main supply
Video output (Composite)
Audio output left
Digital output
SCART output for Video
SCART output for TV
Satellite signal loop through out
Digital satellite signal input
Antenna input
Antenna output
Serial Low-Speed-Interface
Audio output right
0/12 Volt-output
mains connection
Smart MX 04
Remote Control
Inserting Of Batteries
Figure 3:
Inserting of batteries into the remote control
Open the battery compartment on back side of remote control. Insert two
batteries type AAA according to polarities mentioned on the battery
compartment. Push the cover of the battery compartment carefully till the
cover is locked.
Replacing Of Batteries
Replace discharging batteries on time. Always replace both batteries
simultaneously and use batteries of the same type.
Safety Instructions
Attention!
Do not recharge or destruct normal batteries. Do not throw
them into fire.
Batteries may contain toxic agents that are hazardous to
health and environment. Therefore, dispose of the batteries
immediately according to the prevailing statutory regulations.
Never throw the batteries in normal household waste.
Note!
Always insert the batteries according to their polarities.
Batteries which are getting discharged may damage the
remote control. If you do not use the receiver for a longer
period of time, remove the batteries from the remote control.
Smart MX 04
EN
13
Connecting The Receiver
Connecting The Receiver
Attention!
Check that connections of all equipment and the antenna are
proper before connecting the receiver to the mains.
Figure 4:
connection scheme
Connecting The Satellite Antenna
Connect the cable of the satellite antenna with the receiver. Screw the
F-connector of the cable to the LNB IN socket of the receiver.
14
EN
Smart MX 04
Connecting The Receiver
Connecting The TV-Set
Connect your TV-Set with the Scart output for TV. Alternatively you can also
use the connectors AUDIO-L, AUDIO-R and VIDEO.
If the receiver has a modulator, you can connect the RF-OUT of the receiver
with the antenna input of the TV-Set. If you want to receive programs as well
via the house antenna, you must connect the RF-IN socket of the receiver with
the antenna socket in your house.
When all antenna cables are connected, you can select a free channel on your
TV-Set and start the channel search. Please look for details in the user
manual of your TV-Set.
The output channel of the modulator is pre-set to channel 38.
Connecting A Dolby-Digital Device
If you want to connect a Dolby-Digital device, you can connect it with a coaxial
cable to the digital output (SPDIF) of the receiver. For connecting to the DolbyDigital device please read its user manual.
Operation
After connecting all devices, you can plug in the mains supplies of all
connected devices and switch them on.
Smart MX 04
EN
15
Start Operating The Receiver
Start Operating The Receiver
Switching On The Receiver
After connecting the receiver (see page 14), you can switch it on with the
switch at the rear side.
You can see "Strt" for start on the display of the receiver. On the TV screen
you find a selection of available languages.
Figure 5:
Selection of language after first startup
Select your language with the PR (+/-) buttons and confirm with OK.
16
EN
Smart MX 04
Operating At The Front Panel
Operating At The Front Panel
Figure 6:
Front side of the receiver
At the rear side of the receiver is the main supply switch. Here you should
switch the device off if it will not be used for longer time. Here you also have to
switch the device on afterwards.
With the On/Off switch at the front side you can switch your receiver to the
standby mode. If the receiver is in the standby mode, press the On/Off switch
to switch the receiver on.
On the display you can see the actual channel number.
For selecting the channels upwards press PR ▲, for selecting the channels
downwards press PR ▼.
Smart MX 04
EN
17
Navigation In The Menus
Navigation In The Menus
Note!
A menu is a text field, which will be displayed on the screen.
Selectable options are marked with color. Not marked options
cannot be changed or selected. Most options in the menus are
explained on the bottom of the screen.
With the PR (+/-) and VOL (+/-) buttons you can navigate through the menu.
After marking the selected option you can confirm your selection with the
OK button.
With pressing the EXIT button you can leave the menu and come to the
previous mode.
Insert Code
To protect some settings against unauthorized access and changes, they are
only accessible after inserting a code. When selecting one of these menus,
you will be asked to enter the code.
Note!
The default code is 0000.
You can change the code at any time (see chapter Channel Lock on page 39).
18
EN
Smart MX 04
Edit Channel
Edit Channel
Ö
Ö
Ö
Ö
Press MENU on the remote control.
Select the menu point Edit Channel.
To confirm press OK.
Insert your code.
TV Channel List
Select the menu point Edit Channel in the main menu.
Ö Select TV Channel List.
Ö To confirm press OK.
Ö To leave the menu, press EXIT.
Figure 7:
TV Channel List
Ö Select the satellite which channel list should be shown with VOL (+/-).
Ö Select the channel which you want to edit with PR (+/-).
FAV
Ö Press FAV to add the marked channel to the favorite s list.
Ö Press the OK button.
Ö Select with PR (+/-) the favorite list for the selected channel. Confirm with
the OK button.
Smart MX 04
EN
19
Edit Channel
Locking
Ö Press Find to lock channels.
Ö Select the channel, which should be locked, with the PR (+/-) buttons.
Ö Press the OK button to lock the selected channel.
Skip
Ö Press ZOOM to skip channels in the channel list.
Ö Select the channel which should be skipped with PR (+/-).
Ö To confirm press OK.
Move
Ö
Ö
Ö
Ö
Ö
Press TXT to move channel to another place in the list.
Select the channel which should be moved.
Press the OK button.
Move the selected channel with PR (+/-) to the new position.
Press the OK button to store the channel at the new position.
Change
Sort
Ö Press Audio to change the channel list. Then press Find to get an
overview about the sorting mode. Select a sorting mode with PR (+/-) and
confirm with the OK button.
Change
Ö Press Audio to change the channel list.
Ö Press ZOOM to change the channel name.
Ö To confirm press OK.
Ö Insert the new name with the Numeric buttons (0~9). Just like on mobile
phones, every numeric button has also some alphanumeric functions. With
pressing several times on the same button you can select the letters with
are printed on top of the Numeric buttons (0~9) of the remote control.
Ö Press the VOL (+/-) buttons to move to the left or right in the input field. To
add a letter, press first the VOL-+ button. Then press the numeric button
for the desired letter.
20
EN
Smart MX 04
Edit Channel
Note!
Press Find to switch between small and capital letters. You
can see on the letters ABC on top of the input panel which
spelling is active.
Press ZOOM for deleting a figure or letter.
Press TXT to finish the input and show the entered channel.
Press Audio or EXIT to exit the dialog box.
Ö For leaving the menu, press EXIT once or repeatedly.
Delete
Ö Press Audio to change the channel list.
Ö Press Audio again to delete a channel.
Ö Select with PR (+/-) the channel which you want to delete.
Ö To confirm press OK.
Radio Channel List
To select the radio channel list, go to the menu Edit Channel, see page 19.
Ö Select the menu point Radio channel list.
Ö To confirm press OK.
Ö All further functions are the same as for the TV channel list. Please look
under Edit Channel, page 19 .
Ö For leaving the menu, press EXIT once or repeatedly.
Delete All
To delete all radio channels, go to the menu Edit Channel, see page 19.
Ö Select the point Delete All.
Ö To confirm press OK.
Ö Select Yes if you really want to delete all channels.
Ö To confirm press OK.
Ö For leaving the menu, press EXIT once or repeatedly.
Smart MX 04
EN
21
Installation
Installation
Ö
Ö
Ö
Ö
Press MENU.
Select the menu point Installation.
To confirm press OK.
Insert the code (see page 18).
Antenna Connection
To select the kind of antenna, go to the menu Installation.
Ö Select the menu point Antenna Connection.
Ö To confirm press OK.
Ö Select Fixed Antenna if you receive your satellite channels with a fixed
satellite antenna.
Ö Select Motor Antenna if your satellite antenna is a slewable one.
Ö For leaving the menu, press EXIT once or repeatedly.
Satellite List
For selecting the satellite list, go to the menu Installation.
Ö Select the menu point Satellite list.
Ö To confirm press OK.
Ö Select from the list the satellites which you can receive.
Ö To confirm press OK. Behind the satellite name appears a checkmark.
Ö For leaving the menu, press EXIT once or repeatedly.
Antenna Setup
LNB Type
To change the LNB type, go to the menu Installation.
Ö Select the menu point Antenna Setup.
Ö To confirm press OK.
Ö Select the menu point LNB Type.
Ö To confirm press OK.
Ö Select the LNB type.
Ö To confirm press OK.
Ö For leaving the menu, press EXIT once or repeatedly.
22
EN
Smart MX 04
Installation
Motor Type
To change the activation of your satellite antenna, go to the menu Installation
on page 22.
Ö Select the menu point Antenna Setup.
Ö To confirm press OK.
Ö Select the menu point Motor Type.
Ö Select the kind of activation.
You can select between following settings:
• USALS
• DiSEqC 1.2
• For leaving the menu, press EXIT once or repeatedly.
Local Longitude
To change the local longitude, go to the menu Installation on page 22. This
menu point is only active when antenna setting is set on USALS (see chapter
Motor Type, page 23).
Ö Select the menu point Antenna Setup.
Ö To confirm press OK.
Ö Select the menu point Local Longitude.
Ö Select the direction (east / west) with VOL (+/-).
Ö To confirm press OK.
Ö Insert the longitude with the Numeric buttons (0~9).
Ö For leaving the menu, press EXIT once or repeatedly.
Local Latitude
To change the local latitude, go to the menu Installation on page 22. This
menu point is only active when antenna setting is set on USALS (see chapter
Motor Type, page 23).
Ö Select the menu point Antenna Setup.
Ö To confirm press OK.
Ö Select the menu point Local Latitude.
Ö Select the direction (north / south) with VOL (+/-).
Ö To confirm press OK.
Ö Insert the latitude with the Numeric buttons (0~9).
Ö For leaving the menu, press EXIT once or repeatedly.
Smart MX 04
EN
23
Installation
Delete All
To delete the saved satellite positions, go to the menu Installation on
page 22. This menu point is only active when antenna setup is set on
DiSEqC 1.2 (see chapter Motor Type, page 23).
Ö Select the menu point Antenna Setup.
Ö To confirm press OK.
Ö Select the menu point Delete all.
Ö To confirm press OK.
Ö If you really want to delete all settings, select Yes and confirm with the
OK button.
Ö If you do not want to delete the settings, select No press the OK button.
Ö For leaving the menu, press EXIT once or repeatedly.
Motor Setting
To change the motor settings, go to the menu Installation on page 22.
Ö Select the menu point Antenna Setup.
Ö To confirm press OK.
Ö Select the menu point Motor Setting.
Ö To confirm press OK.
At the bottom of the menu you can see two progress bars for signal strength
and signal quality.
Satellite
Ö Select the menu point Satellite.
Ö To confirm press OK.
Ö Select the satellite which position you want to setup.
Ö To confirm press OK.
Transponder
Ö Select the menu point Transponder.
Ö To confirm press OK.
Ö Select a transponder.
Ö To confirm press OK.
Pos.No. & Save
Ö Select the menu point Pos.No. & Save.
Ö Select a position number.
24
EN
Smart MX 04
Installation
Go To X
Ö Select the menu point go to X.
Ö To confirm press OK.
Ö Select a position.
Ö To confirm press OK.
Save
Ö Select the menu point Save.
Ö Change the setting of the satellite antenna with the VOL (+/-) buttons
Ö Safe your changes with the OK button.
Ö If you want to safe the new settings, then select Yes and confirm with the
OK button.
Ö Otherwise select No and confirm with the OK button.
Recalculation
Ö Select the menu point Recalculation.
Ö To confirm press OK.
Ö If you want to have all satellite positions recalculated, then select Yes and
confirm with the OK button.
Ö Otherwise select No and confirm with the OK button.
Limit Setup
To setup or change the limits for the slewable satellite antenna, go to the
menu Installation on page 22.
Ö Select the menu point Antenna Setup.
Ö To confirm press OK.
Ö Select the menu point Limit Setup.
Ö To confirm press OK.
Limit Setup
Ö Select the menu point Limit Setup.
Ö Select the limit of the position.
You can select following points:
• Disable Limit
• West Limit
• East Limit
Smart MX 04
EN
25
Installation
Limit Setup
Ö Select the menu point Limit Setup.
Ö Change the limit with the VOL (+/-) buttons.
Go To Reference
Ö Select the menu point Go to reference.
Ö To confirm press OK.
Ö For leaving the menu, press EXIT once or repeatedly.
Single Satellite Search
To search channels on a satellite, go to the menu Installation on page 22.
Ö Select the menu point Single Satellite Search.
Ö To confirm press OK.
Ö For leaving the menu, press EXIT once or repeatedly.
Satellite
Ö
Ö
Ö
Ö
Select in menu Single Satellite Search the menu point Satellite.
To confirm press OK.
Select a Satellite from the list.
To confirm press OK.
Scan Channel
Ö
Ö
Ö
Ö
26
Select the menu point Scan Channel in menu Single Satellite Search.
If you only want to search for TV channels, then select TV Channels.
If you want to search for radio channels, then select Radio.
If you want to search for TV and radio channels, then select TV + Radio.
EN
Smart MX 04
Installation
Network Search
Ö Select the menu point Network Search in menu Single Satellite Search
on page 26. This menu point is only active when you have selected
Preset Scan.
Ö If you want to search with network search, then select Yes.
Ö Otherwise select No.
Scan Mode
Ö Select the menu point Scan Mode in menu Single Satellite Search on
page 26.
Ö Select the search mode Preset Scan or Blind Search.
Search
Ö Select the menu point Search in menu Single Satellite Search on
page 26.
Ö Press OK to start the search run.
Multi Satellite Search
To search channels on several satellites, go to the menu Installation on
page 22.
Ö Select the menu point Multi Satellite Search.
Ö Confirm with OK. At the bottom of the menu you can see the satellites on
which the channels will be searched.
Ö For leaving the menu, press EXIT once or repeatedly.
Satellite
Ö
Ö
Ö
Ö
Select the menu point Satellite in menu Multi Satellite Search.
To confirm press OK.
Select a satellite from the list.
To confirm press OK.
Scan Channel
Ö Select the menu point Scan Channel in menu Multi Satellite Search on
page 27.
Ö If you only want to search for TV channels, then select TV Channels.
Ö If you want to search for radio channels, then select Radio.
Ö If you want to search for TV and radio channels, then select TV + Radio.
Smart MX 04
EN
27
Installation
Network Search
Ö Select the menu point Network Search in menu Multi Satellite Search
on page 27. This menu point is only active when you have selected
Preset Scan.
Ö If you want to search with network search, then select Yes.
Ö Otherwise select No.
Scan Mode
Ö Select the menu point Scan Mode in menu Multi Satellite Search on
page 27.
Ö Select the search mode Preset Scan or Blind Search.
Search
Ö Select the menu point Search in menu Multi Satellite Search on page 27
Ö Press OK to start the search run.
TP List
To select the transponder list, go to the menu Installation on page 22.
Ö Select the menu point TP List.
Ö To confirm press OK.
Ö To edit the TP List, press Find.
Ö To add a transponder, press ZOOM.
Ö To delete a transponder, press TXT.
Ö To search a transponder, press Audio.
Ö For leaving the menu, press EXIT once or repeatedly.
28
EN
Smart MX 04
System Setup
System Setup
Ö Press MENU.
Ö Select the menu point System Setup.
Ö To confirm press OK.
Language
Figure 8:
menu for language settings
Language
The menu language is set when the receiver was stared for the first time (see
chapter Start Operating The Receiver, page 16).
To change the menu language, go to the menu System Setup.
Ö Select the menu point Language.
Ö To confirm press OK.
Ö Select with VOL (+/-) the desired language.
Ö To confirm press OK.
Ö For leaving the menu, press EXIT once or repeatedly.
Smart MX 04
EN
29
System Setup
First Audio
To change the first audio language, go to the menu System Setup on
page 29.
Ö Select the menu point Language.
Ö To confirm press OK.
Ö Select the menu point First Audio.
Ö To confirm press OK.
Ö Select with VOL (+/-) the desired language.
Ö To confirm press OK.
Ö For leaving the menu, press EXIT once or repeatedly.
Second Audio
To change the second audio language, go to the menu System Setup on
page 29.
Ö Select the menu point Language.
Ö To confirm press OK.
Ö Select the menu point Second Audio.
Ö To confirm press OK.
Ö Select with VOL (+/-) the desired language.
Ö To confirm press OK.
Ö For leaving the menu, press EXIT once or repeatedly.
Subtitle Language
To change the language of the subtitle, go to the menu System Setup on
page 29.
Ö Select the menu point Language.
Ö To confirm press OK.
Ö Select the menu point Subtitle Language.
Ö To confirm press OK.
Ö Select with VOL (+/-) the desired language.
Ö To confirm press OK.
Ö For leaving the menu, press EXIT once or repeatedly.
30
EN
Smart MX 04
System Setup
Teletext
To change the language of the teletext, go to the menu System Setup on
page 29.
Ö Select the menu point Language.
Ö To confirm press OK.
Ö Select the menu point Teletext.
Ö To confirm press OK.
Ö Select with VOL (+/-) the desired Ianguage.
Ö To confirm press OK.
Ö For leaving the menu, press EXIT once or repeatedly.
TV System
Figure 9:
menu for TV System
Display Mode
To change the color TV norm, go to the menu System Setup on page 29.
Ö Select the menu point TV-System.
Ö To confirm press OK.
Ö Select the menu point Display Mode.
Ö To confirm press OK.
Smart MX 04
EN
31
System Setup
Ö Select the adequate color TV norm for your system with the VOL (+/-)
buttons.
To be available are following norms
• PAL
• PAL-M
• PAL-N
• NTSC
• Auto
Ö To confirm press OK.
Ö For leaving the menu, press EXIT once or repeatedly.
Aspect Mode
To change the screen format, go to the menu System Setup - see on
page 29.
Ö Select the menu point TV-System.
Ö To confirm press OK.
Ö Select the menu point Aspect Mode.
Ö To confirm press OK.
Ö Select with VOL (+/-) the adequate screen format for your TV-Set.
To be available are:
• 4:3 PanScan
• 4:3 Letter Box
• 16:9
Ö To confirm press OK.
Ö For leaving the menu, press EXIT once or repeatedly.
Video Output
To change the format of the video signal, go to the menu System Setup – see
on page 29.
Ö Select the menu point TV-System.
Ö To confirm press OK.
Ö Select the menu point Video Output.
Ö Select the video output format with VOL (+/-).
To be available are:
• RGB
• CVBS
32
EN
Smart MX 04
System Setup
Ö To confirm press OK.
Ö For leaving the menu, press EXIT once or repeatedly.
RF System (only for Receivers with Modulator)
To change the color TV norm of the modulator, go to the menu System Setup
– see on page 29.
Ö Select the menu point TV System.
Ö To confirm press OK.
Ö Select the menu point RF System.
Ö To confirm press OK.
Ö Select the norm for the modulator with VOL (+/-).
To be available are:
• PAL-BG
• PAL-I
• PAL-DK
• NTSC
Ö To confirm press OK.
Ö For leaving the menu, press EXIT once or repeatedly.
RF Channel (only for Receivers with Modulator)
To change the output channel of the modulator, go to the menu System
Setup – see on page 29.
Select the menu point TV-System.
Ö To confirm press OK.
Ö Select the menu point RF Channel.
Ö To confirm press OK.
Ö Select the output channel for the modulator. Default setting is the
RF channel 38.
Ö To confirm press OK.
Ö For leaving the menu, press EXIT once or repeatedly.
Smart MX 04
EN
33
System Setup
Local Time Setting
GMT Usage
To change the time setting, go to the menu System Setup – see on page 29.
Ö Select the menu point Local Time Settings.
Ö To confirm press OK.
Ö Select the menu point GMT Usage.
Ö Select On if the time setting should be automatically.
Ö Select Off if you want to set or change the time manually.
Ö To confirm press OK.
Ö For leaving the menu, press EXIT once or repeatedly.
GMT Offset
To choose the time zone, go to the menu System Setup – see on page 29.
Ö Select the menu point Local Time Settings.
Ö To confirm press OK.
Ö Select the menu point GMT Offset.
Ö To confirm press OK.
Ö Select the time zone for your location.
Ö To confirm press OK.
Ö For leaving the menu, press EXIT once or repeatedly.
Summertime
To select the summertime, go to the menu System Setup – see on page 29.
Ö Select the menu point Local Time Settings.
Ö To confirm press OK.
Ö Select the menu point Summertime.
Ö Select On when time is just summertime.
Ö Select Off in wintertime.
Ö To confirm press OK.
Ö For leaving the menu, press EXIT once or repeatedly.
Date
To set the date, go to the menu System Setup – see on page 29.
Ö Select the menu point Local Time Settings.
Ö To confirm press OK.
34
EN
Smart MX 04
System Setup
Ö Select the menu point Date.
Ö Insert the date with the Numeric buttons (0~9).
Ö For leaving the menu, press EXIT once or repeatedly.
Time
To set the time, go to the menu System Setup – see on page 29.
Ö Select the menu point Local Time Settings.
Ö To confirm press OK.
Ö Select the menu point Time.
Ö Insert the time with the Numeric buttons (0~9).
Ö For leaving the menu, press EXIT once or repeatedly.
Timer Setting
To change the timer settings, go to the menu System Setup – see on
page 29.
Ö Select the menu point Timer setting.
Ö To confirm press OK.
Ö Select the timer which you want to program or which you want to change.
Ö To confirm press OK.
Timer Mode
To set the timer repetition, go to the menu System Setup – see on page 29.
Ö Select the menu point Timer Settings.
Ö To confirm press OK.
Ö Select the timer which you want to change or program.
Ö To confirm press OK.
Ö Select the menu point Timer Mode.
Ö Select the frequency of repetition.
To be available are following settings:
• off
• once
• daily
• weekly
• monthly
• yearly
Ö Go to Save to safe your settings and press the OK button.
Smart MX 04
EN
35
System Setup
Ö Go to Cancel for not saving the settings and press the OK button.
Ö For leaving the menu, press EXIT once or repeatedly.
Timer Service
To select the service for the timer, go to the menu System Setup – see on
page 29.
Ö Select the menu point Timer Setting.
Ö To confirm press OK.
Ö Select the timer which you want to change or program.
Ö To confirm press OK.
Ö Select the menu point Timer Service.
Ö Select the service.
To be available are:
• Channel
•
Ö
Ö
Ö
Message
Go to Save to safe your settings and press the OK button.
Go to Cancel for not saving the settings and press the OK button.
For leaving the menu, press EXIT once or repeatedly.
Wakeup Channel
You can only choose a channel if the setting in menu point Timer Service,
(see page 36) is set on channel.
Ö Go to the menu System Setup – see on page 29.
Ö Select the menu point Timer Setting.
Ö To confirm press OK.
Ö Select the timer which you want to change or program.
Ö To confirm press OK.
Ö Select the menu point Wakeup Channel.
Ö To confirm press OK.
Ö Select the channel.
Ö To confirm press OK.
Ö Go to Save to safe your settings and press the OK button.
Ö Go to Cancel for not saving the settings and press the OK button.
Ö For leaving the menu, press EXIT once or repeatedly.
36
EN
Smart MX 04
System Setup
Wakeup Message
You can only chose the message if the setting in the menu point Timer
Service (see page 36) is notice.
To chose a message, go to the menu System Setup – see on page 29.
Ö Select the menu point Timer Setting.
Ö To confirm press OK.
Ö Select the timer which you want to change or program.
Ö To confirm press OK.
Ö Select the menu point Wakeup Message.
Ö To confirm press OK.
Ö Select the kind of notice.
To be available are:
• Birthday
• Anniversary
•
Ö
Ö
Ö
General
Go to Save to safe your settings and press the OK button.
Go to Cancel for not saving the settings and press the OK button.
For leaving the menu, press EXIT once or repeatedly.
Wakeup Date
To select the wakeup date, go to the menu System Setup – see on page 29.
Ö Select the menu point Timer Setting.
Ö To confirm press OK.
Ö Select the timer which you want to change or program.
Ö To confirm press OK.
Ö Select the menu point Wakeup Date.
Ö Insert the date.
Ö Go to Save to safe your settings and press the OK button.
Ö Go to Cancel for not saving the settings and press the OK button.
Ö For leaving the menu, press EXIT once or repeatedly.
On Time
To select the start-up time, go to the menu System Setup – see on page 29.
Ö Select the menu point Timer Setting.
Ö To confirm press OK.
Ö Select the timer which you want to change or program.
Smart MX 04
EN
37
System Setup
Ö
Ö
Ö
Ö
Ö
Ö
To confirm press OK.
Select the menu point On Time.
Insert the time.
Go to Save to safe your settings and press the OK button.
Go to Cancel for not saving the settings and press the OK button.
For leaving the menu, press EXIT once or repeatedly.
Duration
To select the duration, go to the menu System Setup – see on page 29.
Ö Select the menu point Timer Settings.
Ö To confirm press OK.
Ö Select the timer which you want to change or program.
Ö To confirm press OK.
Ö Select the menu point Duration.
Ö Insert the duration.
Ö Go to Save to safe your settings and press the OK button.
Ö Go to Cancel for not saving the settings and press the OK button.
Ö For leaving the menu, press EXIT once or repeatedly.
Parental Lock
Figure 10:
38
EN
menu for setting the parental lock
Smart MX 04
System Setup
To change the setting of Parental Lock, go to the menu System Setup – see
on page 29.
Ö Select the menu point Parental Lock.
Ö To confirm press OK.
Ö Insert the code (see page 18).
Ö For leaving the menu, press EXIT once or repeatedly.
Menu Lock
Ö Select the menu point Menu Lock in the menu Parental Lock.
Ö Select On if you want to lock some menus.
Ö Select Off if all settings shall be free accessible. Only exception: the menu
Parental Lock can only be opened after inserting the code.
Ö For leaving the menu, press EXIT once or repeatedly.
Channel Lock
Ö Select the menu point Channel Lock in the menu Parental Lock.
Ö Select On if you want to lock some channels.
Ö Select Off if all settings shall be free accessible. Only exception: the menu
Parental Lock can only be opened after inserting the code.
Ö For leaving the menu, press EXIT once or repeatedly.
New Password
Select the menu point New Password in the menu Parental Lock.
Insert a new code with the Numeric buttons (0~9).
Repeat the new code under confirm password.
You will see the message Change password successfully! Confirm the
new code with the OK button.
Ö For leaving the menu, press EXIT once or repeatedly.
Ö
Ö
Ö
Ö
Note!
When the new code is inserted and confirmed, there is no
possibility to revoke or cancel the code change.
Smart MX 04
EN
39
System Setup
OSD Setting
Figure 11:
menu for OSD Setting
To change the settings of the OSD, go to the menu System Setup – see on
page 29.
Ö Select the menu point OSD Setting.
Ö To confirm press OK.
Ö For leaving the menu, press EXIT once or repeatedly.
Subtitle Display
Ö
Ö
Ö
Ö
Select the menu point Subtitle Display in the menu OSD Setting.
Select on to show the subtitles.
Select off to hide the subtitles.
For leaving the menu, press EXIT once or repeatedly.
OSD Timeout
Ö Select the menu point OSD Timeout in the menu OSD Setting.
Ö To confirm press OK.
Ö Select the time how long the menu shall be displayed. The minimum is
1 second and the maximum is 10 seconds.
Ö To confirm press OK.
Ö For leaving the menu, press EXIT once or repeatedly.
40
EN
Smart MX 04
System Setup
OSD Transparency
Ö Select the menu point OSD Transparency in the menu OSD Setting.
Ö To confirm press OK.
Ö Select the value for die transparency.
To be available are following grades:
• Off
• 10%
• 20%
• 30%
• 40%
Ö To confirm press OK.
Ö For leaving the menu, press EXIT once or repeatedly.
Favorite
Figure 12:
change name of favorite list
To change the names of the favorite lists, go to the menu System Setup –
see on page 29.
Ö Select the menu point Favorites.
Ö To confirm press OK.
Ö Select the favorite list supposed to be changed.
Smart MX 04
EN
41
System Setup
Ö To confirm press OK.
Ö Insert the new name with the Numeric buttons (0~9). Just like on mobile
phones, every numeric button has also some alphanumeric functions. With
pressing several times on the same button you can select the letters with
are printed on top of the Numeric buttons (0~9) of the remote control.
Ö Press the VOL (+/-) buttons to move to the left or right in the input field. To
add a letter, press first the VOL-+ button. Then press the numeric button
for the desired letter.
Note!
Press Find to switch between small and capital letters. You
can see on the letters ABC on top of the input panel which
spelling is active.
Press ZOOM for deleting a figure or letter.
Press TXT to finish the input and show the entered channel.
Press Audio or EXIT to exit the dialog box.
Ö For leaving the menu, press EXIT once or repeatedly.
Other
Figure 13:
42
EN
menu for other
Smart MX 04
System Setup
LNB Power
To switch the LNB voltage on or off, go to the menu System Setup – see on
page 29.
Ö Select the menu point Other.
Ö To confirm press OK.
Ö Select the menu point LNB voltage.
Ö Select On if there should be any voltage at the LNB IN socket.
Ö Select Off if there should be no voltage at the LNB IN socket.
Channel Play Type
To change the channel type, go to the menu System Setup – see on page 29.
Ö Select the menu point Other.
Ö To confirm press OK.
Ö Select the menu point Channel Play Type.
Ö Select Free if you only want to watch free-to-air channels.
Ö Select All if you want to watch all channels.
Ö For leaving the menu, press EXIT once or repeatedly.
Channel Change
To select the kind of change of channels, go to the menu System Setup – see
on page 29.
Ö Select the menu point Other.
Ö To confirm press OK.
Ö Select the menu point channel change.
Ö Select Black Screen if you want to see a black screen when switching
from one channel to another.
Ö Select Freeze if you want to see the latest picture before switching to
another channel.
Ö For leaving the menu, press EXIT once or repeatedly.
Beeper
The receiver can show the signal strength of the actual channel with a sound
signal. The stronger the signal, the higher will be the sound. This is very
helpful when adjusting the satellite antenna. The better the antenna is
adjusted to the satellite, the higher is the sound. To switch this sound signal
on or off, go to the menu System Setup – see on page 29.
Ö Select the menu point Other.
Ö To confirm press OK.
Smart MX 04
EN
43
Tools
Ö Select the menu point Beeper.
Ö Select On to switch the sound signal on.
Ö Select Off to switch the sound signal off.
Tools
Figure 14:
Ö
Ö
Ö
Ö
menu for tools
Press MENU.
Select the menu point Tools.
To confirm press OK.
Insert the code (see chapter Insert Code, page 18).
Information
To get information about hardware and software of the Smart MX 04 go to the
menu Tools.
Ö Select the menu point Information.
Ö To confirm press OK.
Ö For leaving the menu, press EXIT once or repeatedly.
44
EN
Smart MX 04
Tools
Factory Setting
To reset the receiver to default setting, go to the menu accessories.
Ö Select the menu point Factory Setting.
Ö To confirm press OK.
Ö Select Yes if you really want to reset the receiver to default setting.
Ö Select No if you want to keep the settings of the receiver.
Ö For leaving the menu, press EXIT once or repeatedly.
SatcoDX Auto Programming
To start the SatcoDX Auto Programming, go to the menu Tools.
Ö Select the menu point SatcoDX Auto-Programming.
Ö To confirm press OK.
Ö Start the programming with the OK button.
Ö For leaving the menu, press EXIT once or repeatedly.
SW Upgrade by OTA
To upgrade the software of the receiver over satellite, go to the menu Tools.
Ö Select the menu point SW Upgrade by OTA.
Ö To confirm press OK.
Ö Select the parameter Satellite, Transponder, Frequency, Symbol Rate,
Polarisation and Download PID with the PR (+/-) and VOL (+/-) buttons.
Ö Select the menu point Start.
Ö Start the Update with the OK button.
Ö For leaving the menu, press EXIT once or repeatedly.
Smart MX 04
EN
45
RAPS
RAPS
Figure 15:
Decision for RAPS
What is RAPS?
The receiver is preset for the receipt of Astra 19,2°, Eutelsat Hot Bird 13° east
and Türksat 42° with the common receiving installations. You only have to
connect, switch on and watch TV. But this receiver is able to do more. It has
the automatical programming system RAPS, which we recommend to use so
that you always receive the updated channels.
Today you can receive more than 1,200 TV and radio channels via the most
important satellite system Astra 19,2° and Eutelsat Hot Bird 13° east and
Turksat 42°.
Modern satellite receivers have stored all important channels at delivery
status. But what is later? Nearly every week there are new interesting
channels. To store these new channels in the existing set top box is not so
easy for most of the users. And furthermore the new channels will usually be
added on the last place so that the viewer has to reprogram his list timeconsuming.
RAPS gives the viewer and the listener an easy possibility to be always up-todate. RAPS relieves you of the task of programming. And this without any
additional costs. You can configure certain standard settings like country or
preferred regional channels, you can also hide foreign languages or certain
channels like erotic channels.
Whenever you switch on the receiver, RAPS searches automatically for new
channels. This lasts only a few seconds. If there are new channels, these will
be added automatically to the channel list and will be shown on the screen as
new channels. If channels will be shut down irrecoverably, they will be deleted
automatically. The new channels will be sorted into logical blocks, this is why
also some areas can remain free. For this procedure it is necessary to
overwrite the general channel list. All changes which you have made by hand
meanwhile will be deleted then.
But for all that it is no problem if you want to program channels by yourself.
You can store an own channel list as favourite list, and favourite lists will not
46
EN
Smart MX 04
RAPS
be changed by the new RAPS list. Furthermore you can deactivate RAPS at
any time with default reset.
RAPS gives you plenty of rope here.
Install or update RAPS automatically
Note!
Scanning for new RAPS lists will only be made in TV mode.
Switch to TV mode to search manually for a new RAPS list or
make later configuration changes of your RAPS system.
The RAPS list will only be transmitted when you receive
Astra 19,2°.
When you use RAPS only the channel list will be updated.
Favourite lists established by you will remain unaffected.
Ö To activate RAPS on your receiver, reset it to default or select RAPS
under MENU -> SOFTWARE VERSION.
Ö After default reset you have to select the menu language.
In the following menu you can choose if you want to use RAPS or not.
Ö If you want to use RAPS, select the option yes with the PR (+/-) buttons.
Ö Press OK.
The receiver will now search for the updated RAPS list.
Figure 16:
Smart MX 04
Automatic programming
EN
47
RAPS
You can see the progress of update at the status bar.
Figure 17:
Selection of receivable satellites
Afterwards you can see a selection of receivable satellites.
Ö Select the satellite which you would like to receive with the
PR (+/-) buttons.
Ö Confirm your selection with OK.
The field behind the selected satellite will be checked now.
Ö Repeat these steps for all desired satellites.
Ö Finally press Vol-+ to come to the next step.
Figure 18:
Selection of RAPS list
The list on the screen shows the available RAPS data.
Ö To select the ideal list, press the PR (+/-) buttons.
48
EN
Smart MX 04
RAPS
Ö Confirm your selection with OK.
Adjust Local TV Channel
In the following menu you must select the local TV channel.
Figure 19:
Selection of local channel
You can see the available local TV channels in a list.
Ö Select the requested TV channel with the PR (+/-) buttons.
Ö Confirm your selection with the OK.
Note!
Depending on the receiver and the input on the following
pages, it can happen that some of the following menu points
will not be shown. In any case you have to follow all settings
through. Only then RAPS is completely configured.
Allow Erotic Channels
Ö As next you can select if you want to watch channels with erotic contents.
Ö Select yes or no with the VOL (+/-) buttons.
Smart MX 04
EN
49
RAPS
Figure 20:
Protection of minors
Ö Confirm your selection with the OK.
Show Pay-TV Channels
If you have subscribed –TV channels, select yes with the VOL (+/-) buttons
and confirm your selection with OK. If you select no, the Pay-TV channels will
not be inserted in the channel list.
Figure 21:
Pay-TV channels
If you have selected yes, you can see the following menu page with different
encrypting systems.
50
EN
Smart MX 04
RAPS
Figure 22:
Selection of encryption system
Ö Press the PR (+/-) buttons to mark the system which is used by your PayTV provider. You will find corresponding information on your CI module or
your card. In case of doubt you can select all.
Ö Confirm your selection with OK.
Behind the selected encrypting system will now be a check.
Ö To select all encrypting systems, press Find.
Ö To delete all checks from the list, press ZOOM.
Ö At last press the VOL-+-Button to get to the next step.
Hiding Channel lists
You can hide the channel lists of not subscribed Pay-TV providers.
Figure 23:
Smart MX 04
hide channel lists
EN
51
RAPS
Ö Press the PR (+/-) buttons to mark a list.
Ö Confirm your selection with OK.
Behind the selected channel list will now be a check.
Ö Repeat these steps for all channel lists which should be hidden.
Ö At last press the VOL-+-Button to get to the next step.
Hide Some Languages
To arrange your channel list clearly, you can hide the languages which are not
desired.
Figure 24:
Hiding of languages
Ö Select yes with the VOL (+/-) buttons, if you want to hide some languages.
Confirm your selection with OK.
Figure 25:
52
EN
Selection of languages
Smart MX 04
RAPS
You can now see a list of languages of the screen and you can select each
language separately.
Ö Press the PR (+/-) buttons to mark a language.
Ö Confirm your selection with OK.
The field behind the selected language will be checked now.
Ö Repeat these steps for all languages with shall be hidden.
Ö At last press the VOL-+-Taste to get to the next step.
Ö To select all languages, press Find.
Ö To delete all checks from the list, press ZOOM.
Ö At last press the VOL-+-Button.
All Settings will now be saved.
Activate And Deactivate The Automatical Checking Of
The RAPS List
Figure 26:
RAPS Data checking
RAPS will check after each switching-on if there is an updated RAPS list with
modified channel data. This will last about 15 seconds.
Press EXIT to stop the checking.
If you do not want to use the automatical update function, act as follows:
Ö Press MENU.
Ö Select the menu accessories with the PR (+/-) buttons. Confirm your
selection with OK.
Ö If necessary, insert the code.
Note!
The default code is "0000“.
Ö Select the menu RAPS System with the PR (+/-) buttons.
Ö Confirm your selection with OK.
Smart MX 04
EN
53
RAPS
Ö Select the menu point RAPS Scanning with the PR (+/-) buttons.
Ö Activate the option off with the VOL (+/-) buttons.
Ö Leave the menu by pressing EXIT several times.
If you selected off, the flash „checking RAPS data“ will not be visible any more
and the receiver will go directly to the last channel list.
Manual Updating Of The RAPS List
If you have switched off the automatic updating of the RAPS list, you can
search manually for an update.
Ö Press MENU.
Ö Select the menu accessories with the PR (+/-) buttons.
Ö Confirm your selection with OK.
Ö If necessary, insert the code.
Note!
The default code is "0000“.
Ö Select the menu RAPS System with the PR (+/-) buttons.
Ö Confirm your selection with OK.
Ö Select the menu point RAPS Mode with the PR (+/-) buttons.
Ö Activate the option Update with the VOL (+/-) buttons.
Ö Select the menu point Start with the PR (+/-) buttons.
Ö Confirm your selection with OK.
The current settings for RAPS will now be shown and the receiver is checking
for an updated RAPS list. If the data for RAPS Date Receiver (list on your
receiver) and Date (current list) are different, the RAPS list has been changed.
In this case the update starts automatically.
If there is no change in the RAPS list, the receiver reports no change. .
Ö Press OK and confirm by pressing again OK to get back to programming
mode.
Change RAPS Settings Belated
If you want to change the RAPS settings (for example hidden languages), act
as follows:
Ö Press MENU.
Ö Select the menu accessories with the PR (+/-) buttons.
54
EN
Smart MX 04
RAPS
Ö Confirm your selection with OK.
Ö If necessary, insert the code.
Note!
The default code is "0000“.
Ö Select the menu RAPS System with the PR (+/-) buttons.
Ö Confirm your selection with OK.
Ö Select the menu point RAPS mode with the PR (+/-) buttons.
Ö Activate the option configure with the VOL (+/-) buttons.
Ö Select the menu point start with the PR (+/-) buttons.
Ö Confirm your selection with OK.
You can see the menu fort he RAPS update on the screen.
Ö Make the RAPS settings like mentioned in chapter Install or update on
page 47.
Smart MX 04
EN
55
Games
Games
Ö Press MENU.
Ö Select the menu point Game.
Ö To confirm press OK.
Tetris
You must assemble the falling bricks to a wall without gaps.
Start
Starting the game.
Ö Select the menu point Start.
Ö To confirm press OK.
Ö For leaving the menu, press EXIT once or repeatedly.
Setup
Setup of Level
Ö Select the menu point Setup.
Ö Select the level by pressing OK.
Cancel
Leave the menu.
Ö Select the menu point Cancel to leave the menu.
Ö To confirm press OK.
Othello
You must win as many tokens of your own color as possible. Set one of your
tokens at the rim and all tokens of the other color, which are between this
token and another of your own color, in vertical, horizontal or diagonal line, will
be changed to your own color.
56
EN
Smart MX 04
Games
Start
Starting the game.
Ö Select the menu point Start.
Ö To confirm press OK.
Ö For leaving the menu, press EXIT once or repeatedly.
Setup
Setup of Level
Ö Select the menu point Setup.
Ö Select the level by pressing OK.
Cancel
Leave the menu.
Ö Select the menu point Cancel to leave the menu.
Ö To confirm press OK.
Smart MX 04
EN
57
Operation With The Remote Control
Operation With The Remote Control
Switch The Receiver On And Off
Press the Standby button to switch the receiver on and off.
Change The Volume
Change the volume with the VOL (+/-) buttons.
Change The Channel
Press Numeric buttons (0~9) for the channel number. To change the channel
in ascending or descending order you can also press the PR (+/-) buttons.
Teletext
For teletext press the TXT button.
The teletext shows news and information about the program.
To exit the teletext, press EXIT.
58
EN
Smart MX 04
Operation With The Remote Control
Electronic Program Guide
Figure 27:
Electronic Program Guide (EPG)
For the electronic program guide press the EPG button.
Here you can get information of the just running and following programs (if
supported by the broadcaster).
Press EXIT to leave the EPG.
Favorite List
While watching TV or listening to the radio you can press the FAV button and
retrieve a list with your favorite TV or radio channels.
If you did not select any favorite channels, no list will appear. Instead you will
see the notice No FAV Channels.
Smart MX 04
EN
59
Operation With The Remote Control
Find A Channel
Figure 28:
Find a channel
Every satellite is broadcasting hundreds of digital channels. To avoid that you
must search the whole channel memory for a certain channel, you can insert
the name of the channel with the keys and search for it.
Press Find to get the input field for the name. Insert the channel name with
the Numeric buttons (0~9). Just like on mobile phones, every numeric button
has also some alphanumeric functions. With pressing several times on the
same button you can select the letters with are printed on top of the Numeric
buttons (0~9) of the remote control.
After inserting the first letter, you can see on the left side a list with channels
which begins with this letter. Press the PR (+/-) buttons and you can scroll
through the channels and select the required channel. With inserting more
letters, you can narrow down the result further.
Press the VOL (+/-) buttons to move to the left or right. To add another letter,
first press the VOL-+ button. Then insert the next letter.
Press Find to switch between small and capital letters.
Press ZOOM to delete a digit or letter.
Press TXT to finish the input and show the selected channel.
Press Audio or EXIT to leave the menu.
60
EN
Smart MX 04
Operation With The Remote Control
Zoom Function
While watching TV press ZOOM to call the zoom menu.
Figure 29:
ZOOM-menu
You can move the section with the PR (+/-) and the VOL (+/-) buttons. Press
ZOOM again and you change the size of the section. To leave the ZOOM
menu press EXIT.
Smart MX 04
EN
61
Operation With The Remote Control
Satellite Overview
Figure 30:
Overview over the programmed satellites
Press SAT to get an overview over the programmed satellites.
TV Switch
Press TV/AV to switch between satellite receipt via the MX 04 and antenna
receipt via TV-Set.
Sleep Timer
Press SLEEP to call the sleep timer. With repeating pressing of the SLEEP
button you can change the time (OFF, 10 30, 60 90, 120).
62
EN
Smart MX 04
Operation With The Remote Control
Program Information
Figure 31:
Detailed Program Information
Digital television gives the opportunity to broadcast additional information for
the program. Not every channel offers this service. In this case the text field is
empty.
Press INFO to get information about the running program. Press INFO again
and you get more detailed information about the current program. If the
information is very detailed, you can scroll forward with the ZOOM button and
back with the Find button.
Smart MX 04
EN
63
Operation With The Remote Control
Mosaic
Figure 32:
Mosaic
Press Mosaic button to get an overview about the current and the next eight
channels.
Pause Function
Press Pause button to freeze the picture of the current program.
Press Pause button again to go back to normal.
Switching Channels
Press the Numeric buttons (0~9) to insert the number of channel.
You can go to the next or previous channel with the PR (+/-) buttons.
Press Up or Down button to switch between the channel lists of the several
programmed satellites.
PR button to recall the last selected channel.
Press
64
EN
Smart MX 04
Operation With The Remote Control
Audio Settings
While watching TV press the Audio button.
Select the audio mode with the VOL (+/-) buttons.
Dependant on the selected channel you can chose between following mode:
• Mono sound track
• Left
• Right
• Stereo
• AC3
After selecting the desired mode, leave the menu with EXIT.
Muting
For Muting press the Mute button. On the screen you will see a symbol with
crossed-out loudspeaker.
Press Mute again to hear the sound. The symbol disappears.
Smart MX 04
EN
65
Storing Of Product
Storing Of Product
Ö Pull all plugs out of the sockets.
Ö Screw the LNB cable from the receiver.
Ö Take the batteries out of the remote control if you do not use the receiver
for a longer period.
Ö Pack the receiver, the cables and the remote control into the original
carton.
Ö Save the receiver and all accessories at a dry and dust-free location.
Ö Protect the receiver from frost.
Cleaning
Danger of Electric Shock!
No liquids must run into the receiver. Never clean it with a wet
cloth. Always pull the plug out of the socket before cleaning.
Attention!
Never use solvent-containing agents like benzene or similar.
These agents can damage the surface of the housing.
Pull the plug out of the socket before cleaning the receiver. Clean the housing
of the receiver only with a dry cloth.
66
EN
Smart MX 04
Troubleshooting
Troubleshooting
Fault Phenomenon
Probable reasons and solution
The display shows
nothing.
The power cable is not plugged in.
Put the plug of the power cable into the mains
socket.
The power switch is off. Switch power on at the
backside of the device.
The receiver is on standby.
Press the power button. The receiver will switch on
and the program is on the screen.
The antenna is not adjusted to the satellite.
Adjust the antenna correctly.
Please check the cable between LNB and receiver
and between receiver and connected devices.
Adjust the antenna.
The system is connected incorrectly.
Check connection of SCART cable.
Switch the TV set on AV input.
No volume or picture,
the LED is on.
No volume or picture.
No or only faint signal.
No picture on TV
screen.
TV-Set is not in AV
mode.
Bd picture,
block defect.
TheLNB is defective.
The remote control
does not work.
The remote control
does not always work.
The antenna is not adjusted to the satellite.
Adjust the antenna.
Replace the LNB.
The batteries are empty.
Replace them with new ones.
Focus the remote control to the front side of the
receiver and assure that nothing else is between
the remote control and the receiver.
If you cannot find out what is wrong with your device, please contact your local
dealer.
Smart MX 04
EN
67
Disposal
Disposal
Attention!
Never throw the receiver and the batteries in normal
household waste. They may contain toxic agents that are
hazardous to health and environment. Therefore, dispose of
the device and the batteries immediately according to the
prevailing statutory regulations. Never throw the batteries in
normal household waste.
EU directive for disposal of used devices in private household
Figure 33:
WEEE-Symbol
Used devices contain valuable materials that should be recycled. Electronic
equipment is not household waste - in accordance with directive 2002/96/EC
OF THE EUROPEAN PARLIAMENT AND THE COUNCIL of 27th January
2003 on used electrical and electronic equipment, it must be disposed of
properly. At the end of its service life, take this unit for disposal at a relevant
official collection point.
68
EN
Smart MX 04
Technical Specifications
Technical Specifications
LNB / Tuner-Input
F-type connector
IEC 169-24
Frequency Range
950 MHz ~ 2150 MHz
Input Level
-65 dBm to -25 dBm
LNB Power Supply
13/18 V, max. 400 mA
LNB Control Signal
22 kHz, 0/12 V
DiSEqC Control
Version 1.2
Demodulator
Front-End-Module
QPSK
Input Data Rates
2 MS/s to 45 MS/s
SCPC- and MCPC-compatible
System Resources
Processor
32 bit, 60 MHz
SDRAM
8 MByte
FLASH
2 MByte
Video-Decoder
Video Resolution (Video format)
720 x 576 (PAL), 720 x 480 (NTSC)
Aspect Ratio
4:3, 16:9
Modulator (optional)
Channel
21 - 69
Remote Control
Batteries
2x type AAA
Range
max. 7 m
Smart MX 04
EN
69
Technical Specifications
Power Supply
Power Consumption
max. 15 W
Supply Voltage
175 - 250 V AC, 50/60 Hz
Connectors Rear Panel
Data Interface
9-pole, D-Sub
Digital Tuner Input (LNB-IN)
IEC 169-24
Loop-Through digit. Tuner (LNB-OUT)
IEC 169-24
TV SCART
RGB, CVBS, Audio
VCR SCART
CVBS, Audio
Analogue Video Output
1 x RCA Cinch coaxial
Analogue Audio Output
2 x RCA Cinch coaxial
Digital Audio Output (SPDIF)
1 x RCA Cinch coaxial
0/12V-Output
1 x RCA Cinch coaxial
Temperature
Operating Temperature
0° C to +40° C
Storage Temperature
-40° C to +65° C
Dimensions
Width
260 mm
Height
50 mm
Depth
165 mm
Weight
ca. 1 kg
70
EN
Smart MX 04
Supplier
Supplier
WELA electronic Handels GmbH
Industriestraße 29
78112 St. Georgen
Germany
Service Hotline:
00 49 1805 / 93 52 11 (0,14 €/min. from German landline)
Fax:
00 49 7724 / 94 78 333
E-Mail:
[email protected]
Internet:
www.smart-electronic.de/
Warranty
The warranty for the digital satellite receiver MX 04 of the WELA electronic
Handels GmbH is in conformity with the prevailing statutory regulations at the
time of purchasing the product. The WELA electronic Handels GmbH reserves
the right to change the specification at any time without prior notice.
Declaration of Conformity
The WELA electronic Handels GmbH, Industriestraße 29, 78112 St. Georgen,
Germany hereby declares conformity with the following guidelines and
standards for this product:
• Guideline for low voltage, 2006/95/EG
• EN 60 335-1
• EN 60 335-2-15
• Guideline for electromagnetic compatibility, 2004/108/EG
• EN 55 013:2001
• EN 55 020
• EN 61 000-3-2:2000
• EN 61 000-3-3:1995+A1:2001
• EN 61 938
Equipment type /model: Free-To-Air Digital Satellite Receiver
WELA electronic Handels GmbH
Smart MX 04
EN
71