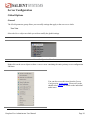
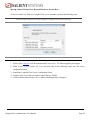
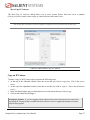
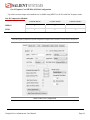
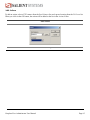
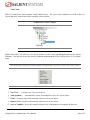
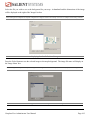
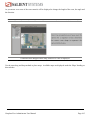
1
CompleteView™ Administrator User Manual CompleteView Version 4.3 Table of Contents Introduction ................................................................................................................. 1 Overview ..........................................................................................................................................................1 System Requirements .......................................................................................................................................2 CompleteView Client Applications..................................................................................................................3 CompleteView Server Applications .................................................................................................................3 End User License Agreement ...........................................................................................................................4 Before You Start .......................................................................................................... 5 Client Applications ...........................................................................................................................................5 Server Applications ..........................................................................................................................................6 Licensing your CompleteView Server .............................................................................................................8 Installing the Hardware License Device ..........................................................................................................8 System Service Fundamentals ..........................................................................................................................9 Managing System Services ..............................................................................................................................9 System Service Overview ..............................................................................................................................12 Services and Permissions ...........................................................................................................................12 What is localhost?...................................................................................................... 13 Server Applications ................................................................................................... 14 CompleteView Administrative Service ..........................................................................................................14 Parameters ......................................................................................................................................................14 Communication Port(s) ..................................................................................................................................14 CompleteView Config Server ........................................................................................................................15 Parameters ......................................................................................................................................................15 Communication Port(s) ..................................................................................................................................15 Automatic Client Software Updates ...............................................................................................................16 CompleteView Server ....................................................................................................................................17 Parameters ......................................................................................................................................................17 Communication Port(s) ..................................................................................................................................17 System Configuration ................................................................................................ 18 Introduction ....................................................................................................................................................18 Starting the System Configuration client .......................................................................................................18 Select the Configuration Context ...................................................................................................................19 Menus .............................................................................................................................................................20 ii File Menu .......................................................................................................................................................20 Server Configuration Menu ............................................................................................................................21 Client Configuration Menu ............................................................................................................................22 View Menu .....................................................................................................................................................23 Panels..............................................................................................................................................................24 Adding a Server Configuration ......................................................................................................................25 Adding a Client Configuration .......................................................................................................................27 Server Configuration ................................................................................................. 30 Global Options ...............................................................................................................................................30 General ...........................................................................................................................................................30 Tree View...................................................................................................................................................30 Server Configuration Tabs ........................................................................................ 31 General Tab. ...................................................................................................................................................31 Logging ..........................................................................................................................................................33 Email Configuration .......................................................................................................................................34 Tracking..........................................................................................................................................................35 Integrations .....................................................................................................................................................36 S2 Access Control Parameters ...................................................................................................................37 SureView Immix Parameters .....................................................................................................................37 Bold Manitou Parameters ..........................................................................................................................37 Axis One-Click ...............................................................................................................................................38 Feature Keys ...................................................................................................................................................40 Adding a Feature Key ................................................................................................................................40 Deleting a Feature Key ...................................................................................................................................42 Moving a Feature Key ....................................................................................................................................43 Users/Groups ..................................................................................................................................................47 Tree View...................................................................................................................................................47 Configuration Tabs .........................................................................................................................................49 Administration ...........................................................................................................................................49 User Object .................................................................................................................................................... 49 Group Object ................................................................................................................................................. 50 User Object .................................................................................................................................................... 51 Camera............................................................................................................................................................52 Advanced ........................................................................................................................................................54 iii Cameras ..........................................................................................................................................................55 General ...........................................................................................................................................................55 Navigation Pane View ...............................................................................................................................55 Move/Copy IP Cameras .............................................................................................................................57 Copy an IP Camera.........................................................................................................................................57 Move an IP Camera ........................................................................................................................................58 Adding IP Cameras using the Camera Search/Add Tool ...............................................................................59 Configuration Tabs .........................................................................................................................................65 General .......................................................................................................................................................65 Gen II Capture Card MPEG4 & H.264 Configuration ..............................................................................68 Camera Adjustments ......................................................................................................................................70 Volumes..........................................................................................................................................................72 IP ....................................................................................................................................................................73 IP Tab ............................................................................................................................................................ 73 Camera Event Alerts ......................................................................................................................................75 Axis Event Camera Configuration .................................................................................................................77 Using Camera Based HTTP Notifications .....................................................................................................80 Axis One Click Connection ........................................................................................................................... 84 PTZ .................................................................................................................................................................85 PTZ Tab ..........................................................................................................................................................85 Auto-Attendant ...............................................................................................................................................88 Communications .............................................................................................................................................89 Control Protocols ............................................................................................................................................89 Preset Tour .....................................................................................................................................................90 Digital PTZ .....................................................................................................................................................91 Motion / Alarm ..........................................................................................................................................92 Actions Editor.................................................................................................................................................94 Add Actions ....................................................................................................................................................95 PTZ Control ....................................................................................................................................................96 Audio ..............................................................................................................................................................98 Email ..............................................................................................................................................................99 Analytics .......................................................................................................................................................101 Edge Storage.................................................................................................................................................102 Adding a QuickTrack Camera ......................................................................................................................105 Audio Devices ..............................................................................................................................................106 iv General .........................................................................................................................................................107 Configuring Audio Devices..........................................................................................................................108 Alarm Devices ..............................................................................................................................................109 Alarm Devices ..............................................................................................................................................109 Tree View.................................................................................................................................................109 IP-based Digital Input / Output ................................................................................................................109 Direct-Attached Digital Input / Output ........................................................................................................110 Configuration Tabs .......................................................................................................................................111 IP Tab ...........................................................................................................................................................111 Inputs........................................................................................................................................................112 Outputs .....................................................................................................................................................113 Serial Ports ...................................................................................................................................................114 General .........................................................................................................................................................114 Tree View.................................................................................................................................................114 Serial Port Configuration..............................................................................................................................115 Volumes........................................................................................................................................................116 General .........................................................................................................................................................116 Tree View.................................................................................................................................................116 Configuration Tabs .......................................................................................................................................117 General .....................................................................................................................................................117 Archiving and Backup Only Configuration .................................................................................................118 Backup Only .................................................................................................................................................118 Configuration of Archive Only or Back Only Volume ................................................................................119 Overview ..................................................................................................................................................... 119 Adding an "Archive Only" Volume ............................................................................................................ 119 Configuring the Archive or Backup Schedule .............................................................................................121 Cameras....................................................................................................................................................123 Schedules ......................................................................................................................................................124 General .........................................................................................................................................................124 Tree View.................................................................................................................................................124 Configuration Tabs .......................................................................................................................................127 Edit ...........................................................................................................................................................127 Diagnostics/Reporting ..................................................................................................................................129 Logging ........................................................................................................................................................129 Log File Specification ..............................................................................................................................130 v Logging Settings ......................................................................................................................................130 Configurations ..............................................................................................................................................132 Client Configuration ................................................................................................ 134 Global Options .............................................................................................................................................134 General .........................................................................................................................................................134 Tree View.................................................................................................................................................134 General .........................................................................................................................................................136 Sites & Zones ...............................................................................................................................................137 Overview ......................................................................................................................................................137 Configuring Sites & Zones ...........................................................................................................................137 Creating Views and Maps within a Site .......................................................................................................139 Map Views within Zones and Sites .........................................................................................................140 Site Administration.......................................................................................................................................141 Users/Groups ................................................................................................................................................142 General .........................................................................................................................................................142 Tree View .....................................................................................................................................................142 User/Groups Node ...................................................................................................................................142 Views Node ..............................................................................................................................................144 User Object ...................................................................................................................................................146 User Group Object........................................................................................................................................147 Credentials ....................................................................................................................................................149 Servers ..........................................................................................................................................................151 Cameras ........................................................................................................................................................151 View Layout Editor ......................................................................................................................................152 General .........................................................................................................................................................152 Edit ...............................................................................................................................................................153 View Layouts ...............................................................................................................................................153 Resizing Cameras .........................................................................................................................................155 Deleting Cameras .........................................................................................................................................156 Adding Maps or Web Pages to a View Layout ............................................................................................157 Map View Editor ..........................................................................................................................................160 General .........................................................................................................................................................160 Import an Image File as a Map ................................................................................................................160 Edit ...............................................................................................................................................................163 vi Appendices .............................................................................................................. 166 Appendix A: PTZ Protocol Drivers..............................................................................................................166 Analog Control Protocols (RS-422/485) ......................................................................................................166 IP-based Control Protocols ...........................................................................................................................167 Appendix B: Generic IP Drivers .................................................................................................................168 "Generic IP Camera" for MJPEG .................................................................................................................168 "Generic IP MJPEG Streaming Camera" for MJPEG..................................................................................168 "Generic IP RTSP Streaming Camera" for MPEG-4 ...................................................................................168 "Generic RTSP/UDP" for MPEG-4 and H.264 ............................................................................................168 Appendix C. Active Directory® Connector .................................................................................................169 C1. Overview................................................................................................................................................169 C2. Dynamic User Authentication ...............................................................................................................170 C3. CompleteView Config Server................................................................................................................171 C4. CompleteView Server ............................................................................................................................172 Appendix D. Users and User Groups ...........................................................................................................173 Appendix E: RS2 Access Control Integration ..............................................................................................175 Working with Live and Recorded Video .................................................................................................175 Appendix F: Lenel OnGuard Integration .....................................................................................................177 vii Introduction Overview CompleteView is an Enterprise-ready Video Management System that utilizes a comprehensive suite of clientserver software applications designed for operation in a Microsoft Windows environment. For turnkey solutions, the software suite and analog video capture hardware is also available factory integrated into Dell and HP workstation computers, as well as Salient's own high-value solutions. When a computer is configured with video capture hardware and/or IP camera licenses and the CompleteView Server software component, the resulting system is referred to as a CompleteView Server. When a computer is configured with any of the CompleteView client applications, the system is referred to as a CompleteView Client. It is therefore possible for a single computer to be both a CompleteView Server and a CompleteView Client. Hybrid Technology CompleteView supports the acquisition of video from both analog CCTV and IP-based video sources and presents them to users in a unified graphical user interface. This allows for a consistency of operation that is unparalleled by any other technology. You can now take advantage of your existing cable plant and legacy CCTV infrastructure, while simultaneously adding IP-based infrastructure at your pace. CompleteView has been designed from the outset as a solid foundation for you to build upon, allowing the system to grow with you as your technology and requirements change. Analog capture technology is provided with CompleteView. Generation 1 capture card, or Fusion4 Capture cards, come in 4 channel PCI or PCIe versions. Gen I capture cards had been provided with CompleteView versions 1.x, 2.x and 3.x software. Starting with CompleteView version 4.1 Salient provide the Gen II capture technology, which features on board compression for faster performance. Gen II capture boards provide either 8, 16 or 32 channels of analog camera connectivity using a PCIe connection. System Service The CompleteView Server software is a fully compliant Windows system service. Security of Surveillance and Recording Services CompleteView makes extensive use of access-control-lists (ACLs) for granting and restricting access to all aspects of the CompleteView Server. Almost every function can be separately controlled on a per-user, percamera basis. Pan-tilt-zoom (PTZ) Camera Control CompleteView Administrator User Manual Page 1 CompleteView delivers basic PTZ control functions for a wide variety of PTZ control protocols. In addition, CompleteView offers advanced features, such as preset tours; auto-home; and auto-attendant. Client Customization The CompleteView Video Client is a multi-user application that can be easily customized for the requirements of each user. Standards-based Technologies CompleteView utilizes Microsoft® DirectShow® technology as the underlying architecture for video capture and display. For video compression, CompleteView takes advantage of Intel codec libraries for ISO-compliant MPEG-4 recordings. This ensures that the majority of Windows-based computers can review your video events, without requiring the installation of additional software. Note: CompleteView ONE supports up to 32 cameras total of which 32 can be any mix of analog or IP cameras. CompleteView Administrator User Manual Page 2 System Requirements CompleteView Client Applications Minimum Software Requirements • Microsoft Windows (32 Bit) 2000 / XP / Vista / 7 • Microsoft Windows (64 Bit) Windows 7 • Microsoft DirectX 9.0 or later Minimum Hardware Requirements • Core 2 Duo 2.0 Ghz or faster. • 2 Gigabytes (GB) of system memory. • 10/100/1000 Ethernet Controller. • A graphics accelerator with a minimum of 256MB of video memory. CompleteView Server Applications Server requirements vary based on the cameras used and recording configuration. Please use the Salient Design Tool to calculate specific server requirements or contact Salient Systems Engineers at 512-617-4802. Minimum Software Requirements for systems with Gen I analog capture cards 1. Microsoft Windows (32 Bit) 2000 / XP / 7 / Server 2003 / Server 2008 2. Microsoft DirectX 9.0 or later Minimum Software Requirements for systems with Gen II analog capture cards 3. Microsoft Windows (64 Bit) 7 / Server 2008 4. Microsoft DirectX 9.0 or later Minimum Software Requirements for IP camera only configuration 5. Microsoft Windows (32 Bit) 2000 / XP / 7 / Server 2003 / Server 2008 6. Microsoft Windows (64 Bit) 7 / Server 2008 7. Microsoft DirectX 9.0 or later Minimum Hardware Requirements • Intel Pentium 4 CPU, 2.0 Gigahertz (GHz) or faster. • 1.0 Gigabyte (GB) of system memory. • One PCI 2.1 expansion slot per each Gen I Fusion4 video capture card. • One PCI-e X1 expansion slot per each Gen I Fusion4-e video capture card. • One PCI-e expansion slot per each Gen II video capture card. CompleteView Administrator User Manual Page 3 End User License Agreement Salient CompleteView™ SOFTWARE LICENSE 1. GRANT OF LICENSE. Salient grants to you the right to use one (1) copy of the Salient CompleteView Server SOFTWARE on one (1) computer. Salient grants to you the right to use one (1) copy of the Salient CompleteView Client SOFTWARE on any numbers of computers, provided that the Salient CompleteView Client is solely used to connect to a Salient CompleteView Server. The SOFTWARE is in "use" on a computer when it is loaded into temporary memory (i.e. RAM) or installed into permanent memory (e.g. hard disk, CD-ROM or other storage device) of that computer. 2. COPYRIGHT. The SOFTWARE is owned by Salient and/or its licensor(s), if any, and is protected by copyright laws and international treaty provisions. Therefore you must treat the SOFTWARE like any other copyrighted material (e.g. a book or a musical recording) except that you may either (a) make a copy of the SOFTWARE solely for backup or archival purposes or (b) transfer the SOFTWARE to a single hard disk provided you keep the original solely for backup purposes. 3. OTHER RESTRICTIONS. You may not rent, lease or sublicense the SOFTWARE but you may transfer SOFTWARE and accompanying written materials on a permanent basis provided that you retain no copies and the recipient agrees to the terms of this agreement. You may not reverse engineer, decompile, or disassemble the SOFTWARE. If the SOFTWARE is an update or has been updated, any transfer must include the most recent update and all previous versions. 4. THIRD PARTY Software. The SOFTWARE may contain third party software, which requires notices and/or additional terms and conditions. Such required third party software notices and/or additional terms and conditions are located in the readme file or other product documentation. By accepting this license agreement, you are also accepting the additional terms and conditions, if any, set forth therein. 5. TERMINATION. This License is effective until terminated. Your rights under this License will terminate automatically without notice from Salient if you fail to comply with any term(s) of this License. Upon the termination of this License, you shall cease all use of the SOFTWARE and destroy all copies, full or partial, of the SOFTWARE. 6. GOVERNING LAW. This agreement shall be deemed performed in and shall be construed by the laws of United States, Texas. 7. DISCLAIMER THE SOFTWARE IS DELIVERED AS IS WITHOUT WARRANTY OF ANY KIND. THE ENTIRE RISK AS TO THE RESULTS AND PERFORMANCE OF THE SOFTWARE IS ASSUMED BY THE PURCHASER/THE USER/YOU. Salient Systems Corporation DISCLAIMS ALL WARRANTIES, WHETHER EXPRESS OR IMPLIED, INCLUDING BUT NOT LIMITED TO, THE IMPLIED WARRANTIES OF MERCHANTABILITY, FITNESS FOR A PARTICULAR PURPOSE, TITLE AND NON-INFRINGEMENT, OR ANY WARRANTY ARISING OUT OF ANY PROPOSAL, SPECIFICATION OR SAMPLE WITH RESPECT TO THE SOFTWARE. Salient AND/OR ITS LICENSOR(S) SHALL NOT BE LIABLE FOR LOSS OF DATA, LOSS OF PRODUCTION, LOSS OF PROFIT, LOSS OF USE, LOSS OF CONTRACTS OR FOR ANY OTHER CONSEQUENTIAL, ECONOMIC OR INDIRECT LOSS WHATSOEVER IN RESPECT OF SALE, PURCHASE, DELIVERY, USE OR DISPOSITION OF THE SOFTWARE. Salient TOTAL LIABILITY FOR ALL CLAIMS IN ACCORDANCE WITH THE SALE, PURCHASE, DELIVERY AND USE OF THE SOFTWARE SHALL NOT EXCEED THE PRICE PAID FOR THE SOFTWARE. CompleteView Administrator User Manual Page 4 Before You Start Client Applications CompleteView Admin Console The CompleteView Admin Console is a Windows application that gives the administrator a tool to monitor the overall health, individual camera status, video archive usage and status, and other elements of every CompleteView server in the enterprise. This tool is also used to perform individual or group updates of the CompleteView software suite on selected servers. In order to monitor a server, it must be running version 2.0 or later of the CompleteView Server application. In addition, if you wish to perform remote software updates, or control the running state of the service, then the CompleteView Administrative Service must also be installed and operational. The CompleteView Video Client is a Windows application that is installed on user workstations that offers your users a simple yet powerful user interface for performing complex video surveillance tasks. CompleteView Video Client Primary Features Selection and viewing of live video and audio streams. Organization of live video sources into an unlimited number of logically organized viewing layouts. Display of camera locations on hyperlinked maps Searching among archived video for event recordings based upon the following criteria: server, camera, start date/time, end date/time and event type. Performing a Smart Search on archived video to determine if motion has occurred at an earlier point in time. Smart Search accomplishes this by using video motion detection algorithms on previously recorded video events. Time-synchronized playback of video events from up to four video sources. Exporting standardized video files to CD and DVD recordable optical drives. Acquisition and export of still images as JPEG, uncompressed BMP or through evidence identification printouts. Manipulation of pan-tilt-zoom controllable cameras. CompleteView System Config Client is a Windows application that allows administrators to configure every aspect of the video management system. CompleteView System Configuration When used in conjunction with the CompleteView Config Server and the CompleteView Admin Console, the administrator can perform true single-seat administration of virtually every aspect of their video surveillance infrastructure. CompleteView Administrator User Manual Page 5 CompleteView Alarm Client CompleteView Alarm Client is a black-screen video client application. The user configures the application to monitor alarm events on one or more servers. Based upon user-configurable monitoring schedules, live video will then be displayed when an alarm event occurs. The user can also quickly review the recorded video event in a side-by-side view with live video from the alarmed camera. CompleteView Web Client CompleteView Web Client is an Internet Explorer compatible web interface for CompleteView. CompleteView Web Client allows for live video display, Pan Tilt & Zoom control as well as playback and export of recorded video from Microsoft Internet Explorer, without installing and managing a client software application. CV SpotLight CompleteView CV SpotLight monitors alarm and motion events from selected cameras and displays video on event. CV SpotLight can be used standalone or in conjunction with other CompleteView Client applications. Used as a standalone client, the CV SpotLight provides a means of monitoring cameras without the need for a dedicated screen. Used with other CompleteView clients, the CV SpotLight adds pop up video alerts, and sound alerts on event to the CompleteView Video or Alarm Clients. Note: Admin Console is a feature of CompleteView Pro and CompleteView Enterprise. CompleteView ONE does not include multi-server management features such as Admin Console. For upgrade details and pricing please contact your Salient Integration Partner. CompleteView Administrator User Manual Page 6 Server Applications CompleteView Config Server The CompleteView Config Server is a centralized database containing the viewing layouts for every user in your enterprise. In addition to the benefits offered by centralized storage of these configurations, it also grants your users the ability to roam to any computer in your enterprise on which the CompleteView Client is installed, while retaining their individual viewing layouts. The CompleteView Server is the core of the CompleteView software suite. This service is responsible for all aspects of acquiring video, performing video motion detection, archiving of video, stream management, and a plethora of other tasks. CompleteView Server This application is installed by selecting the CompleteView Server component in the setup program. The CompleteView Server component must be installed on at least one server in your enterprise. CompleteView Administrative Service The CompleteView Administrative Service is an application developed for outof-band management of the CompleteView Server system service. This application is required to remotely start and stop the CompleteView Server, and perform remote updates of the CompleteView software suite. This application is installed automatically when you select the CompleteView Server component in the setup program. CompleteView Video Proxy The CompleteView Video proxy is a service that allows CompleteView Web Client users to view cameras from multiple CompleteView servers in one interface. The Video Proxy acts as a single server location Web Client users can connect to for access to CompleteView. CompleteView Administrator User Manual Page 7 Licensing your CompleteView Server CompleteView v4.x and later use a software license file. Please reference the CompleteView Quick Start Guide for software licensing instructions. All CompleteView Server v2.0 and v3.x installations require that a hardware license device be attached to each computer where the CompleteView Server software has been installed. The hardware license device is available as a USB dongle. The CompleteView Server software license and feature keys are stored in an encrypted format within each hardware license device. By utilizing a hardware-based licensing system, CompleteView becomes even more flexible as product licenses and feature keys are portable from computer to computer. This approach also enables administrators to easily transfer feature keys between CompleteView Servers, such as moving an IP camera license from one CompleteView Server to another. Lastly, hardware license devices do not require product activation and are not 'tied' to specific hardware or hardware configurations. IMPORTANT: Salient Systems will gladly replace lost or stolen product manuals, installation media and other documentation. The hardware license device, however, IS your software for all intents and purposes. Please ensure the physical security of your CompleteView Server as lost or stolen license devices require that you repurchase the CompleteView software and feature keys. Installing the Hardware License Device The device driver for the USB hardware license device is automatically installed when you select the CompleteView Server component during the setup process. USB License Device Insert the USB license device into any available USB port. The device driver is also located on the CompleteView Setup CD-ROM in the \drivers directory. CompleteView Administrator User Manual Page 8 System Service Fundamentals Managing System Services Open the Services console by clicking on the following: Start>Control Panel>System and Security>Computer Management>Services CompleteView Administrator User Manual Page 9 A dialog box will appear, as shown in the figure to the right: Service Properties The properties of the dialog are: Service name The current display name of the selected system service. Display Name Provides a space for you to change the display name of the selected service. The new name will appear in the Name column in the details pane of the Services console. Description Provides a space to type a description of the selected service. The description will appear in the Description column in the details pane of the Services console. Path to executable Specifies the path and file name of the selected service. The path and file name cannot be changed directly. Startup type Shows the startup type for the selected system service. • • • Automatic – specifies that the service should start automatically when the system starts. Manual – specifies that a user or dependent service must start and stop the system service. If set to manual startup, the service will not start automatically when the computer starts! Disabled – Prevents the selected service from being started by the system, a user, or any dependent service. Service Status Shows the status of the service as follows: • • • • Started. – the selected service is running. Starting. – the selected service is starting, but has not fully started yet. Stopped. – the selected service is not running. Stopping. – the selected service is stopping, but has not fully stopped yet. CompleteView Administrator User Manual Page 10 Start Starts the selected service, if it is stopped. Stop Stops the selected service, if it is running. Start parameters Passes startup parameters to a service when it is manually started. Windows does not save the startup values. You must therefore re-enter them each time that you manually start the service. CompleteView Administrator User Manual Page 11 System Service Overview System services are programs that run in a special layer of Windows NT-based operating systems. They can be configured to launch before a user logs on to a Windows 2000/XP/7/2003/2008 system. As such, they do not require that a user be locally logged onto the computer in order to function properly. If the Server component was selected during installation, then the CompleteView Server and the CompleteView Admin Service are automatically installed as system services and are configured for automatic startup. To manually start and stop the CompleteView Server, you must use the Computer Management console and be logged into Windows as a user with Administrative rights to the local computer. Services and Permissions By default, the CompleteView system services are configured to use the LocalSystem user account with the right to interact with the desktop. If you wish to have CompleteView write video to a network device, such as a SAN, NAS or file server, then the access-control list (ACL) for the networked storage must contain the appropriate permissions to allow the LocalSystem account to read, write, modify and delete data. The LocalSystem user account is referenced in two distinct manners, depending on whether the device being accessed is local to the computer, or is a network device being accessed through a mapped drive letter or universal naming convention (UNC) path. If you are modifying the security ACL of a directory or file that resides on a local device (ex: D:\Video), then the LocalSystem account is referenced as the SYSTEM user account. If you are modifying the security ACL of a file or directory that resides on a network device (ex: \\FILESERVER1\VIDEO), then the LocalSystem account uses the user credentials of the computer account that was created when it was first joined to the domain. If the computer has not been joined to a domain, then LocalSystem utilizes the local SAM. Please refer to the following table for examples of valid security credentials: PC1\PC1$ DOMAIN\PC1$ [email protected] PC1 is not a member of a domain and is configured for the workgroup security model PC1 is joined to a pre-Windows 2000 domain named DOMAIN PC1 is joined to an Active Directory named DOMAIN.TLD LocalSystem credentials for different security contexts CompleteView Administrator User Manual Page 12 What is localhost? Every networked computer uses the name localhost to refer to itself. This is also known as the loopback address. The IP address of localhost is always 127.0.0.1. When you use localhost or 127.0.0.1 as the address of a server, you are telling the software that the server software is running on the same system that you are physically accessing. CompleteView Administrator User Manual Page 13 Server Applications CompleteView Administrative Service The CompleteView Administrative Service is installed automatically whenever the CompleteView Server component is selected during the setup process. It is a stand-alone system service that is required for the following administrative capabilities: • • Remote Software Updating. Remote Starting and Stopping of the CompleteView Server system service. If you do not require the above capabilities, then you may stop or disable the system service. Parameters /register /unregister /noservice /port {n} Adds the Administrative Service to the list of system services Removes the Administrative Service from the list of system services Runs the Administrative Service in "interactive mode", i.e. as a normal application Listen for connections on TCP port n Communication Port(s) default TCP 4255 To change the default port, you will need to re-register the system service. 1. Stop the service. 2. Open a command shell, and navigate to the directory in which you installed CompleteView. (Example using default path) CD \Program Files\CompleteView 3. Unregister the system service by typing the following into the command shell: AdminService.exe /unregister 4. Register the system service by typing the following into the command shell, where n is the TCP port that you wish to assign: AdminService /register /port n 5. Start the service. CompleteView Administrator User Manual Page 14 CompleteView Config Server The CompleteView Config Server is a centralized database containing the Video Client configuration for every user in your enterprise. In addition to the benefits offered by centralized storage of these configurations, it also grants your users the ability to roam to any computer in your enterprise on which the CompleteView Client is installed, while retaining their individual viewing layouts. The Config Server is also an important component in CompleteView's software update strategy. Each CompleteView Client that utilizes the configuration server can be configured to check for newer client software during the login process. If a newer version of the client application is found, then the user will be prompted to update their client software. The actual process of updating the client software is entirely automatic and does not require user or administrator intervention. The Config Server may be installed on any Windows-based computer in your enterprise, regardless of whether or not it is running the CompleteView Server application. This application is installed by selecting the CompleteView Config Server component in the setup program. Parameters /register /unregister /noservice /port {n} Adds the Config Server to the list of system services Removes the Config Server from the list of system services Runs the Config Server in "interactive mode", i.e. as a normal application Listen for connections on TCP port n Communication Port(s) default TCP 4250 To change the default port, you will need to re-register the system service. 1. Stop the service. 2. Open a command shell, and navigate to the directory in which you installed CompleteView. (Example using default path) CD \Program Files\CompleteView CompleteView Administrator User Manual Page 15 3. Unregister the system service by typing the following into the command shell: ConfigServer.exe /unregister 4. Register the system service by typing the following into the command shell, where n is the TCP port that you wish to assign: ConfigServer /register /port n 5. Start the service. Automatic Client Software Updates In order to enable the automated update capability of the Config Server and CompleteView Client, you must first perform the following simple steps. 1. Download and unzip the latest client update from Salient's support website. http://support.salientsys.com - OR After the update has completed, locate the file named MainClient.exe in your CompleteView application directory. Proceed to step #2, use this file instead of "the extracted files." 2. Copy the extracted files into the directory where the Config Server has been installed. 3. The next time a user retrieves their viewing layouts from the Config Server, they will be informed that a new client is available. The user will then be given the opportunity to accept or decline the update. If they decline, then the user will be prompted again during each successive login until their installed client software has been updated. Note: Config Server is a feature of CompleteView Pro and CompleteView Enterprise. CompleteView ONE does not include some management features such as Config Server. For upgrade details and pricing please contact your Salient Integration Partner. CompleteView Administrator User Manual Page 16 CompleteView Server The CompleteView Server is the core of the CompleteView software suite. This service is responsible for all aspects of acquiring video, performing video motion detection, archiving of video, stream management, and a plethora of other tasks. This application is installed by selecting the CompleteView Server component in the setup program. The CompleteView Server component must be installed on at least one server in your enterprise. Parameters /register /unregister /noservice Adds the CompleteView Server to the list of system services Removes the CompleteView Server from the list of system services Runs the CompleteView Server in "interactive mode", i.e. as a normal application Communication Port(s) default Data Port * TCP 4242 RPC 4243 * v1.x Clients API connections CompleteView Administrator User Manual Page 17 System Configuration Introduction The CompleteView’s System Configuration client application allows you to configure all aspects of the CompleteView Server system service as well as CompleteView Video Client viewing layouts. System Configuration can either be run on the same computer on which the CompleteView Server application is installed (local configuration mode), or on a different computer that has access to a CompleteView Server via an IP network (remote configuration mode). In order to configure a CompleteView Server, you must first ensure that the CompleteView Server system service is running on the computer that you wish to administer. Use the Services console to confirm that the CompleteView Server’s Service Status is shown as Started. You may also use the Admin Console to verify the service status and to launch the System Configuration client application. Starting the System Configuration client Launch the CompleteView System Configuration client application by double-clicking on the icon labeled System Configuration, as shown below: Start>All Programs>CompleteView>System>Configuration You may also find the System Configuration icon located on your desktop, depending on the following factors: 1. The item "Create Desktop Icon" was selected during the installation of the application. 2. Windows has been configured to show desktop icons. CompleteView Administrator User Manual Page 18 Select the Configuration Context After you have launched the System Configuration client, a dialog containing configuration tasks is displayed. Start>All Programs>CompleteView>System>Configuration 1. 2. 3. 4. Open an Existing Session — opens a previously saved session. Configure Servers — starts a new server configuration session. Configure Clients — starts a new client configuration session. Exit — exits the System Configuration client. CompleteView Administrator User Manual Page 19 Menus File Menu Start>All Programs>CompleteView>System>Configuration>Configure Servers>file 1. 2. 3. 4. 5. 6. New Session — creates a new, empty session. Open Session... — opens a previously saved session. Save Session — saves the current session using the current filename. Save Session As... — saves the current session using a different filename. Save and Exit — saves the current session and quits the System Config application. Exit — quits the System Config application. Note: A Session is the currently configured list of servers. CompleteView Administrator User Manual Page 20 Server Configuration Menu Start » All Programs » CompleteView » System Configuration>>Server Configuration><right click server> Server Configuration menu items only active when a server has been selected. 1. Add Server Configuration: — adds a server to the list of servers available for configuration. 2. Edit Credentials... — edits the credentials (user name & password) used to connect to the server in the current Server Configuration session for the currently selected server. 3. Delete Server Configuration — removes the selected server from the list of servers available for configuration. 4. Feature Keys... — retrieves the installed license information from the selected server and displays the license management dialog. 5. Reload Configuration — retrieves the configuration from the currently selected server. 6. Save Configuration — saves the configuration to the currently selected server. 7. Load Configuration From — retrieves the configuration from a different server. 8. Save Configuration To — saves the configuration to a different server. 9. Load Backup — restores a configuration backup file into the selected server. 10.Save Backup — saves the configuration of the selected server into a backup file. 11.User > — displays the user configuration submenus for the selected server. 12.Camera > — displays the camera configuration submenus for the selected server. 13.Alarm Device > — displays the alarm device submenus for the selected server. 14.Volume > — displays the volume management submenus for the selected server. 15.Schedule > — displays the recording schedule submenus for the selected server. CompleteView Administrator User Manual Page 21 Client Configuration Menu Start » All Programs » CompleteView » System Configuration>>Client Configuration The items on the Client Configuration menu are only active when a server has been selected in the Client Configurations tree view. 1. Add Client Configuration... — adds a client configuration file to the list of available configurations. 2. Edit Client Info... — edits the source location (local, configuration file, configuration server) for the currently selected client configuration. 3. Delete Client Configuration — removes the selected configuration from the list of available configurations. 4. Reload Configuration — retrieves the selected configuration from its source location. 5. Save Configuration — saves the selected configuration to its source location. 6. Load Configuration From — retrieves the configuration from a different server. 7. Save Configuration To — saves the configuration to a different server. 8. Load Backup — restores a configuration backup file into the selected configuration. 9. Save Backup — saves the currently selected configuration into a backup file. 10. User > — displays the User configuration submenus for the selected configuration. 11. View > — displays the View layout submenus for the selected configuration. 12. Map > — displays the Map configuration submenus for the selected configuration 13. Server > — displays the Server management submenus for the selected configuration. 14. Zone >— displays the Zones/Sites configuration submenus for the selected configuration CompleteView Administrator User Manual Page 22 View Menu Start>All Programs>CompleteView>System Configuration>>Server Configuration>View The View Menu consists of the following items: Toolbar — enables/disables the horizontal toolbar. Status Bar — enables/disables the status bar located at the bottom of the System Configuration client window. Toolbar The toolbar contains the same items displayed in the system menus. Which items are displayed depends upon the currently selected context, either Server Configuration or Client Configuration. Refer to the chapter titled Menus for more detail. Toolbars Toolbar - Server Configuration Context Toolbar - Client Configuration Context CompleteView Administrator User Manual Page 23 Panels The user interface of the System Configuration client is divided into two distinct panels. On the left-hand side of the application window is the Tree View. This contains an expandable list of all of the configuration parameter groups for each server that has been added to the current session. On the right-hand side of the application window are the Configuration Tabs. In the Server Configurations branch, each tab contains a collection of related configuration items. When configuring client view layouts, the right-hand side contains the view layout editor. Start>All Programs>CompleteView>System Configuration>Server Configuration CompleteView Administrator User Manual Page 24 System Configuration Utility, Server Configuration Panels Adding a Server Configuration To add a server configuration to the current session, perform the following steps: 1. From the Server Configuration menu, select the item named Add Server Configuration. 2. When prompted, enter the address, username and password of a user with administrative rights to the specified server. CompleteView Administrator User Manual Page 25 Start » All Programs » CompleteView » System Configuration>>Server Configuration>>Add Server Add Server Dialogue 3. After clicking OK, the server will be added to the list. Enterprise Feature: A single session will support an unlimited number of Enterprise servers. CompleteView ONE servers and pre-version 3.x servers are limited to one server per session. CompleteView Administrator User Manual Page 26 Adding a Client Configuration To add a client configuration to the current session, perform the following steps: 1. From the Client Configuration menu, select the item named Add Client Configuration. 2. When prompted, select from among the following choices: Start>All Programs>CompleteView>System Configuration>Configure Clients Add Client Dialogue a. Local Configuration — loads the client configuration from a file located in the local CompleteView application directory. b. Configuration File — loads the client configuration file from a file located in any directory. c. Configuration Server — retrieves the client configuration from a CompleteView Config Server. 3. You will be prompted to provide additional information based upon your selection in step two. a. Local Configuration — provides the username and password of a user with administrative access to the local configuration file. b. Configuration File — locate a file with the extension *.cvw. Provide the username and password of a user with administrative access to the selected configuration file. c. Configuration Server — enter the address, username, and password of a user with administrative access to the configuration server. CompleteView Administrator User Manual Page 27 Local Configuration Selected Authentication Dialogue Configuration File Selected Browse for Configuration File CompleteView Administrator User Manual Page 28 Configuration Server Selected Config Server Authentication Dialogue CompleteView Administrator User Manual Page 29 Server Configuration Global Options General The Global parameter group allows you to modify settings that apply to the server as a whole. Tree View Select the Server object on which you wish to modify the global settings. Server Configurations Panel Right-click on the server object to show a context-menu containing the entire primary server configuration functions. You can also access this item from the System Configuration system menu. Please refer to the chapter titled Menus for details on the individual menu items. CompleteView Administrator User Manual Page 30 Server Configuration Tabs General Tab. General server settings. Start>All Programs>CompleteView>System Configuration>Configure Servers>General Tab Server Configuration – General Tab 1. Friendly Server Name – whenever a user is guided by CompleteView to select a server, they will see the friendly name listed here rather than a hostname or IP address. By default, the friendly name is set to the same name as the current computer name. The friendly name can be made of any combination of characters and numbers with the exception of the following: / \ : * | ? < > CompleteView Administrator User Manual Page 31 2. TCP Port Numbers – Defines the TCP port that CompleteView should use to listen for commands. The Command Port is required for legacy v1.x connections. 3. Embedded Web Server – A built-in web server used to host the CompleteView Web Client. Enabling the web server allows access to the CompleteView server by Microsoft Internet Explorer clients. If the Web Server is not enabled the Web Client will not be active and available to users. Additionally some third-party applications to gain access to CompleteView video streams via requests to the web server. a. Enabled – Enables/disables the web server. b. Port – The TCP port that the web server should use to listen for connections. Note: The port number used will affect the address Web Client users need to type to access CompleteView. The address Web Client users will use is: http://{Ip Address or Hostname of CompleteView server}:port/ For example, if the address of the CompleteView server is 192.168.1.5 and the port is left at the default of 8080 the address users will user to access the Web Client is: http://192.168.1.5:8080/ 4. Video Analytics - contains general configuration settings for Agent VI analytics integration. 1. Enabled - check to enable video analytics. 2. Local Port - the port number on which CompleteView listens for events from the VI Server 3. IP Address - the IP Address of the VI Server CompleteView connects to receive events 4. Active Directory Authentication: Domain – Specifies the name of the domain that this server will authenticate against. 5. Feature Keys – launches the Feature Key management dialog. CompleteView Administrator User Manual Page 32 Logging Selects which events the CompleteView Server should keep in its log files. Start>All Programs>CompleteView>System Configuration>Configure Servers> Logging Tab Log File Configuration CompleteView Administrator User Manual Page 33 Email Configuration The SMTP server is a global setting used by all of the cameras when sending email alarm notifications. Start>All Programs>CompleteView>System Configuration>Configure Servers> Email Tab Email Configuration 1. Mail Server (SMTP) – defines a resolvable hostname or IP address to an SMTP mail server. 2. Authentication – many SMTP mail servers require that the user submit a username and password in order to send mail through the server. If you attempt to send email to one of these servers, and do not supply a valid set of user credentials, then your mail will likely be rejected. Check with your network administrator for more details. 3. Username – the user name to use when authenticating to the SMTP server. 4. Password – the password to use when authenticating to the SMTP server. 5. Sender Name – who the email will appear to be coming from. It is a good practice to set this to a user who will be responsible for answering queries and has some knowledge of your security processes. 6. Sender Email – the email address that the alarm alert email will appear to be from. Again, it is a good practice to make this the valid address of the person defined in the “Sender Name” box. CompleteView Administrator User Manual Page 34 Tracking Configures the priorities for the PTZ auto-attendant function. Start>All Programs>CompleteView>System Configuration>Configure Servers> Tracking Tab Tracking Configuration 1. Zone Priority – allows configuration of 10 motion zone priority levels, with 10 being the highest priority and 1 being the lowest. 2. Hold Time (s) – when motion is detected in a zone, CompleteView will show a preset location from one or more PTZ cameras as configured in the Actions Editor. This setting is the number of seconds that CompleteView should dwell on a preset before responding to a lower-priority alarm. This setting has no effect if a new motion event is in a higher priority zone than the currently alarmed zone, as CompleteView will respond to the higher priority zone immediately. 3. Dwell Time (s) – number of seconds that CompleteView should dwell on a preset before cycling between motion zones that are configured with the same priority level. This value is only valid if Cycle is enabled for the selected priority level. 4. Cycle – enables Zone Cycling. When motion is detected in multiple zones, and the zones are configured with the same priority level, CompleteView will alternate between the presets that they were associated with using the Actions Editor. CompleteView Administrator User Manual Page 35 Integrations The Integrations Tab enables the System Administrator to set various parameters needed to integrate third party products with the CompleteView™ VMS. Start>All Programs>CompleteView>System Configuration>Configure Servers>Integrations Third Party Integration Parameters CompleteView Administrator User Manual Page 36 S2 Access Control Parameters Address Field: Enter the IP address of the S2 Netbox controller Enabled Checkbox: Check to enable communications with the S2 Netbox controller For more detailed information, refer to Appendix E: “RS2 Access Control Integration” SureView Immix Parameters Immix Device Number Field: Enter the Immix Device number associated with the present CompleteView™ Server. SMTP Server Field: Enter the IP address of the SureView Immix server. SMTP Port Field: Enter the network port number the SureView Immix server uses for SMTP communications. Enabled Checkbox: Check to enable communications with the SureView Immix controller. For more detailed information, refer to Appendix G: “SureView Immix Integration” Bold Manitou Parameters Address Field: Enter the IP address of the Bold Manitou server that will receive CompleteView™ alerts. Port: Enter the network port number used by the Bold Manitou server to receive CompleteView™ alerts. Heartbeat Interval: Enter the time in seconds between heartbeat messages sent from the CompleteView™ server to Bold Manitou. Enabled Checkbox: Check to enable communications with the Bold Manitou server. For more detailed information, refer to Appendix H: “Bold Manitou Integration” CompleteView Administrator User Manual Page 37 Axis One-Click The Axis One-Click Tab enables the System Administrator to set various parameters needed to integrate Axis One-Click with the CompleteView™ VMS. For detailed information, refer to the “CompleteView™ Axis One Click Connection Manual.” Start>All Programs>CompleteView>System Configuration>Configure Servers> Axis One-Click Tab Axis One-Click Parameters CompleteView Administrator User Manual Page 38 Axis Dispatch Server Dispatch Server Field: Contains the Axis Dispatch Server hostname User Name Field: Enter the Axis Dispatch Server account username obtained from Salient Systems. Password Field: Enter the Axis Dispatch Server account password obtained from Salient Systems. Axis One-Click Component External Address|Port: Enter the One Click Proxy server public (external) IP address and port number. Internal Address|Port: Enter the One Click Connection Component private (internal) network IP address and port number. Certificate Name: Enter the filename of the installed digital certificate. • The default certificate name is shown. • The default path is C:\Program Files\Axis Communications\AXIS OneClick Connection Component\stserver_ca.crt • Custom installations may require that a fully qualified pathname be specified. CompleteView Administrator User Manual Page 39 Feature Keys Adding a Feature Key To add a feature key to a CompleteView server, perform the following steps: Start>All Programs>CompleteView>System Configuration>Configure Servers>General>Feature Keys 1. From Global, General., click the button named Feature Keys. The following dialog will appear: 2. Click the button named Add, and the Feature Key Dialog will appear: Feature Keys dialogue Note: Users upgrading from any v3.x CompleteView installation will need to enter a CompleteView v4 feature key prior to upgrading. If upgrading from v4.0 to v4.1 a feature key is required. Please contact Salient Technical Support for a feature key. CompleteView Administrator User Manual Page 40 Start>All Programs>CompleteView>System Configuration>Configure Servers>General>Feature Keys>Add Add Feature Key Dialog 3. Enter the feature key into the appropriate field. If this is a newly issued key, then you will not need a validation code. If this key was transferred from a different CompleteView Server, then you must enter the feature key and validation code that were issued by the other server during the export process. 4. Click on the button named OK to program the feature key into the license device. 5. When the device has been programmed, you will be returned to the main feature key dialog. Your new feature key should now be listed and available for use. CompleteView Administrator User Manual Page 41 Deleting a Feature Key To delete a feature key from a CompleteView server, perform the following steps. Start>All Programs>CompleteView>System Configuration>Configure Servers>General>Feature Keys Highlight then click Remove 1. From Global, General., click the button named Feature Keys. The following dialog will appear: 2. Click on the feature key that you wish to delete. 3. Click the button named Remove. 4. When prompted, click on the button named OK to delete the feature key from the license device. 5. When the device has been programmed, you will be returned to the main feature key dialog. The feature key that you removed should no longer appear in the list. CompleteView Administrator User Manual Page 42 Moving a Feature Key CompleteView™ systems are licensed on a per camera basis. In a deployed system the CompleteView™ licensing schema requires camera licenses to be allocated among CompleteView™ servers. At times it may become necessary to re-allocate the IP cameras in a system. To do so requires removing camera licenses from a source server and then adding them to a destination server. Camera licenses are contained in a Camera Feature Key found in the CompleteView™ License Key provisioned at each server. Moving Camera Licenses involves a process of removing Camera Licenses from the IP Camera Feature Key at a source server and then adding those IP Camera Licenses to the IP Camera Feature Key to a destination server license key. Moving Camera Feature Keys Between Software License Keys To move camera licenses between servers provisioned with software license keys contact Salient Systems Customer Support: Customer Support Address: 10801 N. MoPac Expwy. Building 3, Suite 700 Austin, TX 78759 Phone: 512-617-4802 Email: [email protected] CompleteView Administrator User Manual Page 43 Moving Camera Feature Keys Between Hardware License Keys To move a feature key from one CompleteView server to another, perform the following steps. Start>All Programs>CompleteView>System Configuration>Configure Servers>General>Feature Keys Highlight then click Move 1. From Global, General, click the button named Feature Keys. The following dialog will appear: 2. Make a note of the Product ID. You will need this in the following steps. Exit the server configuration client. 3. Launch the CompleteView Server Configuration client. 4. Connect to the server that you wish to transfer the key FROM. 5. Click the button named Feature Keys, and the following dialog will appear: CompleteView Administrator User Manual Page 44 Start>All Programs>CompleteView>System Configuration>Configure Servers>General>Feature Keys Highlight then click Move 7. Click on the feature key that you wish to transfer. 8. Click the button named Move, and the following dialog will appear: Start>All Programs>CompleteView>System Configuration>Configure Servers>General>Feature Keys>Move Enter Product ID CompleteView Administrator User Manual Page 45 10. Enter the Product ID acquired in step 5. 11. If you wish to move the entire key to another server, then select Move Entire Key. 12. If you wish to move a part of the key to another server, then select Move Partial Key and then enter the number of licenses that you wish to transfer. IMPORTANT: Ensure the accuracy of the data that you enter here. If you proceed to step 12, the process of transferring the key cannot be aborted. If you later decide that you do not wish to complete the move operation, you must first finish transferring the key to the target CompleteView server. Once the transfer has been completed, you must begin a new move operation to transfer the license from the target, back onto the original server. 12. Click on the button named OK to continue, and the following dialog will appear: Start>All Programs>CompleteView>System Configuration>Configure Servers>General>Feature Keys>Move Make a Record of the Feature Key and Validation Code 13. Make a note of this Feature Key and Validation Code, as they will be needed when you add the key to your target server. You may also click the button named Save to File, which will allow you to save them to a removable device such as a floppy disk or USB thumb drive as an ASCII text file, or print out for later reference. 14. Click on the X at the upper right corner of the dialog to return to the previous screen. 15. Exit the server configuration client. 16. Follow the steps outlined in the Adding a Feature Key to add the key to your target server. CompleteView Administrator User Manual Page 46 Users/Groups The Users/Groups parameter group allows you to create, modify and delete server user accounts and user groups. Once a user or user group has been created, you may limit its access to live viewing, video archive playback, pan-tilt-zoom camera control functions, and ability to access the System Configuration. Please reference Appendix E for additional information regarding Users and User Groups. Tree View The Users/Groups node on the Server Configuration tree contains a list of all user and user group objects that exist in the selected server’s configuration. Users/Groups Server Configurations Panel Right-click on a user, or user group objects, to show a context-menu containing the primary user management functions. You can also access this item as a submenu underneath the System Configuration>User system menu. CompleteView Administrator User Manual Page 47 Start>All Programs>CompleteView>System Configuration>Configure Servers>Users/Groups Right Click Users/Groups in Server Configurations Console Tree 1. New Group... – creates a new user group object. Options include local and import from Active Directory (enterprise feature). 2. New User... – creates a new user object. Options include local and import from Active Directory (enterprise feature). 3. Clone – creates a copy of the currently selected user, including camera permissions. 4. Delete – deletes the currently selected user from the server configuration. 5. New Password – resets the password for the currently selected user. CompleteView Administrator User Manual Page 48 Configuration Tabs Administration User Object 1. Administrator – if set, the user can view and modify the configuration for the selected CompleteView Server. 2. Log Events – if set, user events such as login, logout, playback requests, and live video requests will be logged by the CompleteView Server for the selected user. 3. Active Directory Authentication – indicates whether the selected user is a non-editable Active Directory object. 4. Member of these groups – displays a list of all local groups. If set, the user is a member of the group. Start>All Programs>CompleteView>System Configuration>Configure Servers>Users/Groups Container User/Group Container, Administration Tab CompleteView Administrator User Manual Page 49 Group Object 1. Administrator – if set, members of the group can view and modify the configuration for the selected CompleteView Server. 2. Log Events – if set, user events such as login, logout, playback requests, and live video requests will be logged by the CompleteView Server for the selected user group. 3. Active Directory Authentication – indicates whether the selected user group is a non-editable Active Directory object. 4. Users in the group – only enabled if the selected group type is local. If so, then this field displays the members of the group. Start>All Programs>CompleteView>System Configuration>Configure Servers>Users/Groups>Administrators Group Object Typical Group Object Enterprise Feature: Users and user groups can be linked from Active Directory to enable a single sign-on environment. AD user group membership is managed using external tools such as the Microsoft Active Directory Users and Computers MMC snap-in. See Appendix C. Active Directory® Integration for more details. CompleteView Administrator User Manual Page 50 User Object 1. Administrator – Setting not available for this object. 2. Log Events – if set, user events such as login, logout, playback requests, and live video requests will be logged by the CompleteView Server for the selected user group. 3. Active Directory Authentication Setting not available for this object. 4. Members of these groups – only enabled if the selected group type is local. If so, then this field displays the groups this user belongs to. Start>All Programs>CompleteView>System Configuration>Configure Servers>Users/Groups>Admin User Object Typical User Object CompleteView Administrator User Manual Page 51 Camera Start>All Programs>CompleteView>System Configuration>Configure Servers>Users/Groups>Cameras Tab Server Configuration, Users/Groups Camera Tab CompleteView Administrator User Manual Page 52 1. PTZ Priority – specifies the priority level of this user when they access a PTZ camera. When there are requests by different users to control a PTZ camera, the user with the higher priority level will win control. If the current user of a PTZ is a lower priority than the user attempting to control it, the user attempting control will win and the current user will lose control of the PTZ. If the users are of the same priority level, then CompleteView will operate on a first-come, first-served basis. If the current user has a higher priority than the user attempting to control the camera, then the user attempting to gain control will not be able to do so. 2. View – when enabled, the selected user may begin a live viewing session of this camera. 3. Playback – when enabled, the selected user may view archived video for this camera. 4. Snapshot – when enabled, the selected user may take snapshot pictures in playback and when viewing live video. 5. Export – when enabled, the user export video clips. 6. PTZ – when enabled, the selected user may control this PTZ camera. 7. Light – if the selected camera is an Axis Communications model camera with a LED or IR light, this permission will allow the user to turn the light on or off from CompleteView’s Video Client or TouchView Mobile. 8. Presets – if the current camera is a PTZ, the maximum number of preset locations allowed by the PTZ protocol will be displayed here. By default, the currently selected user is allowed to set and show every preset location. To restrict access to PTZ preset functions, you must first click on the preset that you wish to modify. Next, select from the following preset functions: 1. Allow Set – enables / disables the ability to change the preset for the selected user. 2. Allow Show – enables / disables the ability for the selected user to go to the preset. CompleteView Administrator User Manual Page 53 Advanced Start>All Programs>CompleteView>System Configuration>Configure Servers>Users/Groups>Advanced Tab Server Configuration, Users/Groups Advanced Tab The Advanced Tab contains options relating to integration with 3rd-party applications. Please see the CompleteView API manual for details regarding creating a user account for API-based control of the CompleteView Server. CompleteView Administrator User Manual Page 54 Cameras General The Cameras parameter group allows you to independently modify settings for each video source connected to a server. Navigation Pane View Expand the Cameras object to show the list of installed cameras. … » CompleteView » System Configuration>>Server Configuration>> Cameras Right-click on any camera object to show a context-menu containing the primary camera configuration functions. You can also access this item as a submenu underneath the System Configuration>Cameras system menu. Please refer to the chapter titled Menus for details on the individual menu items. PTZ Video Source IP Video Source QuickTrack Camera Server Configuration, Users/Groups Advanced Tab CompleteView Administrator User Manual Page 55 Start>All Programs>CompleteView>System Configuration>Configure Servers>Cameras Installed Camera List 1. 2. 3. 4. 5. 6. 7. 8. 9. Camera Context Menu Add Camera – creates a new IP camera object. Add QuickTrack Camera – creates a new QuickTrack camera source. Clone IP Camera – creates a copy of an existing IP camera object and settings. Delete Camera – deletes the currently selected IP camera object. Move Up – moves the currently selected IP camera object one position higher in the camera list. Move Down – moves the currently selected IP camera object one position lower in the camera list. Live View – displays a dialog containing live video from the currently selected camera object. Move/Copy IP Cameras... – displays the Move/Copy IP Cameras dialog. Camera Search/Add – displays the ‘Camera Search/Add’ dialog allowing users to find and add cameras or groups of cameras. CompleteView Administrator User Manual Page 56 Move/Copy IP Cameras The Move/Copy IP Cameras dialog allows you to move camera objects from one server to another (Enterprise feature) and to create copies of camera objects on the same server. Start>All Programs>CompleteView>System Configuration>Configure Servers>Users/Groups>Cameras>Move/Copy Cameras Context Move/Copy IP Cameras Copy an IP Camera To make a copy of an IP camera object, perform the following steps: 1. At the top of the left-hand column, select the server that you wish to copy from. This is the source server. 2. At the top of the right-hand column, select the server that you wish to copy to. This is the destination server. 3. In the left-hand column, place a checkmark next to each camera that you wish to copy. 4. Click on the button labeled Copy ->. Enterprise Feature: If you are copying camera objects between two different servers, there must be enough IP camera licenses available on the destination server to support the number of camera objects being copied. CompleteView Administrator User Manual Page 57 Move an IP Camera To move an IP camera object from one server to another, perform the following steps: 1. At the top of the left-hand column, select the server that you wish to copy from. This is the source server. 2. At the top of the right-hand column, select the server that you wish to copy to. This is the destination server. The source and destination servers cannot be set to the same server. 3. In the left-hand column, place a checkmark next to each camera that you wish to copy. 4. Click on the button labeled Move ->. Enterprise Feature: If you are moving camera objects between two different servers, there must be enough IP camera licenses available on the destination server to support the number of camera objects being moved. CompleteView Administrator User Manual Page 58 Adding IP Cameras using the Camera Search/Add Tool CompleteView Server Configuration include the ability to add IP cameras by ‘finding’ them on the network. CompleteView’s Camera Search/Add tool detects cameras connected to the local network via Universal Plug and Play (UPnP). To add IP cameras using the Camera Search/Add tool, open the tool using the cameras right click menu. The Camera Search/Add dialog will appear and will immediately begin searching for cameras. Cameras appear in the dialog as soon as they are detected. Start>All Programs>CompleteView>System Configuration>Configure Servers>Users/Groups>Cameras>Search/Add Camera Search/Add Dialogue Camera Context Menu Note: Cameras appear in the dialog as their UPnP notifications are received by CompleteView. The timing of the notifications is controlled by the camera. In other words CompleteView is not scanning for cameras actively. As such a camera may take several minutes to appear and rebooting a camera may make it appear more quickly. Note: UPnP communicates via Multicast. Most LAN networks are not configured to transmit multicast across vLANs or network segments. As such CompleteView should be able to detect cameras on the local network but in most cases the network will need to be configured to transmit multicast across network segments for cameras to be detected on a different network or vLAN. CompleteView Administrator User Manual Page 59 Adding cameras using Camera Search/Add Using the Camera Add/Search dialog, a single camera can be added to CompleteView’s configuration or multiple cameras can be added simultaneously. Perform the following steps to add cameras to CompleteView’s configuration. Please note; a valid camera license must be available for each camera being added. Step-1, Adding cameras using Camera Search/Add From the Camera Add/Search dialog select the camera or cameras being added. Use the CTRL or Shift keys to select multiple cameras. CompleteView Administrator User Manual Page 60 Step2, Adding cameras using Camera Search/Add Prior to adding the camera the Camera Search/Add tool will check to verify the video stream can be obtained, helping to ensure the settings used to add the camera or cameras are correct. Enter the camera’s Username and Password using the corresponding fields and select the correct compression type to pull from the camera using the ‘Stream type’ field. Please note; if adding multiple cameras simultaneously all of the cameras will need to use the same username and password and have the same stream type. CompleteView Administrator User Manual Page 61 Step-3, Adding cameras using Camera Search/Add Press the ‘Add Selected Cameras’ button. CompleteView will attempt to connect to each camera individually to obtain a video stream from the camera using the closest match camera driver and the Username, Password and selected Stream type provided on the dialog. While the camera is being checked the ‘Status’ column on the dialog will display ‘Testing…’. If the camera passes testing it will show a status of ‘Added/Passed’ and be automatically added and available under ‘Cameras’ in the Server Configuration window. If the camera did not pass the stream acquisition test it will show a Status of ‘Failed’. If a single or multiple cameras fail the test the ‘Edit Camera’ dialog will appear allow changes the configuration before adding the cameras to CompleteView. CompleteView Administrator User Manual Page 62 1. On this screen set the following parameters to successfully add the remaining cameras. 1. Manufacturer: set the manufacturer matching the camera being added form the list. 2. Model: select the closest matching camera model from the list. 3. RTSP Port: set the RTSP port MPEG4 or H.264 video will be streamed to. 554 is the default port. 4. Username: set the camera username CompleteView will use when requesting video from the camera. 5. Password: set the password which corresponds to the username CompleteView will use when requesting video from the camera. 6. Under ‘Actions’ choose from the following behavior: • Retry: Selecting Retry and pressing ‘Perform Action’ will attempt to retry the video acquisition test using the new settings entered on this dialog to verify the settings used are correct. If the test passes the camera will be added to CompleteView’s configuration automatically using the newly entered correct settings. • Add without video acquisition test: Selecting this option and pressing the ‘Perform Action’ button will add the camera using the settings on this screen without first CompleteView Administrator User Manual Page 63 • • attempting to test whether CompleteView can obtain a video stream form the camera suing these settings. Skip: Selecting ‘Skip‘ will skip past this camera and will move to the next camera which failed the video acquisition test. Retry all remaining cameras with these settings: Select this option to apply these settings to all cameras which originally failed the video acquisition test and were not added to CompleteView from the Camera Search/Add dialog. Note: After adding cameras using the Camera Search/Add tool, settings such as motion detection, PTZ (such as digital PTZ), notification and other configuration options may still need to be configured. Click on the camera object in Server Configuration to adjust other camera settings. CompleteView Administrator User Manual Page 64 Configuration Tabs General Each camera input in a CompleteView server has a dedicated video decoder. This allows for each camera input to be modified independently of the others. There is one exception to this rule, which is the video size, or resolution. Video capture size is a global setting. When video size is changed, it is modified for all camera inputs in the CompleteView server. Start>All Programs>CompleteView>System Configuration>Configure Servers>Cameras>{selected camera}>General Tab Cameras Container, General Tab CompleteView Administrator User Manual Page 65 1. Enabled: Specifies whether the camera is enabled or disabled. If the input has been disabled, no recording will take place regardless of whether recording has been activated in a recording schedule. Additionally, both local and remote viewing of the camera is not available. If a client connects to a disabled camera input, the user will receive a message indicating that connection to the server succeeded, but that the camera input has been disabled. 2. Convert Analog License to IP: For users with installed Gen II capture cards, it is possible to switch the analog license to an IP license allowing the user to control transitioning from analog to IP cameras. Checking this box will disable the corresponding Gen II analog connector and enable the IP tab so the camera can be configured as an IP camera. 3. Name: Specifies the name of the camera input. This name is used throughout CompleteView to identify the camera to both the administrator and the user. 4. Video Size: This setting is used to set the video capture resolution for all camera inputs in a CompleteView Server. The actual video capture size is specified in this configuration option and cannot be overridden or otherwise changed by the client. If, for example, you set the video size to 160 x 120, and then configure a CompleteView Client video port to display the video at 640 x 480, the client would display a 640 x 480 viewport with the video captured at 160 x 120 stretched to fill it. 5. Stream Compression Settings: Select how video is compressed in each of three compression paths: a) As received from the camera b) As recorded c) As streamed to clients For each compression path there are a total of three codecs to choose from, depending on which features have been installed: • MJPEG: The MJPEG (Motion JPEG) video compressor is the default for IP camera sources. MJPEG generates larger video files than Basic MPEG4. This results in a decrease in how long you are able to retain video, as well as increased network bandwidth consumption. The MJPEG video compressor may also be used with analog CCTV cameras. This video compressor is best suited to low frame-rate camera sources, and those where there is constant large-scale movement, such as a pan-tilt-zoom camera that is on a preset tour. Note: DirectX9 or later must be installed on a computer before it is able to view exported video files that have been compressed with MJPEG. • MPEG4: This video compression codec utilizes the latest enhancements in MPEG4, resulting in extremely high quality MPEG4 video files that are much smaller in size than those compressed with MJPEG. When compared to Basic MPEG4, using this codec results in a slight increase in how long you are able to retain video files and a decrease in network CompleteView Administrator User Manual Page 66 bandwidth consumption. MPEG4, however, allows for the video size to be different for each camera input that is using it. Note: If a PC does not have an ISO-compliant MPEG-4 video decoder installed, then the CompleteView Video Player application must be used to view exported video files. • H.264: This video compression codec provides the highest level of compression resulting in the lowest files sizes and highest retention times as compared to other codecs. H.264 uses the most processing power (CPU cycles) as compared with the other codecs. When using H.264 it is highly recommended "disable Stream Processing" under the IP tab be enabled to reduce CPU utilization. 5. Lens Type: If using an Immervision Panomorph lens on the selected camera chooses Immervision, otherwise leave the setting on "Standard" (default). 6. Lens Orientation: Choose from Ceiling, Wall or Ground based on the camera's placement. These settings will optimize the image for the chosen scene type. 7. Time Stamp Overlay: Adds the date and time to the lower right-hand corner of the video input. 8. Camera Name Overlay: Adds the name of the camera, as defined in the Name setting, to the upper lefthand corner of the video input. 9. Black & White Camera: Selects whether the camera connected to the input is black & white. 10. Video Quality: Sets the quality level of video compressed with the MPEG-4 codec. This setting affects recorded video for a camera, as well as the quality of the live view. 11. Scheduled Recording FPS: Sets the video recording frame rate for scheduled, continuous recording. 12. External Alarm FPS: Sets the video recording frame rate for external alarm events. Note: alarms raised through the API are treated as external alarm events. 13. Motion Detection FPS: Sets the video recording frame rate for motion detection events. 14. Apply these settings to all cameras: Applies selected settings of the current camera to ALL cameras. The settings that are applied are: a. b. c. d. e. f. g. Time Stamp Overlay Camera Name Overlay Video Quality Keyframe Rate Scheduled Recording FPS External Alarm FPS Motion Detection FPS CompleteView Administrator User Manual Page 67 Gen II Capture Card MPEG4 & H.264 Configuration Up to three stream compression methods are available using MPEG4 or H.264 with Gen II capture cards: Gen II Compression Methods Constant Bitrate Variable Bitrate MPEG4 H.264 Constant Quality Start>All Programs>CompleteView>System Configuration>Configure Servers>Cameras>{selected camera}>General Tab MPEG4 & H.264 Configuration CompleteView Administrator User Manual Page 68 Constant Bitrate: Provides the most predictable storage level, but high levels of scene activity cause the algorithm to apply a greater level of compression to the video resulting in areas of activity in the scene showing more noticeable compression artifacts. Variable Bitrate: Provides somewhat predictable storage levels however lower activity or greater activity will cause the required storage to fluctuate more. Video quality is not affected unless a maximum bitrate option is set and exceeded. Constant Quality: Provides the least predictable storage levels but has the lowest chance of applying more compression to scenes with high activity, producing higher quality video. After choosing one of the options the follow settings will affect storage consumption and/or video quality. Average Bitrate: Used for Constant Bitrate and Variable Bitrate. This will be the target storage level and will directly affect the amount of storage consumed for the camera. Max Bitrate: Used for Variable Bitrate and Constant Quality. The bitrate will not be allowed to exceed this level. CompleteView Administrator User Manual Page 69 Camera Adjustments Camera Adjustments permits adjustments to be made to the video signal of directly-connected analog cameras. Gen I Camera Adjustments For Gen I capture card systems: o o o o o o o o o Brightness – Changes the brightness of the video. Contrast – Changes the contrast of the video. Hue – Changes the color balance of the video. Saturation – Changes the color level of the video. Sharpness – Changes the sharpness of the video. Gamma – Changes the gamma level of the video. White Balance – Changes the white balance of the video. Backlight Comp – Enables / disables backlight compensation. Defaults – Resets all adjustments to their default values. CompleteView Administrator User Manual Page 70 The checkboxes to the right of saturation, sharpness and gamma indicate whether automatic control of the adjustment is enabled or disabled. You must un-check the ‘auto’ box in order for any change of these settings to be applied. Gen II Camera Adjustments For Gen II capture card systems: o o o o o o Brightness – Changes the brightness of the video. Contrast – Changes the contrast of the video. Hue – Changes the color balance of the video. Saturation – Changes the color level of the video. Sharpness – Changes the sharpness of the video. Defaults – Resets all adjustments to their default values. CompleteView Administrator User Manual Page 71 Volumes The Volumes tab contains a list of all recording volumes to which the camera is a member Start>All Programs>CompleteView>System Configuration>Configure Servers>Cameras Container>{selected camera}>Volumes Tab Camera Object Volumes Tab CompleteView Administrator User Manual Page 72 IP IP Tab Start>All Programs>CompleteView>System Configuration>Configure Servers>Cameras>{selected camera}>IP Tab IP Tab 1. Manufacturer – Select the manufacturer of the IP camera being configured. 2. Model – Select the specific model of IP camera that you are configuring. 3. Address (Hostname / IP) – Enter the IP address or hostname of the IP camera. 4. Camera ID – For multi-channel video encoders, select the camera's channel number. 5. HTTP Port – Enter the TCP port number for the camera's built-in web server. Default is 80. CompleteView Administrator User Manual Page 73 6. Stream Port/Control Port – Enter the camera's video stream and control port. For example ports 6002/6001 can be used for RTP/RTCP protocol video stream/control ports, respectively. 7. Username – Enter the username that the server will use to contact the camera. 8. Password - If required, enter the password for the associated username. 9. Image Path - This field is only enabled if you have selected one of the Generic IP Camera drivers. Enter the path to a still image on the camera. For example, if the full path to the still image is 'http://myipcamera/images/still.jpg', then the image path that you would enter is 'images/still.jpg'. 10. Timeout – Controls how long, in seconds, CompleteView should wait for a response to the initial http request. This is an advanced setting, and should only be changed from the default value of '3' at the direction of Salient's technical support. 11. Retries – Controls how many times CompleteView should attempt to connect to the IP camera before determining that the IP camera is unreachable. This is an advanced setting, and should only be changed from the default value of '1' at the direction of Salient's technical support. 12. Disable Stream Processing - Disables any decoding of the video stream on the recording server and allows for recording of the video from the camera only. This option will increase server performance, however features such as transcoding, Dynamic Resolution Scaling, text overlay and motion detection, camera preview in setup, snapshot image attachments to email alerts, camera name overlay & timestamp overlay will not be available 13. DCompression of Recorded Video – This switch controls whether or not CompleteView should use the original compressed image as received from the camera, or whether it should recompress the images using the video compressor specified in the General tab of the camera configuration. If you choose to use the original video from the camera, CompleteView will be unable to add the date/time, camera name or other text overlays to the archived video files. The overlays will appear, however, in all live video streams. . CompleteView Administrator User Manual Page 74 Camera Event Alerts CompleteView supports edge based device alarms on Axis Communications and Arecont model cameras. When an Axis or Arecont is selected from the "Manufacturer" drop down box, the option to "Use On-Camera Alerting" will be enabled. Enable “Use On-Camera Alerts To enable camera based alerting, check the box labeled "Use On-Camera Alerting" and click the "Configure Alerts..." button to select which events to alert on. Note: For Axis Communications model cameras, on-camera alerting will work for cameras stream MJPEG or MPEG4 video streams. Within the camera’s interface, 'Trigger Data' must be turned on for the camera to provide CompleteView with camera event notifications. Please reference the "Axis Event Camera Configuration” section for more details. CompleteView Administrator User Manual Page 75 The "Configure Alerts" screen (pictured below) allows you to choose which camera based alarm to trigger recording and scripts on. Trigger on camera motion detection. (Axis/Arecont cameras) Trigger on camera audio detection. (Axis cameras) Trigger on camera tampering detection. (Axis cameras) Trigger on camera input activity. (Axis/Arecont cameras) Trigger on encoder video loss. Axis cameras) Trigger Motion recording for duration. Trigger Alarm recording for duration. Run script on trigger Specify Script Configure Alerts CompleteView Administrator User Manual Page 76 Axis Event Camera Configuration Without properly configuring the camera, camera based alerts will not work. To configure the camera, both 'Trigger Data' must be enabled and the alerting mechanism itself must be configured, such as motion detection. To enable Trigger Data, from the 'IP' tab of CompleteView click the 'Configure' button. This will launch a browser to cameras configuration pages. Click Configure Button This will launch the Axis camera's setup page. Click 'System Options' -> 'Advanced' -> 'Plain Config' Choose 'Image' from the drop down box labeled "Select a group of parameters to modify". CompleteView Administrator User Manual Page 77 Axis Camera Setup Page Axis Camera Setup Page CompleteView Administrator User Manual Page 78 On the follow screen check the option under "Image" labeled "Trigger data enabled". Also check the option under "Image I0 MPEG" labeled "User data enabled" Image IO Selections Note: Trigger data based alarming will work only with Motion JPEG and MPEG4 based video streams. Alarming through this interface will not work when H.264 is configured as the compression type. If using H.264 please see "Using Camera Based HTTP Notifications". CompleteView Administrator User Manual Page 79 Using Camera Based HTTP Notifications When using Axis cameras, it is possible to configure the camera to trigger motion or alarm based recording in CompleteView when an event occurs on the camera. CompleteView’s Web Server provides a URL for 3rd party devices to send notification events through. This configuration method is required for Axis camera configured to stream H.264 video to CompleteView when on-camera events are to be used to trigger events in CompleteView. Setting up CompleteView Enable Embedded Web Server CompleteView’s Web Server must be enabled for HTTP based notifications. To enable CompleteView’s Web Server, from Server Configuration, choose ‘Enabled’ under ‘Embedded Web Server’. CompleteView Administrator User Manual Page 80 Notification URLs A 3rd party device, such as an Axis camera, can trigger alarm or motion recording on a specified camera in CompleteView. When CompleteView’s web server is enabled the 3rd party device can send a specially formatted URL to tell CompleteView to start or stop alarm or motion recording on a specified camera. The format of the event URL is: http://[CompleteView server address]:[CompleteView Web Server port number]/axisevent.cgi?camera=[CompleteView camera number]&event=[event action] Parameter [CompleteView server address] [CompleteView Web Server port number] [CompleteView camera number] [event action] Description This is the IP address or hostname of the CompleteView server. Please note if using the hostname of the CompleteView server the camera must be configured with a DNS server to resolve the hostname. This is the port number of the CompleteView web server. If the CompleteView web server is set to port 80, this section of the URL can be omitted. The default port is 8080. This is the camera number of the camera in CompleteView to change the recording mode on. This will correspond to the camera number of the target camera in CompleteView’s Server Configuration. This command tells CompleteView the type of recording and whether to start or stop that recording type. Valid options include ‘motion_on’, ‘motion_off’, ‘alarm_on’ and ‘alarm_off’. Examples: To start motion recording on camera 5 on a CompleteView server with an IP address of 192.168.1.5 with a web server configured on port 8080, the following URL would be used: http://192.168.1.5:8080/axis-event.cgi?camera=5&event=motion_on To then stop motion recording on the same camera use the following URL: http://192.168.1.5:8080/axis-event.cgi?camera=5&event=motion_off CompleteView Administrator User Manual Page 81 Setup event notifications on an Axis camera The Axis camera must be configured to send a URL based notification to CompleteView on the desired event. The Axis camera event alerting interface varies slightly across different camera firmware revisions. Please refer to Axis documentation for the camera being configured for specific instructions. Step-1, Setup event notifications on an Axis camera First the CompleteView server must be configured as an Event Recipient in the camera. From the camera’s web interface choose Setup -> Events -> Recipients. Click [Add]. Setup -> Events -> Recipients. Click [Add]. Next, on the ‘Event Configuration/ Recipient Setup’ screen configure the following: 1. Name: enter a text description of the recipient, such as ‘CompleteView’ 2. Type: Choose ‘HTTP’ 3. URL: enter ‘http://[CompleteView server address]:[CompleteView Web Server port number]/axis-event.cgi’. Replace the sections in brackets according to your server’s specific settings. 4. User name: enter the CompleteView user name, such as ‘admin’ 5. Password: enter the password for the CompleteView user. Please note, the CompleteView user must not have a blank password. 6. Press the ‘Test’ button. The ‘Event Configuration/Recipient Test’ popup window should report ‘Upload successful’ CompleteView Administrator User Manual Step-2, Setup event notifications on an Axis camera Click [OK] to Save and Close Page 82 Step-3, Setup event notifications on an Axis camera Under ‘Events’ click ‘Action Rules’ then click ‘Add’. Two Action Rules are required for each trigger event. One rule to trigger recording ‘ON and one rule to trigger recording ‘OFF’ Select Action Rules – Click [Add] Step-4, Setup event notifications on an Axis camera Add an Action Rule: 1. Name: Enter a name to identify he event such as ‘Motion ON’ 2. Trigger: set to the Axis camera trigger you would like to trigger this event. 3. Type: set to ‘Send Notification’ 4. Recipient: set to the CompleteView server previously setup as a recipient. 5. Message parameter: this can be left blank, however text entered into this box will show up as a log entry in CompleteView when the event triggers recording. 6. Custom parameter: Click the ‘Add’ for each custom parameter. . Setup Action Rule – Click [OK] to Save/Close CompleteView Administrator User Manual Page 83 Step-4a, Setup event notifications on an Axis camera Action Rule Custom Parameters 7. When adding an Action Rule, two ‘Custom parameters’ need to be added. The first will specify he camera number to trigger recording on, the second will specify the type of recording a. b. c. d. e. Name: enter ‘camera’ Value: enter the camera number in CompleteView. Press the ‘Add’ button again to add another ‘Custom parameter’. Name: enter ‘event’ Value: enter ‘alarm_on’, ‘alarm_off’, and ‘motion_on’ or ‘motion_off’ depending on the type of recording you would like to trigger when this event occurs. Repeat steps 7.a – 7.f.i again to add the stop event, which will stop recording on the target camera in CompleteView when the event ends. Axis One Click Connection CompleteView supports Axis One Click Connection feature built into most Axis Communications cameras. Axis One Click Connection simplifies installation by reducing the IP configuration necessary to connect the camera to the CompleteView Video Management System. Please contact Salient for Axis One Click Connection setup documentation. CompleteView Administrator User Manual Page 84 PTZ PTZ Tab Pan-Tilt-Zoom (PTZ) cameras are enabled and defined using the properties located on this tab. Start>All Programs>CompleteView>System Configuration>Configure Servers>Cameras>{selected camera}>PTZ Tab PTZ Tab 1. PTZ Enabled – Specifies whether CompleteView should enable PTZ camera control functions for the selected camera. 2. Model – Specifies the control protocol that CompleteView should use to communicate with the selected PTZ camera. 3. ID – Assigns the ID number of the PTZ camera. This value should equal the physical ID number of the camera. Please refer to the documentation that came with your PTZ camera for more information on configuring the camera ID. 4. Flip Directions – Swaps left/right movement commands. CompleteView Administrator User Manual Page 85 5. Serial Port – Specifies which RS-232C serial port on the CompleteView Server that the PTZ (or RS422/485 adapter) is connected to. 6. Default Monitor – Assigns a default monitor to use when selecting the camera on an analog matrix switch. 7. Arbitration Timeout (s) – If a user is currently controlling the camera, CompleteView waits the specified number of seconds after the user stops issuing control input. Should the user resume control inputs within this time period, the timeout period will be reset with each stop. The arbitration period only applies when a different user with an identical or lower priority level attempts to control the camera. A higher priority user will always gain immediate control of the PTZ, regardless of this setting. 8. Inactivity Timeout (s) – CompleteView will wait the specified number of seconds for control input. If no control input has been received by the end of this period, then the following behavior will occur: If a preset tour is defined and active, then CompleteView will restart the tour from the beginning. If a preset tour is defined but inactive (a user turned off the preset tour in the CompleteView Client), and the Auto-Home after inactivity timeout has been enabled, then CompleteView will show the Auto-Home Preset location. If a preset tour has not been defined, and the Auto-Home after inactivity timeout has been enabled, then CompleteView will show the Auto-Home Preset location. If neither a preset tour nor auto-home after inactivity timeout is enabled, CompleteView will do nothing. 9. Auto-Home after Inactivity Timeout – Sets the number of seconds that CompleteView should wait after control input ends before performing an automatic action. 10. Auto-Home Preset – Sets the stored preset location that CompleteView should show after the inactivity timeout has expired. 11. Enable Preset Tour – Enables / Disables the preset tour. If Enable Preset Tour is not checked, then users who attempt to change the status of the tour in the CompleteView Client will receive the following error message: Preset Tour Error Message Operation Not Supported 12. Preset Tour Off on Server Start – If checked, then CompleteView will not automatically start the preset tour when the server is first started. CompleteView Administrator User Manual Page 86 13. Dwell Time (s) – Specifies how many seconds CompleteView should wait before proceeding to the next preset in the tour. CompleteView Administrator User Manual Page 87 Auto-Attendant PTZ Auto-attendant automates the operation of a PTZ camera based upon video motion detection. CompleteView allows you to specify that a PTZ camera move to one or more stored preset locations if motion occurs in a designated region of one or more fixed cameras. In addition, CompleteView offers the ability to prioritize the motion detection regions. This enables the PTZ camera to hold a view on a high priority area, even if motion has been detected in other, lower-priority areas. CompleteView is also able to automatically cycle between preset locations which are configured with equal priority levels. When coupled to a Philips AutoDome® with AutoTrack, the CompleteView server offers a powerful, robust and sophisticated motion tracking system. CompleteView Administrator User Manual Page 88 Communications Communications between CompleteView and PTZ cameras can occur through several means. First, it is necessary to understand how CompleteView communicates with the camera. Each CompleteView PC includes at least one RS232 serial communications port. The most common method of communication for PTZ cameras is via RS485 serial communications. It is therefore necessary to use a RS232-to-RS485 signal convertor when connecting a CompleteView server to a PTZ camera that uses RS485. Over-the-coax control technologies, such as Pelco's Coaxitron®, are not directly supported by CompleteView. It is still possible, however, to utilize Coaxitron to control your PTZ cameras through the use of intermediary hardware. For example, the most common solution to controlling 16 or fewer Pelco PTZ cameras via Coaxitron involves the use of the Pelco CM-6700 video matrix unit. In this case, you would configure the second serial port (COM B) on the CM-6700 for RS232 communications. CompleteView would be configured to use the Pelco ASCII protocol. The CM-6700 would handle converting from RS232 to Coaxitron signaling, as well as from Pelco ASCII to Pelco P control protocols. A side benefit of this approach is that the CM-6700 supports (2) keyboard inputs. The CompleteView server takes up one of these ports, leaving a second which can be used to add, for example, a KBD-300 system controller. Note: Depending upon the application, an optional RS232 -> RS485 adapter may be required to connect CompleteView to the control interface of the camera. Control Protocols CompleteView can control many different models of pan-tilt-zoom (PTZ) cameras from a wide variety of manufacturers. Each PTZ camera manufacturer communicates with their PTZ cameras using a system of proprietary commands. These command sets are referred to as control protocols. See Appendix A for the list of PTZ control protocols supported by CompleteView. Note: The 'Digital' protocol can be configured on any analog or IP fixed camera to enable digital PTZ control within the fixed camera's field of view. CompleteView Administrator User Manual Page 89 Preset Tour CompleteView allows you to automate your PTZ camera by enabling a preset tour. A preset tour consists of the PTZ camera alternating between two or more preset locations. 1. Enable Preset Tour – Enables / Disables the preset tour. 2. Preset Tour Off on Server Start – If checked, CompleteView will not automatically start the preset tour when the server is first started. 3. Dwell Time (s) – Specifies the amount of time in seconds that CompleteView should wait at the presetlocation before proceeding to the next preset in the sequence. Preset Tour Enabling Preset Tour To define a preset tour, begin by selecting the preset number that you wish to add to the tour. Next, set the dwell time for the preset location. CompleteView Administrator User Manual Page 90 Digital PTZ CompleteView can be configured to digitally Pan Tilt and Zoom any camera. Digital PTZ allows the system operator to zoom in on an area within the cameras field of view to get a closer look at activity in the screen. Once zoomed in the user can pan and tilt the view, operate preset position and perform most functions that are available on mechanical PTZ cameras. Digital PTZ Enable Digital PTZ To enable digital PTZ functionality on a camera, check 'PTZ Enabled' then select the 'Digital' protocol from the Protocol droop down box. CompleteView Administrator User Manual Page 91 Motion / Alarm The Motion / Alarm tab contains settings which control the software motion detection and external alarm IO behavior of the CompleteView Server. Start>All Programs>CompleteView>System Configuration>Configure Servers>Cameras>{selected camera}>Motion/Alarm Tab Motion/Alarm Tab 1. Pre-alarm/Pre-motion (s) – Sets the number of seconds to capture video prior to the start of a video motion detection or external alarm event. Pre-alarm recording is selected in increments of 5 seconds, and can be adjusted from 5 seconds to 120 seconds prior to the beginning of the alarm event. 2. Post motion (s) – Sets the number of seconds that CompleteView should wait after motion stops before ending a motion event. 3. Post alarm (s) – Sets the number of seconds that CompleteView should wait after an alarm stops before ending the alarm event. 4. Motion Zones – Opens the video motion detection configuration screen. CompleteView Administrator User Manual Page 92 5. Motion Sensitivity – Selects the sensitivity of the motion detection engine for the selected camera. The sensitivity scale is from 0 to 100, with a default value of 80. Lowering this value decreases the sensitivity of the motion detection, while increasing the value makes the motion detection more sensitive to change. 6. Enable Motion Zone Actions – Allows the PTZ auto-attendant to respond to motion events for the selected camera input. 7. Only when Motion Scheduled – Restricts Motion Zone commands to periods of time when motion recording is scheduled. 8. Send to Preset Before Alarm Recording – Issues a show preset n command when an external alarm event is active. CompleteView Administrator User Manual Page 93 Actions Editor The Actions editor is the heart of CompleteView's PTZ Auto-attendant functionality. Using the editor, you can specify one or more actions that will be performed when motion is detected in the selected zone. Actions Editor 1. Add – Adds an action. 2. Remove – Deletes the selected action. 3. Live View – Displays a live video window with PTZ controls. You can set and show PTZ preset locations from the resulting screen. 4. OK – Closes the Actions window and saves any changes that were made. 5. Cancel – Closes the Actions window and discards any changes that were made. CompleteView Administrator User Manual Page 94 Add Actions To add an action, select a PTZ camera from the Send Camera list and a preset location from the To Preset list. When you click on the OK button, the action will be added to the list in the Actions Editor. Add Actions Add Actions Dialogue CompleteView Administrator User Manual Page 95 PTZ Control This dialog allows you to set and show presets for the selected PTZ camera. If you have selected a camera that is not a PTZ, then the controls will be disabled. PTZ Control PTZ Control Dialogue CompleteView Administrator User Manual Page 96 Zones Zones set the areas, or zones, that the video motion detection (VMD) engine should analyze for movement. You should use as few zones as possible in order to accomplish your goals, as each motion zone that you enable requires additional CPU processing time. The more zones there are the more CPU time is required to perform motion analysis. In addition, try to avoid the overlapping of zones. Zones Motion Zones Dialogue 1. 2. 3. 4. 5. 6. 7. 8. OK – Closes the configure zones screen and saves the changes. Cancel – Closes the configure zones screen and does not save the changes. Select Zone – Selects a zone to add actions to. New Zone – Adds a new zone to be analyzed. Click and hold the left mouse button at the upper-left hand corner of where you wish to begin the zone. Drag the mouse to expand the zone. When the zone is covering the location that you wish to analyze, release the mouse button and the motion detection zone will be created. Erase Zone – Removes a single zone. Click the mouse on the zone that you wish to remove. Erase All – Removes all zones. Selected Zone – Sets the PTZ auto-attendant priority level for the selected zone. Actions – Display, add, and remove actions for the PTZ auto-attendant. CompleteView Administrator User Manual Page 97 Audio To assign an audio stream to a video channel, you must first have purchased an audio feature key and enabled your audio source(s). Start>All Programs>CompleteView>System Configuration>Configure Servers>Cameras>{selected camera}>Audio Tab Audio Control Tab 1. Enable Audio – Attaches an audio stream to the currently selected video source. 2. Audio Source – Specify which audio device to use. 3. Channel – If the Split Channels audio mode was enabled in the Audio configuration, then you can assign either the left or the right audio channel to the currently selected video source. This feature enables a single stereo audio input to provide two separate audio channels, when using the appropriate adapter. CompleteView Administrator User Manual Page 98 Email CompleteView can deliver email notifications to one or more recipients when certain alarm events occur. This is configurable on a per-camera basis. Start>All Programs>CompleteView>System Configuration>Configure Servers>Cameras>{selected camera}>Email Tab Email Tab Notification events: Sync Loss – If CompleteView detects a loss of video signal, the server will generate a notification email with an optional JPEG still image file attachment. By default, the JPEG still image is taken from the start of the event. CompleteView Administrator User Manual Page 99 External Alarm – Sends a notification email with optional JPEG still image file attachment whenever an “external” alarm condition occurs. An external alarm can be generated either through a hardware input or from an external application via the API. Motion Detected – Sends a notification email with optional JPEG still image file attachment when the internal video motion detection system detects motion. Sync Gained – Following a Sync Lost event, when CompleteView reconnects to the camera, the Sync Gained event is triggered. Notification settings: 1. To setup an email to be sent on a notification event, choose the event form the ‘Send Email on:’ list. 2. Check the ‘Email Notification Enabled’ checkbox. 3. Optionally, configure notification limits. a) Check the corresponding checkbox to enable to email notification limit. b) For Maximum Emails use the arrow controls to set the number of email notifications that should be set for the event. Note, only the Sync Lost notification can use this setting. c) For Minimum Interval between Emails enter the number of seconds between email alerts for the same event. This will prevent many event alerts from being sent too rapidly. Note, the Motion Detection, External Alarm, Sync Lost and Sync Gained notifications can use this setting. Include Snapshot – Specifies whether to include a JPEG still image as a file attachment when an alarm event is detected. Each 320 x 240 JPEG still image is approximately 10KB in size. Delay before Taking Snapshot (s) – Specifies a delay period, in seconds, after the alarm has triggered before taking the snapshot. Email Subject – The subject header of the email. Recipients – The Internet format email addresses of the persons who should receive the notification. You can include multiple recipients by separating the email addresses with a comma. Note: You might find that the emailed snapshots might include undesired objects, being from the beginning of the motion event. For example, a person opens a door. You want a picture of the person. As a result of CompleteView detecting the door opening as motion, this is the beginning of the motion event. A snapshot taken at this point (when the motion alarm triggered) might show only a slightly opened door. By setting a 2 or 3-second delay before taking the snapshot, the person has time to complete the opening of the door. The resulting snapshot will now be of the person rather than the door. CompleteView Administrator User Manual Page 100 Analytics CompleteView can deliver video streams to an integrated Agent VI video analytics system and associate alarm events from the integrated analytics system with alarm recordings. Start>All Programs>CompleteView>System Configuration>Configure Servers>Cameras>{selected camera}>Analytics Tab Analytics Control Tab Select this option to have the CompleteView server analyze the video stream and transmit a feature stream to the associated Agent VI server. Select to record alarm on event notification from the Agent VI server. This number associates a sensor from the Agent VI system to the corresponding camera in CompleteView. Make sure the sensor number configured in Agent VI matches this number. CompleteView Administrator User Manual Page 101 Edge Storage CompleteView supports edge storage recording on Axis Communications cameras with Edge Storage support. Edge Storage integration allows CompleteView to configure the target Axis camera to record to either an internally installed SD card or to a separate NAS storage device. The camera will record the same resolution and frame rate video stream CompleteView server is configured to record. If recordings from the camera are interrupted by a network outage, or some other event, CompleteView will retrieve the missing recordings from the camera’s SD card or associated NAS server and automatically fill in any missing gaps in its recordings. Start>All Programs>CompleteView>System Configuration>Configure Servers>Cameras>{selected camera}>Edge Storage Tab Edge Storage Tab Note, only Axis IP cameras can be configured for Edge Storage. The controls on the Edge Storage tab will be unavailable if the camera being configured is not set as an Axis model camera from the IP configuration tab in CompleteView. CompleteView Administrator User Manual Page 102 To configure Edge Storage perform the following steps: 1. From the ‘Edge Storage’ tab enable ‘Retrieve Missing Video from Edge Storage’ to enable the configuration controls. 2. Select either ‘SD Card’ or ‘Network Share’ depending on where the camera will be configured to record the backup video stream to: ‘SD Card’ is selected: 1. Optionally check ‘Format SD Card’. Selecting this option will initiate a format of the internally installed SD card on the Axis camera. It is recommended to select this option. The option will automatically disable once CompleteView has finished the format to prevent the card from being reformatted in the future. ‘Network Share’ selected: 1. The option under ‘Storage Options’ will change. 2. Hostname or IP: enter the hostname or IP address of the NAS server. Please note if the hostname of the NAS eerver is entered the camera will need to be configured with a DNS server to resolve the hostname. 3. Share path: enter the path to the shared folder the camera will store video to. 4. Username: enter the username which will be used by the camera to record to the NAS server. 5. Password: enter the password for the previously configured user name. 3. CompleteView can be configured to synchronize the recordings on a schedule, so remote cameras which may be recording over limited bandwidth connections can have their recordings synchronized to CompleteView at a time when the network connection may be fully available to the camera. The synchronization schedule is configured under ‘Synchronization Options’. Start>All Programs>CompleteView>System Configuration>Configure Servers>Cameras>{selected camera}>Edge Storage Tab Synchronization Options CompleteView Administrator User Manual Page 103 1. Run video synchronization at: set the calendar control to the day you would like the first synchronization event to begin on. 2. Using the time control to the right of the calendar control, set time of day the synchronization event should occur on. 3. Below the date and time controls, set the frequency by number of days or hours between synchronization events. In the example in the screen shot, the synchronization is set to start on 8/21/2013 at 1am and occur at 1am every day. CompleteView Administrator User Manual Page 104 Adding a QuickTrack Camera A QuickTrack camera allows users of CompleteView’s Video Client to record a series of cameras as one video feed. A QuickTrack camera panel in a Video Client view layout can contain any other camera the user has permission to view. Any camera can be dragged and dropped into the QuickTrack panel to have its video displayed in the panel. Additionally the camera, along with any other camera brought into the QuickTrack panel, will be recorded as a video feed. This allows for later review of all cameras being focused on; as an example, if a loss prevention professional is tracking a suspect across multiple cameras in a retail store, each camera can be brought into the QuickTrack panel as the suspect enters the camera’s field of view. The QuickTrack panel’s activity can later be reviewed as its own video feed to easily reproduce what the loss prevention professional was focusing on. QuickTrack Camera Settings Start>All Programs>CompleteView>System Configuration>Configure Servers>Cameras>{selected camera}>General Tab QuickTrack Camera Settings CompleteView Administrator User Manual Page 105 QuickTrack cameras are configured using a subset of the configuration options on the ‘General’ tab of camera settings. Video Quality Video Size Stream Compression External Alarm FPS Specifies the display name of the QuickTrack camera. Cameras recorded to a QuickTrack camera panel will be transcoded using the Video Quality, Video Size, Compressor and External Alarm FPS settings. The Video Quality setting determines the level of compression used. Cameras recorded to a QuickTrack camera panel will be transcoded using the Video Quality, Video Size, Compressor and External Alarm FPS settings. The Video Size setting determines the resolution the QuickTrack video feed is recorded at. The target camera to be recorded in the QuickTrack panel will be resized to the resolution selected. Cameras recorded to a QuickTrack camera panel will be transcoded using the Video Quality, Video Size, Compressor and External Alarm FPS settings. The Compressor setting determines type of Compression used (H.264, MPEG4 or MJPEG). Cameras recorded to a QuickTrack camera panel will be transcoded using the Video Quality, Video Size, Compressor and External Alarm FPS settings. The External Alarm FPS setting determines the frame rate the QuickTrack video is recorded at. Note, the QuickTrack camera will require a recording schedule be set under ‘Schedules’ in Server Configuration. Alarm recording must be set for the QuickTrack camera to record. Limiting Alarm recording can be used to limit the times of day a Video Client user can record using the QuickTrack camera. CompleteView Administrator User Manual Page 106 Audio Devices General The settings in the Audio Devices group of options allow you to independently configure each audio device in a CompleteView Server. You must have an audio feature key installed before you can enable audio recording. Please contact Salient Systems for additional details regarding recording of audio with CompleteView. Tree View The Users/Groups node on the Server Configuration tree contains a list of all user and user group objects that exist in the selected server’s configuration. CompleteView Administrator User Manual Page 107 Configuring Audio Devices Start>All Programs>CompleteView>System Configuration>Configure Servers>Audio Devices>{Selected Device} Audio Devices ‘Settings’ Tab Capture Quality – Select from among three audio quality levels {low, medium, high.} Higher quality generates more data resulting in a decrease in your video event retention time and live viewing experience. You should always select the lowest quality level that is acceptable for your particular application. Channel Mode – Selects the operation mode of the audio input. Mono – Monaural audio recording. Stereo – Stereo audio recording. Split Channels – Separates a stereo signal into two audio channels (may require additional hardware.) If this mode is selected, it effectively turns a single audio input system into a two audio input system by utilizing the left and right channels of a stereo signal as two discrete audio inputs. CompleteView Administrator User Manual Page 108 Alarm Devices Alarm Devices The settings in the Alarm Devices group of options allow you to independently configure each alarm device in a CompleteView Server. Tree View The Users/Groups node on the Server Configuration tree contains a list of all user and user group objects that exist in the selected server’s configuration. Alarm Devices IP-based Digital Input / Output To add a new IP-based Alarm Device, perform the following steps: 1. 2. 3. 4. 5. Right-click on the Alarm Devices object in the tree view. Select Add Alarm Device from the resulting context-menu. Enter a name for the alarm device. Select OK. Configure the new alarm device from the IP tab. Add Alarm Device CompleteView Administrator User Manual Page 109 Direct-Attached Digital Input / Output CompleteView supports several different digital input/output (DIO) devices. Each of the devices is connected to a CompleteView server via a USB port. It is possible to add a single device, or any combination of device types to a CompleteView server. Direct Attached Digital I/O USB to 8 Isolated Inputs/ 8 Reed Relay Outputs Digital I/O Interface Adapter USB to 16 Isolated Inputs Digital I/O Interface Adapter USB to 16 Reed Relay Outputs Digital I/O Interface Adapter USB to 48 channel TTL Digital I/O Interface Adapter USB to 96 Channel TTL Digital I/O Interface Adapter CompleteView Administrator User Manual Page 110 Configuration Tabs IP Tab The IP Tab displays the connection information for the selected alarm device: Start>All Programs>CompleteView>System Configuration>Configure Servers>Alarm Devices>{Selected Device}/IP Tab Direct Attached Alarm Devices 1. 2. 3. 4. 5. Device Model – Select the specific device model. Address (Hostname/IP) – The IP address or hostname for the selected alarm device. Username – Enter the username that the server will use to contact the camera. Password – If required, enter the password for the associated username. Timeout – Controls how long, in seconds, CompleteView should wait for a response to the initial http request. This is an advanced setting, and should only be changed from the default value of '3' at the direction of Salient's technical support. 6. Retries – Controls how many times CompleteView should attempt to connect to the IP alarm device before determining that it is unreachable. This is an advanced setting, and should only be changed from the default value of '0' at the direction of Salient's technical support. CompleteView Administrator User Manual Page 111 Inputs Based upon the configuration and capabilities of the selected alarm device, CompleteView will list the maximum number of inputs that the device is capable of. To configure an input, first select it from the Input: list. Start>All Programs>CompleteView>System Configuration>Configure Servers>Alarm Devices>{Selected Device}/Inputs Tab Input List 1. Trigger When Closed / Low – Alarm condition when circuit is closed. 2. Trigger When Opened / High – Alarm condition when circuit is open. 3. Trigger Recording on Cameras – Select each camera that CompleteView should begin recording when the input is triggered. Note: By selecting one or more camera inputs, CompleteView will utilize the alarm input to drive video recording. It is important to note that in order for the recording to take place, you must enable the External Alarm Recording mode in the Recording Schedule. If the input is alarmed, but external alarm recording is not currently active in the recording schedule, then video recording will not occur. CompleteView Administrator User Manual Page 112 Outputs Based upon the configuration and capabilities of the selected alarm device, CompleteView will list the maximum number of outputs that the device is capable of. To configure an output, first select it from the Output: list. Start>All Programs>CompleteView>System Configuration>Configure Servers>Alarm Devices>{Selected Device}/Outputs Tab Output List Close When Triggered – Generates alarm condition by closing the circuit. Open When Triggered – Generates alarm condition by opening the circuit. By configuring a camera output, CompleteView can perform one or more functions. The selected functions are applied to all cameras that are associated with the output in the Cameras Triggering Output area. Trigger on External Alarm – When an external alarm condition is active for one of the selected cameras, the output is alarmed. External alarms can be software generated through the API, or when any of the inputs associated with a given camera has an active alarm condition. Trigger on Motion – When CompleteView detects motion is occurring for one of the selected cameras, the output is alarmed. Trigger on Sync Loss – If a loss of video signal is detected for one of the selected cameras, CompleteView will generate an alarm on the selected output. CompleteView Administrator User Manual Page 113 Serial Ports General The settings in the Serial Ports group of options allow you to independently configure each RS-232 serial port in a CompleteView Server. Tree View The Serial Ports node on the Server Configuration tree contains a list of the RS-232 serial ports in the server. Serial Ports Tree View CompleteView Administrator User Manual Page 114 Serial Port Configuration Start>All Programs>CompleteView>System Configuration>Configure Servers>Serial Ports>{Selected Port} Serial Port Settings • • • • • Baud Rate – Valid options are: 1200, 2400, 4800, 9600, 14400, 19200, 38400 and 57600. Data Bits – Valid options are: 8 and 7. Parity – Valid options are: None, Even and Odd Stop Bits – Valid options are: 1, 1.5 and 2. Flow Control – Valid options are: None, Software and Hardware. CompleteView Administrator User Manual Page 115 Volumes General Before video recording can begin, at least one "Regular Storage" volume object must be defined on the CompleteView Server. A storage volume can be a directory on a local hard disk drive, a removable hard disk drive, or a shared directory on a network file server. Volumes can be defined using the standard Microsoft pathname format, such as D:\Video, or by using a Universal Naming Convention (UNC) pathname such as \\ServerName\Video. Console Tree Volumes Container Tree View Volumes on the Server Configuration tree contain a list of all of the video volumes in the selected server’s configuration. Volumes Right-click on a video archive volume object to show a context-menu containing the primary volume management functions. You can also access this item as a submenu underneath the Server Configuration>Volume system menu. Volumes New Volume – Creates a new volume object. Delete Volume – Permanently removes the currently selected volume object. Move Up – Moves the currently selected volume object one position higher in the volume list. Volume Management Functions CompleteView Administrator User Manual Move Down – Moves the currently selected volume object one position lower in the volume list. Page 116 Configuration Tabs General Start>All Programs>CompleteView>System Configuration>Configure Servers>Volumes>{Selected Volume}>General Volumes Configuration ‘General’ Tab 1. Path: – Specifies the location of the video archive volume. This can be either a literal path such as E:\Video or a UNC path such as \\ServerName\Video. IMPORTANT: If you are writing to a mapped network drive or universal naming convention ('UNC') path, then you must ensure that the LocalSystem user account has appropriate permission to read, write, modify, create and delete files. Please see chapter Server Components Overview, section System Service Overview for more details. 2. Volume Type - Specifies the purpose and function of the storage volume. a) Regular Storage - At least one "Regular Storage" volume needs to be defined for the server. Video is written to this volume for the cameras associated with it according to the recording schedule defined (see Schedules for more information on configuring a recording schedule). CompleteView will find recorded video for the associated cameras on this volume type when a search is initiated through a playback interface. b) Permanent Storage (Read only) - CompleteView will find recorded video for the associated cameras on this volume type when a search is initiated through a playback interface. This is used CompleteView Administrator User Manual Page 117 less frequently than Regular Storage and Archive Only volume types. An example of this volume type would be to define the location of video which has been restored from a backup or the location of video moved from Regular Storage by a 3rd party archiving program. c) Archive Only - This defines a volume for the purpose of moving video from a Regular Storage volume on a preset schedule in order to free space on the associated Regular Storage volume(s) for new video to be recorded. Archiving removed the designated video from the original volume and places it on the archive volume d) Backup Only –This defines a volume for the purpose of backing up a drive. Backup copies the original files to the backup volume but does not remove them from the original volume. (Backup Only: available in CompleteView 3.8.1 and beyond) 3. Free Space Threshold for Writing (MB) – Specifies the amount of available disk space (in megabytes) on the volume before First-In-First-Out (FIFO) processing is triggered. Each time the threshold drops below this number, it will cause CompleteView’s FIFO processor to delete approximately one day of video in order to free disk space for newer video events. 4. Keep Video for (days) – Enable this setting to remove video based on retention time. Specify the number of days to keep video for, before deleting the oldest day of video. 5. Begin Removal At – Specified the time of day to begin removing the oldest day of video, after video becomes older than what is specified for the “Remove Video Older Than” setting. 6. Enable Archive – (Available for Regular Storage volume types) when checked, the archiving scheduling options are presented permitting the administrator to associate an Archive Only volume. 7. Enable Backup – (Available for Regular Storage volume types) when checked, the backup scheduling options are presented permitting the administrator to associate an Archive Only volume. Note: For any given regular volume, you may enable archiving or backup, but not both for the same volume Archiving and Backup Only Configuration Archiving can be used to automatically move recorded video from its originally recorded location to a longer term storage medium. This will free space for new recordings without requiring the older video be deleted. The administrator can define the archive volume, associate it with regular volume(s) and set a schedule to automatically move the oldest video from regular storage to archive storage. Backup Only Backup only can be used to automatically copy recorded video from its originally recorded location to any designated storage volume. The video on the original volume remains in place and is subject to first in first out The administrator can define the Backup Only volume, associate it with regular volume(s) and set a schedule to automatically copy the oldest video from regular storage to archive storage. CompleteView Administrator User Manual Page 118 Configuration of Archive Only or Back Only Volume The process to configure a Back-up Only Volume is the same as configuring an Archive Only Volume Overview Archiving can be setup in following four steps: 1. 2. 3. 4. The administrator must first add an Archive only or Backup only volume type to the server. Select Enable Archive or Enable Backup on a Regular Storage volume. Associate the Archive Only or Backup Only volume to the selected Regular Storage Volume. A schedule for automatically moving / copying video from the Regular Storage volume to the Archive Only or Backup only volume must be defined in the Regular Storage volume's settings. Adding an "Archive Only" Volume Console Tree Volumes Container Volumes Right click on Volumes and choose New Volume. On the volume's General tab set the Volume Type to "Archive only." CompleteView Administrator User Manual Page 119 Start>All Programs>CompleteView>System Configuration>Configure Servers>Volumes>{Selected Volume}>General Add “Archive Only” Volume The icon for the volume will change indicating it is an either an Archive Only or Backup Only volume type. 1. Keep Archived / Backup Video for How Many Days: - This setting defines the number of days to keep video for before deleting it from the archive or backup volume. Example: if set to 10 days, video will be deleted on the 11th day after it has been moved from a "Regular Storage" volume. 2. Minimum Delete Size When Full (MB): - If the drive becomes full and an archive or backup operation cannot be completed because not enough free space exists, CompleteView will automatically delete the oldest video until the Minimum Delete Size specified here has been reached. Note: For the purposes of the "Minimum Delete Size When Full (MB):": The Archive Only volume is considered full when it has reached 92% of its capacity. CompleteView Administrator User Manual Page 120 Configuring the Archive or Backup Schedule Start>All Programs>CompleteView>System Configuration>Configure Servers>Volumes>{Selected Volume}>General Tab Add “Archive Only” Volume The Archive or Backup schedule is configured on the "Regular Storage" volume, which is to be archived or backed up. First click on the target "Regular Storage" volume. CompleteView Administrator User Manual Page 121 Check "Enable Archiving" to enable archiving of the selected "Regular Storage" volume and to display the Archiving Settings. Check "Enable Backup" to enable backup of the selected "Regular Storage" volume and to display the Backup Settings. Set the "Archive Only" volume to move video to. Specifies the number of days of video to move when an archiving event occurs. When an archiving event occurs, this number of days of video (of the specified recording types) will be moved to the Archive Only drive. Recording type(s) not specified will not be deleted when the archiving event occurs and could be stored for longer than the specified number of days. Specifies the number of days between archiving events. Specifies the time of day to begin the archive event. When check archiving begins the day archiving is turned on instead of waiting the number of days specified in "Archive Video Every (days)". The checkboxes available here allow the user to specify the types of recordings which will be moved on an archiving event. Archive Only or Backup Only Configuration Guidelines It is strongly recommended that these guidelines be employed for best performance. Improper configuration of archiving or backup can result in video being deleted before it is intended to be removed. 1. The "Archive Only" or Backup Only volume should be on its own partition and not used for any other purpose. 2. Multiple "Regular Storage" volumes should not be configured to archive to the same "Archive Only" or Backup Only volume. Each "Regular Storage" volume you wish to have archived or backed up should have its own dedicated "Archive Only" or Backup Only volume associated with it. 3. When scheduling archiving or backing up multiple "Regular Storage" volumes on a single server, schedule the archiving or backup of each volume to occur at separate times. Plan the archiving or backup schedule for each "Regular Storage" volume so no other volume on the same server will be archiving simultaneously. 3. Make sure the archive or backup volume is larger than the contents that will be stored on it. 4. Schedule archiving or backup to occur when there will be limited recording on the "Regular Storage" volume and limited network activity. Keep in mind video may not be available for playback when it is being archived or backed up and the server performance may be affected during the archive or backup event. CompleteView Administrator User Manual Page 122 Cameras Select which cameras are allowed to record to this volume. Start>All Programs>CompleteView>System Configuration>Configure Servers>Volumes>{Selected Volume}>Cameras Tab Cameras Tab You can use this setting to restrict which cameras are allowed to record to a particular volume. For example, if you wish to extend the video archive retention time of a group of cameras, you can define a volume that only those cameras can record to. CompleteView Administrator User Manual Page 123 Schedules General The recording schedule planner allows you to set a recording schedule for each camera by specific date, whether it is a weekend or weekday, or by the catch-all ‘Every Day’ schedule. Tree View Console Tree Schedules Container The Schedules node on the Server Configuration tree contains a list of all of the defined recording schedules in the selected server’s configuration. Schedules Schedules Menu Right-click on a schedule object to show a context-menu containing the primary schedule management functions. You can also access this item as a submenu underneath the Server Configuration->Schedule system menu. Schedules New Schedule – Creates a new recording schedule. You will be prompted for the type of schedule to create, as shown below: CompleteView Administrator User Manual Page 124 Start>All Programs>CompleteView>System Configuration>Configure Servers>Schedules Container>Menu>New Schedule New Schedule Dialogue Date – Creates a schedule which will run only on the selected date. Weekday – Creates a schedule which will run on every weekday, defined as Monday - Friday. Weekend – Creates a schedule which will run on every Saturday and Sunday. Every Day – Creates a schedule which will run on every day of the week. Note: If there are multiple schedules which apply to a particular date, then the CompleteView server chooses the most restrictive schedule available. For example, if the date is Tuesday, 6/3/2008, and there is a schedule for 2/3/2008, Weekday, and Every Day, then the CompleteView Server will use the schedule for 2/3/2008, since it is the most restrictive. If the 2/3/2008 schedule did not exist, then CompleteView would use the Weekday schedule, and so on. Clone Schedule – Creates a copy of an existing schedule. Select the schedule that you wish to copy, and then click the Clone Schedule button. You will be prompted to supply a schedule type for the new schedule. Delete Schedule – Deletes the currently selected recording schedule from the server configuration. Edit Schedule – Not used. CompleteView Administrator User Manual Page 125 If the type of schedule you select already exists, the operation will fail with the error message shown below: Start>All Programs>CompleteView>System Configuration>Configure Servers>Schedules Container>Menu>New Schedule New Schedule Error Dialogue CompleteView Administrator User Manual Page 126 Configuration Tabs Edit The recording schedule planner allows you to specify what types of recording should occur for each camera in a 24-hour period. Start>All Programs>CompleteView>System Configuration>Configure Servers>Schedules>{Selected Schedule}>Edit Tab Schedules Edit Tab 1. Scheduled – Click on this button to enable scheduled (continuous mode) recording. 2. Ext. Alarm – Click on this button to enable recording during an external alarm event. 3. Motion – Click on this button to enable recording when motion is detected. 4. Pre-alarm – Click on this button to enable pre-alarm recording. Note: Pre-alarm recording and scheduled recording cannot be selected simultaneously. When prealarm recording is enabled, scheduled recording is automatically disabled. Simultaneously selecting motion detection or external alarm AND scheduled recording, will automatically disable pre-alarm recording. CompleteView Administrator User Manual Page 127 5. Start – Manually sets the start time for a recording plan. 6. End – Manually sets the end time for a recording plan. 7. Schedule – Displays a text-based list of planned recording items for the currently selected camera. In the above screenshot, Camera 1 has been selected. You can view its recording plan in 2 different ways: a. Textually – You can determine the recording plan for a camera by examining the items listed in the Schedule box. Items beginning with the letter S represent a scheduled recording; a represents external alarm recording; P represents pre-alarm recording; and M represents motion detection recording. The start and stop time each item are shown to the right of the recording type. b. Graphically – To the immediate right of the camera selection is a series of bars. These are displayed on a scale from 0 to 24, which indicate the time period 00:00:00 through 23:59:59. The scale is broken into increments of 15 minutes. The bars are color-coded by recording type: green represents scheduled recording; yellow represents external alarm recording, cyan represents pre-alarm recording; and red represents motion detection recording. 8. Copy Schedule – Copies the recording plan for the currently selected camera. 9. Paste Schedule – Pastes a copied recording plan into the currently selected camera. 10. Remove Schedule – Deletes the recording plan from the currently selected camera. 11. OK – Saves the changes to the entire recording schedule plan, and exits back to the previous screen. 12. Cancel – Does not save any changes to the recording schedule plan, and exits back to the previous screen. To graphically edit the recording schedule plan, first choose the type of recording that you wish to occur by selecting the appropriate recording mode buttons. Next, click and drag on a camera, from the time you wish the recording to start, until the time you wish for it to end. When you are done modifying the recording plan, click on the OK button to save changes and exit. Note, the QuickTrack camera will require a recording schedule be set under ‘Schedules’ in Server Configuration. Alarm recording must be set for the QuickTrack camera to record. Limiting Alarm recording can be used to limit the times of day a Video Client user can record using the QuickTrack camera. CompleteView Administrator User Manual Page 128 Diagnostics/Reporting The Diagnostic/Reporting object in the Server Configurations console tree provides system support personnel with useful troubleshooting tools. In the server configurations console tree click Diagnostic/Reporting to display the Diagnostic/Reporting details pane. The details pane contains a set of tabbed windows. Each window presents configuration parameters and information related to a particular diagnostic tool. To access a diagnostic tool, click its associated tab. Logging The Logging pane enables support personnel to configure log file content and behavior. The Logging pane is loosely organized into two sections where the left half of the window contains a log file specification and the right half of the display presents “Logging Settings” that determine log file behavior. Start>All Programs>CompleteView>System Configuration>Configure Servers>Diagnostics/Reporting>Logging Diagnostic Logging Tool CompleteView Administrator User Manual Page 129 Log File Specification The log file specification portion of the Logging window consists of: 1. The log file Path Specification 2. The CompleteView™ Component Window Log File Specification Log File Path: Specify where CompleteView™ log files will be stored. Component Window: Lists the software components that contribute to the log file. The Log File Path specification determines where CompleteView™ log files will be stored. By default, log files are stored in the .\logs subdirectory of the CompleteView™ installation folder. Typically, the .\logs subdirectory can be found at c:\Program Files\CompleteView\logs. The Log File Path dialogue consists of a pathname text box and a […] button. The Log File Path text box displays the currently defined log file path. The currently defined path can be changed by typing a new pathname into the pathname text box or by clicking the […] button thereby opening a browse for folder dialogue and browsing to the new log file folder. The CompleteView™ Component Window is a two column display consisting of a component column and a logging level column. The component column lists the CompleteView™ software components that can contribute to the log file. The logging level column lists the logging level at which each component currently contributes. The logging level determines how much diagnostic information a software component generates and sends to the log file. Logging Settings Logging Settings determine how logging functions behave. The Logging Settings portion of the logging window presents options that affect logging activity, process and log file behaviors. Logging Settings Log Level: Specify the logging activity level permitted for each software component that contributes to the log file. Immediate Flush: Allows log events to be immediately written to disk. Rollover Logfiles: Starts a new log file whenever updated system configurations are saved. Keep Logs For: Specify log file retention period in days. CompleteView Administrator User Manual Page 130 The Log Level drop-down menu contains the logging activity settings that can be assigned to each software component in the Component Window. To assign a log level to a software component: 1. In the Component Window click to select the software component to be modified. 2. In the Logging Settings section, click the carat in the Log Level drop down box to open the menu. Mouse over and then click to select the new log level. 3. In the Component Window, the log level associated with the selected software component will change to reflect the new setting. Log levels range from “None” to “Trace.” Selecting “None” disables logging for the selected component. Selecting “Trace” enables the most verbose logging activity for the selected component. When logging activity is increased, more system resources are required to support the logging function and overall system performance may be affected. The Immediate Flush checkbox enables log entries to be immediately written to disk. Software components generate log entries according their associated log level, these entries are posted to a memory-resident queue. The memory-resident queue periodically writes its content to the log file on disk. When Immediate Flush is selected the memory-resident queue writes log entries to the log file on disk immediately as they are posted. Selecting Immediate Flush greatly increases disk activity and overall system performance will likely be affected. The Rollover Logfiles checkbox causes the current log file to be closed and a new log file to be opened whenever updated system settings are saved. The Keep Logs field specifies the number of days log files are kept on disk. CompleteView Administrator User Manual Page 131 Configurations The Configurations Window enables support personnel to examine CompleteView™ server or client configuration files retrieved from the localhost, from configuration files saved to disk or from a configuration server. The Configurations Window contains a configuration view window and a collection of buttons that enable configuration files to be loaded into the view window and optionally saved as XML files. Start>All Programs>CompleteView>System Configuration>Configure Servers>Diagnostics/Reporting>Configurations Configurations Tab CompleteView Administrator User Manual Page 132 Configurations Window Load Buttons View Server Configuration Button Load the active Configure Server Session configuration file into the configuration view window. Load Server Configuration Button Load a saved server configuration file from disk. Load Client Configuration Button Load client configuration files Save as XML File Button Save the currently loaded configuration file from the configuration view window to disk The View Server Configuration button causes the server configuration file for the current configure server session to be loaded into the configuration view window. The Load Server Configuration button opens a browse for file dialogue. Using the browse for file dialogue, navigate to and select a server configuration file to load into the configuration view window. Configuration files are those having a .cvw file extension. The Load Client Configuration button opens a Load Client Configuration dialogue: Load Client Configuration Local Configuration opens a client login dialogue. Input valid user account credentials for the localhost client and click [OK]. The localhost client configuration is loaded into the configuration view window. Configuration File opens a browse for file dialogue. Using the browse for file dialogue, navigate to and select a client configuration file to load into the configuration view window. Configuration files are those having a .cvw file extension. Click [OK] to continue Configuration Server opens a server login dialogue. Input the IP address and valid user account credentials for the target configuration server and click [OK]. The Save as XML File button opens a save file dialogue. Using the save file dialogue navigate to your target folder. In the File Name text box provide a name for the XML file being created and click [Save]. The configuration file currently loaded in the configuration view window is saved to disk in XML format using your specified filename. CompleteView Administrator User Manual Page 133 Client Configuration Global Options General The Global parameter group allows you to modify settings that apply to the selected Client Configuration as a whole. Tree View Client Configuration Console Tree The top level of the Client Configurations tree contains a separate object for each of the Client Configuration sources that you have specified. Client Configuration Console Tree Right-click on a client configuration object to show a context-menu containing the primary configuration management functions. You can also access this item as the Client Configuration system menu. Client Configuration Menu CompleteView Administrator User Manual Page 134 1. Add Client Configuration... — adds a client configuration file to the list of available configurations. 2. Edit Credentials... — Edits the credentials used to access the currently selected client configuration. 3. Delete Client Configuration — removes the selected configuration from the list of available configurations. 4. Reload Configuration — Reloads the selected configuration from its source location. 5. Save Configuration — Saves the selected configuration to its source location. 6. Load Configuration From - Opens a client configuration from a specified location. 7. Save Configuration To - Saves the current client configuration to a specified location. 8. Load Backup — Restores a configuration backup file into the selected configuration. 9. Save Backup — Saves the currently selected configuration into a backup file. 10. User — Displays the user configuration submenus for the selected configuration. 11. View — Displays the view layout submenus for the selected configuration. 12. Map - Displays the Map submenus for the selected configuration. 13. Server — Displays the server management submenus for the selected configuration. 14. Zone - Displays the location setup submenus for the selected configuration. CompleteView Administrator User Manual Page 135 General The General settings tab contains configuration settings that apply to the currently select client configuration. Start>All Programs>CompleteView>System Configuration>Configure Clients>Client Container>General Tab General Tab 1. Active Directory Authentication (Enterprise feature) – Defines the AD domain that the client configuration should authenticate against. 1. Domain - Defines the domain to authenticate against. 2. Username - User name to use for domain authentication. 3. Password - Password to use for domain authentication. 2. Auto disconnect when idle - When enabled the client will automatically disconnect from the server(s) when the client window is minimized or the screen saver becomes active. Client will automatically reconnect when window is restored or screen saver is deactivated. CompleteView Administrator User Manual Page 136 Sites & Zones Overview CompleteView provides the ability to organize view layouts and maps through the Sites & Zones feature. Organizing view layouts and maps using Sites & Zones is similar to organizing files in folders. The structure created using Sites & Zones appears in the Video Client. A Zone is the top level object in the structure. A Zone can contain other Zones as well as sites within it but Zones do not contain views and maps. Sites are the bottom level organizational object and can contain any number of view layouts and/or maps but no other sites and Zones. A common structure may begin with Zones named to represent states. With the Zones which represent a state there may be sites representing cities. Each site there would contain view layouts and maps. For example, there may be a Zone names "Texas" with a site names "Austin" which would contain the views and maps. Note: Zones and Sites feature is available in CompleteView Enterprise. Please contact Salient Systems Sales for information on upgrading to CompleteView Enterprise to enable Zones and Sites. Configuring Sites & Zones A Zone object is similar to a folder and can contain other Zones as well as Sites. Zones can be nested within other Zones and there is no limit to the number of levels deep the Zones can be configured to. The Sites object is the bottom level object and can contain view layouts and maps. Start>All Programs>CompleteView>System Configuration>Configure Clients>Zones/Sites Container>Menu Zones/Sites Menu To add a new Zone, right click on ‘Zones/Sites’ or an existing Zone and choose 'New Zone' To add a new site, right click on ‘Zones/Sites’ or an existing Zone and choose 'New Site' CompleteView Administrator User Manual Page 137 When creating Zones or Sites, you will be prompted to enter a name for the new Zone or Site being created. New Zone Dialogue Enter a name for the new Zone then click [OK] New Site Dialogue Enter a name for the new Site then click [OK] CompleteView Administrator User Manual Page 138 Creating Views and Maps within a Site To create a new view layout within a Site: Console Tree Site Container Expand the Site by clicking the '+' next to the Site. View Menu Right Click on 'Views' and choose either 'New View' or 'New Auto View.... Creating a View Please refer to the 'View Layout Editor' section of this manual for details on configuring view layouts. CompleteView Administrator User Manual Page 139 Map Views within Zones and Sites Console Tree Site Container To create a new map within a Site, expand the Site by clicking the '+' next to the Site. Map Menu Right click on 'Maps' then choose 'New Map'. Creating a Map Please refer to the 'Map View Editor' section of this manual for details on configuring maps. CompleteView Administrator User Manual Page 140 Site Administration Clicking on a Site object will display the 'Administration' tab. Start>All Programs>CompleteView>System Configuration>Configure Clients>Zones/Sites/{Selected Site}/Administration Tab Site Administration Name - Text entered in this field will display as the Site's name. Users/Groups - Select the Users and/or Groups who should have permission to view this site. Only Users and Groups checked in this field will be able to see the site in the Video Client. CompleteView Administrator User Manual Page 141 Users/Groups General The Users and Groups configuration objects allow you to create, modify and delete view layouts and associate them with either an individual user, or a group of users. An unlimited number of view layouts may be created for each User or User Group object. Please reference Appendix E for additional information regarding Users and User Groups. Tree View User/Groups Node Console Tree Users/Groups Container User Object The Users/Groups node on the Client Configuration tree contains a list of all user and user group objects that exist in the selected client configuration. Group Object CompleteView Administrator User Manual Page 142 Right-click on either a user or group object to show a context-menu containing the primary management functions. You can also access this item as a submenu underneath the Client Configuration->User system menu. Start>All Programs>CompleteView>System Configuration>Configure Clients>Users/Groups>Menu User/Group Menu 1. New Group... – Creates a new user group object. Options include local and import from Active Directory (enterprise feature). 2. New User... – Creates a new user object. Options include local and import from Active Directory (enterprise feature). 3. Clone – Creates a copy of the currently selected user, including camera permissions. 4. Delete – Deletes the currently selected user from the server configuration. 5. New Password – Resets the password for the currently selected user. CompleteView Administrator User Manual Page 143 Views Node Each User and Group object contains a node entitled Views. The Views node contains a list of all of the view layouts that have been created for the currently selected object. Console Tree “Views” Object Right-click on the Views node or a view layout to show a context-menu containing the primary view layout functions. You can also access this item as a submenu underneath the Client Configuration->View system menu. Start>All Programs>CompleteView>System Configuration>Configure Clients>{Selected User}>Views>{Selected View}>Menu View Layout Context Menu 1. New View... – Creates a new view layout object. 2. Auto-populate... – Automatically creates and configures a new view layout object. 3. Clone – Creates a copy of the currently selected view layout object. 4. Remove View – Removes the currently selected view layout object. 5. Save as Template - Saves the currently selected view configuration as a template for later use. CompleteView Administrator User Manual Page 144 6. Apply Template - Changes the current view layout to the layout saved in the template selected. Each camera in the view is reset to the 'No Camera'. 7. Delete Template - Removes the selected Template. CompleteView Administrator User Manual Page 145 Administration User Object 1. Administrator – If set, the user can view and modify the configuration for the selected CompleteView Server. 2. Auto Full screen – If set, then when the user logs in to the CompleteView Client, the application will automatically enter Fullscreen viewing mode. 3. Auto Sequence – If set, then when the user logs in to the CompleteView Client, the application will automatically begin sequencing between live view layouts. 4. Active Directory Authentication – Indicates whether the selected user is a non-editable Active Directory object. 5. Hide Nodes – Check nodes to hide from the selected user in Video Client. At least one node type must be selected otherwise nothing will be visible to the Video Client user. 6. Member of these groups – Displays a list of all local groups. If set, the user is a member of the group and will inherit any view layouts that have been created for the group(s). Start>All Programs>CompleteView>System Configuration>Configure Clients>Users/Groups>{Selected User}/Administration Tab User Object Administration Tab CompleteView Administrator User Manual Page 146 User Group Object 1. Administrator – If set, members of the group can view and modify the configuration for the selected CompleteView Server. 2. Auto Fullscreen – If set, then when a member of the group logs in to the CompleteView Client, the application will automatically enter Fullscreen viewing mode. 3. Auto Sequence – If set, then when a member of the group logs in to the CompleteView Client, the application will automatically begin sequencing between live view layouts. 4. Active Directory Authentication – Indicates whether the selected user is a non-editable Active Directory object. 5. Hide Nodes – Check nodes to hide from users that are members of the group in Video Client. At least one node type must be selected otherwise nothing will be visible to the Video Client user. 6. Users in this group – Only enabled if the selected group type is local. If so, then this field displays the members of the group. Start>All Programs>CompleteView>System Configuration>Configure Clients>Users/Groups>{Selected Group}/Administration Tab Group Object Administration Tab CompleteView Administrator User Manual Page 147 Enterprise Feature: Users and user groups can be linked from Active Directory to enable a single sign-on environment. AD user group membership is managed using external tools such as the Microsoft Active Directory Users and Computers MMC snap-in. See Appendix C. Active Directory® Integration for more details. CompleteView Administrator User Manual Page 148 Credentials When a user logs in to the CompleteView Client application, the authenticated users’ credentials are utilized each time that the user attempts to access a protected resource. Using the Credentials settings, you can override this behavior and supply a different set of user credentials for each configured server. This is most useful for an environment where you wish to simplify user management and do not require a user-level audit trail. In the following scenario, each user would have an individual user object created within the Client Configuration, but would use a shared set of user credentials when accessing video servers. A single user account that is shared by multiple users is also known as a role account. In our example, the users Larry, Moe and Curly have individual user accounts on the configuration server. Larry, Moe and Curly's user credentials have been configured to use an alternate username and password (u: operators and p:drowssap) when accessing the server named DVMS. On DVMS, a single user account has been created. This user is named operators with a password of drowssap. Whenever Larry, Moe or Curly attempt to access a camera located on DVMS, they will authenticate using the alternate credentials. The primary benefit of using role accounts is that there is less administration required to manage users on each video server. Once the role accounts have been setup on each video server, there should be little to no recurring user administration. The primary focus of user configuration becomes the Configuration Server. Start>All Programs>CompleteView>System Configuration>Configure Clients>Users/Groups>{Selected User}/Credentials Tab Server Credentials CompleteView Administrator User Manual Page 149 Servers The Servers list contains a list of each video server that is defined in the currently selected client configuration database. Credentials The credential parameters determine how clients authenticate to servers. 1. Pass through – (default) User credentials supplied during the client login process are used to authenticate to the selected video server. 2. Alternate From Group – N/A 3. Alternate – Utilize the user credentials specified below to authenticate to the selected video server. 4. Username – The username used to authenticate to the selected video server. 5. Password – The valid password for the username entered above. CompleteView Administrator User Manual Page 150 Servers Cameras Camera list contains a list of all cameras available on the selected server. Start>All Programs>CompleteView>System Configuration>Configure Clients>Servers>{Selected Server}/Cameras Tab Camera List CompleteView Administrator User Manual Page 151 View Layout Editor General The View Layout editor contains configuration information for the currently selected view layout. Start>All Programs>CompleteView>System Configuration>Configure Clients>Users/Groups>{Selected User}/Views/{Selected View}>General View Layout Editor General Tab View Name – The name of the view layout as it is displayed to the user. In Sequence – Determines whether or not this layout is to be included in a timed rotation of view layouts. Dwell Time – Sets how long the client application should pause, in seconds, after this layout is displayed in the view sequence. CompleteView Administrator User Manual Page 152 Edit The Edit Tab permits editing the selected view layout properties for the current user or user group object. View Layouts Start>All Programs>CompleteView>System Configuration>Configure Clients>Users/Groups>{Selected User}/Views/{Selected View}>Edit View Layout Editor Edit Tab 1. Server – Contains a list of each video server that is defined in the currently selected client configuration database. 2. Cameras – Contains a list of all cameras that are available on the currently selected video server. Each camera name is accompanied by a low-resolution thumbnail still image to assist the administrator in selecting camera resources. 3. Refresh – Reloads the list of cameras and thumbnail images for the currently selected video server. 4. View Target - The aspect ratio of the tiled view display. Select 4x3 for views intended to be displayed on 4x3 aspect ratio monitors or 16x9 for views intended to be displayed on 16x9 aspect ratio monitors. 5. Grid Scale– Check to enable a snap to grid layout editor. Uncheck for a free form view layout editor. 1x, 2x, 3x corresponds to the grid size. The lower number corresponds to a finer grid. 6. Title Bar - Check to overlay the title bar on the video window. Note this does not change the aspect ratio of the video window. 7. Frame Rate – Sets the maximum live view frame rate for all currently selected cameras. 8. Quality – Sets the video compression visual quality (low, medium, high) for all currently selected cameras. CompleteView Administrator User Manual Page 153 Adding Cameras You can easily add cameras to the view layout by dragging a camera thumbnail image from the camera list onto the grid position where you wish it to appear. Adding Cameras View Layout Editor Note, when adding QuickTrack cameras to a View Layout, a maximum of 1 QuickTrack camera can be added per view layout. CompleteView Administrator User Manual Page 154 Resizing Cameras The lower right-hand corner of each camera image contains an anchor point. Click on the anchor point and drag the camera to the size that you want. When it is at the desired size, release the mouse button. Resizing Cameras View Layout Editor Cameras can be dragged to 16x9 aspect ratio, or, to a 4x3 aspect ratio. Also, 9x16 (Corridor View) cameras can be dragged from their original size to a 4x3 aspect ratio. CompleteView Administrator User Manual Page 155 Deleting Cameras Left-click on a camera to select it. Press the delete button on the keyboard, or drag the camera onto the camera list. The camera will be removed from the view layout immediately. Deleting Cameras View Layout Editor CompleteView Administrator User Manual Page 156 Adding Maps or Web Pages to a View Layout From the view layout editor the ‘Cameras’ list will contain three non-camera objects below the selected server’s IP and analog cameras. Adding Maps or Web Pages to a View Layout • Map: dropping this object onto the view layout drawing surface will add a map to the view layout. • Web Page: dropping this object onto the view layout drawing surface will add a browser window set to an administrator-configured default web page to the view layout. • Empty: dropping this object onto the view layout drawing surface will add an empty viewing tile to the view layout. View Layout Editor CompleteView Administrator User Manual Page 157 Adding Maps Add a map to a view layout in the same way a camera is added. Add a Map ‘Map’ Dialogue 1. Drag and drop the ‘Map’ object to the drawing surface, or to an existing ‘Empty’ video tile. 2. The ‘Map’ dialog will appear. Select a map to display in media pane. 3. The map will apear on the drawing surface. The map object can be resized and moved like any other camera view. CompleteView Administrator User Manual Page 158 Adding a Web Page Add a web page to a view layout in the same way a camera is added. Add a Webpage ‘Webpage’ Dialogue 1. Drag and drop the ‘Web Page’ object to the drawing surface, or to an existing ‘Empty’ video tile. 2. The ‘Web Page’ dialog will appear. Enter the ‘home page’ URL under ‘Please specify a URL’. 3. Optionally choose to disable link and other browser controls by enabling ‘Disable links and browsers controls’. This option will prevent a user to navigating to any other links or web pages but will allow a user to refresh the specified page. 4. The Web Page object will appear on the drawing surface. The Web Page object can be resized and moved like any other camera view. CompleteView Administrator User Manual Page 159 Map View Editor General The General tab allows the administrator to import map files and to select the map file to be used for the view being configured. Import an Image File as a Map Start>All Programs>CompleteView>System Configuration>Configure Clients>Users/Groups>{Selected User}/Maps/{Selected Map}>General Map View Editor General Tab 1. Click the 'Import' button 2. You will be presented with a file dialog box. Choose any .BMP or .JPG file to be imported. 3. The selected image file will be added to the list of available maps. CompleteView Administrator User Manual Page 160 Import Image as a Map File Dialogue Box Note: You can import any number of files as maps. The file that you import does not have to be selected as the map image for the map you are editing. Start>All Programs>CompleteView>System Configuration>Configure Clients>Users/Groups>{Selected User}/Maps/{Selected Map}>General List of available maps CompleteView Administrator User Manual Page 161 Select the file you wish to use as the background for your map. A thumbnail and the dimensions of the image will be displayed to the right of the 'Images' list box. Start>All Programs>CompleteView>System Configuration>Configure Clients>Users/Groups>{Selected User}/Maps/{Selected Map}>General displaying thumbnail of selected image Press the 'Select' button to use the selected image as the map background. The image file name will display in the 'Image Name' box. Start>All Programs>CompleteView>System Configuration>Configure Clients>Users/Groups>{Selected User}/Maps/{Selected Map}>General An image has been successfully selected as the map CompleteView Administrator User Manual Page 162 Edit The edit tab allows the administrator to place cameras on the map, edit field-of-view cones and link to other maps. Start>All Programs>CompleteView>System Configuration>Configure Clients>Users/Groups>{Selected User}/Maps/{Selected Map}>Edit Map Object ‘Edit’ Tab As you mouse-over the camera a snapshot from the camera's field-of-view will be displayed. You can use this as a guide to placing the camera and editing the field of view cone (Image 1.1). CompleteView Administrator User Manual Page 163 Start>All Programs>CompleteView>System Configuration>Configure Clients>Users/Groups>{Selected User}/Maps/{Selected Map}>Edit Image from camera as is displayed upon mouse-over Camera placement on the map is controlled by drag and drop. Simply left click on a camera and drag it to the desired spot on the map. A default field-of-view cone will be displayed (Image 1.2). Start>All Programs>CompleteView>System Configuration>Configure Clients>Users/Groups>{Selected User}/Maps/{Selected Map}>Edit Camera has been dropped on the map, default FOV cone is displayed CompleteView Administrator User Manual Page 164 As you mouse over areas of the cone controls will be displayed to change the length of the cone, the angle and the direction. Start>All Programs>CompleteView>System Configuration>Configure Clients>Users/Groups>{Selected User}/Maps/{Selected Map}>Edit Camera has been dropped on the map, default FOV cone is displayed Use the same drag and drop method to place maps. Available maps are displayed under the 'Maps' heading as shown below. CompleteView Administrator User Manual Page 165 Appendices Appendix A: PTZ Protocol Drivers Analog Control Protocols (RS-422/485) Protocol Name AD ASCII Continuous AD ASCII Make/Break Canon VC-C4 Kalatel Digital Panasonic WVCS850 Conv Panasonic WVCS850 New Pelco ASCII Pelco D Pelco P Philips Biphase RVision SAE Samsung Sensormatic Sony EVI-D30/D31 Ultrak KD6 (Diamond) VCL Vicon Notes American Dynamics ASCII; Continuous commands American Dynamics ASCII; Start/Stop commands Digital PTZ control for fixed analog or IP cameras Panasonic Conventional Panasonic 'New' Used for controlling a CM6x00 video matrix switch. Should work with CM9760 as well. Sensormatic and American Dynamics cameras Sony Visca protocol Ultrak; formerly known as the 'Diamond' protocol CompleteView Administrator User Manual Page 166 IP-based Control Protocols Protocol Name ACTi HTTP IP ACTi Pelco D IP ACTi Pelco P IP Axis V2 IP Axis V2 IP (Firmware 4.40) Digital Mobotix IP Panasonic IP Sony P5 IP Sony Visca IP Toshiba IK-WB IP Toshiba IK-WB21A IP Notes ACTi IP camera driver ACTi IP camera driver ACTi IP camera driver Axis Communications V2 API Axis Communications V2 API; Use for camera/encoder firmware v4.40 and later Digital PTZ control for fixed analog or IP cameras Mobotix 360 degree IP cameras Panasonic Sony P5 All other Sony cameras Toshiba IK-WB01A/11A Toshiba IK-WB21A CompleteView Administrator User Manual Page 167 Appendix B: Generic IP Drivers CompleteView has been designed as a flexible platform for supporting IP imaging devices. Accordingly, a generic driver model is available that supports a basic level of functionality for most IP cameras. "Generic IP Camera" for MJPEG Repetitive HTTP requests for a JPEG image. Enter the path* for a JPEG image on the camera. Examples include "image", "jpeg", and "axiscgi/jpg/image.cgi?camera=2". "Generic IP MJPEG Streaming Camera" for MJPEG An HTTP request for streaming JPEG images. Enter the path* for an MJPEG stream on the camera. Examples include "image", "nphMotionJpeg", and "axiscgi/mjpg/video.cgi". "Generic IP RTSP Streaming Camera" for MPEG-4 RTSP control of MPEG-4 video over RTP, both tunneled through HTTP. Enter the path* for an MPEG-4 stream on the camera. "Generic RTSP/UDP" for MPEG-4 and H.264 RTSP control of MPEG-4 and H.264 video over RTP over UDP. Enter the path* for an MPEG-4 or H.264 stream on the camera. Examples include "video" and "stream1". Note: *A URL path follows the domain name (and optional port number) and precedes the query string. For example, in the URL, "http://192.168.1.100:80/image?speed=10", "image" is the path. However, CompleteView’s use of "path" includes everything after the domain name (and optional port number), which also includes the query string, if present. Therefore, from the example URL, one may enter "image?speed=10" as the path. If one does not enter the path beginning with a slash character ("/"), as in our example, CompleteView™ provides one. For those rare cases where the camera does not allow a path, enter a single slash character instead of leaving the path field blank. CompleteView Administrator User Manual Page 168 Appendix C. Active Directory® Connector C1. Overview This appendix assumes that you already have a live Active Directory implementation on your network and that you are familiar with the concepts, terms and tools surrounding it. Key Benefits of Integration with AD (Enterprise feature) 1. Active Directory can be leveraged for resolving issues related to the management of multiple passwords and accounts and greatly alleviates the account administration burden of the IT staff. 2. End-users in Windows environments typically already employ Active Directory for their Windows login, thus options for achieving reduced or single sign-on are expanded. 3. Authentication against a central directory such as Active Directory allows end-users to have only one password to remember or change, eliminating the downtime and lost productivity associated with maintaining multiple passwords. 4. With end-users employing only the Active Directory password, administrators’ account management tasks are streamlined and they realize a dramatic reduction in Help Desk calls, as end-users no longer require them to perform password resets for forgotten passwords. 5. Coordinating disparate password policies is no longer an issue for administrators as Active Directory controls password quality, expiration, etc. 6. Authentication redirection to Active Directory provides strength and flexibility for optimizing compliance related activities, such as enforcing password policies that require passwords to be strong and changed regularly. Prerequisites The following conditions must be met for each video server on which you wish to enable the AD connector. 1. The computer must be a member of the domain that you have configured the AD connector for. 2. An Enterprise feature key must be installed. Limitations The following limitations exist in the current implementation of the AD connector. 1. Dynamic selection of domains is unavailable. 2. Supports only User and User Group objects. Implementation • Performs dynamic authentication of users against the configured AD domain. • Enumerates a user's group membership within the configured AD domain. • Access control remains within CompleteView. • The Active Directory database schema is not extended. CompleteView Administrator User Manual Page 169 C2. Dynamic User Authentication User logs in as John. The Server asks AD to authenticate John. John fails AD authentication. Unsuccessful Authentication User logs in as John. The Server asks AD to authenticate John. John passes AD authentication; user group membership is enumerated. Successful Authentication CompleteView Administrator User Manual Page 170 C3. CompleteView Config Server When the AD Connector for the Config Server has been enabled, dynamic authentication against AD is performed as users’ login to the CompleteView Client application. User credentials pass through the Config Server to each CompleteView Server that the user attempts to access. John’s effective views. Unsuccessful Authentication John’s views are configured and stored in the Config Server. John inherits two view layouts from the Video Operators user group and one from the John user object. John’s effective views. Successful Authentication CompleteView Administrator User Manual Page 171 C4. CompleteView Server When the AD Connector for the Config Server has been enabled, dynamic authentication against AD is performed as users’ login to the CompleteView Client application. User credentials pass through the Config Server to each CompleteView Server that the user attempts to access. John’s effective camera permissions. Unsuccessful Authentication Camera permissions are configured in the CompleteView Server. John inherits live view permission from the Video Operators and Video Supervisors user groups, playback permission from the Video Supervisors user group, and a PTZ priority level of '1' from the John user object. John’s effective camera permissions. Successful Authentication CompleteView Administrator User Manual Page 172 Appendix D. Users and User Groups User objects are useful in that you can assign permissions for camera live viewing, playback and PTZ control on a per-user basis. If you have more than one or two users, however, this can quickly become unwieldy to manage. Enter the User Group object. User Groups are treated exactly the same as User objects when it comes to assigning permissions, but they have one very significant difference - User Groups are containers for user objects. In practice, this means that you only need to assign permissions once to a user group. When you make a user object a member of the user group, the user object inherits the permissions granted to the group. If a user object is a member of more than a one group, additive inheritance comes into play. With additive inheritance, the user gains permissions from all of the groups that he or she belongs to. For example, assume that John is a member of both the Operators and Supervisors user groups. Operators have been configured to allow live viewing only on the camera named Parking Lot PTZ. The user group Supervisors, however, is configured to allow playback and PTZ control of Parking Lot PTZ. Since John is a member of both groups, he inherits the right to live view from the Operators group, and the right to playback and PTZ control from the Supervisors group. The process of rights inheritance greatly reduces the amount of administration required to control access to resources. For example, if you need to grant or revoke access to a particular function on a camera for a large number of users, then using a user group object makes both the initial configuration and ongoing administration a much simpler process. Instead of repeatedly configuring multiple user objects, you would only need to configure a single object – the user group. Once you save the configuration, the change will automatically be applied to each user that is a member of the group. If you use user groups to grant permissions, occasionally you will need to make an exception for a single user. Let's go back to John. As a member of Supervisors and Operators, he gained full access to Parking Lot PTZ. He also inherited the PTZ Priority Level of '5' granted to the Supervisors user group. It turns out, however, that John requires the ability to take over control of the PTZ regardless of who is currently accessing it. This is done by increasing his PTZ priority level. We can't increase the PTZ priority level of the Supervisors user group, as this would elevate the priority level for every member of the group. The solution is to create a user object named John and explicitly grant him a PTZ priority level of 1. John’s effective permissions are as follows: Permission Sources for John on the camera named Parking Lot PTZ • Operators (User Group) - Live View • Supervisors (User Group) - Playback; PTZ Control, PTZ Priority Level 5 • John (User Object) - PTZ Priority Level 1 CompleteView Administrator User Manual Page 173 Since inheritance is additive in nature, we simply add all of his permissions together to determine what his effective permissions are. When there are two or more permissions regarding the same function, the user inherits the highest level. John's Effective Permissions to Parking Lot PTZ • Live View • Playback • PTZ Control • PTZ Priority Level 1 (replaces the lower priority level of 5 inherited from the Supervisors user group) CompleteView Administrator User Manual Page 174 Appendix E: RS2 Access Control Integration The CompleteView RS2 Access IT! Integration provides live video and playback of recordings integrated to the RS2 Access Control interface. To setup the integration install the "CV-RS2.exe" file, located on the CompleteView CD under the "setup" folder, on computer running RS2 software. Follow the setup instructions provided in the RS2 Universal DVR Viewer setup documentation. Working with Live and Recorded Video Live video Recorded video playback Live video will be displayed in a pop up window at 640x480 (VGA) resolution. The Aspect button allows for toggling between 4x3 and 16x9 aspect ratio video. Recorded video will be displayed in a pop up window at 640x480 resolution. Play - Plays the current video clip at 1x speed Stop - Stops the current video clip Skip to beginning - move to the beginning of the video clip Skip to end - move to the end of the video clip Step forward – moves forward one frame. Step back – moves back one frame. CompleteView Administrator User Manual Page 175 PTZ Control Buttons: Each button will move the camera incrementally in the direction clicked. Auto Focus: enables automatic focus function on the selected camera. This function does not apply to fixed cameras configured as digital PTZ cameras. Auto Iris: Enables automatic iris control on the selected camera. This function does not apply to fixed cameras configured as digital PTZ cameras. Zoom: Incrementally changes the zoom level of the camera. Focus: Manually adjusts the focus of the selected camera incrementally. This function does not apply to fixed cameras configured as digital PTZ cameras. Iris: Manually adjusts the iris of the selected camera incrementally. This function does not apply to fixed cameras configured as digital PTZ cameras. Preset: Changes the preset number to be controlled. Use the Show and Set buttons to control the preset number selected. Show: Moves the camera to the selected preset number. Set: Sets the current camera position to the selected preset number. Tour: Enables an administrator-configured preset tour (if configured). Monitor: When a PTZ camera is controlled through a Pelco ACSII compatible matrix switch this sets the monitor associated with the camera. This function does not apply to fixed cameras configured as digital PTZ cameras. PTZ Speed: Sets the speed of the camera movement. CompleteView Administrator User Manual Page 176 Appendix F: Lenel OnGuard Integration The CompleteView - OnGuard Integration provides live video to OnGuard Access Control for the purpose of configuring video associated alarms in OnGuard. An eLearning module can contacting [email protected] be obtained to demonstrate the integration step by To setup the integration: CompleteView 1. For each CompleteView Server that is employed, complete the following 2. CompleteView must be installed and operational with cameras. a. A user, (suggest: username Lenel) with administrator permissions must be created in CompleteView. b. The user must be enabled for the CompleteView API 1. Select the Users/Groups Advanced Tab. 2. Check both boxes to enable the API c. Save the Server Configuration OnGuard 1. OnGuard must be installed and operational and ready to receive video inputs from CompleteView. 2. Go to www.lenel.com and log into the website a. Select Support b. Select Downloads c. Select Add-ons d. Locate, download and install: Salient Systems CompleteView Add-on into each OnGuard Server to be employed with CompleteView. CompleteView Administrator User Manual Page 177 3. Open and login to OnGuard System Administration a. Select Video b. Select Digital Video c. Select the Video Recorder Tab and then select Add. Entries Name Enter the name of the CompleteView Server. This should be the CV server Friendly Name. Video Recorder: Type the pull-down menu and select Salient Systems CompleteView. Workstation Name Enter the workstation name Use IP address of Video Recorder Enter the CompleteView server’s IP address. When the IP address is entered, the Username and Password block will appear. Username Enter the CompleteView username (Lenel) created in CompleteView and for which the API was enabled. Password Enter the password that is associated with user Lenel. World Time Zone Use the pull-down menu to select a time zone and if appropriate select daylight savings. Adding Video a. When the video recorder entries are complete, remain in Digital Video CompleteView Administrator User Manual Page 178 and select the OnGuard Camera Tab. b. Select Display Video. c. Select Add d. Enter the name of the CompleteView camera name and CompleteView channel number in the boxes as shown and select OK. Video will display. CompleteView Administrator User Manual Page 179 Appendix G: SureView Immix Integration The SureView Immix integration allows video from CompleteView to be displayed on an alarm event in the Immix system. The integration allows for display of live video, control of PTZ cameras, the display of recorded video as well as notification of camera status and motion events detected by integrated CompleteView servers. Note: Prior to configuring the SureView Immix integration settings in CompleteView, perform the appropriate integration configuration in Immix. Please refer to the SureView Immix documentation for configuration instructions. To complete the SureView Immix & CompleteView integration configuration, open CompleteView’s Server Configuration and perform the following steps. 1. Click the server object from the tree view. 2. Select the ‘Integrations’ configuration tab. 3. Enter the appropriate settings under the ‘SureView Immix’ configuration section. a. Check the ‘Enabled’ checkbox to enable the integration. b. ‘SMTP Server’ should be set to the IP address of the SureView Immix server. Immix received notification from CompleteView via SMTP. c. ‘SMTP Port’ should be set the SMTP port configured for the SureView Immix server. d. ‘Immix Device Number’ is an identification number Immix uses to identify messages received from the CompleteView server being configured. Enter the number that corresponds to the Device Number configured in Immix for the target CompleteView Server. CompleteView Administrator User Manual Page 180 Appendix H: Bold Manitou Integration CompleteView’s integration with Bold Manitou allows for the display of live video, recordings, PTZ camera control and is capable of receiving notification of motion events as well as camera sync loss from integrated CompleteView servers. Note: Prior to configuring the Bold Manitou integration settings in CompleteView, perform the appropriate integration configuration in Manitou. Please refer to the Bold Manitou documentation for configuration instructions. Note: The CompleteView user account used for the Bold Manitou system to access CompleteView must be configured for API Access. API Access can be enabled on the ‘Advanced’ tab of the target CompleteView user account. To complete the Bold Manitou & CompleteView integration configuration, open CompleteView’s Server Configuration and perform the following steps. 1. Click the server object from the tree view. 2. Select the ‘Integrations’ configuration tab. 3. Enter the appropriate settings under the ‘Bold Manitou’ configuration section. a. Check the ‘Enabled’ checkbox to enable the integration. b. ‘Address’ should be configured as the address of the Manitou server which will receive notification of CompleteView events. c. ‘Port’ should be set the port configured on the Manitou server for receiving event alerts. d. ‘Heartbeat Interval’ is the time between ‘Heartbeat’ messages sent from CompleteView to Manitou. If Manitou stops receiving Heartbeat messages it will report the corresponding CompleteView server is down. CompleteView Administrator User Manual Page 181 Working with Live and Recorded Video Toggles to Live View mode if already in Playback mode. Toggles to Playback mode if already in Live View mode. Button controls allow for Pan and Tilt control of mechanical or digital Pan Tilt and Zoon cameras. Turns on auto focus for mechanical PTZ cameras. Turns on auto iris control for mechanical PTZ cameras. Controls Zoom for mechanical or digital Pan Tilt and Zoom cameras. Provides manual control of the focus for mechanical Pan Tilt and Zoom cameras. Provides manual control of the iris for mechanical Pan Tilt and Zoom cameras. CompleteView Administrator User Manual Page 182 Controls the Pen Tilt and Zoom movement speed of mechanical and digital PTZ cameras. Set or show preset positions by selecting the preset number and using the corresponding button. Start Date is used from the Playback mode to set the date to retrieve recordings from. Start Time is used from the Playback mode to set the time to retrieve recordings from. End Date is used from the Playback mode to set the date to retrieve recordings to. End Time is used from the Playback mode to set the time to retrieve recordings to. Used from Playback mode to control the playback speed. After filling in Start Date, Start Time, End Date and End Time use the Begin Playback button to retrieve the recordings form CompleteView and start playback of the clips. Pauses playback and steps back one frame. Toggles between pause and pay when recordings are being played back. Pauses playback and steps forward one frame. CompleteView Administrator User Manual Page 183 Additional Resources Visit the Salient website, www.salientsys.com, for additional support and CompleteView training: • Manuals & Documentation (www.salientsys.com/support/manuals-documentationx/) – Includes Administrator’s Manual, Client User Manuals (including Video, Alarm and Web clients), How To Guides and Tips. • Online Tech Support (www.salientsys.com/elearning) – Get quick access to online tech support modules that cover the most frequently asked product questions, such as “Adding and Moving IP Camera Licenses.” • Salient University eLearning (http://salientsys.latitudelearning.com) – A convenient way to get trained on CompleteView. Register online for access to interactive, user training modules covering the Video, Alarm, Mapping and Web clients. • Classroom Training (www.salientsys.com/training) – Traditional, classroom training is available throughout the United States. Please visit the Salient website for training calendar, agenda and registration. Salient Systems 10801 N. MoPac Expy. Building 3, Suite 700 Austin, TX 78759 512.617.4800 512.617.4801 Fax www.salientsys.com ©2012 Salient Systems Corporation. Company and product names mentioned are registered trademarks of their respective owners. CompleteView Administrator User Manual Page 184