1
EVault Software
Agent 6.5 for Microsoft Windows
User’s Guide
March 2009
This document describes how to install and use the version 6.5 Agent for Microsoft Windows, for
Windows and Web CentralControl Backups and Restores.
Agent 6.5 User’s Guide for Microsoft Windows
Contents
1.
INTRODUCTION AND INSTALLATION .................................................. 7
1.1
What’s New...................................................................................................... 8
1.1.1
Agent 64-bit ................................................................................................ 10
1.2
Agent for Windows Installation..................................................................... 11
1.2.1
System Requirements .................................................................................... 11
1.2.1.1
Privilege Requirements .............................................................................12
1.2.1.2
Configuration File locks............................................................................12
1.2.1.3
Open Files, File Lock Management, and Anti Virus Programs ........................13
1.2.1.4
Default Installation Directories..................................................................13
1.2.2
Installation Procedures ................................................................................... 14
1.2.2.1
Plug-Ins...................................................................................................14
1.2.2.2
Requirements..........................................................................................15
1.2.2.3
Running the Self-extracting Install Kit.........................................................15
1.2.2.4
System Privileges for EFS ..........................................................................17
1.2.3
Setup Maintenance....................................................................................... 18
1.2.3.1
Installation Languages ...............................................................................18
1.2.3.2
Modify ....................................................................................................19
1.2.3.3
Repair ....................................................................................................20
1.2.3.4
Uninstalling .............................................................................................21
1.2.3.5
Upgrading from earlier versions ................................................................22
1.2.4
MAPI Upgrades............................................................................................ 25
1.2.5
Silent Install................................................................................................. 26
1.2.5.1
Running the Silent Installation....................................................................29
1.3
How the Windows Agent Works .................................................................. 30
1.3.1
Agent Software ............................................................................................ 31
1.3.1.1
MS Exchange Plug-In.................................................................................31
1.3.1.2
Oracle Plug-In .........................................................................................31
1.3.1.3
MS SQL Server Plug-In .............................................................................32
1.3.1.4
Cluster Support Plug-In ............................................................................32
1.3.1.5
MS SharePoint 2003/2007 Plug-In ..............................................................32
1.3.2
CentralControl Software ................................................................................. 33
1.3.3
Director Software ......................................................................................... 33
1.3.4
On Line Helps.............................................................................................. 33
1.3.5
Overview of Product Set ................................................................................. 34
1.3.6
Overview of Licensing .................................................................................... 35
1.4
Agent/CentralControl Configuration Overview ........................................... 38
1.4.1
Agent Assistant Overview................................................................................ 39
1.4.1.1
Help, Show Status and Launch Web CentralControl menu choices...............40
2.
AGENT CONFIGURATION ....................................................................... 42
2.1
Introduction.................................................................................................... 42
2.2
Create an Agent Profile ................................................................................. 43
2.2.1
Agent Groups............................................................................................... 45
2.3
Save the Workspace ...................................................................................... 46
2.3.1
Options ...................................................................................................... 48
Preface
Page 2 of 121
Agent 6.5 User’s Guide for Microsoft Windows
2.4
Configure the Vault – Agent Configuration .................................................. 49
2.4.1
Configure a New Vault Connection ................................................................... 50
2.4.2
Agent Configuration Tabs ............................................................................... 52
2.4.3
Re-Registration............................................................................................. 54
2.4.4
Cluster Support ............................................................................................ 55
2.4.4.1
Virtual Server Agents ...............................................................................56
2.4.4.2
Cluster Support Plug-In ............................................................................57
2.5
Create a Job.................................................................................................... 59
2.5.1
Adding Files and Directories to a new Backup Job................................................ 61
2.5.1.1
Wildcards in File Names and Directories ...................................................63
2.5.1.2
Wildcards in Directory Paths ....................................................................64
2.5.1.3
Wildcard Rules for Directories .................................................................65
2.5.2
Adding/Removing a File or Directory with an existing Backup Job ............................ 66
2.5.3
System State and System Files......................................................................... 67
2.5.4
Other Sources.............................................................................................. 68
2.5.5
Performance ................................................................................................ 69
2.6
Schedule the Job............................................................................................. 70
3.
PERFORMING BACKUPS........................................................................... 72
3.1
Running an ad hoc Backup ............................................................................. 73
3.2
Check the Backup results .............................................................................. 75
3.2.1
Process Information - Backup .......................................................................... 75
3.2.2
Safeset Properties ......................................................................................... 76
3.2.3
Log Files ..................................................................................................... 76
3.2.4
Email Notification ......................................................................................... 77
4.
PERFORMING RESTORES ......................................................................... 79
4.1
Restoring a Safeset......................................................................................... 79
4.1.1
File Restore Handling..................................................................................... 81
4.1.1.1
Original or Alternate Location ..................................................................81
4.1.1.2
Subdirectories .........................................................................................81
4.1.1.3
File Overwrite Options ............................................................................81
4.1.1.4
Overwrite if locked..................................................................................81
4.1.1.5
Restore all streams or only data streams....................................................82
4.1.1.6
Use all available bandwidth........................................................................82
4.1.2
Restoring from CD or DVD............................................................................. 82
4.1.3
Process Information - Restore .......................................................................... 83
4.1.4
Log Files for Restore Jobs................................................................................ 83
4.2
Cross-Computer Restores ............................................................................. 84
4.3
5.
Bare-metal Restore........................................................................................ 85
APPENDIX ................................................................................................... 86
5.1
Examples ........................................................................................................ 86
5.1.1
Example 1: Creating a Backup Job ................................................................... 86
5.1.2
Example 2: Running an ad hoc Backup ............................................................. 88
5.1.3
Example 3: Scheduling a Backup Job ................................................................ 89
5.1.4
Example 4: Check the Backup Results .............................................................. 90
5.1.5
Example 5: Running a Restore Job ................................................................... 90
5.1.6
Example 6: Cross Computer Restore ................................................................ 91
Preface
Page 3 of 121
Agent 6.5 User’s Guide for Microsoft Windows
5.1.7
Example 7: Bare-metal Disaster Recovery.......................................................... 92
5.2
Windows System Recovery ........................................................................... 94
5.2.1
Hardware Requirements ................................................................................ 94
5.2.2
Software Requirements .................................................................................. 94
5.2.3
Windows Restoration Steps ............................................................................ 95
5.2.4
Windows Recovery Problems........................................................................... 98
5.2.5
Recovery Verification for Windows.................................................................... 98
5.2.6
Active Directory Restores................................................................................ 99
5.2.6.1
Troubleshooting: .....................................................................................99
5.3
Cluster Awareness – Cluster Plug-In........................................................... 100
5.3.1
Main Features of the Cluster Plug-In ............................................................... 100
5.3.2
Installation Setup Recommendations............................................................... 101
5.4
Command Line Interface (CLI) ................................................................... 102
5.4.1
VV.exe CLI Command Mode ......................................................................... 102
5.4.1.1
General Command Options....................................................................103
5.4.1.2
Backup Command Options.....................................................................104
5.4.1.3
Restore Command Options....................................................................106
5.4.1.4
Sync Command Options.........................................................................107
5.4.1.5
Inventory Command Options .................................................................107
5.4.1.6
List Command Options ..........................................................................107
5.4.1.7
Verify Command Options.......................................................................107
5.4.1.8
Forcereseed Option...............................................................................108
5.4.2
CLI Command Syntax .................................................................................. 109
5.4.2.1
Using File names in Command Strings ......................................................109
5.4.3
CLI File Formats ......................................................................................... 110
5.4.3.1
Directory Layout and Configuration Files .................................................110
5.4.3.2
Configuration Files.................................................................................110
5.4.3.3
Settings that are Global to all Jobs ...........................................................111
5.4.3.4
Settings that are usually Job specific .........................................................111
5.4.3.5
Miscellaneous Settings ............................................................................112
5.4.4
Scheduling Backups..................................................................................... 113
5.4.4.1
How to Schedule Backups under Windows ..............................................113
5.4.4.2
How to use the AT Service under Windows ............................................114
5.4.4.3
Entries Scheduled Simultaneously ............................................................114
5.4.4.4
VVAgent CLI Command Mode................................................................115
6.
INDEX ........................................................................................................ 116
Preface
Page 4 of 121
Agent 6.5 User’s Guide for Microsoft Windows
Table of Figures
Figure 1. - 64-bit Agent Status..............................................................................................10
Figure 2. - MAPI Upgrade screen ..........................................................................................25
Figure 3. - Overview of Product Set......................................................................................34
Figure 4. - License Behavior for Agents .................................................................................36
Figure 5. - Create an Agent Profile........................................................................................43
Figure 6. - Agent Properties.................................................................................................43
Figure 7. - Check Agent Status. ............................................................................................44
Figure 8. - Save the Workspace. ...........................................................................................46
Figure 9. - Set Workspace Password.....................................................................................47
Figure 10. - Workspace Options ..........................................................................................48
Figure 11. - Start Agent Configuration...................................................................................49
Figure 12. - Vault Configuration Wizard ................................................................................50
Figure 13. - Can’t delete a Vault connection with jobs ............................................................51
Figure 14. - Agent Configuration tabs....................................................................................52
Figure 15. - Cluster Support Plug-In......................................................................................57
Figure 16. - Cluster Virtual Servers – Cluster Support Plug-In License......................................58
Figure 17. - Virtual Server – Agent Icon ................................................................................58
Figure 18. - Create a Job......................................................................................................59
Figure 19. - Backup Source and Options................................................................................61
Figure 20. - Include/Exclude Directories and Files...................................................................62
Figure 21. - Confirm Include ................................................................................................63
Figure 22. - Wildcard example .............................................................................................64
Figure 23. - Source Tab in Job Properties. .............................................................................66
Figure 24. - System State and System Files .............................................................................67
Figure 25. - Schedule the Job. ...............................................................................................70
Figure 26. - Ad hoc Backups.................................................................................................73
Figure 27. - Backup Progress................................................................................................74
Figure 28. - Backup Completed ............................................................................................74
Figure 29. - Checking Backup results.....................................................................................75
Figure 30. - Safeset Properties..............................................................................................76
Figure 31. - Email Notifications.............................................................................................77
Figure 32. - Starting a Restore. .............................................................................................79
Figure 33. - Restore in Progress. ..........................................................................................83
Figure 34. - Log Files for Restore Jobs...................................................................................83
Figure 35. - Restoring from another computer.......................................................................84
Preface
Page 5 of 121
Agent 6.5 User’s Guide for Microsoft Windows
Revision: This manual has been updated for Version 6.5.
Software Version: 6.50 (March, 2009)
© 1997-2009 i365 Inc. All rights reserved.
i365, A Seagate Company, makes no representations or warranties with respect to the contents hereof and
specifically disclaims any implied warranties of merchantability or fitness for any particular purpose.
Furthermore, i365 reserves the right to revise this publication and to make changes from time to time in the
content hereof without obligation of i365 to notify any person of such revision of changes. All companies,
names and data used in examples herein are fictitious unless otherwise noted.
No part of this document may be reproduced, transmitted, transcribed, stored in a retrieval System or
translated into any language including computer language, in any form or by any means electronic, mechanic,
magnetic, optical, chemical or otherwise without prior written permission of:
i365, A Seagate Company.
c/o Corporation Trust Center
1209 Orange Street
Wilmington, New Castle
Delaware 19801
www.i365.com
EVault, EVault Software, EVault SaaS, and EVault DeltaPro, are registered trademarks of i365, A Seagate
Company. All other products or company names mentioned in this document are trademarks or registered
trademarks of their respective owners.
Acknowledgements: Two encryption methods, DES and TripleDES, include cryptographic software written by
Eric Young. The Windows versions of these algorithms also include software written by Tim Hudson. Bruce
Schneier designed Blowfish encryption.
“Part of the software embedded in this product is gSOAP software. Portions created by gSOAP are Copyright I
2001-2006 Robert A. van Engelen, Genivia inc. All Rights Reserved. THE SOFTWARE IN THIS PRODUCT
WAS IN PART PROVIDED BY GENIVIA INC AND ANY EXPRESS OR IMPLIED WARRANTIES,
INCLUDING, BUT NOT LIMITED TO, THE IMPLIED WARRANTIES OF MERCHANTABILITY AND FITNESS
FOR A PARTICULAR PURPOSE ARE DISCLAIMED. IN NO EVENT SHALL THE AUTHOR BE LIABLE FOR
ANY DIRECT, INDIRECT, INCIDENTAL, SPECIAL, EXEMPLARY, OR CONSEQUENTIAL DAMAGES
(INCLUDING, BUT NOT LIMITED TO, PROCUREMENT OF SUBSTITUTE GOODS OR SERVICES; LOSS
OF USE, DATA, OR PROFITS; OR BUSINESS INTERRUPTION) HOWEVER CAUSED AND ON ANY
THEORY OF LIABILITY, WHETHER IN CONTRACT, STRICT LIABILITY, OR TORT (INCLUDING
NEGLIGENCE OR OTHERWISE) ARISING IN ANY WAY OUT OF THE USE OF THIS SOFTWARE, EVEN IF
ADVISED OF THE POSSIBILITY OF SUCH DAMAGE.”
The EVault Software Agent, EVault Software CentralControl, and EVault Software Director applications
(version 4 and above) now have the added encryption option of 128bit AES (Advanced Encryption Standard).
Advanced Encryption Standard algorithm (named Rijndael, pronounced “Rain Doll”) was developed by
cryptographers Dr. Joan Daemen and Dr. Vincent Rijmen. This algorithm was chosen by the National Institute
of Standards and Technology (NIST) of the U.S. Department of Commerce to be the new Federal Information
Processing Standard (FIPS). AES is not available when connecting to a Vault lower than version 4.1.
See:http://csrc.nist.gov/encryption/aes/round2/r2report.pdf for details.
The EVault Software Agent and EVault Software Director applications (version 4 and above) also have the
added security feature of an over the wire encryption method. Over the wire encryption is not available when
connecting to a Vault lower than version 4.1.
Preface
Page 6 of 121
Agent 6.5 User’s Guide for Microsoft Windows
1.
Introduction and Installation
This User’s Guide is intended for the System Administrator responsible for ensuring that
their Users’ computers are properly configured to be backed up, and that Backups and
Restores can be run successfully. The computer Users who use the Servers are not
usually aware that their Systems are being backed up.
Different Servers may require different files and directories backed up, on different
schedules, depending on what data needs to be secured. Some may require backing up
more frequently, depending on how the data changes (its volatility).
This Guide will show the Administrator how to install the Agent, select data to be backed
up, configure the Agents to do that, and how to schedule the backup times. Restores are
also covered in detail.
The “Windows CentralControl Operations Guide” manual covers all the details about
Windows CentralControl and Agents, from the point of view of “how to operate” the
program.
Note that BUAgents running under Web CentralControl are described separately in the
Web CentralControl documentation. The Agent installation uses the same program for
installation for Windows CentralControl or Web CentralControl.
Introduction and Installation
Page 7 of 121
Agent 6.5 User’s Guide for Microsoft Windows
1.1
What’s New
New Features in this Release:
1. This version supports Windows Server 2008. (System State and Event Log
backup/restores for Agents on Windows Server 2008 are not supported.) Bare
Metal Restore is a new Backup option for ESR (EVault System Restore).
2. This release only supports backups and restores with versions 5.53 and 6.0x of
the Director. It supports version 6.5 of Windows CentralControl (32-bit) and
version 6.5 of Web CentralControl. The 32-bit and 64-bit Agent installation kits
offer the same functionality as the earlier kits, but now they are MSI based.
3. The Windows installation kit allows the user to choose an account other than
LocalSystem, under which to run the Server Agent’s VVAgent services. Two
separate options are provided. The first option lets the user specify an existing
account (with password) and the second lets the kit automatically generate the
user account and password.
4. The Agent provides support for vaults configured for LVR (Logical Vault
Recovery: one-to-one, and many-to-one).
5. The Agent can re-create a missing delta file. The Agent includes additional
information with the backup that allows it to re-build the file, partially or wholly.
This delta recovery only occurs with Director 6.0+.
6. Bandwidth Throttling: The user now has the opportunity to either let the system
use as much bandwidth as it can get for backups and restores, or “throttle back”
and restrict the usage by a percentage (i.e., in kb/sec), and/or time of day, and
days of the week. When two or more jobs are run simultaneously, they will share
an equal portion of the available bandwidth. Backup and Restore jobs are
weighted equally in terms of allocated bandwidth. Bandwidth sharing works
regardless of how the job is created (i.e.: ad hoc, scheduled, or command line).
7. Performance improvements in backups and restores with multi threading features
on multi CPU systems.
8. Advanced Filtering to improve backup performance and usability.
9. Longer Job name support. The Agent provides support for very long path names
for both file system and Plug-In data sources. The maximum path length
supported by the Agent is 32,000 characters (older Agents supported only 511
characters). The Agent will only enable its support for long path names when
connected to Director 6.0+. For earlier Vault versions, or when backing up to
local media, the Agent only supports 511 character path names.
10. For Progress Monitoring during backup or restore, the path name displayed is
limited to 511 characters. A path name that exceeds 511 characters will be
shortened by removing characters in the middle of the path. Maximum path
length is only enforced during backup. As a result, the Agent will allow the UI to
configure a job with selections that are up to the maximum length supported
(32,000 characters). When backing up to either local media or an older Director,
the Agent will filter out these longer path selections. Windows CentralControl will
Introduction and Installation
Page 8 of 121
Agent 6.5 User’s Guide for Microsoft Windows
only support browsing of path lengths up to the buffer size limit of (approximately
8,000 characters). When this limit is reached it will show a dialog box with
“Selection spec is too long”, preventing the user from browsing any further. Web
CentralControl does not have this limitation.
11. Browse and back up network resources via UNC paths (for Windows Agents
only). The UNC share will be the root for the browse, instead of a device letter.
12. Oracle Plug-In for Windows has functionality similar to that of the existing Oracle
Plug-In for Solaris (non-RMAN).
13. Cross catalog searching. Users can search through all available catalogs when
restoring files, without switching Restore Wizard screens.
14. Restore from another computer. The User can restore from another computer
when the job name is identical on both computers.
15. The Agent supports symbolic and hard links on Vista and Server 2008. The
Agent can back up and restore the symbolic link itself, but not the target. If the
symbolic link is a directory, the Agent will not traverse the target path. Handling
hard links allows the Agent to process a single instance of all selected hard
linked files. That is, the backup size will be smaller, and the backup process will
be faster.
16. SharePoint 2003/2007 Plug-In. This version of the MS SharePoint Server Plug-In
performs backups and restores of SharePoint Portal 2003, WSS 3.0 and Server
2007 on Windows 2003/2008 Servers. The SharePoint Plug-In enables brick
level backups and restores of SharePoint items such as webs, lists, libraries,
folders and documents.
17. When connected to a version 5.5+ Director, the Agent supports Director based
licensing of these products/Plug-Ins: MS SQL Plug-In; MS Exchange DR Plug-In;
MS Exchange MAPI Plug-In; Oracle Plug-In (Windows and Solaris); Cluster PlugIn; and OTM.
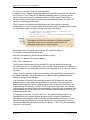
Note: If you are configuring a 5.5x Vault (see Section 2.4 in this manual) the
OTM License field, and the Validate Key field are shown as available to be
changed, and used (that is, not grayed out). You cannot modify these with a 5.5x
Vault, and the Validate Key is not applicable, but you can use them on an earlier
Vault.
18. Force Reseed. There is a new command line only option to force a re-seed, in
case of a failure with delta recreation in rebuilding delta files. Delta recreation
allows the user to rebuild a DTA file by using job synchronization. See section
5.4.1.8 of this guide.
See the “Windows CentralControl Operations Guide”, the “Web CentralControl User
Guide”, or the “Web CentralControl Administrator Guide” (or their Helps) for more details
on these features.
Introduction and Installation
Page 9 of 121
Agent 6.5 User’s Guide for Microsoft Windows
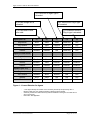
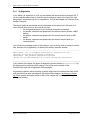
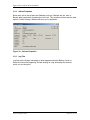
1.1.1
Agent 64-bit
This manual covers both 32-bit and 64-bit Agents.
A 64-bit Agent can only be installed on a supported 64-bit Windows Server platform. See the
Agent-Win 64 Release Note for a list of those supported platforms. If you try to install it on a
non-supported platform, you will get an error message:
“This installation package is not supported by this processor type. Contact your product
vendor.”
The 64-bit Agent currently supports the following Plug-Ins:
•
MS SQL Server Plug-In
•
MS Exchange Plug-In
•
MS SharePoint Plug-In
•
Cluster Plug-In
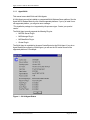
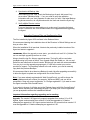
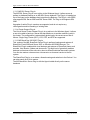
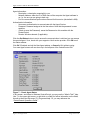
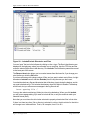
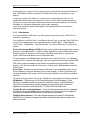
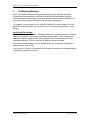
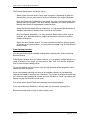
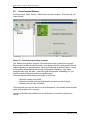
The 64-bit Agent is controlled by the same CentralControl as the 32-bit Agent. If you do an
Agent Status after configuring a 64-bit Agent, you will see the OS version as one of the
supported platforms. For example:
Figure 1. - 64-bit Agent Status
Introduction and Installation
Page 10 of 121
Agent 6.5 User’s Guide for Microsoft Windows
1.2
Agent for Windows Installation
This chapter describes the steps required to install the Agent on a supported Windows
machine. See the Release Notes for all supported versions.
Note: To communicate with, configure and manage the VVAgent, the Windows
CentralControl program must be installed on a supported Windows System.
Note: The Agent can use alternate vaults, in a Vault Replication scenario. To do this the
Agent has a list of alternate vaults that is created and overwritten whenever the Agent
connects to a Vault. This list (file) has an .ALT extension, and is kept in the installation
folder.
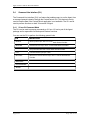
1.2.1 System Requirements
(See the “Shipping Products Chart” for the most current version requirements. For 64-bit
requirements, see the Release Notes.)
Hardware
CPU and RAM – Should meet the basic requirement of your
Operating System, as prescribed by Microsoft.
HDD – at least 100 MB of available disk space.
Software
OS – 32-bit editions of the following:
2000 Server & Advanced Server (SP4) / XP Professional (SP2) /
2003 Server (Standard, Enterprise, and Small Business) (SP1) and
2003 Server Standard & Enterprise R2 x86
Vista Home Basic, Home Premium, Business, Ultimate, and
Enterprise x86
Server 2008 (Standard, Enterprise, and Datacenter) x86
OS – 64-bit editions of the following:
XP Professional (SP2)
Vista Home Basic, Home Premium, Business, Ultimate,
Enterprise
2003 Server Standard & Enterprise (SP2), R2 (SP2)
Server 2008 (Standard, Enterprise, and Datacenter)
Network – A TCP/IP stack (for communicating with the Vault
Director and CentralControl software).
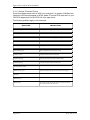
Optional Open File Software for the Windows Agent:
• Open Transaction Manager * - OTM 1.12.211 for
Windows (included in the installation kit).
OR …
• Open File Manager ** - OFM 10 (not included – available
separately).
*OTM is a product of Columbia Data Products. See the CentralControl Help files
or the CentralControl User’s Guide for configuration details.
**OFM is a product of EVault Software. See the CentralControl Help files or the
CentralControl User’s Guide for configuration details.
Introduction and Installation
Page 11 of 121
Agent 6.5 User’s Guide for Microsoft Windows
Note: The CentralControl GUI optimally requires the video setting of 16-bit graphics.
This setting is found in your Windows > Settings > Control Panel > Display
Properties > Settings.
1.2.1.1 Privilege Requirements
Installation
To install the Agent, Administrator or equivalent access is required for the target
machine.
Note: If you want to manage an Agent from both Windows CentralControl and Web
CentralControl, they must both be installed using the same service account user identities.
That is, “BUAgent” and “VVAgent” service accounts must be the same. If not, the BUAgent
will not be able to provide any status, or administration functions. The account under which
services are running is shown in VVAgent and BUAgent logs.
Functional
Three modes of operation of the Agent for Windows 2000 Server / 2003 Server / XP
Professional / Vista / Server 2008 are provided:
Ad-Hoc: Using the CentralControl application, the User can configure Backup and
Restore Jobs on an Agent. The specified User must have the “Backup Files and
Directories” privilege. The initial configuration requires these privileges.
Scheduled: Backup jobs can be configured to run in scheduled mode. Using the
CentralControl application, the User can schedule Backup and Restore Jobs on
an Agent. If the VVAGENT.EXE program is run as a System service logged in
under the System Account User, no special privileges are required to run
scheduled jobs.
CLI: Command Line Interface mode allows the User logged on to the System
console to execute Backups and Restores directly from the command line
interface, or in a batch file. Users must log on with an account that includes
“Backup Files and Directories” privilege. This privilege is enabled by default for
the Backup Operators and Administrators groups.
1.2.1.2 Configuration File locks
The directories where the Agent program files and configuration files are stored can be
locked down to prevent both reading and writing by non-privileged users.
The only user/groups with permission will be:
.\Administrators group
.\BackupOperators group
.\LocalSystem user
Previously, the configuration files were readable by all users. Locking the directory tree
down will prevent non-privileged user from reading sensitive information in the
configuration files, or run applications in those directories.
Introduction and Installation
Page 12 of 121
Agent 6.5 User’s Guide for Microsoft Windows
Of course, the Agent itself will still be able to perform its functions. Only users without
the proper permissions will be “locked out”.
1.2.1.3 Open Files, File Lock Management, and Anti Virus Programs
The system supports two optional file-lock management software utilities called Open
Transaction Manager (OTM) from Columbia Data Products and Open File Manager
(OFM) from EVault Software.
Note: Both OTM and OFM must NEVER be installed on the same System. Installing
both OTM and OFM is not recommended or supported. Other open file software
products are available.
Typically, OTM is used on small to medium sized servers, while OFM is used on large
servers.
OTM and OFM are intended to protect open files, such as user data files, and
databases. Installation and Agent directories should not be included in Agent backups.
Also, if using VBA, the Director WORK and RAID locations should be excluded from
scanning.
If you use an Anti Virus program, you should disable real time scanning on reads
(sometimes called “outgoing” on some AV products). Do not back up the AV directories
themselves.
Do not use any file-lock management utilities on Agent installation and application
directories, or AV directories.
Directories that contain the AV programs, and the Agent installation and application
programs can be re-installed, if the Agent system crashes. The operating system can
also be re-installed, but you should also be backing up the System State.
1.2.1.4 Default Installation Directories
By default the installation will put the files for fresh installs in directories called:
C:\Program Files\EVault Software\Agent
C:\Program Files\EVault Software\Agent Assistant
(Where “C:” may be another drive.) You may still change the path, if required.
All the Agent applications are then located in a single directory, but have their own sub
directory to run in. Requirements (like locking down for admin users only) won’t affect
the other applications. The Agent would only lock down the Agent sub directory for
Administrators.
The install kit will not remove the top level directory unless it is empty at the end of an
uninstall.
Introduction and Installation
Page 13 of 121
Agent 6.5 User’s Guide for Microsoft Windows
1.2.2
Installation Procedures
Note: The 32-bit Agent and 64-bit Agent installations are similar. See the Release Notes
for versions and supported platforms.
The Agent for Windows Installation kit is available in a self-extracting executable format
with the file name “Agent-Windows-6-xx-xxxx.exe”, or “Agent-Windows-x64-6-xx-xxxx.exe”.
Your Service Provider may have renamed this file. This single self-extracting executable file
contains all these components necessary to install the Agent under Windows:
•
Windows Agents (32 and 64 bit)
•
OTM (32 and 64 bit)
•
SQL Server Plug-In (32 and 64 bit)
•
Oracle Plug-In (32-bit)
•
MS Exchange Plug-In (32 and 64 bit)
•
Cluster Support Plug-In (32 and 64 bit)
•
SharePoint Plug-In (32 and 64 bit)
1.2.2.1 Plug-Ins
MS Exchange, MS SQL Server, Oracle, Cluster Support and SharePoint Plug-Ins, and
OTM can be installed along with the Agent. That is, there is no separate install program
for individual Plug-Ins.
You can always install a Plug-In afterwards by running the installation again, with the
Modify option.
See the CentralControl Operations Guide, and the separate Plug-In Guides for more
information on licensing and installation.
Note that Plug-Ins require a separate license if you are connecting to a Vault that is
lower than version 5.53. If you are connecting to a Vault that is version 5.53 or more, the
license is supplied automatically from the Vault.
To apply a license that is not supplied automatically, you first install the Plug-In. Then
enter and validate the license from CentralControl, under Agent Configuration, Plug-In
tab. See the CentralControl User Guide.
Oracle Plug-In (for 32-bit Agent):
If you install the Oracle Plug-In, you must also install the “Oracle Instant Client for
Windows” after the Agent (32-bit only) has been installed.
This is a separate installation that is available on the i365 Support website
(csp.i365.com). It is not included as part of the Windows Agent installation, and must be
run separately.
Introduction and Installation
Page 14 of 121
Agent 6.5 User’s Guide for Microsoft Windows
1.2.2.2 Requirements
You must have the following items before installing and using the 32-bit Agent:
The self-extracting Agent for Windows Installation kit.
A target System running 2000 Server / 2003 Server / XP Professional / Vista / Server
2008. (See the Release Notes for 64-bit Agents.)
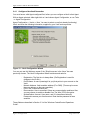
1.2.2.3 Running the Self-extracting Install Kit
Depending on your service provider, you may have the option of installing from disk, or
the Web or a CD. Each of the self-extracting install kits may be executed directly over
the Web or may be copied to a temporary directory first and then executed. They may
also be executed directly from a CD.
Option A: If installing directly from the Web, follow the instructions given on
the Web page to start the installation process.
Option B: From the Web, you can download the self-extracting executable to a
temporary directory. Navigate to the temporary directory.
Option C: If using a CD, place the media containing the CentralControl
installation kit into the CD-ROM drive. Navigate to the disk or CD drive that
contains the self-extracting executable.
To install the Agent for Windows using the installation Wizard:
1. Log on to the System.
2. Double click on the self-extracting executable file (“Agent-Windows-6-xx.exe”).
You are first prompted to select a language for the installation. Choose
English, French, German or Spanish.
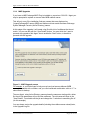
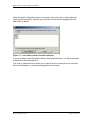
3. InstallShield sets up the installation process (Extracting and Preparing). From
the Setup Welcome dialog, click Next. A text viewer window appears.
4. From the viewer screen, Users can read or print Support Notes and product
Release Notes. Click Next to proceed.
5. The software “End User License Agreement” window is shown. You must
Accept this to continue the installation.
6. Select Install Type. You can choose a Typical Install, or a Custom Install.
Typical will finish without you having to choose more components. It will take
you to the end (Step 13) and begin the actual installation. If you choose
Custom, you will be asked the following steps, before you begin the
installation.
7. “Agent Management Method Selection” is next. This allows you to choose how
you want to give the proper credentials for the Agent Service to run on the PC.
Note: “Use ‘Local System’ Account”, and “Create Account automatically”
supply the correct user rights (in the administrator group). If you select
“Use custom account”, you must ensure that the account (in the
administrator group) has “act as part of the operating system”, and
“logon as a service” user rights. (See the note in section 1.2.1.1 –
Privilege Requirement – about BUAgent and VVAgent together.)
8. Choose a destination folder for the installation, or accept the default. Click
Next.
Introduction and Installation
Page 15 of 121
Agent 6.5 User’s Guide for Microsoft Windows
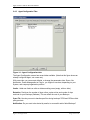
9. The “Custom Setup” dialog appears. You may choose these program features,
depending on what your system will use to back up its data. They will require a
proper license before you can use them. Note that OTM is optional, but if it is
chosen here, you will get an “OTM settings” screen later in this installation, and
you will have to restart the computer.
Note: You can return to this installation at another time (with Modify) to install
these program features, if you do not select them now. You must install at
least the Agent. It cannot be turned off. The other features are optional. Click
Next.
10. If you had chosen, before, to install OTM, you will now get an “OTM Settings”
screen. These parameters are described in the “CentralControl Operations
Guide”, and can be changed, in the CentralControl GUI, under the Agent
Configuration screen, Open File tab. OTM can also be set with Web
CentralControl.
Note: If you had asked for OTM before, you will be reminded here that this is a
30-day trial and you will need to get a permanent license if you wish to
continue using OTM. Click Next.
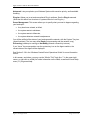
11. Agent Management Method Selection. Choose one of:
I will manage my Agent using Web CentralControl hosted at <Web URL>
I will manage my Agent using Web CentralControl. I will specify the location.
I will manage my Agent using Windows CentralControl only.
That is, you may be asked to use a known Web URL address, or to supply one
if you want to use Web CentralControl, or to only use Windows CentralControl.
Depending on how your install kit is set-up, and what Agent you have installed
already, you may see a) all three of these prompts, or b) the first and third, or
c) the second and third ones.
12. If you have selected to manage your Agent with Windows CentralControl only,
you will not see the next screen on Registering the Agent with Web
CentralControl. But if you have selected one of the first two choices you will
see that screen next. “Would you like to begin the installation?” Click Yes.
13. “Register Agent with Web CentralControl” screen. If you are using the Web
CentralControl, you must Register the Agent with it so that it can be managed
by the Web CentralControl. You may or may not have an address in the
address field, depending on what you selected in the “Agent Management
Method Selection”. Enter the username and password that will allow this Agent
to register with the Web CentralControl. This is a name and password created
for this Agent by an Administrator on the Web CentralControl. Click Next. The
Registration will fail if it cannot connect to the Web CentralControl. You can
run the installation again to register if you cannot succeed here. (In that case
use, “Skip Registration” to finish.)
14. You could “Skip Registration” here, and only manage the Agent with Windows
CentralControl if you want. Click Next.
15. If you had selected to install OTM, you will be asked to restart. Select either
Yes, I want to restart my computer now or No, I will restart my computer
later. Click Finish.
16. If you did not choose OTM, the “Ready to Install the program” message is
shown. Click Install to begin the installation.
Introduction and Installation
Page 16 of 121
Agent 6.5 User’s Guide for Microsoft Windows
17. Note: If you had chosen to include the Agent Assistant in a Custom Setup (in
Web CentralControl only), you will be prompted next for the URL of the Web
CentralControl program and the URL for the Help for the Web CentralControl.
When you installed the Web CentralControl application on your server, you
chose the locations for them. They must correspond to the addresses here.
The Web CentralControl and the Help applications can then be accessed from
the Agent Assistant on the Agent machine.
(See section 1.5.1.1 for an example of the URL addresses.)
18. The installation is finished.
In addition to holding the executables, the directory setup will also store all the required
configuration and delta files.
The space requirements for these files will vary depending on the following factors:
-
whether or not Backups are targeted to a local directory,
the retention settings that are applied to the Backups.
1.2.2.4 System Privileges for EFS
If you have Encrypted File System on your Windows system, the Agent will need more
than Administrator Rights to be able to back up those files. You might receive error
messages (in the log) about “access is denied” and “ACL’s for all subsequent files might
not be backed up.”
After the Agent has been installed, you need to change local security settings, or the
default domain policy.
-
For the logon for the Agent, you need to set it to “Act as part of the
operating system”.
-
Set it to “Logon as a service”.
-
Then, in services, select the Agent Job, choose the logon tab, choose the
“This account” button, and set it to the administrator logon.
This will ensure that the logon for the Agent has the correct rights to be able to do the
EFS backups.
Introduction and Installation
Page 17 of 121
Agent 6.5 User’s Guide for Microsoft Windows
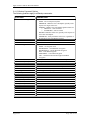
1.2.3
Setup Maintenance
Users can modify, repair, upgrade or uninstall the Agent currently on their System. To
run the Setup Maintenance Wizard, double click on the Agent-Windows-6-xx-xxxx.exe
file (located on your computer hard drive, CD or the web) or select Add/Remove
Programs from the Control Panel. The Setup Maintenance Wizard presents you with the
following choices:
Modify: add or remove additional components (OTM and Plug-Ins).
Repair: fix your current version of the Agent. This option appears if the application
detects that you have the same version of the Agent on your System.
Upgrade: move up to a newer version of the Agent. This option appears if the
installation is a newer version than the previously installed one.
Uninstall: remove the currently installed Agent. This can be a partial (program files),
or total uninstall.
Note: If you run the Agent-Windows installation and it detects that you have a newer
version of the Agent on your System, the Setup Maintenance Wizard will
terminate. That is, you cannot install an older version of the Agent over a newer
one.
1.2.3.1 Installation Languages
Language choices are: English, French, German and Spanish. English is the default.
During a Modify/Upgrade of the Agent, you cannot change the setup language. As a
workaround, you can uninstall the Agent’s Program files (not a total uninstall) and run a
fresh install of the Agent kit, selecting the desired language when prompted.
Introduction and Installation
Page 18 of 121
Agent 6.5 User’s Guide for Microsoft Windows
1.2.3.2 Modify
To Modify Agent components under Windows:
1. Choose Start > Settings > Control Panel > Add/Remove Programs, and select
<Service Provider>Agent<version>. Or, instead of using Add/Remove
Programs, you can re-run the installation program.
At this point, you cannot change the setup language. (As a workaround, you
can uninstall the Agent’s Program files. This is not a total uninstall. Next, run a
fresh install of the Agent kit, selecting the desired language when prompted.)
2. Click OK to continue.
3. From the Welcome screen, click Next.
4. Choose the Modify option (from Modify, Repair, or Remove).
5. “Agent Management Method Selection” is next. This allows you to choose how
you want to give the proper credentials for the Agent Service to run on the PC.
Note: “Use ‘Local System’ Account”, and “Create Account automatically”
supply the correct user rights (in the administrator group). If you select “Use
custom account”, you must ensure that the account (in the administrator
group) has “act as part of the operating system”, and “logon as a service” user
rights.
For a Modify or Repair, you can typically leave these credentials unchanged.
6. Select the components (Agent, OTM, and/or Plug-Ins) you want to install and
deselect the components you want to remove.
Note: If you deselect everything, you will be doing an uninstall.
7. If you have selected components, the installation continues like a new
installation. See the previous sections.
8. Agent Management Method Selection. Choose one of:
I will manage my Agent using Web CentralControl hosted at <Web URL>
I will manage my Agent using Web CentralControl. I will specify the location.
I will manage my Agent using Windows CentralControl only.
That is, you may be asked to use a known Web URL address, or to supply one
if you want to use Web CentralControl, or to only use Windows CentralControl.
Depending on how your install kit is set-up, and what Agent you have installed
already, you may see a) all three of these prompts, or b) the first and third, or
c) the second and third ones.
9. Ready to modify the program. Click Install.
10. If you had selected to install OTM, you will be asked to restart. Select either
Yes, I want to restart my computer now or No, I will restart my computer later.
Click Finish.
Introduction and Installation
Page 19 of 121
Agent 6.5 User’s Guide for Microsoft Windows
1.2.3.3 Repair
When the Agent installation is launched, it searches your computer for previously
installed versions of the Agent. If the same version of the Agent is located, you will be
offered the options of Modifying the software, Repairing or Uninstalling it.
To Repair the Agent under Windows:
1. Choose Start > Settings > Control Panel > Add/Remove Programs, and select
<Service Provider>Agent<version>. Or, instead of using Add/Remove
Programs, you can re-run the installation program.
At this point, you cannot change the setup language. (As a workaround, you
can uninstall the Agent’s Program files. This is not a total uninstall. Next, run a
fresh install of the Agent kit, selecting the desired language when prompted.)
2. Click OK to continue.
3. From the Welcome screen, click Next.
4. Choose the Repair option (from Modify, Repair, or Remove).
5. Agent Management Method Selection. Choose one of:
I will manage my Agent using Web CentralControl hosted at <Web URL>
I will manage my Agent using Web CentralControl. I will specify the location.
I will manage my Agent using Windows CentralControl only.
That is, you may be asked to use a known Web URL address, or to supply one
if you want to use Web CentralControl, or to only use Windows CentralControl.
Depending on how your install kit is set-up, and what Agent you have installed
already, you may see a) all three of these prompts, or b) the first and third, or
c) the second and third ones.
6. Ready to Repair the program. Click Install.
7. When the Repair is complete, the Maintenance panel appears indicating the
Agent has been properly installed. Click Finish.
Introduction and Installation
Page 20 of 121
Agent 6.5 User’s Guide for Microsoft Windows
1.2.3.4 Uninstalling
To uninstall the Agent under Windows:
1. Choose Start > Settings > Control Panel > Add/Remove Programs, and select
<Service Provider>Agent<version>. Or, instead of using Add/Remove
Programs, you can re-run the installation program.
At this point, you cannot change the setup language. (As a workaround, you
can uninstall the Agent’s Program files. This is not a total uninstall. Next, run a
fresh install of the Agent kit, selecting the desired language when prompted.)
2. Click OK to continue.
3. From the Welcome screen, click Next.
4. Choose the Remove (Uninstall) option (from Modify, Repair, or Remove). Click
Next.
5. Select Total Uninstall or Program Files Only. A total uninstall removes all
traces of the application from your System. Program Files Only leaves Job
configuration files, log files, delta files and Backup Safesets on your computer
for future use.
6. Click Remove to uninstall. (Note: You cannot Cancel after this stage, as the
uninstallation is now irreversible.)
7. Once the Remove/uninstall is complete, click Finish.
Introduction and Installation
Page 21 of 121
Agent 6.5 User’s Guide for Microsoft Windows
1.2.3.5 Upgrading from earlier versions
Agent 6.50 supports upgrades from:
- The version 6.50 Agent only supports upgrades from version 5.6 or 6.30
Agents. Agent versions earlier than version 5.6 must be upgraded to 5.6
before attempting an upgrade to 6.50. Agent versions later than 5.6 but
earlier than version 6.3 must be upgraded to 6.3 before attempting an
upgrade to 6.50.
Upgrading an Agent to Version 6.50 involves these tasks:
- Meeting System and Software Requirements
- Preparing the Computer
- Upgrading Program Files and Configuration Files
- Meeting System and Software Requirements
To upgrade to Agent 6.50, your System must meet the minimum requirements
mentioned in the User Guide.
Note: Available free space of the volume that the Agent is installed on should be bigger
than the size of all Delta files + the size of the largest Delta file + a reasonable cushion
(at least 100 MB).
-
Preparing the Computer
To prepare your existing machine for upgrading Agent, complete the following Jobs:
1. Back up the previous Agent Files
We strongly recommend that you make at least one Backup of your previous
Agent files, including all files and subdirectories under the Agent installation
directory. Do not attempt an upgrade without a Backup.
2. Clean up Server Profiles in Global.vvc
From the Management Console, open up the Agent Configuration that you want
to upgrade. Go to Vaults section, check if there is any Server configuration that
no longer being used and delete it. Also, highlight every Server configuration and
click Edit, and double check the information of this Server Profile is valid. Then
click OK to save your changes.
3. Clean up Jobs
After the Global.vvc has been cleaned up, check all Backup Jobs to see if there
is any Job backing up to a Vault that has been deleted from Global Settings. If
so, delete that Job or assign it to a different Vault.
If you have Jobs that are backing up to Tape drive or Directory on Disk, they are
local Jobs and leave them unchanged. During upgrade, they will be registered to
the first Vault indicated in Global Settings.
Introduction and Installation
Page 22 of 121
Agent 6.5 User’s Guide for Microsoft Windows
4. Synchronize all Backup Jobs
After cleaning up the Jobs, check the Backup logs of each Job to see if any
errors show “Validation failed: “. If so, you need to verify the validation
information with your Vault Operator to make sure it is valid. If the latest Backup
log shows no errors, do a Synchronize with the Vault and check the Synch log.
5. Verify eligible Director version
For every Vault that you are backing up to, make sure it is running the latest
version. Otherwise, the Vault software needs to be upgraded before upgrading
the Agent.
-
Upgrading Program Files and Configuration Files
The files installed by Agent 6.50 are listed in the Release Notes.
We recommend starting the installation when all the Directors in Global Settings are not
busy on other Jobs.
When the Installation Kit is launched, it detects the previously installed versions of the
Agent and starts to upgrade it.
IMPORTANT: When the upgrade process starts, you should wait until it is finished. Do
not run multiple upgrade processes at a time.
Always check the log file, after an upgrade process. The log file will be used when
troubleshooting in the case of failure. If an upgrade failed, the Global.vvc, Job vvc and
Delta files are rolled back to the old version. But they will not work with new executables.
You may try to run the upgrade program again. If it still fails, contact your service
provider for support. To completely rollback to the old version, you need to manually
copy back the previous Backups.
We recommend that to do at least one Backup for each Job after upgrading successfully
to allow the Agent to upload new configuration files to the Director.
Note: If you were already registered with Web CentralControl, you will be shown the
existing address and port number (for example: “MyServer:8086”) and you will be
prompted to “Keep my current registration” or “Change registration” if you want to move
the Agent to another Web CentralControl.
If you select to change, it will take you to the “Register Agent with Web CentralControl”
screen, before resuming the InstallShield Wizard. If you keep your current registration,
you are prompted to resume the InstallShield Wizard.
Important Information regarding upgrading and re-seeding:
Upgrade: The version 6.50 Agent only supports upgrades from version 5.6 or 6.30
Agents. Agent versions earlier than version 5.6 must be upgraded to 5.6 before
attempting an upgrade to 6.50. Agent versions later than 5.6 but earlier than version 6.3
must be upgraded to 6.3 before attempting an upgrade to 6.50.
Introduction and Installation
Page 23 of 121
Agent 6.5 User’s Guide for Microsoft Windows
Note: There are two conditions you should be aware of that could cause your backups
to be reseeded.
•
One would occur if you are upgrading older Agents from 4.x to 5.6 to 6.0 to 6.01
to 6.10 or 6.3 or 6.50. During the upgrade from 6.0 to 6.01 to 6.10 or 6.30 or
6.50, the older 4 k blocks change to the newer 32 k blocks, causing a re-seed on
the next backup.
•
The other reseeding case may occur because Exchange Mailbox names are
now the same as displayed in Exchange System Manager Console. If the older
names were different, the newer names will cause a reseed.
Introduction and Installation
Page 24 of 121
Agent 6.5 User’s Guide for Microsoft Windows
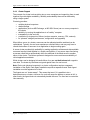
1.2.4
MAPI Upgrades
If you have an MS Exchange MAPI Plug-In installed on a previous 5.6/6.0/6.1 Agent you
may be prompted to replace or remove older MDB mailbox names.
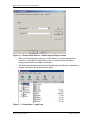
This will only occur if the installation finds any names that were displayed as
“LegacyExchangeDN” names (MDB) and these would not match the newer Exchange
System Manager Console (Active Directory) names.
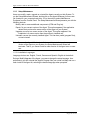
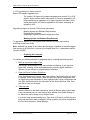
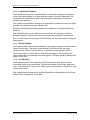
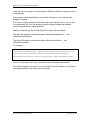
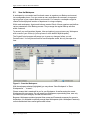
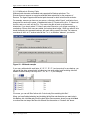
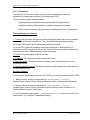
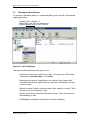
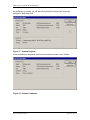
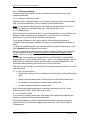
At this stage of the upgrade, it will create a log file with a list of mailboxes that do not
match. You can see this with the “View Details” button. You must click the “I want to
proceed with upgrade of this Agent” box to enable the “Next” button, to be able to
proceed with the upgrade.
Figure 2. - MAPI Upgrade screen
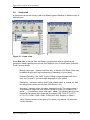
For example, in your older Agent’s Job you may have had some mailboxes (MDB
names) that started with a number, and you used a wildcard combination such as “1*” to
select them for backup.
The new Agent, using Active Directory names shows the names as starting with a letter.
So the old Job parameters will not find the mailboxes. The old names will show in the
“View Details”. You should edit the job and change the 1* selection to something like A*
(for this example).
You can always review the upgrade details (including the mailbox names missed) later,
in the Upgrade Log file.
Introduction and Installation
Page 25 of 121
Agent 6.5 User’s Guide for Microsoft Windows
1.2.5
Silent Install
The InstallShield program allows users to create an installation answer file, to be used to
install another Agent “silently” – that is, without any user interaction. An administrator
can create an answer file on one machine, and then play that back on another machine,
to perform an identical installation.
So, an administrator with many installs can run the installation once, and copy the files to
other remote machines, and run them silently there.
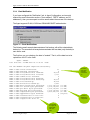
Configuration File:
A configuration file is required for silent installation. This xml format configuration file
contains the properties that need to be set for the installation. This file is not supplied
with the installation. The user must create it.
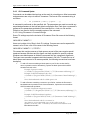
A file similar to the following example can be used for your system.
Example xml configuration file (“silentinstall.xml”):
<SilentInstallSettings>
<AccountType>AutoCreate</AccountType>
<ServiceAccountName>dd</ServiceAccountName>
<ServiceAccountPassword>dd</ServiceAccountPassword>
<InstallDir>c:\program files\Evault Software</InstallDir>
<FeatureAgentTray>on</FeatureAgentTray>
<FeatureOTM>on</FeatureOTM>
<FeatureCluster>Off</FeatureCluster>
<FeatureSQL>Off</FeatureSQL>
<FeatureExchange>Off</FeatureExchange>
<FeatureOracle>Off</FeatureOracle>
<FeatureSharePoint>off<FeatureSharePoint>
<FeatureAgentTray>off</FeatureAgentTray>
<KeepExistingReg>true</KeepExistingReg>
<RegisterWithWebCC>true</RegisterWithWebCC>
<WebCCURL>192.168.2.167</WebCCURL>
<WebCCPort>8086</WebCCPort>
<WebCCLoginName>login</WebCCLoginName>
<WebCCPassword>password</WebCCPassword>
<OTMForceReboot>true</OTMForceReboot>
</SilentInstallSettings>
Introduction and Installation
Page 26 of 121
Agent 6.5 User’s Guide for Microsoft Windows
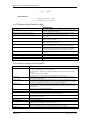
Silent Install Settings:
AccountType: (required). There are three types : AutoCreate, LocalSystem, and
Custom. For the first two types, ServiceAccountName and ServiceAccountpassword are
not required. If the wrong account type is provided, or the account credentials are wrong,
the installation will fail silently. The “SetUp.log” will contain the error information.
Note: If you use “Custom” account, then both <ServiceAccountName> and
< ServiceAccountPassword > should have valid values
The account name should be in the form “domainname\username”, or if a built-in domain is
used, the username should be in the form “.\username”. For example:
- An account with a domain name:
<AccountType>Custom</AccountType>
<ServiceAccountName>MyDomain\Administrator</ServiceAccountName>
<ServiceAccountPassword>password</ServiceAccountPassword>
- A built-in domain account:
<AccountType>Custom</AccountType>
<ServiceAccountName>.\Administrator</ServiceAccountName>
<ServiceAccountPassword>password</ServiceAccountPassword>
InstallDir: (required). If you are upgrading from a previous kit, the previous installation
directory will be used for the silent installation directory.
FeatureOTM: This is for turning on/off the OTM Plug-In installation. If not specified, it
defaults to Off.
Note: If you use Silent Install with OTM, at the end of the installation the system will be
rebooted automatically so that OTM can be operational.
FeatureCluster: This is for turning on/off the Cluster Plug-In installation. If not specified,
it defaults to Off.
FeatureSQL: This is for turning on/off the SQL Plug-In installation. If not specified, it
defaults to Off.
FeatureExchange: This is for turning on/off the Exchange Plug-In installation. If not
specified, it defaults to Off.
FeatureOracle: This is for turning on/off the Oracle Plug-In installation. If not specified, it
defaults to Off.
FeatureSharePoint: This is for turning on/off the SharePoint Plug-In installation. If not
specified, it defaults to Off.
FeatureAgentTray: During a silent install, this switch (on or off) will install, or not install
the Agent Tray program. Default is off.
Introduction and Installation
Page 27 of 121
Agent 6.5 User’s Guide for Microsoft Windows
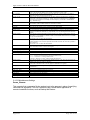
RegisterWithWeb CC: This is for turning on/off the Registration with Web
CentralControl. If not specified, it defaults to False (Off).
WebCCURL: (required). This is only required if “RegisterWithWeb CentralControl” is set
to True (On).
WebCCPort: (required). This is only required if “RegisterWithWeb CentralControl” is set
to True (On).
WebCCLoginName: (required). This is only required if “RegisterWithWeb
CentralControl” is set to True (On).
WebCCPassword: (required). This is only required if “RegisterWithWeb CentralControl”
is set to True (On).
OTMForceReboot: This tag, if set to true, will make the system reboot after the
installation, otherwise the rebooting will not occur.
BackupConsoleUrl: This is only required if “FeatureAgentTray” is set to True (On).
BackupConsoleHelpUrl: This is only required if “FeatureAgentTray” is set to True (On).
(Note: See section 1.5.1.1 for an example of these two URL addresses.)
InstallLanguage: (optional). If it is not set, the default is “English”. Choices are: English,
French, German or Spanish.
Introduction and Installation
Page 28 of 121
Agent 6.5 User’s Guide for Microsoft Windows
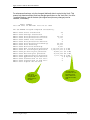
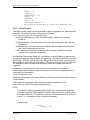
1.2.5.1 Running the Silent Installation
To run the Silent Installation from the command line, go to the directory containing the
Agent installation kit and the silentinstall.xml file and then run the following command:
Agent-Windows-6-xx-xxxx.exe /s /v” /qn
SILENTINSTALLCONFIG=\”c:\silentinstall.xml\””/l”1033”
The end of this example is where you can choose an installation language. If you do not
choose one, the default English is used.
You can select one of these languages for the installation:
1033=English
1031=German
1034=Spanish
1036=French
Note: In this example, the version of 6-xx-xxxx.exe would be the real version number of
the supplied installation kit, rather than the x characters shown. Also, the kit may have
been renamed.
For Uninstall:
Agent-Windows-6-xx.exe /s /x /v”/qn TOTALUNINSTALL=2”
Introduction and Installation
Page 29 of 121
Agent 6.5 User’s Guide for Microsoft Windows
1.3
How the Windows Agent Works
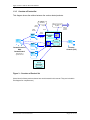
The CentralControl program (Windows or Web) and the Windows Agent comprise a data
protection software suite that securely backs up file data from computers across a
network to a remote Data Protection Vault. The applications provide an automated,
unattended method for protecting your valuable computer data without the need for tape
devices or other Backup media.
Each Backup is termed a “full” backup in that it is possible to Restore all the data, if
necessary, without using any incremental or differential backups.
Each computer that needs to be backed up must have the Agent software installed and
running, and be connected to a network, to be able to access a Vault. The Agent runs on
the computer as a background service, and starts automatically when the System is
booted.
The setup of Agents, Jobs, scheduling, and monitoring is done from the CentralControl
GUI application. The actual Backup is done from the Computer System with the Agent,
to the System with the Vault. No (Backup) User data goes through the CentralControl.
The Vault has to be previously set up with an account, to receive your Agent’s
commands and data.
Once an Agent has been properly configured and scheduled, backups will occur
automatically. The CentralControl does not have to be running all the time. It is used for
configurations, and to check for successful completion and to view the error logs.
Success or failure messages can also be sent by automated emails.
Introduction and Installation
Page 30 of 121
Agent 6.5 User’s Guide for Microsoft Windows
1.3.1
Agent Software
The Agent software runs on the individual computers to be backed up. Backups on the
Agent computers are configured and scheduled by the CentralControl computer. The
Agent then sends its Backup data (optionally encrypted, for security) directly to the
Director (Vault).
The Agent consists of the following components:
•
The “VV.exe” component performs the Backup and Restore functions to the
Vault.
•
The Agent component (“VVAgent.exe” for Windows CentralControl and
“BUAgent.exe” for Web CentralControl) handles scheduling, configuration and
communication with the CentralControl. It runs as a Windows Service on a
supported Windows Operating System.
Note: Check the Appendix of this manual for more information on these, and other files
that run the applications.
The Windows platform can optionally have: Exchange Plug-In; Oracle Plug-In; MS SQL PlugIn; Cluster Plug-In, and SharePoint Plug-In.
Note: See the appropriate Release Note for the current supported versions of the Agents,
Plug-Ins, and Operating Systems.
The following products are optional on some Systems, and require an extra license.
During installation of the Agent, the Plug-Ins are installed (i.e.: made available) and
ready to be activated. You do not need a separate installation for a Plug-In. But, you
may also install them later, using the Repair/Upgrade option.
1.3.1.1 MS Exchange Plug-In
The MS Exchange Plug-In is an add-on to the Windows Agent. It allows for full (DRVSS) disaster recovery capabilities on Microsoft Exchange databases as well as for
backing up and restoring individual mailboxes and folders (with MAPI).
1.3.1.2 Oracle Plug-In
The Oracle Plug-In is an add-on to the Windows or Solaris Agent. It allows a user to
perform a database Backup on an Oracle database. The Plug-In is installed on top of the
Agent on the database host to perform the Backups.
The Oracle Plug-In for Windows is installed via the Server Agent install kit. It will appear
as a new option in the “Select Plug-Ins to install” page. The Server Agent kit will not
contain the “Oracle Instant Client” required by the Oracle Plug-In for Windows. The
Oracle Instance Client will be made available through a separate kit. The Server Agent
kit, however, will detect when the Oracle Instant Client has not been installed, and direct
the user to the appropriate installation kit.
The Oracle Instant Client kit, created with InstallShield, is dedicated to installing Oracle’s
Instant Client. The kit will only install the Oracle Instant Client into the installation
directory of the Server Agent. If the Agent has not already been installed, the install will
terminate gracefully.
Introduction and Installation
Page 31 of 121
Agent 6.5 User’s Guide for Microsoft Windows
1.3.1.3 MS SQL Server Plug-In
The MS SQL Server Plug-In is an add-on to the Windows Agent. It allows a user to
perform a database Backup on an MS SQL Server database. The Plug-In is installed on
top of the Agent on the database host to perform the Backups. The Plug-In, with ODBC,
now supports SQL Server 2005 and SQL Server 2008. The Plug-In still supports SQL
2000.
Upgrades of earlier Plug-In versions are supported, and do not require any
reconfiguration and/or reseeding of existing data.
1.3.1.4 Cluster Support Plug-In
The Virtual Server Cluster Support Plug-In is an add-on to the Windows Agent. It allows
a user to be able to back up a server that has failed over to another machine (node) in
the cluster. The configuration is automatically picked up by the correct server after a
failover. Single Copy Cluster (SCC), LCR, CCR, and SCR are supported.
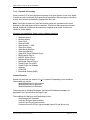
1.3.1.5 MS SharePoint 2003/2007 Plug-In
This version of the MS SharePoint Server Plug-In performs backups and restores of
SharePoint Portal 2003 and Server 2007 on Windows 2003/2008 Servers. The
SharePoint Plug-In enables brick level backups and restores of SharePoint items such
as webs, lists, libraries, folders and documents. This high level of granularity enables
backups and restores of the entire site, down to different individual document versions.
You can also restore a document as a document or a document version to the file
system.
The SharePoint Plug-In, on a restore, allows browsing and selection to the file level. You
can also search for a file to restore.
The MS SharePoint Server Plug-In with the Agent installs directly on the server
hardware.
Introduction and Installation
Page 32 of 121
Agent 6.5 User’s Guide for Microsoft Windows
1.3.2
CentralControl Software
The CentralControl provides a centralized point of control for managing all computers
running the Agent software on a large computer network. Within an organization, the
configuration and scheduling of Jobs is done through the computer(s) running the
CentralControl software.
The CentralControl software connects to an organization’s computers running the Agent
software, activating that computer’s Backup Job.
Windows CentralControl software operates as an application on supported Windows
Systems.
Web CentralControl runs on a web server, but the user uses a browser to connect
across the network to perform the same functions as on the Windows CentralControl.
Note: You should not use both types of CentralControl (at the same time) to manage the
same Agents.
1.3.3
Director Software
The Director software controls and manages the pooling and storage of data at a remote
secure Vault location. This data is communicated to the Director from the Agent
computers over a WAN, LAN, the Internet, or imported from an alternate media.
The Director does not interact with the CentralControl program. The CentralControl
communicates with, and manages the remote Agents. The Agent sends its backup data
directly to the Vault.
1.3.4
On Line Helps
The Windows CentralControl application (GUI) has an online help, which contains
information similar to the user manual. The help is accessed from the main drop-down
menu, or by using the F1 function key. There is also context sensitive “WhatsThis?” help
on each GUI screen.
Web CentralControl is described in the Web CentralControl Administration User Guide,
and the Web CentralControl on-line help.
Introduction and Installation
Page 33 of 121
Agent 6.5 User’s Guide for Microsoft Windows
1.3.5
Overview of Product Set
This diagram shows the relation between the various related products.
Tape or
Quickship
Offline
Backup
Online
Restore
Online
Backup
Director
Vault
VBA
Agent
Windows
CentralControl or
Web
CentralControl
Management of
Agents and Jobs
Reports
via Web
Browser
Import
Offline
Restore
Agent
Evault Reporting
System
Export
Synch
Web
Primary
Pool Data
Director
Console (GUI)
Agent
Network Attached
Storage
Secondary
Pool data
Figure 3. - Overview of Product Set
(Note: Not all of these products shown here are discussed in this manual. They are included in
this diagram for completeness.)
Introduction and Installation
Page 34 of 121
Agent 6.5 User’s Guide for Microsoft Windows
1.3.6
Overview of Licensing
Vaults (version 5.53 or later) implement licensing via a quota system on the Vault. Agent
licenses are used (consumed) by Agents during registration. When an Agent connects to
a Vault, the license is automatically supplied from the Vault.
Note: If an Agent registers to a Vault and license quotas are exceeded on the Vault,
backups for that new Agent will fail to complete. This will not affect previously licensed
Agents. Additional licenses can be acquired and applied to the quota. Contact your
vendor for further details.
Licenses are required for these various software products:
•
•
•
•
•
•
•
•
•
•
•
•
•
•
•
•
•
•
Windows Agents
Desktop Agents
Agent Linux
Agent AIX-IBM
Agent System i – IBM
Agent Sun Solaris
Agent Novell NetWare
Agent Vault Backup
Agent ESX Server VMware Plug-In
MS Exchange Plug-In
MS SQL Server Plug-In
MS SharePoint Plug-In
MS Cluster Support Plug-In
Oracle Plug-In for Solaris
Oracle Plug-In for Windows
ArcWare
OFM/OTM
Bare Metal Restore (BMR)
License Behavior:
Agents may be either pre-version 5.6, or 5.6 and later: Depending on the conditions
encountered you may be:
Allowed/Disallowed on Job creation,
Allowed/Disallowed on Backups,
Allowed/Disallowed on Restores.
There may also be Warning Messages. Warning and Disallowed messages are
displayed in the CentralControl and Agent Logs.
The conditions for Warnings and Disallowing include:
Vault storage limit exceeded,
Vault limit for Agent type exceeded,
Vault limit for Plug-In type exceeded,
Customer Quota for Plug-In type exceeded (Agent 5.6 and above only).
Introduction and Installation
Page 35 of 121
Agent 6.5 User’s Guide for Microsoft Windows
(3) If Vault limit for Agent type is
exceeded:
(2) If Vault Storage limit is
exceeded:
(4) If Vault limit for Plug-In type
is exceeded:
(1) If Vault Base License
is not valid:
Agent (pre-5.6)
(5) If Customer Quota for
Plug-In type is exceeded:
(1)
(2)
(3)
(4)
(5)
Registration
Allow
Allow
Allow
Client Key
N/A
Job Creation
Disallow
Allow
Disallow
Client Key
N/A
Backup
Allow
Allow
N/A
Client Key
N/A
Restore
Disallow
Disallow
N/A
Client Key
N/A
Registration
Allow
Allow
Allow
Allow
Allow
Job Creation
Disallow
Allow
Warn
Warn
Warn
Backup
Disallow*
Allow
Disallow*
Disallow*
Disallow*
Restore
Disallow
Disallow
Disallow*
Disallow*
Disallow*
Registration
Allow
Allow
Client Key
N/A
N/A
Job Creation
Disallow
Allow
Disallow
N/A
N/A
Backup
Allow
Allow
N/A
N/A
N/A
Restore
Disallow
Disallow
N/A
N/A
N/A
Agent (5.6 and above)
System I (pre- 5.6)
Figure 4. - License Behavior for Agents
-
* If the Agent already has a claim on the necessary licenses (it has previously done a
Backup of that type), the operation (Backup or Restore) will be allowed.
Client Key refers to the older license key that was installed on the Agent. The Vault did not
see or use this key.
N/A means: Not Applicable.
Introduction and Installation
Page 36 of 121
Agent 6.5 User’s Guide for Microsoft Windows
Scenarios:
If an end user can successfully register an Agent to a Vault, then that Agent will be able
to perform Backups and Restores. Successful registration means that the Vault accepts
the Agent’s credentials and can supply the licenses that the Agent needs.
After this, it is up to the Vault Administration to ensure that Vault disk space and quotas
are available for all properly licensed users.
Quotas restrict Customers to some configurable amount of disk space and number of
licenses (by the Vault). So, even though there may be more licenses and disk space
available on the entire Vault, individual Customers can be restricted to a limited amount.
If an end user is rejected because of license or space restrictions, it is up to the user
(“Customer”) to acquire more licenses.
A Vault Administrator may disable a User’s account, for example, for Accounting
problems. This will stop the user from accessing the Vault even though they have
previously Registered and performed Backups and Restores.
Note:
-
Job Registration is always allowed.
-
Backups will fail if the licenses are not present, or are insufficient (exceeded).
-
If an Agent already has a claim on the necessary licenses (it has previously done a
Backup of that type), the operation (Backup or Restore) will be allowed.
Introduction and Installation
Page 37 of 121
Agent 6.5 User’s Guide for Microsoft Windows
1.4
Agent/CentralControl Configuration Overview
The Agent program runs as a service on the computer that will be backed up. The way
to control/direct it is with the CentralControl GUI program. One CentralControl program
controls many Agents on many Servers on a network.
1. Each computer to be backed up needs an Agent.
2. You need to connect (from the CentralControl) to an Agent (when you create a
new Agent).
3. You must supply: a Name, IP or DNS address, and user/password credentials.
4. Then, you must Register the computer on the Vault.
You must Register a computer on a Vault to be able to “log on” to the Vault and establish
a connection. The Vault must know that this Agent is valid and is authorized to perform
its functions.
You will need to “re-register” a computer if you are restoring from another computer, or
you are performing a bare-metal Restore (described in chapter 4 of this Guide.).
Jobs are registered during the creation of the Job, and are used during a Backup. They
contain information such as:
1. Which Profile is used? (i.e.: which Vault?)
2. What data is to be backed up?
3. What type of logs do you want?
4. What type of encryption (if any)?
5. When is it scheduled to run?
Note: The first Backup is a “seed” (a complete, full Backup), the next and subsequent
ones are deltas (i.e. changes only), but they are equivalent to, and still considered a “full”
Backup. That is, you are able to restore all or any files from it.
Depending on how your System is configured:
- There may be more than one Vault you can connect to.
- One CentralControl usually controls all the Agents on your network.
- You can also back up to a disk or tape that is local to the Agent machine.
Introduction and Installation
Page 38 of 121
Agent 6.5 User’s Guide for Microsoft Windows
1.4.1
Agent Assistant Overview
If you have installed the Agent Assistant option with the Agent, you will have an icon in
the System Tray that will show status messages with your backups and restores.
If the BUAgent service is on, the Agent Assistant will start automatically when the PC
starts. You will see the Agent Assistant icon in the System Tray, beside the time/clock.
If you hover the mouse pointer over the icon, it will show you the current status.
The icon has three display states:
Ready. This is the normal state. The Agent is operational and ready to perform
scheduled backups.
Processing. The Agent is currently running a backup.
Not Ready. The Agent may be down, or the network connection may not be
accessible.
Right click on the Agent Assistant icon to show the menu choices. You can Exit from the
Agent Assistant program. Scheduled backups will continue to run without the Agent
Assistant running.
If there is a backup or restore running on your Agent, the “Stop running processes” line
becomes active. This allows you to gracefully stop all Agent Jobs.
When you run a backup, you will see a message in the balloon over the icon.
If you hover the mouse over the Agent Assistant icon, after the “Backup Started”
message disappears, you will see a message telling you how many backups are running
(concurrently). Typically, there will only be one running at a time.
Introduction and Installation
Page 39 of 121
Agent 6.5 User’s Guide for Microsoft Windows
You may also see Job Status messages (in the balloons and when hovering) such as:
•
•
•
•
There is a failed Backup Job.
There is a Backup Job with errors.
A Backup Job has not run in a week.
Backup completed with errors.
Note: If your Agent is controlled by Web CentralControl, you will have all the menu
choices active. But if the Agent is controlled by Windows CentralControl, only the Exit
will be active.
If you Exit the Agent Assistant, scheduled backups will still occur, but you will not see the
status messages here. If you only want to restart the Agent Assistant, go to “Program
Files” on your installation disk, “<Agent Assistant directory>” and run the program called
“Maestro.exe”.
1.4.1.1 Help, Show Status and Launch Web CentralControl menu choices
If your Agent was configured at installation time to be controlled by Web CentralControl,
you will see “Launch Web CentralControl”, “Show Status” and “Help” active (not grayed
out) in the Agent Assistant menu choices.
“Show Status” will bring up a screen with the latest message. This is the same message
that showed in the balloon, and when you hover the mouse over the Agent Assistant
icon in the System Tray. You can also Launch Web CentralControl from here.
“Launch Web CentralControl” will take you to the Login page of the Web CentralControl
that was configured when the Agent was installed.
Introduction and Installation
Page 40 of 121
Agent 6.5 User’s Guide for Microsoft Windows
“Help” will take you a page in the online Help for Web CentralControl. Usually this is the
Welcome page.
If these pages cannot be displayed, your browser will display a “cannot display the
webpage” message.
If you want to change where the Launch and Help menu choices point to, you can edit
the configuration file. It is in the directory where the Agent Assistant was installed
(usually “Program Files > Agent Assistant”).
Modify the “Maestro.cfg” file (an XML file) with an editor such as Notepad.
The Help URL address is bracketed between <BackupConsoleHelpUrl> … and
</BackupConsoleHelpUrl>.
The Login URL address is bracketed between <BackupConsoleUrl> … and
</BackupConsoleUrl>.
For example:
<BackupConsoleHelpUrl>http://MyServer/BackupConsole/Documentation/enUS/main/Welcome_To_Web_CentralControl.htm</BackupConsoleHelpUrl>
<BackupConsoleUrl>http://MyServer/login/login.aspx</BackupConsoleUrl>
You can modify these to suit your environment. See your System Administrator.
If you make changes to this cfg file, you must stop and start the “Maestro.exe” program
(the Agent Assistant) to be able to see the changes.
Introduction and Installation
Page 41 of 121
Agent 6.5 User’s Guide for Microsoft Windows
2.
Agent Configuration
2.1
Introduction
These steps are described from the point of view of a User on a newly installed System,
using the Windows CentralControl. They will “get you going” to be able to do a Backup.
The Windows “CentralControl Operations Guide” manual and Help describes all the
features, options and further details of the CentralControl program.
Web CentralControl has its own manual and on-line Help, for greater detail. The functional
steps are similar in both Windows and Web CentralControl.
An Agent collects and readies the backup data, then runs and monitors Backup Jobs. You
can manage and control many Agents through one CentralControl application (GUI). An
Agent may have multiple Jobs.
A Job defines the parameters associated with a Backup, Restore, or other commands.
Examples of parameters include: file selections and filters, compression, and encryption
settings. A Job always belongs to only one Agent. Job names are unique on that Agent.
A Profile defines the Vault configuration that will be used by your Agent. It matches a Job to
an account on a Vault. The Job uses the Profile to validate the Backup to the Vault, and to
know where to put the Backup. A Profile may be used by more than one Job.
Briefly, the steps in the configuration are:
1. Create an Agent Profile. This is the local name (used by the CentralControl) of the
Agent program that will initiate the Backups. There is one Agent Profile name per Server
that needs to be backed up.
2. Save the default Workspace as a named Workspace (the default is “MyWorkspace”). To
save all your configurations (Agents, Jobs and options) you must save your Workspace
with a name of your choice, or use the default. You may have more than one Workspace
saved, but only one open at a time.
3. Configure the Vault (with Agent Configuration – i.e.: Agent Properties). You create a
Profile, with the properties of this Agent, to connect with your account on the Vault. Some
Users may have only one Profile to service their one account (i.e.: all Agents back up to
the one account). Others may have multiple Profiles (and accounts) on one or more
Vaults.
4. Create a Job. Each Agent on the CentralControl has Jobs with names unique to that
Agent. Other Agents may have similar or different Job names, even if they do similar
functions. A named Job can be one of many used to do different types of Backups, in
different ways, at different times. When you create a Job, you specify the Profile created
above, to allow you access to the Vault (i.e.: your account).
5. Schedule the Job. The Job can now be run automatically, at times determined by you.
All Jobs can also be run “manually” (ad hoc) when desired.
Once these configuration steps (described further in this chapter) have been
completed, you will be ready to run a Backup. Backups are described in the next
chapter.
Agent Configuration
Page 42 of 121
Agent 6.5 User’s Guide for Microsoft Windows
2.2
Create an Agent Profile
This is the named function that will define and authenticate an Agent. You may (at this
stage, when you create the Agent) continue right through to creating a Job, configuring the
Vault, and running the Backup. This chapter will describe the steps for configuration only.
Backups are described in the next chapter.
To create an Agent Profile, you must have the Workspace selected (highlighted).
From here, you may either:
- From the drop-down menus, use File -> New Agent, or
- Right-Click on the Workspace, and then click on New Agent.
Figure 5. - Create an Agent Profile.
This brings up an Agent Properties screen.
Figure 6. - Agent Properties
Agent Configuration
Page 43 of 121
Agent 6.5 User’s Guide for Microsoft Windows
Agent Information:
- Description: a description meaningful to you.
- Network Address: either the IP or DNS name of the computer the Agent software is
on (i.e.: the one you are going to back up).
- Port: the communications port number reserved for this service (the default is 808).
Authentication information:
- User name: authentication to communicate with the Agent Service.
- Password: Password assigned to the User above. Note that the password is case
sensitive.
- (Check to save the Password): saves the Password on this machine with the
CentralControl.
- Domain: Windows domain (if applicable).
Click the Get Status button to test to ensure the communication is valid and you can access
the remote Agent. If not, check with your support or Vault service provider. Click OK to exit
the Status window.
Click OK if finished, and exit the New Agent window, or Cancel to Quit without saving.
Your new Agent’s name will now show up in the left pane of the CentralControl GUI.
Figure 7. - Check Agent Status.
In this screen, and others in Windows CentralControl, you may use the “What’s This?” help
(the ‘?’ in the upper right corner, or right click on a field) for further information on the fields,
as well as the main Help menu (F1) for general help. Or, you may reference the
“CentralControl Operations Guide”.
Agent Configuration
Page 44 of 121
Agent 6.5 User’s Guide for Microsoft Windows
2.2.1
Agent Groups
Normally, when you create (add) a single New Agent, you enter six pieces of information
(not counting the “Save password” checkbox):
• Description
• Network address
• Port
• User name
• Password
• Domain
Agent Groups allow you to add multiple agents at one time with a user-created text file
containing agent information. This is a faster and easier way for an administrator to add
many similar Agents to a system.
When you first create a group to logically hold Agent names, it is empty. Instead of adding
the names individually, as if they were new, the Group function allows you to add a “block”
of them using a csv (Comma Separated Value) text file that you create.
Later you can propagate the agent configuration (Vault registration, retention and
notification), and Job and schedule configuration to all of the agents in that group.
This function is described in detail in the “Agents Groups” section in the “Windows
CentralControl Operations Guide” manual.
Agent Configuration
Page 45 of 121
Agent 6.5 User’s Guide for Microsoft Windows
2.3
Save the Workspace
A workspace is a convenient and functional means to organize your Backup environment
into manageable pieces. You can create as many workspaces as necessary to represent
logical groups in your network Backup environment. For example, a workspace might be
created for each physical location or department in a large company.
Within each workspace, Agents and Jobs are created. Each of these organizes and defines
various parameters of the Backup process. They manage the regular Backup activities
within a network.
To save all your configurations (Agents, Jobs and options) you must save your Workspace
with a name of your choice (or you may leave it at the default “MyWorkspace”).
The CentralControl program will prompt you to save any changes, before you exit
CentralControl. You may have more than one Workspace saved, but only one open at a
time.
Figure 8. - Save the Workspace.
With the workspace selected (highlighted) you may choose “Save Workspace” or “Save
Workspace As …” to save it.
Choose a name that is meaningful to you for your Workspace. As well as saving the current
Workspace with a new name, you may create new Workspaces, open existing ones, save only
the current one (with changes), and see the recent ones.
Because a Workspace contains important User names and Passwords necessary for access to
do Backups, it is advisable to optionally encrypt these Workspaces (with a Workspace Password)
so that unauthorized Users cannot gain access to them.
Agent Configuration
Page 46 of 121
Agent 6.5 User’s Guide for Microsoft Windows
Figure 9. - Set Workspace Password.
The “Workspace Password” option allows you to add or change a Password, as well as choosing
an encryption type, with different cipher strengths.
If this is the first time that you are using a Password here, there will not be an “Old Password”, so
leave that field blank.
Select an encryption type, and create a New Password (case sensitive, up to 31 characters). The
different types have different cipher strengths, ranging from DES-56 to AES-256.
•
None – no password
•
DES 56 bit
•
Blowfish 56 bit
•
TripleDES 112 bit
•
Blowfish 128 bit
•
AES 128 bit
•
AES 256 bit
Confirm (re-enter) the password and click OK. The actual password is not displayed as you type
it in. It is shown here as asterisks (the “star” character), for security reasons.
You are prompted for this password each time you open the Workspace. If you lose this
password, you will have to recreate the Workspace.
In this screen, and others, you may use the “What’s This?” help (the ‘?’ in the upper right corner,
or right click on a field) for further information on the fields, as well as the main Help menu (F1) for
general help. Or, you may reference the “CentralControl Operations Guide”.
Note: If the F1 Help screen is open (even minimized) the “What’s This?” help will not be
active. The F1 help must be closed for the “What’s This” help to function properly.
Agent Configuration
Page 47 of 121
Agent 6.5 User’s Guide for Microsoft Windows
2.3.1 Options
From Tools -> Options, you can set workspace options, as well as options for other functions.
Figure 10. - Workspace Options
Automatically Reload Last Workspace on Startup:
Automatically loads your last saved workspace when you start the CentralControl
application. If not set, you must select one manually. If there is a password on the
workspace, it will prompt you for it on every startup.
Auto-Refresh Display for Selected Agent every <#> minutes:
This global value applies to all Agents, but only refreshes the one that is selected
(highlighted). It will be polled for changed information every <#> of minutes (an integer value
from 1 to 15), to refresh the screen display. You may also refresh the screen at any time
with the Refresh button, or with the F5 function key.
Update Progress Display every <#> seconds:
Specifies the number of seconds (an integer from 5 to 10000), after which the Progress
Monitor Display will poll the Agent for changed information.
Return maximum <#> of files and directories:
Shows the maximum number of files and directories (from 10 to 10000000) that will be
returned at one time when you select to view them. This optimizes the system in cases
where there may be large directories, and you have to wait while the filenames are read and
displayed. If there are more returned than the number here, you will be prompted if you want
to see them all.
NOTE: In the above three <#> fields do not use a separator, such as a decimal point,
or comma in the fields
Default Text Viewer:
This is the viewer that is used to show logs (XML based), and other text based files.
Agent Configuration
Page 48 of 121
Agent 6.5 User’s Guide for Microsoft Windows
2.4
Configure the Vault – Agent Configuration
These are the properties for this Agent to connect to your Vault. The settings are specific to
an Agent, and affect all Jobs run under that Agent.
You can start the Agent Configuration from either the Tools -> Agent Configuration dropdown menus (with an Agent selected/highlighted).
... or by Right-Clicking on an Agent icon/name.
Figure 11. - Start Agent Configuration.
Starting the Agent Configuration shows a screen similar to Figure 14 (Agent Configuration
Tabs). If you have the Vaults tab selected, and click on the “New” button, you will start the
Vault Connection Wizard.
Agent Configuration
Page 49 of 121
Agent 6.5 User’s Guide for Microsoft Windows
2.4.1
Configure a New Vault Connection
You must have a valid Agent configured first, before you can configure a Vault to that Agent.
With an Agent selected, either right-click on it and choose Agent Configuration, or use Tools
-=> Agent Configuration.
Agent Configuration -> Vaults -> New. You want to select a new (but already functioning)
Vault, and enter the following information, supplied by your Vault service provider.
Figure 12. - Vault Configuration Wizard
You may not see this Welcome screen if the “Skip this screen in the future” box was
previously chosen. The Vault Configuration Wizard continues and asks for:
-
Registration: The first time is always New. (Re-Registration is used for
changes to the Profile.)
Profile Name: A name (meaningful to you) that points to your account on the
Vault.
Network Address: Vault machine address (IP or DNS). (There may be more
than one address on the same machine.)
Ports: Use a communication port.
Reconnection: How to reconnect if there are communication problems. Also,
you may choose to enable or disable Over The Wire (OTW) encryption.
Authentication: Account, User name, and (31 characters maximum)
Password to access your Vault account. Note that the password is case
sensitive.
These fields are described in Section 3.3 of the “Windows CentralControl Operations
Guide”.
Agent Configuration
Page 50 of 121
Agent 6.5 User’s Guide for Microsoft Windows
Under the Agent Configuration screen, you can also add a new Vault, or edit or delete an
existing Vault (connection). Note that you must have a Vault selected (highlighted) to be
able to edit or delete it.
Figure 13. - Can’t delete a Vault connection with jobs
If you try to delete a Vault Connection that has Jobs associated with it, you will be prompted
to delete all of the Jobs (Jobs) first.
The “Copy to Clipboard” button allows you to capture the list of Jobs so that you can paste
that list into Notepad, or a word processing document, for review.
Agent Configuration
Page 51 of 121
Agent 6.5 User’s Guide for Microsoft Windows
2.4.2
Agent Configuration Tabs
Figure 14. - Agent Configuration tabs
The Agent Configuration screen has several tabs available. (Note that this figure shows an
already configured Agent, not a new one.)
With some tabs, you can accept defaults, or change the parameters later. Some, like
Notification, Power Management or Plug-In, you might not use here, depending on your
System, and company/organization policies.
Vaults - Adds new Vaults or edits or deletes existing ones (empty, with no Jobs).
Retention: Decide on the number of days online, copies online and number of days
archived for your Backups (Safesets). This can affect the cost of your Backups.
Open File: How do you want to handle open files during backups? OTM and OFM are third
party products.
Notification: Do you want to be alerted by emails, to successful and/or failed Backups?
Agent Configuration
Page 52 of 121
Agent 6.5 User’s Guide for Microsoft Windows
Advanced: Lets you optimize your Windows System with execution priority, and bandwidth
throttling.
Plug-Ins: Allows you to set and use optional Plug-In software. See the Plug-In manuals.
(Note that this tab will not be shown in systems that don’t use Plug-Ins.)
Power Management: This screen allows you to specify what you want to happen regarding
your backups if:
they have been missed, or failed,
the system wants to shutdown,
the system wants to hibernate,
the system detects a network loss/presence.
You will be notified of the status of your backups and the network, with the System Tray icon
(Agent Assistant). The icon may show Ready (not processing and the network is up),
Processing (a backup is running) or Not Ready (network connectivity is down).
If you “hover” the mouse pointer over the system tray icon on the Agent machine, the
current status of the Agent will be displayed.
See Section 3.3.8 in the “Windows CentralControl Operations Guide” for more information
on this.
In this screen, and others, you may use the “What’s This?” help (the ‘?’ in the upper right
corner, or right click on a field) for further information on the fields, as well as the main Help
menu (F1) for general help.
Agent Configuration
Page 53 of 121
Agent 6.5 User’s Guide for Microsoft Windows
2.4.3
Re-Registration
If you “delete” an Agent from a Vault, you are deleting the actual profile on the Agent PC. If
you then add that same Agent (it uses the Agent’s computer name) to the Vault, the Vault
recognizes it and prompts you for a re-registration. This will also happen on a Restore From
Another Computer.
The original profile is downloaded from the Vault back to the Agent, but in this case, it is
minus several fields (you may not have all of these):
• the encrypted password, if you had used encryption on backups,
• the domain, username and password of the account used to perform a MAPI
backup,
• the domain, username and password of the account used to back up SQL
server,
• the domain, username and password of the account used to back up a
networked drive.
You will receive messages similar to this example, in the error log, when a backup or restore
fails, because of a re-registration, or restore from another computer situation.
PARS-W-0002
Due to a computer registration, configuration file
“weekend” is missing the following information:
PARS-W-0002
Enc_Password (Encryption Password)
please use the CentralControl to re-enter the missing information.
In this version of the Agent, the agent re-registration process creates a “register.log” log
file that reports any missing Job file settings. The log file can be viewed via the
CentralControl once the re-registration has completed.
Any attempt to perform either a backup or restore using one of the affected Job files will fail
until the Job file has been reconfigured. Should this failure happen, the backup or restore
log file will contain information similar to that of the “register.log” indicating which Job
settings are missing.
Agent Configuration
Page 54 of 121
Agent 6.5 User’s Guide for Microsoft Windows
2.4.4
Cluster Support
The concept of a cluster involves taking two or more computers and organizing them to work
together to provide higher availability, reliability and scalability than can be obtained by
using a single system.
Clustering provides:
•
•
•
•
•
•
•
multiple physical computers
shared storage
applications (such as MS Exchange, or MS SQL Server) can run on any computer in
the cluster
reliability, by moving the applications to a “healthy” computer
transparency to the end user
a reduction in single point of failure (such as computer, memory, CPU, network)
for “planned” outages (maintenance, configuration and upgrades)
When failure occurs in a cluster, resources can be redirected and the workload can be
redistributed. Typically, the end user experiences a limited failure, and may only have to
refresh the browser or reconnect to an application to begin working again.
A server cluster provides high availability by making application software and data available
on several servers linked together in a cluster configuration. If one server stops functioning,
a process called failover automatically shifts the workload of the failed server to another
server in the cluster. The failover process is designed to ensure continuous availability of
critical applications and data.
While clusters can be designed to handle failure, they are not fault tolerant with regard to
user data. The cluster by itself does not guard against loss of a user’s work.
Note: Each node (physical computer) in a cluster configuration requires a separate
installation of the Agent. Each Agent installation requires a separate license. Each Agent
installation must be registered to a Vault.
The Agents are not “cluster aware”. This means that even if it is possible to do a
backup/restore on a cluster, a failover of a node will cause the backup or restore to fail. In
other words, the Agent does not automatically handle failovers. The user has to re-start the
Jobs manually.
Agent Configuration
Page 55 of 121
Agent 6.5 User’s Guide for Microsoft Windows
2.4.4.1 Virtual Server Agents
Microsoft provides Server Clustering Services (MSCS).
Multi-node clusters can be configured using different combinations of Active and Passive
nodes. When a node is Active, it is actively handling requests. When a node is Passive, it is
idle, on standby waiting for another node to fail.
From a GUI perspective, there is one “server” for each physical node and also one “server”
in the GUI for each cluster virtual server. Virtual servers are marked with a different icon
(see Figure 17).
Features:
•
A user can connect to an Agent (with a Plug-In and proper license) on a Virtual
Server or Local machine (a node) via IP or name.
•
The Virtual Server Agent can back up virtual server shared data without re-seeding,
or in case of a failover.
•
Once created, Jobs (on a shared drive belonging to a virtual server) can be used by
all Agents on the cluster.
•
Scheduling of virtual server backups is handled between node Agents without
schedule overlapping. The configuration files are located on the drive owned by the
virtual server.
•
Each physical node in a cluster configuration requires a separate installation of the
Agent, each with a separate cluster Plug-In and license. You also need to enter the
licenses of the Plug-Ins on the virtual server as well. The Cluster Plug-In should not
be visible on the virtual server.
Licensing Example:
If we have a three-node cluster, for this example, we would have three physical nodes and a
number of virtual servers running on the cluster. Assume here that we have an Exchange
Server and a SQL Server running on the cluster. This means the cluster has two virtual
servers or two virtual IP’s (one running Exchange and one running SQL).
The licensing would be thus:
1 Server Agent license per physical node (for a total of 3 Server Agent licenses).
1 Cluster license per physical node (for a total of 3 cluster licenses.
1 Server Agent license per virtual server (for a total of 2 Server Agent licenses,
because there are two virtual servers or IPs).
1 Exchange Plug-In license, because there is one virtual Exchange Server.
1 SQL Plug-In license because there is one virtual SQL Server.
Each physical node does not need a license per Plug-In because the backups are done
through the virtual agent. Attempting to back up an item for the Plug-In on the physical node
would fail because there is no license for the Plug-In (nor is one needed because the virtual
Agent does the backups).
(In this example, if you wanted to host a SQL server on one the physical nodes, you will
require a SQL Plug-In license to do so.)
Agent Configuration
Page 56 of 121
Agent 6.5 User’s Guide for Microsoft Windows
2.4.4.2 Cluster Support Plug-In
The main function of the Cluster Support Plug-In is for the Agent on a MS SQL or MS
Exchange Server, which has a virtual IP address in the cluster, to be able to follow the
server when it fails over to another node in a cluster.
The Agent can still access its configuration (on a shared drive), and scheduled backups will
occur as usual, without it looking like a “different” backup and causing a reseed.
Agent Differences:
•
At Agent installation time, you will have a choice of installing the Cluster Support
Plug-In, which you must have installed and be properly licensed, to be able to use
the Agent on clusters.
Figure 15. - Cluster Support Plug-In
Agent Configuration
Page 57 of 121
Agent 6.5 User’s Guide for Microsoft Windows
Figure 16. - Cluster Virtual Servers – Cluster Support Plug-In License
•
When you first configure an Agent on a Virtual Server, you will be prompted for a
location on a drive that the Virtual Servers see. So, after a failover, the Agent
configuration will still be available to all servers.
•
The icons representing the servers in the CentralControl are different, to represent a
“regular” local Agent, and a Virtual Server Agent.
Figure 17. - Virtual Server – Agent Icon
Agent Configuration
Page 58 of 121
Agent 6.5 User’s Guide for Microsoft Windows
2.5
Create a Job
A named Job can be one of many used to do different types of Backups, in different ways, at
different times.
or ...
Figure 18. - Create a Job.
Select New Job, to start the New Job Wizard, a program that asks you questions and
prompts for details regarding the new Job. See Chapter 4 in the “CentralControl Operations
Guide” for more details.
- Backup source type – choose Local Drive only, or Network UNC Share, (there may
be additional types and Plug-Ins shown here, depending on your system).
- Filename Encoding – Use “ANSI” if you are using a single language most of the
time. Use “Unicode” if you use multiple languages on your system.
- Destination – choose an existing Vault Profile created earlier, or “branch out” from
this Wizard and create a new one here (See Section 2.4.1).
- Job name – choose a unique Job name, meaningful to you. The name must be 130 characters in length and must consist of letters (A-Z and a-z), numbers (0-9)
and/or _, -, $ (underscore, dash, dollar sign). (Note: The following names cannot
be used as Job names when connected to an Agent: PRN, CON, LPT1, LPT2,
LPT3, LPT4, COM1, COM2, COM3, COM4, NUL, AUX, Register, or Global.)
Note: Previous versions of the Agent (5.5 or lower), only allowed 1-8 characters
for the Job name.
Agent Configuration
Page 59 of 121
Agent 6.5 User’s Guide for Microsoft Windows
- File list Backup source - Data files; System State; RSM database; Event logs. You
can include/exclude files and subdirectories here. (See the section below for more
details.) Note: You may have a “Bare Metal Restore” option in this list. You need a
license for this to be able to back up. See “Overview of EVault System Restore” in
the “CentralControl Operations Guide”.
- Set the options – Quick File Scanning (on/off), Backup time Options (Disable
Deferring) and Common File exclusion (filtering). (These are also accessible in the
Schedule Job Wizard.) See the “CentralControl Operations Guide” for more
information.
- Select an encryption type – choose one from the list, or none. You must supply a
Password if you choose to encrypt your data on the Vault. The data cannot be
recovered if you lose the Password. Note that the password is case sensitive.
- Configure the logs – set log options and log copies. Choices here depend on your
Backup activity, and your need for detailed logs and their length of retention.
Changes here only affect the logs that will be created, not those already created.
Note: The default choice to automatically purge expired log files means that
when a safeset is expired, the log files will also be deleted. If you want to delete
log files before the safeset expires, you can choose to keep the last “X” number
of days of logs .In both cases you cannot keep the logs for longer than the
safeset, unless you copy them off manually.
- Finish – Run immediately, schedule a Backup, or simply exit.
To do an “ad hoc” (on demand) Backup, you would choose to run this Job immediately. For
this chapter, we are going to schedule the Job to run later. Choose either “Schedule a
Backup” and go to the next section, or “Exit” and start the schedule in the next section.
In this screen, and others, you may use the “What’s This?” help (the ‘?’ in the upper right
corner, or right click on a field) for further information on the fields, as well as the main Help
menu (F1) for general help. Or, you may reference the “CentralControl Operations Guide”.
Note: If the F1 Help screen is open (even minimized) the “What’s This?” help will not be
active. The F1 help must be closed for the “What’s This” help to function properly.
Agent Configuration
Page 60 of 121
Agent 6.5 User’s Guide for Microsoft Windows
2.5.1 Adding Files and Directories to a new Backup Job
When you first create a Backup Job, you must include one or more files, or directories (folders).
You may modify this list of files and directories afterwards.
In the New Job Wizard (described above), the Source screen asks you to select files and/or
directories to be included in the Backup.
Figure 19. - Backup Source and Options
If you are selecting Data Files, the Options button allows you to select Backup files opened for
write (that is, shared read, not opened exclusive), or Suppress archive bit processing. By default
the Backup will clear the archive bit after a backup.
Click Add to start adding files/directories to the list to be backed up. This brings up the
Include/Exclude screen, which displays a hierarchy of the disks and directories that you may
select from for the backup.
Agent Configuration
Page 61 of 121
Agent 6.5 User’s Guide for Microsoft Windows
Figure 20. - Include/Exclude Directories and Files
You can “open” the tree in the left pane by clicking on the + signs. The files in that directory are
displayed in the right pane, where you can select one or more files. Use the CTRL key and the
mouse to select multiple files in that directory. Click Include. The file/directory names are moved
to the lower part of the screen.
The Remove Item button allows you to un-select names from this lower list, if you change your
mind, before you click the OK button.
If you have a directory with a large number of files, and you want to select most of them, it might
be easier to Include them all, and then Exclude (from the list) the ones you don’t want.
You should exclude any files and directories that will be busy (open) during the backup, and do
not need to be backed up. This includes the directory where the Agent is installed. The backup
will still work, but you will see error messages in the log file such as:
“error opening file …”.
You may also select one directory (folder) at a time to be backed up. When you click Include,
you will get a message asking if you want to include all files, or only the ones that match your
selection criteria (filter).
Note that you must have the drive letter selected to properly show/select files in that drive.
If there is at least one item (file or directory) selected in a drive, the drive letter for that drive
will change to an italicized letter. That is, for example, from C:\ to C:\
Agent Configuration
Page 62 of 121
Agent 6.5 User’s Guide for Microsoft Windows
Figure 21. - Confirm Include
“Recursive” means to include all files and directories below this directory. Otherwise you may
choose to select certain files, depending on their names and extensions. A period (.) means a
recursive directory.
Previously, if a file selection contained nested exclusions and inclusions, the exclusions
would always take precedence. Now, the selection with the most detail will take
precedence. This allows for nesting of multiple inclusions and exclusions. In these cases,
the filtering will avoid traversing excluded directories.
2.5.1.1 Wildcards in File Names and Directories
An asterisk (*) means all files with any (partial) name or extension, or a part (start, middle, end) of
a Directory name.
A question mark (?) means a single character in a file name, or Directory.
Agent Configuration
Page 63 of 121
Agent 6.5 User’s Guide for Microsoft Windows
2.5.1.2 Wildcards in Directory Paths
Wildcard path elements are handled and supported for Backup selections. The
Director does not support or recognize wildcard folder selections for the purposes of
Restore. The Agent supports wild-carded path elements for both inclusion and exclusion.
For example, assume you have on your server, a directory called “Users”, and below it are
directories for each user’s name, in alphabetical order (C:\Users\<all the A’s>, C:\Users\<all
the B’s> and so on until <all the Z’s>. You want to be able to back up all these user
directories. If you simply select “C:\Users” and select Recursive, you will get everything, in
one backup. But as more users are added, the backup takes longer. What you want to do is
break the backup into separate backups, with each taking a part of the data. For instance,
one takes all the A to E, another takes all the F to J, or whatever “balance” you decide.
Figure 22. - Wildcard example
If you use a wildcard with each letter, A*, B*, C*, D*, E*, (and recursive) for one backup, you
can get all the data, automatically including any new ones added, and excluding old ones
deleted. Another backup Job may use F*, G*, H*, I*, J* (for example).
Of course, you can still filter further with ”include only files matching this filter”.
When you have finished selecting (and including) all the files and directories you want to be in
this Backup Job, click Yes and you will be back at the Source screen, where you can click Next
to continue the next step of the New Job Wizard. See the section on “Create a Job” above.
Agent Configuration
Page 64 of 121
Agent 6.5 User’s Guide for Microsoft Windows
2.5.1.3 Wildcard Rules for Directories
In these examples, a path element” is a part of the path ( \ …\ )of a directory. If the wildcards
are not used in this way, you will see an error message. Note that the *.* at the end of the
selection represents wildcards for the files. This is different than the wildcards for the folders.
• Only the last path element of the selection can contain a wildcard:
• ·
Supported:
C:\Projects\A*\.\*.*
• ·
NOT supported: C:\P*\Active\.\*.*
•
A path element of a selection can only contain one wildcard:
• ·
Supported:
C:\Project*\.\*.*
• ·
NOT supported C:\P*j*\.\*.*
•
The wildcard can appear anywhere in the path element:
• ·
Supported: C:\Project*\.\*.*
• ·
Supported: C:\*rojects\.\*.*
•
The Agent supports one path element with a wildcard per selection:
• ·
Supported:
C:\Projects\User*\.\*.*
• ·
NOT supported: C:\P*\U*\.\*.*
Selection Rules:
The more specific path spec wins if the file specs are the same:
e.g.: C:\DIR1\DIR2\.\*.DAT wins over C:\DIR1\.\*.DAT
The more specific file spec wins if the path specs are the same:
e.g.: C:\DIR1\.\*.DAT wins over C:\DIR1\.\*.*
If there is a conflict, and one has a more specific path and the other has a more specific file, then
the exclude wins:
e.g.: Exclusion of C:\.\*.DAT wins over inclusion of C:\DATA\.\*.*,
but: inclusion of C:\.\*.DAT does not win over exclusion of C:\DATA\.\*.*
Agent Configuration
Page 65 of 121
Agent 6.5 User’s Guide for Microsoft Windows
2.5.2 Adding/Removing a File or Directory with an existing Backup Job
When you first create a Backup Job, you must include one or more files, or directories (folders).
See the section above, on “Adding a File or Directory to your new Backup Job”. Later you may
want to add or remove files or directories from the Backup Job.
Select a Job in the CentralControl window, and select “Properties” for that Job, either from the
icons, or by right clicking or by using F2.
Select the “Source” tab in the Properties window.
Figure 23. - Source Tab in Job Properties.
This displays the existing list of files and directories for this Backup Job. You may select
(highlight) one or more in the lower window, and click Remove. You will be prompted with a
message “Are you sure you wish to delete the scheduled entry (or entries)?”
The Add and Options buttons work as described in the previous section on “Adding a File
or Directory to your new Backup Job”.
Click OK when you are finished.
Agent Configuration
Page 66 of 121
Agent 6.5 User’s Guide for Microsoft Windows
2.5.3
System State and System Files
Depending on the “Backup Type” (Local Drive only, or Network UNC Share) you chose in
Job creation, you might be able to choose to back up the System State of the computer that
has the Agent on it.
Note: An Agent on a Windows System 2008 currently cannot do System State or Event Log
Backups or Restores.
The system state includes:
COM + Class Registration Database
Registry
Boot Files
System Files
Performance Counter
Note that this list may be different, depending on your system. See section 4.1.4.3 (“System
State”) of the CentralControl User Guide for what is included in the different Operating
Systems.
If you click Options for System State, you are able to select/deselect including the System
Files in the backup. By not selecting “Backup system files” you will see a red negation circle
on the System Files icon, and they will not be included in the backup. The default is to have
them included.
Figure 24. - System State and System Files
Agent Configuration
Page 67 of 121
Agent 6.5 User’s Guide for Microsoft Windows
System files vary by system O/S and service packs. Usually there are several thousand of
them. MS Windows makes a dynamic list of these DLLs when you include them in the
backup.
Including the system files allows you to recover from corrupted system files, or if you
accidentally uninstall some service packs, or want to recover with a bare-metal restore. It
allows you to return to the state of the backup without having to reinstall the O/S from the
installation kit, and then installing each service pack separately.
You should include the System State objects in a backup whenever you modify the
Operating System.
2.5.4
Other Sources
If you chose Network UNC Share, you will be able to see and select only “Data Files” for
inclusion in the backup.
If you selected “Local Drive Only” in the Backup Source Type, you will see “Data Files” plus
you may have (depending on your operating system) “System State”, “RSM database”,
“Event Logs”, “IIS Metabase”, “Terminal Services”, and “Active Directory” to include in the
backup.
Removable Storage Manager (RSM) facilitates communication among applications, robotic
changers, and media libraries. It enables multiple applications to share local robotic media
libraries and tape or disk drives, and manage removable media within a single-server
system. RSM uses a database to store its persistent data.
To back up/restore an RSM database, the Agent uses a “Local Drive Only” Job (the same
one used for file or System State backup), but it has a special selection option called “RSM”.
This option is always available on the CentralControl backup/restore interface if RSM
service on the client is installed and functioning. To back up the RSM database, check the
“RSM” option.
Event Logs – This backs up the Windows Event Logs. Event log databases store events
that are viewed by using the Windows Event Viewer program. To back up all Event logs
currently available on the system, select “Event Logs” checkbox on CentralControl backup
interface:
To restore event logs select “Event Logs” checkbox on the CentralControl restore interface.
IIS Metabase – The backing up of IIS involves the backup of the IIS Metabase. The IIS
Metabase is a database similar in structure to the Windows Registry. The IIS Metabase is
optimized for IIS and provides a hierarchal storage and fast retrieval of IIS configuration
properties for Web sites, Virtual directories, FTP Sites, SMTP and NNTP sites.
Terminal Services Licensing Database – Terminal Service licenses are stored in a database
that needs to be properly handled during backup/restore. If Terminal services is installed and
licensed on a Windows 2003/2008 server, you will see this source option.
2000/2003 Active Directory – The Agent supports backups and restores of the Windows
2000/2003 Active Directory. It supports restoration of replicated data where the target is the
primary AD server.
Agent Configuration
Page 68 of 121
Agent 6.5 User’s Guide for Microsoft Windows
2.5.5
Performance
If the Agent is on a multi-cpu system, you can use multi-threading to improve the
performance of backups and restores for files larger than 32 kB.
There are three threading models available:
-
Single threading. All the data processing is handled by a single thread.
-
Combined threading. Data processing is divided up between two threads.
-
Block Processor threading. Data processing is spread across four or more threads.
Threading Model User Options:
1. Default. With this option the Agent will check both backup settings and current hardware
to determine which model it should use. This is the default setting used by the Agent.
On a single CPU system, the Single threading model will be used.
On a multi-CPU system the threading model used will depend on backup settings. If
compression and/or encryption are turned ON, the Block Processor threading model will be
used, otherwise the Combined threading model will be used.
2. Single. A Single threading model will be used.
3. Combined. The Combined threading model will be used.
4. Block Processor. The Block Processor threading model will be used with up to four
processing threads.
5. Maximum Block Processor. The Block Processor threading model will be used with up to
five processing threads.
Using the Options:
You can specify a threading model in the Job CFG file, or on the command line with VV.EXE:
1. “Backup” section of the job configuration file: Thread_Model = Default
Possible values: Default, Single, Combined, BlockProcessor or MaximumBlockProcessor.
2. “Restore” section of the job configuration file: Thread_Model = Default
Possible values: Default, Single, Combined or BlockProcessor. (Notice that there is no
“MaximumBlockProcessor” option here.)
3. At the command prompt, specify: “/ThreadModel=Value”, where Value is one of the
options above. (For example “/ThreadModel=Single”).
Agent Configuration
Page 69 of 121
Agent 6.5 User’s Guide for Microsoft Windows
2.6
Schedule the Job
A Job (a Backup or Synchronize, but not a Restore) can be run at pre-determined
(scheduled) times. All Jobs can also be run “manually” (ad hoc, or unscheduled) when
desired.
Figure 25. - Schedule the Job.
Start the scheduling from Tools -> Schedule Entries, or right-click on an Agent. This brings
up the Schedule List screen. For a new installation, this will be empty.
Click New to add a new schedule. This will start the Schedule Wizard, which will take you
through the steps to configure a schedule.
-
Select a Command to schedule. You may choose: Backup, Synchronize, or Custom
command. To perform a backup, choose “Backup”.
-
Select a Job from the list. It shows the Target and Destination for each.
-
Select a Backup type. (Note: This screen will not be displayed for a backup to a
Vault). You would select Backup type and Processing Options for local disk or tape.
-
Select a Retention. Choose Daily, Weekly, or Monthly from the list. This determines
how long your Backup will be kept online.
-
Set the Options. Choose Quick File Scanning (on/off), and Backup Time Options.
(These are also accessible in the Create a Job Wizard.)
Note: You may have MS Exchange options here. See the MS Exchange Plug-In
User Guide.
Agent Configuration
Page 70 of 121
Agent 6.5 User’s Guide for Microsoft Windows
-
Select a Command Cycle. Choose Weekly, Monthly or a Custom Cycle for Backups.
When you have selected one, and defined the days and times, the Wizard will finish.
The command that you have created will now show in the Schedule List. You may
Edit, Remove or Disable it. If you have more than one schedule in the list, you may
move them up or down in position (priority), so that any conflicts are resolved by
taking the parameters in the first (highest) one, and overriding any others.
-
Click Finish when you are done the Wizard.
In this screen, and others, you may use the “What’s This?” help (the ‘?’ in the upper right
corner, or right click on a field) for further information on the fields, as well as the main Help
menu (F1) for general help. Or, you may reference the “CentralControl Operations Guide”.
Note: If the F1 Help screen is open (even minimized) the “What’s This?” help will not be
active. The F1 help must be closed for the “What’s This” help to function properly.
Agent Configuration
Page 71 of 121
Agent 6.5 User’s Guide for Microsoft Windows
3.
Performing Backups
(Note: This chapter references Windows CentralControl only. Backups with Web
CentralControl are described in the Web CentralControl documentation and help.)
Once all the Agent Configuration information has been entered, and a schedule set up,
as in the previous chapter, the Backups will take place automatically.
On occasion, you may need to run a “one-time” Backup for a special reason. You can
either use an existing Agent and Job (and modify it) or create one specifically for that
Backup.
Seeding and Re-Seeding:
When you run your first Backup, a full backup (safeset) is created on the Vault. This first
safeset contains all the data selected for backup and is called a “seed”. Subsequent
backups are deltas (changes in file) that are applied to the first full backup to create
subsequent safesets. This way a current full backup is always available.
If the Agent detects changes, such as the encryption type or password changing, the
next backup will be a re-seed.
In this case of a re-seed, your backup will take longer to complete and a message about
re-seeding is created in the log file .
Performing Backups
Page 72 of 121
Agent 6.5 User’s Guide for Microsoft Windows
3.1
Running an ad hoc Backup
To start an un-scheduled (ad-hoc, or on-demand) Backup Job, and with a Job selected
(highlighted) either:
- Choose Tools -> Backup, or
- Right-Click on the Job in the left pane, or
- Click the Backup icon (or use CTRL+B)
Figure 26. - Ad hoc Backups.
This starts the Backup Wizard, which asks you for:
- A destination (Vault, tape or directory on disk). You may choose “Skip further
configuration and Backup Now”, or click Next.
- Backup type and options. Depending on your choice of Vault, tape or disk,
make selections here for type and options. Note that a Vault Backup will skip
over this screen.
- Retention scheme. Select a retention scheme: daily, weekly or monthly. This is
the same as in the scheduling of Jobs.
- Options. Quick file scanning, and Backup time options. This is the same as in
the scheduling of Jobs.
- Click Finish to complete the configuration and start the Backup.
Performing Backups
Page 73 of 121
Agent 6.5 User’s Guide for Microsoft Windows
As the Backup is running, you will see a Process Monitor screen that shows the
progress of the Backup Job.
Figure 27. - Backup Progress
Once the backup is completed, the Process Information screen can be Closed.
Figure 28. - Backup Completed
Performing Backups
Page 74 of 121
Agent 6.5 User’s Guide for Microsoft Windows
3.2
Check the Backup results
After a Backup (scheduled or ad hoc) you can check the results for success, or any
possible errors. Note that you may have chosen, in Agent Configuration, to be notified by
email of successful and/or failed Backups. See section 3.2.4 for email notification
examples.
Figure 29. - Checking Backup results.
3.2.1
Process Information - Backup
Processes are the “jobs” that the System has performed, such as Backups, Synchs, and
Restores. If you select “Processes” in the left pane, you can see a list of processes.
Double clicking on one will show you the details.
This Process Information will normally be deleted after approximately one hour in this
list. Or you may delete it with the "Delete Entry" button. The information about the job is
still retained in the log files.
To ensure an accurate (current) picture of the processes, you must perform a
“Synchronize”.
Performing Backups
Page 75 of 121
Agent 6.5 User’s Guide for Microsoft Windows
3.2.2
Safeset Properties
Below each Job in the left pane are Safesets and Logs. Safesets are the ”sets” of
Backup data (sequentially numbered) on the Vault. They remain until their retention date
expires. Double clicking a Safeset will show you its properties.
Figure 30. - Safeset Properties.
3.2.3
Log Files
Log files are the System transcripts of what happened while the Backup, Synch or
Restore function was happening. Double clicking on a log will display the contents,
which you can also print.
Performing Backups
Page 76 of 121
Agent 6.5 User’s Guide for Microsoft Windows
3.2.4
Email Notification
If you have configured the "Notification" tab, in Agent Configuration, and correctly
entered the email information sections ("from address", "SMTP" address, and "to
addresses"), then you can expect to receive emails about the success of the backup.
The Agent supports PLAIN, LOGIN and CRAM-MD5 SMTP authentication.
Figure 31. - Email Notifications
The following email example demonstrates a first backup, with all the selected data
backed up. The second email example demonstrates that less data (only the delta) is
sent after a seed.
The first time you run a backup, the data is "seeded". That is, all the data has to be
copied from the PC to the Vault.
Agent: PCACCT
Date and time: 23-FEB-2007 10:17:26.25 -0500
The Job BACKUP DailyBak completed successfully.
BKUP-I-0000
BKUP-I-0000
BKUP-I-0000
BKUP-I-0000
BKUP-I-0000
BKUP-I-0000
BKUP-I-0000
BKUP-I-0000
BKUP-I-0000
BKUP-I-0000
BKUP-I-0000
BKUP-I-0000
BKUP-I-0000
BKUP-I-0000
BKUP-I-0000
BKUP-I-0000
BKUP-I-0000
BKUP-I-0033
errors encountered:
warnings encountered:
files/directories examined:
files/directories filtered:
common files excluded:
files/directories deferred:
files/directories backed-up:
files backed-up:
directories backed-up:
data stream bytes processed:
all stream bytes processed:
pre-delta bytes processed:
deltized bytes processed:
compressed bytes processed:
approximate bytes deferred:
reconnections on recv fail:
reconnections on send fail:
elapsed time 00:46:23
36
0
54,678
9,731
0
0
44,919
42,338
2,581
6,973,189,793
6,978,110,221
6,978,110,221
6,978,110,221
5,095,823,625
0
0
0
Some files
were open,
and were
not backed
up.
(6.5 GB)
(6.5 GB)
(6.5 GB)
(6.5 GB)
(4.7 GB)
(0 bytes)
The data is
deltized and
compressed
The first time
is longest, as
all the data
has to be
sent.
Performing Backups
Page 77 of 121
Agent 6.5 User’s Guide for Microsoft Windows
For subsequent backups, only the changed (deltized) data is copied to the Vault. This
means less data transmitted, and less storage space taken on the Vault. But, it is still a
"complete" backup, and all the data (the original seed plus any changes) can be
restored, if necessary.
Agent: PCACCT
Date and time: 24-FEB-2007 10:15:18.89 -0500
The Job BACKUP DailyBak completed successfully.
BKUP-I-0000
BKUP-I-0000
BKUP-I-0000
BKUP-I-0000
BKUP-I-0000
BKUP-I-0000
BKUP-I-0000
BKUP-I-0000
BKUP-I-0000
BKUP-I-0000
BKUP-I-0000
BKUP-I-0000
BKUP-I-0000
BKUP-I-0000
BKUP-I-0000
BKUP-I-0000
BKUP-I-0000
BKUP-I-0033
errors encountered:
warnings encountered:
files/directories examined:
files/directories filtered:
common files excluded:
files/directories deferred:
files/directories backed-up:
files backed-up:
directories backed-up:
data stream bytes processed:
all stream bytes processed:
pre-delta bytes processed:
deltized bytes processed:
compressed bytes processed:
approximate bytes deferred:
reconnections on recv fail:
reconnections on send fail:
elapsed time 00:03:03
Less time is
taken as only the
changed data
(delta) is sent to
the Vault.
Performing Backups
48
0
54,690
9,736
0
0
44,920
42,339
2,581
6,973,190,632
6,978,111,212
34,083,596
29,660,588
8,711,184
0
0
0
(6.5 GB)
(6.5 GB)
(32.5 MB)
(28.3 MB)
(8.3 MB)
(0 bytes)
The same data is
processed, but much
less data (only the
delta) is sent to the
Vault after the initial
seed.
Page 78 of 121
Agent 6.5 User’s Guide for Microsoft Windows
4.
Performing Restores
(Note: This chapter references Windows CentralControl only. Restores with Web
CentralControl are described in the Web CentralControl documentation and help.)
There are several circumstances or reasons you may want to do Restores.
- To recover one or more data files or directories. You can Restore them to their
original location, overwriting any that are there, or Restore them to a different
location on that disk, so that you can then decide on which files you want to copy
(restore).
- To recover data that was backed up from one computer, to be Restored on another
(similar) computer System.
- To recover a complete System (from the “bare-metal” up) when the original System
has been lost.
You can run multiple individual Restores at the same time (i.e.: simultaneous restores).
Each one will start a new process, which you can monitor.
4.1
Restoring a Safeset
Restoring a Safeset is the most common usage, allowing you to recover anything from a
single file to a complete directory structure.
To start a Restore Job, and with a Job selected (highlighted) either:
- Choose Tools -> Restore, or
- Right-Click on the Job in the left pane, or
- Click the Restore icon (or use CTRL+R).
Figure 32. - Starting a Restore.
Performing Restores
Page 79 of 121
Agent 6.5 User’s Guide for Microsoft Windows
The Restore Wizard starts, and allows you to:
- Select a type of source device, Vault, tape or directory. Depending on what you
choose here, you may also select a Vault and a Safeset, or a range of Safesets.
- Enter the Password if the Backup is encrypted. You may not see this screen if the
Backup was not encrypted. If you have lost the Password, you cannot access the
Backup data. Note that the password is case sensitive.
- Select the Restore objects (files or directories). You can expand the directories (if
available) and select or deselect files to include in the Restore.
- Enter the Restore destination. You may choose to Restore files to their original
locations, or to alternate locations; create sub-directories; overwrite or rename
already existing files.
- Select the other Restore options. You may overwrite files that are locked; choose
all streams or only data streams. You may choose to create a log file with different
levels of detail.
Cross Catalog Searches:
You can search through all available catalogs when restoring files, without switching
Restore Wizards.
In the Restore Wizard, when you select a source, you can specify a single safeset, or a
range of safesets. For a range, you may chose a "from" and "to" in the two dropdown
lists, to show multiple catalog entries.
For a single safeset, you must know, from the Job, data and safeset properties, which
safeset you want to Restore.
Since cross catalog searches are done on all available safesets, all corresponding
catalogs are loaded in case they are not present. The number of safesets could be high,
so in case too many catalogs fail to load, you have the ability to "break" the search and
display only the files that were found so far.
You cannot select System State when restoring from multiple safesets.
If you use renaming on Restores, it will only allow you to rename incoming files.
Restores are performed in order of older to newer ones.
Performing Restores
Page 80 of 121
Agent 6.5 User’s Guide for Microsoft Windows
4.1.1 File Restore Handling
You may choose from locations to restore your files, preserve directory structure and
overwrite options here.
4.1.1.1 Original or Alternate Location
Original location or alternate location: If you choose original you may overwrite existing
files. If you choose alternate, you may choose to create subdirectories.
Note: You can Restore a Backup from a UNC path to the original location. But if you
attempt to Restore to an alternate UNC path, it will fail and log an error.
4.1.1.2 Subdirectories
When restoring to an alternate location, you may choose whether or not to Restore your
Backups in their original directory configuration. If you choose not to create subdirectories, all of your files will be Restored to one directory.
If you choose to Restore to the original location, the initial directory structure is
recreated. When this option is selected, choosing not to create sub-directories has no
effect.
To specify an alternate location, you can either enter the location in the text box or click
on the Browse button to search for the location.
Note: If two files with the same name, but located in different volumes, are Restored to
the same alternate location, CentralControl does not differentiate between volume
names. The first file is Restored and then overwritten by the second file.
For example, a user copies some system files from C:\WINDOWS to D:\WINDOWS.
After some time, the user Restores files from C: and D: to an alternate location. The first
WINDOWS file is Restored and then overwritten by the second WINDOWS file. The
Restored Windows directory will contain a mix of old and new files.
This issue can be resolved by restoring the files to separate alternate locations or to their
original locations.
4.1.1.3 File Overwrite Options
•
Rename files coming in from your Restore, so that they don’t conflict with existing
ones.
•
Rename files that already exist, so that they don’t conflict with restored ones.
•
Do not restore existing files by overwriting the existing ones.
•
Overwrite existing files with the restored ones.
Note: Renaming will append additional (cumulative) extensions to the file. These
extensions start at .0001, .0002, .0003, and so forth.
4.1.1.4 Overwrite if locked
If you choose to overwrite locked files, these files will be replaced after restarting the
machine on which the Restore Job was performed.
Restoring the Registry or NDS are options that are related to performing complete
systems recovery. The Windows Registry stores almost all of the custom data that
Windows uses.
Performing Restores
Page 81 of 121
Agent 6.5 User’s Guide for Microsoft Windows
4.1.1.5 Restore all streams or only data streams
CentralControl stores the information from your files in various streams. The original
data created by the user is called the Data Stream. Other information, such as security
settings, alternate data for other operating systems and file reference information, is
stored in separate data streams.
Restore all streams is selected by default. This option Restores all information streams
and is recommended, provided you are restoring files onto a system with the identical
operating system. If you wish to perform a cross platform Restore, select Data streams
only. This option ensures that conflicts do not arise as a result of system-specific
information streams.
4.1.1.6 Use all available bandwidth
This check box is on, by default. During backups you had a choice of using all
bandwidth, or “throttling back” on a job, so that the network would not be overwhelmed
with backup data, leaving others users with very little bandwidth for their daily tasks.
Typically you would want a restore to happen as fast as possible. But, you can choose to
use only the bandwidth allocated during Agent Configuration.
4.1.2
Restoring from CD or DVD
The Agent will allow restores directly from a CD or DVD drive, without having to copy
safesets to the hard disk first. CDs and DVDs with safesets are created by Vault
personnel.
CDs typically can store around 700 MB, while a DVD will store about 4 GB.
There are several ways the safesets can be stored on the media:
- a single SSI on a single CD/DVD.
- SSI files that are divided into many SSI files with a fixed length, but the whole
set fits on a single medium.
- CDs or DVDs that contain a single backup that spans more than one media.
The user specifies “Directory on Disk” and then browses to the folder containing the SSI
file. The SSI file on the CD/DVD must correspond correctly to the safeset number that is
specified under “Restore from the following safeset”. If not, the CC will show an error
when the restore operation begins, saying that the medium is not the right one.
When the Restore operation begins it will request a certain CD/DVD to be mounted in
the drive, if there is no media mounted. If a second (or more) media is required, it will be
prompted. It will not prompt if the requested SSI is on a CD/DVD that is already in use
(i.e.: mounted).
Performing Restores
Page 82 of 121
Agent 6.5 User’s Guide for Microsoft Windows
4.1.3
Process Information - Restore
Press the Finish button to start the Restore process. The Restore process proceeds,
and the process information is displayed. A progress bar will indicate the approximate
time used and time remaining for each file.
Figure 33. - Restore in Progress.
4.1.4
Log Files for Restore Jobs
You may wish to review the log file afterwards. Under the Job name in the
CentralControl GUI left pane is a selection called Logs. A Restore process will have a
log file with this format: “RSTyyyymmdd-hhmmss”.
Figure 34. - Log Files for Restore Jobs
Performing Restores
Page 83 of 121
Agent 6.5 User’s Guide for Microsoft Windows
4.2
Cross-Computer Restores
From the menus, select “Actions > Restore from another computer”. This starts the Job
Import Wizard.
Figure 35. - Restoring from another computer
The “Restore from another computer” option allows the User to redirect the (original)
Restore Job to a different client (location). It re-registers where the configuration file was
originally pointing, so that the Restore Job can be redirected to another location. It does
this by getting, authenticating and copying configuration information - Vault name,
computer name, and Job name - from the original configuration, and adding it to your
location so that the Restore can be accomplished there.
The steps that the Wizard takes you through, to do this are:
- Select an existing Vault Profile.
- Select the computer that has backed up the Job that you wish to import.
- Select the Job you want to Restore.
The Wizard will now copy the Job to your local Workspace. If one already exists with that
name, it will prompt you to overwrite.
From here, the Restore proceeds like a normal Restore, as outlined in the previous
section.
Performing Restores
Page 84 of 121
Agent 6.5 User’s Guide for Microsoft Windows
4.3
Bare-metal Restore
A “bare-metal” restore (BMR) is not a menu choice in the CentralControl program.
Rather, it is a way of restoring a “complete” Backup to a new System. The “EVault
System Restore” application is used to do this. See the EVault System Restore User
Guide for more information.
You would want to do this, for example, if a System has crashed, and the disk has been
replaced. Now you want to recover all the System and User data back to that disk.
Note that reinstalling the O/S and applications and then the data is possible, but you
may not be able to recreate the exact state of the System that you would get with a
Restore of a full drive Backup that included data files, System State, and System Files.
(Note: System State and Event Log backup/restores for Agents on Windows Server
2008 are currently not supported.)
“Bare Metal Restore” is an option (available in “Local Drive” Agent Jobs) that captures
the information necessary for the “EVault System Restore”.
“EVault System Restore” is a separate application used for “bare metal recovery” of
systems in case of disaster recovery.
Performing Restores
Page 85 of 121
Agent 6.5 User’s Guide for Microsoft Windows
5.
Appendix
(Note: This chapter references Windows CentralControl only. Examples with Web
CentralControl are described in the Web CentralControl documentation and help.)
5.1
Examples
The examples in this section are intended to allow a new User to be able to step through
the major pieces of a Backup/restore process In Windows CentralControl), by following
an example. By using the beginning steps outlined in the chapters of this manual, and
then by following the steps listed here, you should be able to complete a simple Backup
and Restore. Further in-depth explanations and details about the steps can be resolved
with the “CentralControl Operations Guide”.
(Note: This chapter references Windows CentralControl only. Examples with Web
CentralControl are described in the Web CentralControl documentation and help.)
5.1.1
Example 1: Creating a Backup Job
1. Right-click on an Agent and select New Job or select New Job from the File
menu. The New Job Wizard launches.
2. Give the Job a name that is unique from all the other Backup Jobs you may have
created for the computer being backed up. This name will need to be 1 to 30
characters. It is good to be descriptive rather than generic. Click Next when
ready.
3. Select a Vault for the Backup. The list of Vaults should have at least one Vault
Profile name in it. Click Next when ready.
4. Select a Backup Source Type. Different types of Backups include: local files,
network files, application Backups such as Microsoft Exchange. The list of types
will vary depending on what you have installed on the computer you are being
backed up. Select “Local Drive Only”. Click Next when ready.
5. You should be now on the “Source” window. This window allows you to select the
files you want backed up. This selection section will vary depending on the
Backup Source Type. This part of the Job creation may be extremely complex
depending on what you are backing up.
6. Double-click the Data Files check box then click the Add button. A pop-up dialog
box should appear where you can select all the files you want to back up. For the
purposes of this example, you should probably pick a few small text files.
7. Select your files and click the Include button.
8. Repeat the previous step until your Backup file selection list is complete. Click
OK when all your files you want backed up have been selected.
9. The pop-up dialog box should have disappeared and you should be back at the
Source window. Click Next to continue.
10. You should be now on the Options window. This window allows you to
enable/disable Quick File Scanning and to configure the amount of time to allow
Appendix
Page 86 of 121
Agent 6.5 User’s Guide for Microsoft Windows
the Backup to complete and also to specify if you want the Backup to “defer” to
the next day if it can’t complete on time.
11. By default, Quick File Scanning is on. This option allows the Backup to quickly
scan the System to figure out if any file has changed by reading the “header”
information on each file that the System supplies. The alternative is for the
Backup to read every file in the Backup completely to see if the file has changed
and is a much slower method but is 100% guaranteed to find all changes in files.
For almost all situations you should leave Quick File Scanning on.
12. Disabling deferring means that the Backup time window settings will be ignored
and all your selection will be backed up in one pass regardless of how long it
takes. Normally it is preferable to defer a long Backup to the next time the
Backup is scheduled; when this happens the Backup simply starts where it left off
from the previous time.
13. The Backup Time Window indicates how long you are giving the Backup time to
complete before stopping. It is normally set to 8 hours.
14. Accept all the defaults on this window and click Next.
15. You should be on the Encryption window. This allows you to indicate whether
you want your data encrypted when it is stored on the Vault. If you do then you
can select an encryption option and choose an encryption Password. Be careful
if you do because the Vault operator will not know your Password when you want
to Restore your data. Only you will know it. Note that the password is case
sensitive.
16. Regardless of whether you choose to encrypt your data for storage on the Vault,
during the actual transmission of the data over the network the Agent will (by
default) encrypt the communications session to ensure privacy during the
transfer of information. This Over The Wire encryption may be disabled in “Agent
Properties”, under the “Connectivity” tab. See the “CentralControl Operations
Guide” for more details.
17. You should now be on the Log options window. Whenever a Backup is run, a log
file of the activity is created. On this window you can select how detailed the
logging information should be. The more detailed, the larger the log file and the
more disk space the Backup uses. You can also select for how long the logs
should be kept around. Viewing the Backup logs periodically is a good way to
ensure that everything is working. After the very first Backup is run you should
check the first log to make sure everything happened correctly.
18. For now use all of the defaults, and simply click Next.
19. You should now be on the last window of the Wizard. This is the Finished
window. Here you can choose to run the Job, schedule it, or simply create it and
do nothing more. The default should be to simply “exit” and do nothing more. If
this is not selected, select it now.
20. Click Finish. At this point the application will attempt to contact the Vault that
was selected in order to register this new Job. If the network is down or the Vault
is otherwise unavailable or there are other unforeseen problems then an Error
Appendix
Page 87 of 121
Agent 6.5 User’s Guide for Microsoft Windows
dialog box will pop up. Normally everything is working ok and this step completes
quickly in a few seconds.
21. This section should now be completed and the Wizard has disappeared from the
screen. Your new Job should be listed in the list of Job under the Agent icon on
the left hand pane of the screen. If instead you received an error message then
you should contact your support staff to troubleshoot the problem.
22. You should now go to the next example “Running an Ad-Hoc Backup” to run the
Backup Job that was newly created.
5.1.2
Example 2: Running an ad hoc Backup
An “ad hoc” Backup is usually a one-time only, unscheduled Backup, run for a special or
unique reason.
1. Right-Click a Job, and choose “Backup”.
2. Select a Backup destination: a Vault, a tape device, or a disk directory.
3. There is an option to “Backup now”, without further configuration, but for this
exercise, click Next.
4. The next screen has Choose a Backup Type, and Processing Options. Because
this is a Vault Backup (with delta and compression pre-selected), the options will
be grayed out.
5. Choose a Retention scheme (used to specify how long we will keep the Backups
on the Vault) – daily, weekly or monthly. There are defaults that we will use for
this example: Daily is retained for seven days; Weekly is retained for a month;
and Monthly is retained for a year.
6. You should be now on the Options window. This window allows you to
enable/disable Quick File Scanning and to configure the amount of time to allow
the Backup to complete and also to specify if you want the Backup to “defer” to
the next day if it can’t complete on time.
7. By default, Quick File Scanning is on. This option allows the Backup to quickly
scan the System to figure out if any file has changed by reading the “header”
information on each file that the System supplies. The alternative is for the
Backup to read every file in the Backup completely to see if the file has changed
and is a much slower method but is 100% guaranteed to find all changes in files.
For almost all situations you should leave Quick File Scanning on.
8. Disabling deferring means that the Backup time window settings will be ignored
and all your selection will be backed up in one pass regardless of how long it
takes. Normally it is preferable to defer a long Backup to the next time the
Backup is scheduled; when this happens the Backup simply starts where it left off
from the previous time.
9. The Backup Time Window indicates how long you are giving the Backup time to
complete before stopping. It is normally set to 8 hours. Accept all the defaults on
this window and click Next.
10. Click Finish and the Backup Job starts, displaying the progress of the Backup.
Appendix
Page 88 of 121
Agent 6.5 User’s Guide for Microsoft Windows
5.1.3
Example 3: Scheduling a Backup Job
When you are creating a new Job, at the end of the New Job Wizard, you have the
option to Run, Schedule or Exit. If you select the Schedule radio button and click Finish
in the Job Wizard, the Schedule List panel appears.
To schedule an existing Job in the CentralControl, Right-Click the Agent, and choose
Schedule Entries from the menus. The Schedule List panel appears.
To schedule a Backup:
1. Click the New button on the Schedule List panel. The schedule Wizard launches.
2. Welcome. Click Next.
3. Select Backup from the schedule command list. Click Next.
4. The Select a Backup Type window appears, but is grayed out. Click Next.
5. The Retention window appears. Choose a Retention scheme (used to specify
how long we will keep the Backups on the Vault) – daily, weekly or monthly.
There are defaults that we will use for this exercise: Daily is retained for seven
days; Weekly is retained for a month; and Monthly is retained for a year. For this
exercise, choose (default) Daily, and Click Next.
6. You should be now on the Options window. This window allows you to
enable/disable Quick File Scanning and to configure the amount of time to allow
the Backup to complete and also to specify if you want the Backup to “defer” to
the next day if it can’t complete on time.
7. By default, Quick File Scanning is on. This option allows the Backup to quickly
scan the System to figure out if any file has changed by reading the “header”
information on each file that the System supplies. The alternative is for the
Backup to read every file in the Backup completely to see if the file has changed
and is a much slower method but is 100% guaranteed to find all changes in files.
For almost all situations you should leave Quick File Scanning on.
8. Disabling deferring means that the Backup time window settings will be ignored
and all your selection will be backed up in one pass regardless of how long it
takes. Normally it is preferable to defer a long Backup to the next time the
Backup is scheduled; when this happens the Backup simply starts where it left off
from the previous time.
9. The Backup Time Window indicates how long you are giving the Backup time to
complete before stopping. It is normally set to 8 hours. Accept all the defaults on
this window and click Next.
10. Command cycle. Choose Weekly or Monthly. The screen describes how to select
the schedules.
11. Click Finish. The Schedule List panel appears.
12. Click OK.
Appendix
Page 89 of 121
Agent 6.5 User’s Guide for Microsoft Windows
5.1.4
Example 4: Check the Backup Results
When your Backup is complete, the results appear in the log files in your CentralControl
window. To confirm a successful Backup:
1. Click an Agent on the left pane of the CentralControl window.
2. Click a Job. The Safesets and Log files for the selected Job appear in the right
pane of the CentralControl window.
3. Click on the Logs folder. A log report for your Backup appears in the right pane.
Double click the Log file to view the details of the Backup. The bottom (last)
portion of the Log file should indicate that the Backup was completed with no
errors. If your Job was not completed or you encountered errors, contact your
service provider.
5.1.5
Example 5: Running a Restore Job
After you have completed one or more Backups, you can execute a file Restore at any
time.
1. Select the Agent Job from which you want to Restore the file(s).
2. Choose the Restore button on the Standard toolbar. This starts the Restore
Wizard.
3. From the Select a Source dialog, you can view the most recent type of source
device (e.g. Vault), specific source (e.g. name of Service Provider) and Safeset
(e.g. number of Safeset – Safesets are numbered starting at one and in
increasing order). Typically, these are what you want to restore from. However,
you may change any of them as required. Click Next.
4. From the Encryption Options dialog, enter your encryption Password in the
Password text box if your data was encrypted during Backup. Also, enter your
Password in the Verify Password text box. Note that the password is case
sensitive. Click Next.
5. From the Select Restore Objects dialog, select the file(s) you would like to
include/exclude from the Restore.
6. From the Destination Options dialog, establish the location to which the files are
to be restored, whether or not you want sub-directories created and if existing
files should be overwritten. The defaults are to restore to an alternate location
(you need to specify the location), create sub-directories and overwrite existing
files.
7. From the Advanced Restore Options dialog, set any desired options. The
defaults are to not restore locked files, to not restore the Local Registry/Novell
Bindery/NDS (depending on the operating System) and to restore all data and
security streams. You may change any or all of the defaults.
8. Click Finish.
Check the Restore log to see if the Restore was successful.
Appendix
Page 90 of 121
Agent 6.5 User’s Guide for Microsoft Windows
5.1.6
Example 6: Cross Computer Restore
Normally when a Job is created to do a Backup, the client uses a unique configuration
file. You must create a Profile for the Server which you want to Restore from, with the
same authentication information as the original computer used for Backup. You may
want to use this method for a disaster recovery plan, as well as for normal data
migration.
There are limitations on which operating Systems can successfully transfer data in this
way. For example, different versions of the same O/S, such as Windows 2000 and 2003
are okay. O/S’s that are part of the same family, or share similar origins, such as Linux
and Solaris are also okay.
What the “restore from another computer” option (via a Wizard) does is allows the User
to redirect the (original) Restore Job to a different client (location). It re-registers where
the configuration file was originally pointing, so that the Restore Job can be redirected to
another location. It does this by getting, authenticating and copying configuration
information - Vault name, computer name, and Job name - from the original
configuration, and adding it to your location so that the Restore can be accomplished
there.
Steps in the Restore
1. Ensure that the data is fully available for Restore (i.e. updated) on the Vault. This
means that the Backup is current, and will properly Restore all needed data.
2. Log on to the System that you will Restore the data to. This is the different
System than the one that did (created) the Backup.
3. Ensure that this System does not have a production Job with the same name as
the Job used to back up the data originally. This process will destroy any Safeset
information for an existing Job and lead to a reseed of data being protected by
this Job.
4. Create a Vault Profile for the Director on which the data is stored. Use the
authentication information that was used for the original Backups.
5. From the Tools menu select “Restore from another computer”, from the Vault
Profile dialog select the Vault Profile that was created above. Click Next.
6. On the Registered Computers dialog select the computer that originally stored
the data being restored. Click Next.
7. On the Job dialog select the Job that protects the data to be retrieved. Click
Next.
8. On the Import Job you are told that all information required has been collected to
accomplish the Restore. Click Next.
9. If the Job is already created the System will tell you be prompted to overwrite it.
Click “Yes” to overwrite.
10. This process downloads catalogs for all available Safesets for this Job.
Appendix
Page 91 of 121
Agent 6.5 User’s Guide for Microsoft Windows
11. This process, when complete, spawns the Restore Wizard starting with the
Select a Source dialog.
The Restore now continues like a Restore from the original computer – select Safeset,
select Restore objects, etc.
Note that now you will have a “new” Job in your list of Jobs, which came from the other
Agent. It only does Restores, and does not allow Backups
5.1.7
Example 7: Bare-metal Disaster Recovery
This section outlines the steps required to recover from a worst-case disaster whereby
you have lost your entire Server System (i.e., hardware, operating System and data
files). These steps will walk you through the CentralControl so as to get your new Server
System up and running back to normal.
(Note: These steps are done with a Backup that was done with System State and Files
(see section 2.5.3 of this Guide). It is not the BMR done with the “EVault System
Restore” application described in section 4.3 of this Guide.)
The steps below may refer to the new System as a replacement System. Also, the old
System may be referred to as the original System.
1. Reconfigure hardware that is similar (at least a minimal configuration) to the original
hardware.
2. Create a logical drive that matches the original configuration. Although hardware
does not always need to be identical, be aware that some drivers that are listed in
the Backup set may be incompatible with hardware on the new Systems, and may
require you to manually remove or install drivers in Safe mode.
3. You may optionally want to test your System state Restore on some other test
hardware (different from your replacement hardware) before you actually perform the
System state Restore on the replacement System.
4. Reinstall the same version of the operating System (as was installed previously) as a
stand-alone Server to the same drives and paths to which the operating System was
previously installed.
5. When re-installing the operating System, you must use the same Server names as
those used on the original System.
6. When re-installing the operating System, you must install all relevant service
packs/patches as those used on the original System.
7. When re-installing the operating System, you must use the same license keys as
those used on the original System.
8. Reinstall the Agent to the same installation directory as that used on the original
System.
9. Reinstall the Management Console to the same installation directory as that used on
the original System.
Appendix
Page 92 of 121
Agent 6.5 User’s Guide for Microsoft Windows
10. When a Job was first created, it was registered with the Vault, which still
“remembers” the Registration, so you cannot register it again as if it was new, you
must “re-register” it to tell the Vault that it is back. In CentralControl, under Agent
Configuration -> New -> Vault Registration, choose “Re-register previously registered
computer”. Complete the rest of the registration as before.
11. Next, to do a Restore for recovering your full drive Backup (i.e. the Backup that
includes your System state Backup as well as all of your other data) select the Agent
Job from which you want to Restore the file(s).
12. Choose the Restore button on the Standard toolbar. This starts the Restore Wizard.
13. From the Select a Source dialog, you can view the most recent type of source device
(e.g. Vault), specific source (e.g. name of the Service Provider) and Safeset (e.g.
number of Safeset – Safesets are numbered starting at one and in increasing order).
Typically, these are what you want to Restore from. However, you may change any
of them as required. Click Next.
14. From the Encryption Options dialog, enter your encryption Password in the
Password text box if your data was encrypted during Backup. Also, enter your
Password in the Verify Password text box. Note that the password is case sensitive.
Click Next.
15. From the Select Restore Objects dialog, select the file(s) (typically all the files,
System and data) you would like to include/exclude from the Restore.
16. From the Destination Options dialog, establish the location to which the files are to
be restored, whether or not you want sub-directories created and if existing files
should be overwritten. The defaults are to Restore to an alternate location (you need
to specify the location), create sub-directories and overwrite existing files.
17. From the Advanced Restore Options dialog, set any desired options. The defaults
are to not restore locked files, to not restore the Local Registry/Novell Bindery/NDS
(depending on the operating System) and to restore all data and security streams.
You may change any or all of the defaults.
18. Click Finish. Check the Restore log to see if the Restore was successful.
19. A successful Restore should have your new System restored back to its state at the
time the last Backup was performed.
Appendix
Page 93 of 121
Agent 6.5 User’s Guide for Microsoft Windows
5.2
Windows System Recovery
The purpose of this section is to illustrate techniques for recovering a Windows 2000
Server/2003 Server/XP Pro / Vista and Server 2008 System. The procedures provided
describe the minimum resources and information required to rebuild the Windows
operating System to its state prior to the last System Backup. The recovery procedure
can be performed either from a Backup tape, directory on disk or directly from a Vault
Manager.
Note: An Agent on a Windows System 2008 currently cannot do System State or Event
Log Backups or Restores.
When you are recovering using the CentralControl, you need to meet some basic
requirements and follow some basic restoration steps. Once these basic steps have
been completed, you need to complete the recovery by following one of the two outlined
methods.
5.2.1
Hardware Requirements
Ensure that the appropriate minimum System configuration is available. This may
involve simply replacing a crashed disk device. Note any differences in the configuration
such as changes in the network card or disk device.
5.2.2
Software Requirements
Ensure that the appropriate installation media is available. The minimum System
software includes:
For Windows 2000 Server/2003 Server/XP Pro / Vista /Server 2008, installation CD
identical to that used during original installation. All of these, including Service
Pack levels, should be identical to those installed on the original System.
Agent for Windows Installation media identical with that installed on the original
System and/or,
CentralControl Installation media identical with that installed on the original System.
Note: In order to complete the four step recovery [the Installation of the Basic
Operating System (OS), the Installation of CentralControl, the System
Recovery and the System Testing], it is crucial that the primary storage
device (located where the OS is installed) contains enough storage to
accommodate a full OS installation AND the contents of a full Backup. In
situations where the primary storage device accommodates a paging file, the
maximum size of the paging file should be added to the total space required.
Appendix
Page 94 of 121
Agent 6.5 User’s Guide for Microsoft Windows
5.2.3
Windows Restoration Steps
To Restore your Windows 2000 Server/2003 Server/XP Pro/Vista Operating
System from a Backup tape or Data Protection Vault:
Appendix
1.
Boot the System up using the Setup Disks. NOTE that if your System
can boot up from a CD-ROM, then you can use the CD-ROM to boot
the System up.
2.
Verify that the CD-ROM installed on the System is recognized by the
setup.
3.
Insert the OS installation CD when prompted.
4.
When prompted to partition the drive, make sure that the partition is at
least as large as the original partition. And, the setup of the partitioning
must match in both the original and recovery systems.
5.
When asked where to install the Windows directory, specify that it be
installed in the same location as it was in the original System
installation. Under 2000/2003/XP Pro, the default is C:\Winnt.
6.
Continue the System installation process until the basic functionality of
the OS is restored.
7.
Under Windows 2000/2003/XP Pro/Vista, install the Service Pack
identical to the one on the original operating System. After this, restart
as prompted by your System.
8.
Ensure that the TCP/IP stack is installed and configured according to
the settings in the Hardware Configuration Settings Checklist. Verify
that the network adapter is correctly identified. Also, apply any service
patches required. (You may choose to set up the network during the
Windows setup.)
9.
Ensure that the basic networking structure is in place (e.g. connectivity
between internal networks where the System to be restored resides)
and that a connection is established between the System and the
Vault. A router, if required, must be properly connected and
configured. Test the TCP/IP connectivity between the local System
and the Vault by Pinging the IP address of the Vault.
10.
For recovery from a tape device under Windows 2000/2003/XP
Pro/Vista, use the device manager located in the Control
Panel\Administrative tools\Computer Management\Device Manager to
locate tape drives. Use “Scan for Hard Drive Changes” if device not
visible.
Page 95 of 121
Agent 6.5 User’s Guide for Microsoft Windows
Continue with Client Installation
1.
Install the version of the CentralControl described on your previously
completed Configuration Settings Checklist.
2.
Install the version of the Client Agent for Windows described on your
Configuration Settings Checklist.
3.
Using the CentralControl, first name the untitled Workspace. Choose
File > Save Workspace As. Enter a name in the File Name text box.
The name does not have to be the same as the one on the original
System. However, it can be the same. Press Save. If desired, enter a
Password in the Password text box and confirm it. Note that the
password is case sensitive. Choose an encryption type from the
Encryption type drop-down list. Click OK.
Create an Agent
1.
Use the right mouse button and click on your Workspace. Click once
on New Agent. This opens the Agent Properties dialog.
2.
Enter the Description and the Network Address. The Description is the
name of the Agent. It can be anything that you choose. It can be the
same as the name on the original System but does not have to be.
The Network Address can be specified using either a numerical IP
format (192.0.0.1) or a textual DNS format (myAgent.myco.com). The
default Port is 808.
3.
Enter the Username, Password and Domain. The Username
authenticates this program with the remote Agent System. When
restoring under Windows, specify a Username with Backup Operator
or Administrator privilege.
4.
Click on the Save Password check box.
5.
Specify the domain name in the Domain text box. The domain can
optionally be left blank under the following circumstances: you are not
specifying a Windows Agent, you belong to the same domain as the
Windows Agent System or your network does not utilize a domain
name Server.
6.
After the Agent and Authentication information have been entered,
click on Get Status. If the information is validated, your data will be
displayed in the Agent Status window. Click OK. However, if the
information is not validated, a message from the CentralControl will
appear. Check your information and revise it as required. Once again,
click on Get Status, and click OK. Finally, click OK.
Set up Notification
Appendix
1.
With the Agent highlighted, click on the Agent Configuration file. If
you want to receive email notification upon success or failure of the
Restore process, choose the Notification tab. Click on the Send
Email on Successful Completion and Send Email on Failure check
boxes.
2.
Enter the address from which the notification is sent. This can be any
valid email address.
3.
Enter the SMTP Server Network Address and recipient’s address in
the designated text boxes.
Page 96 of 121
Agent 6.5 User’s Guide for Microsoft Windows
Re-Register the computer.
1.
Re-Registering the computer will bring back all the Agent information
from the Vault. This includes your configuration and scheduling
information. Re-registering basically re-assigns this information to the
new computer.
Perform a Synchronize, only if you choose Tape or Directory on disk for Source.
1.
With the Job highlighted, choose the Synch button on the Standard
toolbar.
2.
When asked to confirm the Synch, click Yes. This starts the Synch
process. The Process Information dialog is displayed.
3.
When the Synch is complete, click on Close.
Using the Restore Wizard
1.
With the Job highlighted, click the Restore button on the Standard
toolbar. The Restore Wizard leads you through the remaining
restoration steps.
2.
From the Select a Source dialog, you need to select which type of
source device to Restore from. From the drop-down list, choose Vault,
Tape Device or Directory on Disk. If you choose Vault, you need to
choose which Vault to Restore from. Choose one from the drop-down
list. You also need to choose the Safeset to Restore from. Choose a
Safeset from the drop-down list.
3.
Next, from the Encryption Options dialog, enter your Password if your
Backup was encrypted. Note that the password is case sensitive.
4.
Select the files to include or exclude from the restoration under the
Select Files dialog. From the Select Files dialog, you can choose to
Add files, Remove files and/or Search for files.
5.
Next, select one of the following destination options:
Do you wish to Restore files to their original locations? (If you select
no, enter the alternate location in the text box.)
Do you wish to create subdirectories?
Do you wish to overwrite files that already exist?
6.
From the Advanced Restore Options dialog, set the Advanced
Options:
Do you wish to overwrite files that are locked by another process?
Do you wish to Restore the Local Registry?
Do you wish to Restore security information?
What detail level to choose.
Select whether or not you want to Restore the Active Directory under
Windows 2000/2003/XP Pro/Vista.
Appendix
7.
Once you have set your options, click Finish. A Process Information
Window indicates the status of the Restore.
8.
When completed, you have two choices: Reboot Now or Reboot Later.
Choose Reboot Now. After you restart, the restoration procedure is
complete and the process of verifying the integrity of the Restore can
commence.
Page 97 of 121
Agent 6.5 User’s Guide for Microsoft Windows
5.2.4
Windows Recovery Problems
Should any of the recovery Jobs fail, consider each of the following basic questions
carefully:
Was the System restored using the same version of OS?
Were the proper Service Packs applied before recovering the System if you were
restoring under Windows 2000/2003/XP/Vista? If you are doing a bare-metal
restore on an XP System, you must install the service pack (i.e.: SP1a) on
the OS, before doing the restore from the Vault. If you don't, the Restore will
complete without errors, but after restarting, the machine will "blue screen"
briefly, and continually try to restart. On a Windows 2000/2003 Server, it may
work correctly without installing the SP before the Restore, but it is
recommended to install the SP before the Restore.
Was the latest version of ASPI installed?
What possible differences were there in the hardware or software settings that
could have affected the restoration?
Were any errors reported in the Restore.log file?
Were all the necessary drivers installed?
5.2.5
Recovery Verification for Windows
Once the Restore procedure is complete, there must be a way to determine and validate
if the restoration is complete and correct. The listing and testing of the Jobs should be
performed as part of the Systems recovery planning. The specific Jobs to be performed
for verification will depend on the application environment deployed and the System's
importance.
Once the System is restored, it is crucial to verify the integrity of the restoration. The test
can be as simple as placing a duplicate file in a different directory structure and testing
for any differences within the file. Then, confirm that the file can be opened using a
known application and that you are able to send email to a known address. It can also
be as complex as completing an SQL query on a known database set. Whatever the
test, both the list and the test itself must be planned and executed during normal System
operation.
Appendix
Page 98 of 121
Agent 6.5 User’s Guide for Microsoft Windows
5.2.6 Active Directory Restores
See section 9.2.2, 9.2.3 and 9.2.4 in the CentralControl Operations Guide for detailed
information.
These sections cover:
•
Perform a Primary Restore
•
Perform a Non-Authoritative AD restore
•
Perform an Authoritative AD restore
•
Cluster quorum restores.
5.2.6.1 Troubleshooting:
If you experience problems booting your System after restoring the Active Directory, you
may try the following:
Restart the computer. If the computer does not restart after restoration because of HAL
mismatches, you can start from the Windows 2000/2003/XP Pro/Vista installation disk to
perform an in-place installation or repair. This type of repair occurs after you accept the
licensing agreement, and Setup searches for previous versions to repair. When the
installation that is damaged or needs repair is found, press R to repair the selected
installation. Setup re-enumerates your computer's hardware (including HAL) and
performs an in-place upgrade while maintaining your programs and User settings. This
also refreshes the SystemRoot%\Repair folder with accurate information that you can
use for normal repairs.
If the computer does restart after the restoration, log on as Administrator and initiate an
in-place upgrade by running Winnt32.exe from the I386 folder on the Windows
2000/2003/XP Pro/Vista CD-ROM. This refreshes the Setup.log and registry files in the
%SystemRoot%\Repair folder, and ensures the proper HAL is in use.
Appendix
Page 99 of 121
Agent 6.5 User’s Guide for Microsoft Windows
5.3
Cluster Awareness – Cluster Plug-In
Microsoft Server Clustering Services (MSCS) Cluster Support Plug-In is available for the
Windows Agent.
The main function of the Cluster Support Plug-In is for the Agent on a MS SQL or MS
Exchange Server, which has a virtual IP address in the cluster, to be able to follow the
server when it fails over to another node in a cluster. The Agent can still access its
configuration (on a shared drive), and scheduled backups will occur as usual, without it
looking like a "different" backup and causing a reseed.
The Cluster Support Plug-In is supported on Windows Agents. It requires a separate
license. Single Copy Cluster (SCC) is supported.
5.3.1
Main Features of the Cluster Plug-In
A user can connect to an Agent (with a Plug-In and proper license) on a Virtual Server or
Local machine (a node) via IP or name.
The Virtual Server Agent can back up virtual server shared data without re-seeding, or in
case of a failover.
Once created, Jobs (on a shared drive belonging to a virtual server) can be used by all
Agents on the cluster.
Scheduling of virtual server backups is handled between node Agents without schedule
overlapping. The configuration files are located on the drive owned by the virtual server.
Each physical node in a cluster configuration requires a separate installation of the
Agent, each with a separate Plug-In and license. You also need to enter the licenses of
the Plug-Ins on the virtual server as well.
When you first configure an Agent on a Virtual Server, you will be prompted for a
location on a drive that the Virtual Servers see. So, after a failover, the Agent
configuration will still be available to all servers owned by the virtual server.
The icons representing the servers in the CentralControl are different, to represent a
“regular” local Agent, and a Virtual Server Agent.
Appendix
Page 100 of 121
Agent 6.5 User’s Guide for Microsoft Windows
5.3.2
Installation Setup Recommendations
1. Install the Agents and Plug-Ins on the Physical Nodes.
2. Set Cluster, SQL, and Exchange Plug-Ins on the Physical Nodes.
3. Create a New Agent for your Exchange or SQL cluster on the Virtual Node using the
IP address or Hostname.
4. From the newly created agent, double click the Global file to open the "Virtual server
shared area" window. From here you must select a drive letter for your SQL or
Exchange Cluster. Click OK. This will launch the Agent Configuration Window.
5. Here you must specify all of your Vault connection information. Click OK when
complete. Note: Once the folder for configuration files on the shared disk has been
created you will not be prompted again for its location.
Note: You must create the backup Job from the Virtual Node in order to use the Cluster
Plug-In failover features even though you can perform backups from the Virtual Node as
well as the Physical Node.
Also, if you create a new MS Exchange Server Job from an SQL Server Virtual node,
you will be able to see the MS Exchange Server in the drop-down “Backup Source Type”
box. But you cannot back up the MS Exchange Server from there. You can only back up
the SQL Server with a SQL Server Job on the SQL Server Virtual node.
And, if you create a new SQL Server Job from an MS Exchange Virtual node, you will be
able to see the SQL Server in the drop-down “Backup Source Type” box. But you cannot
back up the SQL Server from there. You can only back up the MS Exchange Server with
an MS Exchange Job on the MS Exchange Virtual node.
Appendix
Page 101 of 121
Agent 6.5 User’s Guide for Microsoft Windows
5.4
Command Line Interface (CLI)
The Command Line Interface (CLI) is a feature that enables users to run the Agent from
a command prompt instead of through the CentralControl GUI. This feature is mainly
used to Restore data if the CentralControl application is not available. The CLI can be
used to perform functions on both VV.exe and VVAgent.
5.4.1
VV.exe CLI Command Mode
The CLI can be used to execute commands on VV.exe. VV.exe is part of the Agent
package and is responsible for Backup and Restore functions.
You can use the CLI to perform the following general Jobs:
JOB
DESCRIPTION
BACKUP
Backs up files to tape, disk or a remote Vault Service Provider.
RESTORE
Restores files from tape, disk or a remote Vault Service Provider.
SYNCH
Re-synchronizes files with a remote Vault Service Provider.
LIST
Lists files backed up to tape or disk.
RECOVER
Menu driven restores files from tape, disk or a remote Vault Service
Provider.
INVENTORY
ENCPASSWORD
SETDIR
Appendix
Page 102 of 121
Agent 6.5 User’s Guide for Microsoft Windows
5.4.1.1 General Command Options
Since the software makes uses of ASPI, only versions 4.2 or greater of NetWare are
supported. ASPI devices appear as STA0: where ST means SCSI tape and A is your
first SCSI adapter and 0 is the SCSI id 0 of the tape device.
The following qualifiers apply to all commands:
QUALIFIER
DESCRIPTION
/PROGRESS[=YES]
Shows progress messages.
/LOG[=YES]
Logs messages to a file.
/DETAIL=<detail>
Determines how verbose the logging messages will be.
/ENCPASSWORD=<password>
Is safeset encryption password (case sensitive).
/ASSIST[=YES]
Requests operator assistance, if necessary, when loading tapes.
/IGNLABEL[=YES]
Ignores tape label and expiry date processing.
/LABEL=<label>
Explicitly specifies the tape volume label.
/UNLOAD[=YES]
Ejects the tape when the program is finished with it.
/USEEOD[=YES]
Uses EOD instead of writing volume trailers.
/DIAGNOSTICS[=YES]
/PARAM=<file_spec>
Specifies a parameter file that is used as input to the program.
FORMAT
PRIORITY[=5]
DIRECTORY
Appendix
This setting specifies the location of all the Job-specific files and
the root of the Job data sub-directories.
Page 103 of 121
Agent 6.5 User’s Guide for Microsoft Windows
5.4.1.2 Backup Command Options
The following qualifiers apply to all Backup commands:
QUALIFIER
/COMPRESSION=<type>
/DEFERAFTER=<time>
/DESTINATION=<destination>
/ENCTYPE=<type>
/EXCLUDE=<filelist>
/IGNLOCKING[=YES]
/IGNSECURITY[=YES]
/INCLUDE=<filelist>
/RETENTION=<retention>
/TYPE=<type>
/INIT[=YES]
/IGNALTDATA[=YES]
/QUICKSCAN[=YES]
/RETRY[=YES]
/DELAY
/DELTA[=YES]
/IGNNOBACKUP[=YES]
/SVRADDRESS
/SVRACCOUNT
/SVRUSERNAME
/SVRPASSWORD
Appendix
DESCRIPTION
Types available are:
• NONE – Do not compress any data.
• MINIMUM – Minimize CPU consumption, possibly at the
expense of a larger safeset size.
• NORMAL– Balance CPU consumption against safeset size.
o DEFAULT – same as normal
o STANDARD – same as normal
• BETTER– Minimize safeset size, possibly at the expense of
extra CPU consumption.
• MAXIMUM – Always minimize safeset size, regardless of
the amount of CPU consumption required.
Specifies the defer time in minutes.
Specifies the safeset location.
Types available are:
• NONE – no encryption used
• BLOWFISH56 – 56 bit Blowfish encryption
• BLOWFISH128 – 128 bit Blowfish encryption
• DES – 56 bit DES encryption
• TRIPLEDES – 112 bit DES encryption
• AES – 128/256 bit Advanced Encryption Standard
encryption
Outlines the list of files to exclude from the Backup.
Backs up locked files.
Does not save file ownership and permission information.
Outlines list of files to include in the Backup.
States the retention name.
States the type of Backup. (e.g. FULL)
Server/Vault address.
Server/Vault account name.
Server/Vault user name.
Server/Vault user password (case sensitive).
Page 104 of 121
Agent 6.5 User’s Guide for Microsoft Windows
The following qualifiers apply to Windows Backup commands:
QUALIFIER
DESCRIPTION
/REGISTRY[=YES]
Backs up the Windows Registry under Windows.
/AD[=YES]
Active Directory
/INCLUDEEXCH
/EXCHTYPE[=INCR]
/DELEXCHLOG[=YES]
/SQLTYPE[=FULL]
Appendix
Page 105 of 121
Agent 6.5 User’s Guide for Microsoft Windows
5.4.1.3 Restore Command Options
The following qualifiers apply to all Restore commands:
QUALIFIER
DESCRIPTION
/CREATESUBDIRS[=YES]
Creates all necessary sub-directories.
/DESTINATION=<destination>
States the destination to Restore to. (e.g. c:\.\*.*)
/INCLUDE=<filelist>
Outlines the list of files to include.
/EXCLUDE=<filelist>
Outlines the list of files to exclude.
/IGNSECURITY[=YES]
Does not Restore file ownership and permission information.
/OVRWRITE[=YES]
Overwrites existing files. If this option is not specified, the user will be notified of each
existing file.
/OVRLOCKED[=YES]
Overwrites locked files.
/SOURCE=<source>
Names the location of the safeset file.
/IGNDATA[=YES]
/SVRADDRESS
Server/Vault address.
/SVRACCOUNT
Server/Vault account name.
/SVRUSERNAME
Server/Vault user name.
/SVRPASSWORD
Server/Vault user password (case sensitive).
The following qualifiers apply to Windows Restore commands:
QUALIFIER
DESCRIPTION
/REGISTRY[=YES]
Restores the Windows Registry under Windows.
/AD[=YES]
Active Directory.
/SYSST[=YES]
/INCLUDEEXCH
/ROLLFORWARD[=YES]
/EXCHLOGALTLOC
Appendix
Restore Exchange log alternate location.
Page 106 of 121
Agent 6.5 User’s Guide for Microsoft Windows
5.4.1.4 Sync Command Options
The following qualifier applies to the synchronize command (synch):
QUALIFIER
/SOURCE=<source>
DESCRIPTION
Names the server to re-synchronize from. By default, the Backup destination is used.
5.4.1.5 Inventory Command Options
The following qualifier applies to the INVENTORY command:
QUALIFIER
DESCRIPTION
/OUTPUT
5.4.1.6 List Command Options
The following qualifiers apply to the list command:
QUALIFIER
DESCRIPTION
/INCLUDE=<filelist>
Names files to include in the listing.
/SOURCE=<source>
Names the location of the safeset file.
/LOG
Sends VV List output to a file named LIST.LOG. If a Job name is specified with the
command, the file is created in the Job directory, otherwise it is created in the root
directory of the VCS.
/FORMAT
Determines the amount of detail included in the VVList log. Choose either BRIEF,
FULL or DUMP.
/EXCLUDE
5.4.1.7 Verify Command Options
The following qualifiers apply to the verify command:
QUALIFIER
DESCRIPTION
/DESTINATION=<destination>
Names the location of files to verify. (e.g. C:\.\*.*) The default is to use the
original file locations.
/INCLUDE=<filelist>
Outlines the list of files to include.
/EXCLUDE=<filelist>
Outlines the list of files to exclude.
/IGNALTDATA[=YES]
Does not verify alternate data streams.
/IGNSECURITY[=YES]
Does not verify security information.
/SOURCE=<source>
Names the location of the safeset file.
/ERRORSONLY[=YES]
Only shows errors.
/COMPARE[=YES]
Compares file data.
/HEADERS[=YES]
Compares file headers (e.g. file date, attributes, etc.)
Appendix
Page 107 of 121
Agent 6.5 User’s Guide for Microsoft Windows
5.4.1.8 Forcereseed Option
Delta recreation allows the user to rebuild a DTA (delta) file by using job
synchronization. This command line only option will force a re-seed, in case of a failure
with delta recreation in rebuilding delta files.
Originally (before delta recreation), if the backup detected that the required DTA file was
missing or corrupt, the backup was forced to reseed. With the delta recreation feature,
on a missing or corrupt delta file the job fails and logs a message. Then the user is able
to rebuild the DTA file through job synchronization.
The parameter will only apply to CLI. The UI will not be affected. In case of a failure in
rebuilding a delta file, this is an alternative approach to rebuild the delta file by
reseeding. With this parameter, if the Vault supports delta recreation, and the recreated
file is unusable, then the backup will be forced to reseed.
The syntax of this parameter is:
VV backup job1 /param=job1.vpb /forcereseed
Note:
Delta files can be recreated only if a backup was done by a version 6 Agent to a version
6 Vault. If you back up a safeset using a version 6 Agent to a version 5 Vault, and then
upgrade the Vault to version 6, any delta information cannot be recreated. If you back up
a safeset using a version 5 Agent to a version 6 Vault, and then upgrade the Agent to
version 6, any delta information cannot be recreated.
In these cases it will report errors in the restore log that the DTA recreation failed, on the
version 5 files. The restore itself will still function properly. In this case you can use the
forcereseed option to create new delta files that are compatible with the version 6 Vault.
(But, if you back up a safeset using a version 6 Agent to a version 6 Vault, then the delta
information can be recreated.)
When performing a Backup to a non-Vault location (i.e. Local backup), delta recreation
information is included by default. To suppress this behavior, run the backup via the
Command Line Interface with:
/FORCEDELTAREC=No
Appendix
Page 108 of 121
Agent 6.5 User’s Guide for Microsoft Windows
5.4.2
CLI Command Syntax
Commands can be abbreviated as long as the result is not ambiguous. Most commands
and parameters are unique to within 4 characters. The format of the command string is
as follows:
>
VV [<command> [<Job>] [/<para> ...]]
A command is performed on the specified Job. The parameters are used to override any
associated parameters in the Job and global configuration files. Each time a command is
performed, the parameters provided on the command line, <Job>.vvc file and the
Global.vvc are used to form the complete syntax of the command.
5.4.2.1 Using File names in Command Strings
Some CLI settings require the inclusion of file names. Enter file names in the following
format:
/INCLUDE=C:\WINNT\.\*.*
Users can include a list of files in their CLI settings. Commas are used to separate file
names in a list. Enter a list of file names in the following format:
/INCLUDE=C:\WINNT\.\*.*,C:\TEST\.\*
File names that contain commas or blank spaces as part of the name require special
treatment because Windows and the Agent use these symbols for specific purposes.
Windows uses blank spaces to divide the command line into a program’s arguments.
The Agent uses commas to separate individual names in file lists. To make the use of
blank spaces and commas in file names possible, the following conventions have been
developed:
1.
To add a file name containing a blank space to your file list, enclose the file
name in quotation marks. Alternatively, replace the blank space with its ASCII
hexadecimal code value.
Example of quotation marks:
vv /include="c:\Program Files\EVault\.\*","C:\Documents and Settings\.\*"
Example of ASCII hexadecimal code value:
vv/include=c:\Program^20Files\EVault\.\*,C:\Documents^20and^20Settings\.\
*
Note: The hexadecimal code for a blank space is 20.
2.
To add a filename containing a comma to your file list, enclose the file name in
backslashes and quotation marks. As an alternative, replace the comma with its
ASCII hexadecimal equivalent.
Example of backslash and quotation marks:
vv/include=\"c:\Program,Files\EVault\.\*\",\"C:\Documents,and,Settings\.\*\
"
Example of ASCII hexadecimal equivalent:
vv/include=c:\Program^2cFiles\EVault\.\*,C:\Documents^2cand^2cSettings\.\
*
Note: The hexadecimal code for a comma is 2c.
Any character, even nonprintable ones, can be used as a part of a
filename. To do this, enter ^ followed by the character's hexadecimal code.
Hexadecimal codes:
Appendix
Page 109 of 121
Agent 6.5 User’s Guide for Microsoft Windows
SPACE ( ) - 20
COMMA (,) - 2c
CIRCUMFLEX (^) - 5e
DASH (-) - 2d
ASTERISK (*) - 2a
PLUS (+) - 2b
QUESTION MARK (?) - 3f
Refer to Windows Charmap utility for a complete list of hexadecimal codes.
5.4.3
CLI File Formats
The Agent system consists of the executable, a global configuration file, a data directory
and some Job configuration files. The layout is as follows:
5.4.3.1 Directory Layout and Configuration Files
In the executable directory, there should be two files, which are VV.exe and
Global.vvc.
In the data directory, there should be one or more Job configuration files, such as
"MyJob.vvc".
As Backups are run, sub-directories are created under the data directory for each
Job, with the same name as the Job.
Local catalog files, DeltaPro™ information files and other related files would be
stored in the Job-specific sub-directory.
Configuration files such as Global.vvc, <JobName>.vvc and Schedule.cfg are normally
configured through the CentralControl GUI application. The files are stored on, and used
by the Agent. During a backup, these files, along with the backup data, and sent to the
Data Protection Vault, and also stored there. They are not used there, by the Vault, but
are available in case of a bare-metal restoration, when the computer has to be reregistered.
Normally, the configuration files will contain all of the necessary information for
performing Backups. However, many configuration values can be superseded on the
command-line as necessary.
5.4.3.2 Configuration Files
The global configuration file is called Global.vvc. This file resides in the same location as
the executable.
The Job-specific configuration files reside in the directory pointed to by the
“data_directory” value in the global configuration file.
Notes:
A Job-specific setting overrides a global setting and a command-line parameter
overrides everything. Spaces before and after a value are ignored. Anything after
two forward slashes '//' is treated as a comment. If the last character on the line is
a dash ('-'), it is treated as a line-continuation character.
The following,
>
Appendix
license {
account = xyz
Page 110 of 121
Agent 6.5 User’s Guide for Microsoft Windows
key = 12345
}
is equivalent to,
>
license.account = xyz
license.key = 12345
5.4.3.3 Settings that are Global to all Jobs
SETTING
Data_directory
license.account, license.expiry, license.key,
license.options, license.version, license.vendor
retentionN
retentionN.name
retentionN.online_days
retentionN.online_copies
retentionN.archive_days
serverN
serverN.net_address
serverN.account
serverN.username
serverN.password
DESCRIPTION
This setting specifies the location of all the Job-specific files and the
root of the Job data sub-directories.
Your Service Provider or software provider will supply the license
settings. All settings are sensitive to case and spacing.
These are settings for retention #N where N is from 0 to 9 (e.g.
"retention1").
At least one retention name should match the name specified by the
"Backup.retention" parameter.
This specifies the minimum number of days to keep the safeset
online. The parameters are 0-9999.
This specifies the minimum number of copies to keep online. For all
Backups, the minimum value is 1 and the maximum value is 999.
This setting specifies the minimum number of days to archive the
safeset offline. A value of 0 will cause online safesets to be deleted
when the online days/copies expire. The parameters are 0-9999.
These are the settings for server #N where N is from 0 to 9 (e.g.
"server1").
This specifies the TCP/IP address of Vault Service Provider.
This specifies the Vault Service Provider account.
This specifies the Vault Service Provider username.
This specifies the Vault Service Provider password.
5.4.3.4 Settings that are usually Job specific
SETTING
Backup.destination
Backup.type
Backup.include
Backup.exclude
Backup.ignore_security
Backup.allow_writers
Backup.enc_type
Backup.log_maxcopies
Backup.local_catalog
Backup.retention
Backup.registry
Backup.nds
Backup.defer_after
Appendix
DESCRIPTION
The destination can be any number of things. Examples include:
1) server1: (server Backup – a colon is required)
2) tape0:safeset.ssi (tape Backup - different operating systems have different names for tape
devices)
3) device:\dir\abc.ssi (disk Backup)
If you plan to use spaces or commas in your command line, see section 9.2.2.1
The Backup category determines the type of Backup that is made. The categories are Full, and
Incremental and Differential.
This specifies a comma-separated list of files to back up. To specify a whole directory tree, use
the syntax "\.\". For example, "C:\TEMP\.\*.DOC" would include all the DOC files in C:\TEMP
or any of its sub-directories. See section 9.2.2.1 for more data on filenames.
This specifies a comma-separated list of files to exclude from the Backup. The set of files that
will be backed up is the set of files specified in the include list minus the set of files specified in
the exclude list.
See section 9.2.2.1 for more data on filenames.
This does not back up security-related information for the file.
This allows files to be backed up even if they are locked for writing by another process.
The possible choices for encryption type are NONE, DES, TRIPLEDES, BLOWFISH and AES.
The encryption algorithms are integrated into the Agent installation.
This states the number of logs to keep. The oldest logs are removed automatically in order to
allow new logs to be created.
If this is set to YES, a local catalog file will be created in the Job sub-directory.
This is the retention name.
This specifies whether or not to back up the Windows Registry. The values are YES or NO. The
default is NO. This only applies to Windows 2000/2003.
This specifies whether or not to back up the Novell Directory Service (NDS). The values are
YES or NO. The default is NO. This only applies to NetWare 4.2x. or greater
This is used with Full Backups. After the specified number of minutes, the Backup will skip any
Page 111 of 121
Agent 6.5 User’s Guide for Microsoft Windows
enc_password
log.log_to_file
log.detail
nds_pass
nds_path
nds_user
Restore.source
Restore.include
Restore.exclude
Restore.overwrite
Restore.replace_locked
Restore.ignore_security
Restore.create_subdirs
Restore.use_orig_dirs
Restore.destination
Restore.registry
Restore.nds
show_progress
tape.label
tape.ignore_label
tape.init
tape.unload
tape.assist
Tape.use_eod
new files or parts of new files that were not backed up completely previously. This makes it
easy to auto-seed a large Backup over a period of several days or even weeks.
This specifies the encryption password for the file data. This is the password (case sensitive)
that will be used to encrypt or decrypt safesets.
If this is true, messages are logged to a file. The file is written to the Job directory and has the
same name as the current command (e.g. "%data_directory%\myJob\Restore.log"). NOTE that
upon successful completion of a Backup, the file "Backup.log" is renamed to a numbered file
(e.g. "00000099.log").
This is the level of detail in the log file. The levels, in increasing order of detail, are NONE,
SUMMARY, DIRECTORIES and FILES. The default is FILES.
This specifies the password for the account used when backing up the NDS.
This specifies the starting point in an NDS tree for the NDS Backup.
This specifies the account used when backing up the NDS.
For server Restores, the safeset number can be shortened (e.g. server1:3). For other types of
safesets, it should be the full name (e.g. tape9:monday1.ssi). See “Backup.destination” for more
details.
This specifies a comma-separated list of files to back up. To specify a whole directory tree, use
the syntax "\.\". For example, "C:\TEMP\.\*.DOC" would include all the DOC files in C:\TEMP
or any of its sub-directories.
See section 9.2.2.1 for more data on filenames.
This specifies a comma-separated list of files to exclude from the Backup. The set of files that
will be backed up is the set of files specified in the include list minus the set of files specified in
the exclude list.
See section 9.2.2.1 for more data on filenames.
This is used to specify whether files are overwritten during a Restore. The values are YES or
NO. The default is NO. It overwrites existing files.
This overwrites locked files.
This does not Restore security-related information for the file.
This creates sub-directories.
This Restores to the original directories.
This specifies the location to Restore to. Some examples are:
\.\*.*
Restores to original locations and creates sub-directories
c:\.\*.* Restores to C:, creating sub-directories
c:\temp\*.* Restores to c:\temp, without creating sub-directories
This specifies whether or not to Restore the Windows Registry. The values are YES or NO. The
default is NO. This only applies to Windows.
This specifies whether or not to Restore the Novell Directory Service (NDS). The values are
YES or NO. The default is NO. This only applies to NetWare 4.2x or greater.
This shows progress messages. Normally, this option is set via the command-line qualifier
/PROGRESS.
This specifies the physical tape label.
This ignores mismatched labels and expiry dates.
This always initializes the tape so that the resulting safeset is the only one on the tape.
This ejects the tape after the Backup.
This requests operator assistance if necessary.
This makes use of End-Of-Data Detection.
5.4.3.5 Miscellaneous Settings
Param_filename
This requests that a parameter file be used as input to the program in place of specifying
command-line arguments. This file is created by the CentralControl application to
execute immediate functions, such as Backup and Restore.
Appendix
Page 112 of 121
Agent 6.5 User’s Guide for Microsoft Windows
5.4.4
Scheduling Backups
The scheduling feature of Agent monitors the Backup schedule file for changes and
prepares to initiate scheduled commands at specified times. Under Windows, the
Scheduler runs as a Service. In addition to running the Scheduler under Windows, you
can run the AT Service. Under NetWare, the Scheduler runs as an NLM. These are
described below.
5.4.4.1 How to Schedule Backups under Windows
VVAgent is a service that enables the automatic scheduling and execution of other
services to be loaded. When the VVAgent service is loaded, it reads the contents of the
configuration file, Schedule.cfg, located in the directory where the CLI is installed. Each
entry in the configuration file contains a time entry and a command name to run,
optionally followed by the command arguments for the target Service.
The syntax of a Schedule.cfg file entry is as follows:
>
<mins>/<hours>/<days>/<months>/<dayofweek>
<command name> [command arguments....]
Valid values for each portion of the time entry are as follows:
<mins>
0..59
<hours>
0..23
<days>
1..31
<months>
1..12
<dayofweek>
0..6 (Sunday..Saturday)
Multiple values may be specified for each time entry portion by separating each
individual value with a comma. Furthermore, separating two values with a dash specifies
a value range. Using an asterisk can specify a wildcard (all valid values).
Some examples:
>
30/11,23/*/*/* vv Backup netback
This entry loads the "vv" command with parameters "Backup" and "netback" daily at
11:30 a.m. and 11:30 p.m.
>
30/11/*/*/1-5 vv Backup netback
This entry loads the "vv" command with parameters "Backup" and "netback" at 11:00
a.m. on days Monday through Friday.
This configuration file is checked for changes every minute. If
any changes occur, the schedule is reloaded. There is no need
to stop and start the Service.
Appendix
Page 113 of 121
Agent 6.5 User’s Guide for Microsoft Windows
5.4.4.2 How to use the AT Service under Windows
In addition to the VVAgent Scheduling program included with the product, you can use
the AT service. The AT service is a standard scheduling service. In order to use the
service, make sure it is set for automatic startup. To do this, open Control Panel >
Services, and then check the startup options for the Schedule Service. To use the AT
service, set the startup to Automatic.
The AT service will remember scheduled jobs even if the machine is rebooted.
Nevertheless, it is wise to create a batch file that can be used to recreate the jobs if they
are accidentally deleted. A typical command file might look like this:
>
at \\ntserv1 19:30 /every:M,W,F c:\vvcmd\vv.exe
Backup myJob /ret=daily
at \\ntserv1 19:30 /every:S c:\vvcmd\vv.exe Backup
myJob /ret=weekly
We suggest you enter the node name so that the command
procedure can be run from a remote machine. Also, the
executable path must be full and complete.
More help on the AT command can be found in the Windows help file.
5.4.4.3 Entries Scheduled Simultaneously
Assume the Schedule.cfg file has the two following entries:
45/2/last/*/* vv Backup full /retention=Monthly
45/2/*/*/0-6 vv Backup full
The first entry is a Backup of the Job entitled 'full' using the Monthly retention and
scheduled for 2:45 a.m. on the last day of every month. The second entry is a Backup of
the Job entitled 'full' using the default retention and scheduled for 2:45 a.m. every day of
the week.
Clearly, there is a potential conflict on the last day of the month. Both schedule entries
are equally applicable. Which should be run, the Backup with the Monthly retention
setting or the regular daily Backup?
In this situation, the position of the schedule entries in the file relative to each other
determines which entry should take precedence. In this case, since the scheduled
Backup with the Monthly retention setting appears closer to the top of the file than the
regular Backup, it has priority. At 2:45 a.m. on the last day of the month, the scheduler
notices that the two entries would run simultaneously. It runs the topmost schedule entry
and reschedules the second (and any other conflicting) schedule entry or entries to run
at the next available time.
For example, on January 31, 2007 at 2:45 a.m., the topmost schedule entry is run
immediately since its position dictates its higher priority. However, the scheduler
calculates the next available valid time that the second schedule entry may run. Since
the second entry specifies that the regular Backup is to be run every day at 2:45 a.m.,
the next available time that fits these criteria is February 1, 2007. The second schedule
entry will run at this time.
Appendix
Page 114 of 121
Agent 6.5 User’s Guide for Microsoft Windows
Note that such rescheduling will not take place for all conflicting Jobs. Only those Jobs
with the same command (e.g. Backup, Restore, synchronize, etc.) and Jobname will be
automatically rescheduled if they conflict. If the command or Jobname differ, the
aforementioned procedure will not take place.
5.4.4.4 VVAgent CLI Command Mode
The CLI is used to execute commands on VVAgent from a command prompt instead of
the CentralControl application. VVAgent is part of the Agent package and is responsible
for scheduling, configuration and enabling communication between a Backup system
and the CentralControl application.
The following switches can be controlled using the CLI:
-d : start VVAgent in the daemon mode (background). This is the most common
mode because it enables the user to continue using the command prompt while
VVAgent operates
-f : start VVAgent as a foreground process. In this mode, the command prompt
cannot be used while the VVAgent is operating
-s : stop the VVAgent that is currently running
-p : set the working directory path
-n : set the port number for the CentralControl application connection (default 808)
The command line syntax rules are:./VVAgent (-d|-f|-s) [-p <Agent path>] [-n <port
number>]
(...|...|...) user must choose either -d,-f, or -s.
[...] optional.
<...> a value provided by the user
Examples:
./VVAgent -d
./VVAgent -f -p /usr/local/<name>
./VVAgent -d -n 1680
./VVAgent –s
Appendix
Page 115 of 121
Agent 6.5 User’s Guide for Microsoft Windows
6.
Index
.ALT extension...........................................11
64-bit Agent installation .............................14
64-bit Windows Server platform ................10
ACL’s .........................................................17
Act as part of the operating system ...........17
Active Directory....................................68, 99
mailbox names ......................................25
ad hoc ............................................12, 42, 60
add multiple agents ...................................45
Administrator
access ...................................................12
Rights ....................................................17
Agent
computer name .....................................54
Configuration ...................................42, 75
Configuration file ...................................96
definition ................................................30
from CentralControl ...............................12
Groups...................................................45
icon/name..............................................49
introduction............................................42
Management Method ................16, 19, 20
names....................................................45
Properties ..............................................87
Service ............................................15, 19
Windows Installation kit .........................14
Agent Assistant
Exit.........................................................40
menu choices ........................................40
restart ....................................................40
status messages ...................................39
Agent Status
64-bit......................................................10
Agent-Windows.exe...................................20
alternate vaults list .....................................11
ANSI
encoding ................................................59
Anti Virus program .....................................13
asterisks...............................................47, 63
AT Service under Windows .....................114
Authentication ......................................44, 50
Auto-Refresh Display.................................48
AV products ...............................................13
background service ...................................30
Backup
a networked drive ..................................54
forced to reseed ..................................108
from a UNC path ...................................81
is encrypted ...........................................80
log..........................................................23
Now .......................................................73
scheduled ..............................................70
Index
Source type .......................................... 59
system files ........................................... 67
Time Options .................................. 60, 70
Type...................................................... 67
Backup section
of job file ............................................... 69
Backup Started
message ............................................... 39
Bandwidth Throttling
on restore ............................................. 82
Option ................................................... 53
throttle back ............................................ 8
Bare Metal Restore
backup source ...................................... 59
definition ............................................... 85
bare-metal
restore - reregister .............................. 110
restore original system ......................... 79
system files ........................................... 68
Block Processor threading model ............. 69
BMR
Bare Metal Restore......................... 59, 85
Boot Files .................................................. 67
BUAgent
for WebCentralControl.......................... 11
logs ....................................................... 12
CD
restore from .......................................... 82
CentralControl
Management Console .......................... 30
Operations Guide ................................. 42
Change registration................................... 23
Check Status............................................. 44
cipher strengths ........................................ 47
Class Registration Database .................... 67
CLI ............................................................ 12
Command Mode ................................. 102
Command Syntax ............................... 109
File Formats........................................ 110
Cluster Support Plug-In ............................ 14
COM
system state ......................................... 67
Combined threading model....................... 69
Comma Separated Value
adding groups....................................... 45
Command Cycle ....................................... 70
command prompt
for threading model............................... 69
command-line ......................................... 110
complete backup....................................... 78
Configuration
file for restore........................................ 84
Page 116 of 121
Agent 6.5 User’s Guide for Microsoft Windows
file lock down.........................................12
Configure
logs ........................................................60
Vault ................................................42, 50
context sensitive help ................................33
copies online..............................................52
Copy to Clipboard ......................................51
corrupted system files................................68
Create
Account automatically .....................15, 19
Agent Profile..........................................42
Job.........................................................42
cross catalog search..............................9, 80
csv
text file for adding groups ......................45
CTRL+B .....................................................73
CTRL+R.....................................................79
current status of the Agent ........................53
current version requirements.....................11
Custom
command...............................................70
Install .....................................................15
Data
Files .......................................................68
Protection Vault ...................................110
database backup .......................................31
days online.................................................52
Default
Text Viewer ...........................................48
workspace .............................................42
delete the scheduled entry ........................66
Delta
after a seed .....................................38, 72
file missing or corrupt ..........................108
recreation ............................................108
Destination Job ..........................................70
Director WORK and RAID .........................13
Directory on Disk .................................22, 82
disable real time scanning on reads ..........13
DLLs
dynamic list............................................68
DNS name .................................................44
Do not restore existing files .......................81
Domain
Authentication........................................44
policy .....................................................17
Double clicking on a log.............................76
drive letter selected ...................................62
DVD
restore from ...........................................82
EFS backups .............................................17
email
backup notification.................................75
Notification tab.......................................77
on completion or failure .........................96
Encrypted
Index
File System ........................................... 17
password .............................................. 54
Encryption
Job information ..................................... 38
type, reseed.......................................... 72
types ................................................... 111
End User License Agreement................... 15
End-Of-Data Detection (EOD) ................ 112
Entries Scheduled Simultaneously ......... 114
EVault System Restore
Bare Metal Restore............................... 59
definition ............................................... 85
Event Logs ................................................ 68
execution priority....................................... 53
Exit the Agent Assistant ............................ 39
F1 function key.......................................... 33
F5 function key.......................................... 48
File
list backup source................................. 59
lock management ................................. 13
Filename Encoding
ANSI or Unicode................................... 59
filtering ...................................................... 63
Forcereseed Option ................................ 108
free space ................................................. 22
from address ............................................. 77
global configuration file ........................... 110
HAL ........................................................... 99
Help
for Web CentralControl......................... 41
from Agent Assistant menu .................. 40
URL address......................................... 41
hover the mouse ....................................... 39
IIS Metabase............................................. 68
Include/Exclude
files and subdirectories......................... 59
screen ................................................... 61
Installation
language ............................................... 29
Procedures ........................................... 14
InstallShield............................................... 15
IP or DNS address .................................... 38
italicized letter ........................................... 62
Job
configuration files................................ 110
definition ............................................... 42
name..................................................... 59
names not to use .................................. 59
settings ................................................. 54
Status messages .................................. 40
synchronization................................... 108
Job CFG file
threading model.................................... 69
Keep my current registration..................... 23
Language choices
at installation......................................... 18
Page 117 of 121
Agent 6.5 User’s Guide for Microsoft Windows
languages
Eng, Ger, Sp, Fr ....................................29
Launch Web CentralControl ......................40
Leave unchanged ......................................19
License
Cluster Support .....................................58
End User Agreement.............................15
for OTM .................................................16
for re-installing.......................................92
for version 5.53 Vault ............................14
licensing
agreement .............................................99
and installation ......................................14
Director based .........................................9
quota system .........................................35
Terminal services ..................................68
Local
catalog files .........................................110
disk or tape backup ...............................38
Drive only ..............................................59
security settings.....................................17
System Account ..........................8, 15, 19
log
copies ....................................................60
file, definition .........................................76
file, reseed.............................................72
options ...................................................60
Login
page of Web CentralControl..................40
URL address .........................................41
Logon
as a service ...........................................17
Credentials for Agent Services........15, 19
Maestro.cfg
Agent Assistant configuration................41
Maestro.exe ...............................................40
main drop-down menu...............................33
MAPI backup .............................................54
MAPI Plug-In
upgrade .................................................25
Mapped
Drive only ..............................................59
Network drive only.................................68
maximum number
of files and directories ...........................48
MDB mailbox names .................................25
Modify ........................................................18
Move the Agent
to another Web CentralControl .............23
MS Exchange Plug-In ..........................14, 31
MS SQL Server
database................................................32
Plug-In ...................................................32
multi-cpu system........................................69
multiple catalog entries ..............................80
multi-threading
Index
for performance .................................... 69
MyWorkspace ..................................... 42, 46
nested exclusions and inclusions ............. 63
Network
Address ................................................ 50
connectivity is down.............................. 53
UNC Share ........................................... 59
New
Agent .................................................... 43
Job Wizard............................................ 61
Password .............................................. 47
Not Ready
icon ....................................................... 39
power management.............................. 53
Notepad.exe.............................................. 48
Notification tab .................................... 52, 77
number of days archived .......................... 52
OFM
definition ............................................... 52
installation............................................. 13
Old Password............................................ 47
Open File Manager ................................... 13
open files
during backups ..................................... 52
Open Transaction Manager ...................... 13
optional Plug-In software .......................... 53
Options
button.................................................... 61
for the workspace ................................. 48
scheduling ............................................ 70
Oracle
database ............................................... 31
Instant Client......................................... 31
Plug-In .................................................. 31
Plug-In Support Libraries...................... 14
original
configuration ......................................... 84
location ................................................. 81
Others tab ................................................. 52
OTM .......................................................... 14
definition ............................................... 52
installation............................................. 13
installation settings ............................... 16
outgoing
for AV.................................................... 13
Overwrite
existing files .......................................... 81
locked files ............................................ 81
paging file.................................................. 94
Password
authentication ....................................... 44
encrypted restore.................................. 80
Performance Counter ............................... 67
Period
for recursive directory ........................... 63
Plug-In
Page 118 of 121
Agent 6.5 User’s Guide for Microsoft Windows
64-bit......................................................10
definition ................................................14
tab..........................................................52
port
connection .............................................50
number ..................................................44
Power Management screen.......................53
Processes ..................................................75
Processing
icon ........................................................39
Options ..................................................70
power management...............................53
Profile
definition ................................................42
Name.....................................................50
Progress
bar .........................................................83
Monitor Display......................................48
properties
Job.........................................................66
safeset...................................................76
protect open files .......................................13
purge expired log files ...............................60
question mark ............................................63
Quick File Scanning.............................60, 70
range of Safesets.......................................80
Ready
icon ........................................................39
power management...............................53
rebuild a delta file.....................................108
Reconnection.............................................50
Recursive...................................................63
red negation circle .....................................67
Refresh button ...........................................48
Register
the computer .........................................38
Register Agent
with Web CentralControl .................16, 23
register.log .................................................54
Registration..........................................50, 93
Registry......................................................67
reinstalling..................................................85
Release Notes .....................................15, 23
Reload Last Workspace ............................48
Removable Storage Manager (RSM) ........68
Remove Item button ..................................62
Rename files..............................................81
Repair
definition ................................................20
folder......................................................99
maintenance..........................................18
Requirements
64-bit Agent ...........................................15
re-register
definition ..............................................110
for bare-metal ........................................38
Index
re-registration............................................ 54
re-seed...................................................... 72
Restore
all streams or only data streams .......... 82
destination ............................................ 80
from another computer ......................... 54
from the following safeset..................... 82
rename incoming files........................... 80
section of job file................................... 69
to an alternate UNC path...................... 81
Wizard................................................... 97
Restore log
delta recreation failed ......................... 108
Retention
date....................................................... 76
definition ............................................... 52
schedule ............................................... 70
type ....................................................... 73
RSM database .......................................... 68
backup .................................................. 59
Save
default Workspace................................ 42
password .............................................. 45
Workspace............................................ 46
Schedule
Backups .............................................. 113
definition ............................................... 12
Job ........................................................ 42
List ........................................................ 70
Schedule.cfg ........................................... 110
Seed
and Re-Seed ........................................ 72
first backup ........................................... 38
Select
an encryption type ................................ 60
multiple files .......................................... 62
Plug-In(s) to Install................................ 16
selection criteria ........................................ 62
separator ................................................... 48
Server Profiles .......................................... 22
Service
Agent .................................................... 38
packs .................................................... 68
Provider ................................................ 14
service account
user identities ....................................... 12
Set
Job options ........................................... 60
Setup Maintenance ............................. 18, 22
shared read............................................... 61
Shipping Products Chart ........................... 11
Show
logs ....................................................... 48
Status.................................................... 40
show/select files........................................ 62
Silent Install
Page 119 of 121
Agent 6.5 User’s Guide for Microsoft Windows
Answer file.............................................26
with OTM ...............................................27
simple Backup and Restore.......................86
simultaneous restores ...............................79
Single Copy Cluster (SCC) ......................100
Single threading model ..............................69
single-cpu system ......................................69
Skip
Registration ...........................................16
this screen in the future .........................50
SMTP
address..................................................77
authentication types ..............................77
Software License Agreement ....................15
Solaris Agent .............................................31
Source
screen....................................................61
tab..........................................................66
SQL
query......................................................98
Server ....................................................54
Server 2005...........................................32
Server Plug-In .......................................14
SSI files......................................................82
start the Backup.........................................73
Status
of your backups .....................................53
Stop running processes
Agent Assistant. ....................................39
Subdirectories............................................81
subsequent backups..................................78
success of the backup ...............................77
successful and/or failed Backups ..............52
Support Notes............................................15
Suppress archive bit ..................................61
Synchronize
all backup Jobs......................................23
command...............................................70
perform a synch.....................................97
process information ...............................75
System
detects a network loss/presence...........53
Files .................................................67, 85
Files icon ...............................................67
has crashed...........................................85
Recovery Verification ............................98
State ..........................................67, 80, 85
State file locking ....................................13
Tray icon..........................................39, 53
System wants to
hibernate ...............................................53
shutdown ...............................................53
Tape drive..................................................22
Target Job..................................................70
Terminal Services ......................................68
Threading Model
Index
Options ................................................. 69
to addresses ............................................. 77
traversing excluded directories ................. 63
Typical Install ............................................ 15
UNC share .................................................. 9
Unicode
encoding ............................................... 59
Uninstall .................................................... 18
Update Progress Display .......................... 48
Upgrade Log
MAPI upgrades..................................... 25
Upgrade.NCF............................................ 22
Use all available bandwidth
on restore ............................................. 82
Use custom account ........................... 15, 19
user/password credentials ........................ 38
Validation failed......................................... 23
Vault
account ................................................. 50
adding ................................................... 52
global.vvc section ................................. 22
Profile.................................................... 60
Replication ............................................ 11
service provider .............................. 44, 50
VBA
open files .............................................. 13
verification................................................. 98
View Details
MAPI upgrade....................................... 25
VV
Agent software...................................... 31
executable directory ........................... 110
threading model options ....................... 69
VVAgent................................................ 8, 31
for Windows CentralControl ................. 11
logs ....................................................... 12
Web
URL address............................. 16, 19, 20
Web CentralControl .................................. 16
Welcome screen ....................................... 50
Wildcard
example ................................................ 64
in Directory Paths ................................. 64
in file names and directories................. 63
in mailbox names.................................. 25
path element......................................... 65
Rules..................................................... 65
Windows
2000/2003 Active Directory .................. 68
2000/2003 Systems.............................. 33
CentralControl .......................... 16, 19, 20
Event Viewer ........................................ 68
Registry ................................................ 81
Service.................................................. 31
Workspace
new ....................................................... 46
Page 120 of 121
Agent 6.5 User’s Guide for Microsoft Windows
Password...............................................46
Index
Write.exe................................................... 48
Page 121 of 121