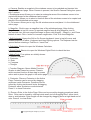
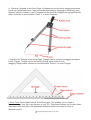
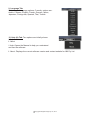
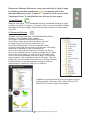
1
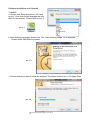
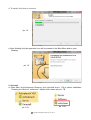
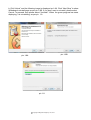
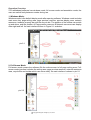
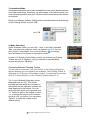
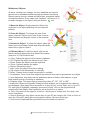
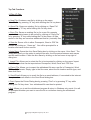
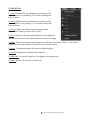
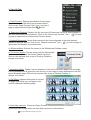
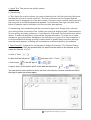
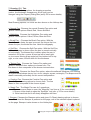
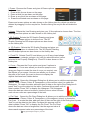
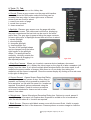
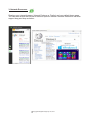
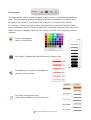
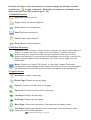
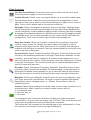
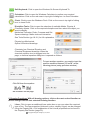
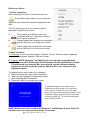
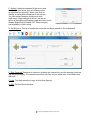
Activetouch Interactive Whiteboard Software Manual
Activetouch interactive whiteboard software will only operate in Windows XP, Vista, Win
2003, Win7 or Win 8 operating systems. Minimum hardware configuration required is
recommended as Pentium III 800MHz or higher, memory 1 GHz or higher, DirectX v9.0c
or higher, 1024 x 768 60Hz resolution, built-in sound card & speakers. The software is fully
compatible with Office XP/ 2003/2007/2010, Internet Explorer, and Firefox.
Manual Contents:
Software Installation and Uninstall
1. Installation
2. Uninstall
2- 3
3- 4
Operation Overview
1. Windows Mode
2. Full Screen Mode
3. Annotation Mode
4. Mode Switching
5
5
6
6
Customise Buttons; Floating Toolbar:
6
Whiteboard Objects:
7
Top Tab Functions:
1. Files (F) Tab:
2. Edit (E) Tab:
3. View (V) Tab
4. Page Tab
5. Insert (I) Tab:
6. Format ( O ) Tab:
7. Drawing ( D ) Tab:
8. Tools ( T ) Tab:
9. Language Tab:
10. Help (H) Tab
8
9
10
11
12 - 13
14
15 - 16
17 - 19
20
20
Resources:
1. Page Preview
2. Resources Preview
3. Network Resources
21
21
22
Property bar:
1. Colour
2. Line Width
3. Transparency
4. Line Style
23
23
23
23
Hot Keys:
1. File/Edit Functions
2. Edit/View Functions
3. Page Functions
4. Tools Functions
5. Drawing Functions
24
24
24
25 - 26
26 - 27
Whiteboard Server:
1. Device Connection
2. Menu Functions
28
28 - 29
For Further Assistance:
30
Copyright A Brighter Image Pty Ltd, 2013
Software Installation and Uninstall
1. Install:
a. Double click Setup Activetouch V3.0.exe
as pic1-1 and then select language that you
want for the software. Please refer to pic 1-2.
pic 1-1
pic 1-2
b. After selecting language, please click “OK”, then following image 1-3 is displayed.
Please select Next Step to proceed.
pic 1-3
c. Choose where you want to install the program, The default location is in C:\Program Files.
pic 1-4
Copyright A Brighter Image Pty Ltd, 2013
d. To Install, click Next to continue.
pic 1-5
e. After finishing, the fast operation icon will be created in the Start Menu and on your
Desktop.
pic 1-6
2. Uninstall
a. Enter Start, find Activetouch Directory, click Uninstall as pic 1-7A or select Installation
Directory and find out “uninst.exe”, double click it same as pic 1-7B
pic 1-7B
pic 1-7A
Copyright A Brighter Image Pty Ltd, 2013
b. Click“Uninst” and the following image is displayed as 1-8A. Click “Next Step” to show
Whiteboard uninstall page as per pic 1-8B. If you don’t want to uninstall, please select
Cancel. To proceed, then please select “Uninstall”. When the green progress bar starts
displaying, it is uninstalling, as per pic 1-9.
pic 1-8B
pic 1-8A
pic 1-9
Copyright A Brighter Image Pty Ltd, 2013
Operation Overview
V3.0 whiteboard software has windows mode, full screen mode and annotation mode; the
user can switch freely between modes during use.
1. Windows Mode:
Windows mode is the default display mode after opening software. Windows mode includes
main menu bar, page writing area, page preview resource, preview display area, network
resources, toolbars, property bar and the recycle bin. The position of the toolbar can switch
up and down, and the position of Page preview resource & Network resources can display
rither right and left. Its main interface shown in Figure 2-1 as below:
pic 2-1
2. Full Screen Mode:
Full-screen mode means the software fills the entire screen to full page writing area, Fullscreen mode interface includes the writing area, page preview resource, network resources
area, recycle Bin and toolbar which can move easily. Its main interface is shown in pic 2-1
pic 2-2
Copyright A Brighter Image Pty Ltd, 2013
3. Annotation Mode:
Annotation mode alows you to take a snapshot of your active Windows screen
and make make notes, comments, etc on the page. In annotation mode, you
have the floating toolbar (see pic 2-3A) that can be moved around the screen
as required.
Return to a different mode by clicking on the required mode screen at the top
of the Floating Toolbar, see pic 2-3B.
pic 2-3B
pic 2-3A
4. Mode Switching:
Under Windows mode, you can click “View” in the Top Command
Tabs, and select the required mode, as shown in pic 2-4. You can
also click the “View Mode” icon in the Hot Keys (
) to change
from Windows to Full Screen or Annotation mode.
In either Full Screen or Annotation modes, you will see the Floating
Toolbar as in pic 2-3A above, and you select the required Mode
window as per pic 2-3B above.
pic 2-4
Customise Buttons; Floating Toolbar
You are able to customise your own buttons in the Floating Toolbar so
that the buttons you use regularly are available. The Floating Toolbar is
displayed in Full Screen or Annotation modes. To customise the buttons,
click on “Custom Buttons” on the Floating Toolbar (see pic 3-1).
pic 3-1
The Custom Buttons Dialog box is then
displayed (see pic 3-2). The left list
includes the tools which are not been in
the toolbar and the right one includes the
tools displayed in the toolbar. You can
select the tools which you want and click
“>>” button to add on the toolbar or click
“<<“ to delete the tools from the toolbar
and click “OK” to confirm. You can select
“Default” to make the toolbar to the
default setting.
pic 3-2
Copyright A Brighter Image Pty Ltd, 2013
Whiteboard Objects
All items, whether text, images, movies, websites, etc that are
placed onto a whiteboard software page are known as objects.
Objects can be moved, rotated and have their properties edited
as explained below. Every object has “handles” (as per pic 4-1)
to make changes to the object using the Select ( ) tool.
pic 4-1
1. Move the Object: Simply place the Select tool
anywhere in the object and drag it to the required
position.
2. Zoom the Object: To change the size of the
object, place the Select tool in one of the 4 corner
Zoom handles and drag the corner to the required
size.
3. Rotate the Object: To rotate the object, place the
Select tool in the Rotate handle and drag the handle
either left or right to rotate it.
4. Edit the Object: To edit the object, click on the
Menu handle to display the drop down Edit window
(see pic 4-2). Edit functions are:
pic 4-2
a. Copy: Copies the object to the memory clipboard
b. Cut: Copies the object but deletes it from view
c. Paste: Pastes the object from the clipboard
d. Clone: Copies & pastes the object
e. Delete: Deletes the object
f. Lock: Locks the object from future editing
g. Flip: Option to flip horizontally or vertically
h. Mirror: Creates mirror image horizontally or vertically
i. Combination: Once 2 are more objects are selected, they can be grouped as one object
j. Layer Sequence: Any object can be positioned above or below other objects, to give
them relative priority of viewing or operation
k. Rotation Angle: The object can be rotated by either 450, 900, 1350 or 1800
l. Hyperlinks: Opens the Hyperlink Dialog box that enables you to hyperlink the object to
any webpage, other page of the document or to any file (pic, movie, flash, etc) in your PC.
For each type of hyperlink (webpage, document or disk), click on the required tab &
complete the link details. Most hyperlinks are a shortcut to an object.
m. Font: Only works if the object is a text box. Allows you to change font, font style, size,
colour and effects
n. Save to Resource: Any object can be save to your PC as a picture file. Click on Save to
open the “Save AS” dialog box and complete location, file name & file type
o. Voice Links: Duplicates the hyperlink function but links to audio files
Copyright A Brighter Image Pty Ltd, 2013
Top Tab Functions
1. Files (F) Tab:
a. New File: Creates a new file by clicking on the name
“New File” or by pressing “N” key while holding the Ctrl key down.
b. Open File: Opens an existing file by clicking on “Open File”
or by pressing “O” key while holding the Ctrl key down.
c. Save File: Saves an existing file (or for a new file, prompts
you for file location/name to be saved) by clicking on “Save File”
or by pressing “S” key while holding the Ctrl key down. All files
saved in this way are saved as whiteboard format (.riostudio) files.
d. Save As: Saves a file in either Powerpoint, Word or PDF file
formats by clicking on “Saves as”. You will be prompted for a
location and name for the new file.
e. Auto Save: Opens the Auto Save Dialog box by clicking on the name “Auto Save”. The
Dialog box gives you the option to select auto save, the time period between auto saves
and the save location. Close the Auto Save by clicking on the red cross in top right of
dialog box.
f. Import File: Allows you to select the file to be imported by clicking on the name “Import
File”. File types that can be imported are Powerpoint, Word, Excel and PDF files.
g. Export File: Allows you to export the whiteboard file as a new file in Powerpoint, Word,
PDF or JPG formats. Simply type in the file name, select the file location and file type, and
then click Save.
h. Send Email: Allows you to email the file to an email address, if connected to the internet.
Complete the email details in the Send Email dialog box.
i. Print: Opens the Printer Dialog box by pressing “Print” or by pressing “P” key while
holding the Ctrl key down. Your whiteboard file can then be printed.
j. Exit: Allows you to exit the whiteboard program & return to Windows only mode. You will
be prompted whether you want to save the file or not before closing the whiteboard
program.
Copyright A Brighter Image Pty Ltd, 2013
2. Edit (E) Tab:
a. Undo: Undoes the last operation by clicking on the
name “Undo” or by pressing “Z” key while holding the
Ctrl key down.
b. Redo: Redoes the last operation by clicking on the
name “Redo” or by pressing “Y” key while holding the
Ctrl key down.
c. Copy: Copies the selected object/objects to the
clipboard by clicking on the name “Copy”.
d. Cut: Copies the selected object/objects to the clipboard
and removes the selected object/objects on the active page.
e. Paste: Pastes the copied object/objects by clicking on the name “Paste”. The object/
objects can be resized and/or moved to the required location.
f. Clone: Copies and pastes the selected object/objects.
g. Delete: Deletes the selected object/objects.
h. Select All: Groups all objects on the page as a single group.
i. Select: Makes the cursor the Select tool.
Copyright A Brighter Image Pty Ltd, 2013
3. View (V) Tab:
a. Page Preview: Displays thumbnails of each page
of the active file in the side Page preview section.
Click on the “Page Preview” icon (
) on side of
page to open/close the Page Preview section.
b. Resources Preview: Displays the file structure of Resources (clip art & other images) in
the side Resources preview section. Click on the “Resources Preview” icon (
) on side
of page to open/close the Resources Preview section.
c. Network Resources: Opens direct access to the internet/google in the side Network
resources preview section. Click on the “Network resources” icon (
) on side of page to
open/close the Network rsources section.
d. Windows Mode: Returns the screen to the Whiteboard Software mode.
e. Full Screen Mode: Fills the screen with the Whiteboard
Software mode & hides the Control Tabs & Hot Keys.
Click on the required view at top of Floating Toolbar to
change view mode.
f. Annotation Mode: Grabs a screen snapshot of the active Windows page as a new page
in the Whiteboard file & opens the pen tool so you are ready to make annotations onto the
saved Windows page. Click on the required view at top of Floating Toolbar to
change view mode.
g. Flip Effect: Opens a dialog box of choices
for page effects that you can apply to the
current whiteboard software page.
h. Auto hide resource: Closes the Page Preview, Resources Preview or Network
Resources side of page when the Auto hide resource is clicked twice.
Copyright A Brighter Image Pty Ltd, 2013
4. Page Tab:
a. New Page: Creates a new page in the Whiteboard file.
Page options are:
White Page: Opens a new page with a white background.
Green Page: Opens a new page with a green background.
Black Page: Opens a new page with a blackbackground.
Background Page: Opens a new page with an image
background that you can select from your computer files.
After pressing “Background Page”, a file Explorer window
opens so you can navigate to the required background file.
b. Clear Page: Erases all objects on the active page.
c. Delete Page: Deletes the active page of your whiteboard file.
d. Page Up: Takes you to the page before the active page, ie. from page 3/3 to 2/3.
e. Page Down: Takes you to the page after the active page, ie. from page 2/3 to 3/3. If you
already on the last page of the file, it will create a new page.
f. Home: Takes you to the first page of your file at normal zoom view.
g. End: Takes you to the last page of your file..
h. Zoom In: Zooms in (enlarges) the image size in the centre of the page. Continue to hit
Zoom In to enlarge the image further. The magnification is shown as a percentage in the
top right corner, next to the page number. Maximum zoom is 100%.
i. Zoom Out: Zooms out (reduces) the mage size in the centre of the page. Continue to hit
Zoom Out to reduce the image further. The magnification is shown as a percentage in the
top right corner, next to the page number. Minimum zoom is 59%.
j. Move Page: Allows you to move the objects around the page as required., including off
the visible viewing range of the page. The objects will still exist when moved off the page &
can be moved back at a later time.
k. Playback Current Page: Replays the creation of the objects on the current page. Good if
you want to review a procedure that you created on a page. A small control panel with
play, pause, stop appears when you select the Playback Current Page option. To exit the
Playback option, press the Stop option on the control panel.
l. Playback Selection Page: Replays the creation of a selected page or pages, and at the
speed required. Selection options are Current page, all pages or a selected page range.
Play speed options are 0.5x, 0.8x, 1x, 2x, 4x and 8x real creation time.
Copyright A Brighter Image Pty Ltd, 2013
5. Insert (I) Tab:
a. Insert Images: Two options are initially shown:
a. From Gallery
b. From Files
a. Gallery: is the Resources library of the whiteboard
software and only the Explorer tree of the Whiteboard
Resources image files are shown. You can navigate to
the required Directory/Subdirectory to select the file
you want. Note that resources files, including new
Resources Directories and Subdirectories can be added using your normal Explorer or My
Computer tools. The Gallery is designed to allow you to locate all relevant files together to
speed up navigation of files.
b. Files: Any image file in your computer can be selected. When the “From Files” option is
selected, a normal Explorer directory is displayed so you can navigate to the required file &
select it.
b. Insert Multimedia: Any video, audio or flash file in your computer can be selected. When
the “Insert Multimedia” option is selected, a normal Explorer directory is displayed so you
can navigate to the required file & select it.
c. Insert Table: Selecting “Insert Table” creates a Table tool that allows you to create a
table with the number of rows & columns that you require. Simply left click at the required
top left corner position of the table, and drag the mouse. Dragging right will increase the
number of columns and dragging down will increase the number of rows. The table size
(rows x columns) is shown in the top left corner of the table while it is being created.
To change the size (width/height) of the table cells, click on the “Selection” tool once the
Table has been created, click on the lower right corner tab and drag the table to the
required cell size.
d. Hyperlinks: Allows you to create a hyperlink from the active page to:
a. a Webpage (using the web address or URL)
b. another page of the file (using the page number)
c. a file within the PC (image, movie, flash, etc)
You can select whether the hyperactive link will be activated by clicking anywhere on the
image or by clicking on the top round yellow handle that is created on top of the Hyperlink
image.
When the Hyperlink is created using the Insert/Hyperlink Tab, a small object with the name
of the Hyperlink is created. Alternatively an existing object can be hyperlinked by choosing
the “Selection” tool, clicking on the Menu handle at the right of the object, selecting
hyperlink & then completing the hyperlink procedure for this object. When completed, the
hyperlink will be activated by clicking on the object. As an example, a image of the heart
could be hyperlinked to an animated video of the heart working, so the video is shown
when the heart image is clicked.
Copyright A Brighter Image Pty Ltd, 2013
e. Insert Text: Two options are initially shown:
a. Text
b. Handwriting
a. Text: Move the cusror to where you want to place the text, left click at the top left corner
and drag the mouse to create a text box. The size of the box can be changed with the
selection tool by dragging one of the box corners. Once the box is created, simply type the
text using the on screen keyboard that appears. Font features (Font type, font size, bold,
italics & underline can be selected in the text box that also appears.
6. Handwriting: Your handwriting will be converted to typed text. Simply write, wait and
your writing will be converted to text. Initially your writing is displayed with 3 interpretations
of your writing, in system preference. If you leave for 5 seconds, the first preference will be
shown. To select an alternative, press on the required alternative. To erase one or more
characters, go to the bottom “backspace” box and tap once to get rid of each character. It
is recommended that writing is limited to short words to enable easy correction although
note that each segment of writing will be treated as a different object by the software.
f. Insert Formula: Create a box on the page to display the formula. The Formula Dialog
box then appears. Click the symbols that you want from the menu on the window. e.g. to
create the formula x2+y2=1:
a. click “=” from
,
b. then click the left part of
c. then insert
to the left part of
and then click “+” from
,
,
d. type x and y on the boxes and 2 in the label as the picture
.
You can set the colour and the size for the font in the formula. Double click the formula in
the page to open the window again.
Copyright A Brighter Image Pty Ltd, 2013
6. Format ( O ) Tab:
a. Common Object: Two options are initially shown:
i. Edit Object
ii. Delete Object
i. Edit Subject: Enables to to create a text or image object
that will appear in the same position & size on every page
of the file. Good for headings, footings, common references.
ii. Delete Object: Deletes the object from every page in the file.
b. Background Pattern: Two options are initially shown:
i. Show Grid
ii. Grid Style
i. Show Grid: Click to either turn on or turn off the background grid. The Grid will help
layout preparation of the page but can then be turned off when required. The grid can be
changed with the option below.
ii. Grid Style: Allows you to select the grid that you require. Selecting Grid Style opens a
Dialog box with choice options for colour, horizontal & vertical grid size, line style & line
thickness. Simply choose what you require and press OK.
c. Parameters Setting: Opens a Dialog box so you can choose the language you want.
d. Alignment: Used to align 2 or more objects. To use, 2 or more objects must be selected
using the Select tool. Then click on the Alignment option to display the various alignment
options:
Align Left
Align Right
Align Top
Align Bottom
Evenly Distribution Lines
Evenly Distribution Columns
Select the required alignment.
Copyright A Brighter Image Pty Ltd, 2013
7. Drawing ( D ) Tab:
For all of the Drawing options, the drawing properties
(colour, line thickness, transparency & line type) can be
changed using the Property Dialog Box (see p.22 for more details).
Most Drawing options, incl Pens are also shown on the Hotkeys bar.
a. Normal Pen: Chooses the normal Drawing Pen option and
gives 4 Colour options: Black, Red, Green and Blue.
b Highlighter: Chooses the Highlighter Pen option and
gives 4 Colour options: Yellow, Green, Blue and Pink.
c. Brush Pen: Chooses the Brush Pen option. With the
Brush Pen, the faster the pen is moved, the thinner the line;
slower the pen, the thicker the line. Used for calligraphy.
d. Soft Pen: Chooses the Spft Pen option. With the Soft Pen,
full line thickness is shown when the pen is moved vertically
or horizontally. The thinnest line is shown when the pen is
moved at 450 to the x:y axes & from top left to lower right,
or vice versa. Moving at an angle but from bottom left to top
right, or vice versa, will still show full line thickness.
e. Texture Pen: Chooses the Texture Pen option and
gives 10 Texture/Colour options to choose from. The
line drawn is then composed of the chosen texture/colour.
f. Smart Pen: Chooses the Smart Pen option, where the software interprets your drawing
as a geometrical shape (arrow, line, circle, triangle, square, rectangle). The shape must be
drawn reasonably accurately for the correct interpretation.
g. Creative Pen: Chooses the Creative Pen option and
gives 6 Clipart drawing options to choose from. The line
drawn is then composed of the chosen clipart.
h. Magic Pen: The Magic Pen can do 3 operations:
i. Draw a square shape to open the “Magnifier” tool (see p.16 for more details)
ii. Draw a circle shape to open the “Spotlight” tool (see p.15 for more details)
iii. Write hand text and it will slowly disappear with time.
i. Stamper: Chooses the Stamper option and gives 10 Clipart drawing options to choose
from. Each time the Stamper is pressed on the page, one of the selected clipart is placed
on the page. Stamper is also shown on the Hotkey bar.
Copyright A Brighter Image Pty Ltd, 2013
j. Eraser: Chooses the Eraser and gives 4 Eraser options
to choose from:
i. Erase a thin line as drawn on the page
ii. Erase a thick line as drawn on the page
iii. Erase a very thick line as drawn on the page
iv. Erase the selected area as drawn on the page
Eraser and eraser options are also shown on the Hotkey bar. Any object can also be
deleted by dragging it to the recycle bin. Double clicking the recycle bin will delete the
page.
k. Lines: Selects the Line Drawing and gives you 12 line options to choose from. The Line
Drawing and line options are also shown on the Hotkey bar.
l. 2D Graphic: Selects the 2D Graphic Drawing and gives
you 10 x 2D shape options to choose from. The 2D
Graphic Drawing and 2D shape options are also shown
on the Hotkey bar.
m. 3D Graphic: Selects the 3D Graphic Drawing and gives you
5 x 3D shape options to choose from. The 3D Graphic Drawing
and 3D shape options are also shown on the Hotkey bar.
n. Flood Fill: Selects Food Fill and allows you to fill any closed shape
(circle, square, rectangle, polygon, etc) with the selected colour (colour
selected in the Property Dialog box). Flood Fill is also shown on the
Hotkey bar.
o. Cover: Chooses the Cover option and gives 2 options to
choose from. Cover area allows you draw an opaque cover
(drag your finger to create the size of cover you require) over
the objects on your page. Uncover pen allows you to erase
the parts of the cover you want to remove to display the
objects that have been hidden below.
p. Histogram: Opens the Histogram Dialog box & allows you to add the required data
(Name, Value, Column Colour & Transparency of the column colour) to create the
Histogram. To create the data, add each item of data on the right of the Dialog box &
press “Add” to put the data into the table. Continue this process until all
data is added. Press “OK” to display the Histogram. The Histogram
shows the data as coloured columns, lists the column value & shows
each column value as a percentage of the total.
q. Pie Chart: Opens the Pie Chart Dialog box & allows you to add the required data
(Name, Value, Column Colour & Transparency of the segment colour) to create the
Pie Chart. To create the data, add each item of data on the right of the Dialog box & press
“Add” to put the data into the table. Continue this process until all
data is added. Press “OK” to display the Pie Chart. The Pie Chart
shows the data as coloured segments, lists the segment value &
shows each segment value as a percentage of the total.
Copyright A Brighter Image Pty Ltd, 2013
8. Tools ( T ) Tab:
All Tools are also shown on the Hotkey bar.
a. Reveal: Places a grey screen over the page with handles
on each side so the information under the screen can be
revealed from any edge. In lower right corner of Reveal
screen there are icons to select:
i. reveal from centre of page
ii. reveal from a corner
iii. close reveal tool
b Spotlight: Places a grey screen over the page with white
centre on the screen. The white area is still active, displaying
the page contents and the last tool can be used in the white
active area. The gray area is opaque hiding the pager contents.
In lower right corner of Spotlight screen there are icons to select:
i. square spotlight
ii. round spotlight
iii. triangular spotlight
iv. close spotlight tool
The size of the spotlight shape
can be changed using the lower
right handle on the spotlight
shape. The spotlight can be
moved by touching outside the
spotlight shape & dragging it to
Drag to change size
the required position.
c. Easy Doc Camera: Allows you to select a camera device (webcam, document
camera, video camera, etc), display the video image on the page & to take a snapshot (still
image) from the video. If you chose multiple blank windows before the video starts, it will
snapshot the same number of images. Note there is a 5 sec delay from taking the
snapshot until the frame is captured. Close the camera display by clicking on the red cross
in top right of dialog box.
d. Screen Record: Opens Screen Recording Dialog
box. Options to record, pause & stop. When stop is
pressed, an Explorer box is opened to enable to file
to be saved as .avi file with file name & in location as
required. Records all actions performed using the
whiteboard software. Good to review a procedure
or to send to students for lesson review or when
absent from class.
e. Microphone: Opens Microphone Recording Dialog box. Options to record, pause &
stop. When stop is pressed, an Explorer box is opened to enable to file to be saved as
.wav file with file name & in location as required.
f. Blank Screen: Places a solid black screen cover with the word Quiet. Useful to regain
student focus to the front of the classroom. Press anywhere on screen image to close the
screen cover.
Copyright A Brighter Image Pty Ltd, 2013
g. Camera: Enables a snapshot of the windows screen to be grabbed and inserted into
current whiteboard page. When Camera is pressed, the Screen Camera Dialog box opens
with 3 options:
i. Rectangular area: Allows you to select a rectangular area of the windows screen to be
copied and placed in the whiteboard active page.
ii. Any region: Allows you to select a freeform area of the windows screen to be copied and
placed in the whiteboard active page.
iii. Full screen: Allows you to copy the full windows screen and place it in the whiteboard
active page.
h. Magnifier: Click to open a magnified view of the whiteboard page. After clicking
Magnifier, start at top left corner of required magified area & drag Magnifier view to
the required size. An inset magnified image is shown with Magnify -, Magnify + and Close
buttons in Inset. Click + button to increase magification. Click X to close Magnifier.
i. Soft Keyboard: Opens the Soft or On Screen keyboard. Icons in top left corner and
enables selection of either Keyboard and Hand Writing options. The Keyboard can be
opened before selecting a Text Box in “Insert/Text”.
j. Calculator: Shortcut to open the Windows Calculator.
j. Digital Clock: Shortcut to open the Windows Digital Clock to check the time.
j. Maths Tools: Five options are initially shown:
i. Function Diagram
ii. Protractor
iii. Ruler
iv. Compass
v. Triangle
i. Function Diagram: Opens Maths Function
Graphs in side Resources screen. Press to
select required function & then drag in screen
active area to place the graph in the active page.
ii. Protractor: Places a Protractor in the Active
Page. Protractor can be moved by dragging
anywhere inside Protractor. Protractor can be
turned by clicking inside small circle & dragging
Protractor either clockwise or anticlockwise.
Press X to close Protractor.
iii. Places a Ruler in the Active Page. Ruler can be moved by dragging anywhere inside
Ruler. Ruler can be turned by clicking inside small circle & dragging Ruler either clockwise or anticlockwise. Ruler length can be changed by dragging arrow at right hand end of
ruler. Press X to close Ruler.
Copyright A Brighter Image Pty Ltd, 2013
iv. Places a Compass in the Active Page. Compass can be moved by dragging anywhere
inside top middle black area. Legs can be opened/closed by dragging on either leg; open
distance (radius) is shown in red. Compass can be turned by dragging on top black handle
either clockwise or anticlockwise. Press X to close Compass.
v. Places a 450 Triangle in the Active Page. Triangle can be moved by dragging anywhere
inside Triangle. Triangle can be turned by clicking inside small circle &
dragging Triangle either clockwise or anticlockwise. Press X to close Triangle.
j. Other Tools: Opens Add External Tools Dialog box. This enables you to create a
hyperlink to any .exe file in any location in your PC. This shortcut allows you to open these
executable files from within the whiteboard software (without the need to return to
Windows mode).
Copyright A Brighter Image Pty Ltd, 2013
9. Language Tab:
Click to open Language options. Currently options are:
Arabic, Chinese, English, French, German, Italian,
Japanese, Portuguese, Spanish, Thai, Turkish.
10. Help (H) Tab: Two options are initially shown:
i. Help
ii. About
i. Help: Opens the Manual to help you understand
and use the software.
ii. About: Displays the current software version and contact website for ABI Pty Ltd.
Copyright A Brighter Image Pty Ltd, 2013
Resources: Software Resources can be moved to left or right of page
by clicking on double ended arrow (
) at opposite side to the
minimised Resources bar. To open Resources bar, click on any of the
3 displayed icons. To minimise the bar, click on the icon again.
1. Page Preview
Displays each page of the whiteboard file as a thumbnail showing its page
number (eg. page 1/3: page 1 of 3 pages). Click on any thumbnail to display
that page as the active page. Pages can also be moved to re-order pages
in the file.
2. Resources Preview
Displays the Resources files in the Whiteboard software
directory of the Program Files, usually
c:\Program Files\AbiTouch\Software\Picture.
These files contain the multimedia library that can
be used during file (lesson) preparation. You
can add sub-directories to suit your specific needs
or faculty within this file structure, and add your own library
resources to existing or new sub-directories.
Click on the req uired sub-directory to display the library
items in the window below. To place an image, movie, flash,
etc into the active page, click on the “Select” hotkey, then
click on the required image, and either drag it to the active
page or simply click anywhere on the active page. The new
image that you have placed can then haver its size changed,
moved around or have its properties changed (such as
hyperlinking to a flash file, video file or website).
In addition to multimedia files such as images, movies,
flash and audio, Microsoft Office (Word, Excel, PPT,
and PDF) files can be shown and played.
Copyright A Brighter Image Pty Ltd, 2013
3. Network Resources
Displays your internet browser (Internet Explorer or Firefox) and your default home page.
You can then search the internet or select a specific website. Network Resources can also
support drag and drop as below:
Copyright A Brighter Image Pty Ltd, 2013
Property Bar:
The Property Bar can be moved (dragged) to any location on the whiteboard software
page. The Property Bar enables changing of the basic properties of a range of Tools
provided in the software. The Property Bar changes to suit the selected Hotkey.
For example, it is grey (not active) when the Eraser tool is selected. When the Table
hotkey is selected, only the Colour property icon is coloured (active) so the colour of the
table lines can be changed. When the Pen hotkey is selected, all 4 property icons are
coloured:
Colour: Changes the
colour of the pen line
Line Width: Changes the width (thickness) of the pen line
Transparency: Changes the transparency
(density) of the pen line
Line Style: Changes the style
(solid. dotted, dashed, etc) of the pen line
Copyright A Brighter Image Pty Ltd, 2013
Hot Keys: Hot Keys can be moved to top or bottom of page by clicking on double
ended arrow (
) to right of hot keys. All Hot Key functions are explained in more
detail under the “Top Tab Functions (pp 8 - 20).
1. File/Edit Functions
Open File: Open a new file
Copy: Copies the selected object/s
Undo Undoes the last operation
Save File Saves working file
Paste Pastes copied object/s
Redo Redoes the last operation
2. Edit/View Functions
Selection: Turns to cursor to Select mode so that you can slect an object/group of
objects. To select one object, simply click on the object. To select a group of
objects, drag your finger around the required objects to select objects. Once
object/s are selected, you can perform edit operations such as copy, or modify the
object using the handles that are displayed. See “Edit” section (page 9) for full
explanation.
Mode: Allows you to select “Full Screen” or “Annotate”. modes. Full screen
increases the working display area & reduces the size of hot keys. Annotate grabs
the windows screen and allows you to makes annotations on the background.
3. Page Functions
New Page: Creates a new page
Delete Page: Deletes the current page
Zoom In: Zooms in on the centre of the page
Zoom out: Zooms out on the centre of the page
Last Page: Displays the last page
Next Page: Displays the next page
Move Page: Allows free movement of the page around display screen
Play Page: Replays the creation of the current page. Press stop button (solid
square) to exit from Play operation.
Copyright A Brighter Image Pty Ltd, 2013
4 Tools Functions
One Key Screen Shade: Covers the screen with a curtain with the word “quiet”.
Touch anywhere on page to remove the curtain.
Curtain (Reveal): Places cover over page & allows you to reveal the hidden page.
Pull the desired arrow to start the reveal process from that edge.Boxes in lower
right corner allow you to select reveal process starting from edge or from centre of
page. Touch cross in bottom right to remove the curtain tool.
Spotlight: Places a full brightness spotlight shape on the page. Spotlight shape
can be changed be touching required shape in bottom right corner. Spotlight size
can be changed by touching shape to display handle in bottom right edge of shape
& dragging to increase/decrease size. Spotlight can be moved by dragging outside
the spotlight area. Last function operation (eg. pen mode) will still work inside the
spotlight area. Touch cross in bottom right to remove the spotlight tool.
Easy-doc Camera: Allows you to select a camera device (webcam, document
camera, video camera, etc), display the video image on the page & to take a
snapshot (still image) from the video. Note there is a 5 sec delay from taking the
snapshot until the frame is captured. Close the camera display by touching the red
cross in top right of dialog box.
Screen Record: Opens “Screen Recording” dialog box. Press Play button to start
recording the operations performed on the page. Pause button available. To stop
recording , press stop button in dialog box & windows screen appears for you to
select file name & save location. Close the screen record by touching the red cross
in top right of dialog box. This function aloows you to create a teaching lesson &
save it to replay at a later date.
Recorder: Opens “Microphone Recording” dialog box. Press Play button to start
recording audio. Pause button available. To stop recording , press stop button in
dialog box & windows screen appears for you to select file name & save location.
Close the microphone record by touching the red cross in top right of dialog box.
Magnifier: Click to open Magnifier mode.To select the area to be magnified, drag
your finger around the required area. Lift finger to create magnified inset display.
Magnification can be changed using + or - buttons. Press cross to close the
magified inset box.
Camera: Opens Camera dialog box that will make a screen copy of part/all of your
windows screen. Select whether you want to make a screen copy of:
a. A rectangular area,
b. free form area, or
c. full screen.
For rectangular area, hold down left button and drag your finger around the
required area. Let go tto make the screen copy. For Free Form, mark the area as if
using a pen & complete the area by finishing at the start point.
The screen save will be placed on the working page of your whiteboard file. Close
the camera by touching the cross in top right of dialog box.
Copyright A Brighter Image Pty Ltd, 2013
Soft Keyboard: Click to open the Windows On Screen Keyboard.To
Calculator: Click to open the Windows Calculator to perform any required
calculations. Click on the red cross in top right of dialog box. to close Calculator.
Clock: Click to open the Windows Clock. Click on the cross in top right of dialog
box. to close Clock.
Discipline Tools: Click to open the selection of available Maths, Physics &
Chemistry objects. Click on the required discipline and then select the object you
want to display.
Maths has Protractor, Ruler, Compass and Set
Square drawings. Maths tools are interactive.
See Tools Section (pp 18-19 ) for full explanation.
Physics has Mechanical,
Optics & Electrical drawings.
Chemistry has Chemical Equation and
Chemical Equipment drawings. When the
chemical equation icon is dragged onto the
page, a chemical equation dialog box is opened as follows.
To input another equation, you need to input the
reaction condition between “&”and”&” as the
following picture (using pull down window):
Click OK then the equation
will be shown on the page.
5. Drawing Functions. With all drawing options, click on the next reuired function or
tool to change from the last selected Drawing function.
Lines: Click to open an additional lines option box so you can select the required
type of line .The line properties (thickness, colour, density & type) can be changed
using the Poperty Bar. A full explanation of the lines & properties can be found in
the Property Bar Section (page 23).
Copyright A Brighter Image Pty Ltd, 2013
2D Graphic: Click to open an additional 2D shapesoption box so you can select
the required type of 2D shape .The 2D shape properties (thickness, colour, density
& type) can be changed using the Property Bar. A full list of the 2D shapes &
properties can be found in the Drawing Section (page 16).
3D Graphic: Click to open an additional 3D shapesoption box so you can select
the required type of 3D shape .The 3D shape properties (thickness, colour, density
& type) can be changed using the Property Bar. A full list of the 3D shapes &
properties can be found in the Drawing Section (page 16).
Flood Fill: Click to select Fill mode. The Fill colour can be changed using the
Property Bar. Any closed shape (circle, square, etc) can be filled with colour by
clicking inside the closed shape.
Table: Click to create a Table on your display page. To select the number of Table
colums & rows, touch in the top left position of the table and drag your finger to
the required size (the number of columns x number of rows is displayed while
dragging the table. Let go to create the Table. The physical size of the table can
be changed using the Select tool & dragging the corner handles until the table is
the required physical size.
Pen: Click to open an additional Pen option boxes (pen Type & Colour) so you can
select the required Pen .The Pen colour can be changed using the 4 main colour
options or the full colour options using the Property Bar. Other Pen Properties ,
density & type) can be changed using the Property Bar. Other Line properties
(type, thickness and density) are also changed in the Line Property Bar. A full
explanation of the Pens can be found in the Drawing Section (page 15).
Eraser: Click to open an additional Eraser option box so you can select the
required type of Eraser .The Eraser options are:
Erasing a Line (select Small, Mid or Big for thickness of eraser line), or
Erasing an area (select the area to be erased). To select an area, touch finger just
outside one corner of area to be erased and drag to cover the required area . A
full explanation of the Eraser & properties can be found in the Drawing Section
(page 16).
Text Click to open an additional Text option box so you can select the required
font, size and whether you require bold, italic or underline options. Once font
details are correct, highlight the position and size of the text box (touch at top left
corner and drag to cover the required area. Text box completed when you lift
finger. Text can then be inserted using the on screen keyboard. A full explanation
of the Text can be found in the Insert Section (page 13).
Stamper: Click to open an additional Stamper option box so you can select the
required type of Stamp to be placed on your screen. .Once stamp style is selected,
simply touch page where you require the stamp and as many times as required. A
full explanation of the Stamper can be found in the Drawing Section (page 15).
Copyright A Brighter Image Pty Ltd, 2013
Whiteboard Server
1. Device connection
After installing the software, there will be an icon
on the bottom right toolbar of your computer,
right click it you will see the window displayed to the
right.
The icon may have one of three status options,
displayed using different colours:
A.
B.
C.
Grey means your display screen isn’t
connected with your computer or doesn’t
have a good connection.
Orange means the computer has connected
with an IWB and it is in single touch mode.
Green means the computer has connected
with an IWB and it is in multi-touch mode.
2. Menu Functions
A. Language: currently we have English, Chinese, French, German, Italian, Japanese,
Arabic, Portuguese, Spanish, Thai and Turkish.
B. Calibrate: NOTE: Windows 7 and Windows 8 users should use the Windows
calibration found in Start/Control Panel/Hardware and Sound/Calibrate (see Win
7/8 multi-touch user manual). Mac users should use the calibrate software
supplied as an option with this product. Windows XP users should use this
calibration option.
The display device may need to be calibrated:
a. When first using the system after installation
b. After moving a projector (whiteboard system)
c. After changing the PC resolution
d. When the cursor is not under your finger
To calibrate single touch mode, press
Calibrate and then press in the centre of
each of the 4 crosses shown. After each
press, the next cross should illuminate. Once
finished & happy that procedure functioned
normally, press OK. To quit and start again,
press Escape button.
NOTE: Multitouch is only available for Windows 7 and Windows 8 users. Other PC
and Mac users can only operate in Single Touch mode.
Copyright A Brighter Image Pty Ltd, 2013
C. Setting: Switches between Single touch and
Multi-touch (the server icon will change colour
as explained on page 28). When you click on
Setting, a dialog box will appear on the screen.
You can choose between single touch and
multi-touch. After setting the device, the server
will be a little different between single and multi-touch.
Disable RightClick & Disable PPT Notes are grey
(not available) in Multi-touch,
D. Set Shortcut: This is to enable the horizontal Hot Keys pasted on the whiteboard.
E. Test: Program Designed to check on whether the interactivity and the drawing functions
are working properly. It is recommended that this Test only be used after consultation with
ABI staff.
F. Help The Help contains a copy of this User Manual
G. Exit: Exit the Server window.
Copyright A Brighter Image Pty Ltd, 2013
For further information or assistance, contact:
A Brighter Image Pty Ltd,
Unit H/134-140 Old Pittwater Rd,
Brookvale NSW 2102 Australia
www.abimage.com.au
+61.2.99386866
Copyright A Brighter Image Pty Ltd, 2013