1
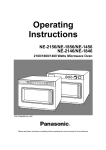
User Manual – TeSOPs – v1.9.0 Objective This system extends the functionality of Sage 200 to allow sales orders to be entered from a ‘template’ of stock items normally required on a customer-orientated basis. The initial screen displays a list of stock items that will show various previous sales history data, and allow selection of what items are required for the next sales order, so that it generates a standard sales order within Sage 200, allowing pricing overrides etc. during generation as if using the standard order entry screens. This varies from the standard Sage 200 facility of “template orders” which are designed to be a ‘repeat’ order basis of a fixed series of stock items with quantities pre-defined. The system has to be generated initially outside of the standard Sage 200 sales order mechanisms as the business rules for the sales order line preclude the ability to save an order line with a quantity of zero. Hence the system will appear as another entry on the sales order entry sub-menu to supplement the full, trade and counter order entry mechanisms. It is assumed that factored pricing is enabled on items that are to be priced by Kg and sold by units. A ‘notional’ unit weight is defined on the stock item that allows basic conversion between stock units and pricing units, e.g. a cheese may notionally weigh 20Kg, but each cheese will be at a slight variance to this. The actual conversion rate will be manipulated on the sales order, so that SellingUnitWeight reflects the average rather than the notional, and hence can be printed on the invoice (suitably multiplied by line quantity) to show the exact total weight, and the PricingMultOfStockUnit reflects the true conversion between the allocated quantity and notional weight to achieve the total weight entered. Note: this mechanism precludes the ability to allow multiple despatches to be combined to a single invoice as the values for the 2nd despatch will override those entered during the first despatch. DOC: N0115UM.doc Page 1 of 39 Contents 1.0 Parameter Setup............................................................................................. 3 1.1 Customer rules ........................................................................................... 3 1.2 System Rules ............................................................................................. 5 1.3 Display Rules............................................................................................. 9 1.4 Grid Settings ............................................................................................ 11 1.5 User Settings............................................................................................ 12 2 Amendments to standard Sage 200 screens ...................................................... 13 2.1 Product Groups ........................................................................................ 13 2.2 Customer Details – New/Amend/View..................................................... 14 2.3 Stock Item Selling Prices ......................................................................... 16 2.4 Stock Item Prices ..................................................................................... 17 2.5 Stock Item Details.................................................................................... 18 3 System Tables ................................................................................................. 19 3.1 Quick Customer Rules entry .................................................................... 19 3.2 Customer Items List ................................................................................. 20 3.3 Exclude Customer Items .......................................................................... 21 3.4 Customer Notes ....................................................................................... 22 3.4 Log Types................................................................................................ 23 4 Order Entry...................................................................................................... 24 4.1 Order Details ........................................................................................... 24 4.2 Delivery and Invoicing............................................................................. 26 4.3 Stock Item Details.................................................................................... 27 5 Post-picking stage............................................................................................ 30 6 Mechanisms to enhance performance............................................................... 32 6.1 Customer Price Lookups .......................................................................... 32 6.1.1 Create New Customer and Create New Stock Item ........................... 32 6.1.2 Rebuild Customer Or Item Prices ..................................................... 33 6.1.3 Check Cust Stock Price Records....................................................... 34 6.1.4 Server-side scheduled recalculations ................................................ 35 6.2 Offline Order Lines.................................................................................. 39 DOC: N0115UM.doc Page 2 of 39 1.0 Parameter Setup There are 4 parts of the parameters screens plus the user specific setup screen. 1.1 Customer rules 1. Rules definable at customer level (yes/no). Allows overrides of the rules defined in parameters 2 through 6 at the customer level. 2. Show Last ‘x’ orders as history– defines ‘x’. This defines how many of the last sales orders are to be shown on the order template screen (subject to maximum from parameter 9 and combined with orders included from parameter 3. 3. Show orders from last ‘x’ weeks as history – defines ‘x’. This defines how many weeks of sales orders are to be shown on the order template screen (each order will show as a discrete column) (subject to maximum from parameter 9 and combined with orders included from parameter 2. 4. Include items from customer item list (yes/no). Defines if the stock items defined in the customer list screen (see section later) are to be included in the list of items shown on the order template screen. DOC: N0115UM.doc Page 3 of 39 5. Include stock items from customer discount matrix (yes/no). If set to yes, all stock items that are defined in the customer discount matrix for the customer will be included in the list of items shown on the order template screen. 6. Include product groups from customer discount matrix (yes/no). If set to yes, all stock items for all product groups that are defined in the customer discount matrix for the customer will be included in the list of items shown on the order template screen. Note: parameters 2 through 6 are not mutually exclusive – each can be selected in combination with any other. DOC: N0115UM.doc Page 4 of 39 1.2 System Rules Enable ‘weight’ field processing (yes/no). Enables the facility to enter weights against stock items belonging to specific product groups, as defined later. Kg Unit of Measure Unit of measure that relates to ‘Kg’ sales (select from units table) (used to default the selling unit on stock items where the product group is defined as weight-priced type – see below). Weight Process All Items Weight Process All Items being ticked allows the ‘PreDespatch’ screen to allow the user to change the allocated quantities on items that are NOT subject to the weight rules used in point 1 above. DOC: N0115UM.doc Page 5 of 39 Prefill Qty On Non-Weight Items Prefill Qty On Non-Weight Items being ticked assumes the weights and quantities of the items in point 3 are completed and the user can override by exception, rather than needing to enter all values Log Reason Percentage. When this value is non-zero, when an order is generated the lines that represent the top ‘x’ percent of the recent order history will be marked as needing reasons to be recorded if the customer does NOT order that item on this order. These reasons are simply logged in the database in this release and can be reported upon using external mechanisms. Run SOP Amend when created order Enable this facility only if you want the standard Sage Amend Sales Order screen to automatically launch after entering the order. This is intended only for sites where there is additional bespoke implemented on the standard Sage screens that cannot be implemented on the TeSOPs screen, and hence it is expected that this setting is not enabled on most sites. Complete Order On Despatch Enable this option to prevent ‘back-orders’ occurring when a partial shipment is made. At the point of despatch, any line items that are not fully despatched will have their order quantities reduced to what has been despatched so that when the order is subsequently invoiced it will be treated as complete. Use Customer Price Lookup By default (with this option disabled) the system will extract the prices for display on the order grid from the price book in the same manner as standard Sales Order Processing. However for larger orders this can cause a delay during the order generation stage. This option disables this feature and enables the prepreparation of customer prices – as described in section 6 of this manual. This allows faster order generation. Offline Order Lines By default (with this option disabled) the sales order lines are created as part of order entry and hence real-time stock allocation is performed. This can cause a slight time delay moving around the entry screen, and hence this option was designed to prevent this delay by adding the sales order lines at the point of saving the order (the work still has to be done – it’s just moved to after order entry) but is only suitable for sites where real-time stock allocation is not important. DOC: N0115UM.doc Page 6 of 39 Suppress Delivery Note (v1.4.0) To use this system you MUST enable the printing of delivery notes within Sage 200. This option then allows the delivery notes to be suppressed from being printed by this system. (Turning on delivery notes is required at a technical level in order for the post-processing of the despatch note information, without which some of the extra information entered into the Post Picking screen (section 5) cannot be saved correctly). System Message System Message is message that appears to users on the order entry screen and can be used as a reminder of certain promotions or actions that need to be taken etc. Despatch Screen options (v1.5.0) Show Save Button / Show Save/Despatch Button / Show Save/Invoice Button These allow the 3 individual ‘Save’ buttons on the Post Picking screen (section 5) to be controlled as to whether they are shown or not. At least 1 must be selected in order to use the screen. Set Cost Price for Kg (v1.6.0) When ticked, when the Post Picking stage is processed (section 5) then any stock item that belongs to a product group defined as having “standard costing” will have the “cost price” value stored on the sales order line amended to reflect the actual cost price for the exact weight being despatched, in an identical manner to the selling price being affected in the same manner. This allows the standard invoice profitability reporting within the Sage 200 system to be used for the Expected Costs and Expected Margins (note: the actual costs and actual margin figures should be ignored as Sage is calculating this in a different manner and they are not reflective of the actual values required for this system). Allow User Settings Copy (v1.6.0) Tick to make the ‘Update All User Settings” button in section 1.3 visible. Allow Suppress Logging (v1.8.0) Tick this to allow the Suppress Forced Logging option (see section 4.3) to be available. Override Log Reason Log Type (v1.7.0) Select from the Log Types (section 3.4) once defined to record which log type is used automatically when an order is saved and the user has ticked the ‘Suppress Forced Logging’ option (see section 4.3) as the system will log the fact that logging was not enabled for traceability reasons. DOC: N0115UM.doc Page 7 of 39 Order Sort Sequence (v1.9.0) This allows the order to be sorted as part of the final ‘save’ process. The default value is ‘None’. None Order lines are based on current sequence in which screen grid is listing. As Picking List Lines are sorted in the order used by picking lists: Warehouse name Bin Name Print Sequence Number (based on line entry sequence) Selling Unit Description Order Line Unique Number Traceable Stock Item Unique Number Generally the first 2 (or 3) fields alone sort the items, but the full list is shown. DOC: N0115UM.doc Page 8 of 39 1.3 Display Rules The following are DEFAULTS for user grid display. Each user can set their own preferences (see section 1.5). 1. Maximum number of historical columns (max 16). The maximum number of columns of historical data to show orders for. 0 is valid and will suppress the historical columns completely. Larger numbers require larger displays and higher screen resolutions to display easily. 2. Background colour to ordered items in order grid (select from window palettes). 3. Background colour to unordered items (1 to 4) in order grid (select from window palettes). When initially entering the template order screen all lines will have these background colours to indicate they have NOT been ordered. As a line changes to enter a quantity, the background colour will change to that defined in the parameter above. The 4 colours relate to the 4 ageing periods defined in the parameter below so that different colours can be used depending on how long ago an item was purchased. 4. Background age to unordered items (1 to 4 in order grid. As the order items screen (section 4.3) is displayed the age of the last VISIBLE order is compared to the 4 ageing periods displayed here. The appropriate background colour will be used from the parameter above subject to this age. Any item not ordered, or where ordered so long ago that it is no longer caught in the selection criteria for display (section 1.1 and 2.2) will be treated as being in the 4th band and that colour used. DOC: N0115UM.doc Page 9 of 39 Update All User Settings button The visibility of this button is controlled by the parameter “Allow User Settings Copy” in section 1.2. When pressed it will copy ALL the details on the current screen to ALL users of the system to replace those defined in section 1.5. DOC: N0115UM.doc Page 10 of 39 1.4 Grid Settings These settings define the widths of the columns for the grid in section 4.3 to allow for different setup criteria depending on things such as stock code lengths etc. “Qty - Decimal Places” and “Price - Decimal Places” fields are not operational in this release due to Sage restrictions. The Sort Sequence allows the entry screen to be listed either purely by stock code, or by the last date the item was sold – hence showing more recently purchased items closer to the top. DOC: N0115UM.doc Page 11 of 39 1.5 User Settings This is a copy of the same details as seen in section 1.3, but is specific to the currently connected user, so that each user can define their own history periods and colours. The option to ‘ignore grid column widths in parameters’ allows this user to ignore the column widths defined in section 1.4 and instead control the size/position of the columns for themselves. DOC: N0115UM.doc Page 12 of 39 2 Amendments to standard Sage 200 screens 2.1 Product Groups There is an additional ‘tick’ box, called “Process Weights”, added to the product group maintenance screen that indicates if the product group is to process sales order lines with BOTH a unit quantity and a weight value. The use of this will depend on how stock items are priced – normally items such as foods etc. are ordered for a quantity, but the pricing is conducted on the basis of the exact weight of the item, which varies on each order line, and hence factored pricing cannot be easily applied. At the order entry stage the user will enter the number of ‘stock’ units that are to be sold – e.g. in units rather than by weight. The weights will be entered later. The Percentage value to the right of this (it is optional – leave as zero to suppress the effects) forces users to enter actual weights on the Post Picking screen (section 5) within a percentage of the nominal weight for the item and is intended to prevent weights being entered incorrectly. For example, if a chess notionally weighs 3Kg and the customer has ordered 0.5 units, then entering a weight of 2Kg will be rejected as the permitted range (within 11% shown here) would be 1.5Kg ± 0.165Kg. The Force Best Before Dates field should be ticked if the entry of dates is MANDATORY for all stock items within this product group within the Post Picking screen (section 5). Left blank the entry of dates is optional. DOC: N0115UM.doc Page 13 of 39 2.2 Customer Details – New/Amend/View An extra tab is added to the customer maintenance and enquiry screens (provided parameter 1. is set to allow customer specific settings for history. This will show the following settings: 1. 2. 3. 4. 5. Show Last ‘x’ orders as history – defines ‘x’ Show orders from last ‘x’ weeks as history – defines ‘x’ Include items from customer item list (yes/no) Include stock items from customer discount matrix (yes/no) Include product groups from customer discount matrix (yes/no) Note: parameters 1 through 5 are not exclusive – each can be selected in combination with any other. See the parameters section that describes these parameters from a global level, rather than customer level. The example shows ABB001 including the last 4 orders OR the last 2 weeks of history on the history columns of the template order. Stock items are to be included from their customer list and the price book by both stock items and product groups. Customer Periods (v1.5.0) This button provides access to the next screen. DOC: N0115UM.doc Page 14 of 39 This screen can be used to override the user settings in section 1.5 for a specific customer. Section 1.5 itself overrides the rules defined in section 1.3 so refer to that section for what these settings do. Ticking the User Customer Colours / Periods option enables this facility for the customer (by default all customers are disabled). The Reset button would return the settings to the values in section 1.3, not to those in section 1.5. DOC: N0115UM.doc Page 15 of 39 2.3 Stock Item Selling Prices This screen shows the subtle change in the ‘units’ in which the prices are shown. The standard Sage screen would have displayed all prices based in ‘Each’ units, as that is the “stock unit” of this item. However, because the product group to which this item belongs has the ‘Process Weights’ option enabled (see section 2.1) then the units are displayed in Kg units (defined in the parameters in section 1.2) instead. Hence instead of showing a price of £30/each the system will now show £1.50/Kg. Note however that this is simply a display feature on this screen, and the price held within Sage will remain in the £30/each format. DOC: N0115UM.doc Page 16 of 39 2.4 Stock Item Prices This screen is the same as section 2.3 and shows that the changes made above are also applicable if changing selling prices directly from the Price Book module instead. DOC: N0115UM.doc Page 17 of 39 2.5 Stock Item Details The stock item screen is amended so that the cost price shown (either standard cost as shown here, or average price etc. as defined by the product group) is shown in Kg if the stock item belongs to a product group that is defined to “Process Weights” – see section 2.1 for definition. The data is still held within Sage in stock units (in this example as Each) and it is purely displayed and entered (where applicable) in Kg units. This change applies to new/amend/view stock item details screens. DOC: N0115UM.doc Page 18 of 39 3 System Tables 3.1 Quick Customer Rules entry There is an additional screen that displays a grid containing all customers and the settings described above to allow rapid amendments to the customer settings without having to access the account maintenance screens for each customer. See parameters section for explanation of the columns. The ‘Reset All’ resets the values on ALL customers to those as defined in section 1.1 The ‘Reset Selected’ button does the same as the ‘Reset All’ button but ONLY for the customers with the ‘tick box’ on the left of their account number ticked, so that any user-selected combination of customers can be reset together. DOC: N0115UM.doc Page 19 of 39 3.2 Customer Items List There is a screen that allows the setup of standard stock items that may always appear in the customer’s template order. This allows defining which items are ‘normal’ for a customer to order from. The ‘Include’ column actually determines if this item will always be included in the order list, which by default is ticked. It is possible to untick this setting, which then allows recording JUST of customer specific picking list and despatch note / invoice comments for the stock item, so that if added to an order would be shown automatically. This shows account ABB001 having 2 stock items that will always be in the template order list, and the first item has comments that will automatically appear on the all stationery printed for the customer. The Customer Docs note will appear on order acknowledgements, despatch notes and invoices, the Picking note will appear just on the picking list. DOC: N0115UM.doc Page 20 of 39 3.3 Exclude Customer Items Similar to section 3.2, but is a list of items that are NOT to appear on an order grid, even if they do appear elsewhere to be included. For example if the customer accidentally ordered one previously, then until the history period expires that item would appear on the order, so this is a means to exclude it. Note: When adding an item to the ‘Customer’s List’ in section 3.2 if the item is present in this table it will also be removed from here so that it can be included for the next order. (reworded below) Note: If the user were to add a stock item to the “Customer’s List” in section 3.2 above, that is also showing in this table of exclusions, then the stock item will removed from this table, as it is then assumed the item IS required to be included on the next template order and as the Exclude list overrides the Include list then the item would not appear unless it was removed. DOC: N0115UM.doc Page 21 of 39 3.4 Customer Notes This section allows for comment lines (not associated with any specific stock item) to be added to the order and shown on either or both the picking list or despatch note / invoice stationery sets. DOC: N0115UM.doc Page 22 of 39 3.4 Log Types This table defined the type of log reasons that are used on the order entry screen (section 4.3) for recording text against the orders or lines. At least 1 entry should be defined before using the system. DOC: N0115UM.doc Page 23 of 39 4 Order Entry The order entry screen consists of 3 tabs. 4.1 Order Details Similar to the standard Sage 200 full order entry details screen, but with the following differences. Company Details section shows the invoice and currently selected delivery address fields (delivery address changed via middle tab). Contact Details section shows all the contacts for the company and their respective contact numbers. All available contact numbers are visible in the drop-down lists. Analysis Codes moved from the 2nd tab on Sage’s screen to the front tab, and also buttons allow selection from lists subject to system parameters. Date Requested and Date Promised will default to the next week day from today’s date. The ‘Generate’ button accepts the selected customer and creates the order list in the following screens (which are disabled until this button is used). The ‘Log Comment’ allows comments to be recorded against the order or just against the customer. DOC: N0115UM.doc Page 24 of 39 DOC: N0115UM.doc Page 25 of 39 4.2 Delivery and Invoicing Similar to the 2nd screen on Sage’s standard order entry screen, with the following changes. Payment Details (disabled in this release) moved from the front screen to here as rarely used. Sundry items list added to show all non-stock type lines added to the order. (Stock items intended to be added on 3rd tab, but can be added here also but will be listed at the end of the order rather than within the main section). DOC: N0115UM.doc Page 26 of 39 4.3 Stock Item Details The grid consists of the stock items that meet the criteria defined either at the global or customer specific levels, depending on settings, and will have the following columns: Stock item code Description Warehouse (if used – can select from applicable list) Quantity ordered (will default to zero). Note – background of this column (as shown in 1st row of grid above) will change to Sage’s warning colour if the quantity ordered is not fully allocated. Selling Unit description (can select from factored units) Pricing Unit Description (can select from factored units) Unit Cost (added v1.5.0) showing the cost price (std, FIFO or Avg) for the item in Pricing Units of measure. Display only. Unit selling price (based in pricing units – e.g. Kg) Unit Discount percentage and amount (calculated from price book) ‘Where From’ shows the reason why the item is listed in the grid – valid entries are “Recent Order”, “Customer Item”, “Discount Item”, “Discount Group”, “Manual Entry”. Log Required. Only visible if the ‘Log Reason Percentage’ in section 1.2 is non-zero. This will display a ‘Y’ for any item that will require an explanation as to why the customer has not ordered this item on this order. Completed using Log Reason field below. DOC: N0115UM.doc Page 27 of 39 Log Reason. Allows operator to record any text specific to this item to this order for this customer as to why it was or was not ordered. May be completed even if not using “Log Required” features. A dynamic number (max 16) of historical columns showing prior order history quantities – the actual number will depend on global or customer specific settings. Each column will show either the order date or order number, depending on the setting of the ‘see order numbers’ tick box. Initially all rows on the grid will have a background colours (for stock code and description fields) defined by the user settings. As quantities are entered any row with a non-zero quantity will change to the ‘ordered’ background colour as per the user settings. This allows easy visualisation of which items have and have not been entered yet. The grid is sortable by any of the first fields in the grid. As the user moves up/down the grid, the picking list and despatch note comments are shown, if present, or can be added as required. The ‘save’ buttons stored the comments in the Customers Items List in section 3.2 for use next time and hence become customer /stock item specific comments that are automatically used on orders. The system will also show a total of the number of lines ordered so far. The grid will normally show up to 16 sales orders as history. These columns are normally shown with the order dates as headings for reference. However, the tick box ‘see order numbers’ changes that back and forth to using the sales order number instead. The ‘Sundry’ button to allow item lines to be added using the standard “order line details” screen – to allow text lines, comments, additional charge items etc. to be added. Hence items NOT already in the grid can be added as required. The ‘Comments’ button allows access to the ‘customer notes’ section 3.4 where notes can be predefined to be added to the end of the order. The ‘Exclude Item’ button takes the currently selected line on the order grid and after confirmation adds it to the list of excluded customer items in section 3.3. At the end of order creation, the save option will take the data entered so far, remove any items with a zero quantity and convert the data into a standard Sage 200 sales order. Stock is allocated automatically during the initial grid order entry and hence will be carried across to the order as generated. This screen also shows the ‘System Message’ from section 1.2. The “Suppress Forced Logging” tick-box allows a user to NOT have to enter any mandatory log reasons for lines not ordered where this is normally required (see yellow highlighted ‘Yes’ in ‘Log’ column above). (Option only available if parameter ticked in section 1.2). DOC: N0115UM.doc Page 28 of 39 Items can be added to the end of the grid by simply clicking on the next blank row in the grid. Choose the stock item code (and from v1.9.0 also via the stock description) by using the standard drop down lists (using F4 for searching etc.). DOC: N0115UM.doc Page 29 of 39 5 Post-picking stage A screen to amend the sales order directly to enter actual weights. Select the order required. This will show the following columns: Stock item code (fixed) Description (fixed) Quantity ordered (fixed) Quantity allocated (may be amended up and down) Selling Unit Description (fixed) Pricing Unit Description (fixed) Best Before Date (free format entry if required) Total Weight (entered now) Average unit weight (calculated from Total Weight / Quantity Allocated) Cust Doc Comment (may be entered / amended here) All rows (subject to weight rules) with a non-zero quantity allocated must have a nonzero total weight. The system then manipulates the sales order line to reflect these values in such a manner to allow both units and total weight to be printed on the invoices etc. Subject to the parameters in section 1.2, the grid may also show the items not subject to the weight rules. These may or may not (subject to parameters) have all their values pre-filled. DOC: N0115UM.doc Page 30 of 39 The order may be ‘saved’ and returned to later, if required by just using the ‘Save’ button. The “Save and Despatch” button performs the confirm goods despatched processes, printing delivery notes if required, and progresses the order through to needing the invoice printing. The “Save and Invoice” takes this one stage further and prints both the despatch note (if required) and invoice, progressing the order through to be posted. The tick box ‘hide non-weight items’ allows the temporary removal of item lines not subject to the weight rules to ensure all weights required have been entered. The tick box ‘Complete Order On Despatch’ takes the default from the parameter in section 1.2 and allows the order to be completed (all outstanding items not fully despatched have their order quantities reduced to the despatch quantity so that the order is treated as completed). However the default can be overridden here. If any stock lines have NO quantity allocated then the item line is removed from the system and replaced with a comment line stating that none of this stock item was available (because Sage is unable to show on an invoice any completely lines that are not being invoiced). The ‘Add Comment’ buttons allows comment lines to be added to the order still at this stage, to record any notes the packers etc. may wish to send on the despatch note and invoice. The MANDATORY “Picked By” text box forces the recording of who did the picking (different to who is doing this screen as that is recorded automatically anyway by Sage) and this data can be shown on the delivery note and invoice stationery. The Best Before and Total Weight fields are available to be shown on both delivery note and invoice stationery layouts. If the option is defined in the product group screen (section 2.1) then the Best Before Dates may be mandatory for items in those product groups. DOC: N0115UM.doc Page 31 of 39 6 Mechanisms to enhance performance These sections relate to optional features that are used to improve system performance if the time delays using the system are considered too long for use, but have sideeffects that must be understood before using. 6.1 Customer Price Lookups This section defines the mechanism by which delays caused by looking up prices from the price book can be removed during the order generation stage. Use this option only if the time to generate an order is considered excessive when this feature is disabled. It relies instead of having a lookup table of customer prices for every stock item, derived from the price book, but prepared in advance so that the system can simply extract the price rather than having to calculate it – the calculation stage is performed in advance and requires background tasks to be running on the server to ensure the list remains valid, despite adding new customers, adding new stock items and updating prices in the price book itself. Controlled by the ‘Use Customer Price Lookup’ option in the parameters in section 1.2. It is not possible (except on very small datasets) to be able to recalculate the price for each stock item for each customer on a regular basis because of the time this takes – hence although an initial calculation is required for all combinations, from then on it is intended that only changes need to be recalculated, which can be maintained in a timely fashion. 6.1.1 Create New Customer and Create New Stock Item When the feature is enabled, whenever a new customer or stock item is created, records for each permutation of the customer v stock item will be added to the lookup table, marked as needing a recalculation, which is performed by the mechanism in section 6.1.4. DOC: N0115UM.doc Page 32 of 39 6.1.2 Rebuild Customer Or Item Prices This screen forces the prices for a single customer for all stock items, or for all customers for a single stock item, to be marked as needing to be recalculated. The recalculation is performed in section 6.1.4. This could be because the prices for this customer have been updated, or the price of a stock item is updated, and this ensures that the system knows which are needed to be performed. This step would normally be needed each time a price record is changed in the price book in order to ensure the correct prices are maintained in the lookup table. DOC: N0115UM.doc Page 33 of 39 6.1.3 Check Cust Stock Price Records This screen can be used to check for new combinations of customer v stock item records needed in the lookup table and create them. This is useful for an initial population, or where stock items or customers are being imported from other sources. The ‘Force Reset’ option should be used with caution – it actually ensures that EVERY stock item for EVERY customer get recalculated – and this WILL take a long time to achieve within section 6.1.4. It should not be used unless all other means to keep the data up to date have been used first. DOC: N0115UM.doc Page 34 of 39 6.1.4 Server-side scheduled recalculations This is designed to be a server-based program that runs permanently checking for items to be recalculated. It DOES require a Sage user connection in order to execute, and hence may be scheduled to run overnight when free user licenses are available. Operational Status tab This screen displays 2 grids which display the current operational status of the import jobs and will update automatically over time as jobs become due for import and as imports occur. The upper grid (Pending Jobs) shows all the import processes that are currently either running or are about to run (only 1 process runs at a time and hence when one job completes the next will commence). Mostly this grid will be empty as no imports will be taking place. The lower grid (Scheduled Jobs) shows all the import processes awaiting their scheduled time to occur. It is possible to select a job from either grid and use the “Delete” button to remove the process (provided it is not in the Pending Jobs grid with a Running Status of Running rather than Pending). Removal from the upper grid removes that occurrence of a job from running only – if it is defined a recurring (see System Setup tab for details) the entry in the lower grid will remain and the job will trigger at its next scheduled time. DOC: N0115UM.doc Page 35 of 39 Removal from the lower grid removes that job from the system for the duration of the execution of the system – once the system is closed and restarted the saved job will be reloaded. System Setup tab This screen allows the setup of the scheduled jobs for the different import types. Select the import type using the dropdown list and the details will be displayed. Use the ‘Change’ button to start amendments to the job details. Note: By using the Change button any scheduled or pending jobs on the Operational Status tab will be removed (unless the pending job is the currently running import – in which case it will continue to completion) and will be reloaded once the Save or Cancel buttons are used to confirm the amendments needed. Each job can be defined to operate in one of 3 modes: 1) Manual – jobs are never loaded – use the ‘Run Now’ button on this tab to trigger a single execution of this import job. 2) Frequency – jobs are loaded for immediate execution and will then trigger again when the number of minutes defined in the Frequency field is reached. This allows loading the job from every 1 minute upwards. Typically this can be defined for every 60 minutes to make the import happen every hour, for example. 3) Times – jobs are loaded at specific times (an unlimited number per day) throughout the day. Hence it is possible to say that a job is to run, for example, every day at 09:00, 12:00 and 17:00. DOC: N0115UM.doc Page 36 of 39 The filename, the checkbox for ‘Prevent Duplicates’, and the field splitter fields are not applicable to this system. Errors tab This screen will display all of the errors found during processing. Use the ‘Clear’ button to remove all the entries from the grid. DOC: N0115UM.doc Page 37 of 39 Email tab This screen allows the setup of email notifications of errors to users directly by email. Use the ‘Change’ button allow amendments to the details shown here. The tick box “Send Emails for failed imports” controls whether emails are sent or not, and hence the rest of the details can remain on the system but emails can be suppressed by removing the tick from this box alone. “SMTP Server” is the address (normally an IP address) of the SMTP server that will handle the sending of the emails. “From” allows setup of the address from whom the email appears to come from. “Subject” allows setup of the title to the email message. “Recipient List” is a list (unlimited length) of the email addresses that will receive the error log of a failed import. Simply enter a new address into the first free slot in the list, or to remove an entry simply delete the line. DOC: N0115UM.doc Page 38 of 39 6.2 Offline Order Lines This feature changes the point in time as to when the sales order details lines are actually added to the sales order, and is controlled by the setting ‘Offline Order Lines’ in section 1.2. By default (feature disabled) the lines are added as part of moving around the lines in the order entry grid. As you change from 1 row to another, if the order quantity is non-zero then the order line is created, and if zero the system ensures the line does not exist (removing any line previously entered). This allows the system to perform standard stock allocation procedures etc. and colour the order quantity in the grid when there is a shortage. This operation is recommended, but can cause a slight pause whilst moving around the grid lines whilst the system performs stock allocation etc. By enabling this feature you can reduce this pause, but by doing so, also remove realtime stock allocation. Instead the sales order detail lines are added to the order at the end, as part of the ‘Save’ button operations. This can be of benefit when stock allocations are not required. DOC: N0115UM.doc Page 39 of 39