1
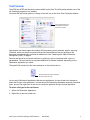
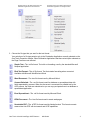
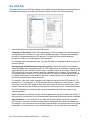
One Touch 4.0 with OmniPage OCR Features
Mini Guide
The One Touch 4.0 software you received with your Xerox scanner now includes new OmniPage
Optical Character Recognition (OCR) features. This brief Mini Guide explains how to use the new
features, which are different than the OCR features currently described in your scanner’s User’s
Guide. Please use this Mini Guide as a supplement to your current User’s Guide.
The new OCR features include:
•
The sPDF and nPDF formats are now available without having to Install the full OmniPage
program on your computer. However, you still received—at no extra charge—the full
OmniPage program with your scanner, and installing it will not affect the availability of the
new OCR features directly from the One Touch software.
•
You now have several new options for processing scanned documents in the PDF format.
These include three different quality levels and an innovative process known as Mixed Raster
Content for scanning documents with a mix of graphics and text.
•
You now have the ability to create and edit your own user dictionaries for the OCR engine to
reference, which will improve the accuracy of the final document.
•
Your choices for the Input and Output formats of scanned documents are also improved.
NOTE: Some of the illustrations in this Mini Guide may not look exactly as they appear on your
computer’s screen. The differences are minor and do not affect the steps to use the new features.
One Touch 4.0 with OmniPage OCR Features
Mini Guide
1
Text Formats
The sPDF and nPDF text formats are now available on the One Touch Properties window even if the
full OmniPage program is not installed.
You select the text format option by clicking on the text icon on the One Touch Properties window.
This is the text format icon.
This example of the text
format icon is nPDF.
Selecting the text format option also selects OCR processing as an automatic step for scanning.
Therefore, when you scan a document with the text format selected, the text portions of the
document are automatically converted to editable text. See “Scanning with Optical Character
Recognition (OCR)” on page 5.
Select a text format for documents with text or numbers, such as a business letter, report, or
spreadsheet. The text format icon may have additional file formats available, depending on the
Destination Application you select.
The specific file format is the file name extension on the text format icon.
The specific text format; this example is
for Rich Text Format (.rtf).
As you select Destination Applications that are text applications, the text format icon changes to
match the file type of the application. In some cases, the Destination Application supports several file
types, and you can right-click on the icon to choose the particular file type for that application.
To select a file type for the text format:
1. Select the Destination Application.
2. Right-click on the text format icon.
One Touch 4.0 with OmniPage OCR Features
Mini Guide
2
Example menu for the TEXT format when the
Destination Application is Microsoft Word.
Example menu for the TEXT format when the
Destination Application is a Storage location.
3. Choose the file type that you want for the text format.
Your selection of a file type pertains only to the Destination Application currently selected on the
One Touch Properties window. Other Destination Applications that have a text option selected as
the Page Format are not affected.
Simple Text—The .txt file format. Text with no formatting; used by the standard Microsoft
Notepad application.
Rich Text Format—The .rtf file format. Text that retains formatting when converted.
Available with Microsoft WordPad and Word.
Word Document—The .doc file format used by Microsoft Word.
Comma Delimited—The .csv file format; used for database or spreadsheet data with
fields separated by commas. When the document is converted into editable text by the
OCR process, the fields are maintained so you can copy and paste them to a database or
spreadsheet application.
Excel Spreadsheet—The .xls file format used by Microsoft Excel.
HTML Document—The .htm file format used to create web pages.
Searchable PDF—The .sPDF file format used by Adobe Acrobat. This format converts
scanned text into PDF with text search and OCR capabilities.
One Touch 4.0 with OmniPage OCR Features
Mini Guide
3
Normal PDF—The .nPDF file format used by Adobe Acrobat. This format also converts
scanned text into PDF with text search and OCR capabilities, plus you can edit the text in
an nPDF image if you have a PDF editing program.
Additional options are available on the menu for the sPDF and nPDF text formats. The three image
quality settings are:
Minimize Size—Smallest file size, lowest image quality.
Normal—Medium file size, some loss of image quality.
Maximize Quality—Largest file size, no loss of image quality.
NOTE: Documents scanned with nPDF and sPDF automatically include OCR processing. If the
processing does not recognize a large number of the text characters in the document, change the
image quality setting and re-scan the document. For example, change from Minimize Size to
Normal to see if the text recognition improves.
The Use MRC option is a special processing procedure for documents scanned with the PDF format.
Use MRC—MRC stands for Mixed Raster Content. MRC is an advanced technique for
optimizing the image quality of scanned documents. Without MRC, the scanned image is
produced using a single process to capture and display the image on the computer screen,
even if the document contains both text and graphics. With MRC, the image is produced
using separate processes for text, graphics, and other elements on the document page. The
result is clearer graphics and sharper text characters. Scans with Use MRC selected may
take slightly longer to complete the processing. Select Use MRC for documents with harderto-read text or lower-quality graphics to get the best possible scan output image. The Use
MRC option is available for sPDF and PDF.
To change the OCR options:
1. Choose OCR Options.
The OCR Options provide a series of selections for the OCR feature when you scan text. See
“Selecting OCR Options” on page 6 for details.
Note that the OCR Options settings apply to all Destination Applications. If you change them for
one Destination Application, those changes apply to the others as well.
2. Click OK or Apply on the One Touch Properties window.
One Touch 4.0 with OmniPage OCR Features
Mini Guide
4
Scanning with Optical Character Recognition (OCR)
Optical Character Recognition (OCR) converts text and numbers on a scanned page into editable
text and numbers. You can then work with the text and numbers to edit, spellcheck, change font or
type size, sort, calculate, and so forth.
NOTE: Xerox recommends that all OCR processing use the original factory settings for OCR
scanning that came with your scanner. When scanning with other settings, use at least 300 dpi for
the resolution. If the original documents are of poor quality and have small type, 400 dpi can be
used as the maximum resolution.
To scan with OCR:
1. Select a Destination Application that has one of the Text formats (TEXT, RTF, DOC, CSV, XLS,
HTML, nPDF, or sPDF).
2. If you want to change the OCR Options for processing and recognizing text before scanning,
right-click on the format icon and choose OCR Options. See the next section, “Selecting OCR
Options” on page 6 for details,
3. Scan the document.
Your scanned pages appear in the Destination Application with their text ready for editing and
other text processing.
NOTE: OCR scanning is also for spreadsheets so you can work in Microsoft Excel (or other
spreadsheet applications) with the figures and text from the original spreadsheets.
One Touch 4.0 with OmniPage OCR Features
Mini Guide
5
Selecting OCR Options
The software you installed for your scanner includes a set of advanced OCR options integrated with
One Touch 4.0.
NOTE: The OCR options apply globally to all the One Touch Destination Applications that perform
OCR. For example, if you select the OCR options for Adobe Acrobat, they also apply to WordPad.
NOTE: The PaperPort and OmniPage applications that you received with your scanner also have
OCR capabilities. See their user’s guides for more information about their OCR features.
To select OCR options available from One Touch 4.0:
1. Open the One Touch Properties window.
2. Select a Destination Application that has one of the text format file types as the page format,
such as Microsoft Word or WordPad.
3. Right-click on the page format icon to see the menu.
4. Choose OCR Options from the menu.
The OCR Properties window opens with the OCR tab selected.
One Touch 4.0 with OmniPage OCR Features
Mini Guide
6
The OCR Tab
The options shown on the OCR tab window are for spellchecking scanned text, replacing missing or
unrecognized characters, and setting the speed and quality levels of the OCR processing.
1. Choose the options you want from the OCR window.
Languages in Document—Click on the language(s) in list that correspond to the languages in
the documents to be scanned. You can click on multiple languages. These are the languages
that will be recognized during the OCR process. For faster and more reliable language
recognition, select only the languages in the documents.
The languages are in alphabetical order. Type the first letter of a language’s name to jump to its
section in the list.
Use languages and dictionaries to improve accuracy—Select this option to automatically
check the validity of the recognized words. An OCR engine looks at each letter or symbol on the
page individually, then “guesses” what the letter or symbol is based on the shape. Therefore, the
OCR engine may have more than one guess for a particular letter or symbol, a “best guess”, a
“second-best guess”, and so on. This option tells the OCR engine to look through the dictionary
to validate its best guess for the letters in that word; if its best guess is not in the dictionary, it
checks for the second-best guess, and so on.
For example, if the word “house” appears in the original document but the OCR engine is 75%
sure that the “o” is actually an “a”, the finished document would have the word “hause”. Turning
this option on tells the OCR engine to look at the other letters in the word, check to see which
version of the word is in the dictionary, and output the correct word “house” in the final document.
The OCR engine does not automatically correct misspelled words that were present in the
original document.
When dictionaries are selected, the terms in those dictionaries are used to check the spelling. If
this is option is not selected, User Dictionaries and Professional Dictionaries cannot be selected.
User Dictionary—A user dictionary is your personal dictionary with words that you want the
OCR engine to reference for better accuracy when converting the document into editable text.
For example, if you scan documents with highly technical terms or acronyms not found in typical
dictionaries, you can add them to your personal dictionary. You can also add names that you
One Touch 4.0 with OmniPage OCR Features
Mini Guide
7
expect to be in the documents too. This way, as the OCR process recognizes each letter or
symbol, there is a higher chance that the technical term or name will be correctly spelled in the
final document. You can create multiple user dictionaries. See the section “Creating Your Own
Dictionaries” on page 9.
Click the menu arrow and select a user dictionary from the list.
If you select [none] as the user dictionary, the text will be validated using the terms in the
dictionaries for the selected languages, as well as any professional dictionaries if they are
selected.
The label [current] is next to the currently-select user dictionary.
Professional Dictionaries—These are legal and medical dictionaries containing highly
specialized words and phrases. The options are: Dutch Legal, Dutch Medical, English Financial,
English Legal, English Medical, French Legal, French Medical, German Legal, and German
Medical. Select the appropriate dictionary for the OCR engine to use to validate the scanned text.
Reject Character—This is the character that the OCR process inserts for an unrecognizable text
character. For example, if the OCR process cannot recognize the J in REJECT, and ~ is the
reject character, the word would appear as RE~ECT in your document. The ~ is the default reject
character.
Type the character you want to use in the Reject Character box. Try to choose a character that
will not appear in your documents.
Missing Character—This is the character that the OCR process inserts for a missing text
character. A missing text character is one that the OCR process recognizes, but cannot
represent because that character is not available for the selected language. For example, if the
document contains the text symbol “Ç” but the OCR process cannot represent that character,
then every place “Ç” appears, the OCR process substitutes the missing character symbol. The
caret (^) is the default symbol for the missing character.
Type the character you want to use in the Missing Character box. Try to choose a character that
will not appear in your documents.
Recognition Quality—Drag the slider to the left or right to set the degree of accuracy for the
OCR process. The higher the accuracy, the longer the OCR process requires to complete. For
clean, highly-legible documents, you can set the recognition quality to a lower level to produce
results more quickly.
2. Click OK or Apply.
These options will now apply to the OCR processing when you select any text format as the page
format.
One Touch 4.0 with OmniPage OCR Features
Mini Guide
8
Creating Your Own Dictionaries
You can create multiple dictionaries for your personal use. For example, you might have different
dictionaries for separate work projects, especially if each project uses different acronyms and
terminology.
To create a personal dictionary:
1. Open any word processing program, such as Microsoft Word, WordPad, or Notepad.
2. Create a new document in the word processing program.
3. Type each word you want in your new dictionary, followed by a carriage return. Make sure to spell
the words correctly as they will be used for spellchecking.
Here is an example of what the text file might look like:
Xerox
One Touch
OmniPage
wysiwyg
jpeg
bmp
sPDF
nPDF
Note: The file does not have to include every word you want in the dictionary. You will be able to
edit the list later. In fact, the file does not have to contain any text at all, and you could add the
words using the editing options. However, if the list of words is long, it’s usually faster to type
them in the word processing program. Note also that the words do not need to be alphabetized.
4. Save the document in the .txt format and give the file the name that you want for the dictionary.
For example, give it the name USERDIC1.
5. Now open the OCR Options window.
6. On the OCR Options window, click the button next to the menu arrow.
7. The User Dictionary Files window opens and shows the available dictionaries.
MyDictionary is an example of a user dictionary.
One Touch 4.0 with OmniPage OCR Features
Mini Guide
9
8. Click Add New.
The Add New User Dictionary window opens.
9. Click the drop-down arrow for Files of type and choose Text Files (.txt).
10. Select the file you just created for your user dictionary and click Open.
In the example above, the file is named USERDIC1.
11. The text file now appears on the list of user dictionaries that you can use for spellchecking.
12. Select a dictionary and click Set As Current to set it as the current dictionary for spellchecking.
The label [current] is added to the name.
If you don’t want to use any user dictionaries for spellchecking, click [none] at the top of the list.
To remove a dictionary from the list, select it and click Remove. This only removes the dictionary
from the list. It does not affect the original text file you created with the list of words.
One Touch 4.0 with OmniPage OCR Features
Mini Guide
10
Editing User Dictionaries
Once a dictionary has been added to the list of user dictionaries, its list of words can be edited.
To edit a user dictionary:
1. On the Add New window, select the dictionary to edit and click Edit.
The Edit User Dictionary window opens. It lists the words currently in the dictionary. The following
example shows the words OmniPage and One Touch are in the user dictionary named
MyDictionary.
2. To add a new word to the list, type it in the box for User Word and click Add. If the word includes
any spaces before or after it, those spaces are removed and the word is added to the list.
To delete a word from the list, select it and click Delete.
If a word in the list is misspelled, delete it, then re-type the word correctly in the User Word box
and click Add.
3. To import a list of words from another text file, click Import.
The Import Contents of User Dictionary window opens.
4. Select the file that has the words you want to add to your user dictionary.
Importing will add the entire list of words in a file to the user dictionary.
5. Click Import. The file’s words will be added to your user dictionary list.
One Touch 4.0 with OmniPage OCR Features
Mini Guide
11
6. To export a user dictionary so it can be used by another program, select the dictionary on the
User Dictionary Files list and click Export.
The Export User Dictionary window opens.
7. Select the dictionary file to export and click Save.
The file is exported as a formatted dictionary with the .ud filename extension so it can be opened
by other programs.
One Touch 4.0 with OmniPage OCR Features
Mini Guide
12
The Format Tab
The options on the Format tab window are for setting the input and output formats for the scanned
documents.
1. Click the Format tab and choose the options you want for both the input and output formats.
Input Format Options
•
Automatic—Choose this option to let the OCR process determine the format of the pages.
Typically you select this option when the document has different or unknown types of layouts,
pages with multiple columns and a table, or pages containing more than one table. The OCR
process will then determine if text is in columns, an item is a graphic or text, and tables are
present.
•
Single Column no Table—Choose this option if the document contains only one column of
text and no tables. Business letters are normally in this form. You can also use this option for
documents with words or numbers in columns if you do not want them placed in a table or
decolumnized or treated as separate columns.
•
Multiple Columns, no Table—Choose this option if some document pages contain text in
columns and you want it kept in separate columns, similar to the original layout. If table-like
data is encountered, it is placed in columns, not in a gridded table.
•
Single Column with Table—Choose this option if your document contains only one column
of text and a table. The table will be placed in a grid in the Destination Application you have
selected. You can later specify whether to export it in a grid or as tab-separated text columns.
•
Spreadsheet—Choose this option if the entire document consists of a table that you want to
export to a spreadsheet program, or have treated as a table. No flowing text or graphics will
be detected.
Output Format Options
•
Automatic—The document will be formatted as close to its original as possible. The One
Touch software will adjust its settings to the most appropriate for the document being
scanned in order to match your selected output format. The output quality will be maximized
and the processing time minimized.
•
No Formatting (NF)—The document will be plain text, one column, left-aligned in a single
font and font size. You can then export the plain text to nearly all file types and target
applications.
One Touch 4.0 with OmniPage OCR Features
Mini Guide
13
•
Retain Fonts and Paragraphs (RFP)—This output format retains the font and paragraph
styling, including graphics and tables without columnized text, but does not retain layout
formatting. If the document is being scanned as an Excel spreadsheet, each detected table or
spreadsheet becomes a separate worksheet, while other content is placed on the last
worksheet.
•
Flowing Page (FP)—This format preserves the original layout of the pages, including
columns. This is done wherever possible with column and indent settings, but not with text
boxes or frames. Text will then flow from one column to the other, which does not happen
when text boxes are present.
•
True Page (TP)—This output format uses absolute positioning on the page to keep the
original layout of the pages, including columns. This is done with text, picture and table boxes
and frames. True Page is the only choice for documents scanned with the PDF format. It is
not available for the TXT, RTF, CSV, or XLS formats.
•
Spreadsheet—This output format produces results in a tabular form with each page
becoming a separate worksheet. The worksheets can then be opened in a spreadsheet
application. The Spreadsheet output option is only available for documents scanned with the
XLS format.
2. Click OK or Apply.
These options will now apply to the OCR processing when you select any text format as the page
format.
One Touch 4.0 with OmniPage OCR Features
Mini Guide
14
Scanning with sPDF or nPDF and Searching for Text
Searchable PDF (sPDF) and Normal PDF (nPDF) are special forms of an Adobe PDF file. sPDF
converts scanned text into the PDF format with text search and OCR capabilities. nPDF has those
same features, plus you can edit the text in an nPDF image if you have a PDF editing program.The
two PDF formats can also produce images with different image quality, so you may want to
experiment with them to determine which is better for your scanned documents.
To scan with sPDF or nPDF:
1. Open the One Touch Properties window.
2. Select a Destination Application that uses a text format as the page format. For example, select
your email application as the Destination Application.
3. Right-click on the text format icon.
4. Choose the Searchable PDF or Normal PDF option for the page format.
NOTE: Not all Destination Applications have the sPDF and nPDF options. Microsoft Word, for
example, does not have them as scanning options.
One Touch 4.0 with OmniPage OCR Features
Mini Guide
15
The settings now show your page format selection.
The page format
icon is now set to
nPDF.
5. Right-click on the text icon again and choose one of the image quality settings, Minimize Size,
Normal, or Maximize Quality.
6. Choose a Scan Configuration.
7. Click Apply or OK.
8. Now when you scan with that Destination Application selected, the scanned document will be in
the sPDF or nPDF format that was selected for it.
NOTE: The Transfer to Storage selection for a Destination Application also has the sPDF and
nPDF options. That means you can scan and store items directly to a server in these formats.
9. To search for the text, open Adobe Acrobat Reader or Adobe Acrobat.
10. From the Adobe Acrobat File menu choose Open, and open the file you just scanned.
11. From the Adobe Acrobat Edit menu choose Find.
The Find dialog box opens.
12. Enter the text you want to find, and click the Find button.
See the Adobe Acrobat user manual for more about finding text in a PDF file, or about editing
PDF text.
Thank you for choosing Xerox!
Copyright © 2007, Visioneer, Inc.
XEROX ® is a trademark of Xerox Corporation in the United States and/or other countries and is used under
license. DocuMate™ is a trademark of Xerox Corporation used under license. Windows is a trademark of
Microsoft Corporation. The PaperPort® and OmniPage® brand names and logos are registered trademarks of
Nuance Communications, Inc. Adobe®, Adobe® Acrobat®, Acrobat® Reader®, and the Adobe® Acrobat®
PDF® logo are registered trademarks of Adobe Systems Incorporated in the United States and/or other
countries. The Adobe PDF logo will appear in this product’s software, and full access to Adobe software features
is only available if any Adobe product is installed on your computer.
One Touch 4.0 with OmniPage OCR Features
Mini Guide
05-0739-000
16


![*Sted Plus UG Jan 2012 [2].indd](http://vs1.manualzilla.com/store/data/005710511_1-f757ed41a0935df19f469c7cee361c5b-150x150.png)