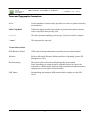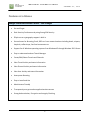
1
GEORGIA SOFTWORKS GSW Business Tunnel for Windows Commercial Tunnel for Windows User Manual THIS PAGE INTENTIONALLY LEFT BLANK GEORGIA SOFTWORKS GSW Business Tunnel Copyright 1997-2015, Georgia SoftWorks, All Rights Reserved Public Square 17 Hwy 9 South • PO Box 729 Dawsonville Georgia 30534 Telephone +1 706.265.1018 • Fax +1 706.265.1020 Visit GSW Web Site Copyright © Georgia SoftWorks, 1997-2015 All Rights Reserved. User's Manual, Version 1.26.0001, January 27, 2015 Microsoft, Windows, Windows 7, Windows 8, Windows VISTA, Windows XP, Windows 2000, Windows 2003, Windows 2008, Window 2008 R2, Windows 2012 are trademarks of Microsoft Corporation. . THIS PROGRAM IS PROVIDED "AS IS" WITHOUT WARRANTY OF ANY KIND, EITHER EXPRESSED OR IMPLIED, INCLUDING, BUT NOT LIMITED TO THE IMPLIED WARRANTIES OF MERCHANTABILITY AND FITNESS FOR A PARTICULAR PURPOSE. LICENSOR MAKES NO WARRANTIES OR REPRESENTATIONS, EXPRESSED OR IMPLIED, ORAL OR WRITTEN, REGARDING THE PROGRAM OR DOCUMENTATION AND HEREBY EXPRESSLY DISCLAIMS ALL OTHER EXPRESSED OR IMPLIED WARRANTIES, INCLUDING MERCHANTABILITY AND FITNESS FOR A PARTICULAR PURPOSE. LICENSOR DOES NOT WARRANT THE PROGRAM WILL MEET YOUR REQUIREMENTS OR THAT ITS OPERATION WILL BE UNINTERRUPTED OR ERROR FREE. IN NO EVENT WILL GEORGIA SOFTWORKS BE LIABLE TO YOU FOR ANY DAMAGES, INCLUDING ANY LOST PROFITS, LOST SAVINGS OR OTHER INCIDENTAL OR CONSEQUENTIAL DAMAGES ARISING OUT OF THE USE OR INABILITY TO USE SUCH PROGRAMS. COPYING: WHILE YOU ARE PERMITTED TO MAKE BACKUP COPIES OF THE SOFTWARE FOR YOUR OWN USE AND PROTECTION, YOU ARE NOT PERMITTED TO MAKE COPIES FOR THE USE OF ANYONE ELSE. LICENSE: YOU ARE LICENSED TO RUN THIS SOFTWARE ON A SINGLE WINDOWS SYSTEM. THE GEORGIA SOFTWORKS BUSINESS TUNNEL SOFTWARE MAY BE INSTALLED ON A SINGLE WINDOWS SYSTEM. i ii Table of Contents TERMS AND TYPOGRAPHIC CONVENTIONS ................................................................................................. V FEATURES AT A GLANCE ...................................................................................................................... 1 OVERVIEW ................................................................................................................................................. 2 INSTALLATION ......................................................................................................................................... 4 REGISTRATION ........................................................................................................................................ 9 SOFTWARE REGISTRATION ......................................................................................................................... 9 How to Register the Software................................................................................................................. 9 TUNNEL MANAGEMENT TOOL CONFIGURATION OVERVIEW .............................................. 13 CONFIGURATION PANE ....................................................................................................................... 14 WORKFLOW TO CREATE A WORKING BUSINESS TUNNEL ......................................................................... 15 Configuring the Tunnel ........................................................................................................................ 15 Configuring Channels for the Tunnel .................................................................................................. 15 Activating the Tunnel ........................................................................................................................... 15 Exceeding the number of licensed tunnels ........................................................................................... 16 TUNNEL PANE OVERVIEW ........................................................................................................................ 17 Activate Button ..................................................................................................................................... 17 Close Button ......................................................................................................................................... 17 CREATE A TUNNEL ................................................................................................................................... 18 CONFIGURATION – TUNNEL SETTINGS ...................................................................................................... 19 Enable this Tunnel ............................................................................................................................... 20 SSH Host info ....................................................................................................................................... 21 Authentication ...................................................................................................................................... 24 More details ......................................................................................................................................... 26 Add to the Tunnel List .......................................................................................................................... 29 CONFIGURATION – CHANNEL SETTINGS ................................................................................................... 30 LOCAL PORTS USAGE ............................................................................................................................... 33 ACTIVITY MONITORING ..................................................................................................................... 34 TUNNEL ACTIVITY .................................................................................................................................... 35 CHANNEL ACTIVITY ................................................................................................................................. 36 USER ACTIVITY ........................................................................................................................................ 37 EXAMPLE CONFIGURATIONS ............................................................................................................ 38 SYSTEM REQUIREMENTS ................................................................................................................... 39 CONCURRENT TUNNELS LICENSE ................................................................................................... 39 SYSTEM SIGNATURE - IMPORTANT PLEASE READ .................................................................... 40 TECHNICAL SUPPORT .......................................................................................................................... 41 TABLE OF FIGURES Figure 1: User Account Control ...................................................................................................................................................................................... 4 Figure 2: Installation Progress Meter .............................................................................................................................................................................. 4 Figure 3: GSW Business Tunnel Setup Welcome Dialog ............................................................................................................................................. 5 Figure 4: GSW Business Tunnel Choose Destination Location .................................................................................................................................. 6 Figure 5: GSW Business Tunnel Installation Confirmation ......................................................................................................................................... 7 Figure 6: GSW Business Tunnel Installation Setup Succeeded.................................................................................................................................... 8 iii Figure 7: GSW Business Tunnel Program Group ......................................................................................................................................................... 8 Figure 8: Registration: Initial Screen................................................................................................................................................................................ 9 Figure 9: Registration: Customer Information Entry ..................................................................................................................................................10 Figure 10: Registration: Serial Number Entered ..........................................................................................................................................................11 Figure 11: Registration Successful .................................................................................................................................................................................11 Figure 12: Registration: Complete .................................................................................................................................................................................12 Figure 13: GSW Business Tunnel Management Tool Screen Sections .....................................................................................................................13 Figure 14: GSW Business Tunnel Configuration Summary .......................................................................................................................................14 Figure 15: Tunnels activated exceeds tunnels licensed ................................................................................................................................................16 Figure 16: Tunnel and Channel list................................................................................................................................................................................17 Figure 17: Create a New Tunnel ....................................................................................................................................................................................18 Figure 18: Tunnel Settings ..............................................................................................................................................................................................19 Figure 19: Enable this Tunnel ........................................................................................................................................................................................20 Figure 20: SSH Host Info ...............................................................................................................................................................................................21 Figure 21: Authentication Tunnel Configuration ........................................................................................................................................................24 Figure 22: Password mismatches warning ....................................................................................................................................................................25 Figure 23: More details - Proxy Settings .......................................................................................................................................................................28 Figure 24: Channel Configuration .................................................................................................................................................................................30 Figure 25: Local Port Usage ...........................................................................................................................................................................................33 Figure 26: Activity Monitoring .......................................................................................................................................................................................34 Figure 27: Activity Monitoring - Tunnels .....................................................................................................................................................................35 Figure 28: Activity Monitoring - Channels ...................................................................................................................................................................36 Figure 29: Activity Monitoring - User ...........................................................................................................................................................................37 iv G S W B U S I N E S S T U N N E L I N D U S T R I A L B U S I N E S S T U N N E L J A N U A R Y 2 7 , 2 0 1 5 Terms and Typographic Conventions Italics: Used to emphasize certain words, especially new terms or phrases when they are introduced. Initial Caps Bold: Words that appear in initial caps boldface represent menu options, buttons, icons or any object that you may click. Courier: This font represents anything you must type. Courier is used for examples. "<enter>" This represents the enter key. Terms/Abbreviations GSW Business Tunnel GSW software that provides secure connectivity over an insecure network. Windows Refers to Microsoft Windows Desktop and Server Operating Systems XP through Server 2012. Port Forwarding This action redirects insecure traffic through the secure tunnel. Port Forwarding is to assign all traffic originally directed to a port to be redirected to a different port. Software ports are numbered connections that a computer uses to sort types of network traffic. SSH Tunnel Encapsulating data using the SSH protocol before sending it to the SSH server. v G S W B U S I N E S S T U N N E L I N D U S T R I A L B U S I N E S S T U N N E L J A N U A R Y 2 7 , 2 0 1 5 Features at a Glance Georgia SoftWorks Business Tunnel – SSH Strength • Set and Forget • Gain Security Conformance by using Strong SSH Security • Elliptic curve cryptography support is built-in • Secure Access for Browsing, Email, RDP etc. from remote locations including hotels, airports, hospitals, coffee shops, fast food restaurants etc. • Support for all Windows operating systems from Windows XP through Windows 2012 Server • Easy to understand and use Tunnel Manager • Create/Edit/Delete Tunnels and Channels • View Tunnel Activity and status information • View Channel Activity and status information • View User Activity and status information • Anonymous Browsing • Easy to Install and Use • Administrator Friendly • Transparently encrypt another applications data stream • Strong Authentication, Encryption and Integrity Checking 1 G S W B U S I N E S S T U N N E L I N D U S T R I A L B U S I N E S S T U N N E L J A N U A R Y 2 7 , 2 0 1 5 Overview “Set It and Forget It” Thank you for purchasing the industrial grade Georgia SoftWorks Business Tunnel for Windows. Business Tunnel - Business Sense Provide secure access and reliable connectivity for traveling employees, branch offices, remote developers and work at home colleagues (and much more) to services at work and away using SSH tunneling. The GSW Business Tunnel offers a business sense approach to SSH Tunneling delivering commercial reliability, configuration and management. Harness the power of SSH Tunneling without the past complexities and frustrations associated with port forwarding or the expense and training for VPN’s. The GSW Business Tunnel provides a graphical user interface for configuration, activation, management and monitoring of SSH tunnels and their associated channels. Each SSH tunnel may have multiple channels configured. A tunnel is the secure connection between the GSW Business Tunnel software and a SSH Server. You then create one or more channels within the tunnel that can be associated with various protocols such as HTTP, POP, SMTP, RDP, etc. This will facilitate a secure channel to perform various activities such as browsing the internet or a company intranet, or checking email etc. where it is otherwise difficult, expensive or not possible. Persistent Connection – Set It and Forget It With the GSW Business Tunnel you create a secure persistent connection (tunnel) between the computer initiating the tunnel and a computer running a SSH Server. The GSW Business Tunnel runs as a service that provides a level of robustness and features not available in stand-alone applications. The administrator of the tunnel can set it up (configure the tunnel) and forget about it. It just runs. Although typical networks may momentarily drop connections, the GSW Business Tunnel will automatically reestablish the tunnel, completely transparent to the user. You can “Set it and Forget it”. The Best Security with built in Elliptic Curve Cryptography Quickly gain security conformance with the GSW Business Tunnel by using strong SSH Security when browsing the internet, intranets, sending/receiving email, using remote desktop and many other services. NSA endorsed and NIST recommended elliptic curve cryptography support is built-in providing some of the strongest authentication and encryption available. Configure your firewall to block all incoming connections, but still allow secured access to company services from remote employees without reconfiguring or weakening your firewall. The Business Tunnel is configured from the company to ensure access only from approved locations. Enhance security by providing connectivity to only the services required instead of opening up access to all services as is often done. Secure typically nonsecure protocols by encapsulation within the GSW Business Tunnel. 2 G S W B U S I N E S S T U N N E L I N D U S T R I A L B U S I N E S S T U N N E L J A N U A R Y 2 7 , 2 0 1 5 Additionally, the Business Tunnel can secure customer TCP connections for all kinds of legacy applications and bring them to compliance with security requirements. Business Tunnel – the Sensible Solution The GSW Business Tunnel Management Tool offers an innovative approach in creating, operating, organizing and monitoring secure tunnels bringing them into use by mainstream business. There are no lengthy or complicated command lines that must be entered over and over again, as can often be the case. The GSW Business Tunnel is lightweight, has a small footprint and is a minimally invasive solution. You will be amazed how your current understanding of port forwarding can easily be utilized with the GSW Business Tunnel for Windows. 3 G S W B U S I N E S S T U N N E L I N D U S T R I A L B U S I N E S S T U N N E L J A N U A R Y 2 7 , 2 0 1 5 Installation Run the SSHTunnel.exe program. If you have User Account Control enabled you may get a prompt that says “Do you want to allow the following program to make changes to this computer?” Click Yes. Figure 1: User Account Control You will see a GSW Business Tunnel progress meter. Figure 2: Installation Progress Meter 4 G S W B U S I N E S S T U N N E L I N D U S T R I A L B U S I N E S S T U N N E L J A N U A R Y 2 7 , 2 0 1 5 The Welcome screen of the setup program is displayed and you are reminded and urged to exit all Windows programs before continuing. You are also reminded that you must have administrative privileges to install this program. Click Next. Figure 3: GSW Business Tunnel Setup Welcome Dialog A screen is displayed indicating the directory where the Georgia SoftWorks Business Tunnel will be installed. The default is C:\Program Files (x86)\Georgia SoftWorks\Georgia SoftWorks Business Tunnel on 64-bit machines. On 32-bit machines the default is C:\Program Files\Georgia SoftWorks\Georgia SoftWorks Business Tunnel You may change the installation directory at this time. Note: If you install on a drive other than the system drive and have NTFS on the installation drive, then you must make sure that the system has full permissions to get to the installation directory and subdirectories. Click Next. 5 G S W B U S I N E S S T U N N E L I N D U S T R I A L B U S I N E S S T U N N E L J A N U A R Y If you would like to use a different Program Folder Name, then enter it here. Then Click Next. Figure 4: GSW Business Tunnel Choose Destination Location 6 2 7 , 2 0 1 5 G S W B U S I N E S S T U N N E L I N D U S T R I A L B U S I N E S S T U N N E L J A N U A R Y 2 7 , 2 0 1 5 The Installation Confirmation screen is displayed. The GSW Tunnel is ready to be installed on your computer. Click NEXT. Figure 5: GSW Business Tunnel Installation Confirmation 7 G S W B U S I N E S S T U N N E L I N D U S T R I A L B U S I N E S S T U N N E L J A N U A R Y 2 7 , 2 0 1 5 The Installation Complete screen is displayed. The GSW Tunnel service has been installed and is automatically started. Click CLOSE Figure 6: GSW Business Tunnel Installation Setup Succeeded Please view the readme.txt file as it may contain late breaking information about the GSW Business Tunnel that has not yet made it into the User Manual. Release notes are contained in the readme.txt Figure 7: GSW Business Tunnel Program Group Installation is complete. The next step is to register your software. 8 G S W B U S I N E S S T U N N E L I N D U S T R I A L B U S I N E S S T U N N E L J A N U A R Y 2 7 , 2 0 1 5 Registration Note: Do not use Windows Terminal Services/Remote Desktop to perform registration. Software Registration To run the Georgia SoftWorks Business Tunnel for Windows you must first register the software1. This entails just a few steps that involve obtaining the Product ID and providing this identification to Georgia SoftWorks so a Serial Number can be generated. - NOTE: Read System Signature chapter at the end of manual. How to Register the Software To run the registration program - 1. Select the Start button on the taskbar, select All Programs, then Georgia SoftWorks Business Tunnel and then Registration. The registration screen is displayed. The Registration software automatically fills in the Product Information fields as shown in Figure 6. Figure 8: Registration: Initial Screen 1 You can obtain a temporary serial number for trial access in certain situations. 9 G S W B U S I N E S S T U N N E L I N D U S T R I A L B U S I N E S S T U N N E L J A N U A R Y 2 7 , 2 0 1 5 Please complete the Customer Information including the Purchased From field in the Registration Screen. Enter the name of the software that will be your primary application to use with GSW Business Tunnel in the Application software field. Figure 9: Registration: Customer Information Entry 1. The registration information must be provided to Georgia SoftWorks to obtain the Serial Number. Several methods are available for your convenience. Use the Save to file button to save the registration information to a text file. a. Save the information to a file and attach it to a Support Ticket. - Preferred and fastest method. OR b. Print the information and Fax it to Georgia SoftWorks Please print (using the Print button on the registration screen) this information and fax to Georgia SoftWorks: +1 706.265.1020 c. Call us at +1 706.265.1018 10 G S W B U S I N E S S T U N N E L I N D U S T R I A L B U S I N E S S T U N N E L J A N U A R Y 2 7 , 2 0 1 5 You may close the registration program at this time. Once Georgia SoftWorks receives the information, we can generate a Serial Number on demand. We will reply back via the ticket system, email or fax. 2. When the Serial Number is provided, run the Registration Program again and enter the Serial Number. The easiest method to get the Serial Number is to highlight the returned Serial Number and copy (ctrl-c). Then position the mouse in the Serial Number field in the Registration Information box and paste (ctrl-v). Figure 10: Registration: Serial Number Entered 3. Click Register. Figure 11: Registration Successful 4. Click OK. 11 G S W B U S I N E S S T U N N E L I N D U S T R I A L B U S I N E S S T U N N E L J A N U A R Y 2 7 , 2 0 1 5 Figure 12: Registration: Complete Now the software is registered. You may now run the Georgia SoftWorks Business Tunnel for Windows. Note that you will be able to obtain Free Updates until the date specified. 12 G S W B U S I N E S S T U N N E L I N D U S T R I A L B U S I N E S S T U N N E L J A N U A R Y 2 7 , 2 0 1 5 Tunnel Management Tool Configuration Overview “Set It and Forget It” Below is the GSW Business Tunnel Management Tool screen. Notice that the Tunnel Management Tool has a pane on the left that allows you to select Configuration or Activity. The contents of the pane on the right are context sensitive and change based on the Configuration or Activity item selected. Selecting Configuration Tunnels displays the tools to list, create, edit and delete tunnels and their associated channels. The Local Ports in use by the tunnels can be viewed by: Configuration Local Ports Usage Activity monitoring can be done by selecting the Tunnel, Channel or User under Activity. Figure 13: GSW Business Tunnel Management Tool Screen Sections 13 G S W B U S I N E S S T U N N E L I N D U S T R I A L B U S I N E S S T U N N E L J A N U A R Y 2 7 , 2 0 1 5 Configuration Pane When Configuration is selected in the pane on the left, the right pane shows a configuration summary of the GSW Business Tunnel. Quickly see the number of tunnels and channels configured and the number that are active. The GSW Business Tunnel Software Version is also displayed. Figure 14: GSW Business Tunnel Configuration Summary 14 G S W B U S I N E S S T U N N E L I N D U S T R I A L B U S I N E S S T U N N E L J A N U A R Y 2 7 , 2 0 1 5 Workflow to Create a Working Business Tunnel The workflow to create a tunnel consist of three steps • Configuring the tunnel • Configuring one or more channels for the tunnel • Activating the tunnel Configuring the Tunnel The tunnel configuration dialog is where you define and configure each tunnel. Each tunnel must connect to a SSH Server. This can be the Georgia SoftWorks SSH Server or any other quality SSH Server. Specifying the location and authentication information so a tunnel can connect to the SSH Server is a main aspect of the tunnel configuration. Additional information such as the compression level, the protocol, the encryption algorithms and if a proxy is used is configured in the tunnel settings. The tunnels also have an Enabled/Disabled setting. This allows tunnels to be configured in advance and enabled only when needed. Configuring Channels for the Tunnel Each tunnel must have at least one channel to operate. However, you may configure many channels for a single tunnel. A channel specifies the type of port forwarding, the local address/port and remote address/port to use to access a specified service on a host. Services such as POP, SMTP, RDP and HTTP are specified in the channel configuration. The tunnel’s channel configuration also has an Enabled/Disabled setting. This allows channels to be configured in advance and enabled only when needed. Activating the Tunnel Any time a Tunnel or Channel is created or modified, the Business Tunnel must be activated before any configuration changes can be used to establish the tunnel. When the Business Tunnel is activated, all enabled tunnels and any associated enabled channels start running and can be used. Activating the Tunnel restarts the GSW Business Tunnel Service. Please note that this will stop and restart any tunnels and associated channels currently in operation. At this point you are ready to use the GSW Business Tunnel to gain SSH secured access to a service. Additional configuration may have to be performed to browsers, email programs, etc. to utilize the tunnel. Please see the link to examples on page 38. 15 G S W B U S I N E S S T U N N E L I N D U S T R I A L B U S I N E S S T U N N E L J A N U A R Y 2 7 , 2 0 1 5 Exceeding the number of licensed tunnels If you have enabled more tunnels than your license allows and you click Activate or Stop and Start the Business Tunnel service you will get an error message indicating that some of your tunnels were not started because of your licensing limits. For example, when four tunnels are enabled and the license is for three, the message in Figure 15 is displayed when the Activate button is clicked or the service is restarted. Figure 15: Tunnels activated exceeds tunnels licensed The corrective action is to either enable only the number of tunnels your license allows or to purchase an upgrade for the Business Tunnel to a license that allows a larger number of simultaneous enabled tunnels. Please note that you can configure as many tunnels as needed. This way you can preconfigure all the various tunnels you may need and simply disable / enable the ones needed at the specific time. 16 G S W B U S I N E S S T U N N E L I N D U S T R I A L B U S I N E S S T U N N E L J A N U A R Y 2 7 , 2 0 1 5 Tunnel Pane Overview When Configuration Tunnels is selected in the pane on the left, the top half of the Tunnels pane on the right displays a summarized list of configured tunnels. The bottom half displays the list of channels associated with the selected tunnel. All columns are sortable by clicking on the column title in the standard Windows fashion. Figure 16: Tunnel and Channel list A Tunnel is created by clicking on the ‘New…’ button. Tunnels can be created, edited or deleted. One or more channels can be added to a tunnel. Channels can be created, edited or deleted. To add channels to a tunnel • Select a tunnel in the Tunnel list • Click ‘New…’ in the “Channel list for selected tunnel frame” Activate Button After you create, edit, or delete a tunnel/channel, click Activate to restart the Tunnel Service. The Tunnel Service must be restarted for your configuration changes to take effect. Close Button This will close the GSW Business Tunnel Management Tool. All activated tunnels will continue to run. 17 G S W B U S I N E S S T U N N E L I N D U S T R I A L B U S I N E S S T U N N E L J A N U A R Y Create a Tunnel Click ‘New…’ in the Tunnel list frame. The Tunnel Settings configuration dialog opens. Figure 17: Create a New Tunnel 18 2 7 , 2 0 1 5 G S W B U S I N E S S T U N N E L I N D U S T R I A L B U S I N E S S T U N N E L J A N U A R Y 2 7 , 2 0 1 5 Configuration – Tunnel Settings The tunnel settings are grouped into four sections. • Enable/Disable this tunnel • SSH Host Info • Authentication • More Details Figure 18: Tunnel Settings Please note that the OK button will not become active if there is incorrect or missing configuration data. 19 G S W B U S I N E S S T U N N E L I N D U S T R I A L B U S I N E S S T U N N E L J A N U A R Y 2 7 , 2 0 1 5 Enable this Tunnel The Enable This Tunnel section enables/disables the tunnel. Tunnels may be configured in advance and not enabled until needed. A new or modified tunnel configuration will not be used unless it is enabled and activated. Enabled means the checkbox is checked in the tunnel configuration. Activated means the Business Tunnel Service is restarted. This can be accomplished several ways. • Clicking the Activate button on the Tunnel/Channel Pane Summary Screen (page 17) • Stopping and re-starting the Business Tunnel Service on the Activity Monitoring screen (page 34) Where Enable this Tunnel is a checkbox is a toggle that enables/disables the Tunnel. Required: Yes Default: Enabled Figure 19: Enable this Tunnel 20 G S W B U S I N E S S T U N N E L I N D U S T R I A L B U S I N E S S T U N N E L J A N U A R Y 2 7 , 2 0 1 5 Please note that enabled tunnels will not connect until Activated (see page 17 ). SSH Host info The SSH Host info configuration section of the GSW Business Tunnel allows you to configure information required to locate and verify the host to where the tunnel will establish a connection. Figure 20: SSH Host Info The SSH Host info section allows configuration of: • Name 21 G S W B U S I N E S S T U N N E L • Host • Host Fingerprint 1: • Host Fingerprint 2: • Port: I N D U S T R I A L B U S I N E S S T U N N E L J A N U A R Y 2 7 , 2 0 1 5 Where Name is a name that you give to the tunnel. It is recommended to name the tunnel something that associates it with its purpose. For example, the name ‘Browse company intranet from Laptop’ may be a good reminder that you would use this tunnel when you are away from work but you need to browse the company intranet. This name is used in the Activity panes. Required: Yes Default: N/A Host is the IP address or DNS name of the SSH Server where the tunnel will connect. Required: Yes Default: N/A Host Fingerprint 1 and Fingerprint 2 are unique SSH Server fingerprints that can be used to verify the server’s fingerprint. Host Fingerprint 1 and Fingerprint 2 are unique SSH Server fingerprints that can be used to protect you against a network attack known as spoofing: secretly redirecting your connection to a different computer, so that you send your password to the wrong machine. Using this technique, an attacker would be able to learn the password that guards your login account, and could then log in as if they were you and use the account for their own purposes. To prevent this attack, each server has one or two unique identifying codes, called host fingerprints. These fingerprints are created in a way that prevents one server from forging another server's fingerprint. So if you specify fingerprint(s), then connect to a server and it sends you a different fingerprint from the one you were expecting the GSW Tunnel will fail the connection. On Unix systems you can get the host fingerprints by running the commands: ssh-keygen -l -f /etc/ssh/ssh_host_rsa_key ssh-keygen -l -f /etc/ssh/ssh_host_dsa_key The output will look like this example: ubuntu@ip-10-73-31-151:~$ ssh-keygen -l -f /etc/ssh/ssh_host_rsa_key 2048 e9:dd:b6:7c:8a:da:41:b4:5e:7d:9a:e7:bc:bd:a2:ac root@ip-10-73-31-151 (RSA) ubuntu@ip-10-73-31-151:~$ ssh-keygen -l -f /etc/ssh/ssh_host_dsa_key 22 G S W B U S I N E S S T U N N E L I N D U S T R I A L B U S I N E S S T U N N E L J A N U A R Y 1024 e6:86:ed:b2:7f:a5:dd:37:14:fe:eb:70:43:ea:dc:00 (DSA) 2 7 , root@ip-10-73-31-151 e9:dd:b6:7c:8a:da:41:b4:5e:7d:9a:e7:bc:bd:a2:ac and e6:86:ed:b2:7f:a5:dd:37:14:fe:eb:70:43:ea:dc:00 are the host fingerprints to be pasted into Host Fingerprint 1 and Fingerprint 2 fields. Required: No Default: N/A Port is the SSH port of the SSH Server. Required: Yes Default: 22 23 2 0 1 5 G S W B U S I N E S S T U N N E L I N D U S T R I A L B U S I N E S S T U N N E L J A N U A R Y Authentication 2 7 , 2 0 1 5 The Authentication configuration section of the GSW Business Tunnel allows you to configure information required to authenticate access to the SSH Host described above. Figure 21: Authentication Tunnel Configuration The Authentication section allows configuration of: • Login • Use public key • Password • Import Private key 24 G S W B U S I N E S S T U N N E L I N D U S T R I A L B U S I N E S S T U N N E L J A N U A R Y 2 7 , 2 0 1 5 Where Login is a Login Id or user name that is required to connect to the SSH Server. Required: Yes Default: N/A Use public key allows you to specify public key authentication for SSH Server instead of username/password authentication. Check this box to use public key authentication. Required: N/A Default: N/A Password/Re-enter Password allows you to specify the Password associated with the Login Id. When creating or editing a tunnel, if the Password and Re-enter password do not match, the OK button at the bottom of the page will not be enabled or you will get the text warning “mismatch” as shown below. Figure 22: Password mismatches warning Required: Only when user name/password authentication is configured Default: N/A Import Private Key allows you to import a Private Key file. Required: Only if public key authentication is selected Default: N/A Private Key Imported will be checked if the Private Key file is successfully imported. This is a read-only field. Private Key Type, Private Key and Key Fingerprint will display the values based on the imported private key. These are read-only fields. 25 G S W B U S I N E S S T U N N E L I N D U S T R I A L B U S I N E S S T U N N E L J A N U A R Y More details 2 7 , 2 0 1 5 The More details configuration section of the GSW Business Tunnel allows you to configure information associated with compression, protocol, encryption and proxy settings for the tunnel. The More details section allows configuration of: • Compression level • Protocol • Allow IPv6 addresses • Encryption Algorithm • Use Proxy Where 26 G S W B U S I N E S S T U N N E L I N D U S T R I A L B U S I N E S S T U N N E L J A N U A R Y 2 7 , 2 0 1 5 Compression is level of compression that is requested. No compression and levels 1 through 9 are available. Level 1 is the least amount of compression (fastest) and level 9 is the most amount of compression (slowest). Level 6 is the default. Required: N/A Default: 6 Allow IPv6 is a checkbox that specifies to allow IPv6 addressing in addition to IPv4. The default for IPv6 is disabled. Required: No Default: Disabled Protocol is the protocol to use. Options available are Negotiate, SSH1 or SSH2. SSH2 is recommended and also the default. Other values are provided for backward compatibly with less secure SSH1 solutions. Required: Yes Default: SSH2 Encryption Algorithm specifies the encryption algorithm to use. AES-256 is the default. Required: Yes Default: AES-256 Use Proxy specifies if the Tunnel is to use a Proxy when connecting to the host. If checked, the ‘Configure Proxy…” button is enabled. Use Proxy is disabled by default. Required: Yes Default: Disabled (do not use proxy) Configure Proxy When the GSW Business Tunnel is unable to establish a direct connection to the SSH Server, the proxy option may be used. For example, if the Business Tunnel does not have access to the internet, but a proxy machine does then you can use the proxy. When the Configure Proxy button is clicked, the following proxy configuration screen is displayed. 27 G S W B U S I N E S S T U N N E L I N D U S T R I A L B U S I N E S S T U N N E L J A N U A R Y 2 7 , 2 0 1 5 Figure 23: More details - Proxy Settings The Tunnel Proxy Settings section allows configuration of: • Proxy Type • Host • Port • Login • Password Where Proxy Type is the proxy type. This is used to specify the appropriate protocol based on the type of remote proxy. Socks 4, Socks 4a, Socks 5 and WEBStandard are available. Use the type as required by the proxy you are using. Required: N/A Default: Socks5 Host IP address or DNS name of the proxy. This specifies the hostname of the proxy to use. Required: Yes Default: N/A 28 G S W B U S I N E S S T U N N E L I N D U S T R I A L B U S I N E S S T U N N E L J A N U A R Y 2 7 , 2 0 1 5 Port is the port number to use to access the proxy. The Port number specifies the port to use when connecting to a proxy. The value for web proxies is 80, and often 8000 or 8080. When Socks (4 and 5) is used 1080 is common. Required: Yes Default: 15011 Login is a Login Id or user name that is required for authentication on the proxy. This is the user name used on the proxy server for authentication. Required: Yes Default: N/A Password/Re-enter Password allows you to specify the password associated with the Login Id. This is the password used on the proxy server for authentication. Required: No Default: N/A Add to the Tunnel List When done configuring the tunnel, click OK to add it to the Tunnel List. Note: The tunnel is not activated until you click Activate on the Tunnel Management Tool. 29 G S W B U S I N E S S T U N N E L I N D U S T R I A L B U S I N E S S T U N N E L J A N U A R Y 2 7 , 2 0 1 5 Configuration – Channel Settings Figure 24: Channel Configuration Channel configuration consists of: • Enable/Disable this Channel • Name • Local Address • Local Port • Remote Address • Remote port Where Enable this Channel is a checkbox is enables/disabled the channel. Required: Yes Default: Enabled Please note that enabled channels are not available for use until the associated tunnel is Activated (see page 17 ). Name is a name that you give to this Channel. It is recommended to name the channel something that associates it with its purpose within the tunnel. For example, the name ‘Get Email from Server from Work’ may be a good reminder Required: Yes Default: N/A 30 G S W B U S I N E S S T U N N E L I N D U S T R I A L B U S I N E S S T U N N E L J A N U A R Y 2 7 , 2 0 1 5 Forwarding Type is the Local Port Forwarding – makes a port on a computer accessible to the SSH Server (the host that you are connecting) available on your local machine running the tunnel. Remote Port Forwarding – makes a port on a computer accessible to the computer running the Business Tunnel available on the remote server. Dynamic Port Forwarding – opens a SOCKS 4/5 proxy on your local computer and forwards all the data to the SSH Server Required: Yes Default: Local Local Address value is dependent on the type of forwarding selected Local Forwarding: Same as Dynamic Forwarding Dynamic Forwarding: This is the address where the client software will be configured to connect to. You can specify 127.0.0.1 if you do not want to share your channel with other computers. You can specify 0.0.0.0 if you want to share your channel with all client computers on all of your IP addresses. Or you can specify one of your IP addresses for other computers to use. Remote Forwarding: This is the address where client software would originally attempt to connect to if tunnel was not used. The forwarded connection will be going to this address through the channel you are about to create. Required: Yes Default: 127.0.0.1 Local Port value is dependent on the type of forwarding selected Local Forwarding: This is the port where client software will be configured to connect to. You will put a port number that is currently not used on the computer running the GSW Tunnel. A good rule of thumb is to add 10,000 to the port number you intend to forward. For example, if you forward telnet (port 23) put 10023 here. Dynamic Forwarding: This is the port where client software will be configured to connect to. You will put a port number that is currently not used on the computer running the GSW Tunnel. 31 G S W B U S I N E S S T U N N E L I N D U S T R I A L B U S I N E S S T U N N E L J A N U A R Y 2 7 , 2 0 1 5 Remote Forwarding: This is the port number where client software would originally attempt to connect to if tunnel was not used. The forwarded connection will be going to this address through the channel you are about to create. Required: Yes Default: 10080 Remote Address is the Local Forwarding: This is the address where the client software would originally connect to if tunnel was not used Dynamic Forwarding: Not Used Remote Forwarding: This is the address where the client software will be configured to connect to on the remote end of the tunnel. You can specify 127.0.0.1 if you do not want to share your channel with other computers. You can specify 0.0.0.0 if you want to share your channel with all client computers on all of your IP addresses. Or you can specify one of your IP addresses for other computers to use. Required: Yes (only for Local and Remote Forwarding) Default: 127.0.0.1 Remote Port is the Local Forwarding: This is the port number where the client software would originally attempt to connect to if tunnel was not used. The forwarded connection will be going to this address through the channel you are about to create. Dynamic Forwarding: Not Used Remote Forwarding: This is the port where the client software will be configured to connect to. You will put a port number that is currently not used on the computer running the SSH server. A good rule of thumb is to add 10,000 to the port number you intend to forward. For example, if you forward telnet (port 23) put 10023 here. Required: Yes (only for Local and Remote Forwarding) Default: 80 32 G S W B U S I N E S S T U N N E L I N D U S T R I A L B U S I N E S S T U N N E L J A N U A R Y 2 7 , 2 0 1 5 Local Ports Usage The Local Port Usage provides a quick view of the local ports configured. Due to the number of ports available on a system it is convenient to quickly identify what ports you have configured and which tunnel and channel they are associated. Figure 25: Local Port Usage 33 G S W B U S I N E S S T U N N E L I N D U S T R I A L B U S I N E S S T U N N E L J A N U A R Y 2 7 , 2 0 1 5 Activity Monitoring The GSW Tunnel service can be stopped and started here. Stop service will stop all tunnels/channels. Start service will start all enabled tunnels/channels. Figure 26: Activity Monitoring Stopping the tunnel service clears the Activity counts for the tunnel and channel screens. 34 G S W B U S I N E S S T U N N E L I N D U S T R I A L B U S I N E S S T U N N E L J A N U A R Y Tunnel Activity Tunnel activity displays activity associated with the selected tunnel. Figure 27: Activity Monitoring - Tunnels 35 2 7 , 2 0 1 5 G S W B U S I N E S S T U N N E L I N D U S T R I A L B U S I N E S S T U N N E L J A N U A R Y Channel Activity Channel activity displays all channel activity. Figure 28: Activity Monitoring - Channels 36 2 7 , 2 0 1 5 G S W B U S I N E S S T U N N E L I N D U S T R I A L B U S I N E S S T U N N E L J A N U A R Y User Activity User activity displays activity associated with Users. Note that Users are computers. Figure 29: Activity Monitoring - User 37 2 7 , 2 0 1 5 G S W B U S I N E S S T U N N E L I N D U S T R I A L B U S I N E S S T U N N E L J A N U A R Y 2 7 , 2 0 1 5 Example Configurations For those not yet familiar with SSH Tunneling, Georgia SoftWorks has put together a set of “cook book” examples that may be helpful in configuration of your tunnel and channels. A pdf document with all of the examples can be viewed here: http://www.georgiasoftworks.com/docs/tunnel/Example_guide_businesstunnel.pdf On each example page there is an example ID, a description and a document number. Example ID is a unique number that identifies a specific example. The Description gives a brief description of the “Use Case” for the Business Tunnel. The document number is a letter (D, L or R) followed by a number. The D, L or R signifies if this example uses Dynamic, Local or Remote Port forwarding. The number is the enumerated value signifying the example number of that type. That is Example D01 is Dynamic port forwarding example 01. D02 is Dynamic port forwarding example 02. 1 2 View All Examples in a single PDF Forwarding Type/Example Number (ex: D01) Dynamic Example 01 D - Dynamic L - Local R - Remote Example ID Description BT_0001_09282013 D01 Browse internet securely by tunneling through a generic SSH server on Amazon cloud BT_0002_11152013 3 BT_0013_11152013 4 5 6 BT_0003_11152013 7 8 9 BT_0006_11152013 10 11 12 BT_0009_11152013 13 BT_0012_11152013 BT_0004_11152013 BT_0005_11152013 BT_0007_11152013 BT_0008_11152013 BT_0010_11152013 BT_0009_11152013 NT_0001_09282013 HTTP D02 Securely connect to your home computer from work & use it to browse the internet HTTP D03 Securely Connect to your home computer from anywhere to Browse the Internet HTTP L01 L02 L03 Make a telnet connection secure using the GSW Business Tunnel Securely Access Blocked Website from Headquarters (Blocked by Proxy Filter) Securely access blocked Website via Home due to company proxy filter HTTP HTTP HTTP L04 L05 R01 Securely Access Email (Send/Receive) from anywhere Securely Remote Desktop to Work from Anywhere Securely browse the company intranet from home, even though company does not allow incoming connections POP/SMTP RDP HTTP R02 R03 R04 Browse the company IntrAnet from Sales Branch – Single Employee Browse the company IntrAnet from Sales Branch – Multiple Employees Browse the Company IntrAnet from Home HTTP HTTP HTTP Browse the company IntrAnet from Sales Branch using address 0.0.0.0 HTTP R05 Tunnel Notes Example ID 1 Service Description N01 Open Windows Firewall to allow access to a SSH SSH Server 38 G S W B U S I N E S S T U N N E L I N D U S T R I A L B U S I N E S S T U N N E L J A N U A R Y 2 7 , 2 0 1 5 System Requirements The GSW Business Tunnel must be installed on a computer running the Windows operating system including Windows Server 2012, Windows Server 2008 R2, Windows Server 2008, Windows Server 2003 Windows 8, Windows 7, Windows XP Both x86 and x64 systems The GSW Business Tunnel is a client side tool and has low CPU and RAM requirements so it can easily run on workstation class computer. We do not make any direct CPU requests to reserve memory from the non-paged pool. It is suggested to use 2GB RAM and CPU running at 1.5 GHz or more. The GSW Business Tunnel must have access and authentication credentials to a SSH Server. The SSH Server must have local and remote port forwarding capabilities. There is no operating system requirement for the SSH Server; however the GSW SSH Server is an excellent choice when using a Windows Operating System. Concurrent Tunnels License The GSW Business Tunnel is licensed to have a maximum number of Tunnels activated at a single time. You may have as many configured as you need. This suits most users as you may have many configurations ready but only need to activate a subset of the total at any one time. GSW Business Tunnels are sold in packages with the ability to have up to 3 concurrent tunnels active 5 concurrent tunnels active 10 concurrent tunnels active 25 concurrent tunnels active 50 concurrent tunnels active 100 concurrent tunnels active on a single computer (laptop, VM, server etc.) If the number of tunnels activated is greater than the number purchased, a log entry is generated and only the number of tunnels licensed will be activated. 39 G S W B U S I N E S S T U N N E L I N D U S T R I A L B U S I N E S S T U N N E L J A N U A R Y 2 7 , 2 0 1 5 System Signature - IMPORTANT PLEASE READ NOTE: This section only applies to Software Registration The registration software obtains a system signature that is unique to your system. This signature is an added security measure to inhibit unauthorized personnel from obtaining working copies of the GSW Business Tunnel. The signature is comprised of hardware and software identifiers existing on your system which make the target system unique. These identifiers are hashed into a Product ID so a Serial Number can be generated from this Product id. If major hardware components of your system are removed replaced or modified your Serial Number may discontinue to work and you may need a new Serial Number to obtain access to the GSW Business Tunnel. Please contact Georgia SoftWorks Technical Support if needed. 40 G S W B U S I N E S S T U N N E L I N D U S T R I A L B U S I N E S S T U N N E L J A N U A R Y 2 7 , 2 0 1 5 Technical Support In order to keep Technical Support Free, please help minimize the cost. • Gather all relevant system and environment information. • Write your question down. This not only helps us but also helps you articulate the question better. If the question is not an emergency, please use the GSW Support Ticket System. http://www.georgiasoftworks.com/support_ost/index.php We try to respond within 24 hours. Otherwise Call +1 706.265.1018 EST, M-F 9:00 a.m. to 5:00 p.m. and have your Product ID ready 41