Download 5-Bay Raid System(E)-manual.cdr
Transcript
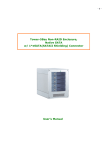
5-Bay Raid Sub-System
Smart Removable 3.5" SATA Multiple Bay Data Storage Device
User's Manual
w w w . v i p o w e r. c o m
Table of Contents
1. How the SteelVine (VPMP-75511R/VPMA-75511R) Operates ..... 1
1-1 SteelVine Storage Policies ......................................... 1
1-2 Prerequisites ............................................................ 2
2. Getting Started ...................................................................... 3
2-1 Connect the Host to the VPMP-75511R/VPMA-75511R . 3
2-2 Start the VPMP-75511R/VPMA-75511R ...................... 4
3. Basic Configuration ................................................................. 8
3-1 A look at the Basic Configuration ................................. 8
3-2 Configure Volumes .................................................... 9
4. Advanced Configuration ........................................................
4-1 Why Advanced Configuration ....................................
4-2 A Look at the Advanced Configuration Wizard .............
4-3 Configure Multiple Volumes ......................................
12
12
13
15
5. Manage Configuration Files .................................................. 25
5-1 Import a Configuration File ....................................... 25
5-2 Save a Configuration File ......................................... 26
6. Partitioning Configured Volumes ......................................... .. 28
6-1 Partition a Volume .................................................... 28
7. Change Password ................................................................ 36
8. Rebuild ................................................................................ 38
8-1 When is a rebuild necessary ..................................... 38
8-2 What happens during a rebuild .................................. 38
8-3 Configure a rebuild .................................................. 39
9. Monitoring and Troubleshooting .............................................. 42
9 -1 Monitor the SteelVine Storage Appliance .................... 42
9-2 Review Event Log ..................................................... 43
1. How the SteelVine (VPMP75511R/VPMA-75511R) operates
The VPMP-75511R / VPMA-75511R supports configuration and management of
multiple storage devices connected to a single host. Its built-in features include RAID
configuration, and virtualization capabilities.
1-1 Storage policies
JBOD: A storage policy that grants the host computer direct access to a physical disk
drive. With JBOD (just a bunch of disks), the number of available virtual drives is
equal to the number of physical drives. JBOD is also called the bypass mode because
the host bypasses the SteelVine virtualization engine to access the drive directly.
SAFE: A storage policy in which all data are stored in duplicate on separate hard disk
drives to protect against data loss due to drive failure. At least two hard disk drives
mirror each other at all times, equivalent to RAID 1. Every write operation goes to
both drives. SAFE provides the highest level of data protection, but halves the amount
of storage space because all data must be stored twice.
To implement the SAFE storage policy, the Basic Configuration Wizard creates two
volumes. Each volume consists of two hard disk drives that mirror each other.
BIG: A storage policy configuration in which multiple physical hard disk drives are
concatenated and treated as one large volume. This configuration allows the end-user
to increase logical volume size beyond the capacity of individual hard disk drives.
BIG provides the maximum amount of storage space, but no additional performance
or data redundancy.
The Basic Configuration Wizard implements the BIG storage policy by concatenating
all the hard disk drives into a single volume.
FAST: A storage policy in which I/O processing is balanced evenly in a method
known as striping, equivalent to RAID 0. Striping increases storage operation speed as
each portion of data is divided into segments that are written to different disks sim
ultaneously. FAST offers the best performance in terms of speed, but has no
redundancy of data.
5 Bay Raid System User Manual
1
1-2 Prerequisites
The VPMP-75511R/ VPMA-75511R installation has the following hardware and
software prerequisites for the host computer(s)
Hardware
For x86 platforms: An Intel PIII 500MHz equivalent or faster
For Mac platforms: A Mac G4 500MHz or faster
CD-ROM drive
64 MB of RAM minimum
250 MB of free hard disk space
Super VGA (800 x 600) or higher resolution with 256 colors
Mouse or compatible pointing device
External SATA cable connection between the VPMP-75511R/ VPMA-75511R
Storage Appliance and the host computer
Software
Microsoft Windows 2000, Windows XP, or Windows Server 2003 with the
latest Service Pack installed.
For Mac platforms: Mac OS X with the latest set of patches installed.
Install the driver
1. Insert the CD into the CD-ROM drive.
2. Click the Setup icon in the Windows or Mac directory and follow the Installation
Wizard to complete the installation.
2
5 Bay Raid System User Manual
2. Getting Started
Start the SteelVine Manager
2-1 Connect the Host to the
VPMP-75511R / VPMA-75511R
MS Windows
1. Plug the VPMP-75511R / VPMA-75511R Storage Appliance into an AC power
outlet and turn the VPMP-75511R / VPMA-75511R power switch to ON.
2. Attach the VPMP-75511R / VPMA-75511R Storage Appliance to the host computer
with an external SATA cable.
3. Right-click the My Computer icon on your desktop and select Manage from the
pop-up menu.
4. Click Disk Management under Storage to view the disk drives.
5. If an Initialize and Convert Disk Wizard dialog appears, click Cancel to close the
Wizard and proceed to Disk Management.
5 Bay Raid System User Manual
3
6. Verify that all two drives are visible in their preconfigured and unallocated state.
2-2 Start the VPMP-75511R
The SteelVine Manager starts with the Status window visible so you can monitor the
SteelVine Storage Appliances. The status only mode is entered when the Rotary switch
is in the JBOD, BIG, FAST or SAFE mode. In Status only mode, the user is not
allowed to change the configuration from the GUI. The only possible way to change
the configuration is to change the Switch setting to in JBOD, Big, Fast or Safe mode.
4
5 Bay Raid System User Manual
MS Windows
1. Select the Start > All Programs > SteelVine > SteelVine Manager icon to
start the Manager.
5 Bay Raid System User Manual
5
2. Monitor the status of SteelVine Storage Appliances on the Status window.
3. Select menu options or click toolbar buttons and follow the instructions in the
remainder of this guide to configure SteelVine Storage Appliances. When prompted,
enter the administrative password. The default password is admin.
Table 1: Toolbar buttons on the Status Windows.
6
5 Bay Raid System User Manual
Table 2: A look at the SteelVine Status Window
Table 3: Sections of the Status Window
5 Bay Raid System User Manual
7
3. Basic Configuration
3-1 A Look at the Basic Configuration
Wizard
The SteelVine Basic Configuration Wizard is accessible from the Status window and
allows volume management. The Basic Configuration Wizard defines volumes based
on a selected storage policy. An end-user cannot modify volume counts or capacities.
To protect against unintended changes, the SteelVine Manager prompts for a password
for first time access of the Wizard. The default password is admin.
(See "Change Password" for additional information on password management.)
8
5 Bay Raid System User Manual
3-2 Configure Volumes
Note: Use the Disk Management utility provided by the OS to delete all
VPMP-75511R/ VPMA-75511R partitions except the un-allocated, un-initialized disk
that represents the SteelVine processor. See "Partitioning volumes" for details.
1. Select Configure Box from the Edit menu or click the Configure Box toolbar button
to open the Configuration Wizard.
2. When prompted, enter the administrator password. The default password is admin.
5 Bay Raid System User Manual
9
3. Select a storage policy in the Storage Policy frame.
4. When prompted to acknowledge that the configuration change may result in data
loss, click Yes to accept the configuration.
5. Select Save to Config File from the File menu or click the Write configuration
for system to a file toolbar button to save the configuration.
10
5 Bay Raid System User Manual
6. Click Apply to create the selected configuration. The Volume display will close
automatically and the Status window will refresh (within a minute or so).
7. Partition the configured volume(s) to complete the implementation.
See "Partitioning Volumes" for details.
5 Bay Raid System User Manual
11
4. Advanced Configuration
4-1 Why Advanced Configuration?
The Basic Configuration Wizard provides six predefined storage policies to quickly
configure the VPMP-75511R / VPMA-75511R Storage Appliance. Each predefined
storage policy allocates the maximum system capacity to the selected storage policy.
Using the Advanced Configuration Wizard, you can configure up to ten
volumes - each with different storage policies and capacities. This flexibility provides
numerous combinations of performance, redundancy, and capacity to meet your
business requirements. For example:
For applications that produce critical data, redundancy is important. You could use
the Basic Configuration Wizard to implement the predefined SAFE,
SAFE and FAST, or SAFE and BIG storage policy. This format would allocate
all hard disk drives to SAFE volumes. This may be excessive for your needs.
Use the Advanced Configuration Wizard to create additional volumes and allocate
capacity more efficiently.
For applications that require hundreds of gigabytes of storage space, the added
redundancy of a SAFE configuration's Hot Spare may not be an acceptable luxury.
Use the Advanced Configuration Wizard to create multiple volumes that make use
of every gigabyte of available space.
These are just a few of the possible combinations of storage policy and capacity
allocations that you can create with the Advanced Configuration Wizard. Experiment
with other combinations to allocate the total system capacity to meet your needs.
12
5 Bay Raid System User Manual
4-2 A Look at the Advanced Configuration Wizard
The Advanced Configuration Wizard is an extension of Basic mode that allows you
to create two volumes (virtual drives) on each physical hard disk drive.
5 Bay Raid System User Manual
13
Toolbar Buttons on the Advanced Configuration Wizard
14
5 Bay Raid System User Manual
4-3 Configure Multiple Volumes
The Advanced Configuration Wizard allows many combinations of storage policies and
capacities. This procedure shows how to modify a basic SAFE configuration so that it
contains several volumes, each with different storages policies. This example illustrates
one possible combination that allocates all of the system's available capacity to:
One 50-gigabyte (GB) SAFE volume on drives 0 and 1, with no reserved for a Hot Spare.
One Fast volume that uses the remaining capacity on drive 0 and 1.
One Big volume that uses all of the capacity on drives 2, 3, and 4.
The same sequence of steps applies to any configuration you choose to implement;
only the storage policy and capacity allocation vary for different configuration options.
1. Select Configure Box from the Edit menu or click the Configure Box toolbar
button to open the Basic Configuration Wizard.
5 Bay Raid System User Manual
15
2. Click To Advanced Mode to open the Advanced Configuration Wizard.
16
5 Bay Raid System User Manual
3. Select the "Delete all volumes" from the toolbar
4. When prompted to confirm the deletion of the volumes, click Yes.
5 Bay Raid System User Manual
17
5. Select "Create a new volume" from the toolbar.
18
5 Bay Raid System User Manual
6. Select SAFE (RAID 1) as the Storage Policy. Click on the "Use" check boxes
underneath Drives 0 and 1. Move the slide to 50.
7. Click Update Volume.
8. When prompted whether to create a Hot Spare for the SAFE volume, click NO.
5 Bay Raid System User Manual
19
9. Click the "Create a New Volume" toolbar button.
10. Select the FAST radio button in the Storage Policy section.
11. Select the "Use" check box beneath both Drive 0 and Drive 1. This example
illustrates two-drive stripping.
12. Move the slider beneath Drive 0 all the way to the right to allocate the remaining
capacity on the two drives to the Fast volume.
If you wish, you can allocate less than the total remaining capacity to the new volume.
However, doing so makes the unallocated capacity unavailable and unused.
20
5 Bay Raid System User Manual
13. Click "Update Volume"
14. Click the "Create a New Volume" toolbar button.
15. Select the BIG radio button in the Storage Policy section.
16. Select the "Use' check box beneath Drive 2, Drive 3, and Drive 4 to allocate all of
the remaining system capacity to the BIG volume.
5 Bay Raid System User Manual
21
17. Click Update Volume.
22
5 Bay Raid System User Manual
18. Click Update Volume.
5 Bay Raid System User Manual
23
19. Click Update Volume to create the multi-volume, close the Wizard, and display
the volumes in the Status window (within a minute or so)
20. Partition the configured volumes to complete the implementation.
See Partitioning Volumes for details.
24
5 Bay Raid System User Manual
5. Manage Configuration Files
The Basic Configuration Wizard provides menus and icons to manage configuration files.
The Read Config File command from the File menu in the Basic Configuration
Wizard imports a configuration file so that the end-user can restore a previously saved
configuration (storage policy).
The Save to Config File command from the File menu in the Basic Configuration
Wizard exports an SteelVine configuration to a file. Each of the procedures in the
"Basic Configuration" chapter prompts you to save a configuration file.
5-1 Import a configuration file
Note: The end-user must have previously saved a configuration file so that one is
available to import it. See "Save a configuration file" for details.
1. Select Configure Box from the Edit menu or click the Configure Box toolbar
button in the Status window to open the Basic Configuration Wizard.
2. Select Read Config File from the File menu in the Basic Configuration Wizard.
3. Navigate to the required file and click Open to import it. The Basic Configuration
Wizard provides notice of a successful import and graphically displays the imported
volumes.
4. Click OK to implement the imported configuration.
5 Bay Raid System User Manual
25
5-2 Save a Configuration File
1. Select Configure Box from the Edit menu or click the Configure Box toolbar
button in the Status window to open the Basic Configuration Wizard.
2. Select Save to Config File from the File menu in the Basic Configuration Wizard.
26
5 Bay Raid System User Manual
3. Navigate to the appropriate directory, specify a file name in the File Name text box,
and click the Save button.
5 Bay Raid System User Manual
27
6. Partitioning Configured
Volumes
This chapter explains how to partition volumes after configuring them with the SteelVine
Manager. The end-user must partition volumes for the host computer's operating system
before one can store data on the volumes. Refer to the operating system documentation
for further guidance.
6-1 Partition a Volume
MS Windows
Important: Before reconfiguring a volume, back up the data and delete previously defined
SteelVine partitions. Do not, however, delete the partition that represents the SteelVine
processor (the "Not Initialized" disk with no capacity allocated to it). After the end-user
configures and partitions the new volumes, S/he can restore the backed-up data to the new
configuration.
1. Right-click the My Computer icon and select Manage from the pop-up window.
28
5 Bay Raid System User Manual
2. From the Computer Management window select Disk Management under
Storage to open Windows Disk Manager.
Note: The Disk numbers in the Windows Disk Manager may be different from the
Volume numbers shown in the VPMP-75511R/ VPMA-75511R Status window, the Basic
Configuration Wizard, and the Advanced Configuration Wizard. Be sure to select the
correct disk based on the expected disk capacity to create a partition.
5 Bay Raid System User Manual
29
3. Right-click on the configured disk's unallocated space and select New Partition.
If the New Partition option is not available, select the disk and Initialize it first.
To do this, right-click on the disk item and select "Initialize Disk".
4. Click Next to start the Partition Wizard.
30
5 Bay Raid System User Manual
5. Select the Primary or Extended option and click Next.
5 Bay Raid System User Manual
31
6. Specify the partition size. By default, the partition occupies the entire volume.
Click Next.
32
5 Bay Raid System User Manual
7. Assign a drive letter or mount path and click Next.
5 Bay Raid System User Manual
33
8. Select file system and name the partition and click Next.
34
5 Bay Raid System User Manual
9. Review the file system settings and click Finish to create the logical partition.
10. Repeat steps 1 through 9 to partition any remaining disks you configured in the
SteelVine Manager. Remember, do not partition the disk that represents the
SteelVine processor.
5 Bay Raid System User Manual
35
7. Change Password
The VPMP-75511R/ VPMA-75511R limits configuration access with a password prompt.
The password information is stored locally on the server running the daemon. The default
password is admin.
1. Select Change Password from the File menu
2. Enter the current password (or use "dmin" if the default password has not been changed)
36
5 Bay Raid System User Manual
3. Enter the new password of 5 or more characters in both fields.
4. Click OK to implement the new password
5 Bay Raid System User Manual
37
8. Rebuild
8-1 When is a rebuild necessary?
A rebuild is initiated to restore data redundancy for a SAFE volume that has entered a
vulnerable state. In a vulnerable state, one of the two mirrored disks goes offline or is
inaccessible. Although the SAFE volume remains available during the rebuild process,
the volume is susceptible to data loss through damage of the remaining disk until data
redundancy is restored through a rebuild. Hose access takes precedence over the rebuild
process. If continuing to use the SAFE volume during the rebuild, the rebuild process will
take a longer time to complete.
8-2 What happens during a rebuild?
The rebuild process restores data redundancy by first utilizing space allocated for a Hot
Spare. In case Hot Space does not exist or has already been rebuilt, the SteelVine processor
rebuilds to empty space on a hard disk other than one containing vulnerable data.
Following a rebuild, it is not necessary to designate space to a Hot Spare for a subsequent
rebuild to occur.
In this example, the daemon started a rebuild of Volume#1 after a failure of Disk#3. Once
the end-user replaces Disk#3 with a new hard disk drive, the SteelVine processor will
initiate a rebuild to Drive#3.
Note: Once the daemon rebuilds to a designated Hot Spare, a designated Hot Spare will
not exist and the SteelVine processor will rebuild to empty space.
38
5 Bay Raid System User Manual
With Automatic Rebuild and Immediate Rebuild options selected, the daemon
automatically initiates an immediate rebuild. If the end-user wants the daemon to delay the
rebuild until after the first write to the SAFE volume, select the Rebuild Only If Needed
option. The latter setup allows temporary removal of a hard disk drive without requiring a
rebuild. To minimize the possibility of data loss, the rebuild process should be set up to start
immediately.
With Manual Rebuild selected, the end-user decides when to initiate rebuild following a
rebuild prompt. Unless the SteelVine Manager is actively monitored, the Automatic rebuild
should be set up to minimize the possibility of data lose.
8-3 Configure a rebuild
1. Select Specify Policy from the Edit menu of the Status window
5 Bay Raid System User Manual
39
2. Select one of the following policy options:
The Manual Rebuild radio button required a user to manually initiate a rebuild of the
volume.
The Automatic Rebuild options forces the daemon to initiate the rebuild process
automatically and minimize the possibility of data loss.
40
5 Bay Raid System User Manual
3. If the Automatic Rebuild option is selected, the end-user will have the following
additional choices:
Immediate Rebuild causes the daemon to rebuild immediately following detections of
an offline hard disk drive.
The Rebuild Only If Needed delays the rebuild for a SAFE volume with an offline hard
disk drive until the write occurs to the SAFE volume.
4. Click the Accept button to commit the selected options.
The daemon uses the specified rebuild policy to maintain redundancy. The Status window
displays a rebuild in progress.
5 Bay Raid System User Manual
41
9. Monitoring and Troubleshooting
9-1 Monitor the SteelVine Storage
Appliance
Monitor Drive Status
The color of the drivers and the labels in the Status window indicate the status of the drive.
Color Codes and Labels for Driver Status
42
5Bay Raid System User Manual
Monitor Fan Status
The SteelVine Storage Appliance uses the following colors to indicate fan status:
9-2 Review Event Log
Event logs are helpful for troubleshooting and locating a system malfunction.
1. Select Event Log from the Edit menu in the Status window
5 Bay Raid System User Manual
43
2. The Event Log screen displays a list of events in a tabular format. The Date column
displays the date and time of the event. The Box SN and Drive SN columns display the
respective serial numbers for the event. The Drive Manufacturer column displays vendor
information. The Message column gives an event description.
3. Click Refresh to update the log or click Close to close the log.
44
5Bay Raid System User Manual
PROPRIETARY NOTICE
ViPowER, Inc. makes no warranty of any kind with regard to this material, including, but not limited
to, the implied warranties of merchantability and fitness for a particular purpose. ViPowER Inc. shall
not be liable for errors contained herein or for incidental or consequential damages in connection with
the furnishing, performance, or use of this material.
This document contains proprietary information which is protected by copyright. All rights are
reserved. No part of this document may be photocopied, reproduced, or translated to another language
without the written consent of ViPowER Inc. The information contained in this document is subject to
change without notice.
Copyright 2006 by ViPowER, Inc.
12/01A
C
w w w . v i p o w e r. c o m


