1
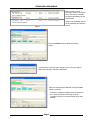
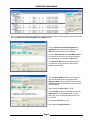
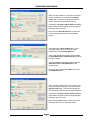
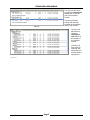
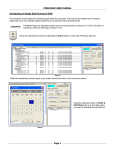
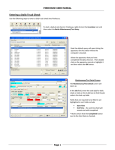
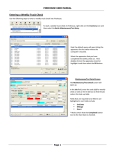
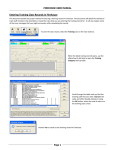
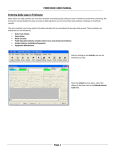
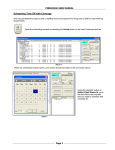
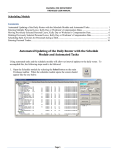
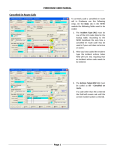
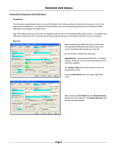
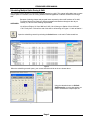
FIREHOUSE USER MANUAL
Scheduling Multiple Splits During A Shift
The schedule module allows for scheduling multiple splits during a shift. This manual will explain how to create
multiple splits for a member, such as moving between different apparatus or stations several times during a
shift.
SCENARIO:
Because of training classes and personal leave requests by other staff members of his shift,
Firefighter Papp will be floating to different apparatus and stations throughout the day on
January 10, 2013 to meet manning requirements.
He will be on Engine 101 from 0800 until 1300. He will then go to Station 2 from 1300 until
1700. Finally from 1700 until the end of his shift he will working on Engine 111 back at Station 1.
Open the scheduling console by selecting the Sched button on the main Firehouse task bar
Figure 1
Figure 2
When the scheduling console opens, your screen should be similar to the one shown above.
Using the calendar button on Shifts &
Staff Status At, go to the date where you
need to schedule the multiple splits on.
Figure 3
Page 1
FIREHOUSE USER MANUAL
Before creating a new
exchange, check in the bottom
box to see if there is already
an approved exchange for the
staff member.
If there is an exchange, double
on the exchange and open the
record.
Figure 4
Select the Delete button to delete the existing
record.
Figure 5
A confirmation screen will open, asking if you are sure you want to
delete the exchange. Select the Yes button.
Figure 6
After the record has been deleted, select the Close
button to continue.
If there are multiple exchanges listed in the bottom
box, follow the previous three steps until all
exchange records for the staff member have been
deleted.
Figure 7
Page 2
FIREHOUSE USER MANUAL
Figure 8
Once you are on the correct date, highlight the members name and double clicking with the left mouse button,
open the Shift Personnel Reassignment or Addition screen.
Once the Shift Personnel Reassignment or
Addition screen opens there are fields on the
Basic tab that will need to be completed.
Note the Start Date/Time and End Date/Time are
for a 24 hour time period. This will be changed in
the next step as you complete the Basic tab.
The Approved By field will be disabled at this
time but later in the process will open and be
updated automatically.
Figure 9
The Covering Staff field needs to be entered; in
this case the staff ID will be the same as the
Assigned Staff. When the staff ID is entered the
Assigned tab will be disabled and does not need
to be completed.
Next, change the Start Time to 13:00.
The End Date needs to be changed to match the
Start Date as the requested time off is on the
same day; in our scenario the date needs to be
01/10/2013.
Change the End Time to 17:00.
Next select the Replacement tab.
Figure 10
Page 3
FIREHOUSE USER MANUAL
Since the staff member is on-duty and only being
moved to Station 2, we can leave the Activity
Code blank. Firehouse will default the on-duty
activity code from the schedule definitions.
Complete the Position, Station, Shift and Unit to
reflect where the staff member is being assigned
during this part of his shift.
Next, select the Save & Split button to save the
current exchange and open a new exchange
screen.
Figure 11
After selecting the Save & Split button, a new
exchange screen will open. Enter the staff
members ID in the Covering Staff field.
If this is the last split that needs to be generated,
the Start Date/Time and End Date/Time will have
the correct values.
If you have additional splits to create change the
Start Date/Time and End Date/Time to the
correct values.
Once you have completed the Basic tab, select
the Replacement tab.
Figure 12
Since the staff member is still on-duty and is now
being moved back to Station 1, we can leave the
Activity Code blank. Firehouse will default the
on-duty activity code from the schedule definitions.
Complete the Position, Station, Shift and Unit to
reflect where the staff member is being assigned
during this part of his shift.
Next, select the Save button to save the current
exchange and close the exchange screen.
Figure 13
Page 4
FIREHOUSE USER MANUAL
The entry will also show
up under the Unassigned
Unit section on the top
part of the schedule
module.
The entry will list the
activity code that was
selected for the member
when it was entered.
Figure 14
The entry will
also show up
under the
Unassigned
Unit section on
the top part of
the schedule
module.
The entry will
list the activity
code that was
selected for the
member when it
was entered.
Figure 15
SCH_005.docx
Page 5