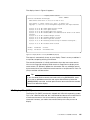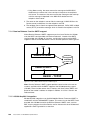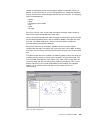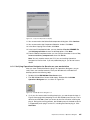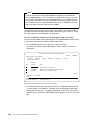
1
Lotus Domino for
AS/400 R5
Implementation
Learn about Domino R5, Lotus’ newest
generation of Internet products
Implement and administer Domino R5
on the AS/400 system
Benefit from the functions and
flexibility that Lotus Domino offers
Justine Middleton
Wilfried Blankertz
Rosana Choruzy
ibm.com/redbooks
Linda Defreyne
Dwight Egerton
Joanne Mindzora
Stephen Ryan
Juan van der Breggen
Felix Zalchman
Michelle Zolkos
International Technical Support Organization
Lotus Domino for AS/400 R5: Implementation
January 2001
SG24-5592-01
Take Note!
Before using this information and the product it supports, be sure to read the general information in Appendix E,
“Special notices” on page 501.
Second Edition (January 2001)
This edition applies to Release 5.0.1 of Lotus Domino for AS/400, 5769-LNT, for use with Version 4 Release 2,
Version 4 Release 3, and Version 4 Release 4 of OS/400 (5769-SS1).
This book was updated on January 10, 2001.
Comments may be addressed to:
IBM Corporation, International Technical Support Organization
Dept. JLU Building 107-2
3605 Highway 52N
Rochester, Minnesota 55901-7829
When you send information to IBM, you grant IBM a non-exclusive right to use or distribute the information in any
way it believes appropriate without incurring any obligation to you.
© Copyright International Business Machines Corporation 1999, 2001. All rights reserved.
Note to U.S Government Users - Documentation related to restricted rights - Use, duplication or disclosure is subject to restrictions
set forth in GSA ADP Schedule Contract with IBM Corp.
Contents
Preface . . . . . . . . . . . . . . . . . . . . . . . . . . . . . . . . . . . . . . . . . . . . . . . . . . . . . . xi
The team that wrote this redbook . . . . . . . . . . . . . . . . . . . . . . . . . . . . . . . . . . . . . . . xi
Comments welcome . . . . . . . . . . . . . . . . . . . . . . . . . . . . . . . . . . . . . . . . . . . . . . . . xiv
Chapter 1. Overview of Lotus Domino for AS/400. . . . . . . . . . . . . . . . . .
1.1 What is Lotus Domino for AS/400? . . . . . . . . . . . . . . . . . . . . . . . . . . . .
1.1.1 The Internet/intranet solution. . . . . . . . . . . . . . . . . . . . . . . . . . . . .
1.1.2 Powerful tool for sharing information . . . . . . . . . . . . . . . . . . . . . . .
1.1.3 Client support . . . . . . . . . . . . . . . . . . . . . . . . . . . . . . . . . . . . . . . .
1.2 History of Lotus Notes and Domino integration with the AS/400 system
1.2.1 Domino for AS/400 solution . . . . . . . . . . . . . . . . . . . . . . . . . . . . . .
1.2.2 Domino for AS/400 Advanced Services . . . . . . . . . . . . . . . . . . . . .
1.3 Administering and using Domino for AS/400 . . . . . . . . . . . . . . . . . . . . .
1.3.1 Domino for AS/400 users . . . . . . . . . . . . . . . . . . . . . . . . . . . . . . .
1.3.2 Database integration . . . . . . . . . . . . . . . . . . . . . . . . . . . . . . . . . . .
1.3.3 Integration of Notes mail and OS/400-based mail . . . . . . . . . . . . .
1.3.4 Backup and recovery of Lotus Notes objects . . . . . . . . . . . . . . . . .
1.3.5 Application development and add-ins . . . . . . . . . . . . . . . . . . . . . .
1.4 AS/400 system architecture . . . . . . . . . . . . . . . . . . . . . . . . . . . . . . . . .
1.4.1 AS/400 system concepts . . . . . . . . . . . . . . . . . . . . . . . . . . . . . . . .
1.5 Summary . . . . . . . . . . . . . . . . . . . . . . . . . . . . . . . . . . . . . . . . . . . . . . .
.
.
.
.
.
.
.
.
.
.
.
.
.
.
.
.
.
. .1
. .1
. .2
. .2
. .3
. .4
. .5
. .7
. .8
. .9
.10
.10
.11
.12
.12
.13
.15
Chapter 2. Installing and setting up Domino for AS/400. . . . . . . . .
2.1 Useful sources of information . . . . . . . . . . . . . . . . . . . . . . . . . . . .
2.2 Overview . . . . . . . . . . . . . . . . . . . . . . . . . . . . . . . . . . . . . . . . . . . .
2.3 Prerequisites for Domino for AS/400 . . . . . . . . . . . . . . . . . . . . . . .
2.3.1 AS/400 hardware prerequisites . . . . . . . . . . . . . . . . . . . . . . .
2.3.2 AS/400 software prerequisites. . . . . . . . . . . . . . . . . . . . . . . .
2.3.3 OS/400 program temporary fix (PTF) requirements . . . . . . . .
2.3.4 Optional software to install on the AS/400 system . . . . . . . . .
2.3.5 Supported networks and protocols . . . . . . . . . . . . . . . . . . . .
2.3.6 Supported Notes workstations. . . . . . . . . . . . . . . . . . . . . . . .
2.3.7 Additional requirements for the administrator workstation . . .
2.4 Pre-installation tasks . . . . . . . . . . . . . . . . . . . . . . . . . . . . . . . . . . .
2.4.1 Configuring TCP/IP on your AS/400 system . . . . . . . . . . . . .
2.4.2 Naming the Domino server . . . . . . . . . . . . . . . . . . . . . . . . . .
2.5 Installing the Domino for AS/400 product on your AS/400 system .
2.5.1 Using the Load and Run (LODRUN) command . . . . . . . . . . .
2.5.2 National language considerations . . . . . . . . . . . . . . . . . . . . .
2.5.3 Running Domino using a secondary language . . . . . . . . . . . .
2.5.4 Additional considerations for double-byte languages . . . . . . .
2.6 Setting up the first server in a new Domino domain . . . . . . . . . . . .
2.6.1 Set up using the Configure Domino Server command . . . . . .
2.6.2 Web-based setup . . . . . . . . . . . . . . . . . . . . . . . . . . . . . . . . .
2.7 What happens during the first server setup . . . . . . . . . . . . . . . . . .
2.8 Basic server management tasks . . . . . . . . . . . . . . . . . . . . . . . . . .
2.8.1 Working with Domino servers . . . . . . . . . . . . . . . . . . . . . . . .
2.8.2 Starting the Domino for AS/400 server . . . . . . . . . . . . . . . . .
2.8.3 Ending the Domino server . . . . . . . . . . . . . . . . . . . . . . . . . . .
2.8.4 Ending the Domino subsystem . . . . . . . . . . . . . . . . . . . . . . .
2.8.5 Identifying the AS/400 jobs for your server . . . . . . . . . . . . . .
.
.
.
.
.
.
.
.
.
.
.
.
.
.
.
.
.
.
.
.
.
.
.
.
.
.
.
.
.
.17
.17
.17
.18
.19
.19
.20
.22
.22
.22
.23
.24
.24
.28
.31
.32
.38
.41
.42
.43
.44
.58
.71
.72
.72
.74
.76
.77
.77
© Copyright IBM Corp. 1999, 2001
..
..
..
..
..
..
..
..
..
..
..
..
..
..
..
..
..
..
..
..
..
..
..
..
..
..
..
..
..
.
.
.
.
.
.
.
.
.
.
.
.
.
.
.
.
.
.
.
.
.
.
.
.
.
.
.
.
.
.
.
.
.
.
.
.
.
.
.
.
.
.
.
.
.
.
.
.
.
.
.
.
.
.
.
.
.
.
iii
2.8.6 Working with the Domino console . . . . . . . . . . . . . . . . . . . . . . . . . . 78
2.9 Setting up an administration workstation for the server . . . . . . . . . . . . . . 82
2.9.1 Setting up the administration workstation . . . . . . . . . . . . . . . . . . . . . 82
iv
Chapter 3. Adding a Domino server to an existing organization
3.1 Registering an additional Domino server . . . . . . . . . . . . . . . . . .
3.2 Handling the ID file for an additional server . . . . . . . . . . . . . . . .
3.2.1 Attaching the ID file to the Server document in the Domino
3.2.2 Storing the ID file on disk . . . . . . . . . . . . . . . . . . . . . . . . . .
3.3 Verifying the connection to the Domino server . . . . . . . . . . . . . .
3.4 Configuring an additional server in an existing Domino domain .
3.4.1 Setting up the additional server on the AS/400 system . . .
3.4.2 File copy phase of the configuration process . . . . . . . . . . .
3.4.3 AS/400 setup phase of the configuration process . . . . . . .
3.4.4 Starting the additional server . . . . . . . . . . . . . . . . . . . . . . .
. . . . . . . 87
. . . . . . . 88
. . . . . . . 92
Directory 92
. . . . . . . 93
. . . . . . . 94
. . . . . . . 95
. . . . . . . 95
. . . . . . 100
. . . . . . 101
. . . . . . 101
Chapter 4. Lotus Domino for AS/400 commands . . . . . . . . . . . . .
4.1 Commands overview . . . . . . . . . . . . . . . . . . . . . . . . . . . . . . . . .
4.2 Add Domino Application (ADDDOMAPP) . . . . . . . . . . . . . . . . . .
4.3 Add Environment Variable (ADDENVVAR) . . . . . . . . . . . . . . . .
4.4 Configure Domino Server (CFGDOMSVR). . . . . . . . . . . . . . . . .
4.5 Change Domino Server (CHGDOMSVR) . . . . . . . . . . . . . . . . . .
4.6 Display Domino Console (DSPDOMCSL) . . . . . . . . . . . . . . . . .
4.7 Display File (DSPF) . . . . . . . . . . . . . . . . . . . . . . . . . . . . . . . . . .
4.8 Display Stream File (DSPSTMF) . . . . . . . . . . . . . . . . . . . . . . . .
4.9 Edit File (EDTF). . . . . . . . . . . . . . . . . . . . . . . . . . . . . . . . . . . . .
4.9.1 EDTF in V4R2 and V4R3 . . . . . . . . . . . . . . . . . . . . . . . . . .
4.9.2 Edit File (EDTF) in V4R4 . . . . . . . . . . . . . . . . . . . . . . . . . .
4.10 End Domino Server (ENDDOMSVR) . . . . . . . . . . . . . . . . . . . .
4.11 Submit Domino Command (SBMDOMCMD) . . . . . . . . . . . . . .
4.11.1 Running Domino commands when the server is inactive .
4.12 Start Domino Server (STRDOMSVR) . . . . . . . . . . . . . . . . . . . .
4.13 Work with Domino Console (WRKDOMCSL) . . . . . . . . . . . . . .
4.14 Work with Domino Servers (WRKDOMSVR) . . . . . . . . . . . . . .
4.15 Work with Environment Variables (WRKENVVAR) . . . . . . . . . .
.
.
.
.
.
.
.
.
.
.
.
.
.
.
.
.
.
.
.
.
.
.
.
.
.
.
.
.
.
.
.
.
.
.
.
.
.
.
.
.
.
.
.
.
.
.
.
.
.
.
.
.
.
.
.
.
.
.
.
.
.
.
.
.
.
.
.
.
.
.
.
.
.
.
.
.
..
..
..
..
..
..
..
..
..
..
..
..
..
..
..
..
..
..
..
103
103
105
107
108
109
114
115
117
119
119
121
122
123
126
128
129
130
133
Chapter 5. Basic server administration . . . . . . . . . . . . . . .
5.1 Alternative ways to install Lotus Domino for AS/400 . . . .
5.1.1 Local batch installation . . . . . . . . . . . . . . . . . . . . . .
5.1.2 Remote batch installation using the remote CD . . . .
5.1.3 Remote installation without a CD . . . . . . . . . . . . . . .
5.1.4 Remote interactive installation with a remote CD . . .
5.2 Upgrading to Lotus Domino for AS/400 R5 . . . . . . . . . . .
5.2.1 Making sure you have the necessary PTFs loaded .
5.2.2 Installing the code . . . . . . . . . . . . . . . . . . . . . . . . . .
5.2.3 Starting up the first server . . . . . . . . . . . . . . . . . . . .
5.2.4 Replacing the database design . . . . . . . . . . . . . . . .
5.2.5 Migrating the SMTP/MIME MTA . . . . . . . . . . . . . . . .
5.2.6 Upgrading Operations Navigator plug-in . . . . . . . . .
5.3 Removing a Lotus Domino for AS/400 server . . . . . . . . .
5.4 Removing the Domino software from the AS/400 system .
5.5 Moving a Domino server . . . . . . . . . . . . . . . . . . . . . . . . .
5.6 Tailoring for system performance. . . . . . . . . . . . . . . . . . .
5.6.1 System tuning . . . . . . . . . . . . . . . . . . . . . . . . . . . . .
.
.
.
.
.
.
.
.
.
.
.
.
.
.
.
.
.
.
.
.
.
.
.
.
.
.
.
.
.
.
.
.
.
.
.
.
.
.
.
.
.
.
.
.
.
.
.
.
.
.
.
.
.
.
.
.
.
.
.
.
.
.
.
.
.
.
.
.
.
.
.
.
..
..
..
..
..
..
..
..
..
..
..
..
..
..
..
..
..
..
135
135
135
136
136
138
138
139
139
143
144
147
149
150
151
151
152
152
Lotus Domino for AS/400 R5: Implementation
.
.
.
.
.
.
.
.
.
.
.
.
.
.
.
.
.
.
.
.
.
.
.
.
.
.
.
.
.
.
.
.
.
.
.
.
.
.
.
.
.
.
.
.
.
.
.
.
.
.
.
.
.
.
..
..
..
..
..
..
..
..
..
..
..
..
..
..
..
..
..
..
5.6.2
5.7 Tips
5.7.1
5.7.2
5.7.3
Job priority . . . . . . . . . . . .
for problem determination .
Notes server dump tool . . .
Domino server job logs . . .
Discovering server restarts
.
.
.
.
.
.
.
.
.
.
.
.
.
.
.
.
.
.
.
.
.
.
.
.
.
.
.
.
.
.
.
.
.
.
.
.
.
.
.
.
.
.
.
.
.
.
.
.
.
.
.
.
.
.
.
.
.
.
.
.
.
.
.
.
.
.
.
.
.
.
.
.
.
.
.
.
.
.
.
.
.
.
.
.
.
.
.
.
.
.
.
.
.
.
.
.
.
.
.
.
.
.
.
.
.
.
.
.
.
.
.
.
.
.
.
.
.
.
.
.
.
.
.
.
.
.
.
.
.
.
.
.
.
.
.
.
.
.
.
.
.
.
.
.
.
.153
.154
.154
.154
.156
Chapter 6. Advanced Domino Services for the AS/400 system . . . . .
6.1 Multiple Domino servers on a single AS/400 system . . . . . . . . . . . . .
6.1.1 Options for setting up partitioned servers . . . . . . . . . . . . . . . . .
6.1.2 Starting a Domino partitioned server . . . . . . . . . . . . . . . . . . . . .
6.1.3 Connecting partitioned servers through the loopback interface .
6.2 Clustering Domino servers . . . . . . . . . . . . . . . . . . . . . . . . . . . . . . . .
6.2.1 Advantages of clustering Domino servers . . . . . . . . . . . . . . . . .
6.2.2 Components of a clustered Domino server . . . . . . . . . . . . . . . .
6.2.3 Prerequisites for setting up a clustered Domino server . . . . . . .
6.2.4 Setting up a clustered Domino server . . . . . . . . . . . . . . . . . . . .
6.2.5 Supported features of Domino server clustering . . . . . . . . . . . .
.
.
.
.
.
.
.
.
.
.
.
.
.
.
.
.
.
.
.
.
.
.
.159
.159
.159
.166
.170
.172
.173
.173
.174
.175
.178
Chapter 7. Lotus Domino for AS/400 and SMTP . . . . . . . . . . . . . .
7.1 Domino and AS/400 mail capabilities overview . . . . . . . . . . . . . .
7.1.1 AS/400 mail capabilities . . . . . . . . . . . . . . . . . . . . . . . . . . .
7.1.2 Lotus Domino as a mail server . . . . . . . . . . . . . . . . . . . . . .
7.1.3 How mail routes in Domino . . . . . . . . . . . . . . . . . . . . . . . . .
7.1.4 Domino Release 5 native SMTP support . . . . . . . . . . . . . . .
7.1.5 AS/400 AnyMail integration . . . . . . . . . . . . . . . . . . . . . . . . .
7.1.6 Combining the mail environments of Domino and OS/400 . .
7.2 TCP/IP configuration for SMTP . . . . . . . . . . . . . . . . . . . . . . . . . .
7.2.1 Verifying or completing the TCP/IP configuration for SMTP .
7.3 Native Domino Release 5 SMTP support . . . . . . . . . . . . . . . . . .
7.3.1 Domino installation and configuration . . . . . . . . . . . . . . . . .
7.3.2 Stopping the AS/400 SMTP server . . . . . . . . . . . . . . . . . . .
7.3.3 Configuring Domino server for native SMTP . . . . . . . . . . . .
7.3.4 Verifying the Domino Server documents . . . . . . . . . . . . . . .
7.3.5 Starting SMTP on the Domino server . . . . . . . . . . . . . . . . .
7.3.6 Verifying that the SMTP/MIME router is completely started .
7.4 Using Domino for AS/400 with AS/400 AnyMail integration . . . . .
7.4.1 Starting and verifying the AS/400 SMTP server . . . . . . . . . .
7.4.2 Changing the distribution attributes . . . . . . . . . . . . . . . . . . .
7.4.3 Verifying the QSNADS subsystem is started . . . . . . . . . . . .
7.4.4 Setting up a Domino for AS/400 server with AS/400 MSF . .
7.4.5 Verifying the Domino Server documents . . . . . . . . . . . . . . .
7.4.6 Restarting the AnyMail/400 Mail Server Framework . . . . . .
7.4.7 Starting the mail router on the Domino server . . . . . . . . . . .
7.4.8 Domino using MSF for multiple partitioned servers . . . . . . .
7.5 Additional information and troubleshooting . . . . . . . . . . . . . . . . .
7.5.1 Which mail environment is used . . . . . . . . . . . . . . . . . . . . .
7.5.2 Where to look if native Domino SMTP does not start . . . . . .
7.5.3 Where to look if AS/400 SMTP does not start . . . . . . . . . . .
7.5.4 Mail routing status in the administrator client. . . . . . . . . . . .
7.6 Sending mail between unlike mail applications . . . . . . . . . . . . . .
7.6.1 What is your Internet mail address? . . . . . . . . . . . . . . . . . .
7.6.2 Sending mail across the border . . . . . . . . . . . . . . . . . . . . . .
7.6.3 Notes with mixed address lists not sent to every recipient . .
.
.
.
.
.
.
.
.
.
.
.
.
.
.
.
.
.
.
.
.
.
.
.
.
.
.
.
.
.
.
.
.
.
.
.
.
.
.
.
.
.
.
.
.
.
.
.
.
.
.
.
.
.
.
.
.
.
.
.
.
.
.
.
.
.
.
.
.
.
.
.181
.183
.183
.184
.186
.188
.188
.190
.191
.191
.195
.195
.195
.197
.199
.202
.203
.205
.206
.207
.208
.208
.212
.215
.215
.217
.218
.218
.220
.221
.222
.224
.226
.230
.238
.
.
.
.
.
.
.
.
.
.
.
.
.
.
.
.
.
.
.
.
.
.
.
.
.
.
.
.
.
.
.
.
.
.
.
.
.
.
.
.
..
..
..
..
..
..
..
..
..
..
..
..
..
..
..
..
..
..
..
..
..
..
..
..
..
..
..
..
..
..
..
..
..
..
..
v
vi
Chapter 8. Graphical user interface of Operations Navigator . . . . . . .
8.1 Client Access for Windows 95/NT V3R2 . . . . . . . . . . . . . . . . . . . . . .
8.1.1 Language requirements for using Operations Navigator. . . . . . .
8.1.2 Installing AS/400 Client Access for Windows 95/NT. . . . . . . . . .
8.1.3 Installing the Lotus Domino for AS/400 plug-in. . . . . . . . . . . . . .
8.1.4 Verifying Operations Navigator for Domino on your workstation .
8.2 Client Access Express for Windows . . . . . . . . . . . . . . . . . . . . . . . . . .
8.2.1 Language requirements for using Operations Navigator. . . . . . .
8.2.2 Installing Client Access Express for Windows . . . . . . . . . . . . . .
8.2.3 Installing the Lotus Domino for AS/400 plug-in. . . . . . . . . . . . . .
8.2.4 Verifying Operations Navigator for Domino on your workstation .
8.3 Creating a new Domino for AS/400 server . . . . . . . . . . . . . . . . . . . . .
8.4 Deleting a Domino server . . . . . . . . . . . . . . . . . . . . . . . . . . . . . . . . .
8.5 Starting and stopping Domino servers . . . . . . . . . . . . . . . . . . . . . . . .
8.6 Managing servers from a separate window . . . . . . . . . . . . . . . . . . . .
8.7 Adding a Domino application . . . . . . . . . . . . . . . . . . . . . . . . . . . . . . .
8.8 Administering a Domino server . . . . . . . . . . . . . . . . . . . . . . . . . . . . .
8.8.1 Displaying the server properties. . . . . . . . . . . . . . . . . . . . . . . . .
8.8.2 Partial server properties displayed . . . . . . . . . . . . . . . . . . . . . . .
8.8.3 Launching the Domino Administrator . . . . . . . . . . . . . . . . . . . . .
8.9 Registering Domino users . . . . . . . . . . . . . . . . . . . . . . . . . . . . . . . . .
8.9.1 Registering a Domino user based on an AS/400 user profile . . .
8.9.2 Registering a new user on the AS/400 system and Domino . . . .
8.10 Considerations for previous releases . . . . . . . . . . . . . . . . . . . . . . . .
.
.
.
.
.
.
.
.
.
.
.
.
.
.
.
.
.
.
.
.
.
.
.
.
.
.
.
.
.
.
.
.
.
.
.
.
.
.
.
.
.
.
.
.
.
.
.
.
241
242
242
242
243
247
251
252
252
252
258
262
263
263
264
265
266
266
271
272
273
274
278
280
Chapter 9. Lotus Domino and the Internet . . . . . . . . . . . . .
9.1 Configuring a Domino Web server on the AS/400 system
9.2 Domino server administration using a Web browser . . . .
9.3 Clustering Domino Web servers . . . . . . . . . . . . . . . . . . .
9.3.1 ICM outside the cluster . . . . . . . . . . . . . . . . . . . . . .
9.3.2 ICM inside the cluster . . . . . . . . . . . . . . . . . . . . . . .
9.3.3 Configuring the ICM . . . . . . . . . . . . . . . . . . . . . . . . .
9.4 Additional Domino Web services . . . . . . . . . . . . . . . . . . .
9.4.1 Creating a virtual Web server. . . . . . . . . . . . . . . . . .
9.4.2 Creating a Web server alias . . . . . . . . . . . . . . . . . . .
9.4.3 Creating URL mappings. . . . . . . . . . . . . . . . . . . . . .
.
.
.
.
.
.
.
.
.
.
.
.
.
.
.
.
.
.
.
.
.
.
.
.
.
.
.
.
.
.
.
.
.
..
..
..
..
..
..
..
..
..
..
..
281
281
285
289
289
290
291
292
292
293
293
Chapter 10. Backup and recovery . . . . . . . . . . . . . . . . . . . . . . . . . .
10.1 What is the integrated file system? . . . . . . . . . . . . . . . . . . . . . . .
10.2 Backing up Domino for AS/400 objects . . . . . . . . . . . . . . . . . . . .
10.2.1 AS/400 libraries and IFS directories for Domino for AS/400 .
10.2.2 Saving the entire AS/400 system . . . . . . . . . . . . . . . . . . . . .
10.2.3 Saving Domino databases . . . . . . . . . . . . . . . . . . . . . . . . . .
10.2.4 Incremental backup . . . . . . . . . . . . . . . . . . . . . . . . . . . . . . .
10.2.5 Reducing the downtime of your servers . . . . . . . . . . . . . . . .
10.2.6 Avoiding object locks when saving Notes databases . . . . . .
10.3 Restoring Domino for AS/400 objects . . . . . . . . . . . . . . . . . . . . .
10.3.1 Restoring the entire Domino for AS/400 server . . . . . . . . . .
10.3.2 Restoring the AS/400 system distribution directory . . . . . . .
10.3.3 Restoring Domino mail. . . . . . . . . . . . . . . . . . . . . . . . . . . . .
10.3.4 Restoring Domino databases . . . . . . . . . . . . . . . . . . . . . . . .
10.3.5 Restoring changed objects to a Domino for AS/400 server. .
.
.
.
.
.
.
.
.
.
.
.
.
.
.
.
.
.
.
.
.
.
.
.
.
.
.
.
.
.
.
.
.
.
.
.
.
.
.
.
.
.
.
.
.
.
295
295
296
296
297
298
302
303
304
306
306
307
308
308
309
Lotus Domino for AS/400 R5: Implementation
.
.
.
.
.
.
.
.
.
.
.
.
.
.
.
.
.
.
.
.
.
.
.
.
.
.
.
.
.
.
.
.
.
..
..
..
..
..
..
..
..
..
..
..
.
.
.
.
.
.
.
.
.
.
.
.
.
.
.
.
.
.
.
.
.
.
.
.
.
.
Chapter 11. Directory synchronization . . . . . . . . . . . . . . . . . . . . . . . . . .
11.1 What is directory synchronization . . . . . . . . . . . . . . . . . . . . . . . . . . . .
11.1.1 Why the same information is stored in multiple directories. . . . . .
11.1.2 Concept of directory synchronization . . . . . . . . . . . . . . . . . . . . . .
11.2 Prerequisites for directory synchronization . . . . . . . . . . . . . . . . . . . . .
11.3 Configuring directory synchronization . . . . . . . . . . . . . . . . . . . . . . . . .
11.3.1 Directory synchronization configuration tips. . . . . . . . . . . . . . . . .
11.3.2 Directory synchronization concepts . . . . . . . . . . . . . . . . . . . . . . .
11.4 Directory synchronization configuration steps . . . . . . . . . . . . . . . . . . .
11.5 Creating new directory fields for the directory fields list . . . . . . . . . . . .
11.5.1 Fields in the system distribution directory and Domino Directory .
11.6 Enabling, disabling, or suspending directory synchronization . . . . . . .
11.6.1 Enabling directory synchronization . . . . . . . . . . . . . . . . . . . . . . .
11.6.2 Disabling or suspending directory synchronization . . . . . . . . . . .
11.6.3 What happens after enabling directory synchronization . . . . . . . .
11.7 Coexistence of directory synchronization, replication, and shadowing .
11.7.1 Never-ending updates . . . . . . . . . . . . . . . . . . . . . . . . . . . . . . . . .
11.8 Questions and answers . . . . . . . . . . . . . . . . . . . . . . . . . . . . . . . . . . . .
11.9 Problem determination . . . . . . . . . . . . . . . . . . . . . . . . . . . . . . . . . . . .
.313
.313
.313
.314
.317
.317
.319
.320
.324
.340
.341
.342
.342
.343
.344
.345
.345
.347
.347
Chapter 12. Domino for AS/400 Single Logon . .
12.1 Requirements . . . . . . . . . . . . . . . . . . . . . . . .
12.2 Installation . . . . . . . . . . . . . . . . . . . . . . . . . .
12.3 Using Domino for AS/400 Single Logon . . . .
12.4 Resynchronizing passwords . . . . . . . . . . . . .
12.5 Removing Domino for AS/400 Single Logon .
12.6 Considerations for Client Access Express . . .
.
.
.
.
.
.
.
.349
.349
.349
.352
.353
.354
.354
Chapter 13. Dial-up connectivity . . . . . . . . . . . . . . . . . . . . . . . . . . . . . . .
13.1 How Lotus Domino Dial-Up works . . . . . . . . . . . . . . . . . . . . . . . . . . . .
13.1.1 Serial Line Internet Protocol (SLIP) . . . . . . . . . . . . . . . . . . . . . . .
13.1.2 Point-to-Point Protocol (PPP) . . . . . . . . . . . . . . . . . . . . . . . . . . .
13.2 Prerequisites for Remote Network Services on the AS/400 . . . . . . . . .
13.3 AS/400 Remote Network Services configuration . . . . . . . . . . . . . . . . .
13.3.1 Configuring an answer connection profile (Operations Navigator)
13.3.2 Configuring a dial-up connection profile (Operations Navigator) .
13.3.3 Starting the new connection profile . . . . . . . . . . . . . . . . . . . . . . .
13.4 Prerequisites for Remote Access Service on Windows . . . . . . . . . . . .
13.5 Windows NT Dial-Up Networking . . . . . . . . . . . . . . . . . . . . . . . . . . . .
13.5.1 Adding Remote Access Service for Windows NT. . . . . . . . . . . . .
13.5.2 Configuring the Remote Access Service . . . . . . . . . . . . . . . . . . .
13.5.3 Granting users dialin access . . . . . . . . . . . . . . . . . . . . . . . . . . . .
13.5.4 Configuring a Windows NT dial-up connection . . . . . . . . . . . . . .
13.6 Windows 98/95 Dial-Up Networking . . . . . . . . . . . . . . . . . . . . . . . . . .
13.6.1 Adding Dial-Up Networking for Windows . . . . . . . . . . . . . . . . . . .
13.6.2 Adding Dial-Up Adapter support . . . . . . . . . . . . . . . . . . . . . . . . .
13.6.3 Checking the Dial-Up Adapter and configuring TCP/IP . . . . . . . .
13.6.4 Configuring a Windows 98/95 dial-up connection . . . . . . . . . . . .
13.7 Configuring Domino to use Remote Network Services . . . . . . . . . . . .
13.7.1 Prerequisites for server-to-server connections . . . . . . . . . . . . . .
13.7.2 Creating a server-to-server connection . . . . . . . . . . . . . . . . . . . .
13.7.3 Prerequisites for client-to-server connections . . . . . . . . . . . . . . .
13.7.4 Creating a Notes client-to-server connection . . . . . . . . . . . . . . . .
.357
.357
.358
.358
.359
.360
.361
.369
.377
.378
.381
.382
.383
.386
.388
.391
.391
.392
.393
.396
.398
.398
.399
.403
.403
.
.
.
.
.
.
.
.
.
.
.
.
.
.
.
.
.
.
.
.
.
..
..
..
..
..
..
..
.
.
.
.
.
.
.
.
.
.
.
.
.
.
.
.
.
.
.
.
.
.
.
.
.
.
.
.
..
..
..
..
..
..
..
.
.
.
.
.
.
.
.
.
.
.
.
.
.
.
.
.
.
.
.
.
.
.
.
.
.
.
.
..
..
..
..
..
..
..
.
.
.
.
.
.
.
vii
13.8 Remote Domino server to an existing organization . . . . . . . . . . . . . . .
13.9 Configuring a SLIP connection profile on the AS/400 system . . . . . . . .
13.9.1 SLIP with an asynchronous line description . . . . . . . . . . . . . . . . .
13.9.2 Physical line information . . . . . . . . . . . . . . . . . . . . . . . . . . . . . . .
13.9.3 Modem information . . . . . . . . . . . . . . . . . . . . . . . . . . . . . . . . . . .
13.9.4 Script source information . . . . . . . . . . . . . . . . . . . . . . . . . . . . . . .
13.9.5 Local system security information . . . . . . . . . . . . . . . . . . . . . . . .
13.9.6 Creating and changing connection scripts . . . . . . . . . . . . . . . . . .
13.9.7 SLIP with a PPP line description . . . . . . . . . . . . . . . . . . . . . . . . .
13.10 Troubleshooting . . . . . . . . . . . . . . . . . . . . . . . . . . . . . . . . . . . . . . . . .
13.11 Special considerations with the 7857-017 modem . . . . . . . . . . . . . . .
13.11.1 Creating customized modem information (Operations Navigator)
13.11.2 Creating customized modem information (5250 interface) . . . . .
406
407
407
410
411
411
412
413
413
415
418
418
419
Chapter 14. Migration from other Domino platforms . . . . . . . . . . . . . . . 423
14.1 Overview . . . . . . . . . . . . . . . . . . . . . . . . . . . . . . . . . . . . . . . . . . . . . . . 423
14.1.1 General approaches to Domino server migration . . . . . . . . . . . . . 423
14.1.2 Domino release issues. . . . . . . . . . . . . . . . . . . . . . . . . . . . . . . . . 424
14.1.3 Platform issues . . . . . . . . . . . . . . . . . . . . . . . . . . . . . . . . . . . . . . 425
14.2 Server transplantation process outline . . . . . . . . . . . . . . . . . . . . . . . . . 425
14.2.1 Identifying the Domino files to be transplanted . . . . . . . . . . . . . . . 426
14.2.2 Creating the Domino directory structure on the AS/400 system . . 428
14.2.3 Configuring the Domino for AS/400 server . . . . . . . . . . . . . . . . . . 432
14.2.4 Editing the NOTES.INI file . . . . . . . . . . . . . . . . . . . . . . . . . . . . . . 435
14.2.5 Bringing down the original Domino server . . . . . . . . . . . . . . . . . . 436
14.2.6 Copying files to the Domino for AS/400 server . . . . . . . . . . . . . . . 437
14.2.7 Changing ownership of subdirectories and files . . . . . . . . . . . . . . 439
14.2.8 Transferring the TCP/IP address to the Domino for AS/400 server 440
14.2.9 Starting the Domino for AS/400 server . . . . . . . . . . . . . . . . . . . . . 442
14.3 Server consolidation process outline . . . . . . . . . . . . . . . . . . . . . . . . . . 443
14.3.1 Identifying the Domino files to be migrated . . . . . . . . . . . . . . . . . 443
14.3.2 Configuring the Domino for AS/400 server . . . . . . . . . . . . . . . . . . 444
14.3.3 Copying files to the Domino for AS/400 server . . . . . . . . . . . . . . . 444
14.3.4 Changing ownership of subdirectories and files . . . . . . . . . . . . . . 445
14.3.5 Starting the Domino for AS/400 server . . . . . . . . . . . . . . . . . . . . . 445
14.3.6 Considering handling of databases with local encryption . . . . . . . 445
14.3.7 Managing synchronization of old and new files . . . . . . . . . . . . . . 445
14.3.8 Updating the Domino Directory to reflect mail server changes . . . 445
14.3.9 Making required changes to Notes client workstations . . . . . . . . . 446
14.4 Migrating SMTP support . . . . . . . . . . . . . . . . . . . . . . . . . . . . . . . . . . . 446
14.5 Migrating from an Integrated Netfinity Server . . . . . . . . . . . . . . . . . . . . 450
14.5.1 Add Notes User command . . . . . . . . . . . . . . . . . . . . . . . . . . . . . . 451
14.5.2 Differences in default port names. . . . . . . . . . . . . . . . . . . . . . . . . 453
14.5.3 Dial-up connectivity . . . . . . . . . . . . . . . . . . . . . . . . . . . . . . . . . . . 454
14.5.4 Directory shadowing versus directory synchronization . . . . . . . . . 454
14.5.5 Database integration . . . . . . . . . . . . . . . . . . . . . . . . . . . . . . . . . . 455
14.5.6 Backup and recovery . . . . . . . . . . . . . . . . . . . . . . . . . . . . . . . . . . 455
14.5.7 Capability to submit Domino commands from a CL program . . . . 456
14.5.8 Using FTP to copy files from an Integrated Netfinity Server . . . . . 456
14.5.9 Changing the TCP/IP address on the Integrated Netfinity Server . 461
14.6 General considerations when migrating your Domino infrastructure . . . 466
viii
Lotus Domino for AS/400 R5: Implementation
Appendix A. Copying ID files using FTP . . . . . . . . . . . . . . . . . . . . . . . . . . . 469
Appendix B. Domino Administrator . . . . . . . . . . . . . . . . . . . . . . . . . . . . . . . 473
Appendix C. Using Facsimile Support for AS/400 . . . . . . . . . . . . . . . . . . .
C.1 Setting up Facsimile Support . . . . . . . . . . . . . . . . . . . . . . . . . . . . . . . . . . . .
C.1.1 Installing and configuring Facsimile Support for AS/400 . . . . . . . . . . .
C.1.2 Using the AnyMail/400 Mail Server Framework . . . . . . . . . . . . . . . . . .
C.1.3 Setting up your system distribution directory entry . . . . . . . . . . . . . . . .
C.1.4 Defining an address for Simple Mail Transfer Protocol. . . . . . . . . . . . .
C.2 Faxing from Lotus Notes . . . . . . . . . . . . . . . . . . . . . . . . . . . . . . . . . . . . . . . .
C.3 Faxing from Client Access/400 . . . . . . . . . . . . . . . . . . . . . . . . . . . . . . . . . . .
C.3.1 Prerequisites . . . . . . . . . . . . . . . . . . . . . . . . . . . . . . . . . . . . . . . . . . . . .
C.3.2 Configuring the PC workstation to fax PC output . . . . . . . . . . . . . . . . .
C.4 Routing received faxes to Domino for AS/400 . . . . . . . . . . . . . . . . . . . . . . .
C.4.1 Routing using received tones . . . . . . . . . . . . . . . . . . . . . . . . . . . . . . . .
C.4.2 Routing using the transmitting subscriber identifier (TSI) . . . . . . . . . . .
C.5 File to TIFF Class-F for viewing in Lotus Notes . . . . . . . . . . . . . . . . . . . . . .
475
475
475
476
476
482
483
483
484
484
484
488
492
495
Appendix D. LPAR and clustering
D.1 Logical partitioning . . . . . . . . . . .
D.2 Primary partition . . . . . . . . . . . . .
D.3 Secondary partitions . . . . . . . . . .
D.4 LPAR and Domino . . . . . . . . . . .
D.5 Clustering . . . . . . . . . . . . . . . . . .
497
497
497
498
499
499
.......
.......
.......
.......
.......
.......
......
......
......
......
......
......
.......
.......
.......
.......
.......
.......
......
......
......
......
......
......
.......
.......
.......
.......
.......
.......
Appendix E. Special notices. . . . . . . . . . . . . . . . . . . . . . . . . . . . . . . . . . . . . . 501
Appendix F. Related publications . . . . . . . . . . . . . . . . . . . . . . . . . . . . . . . . .
F.1 International Technical Support Organization publications . . . . . . . . . . . . . .
F.2 Redbooks on CD-ROMs . . . . . . . . . . . . . . . . . . . . . . . . . . . . . . . . . . . . . . . .
F.3 Other publications . . . . . . . . . . . . . . . . . . . . . . . . . . . . . . . . . . . . . . . . . . . . .
F.3.1 IBM publications . . . . . . . . . . . . . . . . . . . . . . . . . . . . . . . . . . . . . . . . . .
F.3.2 Non-IBM publications . . . . . . . . . . . . . . . . . . . . . . . . . . . . . . . . . . . . . .
503
503
503
503
503
504
How to get IBM Redbooks . . . . . . . . . . . . . . . . . . . . . . . . . . . . . . . . . . . . . .505
IBM Redbooks fax order form. . . . . . . . . . . . . . . . . . . . . . . . . . . . . . . . . . . . . . . . 506
Index . . . . . . . . . . . . . . . . . . . . . . . . . . . . . . . . . . . . . . . . . . . . . . . . . . . . . . .507
IBM Redbooks review . . . . . . . . . . . . . . . . . . . . . . . . . . . . . . . . . . . . . . . . .515
ix
x
Lotus Domino for AS/400 R5: Implementation
Preface
Domino R5 is Lotus' new generation of Internet products. This redbook helps you
implement and administer this exciting new release on the AS/400 with Lotus
Domino for AS/400. This redbook is written for technical specialists and
programmers, who are IBM customers and business partners. It also serves as
an education tool for the general IBM and Lotus community. By reading this
redbook, you are sure to obtain a solid technical understanding of how to deploy
Domino for AS/400. Use this redbook to take full advantage of the function and
flexibility of Lotus Domino, together with the reliability and security of the AS/400
platform for your Domino server.
The Domino Server Family is an integrated messaging and Web application
software platform for companies that need to improve customer responsiveness
and streamline business processes. For those organizations that need to deliver
secure, interactive Web applications, and a rock solid infrastructure for
messaging and collaboration, Domino servers are the proven choice.
Domino R5 consists of:
• Notes integrated Internet client
• Domino server platform for messaging, collaboration, and Internet and intranet
applications
• Domino Designer, a Web and intranet application development tool
Note: This book does not cover application development.
This redbook is based on Lotus Domino for AS/400: Installation, Customization
and Administration , SG24-5181, which was for Domino R4.6. If you are working
with R4.6 servers, we recommend that you download SG24-5181 from the Web
at http://www.redbooks.ibm.com to complement the information in this redbook.
The team that wrote this redbook
This redbook was produced by a team of specialists from around the world
working at the International Technical Support Organization, Rochester,
Minnesota, USA.
Justine Middleton is a Senior AS/400 Specialist at the International Technical
Support Organization, Rochester Center. She writes extensively and teaches IBM
classes worldwide on Domino for AS/400 and Client Access/400. Before joining
the ITSO in 1998, Justine worked for IBM Australia as a Senior IT Specialist in
the Business Server team. Justine holds an MBA from the University of Western
Australia and is a Certified Lotus Professional Notes Principal System
Administrator.
Linda Defreyne is a Principal Lotus Certified Lotus Professional (CLP) and a
Certified Lotus Instructor who is working for SkillTeam, a Belgian AS/400 and
Lotus Business Partner, specializing in e-business solutions. She has 11 years of
experience on the AS/400 system and three years with Lotus Domino. Linda
holds a degree in educational sciences from the University of Leuven in Belgium
and has been teaching classes for IBM since 1986, starting with System/36 and
© Copyright IBM Corp. 1999, 2001
xi
System/38. She also provides customer support on the AS/400 system and Lotus
Domino.
Dwight Egerton is a Senior Consultant with Knowledge Architects, South Africa.
He has been working in the IT industry for the past six years and Lotus Notes and
Domino for the past five years. He is currently a Certified Lotus Professional
(CLP) and Certified Lotus Instructor (CLI). He focuses on providing the best
solutions to meet customers needs. Knowledge Architects is an IBM and Lotus
Business Partner and has brought together an International team of professionals
specializing in Consulting, Development, and Knowledge Management.
Stephen Ryan is an Advisory IT Specialist with IBM Australia. He has 11 years
experience on the AS/400 system and provides support to customers and
business partners in all areas of the AS/400 system, including Domino
implementation. He holds degrees in Engineering and Arts from Trinity College,
Dublin.
Juan van der Breggen is a Senior IT Specialist with IBM South Africa. He has
been with IBM for nine years and has worked on various platforms. For the past
five years he has focussed on the Lotus Notes and Domino product sets. Juan is
currently part of the e-business solutions team that helps with the architecture of
Internet and Intranet solutions. He has a Bachelor of Science degree in Computer
Science.
This redbook is based upon Lotus Domino for AS/400: Installation, Customization
and Administration, SG24-5181. The authors of the earlier book are:
Wilfried Blankertz is an Advisory International Technical Support Specialist for
the AS/400 system at the International Technical Support Organization,
Rochester Center. He writes extensively and teaches IBM classes worldwide on
all areas of AS/400 Groupware solutions and AS/400 Systems Management.
Before joining the ITSO in 1995, he worked as a systems engineer in IBM
Germany supporting customers with the AS/400 system and its predecessor
systems (IBM System /3, /32, /34, /36, and /38) for over 20 years. While he still
concentrates on AS/400 technical support, he is also a Certified Lotus
Professional System Administrator.
Rosana Choruzy is a consultant who has been working for Thebas S.A, an IBM
Business Partner and a Lotus Qualified Business Partner in Buenos Aires for
more than two years. She develops Lotus Notes applications for customers and
internal usage, provides customer support, and plans customer business
solutions with Domino technology. She is a Certified Lotus Professional (CLP) in
Application Development. Her previous experience includes installing,
configuring and administering Domino servers on different platforms, such as NT,
UNIX, Novell, and Windows.
Joanne Mindzora is a Consulting Marketing Support Representative in IBM
Software Group. Joanne is an IBM Certified I/T Specialist in the groupware
discipline and a Certified Lotus Professional - Principal, Application
Development. Her 21-year IBM career includes the development of worldwide
Domino for AS/400 technical marketing deliverable, technical sales support as a
midrange system and office specialist, and a two-year assignment to Lotus as a
host messaging migration/coexistence specialist and prototypist.
xii
Lotus Domino for AS/400 R5: Implementation
Felix Zalcmann is a AS/400 Instructor for IBM Global Learning Services Austria.
He started his career as AS/400 IT-Manager for the biggest Trade-Fair Company
in Austria in 1989. There, he was responsible for the hardware and software
structure, security concepts, and networking infrastructure. He has been working
since 1997 for IBM Global Learning Services in Austria to train customers and
IBM employees in AS/400 programs. He is a frequent speaker on Domino for
AS/400 at international technical meetings in Austria, Belgium, Germany,
Switzerland and USA.
Michelle Zolkos is a technical writer for IBM User Technologies, specializing in
Domino for AS/400. In addition to her writing responsibilities, Michelle conducts
usability tests for Domino. Her previous experience includes serving as a Notes
Administrator and using Domino to create the IBM Printing Systems Company
(PSC) Web site.
A number of people provided support and guidance throughout the production of
this book. We especially thank the following people:
Rodney Brusse
Brian Cragun
Terrence Forrest
Laurie Miller
Ted Mongeon
Norka Morales
Mike Mullenmeister
Terry O’Brien
Joseph H. Peterson
George Romano
Steve Sparrow
Jeff Tenner
Rochester Programming Laboratory
Robert Boutault
ITSO, Rochester
Paul Marchessault
IBM Rochester
Debra Landon
IBM Partners in Development Rochester
Lee Recknor
IBM Global Services
Fiona Collins
Bridget Dunford
IBM UK
Björn Nilsson
IBM Denmark
Wendy Thomson
IBM Australia
xiii
Pertti Malinen
IBM Finland
Daniel H Jaffe
Lotus Corporation
Ruth Webster
IBM Lotus Integration Center, Dallas, Texas
Thomas Schneider
IBM Lotus Integration Center, Böblingen, Germany
Comments welcome
Your comments are important to us!
We want our redbooks to be as helpful as possible. Please send us your
comments about this or other redbooks in one of the following ways:
• Fax the evaluation form found in “IBM Redbooks review” on page 515 to the
fax number shown on the form.
• Use the online evaluation form found at ibm.com/redbooks
• Send your comments in an Internet note to [email protected]
xiv
Lotus Domino for AS/400 R5: Implementation
Chapter 1. Overview of Lotus Domino for AS/400
This chapter describes Domino for AS/400, the history of Lotus Domino, and
Domino integration with the AS/400 system.
Note
Throughout this redbook, we refer to sections in the Domino for AS/400 Help
database (as400hlp.nsf). These correspond to chapters in Installing and
Managing Domino for AS/400, the hardcopy publication (Lotus part number
CT6IPIE), which is delivered to customers. The Lotus Web site at
http://notes.net/doc has the PDF and NSF versions of this book.
1.1 What is Lotus Domino for AS/400?
Lotus Domino for AS/400 is the implementation of a Lotus Domino server on the
AS/400 platform. Lotus Domino, on any of the supported platforms, is a
combination of several different server types. The following list shows some of
these server types:
•
•
•
•
•
Mail server for Notes, POP3 or IMAP4 clients
Database server
Database replication server
HTTP server
Other servers (for example, LDAP)
In supporting these servers, Domino supports the following protocols:
• For messaging, Post Office Protocol 3 (POP3), Internet Message Access
Protocol (IMAP), Lightweight Directory Access Protocol (LDAP), Simple Mail
Transfer Protocol (SMTP), and Multipurpose Internet Mail Extensions (MIME).
• For Web use, Hyper Text Transfer Protocol (HTTP), Internet Inter-ORB
Protocol (IIOP), Hyper Text Markup Language (HTML), and Network News
Transfer Protocol (NNTP).
• Domino Internet security includes support for the Secure Sockets Layer (SSL)
protocol and X.509 certificates. You can use your existing Internet
infrastructure with Domino and be assured that your system works with other
systems based on open protocols.
Domino is available on a number of platforms, including IBM OS/2, IBM
System/390, Microsoft Windows NT, and several types of UNIX operating
systems. The AS/400 supports Domino for AS/400 Release 4.6 and Domino for
AS/400 Release 5.
Domino can actually work on any of the supported platforms as a server for
clients with many different protocols. Domino contains the original Notes server,
which has been extended by several Internet standards for client/server
relationships. One (probably the most important) of these standards is HTTP.
Other Domino server functions include mail servers of various kinds (such as
Notes Mail, POP3, and IMAP4), Calendaring & Scheduling, Database Server,
Replication, Workflow, and so on.
© Copyright IBM Corp. 1999, 2001
1
The excerpt in the following paragraph from Bob Tipton's (Whittman-Hart, Inc.)
1997 white paper, Domino for AS/400: Uniting Two Hall of Fame Technologies,
attempts to give a concise explanation of Domino.
“ Domino defies easy definition because Domino is so many things all at once. It is
electronic mail, it is workflow-based computing, it is a productive, visual
client/server programming tool, it is database and document management, it is
highly secure, it is platform neutral, and it is the standard by which all other
(groupware) solutions. . . are measured.”
Refer to the Web site at http://www.as400.ibm.com/conslt/tipton.htm to read the
complete white paper.
1.1.1 The Internet/intranet solution
By extending the power of Notes to anyone with a Web browser, Domino is the
premier interactive Web application server for creating and hosting Internet and
intranet sites. Domino bridges the open networking environment of Internet
standards and protocols with powerful application development facilities. By
using Domino, any Web client can participate in applications securely.
There is no better technology for Web publishing, Web browsing, and
Internet/intranet applications than Domino. Only Domino offers replication,
authentication, messaging, and security services, which are fully integrated with
Internet protocols, in a single package. Non-Notes mail clients can also access
Domino servers for mail. Because Domino is cross-platform, it is the software
solution for extending business applications to the Internet.
1.1.2 Powerful tool for sharing information
Domino is the central access point for finding and sharing information you need,
whether it is located in e-mail, relational databases, or host-based systems; in
your favorite desktop application; or on the World Wide Web. The Notes database
provides a secure, reliable, and scalable means to store, manage, and distribute
business information.
The following three powerful technologies come together to make Domino the
strongest client/server application development and deployment platform in the
industry:
• Powerful, flexible compound-document database
• Rich application development environment
• Sophisticated messaging system
A powerful, flexible compound-document database
The Lotus Notes document database is a robust object storage facility through
which users can access, track, store, and organize a wealth of information.
Documents can contain any number of objects and data types, including text, rich
text, numerical text, structured data, images, graphics, sound, and motion picture
images. A Notes database also contains forms for entering information into the
documents, views for accessing the information, and rich application
development tools to automate processes related to the application. Integration
between Notes databases and traditional databases dramatically enhances the
value of an organization's information assets.
2
Lotus Domino for AS/400 R5: Implementation
A rich application development environment
With Lotus Domino, both end-users and professional developers can create
effective cross-platform client/server applications. Lotus provides ready-to-run
application templates for the most common groupware applications including
team management, customer service, meeting tracking, status reporting,
reservation scheduling, and more. Customers can use these templates right out
of the box, or customize them to meet their specific needs. Or they can build
applications from scratch using forms, fields, and views, which are the basic
building blocks of a Notes database.
Domino makes developing applications that automate business processes easy.
For an organization with heterogeneous platforms and operating systems, use
the seamless cross-platform design of application databases created with the
Lotus Notes Designer for Domino client. With the Notes Designer for Domino
client, you can start creating applications by using a graphical user interface
(GUI) with no knowledge of programming or scripting languages.
On the other hand, experienced application developers can create complex
workflow or other GUI-based client/server applications with much less effort than
with traditional computer application development techniques. Templates make
setting up and configuring applications fast and easy. Applications on Domino can
perform these functions:
• Route information automatically.
• Alert users that an item is overdue or needs attention.
• Exchange information with enterprise software, such as relational databases
and transaction processing systems.
• Push information to user desktops.
A sophisticated messaging system
Every Notes user can send and receive e-mail, and every Notes application is
automatically mail-enabled. Users can exchange mail across a variety of mail
systems, including cc:Mail and Novell’s MHS, and use standards, such as SMTP
and X.400. In addition, application developers can build messaging and routing
applications to automate the flow of work and information throughout their
organization. The Lotus Domino Mail server can be used as the backbone of a
messaging system.
1.1.3 Client support
Domino supports a wide variety of clients:
• Notes client, the most feature-rich client available
• IMAP clients, such as Lotus Mail and Qualcomm Eudora
• NNTP clients, such as Internet news readers
• Internet browsers, such as Microsoft Internet Explorer and Netscape
Navigator
• LDAP clients
Overview of Lotus Domino for AS/400
3
1.2 History of Lotus Notes and Domino integration with the AS/400 system
In 1996, IBM began implementing Lotus Notes 4.0 on the Integrated Netfinity
Server for the AS/400 system.
The ÀS/400 Integrated Netfinity Server is a special type of input/output processor
(IOP) which is available as an option for an AS/400 system. The AS/400
Integrated Netfinity Server is a PC processor card that fits within the AS/400
system unit. At the same time, it can serve as a normal IOP, providing a high
performance local area network (LAN) adapter to AS/400 applications. Its
processor can be used to run programs originally written for personal computers.
Earlier models were known as the IBM Integrated PC Server for AS/400 (IPCS).
Prior to that, the original models were called the File Server Input/Output
Processor (FSIOP).
OS/400 integration of Lotus Notes provided many opportunities for the AS/400
user. Although the Notes software running on the AS/400 system is the same as
that running on an OS/2 server, the integration with the AS/400 system provided
the following additional advantages:
• Maintenance of Notes users through an AS/400 interface
• Database integration
• Directory synchronization, one way from OS/400 System Distribution Directory
(SDD) to Domino Public Address Book (PAB)
• Integration of Notes mail with AS/400 mail
• Backup and recovery of Lotus Notes databases
The original FSIOP had an Intel 80486 DX2 processor.
In May of 1997, the FSIOP was renamed to Integrated PC Server (IPCS). The
installation process was rewritten, the number of users increased greatly, the
processor on this SPD model became a faster Pentium 166, and the Lotus Notes
Server was renamed Domino with the release of Domino 4.5. The installation
process was enhanced to support the AS/400 CD-ROM drive to eliminate the
administrative PC for the installation process, and a serial port was included that
could be used by a modem. There was also a Pentium 133 processor PCI card
version.
More IBMers and Business Partners became aware of the value of this
collaborative Web environment being managed by their AS/400 system. Over
4000 were sold in the first part of 1997. Numerous success stories can be found
in the case studies section of our AS/400 home page. Customers began using
Domino on the IPCS for many applications. They began to realize the integration
points, especially in the directory, were a reason to make the AS/400 system their
universal mail server, in addition to their hub for client server groupware
applications.
Some limitations of this solution were:
• DataPropagator was required for data movement.
• No real-time access from Domino to DB2/400 data.
4
Lotus Domino for AS/400 R5: Implementation
• Only one-way directory shadowing.
• The Domino server running on a separate processor cannot take advantage of
all the AS/400 system management functions.
In early 1998, the IPCS was enhanced to provide a 200 MHz Pentium Pro II
processor in both PCI and SPD models. In February 1999, the processor was
further upgraded to a 333 MHz Pentium Pro II processor and the current range is
called the IBM Integrated Netfinity Server.
Please notice that this implementation of an OS/2 Domino server using an
additional integrated processor card is not supported with OS/400 V4R4. It is still
possible to put Domino on a Windows NT-based Integrated Netfinity Server but
Enhanced Domino integration, including database integration and directory
synchronization, is not available.
1.2.1 Domino for AS/400 solution
After having done the first steps by implementing Domino on the AS/400
Integrated PC Server, it became more and more clear that the AS/400
architecture would be able to provide much more benefit to groupware users if
Domino were implemented directly as an AS/400 application, rather than as an
OS/2 application on the IPCS.
Therefore, the UNIX version of the Domino product was ported to AS/400 to run
directly on an AS/400 system. This new product named Domino for AS/400
became available for customers in February 1998 with many advantages over the
previous coprocessor based implementation.
Domino for AS/400 is a powerful solution for building and deploying e-business
applications. As a server, AS/400 provides reliability and scalability, which are
essential in the dynamic and often unpredictable e-business environment.
Domino for AS/400 has the power and tools to enhance existing business
applications and reach new levels of collaboration and coordination.
Scalability
Within a single architecture, the AS/400 system family spans a vast performance
spectrum. In a fourth quarter 1998 measurement, using the NotesBench
benchmark, the largest AS/400 system sustained a mail workload of 27,030
concurrent active mail users with 82 millisecond average response time. AS/400
scales downward as well. A small AS/400 can be implemented at a price
comparable to a single processor Intel server.
NotesBench is a tool developed by the NotesBench Consortium, an independent,
non-profit organization dedicated to providing Domino and Notes performance
information to customers. The NotesBench Consortium Web site at
http://www.notesbench.org has more information on NotesBench.
Note
You cannot necessarily relate the number of NotesBench users to the users
that can be supported in a real-life environment. The NotesBench numbers
should only be used to compare different server platforms.
Overview of Lotus Domino for AS/400
5
Reliability and availability
Domino for AS/400 takes advantage of the reliability and availability features of
AS/400, such as RAID-5, mirrored disk units, and integrated backup capability.
Each Lotus Domino server runs as an OS/400 application in its own subsystem.
The unique AS/400 architecture makes it safe to run the Domino server and other
mission-critical business applications on the same machine.
Integration
Domino for AS/400 includes integration between Domino and DB2/400
databases. Domino for AS/400 maximizes its integrated access to OS/400,
allowing direct, real-time access to DB2/400. Data can be accessed through
several methods, providing tight integration between Domino and DB2/400. For
example, a feature of the Lotus Notes client known as DB2 Import Library allows
an SQL query to be run and the results to be automatically imported into a Notes
rich text field.
Domino for AS/400 provides Notes applications with direct access to DB2/400
using @DB-functions or LotusScript:Data Object (LS:DO) to move and combine
data. When these functions are executed on the Domino server, an ODBC driver
or middleware communications layer is not needed, for example, when DB2/400
data is accessed from a Web browser or when running an agent.
In addition to the above data integration methods provided by Domino for AS/400,
a separate product, NotesPump 2.5a, was also ported to the AS/400 system to
allow replication with the DB2/400 relational database, scheduled, high-volume
data transfer, as well as real-time access to relational data.
NotesPump has now been separated into two products. The real-time access part
becomes a standard part of the Domino server software (from Release 4.6.3
onwards) and is named Domino Enterprise Connection Services (DECS). DECS
is a forms-based technology that provides the capability to integrate live data
from the AS/400 system into Domino applications. Using DECS, you can build
live links from Domino pages and forms to data in the DB2/400 relational
database on AS/400 system. The DB2/400 database can be on either the local or
a remote AS/400 system. The remainder of Notes Pump stays as a separate
product, but is renamed Lotus Enterprise Integrator (LEI). You can read more
about database integration in Lotus Domino for AS/400: Integration with
Enterprise Applications, SG24-5345.
Domino for AS/400 also includes a directory synchronization function which
allows you to propagate changes in the Domino Directory (formerly called the
Public Address Book (PAB)) and the AS/400 system distribution directory (SDD)
in both directions. Details of this can be found in Chapter 11, “Directory
synchronization” on page 313.
Domino R5
Domino Release 5 provides many server enhancements. These include X.509
certificates, support for LDAPv3, a compressed enterprise directory (Directory
Catalog), transaction logging, and online in-place data compaction. At R5.0.1, the
AS/400 supports databases up to 64 GB in size when running V4R4 or higher of
OS/400.
Domino for AS/400 mail integration has changed with Domino for AS/400
Release 5. In prior releases, when interacting with other mail systems on the
6
Lotus Domino for AS/400 R5: Implementation
AS/400 system (including OfficeVision for AS/400, JustMail/400, POP3, and
Internet e-mail) through the AS/400 AnyMail framework, Domino used a Mail
Transport Agent (MTA) to translate Notes Mail to and from Simple Mail Transport
Protocol (SMTP) when transferring to and from AnyMail. With R5, Domino
supports native SMTP. In addition, no MTA is required when interfacing with
AnyMail/400. For more details, see Chapter 7, “Lotus Domino for AS/400 and
SMTP” on page 181.
Proven security
Integrated, flexible security is a strength of both Domino and the AS/400 system.
The AS/400 system has been enhanced with Firewall for AS/400, an integrated
firewall that runs on the AS/400 Integrated Netfinity Server. This can be used in
conjunction with Domino for AS/400 to provide a secure mail environment.
1.2.2 Domino for AS/400 Advanced Services
The Domino server on the AS/400 system provides the same functions as a
Domino server on other platforms, including functions which are only available on
some platforms. One example is partitioned servers, which comes as a part of
Advanced Services.
The Advanced Services (provided as option 7 on the installation CD) enhance the
Domino for AS/400 server with the following capabilities:
• Partitioned servers
• Clustered servers
• Billing
The following sections briefly describe these functions.
Before July 1998, Lotus Domino Advanced Services required a separate license.
Now it is part of the Lotus Domino Enterprise Server and the Domino Advanced
Enterprise Server for AS/400 P40/P50 licenses. Even if your AS/400 system has
four processors or less, you need to purchase one of these licenses to be able to
use Advanced Services. The Domino Mail Server or Domino Application Server
licenses, are appropriate for one to four processor systems, when Advanced
Services are not being used.
Partitioned servers
Partitioned servers allow multiple Domino servers to run on a single computer.
This feature is a part of the Lotus Domino Enterprise Server and Domino
Advanced Enterprise Server for AS/400 P40/P50 licenses and is available only
for use on AS/400, NT, and UNIX.
Note: Domino R5 supports an unlimited number of partitioned servers. The
practical limit to the number of servers is determined by your system resources.
Partitioning a single computer into separate servers provides the following
benefits:
• Full Domino security for users of partitioned servers. Each server supports
fully independent Domino security as if it were a standalone server.
• Reduced number of computers to own and administer to support independent
groups of users.
• Ability to tailor performance tuning characteristics on each server.
Overview of Lotus Domino for AS/400
7
More information on partitioning and the AS/400 system can be found in 6.1,
“Multiple Domino servers on a single AS/400 system” on page 159.
Clustered servers
A server cluster is a group of Domino servers in the same domain connected by a
local area network. Clusters provide high availability of data and services by
allowing the services of a failing or over-committed server to be taken over by a
different server within the cluster. To protect against software failures with the
Domino product or to bypass planned downtime (for example, while saving data
to tape), you may also use partitioned servers as part of a cluster.
Server cluster on a single AS/400 system
The high availability of AS/400 systems makes it possible to implement more
logical servers on the same hardware and even combine the concepts of
partitioned servers and server clusters on the same hardware .
Domino clustering on the AS/400 is described further in 6.2, “Clustering Domino
servers” on page 172.
Billing
The billing feature enables a Domino server to track specific Domino activities.
The billing server task collects the billing information provided by the server and
records the data for billing purposes.
Domino servers can track specific activities for billing. Each type of activity is
designated by a billing class. You select which activities you want the server to
track by adding classes to the Billing Class setting in the NOTES.INI file. A server
with billing enabled is referred to as a billing server.
Customers or users access billing information through a Notes Application
Programming Interface (API) program or a third-party program. An API is a set of
subroutines and data structures that allows you to write programs that access
databases.
You must have a Domino Enterprise Server or Domino Advanced Enterprise
Server for AS/400 P40/P50 licenses to use the billing feature, even if you have an
AS/400 system with four processors or less.
The AS/400 system uses the terms partitioning and clustering, as well. See
Appendix D, “LPAR and clustering” on page 497, for a brief overview of logical
partitioning and clustering.
1.3 Administering and using Domino for AS/400
Managing the Domino server includes many different tasks. Depending on the
task, you can use the AS/400 user interface, Operations Navigator, Domino
Administrator client, Web administration or even a text editor. Some tasks may be
managed in more than one way.
These are the three main types of management tasks to perform:
• Managing the server while it is running is mainly done from the host operating
system of the Domino server and the Domino console. Examples of these
tasks are: starting the Domino server, stopping the Domino server, setting
variables, running server tasks.
8
Lotus Domino for AS/400 R5: Implementation
More information can be found in 2.8, “Basic server management tasks” on
page 72, and Chapter 4, “Lotus Domino for AS/400 commands” on page 103.
• Configuration of the server is mainly done from the Domino Administrator
client. For example, you change server settings in the Server document by
using the Domino Administrator client. However, editing the NOTES.INI file,
can be done from an AS/400 command line interface using the Edit File
(EDTF) command, through the Work with Domino Servers (WRKDOMSVR)
command, which also calls the Edit File (EDTF) command, or with a PC-based
ASCII editor.
• User and database management is mainly done from the Domino
Administrator client. For example, you use the Domino Administrator client to
create users, replicate databases, change database security, and add a server
connection. You can also use Operations Navigator to create an AS/400 user
profile and register the user for Domino at the same time. Using Operations
Navigator to manage Domino users is discussed in more detail in 8.9,
“Registering Domino users” on page 273.
1.3.1 Domino for AS/400 users
A Domino server on an AS/400 system can have these types of users:
• Domino-only users
Connect to the Domino server from a Notes client or a browser. They do not
use any AS/400 functions except the Domino for AS/400 server. These users
do not need an AS/400 user profile.
• Domino and AS/400 users
Connect to the server from a Notes client or a browser. They also access your
AS/400 system in others ways, such as with 5250 workstation emulation or
Client Access. These users need both an AS/400 user profile and a Domino
registration.
• Domino users who need DB2/400 access
May never appear to run an AS/400 application. However, they may use a
Notes application that accesses DB2/400 data. Whether they need an AS/400
user profile depends on how you design your Notes application.
When you set up a new Domino user on a server, the server application creates
the following items:
• A Person document in the server Domino Directory.
• An ID file for the user. The ID file contains the certificate that the Notes client
uses to authenticate with the server. The user’s workstation must have a copy
of this ID file for the user to connect to the server successfully.
The following two options are available for setting up Domino for AS/400 users:
• Use the Domino Administrator client to register a new user. This method is a
standard Domino administration task and does not create an AS/400 user
profile for the Domino user. However, the directory synchronization function
can be used to copy the user entries from the Domino Directory to the AS/400
system distribution directory.
• From an administrator workstation connected to the AS/400 system, you can
use Operations Navigator to create an AS/400 user profile and register the
user for Domino at the same time. Use this method to also register an existing
Overview of Lotus Domino for AS/400
9
AS/400 user as a Domino user. Further details can be found in 8.9.2,
“Registering a new user on the AS/400 system and Domino” on page 278, and
8.9, “Registering Domino users” on page 273.
To create an AS/400 user profile, your Domino administrator’s AS/400 user profile
must have *SECADM special authority. To give a user *SECADM special
authority, change the authority field in the user profile. You can use either the
Change User Profile (CHGUSRPRF) command or Operations Navigator to
change a user profile.
Depending upon your environment, you may want to maintain synchronization of
information about users held in the AS/400 system distribution directory and the
Domino Directory. For details on directory synchronization, see the Domino for
AS/400 Help database (as400hlp.nsf), and Chapter 11, “Directory
synchronization” on page 313 .
1.3.2 Database integration
As previously mentioned, integration between Domino and DB2/400 databases is
an important feature of Domino for AS/400. The following methods are available
for Domino applications to access (and potentially update) DB2/400 databases:
• LotusScript applications use LS:DO (LotusScript data object) as an interface
to DB2/400 data.
• Agents written using the Domino formula language can use @DB functions to
interact with a relational database, including DB2/400.
• Domino Enterprise Connection Services (DECS), a standard component of
Domino Release 4.6.3 or later, provides the capability to integrate live data
from the AS/400 system into Domino applications. Using DECS, you can build
live links from Domino pages and forms to data in the DB2/400 relational
database on local or remote AS/400 systems.
• Lotus Enterprise Integrator (LEI) and the earlier product, NotesPump, add-on
Domino products that you can order separately, provide easy-to-use methods
for synchronizing information in Domino databases with information in
DB2/400 databases.
All these methods for accessing DB2/400 from Domino establish a connection
from Domino to AS/400. The connection specifies both the user profile whose
authority the system uses to access DB2/400 database files and a password for
that user profile.
For details on database integration, refer to Lotus Domino for AS/400: Integration
with Enterprise Applications, SG24-5345.
1.3.3 Integration of Notes mail and OS/400-based mail
With an integrated approach to managing many different types of applications,
OS/400 also allows you to integrate multiple types of mail applications. The
AnyMail/400 Mail Server Framework (MSF) included with OS/400 provides
seamless connection to the Internet world from the AS/400 Systems Network
Architecture (SNA) distribution services environment without external mail
gateways. The underlying e-mail support for OfficeVision/400 users, POP3 users,
SMTP, and other mail interfaces is integrated directly into OS/400. AnyMail/400
10
Lotus Domino for AS/400 R5: Implementation
serves as an integration point for all mail and messaging services on the AS/400
system, including the system distribution directory.
In addition, AnyMail provides middleware that allows programmable extensions of
the AS/400 system e-mail support by supporting application programs that snap
into specific target points in the framework. This allows mail integration with other
AS/400 program products and allows vendors and customers to build custom
functions into the AS/400 system e-mail support to address unique requirements.
One advantage the AnyMail framework offers Domino users is easy participation
in an existing AS/400 mail environment. This may include users of
OfficeVision/400 and POP3 clients (users of the AS/400 system native POP3
server and SMTP capabilities). Domino can interface directly with the
AnyMail/400 mail server framework and take advantage of the integrated OS/400
TCP/IP support.
With Domino R5, the administrator has the choice to use native Domino SMTP
support for Internet mail, rather than the AnyMail/400.
1.3.4 Backup and recovery of Lotus Notes objects
A Domino server often contains important business information that may not exist
elsewhere in your organization. For example, users may rely on e-mail for
important communications that are not documented anywhere else. Similarly, an
online customer service application may contain records that do not exist in
printed form.
To protect the data from disasters (such as a site loss or hardware loss) and from
human error, such as accidentally deleting a critical database, develop a good
strategy for regularly backing up the information on your Domino server. Make a
plan to back up the following objects:
• Objects that change infrequently, such as programs for the Domino product
The “Backing Up Domino programs and product files” sub-section of
"Managing Backup and Recovery" in the Domino for AS/400 Help database
(as400hlp.nsf), describes options for backing up the relatively static
(unchanging) parts of your Domino server.
• Objects that change regularly, such as Domino databases
The “Backing up all Domino databases” sub-section of "Managing Backup and
Recovery" in the Domino for AS/400 Help database (as400hlp.nsf), describes
the options for backing up the dynamic (changing) parts of your Domino
server.
Domino for AS/400 takes advantage of the AS/400 single-level store architecture.
Domino databases and programs are spread across all the AS/400 disk units,
along with other AS/400 objects. The OS/400 operating system automatically
manages the allocation of disk space so that you do not have to decide on which
disk to place each single database. To back up information on the AS/400
system, back up logically (by library or directory), rather than physically (by disk
unit). To plan a backup strategy, you need to understand the logical location of
your Domino for AS/400 databases and programs. For more information, see the
Domino for AS/400 Help database (as400hlp.nsf) and Chapter 10, “Backup and
recovery” on page 295.
Overview of Lotus Domino for AS/400
11
Note: For details about planning a backup strategy for your AS/400 system, using
the Save menu and SAVxxx and RSTxxx commands, see OS/400 Backup and
Recovery, SC41-5304.
1.3.5 Application development and add-ins
Regardless of your platform, Lotus Notes/Domino application development tools
allow access to relational data using ODBC. Many existing applications use
LotusScript:Data Object (LS:DO) or include @DB function statements with an
ODBC parameter specified.
What is different about the AS/400 system is what OS/400 does with the
database request after it leaves Domino. When the application is running on the
Domino for AS/400 server, OS/400 intercepts the ODBC request and processes it
by making direct calls to DB2/400. No ODBC driver or middleware
communications layer is necessary. This provides the benefits of a shorter path
length for optimum performance. It also eliminates the cost and work associated
with installing, configuring, and managing an ODBC driver (unless you have
client-based Domino applications or others that use ODBC functions directly).
1.4 AS/400 system architecture
The AS/400 system is designed and built as a total system. This means that
facilities, such as security, a relational database, and networking capabilities are
fully integrated into the operating system and the hardware. The user
communicates with all of these functions through a single control language (CL),
or by using the system menus and prompts.
Some important system concepts are shown in the following list:
• Layered machine architecture
This architecture, together with the high-level machine interface, insulates
user applications from hardware characteristics. It enables them to move to
new hardware technology at any time without changing their application
programs.
• Object-based design
Everything that can be stored or retrieved on the system is known as an
object. Objects exist to make user interfaces and applications independent of
the internal structure of the machine.
• Single-level storage
Main storage and disk storage appear contiguous. An object is saved or
restored on the system through a device-independent addressing mechanism.
This means that extra main storage or disk storage can be added to the
system and used without affecting the application programs. A user or a
programmer is not concerned as to where a program or a file is located. If they
want to use it, they simply name it.
• Hierarchy of microprocessors
In addition to the main system processor, the AS/400 system has a large
number of microprocessors. Every microprocessor is called an input/output
processor (IOP). This means that requests for data to be written to or read
from any I/O device can be delegated to a specialized processor while the
main system processor executes other applications.
12
Lotus Domino for AS/400 R5: Implementation
• OS/400
This is the operating system for the AS/400 system, which is a single entity
that fully integrates all of the software components needed for most
commercial computing environments. The following components are included:
– Security
– Relational database
– Network capabilities
AS/400 System Concepts, GC41-9802, introduces the basic concepts of AS/400
architecture. For more information, see the iSeries Handbook, GA19-5486. It
introduces the AS/400 system architecture and provides an overview to all
hardware and software capabilities.
For a more detailed description, see Inside the AS/400, SR28-5910. In this book,
the AS/400 system’s chief architect provides an in-depth look at the design,
architecture, and history of the system. Included are detailed looks at the AS/400
system advanced application architecture. Other concepts discussed in this book
are shown in the following list:
•
•
•
•
•
•
•
Technology-independent machine interface
Objects and object management
Integrated database, security and authorization
Single-level store
Process management
I/O system
Client/server computing
1.4.1 AS/400 system concepts
This section provides a brief overview of AS/400 system concepts. It includes an
explanation of control language (CL) commands, the AS/400 integrated file
system, and security.
Control language commands
Control language (CL) is used by system operators to perform functions, such as
monitoring the system, performing backups, or manipulating objects.
CL is much more than just a set of operator commands. CL is an interface
between the system user and the AS/400 system. This includes all menus, high
level languages, program product, and system utilities that use CL to perform
various system tasks. These tasks include creating files, starting spooling files,
changing operational priorities, and initiating work.
Designed for ease-of-use, the consistency and structure of AS/400 CL command
names makes them easy to learn. CL command names consist of verb and
subject abbreviations.
For commonly used Domino related CL commands, refer to Chapter 4, “Lotus
Domino for AS/400 commands” on page 103.
Table 1 on page 14 lists common CL verb and subject abbreviations. After you
become familiar with these abbreviations, you can perform almost any function on
the AS/400 system. In most cases, subject abbreviations are three letters. An
Overview of Lotus Domino for AS/400
13
exception to this rule is F for file. For more information, see OS/400 CL
Programming, SC41-5721.
Table 1. Common CL verb and subject abbreviations
Verb
Description
Subject
Description
ADD
Add
CSL
Console
CHG
Change
DOM
Domino
CFG
Configure
DTAARA
Data Area
CPY
Copy
F
File
CRT
Create
JOB
Job
DLT
Delete
JOBD
Job Description
DSP
Display
JOBQ
Job Queue
EDT
Edit
LIB
Library
END
End
MSG
Message
RMV
Remove
MSGQ
Message Queue
RNM
Rename
OBJ
Object
RST
Restore
OBJD
Object Description
SAV
Save
SBS
Subsystem
STR
Start
SBSD
Subsystem
Description
WRK
Work with
SPLF
Spooled File
STS
Status
SVR
Server
TAP
Tape
USR
User
USRPRF
User Profile
Integrated file system
The AS/400 system uses an object-based architecture. There are many types of
objects and each object has certain unique characteristics. Some examples of
objects include: files, programs, message queues, device descriptions, and user
profiles. OS/400 treats each object type uniquely, making the control language
(CL) commands simple and easy to use.
Typically, objects are accessed through a file system. Under the integrated file
system, there are multiple ways to store and manage objects. The integrated file
system allows the use of multiple logical file systems on a single AS/400 system.
Each logical file system has its own structure and rules, and a common set of
user interfaces and application programming interfaces. The AS/400 logical file
systems of most interest for Domino users are the root file system and the library
file system.
14
Lotus Domino for AS/400 R5: Implementation
Containing a hierarchical directory tree structure, the root file system allows for
the storage of stream files. These files potentially contain long strings of data. PC
files are an example of stream files. The Domino server data directory on the
AS/400 system is a subdirectory in the root file system. For example,
/DOMINO/DATA could be a subdirectory in the root file system. Domino
databases are stored in the root file system in the same format as on other
Domino platforms. Domino for AS/400 controls the access to each database
stored in the root file system. Access to these databases is limited to authorized
client workstations.
The AS/400 library file system is a directory of object names, types, and storage
addresses that point to the object. DB2/400 tables (physical and logical files) and
AS/400 programs are the primary objects supported by the AS/400 library file
system. Domino for AS/400 provides many ways of accessing DB2/400 data. It
also provides many ways for AS/400 programs to access Domino databases.
Both Domino for AS/400 and AS/400 programs are managed by the integrated file
system. For more information on DB/400 integration, see the Lotus Domino for
AS/400 Help (as400hlp.nsf) database and Lotus Domino for AS/400: Integration
with Enterprise Applications, SG24-5345. For more information on the integrated
file system, see Integrated File System Introduction, SC41-5711 (currently
available in softcopy only).
Security
AS/400 security features protect the integrated file system. Security features,
such as AS/400 user profiles and group profiles, control access to the system.
Special authorization is given to access specific resources such as libraries,
programs, and files. AS/400 security concepts are similar to Domino security
concepts. These security concepts complement each other. The AS/400 security
system protects Domino databases from any access outside of Domino. Domino
security controls access within Domino for AS/400.
AS/400 basic authority levels include *READ, *CHANGE, *ALL, *EXCLUDE, and
*USE. There are additional special levels of authority for object management and
more advanced administrative tasks. If you plan to use a Domino application to
access DB2/400 data, you must control access at the AS/400 level and the
Domino for AS/400 level. More information about AS/400 security is found in
AS/400 Security - Basic , SC41-5301 and OS/400 Security - Reference,
SC41-5302.
1.5 Summary
There is powerful integration with Domino for AS/400. This integration
encompasses centralized administration and management, universal mail
framework, airtight security, direct access to DB2/400 data, and integration with
online transaction programs. The architecture of Domino for AS/400 allows for
simplicity through integration of groupware, workflow, collaboration, Internet,
enterprise applications, data warehousing and more, all on the same system. The
AS/400 system is one of the most reliable in the industry and can fit the budget
and needs of both small and mid-sized businesses. Domino for AS/400 can scale
high enough to support over 27 030 NotesBench mail users on a single machine,
and scale wide enough to accommodate a disperse geographic network. Domino
for AS/400 is easy to use and administer.
Overview of Lotus Domino for AS/400
15
For a good overall look at how the AS/400 and Domino complement each other,
see Lotus Domino for AS/400: Bringing the Best Together for Business, by Jelan
Heidelberg (Editor).
16
Lotus Domino for AS/400 R5: Implementation
Chapter 2. Installing and setting up Domino for AS/400
This chapter describes how to install a Domino server on an AS/400 system and
set it up using two possible methods. You can use a control language (CL)
command from an AS/400 command line or you can use the Web-based setup
method through a Web browser. The Web-based setup method can be initiated
either directly from a browser or indirectly from Operations Navigator. It also
describes setting up an administration workstation for the server.
2.1 Useful sources of information
In addition to the publications shipped with both Domino and the AS/400 system,
you may also find the following information sources useful for all sections of this
redbook:
• The Domino for AS/400 Help (as400hlp.nsf) database contains all
AS/400-specific information. It is also delivered with the software as the
printed book, Installing and Managing Domino for AS/400.
• The Domino for AS/400 Release Notes (readas4.nsf) database contains
last-minute information specific to the AS/400 platform. A printed version
comes with the Domino for AS/400 CD-ROM. The Web site at
http://notes.net/doc may have an updated version.
• The Domino 5 Administration Help (help\help5_admin.nsf) database contains
detailed Domino 5 System Administration information.
The Domino 5 Administration Help database is also available in hardcopy as
the R5 Domino Administration Doc Pack. It can be purchased through the
Lotus Store at:
http://www.lotus.com/store
• The AS/400 Domino Web page at:
http://www.as400.ibm.com/notes
• Lotus Web page on Domino for AS/400 at:
http://www.lotus.com/dominoas400
• Lotus Domino and Notes User Assistance Web site at:
http://notes.net/doc
2.2 Overview
As with the implementation of Domino servers on other platforms, the process of
setting up a Domino for AS/400 server consists of the following three main
phases:
1. Installing the Domino software
This basically copies the software from the distribution medium (CD-ROM) to
the AS/400 system disk storage.
2. Setting up the Domino server
Setting up one or more servers creates environments on your system where
the servers run. Some basic configuration is done at this time; for example,
naming the server and specifying the data directory to be used. While the
Lotus Notes and Domino documentation refer to this task in many places as
© Copyright IBM Corp. 1999, 2001
17
setup, the command to do this on an AS/400 platform is called Configure
Domino Server (CFGDOMSVR) command.
3. Configuring the Domino server
Configuring the server is a task which can be done after the setup or even
after the server has been in use for some time. It involves changing
parameters in the NOTES.INI file, the Domino Directory and other
configuration databases. Most of these configuration tasks are beyond the
scope of this book. Refer to general Lotus Domino documentation and
education material.
This chapter describes the installation and setup phases in detail. Additionally, it
cover pre-installation tasks (some of which may already be done if the AS/400
system is already in production) and some basic server management tasks that
can be performed after the server has been set up. A section also covers
installation of the administration client on a workstation.
For the installation of the Domino software on AS/400 system, you must use the
Load and Run (LODRUN) CL command.
Note
Control Language (CL) is the language of OS/400. CL consists of a set of
commands for performing system functions. You enter CL commands from a
command line on any system display. The command line usually appears at the
bottom of the display and has an arrow to prompt you. A series of CL
commands can also be compiled to create a CL program.
This OS/400 CL command calls a program on the Lotus CD-ROM that prompts
the user to select the options and components to be installed. After the user has
selected which options to install, this command performs a Restore Licensed
Program (RSTLICPGM) command, which is invisible to the user, and performs
functions that include copying the code from the CD-ROM onto the server disk
storage, decompressing it, and creating a storage infrastructure (subdirectories,
libraries, and other objects).
For the second phase of the Domino server setup, you have two options:
• Use the AS/400 interface (often called the green screen method), running the
Configure Domino Server (CFGDOMSVR) command.
• Use the Web-based setup method to configure the server. This can be initiated
directly from the browser or indirectly from Operations Navigator.
Even if you decide to install and set up using the AS/400 user interface, you must
install a Notes client for some administration tasks. This Notes client can be any
Notes version. However, to fully support all administration functions, we
recommend that you use a client with the same version as the server. When
installing the Notes client, make sure you include the Domino Administrator.
2.3 Prerequisites for Domino for AS/400
Before you install Domino for AS/400, you must install the hardware and software
necessary to support the Domino server on the AS/400 system.
18
Lotus Domino for AS/400 R5: Implementation
The following sections describe the prerequisites for the Domino server running
on an AS/400 system.
2.3.1 AS/400 hardware prerequisites
The following hardware is required:
• An AS/400 RISC model (Domino for AS/400 is not supported on CISC
hardware).
• At least 64 MB base memory. A base memory of 128 MB is recommended for
a mail server and 256 MB is recommended for an application server.
• Memory of 0.5 MB to 1 MB for each active mail user is a good estimate to
provide sufficient memory for the workload typically created by each user.
• Disk space of 490 MB for Domino executables and data (templates and help
files).
• Disk space of 50 MB for each registered and active mail user. This is a very
rough estimate. The actual amount of disk space needed depends largely on
the Domino applications and the data stored in the Domino databases.
Note
The memory and disk space requirements are based on results from a test
environment. Use these values as general guidelines for minimum memory
and disk space. The requirements for your environment may be different.
See the Web site at http://www.as400.ibm.com/notes for more information
about sizing an AS/400 system for Domino.
2.3.2 AS/400 software prerequisites
The following software is required:
• Operating System/400 (5769-SS1) Version 4 Release 2 or later (see “OS/400
program temporary fix (PTF) requirements” on page 20, for PTF levels).
Note
PTF stands for program temporary fix, a program package allowing
corrections to be applied to applications and operating system functions
installed on the AS/400 system. A cumulative PTF package (also called
“CUME tape”) is a collection of important PTFs for OS/400 and other IBM
licensed programs being delivered to customers on request or on a periodic
basis.
The Web page http://www.as400.ibm.com/notes also contains the latest
information on necessary PTFs for OS/400 or other AS/400 licensed
programs. Click Support in the navigation frame on the left side of the page
to read about QMUs, QMRs and PTFs.
• TCP/IP Connectivity Utilities for AS/400 (5769-TC1).
• Domino for AS/400 Release 4.6 or later or Domino for AS/400 Release 5 or
later. However, this redbook is based on using Domino R5.
Installing and setting up Domino for AS/400
19
Note
The software displays as software resource 5769-LNT when the Display
Software Resource (DSPSFWRSC) comand is used. On a V4R4 or higher
system, it also shows as a licensed program when you use the LICPGM
menu to display the installed licensed programs.
• The latest Quarterly Maintenance Update (QMU).
Note
You can get QMUs from the Web site at http://www.as400.ibm.com/notes free
of charge.
The QMU for Domino for AS/400 is basically an AS/400 save file containing
PTFs to be loaded for the 5769-LNT product. Please follow the latest
instructions on the Web page for additional information.
Note
Future releases of Domino, called Quarterly Maintenance Releases
(QMRs), must be purchased, unless the customer buys Software
Subscription (maintenance).
2.3.3 OS/400 program temporary fix (PTF) requirements
In all cases, if you do not have the cumulative package listed below installed,
order the latest version of the cumulative package and not the one listed. In all
cases, go to the Web site at http://www.as400.ibm.com/notes and select Support
from the left hand side. Select PTFs for your release to see additional PTFs that
you may require.
2.3.3.1 OS/400 V4R2
For OS/400 V4R2, the following PTFs are required:
• Domino for AS/400 requires the cumulative PTF package C9068420 and the
following individual PTFs:
– 5769SS1 SF45296 — EDTF, DSPSTMF, SQLUTIL, and RCLSPACE tools,
which provides the Edit File (EDTF) command
Note
After you apply this PTF, make sure that you read the cover letter for this
PTF and follow the special instructions that are provided with it. The
special instructions show how to activate the EDTF support.
– 5769SS1 SF52098 — OSP-CHGDOMSVR DOES NOT SHOW THE
PROPER TIMEZONE VALUES
Corrects the time zone values provided by the Change Domino Server
(CHGDOMSVR) command.
20
Lotus Domino for AS/400 R5: Implementation
The cumulative PTF package includes support for DECS.
• If you plan to move data between Domino and DB2 for AS/400 (DB2/400), we
recommend that you order DB2/400 group PTF SF99102. This group PTF,
which is provided on a CD, contains PTFs related to DB2/400, SQL, and
journaling.
Order group PTF SF99102 through AS/400 electronic customer support. This
group PTF is updated once a quarter.
• For Java, order group PTF SF99065. This group PTF, which is provided on a
CD, contains all Java-related PTFs for licensed internal code, OS/400, and
Java.
Order group PTF SF99065 through electronic customer support. This group
PTF is updated once a month.
2.3.3.2 OS/400 V4R3
For OS/400 V4R3, the following PTFs are required:
• Domino for AS/400 requires the cumulative PTF package C9054430. The
cumulative PTF package includes support for the EDTF command and support
for DECS.
Note
After applying this cumulative PTF package, you must perform additional
actions to enable the support for the EDTF command (if you do not have
this support already). Download the cover letter for the individual PTF
5769SS1 SF49052 (EDTF, DSPSTMF, SQLUTIL and RCLSPACE tools) and
follow the special instructions provided.
• If you plan to move data between Domino and DB2/400, we recommend that
you order DB2/400 group PTF SF99103. This group PTF, which is provided on
a CD, contains PTFs related to DB2/400, SQL, and journaling.
Order group PTF SF99103 through AS/400 electronic customer support. This
group PTF is updated once a quarter.
• For Java, order group PTF SF99066. This group PTF, which is provided on a
CD, contains all Java-related PTFs for licensed internal code, OS/400, and
Java.
Order group PTF SF99066 through electronic customer support. This group
PTF is updated once a month.
2.3.3.3 OS/400 V4R4
For OS/400 V4R4, the following PTFs are required:
• Domino for AS/400 requires the cumulative PTF package C9117440.
• If you plan to move data between DB2/400 and Domino, we recommend that
you order the DB2/400 group PTF SF99104.
Order SF99104 using Electronic Customer Support. This group PTF, which is
provided on a CD, contains PTFs related to DB2/400, SQL, and journaling.
• If you are using Java, a group PTF is available that contains V4R4
fixes for the AS/400 Developer Kit for Java. Order SF99067 using
Installing and setting up Domino for AS/400
21
Electronic Customer Support. You are shipped a CD containing Java-related
PTFs.
2.3.4 Optional software to install on the AS/400 system
Depending on your needs and how you want to use and administer the Domino
for AS/400 server, you may also want to install additional software on your
AS/400 system.
AS/400 support for Operations Navigator is provided by AS/400 Client Access.
Operations Navigator requires the following AS/400 options.
OS/400 Host Servers (5769SS1 option 12) and either of the following versions of
Client Access:
• IBM AS/400 Client Access for Windows 95/NT, 5763XD1, V3R1M3 or later
with the Cumulative Service Pack
• IBM AS/400 Client Access Express for Windows, 5769XE1
Note
Those parts of AS/400 Client Access mentioned here are all free of charge.
If you plan to use other Client Access functions such as 5250 emulation,
which is not free, you also must order AS/400 Client Access Family for
Windows, 5769-XW1.
To develop applications that use Notes C APIs, you must have one of these
compilers:
• To compile on the AS/400: AS/400 ILE C Compiler, 5769CX2
• To compile on a workstation: Visual Age C++ for OS/400, 5769CX4
To run Java Domino agents including the Lotus provided ISpy utility, you need to
install the following AS/400 options:
• OS/400 Qshell Interpreter option, 5769SS1 option 30
• AS/400 Developer Kit for Java, 5769JV1
If running OS/400 V4R4, you must install the 5769JV1 base and at least one
of the Java Developer Kit options.
2.3.5 Supported networks and protocols
The Domino server for AS/400 uses the TCP/IP network protocol to connect to
Notes clients or other Notes or Domino servers.
2.3.6 Supported Notes workstations
The Domino for AS/400 server can connect to Lotus Notes Release 5 (R5),
Domino Designer R5, and Domino Administrator R5 clients that run on the
following operating systems:
• Microsoft Windows 95, Microsoft Windows 98, or Microsoft Windows NT
Version 4.0
• Macintosh PowerPC
22
Lotus Domino for AS/400 R5: Implementation
The Domino for AS/400 server can connect to Lotus Notes Release 4.6 clients
using TCP/IP and running on the following operating systems:
• AIX 4.1.5 or 4.2.1
• HP-UX 10.20
• Sun Solaris Intel Edition 2.5.1, or Sun SPARC Solaris 2.5.1
• Microsoft Windows 95, Microsoft Windows 98, or Microsoft Windows NT
Version 4.0
Earlier versions of Notes Release 4 clients can also connect to the Domino
server. These earlier versions support additional operating systems, in particular
OS/2 and Microsoft Windows 3.1. However, some administration functions
require the Notes 4.6 client or later.
2.3.7 Additional requirements for the administrator workstation
To manage a Domino server on AS/400 from a Notes client, you must have a
workstation connected to the AS/400 system. The software requirements for that
workstation depend on which administrator functions you use to manage the
server.
2.3.7.1 Notes for administrator functions
If you plan to use only the Lotus Domino administrator functions to manage the
Domino server, you must have the following software on the workstation:
• An operating system supported by the Lotus Notes R4 or Lotus Domino
Administrator R5 client
• TCP/IP installed and configured
• Lotus Notes R4.1 client or later, including all administration functions
We recommend that you use an R5 Domino Administrator client to administer
a Domino R5 server.
If you plan to use the Web administration functions, you must have a Web
browser on the workstation.
2.3.7.2 AS/400 Operations Navigator
If you plan to use AS/400 Operations Navigator to manage the Domino server,
you must have the following software on the workstation:
• A Microsoft Windows 95, Microsoft Windows 98, or Microsoft Windows NT
Version 4 operating system
• IBM AS/400 Client Access for Windows 95/NT or IBM AS/400 Client Access
Express for Windows
• TCP/IP configured
• One of these Notes clients:
– Notes R4.5 with full administration functions
– Notes R4.6 with Notes Designer
– Domino Administrator R5
2.3.7.3 AS/400 Directory Synchronization
If you plan to use the AS/400 directory synchronization function to help manage
Notes users, you must have one of the following on the workstation:
Installing and setting up Domino for AS/400
23
• A Microsoft Windows 95, Windows 98, or Windows NT operating system with
the following components:
– TCP/IP installed and configured
– Lotus Notes 4.5 client with all administration functions, Notes 4.6 client with
Notes Designer, or Domino Administrator R5 client
• An OS/2 operating system with the following components:
– TCP/IP installed and configured
– Lotus Notes 4.5.3 client with all administration functions
Note
If the workstation has a VGA display, use more than 16 colors.
2.4 Pre-installation tasks
Before installing the Domino server on your AS/400 system, you must perform
these tasks:
1. Configure TCP/IP on the AS/400 system.
2. Decide on a name for the Domino server.
Optional pre-installation tasks
A Web browser that supports Java must be installed on a client PC if you plan to
use the Web-based setup.
If the Web-based setup is to be initiated from Operations Navigator, the client PC
must be a Windows 95, Windows 98, or Windows NT 4.0 client configured with
Client Access.
2.4.1 Configuring TCP/IP on your AS/400 system
To allow Notes clients or Web browsers to connect to Domino for AS/400, the
OS/400 TCP/IP support must be configured and started. TCP/IP is a service of
the operating system that Domino is using. This section is not meant to replace
AS/400 TCP/IP documentation, but it is intended to provide a minimum list of
steps that must be performed to activate TCP/IP on your AS/400 system.
Before you start configuring TCP/IP, a line description must exist. A line
description is an OS/400 object of the type *LIND, which describes the
characteristics of a physical interface to a communications network. For TCP/IP,
you can use Token Ring, X.25, Ethernet, DDI, frame relay, or wireless networks.
The following steps describe how you configure a TCP/IP interface.
1. Sign on to the AS/400 with a user profile that has at least all object (*ALLOBJ),
security administrator (*SECADM) and input/output configuration
(*IOSYSCFG) special authorities.
2. You can use the Configure TCP/IP (CFGTCP) command to show a menu
which allows you to perform all configuration tasks related to TCP/IP. On any
OS/400 command line (indicated by the ===> symbol), type CFGTCP and press
Enter.
The Configure TCP/IP menu appears, as shown in Figure 1.
24
Lotus Domino for AS/400 R5: Implementation
CFGTCP
Configure TCP/IP
System:
AS01
Select one of the following:
1. Work with TCP/IP interfaces
2. Work with TCP/IP routes
3. Change TCP/IP attributes
4. Work with TCP/IP port restrictions
5. Work with TCP/IP remote system information
10. Work with TCP/IP host table entries
11. Merge TCP/IP host table
12. Change TCP/IP domain information
20. Configure TCP/IP applications
21. Configure related tables
22. Configure point-to-point TCP/IP
Selection or command
===> _____________________________________________________________________
__________________________________________________________________________
F3=Exit
F4=Prompt
F9=Retrieve
F12=Cancel
Figure 1. Configure TCP/IP (CFGTCP) menu
3. Select option 1 (Work with TCP/IP interfaces) to add a TCP/IP interface to
your TCP/IP configuration, which associates one or more Internet addresses
with an existing line description representing a physical network interface.
Press Enter.
The Work with TCP/IP Interfaces display appears, as shown in Figure 2.
Work with TCP/IP Interfaces
System:
Type options, press Enter.
1=Add 2=Change 4=Remove
Internet
Subnet
Opt Address
Mask
1_ 10.1.2.3_______
__ 127.0.0.1
255.0.0.0
F3=Exit
F12=Cancel
F5=Refresh
F17=Top
5=Display
9=Start
AS01
10=End
Line
Line
Description Type
*LOOPBACK
F6=Print list
F18=Bottom
*NONE
Bottom
F11=Display interface status
Figure 2. Work with TCP/IP interfaces
Installing and setting up Domino for AS/400
25
Note
It is possible that TCP/IP has already been set up on your AS/400 system.
Look for an Internet address that does not have a line description of
*LOOPBACK. If you do not see an Internet address other than the address
associated with the *LOOPBACK description, you must configure TCP/IP.
Otherwise, TCP/IP is probably already configured. For more information,
see Getting Your AS/400 Working for You, SC41-5161.
4. To add a TCP/IP interface, type 1 (Add) in the Opt column and the Internet
address to be used in the Internet Address field, as shown in Figure 2 on page
25, and press Enter. The Add TCP/IP Interface (ADDTCPIFC) display
appears, as shown in Figure 3.
Add TCP/IP Interface (ADDTCPIFC)
Type choices, press Enter.
Internet address . . . . . . . . > '10.1.2.3'_______
Line description . . . . . . . . TRNLINE___
Name, *LOOPBACK, *VIRTUALIP
Subnet mask . . . . . . . . . . 255.255.255.0____
Associated local interface . . . *NONE____________
Type of service . . . . . . . . *NORMAL___
*MINDELAY, *MAXTHRPUT...
Maximum transmission unit . . . *LIND______ 576-16388, *LIND
Autostart . . . . . . . . . . . *YES
*YES, *NO
PVC logical channel identifier
___
001-FFF
+ for more values ___
X.25 idle circuit timeout . . . 60____
1-600
X.25 maximum virtual circuits . 64____
0-64
X.25 DDN interface . . . . . . . *NO_
*YES, *NO
TRLAN bit sequencing . . . . . . *MSB
*MSB, *LSB
F3=Exit F4=Prompt
F24=More keys
F5=Refresh
F12=Cancel
Bottom
F13=How to use this display
Figure 3. Add TCP/IP interface (ADDTCPIFC)
5. Enter the name of the line description and the subnet mask for your new
interface, as shown in Figure 3. Contact your network administrator if you
need more information about the values for your TCP/IP configuration.
6. Press Enter to add the new interface and return the Work with TCP/IP
Interfaces display (Figure 2 on page 25).
Note
If you do not see F11=Display interface status at the bottom of the Work
with TCP/IP Interfaces display, you know that the TCP/IP support on your
AS/400 system has not been started. Continue with step 7 on page 27.
If you do see F11=Display interface status at the bottom of the Work with
TCP/IP Interfaces display, you know that the TCP/IP support on your
AS/400 system has been started. Go to step 9 on page 27 to verify that the
interface is working correctly.
26
Lotus Domino for AS/400 R5: Implementation
7. Press Enter to return to the Configure TCP/IP menu (Figure 1 on page 25).
8. Start the TCP/IP support on the AS/400 system using the Start TCP/IP
(STRTCP) command. Type STRTCP on the command line and press F4.
Start TCP/IP (STRTCP)
Type choices, press Enter.
Additional Parameters
Start application servers . . .
Start TCP/IP interfaces . . . .
*YES
*YES
F3=Exit F4=Prompt
F24=More keys
F12=Cancel
F5=Refresh
*YES, *NO
*YES, *NO
Bottom
F13=How to use this display
Figure 4. Start TCP/IP (STRTCP)
You see the display, as shown in Figure 4. Press Enter to start the OS/400
TCP/IP support. You see the Configure TCP/IP menu again.
Note
Because you are selecting the defaults for both additional parameters, you
can type STRTCP and press Enter. We include the full prompting option for
completeness.
9. Type 1 on the command line at the bottom of the menu. Press Enter to return
to the Work with TCP/IP Interfaces display, as shown in Figure 2 on page 25.
10.To start the new TCP/IP interface, type 9 next to the TCP/IP address and press
Enter.
11. Press F11 (Display interface status) to see if the new interface is active.
12.Press Enter to return to the Configure TCP/IP menu.
13.To verify that your TCP/IP connection is active, you can use the Verify TCP/IP
Connection (VFYTCPCNN) command, also known as PING. The easiest way
to see the results of the PING command is to use the OS/400 Command Entry
screen. To do so, type CALL QCMD on the command line and press Enter.
14.Press F10 (Include detailed messages).
15.Type PING and press F4 (Prompt).
16. Enter the Internet address you defined in step 4 on page 26 and press Enter.
The connection verification statistics should appear, as shown in Figure 5 on
page 28.
Installing and setting up Domino for AS/400
27
Command Entry
AS01
Request level: 4
Previous commands and messages:
> PING RMTSYS('10.1.2.3')
Verifying connection to host system 10.1.2.3.
PING request 1 from 10.1.2.3 took 11 ms. 256 bytes. TTL 64.
PING request 2 from 10.1.2.3 took 8 ms. 256 bytes. TTL 64.
PING request 3 from 10.1.2.3 took 6 ms. 256 bytes. TTL 64.
PING request 4 from 10.1.2.3 took 6 ms. 256 bytes. TTL 64.
PING request 5 from 10.1.2.3 took 7 ms. 256 bytes. TTL 64.
Round-trip (in milliseconds) min/avg/max = 6/7/11
Connection verification statistics: 5 of 5 successful (100 %).
Bottom
Type command, press Enter.
===> __________________________________________________________________________
F3=Exit F4=Prompt F9=Retrieve F10=Include detailed messages
F11=Display full
F12=Cancel
F13=Information Assistant F24=More keys
Figure 5. Result of using the PING utility to verify TCP/IP connection
Note: Verifying the connection by using the (numerical) IP address is normally
not sufficient to ensure that the Notes clients or other Domino servers are able to
connect to your Domino for AS/400 server. The Notes clients also assume that
the name of the Domino server to connect to is known as a TCP/IP host name.
Therefore, we talk about some naming considerations in the following section.
Note
By creating a connection document in the local address book of the client, you
can also assign an IP address directly to the name of a Domino server.
However, this is not a very flexible solution.
2.4.2 Naming the Domino server
The close relationship between the TCP/IP host names and Domino server
names makes it very important to think about the Domino server name. A Domino
server may have a long name, even with embedded spaces. For example, Acme
Domino Server One would be a valid name for a Domino server. This type of
naming is possible in Notes environments. However, Acme Domino Server One is
not a valid TCP/IP host name.
Notice that a first Domino server on an AS/400 cannot have a space in its name.
For more information about first servers, see 2.6, “Setting up the first server in a
new Domino domain” on page 43. In fact, we do not recommend that you use any
server names with spaces. Additional configuration is required to allow client
connection and you may have problems managing the server easily.
By default, when a Notes client (or another Domino server) tries to connect to a
Domino server through TCP/IP protocol, it uses the common name, which is the
first part of the hierarchical name, as the TCP/IP host name. Such a naming
convention can use connection documents to translate between the
Notes/Domino name and the TCP/IP host name or IP address.
28
Lotus Domino for AS/400 R5: Implementation
Note
We always assume that hierarchical names are used for Domino servers and
Notes users. For more information on hierarchical names, see the Domino 5
Administration Help (help\help5_admin.nsf) database.
A simple solution is to use a short name with no spaces in it, such as AcmeDS1.
The TCP/IP host name and the Domino server name can then be the same.
2.4.2.1 Same names for the Domino server and AS/400 system
The easiest way to name a Domino for AS/400 server is to use the existing host
name of the AS/400 system. If you have an existing TCP/IP network, the AS/400
TCP/IP host name is probably already defined in the Domain Name System
(DNS) server or HOSTS files of the clients (see 2.4.2.3, “Domain Name System
(DNS)” on page 30). This makes configuration much easier. Use the Configure
TCP/IP (CFGTCP) menu, option 12 (or the Change TCP/IP Domain
(CHGTCPDMN) command) to find out or define the host name of your AS/400.
Note
The TCP/IP host name of the AS/400 system may be identical to the AS/400
system name (and this is recommended for a single server system). However,
these are two different parameters and are totally independent.
2.4.2.2 Different names for the Domino server and AS/400 system
Even though it may be the most obvious approach, it is not always possible to
use the existing AS/400 name as the Domino server name. For example, if you
plan to configure more than one logical server (a partitioned server) on the same
AS/400 system, each server must have its own unique name.
Another example is when you plan to use the Lotus Calendar Connector for
OfficeVision (LCCOV) to exchange free time information between Notes
calendars and OfficeVision/400 calendars. In such a case, LCCOV needs to
uniquely identify the calendar on the Domino server and the one under
OfficeVision by their respective names, which is not possible if both names are
the same.
Because all Domino for AS/400 servers, as AS/400 applications, use the AS/400
TCP/IP interfaces, the AS/400 system will be able to be known in the network by
more than one host name. This allows Domino to use a different host name from
other AS/400 applications. Two concepts supported by the OS/400 TCP/IP
implementation enable this. These concepts are multi-homing and multi-hosting .
These concepts are described here:
• A multi-homed host has multiple IP addresses, which we think of as logical
interfaces. These logical interfaces can be associated with one or more
physical interfaces. These physical interfaces may be connected to the same
or different networks. This allows you to specify either a single interface or
multiple interfaces for a line description and use IP aliasing.
Multi-homing allows more than one (up to 128 per line, but not more than 512
per AS/400 system) Internet address to be defined on a single network
Installing and setting up Domino for AS/400
29
adapter (represented by an AS/400 line description). If you decide that each
Domino server will use its own unique TCP/IP address, then perform step 4 on
page 26 more than once, each time entering a different Internet address for
the same line description.
• Multi-hosting (name aliasing) allows you to assign up to four host names
(aliases) to the same IP address within the OS/400 host tables, or even more
on DNS name servers. If you decide that more than one Domino for AS/400
server will share a TCP/IP address, distinguished by name and port number,
then just add aliases to the existing host table entries, either in the OS/400
table, a DNS name server database, or the Notes client host tables.
If you do not have a DNS name server, make sure that all clients and the OS/400
host table contain entries to translate the server (non-qualified) host name to a
numerical Internet address. For example, the host name AcmeDS1 must be
translated using a host table or DNS to 10.1.2.3.
Attention
If the host name used for a Domino server is only added to the client host table,
but not to the OS/400 host table, most of the server functions may work
perfectly. However, you may run into several problems later, for example:
• OS/400 SMTP support does not recognize that host name as a valid local
SMTP domain name.
• You are not able to configure NotesPump.
2.4.2.3 Domain Name System (DNS)
The Domain Name System (DNS) is an application that enables a TCP/IP host (in
our case, either a Domino server or a Notes client) to determine the IP address
associated with a given host name.
Note
There is no relationship between the Notes/Domino domain and the TCP/IP
domain mentioned in this paragraph.
The DNS is similar to a telephone book. The user looks up the name of the
person or organization to be called and cross references the name to a telephone
number. In the case of a DNS, it is the IP address or information on how to find
the IP address that is returned. It is a hierarchical client/server-based distributed
database. Name servers are programs which contain information about some
segment of the network in a database and make it available to the clients.
2.4.2.4 Hosts file configuration
If you do not have a DNS for your TCP/IP network (or you do not want to use it),
use the TCP/IP host table entries on your AS/400 and the client workstations to
associate the host name with the Internet address.
On Windows 95/98 clients, the host table is implemented with an ASCII file called
HOSTS (usually in the WINDOWS directory). Figure 6 shows the HOSTS file
being edited with the DOS Edit command. If you do not find a file called HOSTS
30
Lotus Domino for AS/400 R5: Implementation
on your PC, look for a file called HOSTS.SAM. Rename it to HOSTS (no
extension) and edit it to contain the names of your Domino servers, along with the
appropriate IP addresses. On a Windows NT workstation, you find the HOSTS file
in another directory, such as WINNT\SYSTEM32\DRIVERS\ETC.
File Edit Search View Options Help
+----------------------------- C:\WINDOWS\hosts -----------------------¦# This is a sample HOSTS file used by Microsoft TCP/IP for Chicago
¦#
¦# This file contains the mappings of IP addresses to host names. Each
¦# entry should be kept on an individual line. The IP address should
¦# be placed in the first column followed by the corresponding host name.
¦# The IP address and the host name should be separated by at least one
¦# space.
¦#
¦# Additionally, comments (such as these) may be inserted on individual
¦# lines or following the machine name denoted by a '#' symbol.
¦#
¦# For example:
¦#
¦#
102.54.94.97
rhino.acme.com
# source server
¦#
38.25.63.10
x.acme.com
# x client host
¦
¦127.0.0.1
localhost
¦10.1.2.3
acmeds1
Figure 6. Example of a HOSTS file on a Windows 95 system
To create or modify the host table on your AS/400 system, use the Configure
TCP/IP (CFGTCP) menu option 10. Figure 7 shows the host table on an AS/400
system.
Work with TCP/IP Host Table Entries
System:
Type options, press Enter.
1=Add 2=Change 4=Remove
5=Display
AS01
7=Rename
Internet
Host
Opt Address
Name
_ _______________
2 10.1.2.3
SYSTEMA
ACMEDS1
_ 127.0.0.1
LOOPBACK
LOCALHOST
Bottom
F3=Exit
F5=Refresh
F6=Print list
F12=Cancel
F17=Position to
Figure 7. Example of host table entries on an AS/400 system
2.5 Installing the Domino for AS/400 product on your AS/400 system
This section guides you through the installation process using the LODRUN
command. It also covers some country-specific issues that should be considered.
Installing and setting up Domino for AS/400
31
2.5.1 Using the Load and Run (LODRUN) command
The Load and Run (LODRUN) command is used to start the installation program
for Domino for AS/400 directly from the Lotus CD-ROM. To load the software onto
your AS/400 system, perform the following steps:
1. Sign on to the AS/400 with a user profile that has at least the *ALLOBJ and
*SECADM special authorities .
For LODRUN, the special authorities *ALLOBJ (access to all AS/400 objects)
and *SECADM (security administration) are sufficient. However, later for
setting up the server, you must have *JOBCTL (job control) and *IOSYSCFG
(device and communications configuration) special authorities as well.
You assign special authorities to an AS/400 user profile when you create it
using the Create User Profile (CRTUSRPRF) command or when you change it
using the Change User Profile (CHGUSRPRF) command. The AS/400
security officer has the required authorities. If you are not the security officer,
use the Display User Profile (DSPUSRPRF) command to determine if your
user profile has the necessary authorities:
Type DSPUSRPRF user-id, where the user-id is your user ID (the name of your
user profile). Press Enter.
Press Page Down (or PgDn) to display the special authorities for the user
profile. If your user profile does not have the required authorities, ask the
security officer to either run the commands or use the Change User Profile
(CHGUSRPRF) command to add the required authorities to your user profile.
2. Insert the Domino for AS/400 CD in the AS/400 CD-ROM drive.
3. On the AS/400 command line, type:
LODRUN DEV(*OPT) DIR('/OS400')
Press Enter. This command starts the installation program directly from the
directory /OS400 on the AS/400 optical device (*OPT). The Lotus Domino for
AS/400 CD must be in the CD-ROM drive of your AS/400 system at this time
(see step 2).
32
Lotus Domino for AS/400 R5: Implementation
Tip
If there are problems with this command, they are typically for one of two
reasons:
• If you get an error message that says something like *LIBL not found in
Library List, the common reason is that library QTEMP is not in your
library list when you ran the LODRUN command. To add QTEMP to your
library list, you can use the Add Library List Entry (ADDLIBLE)
command. Type ADDLIBLE QTEMP on any AS/400 command line and press
Enter. Then, run the LODRUN command again.
• If you get an error message that says something like Request to optical
device OPT01 failed, it means you are pointing to the wrong optical (CD)
device. AS/400 optical devices are typically named OPT01, OPT02, or
similar. The device specification of *OPT indicates to use the default
optical device (typically OPT01). If for some reason your system has two
optical devices and you have put your CD in the wrong one, then try
DEV(OPT02). Use the command WRKCFGSTS *DEV OPT* to determine the
name of your optical device.
4. The first function this program performs is to display a menu, as shown in
Figure 8, to select which of the product options you want to install.
Install Lotus Domino For AS/400 Licensed Program (5769LNT)
Type options, press Enter.
1=Install
Option
1
1
1
1
1
1
1
F3=Exit
Product
Option
Installed
Status
Description
*BASE
1
3
4
5
6
7
*NO
*NO
*NO
*NO
*NO
*NO
*NO
Domino 5.0 Server
AS/400 Integration
C API Release 5.0
C++ API Release 2.0
LotusScript Extension Toolkit
HiTest C API Release 4.5
Advanced Services
ENTER To Continue
(C) COPYRIGHT IBM CORP. 1980, 1998.
(C) COPYRIGHT LOTUS DEVELOPMENT CORP. 1998.
Figure 8. Select product options to install
5. Type 1 next to each product option you want to install. Press Enter to
continue. Table 2 on page 34 describes the mandatory (*BASE) and optional
parts of the product.
Installing and setting up Domino for AS/400
33
Table 2. Domino product options
Option
*BASE
Domino Base
Code
Contains the programs, data, and template files needed to
run a Domino server. This option includes the built-in
Domino SMTP support and all Domino help databases.
1
AS/400
Integration
Contains AS/400 programs and objects that enable you to
perform these tasks:
• Take advantage of a Single Logon capability on
workstations running Microsoft Windows 95, Windows
98, or Windows NT. This capability allows users to log on
once and access both Notes client and AS/400 Client
Access functions.
• Manage the Domino server through the Windows-based
interface of Operations Navigator, which is part of
AS/400 Client Access.
• Synchronize the AS/400 directory with the Domino
Directory. Directory synchronization also requires the
HiTest C API (option 6). If you install option 1, the system
automatically installs option 6.
3
C API
Contains the header files and modules for creating Notes C
applications that can run on a Domino server on AS/400.
4
C++ API
Contains the header files, modules, and service program for
creating and running C++ applications for the Domino server
on AS/400.
5
LotusScript
Extensions
Toolkit
Contains the source code, programs, and files for creating
LotusScript Extension (LSX) applications that can run on a
Domino server on AS/400.
6
HiTest C API
Contains the service program for running Notes HiTest C
applications for the Domino server on AS/400.
7
Advanced
Services
Contains the files necessary to install the following Domino
capabilities:
•Server clusters — Connect up to 6 Domino servers
together for maximum availability
•Partitioned servers — Run up to 30 Domino servers on
the same AS/400
•Billing features — Track and record server usage
Note: If you plan to have more than one server on your
AS/400, you may want to install Advanced Services
immediately, even if you want to start by using a single server
only.
Note: The code for Advanced Services is provided with every
CD-ROM; to actually use Domino Advanced Services, you
must purchase the Domino Enterprise Server license.
6. If you elect to install option 7, Advanced Services, you receive the Lotus Notes
License Agreement display shown in Figure 9.
34
Lotus Domino for AS/400 R5: Implementation
Lotus Notes License Agreement
System: AS01
Advanced Services are only available if you have purchased the Domino
Enterprise Server license, or Domino Advanced Enterprise Server license.
Please verify that you have purchased one of these licenses before you
continue.
You can verify your purchase by examining your Lotus Notes Software
package. If the package includes the "Domino Enterprise Server" label,
or "Domino Advanced Enterprise Server" label, press ENTER to continue
the install.
If you are uncertain, or your organization has not purchased the proper
license, you are not entitled to continue. Press PF3 to exit the
install or PF12 to return to previous screen.
F3=Exit F12=Cancel
(C) COPYRIGHT IBM CORP. 1980, 1998.
Figure 9. Lotus Notes License Agreement
7. If you meet the licensing requirements, press Enter to proceed with the
installation.
Note: This may take up to 30 minutes to complete.
Note
After using the LODRUN command to install the Domino for AS/400 R5
software, you may see the following message:
CPF3717 - File not selected. File label or file name mismatch for file
/OS400/QNNLABEL.
This is a normal message and does not affect the success of the
installation.
8. After the installation completes successfully, you can use the Display Software
Resources ( DSPSFWRSC) command to verify the software was installed.
Enter the command DSPSFWRSC on any command line and you see a display, as
shown in Figure 10 on page 36. Press Page Down until you find the resource
ID 5769-LNT.
Installing and setting up Domino for AS/400
35
Display Software Resources
System:
Resource
ID
5769JS1
5769JV1
5769JV1
5769LNT
5769LNT
5769LNT
5769LNT
5769LNT
5769LNT
5769LNT
5769LNT
5769LNT
5769MG1
5769MG1
AS01
Option Feature Description
*BASE
2924
Job Scheduler for AS/400
*BASE
5050
AS/400 Developer Kit for Java
*BASE
2924
AS/400 Developer Kit for Java
*BASE
5050
Lotus Domino For AS/400
*BASE
2924
Lotus Domino For AS/400
1
5050
AS/400 Integration
1
2924
AS/400 Integration
3
5050
C API
4
5050
C++ API
5
5050
LotusScript Extension ToolKit
6
5050
HiTest C API
7
5050
Advanced Services
*BASE
5050
Managed System Services for AS/400
*BASE
2924
Managed System Services for AS/400
More...
Press Enter to continue.
F3=Exit F11=Display libraries/releases
F19=Display trademarks
F12=Cancel
Figure 10. Display Software Resources (DSPSFWRSC)
After Domino for AS/400 has been installed on the AS/400 system, it is known to
the operating system as software resource 5769-LNT.
Starting with OS/400 V4R4, Domino for AS/400 shows as a licensed program
when you use the LICPGM menu to display installed licensed programs, although
you cannot use the Install Licensed Programs menu to install the software.
However, you can use the Delete Licensed Program s menu to remove the
software.
Note
The base option, as well as option 1 of the product, appears in two lines in
Figure 10. The reason is that the AS/400 system stores the executable objects
differently from the language dependent objects, called Machine Readable
Material (MRI). The feature number 2924 in the second line for those two
options indicates that language ID 2924 (US English) for Domino for AS/400 is
installed on this AS/400 system. However, language ID 2924 does not imply
that this is the North American encryption version of the product. Either
version, International English or North American English, appears as language
ID 2924.
36
Lotus Domino for AS/400 R5: Implementation
Tip
Press F11 (Display libraries/releases) on the Display Software Resources
display to see the release level of the installed products. The following release
levels are valid Domino releases:
•
•
•
•
•
V5R0M1 indicates Domino for AS/400 5.0.1
V5R0M0 indicates Domino for AS/400 5.0.0
V4R6M4 indicates Domino for AS/400 4.6.4
V4R6M3 indicates Domino for AS/400 4.6.3
V4R2Mx indicates Domino for AS/400 4.6.2 or earlier
2.5.1.1 What happens when the Domino software is installed?
After the administrator has entered the desired values into the menu shown in
Figure 8 on page 33, an installation program residing on the Lotus Domino
CD-ROM is started. This program performs a Restore Licensed Program
(RSTLICPGM) command under the covers for each of the selected program
options, which in turn copies and registers all objects for this product as a
software resource in OS/400.
This is what happens:
1. AS/400 objects, such as programs (*PGM) and service programs (*SRVPGM),
are put in the QNOTES library.
2. Files that contain symbolic links to the programs, service programs, and other
objects in the QNOTES library are created in the
/QIBM/PRODDATA/LOTUS/NOTES directory in the AS/400 integrated file
system. These symbolic links provide access to the objects in the QNOTES
library from the integrated file system.
3. The AS/400 integrated file system provides a directory structure similar to PC
operating systems (DOS, Windows) or UNIX operating systems.
The /QIBM/USERDATA/LOTUS/NOTES directory is created in the integrated
file system. Users who create programs to be accessed by Domino must add
symbolic links to their programs in this directory.
4. The QNOTES user profile is created for use by Domino and Notes application
programs that run on AS/400. This user profile is intended for system
functions and for integration with the underlying AS/400 security mechanisms.
Therefore, it does not have a password. Individual users cannot use the
QNOTES user profile to sign on the AS/400.
What does not happen during this initial setup is the creation of the data directory
for the Domino server (which is the case on other server platforms for the Domino
server). Creation of the data directory is done during the second phase of the
installation of Domino for AS/400 when the server is set up using the Configure
Domino Server (CFGDOMSVR) command or using Web-based setup.
Notice that, when you install software option 1, OS/400 adds the autostart job
entry named QNNDISTJ to the subsystem QSYSWRK. If you will not be using
directory synchronization, you can remove the QNNDISTJ autostart job entry. On
any AS/400 command line, type:
rmvadje sbsd(qsyswrk) job(qnndistj)
Installing and setting up Domino for AS/400
37
Press Enter.
2.5.2 National language considerations
The Domino for AS/400 Help (as400hlp.nsf) database describes some limitations
and considerations for using Domino for AS/400 in languages other than US
English. Notice, all language dependent settings are taken from the locale
defined in the QNOTES user profile. The date format for the Domino server is
taken from the locale associated with QNOTES. Table 3 shows the attributes that
are picked up from the locale for each language.
If you need to specify different settings from those chosen by the installation
process (based on the language of the CD-ROM), use the Change User Profile
(CHGUSRPRF) command on the QNOTES user profile to specify all
locale-specific job attributes that should be picked up from the specified locale.
The locale name is /qsys.lib/qnotes.lib/xx_yy.locale, where xx_yy is the value
specified in the second column of the following table.
For example, to set the locale for German, stop the Domino server, and then use
the following CL command:
CHGUSRPRF USRPRF(QNOTES)
LOCALE('/qsys.lib/qnotes.lib/de_de.locale')
SETJOBATR(*ccsid *datfmt *datsep *decfmt *srtseq *timsep)
2.5.2.1 Default locale
For both the North American and International English versions of Domino for
AS/400, the default locale is set to the value listed for English US.
For each National Language Version (NLV) release of Domino, the default locale
should be appropriate to the language. Table 3 shows the attributes that are
picked up from the locale for each language.
Table 3. Locales used for supported countries
Language
Locale
CCSID
Date
format
Date
separator
Time
separator
Decimal
format
Sort
sequence
Albanian
SQ_AL
500
*DMY
.
:
I
*HEX
Arabic
AR_AA
420
*DMY
/
:
I
*HEX
Belgian English
EN_BE
500
*DMY
/
:
I
*HEX
Belgian French
FR_BE
500
*DMY
.
:
I
*HEX
Bulgarian
BG_BG
1025
*DMY
.
:
I
*HEX
Canadian French
MNCS
FR_CA
500
*MDY
.
:
I
*HEX
Chinese, Simplified
ZH_CN
935
*YMD
/
:
*BLANK
*HEX
Chinese, Traditional
ZH_TW
937
*MDY
/
:
*BLANK
*HEX
Croatian
HR_HR
870
*DMY
.
:
I
*HEX
Czech
CS_CZ
870
*YMD
-
:
I
*HEX
Danish
DA_DK
277
*DMY
-
:
I
*HEX
Dutch
NL_NL
37
*DMY
-
:
I
*HEX
38
Lotus Domino for AS/400 R5: Implementation
Language
Locale
CCSID
Date
format
Date
separator
Time
separator
Decimal
format
Sort
sequence
Dutch MNCS
NL_BE
500
*DMY
/
:
I
*HEX
English (UK)
EN_GB
285
*DMY
/
:
*BLANK
*HEX
English (US)
EN_US
37
*MDY
/
:
*BLANK
*HEX
Estonian
ET_EE
1122
*DMY
-
:
I
*HEX
Finnish
FI_FI
278
*DMY
.
.
I
*HEX
French (France)
FR_FR
297
*DMY
.
:
I
*HEX
French (MNCS)
FR_CH
500
*DMY
.
:
*BLANK
*HEX
German (Germany)
DE_DE
273
*DMY
.
:
I
*HEX
German (MNCS)
DE_CH
500
*DMY
.
:
*BLANK
*HEX
Greek
EL_GR
875
*DMY
/
:
I
*HEX
Hebrew
IW_IL
424
*DMY
/
:
*BLANK
*HEX
Hungarian
HU_HU
870
*YMD
*BLANK
:
*BLANK
*HEX
Icelandic
IS_IS
871
*DMY
-
:
I
*HEX
Italian (Italy)
IT_IT
280
*DMY
/
.
I
*HEX
Japanese (Latin)
JA_JP5035
5035
*YMD
/
:
*BLANK
*HEX
Korean
KO_KR
933
*YMD
/
:
*BLANK
*HEX
Latvian
LV_LV
1112
*YMD
.
:
I
*HEX
Lithuanian
LT_LT
1112
*YMD
.
:
I
*HEX
Macedonian
MK_MK
1025
*DMY
.
:
I
*HEX
Norwegian
NO_NO
277
*YMD
-
:
I
*HEX
Polish
PL_PL
870
*YMD
-
:
I
*HEX
Portuguese (Brazil)
PT_BR
37
*DMY
-
:
I
*HEX
Portuguese
(Portugal)
PT_PT
37
*DMY
-
:
I
*HEX
Romanian
RO_RO
870
*DMY
/
:
I
*HEX
Russian
RU_RU
1025
*DMY
.
.
I
*HEX
Serbian (Cyrillic)
SR_SP
1025
*DMY
.
:
I
*HEX
Serbian (Latin)
SH_SP
870
*DMY
.
:
I
*HEX
Slovak
SK_SK
870
*DMY
-
:
I
*HEX
Slovene
SL_SI
870
*DMY
.
:
I
*HEX
Spanish
ES_ES
284
*DMY
/
:
I
*HEX
Swedish
SV_SE
278
*DMY
-
.
I
*HEX
Thai
TH_TH
838
*MDY
*BLANK
:
*BLANK
*HEX
Installing and setting up Domino for AS/400
39
Language
Locale
CCSID
Date
format
Date
separator
Time
separator
Decimal
format
Sort
sequence
Turkish
TR_TR
1026
*DMY
/
:
I
*HEX
2.5.2.2 Changing the date and time formats
The date format for the Domino server is affected by the following items:
•
•
•
•
Locale for the QNOTES user profile
Local job attributes values specified for the QNOTES user profile
DateOrder specified in the NOTES.INI file
QDATFMT system value
The OS/400 processes (jobs and threads) that the Domino server runs under
have a job attribute for the date format. When *DATFMT is specified on the Local
job attributes (SETJOBATR ) parameter for the QNOTES user profile, the date
format job attribute for the job is determined by the locale. Otherwise, the job
attribute is determined by QDATFMT system value.
In addition, the Domino server keeps an internal date format setting. If a
DateOrder keyword is specified in the NOTES.INI file, the internal setting is the
value specified for the DateOrder. Otherwise, the date format is determined from
the locale value of the QNOTES user profile.
Normally, the QNOTES user profile has a value of *DATFMT in the Locale job
attributes parameter, and the NOTES.INI file does not contain a DateOrder
keyword. Therefore, both the job attribute and the internal Domino date formats
have the value specified for the locale.
Table 3 on page 38 lists the date formats for each locale shipped with the Domino
server. To specify a different value for the date format, you can set the DateOrder
value in the NOTES.INI file for the server. This changes the date format Domino
uses internally. However, it does not change the date format for the job attribute,
which affects the format of data for various OS/400 interfaces. Therefore, you
must also change the date format for the OS/400 processes for the AS/400
system.
Like the date format, the date separator and time separator are affected by the
setting in the NOTES.INI file and an AS/400 system value. However, the default
values for the date separator and time separator are determined by the language
resource files, rather than the locale value.
Use the following procedures to specify a different value for each format for the
Domino server and ensure that OS/400 interfaces have the same format.
Changing the date format
To change the date format, follow these steps:
1. Change the date format that Domino uses internally by setting the DateOrder
value in the NOTES.INI file for the server. In the NOTES.INI file, specify
DateOrder=xxx, where xxx is one of the following formats:
• DMY (day month year)
• YMD (year month day)
• MDY (month day year)
40
Lotus Domino for AS/400 R5: Implementation
2. Use the Work with System Value (WRKSYSVAL) command to change the date
format (QDATFMT) system value. Set the QDATFMT system value to the
same format that you specified for DateOrder in the NOTES.INI file.
3. Use the Change User Profile (CHGUSRPRF) command to remove the *DATFMT
value from the Locale job attributes parameter in the QNOTES user profile.
Changing the date separator
To change the date separator, follow these steps:
1. Change the date separator that Domino uses internally by setting the
DateSeparator value in the NOTES.INI file for the server. In the NOTES.INI
file, specify DateSeparator=x, where x is any character.
2. Use the WRKSYSVAL command to change the date separator (QDATSEP)
system value. Set the QDATSEP system value to the same character that you
specified for DateSeparator in the NOTES.INI file.
3. Use the CHGUSRPRF command to remove the *DATSEP value from the Locale
job attributes parameter in the QNOTES user profile.
Changing the time separator
To change the date separator, follow these steps:
1. Change the time separator that Domino uses internally by setting the
TimeSeparator value in the NOTES.INI file for the server. In the NOTES.INI
file, specify TimeSeparator=x, where x is any character.
2. Use the WRKSYSVAL command to change the time separator (QTIMSEP)
system value. Set the QTIMSEP system value to the same character that you
specified for TimeSeparator in the NOTES.INI file.
3. Use the CHGUSRPRF command to remove the *TIMSEP value from the Locale
job attributes parameter in the QNOTES user profile.
Using a 24-hour clock
To use a 24-hour clock for a Domino server on the AS/400 system, edit the
NOTES.INI file for the server and specify the setting:
ClockType=24_HOUR
2.5.3 Running Domino using a secondary language
If the national language version (NLV) of the Domino for AS/400 software does
not match the NLV of your primary language, the Domino for AS/400 language
version is installed as a secondary language. To use Domino for AS/400, you
must add the secondary language library to the system library list. You need to
determine the feature number of the NLV for the primary language and any
installed secondary languages on your system:
1. Type GO LICPGM on an AS/400 command line and press Enter.
2. On the Work with Licensed Programs menu, select option 20 to display
installed secondary languages.
3. On the Display Installed Secondary Languages display, determine the primary
language and the library containing each installed secondary language.
If the primary language of the system does not match the NLV of Domino for
AS/400, add the secondary language library to the top of the system part of the
Installing and setting up Domino for AS/400
41
user's library list. For details on the steps to ensure that the secondary language
can be used, see AS/400 National Language Support, SC41-5101.
2.5.3.1 Code page conversion for the Domino server console
The Domino console on the AS/400 system (displayed by using the Work with
Domino Console (WRKDOMCSL) command or the Display Domino Console
(DSPDOMCSL) command) uses the character identifier (CHRID) of the job
device description to tag data that is entered and displayed on the console. To
avoid conversion problems, such as the substitution of some characters, make
sure that the CHRID for the workstation device specifies a code page that
matches the code page of the Domino server. The code page used by the Domino
server is based on the locale that is specified for the QNOTES user profile. To
determine the locale:
1. Type:
DSPUSRPRF QNOTES
Press Enter.
2. Press the Page Down (or PgDn) until you see the following line:
Locale . . . . . . . . . . :
Note
If you are on a non-English system and you are not sure of the translated
name for the Locale parameter, type CHGUSRPRF and press F4. Press F10 for
additional parameters. Press F11 to display the parameter names. Look for
LOCALE.
For information on what CCSID values are used for each locale, see Table 3 on
page 38. For details on how CCSIDs map to code pages and how to change the
CHRID of a device description, see AS/400 International Application
Development, SC41-5603.
2.5.4 Additional considerations for double-byte languages
The following topics only apply to languages requiring double-byte character
sets, such as Japanese, Chinese, and others.
Starting a Domino server that runs under a double-byte user profile
Domino server jobs on AS/400 system run under the QNOTES user profile. If the
locale specified for the QNOTES user profile has a double-byte CCSID, the job
from which you start the server (by using the STRDOMSVR command) must also
have a double-byte CCSID.
If you start the Domino server from a job that has a single-byte CCSID, the server
is started with the single-byte CCSID instead of the double-byte CCSID specified
for the QNOTES user profile. The job log of the job running under the Domino
server contains a message that indicates the job CCSID was changed from the
requested double-byte CCSID to the single-byte CCSID.
Using the Domino server console on double-byte systems
The Domino console on the AS/400 system has the following limitations on
systems using a double-byte character set:
42
Lotus Domino for AS/400 R5: Implementation
• If the job CCSID is a double-byte CCSID, F9 does not perform an action.
• When you use some 5250 emulation programs, lowercase single-byte
characters may display incorrectly on the Domino console on AS/400 systems
that have the Japanese (Katakana) double-byte character set (Feature 2962)
as the primary language. For example, the IBM Personal Communications
Workstation Program displays these characters incorrectly when running over
a TCP/IP connection.
To work around the problem, use one of the following alternatives:
– Use the remote console either from a Notes client or using the Domino
Web Administration tool.
– Use an SNA APPC (LU 6.2) connection for your Personal Communications
Workstation Program and specify a Host Codepage of 5035.
– Use Graphical Access/400, a part of Client Access for AS/400 for Windows
95/NT, and sign on using a user profile that has a CCSID value of 5026.
For more information about the CCSID, see AS/400 International Application
Development, SC41-5603.
Double-byte database file names on the AS/400 system
With R5, Domino for AS/400 now fully supports double-byte file names. If you
configure OS/400 for a given locale, Domino supports any IFS file names that
OS/400 supports.
2.6 Setting up the first server in a new Domino domain
After you have installed the Domino for AS/400 software on your AS/400 system,
you can set up a Domino server. In this section, we describe the simplest
scenario, a first server. We also recommend that you try this scenario on your
AS/400 system before you attempt to implement partitioned servers (see Chapter
6, “Advanced Domino Services for the AS/400 system” on page 159, for
information about partitioned servers).
You can use one of the following methods to set up a Domino server on an
AS/400 system:
• AS/400 Configure Domino Server (CFGDOMSVR) command
Use this method if you are familiar with the AS/400 system and prefer to use
the AS/400 command interface. This method is sometimes referred to as the
green screen method because it can only be done from a 5250 terminal or
display emulation session.
• Web-based setup
Use this method if you are most familiar with the Lotus Notes client interface
or PC-based applications that run on operating systems such as Windows 95
or Windows NT. Use one of the following methods to access the Web-based
setup:
– Use an AS/400 command to enable the Web-based setup Domino server
on AS/400 system, and then use a browser on a workstation to access the
setup server. The only requirements for the workstation are that it can
communicate with the AS/400 system through TCP/IP and has a
Java-enabled Web browser.
Installing and setting up Domino for AS/400
43
– Start the server setup through the AS/400 Operations Navigator on a
workstation. Operations Navigator automatically uses the Web-based
setup when you select New Domino server on an R5 server.
In this chapter we describe both methods in 2.6.1, “Set up using the Configure
Domino Server command” on page 44, and 2.6.2, “Web-based setup” on page
58.
After describing both setup methods, we explain briefly how to start the server
and verify that it is working (see 2.7, “What happens during the first server setup”
on page 71). We also describe how to install the administration client software on
the administrator’s PC (see 2.9, “Setting up an administration workstation for the
server” on page 82).
2.6.1 Set up using the Configure Domino Server command
The following steps describe the green screen method using the Configure
Domino Server (CFGDOMSVR) command.
1. Sign on to the AS/400 with a user profile that has at least the following special
authorities:
*ALLOBJ
*SECADM
*JOBCTL
*IOSYSCFG
Access to all AS/400 objects
Security administrator
Job control
Device and communications configuration
2. On an AS/400 command line, type CFGDOMSVR (Configure Domino Server) and
press F4. You see the display, as shown in Figure 11.
Configure Domino Server (CFGDOMSVR)
Type choices, press Enter.
Server name . . . . . . . . . . AcmeDS1_____________________________________
________________________________________________________________________________
________________________________________________________________________________
____________________________________________________
Option . . . . . . . . . . . . . *FIRST_
*FIRST, *ADD, *REMOVE
F3=Exit F4=Prompt F5=Refresh
F13=How to use this display
F10=Additional parameters
F24=More keys
Bottom
F12=Cancel
Figure 11. CFGDOMSVR for a first server (Part 1 of 6)
The Configure Domino Server (CFGDOMSVR) command supports selective,
context-sensitive prompting. Depending on what value you enter for the Option
parameter, different parameters are shown when you press Enter.
The following steps describe the least complicated scenario, which is configuring
a first server for a new Domino domain and organization. This requires that you
create the Domino Directory, the certifier ID file, a user ID file for the
administrator, and a server ID.
44
Lotus Domino for AS/400 R5: Implementation
Note
The term first serve r has nothing to do with the fact that you are installing the
first server on this AS/400 system. It only refers to the fact that a new Domino
domain and organization are created, rather than adding the new server to an
existing domain.
Tip
This command (like most other OS/400 CL commands) provides context
sensitive help text for each parameter. Position the cursor on the parameter
and press F1 for help.
After the help document is displayed, you can press F2 for extended help to
show help information on the entire command, rather than a single parameter.
Position the cursor on a parameter and press F4 to prompt for a list of possible
values for this parameter.
If you are using an AS/400 system with a different national language support
(NLS) installed, you may not be able to recognize the description of each
parameter as shown in the figures and the following table. In this case, press
F11 to see the parameter keywords, which are not changed when the product
is translated to other languages.
2.6.1.1 Detailed description of command parameters for a first server
The following section guides you through all the parameters which can or must be
specified when you set up the first server in a new Domino domain.
1. Fill in the following parameters in the prompt, as shown in Figure 11.
Table 4. CFGDOMSVR parameters (Part 1 of 6)
Keyword
Description
SERVER
Server Name
Specify the name of your new Domino server. When you configure a first
server, you just type the common name, that is, no /organization. The first
15 characters of this name must be unique across the organization. For
more information, refer to 2.4.2, “Naming the Domino server” on page 28.
Example: AcmeDS1
OPTION
Option
Specifies whether you are setting up the first Domino server in a Notes
domain (*FIRST), adding an additional Domino server to an existing Notes
domain (*ADD), or removing a Domino server from your AS/400 (*REMOVE).
Possible Values: *FIRST, *ADD, and *REMOVE
Example: *FIRST
Installing and setting up Domino for AS/400
45
Tip
For more information on any of the parameters, type CFGDOMSVR on any
AS/400 command line and press the F4. Place the cursor on any one of the
parameters and press the F1 for help. To see all possible parameters
independently of what was entered for the Option parameter, press the F9
to see all parameters.
2. Press Enter and fill in the additional parameters, as shown in Figure 12.
Configure Domino Server (CFGDOMSVR)
Type choices, press Enter.
Server name . . . . . . . . . . > AcmeDS1_____________________________________
________________________________________________________________________________
________________________________________________________________________________
____________________________________________________
Option . . . . . . . . . . . . . > *FIRST_
*FIRST, *ADD, *REMOVE
Data directory . . . . . . . . . /lotus/domino/acmeds1_______________________
______
Organization . . . . . . . . . . Acme________________________________________
____________________________________
F3=Exit F4=Prompt F5=Refresh
F13=How to use this display
F10=Additional parameters
F24=More keys
More...
F12=Cancel
Figure 12. CFGDOMSVR for a first server (Part 2 of 6)
Note
The contents of the Option parameter controls which additional parameters are
shown after you press Enter . For this example, we select *FIRST, which creates a
completely new Domino domain.
Table 5. CFGDOMSVR parameters (Part 2 of 6)
46
Keyword
Description
DTADIR
Data Directory
Specifies the path to the integrated file system directory where you want the
Domino data files to reside. If the specified directory does not exist, it is
automatically created.
Notice that you cannot specify any drive letter, such as C:, as you would on
other platforms. The hierarchy of directories is indicated by forward slashes (/),
not by backslashes (\).
Example: /lotus/domino/acmeds1
Note: It is a good idea to give the data directory the same name as the server,
particularly if you plan to have multiple servers. This makes it easy to identify
which data directory belongs to which server. By grouping all these server data
directories as subdirectories under the one directory (/lotus/domino in this
example), it makes it easy to locate the Domino data directories and also
collectively backup or restore these directories. As of Domino R5 on the
AS/400, the recommended naming convention is /lotus/domino/server_name.
Lotus Domino for AS/400 R5: Implementation
Keyword
Description
ORG
Organization
Specifies the organization name for the Domino server. Most likely, this is the
name of your company. If you are setting up a first server (as in this example),
you should not choose the name of an existing Domino organization here.
Example: Acme
3. Press Page Down (or PgDn) to see and fill in the next set of parameters.
Tip
Whenever you see the word “More...” at the bottom right of the display, you
can press Page Down to see more parameters. Do not press Enter at this
point because you may miss an important parameter.
Configure Domino Server (CFGDOMSVR)
Type choices, press Enter.
Administrator:
Last name . . . . . . .
______
First name . . . . . . .
Middle initial . . . . .
Password . . . . . . . .
Minimum password length
Internet password . . .
Time zone . . . . . . . .
Daylight savings time . .
Web browsers . . . . . . .
. . .
Ryan________________________________________
.
.
.
.
.
.
.
.
Internet mail packages . . . . .
+ for more values
SMTP services . . . . . . . . .
Stephen__________________
__
Character value
________________________________
8_____
0-31
*NONE___________________________
CST___
GMT,EST,CST,MST,PST,CET ...
*NO_
*YES, *NO
*NONE
*NONE, *ALL, *HTTP, *IIOP
_____
*NONE_____
*NONE,*ALL,*IMAP,*POP3 ...
__________
*DOMINO
*DOMINO, *MSF
F3=Exit F4=Prompt F5=Refresh
F13=How to use this display
F10=Additional parameters
F24=More keys
.
.
.
.
.
.
.
.
.
.
.
.
.
.
.
.
More...
F12=Cancel
Figure 13. CFGDOMSVR for a first server (Part 3 of 6)
Installing and setting up Domino for AS/400
47
Table 6. CFGDOMSVR parameters (Part 3 of 6)
Keyword
Description
ADM
Administrator:
This parameter has six parts: The first name, middle initial, last name, password, minimum password
length, and Internet password for the administrator ID to be created.
Last name
Specifies the last name of the person who is the administrator for this Domino server. This name
appears in the Server document, in the Domino Directory access control list (ACL), and in the
USER.ID file created in the data directory (if *GEN is specified for ADMID).
First name
Middle initial
Password
Use the Password value to specify the administrator's password. This is also the password protecting
the certifier ID file. This password is case-sensitive.
Minimum password length
The minimum length password that is acceptable. This can be from 0 to 31.
Default: 8
Internet password
Specifies the password to use to access the server if it is to be administered from a browser. If this
field is left blank, which is the default, the server cannot be administered from a browser. If the
password is specified, its length must be greater or equal to the minimum password length and less
than or equal to 31 characters. It is case-sensitive. Specify *ADMIN if it should be the same as the
administrator’s password or *NONE if there is no Internet password. An Internet password can be
added to the administrator’s Person document in the Domino Directory at a later time to enable
browser server administration.
Default: *NONE
TIMEZONE
Time zone
Specifies the time zone to be used by the Domino server.
DAYSAVTIME
Daylight savings time
Specifies whether the server time stamp should be adjusted for daylight savings time (DST).
Note: Domino does not adjust the AS/400 system clock, it only adjusts the time stamps internally. If
DAYSAVTIME is set to *YES, Domino assumes DST starts on the first Sunday in April and ends on
the first Sunday in October. You can change these dates by editing the NOTES.INI file and adding a
DSTlaw statement. See the information about the DST and DSTlaw statements in the Domino 5
Administration Help database (help\help5_admin.nsf) for more information about these values. See
the Note box following this table for more information about daylight savings and Domino for AS/400.
Default: *YES
WEB
Web browsers
Specifies which, if any, Web features should be included in the Domino server configuration. These
features enable Web browsers to access the Domino server.
• Specify *HTTP to include the HTTP Web server. The HTTP server enables Web browsers to
access the Domino server.
• Specify *IIOP to include the Internet Inter-ORB Protocol (IIOP) feature. IIOP lets browsers
and servers exchange complex objects, unlike HTTP, which only supports transmission of
text. The IIOP supports both Notes objects and object request broker (ORB) objects.
Possible values: *ALL,*HTTP, *IIOP, and *NONE
Default: *NONE
48
Lotus Domino for AS/400 R5: Implementation
Keyword
Description
MAIL
Internet mail packages
Specifies which, if any, Internet mail packages should be included in the Domino server configuration.
The mail packages enable the Domino server to send mail to and to receive mail from the Internet.
Unless *ALL or *NONE is entered, one or more keywords can be entered.
Possible values: *ALL, *IMAP, *POP3, *SMTP, and *NONE
Default: *NONE
SMTP
SMTP services
If *SMTP or *ALL is specified for Internet mail packages (MAIL), use this parameter to specify the
type of SMTP support to set up.
• Specify *DOMINO to set up support for Domino mail using the built-in Domino SMTP. Use this
value if you want to use Domino or Internet mail, but do not need to exchange mail with
AS/400 mail functions such as OfficeVision/400.
• Specify *MSF to set up support for Domino, Internet and AS/400 mail. This support uses the
AS/400 SMTP server in combination with the AnyMail/400 Mail Server Framework (MSF).
Use this value if you want to use Domino mail and need to exchange mail with AS/400 mail
functions, such as OfficeVision/400.
Possible values: *DOMINO and *MSF
Default: *DOMINO
Daylight savings
The following is the recommended approach for handling daylight savings
time:
Domino servers and clients should either all use daylight savings time or not
use it at all.
If they use daylight savings time at the time of the time change, the AS/400
administrator manually changes the system value QTIME to reflect the
appropriate changed time.
The Domino servers are now incorrect by one hour.
The administrator stops and restarts the Domino servers. They get their
time from the AS/400 system value and the time is correct again.
4. Press Page Down (or PgDn) to see and fill in the next set of parameters as
shown in Figure 14 on page 50.
Installing and setting up Domino for AS/400
49
Configure Domino Server (CFGDOMSVR)
Type choices, press Enter.
Directory services . . . . . . .
News readers . . . .
Connection services
Advanced services .
+ for
. . . . . .
. . . . . .
. . . . . .
more values
F3=Exit F4=Prompt F5=Refresh
F13=How to use this display
*SYSDIR
_______
*NONE
*DECS
*NONE_____
__________
*NONE, *ALL, *SYSDIR, *LDAP
*NONE, *NNTP
*DECS, *NONE
*NONE, *ALL, *PARTITION...
F10=Additional parameters
F24=More keys
Bottom
F12=Cancel
Figure 14. CFGDOMSVR for a first server (Part 4 of 6)
Table 7. CFGDOMSVR parameters (Part 4 of 6)
Keyword
Description
DIRSRV
Directory services
Specifies which, if any, directory services should be included in the configuration.
•Specify *SYSDIR to include directory synchronization services in the configuration. Directory
synchronization allows you to keep the AS/400 system distribution directory synchronized with
the Domino Directory.
•Specify *LDAP to include the Lightweight Directory Access Protocol (LDAP) in the
configuration.
Make sure that you select *NONE if you are not going to use directory synchronization. This prevents
a Domino server task (QNNINADD) being started each time the server is started.
Possible values: *ALL, *SYSDIR, *LDAP, and *NONE
Default: *SYSDIR
NEWS
News readers
Specifies whether an Internet news reader should be included in the Domino server configuration. A
news reader enables the Domino server to send messages to and receive messages from Internet
newsgroups. It also enables Internet news readers to access the Domino server.
Specify *NNTP to include the Network News Transfer Protocol (NNTP) news reader.
Possible values: *NNTP and *NONE
Default: *NONE
CNNSRV
Connection services
Specifies whether the Domino Enterprise Connection Services (DECS) feature should be included in
the Domino server configuration. DECS provides the capability to build live links from Domino pages
and forms to data from relational databases. Currently, the AS/400 system only supports connections
to the DB2/400 relational database.
Possible values: *DECS and *NONE
Default: *DECS
50
Lotus Domino for AS/400 R5: Implementation
Keyword
Description
ADVSRV
Advanced services
Specifies which, if any, features of the Lotus Domino Advanced Services should be included in the
Domino server configuration.
• Specify *PARTITION to set up this Domino server as a partitioned server. The partitioned
servers feature enables you to run up to 30 Domino servers on the same AS/400. The actual
number of servers that you can run on an AS/400 system depends on system size and system
load.
• Specify *BILLING to set up this Domino server with the billing feature. The billing feature
allows a Domino server to track and record specific Domino activities for billing purposes.
• Specify *CLUSTER to set up this Domino server as a cluster server. The server cluster feature
enables you to group Domino servers in the same domain connected by a local area network.
Clusters provide failover protection for high availability of data and services.
Possible Values: *ALL, *PARTITION, *BILLING, *CLUSTER, and *NONE
Default: *NONE
Note: You can enter multiple values. If you need additional entry fields to enter these multiple values,
type a plus sign (+) in the entry field opposite the phrase "+ for more values".
5. When the CFGDOMSVR command is invoked, only the most commonly
specified parameters are displayed. To see all available parameters, press
F10 (Additional parameters). If you already know the defaults for these
parameters are acceptable, you can proceed to the next step without pressing
F10. Figure 15, and Figure 16 on page 52, show the remaining parameters for
this command.
Configure Domino Server (CFGDOMSVR)
Type choices, press Enter.
Directory services . . . . . . .
*SYSDIR
_______
. . . . . . *NONE
. . . . . . *DECS
. . . . . . > *NONE_____
more values __________
*NONE, *ALL, *SYSDIR, *LDAP
News readers . . . .
Connection services
Advanced services .
+ for
*NONE, *NNTP
*DECS, *NONE
*NONE, *ALL, *PARTITION...
Additional Parameters
Replace configuration
Domain name . . . . .
Network name . . . . .
Country code . . . . .
Certifier ID . . . . .
______
F3=Exit F4=Prompt
F24=More keys
.
.
.
.
.
.
.
.
.
.
.
.
.
.
.
.
.
.
.
.
.
.
.
.
.
F5=Refresh
*YES
*YES, *NO
*ORG____________________________
NETWORK1________________________
*BLANK
*GEN________________________________________
F12=Cancel
More...
F13=How to use this display
Figure 15. CFGDOMSVR for a first server (Part 5 of 6)
Installing and setting up Domino for AS/400
51
Configure Domino Server (CFGDOMSVR)
Type choices, press Enter.
Administrator ID . . . . . . . .
______
Server ID . . . . . . . . . . .
______
Start server . . . . . . . . . .
Log replication events . . . . .
Log client session events . . .
TCP/IP port options:
Encrypt network data . . . . .
Internet address . . . . . . .
Subsystem and object names . . .
Collation . . . . . . . . . . .
Copy Administrator ID file . . .
Additional services . . . . . .
+ for more values
F3=Exit F4=Prompt
F24=More keys
F5=Refresh
*GEN________________________________________
*GEN________________________________________
*NO_
*YES
*YES
*YES, *NO
*YES, *NO
*YES, *NO
*NOENCRYPT
*ENCRYPT, *NOENCRYPT
*SYSTEM__________
*GEN______
Name, *GEN
*STD______
*STD,CS,DA-DK-AA,DE,E2-ES ...
*ALL___
*DOMDIR, *DTADIR, *ALL
*NONE_____
*NONE,*ICM
__________
Bottom
F12=Cancel F13=How to use this display
Figure 16. CFGDOMSVR for a first server (Part 6 of 6)
Table 8. CFGDOMSVR parameters (Parts 5 and 6 of 6)
Keyword
Description
RPLCFG
Replace configuration
Specifies whether the existing Domino server configuration files in the directory that is specified in
the Data directory (DTADIR) parameter should be erased and replaced with the new ones. These
files are NAMES.NSF and the ID files. If you are changing settings for an existing Domino server, you
should use the Change Domino Server (CHGDOMSVR) command, rather than this option set to *NO
which was the approach used before we had the CHGDOMSVR command.
Default: *YES
DOMAIN
Domain name
Specifies the domain name for the Domino server. Each Domino domain has a common Domino
Directory (Public Address Book) that is shared by all Domino servers in the domain. The hierarchy
of naming for users and servers is user_name/organization@domain.
*ORG specifies that the domain name of the Domino server is the same as the organization name.
Default: *ORG
NETWORK
Network name
Specifies the name of the Domino Named Network (DNN, in prior releases called "Notes Named
Network") to which this Domino server belongs. A Domino Named Network identifies a group of
servers that share a common protocol so they can communicate directly.
NETWORK1 is the network name . Use this default name unless you are sure that another name is
used for other servers in the Notes network.
Default: NETWORK1
CNTRYID
Country code
Specifies a two-character country code that is added to the certifier ID for the Domino server. If
you are planning to use your Domino server to communicate with other companies, you can use
a country code to minimize the chance that another company has the same Domino server ID.
Default: *BLANK
Note: This is not related to national language support.
52
Lotus Domino for AS/400 R5: Implementation
Keyword
Description
CERTID
Certifier ID
Specifies the certifier ID file to be used. Each grouping of Domino servers in an organization has an
organization certifier ID that is stored in a file named CERT.ID. During setup of the first Domino
server, Domino automatically creates the organization certifier ID and saves it in the directory that is
specified in the Data directory (DTADIR) parameter. This certifier ID automatically certifies the first
server's ID and the administrator's user ID. When you register new users or servers, you use the
certifier ID to give access to the domain. You also use the organization certifier ID when you create
organizational unit certifiers for organizational units (lower level units) within an organization.
• *GEN specifies that a new organization certifier ID file should be created. If the file CERT.ID
already exists in the Domino data directory and the Replace configuration (RPLCFG)
parameter is set to *NO, a new certifier ID file is not created.
• certifier-ID-file-path-name: Specify the path to the Domino certifier ID file that should be
copied. If CERT.ID file does not exist in the Domino data directory, it is copied from the
specified file. If CERT.ID file already exists in the Domino data directory and the RPLCFG
parameter is set to *YES, the certifier ID file is replaced by the specified ID file. If CERT.ID file
already exists in the Domino data directory and the RPLCFG parameter is set to *NO, no
action is taken.
Default: *GEN
ADMID
Administrator ID
Specifies the user ID file to be used for the Domino administrator. During setup of the first Domino
server, Domino automatically creates a user ID for the Domino administrator and attaches it as a file
named USER.ID to the administrator's Person document in the Domino Directory and/or copies it to
the Domino data directory (see CPYADMID parameter).
• *GEN specifies that a new administrator ID file should be created. If a USER.ID file already
exists in the Domino data directory and the Replace configuration (RPLCFG) parameter is
set to *NO, an administrator ID file is not created.
• administrator-ID-file-path-name : Specify the path to the Domino administrator ID file that
should be copied. If USER.ID file does not exist in the Domino data directory, it is copied
from the specified file. If USER.ID file already exists in the Domino data directory and the
RPLCFG parameter is set to *YES, the existing USER.ID file is replaced by the specified ID
file. If file USER.ID already exists in the Domino data directory and the RPLCFG parameter
is set to *NO, no action is taken.
Default: *GEN
SVRID
Server ID
Specifies the server ID file to be used for the Domino server. During setup of the first Domino server,
Domino automatically creates a server ID for the new server. The new server ID file is saved in the
directory that is specified in the Data directory (DTADIR) parameter and has the default name of
SERVER.ID.
• *GEN specifies that a new server ID file should be created. If a SERVER.ID file already exists
in the Domino data directory and the Replace configuration (RPLCFG) parameter is set to
*NO, a server ID file is not created.
• server-ID-file-path-name : Specify the path to the Domino server ID file that should be
copied. If SERVER.ID file does not exist in the Domino data directory, it is copied from the
specified file. If SERVER.ID file already exists in the Domino data directory and the RPLCFG
parameter is set to *YES, the existing SERVER.ID file is replaced by the specified ID file. If
file SERVER.ID already exists in the Domino data directory and the RPLCFG parameter is
set to *NO, no action is taken.
Default: *GEN
STRDOMSVR
Start server
Specifies whether the Domino server should be started when the CFGDOMSVR command
completes the setup.
Default: *NO
Installing and setting up Domino for AS/400
53
Keyword
Description
LOGREPEVT
Log replication events
Specifies whether replication events should be logged in the Notes log (LOG.NSF) for this Domino
server.
Default: *YES
LOGSSNEVT
Log client session events
Specifies whether client session events should be logged in the Notes log (LOG.NSF) for this Domino
server.
Default: *YES
TCPOPT
TCP/IP port options:
This parameter has two parts. Encrypt network data option and Internet address option.
Encrypt network data
Use the Encrypt network data option to specify whether the system should encrypt data that is sent
through the port. Encrypting the data can make the transmission more secure, but the transmission
speed may decrease slightly. The possible values are:
Possible Values: *NOENCRYPT, *ENCRYPT
Default: *NOENCRYPT
Internet address
Use the Internet address option to specify a separate Internet (IP) address for the server's port. You
might use this option, for example, to specify a separate port address for each partitioned server.
• *SYSTEM specifies this port should use the host IP address of the server.
• IP-address : Specify the IP address of the port.
Default: *SYSTEM
Note: If a specific IP address is entered here, the system adds a line to the NOTES.INI file with the
format of TCPIP_TCPIPAddress=0,a.b.c.d:1352, where a.b.c.d is the Internet address. If more than
one Domino server on this AS/400 share the same IP address, this line may have to be modified
manually. This is described in Chapter 6, “Advanced Domino Services for the AS/400 system” on
page 159.
SBS
Subsystem and object names
Specifies the name to be used for the AS/400 subsystem in which the Domino server runs. This
name is also used for other AS/400 objects that are used for the server. These objects include a job
description (*JOBD), a job queue (*JOBQ), and a class (*CLS).
• *GEN specifies that the system should generate the name. The name is DOMINO, followed by
a two-character sequence number; for example, DOMINO01 or DOMINO02.
• Name: Specify a 10 character name for the subsystem and objects.
Default:
COLLATE
*GEN
Collation
Specifies the way in which the Domino server should sort characters.
• *STD specifies the standard collation sequence should be used. Using this collation
sequence, Domino sorts numbers and accented characters before letters.
• Collation-code : Specify a collation code that defines the way in which the Domino server
should sort characters. While the cursor is on this field, you can press the F4 to display a list
of valid collation codes.
Default: *STD
54
Lotus Domino for AS/400 R5: Implementation
Keyword
Description
CPYADMID
Copy Administrator ID file
Specifies where the system should copy the Administrator ID file for the server.
• *DOMDIR copies the ID file only to the Domino Directory (formerly called the Public Address
Book). The ID file is attached to the Person document created for the Administrator.
• *DTADIR copies the ID file only to the data directory.
• *ALL copies the ID file to both places.
Default: *ALL
ADLSRV
Additional services
Specifies which, if any, additional services should be included in the server configuration.
*ICM includes the Internet Cluster Manager. Internet Cluster Manager provides clustering support
for Web browser clients.
Default: *NONE
Note
If you want to change, use, or modify selections for parameters WEB, MAIL,
DIRSRV, NEWS, CNNSRV, ADVSRV or ADLSRV after the server has been
configured, use the Change Domino Server (CHGDOMSVR) command (see
4.5, “Change Domino Server (CHGDOMSVR)” on page 109).
2.6.1.2 Starting the setup process
After completing the Configure Domino Server display, press Enter to start the
setup process.
Attention
The Configure Domino Server (CFGDOMSVR) command is not designed to
configure multiple servers at the same time. If the system detects the setup
process from another invocation of this command is in progress, it gives you an
error message and returns you to the command line. When the other setup
process has completed, press F9 (Retrieve) to retrieve the CFGDOMSVR
command, then press F4 (Prompt) to check the parameter settings once more
(you need to re-enter the passwords) before pressing Enter to run the
command.
Your keyboard is locked and the display does not change for approximately one to
five minutes. After that, you see the Terminal Session display, as shown in Figure
17 on page 56. The keyboard remains locked until the message Press ENTER to
end terminal session is displayed. There are two distinct phases to the setup
process, a platform independent phase and an AS/400 specific phase.
Installing and setting up Domino for AS/400
55
Creating ID for Stephen Ryan/Acme. This requires 1-3 minutes of computation.
..
Begin certifying Stephen Ryan/Acme...
Done certifying Stephen Ryan/Acme...
Begin registering /O=Acme...
Adding /O=Acme to the Name and Address Book...
/O=Acme successfully registered.
Begin registering AcmeDS1...
Creating ID for AcmeDS1/Acme. This requires 1-3 minutes of computation...
Begin certifying AcmeDS1/Acme...
Done certifying AcmeDS1/Acme...
Adding AcmeDS1/Acme to the Name and Address Book...
AcmeDS1/Acme successfully registered.
Begin registering Stephen Ryan...
Creating mail file for Stephen Ryan/Acme...
Adding Stephen Ryan/Acme to the Name and Address Book...
Stephen Ryan/Acme successfully registered.
Press ENTER to end terminal session.
===>
F3=Exit F4=End of File F6=Print F9=Retrieve F17=Top
F18=Bottom F19=Left F20=Right F21=User Window
Figure 17. Terminal session display for last phase of CFGDOMSVR
Platform-independent phase of server setup
You see messages moving up the display, showing you the progress of the setup
process.
During this phase, the certification keys are created and stored in CERT.ID file.
Based on this certifier, the server ID (SERVER.ID) and the administrator ID
(USER.ID), as well as the Domino Directory (NAMES.NSF) are also created. The
CERT.ID file, SERVER.ID file, and NAMES.NSF file are stored in the data
directory within the AS/400 integrated file system (IFS), as specified in the
DTADIR parameter (in our example this is lotus/domino/acmeds1). The USER.ID
file is stored based on the setting of the CPYADMID parameter. A NOTES.INI file
is built using values entered by you in the parameters of the CFGDOMSVR
command.
This all happens when we select option *FIRST because this is the first server
within a new domain to be configured. See Chapter 6, “Advanced Domino
Services for the AS/400 system” on page 159, for information on setting up
additional servers in the same domain.
In addition, many Notes databases (.NSF files), Notes templates (.NTF files), and
other files needed for this server are placed in the data directory.
AS/400-specific part of server setup
After two to 15 minutes (depending on the size and workload of your AS/400
system), the end of this configuration phase is indicated by the message Press
ENTER to end terminal session.
Press Enter. The (very short) final phase of the configuration is performed. At this
time, the AS/400 specific part of the configuration is done. Now, a subsystem
name of the form DOMINOxx or with the name specified for the SBS (subsystem
and object names) parameter is created and associated with the new server and
56
Lotus Domino for AS/400 R5: Implementation
the subsystem description (an object of type *SBSD) is created in library
QUSRNOTES.
Tip
The content of the terminal session is kept during the duration of your AS/400
job until you sign off the AS/400 system. If you perform the CFGDOMSVR
command multiple times, you may see the messages of the previous runs.
This may be confusing, especially when the first attempt ended in an error
message because you see the error message again when you repeat the
command.
See 2.7, “What happens during the first server setup” on page 71, for a more
complete description of what happens during the setup process.
2.6.1.3 The configuration completes
After a couple of seconds, you see the AS/400 command line again. A message
is shown on the bottom of the display (or above your command line if you use the
Command Entry display), indicating the server was successfully (or not
successfully) configured.
If the server is successfully configured, it is automatically started if you specified
*YES for the STRDOMSVR parameter of the CFGDOMSVR command. The
starting of a server is described in more detail in 2.8.2, “Starting the Domino for
AS/400 server” on page 74.
1. Position the cursor on the error message (if one appears) and press F1 for
help. Additional information on this message is displayed. Do not forget to
write down the message ID.
2. If you get an error message, you probably should look at the AS/400 job log.
To see the information in the AS/400 job log, press F10.
Display All Messages
Job . . :
QPADEV0007
User . . :
ITSCID50
System:
Number . . . :
AS01
542690
3>> CFGDOMSVR SERVER(AcmeDS1) OPTION(*FIRST) DTADIR('/domino/acmeds1') ORG(Acm
e) ADM(Ryan Stephen *N ()) TIMEZONE(CST) DAYSAVTIME(*NO) DIRSRV(*NONE) CNN
SRV(*NONE)
Directory created.
Object changed.
Object changed.
Object changed.
Link added.
Link added.
Link added.
Link added.
Link added.
Object copied.
Object copied.
More...
Press Enter to continue.
F3=Exit
F5=Refresh
F12=Cancel
F17=Top
F18=Bottom
Figure 18. Display the job log after performing CFGDOMSVR
Installing and setting up Domino for AS/400
57
Note
Since the job log shows very detailed information starting with the time you
entered the command, it is usually helpful to show the most recent
messages first by pressing F18 ( Bottom), which is Shift+F6 on most
keyboards.
3. Search for error messages. Place the cursor on the message, and press F1 to
see more information.
2.6.2 Web-based setup
As an alternative to using the Configure Domino Server command, you can also
set up a Domino server using a Java-enabled Web browser. This is called the
Web-based setup method.
Attention
When setting up a Domino server from a Web browser on a workstation, the
user enters passwords in the Web browser. Those passwords are sent to the
AS/400 system without encryption. This restriction will be removed in the
future.
Installation of the Domino software using the LODRUN command creates a
special Domino server called *HTTPSETUP that is used for setting up other
Domino servers using a Web browser. This server must be started before the
Web-based setup process can be initiated directly from a browser. If the
configuration process is initiated from Operations Navigator, Operations
Navigator starts this server, if it is not already started.
Starting the *HTTPSETUP server
Follow these steps to start the *HTTPSETUP server:
1. Type WRKDOMSVR on any AS/400 command line and press Enter.
You see the Work with Domino Servers display, as shown in Figure 19.
58
Lotus Domino for AS/400 R5: Implementation
Work with Domino Servers
Type options, press
1=Start server
7=Submit command
11=Change current
System: AS01
Enter.
2=Change server 5=Display console 6=End server
8=Work console
9=Work server jobs
directory 12=Work object links 13=Edit NOTES.INI
Domino
Opt Server
__ *HTTPSETUP
Subsystem
QDOMINOHT
Domino
Status
*ENDED
Bottom
Parameters or command
===> _________________________________________________________________________
F3=Exit
F4=Prompt F5=Refresh F9=Retrieve F11=Display path
F12=Cancel F17=Top F18=Bottom F22=Display entire field F24=More keys
Figure 19. Work with Domino Servers display
This command is described in detail in 4.14, “Work with Domino Servers
(WRKDOMSVR)” on page 130. However, at this stage, we must be able to
check the status of the *HTTPSETUP server and start it if required.
2. If the *HTTPSETUP server has the status *ENDED, start it by typing 1 in the Opt field
next to the *HTTPSETUP name and press Enter. Press F5 at few seconds
intervals until the status of the server changes to *STARTED.
3. Start the Web browser and type:
http://system-name:8081
The system-name is the TCP/IP name of your AS/400 or its IP address.
Note
The browser session to this URL can also be initiated from Operations
Navigator (with the Domino Plug-In installed) if you right-click the Domino
icon (found under System_Name —> Network —> Servers, where
System_Name is the name of the AS/400 system) and select New Domino
Server.
Your Web browser shows the display in Figure 20 on page 60.
Installing and setting up Domino for AS/400
59
Figure 20. Web-based setup — Identify yourself to the AS/400
4. Fill in the AS/400 User ID and Password fields. The AS/400 user profile must
have at least the following special authorities:
*ALLOBJ
*SECADM
*JOBCTL
*IOSYSCFG
Access to all AS/400 objects
Security administrator
Job control
Device and communications configuration
5. Click >> (next) advance to the Web page shown in Figure 21.
60
Lotus Domino for AS/400 R5: Implementation
Figure 21. Web-based setup — Create a New Domino Server
6. Accept the default of First Domino Server and click >> (next) to advance to
the Web page shown in Figure 22.
Figure 22. Web-based setup — Server Audience
Installing and setting up Domino for AS/400
61
Table 9 shows the options you can select on this Web page.
Table 9. Web-based setup — Server Audience page
Description
Additional Services
Specifies which, if any, additional services should be included in the server configuration.
Select ICM to include the Internet Cluster Manager. Internet Cluster Manager provides clustering support for Web
browser clients.
Web Browsers
Specifies which, if any, Web features should be included in the Domino server configuration. These features enable Web
browsers to access the Domino server.
• Select HTTP to include the HTTP Web server. The HTTP server enables Web browsers to access the Domino
server.
• Specify IIOP to include the Internet Inter-ORB Protocol (IIOP) feature. IIOP lets browsers and servers
exchange complex objects, unlike HTTP, which only supports transmission of text. The IIOP supports both
Notes objects and Object Request Broker (ORB) objects.
Internet Mail Packages
Specifies which, if any, Internet mail packages should be included in the Domino server configuration. The mail
packages enable the Domino server to send mail to and to receive mail from the Internet. Choices available: IMAP,
SMTP, and POP3
Directory Services
Specifies which, if any, directory services should be included in the configuration.
• Select Directory Synchronization to include directory synchronization services in the configuration.
Directory synchronization allows you to keep the AS/400 system distribution directory synchronized with the
Domino Directory.
• Select LDAP to include the Lightweight Directory Access Protocol (LDAP) in the configuration.
• If not deselected, directory synchronization is included by default. Make sure that you deselect this if you are
not going to use directory synchronization. This prevents a Domino server task (QNNINADD) being started
each time the server is started.
News Readers
Specifies whether an Internet news reader should be included in the Domino server configuration. A news reader
enables the Domino server to send messages to and receive messages from Internet newsgroups. It also enables
Internet news readers to access the Domino server.
Select NNTP to include Include the Network News Transfer Protocol (NNTP) news reader.
SMTP Services
If SMTP is included for Internet Mail Packages, use this parameter to specify the type of SMTP support to set up.
• Select Domino to set up support for Domino mail using the built-in Domino SMTP. Use this value if you want to
use Domino or Internet mail, but do not need to exchange mail with AS/400 mail functions such as
OfficeVision/400.
• Select MSF to set up support for Domino, Internet and AS/400 mail. This support uses the AS/400 SMTP
server in combination with the AnyMail/400 Mail Server Framework (MSF). Use this value if you want to use
Domino mail and need to exchange mail with AS/400 mail functions such as OfficeVision/400.
The default is Domino mail.
Enterprise Connection Services
Specifies whether the Domino Enterprise Connection Services (DECS) feature should be included in the Domino server
configuration. DECS provides the capability to build live links from Domino pages and forms to data from relational
databases. Currently, AS/400 only supports connections to the DB2/400 relational database. If not deselected, DECS
is included by default.
62
Lotus Domino for AS/400 R5: Implementation
Description
Advanced Services
Specifies which, if any, features of the Lotus Domino Advanced Services should be included in the Domino server
configuration.
• Select Partition to set up this Domino server as a partitioned server. The partitioned servers feature enables
you to run up to 30 Domino servers on the same AS/400. The actual number of servers that you can run on an
AS/400 system depends on system size and system load.
• Select Billing to set up this Domino server with the billing feature. The billing feature allows a Domino server to
track and record specific Domino activities for billing purposes.
• Select Cluster to set up this Domino server as a cluster server. The server cluster feature enables you to group
Domino servers in the same domain connected by a local area network. Clusters provide failover protection for
high availability of data and services.
7. If the defaults are not acceptable, make the appropriate changes, and then
click >> (next) to advance to the next Web page.
Depending on your display size, you may need to scroll down to see all
parameters on this Web page.
Figure 23. Web-based setup — Administration settings (top half)
Installing and setting up Domino for AS/400
63
Figure 24. Web-based setup — Administration Settings (bottom half)
Table 10. Web-based setup — Administration settings page
Description
Organization
Specifies the organization name for the Domino server. Most likely, this is the name of your company. If you are setting
up a first server (as in this example), you should not choose the name of an existing Domino organization here.
Example: Acme
Domain name
Specifies the domain name for the Domino server. Each Domino domain has a common Domino Directory (Public
Address Book) that is shared by all Domino servers in the domain. The hierarchy of naming for users and servers is:
user_name/organization @ domain.
If you leave this field blank, the domain name is the same as the organization name.
Country code
Specifies a two-character country code that is added to the certifier ID for the Domino server. If you are planning
to use your Domino server to communicate with other companies, you can use a country code to minimize the
chance that another company has the same Domino server ID. Click the pull-down to see a list of valid country
codes. The default leaves this blank.
Note: This is not related to national language support.
64
Lotus Domino for AS/400 R5: Implementation
Description
Certifier ID
Specifies the certifier ID file to be used. Each grouping of Domino servers in the same organization has an organization
certifier ID that is stored in a file named CERT.ID. During setup of the first Domino server, Domino automatically creates
the organization certifier ID and saves it in the directory that is specified in the Data directory path name. This certifier
ID automatically certifies the first server's ID and the administrator's user ID. When you register new users or servers,
you use the certifier ID to give access to the domain. You also use the organization certifier ID when you create
organizational unit certifiers for organizational units (lower level units) within an organization.
• Leave this field blank (the default) to specify that a new organization certifier ID file should be created in the
Domino data directory (next parameter). If the file CERT.ID already exists in the Domino data directory and the
Replace Server parameter (see Figure 26 on page 69) is set to NO, a new certifier ID file is not created.
• certifier-ID-file-path-name — Specify the path to the Domino certifier ID file that should be copied. If file
CERT.ID does not exist in the Domino data directory, it is copied from the specified file. If file CERT.ID already
exists in the Domino data directory and the Replace Server parameter (see Figure 26 on page 69) is set to Yes,
the certifier ID file is replaced by the specified ID file. If file CERT.ID already exists in the Domino data directory
and the Replace Server parameter (see Figure 26 on page 69) is set to No, no action is taken.
Domino directory path name
Specifies the path to the integrated file system directory where you want the Domino data files to reside. If the specified
directory does not exist, it is automatically created.
Notice that you cannot specify any drive letter (such as C:), as you would on other platforms. The hierarchy of directories
is indicated by forward slashes (/), not by backslashes (\).
If this field is left blank, then the directory is /LOTUS/DOMINO/servername (servername is replaced with the name of
the server being created).
Note: In our example, we have left this field blank. Therefore, it defaults to /LOTUS/DOMINO/ACMEDS1.
Collation
Specifies the way in which the Domino server should sort characters.
For the default, Standard , Domino sorts numbers and accented characters before letters.
Click the pull-down to see a complete list of collation choices.
Server name
The name of your new Domino server. When you configure a first server, you just type the common name, that is, no
/organization. The first 15 characters of this name must be unique across the organization. For more information, refer
to 2.4.2, “Naming the Domino server” on page 28.
Example: AcmeDS1
Server ID
Specifies the server ID file to be used for the Domino server. During setup of the first Domino server, Domino
automatically creates a server ID for the new server. The new server ID file is saved in the directory that is specified in
the Data directory path name and has the default name of SERVER.ID.
• Leave this parameter blank (the default) to specify that a new server ID file should be created. If a SERVER.ID
file already exists in the Domino data directory and the Replace Server parameter (see Figure 26 on page 69)
is set to No, a server ID file is not created.
• server-ID-file-path-name — Specify the path to the Domino server ID file that should be copied. If file
SERVER.ID does not exist in the Domino data directory, it is copied from the specified file. If file SERVER.ID
already exists in the Domino data directory and the Replace Server parameter (see Figure 26 on page 69) is
set to Yes, the existing SERVER.ID file is replaced by the specified ID file. If file SERVER.ID already exists in
the Domino data directory and the Replace Server parameter (see Figure 26 on page 69) is set to No, no
action is taken.
Administrator’s name - First/Middle Initial and Last
Specifies the name of the person who is the administrator for this Domino server. This name appears in the Server
document, in the Domino Directory access control list (ACL), and in the USER.ID file created in the data directory.
Installing and setting up Domino for AS/400
65
Description
Administrator’s ID
Specifies the user ID file to be used for the Domino administrator. During setup of the first Domino server, Domino
automatically creates a user ID for the Domino administrator and attaches it as a file named USER.ID to the
administrator's Person document in the Domino Directory and/or copies it to the Domino data directory (see next
parameter).
•Leave this parameter blank, the default, to specify that a new administrator ID file should be created. If a
USER.ID file already exists in the Domino data directory and the Replace Server parameter (see Figure 26) is
set to No, an administrator ID file is not created.
• administrator-ID-file-path-name — Specify the path to the Domino administrator ID file that should be copied. If
file USER.ID does not exist in the Domino data directory, it is copied from the specified file. If file USER.ID
already exists in the Domino data directory and the Replace Server parameter (see Figure 26 on page 69) is set
to Yes, the existing USER.ID file is replaced by the specified ID file. If file USER.ID already exists in the Domino
data directory and the Replace Server parameter (see Figure 26 on page 69) is set to No, no action is taken.
Copy administrator’s ID file to:
Specifies where the system should copy the Administrator ID file for the server.
• Select Domino Directory to copy the ID file only to the Domino Directory (formerly called the Public Address
Book). The ID file is attached to the Person document created for the Administrator.
• Select Data Directory to copy the ID file only to the data directory.
It is copied to both by default.
Minimum password length
The default for this field is taken from the AS/400 System Parameter QPWDMINLEN.
Password
Use the Password value to specify the administrator's password. This is also the password used to protect the certifier
ID file. This password is case-sensitive.
Confirm password
Retype the password once more to ensure that it was entered correctly.
Internet password
Specifies the password to use to access the server if it is to be administered from a browser. If this field is left blank (the
default), the server cannot be administered from a browser. If the password is specified, its length must be greater or
equal to the minimum password length and less than or equal to 31 characters. It is case sensitive. An Internet password
can be added to the administrator’s Person document in the Domino Directory at a later time to enable browser server
administration.
Confirm Internet password
If an Internet password was specified, retype the password once more to ensure that it was entered correctly.
Local time zone
Specifies the time zone to be used by the Domino server. The timezone can be selected from the pull-down list of
timezones.
Daylight savings time
Specifies whether the server time stamp should be adjusted for daylight savings time (DST). The default is observed.
Note: Domino does not adjust the AS/400 system clock, it only adjusts the time stamps internally. If DAYSAVTIME is
set to observed , Domino assumes DST starts on the first Sunday in April and ends on the first Sunday in October. You
can change these dates by editing the NOTES.INI file and adding a DSTlaw statement. See the information about the
DST and DSTlaw statements in the Domino 5 Administration Help database (help\help5_admin.nsf) for more
information. See the Note box following this table for more information about daylight savings and Domino for AS/400.
Log replication events
Specifies whether replication events should be logged in the Notes log (LOG.NSF) for this Domino server. Default is Yes.
66
Lotus Domino for AS/400 R5: Implementation
Description
Log client session events
Specifies whether client session events should be logged in the Notes log (LOG.NSF) for this Domino server. Default is
Yes.
Subsystem and object names
Specifies the name to be used for the AS/400 subsystem in which the Domino server runs. This name is also used for
other AS/400 objects that are used for the server. These objects include a job description (*JOBD), a job queue (*JOBQ),
and a class (*CLS).
Leave this parameter blank (the default) to have the system generate the name. The name is DOMINO, followed by a
two-character sequence number, for example, DOMINO01 or DOMINO02.
Otherwise a name of up to 10 characters can be specified for the subsystem and objects.
Daylight savings
The following is the recommended approach for handling daylight savings
time:
Domino servers and clients should either all use daylight savings time or not
use it at all.
If they use daylight savings time at the time of the time change, the AS/400
administrator manually changes the system value QTIME to reflect the
appropriate changed time.
The Domino servers are now incorrect by one hour.
The administrator stops and restarts the Domino servers. They get their
time from the AS/400 system value and the time is correct again.
8. Enter the desired selections, and then click >> (next) to advance to the next
page.
Installing and setting up Domino for AS/400
67
Figure 25. Web-based setup — Network and Communications Settings
Table 11. Web-based setup — Network and Communications Settings page
Description
Network name
Specifies the name of the Domino Named Network (DNN, in prior releases was called
Notes Named Network ) to which this Domino server belongs. A Domino Named Network
identifies a group of servers that share a common protocol so they can communicate
directly. If you leave this field blank, the default name of NETWORK1 is used.
Encrypt network data
Use the Encrypt network data option to specify whether the system should encrypt data that
is sent through the port. Encrypting the data can make the transmission more secure, but
the transmission speed may decrease slightly. The default is not to encrypt.
Internet address
Use the Internet address option to specify a separate Internet (IP) address for the server
port. You might use this option, for example, to specify a separate port address for each
partitioned server. If this field is left blank, the default, the IP address of the host system is
used.
Note: If a specific IP address is entered here, the system adds a line to the NOTES.INI file
with the format of TCPIP_TCPIPAddress=0,a.b.c.d:1352, where a.b.c.d is the internet
address. If more than one Domino server on this AS/400 share the same IP address, this
line may have to be modified manually. This is described in Chapter 6, “Advanced Domino
Services for the AS/400 system” on page 159.
9. Enter the desired selections, and then click >> (next) to advance to the next
Web page.
68
Lotus Domino for AS/400 R5: Implementation
Figure 26. Web-based setup — Final Questions
Table 12. Web-based setup — Final Questions page
Description
Replace server
Specifies whether the existing Domino server configuration files in the directory that is
specified in the Data directory parameter should be erased and replaced with the new ones.
These files are NAMES.NSF and the ID files. If you are changing settings for an existing
Domino server, you should use the command Change Domino Server (CHGDOMSVR)
rather than this option set to No, which was the approach used before we had the
CHGDOMSVR command.
Default is Yes.
Start server
Specifies whether the Domino server should be started when the CFGDOMSVR command
completes the setup.
Default is No.
10.Enter the desired selections, and click Finish to process the values you have
entered for all panels. After you click Finish, a CFGDOMSVR command, with
the parameters you selected, runs on the AS/400 system. The job running the
command is called QNNINWSU and it runs in the subsystem QDOMINOHT.
You can enter DSPJOB QNNINWSU on a command line, to display a list of the
current and all previous Web configuration jobs. There is a maximum of only
one active QNNINWSU job at any one time. You can select the job, and then
work with the job log to monitor the progress of the server configuration.
As mentioned in 2.6.1.2, “Starting the setup process” on page 55, you receive
an error message when you click Finish if someone else is running a Web
configuration or a green screen invocation of CFGDOMSVR.
Installing and setting up Domino for AS/400
69
11.After several minutes, if the setup was successful, you receive the
Congratulations Web page, as shown in Figure 27.
Figure 27. Web-based setup — Congratulations page
12.Click Exit to end the setup. You receive the message: If setup has
successfully completed, start the Domino Server to start utilizing the
features of Domino.
A successfully created server is in the list displayed by the WRKDOMSVR
command. Section 2.8, “Basic server management tasks” on page 72,
describes how to use this command to start and stop the newly created server.
13.If the setup was not successful, you receive a display telling you what caused
the error. You can use the browser Back button and the Reload button to
display your setup prompts. After your setup prompts are displayed, you must
use your Web setup arrows, not your browser buttons, to move back and forth
within the setup procedure.
If you use a Web browser to set up a Domino server and the last Web page
indicates an error was detected, but the error message text field is blank, you
can display the message by using the AS/400 Display Job (DSPJOB)
command.
Follow these steps:
1. Type DSPJOB QNNINWSU on an AS/400 command line and press Enter.
2. Select option 4 to display spooled files.
3. Type 5 next to the QPRINT files to display the two most recent files.
The QPRINT files contain the text of error messages. Notice that a single
QPRINT file with the single line CONSOLE ERROR: Setup error: missing
environment variable ServerName is not an error.
70
Lotus Domino for AS/400 R5: Implementation
Note
After the setup is complete, we recommend that you stop the special
*HTTPSETUP server to make sure no one can access the setup process from
a Web browser. Stop the *HTTPSETUP server by using any of the methods
used to stop a Domino server. For example, in Operations Navigator, right-click
the server and select Stop. On an AS/400 command line, type:
ENDDOMSVR *HTTPSETUP
Press Enter.
2.7 What happens during the first server setup
The first server setup performs the following tasks:
1. Creates a new domain for the Domino servers.
2. Enables the appropriate network.
3. Creates the Domino Directory for the domain. The setup program creates the
Domino Directory in the data directory that you specify for the Domino server
and gives it the default name NAMES.NSF.
4. Creates a certifier ID for your organization. The setup program saves the
certifier ID in the same directory you choose for Domino data files and gives it
the default name CERT.ID.
5. Creates a Certifier document in the Domino Directory. This document
describes the certifier ID.
6. Creates a server ID for the new server. The setup program saves the server ID
in the same directory you choose for Domino data files and gives it the default
name SERVER.ID. The setup program creates the server ID with no
password. If needed later, you can require a password for the server ID.
7. Certifies the server ID with the organization certifier ID.
8. Creates a Server document in the Domino Directory. This document describes
the first server based on information that you specify during setup.
9. Creates a Person document in the Domino Directory for the Domino
administrator specified during setup.
10.Creates a user ID and a password for the Domino administrator and does one
or both of the following, depending on what you specified:
• Attaches the user ID as a file named USER.ID to the administrator's
Person document in the Domino Directory.
• Copies the user ID file to the data directory.
11.Certifies the administrator's user ID with the organization certifier ID.
12.Adds the administrator's name and the server name as managers in the
access control list of the Domino Directory.
13.Adds the server name to the LocalDomainServers group in the Domino
Directory.
Installing and setting up Domino for AS/400
71
14.Creates the log file for the server in the same directory you specify for Domino
data files and gives it the default name LOG.NSF.
15.Creates a mail directory in the Domino data directory and a mail file in that
directory for the Domino administrator.
16.Sets up the additional options that you specified.
2.8 Basic server management tasks
This section describes some basic tasks that enable you to manage and monitor
the status of the server. A description of all the commands that can be used for
managing AS/400 Domino servers from an AS/400 display is in Chapter 4, “Lotus
Domino for AS/400 commands” on page 103. More advanced management tasks
are outside the scope of this publication. However, you can refer to the
help\admin5_help.nsf database on your Domino server.
2.8.1 Working with Domino servers
To find out about the status and to manage your Domino for AS/400 servers, you
can use the Work with Domino Servers (WRKDOMSVR) command. On any
AS/400 command line, type:
WRKDOMSVR
Press Enter. You see the Work with Domino Servers display, as shown in Figure
28.
Work with Domino Servers
Type options, press
1=Start server
7=Submit command
11=Change current
Domino
Opt Server
__ *HTTPSETUP
__ ACMEDS1
System: AS01
Enter.
2=Change server 5=Display console 6=End server
8=Work console
9=Work server jobs
directory 12=Work object links 13=Edit NOTES.INI
Subsystem
QDOMINOHT
ACMEDS1
Domino
Status
*ENDED
*ENDED
Bottom
Parameters or command
===> _________________________________________________________________________
F3=Exit
F4=Prompt F5=Refresh F9=Retrieve F11=Display path
F12=Cancel F17=Top F18=Bottom F22=Display entire field F24=More keys
Figure 28. Work with Domino Servers display
This command is basically the starting point to reach all AS/400 CL commands
necessary to manage the Domino for AS/400 servers on your AS/400 system
(without actually having to type the command name). It also shows you the
following important information at a glance:
• Names of the subsystems on your AS/400 system used for Domino servers
• Server name related to each subsystem
• Current status (ended or started) of each server
72
Lotus Domino for AS/400 R5: Implementation
If you use the default generated subsystem name of Dominoxx and subsequently
delete a server, the generated name is reused the next time a server is defined.
This is not true in earlier releases.
Press F11 to get information on the name of the data directory path for each
server, as shown in Figure 29.
Work with Domino Servers
Type options, press
1=Start server
7=Submit command
11=Change current
Domino
Opt Server
__ *HTTPSETUP
__ ACMEDS1
System: AS01
Enter.
2=Change server 5=Display console 6=End server
8=Work console
9=Work server jobs
directory 12=Work object links 13=Edit NOTES.INI
Subsystem
QDOMINOHT
DOMINO01
Path
/QIBM/UserData/HTTPSetup/Notes/Data
/lotus/domino/acmeds1
Bottom
Parameters or command
===> _________________________________________________________________________
F3=Exit
F4=Prompt F5=Refresh F9=Retrieve F11=Display status
F12=Cancel F17=Top F18=Bottom F22=Display entire field F24=More keys
Figure 29. Work with Domino Servers display — Data directory path
As the name Work with implies, this command is not only valuable to display
information about servers, but can also be used to perform certain actions upon
each server. These include the following actions:
Option 1
Start the Domino server.
Option 2
Change the Domino server.
Option 5
Display the Domino console.
Option 6
End the Domino server.
Option 7
Submit a Domino command.
Option 8
Work with the Domino console.
Option 9
Work with Domino jobs.
Option 11 Change the current directory to the server data directory.
Option 12 Work with object links (in the data directory).
Option 13 Edit the NOTES.INI file for the server.
The following sections explain some of these functions and describe how you can
use them either in the Work with Domino Servers display or by entering the
appropriate commands individually.
A full description of all functions of the command can be found in 4.14, “Work with
Domino Servers (WRKDOMSVR)” on page 130.
Installing and setting up Domino for AS/400
73
2.8.2 Starting the Domino for AS/400 server
After you have verified that the server configuration completed successfully, you
can start the server for the first time, if it has not automatically been started by
specifying *YES for the STRDOMSVR parameter of the CFGDOMSVR command.
You can manually start the server using the following three methods:
• Work with Domino Servers (WRKDOMSVR) command
• Start Domino Server (STRDOMSVR) CL command
• Operations Navigator
You can also modify the startup program pointed to by the QSTRUPPGM system
value to have the server automatically start after each IPL. Refer to 2.8.2.3,
“Starting the Domino for AS/400 server automatically after IPL” on page 76, for
more information.
The following sections explain how to start a server using the AS/400 green
screen command interface. The Operations Navigator method is described in 8.5,
“Starting and stopping Domino servers” on page 263.
2.8.2.1 Using the Work with Domino Servers (WRKDOMSVR) command
In the Work with Domino Servers list display, type 1 in the Opt column next to the
server name you want to start, as shown in Figure 30. You should see a message
immediately indicating that the server has been started. However, this does not
necessarily indicate that the server was started successfully. Press F5 (Refresh)
repeatedly and you see the status indicator change to *STARTING, and finally to
*STARTED.
Work with Domino Servers
Type options, press
1=Start server
7=Submit command
11=Change current
Domino
Opt Server
__ *HTTPSETUP
1_ ACMEDS1
System: AS01
Enter.
2=Change server 5=Display console 6=End server
8=Work console
9=Work server jobs
directory 12=Work object links 13=Edit NOTES.INI
Subsystem
QDOMINOHT
DOMINO01
Domino
Status
*ENDED
*ENDED
Bottom
Parameters or command
===> _________________________________________________________________________
F3=Exit
F4=Prompt F5=Refresh F9=Retrieve F11=Display path
F12=Cancel F17=Top F18=Bottom F22=Display entire field F24=More keys
Starting Domino server ACMEDS1 in subsystem DOMINO01.
Figure 30. Work with Domino Servers display — Start a server
2.8.2.2 Using the Start Domino Server (STRDOMSVR) Command
To start a Domino for AS/400 server from the AS/400 command line, use the Start
Domino Server (STRDOMSVR) command. To do so, perform the following steps:
1. Type STRDOMSVR on any AS/400 command line and press F4.
74
Lotus Domino for AS/400 R5: Implementation
You see the display for the Start Domino Server (STRDOMSVR) command, as
shown in Figure 31 on page 75. This command requires one parameter,
Server name (SERVER).
Note
If you know the name of the Domino server you want to start, you can start it
directly by typing STRDOMSVR SERVER_NAME , where SERVER_NAME is the
name of the server, and then press Enter.
Start Domino Server (STRDOMSVR)
Type choices, press Enter.
Server name . . . . . . . . . . AcmeDS1_____________________________________
________________________________________________________________________________
________________________________________________________________________________
____________________________________________________
Bottom
F3=Exit F4=Prompt F5=Refresh F12=Cancel F13=How to use this display
F24=More keys
Figure 31. Start Domino Server display
2. The command prompt also allows you to see a list of all configured Domino
servers on your AS/400 system. To do so, make sure your cursor is placed in
the input field for the server name (the underlined area) and press F4
(Prompt). You see a list of configured Domino servers, as shown in Figure 32.
Specify Value for Parameter SERVER
Type choice, press Enter.
Type . . . . . . . . . . . . . : CHARACTER
Server name . . . . . . . . . . > ____________________________________________
____________________________________ ...
*HTTPSETUP
ACMEDS1
F3=Exit
F5=Refresh
F12=Cancel
F13=How to use this display
F24=More keys
Figure 32. Field prompt for the SERVER parameter
3. Enter your server name and press Enter to return to the command prompt
shown in Figure 31 . Press Enter again to actually run the Start Domino Server
(STRDOMSVR) command.
The STRDOMSVR command submits a new AS/400 job, which runs
independently of your interactive job. Therefore, you return to the command
line very quickly. You should see a completion message on the bottom of your
display, such as Starting Domino server ACMEDS1 in subsystem DOMINO01.
4. If you see an error message instead, press F1 for help, and then press F10
(as described in 2.6.1.3, “The configuration completes” on page 57) to check
the job log for the reason for the error.
Installing and setting up Domino for AS/400
75
2.8.2.3 Starting the Domino for AS/400 server automatically after IPL
If you want to start the Domino server automatically after each OS/400 initial
program load (IPL), you can modify the start-up program defined in the system
value QSTRUPPGM. The autostart job in the controlling subsystem transfers
control to the program specified in the system value QSTRUPPGM during an IPL.
You can create your own program and change the QSTRUPPGM system value to
that program name. You can also use the shipped program QSTRUP in QSYS as
a base to create your own program.
To do this, follow these steps:
1. Retrieve the source of the shipped program using the RTVCLSRC command,
for example:
RTVCLSRC PGM(QSYS/QSTRUP) SRCFILE(YOURLIB/YOURFILE).
You may want to use QGPL/QCLSRC for YOURLIB/YOURFILE because this
file already exists.
2. Change the program to include STRDOMSVR SERVER_NAME, where SERVER_NAME
is the name of the Domino server.
3. You must also include the startup of TCP/IP (STRTCP command), if not
already in there. The startup of TCP/IP must precede the startup of the
Domino server
4. Create the program using the CRTCLPGM command, putting it into your own
library or QGPL.
5. Test the program to ensure that it works.
6. Change the system value QSTRUPPGM to the program name and library you
specified on the CRTCLPGM command.
More information about the system value QSTRUPPGM can be found in Work
Management, SC41-5306.
2.8.3 Ending the Domino server
Just as you have several ways to start a Domino server, you have several ways to
end a Domino server. You have the following options:
• Use option 6 of the Work with Domino Servers (WRKDOMSVR) command.
• Use the End Domino Server (ENDDOMSVR) command.
• Use Operations Navigator. The Operations Navigator method is described in
8.5, “Starting and stopping Domino servers” on page 263.
Alternatively, you may also end any Domino server by using the console
command quit or exit from the Work with Domino Console (WRKDOMCSL)
command line or a remote Domino console from an authorized Notes client.
Important
Typing the exit command is not the same as pressing F3 (Exit), which is also
described in the help text as F3=Exit. F3 ends the console, rather than the
entire server.
76
Lotus Domino for AS/400 R5: Implementation
2.8.4 Ending the Domino subsystem
With early releases of the product, the Domino server subsystem was also ended
after all servers tasks terminated. This is no longer the case.
Attention
With 4.6.2 or 4.6.3, Domino servers, do not end the Domino subsystem using
the End Subsystem (ENDSBS) command while the server is still active. This
may cause the server to restart immediately after the End Domino Server
(ENDDOMSVR) command has been run.
2.8.5 Identifying the AS/400 jobs for your server
The successful completion message received after starting a server is no
guarantee that the server jobs have actually been started. For example, if the
AS/400 system has been set to restricted mode (using the ENDSYS or ENDSBS *ALL
commands), you may be able to successfully run the STRDOMSVR command
and the necessary jobs will be submitted to a job queue. However, they do not
start until the system is started again (either by performing an IPL or by starting
the controlling subsystem again).
The fastest way to find out if the server jobs are actually running is type WRKDOMSVR
and press Enter. Press F5 (Refresh) until the status shows *STARTED. Then type 9
(Work server jobs) in the Opt column next to the name of your server and press
Enter.
You see the Work with Active Jobs display, as shown in Figure 33.
Work with Active Jobs
CPU %:
.0
Elapsed time:
Type options, press Enter.
2=Change 3=Hold 4=End
8=Work with spooled files
00:00:00
AS01
03/05/99 09:35:26
Active jobs: 300
5=Work with 6=Release
13=Disconnect ...
Opt Subsystem/Job User
__ DOMINO01
QSYS
__
ADMINP
QNOTES
__
AMGR
QNOTES
__
AMGR
QNOTES
__
CALCONN
QNOTES
__
EVENT
QNOTES
__
QNNINSTS
QNOTES
__
REPLICA
QNOTES
__
ROUTER
QNOTES
7=Display message
Type CPU % Function
SBS
.0
BCI
.0
BCI
.0
BCI
.0
BCI
.0
BCI
.0
BCH
.0 PGM-QNNINSTS
BCI
.0
BCI
.0
Status
DEQW
SELW
SELW
CNDW
CNDW
SELW
EVTW
SELW
SELW
More...
Parameters or command
===> _________________________________________________________________________
F3=Exit F5=Refresh
F7=Find
F10=Restart statistics
F11=Display elapsed data F12=Cancel F23=More options F24=More keys
Figure 33. Work with Active Jobs display
Depending on the configuration of your server and how soon you enter this
command after starting the server, you may see more or fewer jobs compared to
Installing and setting up Domino for AS/400
77
those shown in Figure 33. However, at least two jobs must be active: QNNINSTS
and SERVER (to see the latter, you may have to press PgDn).
If you only see the QNNINSTS job, press F5 ( Refresh) in case the SERVER job
is still being started. If the SERVER job does not appear within five minutes or if it
comes up shortly and disappears again, type 5 (Work with) next to the
QNNINSTS job, then select option 10 (Display job log). Press F10 (Display
detailed messages) to search for error messages.
Note
The job QNNINSTS is the watchdog, which means this job controls all server
functions. If one of them fails, QNNINSTS job tries to bring down all other
functions, and then restart the server again. If the error condition persists, this
may happen up to 10 times (unless configured otherwise) before the
QNNINSTS job also ends.
Tip
If you see no other jobs besides the QNNINSTS and SERVER jobs for more
than two or three minutes, you may be using a password protected server ID
file. In that case, the server is waiting for the password to be entered through
the Domino console. See 2.8.6, “Working with the Domino console” on page
78, to learn how to access the Domino console and enter the password.
2.8.6 Working with the Domino console
After verifying that all jobs making up the Domino for AS/400 server have actually
been started, you can use the Work with Domino Console (WRKDOMCSL)
command from any AS/400 workstation to verify whether the basic server
functions are working.
Follow these steps:
1. On any AS/400 command line, type WRKDOMCSL ACMEDS1, where ACMEDS1
should be replaced by the name of your server, and press Enter. You can also
type 8 next the server name on the Work with Domino Server (WRKDOMSVR)
display to get to this same display.
You see the Domino Console, which looks similar to the display shown in
Figure 34.
78
Lotus Domino for AS/400 R5: Implementation
Work with Domino Console
Server: ACMEDS1
Previous subcommands and messages:
07/11/99 07:04:12 AM Agent Manager started
07/11/99 07:04:16 AM Acmeds1/Acme is the Administration Server of the
Domino Directory.
07/11/99 07:04:17 AM Administration Process started
07/11/99 07:04:22 AM Schedule Manager started
07/11/99 07:04:22 AM SchedMgr: Validating Schedule Database
07/11/99 07:04:22 AM SchedMgr: Done validating Schedule Database
07/11/99 07:04:23 AM JVM: Java Virtual Machine initialized.
07/11/99 07:04:23 AM AMgr: Executive '1' started
07/11/99 07:04:27 AM Calendar Connector started
07/11/99 07:04:32 AM Event Dispatcher started
07/11/99 07:04:33 AM Releasing unused storage in database statrep.nsf...
07/11/99 07:04:42 AM Database Server started
Enter a Domino subcommand.
===> __________________________________________________________________________
_______________________________________________________________________________
F3=Exit F5=Refresh F6=Print F9=Retrieve
F17=Top F18=Bottom F21=Command line
Figure 34. Work with Domino Console (WRKDOMCSL) command
The messages shown in Figure 34 are probably different from those you see
on your system. What you see are the most recent messages logged by the
Domino server.
Note: This is not an AS/400 job log. If you just started the server for the very
first time, it is a good idea to look at all the messages, beginning at the point
when you started the server.
2. Press F17 (Top) (for most workstations, this is Shift+F5) to see the oldest
messages on the Domino console, as shown in Figure 35 on page 80. Notice
the release level information at the beginning of the display.
Installing and setting up Domino for AS/400
79
Work with Domino Console
Server: ACMEDS1
Previous subcommands and messages:
Lotus Domino (r) Server, Build V5010618 (Intl), 18 June 1999
Copyright (c) 1985-1999, Lotus Development Corporation, All Rights Reserved
07/11/99 07:03:44 AM DECS Server started
07/11/99 07:03:49 AM Database Replicator started
07/11/99 07:03:55 AM Mail Router started for domain ACME
07/11/99 07:03:55 AM Router: Internet SMTP host as25 in domain
itsoroch.ibm.com
07/11/99 07:03:59 AM Index update process started
07/11/99 07:04:05 AM Stats agent started
07/11/99 07:04:12 AM Agent Manager started
07/11/99 07:04:16 AM Acmeds1/Acme is the Administration Server of the
Domino Directory.
07/11/99 07:04:17 AM Administration Process started
Enter a Domino subcommand.
===> __________________________________________________________________________
_______________________________________________________________________________
F3=Exit F5=Refresh F6=Print F9=Retrieve
F17=Top F18=Bottom F21=Command line
Figure 35. Work with Domino Console — Top page
3. Press PgDn to page through all the messages and check for potential
problems.
4. You can type Domino console commands, for example, show server or show
tasks, and press Enter. Wait a couple of seconds and press F5 ( Refresh) to
see the response.
5. It is a good idea at this point to verify whether the server is actually listening to
an IP interface. You can do so in the following two ways:
• Use the show port tcpip Notes command.
• Use the OS/400 interface, and run the Work with TCP/IP Network Status
(WRKTCPSTS) command, also known as NETSTAT *CNN or menu option 3.
6. Because you are already looking at the Domino console, the Notes command
may be most convenient at this time. Type sh port tcpip (sh is a short form for
show ) on the Domino command line and press Enter.
Wait a couple of seconds and press the F5 ( Refresh) to see the response.
Note: If you start the server, and then immediately start working with the
console, it may take longer for the server to respond to your command. Press
F5 repeatedly and you see more informational messages telling you what
functions are being started. Finally, you see the command that you entered
(with a greater than sign (>) on the left and two spaces indented) and the
response to it. The example in Figure 36 shows two lines with the sh port
tcpip command. The first one is displayed immediately after being entered,
and the second one appears together with the response. If the server is very
busy, there may be many informational messages shown between the two
commands.
80
Lotus Domino for AS/400 R5: Implementation
Work with Domino Console
Server: acmeds1
Previous subcommands and messages:
>
> sh port tcpip
> sh port tcpip
TCP/IP Port Driver
Transport Provider: TCP
Notes Session
Local Address
07850003
*:1352
078C0001
*:1352
Foreign Address
10.1.2.63:1759
*:*
Enter a Domino subcommand.
===> __________________________________________________________________________
_______________________________________________________________________________
F3=Exit F5=Refresh F6=Print F9=Retrieve
F17=Top F18=Bottom F21=Command line
Figure 36. Show TCP/IP port status on the domino console
The response (Local Address = *:1352) indicates that the Domino server is
listening on all (*) local IP interfaces on port 1352 (the default for Notes clients
if the Internet address part of the TCPOPT parameter of the CFGDOMSVR
command is specified as *SYSTEM). If a specific IP address had been specified
for the address, that IP address would show in place of the *.
If you see only the first two lines (TCP/IP Port Driver - Transport Provider:
TCP), it indicates that the Domino server is not able to connect to OS/400
TCP/IP. This can be for the following reasons:
• TCP/IP Support for OS/400 is not configured or not started.
• The TCP/IP interface is not active.
• Another application is already listening on port 1352.
• A (partitioned) Domino server is already started and is listening on all
interfaces).
7. Press F3 to exit the Domino console. Do not type Quit unless you want to end
the server session. Pressing F3 just ends the Domino console, but leaves the
server running.
Note
We received the message, LNT0910 Error occurred, unable to continue, the
first time we used the WRKDOMCSL command for a new server if we were
too quick to use the command.
The console file (/datadirectory/servername.noteshst) has not been created
by that time. Repeating the WRKDOMCSL command is successful.
Installing and setting up Domino for AS/400
81
2.9 Setting up an administration workstation for the server
On some platforms, a computer used for a Domino server may be both a server
and a Notes client workstation. The AS/400 system is a pure server in that it does
not provide a local client workstation. To use a Notes client, such as the Domino
Administrator, to manage Domino servers on AS/400 system, you must set up a
client workstation that can communicate with your AS/400 system through
TCP/IP. An alternative is to manage the Domino servers using the Domino Web
Administration tool, although not all functions can be performed through a
browser.
If you plan to use a Notes client workstation that is running Windows 95, Windows
98, or Windows NT, consider installing AS/400 Client Access. Client Access
includes a powerful administrative tool called Operations Navigator, which
provides a familiar Windows-based interface for managing both your AS/400
network and Domino servers on each AS/400 system. When used in combination
with Domino Administrator, Operations Navigator gives you access to all Domino
administrative functions in addition to its own special capabilities, such as these
functions:
• Start and stop Domino servers or view server properties with just a click of a
mouse.
• Set up both Domino and AS/400 users in one operation.
For more information about Operations Navigator and Domino for AS/400, see
Chapter 8, “Graphical user interface of Operations Navigator” on page 241.
2.9.1 Setting up the administration workstation
To use a Lotus Notes client to administer a Domino server on your AS/400
system, you must connect the Notes client workstation to your AS/400 system
using TCP/IP. Depending on the method you use to set up the Domino server on
the AS/400 system, you may also need to copy the organization’s certifier ID and
administrator ID from your AS/400 system to the workstation.
You must manually copy at least the certifier ID file to the workstation. You must
also copy the administrator ID file to the workstation if you specified that the
administrator ID should be stored only in a file (not in the Domino Directory) when
you set up the server.
In the R5.0 help database (as400hlp.nsf), it states that if you are using the Web
setup, the files are copied to your workstation from where you ran the set up. This
is not currently true and has been corrected in subsequent Release notes.
The following procedure assumes that the Notes client is not installed on the
workstation. If Notes is already installed, skip the tasks that are already done.
1. Determine the hardware and operating system requirements for the Notes R5
release (refer to the Notes installation documentation).
2. Connect the workstation so that it can communicate with the AS/400 system.
3. Install and set up the following components:
a. The operating system on the workstation, if you have not already done so.
82
Lotus Domino for AS/400 R5: Implementation
b. TCP/IP on the workstation. For instructions, see the documentation for the
TCP/IP product you installed on the workstation.
4. If you want to take advantage of the Operations Navigator graphical interface
for managing Domino servers on the AS/400 system, follow these steps:
a. Install and set up AS/400 Client Access on your AS/400 system and the
workstation. For details, see Client Access for Windows 95/NT - Setup,
SC41-3512, or Client Access Express for Windows - Setup, SC41-5507.
b. Make sure you installed the AS/400 integration option of the Domino for
AS/400 software (Option 1).
c. Add the Lotus Domino plug-in to Client Access.
5. Verify the TCP/IP connection to the AS/400 system.
Open a command window on the workstation and type ping hostname, where
hostname is the TCP/IP host name of the AS/400 system.
Note
You can find the TCP/IP host name of the AS/400 system by selecting menu
option 12 (Change TCP/IP domain information) from the Configure TCP/IP
menu. To the Configure TCP/IP menu, type CFGTCP on an AS/400 command
line, and then press Enter.
If the name of the Domino server is different from the TCP/IP host name for
the AS/400 system, also type ping servername, where servername is the name
of the Domino server.
If the PING is successful, the workstation is communicating with the server
and AS/400 system. If the PING is not successful, review the steps you
followed to set up TCP/IP on the workstation and the AS/400 system.
Note
If there is a firewall between your workstation and the server, the ping
technique does not work. However, you may still be able to communicate
with the server.
6. Install the Lotus Notes client software on the workstation. Make sure you
install the full set of administrative functions (called Domino Administrator for
Domino R5). When you select to install the Domino Administrator, it includes
the Notes client. Do not start Lotus Notes yet.
7. If you already have a \NOTES\DATA directory on your workstation that
contains a certifier ID (CERT.ID) or administrator ID (USER.ID) file, take
precautions to avoid replacing those files.
Create a separate directory for the ID files that you will copy from the AS/400
system.
For example, to create this new directory, type
lotus\notes\idfiles\servername, where servername is the name of the
Domino server you just set up on the AS/400 system.
Installing and setting up Domino for AS/400
83
8. As needed, copy the certifier ID (CERT.ID) and the administrator's user ID
(USER.ID) files from the Domino server to the workstation. Copy the files in
binary format. Use any method that you typically use to copy files between the
AS/400 system and a workstation. For example, you can copy the files by
using one of the following methods:
• TCP/IP File Transfer Protocol (FTP).
• Windows Network Neighborhood in combination with either AS/400 Client
Access or AS/400 NetServer support to map a network drive between the
workstation and AS/400 system. Then you can copy the file by using any
method that copies files from one directory to another on the workstation.
• Operations Navigator. Select File Systems —> Integrated File Systems
—> Root. Select the server data directory, which is usually
LOTUS/DOMINO/DATA or LOTUS/DOMINO/Servername. Then, copy (or
drag) the ID files to a local directory on the workstation.
To use any of these methods, you must have TCP/IP communications set up
and active between the workstation and the AS/400 system.
An example of using the FTP method is provided in Appendix A, “Copying ID
files using FTP” on page 469.
9. Ensure that the name and IP address of your Domino server is added to your
company Domain Name Server (DNS) or add it to your PC host file.
10.Start Lotus Notes on the workstation and fill in the following information:
• Indicate how the workstation is connected to the Domino server, such as
network connection using LAN.
• Enter the name of your Domino server.
• If the administrator ID is in a file that you copied to the workstation, click
the box that indicates the user ID is in a file.
• Also, specify the location of the ID file on the workstation, for example:
c:\lotus\notes\data\user.id or lotus\notes\idfiles\servername
• Provide the password for the administrator. You specified the password
when you set up the Domino server.
You have completed setting up a Domino server and an administrator workstation
for the server.
If your PC is already used as a Notes client to a different Domino organization (as
probably is the case if you already had ID files on your PC used in a test
environment) you probably must set up a new location document in your personal
address book database to be used in conjunction with your new USER.ID and
CERT.ID files for the new server. You may need to speak to someone who is
familiar with Domino systems administration to help you with this. You may want
to reset your PC to a clean state, which means not referring to any Domino
servers that no longer exist. To do this without deleting and reinstalling the Notes
client software, follow the instructions in the following Tip box.
84
Lotus Domino for AS/400 R5: Implementation
Tip
The following can be done to totally reset the Notes client on the PC.
It is suggested that the following commands be put into a bat file. Use the
appropriate directory for your installation. Notice that some of these files may
not exist on your PC and it is possible that not all relevant files have been
included. We found that it worked for us.
cd c:\lotus\notes\data
erase headline.nsf
erase bookmark.nsf
erase names.nsf
erase desktop5.dsk
erase cache.dsk
erase events4.nsf
erase journal.nsf
erase log.nsf
erase perweb.nsf
erase domadmin.nsf
erase user.id
erase cert.id
You also need to edit NOTES.INI and remove all but the first four lines as
shown here. NOTES.INI is now located in c:\lotus\notes (or the equivalent for
you) and not in the Windows directory.
[Notes]
Directory=C:\Lotus\Notes\Data
KitType=1
InstallType=2
You may want to create a reset NOTES.INI file and add the replacement of the
existing one into the batch file you create to delete all the .NSF and .ID files.
Click the Notes client icon, and you are prompted for your connection
information (server and ID).
Installing and setting up Domino for AS/400
85
86
Lotus Domino for AS/400 R5: Implementation
Chapter 3. Adding a Domino server to an existing organization
This chapter provides the procedure for setting up an additional Domino for
AS/400 server in an existing Domino domain and organization. It contains a
detailed explanation of how to register an additional Domino server that uses the
same organization certifier and a replica of the existing Domino Directory. It goes
through how to set up the server.
A Domino domain is not only defined by using the same domain name. The
correct definition is that all servers within a single domain use a replica of the
same Domino Directory. Therefore, all the configuration can be done in one place
and all users and servers are known to all servers within the domain. Remember,
the term Domino Directory is the R5 name for the Public Address Book or Name
and Address Book.
Note
The term Domino (or Notes) domain is not related to the term TCP/IP domain.
The second important concept is the organization. All Notes users and Domino
servers within the same organization have an ID that is based on the same
certifier, which was created (and stored in file CERT.ID) when the first server in
the organization was set up. An organization can also be split into organizational
units.
The default, and probably the most common way to structure a Notes network, is
to use a single organization within a single domain. However, an organization can
contain multiple domains. It is also possible (but less likely) that multiple
organizations or organizational units can be in the same domain.
For the purpose of this book, we have assumed that the domain contains the
same set of users and servers as the organization. For more information, refer to
the Domino Administrator Help (help\help5_admin.nsf) database, and the Domino
for the AS/400 Help (as400hlp.nsf) database.
Whenever we talk about configuring an additional server, we mean adding a new
server to an existing Domino domain (that is, registering it to an existing Domino
Directory) and at the same time including it in an existing organization (that is,
creating its server ID based on an existing certifier). This is the main difference
from a first server, when both the Domino Directory and the certifier ID are
created.
When an additional server is set up, the server ID file is created when you
register the new server to the existing Domino Directory before you configure the
new server. No new administrator ID is created. You either use the existing one to
administer the existing and new servers or you create a new user ID if a different
person needs to administer the new server.
© Copyright IBM Corp. 1999, 2001
87
3.1 Registering an additional Domino server
Note
The server registration process in this section is not specific to servers that run
on the AS/400 system. This process applies to any platform on which the Lotus
Domino Server runs.
The procedure to register a new Domino server is similar to the procedure used
when registering a new Notes user. Before adding a Domino server to an existing
Domino domain, you must register the server in the Domino Directory on a
registration server. The registration server (the Domino server on which you
register other servers) must be up and running on your network. To register a new
server from your workstation, you must have access to the registration server and
have at least Author access to the Domino Directory with the appropriate role in
the access control list of the Domino Directory.
From the Notes administrator workstation, perform the following steps:
1. From the Windows NT/98/95 desktop, launch the Domino Administrator (if it is
not already running).
There is a completely redesigned administration client for Domino Release 5.
See Appendix B, “Domino Administrator” on page 473, for information about
the names of the parts of this client interface.
When you install the Notes R5 Client, you can choose to install the Domino
Administrator client at the same time as the Notes client. The Notes Designer
for Notes 4.6 client can also be used to administer an R5 Domino server.
2. Select the Administration server from the Bookmarks, as shown in Figure 37.
Figure 37. Domino Administrator — Bookmarks
3. After the server is selected, click the Configuration tab.
4. On the tasks pane, select Server and click All Server Documents.
The results pane shows all Server documents by domain.
5. Select Registration from the tools pane, as shown in Figure 38. Under
Registration, click Server.
88
Lotus Domino for AS/400 R5: Implementation
Figure 38. Tools pull-own menu
6. If you want to use a different server to register your new server, click
Registration Server. This is used to change the registration server on which
the Domino Directory is updated with all the new server or servers details. If
your Registration Server is not listed, you can type in the name. You must be
able to establish a network connection to the registration server.
Figure 39. Server registration
7. If you must use a different certifier ID, click Certifier ID. Select the correct ID
file for the organization. You may require a mapped drive to access the
certifier ID file. Alternatively, you may have used FTP to put it in a directory on
your PC. You must know the correct password for the certifier ID.
8. Click Continue.
Figure 40. Server Registration — Basics
Adding a Domino server to an existing organization
89
9. In the Register Servers dialog box shown in Figure 40 on page 89, type the
required information. A description of the required information is provided in
the following list:
• Server Name: Enter the name of the new server. For more information,
refer to 2.4.2, “Naming the Domino server” on page 28.
• Password: You can enter a password to protect the server’s ID file. The
password is mandatory if you want the ID file to be attached to the Server
document in the Domino Directory. Attaching the file to the Server
document seems to make the server configuration on the AS/400 system
easier. However, after successfully configuring the server, you either must
enter the password manually every time you start the server in the future,
or you must clear the password (refer to 3.2, “Handling the ID file for an
additional server” on page 92).
The entire process is shorter if you do not specify a password (and
consequently cannot attach the ID file to the Server document). To do so,
you also must specify a minimum password length of zero.
• Domain: Enter the name of the existing Domino domain.
• Administrator: Type the name of the local Notes administrator or an
administration group. The name must match the name of an existing Notes
user or group. Notice that, when you configure an additional server on your
AS/400 system, no administrator is registered (unlike when you are
configuring a first server).
• Minimum password length: Use the password scroll bar to select the
required minimum password length. Specify 0 (zero) to allow you to clear
the password later. This also allows you to leave the password field empty.
However, this is only if the ID file will not be attached to the Server
document in the Domino Directory.
10.Click Other. You see the dialog box for the Other options for registering the
new server, as shown in Figure 41.
Figure 41. Server Registration — Other
A description of the information in Figure 41 on page 90 is provided in the
following list:
• Server Title
This long title is visible in the Domino Directory to identify the server.
90
Lotus Domino for AS/400 R5: Implementation
• Network: A Domino Named Network (DNN) defines the network to be used
by the Domino server.
• Local administrator: A local administrator for the new server is a user who
has Author access to the Domino Directory and can change the Server
document for this specific server.
• Store Server ID: You have the choice of storing the new server ID as an
attachment to the Server document in the Domino Directory, in a file on the
disk drive of your workstation, or both.
If the ID file is stored in the Domino Directory, the setup process (when you
configure the Domino server later) accesses the directory database to
detach the ID file. In this case, it is mandatory to specify a password, even
if you selected a minimum password length of 0.
If you choose to store the ID in a file, it is saved to the selected drive on
your workstation. It must be copied to the AS/400 integrated file system
(IFS) before running the Configure Domino Server (CFGDOMSVR)
command to set up the additional server.
The advantage of this method is that you do not have to clear the password
after setting up the additional server. If you do not want to specify a
password, deselect the check mark for In Address Book.
Note
The default drive and path for storing the ID file is set in the
Administration Preferences. This can be changed by clicking File
Preferences —> Administration Preferences. There are other
preferences that can be set in the Administration Preferences.
—>
If you want to store the file elsewhere, click Set ID File.
11.Click Register.
During the next couple of minutes, the actual registration process is
performed, updating the directory on the registration server. This includes the
following tasks:
• Creating a server ID for the new server and certifying it with a certifier
based on the existing organization (organizational unit) certifier, you
selected in step 7 on page 89.
• Creating a Server document for the new server in the Domino Directory,
and entering the administrator name in the Administrators field of the
Server document.
• Encrypting and attaching the server ID to the Server document in the
Domino Directory or saving the ID to a file on a disk of your workstation (or
both), depending on the selection you made .
• Adding the server name to the LocalDomainServers group in the Domino
Directory.
• Creating an entry for the new server in the Certification Log
(CERTLOG.NSF), if you created one on the registration server.
After finishing this process, the new server is known to the existing Domino
domain and organization. However, it must still be configured (set up) on the
AS/400 system using the Configure Domino Server (CFGDOMSVR) command
Adding a Domino server to an existing organization
91
from a 5250 display session or using a Web browser (refer to 2.6.2,
“Web-based setup” on page 58). Before taking a closer look at the setup
parameters, we first discuss two different ways to handle the new server ID
file.
3.2 Handling the ID file for an additional server
As pointed out earlier, you can put the new server ID in the following two places
when you register it:
• Attach the ID to the Server document in the Domino Directory.
• Store the ID on a disk.
Each method has advantages and disadvantages. We describe the
characteristics of each method in the following sections.
Note
The term Public Address Book (PAB) is no longer used for Domino Release
5.0. The NAMES.NSF database on a Domino server has been renamed the
Domino Directory.
3.2.1 Attaching the ID file to the Server document in the Domino Directory
The advantage of this method is that during the setup process on the AS/400
system, which requires running the Configure Domino Server (CFGDOMSVR)
command, the ID file is automatically retrieved from the registration server. The
disadvantage is that a password must be specified for the ID file.
This is not a problem during the configuration process because you can specify
the ID file password with the additional Domino server ID (ADDSVRID) parameter
of the Configure Domino Server (CFGDOMSVR) command. However, when you
start the server after configuring it, it does not completely start unless you access
the Domino console on the AS/400 system with the Work with Domino Console
(WRKDOMCSL) command and enter the correct password. This must be done
every time you start the server. Provided you did specify a minimum password
length of zero, you can clear the password at a later time.
Follow these steps:
1. Copy the file SERVER.ID file to a directory on the Administrator workstation.
For more details, see Appendix A, “Copying ID files using FTP” on page 469 or
map the Domino data directory on the AS/400 IFS as a network drive to your
workstation. Alternatively, map a network drive using Client Access or AS/400
NetServer to allow you to access the file.
2. From the Lotus Domino Administrator, select Certification from the tools
pane, as shown in Figure 38 on page 89. On the Certification sub-menu, click
ID Properties.
3. In the Choose ID File to Examine dialog box, select the server ID file from the
directory to which it was copied (or which is mapped to your workstation).
Click Open.
92
Lotus Domino for AS/400 R5: Implementation
4. Click Clear Password. This removes the password from the ID file.
Remember, this is only possible if you specified a minimum password length
of zero when you registered the server.
5. If you did not use a network drive, use FTP to copy the ID file back to the
AS/400 IFS.
Attention
After copying the ID file to the AS/400 IFS, the ownership for this IFS object
is changed from the QNOTES user profile to the user profile you were using
when storing the modified file on AS/400 IFS. Therefore, you must change
the ownership back to QNOTES before you can start the server.
6. Use the Change Owner (CHGOWN, not CHGOBJOWN) command to change ownership
of an IFS object. On any AS/400 command line (using the correct path to your
SERVER.ID), type:
chgown 'lotus/domino/server/server.id' qnotes
Press Enter.
If you did not set the minimum password length to 0, you must recertify your
server before you can remove the password. Consult Domino R5
administration documentation for information on how to do this.
Note
The entire process described in this section must be performed after you
have configured and started the additional server on the AS/400 system, as
described in 3.4, “Configuring an additional server in an existing Domino
domain” on page 95. If you choose not to attach the ID file to the Server
document, you must perform the steps described in 3.2.2, “Storing the ID file
on disk” on page 93, before configuring the server.
3.2.2 Storing the ID file on disk
If you do not attach the ID to the Server document in the Domino Directory, you
have the advantage that no password needs to be specified when configuring the
additional server. This does not mean that the ID has to be created without a
password. The ID file can still have a password. The minimum password length
should be set to zero because you may want to remove it later.
The disadvantage is that you must copy the ID file from your workstation disk to
the Domino data directory within the AS/400 IFS before configuring the server.
1. Before you can copy the new server ID file, you must decide in which IFS
directory you want to store the new ID file. Normally the data directory is
created when you execute the Configure Domino Server (CFGDOMSVR)
command. However, in this case, you must create the directory beforehand.
The following directory structure is recommended by Lotus. Replace the
<servername> with the name of the additional server you registered.
Assuming you want to use /lotus/domino/<servername> as your data
directory, you can enter the following commands on any AS/400 command
line, to create that directory:
Adding a Domino server to an existing organization
93
md '/lotus'
md '/lotus/domino'
md '/lotus/domino/<servername>'
Note
When you run the CFGDOMSVR command and the data directory already
exists, the contents are not deleted.
If you did not map a network drive, use FTP to copy the ID file back to the
AS/400 IFS.
Attention
After copying the ID file to the AS/400 IFS, the ownership for this IFS object
is changed from the QNOTES user profile to the user profile you were using
when storing the modified file on the AS/400 IFS. Therefore, you must
change the ownership back to QNOTES before you can start the server.
2. Use the Change Owner (CHGOWN, not CHGOBJOWN) command to change ownership
of an IFS object. On any AS/400 command line (using the correct path name
to your server.id file), type:
chgown '/lotus/domino/<servername>/server.id' qnotes
Press Enter.
3. If you do not change ownership of the ID file and attempt to start the server, it
shows the following message on the Domino console, and then ends:
Server exiting:
The ID file is write protected
Continue with the next task, which is to configure the additional server on your
AS/400 system.
3.3 Verifying the connection to the Domino server
During the setup process for an additional Domino server, an existing Domino
server is contacted to request a replica of the Domino Directory. Therefore, the
Domino server must be reachable by the AS/400 system using TCP/IP.
Note
This can be any existing Domino server in the organization, but requires the
most up-to-date replica of the Domino Directory.
It is a good idea to verify the connection by performing a ping from an AS/400
command line. Notice that a successful ping from your workstation to the Domino
server does not guarantee that the AS/400 system can also access that server.
You must use the Verify TCP/IP Connection (PING) command from an AS/400
command line (rather than from a DOS command line). For example, to verify the
connection to the server called AcmeDS1, on any AS/400 command line, type:
ping acmeds1
94
Lotus Domino for AS/400 R5: Implementation
Press Enter.
You must be able to ping by name. If you cannot reach the server by specifying its
name, but you do get a positive response by using the numerical IP address, the
name along with the correct IP address must be added to a name server (if any
exists) or to the AS/400 system host table (using the Configure TCP/IP
(CFGTCP) menu, option 10 or the Add TCP/IP Host Table Entry (ADDTCPHTE)
command).
3.4 Configuring an additional server in an existing Domino domain
The Domino server can be configured on the AS/400 system after the following
occur:
1. The new server has been registered (which creates the server ID file).
2. The ID file is put in the IFS and made available to QNOTES (if necessary).
3. The communication tests are completed.
If you want to configure any of the advanced Domino features, refer to Chapter 6,
“Advanced Domino Services for the AS/400 system” on page 159.
This section describes the AS/400 green screen setup of an additional Domino
server. You have the option to use a Web-browser or AS/400 Operations
Navigator to run a graphical install. For more information on the graphical
installation process, refer to 2.6.2, “Web-based setup” on page 58.
3.4.1 Setting up the additional server on the AS/400 system
The following steps describe the green screen method using the Configure
Domino Server (CFGDOMSVR) command.
1. Sign on to the AS/400 system with a user profile that has at least the following
special authorities:
•
•
•
•
*ALLOBJ
*SECADM
*JOBCTL
*IOSYSCFG
Access to all AS/400 objects
Security administrator
Job control
Device and communications configuration
2. On an AS/400 command line, type CFGDOMSVR and press F4. The display shown
in Figure 42 on page 96 appears.
Adding a Domino server to an existing organization
95
Configure Domino Server (CFGDOMSVR)
Type choices, press Enter.
Server name . . . . . . . . . . > AcmeDS2/Acme
Option . . . . . . . . . . . . . > *ADD
F3=Exit F4=Prompt F5=Refresh
F13=How to use this display
*FIRST, *ADD, *REMOVE
F10=Additional parameters
F24=More keys
More...
F12=Cancel
Figure 42. CFGDOMSVR for additional server (Part 1 of 3)
3.4.1.1 Detailed description of parameters for an additional server
The following section guides you through all the parameters which can, or must,
be specified when you set up (configure) a server which is an additional server in
an existing Domino domain. Use Table 13 to fill in the following parameters in the
fields shown in Figure 42.
Table 13. Additional domino server parameters (Part 1 of 3)
Keyword
Description
SERVER
Server name
Specifies the name of the Domino server. The first 15 characters of
this name must be unique across the organization. The Domino
server name can be a text string having 1 to 255 characters. The
full hierarchical server name must be entered into this field. Notice
that this is different from the first server where you just enter the
server name.
Example: AcmeDS2/Acme
OPTION
Options
Specifies whether you are setting up the first Domino server, adding
an additional Domino server, or removing a Domino server.
The possible values are *FIRST, *ADD, and *REMOVE. For a second
server, this is *ADD.
3. When the Configure Domino Server is first displayed there are only two
options: Server name and Option. Enter the name of the additional server and
type the value *ADD. After the values are entered, press Enter. This displays
additional required fields.
96
Lotus Domino for AS/400 R5: Implementation
Note
The contents of the Option parameter controls which additional parameters are
shown after you press Enter. For this example, we select * ADD so the new
server is added to an existing domain.
Configure Domino Server (CFGDOMSVR)
Type choices, press Enter.
Server name . . . . . . . . . .
AcmeDS2/Acme
Option . . . . . . . . . . . . .
Data directory . . . . . . . . .
*ADD
*FIRST, *ADD, *REMOVE
/lotus/domino/acmeds2
Time zone . . . . . . . . . . .
Daylight savings time . . . . .
Get Domino Directory from . . .
CST
*YES
AcmeDS1
F3=Exit F4=Prompt F5=Refresh
F13=How to use this display
F10=Additional parameters
F24=More keys
GMT,EST,CST,MST,PST,CET ...
*YES, *NO
More...
F12=Cancel
Figure 43. CFGDOMSVR for additional server (Part 2 of 3)
Table 14. Additional domino server parameters (Part 2 of 3)
Keyword
Description
DTADIR
Data Directory
Specifies the path to the AS/400 directory where you want Domino data files to reside.
If the specified directory does not exist, it is automatically created with public authority
of *EXCLUDE.
If the specified directory already exists, we recommend that you specify a public
authority of *EXCLUDE for this directory.
If you are setting up more than one Domino server on the same AS/400 system
(partitioned servers), specify a different data directory for each server.
Example: /lotus/domino/acmeds2
TIMEZONE
Time zone
Specifies the time zone to be used by the Domino server.
DAYSAVTIME
Daylight savings time
Specifies whether the server time stamp should be adjusted for daylight savings time (DST).
Note: Domino does not adjust the AS/400 system clock, it only adjusts the time stamps
internally. If DAYSAVTIME is set to *YES, Domino assumes DST starts on the first Sunday
in April and ends on the first Sunday in October. You can change these dates by editing the
NOTES.INI file and adding a DSTlaw statement. See the information about the DST and
DSTlaw statements in the administrator’s Help database (help\help5_admin.nsf) for more
information about these values. See the Note box following this table for more information
about daylight savings and Domino for AS/400.
Default: *YES
Adding a Domino server to an existing organization
97
Keyword
Description
NABSVR
Get Domino Directory from
Specifies the name of an existing Domino server that has the Domino Directory to be
used for this server. The Domino Directory is replicated from the specified Domino
server to this new server. Because the Domino Directory has a large amount of
information, the copy time could be extensive.
Example: AcmeDS1
4. Complete the parameters, as required. Press Page Down (or PgDn) to see the
next set of parameters.
Configure Domino Server (CFGDOMSVR)
Type choices, press Enter.
Additional server ID:
ID file . . . . . . . . . . .
ID file's password . . . . . .
Web browsers . . . . . . . . . .
Internet mail packages . . . . .
+ for more values
SMTP services . . . . . . . . .
Directory services . . . . . . .
News readers . . . .
Connection services
Advanced services .
+ for
. . . . . .
. . . . . .
. . . . . .
more values
F3=Exit F4=Prompt F5=Refresh
F13=How to use this display
*NAB
*NONE
*NONE
*NONE, *ALL, *HTTP, *IIOP
*NONE,*ALL,*IMAP,*POP3 ...
*DOMINO
*SYSDIR
*DOMINO, *MSF
*NONE, *ALL, *SYSDIR, *LDAP
*NONE
*DECS
*NONE
*NONE, *NNTP
*DECS, *NONE
*NONE, *ALL, *PARTITION...
F10=Additional parameters
F24=More keys
Bottom
F12=Cancel
Figure 44. CFGDOMSVR for additional server (Part 3 of 3)
Use Table 15 to fill in the information in Figure 44.
Table 15. Additional Domino server parameters (Part 3 of 3)
Keyword
Description
ADDSVRID
Additional server ID (file and password)
Specifies the name and associated password for the ID file for the additional Domino
server. This server ID file was created for the new server when it was registered by an
existing Domino server.
The possible values for the ID file are:
• *NAB :Retrieves the server ID file from the Domino Directory.
• server-ID-file-name : Specify the path name that identifies the server ID file to be
used for the new server.
Example: /lotus/domino/acmeds2/server.id
For the ID file password, specify the password that is associated with the new server
when it is created. A password is required only if the new server ID file is
password-protected, (only if a password was specified when the new server was
registered).
98
Lotus Domino for AS/400 R5: Implementation
Keyword
Description
WEB
Web browsers
Specifies which, if any, Web features should be included in the Domino server configuration.
These features enable Web browsers to access the Domino server.
• Specify *HTTP to include the HTTP Web server. The HTTP server enables Web
browsers to access the Domino server.
• Specify *IIOP to include the Internet Inter-ORB Protocol (IIOP) feature. IIOP lets
browsers and servers exchange complex objects, unlike HTTP, which only supports
transmission of text. The IIOP supports both Notes objects and object request
broker (ORB) objects.
Possible values: *ALL,*HTTP, *IIOP, and *NONE
Default: *NONE
MAIL
Internet mail packages
Specifies which, if any, Internet mail packages should be included in the Domino server
configuration. The mail packages enable the Domino server to send mail to and to receive
mail from the Internet. Unless *ALL or *NONE is entered, one or more keywords can be
entered.
Possible values: *ALL, *IMAP, *POP3, *SMTP, and *NONE
Default: *NONE
SMTP
SMTP services
If *SMTP or *ALL is specified for Internet mail packages (MAIL), use this parameter to
specify the type of SMTP support to set up.
•Specify *DOMINO to set up support for Domino mail using the built-in Domino SMTP.
Use this value if you want to use Domino or Internet mail, but do not need to
exchange mail with AS/400 mail functions such as OfficeVision/400.
•Specify *MSF to set up support for Domino, Internet and AS/400 mail. This support
uses the AS/400 SMTP server in combination with the AnyMail/400 Mail Server
Framework (MSF). Use this value if you want to use Domino mail and need to
exchange mail with AS/400 mail functions, such as OfficeVision/400.
Possible values: *DOMINO and *MSF
Default: *DOMINO
DIRSVR
Directory services
Specifies which, if any, directory services should be included in the configuration.
•Specify *SYSDIR to include directory synchronization services in the configuration.
Directory synchronization allows you to keep the AS/400 system distribution
directory synchronized with the Domino Directory.
•Specify *LDAP to include the Lightweight Directory Access Protocol (LDAP) in the
configuration.
Make sure that you select *NONE if you are not going to use directory synchronization. This
prevents a Domino server task (QNNINADD) being started each time the server is started.
Possible values: *ALL, *SYSDIR, *LDAP, and *NONE
Default: *SYSDIR
NEWS
News readers
Specifies whether an Internet news reader should be included in the Domino server
configuration. A news reader enables the Domino server to send messages to and receive
messages from Internet newsgroups. It also enables Internet news readers to access the
Domino server.
Specify *NNTP to include the Network News Transfer Protocol (NNTP) news reader.
Possible values: *NNTP and *NONE
Default: *NONE
Adding a Domino server to an existing organization
99
Keyword
Description
CNNSVR
Connection services
Specifies whether the Domino Enterprise Connection Services (DECS) feature should be
included in the Domino server configuration. DECS provides the capability to build live links
from Domino pages and forms to data from relational databases. Currently, the AS/400
system only supports connections to the DB2/400 relational database.
Possible values: *DECS and *NONE
Default: *DECS
ADVSRV
Advanced services
Specifies which, if any, features of the Lotus Domino Advanced Services should be included
in the Domino server configuration.
• Specify *PARTITION to set up this Domino server as a partitioned server. The
partitioned servers feature enables you to run up to 30 Domino servers on the same
AS/400. The actual number of servers that you can run on an AS/400 system
depends on system size and system load.
• Specify *BILLING to set up this Domino server with the billing feature. The billing
feature allows a Domino server to track and record specific Domino activities for
billing purposes.
• Specify *CLUSTER to set up this Domino server as a cluster server. The server cluster
feature enables you to group Domino servers in the same domain connected by a
local area network. Clusters provide failover protection for high availability of data
and services.
Possible Values: *ALL, *PARTITION, *BILLING, *CLUSTER, and *NONE
Default: *NONE
Note: You can enter multiple values. If you need additional entry fields to enter these
multiple values, type a plus sign (+) in the entry field opposite the phrase "+ for more values".
5. Pressing F10 displays some additional parameters that allow you to specify a
TCP/IP address to be used by this server and the name of a subsystem to use
for the server.
6. Based on your requirements, select the configuration options you require.
Press Enter to start the configuration process. Your keyboard is locked and
the display does not change for approximately the next three to five minutes.
Unlike setting up a first server, you do not see the terminal session display
(Figure 17 on page 56) unless errors occur. The following section explains
what happens behind the scenes after the configuration process is started.
3.4.2 File copy phase of the configuration process
During this phase, many Notes databases (.NSF files), Notes templates (.NTF
files) and other files needed for this server are copied to the data directory. You
receive messages indicating the percentage of files that has been copied.
Because you are setting up an additional server, ID files and the Domino
Directory are not created. Instead, the existing Domino server (registration
server) is contacted using TCP/IP. The following steps use the registration server.
Depending on whether the ID was attached to the new Server document (*NAB)
or stored as a file in an IFS directory, the steps are different.
1. ID File attached to Server document (ADDSVRID = *NAB)
The Server documents in the Domino Directory are searched for the name
specified with the SERVER parameter, using the full hierarchical name. The
100
Lotus Domino for AS/400 R5: Implementation
password provided for the additional server ID (ADDSVRID) is used to open
the ID file attached to the Server document.
A replica of the existing Domino Directory is created in the data directory of
the new server. The ID file is detached from the Server document and stored
in the new server data directory.
2. ID file stored in IFS directory
The ID file specified in the ADDSVRID parameter is opened by Domino, if
necessary, using the password provided for the server ID.
The Server documents in the Domino Directory are searched for the name
stored within the ID file.
Attention
No error message is sent if the name specified in the SERVER parameter
and the one stored in the ID file do not match.
A replica of the existing Domino Directory is created in the data directory of
the new server. A completion message indicates the successful configuration
of your Domino server.
3.4.3 AS/400 setup phase of the configuration process
After 5 to 15 minutes (depending on size and workload of your AS/400 system),
the end of this configuration phase is indicated by the message Press ENTER to
end terminal session.
Press Enter. This starts the very short final phase for the AS/400 specific
configuration. A subsystem name of either the form DOMINOxx or the name
specified is associated with the additional server and the subsystem description
(an object of type *SBSD) is created in library QUSRNOTES.
If you make a mistake with the selected parameters, but the server is created
successfully, you can use the Change Domino Server (CHGDOMSVR) command
to correct the parameters after the server is setup.
3.4.4 Starting the additional server
After the server is successfully configured, you can start it using one of the
methods described in 2.8.2, “Starting the Domino for AS/400 server” on page 74.
If your server has a password associated with it, you must enter the password at
the Domino console before the server is completely start.
See 3.2.1, “Attaching the ID file to the Server document in the Domino Directory”
on page 92, for details on how to remove the password.
Adding a Domino server to an existing organization
101
102
Lotus Domino for AS/400 R5: Implementation
Chapter 4. Lotus Domino for AS/400 commands
This chapter describes AS/400 commands you can use to maintain your Domino
server. There are no new commands in Domino for AS/400 Release 5.1.
However, some commands, such as SBMDOMCMD, have existed only since
Release 4.6.3. Other commands, such as CFGDOMSVR, were modified
substantially over the releases since their original R4.6 version. If you are using
Release 4.6.x, we suggest that you use the corresponding release notes
(readas4.nsf) to determine the specific functionality of the commands in your
implementation.
The following commands are described in this chapter:
•
•
•
•
•
•
•
•
•
•
•
•
•
•
Add Domino Applications (ADDDOMAPP)
Add Environment Variable (ADDENVVAR)
Configure Domino Server (CFGDOMSVR)
Change Domino Server (CHGDOMSVR)
Display Domino Console (DSPDOMCSL)
Display File (DSPF)
Display Stream File (DSPSTMF)
Edit File (EDTF)
End Domino Server (ENDDOMSVR)
Submit Domino Command (SBMDOMCMD)
Start Domino Server (STRDOMSVR)
Work with Domino Console (WRKDOMCSL)
Work with Domino Server (WRKDOMSVR)
Work with Environment Variable (WRKENVVAR)
4.1 Commands overview
On the AS/400 system, you can always find commands using the OS/400 GO
command. For example, if you want to find all related commands, type GO CMDxxx ,
where xxx is substituted by a three character abbreviation, such as WRK. If you
type GO CMDDOM, you receive a menu listing all commands related to Domino for
AS/400. Because these menus are not shipped with the Domino products, but
with the OS/400, the menus change according to the release of OS/400, rather
than Domino.
The resulting display from a GO CMDDOM command on a V4R3 system with an R5
Domino for AS/400 server installed is shown in Figure 45 on page 104.
© Copyright IBM Corp. 1999, 2001
103
CMDDOM
Domino Commands
Select one of the following:
Commands
2. Configure Domino Server
3. Display Domino Console
4. End Domino Server
6. Start Domino Server
7. Work with Domino Console
CFGDOMSVR
DSPDOMCSL
ENDDOMSVR
STRDOMSVR
WRKDOMCSL
Bottom
Selection or command
===> __________________________________________________________________________
_______________________________________________________________________________
F3=Exit F4=Prompt F9=Retrieve F12=Cancel F16=Major menu
(C) COPYRIGHT IBM CORP. 1980, 1998.
Figure 45. The Domino commands menu in V4R3
Because the commands come with the Domino for AS/400 product, you can use
the Add Domino Application (ADDDOMAPP), Submit Domino Server Command
(SBMDOMCMD), and Work with Domino Server (WRKDOMSVR) commands,
even though they are not listed on the Domino Commands menu on a V4R2 or
V4R3 system running Domino for AS/400 R5 as well.
The result of a GO CMDDOM command on a V4R4 system with an R5 Domino for
AS/400 server system is shown in Figure 46.
104
Lotus Domino for AS/400 R5: Implementation
CMDDOM
Domino Commands
Select one of the following:
Commands
1. Add Domino Application
ADDDOMAPP
3.
4.
5.
6.
Configure Domino Server
Change Domino Server
Display Domino Console
End Domino Server
CFGDOMSVR
CHGDOMSVR
DSPDOMCSL
ENDDOMSVR
8.
9.
10.
11.
Submit Domino Command
Start Domino Server
Work with Domino Console
Work With Domino Servers
SBMDOMCMD
STRDOMSVR
WRKDOMCSL
WRKDOMSVR
Bottom
Selection or command
===> __________________________________________________________________________
______________________________________________________________________________
F3=Exit F4=Prompt F9=Retrieve F12=Cancel F16=Major menu
(C) COPYRIGHT IBM CORP. 1980, 1999.
Figure 46. The Domino commands menu in V4R4
4.2 Add Domino Application (ADDDOMAPP)
The Add Domino Application (ADDDOMAPP) command allows you to add an
optional part of the Domino licensed program to a Domino server on an AS/400
system. Currently, only programs such as Lotus Calendar Connector for Office
Vision (LCCOV - 5733LC1) and Domino Migration Engine (DME - 5733DME), can
be added this way.
In future releases, this command will be used as a consistent way to add new
products from IBM, as well as from third party tools integrating with Domino. The
idea behind this new command is to provide one command for all additional
programs, instead of having one command for each program. For example, if you
want to add a Notes Pump Server, you use the ADDLNPSVR command. Rather
than having a different command for each add-in, ADDDOMAPP will be the
preferred command in the future. The ADDDOMAPP command has been
available since Release 4.6.2.
There are some restrictions when using this command. Your Domino server must
already be set up on the AS/400 system. Furthermore, the option you want to add
must be installed on the AS/400 system. This means that you must have loaded
the code using the Load and Run (LODRUN) or Restore Licensed Program
(RSTLICPGM) command. No list of choices is shown under the LICPGM
parameter in the Add Domino Application (ADDDOMAPP) command if you do not
have either of the two programs (mentioned at the beginning of this section),
installed on your AS/400 system. To run the command, you must have *ALLOBJ,
*SECADM, and *IOSYSCFG special authorities.
To run the command, type ADDDOMAPP on a command line and press F4. The
display shown in Figure 47 on page 106 appears.
Lotus Domino for AS/400 commands
105
Add Domino Application (ADDDOMAPP)
Type choices, press Enter.
Server path:
Server name . . . . . . . . . > ACMEDS1_____________________________________
________________________________________________________________________________
________________________________________________________________________________
___________________________________________________
Data subdirectory . . . . . . > *NONE_______________________________________
______
+ for more values _
Product . . . . . . . . . . . . ______
F4 for list
Optional part to be added . . . *BASE
*BASE, 0, 1, 2, 3, 4, 5, 6...
F3=Exit F4=Prompt
F24=More keys
F5=Refresh
F12=Cancel
Bottom
F13=How to use this display
Figure 47. Add Domino Application (ADDDOMAPP) display
The Server path (SVRPATH) parameter requires the following information:
• Enter the name of the Domino server to which the application should be
added. You can indicate the name of one server or you can specify a list of
servers. To enter more than one name, type a plus (+) sign next in the input
field next to the text "+ for more values" and press Enter. You receive extra
input fields. You can enter a server name on each input field. You can even
add the application to all Domino servers on a particular AS/400 system, by
selecting the *ALL value. If you want to retrieve the list of your actual servers,
position your cursor in the Server name field and press F4. A list of server
names appears.
• Indicate the subdirectory of the server data directory where you want to store
the application. If you specify *NONE, the application is added to the server data
directory. If you indicate the name of a subdirectory and the subdirectory does
not already exist, it is created automatically. The subdirectory must always be
under the server data directory. To determine your actual data directory, type
WRKDOMSVR and press F11. If you maintained the default R5 structure, it looks
like /lotus/domino/servername.
The Product (LICPGM) parameter requires you to enter the licensed program
identifier of the Domino application currently being added. If you want to retrieve
a list of available applications, press F4 while your cursor is positioned in the
Product field. The first seven characters represent the licensed program
identifier, the next two characters represent the option number and the remaining
text is the name of the licensed program.
The Optional part to be added (OPTION) parameter requires you indicate the
number of the optional part of the licensed program you want to add. You have
the choice between *BASE and a number 0 through 99. Your installation
instructions should tell you what to enter for this parameter.
106
Lotus Domino for AS/400 R5: Implementation
4.3 Add Environment Variable (ADDENVVAR)
The Add Environment Variable (ADDENVVAR) command allows you to add an
environment variable. Job-level environment variables are character strings
stored in a temporary space outside of your program but associated with your job.
System-level environment variables are stored in a global environment space that
is persistent across IPLs and have only existed since V4R4. Job-level
environment variables exist for the duration of the job or until they are deleted.
Job-level environment variables are important for setting the Domino
environment. Environment variable names and values are case sensitive.
On an AS/400 system, there is no default set of job-level environment variables
provided when a job starts. You must associate them with your job using the Add
Environment Variables (ADDENVVAR) or Work with Environment Variables
(WRKENVVAR) command. Environment variables remain active as long as the
job is active. This means that an interactive job is active until you do a signoff.
Environment variables are extended to a new job created using the Submit Job
(SBMJOB) command, provided the first job has environment variables.
Whenever you start a Lotus Domino for AS/400 server, the environment variables
defined for your job at the time you run the Start Domino Server (STRDOMSVR)
command are used by Domino to change default settings for the server.
To run the command, type ADDENVVAR on a command line and press F4. When
working on a V4R4 system, you have the choice between the job environment
variables (*JOB) and system environment variables (*SYS). After a job uses a
job-level environment variable API or CL command for the first time, it inherits the
system-level environment variables on its job-level environment space. Any
changes to job-level and system-level environment variables are then
independent of one another. You must have *JOBCTL special authority to use this
command to add, change, or remove system-level environment variables.
Figure 48 on page 108 shows the second display you receive after pressing
Page Down, when you add a job-level environment variables.
Lotus Domino for AS/400 commands
107
Add Environment Variable (ADDENVVAR)
Type choices, press Enter.
Environment variable . . . . . . ____________________________________________
________________________________________________________________________________
________
Initial value . . . . . . . . . *NULL_______________________________________
________________________________________________________________________________
________________________________________________________________________________
________________________________________________________________________________
________________________________________________________________________________
________________________________________________________________________________
___________________________________________________________________ ...
Additional Parameters
Coded character set ID . . . . .
Level . . . . . . . . . . . . .
Replace existing entry . . . . .
*JOB_______
*JOB
*NO_
F3=Exit F4=Prompt
F24=More keys
F12=Cancel
F5=Refresh
*JOB, *HEX...
*JOB, *SYS
*NO, *YES
Bottom
F13=How to use this display
Figure 48. Add Environment Variable (ADDENVVAR) display
For information on specific environment variables, please refer to 4.15, “Work
with Environment Variables (WRKENVVAR)” on page 133.
4.4 Configure Domino Server (CFGDOMSVR)
The Configure Domino Server (CFGDOMSVR) command is used to create a
server through a green screen interface. To run the CFGDOMSVR command, you
need *ALLOBJ, *SECADM, *IOSYSCFG, and *JOBCTL special authorities.
When you configure a Domino for AS/400 server, the name of the server is
defined to OS/400 by creating some internal objects in QUSRNOTES, the
Domino data directory is created in the IFS (unless it already exists), and
populated with a number of databases, templates, and other files. If you configure
a first ( OPTION(*FIRST)) server, the certifier ID, server ID and administrator ID, as
well as the Domino Directory (formerly called Public Address Book), are created
as new. If you create an additional (*ADD) server, the Domino Directory is
requested from the existing registration server through TCP/IP and the new
server ID file is either detached from the Server document or copied from the IFS
location specified with a command parameter.
Prior to release 4.6.3, the Configure Domino Server (CFGDOMSVR) command was
also necessary to reconfigure a server to add certain functions after the initial
configuration. This function has been replaced in 4.6.3 by the Change Domino
Server (CHGDOMSVR) command.
CFGDOMSVR is also used for deleting a server. The entire data directory is also
deleted when you delete a Domino server.
For detailed information about the command, refer to 2.6.1, “Set up using the
Configure Domino Server command” on page 44.
108
Lotus Domino for AS/400 R5: Implementation
4.5 Change Domino Server (CHGDOMSVR)
The Change Domino Server (CHGDOMSVR) command is used for changing the
configuration of a Domino server that you previously set up on your AS/400
system. The Change Domino Server command has been available since Release
4.6.3.
In earlier releases of Domino for AS/400, you used the CFGDOMSVR command
to modify your server definition. In R5, you do not need to use the CFGDOMSVR
command to make a modification to your server. For example, if you want to
switch to the Native Domino SMTP support or select another subsystem name,
you stop the server, use the CHGDOMSVR command, and restart the server.
Important
If you specify *NONE for any option where your previously defined a value, the
function will get deleted. This means that if you originally chose *HTTP as a
value for the WEB (Web browsers) parameter, do not select *NONE if you want to
keep the function. *NONE means that you do not want any Web browsers. If you
do not want to change anything, do not modify the actual values. If a field
shows * NONE, then it means that the function is actually not defined for that
server.
The advantage of using this command is that you do not need to worry about
inadvertently replacing your existing configuration files, which sometimes
accidentally happened when you were using CFGDOMSVR to change the
configuration of your server. Your NAMES.NSF, NOTES.INI, and your ID files are
not replaced or recreated. To run the CHGDOMSVR command, you must have
*ALLOBJ, *SECADM, *IOSYSCFG and *JOBCTL special authorities.
To run the command, type CHGDOMSVR on a command line and press F4. The
system prompts you for the name of the server. You can press F4 again to see a
list of Domino servers that are currently set up on your AS/400 system. When you
type the server name and press Enter, the system retrieves the current server
characteristics which are eligible for change.
The display in Figure 49 on page 110 appears.
Lotus Domino for AS/400 commands
109
Change Domino Server (CHGDOMSVR)
Type choices, press Enter.
Server name . . . . . . . . . . > ACMEDS1_____________________________________
________________________________________________________________________________
________________________________________________________________________________
___________________________________________________
Additional server ID:
ID file's password . . . . . . *NONE___________________________
Time zone . . . . . . . . . . . CST___
*SAME, GMT, EST, CST, MST ...
Daylight savings time . . . . . *NO__
*SAME, *YES, *NO
Web browsers . . . . . . . . . . *NONE
*SAME, *NONE, *ALL, *IIOP...
_____
Internet mail packages . . . . . *NONE_____
*SAME,*NONE,*ALL,*IMAP ...
+ for more values __________
SMTP services . . . . . . . . . *SAME__
*SAME, *DOMINO, *MSF
Directory services . . . . . . . *NONE__
*SAME, *NONE, *ALL, *LDAP...
_______
News readers . . . . . . . . . . *NONE
*SAME, *NONE, *NNTP
More...
F3=Exit F4=Prompt F5=Refresh F12=Cancel F13=How to use this display
F24=More keys
Figure 49. Change Domino Server (CHGDOMSVR) (Part 1 of 2)
If you want to change the values of any field, position your cursor in the field,
press F4. A list of available values is shown. Fields you did not change keep their
original value.
The remaining portion of this section describes the other parameters you can
enter for this command.
• ID file’s password (ADLSVRID): If the server ID is protected by a password,
enter the password in the ID file’s password (ADLSVRID) field.
• Time zone (TIMEZONE): Indicates the current time zone for the server.
Change to another time zone, if necessary. This setting is active after the
server is restarted.
Attention
For the CHGDOMSVR command in V4R2 and V4R3, the choices shown for the
TIMEZONE parameter are not the same as the ones shown in TIMEZONE
parameter for the CFGDOMSVR command. The CHGDOMSVR command still
works, as long as you do not specify any of the values listed in the choices that
are not supported, for example, *SYSVAL. V4R4 does not have this problem.
The following OS/400 PTFs are available to solve this problem:
V4R2: 5769SS1 SF52098
V4R3: 5769SS1 SF52097
• Daylight savings time (DAYSAVTIME): Indicates whether daylight savings
time is observed on this particular server. For more information on this
parameter, refer to the DAYSAVTIME parameter in Table 6 on page 48.
• Web browsers (WEB): Adds HTTP or IIOP server support or removes it. The
HTTP server enables Web browsers to access the Domino server.
110
Lotus Domino for AS/400 R5: Implementation
IIOP stands for the Internet Inter-ORB Protocol (IIOP) feature. IIOP lets
browsers and servers exchange complex objects, unlike HTTP, which only
supports transmission of text. The IIOP supports both Notes objects and
object request broker (ORB) objects. IIOP is a part of the Common Object
request broker architecture (CORBA) standard implemented in Release 5 of
Domino.
• Internet mail packages (MAIL): Adds IMAP, POP3, and SMTP mail support,
or removes the support. The possible values are:
– *IMAP: IMAP allows manipulation of mail in different modes. IMAP clients
can retrieve messages from the IMAP server and store them locally (similar
to POP3), access messages directly from the server, or copy messages for
offline use, then later synchronize with mail on the server. IMAP clients can
share mailboxes. Mailboxes are the equivalent of Notes mail folders.
The Domino IMAP server, like all IMAP servers, enables IMAP clients to
access their messages, but is not involved with sending and delivering
messages. These functions are handled by SMTP, for example by the
Domino SMTP/MIME MTA, and Domino mail routing.
See the Web site at http://www.imap.org for a listing of IMAP clients and
more information on IMAP.
– *POP3: The Post Office Protocol Version 3 (POP3) is an Internet mail
protocol that allows a client running POP3, such as Netscape Navigator,
Eudora Pro, or Microsoft Internet Explorer to retrieve mail from a host
server also running POP3. You can set up a Domino server to be a POP3
host server for POP3 clients. POP3 clients do not run Notes but have
Notes mail files on the POP3 server and they periodically connect to the
server to retrieve their mail. To use a Domino server as a POP3 server, you
run the server task POP3 and create a mail file on the server and a Person
document in the Domino Directory for each POP3 client that will use the
server as its POP3 host. POP3 clients do not use Notes IDs and their
Person documents do not contain public keys. Therefore, they are not
authenticated through Notes and they cannot read encrypted mail. A Notes
mail file can be accessed from both Notes and POP3 clients. Notice that an
AS/400 can also be a POP3 server.
– *SMTP: Specify this value if you plan to use Domino mail or want to
exchange mail with AS/400 mail functions, such as OfficeVision/400. If you
select *SMTP, you must indicate the type of SMTP support to set up through
the parameter SMTP Services (SMTP).
• SMTP services (SMTP): Specify this parameter only if you indicate SMTP as
an Internet Mail package. Since Release 5 of Domino on AS/400, you have
two choices for your SMTP support. You select the Native Domino SMTP
support or you use AnyMail/400 MSF with AS/400 SMTP support. If you do not
need to exchange mail with AS/400 mail functions, such as OfficeVision/400
or the Send Network Message (SNDNETMSG) command, you can use the
Domino SMTP support, which is easier to configure and faster. This is the
default value for a new server using SMTP. Implement this feature by selecting
*DOMINO as the value for the parameter.
If you want to exchange mail between AS/400 mail functions and Domino,
select *MSF as a value for the parameter.
Lotus Domino for AS/400 commands
111
• Directory services (DIRSRV): Specify in this parameter whether you want
directory synchronization active. Directory synchronization is a function which
allows you to keep your Domino Directory and your system distribution
directory (SDD) synchronized. You can also select LDAP support. You can
select both types of support, if required. For more information on directory
synchronization, refer to Chapter 11, “Directory synchronization” on page 313.
• News readers (NEWS): Adds Network News Transfer Protocol (NNTP)
support or removes it. The Domino news server enables the Domino server to
support Internet standard news reader clients using the NNTP protocol. The
server can also support NNTP server-to-server replication or newsfeeds with
other Internet standard news servers, including USENET.
Change Domino Server (CHGDOMSVR)
Type choices, press Enter.
Connection services . . . . . . *NONE
*SAME, *DECS, *NONE
Advanced services . . . . . . . *PARTITION
*SAME, *NONE, *ALL...
+ for more values __________
Log replication events . . . . . *YES
*SAME, *YES, *NO
Log client session events . . . *YES
*SAME, *YES, *NO
TCP/IP port options:
_
Communications port . . . . . TCPIP___________________________
Network name . . . . . . . . . NETWORK1________________________
Encrypt network data . . . . . *NOENCRYPT
*ENCRYPT, *NOENCRYPT
Internet address . . . . . . . *SYSTEM__________
Enable port . . . . . . . . . *YES_
*NO, *YES
+ for more values _
Subsystem and object names . . . DOMINO01__
Name, *SAME
Additional services . . . . . . *NONE_____
*SAME,*NONE,*ICM
+ for more values __________
Collation . . . . . . . . . . . *STD______
*SAME, *STD, CS, DA-DK-AA ...
Bottom
F3=Exit F4=Prompt F5=Refresh F12=Cancel F13=How to use this display
F24=More keys
Figure 50. Change Domino Server (CHGDOMSVR) (Part 2 of 2)
Press PgDn to see the remaining parameters.
• Connection services (CNNSRV): Specify whether you want the Domino
Enterprise Connection Services (DECS) feature included in your Domino
server configuration. DECS has been available since Release 4.6.3. It
provides the capability to build live links from Domino pages and forms to data
from relational databases. Currently, the AS/400 system only supports
connections to the DB2/400 relational database. DECS is installed together
with the *BASE option of the LODRUN command.
• Advanced services (ADVSRV): Adds partitioned servers, server clustering,
and billing support or removes the support. With Lotus Domino for AS/400
Release 5, you can have up to 30 partitioned servers on one AS/400 system.
For more information on partitioned servers and clustering, refer to Chapter 6,
“Advanced Domino Services for the AS/400 system” on page 159.
• Log replication events (LOGREPEVT): Specify whether the server should
log replication events or not. This setting can also be modified by creating a
configuration document in the Domino Directory of the server.
112
Lotus Domino for AS/400 R5: Implementation
• Log client session events (LOGSSNEVT): Specify whether the server
should log client session events or not. This setting can also be modified by
creating a configuration document in the Domino Directory of the server.
• TCP/IP port options (TCPOPT): This parameter specifies options for the
TCP/IP port.
– Communications port: Specify the name of the port whose characteristics
you want to modify. The name probably will be TCPIP, although it is
possible to have another name. The communication port can have a
maximum length of 31 characters.
– Network Name: If you change the Network name, you generate another
Domino Named Network (DNN, formerly known as Notes Named Network
or NNN). This is a modification which is reflected in the Server document.
Changing the name has an impact on the way your mail is routed. Mail is
routed automatically in the same Network. This is not the case if your
servers are defined in different networks. Please refer to the Domino 5
Administration Help database for more information about mail routing.
– Encrypt network data: If you want the data sent through the TCP/IP port
to be encrypted, specify *ENCRYPT as value for the parameter. This can
cause a small performance degradation. *NOENCRYPT means that the data
sent through the port is not encrypted.
– Internet address: Use the Internet address option to specify a separate
Internet (IP) address for the server's port. There is no need to change
anything if you do not plan on setting up partitioned servers. However, if
you set up partitioned servers based on different IP addresses, you can
assign an IP address to each partitioned server with this parameter. You do
not need to edit NOTES.INI manually any more. The
TcpIp_Address=0,10.1.2.3:1352 line is automatically added to the servers
NOTES.INI file.
– Enable port: If you want to use the port, it should be enabled. This value
should always be set to *YES if you want to have a working server.
• Subsystem and object names (SBS): Specify the name of the subsystem in
which you want your Domino server to run. This name is also used for related
objects, such as a job description(*JOBD), a job queue (*JOBQ), and a class
(*CLS). These objects are stored in QUSRNOTES library. If you are changing
the SBS parameter, the Domino server and the subsystem under which this
Domino server is running must be ended before you run the CHGDOMSVR
command.
• Additional Services (ADLSRV): You can choose not to use any Additional
Services or to activate Internet Cluster Manager (ICM). ICM extends failover
and load balancing capabilities to Web browsers, offering enhanced reliability
for Web applications. For more information on ICM, refer to 9.3, “Clustering
Domino Web servers” on page 289.
• Collation (COLLATE): Specify the way in which your Domino server should
sort characters. With the standard collation sequence, Domino sorts numbers
and accented characters before letters. If you want a language specific
collation code, specify the abbreviation of your language. Press F4 on this
parameter to get a list of all possible values.
Lotus Domino for AS/400 commands
113
Attention
If you want to modify the timezone (TIMEZONE), daylight savings time
(DAYSAVTIME), advanced services (ADDSRV ), TCP/IP port options (TCPOPT
parameter), or subsystem name (SBS), you must stop the server first. If this is
not the case, you receive error message LNT0909. If you want to modify the
subsystem name, you also must end the subsystem.
Figure 51 shows the detailed error message information you receive when trying
to change the time zone, the daylight savings time, or the advanced services
while the server is running.
Additional Message Information
Message ID . . . . . . :
Message type . . . . . :
Date sent . . . . . . :
LNT0909
Diagnostic
03/02/99
Severity . . . . . . . :
30
Time sent . . . . . . :
09:44:48
Message . . . . : Server Acmeds1 needs to be ended before it can be
reconfigured.
Cause . . . . . : Server Acmeds1 has to be ended before it can be
reconfigured. The options you have requested be changed require ending the
server first.
Recovery . . . : If you are changing any of the following, you must end the
server first: TIMEZONE, DAYSAVTIME, TCPOPT, ADVSRV, SBS. After the server
has successfully ended, attempt this command again. If you are changing the
SBS parameter, the subsystem under which this Domino server is running must
be ended as well. This subsystem is LABSBS.
Bottom
Press Enter to continue.
F3=Exit F6=Print F9=Display message details
F10=Display messages in job log F12=Cancel F21=Select assistance level
Figure 51. LNT0909 error message
You can change the values of the other parameters while the server is running.
However, you need to stop and restart the server for the changes to take effect.
4.6 Display Domino Console (DSPDOMCSL)
The Display Domino Console (DSPDOMCSL) command allows you to see your
Domino console from a green screen interface. Press F5 (Refresh) on the display
to monitor what is happening. Because you are only operating in a read-only
mode, you cannot enter console commands. Multiple people can run the
DSPDOMCSL command at the same time. You must have *JOBCTL special
authority to run the command.
The command only has one parameter, which is the name of the server you want
to monitor. To request a list of available servers, position the cursor in the Server
field and press F4. Type in the name of the server you want to use and press
Enter.
114
Lotus Domino for AS/400 R5: Implementation
The display shown in Figure 52 appears.
Display Domino Console
Server: ACMEDS1
Previous subcommands and messages:
OS400 Domino Server built at 00:59:01 on Feb 22 1999.
Lotus Domino (r) Server, Build 164.1 (Intl), 28 January 1999
Copyright (c) 1985-1999, Lotus Development Corporation, All Rights Reserved
03/03/99 12:32:55
03/03/99 12:32:55
03/03/99 12:32:56
03/03/99 12:33:02
Directory.
03/03/99 12:33:07
03/03/99 12:33:12
03/03/99 12:33:17
03/03/99 12:33:19
AM
AM
AM
AM
Index update process started
Stats agent started
Database Replicator started
Acmeds1/ACME is the Administration Server of the Domino
AM
AM
AM
AM
Schedule Manager started
Calendar Connector started
Event Dispatcher started
Releasing unused storage in database statrep.nsf...
03/03/99 12:33:26 AM Database Server started
F3=Exit
F17=Top
F5=Refresh
F18=Bottom
F6=Print
F21=Command line
Figure 52. Display Domino Console (DSPDOMCSL) display
The output is automatically shown on your display. There is no way to redirect it
to a printer, except by pressing Print Screen.
The console information is initially positioned to show the most recent events.
You can use Page Up to display earlier events or Page Down to display more
recent events. F5 (Refresh) updates the information with any additional events
that occurred since you started the console session or last pressed F5. Press F3
(Exit) to end the console session.
Tip
If you must enter Domino console commands while using DSPDOMCSL, press
F21 to see an AS/400 command line and use the Submit Domino Command
(SBMDOMCMD) command, and then press Enter to return to the Domino console.
Press F5 to refresh the display.
4.7 Display File (DSPF)
The Display File (DSPF) command is shipped with V4R4 of the operating system.
This is not a Domino command, but is mentioned here because it can be useful in
a Domino environment. You do not need any special authority to run this
command. However, you need at least read authority to the file you want to
display.
Lotus Domino for AS/400 commands
115
Display File (DSPF)
Type choices, press Enter.
Stream file, or . . . . . . . .
______
Data base file . . . . . . . . .
Library . . . . . . . . . . .
F3=Exit F4=Prompt
F24=More keys
F5=Refresh
____________________________________________
__________
Name
*LIBL_____ Name, *LIBL, *CURLIB
F12=Cancel
Bottom
F13=How to use this display
Figure 53. Display File (DSPF) display
If you want to display a stream file, enter the path and the name of the file in the
Stream file parameter (STMF). If you want to display a DB2/400 file, enter the file
name and its library in the Data base file parameter (FILE).
For example, you can use this command to list the contents of the file
DOMINO_SERVERS, which resides in the directory
/QIBM/USERDATA/LOTUS/NOTES. This file lists all your servers that are
defined, the subsystems they are in, and the number of the last partition used. In
previous releases of OS/400, the file was difficult to read with DSPSTMF. In
V4R4, it is presented as a text file.
The display in Figure 54 shows you an example of the result of DSPF on the
DOMINO_SERVERS file. This file cannot be read with a PC editor.
116
Lotus Domino for AS/400 R5: Implementation
Browse : /QIBM/USERDATA/LOTUS/NOTES/DOMINO_SERVERS
Record . :
1 of
10 by 15
Column:
Control :
1 of
59 by 79
....+....1....+....2....+....3....+....4....+....5....+....6....+....7....+....
************Beginning of data**************
LAST_PARTITION=02
SERVER=*HTTPSETUP
DIRECTORY=/QIBM/UserData/HTTPSetup/Notes/Data
SBSD=QDOMINOHT
SERVER=ACMEDS1
DIRECTORY=/domino/Acmeds1
SBSD=LABSBS
SERVER=JMDOM5
DIRECTORY=/domino/jmdom5
SBSD=DOMINO02
************End of Data********************
F3=Exit
F10=Display Hex F12=Exit F16=Repeat find
(C) COPYRIGHT IBM CORP. 1980, 1999.
F19=Left
F20=Right
Figure 54. The DOMINO_SERVERS file displayed using the DSPF command
4.8 Display Stream File (DSPSTMF)
Display Stream File (DSPSTMF) is a command which is only available in V4R2
and V4R3 (in V4R4 the function is provided by DSPF). The command is delivered
through PTFs. For detailed information on the PTFs to apply, refer to 4.9, “Edit
File (EDTF)” on page 119.
If you want to run the command, you must make sure that the library which
contains the command is in your library list. To run the command, type DSPSTMF
on an AS/400 command line and press Enter. The display shown in Figure 55 on
page 118 appears.
Lotus Domino for AS/400 commands
117
Display Stream File (DSPSTMF)
Type choices, press Enter.
Stream file . . . . . . . . . . ____________________________________________
________________________________________________________________________________
________
F3=Exit F4=Prompt
F24=More keys
F5=Refresh
F12=Cancel
Bottom
F13=How to use this display
Figure 55. Display Stream File (DSPSTMF) display
There is only one parameter to enter the name of the stream file. For example,
with this command you can display the NOTES.INI file and the
DOMINO_SERVERS file, which resides in the directory
/QIBM/USERDATA/LOTUS/NOTES. The data you see displayed if you look at
this file is not automatically translated from its original LMBCS (Lotus MultiByte
Character Set) format to EBCDIC. LMBCS is the format in which Notes stores all
internal text, except file attachments and objects. If you want to read the content
of the file, you must press F13 (Convert) it to Hexadecimal first (F10), and then
press F13 (Convert) a second time to convert the hexadecimal characters into a
readable format.
118
Lotus Domino for AS/400 R5: Implementation
Stream file. .
Offset . . . .
Control. . . .
Find . . . . .
-- -00D300C1
00E300C9
00D900E5
00E200C5
00C300E3
00D40061
006100C8
006100D5
00810025
00D400C9
00E500C5
002500C4
007E0061
00940084
007E00C4
F3=Exit
Display Stream File
. : /qibm/userdata/lotus/notes/domino_servers
. :
0
Size :
732
. :
. :
+ - - - - * - - - - + - - - - *
----+----*----+----*
00E200E3 006D00D7 00C100D9 00E300C9
L A S T _ P A R T I
00D600D5 007E00F0 00F50025 00E200C5
T I O N = 0 5 S E
00C500D9 007E005C 00C800E3 00E300D7
R V E R = * H T T P
00E300E4 00D70025 00C400C9 00D900C5
S E T U P D I R E
00D600D9 00E8007E 006100D8 00C900C2
C T O R Y = / Q I B
00E400A2 00850099 00C40081 00A30081
M / U s e r D a t a
00E300E3 00D700E2 008500A3 00A40097
/ H T T P S e t u p
009600A3 008500A2 006100C4 008100A3
/ N o t e s / D a t
00E200C2 00E200C4 007E00D8 00C400D6
a S B S D = Q D O
00D500D6 00C800E3 002500E2 00C500D9
M I N O H T S E R
00D9007E 00D100D4 00C400D6 00D400F4
V E R = J M D O M 4
00C900D9 00C500C3 00E300D6 00D900E8
D I R E C T O R Y
00840096 00940089 00950096 00610091
= / d o m i n o / j
00960094 00F40025 00E200C2 00E200C4
m d o m 4 S B S D
00D600D4 00C900D5 00D600F0 00F20025
= D O M I N O 0 2
F10=Display character
F12=Cancel
F13=Convert
F16=Find
Figure 56. The DOMINO_SERVERS file displayed using DSPSTMF
Refer to 4.7, “Display File (DSPF)” on page 115, to see how this file looks when
using the V4R4 version of the DSPF command.
4.9 Edit File (EDTF)
The Edit File (EDTF) command allows you to edit a stream file, such as
NOTES.INI or a database file. Starting with V4R4, the command is shipped with
the base code of OS/400. Prior to V4R4, it was provided by a PTF. At the same
time, the look has slightly changed. We first discuss the version of the command
for V4R2 and V4R3. After that, you find the parameters for V4R4.
Tip
There are line commands available, such as I for Insert line, D for Delete line,
and C for Copy line. To receive an overview of the available line commands,
position the cursor on one of the input lines in front of a line of the file you are
viewing. Press (F1) for help. You receive a help display showing you which
commands are allowed. Most of the line commands are the same as for Source
Entry Utility (SEU).
4.9.1 EDTF in V4R2 and V4R3
PTFs, SF45296 for OS/400 V4R2 and SF49052 for V4R3, provide the objects for
the Edit File (EDTF) and the Display Stream File (DSPSTMF) commands. In
previous releases, the source members for these tools were provided in library
QUSRTOOLS. Therefore, you may have an older version of these tools in one or
more libraries on your system. The functions of the older tools are different from
those provided with this PTF. To make sure you use the correct version of the
Lotus Domino for AS/400 commands
119
tools, existing objects with the same name should be deleted before restoring the
tools provided with the PTF.
After loading and applying PTF SF45296, the objects for the EDTF and
DSPSTMF commands are provided in a save file (an object of type *FILE,
attribute SAVF), which is called QGPTOOLS. It resides in library QGPL. If you
want to use these commands, follow these steps:
1. Sign on to the system with a user profile that has *ALLOBJ special authority.
2. Delete any old objects that exist on your system for these commands. This
must be done to avoid incompatibilities. Use the following command
statements to remove all the objects from your system before restoring from
the save file:
All objects for EDTF
DLTPGM PGM(*ALL/EDTF)
DLTF FILE(*ALL/EDTF)
DLTCMD CMD(*ALL/EDTF)
Objects for DSPSTMF
DLTPGM PGM(*ALL/DSPSTMF)
DLTPGM PGM(*ALL/HEXEDITOR)
DLTPGM PGM(*ALL/HEXEDTATN)
DLTSRVPGM SRVPGM(*ALL/HEXEDTSRV)
DLTF FILE(*ALL/HEXEDITOR)
DLTCMD CMD(*ALL/DSPSTMF)
3. Determine which user library will contain the objects. Create it if it does not
exist. Although you can give your library any name you want, we recommend
you give it the name QGPTOOLS. For further explanation on this advice, refer
to the following Attention box.
CRTLIB LIB(yourlibrary)
4. Run the following command to restore the tools:
RSTOBJ OBJ(*ALL) SAVLIB(QGPTOOLS) DEV(*SAVF)
OBJTYPE(*ALL) SAVF(QGPL/QGPTOOLS)
MBROPT(*ALL) RSTLIB(yourlibrary)
Attention
For V4R2 and V4R3, a check is done in WRKDOMSVR command as to
whether the PTF is loaded and applied. If it is, you receive option 13 (Edit
Notes.ini). If the PTF is not loaded, the option is not displayed. However, if
the PTF is loaded, but is not restored in library QGPTOOLS, option 13 is still
shown. When the option is run, the option tries to locate the command in
library QGPTOOLS. This generates error message CPD0030 Command not
found. If you did the restore into a library other than QGPTOOLS, you must
add that library to your library list before you run the WRKDOMSVR
command.
5. To run the Edit File command, type EDTF on an AS/400 command line and
press F4. The display in Figure 57 appears.
120
Lotus Domino for AS/400 R5: Implementation
Edit Files (EDTF)
Type choices, press Enter.
Stream file to edit: . . . . . . '*DBFILE'___________________________________
____________________________________
DataBase file to edit: . . . . . __________
Name
Library: . . . . . . . . . . .
*LIBL_____ Name, *LIBL, *CURLIB
Member to be edited: . . . . . . *FIRST____
Name, *FIRST
F3=Exit F4=Prompt
F24=More keys
F5=Refresh
Bottom
F13=How to use this display
F12=Cancel
Figure 57. Edit File (EDTF) command for V4R2 and V4R3
As shown in Figure 57, the system allows you to edit a DB2/400 database file in
the file system QSYS. If you want to edit a stream file, enter the name of the
stream file in the first parameter (STMF). You do not need to specify the quotes if
you are using the prompt. The other parameters can be ignored if you only want
to display a stream file.
4.9.2 Edit File (EDTF) in V4R4
As mentioned in the beginning of this chapter, the Edit File (EDTF) command is
shipped with the base code of the OS/400 from V4R4.
To run the command, type EDTF on an AS/400 command line and press F4. The
display shown in Figure 58 on page 122 appears.
Lotus Domino for AS/400 commands
121
Edit File (EDTF)
Type choices, press Enter.
Stream file, or . . . . . . . .
______
Data base file . . . . . . . . .
Library . . . . . . . . . . .
F3=Exit F4=Prompt
F24=More keys
F5=Refresh
____________________________________________
__________
Name
*LIBL_____ Name, *LIBL, *CURLIB
F12=Cancel
Bottom
F13=How to use this display
Figure 58. Edit File (EDTF) command for V4R4
The command has the following two parameters:
• If you want to edit a stream file, enter the path and the name of the file in the
Stream file (STMF) parameter.
• If you want to edit a DB2/400 database file, enter the file name and its library
in the Data base file parameter (FILE).
4.10 End Domino Server (ENDDOMSVR)
The End Domino Server (ENDDOMSVR) command allows you to shut down your
Domino server. You must have *JOBCTL special authority to run the command.
To run this command, type ENDDOMSVR on any AS/400 command line and press F4.
The display shown in Figure 59 appears.
122
Lotus Domino for AS/400 R5: Implementation
End Domino Server (ENDDOMSVR)
Type choices, press Enter.
Server name . . . . . . . . . . ____________________________________________
________________________________________________________________________________
________________________________________________________________________________
____________________________________________________
How to end . . . . . . . . . . . *CNTRLD
*CNTRLD, *IMMED
F3=Exit F4=Prompt
F24=More keys
F5=Refresh
F12=Cancel
Bottom
F13=How to use this display
Figure 59. End Domino Server (ENDDOMSVR) display
For the Server name parameter, you must specify the name of your server. If you
cannot remember your server name, press F4 a second time. A list of server
names is shown from which you can select a server.
For the How to end parameter (OPTION), select a controlled ( *CNTRLD) or an
immediate ( *IMMED) server shutdown. You should always run a controlled server
shutdown. This way, the ENDDOMSVR command runs a "quit" Domino server
command. All AS/400 jobs used by the Domino server are ended in a controlled
manner. The subsystem remains active. The subsystem is using (by default) the
*BASE pool. Therefore, in leaving the subsystem active when the server is down, no
storage pools remain allocated. However, if you change the subsystem description to
use private storage pools, those pools remain allocated until the subsystem is ended.
Attention
You should only end the server immediately if the controlled server shutdown
fails. Data could be lost if server processing is stopped abruptly.
4.11 Submit Domino Command (SBMDOMCMD)
The Submit Domino Command (SBMDOMCMD) allows you to submit a Domino
server console command to a Domino server without accessing the Domino
console. You can use this command if someone else has acquired the console
using the WRKDOMCSL command or you want to launch commands from a
batch program.
Often, it is useful to run a task while the server is not running. For example, you
may want to fix up or compact the Domino Directory without having the server up.
Lotus Domino for AS/400 commands
123
You can run the command if you have either of the following access authorities.
• *ALLOBJ special authority
• *USE authority to the SBMDOMCMD command object in the QSYS library
and *USE authority to the QNNINSDC program object in QNOTES library
This command can only be used to submit Domino commands to your Domino
server. You cannot use it to enter a server password when starting the Domino
server. Because the output can be stored in a file, you can use the command in a
batch program running at night.
To run the command, type SBMDOMCMD on a command line and press F4. The
display shown in Figure 60 appears.
Submit Domino Command (SBMDOMCMD)
Type choices, press Enter.
Command . . . . . . . . . . . . ____________________________________________
________________________________________________________________________________
________________________________________________________________________________
____________________________________________________
Server name . . . . . . . . . . ____________________________________________
________________________________________________________________________________
________________________________________________________________________________
____________________________________________________
F3=Exit F4=Prompt
F24=More keys
F5=Refresh
F12=Cancel
Bottom
F13=How to use this display
Figure 60. Submit Domino Command (SBMDOMCMD) command
The command has the following two parameters:
• The Command (CMD) parameter allows you to enter the command you want
to run, for example sh port tcpip.
• The Server name parameter requires you to enter the name of the server for
which you want to run the command.
Any output from the command is shown at the Domino server console. However,
it is possible to redirect the output to a file. To do so, add a redirection symbol (>)
and a file name to the command. The command should be followed by at least
one space. The filename should follow immediately after the redirection symbol.
The system always creates a new file to receive the result of the command. If the
file does not exist when the command is run, the system creates it. If the file
exists when the command is run, the file is replaced by the newly created one, for
example:
sh port tcpip >ports
124
Lotus Domino for AS/400 R5: Implementation
This generates a file named ports, which contains the result of the sh port tcpip
command. The file is created by default in the server data directory, as a stream
file. However, you can indicate any IFS path which can host stream files.
Therefore, it is valid to enter the sh port tcpip >/ports command. This way,
the file is created in the root directory.
To run a server command from a batch job, use the Submit Job (SBMJOB)
command and specify the SBMDOMCMD value for the Command to run (CMD)
parameter. You can also include the SBMDOMCMD command as a statement in
a CL program. In either case, specify the SBMDOMCMD command as follows:
SBMDOMCMD cmd('server-command >file-name') server(server-name)
Note that server-command is the server command to run, file-name is the file, if
any, into which any output should be written, and server-name is the Domino
server on which the server command should run. This way, you can run a
compact command against a database from your CL program by specifying the
following command:
SBMDOMCMD cmd(’load compact databasename.nsf’) server(server-name)
A successful submission of the command generates the completion message,
LNT0905 Domino command submitted for processing on server &1, where
your server name is substituted for &1 .
An incorrect command is considered as being submitted correctly, as long as the
necessary parameters are specified and as long as the server name is correct. If
the command you entered contains syntax errors, the Domino console displays
the error message shown in Figure 61.
Display Domino Console
Server: Acmeds1
Previous subcommands and messages:
PORT portname
Disable/Enable transactions on port
TRACE servername
Trace server connection
03/02/99 01:44:13 PM Periodic full text indexer starting, performing hourly
full text indexing
03/02/99 01:44:13 PM Periodic full text indexer terminating
03/02/99 01:49:26 PM Searching Administration Requests database.
> sh port tcp
No such Notes Port Driver known
> show tcpip
Command or option is not recognized
F3=Exit
F17=Top
F5=Refresh
F18=Bottom
F6=Print
F21=Command line
Figure 61. Domino console with error messages as a result of SBMDOMCMD
An unsuccessful submission of the command generates the following escape
message: LNT0904 Domino command not submitted. Reason code &1. A valid reason
can be that you misspelled the name of your server.
Lotus Domino for AS/400 commands
125
4.11.1 Running Domino commands when the server is inactive
Note
While a server is active, the Directory file NAMES.NSF is in use. One of the
Domino R5 enhancements is the support for the compacting of databases even
when they are in use. After creating a new server, we found that although the
On Disk Structure (ODS) of the NAMES.NSF file is R5 format, the first compact
of NAMES.NSF must be done with the server inactive using the instructions in
this section. After this, NAMES.NSF can be compacted when the server is
active.
If you want to run certain commands to your Domino server while it is not active,
such as fixup or compact tasks, you must take a different approach.
Domino for the AS/400 system is integrated with the AS/400 security system.
Therefore there are some unique requirements for running a Domino task outside
the server (that is, not through the load command in the Domino console).
Essentially, the following three items are required:
1. Set the PATH environment variable.
2. Run the job under the QNOTES user profile.
3. Make sure the current IFS directory is the appropriate data directory.
As mentioned previously, you must set up the correct environment variables. If it
is always the same, you can set it up in the initial program of the user invoking the
command. The initial user program is specified in the user profile. It behaves like
a logon script. If you want to specify it only for a particular job, then you should
write a CL program which could look similar to the one shown in Figure 62.
Columns . . . :
1 71
Edit
DOMLAB/QCLSRC
SEU==>
COMPACT
FMT ** ...+... 1 ...+... 2 ...+... 3 ...+... 4 ...+... 5 ...+... 6 ...+... 7
*************** Beginning of data *************************************
0001.00 PGM
0002.00 ADDENVVAR ENVVAR(PATH) +
0003.00
VALUE('/QIBM/PRODDATA/LOTUS/NOTES: +
0004.00
/QIBM/USERDATA/LOTUS/NOTES:/LOTUS/DOMINO/ACMEDS1') +
0005.00
REPLACE(*YES)
0006.00 CHGCURDIR DIR('/LOTUS/DOMINO/ACMEDS1')
0007.00 SBMJOB
CMD(CALL PGM(QNOTES/COMPACT) +
0008.00
PARM(NAMES.NSF)) USER(QNOTES) +
0009.00
CURLIB(*USRPRF) INLLIBL(*JOBD) +
0010.00
CPYENVVAR(*YES)
0011.00 ENDPGM
****************** End of data ****************************************
F3=Exit F4=Prompt
F16=Repeat find
F5=Refresh F9=Retrieve F10=Cursor F11=Toggle
F17=Repeat change
F24=More keys
(C) COPYRIGHT IBM CORP. 1981, 1999.
Figure 62. CL program compacting NAMES.NSF
126
Lotus Domino for AS/400 R5: Implementation
Lines 2 through 5 set the PATH environment variable. Please notice that there is
a list specified here. The elements of the list are separated by colons. Actually,
we indicate these three directories:
• /QIBM/PRODDATA/LOTUS/NOTES
• /QIBM/USERDATA/LOTUS/NOTES
• /LOTUS/DOMINO/ACMEDS1, which is actually your data directory
Line 6 runs the CHGCURDIR command to set the current directory to the data
directory.
Line 7 runs the compact command using a Submit Job (SBMJOB) command
under the QNOTES user profile. The Copy environment variables (CPYENVVAR)
parameter must be set to *YES.
Attention
Do not forget to specify the parameter REPLACE(*YES) on line 2. If you do not,
and an environment variable of the same name already exists, it is not
replaced by the new value. The parameter is in the additional parameters and
its default value is set to *NO. To change it, press F10.
Figure 63 shows you a snapshot of the Work with Submitted Jobs
(WRKSBMJOB) display while the compact command is running. This screen was
captured while the Domino server was down.
Work with Submitted Jobs
Submitted from . . . . . . . . :
Type options, press Enter.
2=Change 3=Hold 4=End
8=Work with spooled files
Opt
_
_
_
_
_
_
_
Job
QNNINSTS
QDFTJOBD
QDFTJOBD
QDFTJOBD
QDFTJOBD
QDFTJOBD
QDFTJOBD
User
QNOTES
QNOTES
QNOTES
QNOTES
QNOTES
QNOTES
QNOTES
*USER
5=Work with
Type
BATCH
BATCH
BATCH
BATCH
BATCH
BATCH
BATCH
AS01
03/08/99 10:27:36
6=Release
7=Display message
-----Status----- Function
OUTQ
OUTQ
OUTQ
OUTQ
OUTQ
OUTQ
ACTIVE
PGM-COMPACT
Bottom
Parameters or command
===> ________________________________________________________________________
F3=Exit F4=Prompt F5=Refresh F9=Retrieve F11=Display schedule data
F12=Cancel
Figure 63. Work with Submitted Jobs (WRKSBMJOB) display
If your server is down, and you submit a job which needs the server to be
running, nothing happens. You still get the LNT0905 message, which says that
the command is submitted successfully.
Lotus Domino for AS/400 commands
127
4.12 Start Domino Server (STRDOMSVR)
The Start Domino Server (STRDOMSVR) command starts a Domino server that
runs on the AS/400 system. You must have *JOBCTL special authority to run this
command.
To run the command, type STRDOMSVR and press F4. The display in Figure 64
appears. You can also directly type STRDOMSVR SERVERNAME, where you
substitute SERVERNAME with the actual name of the server you want to start.
Start Domino Server (STRDOMSVR)
Type choices, press Enter.
Server name . . . . . . . . . . ____________________________________________
________________________________________________________________________________
________________________________________________________________________________
____________________________________________________
F3=Exit F4=Prompt
F24=More keys
F5=Refresh
F12=Cancel
Bottom
F13=How to use this display
Figure 64. Start Domino Server (STRDOMSVR) display
This command only has one parameter. You only need to specify the name of the
server you want to start.
More information about this command can be found in 2.8.2, “Starting the Domino
for AS/400 server” on page 74, where you also find how to incorporate the
STRDOMSVR command into the startup program for your AS/400 system.
Note
Instead of a server name, you can specify *HTTPSETUP to start the special HTTP
server that enables you to set up a Domino server from a Web browser. The
HTTP server is not a fully functional Domino server. As such, not all the other
AS/400 native Domino commands can be used with the *HTTPSETUP server.
For instance, WRKDOMCSL, SBMDOMCMD and ADDDOMAPP commands do
not accept *HTTPSETUP as a valid server name.
128
Lotus Domino for AS/400 R5: Implementation
4.13 Work with Domino Console (WRKDOMCSL)
The Work with Domino Console (WRKDOMCSL) command allows you to enter
Domino server commands from an AS/400 green screen interface. To run the
WRKDOMCSL command, you must have *ALLOBJ special authority.
To run the command, type WRKDOMCSL and press F4. Enter the name of your
server and press Enter. The display shown in Figure 65 appears.
Only one person a time can run the WRKDOMCSL command. If you are the
second person running the command, you get the diagnostic error message,
LNT0910 Error occurred, unable to continue. To detect who has already
acquired the Domino console, position your cursor on the error message and
press F1. Then, press F10. Details of the error message appear, such as the one
shown in Figure 66 on page 130.
Work with Domino Console
Server: ACMEDS1
Previous subcommands and messages:
Database Server
Idle task
Database Server
Idle task
Database Server
Idle task
Event Monitor
Idle
Calendar Connector Idle
Schedule Manager
Idle
Admin Process
Idle
Agent Manager
Executive '1': Idle
Agent Manager
Idle
Stats
Idle
Indexer
Idle
Router
Idle
Replicator
Idle
Enter a Domino subcommand.
===>
F3=Exit
F17=Top
F5=Refresh
F18=Bottom
F6=Print F9=Retrieve
F21=Command line
Figure 65. Work with Domino Console (WRKDOMCSL) display
The messages shown in Figure 65 are only a snapshot of the console at a given
moment.
Lotus Domino for AS/400 commands
129
Display All Messages
Job . . :
QPADEV000R
User . . :
ITSCID13
System:
Number . . . :
AS01
033734
6>> wrkdomcsl Acmeds1
WRKDOMCSL is being used by job 033685/ITSCID13/QPADEV000P and can not be
started at this time.
Error occurred, unable to continue.
Bottom
Press Enter to continue.
F3=Exit
F5=Refresh
F12=Cancel
F17=Top
F18=Bottom
Figure 66. Second level error message display
Do not forget to press F5 (Refresh) regularly. The console does not get
automatically refreshed.
Press F9 (Retrieve) to display the different Domino server commands you
entered before, one-by-one in a backwards direction. You run one of these by
pressing Enter.
Notice that you can use F17 (Top) to see the oldest messages and F18 (Bottom)
to see the most recent ones. You can also request an OS/400 command line by
pressing F21 (Command line). You get a window where you can enter OS/400
commands.
4.14 Work with Domino Servers (WRKDOMSVR)
The command Work with Domino Servers (WRKDOMSVR) allows you to display
a list representing all Domino Servers. The command has been available since
4.6.2. However, there is a new option (option 13) added to edit the NOTES.INI file
directly, if you are on V4R4, or if you have the necessary PTFS when working
with V4R2 or V4R3. For information about the PTFS, refer to 4.9.1, “EDTF in
V4R2 and V4R3” on page 119.
Also, notice that option 1 (STRDOMSVR), option 2 (CHGDOMSVR) and option 6
(ENDDOMSVR) do not show up on the WRKDOMSVR display if you do not have
the necessary special authorities to run these commands.
To run the command, type WRKDOMSVR on a command line and press F4. Enter
your server name or leave the default value of *ALL, Then, press Enter. The
display in Figure 67 appears. (Typing WRKDOMSVR at the command line and
pressing Enter is the equivalent of entering WRKDOMSVR *ALL.)
130
Lotus Domino for AS/400 R5: Implementation
Work with Domino Servers
Type options, press
1=Start server
7=Submit command
11=Change current
Domino
Opt Server
_
*HTTPSETUP
ACMEDS1
DOMSVR3
SERVER01A
SERVER01B
SERVERXX
System: AS25
Enter.
2=Change server 5=Display console 6=End server
8=Work console
9=Work server jobs
directory 12=Work object links 13=Edit NOTES.INI
Subsystem
QDOMINOHT
DOMINO02
DOMINO01
SERVER01A
SERVER01B
DOMINO05
Domino
Status
*STARTED
*ENDED
*ENDED
*STARTED
*ENDED
*ENDED
Bottom
Parameters or command
===> _________________________________________________________________________
F3=Exit
F4=Prompt F5=Refresh F9=Retrieve F11=Display path
F12=Cancel F17=Top F18=Bottom F22=Display entire field F24=More keys
Figure 67. Work with Domino Servers (WRKDOMSVR) display
This example shows both servers with a subsystem name defined by the
administrator and servers with default assigned subsystem names.
Next to the name of each server, you see the name of the associated subsystem
and the server status. Valid values are:
•
•
•
•
•
*ENDING
*ENDED
*STARTING
*STARTED
*UNKNOWN
A server can be *ENDED, which means it is shut down. If the server is in the
process of being shut down, the status column indicates *ENDING. Pressing the F5
(Refresh) repeatedly eventually displays a status of *ENDED.
If the server is being started, the status column reflects *STARTING. After waiting
a couple of minutes and refreshing the display by pressing F5, the status now
indicates *STARTED. In case of problems, when the system cannot find out the
status, you can get a status of *UNKNOWN.
If you press F11, you see a display showing the data directory for each Domino
server on the system. This is useful if there are multiple server definitions and if
you have not followed a convention for the location of the directories. This way,
you can always determine what your actual data directories are and to which
server they belong, even if you do not have a clear naming convention. F11 acts
as a toggle. Pressing it a second time shows the first display again.
If either the server name or the directory name is too long for the field on the
display, the ">" character appears at the end of the name. To see a window with
the full name, position the cursor on the truncated field and press F22. Look at
the options available from the display in Figure 67 on page 131. When you select
Lotus Domino for AS/400 commands
131
an option, you can press F4 (Prompt) instead of Enter if you want the system to
prompt you for parameters associated with the option. You can specify an option
for more than one Domino server at a time. For example, to start three Domino
servers, type 1 in the Opt column in front of each server and press Enter.
Note: To run an option from the Work with Domino Servers display, you must
have the authority that the underlying command requires. For example, to run
option 1, you must have the authorities required for the STRDOMSVR command.
The following list provides you with a brief overview of the commands available
through the different options on the WRKDOMSVR display.
• Option 1 (Start server): Runs the command Start Domino Server
(STRDOMSVR) against the selected Domino server. Refer to 2.8.2, “Starting
the Domino for AS/400 server” on page 74, and 4.12, “Start Domino Server
(STRDOMSVR)” on page 128, for more information on the STRDOMSVR
command.
• Option 2 (Change): Runs the Change Domino Server (CHGDOMSVR)
command against the selected Domino server. Refer to 4.5, “Change Domino
Server (CHGDOMSVR)” on page 109, for more information on the
CHGDOMSVR command.
• Option 5 (Display console): Runs the Display Domino Console
(DSPDOMCSL) command. The console in display mode does not allow
commands to be entered.
• Option 6 (End server): Runs the End Domino Server (ENDDOMSVR)
command against the selected Domino server. Refer to 4.10, “End Domino
Server (ENDDOMSVR)” on page 122, for more information on the
ENDDOMSVR command.
• Option 7 (Submit Command): Runs the Submit Domino Command
(SBMDOMCMD) command against the selected Domino server. Refer to 4.11,
“Submit Domino Command (SBMDOMCMD)” on page 123, for more
information on the command SBMDOMCMD.
• Options 8 (Work console): Runs the Work with Domino Console
(WRKDOMCSL) command. Only one person at a time can request the Domino
console in update mode for a server. If you receive the display, you can enter
Domino server commands. Refer to 2.8.6, “Working with the Domino console”
on page 78, and 4.13, “Work with Domino Console (WRKDOMCSL)” on page
129, for more information on the WRKDOMCSL command.
• Option 9 (Work server jobs): Runs the Work with Active Jobs
(WRKACTJOB) command. It shows only the jobs running in the subsystem
associated with the selected Domino server.
• Option 11 (Change current directory): Runs the CHGCURDIR command.
This way you can set another default AS/400 directory for your job. The
original default directory is the data directory for the selected Domino server.
• Option 12 (Work object links): Runs the Work with Links (WRKLNK)
command, which allows you to display directories in the IFS structure. By
default, you see the objects in the data directory for the Domino server.
• Option 13 (Edit NOTES.INI): Runs the Edit File (EDTF) command, which
allows you to directly edit the NOTES.INI file for the selected server. For more
132
Lotus Domino for AS/400 R5: Implementation
information about the EDTF command, refer to 4.9, “Edit File (EDTF)” on page
119.
4.15 Work with Environment Variables (WRKENVVAR)
The Work with Environment Variables (WRKENVVAR) command shows you a list
of current environment variables and their names. From here, you can select
options to add, change, remove, display the details of, or print the environment
variables. Environment variables are used to provide settings for the Domino
environment. You must have *JOBCTL special authority to use this command to
add, change, or remove system-level environment variables.
Whenever you start a Lotus Domino for AS/400 server, the environment variables
defined for your job at the time you perform the Start Domino Server
(STRDOMSVR) command are used by Domino to change default settings for the
server. There is also a Change Environment Variable (CHGENVVAR) command
that we do not specifically cover in this redbook.
To run the command, type WRKENVVAR on a command line and press F4. From
V4R4 onwards, you have the choice between working with the job-level
environment variables (*JOB) or system-level environment variables (*SYS). The
job inherits the system level-environment variables the first time it calls an
environment variable command. They then become job-level environmental
variables for that job. See 4.3, “Add Environment Variable (ADDENVVAR)” on
page 107, for some more general information about environment variables.
The sample display in Figure 68 is shown when you ask to work with the job-level
environment variables or enter the command WRKENVVAR with no parameters.
Work with Environment Vars (*JOB)
Type options, press Enter.
1=Add 2=Change 4=Remove
Opt
_
_
_
_
_
_
_
_
_
_
Name
________________________
QYPS_DISC_LCLSUBNET
QYPS_DISCOVERY_STARTUP
QYPS_FTP_DISCOVERY
QYPS_SNMP_DISCOVERY
QYPS_EARLIEST_RELEASE
QYPS_IP_DISCOVERY
PATH
NOTES PARTITION
LANG
5=Display details
6=Print
Value
'1'
'0'
'1'
'0'
'V4R4M0'
''
''
''
'C'
Bottom
Parameters or command
===> __________________________________________________________________________
_______________________________________________________________________________
F3=Exit
F4=Prompt
F5=Refresh F9=Retrieve F11=Display CCSIDs
F12=Cancel F16=Print list F17=Top F18=Bottom F22=Display entire field
Figure 68. Work with Environment Variables (WRKENVVAR) display
Lotus Domino for AS/400 commands
133
Attention
No documented list of all existing environment variables is available for the
Domino environment. Be careful not to change any variables if you are not sure
what they mean. However, the change is only active for your job. After a new
sign-on, you again receive the default environment variables.
The following variables are used frequently:
• FaultRecovery: This variable specifies whether automatic recovery is on or
off. Automatic recovery means that if an exception occurs, Domino for AS/400
automatically cleans up the server and restarts it. The clean-up processing
ends all server and add-in jobs. When you set up a Domino server on an
AS/400 system, automatic recovery is on. If you want to turn off automatic
recovery, set the FaultRecovery value to 0. For example, you may want to turn
off automatic recovery to debug add-in jobs. The number of restarts is
determined by another environment variable AS400_DOMSVR_RESTART.
• AS400_DOMSVR_RESTART: This variable specifies the number of restart
attempts after an exception occurs. If the environment variable is not set, its
defaults to 10 restarts after an exception, except when FaultRecovery is set to
0. Then, no restarts occur. You can use AS400_DOMSVR_RESTART to
change the value to a larger or smaller number.
• PATH: This variable indicates the data directory that should be used for the
execution of subsequent commands that do not specify a path in the
command itself.
• NOTES_AS400_CONSOLE_ENTRIES: The console entries for a Domino for
AS/400 console are written in a stream file stored in your data directory. There
you find a file named SUBSYSTEMNAME.NOTESHST (where
SUBSYSTEMNAME is substituted by the name of the subsystem the server is
running in). This file contains the console entries for the Domino partition. The
WRKDOMCSL and DSPDOMCSL commands are interfaces that let you work
with this file. The SUBSYSTEMNAME.NOTESHST file is cleared at the start of
a server run. There is a limit to the number of console entries that can be
stored in this file. The default limit is 2000 entries and the maximum is 100,000
entries. When the limit is reached, the console starts to wrap. The
WRKDOMCSL/DSPDOMCSL support handles this. If however, for any reason
you want to allow more entries in the file, add the environment variable
NOTES_AS400_CONSOLE_ENTRIES. If the variable is set to a value greater
than the maximum, which is 100,000, it is set to the maximum.
• NOTES_AS400_STSDEBUG: If this environment variable is set to 1, then the
Domino server dumps all the environment variables and their values when the
server is started. This enables you to determine if the environment variables
are set to appropriate values. The environment variables are written to the job
log of the QNNINSTS job.
Notice that these environment variables must be set prior to starting the
Domino server.
134
Lotus Domino for AS/400 R5: Implementation
Chapter 5. Basic server administration
This chapter covers some basic administration tasks that may need to be
considered when running Lotus Domino Release 5 on the AS/400 system. The
following topics are covered in this chapter:
•
•
•
•
•
•
•
Alternative ways to install Lotus Domino for AS/400
Upgrading to Lotus Domino for AS/400 R5
Removing a Lotus Domino for AS/400 server
Removing the Domino software from the AS/400 system
Moving a Domino server
Tailoring the subsystem
Tips for problem determination
5.1 Alternative ways to install Lotus Domino for AS/400
In 2.5, “Installing the Domino for AS/400 product on your AS/400 system” on page
31, we described how to install Lotus Domino for AS/400 using the command line
and interactive prompting.
Since Release 4.6.2, we have had the ability to install Domino for AS/400 without
responding to the display that requires you to select which options to install. This
is particularly useful for multiple installations in remote locations that do not have
skilled administrators or that require unattended installation during off-business
hours. The following two methods are available for batch installation:
• Local batch: The installation command is submitted on the same system
where the software is to be installed.
• Remote batch: The installation command is sent to a remote system where
the software is to be installed.
Both methods are described in the following sections. In addition, we also
describe how to save the software from one AS/400 system, FTP it to another,
and restore the software on the second system.
5.1.1 Local batch installation
To install all the options for Domino for AS/400, place the Domino for AS/400 CD
in the CD-ROM device of your AS/400 system. Type the following command or
include it in a CL program:
lodrun dev(*opt) dir('/os400/intleng/batch')
Note
In this command, intleng is the directory on the CD that contains International
English version of the server code. If desired, replace intleng with the name of
the directory that contains the language you want to install.
To install only certain options, specify the subdirectory that contains the option
you want to install. You must run the Load and Run (LODRUN) command once
for each option that you want to install. For example, to install the *BASE option
(option 00), option 01, option 04, and option 06, type the following commands or
run them from a CL program:
© Copyright IBM Corp. 1999, 2001
135
lodrun
lodrun
lodrun
lodrun
dev(*opt)
dev(*opt)
dev(*opt)
dev(*opt)
dir('/os400/intleng/batch/opt00')
dir('/os400/intleng/batch/opt01')
dir('/os400/intleng/batch/opt04')
dir('/os400/intleng/batch/opt06')
5.1.2 Remote batch installation using the remote CD
To install Domino for AS/400 software on a remote AS/400 system that is
connected to your system, follow these steps:
1. Insert the Domino for AS/400 CD in the CD-ROM drive on the remote system.
2. Make sure that the Remote Execution (REXEC) TCP/IP server is running on
both your AS/400 system and the remote AS/400 system. To start the REXEC
server, type strtcpsvr server(*rexec) and press Enter.
For more information about the REXEC server, see OS/400 TCP/IP
Configuration and Reference, SC41-5420.
3. Use the AS/400 Run Remote Command (RUNRMTCMD) command to submit
the installation command or commands. Here is an example of installing all
software options from the International English directory on the Domino for
AS/400 CD:
runrmtcmd cmd('lodrun dev(*opt) dir('/os400/intleng/batch')')
rmtlocname(remote-name *ip) rmtuser(myuserid) rmtpwd('password')
In this example, remote-name is the host name or Internet address of the
remote system, myuserid is a user profile on the remote system, and
password is the password for that user profile. The user profile and password
must exist on the remote system. The user profile must have the AS/400
authorities that are required to install the Domino for AS/400 software.
5.1.3 Remote installation without a CD
To install Domino for AS/400 at remote locations without requiring the CD, follow
these steps:
1. Install Domino for AS/400 on the central system.
2. We recommend that you use an existing library to store the save files. Use
general purpose library (QGPL) can be used or a library can be created for the
save files that will contain the Domino software by using the Create Library
(CRTLIB) command:
crtlib lib(<lib-name>)
Example:
crtlib lib(domsavf)
3. To create a save file to hold the Domino software, use the Create Save File
(CRTSAVF) command:
crtsavf file(<lib-name>/<save-file-name>)
Examples:
crtsavf file(QGPL/dombase)
crtsavf file(domsavf/dombase)
136
Lotus Domino for AS/400 R5: Implementation
Note
You need a separate save file for each Domino option that you want to save.
For example, create a save file dombase for the base software and save files
domoptx (x is the option number) for the Domino for AS/400 options.
4. To save the base Domino for AS/400 software to the save file, use the Save
Licensed Program (SAVLICPGM) command:
savlicpgm licpgm(5769LNT) dev(*savf) savf(<lib-name>/<save-file-name>)
Examples:
savlicpgm licpgm(5769LNT) dev(*savf) savf(QGPL/dombase)
savlicpgm licpgm(5769LNT) dev(*savf) savf(domsavf/dombase)
5. For each additional software option that you want to save, use the Save
Licensed Program (SAVLICPGM) command and a save file for the option, for
example:
savlicpgm licpgm(5769LNT) option(3) dev(*savf) savf(QGPL/domopt3)
savlicpgm licpgm(5769LNT) option(3) dev(*savf) savf(domsavf/domopt3)
6. You must create empty save files on the remote system to receive the save
files. This is to ensure that the structure of the received data is still in save file
format.
You can use Telnet or PC5250 emulation to sign on to the remote system and
create the save files.
Consider these examples:
crtsavf file(QGPL/dombase)
crtsavf file(domsavf/dombase) (after creating the domsavf library first)
7. Use the File Transfer Protocol (FTP) to copy the save files to the remote
system where you want to install Domino for AS/400.
Information about FTP and the AS/400 system can be found in OS/400 TCP/IP
Configuration and Reference , SC41-5420.
Note
If you are not comfortable with the FTP command, there is the Send
Network File (SNDNETF) command, which can also transfer files between
two AS/400 servers.
8. On the remote system, use the Restore Licensed Program (RSTLICPGM)
command to install Domino for AS/400 from the save files. You must install
each Domino option separately:
rstlicpgm licpgm(5769LNT) dev(*savf) savf(<lib-name>/<save-file-name>)
Example:
rstlicpgm licpgm(5769LNT) dev(*savf) savf(QGPL/dombase)
9. If necessary, use the Change User Profile (CHGUSRPRF) command to set the
locale for the QNOTES user profile:
chgusrprf usrprf(qnotes) locale(newlocale)
Basic server administration
137
Note
For information about setting the Locale parameter, refer to 2.5.2, “National
language considerations” on page 38.
5.1.4 Remote interactive installation with a remote CD
If you have the CD at the remote location, you can use Telnet or PC5250
emulation to sign on to the remote location and install the software as if you were
local to the AS/400 system.
5.2 Upgrading to Lotus Domino for AS/400 R5
There are many reasons you will want to upgrade to Domino for AS/400 Release
5. You can take advantage of native SMTP support, the enhanced user interface
and database design features, the new Directory Catalog to provide name and
address resolution in large organizations, and 64GB databases (R5.0.1) just to
name a few.
Before installing a new release of Domino for AS/400, make sure you read the
Lotus Domino for AS/400 Release Notes. A printed version is provided with the
CD ROM. You may also refer to the online version on the CD ROM in the form of
a Domino database called readas4.nsf. It is recommended that you visit the Web
site at http://www.notes.net to verify that your CD contains the latest available
version. There is a drop down list available where you can select your product, for
example AS/400 system. This gives you access to the release notes.
You can find a document at the Web site http://notes.net/doc entitled Moving to
Notes and Domino R5. The same information is also in the Domino 5
Administration Help (help5_admin.nsf) database. You should read this thoroughly
before upgrading your system. It contains suggestions as to the order you should
approach the upgrade and technical details about the steps required.
Lotus suggests that you upgrade to Domino R5 in the following order:
•
•
•
•
•
Hub servers
Mail servers
Application servers
Notes clients
Applications and databases.
Lotus emphasizes coexistence. It is important you understand that you can
update your Mail servers without actually updating the design of the mail
databases that your users use. This can be done at a later stage. Similarly, you
can update your applications to take advantage of the new disk structure or new
features after your users are already running the applications on an R5 server.
Upgrading is more than just loading your code. An important exercise to
undertake before the upgrade project commences, is an audit of the databases
on all of the servers in the domain. This provides information to the
administrators, which allows them to ensure that any design elements that may
have been tailored for the site (for example, in the mail templates) are preserved
when system database designs are updated to provide R5 functionality. In fact,
138
Lotus Domino for AS/400 R5: Implementation
you may find some changes you have made to work around shortcomings in the
R4 design are not necessary when you move to R5.
New Domino functions, such as multiple mail.box files, transaction logging, and
others, are not automatically enabled when you upgrade to R5.
Before upgrading, you must also test your own in-house developed applications
and any applications you have purchased, to make sure they run seamlessly with
R5. If you do not want the databases converted to the new R5 ODS (on disk
structure) whenever the first compact occurs, change their file extensions from
NSF to NS4. You can also perform a roll back to an R4 format, if necessary. To do
so, create a copy or replica with the file extension NS4. Afterwards, perform a
compact against the database with the -r parameter specified.
To update your installed Domino for AS/400 software to Release 5, perform the
tasks in the following sections.
5.2.1 Making sure you have the necessary PTFs loaded
Throughout the different chapters of this redbook, you find frequent reference to
PTFS. PTF requirements change over time. Therefore, it is necessary to always
check the latest requirements before starting the Load and Run (LODRUN)
command.
Because you are upgrading from an earlier version of Domino for AS/400, you
probably have already installed the necessary PTFs. Check the information
provided in 2.3.3, “OS/400 program temporary fix (PTF) requirements” on page
20, in case you are missing one or more.
5.2.2 Installing the code
Perform these tasks to install Release 5 software for Domino for AS/400:
1. Use the Display Software Resources (DSPSFWRSC) command to determine
which Domino for AS/400 options you already have installed. On the display,
locate 5769LNT. The display shows one or more lines for each option of
Domino for AS/400 that is installed on your system. (The option numbers
appear in the Option column.) Write down each option number for Domino for
AS/400 that appears on the display.
2. Ensure that you have current backup copies of all the Domino servers on the
AS/400 system where you plan to install the new release. Back up both the
Domino data directories and all the Domino libraries. For information about
backing up your Domino for AS/400 servers, see Chapter 10, “Backup and
recovery” on page 295.
3. End all Domino servers on the AS/400 system. Use the End Domino Server
(ENDDOMSVR) command or Operations Navigator to end the servers or run
the Domino console Quit command for each server.
4. If you use directory synchronization, end the directory synchronization jobs.
Type:
CALL QNOTESINT/QNNDIEND
Press Enter.
Basic server administration
139
5. The QNNDIEND program does not end the QNNDILCK job. If this job is active,
type:
CALL QNOTESINT/QNNDIEND *ALL
Press Enter.
6. After allowing at least five minutes for the servers and directory
synchronization to end, use the Work with Active Jobs (WRKACTJOB)
command to verify that no Domino subsystems are active. Depending on your
release and configuration, your subsystems can have names such as
DOMINOxx or any text name. Use the Work with Domino Server
(WRKDOMSVR) command (if you using 4.6.2 or later) to display the names.
This displays a list of all servers and subsystems in which they are running.
Also, check the QSYSWRK subsystem to ensure that no jobs starting with
QNNDI are running. These are the directory synchronization jobs.
Attention
Press F3 repeatedly to go up in the invocation stack for your job to make
sure that there is not a Domino command display shown at a higher level in
your invocation stack. If there is, your job holds a lock on the object of type
*PNLGRP and the upgrade process fails because of the lock.
If you are not sure whether there are locks and you are not familiar enough
with the AS/400 system, signoff your session and sign on again.
Also make sure that no one else is in the same situation.
7. Load the CD for Domino for AS/400 5.0 in the CD-ROM drive on the AS/400
system.
8. Type:
lodrun dev(*opt) dir('/os400/')
Press Enter.
9. If the CD contains more than one language version, you must select a
language on the prompt display. Type 1 next to the language version that you
want to install.
10.On the prompt display, type 1 next to each product option that you want to
install. You must select each option that you already have installed on your
system. You determined this in step 1. You may also choose to install
additional options. The display is similar to the one shown in Figure 69.
140
Lotus Domino for AS/400 R5: Implementation
Install Lotus Domino For AS/400 Licensed Program (5769LNT)
Type options, press Enter.
1=Install
Option
_
_
_
_
_
_
_
F3=Exit
Product
Status
Installed
Description
*BASE
1
3
4
5
6
7
*INSTALLED
*INSTALLED
*INSTALLED
*INSTALLED
*INSTALLED
*INSTALLED
*INSTALLED
Domino 5.0 Server
AS/400 Integration
C API Release 5.0
C++ API Release 2.0
LotusScript Extension Toolkit
HiTest C API Release 4.5
Advanced Services
ENTER To Continue
(C) COPYRIGHT IBM CORP. 1980, 1998.
(C) COPYRIGHT LOTUS DEVELOPMENT CORP. 1998.
Figure 69. Lotus Domino for AS/400 installation
11.Press Enter. A license agreement display is shown. Notice the remark about
the Advanced Services availability. For further information about license
policy, refer to 1.2.2, “Domino for AS/400 Advanced Services” on page 7.
Lotus Notes License Agreement
System: ASM02
Advanced Services are only available if you have purchased the Domino
Enterprise Server license, or Domino Advanced Enterprise Server license.
Please verify that you have purchased one of these licenses before you
continue.
You can verify your purchase by examining your Lotus Notes Software
package. If the package includes the "Domino Enterprise Server" label,
or "Domino Advanced Enterprise Server" label, press ENTER to continue
the install.
If you are uncertain, or your organization has not purchased the proper
license, you are not entitled to continue. Press PF3 to exit the
install or PF12 to return to previous screen.
F3=Exit F12=Cancel
(C) COPYRIGHT IBM CORP.
Figure 70. Lotus Domino License Agreement display
12.The system loads the updated Domino for AS/400 programs to the appropriate
libraries and /QIBM directories. You see status messages as the system
installs each option that you selected.
Basic server administration
141
In addition, the system copies updated data files to the data directory for each
Domino server on the AS/400 system. The system requires approximately
three minutes for each Domino server for this update process. During this
process, you see a status message, similar to the one shown at the bottom of
Figure 71, for each server that the system upgrades.
Install Lotus Domino For AS/400 Licensed Program (5769LNT)
Type options, press Enter.
1=Install
Option
1
1
1
1
1
1
1
F3=Exit
Product
Status
Installed
Description
*BASE
1
3
4
5
6
7
*INSTALLED
*INSTALLED
*INSTALLED
*INSTALLED
*INSTALLED
*INSTALLED
*INSTALLED
Domino 5.0 Server
AS/400 Integration
C API Release 5.0
C++ API Release 2.0
LotusScript Extension Toolkit
HiTest C API Release 4.5
Advanced Services
ENTER To Continue
(C) COPYRIGHT IBM CORP. 1980, 1998.
(C) COPYRIGHT LOTUS DEVELOPMENT CORP. 1998.
Upgrading AS02 ...
Figure 71. Install a new version of Lotus Domino for AS/400
13.When the installation process completes, you receive a message indicating
whether the Load and Run (LODRUN) process completed successfully or
encountered errors. If you want to see detailed information about the
LODRUN process, especially when you have a problem during installation, run
the Display Job Log ( DSPJOBLOG) command, and then press F10 to look at the
detailed messages. If you find an error message, position your cursor on it and
press F1 to get extra help.
142
Lotus Domino for AS/400 R5: Implementation
Display All Messages
Job . . :
QPADEV000G
User . . :
ITSCID13
System:
Number . . . :
AS01
102272
Object copied.
Object copied.
Object copied.
Object copied.
Object copied.
Object copied.
Domino server AS01 upgraded. Use WRKDOMCSL after restarting the server
to check for messages.
Object copied.
Object copied.
Object copied.
Object copied.
Object copied.
Object copied.
Bottom
Press Enter to continue.
F3=Exit
F5=Refresh
F12=Cancel
F17=Top
F18=Bottom
Figure 72. Job log display
Note
After using the LODRUN command to install the Domino for AS/400 R5
software, you may see the following message, CPF3717 - File not selected.
File label or file name mismatch for file /OS400/QNNLABEL.This is a normal
message and does not affect the success of the installation.
5.2.3 Starting up the first server
After the code is loaded and you receive the final message that the LODRUN has
completed successfully, you can start the servers to make sure they come up
normally. Besides the normal startup messages, you will also see specific
messages, as shown in the Figure 73 on page 144. The question whether you
want to upgrade the design of the Domino Directory (the Address Book) is
automatically answered, N (NO) for you. This is different from other platforms.
The reason is that, to answer the message, you would need to open a console
session, using the Work with Domino Console (WRKDOMCSL) command and
respond to the message before the server startup could complete. This means
that you must subsequently replace the design of the Domino Directory manually.
Refer to 5.2.4, “Replacing the database design” on page 144, for more
information about the database design upgrade.
Basic server administration
143
Work with Domino Console
Server: AS01
Previous subcommands and messages:
Setting default information in preferences file...
Upgrading the design of your databases
Performing consistency check on log.nsf...
Performing consistency check on mail.box...
Your current Statistics & Events database has been copied to events4.sav. The
database events4.nsf will be upgraded when the Event task runs and old messa
ges will be deleted.
***************************************************************************
Do you want to upgrade the design of your Address Book? This replaces the sta
ndard forms and views with ones from the template.
(Yes/No)
>N
Enter a Domino subcommand.
===>
F3=Exit
F17=Top
F5=Refresh
F18=Bottom
F6=Print F9=Retrieve
F21=Command line
Figure 73. First server startup messages
5.2.4 Replacing the database design
There are several databases, like the Domino Directory, the Administration
Request database, and the mail database files, which still have the old template
attached to them. It is recommended that you update the design of these
databases to the new templates. Select or open the Domino Directory, and then
select File —> Database —> Replace Design. Scroll down the list of templates
and select the appropriate template. For the Domino Directory, it is pubname.ntf.
Its name appears next to the About button. Leave the check mark for Inherit
future design changes. Click Replace to start the process.
Tip
If you have multiple servers in your domain, just do the replace of the design in
one. Use replication to propagate the modifications to other servers. This way
you avoid replication conflicts.
If you plan an upgrade of the Administration Request database, it is
recommended that you process any outstanding administration requests first.
This is a performance issue, rather than a functional issue. Upgrading the
Administration Request database while requests are outstanding takes more
time. Before you do the upgrade, enter the tell adminp process all console
command. You may need to run this command more than once because some
administration requests create others. After the administration process has
finished, you must shut it down with the tell adminp quit command to stop the
function. After the design has been replaced, start adminp again by running load
adminp. The template used for the Administration Request database has a
description StdR4AdminRequests. The template file name is admin4.ntf.
144
Lotus Domino for AS/400 R5: Implementation
Note
If you are using Directory synchronization and you want to change the
database design to reflect the changed "Using this database" and "About this
database" help documents for the directory synchronization (NNDIRSYC.NSF)
database and the directory synchronization logging (NNDILOG.NSF) database,
you must perform some actions. You may find it easier to do them just before
you upgrade your client if you are not familiar with the new design client yet.
To do so, perform the following actions for each of the above mentioned
databases:
1. Open the database and select Design.
2. Open the About Database document in design mode and select Edit
Properties.
—>
3. In the Properties window, click the Design tab.
4. Uncheck the box that has the description Do not allow design/refresh
replace to modify.
5. Perform the same step for the Using Database document. NNDILOG.NSF
may not have a Using Database document.
The next time the designer task runs to update the design for databases, the
latest help information appears in these databases.
At some point, you will want to upgrade the mail files to take advantage of the
new interface and features. You must upgrade your Notes clients first. You can
choose to do this manually or you can use the mail conversion utility. It is
important you understand that to totally move an application to R5 involves
moving it to the new ODS using the compact command, and then upgrading the
database design by using the new template. However, these are independent
tasks. You may want to move your mail databases to the new ODS for faster
compaction and view rebuilding. However, you must delay updating the design
until the clients are ready.
Note
Upgrading the database format of a database to R5 involves running the
compact command against it. Before you do this, you should run fixup on the
database to prevent most errors that interfere with compaction to the new
database format.
After you have upgraded the database format to R5, you should consider
running Updall -r on the database. This rebuilds views in the database,
preventing delay when users first try to access it. This is especially important
for databases that are used frequently, are mission-critical, or have large
views.
The mail conversion utility command uses arguments to specify options. It has
the following form:
Basic server administration
145
load convert [-r | -l | -f | -m] mailfilepath existingtemplatename
newtemplatefilename
The following list explains each part of this utility:
-r
Converts mail files in subdirectories of the specified directory.
-l
Creates a text list of mail files.
-f
Uses a text list of mail databases to determine which mail files to upgrade.
-m
Converts the file or files for IMAP use.
mailfilepath
Specifies which mail file or files to upgrade.
existingtemplatename
Specifies a certain mail file design (for example, only mail files using R4.6
designs) to upgrade.
newtemplatefilename
Specifies the template with which to upgrade the mail files.
Examples
This example finds all databases located in the \MAIL subdirectory of the Notes
data directory that use StdR45Mail, the R4.5x mail template, and replaces their
design template with StdR50Mail (MAIL50.NTF), the R5 mail template:
load convert mail/*.nsf stdr45mail mail50.ntf
The following example finds all databases located in the \MAIL subdirectory of the
Notes data directory and all subdirectories of the \MAIL directory (for example,
C:\NOTES\DATA\MAIL\GROUP1, C:\NOTES\DATA\MAIL\GROUP2, and
C:\NOTES\DATA\MAIL\GROUP3) and upgrades them to the R5 mail template,
MAIL50.NTF:
load convert -r mail/*.nsf * mail50.ntf
You can create a text file, which lists databases you want to upgrade, and then
use it with the mail conversion utility to upgrade only those databases. For
example, you create the text file MAILLIST.TXT, which lists all the mail databases
you want to upgrade, and then save it in the directory /TEMP in the IFS. The
following example finds all databases listed in MAILLIST.TXT, determines
whether the databases use a design template name that matches STD*
(StdR4Mail, for example), and replaces the designs of the matching databases
with StdR50Mail (MAIL50.NTF), which is the R5 mail template:
load convert -f /temp/maillist.txt std* mail50.ntf
If you have multiple Domino servers in the same domain, you only replace the
design on one of them. The design changes are replicated to the other servers.
Do not do a design replace if your Notes templates have been modified without
first consulting your application developers.
146
Lotus Domino for AS/400 R5: Implementation
5.2.4.1 Compacting your databases
After upgrading the design of your Domino Directory, you must compact it. See
4.11.1, “Running Domino commands when the server is inactive” on page 126,
for information on how to do this for NAMES.NSF. A compact command run
against any database updates that database to the new on-disk structure. To
update other databases, type the following command on any AS/400 command
line and press Enter:
SBMDOMCMD cmd(’compact databaseName.nsf’) server(servername)
You can also run the compact command from the Domino console.
5.2.4.2 Rebuilding your views
After upgrading the design of an application to R5, you must rebuild the views in
that database. To rebuild the views, open the database in a Notes client and
press Ctrl + Shift + F9, or type load updall databaseName.nsf -r at the Domino
server console and press Enter.
5.2.4.3 Changing the NOTES.INI file
Domino no longer uses the reporter task for statistics reporting and collection.
The file statistics collection, performed formerly by report, is now done by the
Directory Catalog task instead. In addition, the collector task is used to enable a
server to collect its own statistics or to act as a central gathering server for others
in the domain in the same way that servers could be designated collectors in
R4.x.
The reporter task is normally mentioned as one of the tasks to perform at server
startup, in the line Servertasks. Remove the task reporter from this line. Add the
task collect instead.
After the Statistics and Events database has been upgraded, Server statistics
collection documents must be created or edited to ensure that statistics collection
is performed properly. These can be found under the view named Server Statistic
Collection. There should be one document for each server that collects statistics.
If you will no longer be using directory synchronization, delete the line
NSF_HOOKS=QNNDIHK from your NOTES.INI file.
5.2.5 Migrating the SMTP/MIME MTA
Important
We suggest you look on the Web site at http://notes.net/doc for the latest
version of the Release notes for Lotus Domino for AS/400 R5. Look for SMTP
within the Release notes.
We recommend that all customers apply the latest QMU for the release they
are running. To apply the latest QMU for your current release, go to the Web
site at http://www.as400.ibm.com/lotus_notes/qmulist.htm to obtain the
appropriate code.
This section covers considerations for migrating an existing Domino Simple Mail
Transfer Protocol/Multi Purpose Internet Mail Extension Message Transfer Agent
Basic server administration
147
(SMTP/MIME MTA, also called SMTP MTA) on Domino R4.6 to Domino for
AS/400 R5.
Important
Before attempting to migrate the SMTP/MIME MTA configuration, you should
read and understand the explanations about the AS/400 implementation of the
MTA in Chapter 7, “Lotus Domino for AS/400 and SMTP” on page 181.
Especially important is that the SMTP server in OS/400 is configured correctly.
The release notes (readas4.nsf) contain comprehensive information about how to
migrate the SMTP/MIME MTA. Configuring the server is simple. However, there is
a step-by-step procedure you should follow to ensure that all mail in the system at
the time the process is initiated, is accounted for and delivered, and all the now
unnecessary objects are removed from the system. The procedure starts before
the new Domino code is installed on the AS/400 system.
The general approach is to delete configuration documents generated by the
original SMTP/MIME MTA configuration process and allow them to be
reconfigured by Domino for AS/400. We do not go through the details here. We
just list the steps required for your general information. Refer to the release notes
for more details.
To migrate the SMTP/MIME MTA configuration follow these steps:
1. Back up important files.
2. Disable the SMTP/MIME MTA housekeeping to prevent the MTA from
restarting.
3. End the AS/400 TCP/IP SMTP server to prevent inbound messages from
coming into the system.
4. Shut down the inbound transport of messages to prevent the MTA receiving
SMTP messages addressed to recipients in your organization so you can
clear the queues.
5. Shut down the router to keep other servers from routing outbound messages
to the MTA.
6. Shut down the outbound transport to prevent the MTA from sending SMTP
messages.
7. End the AnyMail/400 Mail Server Framework to prevent the MSF from
processing inbound and outbound messages.
8. Clear SMTP.BOX.
9. Clear messages from the outbound MTA queue which routes all remaining
outbound SMTP messages to their destinations.
10.Clear messages from the inbound MTA queue so that they can be delivered
after the server is upgraded and restarted.
11.Clear messages from the /QIBM/UserData/Lotus/SMTPMTA/TMP directory to
ensure that a new directory structure is created for the AnyMail Integration
option.
12.Shut down the MTA server.
148
Lotus Domino for AS/400 R5: Implementation
13.Install the Domino for AS/400 Release 5 software.
14.Select the type of SMTP support for your organization. You must select
between the native Domino SMTP or the AnyMail/400 Integration using SMTP
on the AS/400 system.
15.Configure your SMTP server. Because we are describing how to migrate the
SMTP/MTA, you use the Change Domino Server (CHGDOMSVR) command to
select the required SMTP option. For Internet mail packages, specify *SMTP. If you
are going to use Domino SMTP, select *DOMINO for SMTP services. If you are
going to use the AnyMail Integration, you probably will not have to run the
CHGDOMSVR command. The necessary documents are created and edited, as
described in Chapter 7, “Lotus Domino for AS/400 and SMTP” on page 181,
and readas4.nsf. Readas4.nsf describes the circumstances under which
someone migrating from the SMTP/MTA to AnyMail Integration must run the
CHGDOMSVR command.
16.If you are running Domino SMTP, then run SMTP ENDTCPSVR *SMTP. If you are
running AnyMail Integration, run STRTCPSVR *SMTP. Start your Domino server.
17.You may also need to make some changes to the Internet address field in
Person documents. The Set Internet Address tool that is part of the Domino
Administrator can be used to fill in the Internet Address field.
5.2.6 Upgrading Operations Navigator plug-in
If you are using the Lotus Domino plug-in for Operations Navigator, upgrade the
plug-in component on the client workstation.
5.2.6.1 Client Access for Windows 95/NT
To update the Lotus Domino plug-in, follow these steps:
1. Make sure the AS/400 system containing the Domino R5 code is defined as
your managing system. For more information concerning setting the managing
system, refer to 8.1.2, “Installing AS/400 Client Access for Windows 95/NT” on
page 242.
2. From the Client Access folder, select the Service icon. Then select Check
Service Pack level.
3. Follow the instructions to update the Operations Navigator plug-in. The plug-in
files are copied automatically to your client workstation.
4. When you open Operations Navigator and select a system, Operations
Navigator automatically scans the AS/400 system and applies the changes.
5.2.6.2 Client-Access Express for Windows 95/98/NT
To update the Lotus Domino plug-in, follow these steps:
1. Make sure the AS/400 system containing the Domino code is defined as your
source system. From the Client Access folder, select Client Access
Properties. Click the Service tab. Set the source directory to the share that
you used to access the AS/400 system when you added the Domino plug-in.
Click Apply. For more information concerning the Lotus Domino plug-in and
Operations Navigator for Client Access Express, refer to 8.2.3, “Installing the
Lotus Domino for AS/400 plug-in” on page 252.
2. From the Client Access folder, select the Service icon. Then, select Check
Service Level.
Basic server administration
149
3. Follow the instructions to update the Operations Navigator plug-in. The plug-in
files are copied automatically to your client workstation.
4. When you open Operations Navigator and select a system, Operations
Navigator automatically scans the AS/400 system and applies the changes.
5.2.6.3 Troubleshooting
The Domino plug-in for Operations Navigator could cause Notes to trap when both of
the following conditions occur:
• A Release 4.6.x Notes client and a Release 5 Notes client are both installed on
the workstation.
• Notes 4.6.x is running when Operations Navigator is started.
The problem occurs because the Domino plug-in uses the most recently installed
release of the Notes client for processing. Notes 4.6.x and Notes 5 cannot run
simultaneously.
5.3 Removing a Lotus Domino for AS/400 server
Unlike the Domino implementation on some other platforms, you do not have to
delete the entire Lotus Domino for AS/400 software if you just want to remove a
server instance. Use the Configure Domino Server (CFGDOMSVR) command to
delete a Domino server from your AS/400 system.
Attention
Deleting a Domino server also deletes the data directory for the server. The
data directory contains server files, such as the Domino Directory, mail, and all
other Domino databases created by users.
Before removing a server, you should make sure that you end the server in an
orderly manner. This includes stopping the subsystem (the server cannot be
removed while the subsystem is running). If the server is not properly stopped,
locks on one or more Notes databases may prevent the data directory from being
deleted. Also, if you enabled directory synchronization for that server, make sure
that you disable it before you end the server.
To remove the server called AcmeDS1 from your AS/400 system, follow these
steps:
1. Type CFGDOMSVR acmeds1 *REMOVE on any AS/400 command line and press Enter.
Notice that you are not prompted for a confirmation that you really want to
delete this server and all the data. If you use Operations Navigator to remove
the server, you are asked to verify your request.
Note
Removing a server does not remove the Domino for AS/400 product from
your system.
2. To be sure that the data directory has been deleted completely, use the Work
with Object Links (WRKLNK) command to verify whether the directory still
150
Lotus Domino for AS/400 R5: Implementation
exists. For example, type WRKLNK '/domino/data' on any AS/400 command line
and press Enter.
If the data directory has been completely removed and you enter this
command, the error message, Error found on WRKLNK command. Qualified name
not valid for parameter OBJ, is displayed.
Depending on how the server was ended before removing it, some or all of the
files and directories within the data directory may still exist and must be
deleted manually.
5.4 Removing the Domino software from the AS/400 system
Use the Delete Licensed Program (DLTLICPGM) command to delete Domino
software from your AS/400 system. You must have all object (*ALLOBJ) special
authority to use this command.
Before deleting the software, make sure that you disable directory
synchronization and end all servers. After doing so, you should verify that no job
under user profile QNOTES is active or in the job queue. You can check for the
latter by entering the following two commands on any AS/400 commands line:
WRKUSRJOB QNOTES STATUS(*ACTIVE)
WRKUSRJOB QNOTES STATUS(*JOBQ)
If you still see one or more active jobs, make sure all servers have been ended
completely. This may take several minutes. If a server does not end within 10
minutes after performing the End Domino Server (ENDDOMSVR) command, end
the server with OPTION(*IMMED), for example, ENDDOMSVR ACMEDS1 OPTION(*IMMED).
Jobs with names starting with the QNNDI are part of directory synchronization.
They continue to run after the server has ended. To end these jobs, type
CALL QNOTESINT/QNNDIEND on any AS/400 command line.
After making sure that all jobs under QNOTES are ended, you can delete the
code. Type DLTLICPGM 5769LNT on any AS/400 command line and press Enter. This
command deletes the base and all options of the product. If you want to delete a
single option, for example, the C APIs, specify option 3 only, as shown in the
following example:
DLTLICPGM 5769LNT OPTION(3)
Note
Servers and data directories are not removed when you delete the software. If
you want to delete everything, you must use the Configure Domino Server
(CFGDOMSVR) command with option *REMOVE before deleting the Domino for
AS/400 software (refer to 5.3, “Removing a Lotus Domino for AS/400 server”
on page 150).
5.5 Moving a Domino server
You may want to move a Domino server from one AS/400 system to another. We
found the following technique worked successfully for us when setting up
standard demonstration servers in different locations:
Basic server administration
151
1. End the Domino server.
2. Backup the Domino data directory to a tape or save file. Here is a sample tape
backup command:
sav dev(’/qsys.lib/tap01.devd/’) obj(’/lotus/domino/servername/*’)
Substitute your device name and data directory name.
3. On the second system, create the data directory structure domino/servername
using the following command:
md ’/lotus/domino/servername’
4. Restore the Domino data directory using the following command:
rst dev(’/qsys.lib/tap01.devd/’) obj(’/lotus/domino/servername/*’)
5. Set up any necessary IP interfaces and host table entries on the second
system.
6. Run the CFGDOMSVR command against the data directory, making sure you
put in the full paths of the CERT.ID, SERVER.ID AND USER.ID files and that
you select RPLCFG(*NO).
You must also include any other options that relate to this server such as mail
options, TCP/IP address, subsystem name and so on. If you forget one or
more options, you can run the CHGDOMSVR command to correct the
definition.
7. Start your server. You continue to use the ID files and location document that
you have on your Notes client against the new server. You may need to
change the IP address you use for the server (either in your PC HOSTS file,
DNS, or with a Connection document).
5.6 Tailoring for system performance
This section contains some tips for managing the subsystems in which Domino
runs.
5.6.1 System tuning
OS/400 Version 4 Release 4 (V4R4) includes enhancements for the performance
of threaded applications. If you do manual performance tuning of your system
(the QPFRADJ system value is set to 0 or 1), you may need to tune your system
again after installing OS/400 V4R4 to prevent a decrease in performance when
running Domino for AS/400. If the QPFRADJ system value is set to 2 or 3, the
system makes the appropriate adjustments to keep Domino running smoothly on
the new release of OS/400.
When doing manual tuning of your system, you may need to increase the Activity
Level (ACTLVL) of your system, which is the maximum number of threads that
can run in your storage pools. You can change the ACTLVL using the Change
Shared Pool (CHGSHRPOOL), Work with Shared Pool (WRKSHRPOOL), or
Work with System Status (WRKSYSSTS) commands. We found, when running a
large number of servers on an AS/400 system, it was very beneficial to increase
the value of ACTLVL significantly.
The shipped default for Domino for AS/400 is to use the *BASE storage pool. The
activity level associated with this storage pool may need to be increased. If you
152
Lotus Domino for AS/400 R5: Implementation
changed the storage pool that is used by Domino for AS/400, you may need to
increase the activity level of that storage pool to ensure good performance.
Here is a partial list of the most common symptoms that might indicate that the
system needs to be tuned again:
• An excessive number of Domino clients time out or are dropped.
• The number of SERVER jobs in the Domino subsystem keeps growing.
• An excessive number of threads in a SERVER job have a status of MTXW and
that status rarely seems to change for a thread.
• On the WRKSYSSTS display, the Wait->Inel column is not zero.
See the article "Performance Tuning of AS/400 for Highly Threaded Applications"
on the Web site at http://www.as400.ibm.com/tstudio/tech_ref/Indexfr.htm for
more information on adjusting the performance on your system.
5.6.2 Job priority
Domino jobs for a single server run in a single AS/400 subsystem. If you want to
change the priority of all jobs for a server, use the Change Class (CHGCLS)
command to change the class object that defines the job priority of all jobs
running in a server subsystem. For example, to specify a priority of 25 for all jobs,
type the following command:
CHGCLS CLS(QUSRNOTES/DOMINO01) RUNPTY(25)
The new priority does not take effect until the next time the server is started. If
you want the new priority to take effect immediately, stop the server, and then
restart it.
Originally, it was not possible for a systems administrator to change the priority of
a single job within the subsystem. However, for Domino for AS/400 R5 servers
running on OS/400 V4R3 or later, you can now tailor the priority of single jobs within
a Domino subsystem.
By default, Domino server jobs run at a priority of 20. To enable a server job to
run at a different priority from the other server jobs, create a new class object
specifically for that job. These classes must be in library QUSRNOTES. Use the
Create Class (CRTCLS) command to create the class. For example, to create a
class named MYCLASS in library QUSRNOTES with run priority set to 30, use
this command:
CRTCLS CLS(QUSRNOTES/MYCLASS) RUNPTY(30)
Next, you must tell Domino which task (or tasks) should use this class. Domino
for AS400 looks for this information in a file named
'/QIBM/USERDATA/LOTUS/NOTES/DOMINO_CLASSES'. You can use the EDTF
command to create this file, if it does not already exist.
Add your server, class, and tasks to the file in the following format:
SERVER=MYSERVER
CLASS=MYCLASS
TASKS=TASK1,TASK2,TASK3
CLASS=MYCLASS2
TASKS=TASK4,TASK5
SERVER=MYSERVER2
Basic server administration
153
CLASS=MYCLASS3 QUSRNOTES
TASKS=TASK6
Note: We found that the class names such as MYCLASS must always be in
uppercase.
Each time task1, task2, or task3 jobs start for the server MYSERVER, the jobs
run using the attributes specified in the QUSRNOTES/MYCLASS class.
You can specify a different priority for any server job except SERVER and
QNNINSTS jobs. These two jobs always run at the priority specified in the class
that is created when the server is set up.
You can find more information about assigning memory to pools, activity levels,
and classes in Work Management , SC41-5306.
5.7 Tips for problem determination
Problem determination is an unfortunate, but, inevitable part of every
administrator's job. With Domino for AS/400, you may be familiar with some of the
problem determination techniques that are the same as on other Domino
platforms. Other techniques are unique to the AS/400 system.
5.7.1 Notes server dump tool
First the more common problem determination techniques. Domino for AS/400
does have a Domino console and supports all of the Domino console commands
that are useful in problem determination (for example: show tasks, show statistic,
and so on). Domino for AS/400 also supports the Notes Server Dump (NSD) tool.
NSD is supported on many of the Unix platforms and provides information when a
problem occurs. When a panic occurs, the NSD tool will write to the server's data
directory all the pertinent information that it has prior to ending. This information
includes call stacks and a copy of the current state of the console entries. The
name of the file is of the format nsd_all_os400_19990617_13:32:46, where
19990617 is the date of the dump and 13:32:46 is the time of the dump. This
dump file can be viewed with either the Display Stream File (DSPSTMF) or the
Edit File (EDTF) commands.
5.7.2 Domino server job logs
Here are some problem determination techniques that are unique to the AS/400
system. The first is job logs. Job logs contain AS/400 messages that indicate if
something has gone seriously wrong. Each message in the job log has a severity
associated with it. If the severity is above 40, then the job has ended. When a job
has ended because of an error, the job log is saved in a spooled file based on the
user profile. For the Domino servers, all spooled files will be found under user
profile QNOTES. The command Work with Spooled Files (WRKSPLF) command
will let you look at spooled job logs. To see the job logs of all the Domino server
jobs that have ended abnormally, type WRKSPLF QNOTES on any AS/400 command
line and press Enter.
154
Lotus Domino for AS/400 R5: Implementation
Attention
It is best to look at the spooled files while in Intermediate Assistance Level.
However, the default on an AS/400 system is Basic Assistance Level (unless
otherwise specified in your AS/400 user profile). If you are using Basic
Assistance Level, the WRKSPLF command will not show any job logs (or other
system output, such as dumps). To get to Intermediate Assistance Level, type
WRKSPLF and press Enter. When it displays the list of spooled files, press F21
(Shift+F9) and select assistance level 2.
An example of the output from the Work with Spooled Files (WRKSPLF)
command is shown in Figure 74.
Work with All Spooled Files
Type options, press Enter.
1=Send 2=Change 3=Hold 4=Delete 5=Display
8=Attributes
9=Work with printing status
Opt File
QPJOBLOG
QPJOBLOG
QPJOBLOG
QPJOBLOG
QPJOBLOG
QPJOBLOG
QPJOBLOG
QPJOBLOG
QPJOBLOG
User
QNOTES
QNOTES
QNOTES
QNOTES
QNOTES
QNOTES
QNOTES
QNOTES
QNOTES
Device or
Queue
QEZJOBLOG
QEZJOBLOG
QEZJOBLOG
QEZJOBLOG
QEZJOBLOG
QEZJOBLOG
QEZJOBLOG
QEZJOBLOG
QEZJOBLOG
User Data
ADMINP
STATS
SCHED
BILLING
AMGR
UPDATE
REPLICA
CALCONN
HTTP
Parameters for options 1, 2, 3 or command
===>
F3=Exit F10=View 4 F11=View 2 F12=Cancel
6=Release
Sts
RDY
RDY
RDY
RDY
RDY
RDY
RDY
RDY
RDY
7=Messages
Total
Pages
1
1
1
1
1
1
1
1
1
F22=Printers
Cur
Page Copy
1
1
1
1
1
1
1
1
1
More...
F24=More keys
Figure 74. Work with spooled files of QNOTES
Notice that, in Figure 74, the User Data column is the name of the Domino task.
As a general rule in problem determination, look at the job logs that are more
than one page. When you press F11, you see the date and time when the job log
was spooled (in other words when the job was ended). This may help you identify
the failing job, if there are many job logs on your system.
Basic server administration
155
Note
You find the job log as a spooled file only if the related AS/400 job has already
ended. If the job is still active, you must use option 10 on the Work with Job
display, as described in the following section.
By default, job logs and other system output written to the output queue
QEZJOBLOG are not automatically printed. However, this may be changed by
customers. In such a case, you may not be able to display the spooled file. If
not printed, spooled files containing job logs are deleted after seven days by
the automatic cleanup procedure, unless the time interval was changed by the
customer using the Change Cleanup (CHGCLNUP) command.
5.7.3 Discovering server restarts
Another unique feature in Domino for AS/400 is the auto-restart capability. This
feature consist of listening for errors to occur in your Domino server. If an error
occurs, the server gracefully turns itself off, cleans up all of its storage and
internal structures, and then re-starts itself. There are some cases where the
restart fails, but these are infrequent.
Sometimes, it is difficult to know if the server has restarted itself. One way to find
out is to look at the job log of the QNNINSTS job. Using Work with Active Jobs
(WRKACTJOB) command, find the subsystem for the Domino server that you
want to look at, or use option 9 on the Work with Domino Servers
(WRKDOMSVR) command. Page down until you find the QNNINSTS job for that
subsystem (every Domino server partition that is running has its own QNNINSTS
job running in it). Look at the job log for the QNNINSTS job (option 5, and then
option 10).
Note
This is the procedure for looking at the job log of any running job. Unless and
until the job fails, there will be no spooled file associated with the job log.
For a restarted server, the job log look similar to the one shown in Figure 75.
156
Lotus Domino for AS/400 R5: Implementation
Additional Message Information
Message ID . . . . . . :
Message type . . . . . :
Date sent . . . . . . :
LNT0929
Diagnostic
09/13/98
Severity . . . . . . . :
20
Time sent . . . . . . :
11:28:10
Message . . . . : The Domino server has ended, probably because of an error.
Trying to restart the Domino server.
Cause . . . . . : The Domino server has probably encountered an unexpected
error. When this happens, the Domino server tries to end any related Domino
jobs and clean up any system resources that have been used.
Recovery . . . : Recovery may not be needed. This job will try to restart
the Domino server.
If the Domino server fails to start, the console log
/TMP/DOMINO18.NOTESHST.19980913112810366000000 and the current error
returned by the restart request will be needed to diagnose any problems.
Technical description . . . . . . . . : The completion code returned by the
main Domino server job indicates that the Domino server jobs were ended
More...
Press Enter to continue.
F3=Exit F6=Print F9=Display message details
F21=Select assistance level
F12=Cancel
Figure 75. Job log of the Domino server after an automatic restart
When the server automatically restarts, the console is copied to a temporary file.
The name of the file can be found in the job log of the QNNINSTS job. If you put
the cursor on the line that begins with Domino server has ended,... and press F1,
the second level message appears. This message tells you where the console file
has been copied. In Figure 75, the console file has been copied to
/TMP/DOMINO18.NOTESHST.19980913112810366000000.
Note
The directory /TMP is in the IFS root and not in the Domino data directory.
You can use the Display Stream File (DSPSTMF) command to view this file.
Because the content of the file is stored in Lotus Multi Byte Character Set
(LMBCS), press F13 (Shift+F1) to see the contents of the file.
The files in the /TMP directory do not get erased automatically. You must
periodically display the /TMP directory and delete the old NOTESHST files.
Domino for AS/400 has provided environment variables to assist in problem
determination. The first is AS400_DOMSVR_RESTART. This environment
variable allows you to control how many times the Domino server should attempt
to auto-restart. The default value is 10. If, after 10 attempts, the server fails, the
Domino server does not restart again. To turn off auto-restart, set the value of this
environment variable to 1.
The other environment variable is NOTES_AS400_STSDEBUG. If this
environment variable is set to 1, the Domino server dumps all the environment
variables and their values when the server is started. This enables you to
determine if the environment variables are set to the appropriate values. The
environment variables are written to the job log of the QNNINSTS job. Notice that
Basic server administration
157
these environment variables must be set prior to starting the Domino server.
Refer to 4.15, “Work with Environment Variables (WRKENVVAR)” on page 133,
for more information about setting environment variables.
158
Lotus Domino for AS/400 R5: Implementation
Chapter 6. Advanced Domino Services for the AS/400 system
In this chapter, the setting up of the advanced services features of Lotus Domino
Release 5 for the AS/400 system is expanded on from Chapter 2, “Installing and
setting up Domino for AS/400” on page 17. This chapter focuses on the following
topics:
• Multiple Domino servers on a single AS/400 system
• Clustering of Domino servers
6.1 Multiple Domino servers on a single AS/400 system
Domino for AS/400 supports multiple servers on a single AS/400 system. This is
referred to as partitioned Domino servers. This function allows you to operate
multiple logically distinct servers, even representing different Notes domains, on
the same AS/400 system. A Lotus Domino Enterprise Server license is needed to
use partitioned servers. Domino Release 5 supports partitioned servers only on
OS/400, OS/390, UNIX, and Windows NT operating systems.
To use partitioned servers on the AS/400 system, you must follow these steps:
1. Select Advanced Services (product option 7) when you run the Load and
Run (LODRUN) command.
2. Set up all Domino servers on the AS/400 system as partitioned servers.
3. Before starting any of the partitioned servers for the first time, the NOTES.INI
file may need modifying to define a port mapper server and the IP address and
TCP/IP port where each Domino server partition is listening.
When you use the Configure Domino Server (CFGDOMSVR) command to set up
a Domino server, you must specify either *ALL or *PARTITION for the Advanced
services (ADVSRV) parameter. If you have already set up a single,
non-partitioned server, you must reconfigure this server to include the support for
partitioned servers (refer to 4.5, “Change Domino Server (CHGDOMSVR)” on
page 109, for more information).
If you see the LNT0109 message, Maximum number of servers exceeded, this does
not mean that you have configured too many servers. This message is displayed
if you did not configure partitioning support. To tell if an existing server was
configured as partitioned, check the server NOTES.INI for NPN=1.
Note
Each partitioned server must have its own data directory. To avoid confusion, it
is a good idea to use the name of the Domino server as the directory name in
one level of the hierarchy. For example, using the convention
/lotus/domino/ <servername> places all the data directories under the main
directory called /lotus/domino.
6.1.1 Options for setting up partitioned servers
From the Notes client workstation point of view, two partitioned servers look like
two different systems (two different IP hosts). From the AS/400 system TCP/IP
© Copyright IBM Corp. 1999, 2001
159
configuration point of view, you can implement partitioned servers in the following
two ways:
• Each server has its own IP address. If the servers use the same AS/400
communication adapter, you assign more than one IP interface to the same
line description. Each server must appear with its correct IP address on a
name server (DNS) or in the clients’ host tables. For more information, refer to
"Assigning separate IP addresses to partitioned servers" in the Domino 5
Administration Help (help\help5_admin.nsf) database.
• All servers running on the AS/400 system use the same IP address. Unique
port numbers are used to distinguish between each partitioned server. For
more information on this topic, refer to "Configuring for one IP address and
port mapping" in the Domino Administration Help (help\help5_admin.nsf)
database.
Each method needs some additional configuration steps. They are described in
the following sections.
6.1.1.1 Assigning and configuring a unique IP address for each server
Note
In the examples in this section, IP addresses that cannot be routed are used.
This is to avoid using TCP/IP public addresses that may belong to a genuine
organization. Please do not copy this example literally, unless you know that
the addresses work in your situation.
A unique IP address must be assigned to each partitioned server and defined in
the OS/400 TCP/IP configuration. Because the AS/400 TCP/IP implementation
supports multi-homing, you can use the same line description for more than one
IP interface. However, if you have more than one communications adapter (for
example, Token Ring and Ethernet), each physical adapter is represented by one
line description and the IP addresses may be assigned to different line
descriptions.
Note
The maximum number of IP addresses that can be assigned to one line
description is 128. The total number of IP interfaces on the entire AS/400
system cannot exceed 512.
For example, we assign the following names and IP addresses to three
partitioned servers, as shown in Table 16.
Table 16. Server assigned IP addresses
160
Server Name
IP Address
AcmeDS1/Acme
10.1.2.3
AcmeDS2/Acme
10.1.2.4
AcmeDS3/Acme
10.1.2.5
Lotus Domino for AS/400 R5: Implementation
Assuming that you want to use the same physical Token Ring line on the AS/400
system, you must add all three interfaces to the appropriate line description by
using the Configure TCP/IP (CFGTCP) menu, option 1 (Work with TCP/IP
interfaces), and then option 1 (Add) or by entering the Add TCP/IP Interface
(ADDTCPIFC) command on any AS/400 command line. You see a display, as
shown in Figure 76.
Add TCP/IP Interface (ADDTCPIFC)
Type choices, press Enter.
Internet address . . . . . . . .
Line description . . . . . . . .
Subnet mask . . . . . . . . . .
Associated local interface . . .
Type of service . . . . . . . .
Maximum transmission unit . . .
Autostart . . . . . . . . . . .
PVC logical channel identifier
+ for more values
X.25 idle circuit timeout . . .
X.25 maximum virtual circuits .
X.25 DDN interface . . . . . . .
TRLAN bit sequencing . . . . . .
10.1.2.4
TRLINE
255.255.255.0
*NONE
*NORMAL
*LIND
*YES
F3=Exit F4=Prompt
F24=More keys
F12=Cancel
F5=Refresh
60
64
*NO
*MSB
Name, *LOOPBACK, *VIRTUALIP
*MINDELAY, *MAXTHRPUT...
576-16388, *LIND
*YES, *NO
001-FFF
1-600
0-64
*YES, *NO
*MSB, *LSB
Bottom
F13=How to use this display
Figure 76. Add TCP/IP Interface (ADDTCPIFC) display
Only the first three parameters of the Add TCP/IP Interface (ADDTCPIFC)
command are mandatory. For more information on configuring TCP/IP on the
AS/400 system, refer to TCP/IP Fastpath Setup, SC41-5430. For more in-depth
information on the TCP/IP support and TCP/IP applications on the AS/400
system, refer to TCP/IP Configuration and Reference , SC41-5420.
Modifying the NOTES.INI file using unique IP address
Before the server can be successfully started, the IP address to be used must be
defined in the NOTES.INI file by adding the following statement:
TCPIP_TcpIpAddress=0,10.1.2.3:1352
The number 10.1.2.3 is this server’s IP address. Notice that 1352 is the standard
port number used by Notes clients and Domino servers to connect to a server.
The name TCPIP at the left of the underscore ( _ ) is the standard name for the
TCP/IP port within the NOTES.INI file.
The NOTES.INI file was created when you performed the Configure Domino
Server (CFGDOMSVR) command. It is stored as a stream file containing ASCII
text characters in the IFS directory you specified for the Data directory (DTADIR)
parameter. If you specify the IP address when configuring the server, the
TCPIP_TcpIpAddress statement is put in the NOTES.INI file for you.
If the only reason you are editing the NOTES.INI file is to add the IP address, you
can use the Change Domino Server (CHGDOMSVR) command instead. See
“Change Domino Server (CHGDOMSVR)” on page 109, for details.
The NOTES.INI file can be manually edited using one of the following methods:
Advanced Domino Services for the AS/400 system
161
• When you use the Work with Domino Servers (WRKDOMSVR) command, you
can use option 13 to edit the current server NOTES.INI file. This option
invokes the Edit File (EDTF) command. It is only available if you are using
OS/400 V4R4 or have the necessary PTF. See 4.9, “Edit File (EDTF)” on page
119, for details about the PTF you may require.
• From a Client Access/400 client which has the IFS directory assigned as a
mapped network drive, use a PC-based text editor.
• Use File Transfer Protocol (FTP) to copy the NOTES.INI file to a workstation,
modify it with a PC editor, and copy it back to the AS/400 IFS.
Tip
Do not use Microsoft Notepad editor. The line ends are marked differently
by Notepad from what is expected by the Domino server.
After saving the file, you must change the ownership of the IFS object so that
QNOTES owns it again. This is done using the Change Owner (CHGOWN)
command.
For example, type CHGOWN OBJ('lotus/notes/data/notes.ini') NEWOWN(QNOTES)
on any AS/400 command line and press Enter.
• Open the server properties with Operations Navigator and click the
Initialization File tab. You see the contents of the NOTES.INI file. Click Edit.
Tip
When you click the Edit button, the Windows 95 application WordPad is
started. You see an error message if WordPad is not installed on your PC.
To install WordPad, perform the following steps on your Windows 95
desktop, after ensuring that you have access to Windows 95 Installation
CDs, diskettes or CAB files:
1. Double-click My Computer —> Control Panel —> Add/Remove
Programs.
2. Click the Windows Setup tab.
3. Double-click Accessories.
4. Scroll down until you see WordPad.
5. Click WordPad and make sure the check mark ( [x] ) appears on the left.
6. Click OK to close the Accessories dialog box.
7. Click OK to close the Add/Remove Programs properties box.
Do not attempt to start any partitioned server unless you have added the
TCPIP_TcpIpAddress statement to the NOTES.INI file. Also, make sure that the
statement is typed correctly. If you make a mistake, the statement is ignored
and no error message is sent. If you did not configure the IP address when
you first configured the server, use the CHGDOMSVR command to reduce the
chance of error when manually editing NOTES.INI.
6.1.1.2 All servers use the same IP address (port mapping)
You can use port mapping only for Notes Remote Procedure Call (NRPC)
communication. NRPC is the data flow used for Notes services. If you want to set
up IMAP, LDAP, NNTP, POP3, or the Web server to use unique ports for
162
Lotus Domino for AS/400 R5: Implementation
communication, the users must specify the port on which they want to
communicate. For example, if you specify port 12080 for the Web server as the
default port to listen for HTTP requests, users must enter the port number as part
of the URL (for example: http://servername.domain.com:12080/index.html).
Otherwise, the Web client tries to connect using port 80.
If a proxy or firewall system is placed between the Web client and the Domino
server, which offers Network Address Translation/Protocol Address Translation
(NAT/PAT) services, PAT services can be used to redirect the Web client access
(port 80) to the given port on each Domino server.
Multiple partitioned servers on the AS/400 system can also use the same IP
address (possibly the only one configured on the AS/400 system). You can use
TCP port mapping to configure multiple partitioned servers to share the same line
and the same IP address. TCP port mapping requires you assign a unique TCP
port number to each partitioned server that shares an IP address and assign one
of these servers as the port mapper server.
The port mapper server listens on the default Lotus Domino TCP port 1352 and
directs connection requests to other servers that share the same IP address. All
other servers on this system that listen to the same IP address must use unique
port numbers different from 1352. The port mapper server knows (using a
definition in its NOTES.INI file: TCPIP_PortMapping0x= statement) to which port
each of the other servers is listening and redirects requests to the appropriate
server.
The port mapper server must be running for the partitioned servers that share its
IP address to receive new connections from workstations. If the port mapper
server is down, new sessions cannot connect. However, existing sessions remain
connected. The reason is that each Notes workstation maintains information in
memory about recent server connections, including those redirected by the port
mapper. If this information is available, a workstation can reach a partitioned
server even when its port mapper server is down.
Note
It is possible to allow for multiple IMAP, POP3, NNTP and LDAP services to run
on the default ports. This allows the service to listen on a specific address for
connections. The NOTES.INI variables are:
•
•
•
•
IMAPAddress=<IP address or fully qualified domain name>
LDAPAddress=<IP address or fully qualified domain name>
NNTPAddress=<IP address or fully qualified domain name>
POP3Address=<IP address or fully qualified domain name>
To use the port mapper approach, you must define one of the partitioned servers
on your AS/400 system as the port mapper server. For more information on this
topic, refer to "Configuring for one IP address and port mapping" in the Domino
Administration Help (help\help5_admin.nsf) database.
Modifying the NOTES.INI file for port mapping
The port mapper server NOTES.INI file must specify the shared IP address to be
used for all servers, along with the standard NRPC port number (1352) on which
the port re-direction takes place, for example:
Advanced Domino Services for the AS/400 system
163
TCPIP_TcpIpAddress=0,10.1.2.3:1352
In addition, you must add in the port mapper NOTES.INI file a port mapping
statement for each of the other partitioned servers, specifying their names and
port numbers. For example:
TCPIP_PortMapping00=CN=AcmeDS2/O=Acme,10.1.2.3:13520
TCPIP_PortMapping01=CN=AcmeDS3/O=Acme,10.1.2.3:13521
The example specifies that AcmeDS2/Acme listens on port 13520 for IP address
10.1.2.3 and AcmeDS3/Acme listens on port 13521 of IP address 10.1.2.3.
Important
The numbers 00, 01, must be in ascending sequence without any gaps. The
port mapping sequence number does not relate to the partition numbers or the
default subsystem names.
The NOTES.INI file for each of the other servers must specify its own IP address
and port number. For example, for AcmeDS2/Acme, this would be:
TCPIP_TcpIpAddress=0,10.1.2.3:13520
In our example, notice that the port number 13520 could be any arbitrary number,
provided that it is not used for other applications. When you specify the number,
assign an available port number as specified in the Assigned Numbers Request
for Comment (RFC) 1340. Information on RFCs can be viewed from the following
Web sites:
• http://info.internet.isi.edu/in-notes/rfc/files/rfc1340.txt
• http://www.rfc-editor.org
A good approach is to use 5-digit numbers. It is less likely the number is already
being used by other applications.
Assume the server AcmeDS1/Acme is the port mapper for the servers AcmeDS2
and AcmeDS3. The NOTES.INI files for each server must contain the statements
shown in the following sections.
Entries in NOTES.INI for port mapping on AcmeDS1/Acme
The statements in the NOTES.INI file for the port mapper ( AcmeDS1/Acme ) must
define the IP address (in line TCPIP_TcpIpAddress), along with the default port
(1352). The addresses and unique port numbers for each of the other servers are
also defined.
164
Lotus Domino for AS/400 R5: Implementation
Edit File: /domino/data/NOTES.INI
Record . :
54 of
89 by 9
Control :
Column:
1 of
74 by 74
CMD ....+....1....+....2....+....3....+....4....+....5....+....6....+....7....+
MailClusterFailover=1
KillProcess=1
ServerName=AcmeDS1/Acme
Ports=TCPIP
TCPIP=TCP, 0, 15, 0
TCPIP_TcpIpAddress=0,10.1.2.3:1352
TCPIP_PortMapping00=CN=AcmeDS2/O=Acme,10.1.2.3:13520
TCPIP_PortMapping01=CN=AcmeDS3/O=Acme,10.1.2.3:13521
TCPIP_PortMapping02=CN=NewCoDS1/O=Org,10.1.2.3:13522
$$HasLANPort=1
KeyFilename=lotus/domino/acmeds1/server.id
CertifierIDFile=lotus/domino/acmeds1/cert.id
F2=Save F3=Save/Exit F10/11=Left/Right F12=Cancel F16=Find F17=Chg F15=Copy
Figure 77. Statements in NOTES.INI for the port mapper server
All other servers must define only the shared IP address on which the port
redirection takes place, along with a unique port number to which access is
redirected, as shown in Figure 78 and Figure 79.
Entries in NOTES.INI for AcmeDS2/Acme
...
ServerName=AcmeDS2/Acme
Ports=TCPIP
TCPIP=TCP, 0, 15, 0
TCPIP_TcpIpAddress=0,10.1.2.3:13520
$$HasLANPort=1
...
Figure 78. Statements in NOTES.INI for AcmeDS2 server
Entries in NOTES.INI for AcmeDS3/Acme
...
ServerName=AcmeDS3/Acme
Ports=TCPIP
TCPIP=TCP, 0, 15, 0
TCPIP_TcpIpAddress=0,10.1.2.3:13521
$$HasLANPort=1
...
Figure 79. Statements in NOTES.INI for AcmeDS3 server
Note
The port mapper server must be active whenever a client first tries to connect
to one of the other partitioned servers.
Advanced Domino Services for the AS/400 system
165
Dedicating one server as the port mapper
You could have a dedicated server as the port mapper server so that it does not
perform any functions other than routing clients to one of the other partitioned
servers. In this case, you perform the following tasks:
• Edit the NOTES.INI file. Change the ServerTasks setting to contain the very
basic server tasks, for example:
ServerTasks=Replica,Router,Update,AMgr,Adminp
Use this example as a guideline. There is no rule on what should be left in or
taken out.
• Remove large databases, such as the Help databases from the data directory.
However, do not remove the Domino Directory. Make sure the Domino
Directory is replicated with the other servers.
6.1.2 Starting a Domino partitioned server
Use the Start Domino Server (STRDOMSVR) command to start the new server.
The completion message LNT0925 (as shown in Figure 80) tells you the name of
the subsystem in which the server jobs are running. Of course, you can use the
Work with Domino Servers (WRKDOMSVR) command to see, for all servers,
which one is running in which subsystem. You can also specify the name of the
subsystem that is used by the Domino server, rather than accepting the system
default.
===> strdomsvr AcmeDS2
Bottom
Parameters or command
===>
F3=Exit
F4=Prompt F5=Refresh F9=Retrieve F11=Display path
F12=Cancel F17=Top F18=Bottom F22=Display entire field F24=More keys
Starting Domino server ACMEDS2 in subsystem DOMINO02.
Figure 80. Starting Domino server completion message LNT0925
There are a number of situations that can occur relating to IP addresses. These
situations are described in the next few sections.
6.1.2.1 Did the Domino server process bind to the correct address?
A Domino server must listen to at least one IP address specifically. If you start a
partitioned server without having added a TCPIP_TcpIpAddress statement, it listens
to port 1352 on all IP interfaces defined to the AS/400 system. It globally binds to
all interfaces defined on the AS/400 system. This allocates the port for each of
the IP addresses to that one partitioned server. If you subsequently start another
partitioned server, it is not able to open any TCP/IP communication.
166
Lotus Domino for AS/400 R5: Implementation
You see the following error message:
Error on Listen function: The TCP/IP port used by the Notes server is still in
use on this system.
The other server is running (it responds to console commands), but it does not
have any access to communication facilities. Trying to connect to the server from
a Notes client results in a Server not responding error message, as shown in
Figure 81.
Figure 81. Failure to connect to the Domino server
Therefore, you have to end the server that was started first, and modify the
NOTES.INI file before starting it again. Assuming you configured the second
server correctly, it automatically opens the interface 20 seconds after the first
server ends.
To verify whether a server is listening to the correct IP interface, look at the status
of the port named TCPIP using the console show port <portname> command.
To do so, use the Work with Domino Console (WRKDOMCSL) command,
indicating the server name, from any AS/400 command line. Then, type the sh
port tcpip Domino subcommand and press Enter. Then, press F5. You should
see a response similar to the one shown in Figure 82.
Tip
After starting the server, especially for the first time, it may take five minutes or
more until the server responds to the show port command.
Work with Domino Console
Server: ACMEDS1
Previous subcommands and messages:
03/05/99 11:01:50 AM Periodic full text indexer starting, performing hourly
full text indexing
03/05/99 11:01:51 AM Periodic full text indexer terminating
> sh po tcpip
TCP/IP Port Driver
Transport Provider: TCP
Notes Session
Local Address
0ACB0002
10.5.69.212:1352
Enter a Domino subcommand.
===>
F3=Exit
F17=Top
F5=Refresh
F18=Bottom
Foreign Address
*:*
F6=Print F9=Retrieve
F21=Command line
Figure 82. Show TCPIP port listening to specific IP address
Advanced Domino Services for the AS/400 system
167
If there is an established connection to the server at the time you use the show
port command, you see one or more additional lines showing a foreign address
other than *:*. However, the line to look at is the one showing *:* as a foreign
address, which must show a specific address under a local address. It must also
show the required port (1352) or the assigned port, in the case of port mapping.
You should not see the following situations:
• The server is listening to all interfaces on the system.
• The server is not listening to any interface.
6.1.2.2 The server is listening to all IP addresses
As shown in Figure 83, the contents *:1352 in column Local Address indicates
that this server is listening to port 1352 on all IP addresses configured on the
AS/400 system. While this does not cause any problem for this server, no other
partitioned server is able to connect to any TCP/IP port unless explicitly specified
using the port mapping.
Work with Domino Console
Server: ACMEDS1
Previous subcommands and messages:
full text indexing
03/05/99 11:01:51 AM Periodic full text indexer terminating
03/05/99 11:05:43 AM Searching Administration Requests database.
> sh port tcpip
TCP/IP Port Driver
Transport Provider: TCP
Notes Session
Local Address
0ACB0002
*:1352
Enter a Domino subcommand.
===>
F3=Exit
F17=Top
F5=Refresh
F18=Bottom
Foreign Address
*:*
F6=Print F9=Retrieve
F21=Command line
Figure 83. Shows TCPIP port listening on all IP addresses
The reason for this may be one of the following situations:
• The NOTES.INI file has not been modified.
• The NOTES.INI file has been modified, but the server has not been restarted
since the modification.
• The NOTES.INI file has been modified, but a typographical error has been
made.
For example, the following line is correct:
TCPIP_TcpIpAddress=0,10.1.2.217:1352
Each of the following lines is incorrect:
TCPIP-TcpIpAddress=0,10.1.2.217:1352
TCPIP_TcpIpAddress=1,10.1.2.217:1352
TCPIP_TcpIpAddress=0,10.1.2.217;1352
TCPIP_TcpIpAddress=0,10.1.2.117:1352
TCPIP_TcpIPAdress=0,10.1.2.217:1352
168
Lotus Domino for AS/400 R5: Implementation
Note
None of the mistakes shown above causes an error message to be sent when
the server is started.
Before you start any other partitioned server, end the server, correct any errors in
the NOTES.INI file, and start the server again.
6.1.2.3 The TCP/IP port is unable to connect to any IP addresses
In this case, the response to the show port tcpip command is two lines only:
TCP/IP Port Driver
Transport Provider: TCP
This response indicates that the port named TCPIP was activated, but that it
failed while listening to an IP interface. By paging backwards in the Domino
console, you may find additional error messages (shown in bold in Figure 84).
Work with Domino Console
Server: ACMEDS2
Previous subcommands and messages:
in use on this system.
03/05/99 03:17:57 PM Error on Listen function: The requested TCP/IP port is
in use on this system.
03/05/99 03:17:57 PM Error on Listen function: The requested TCP/IP port is
in use on this system.
03/05/99 03:17:57 PM Listener task for port TCPIP is suspending for 20
seconds due to listen errors
> sh port tcpip
> sh port tcpip
TCP/IP Port Driver
Transport Provider: TCP
Enter a Domino subcommand.
===>
F3=Exit
F17=Top
F5=Refresh
F18=Bottom
F6=Print F9=Retrieve
F21=Command line
Figure 84. TCP/IP port not listening on any IP address
The most likely reason for this is that another partitioned server is already active
and is listening to all interfaces on the AS/400 system. Therefore, this server is
not allowed to use the same port.
However, you may find the following error message:
Error on Listen function: The TCP/IP stack can't bind a network address to a
TCP socket, please verify that the TCP stack has been properly initialized.
The message may be caused by one of the following situations:
• TCP/IP support on your AS/400 system was not started.
• The IP interface was not started.
After verifying that the server is listening to only one specific IP address, repeat
the same procedure for other partitioned servers on your AS/400 system.
Advanced Domino Services for the AS/400 system
169
6.1.3 Connecting partitioned servers through the loopback interface
After you have configured multiple partitioned servers on the same AS/400
system, you may need to replicate your databases or allow mail routing between
those servers. Because these servers reside on the same AS/400 system, it is
obviously desirable to exchange information between them without the need for
an external communication network.
Domino for AS/400 servers use TCP/IP for replication and mail routing. A network
interface is used between stand-alone servers. In the default configuration,
partitioned servers use the external network interface for replication and mail
routing. This section describes how to connect partitioned servers without a
physical interface, using a special TCP/IP function called the loopback interface.
The loopback interface is a special virtual TCP/IP interface that allows socket
connections without the use of a real hardware interface. The TCP/IP address of
the loopback interface is 127.0.0.1. It is defined on every system using TCP/IP as
a networking protocol.
Assuming that you set up two or more partitioned servers as described in the
previous sections, either with unique IP addresses or using a port mapper, you
can do some additional configuration to allow those servers to connect using the
loopback interface.
Note
The configuration of a loopback port is not required when using OS/400 V4R4.
With OS/400 V4R4, the operating system performs the loopback automatically
for all local IP addresses.
Follow these steps for OS/400 V4R2 and V4R3:
1. Use the Change Domino Server (CHGDOMSVR) to define an additional
Domino port which allows a connection only to other partitioned servers on the
same AS/400 system using the loopback interface. In our examples, we call
that port LOOPBACK.
Refer to 4.5, “Change Domino Server (CHGDOMSVR)” on page 109, for more
information on the Change Domino Server command.
2. Because there is only a single loopback address, each server must listen to a
different TCP/IP port. In our example, we use the port numbers 1353x, where
x is a number between 0 and 9, therefore providing a unique TCP/IP port
number for each server.
3. The new port (LOOPBACK) must also be defined and activated in the Server
document in the Domino Directory.
4. For each connection between any two servers, a pair of Connection
documents must be added to the Domino Directory.
170
Lotus Domino for AS/400 R5: Implementation
Note
The term port maybe misleading or confusing because it is used on different
systems in the following different ways:
• In Domino or Notes, it is used to describe how to connect to any of the
supported network ports, such as TCP/IP.
• In TCP/IP, the port number provides a way for multiple applications on
the same host system to share the same IP interface by distinguishing
the applications through the port number.
In the following example, we show what must be done to connect the
partitioned servers, AcmeDS1/Acme and NewCoDS1/Org, assuming that both
servers use unique IP addresses (no port mapper is involved).
5. Add or change the following lines in the NOTES.INI file for AcmeDS1/Acme:
Ports=TCPIP, LOOPBACK
LOOPBACK=TCP,0,15,0
LOOPBACK_TcpIPAddress=0,127.0.0.1:13530
The first line already exists in the NOTES.INI. The new port (LOOPBACK)
must be added. The second line defines the new Domino port. We make sure
this port is limited to IP address 127.0.0.1, the loopback address, and is
listening to TCP/IP port 13530.
6. For the server NewCoDS1/Org NOTES.INI file, we do the same, except that
we use a different TCP/IP port (13531):
Ports=TCPIP, LOOPBACK
LOOPBACK=TCP,0,15,0
LOOPBACK_TcpIPAddress=0,127.0.0.1:13531
7. After starting the servers, you must modify the Server document for each
server to define the port. Also, notice that we use a different Domino Named
Network for each port (the field labeled Notes Network).
Figure 85. Server document to define port for loopback interface
Because all the servers must be known in the network (using DNS or host
tables) by their external IP addresses, you must make sure that for a
server-to-server connection the loopback interface is used. This can be done
by adding a Connection document to the Domino Directory. The example in
Figure 86 on page 172 defines the connection from server AcmeDS1 to
NewCoDS1.
Advanced Domino Services for the AS/400 system
171
Figure 86. Connection document to use loopback interface
Make sure you enter the distinguished name (full hierarchical name) for both
servers in the connection document. In our example, it is AcmeDS1/Acme and
NewCoDS1/Org, rather than AcmeDS1 and NewCoDS1. Also both server names
should be part of the LocalDomainServers or OtherDomainServers group. Lotus
suggests to define the servers group as Access Control List Only (rather than
“Multi-Purpose”).
Ignoring these suggestions may result in the servers not replicating and you see
the following error message in LOG.NSF:
Access Control is Set in names.nsf to Not Allow Replication from AcmeDS1
names.nsf.
You probably want each of the servers to establish a connection. To do this you
need a second Connection document to define the direction from NewCoDS1 to
AcmeDS1. If both servers are part of the same domain, you still need two
Connection documents. However, they would be in the same Domino Directory. If
the server is part of a different organization or different Domino domains, you also
must perform these tasks:
• Cross-certify their ID files.
• Add an adjacent domain document on both servers. This document makes it
possible to route mail to the specified domain using the server Connection
document.
For more information on these functions, see the Administrator help
(help\help5_admin.nsf) database.
6.2 Clustering Domino servers
What is the purpose of a Domino cluster? Clustered Domino servers are a group
of two to six servers that work together to provide workload balancing to improve
performance and provide better scalability for your organization.
All supported Domino Server platforms support clustering. Also, the members of
a cluster do not have to run on the same platform. It is possible to mix UNIX,
S/390, AS/400 system, Windows NT, and OS/2 Domino servers in one cluster.
Domino clustering uses an advanced form of replication that is event-driven. This
allows replicas of databases to be kept up-to-date within a second of a change.
172
Lotus Domino for AS/400 R5: Implementation
When an request for a database on a specific server cannot be performed, there
is automatic failover to another server within the cluster that has a replica of the
database.
6.2.1 Advantages of clustering Domino servers
The main benefits of clustering Domino Servers are shown in the following list:
• Failover support
If any hardware or software problem occurs that prevents users from
accessing data on a specific server, the request for data is redirected to
another server within the cluster. This allows for high availability of
business-critical databases.
With servers configured in a cluster, the problems of downtime when
performing required upgrades and maintenance to servers, is no longer an
issue. A server can be set to restricted to allow for this type of service.
• Workload balancing
When users request data from a server within a cluster that is heavily-used,
the server passes on the request to another server within the cluster that is
less used. This allows for better response times from the servers.
• Improved performance
Domino allows the administrators to control workload thresholds on the
servers within the cluster to optimize performance. This allows for the best
response times from the servers.
With the monitoring databases, such as the Notes log file and Statistics &
Events, in addition to the Cluster Analysis tools, the servers can be fine-tuned
to further optimize performance.
• Continuous data synchronization
With an event-driven method of replicating databases, each server within the
cluster is kept in synchronization with the latest changes, which provides the
following two primary advantages:
– If a server ends abnormally, all servers within the cluster contain the most
up-to-date replica of the databases. Users are able to continue working
with little or no time lost.
– Each server replica is considered a backup copy of the database. If data on
one server becomes irretrievable, the databases can be replaced from
another server within the cluster. Information on the clustered servers is
continuously updated.
There is also the option of setting up a server within the cluster which uses
cluster replication to keep all databases synchronized, but which cannot be
accessed by users. This server can be used for recovery in the event of
total data loss on a system.
6.2.2 Components of a clustered Domino server
When a server is started in a cluster, the following Domino tasks are required for
clustering (all of the clustering tasks run on each clustered server):
Advanced Domino Services for the AS/400 system
173
• Cluster Manager
Tracks the status of servers within the cluster. The manager monitors the
current availability, workload and member changes (added or removed
servers) within the cluster.
The Cluster Manager is able to find out information on other servers by
probing other servers in the cluster. The manager also works with the Cluster
Directory Database to redirect user requests.
• Cluster administrator
Performs all the housekeeping tasks required by the clustered server. The
administrator ensures that the cluster tasks (CLDBDIR and CLREPL) start
automatically (by modifying the NOTES.INI file) and all changes to the system
are cleaned up if a server is removed from a cluster.
• Cluster Directory Manager (CLDBDIR)
When a server is added to a cluster, the Directory Manager creates a new
Directory Database and the documents within that database for each of the
databases on that server.
The Directory Manager tracks additions and deletions of databases on the
server and when a change is made, the database is replicated to each
member of the cluster so that the changes are copied.
• Cluster Replicator (CLREPL)
This task is very similar to the standard replication task (REPLICA). The main
differences are:
– The Cluster Replicator only replicates with servers within a cluster. The
standard replicator is used to replicate with any server in the organization.
Database changes are pushed to members of the cluster that have a
database replica (using the Directory Database to find other replicas).
– The Cluster Replicator continuously synchronizes changes to databases,
whereas the standard replicator performs replication on a scheduled time
frame.
• Cluster Directory Database
The Cluster Directory Database is created by the Cluster Directory Manager.
Each document within the database contains information on a database on the
server. Some of the information that is tracked in this database is:
– Database name
– Replica ID
– Server name
– Path
– Access information (such as out-of-service or pending delete)
Each server within the cluster has a replica of the Directory Database which
contains information about every database and replica on every server.
6.2.3 Prerequisites for setting up a clustered Domino server
Consider the following prerequisites before setting up servers in a cluster:
• An Administration server must be specified in the Domino Directory and the
Administration Process (adminp) must be running on all servers in the cluster.
With R5, the first server defined is the Administration server by default.
174
Lotus Domino for AS/400 R5: Implementation
Note
The Administration server does not need to be part of the cluster. There is
also no special license requirements for the Administration server.
• The servers must be set up using a high speed local area network (LAN) or set
up on a private network between the cluster members.
• All the cluster members must be part of the same Domino domain and use the
same Domino Directory.
• Each server requires a hierarchical ID.
• Adequate hardware for the additional databases and users that may connect
to the server if there is a failure, is required.
• Servers in a cluster must be running Domino Release 5 or Release 4.6.2 or
higher Enterprise Server license, or the Domino Release 4.5 or Release 4.6
Advanced Services license.
Note
For more information on Domino clustering requirements, refer to the
Domino Administration Help (help\help5_admin.nsf) database.
• For the client to be able to failover to a cluster member, the client release must
be Notes 4.5x, 4.6x, or 5.x.
6.2.4 Setting up a clustered Domino server
After the prerequisites are met, proceed with setting up a Domino cluster. Follow
these steps:
1. From the Windows NT/98/95 desktop, launch the Domino Administrator (if it
is not already running).
There is a completely redesigned administration client in Domino Release 5.0.
See Appendix B, “Domino Administrator” on page 473, for information about
the names of the parts of this client interface.
2. Select the Administration server from the Bookmarks, as shown in Figure 87.
Figure 87. Domino Administrator — Bookmarks
3. After selecting the server, click the Configuration tab.
4. On the tasks pane, select and expand Server. Click All Server Documents.
The results pane shows all Server documents by domain.
Advanced Domino Services for the AS/400 system
175
5. Before we can create new replicas on the servers, we must update the access
control to each server so we are authorized to create new replicas of
databases. Click All Server Documents view in the Tasks pane and open the
first Server document. Click the Security sub-tab. Click Edit Server at the top
of the window. Select the Administrator or the Administrator group that you
may have created. Select LocalDomainServers from the drop-down list for
the Create new databases and Create replica databases fields.
6. Click Save and Close to close the document. You have now allowed the
administrator to create new databases and new replicas of databases on your
server. You must do the same for every server in the cluster.
7. Open the other Server document. Click the Security sub-tab. Click Edit
Server at the top of the window. Select Admin and LocalDomainServers in
the Create Replica databases field, as you did for the first server.
If you click Save and Close now, you receive a message telling you that you
have no port defined. Click the Ports tab. Type TCPIP in the first row of the
Port column.
8. Click Save and Close to save and close the document. Repeat steps 7 and 8
for each server in the cluster.
9. Select the server or servers that you want to add to a cluster by clicking in the
column to the left of the server names in the Results Pane. You see a check
mark next to each server selected. Click Add to Cluster in the action bar.
Figure 88. Adding selected servers to a cluster
10.There is a verification prompt that confirms whether you want to proceed.
Click Yes to continue.
Figure 89. Verification to add server to cluster
11.In this example, a new cluster is created. Select the option to *Create New
Cluster.
If there are clusters already created in the Domino Directory, these clusters
are listed as options to which the selected servers can be added. Click OK to
continue.
176
Lotus Domino for AS/400 R5: Implementation
Figure 90. Adding to or creating a new cluster
12.Enter a name for the new cluster. This name should be descriptive but not too
complex. Click OK.
Figure 91. New cluster name
13.In the following prompt, you are asked how to process create cluster requests
(immediately or to use the Administration Process). Using the Administration
Process, the request is handled in the same way, but may take a little longer.
For this example, click Yes to process immediately.
Figure 92. How to process the create cluster request
If you select No on the display shown in Figure 92, the request is placed in the
Administration Request Database and processed at the earliest possible time.
To check the status of the request, open the Administration Requests
Database (admin4.nsf) on the Administration server.
Assume you want to add servers to a cluster, but want to perform the request
using a Domino Directory on a server that is not the Administration server.
This can be done as long as you select No when prompted in Figure 92.
14.The servers have now been added to the cluster. Click OK to complete the
procedure.
Figure 93. Successful addition of servers to a cluster
15.After the Domino Directory is replicated to a server that is to be added to a
cluster, the Cluster Administration Process (refer to 6.2.2, “Components of a
Advanced Domino Services for the AS/400 system
177
clustered Domino server” on page 173) is started automatically on that server
and all required configuration and sub-processes are started.
The replication takes several minutes and the start of clustering on the server
takes from five to 10 minutes to fully initialize because this is the first time that
clustering has been set up on this server.
16.Click the Configuration tab. Click the Replication option and select
Connections view in the Tasks pane. You see that there is already a
Connection document. This was created when you replicated the Directory.
Select the document and click Edit Connection above it.
17.Enable this replication connection. You do not need to change any of the
current fields of the document except in the Schedule tab. Please look at each
tab and the information in each. Select the Schedule tab. Change the
Schedule field from Disabled to Enabled. Click Save and Close to save and
close the document.
18.This Connection document describes replication from the second server to the
first server. We must create a Connection document for the first server to the
second server. We create one by copying the existing Connection document.
19.Select the Connection document in the Results pane by clicking on it once.
Copy the document to the clipboard by selecting from the pull-down menu
Edit —> Copy. Paste the document to the same window with Edit —>
Paste. Open the duplicate document by selecting it and clicking on the Edit
Connection button. Change the Source Server field to the second server
name and the Destination Server field to the first server name. Save and close
the document by clicking Save and Close at the top of the window. You now
have a replication Connection document for two of the servers in the view.
20.Your cluster is now set up. Ensure that all your databases (applications,
directory catalog, mail, and so on) get replicated to the cluster servers (refer to
the Domino Administration Help database (help\help5_admin.nsf) for more
information about clustering).
6.2.5 Supported features of Domino server clustering
There are additional features that are supported by Domino and Domino
Clustering. These are explained in more detail in this section.
6.2.5.1 Support for clustered Free Time database
Domino servers use the Free Time database (busytime.nsf). This database
contains the free time for all users and resources on a specific Domino server.
When a server is added to a cluster, the Free Time database is deleted and a new
database is created. This is the Clustered Free Time (clubusy.nsf) database. This
database is replicated with members of the cluster.
The Clustered Free Time database is kept in synchronization with all free time
changes on all servers in the cluster. The advantage of the Clustered Free Time
database is that the free time information is always available, even when there is
a server failure.
When a server is removed from a cluster, a very similar process takes place. The
Clustered Free Time database (clubusy.nsf) is deleted and a new Free time
database (busytime.nsf) is created. For more information on Free Time, refer to
the Domino Administration Help (help\help5_admin.nsf) database.
178
Lotus Domino for AS/400 R5: Implementation
6.2.5.2 Support for mail routing failover
Mail cannot be delivered if the recipient’s mail server is not available. If this
server is configured as part of a cluster, and the mail files are also clustered, the
requirement is to deliver the mail to the active cluster member. For mail cluster
failover to work, a setting must be changed on every server within the Domino
Domain. You can set this up using a Configuration document in the Domino
Directory for all servers in the Domino domain.
When creating or editing a Configuration Document, click the Router/SMTP
Advanced —> Controls tabs. Figure 94 is an example of a Configuration
Document.
—>
Figure 94. Server configuration document
The following options are available for the cluster failover:
• Disabled
There is no mail failover. Mail queues on the sending server until the mail can
be sent. If routing through multiple Domino Name Networks (DNN), mail
queues on a server that is in the same DNN.
• Enabled for last hop only (the default)
The mail is delivered to a cluster member as long as a replica of the recipient’s
mail file exists.
• Enabled for all transfers in the domain
The mail is routed around server failures. For example, assume you are
routing mail between two servers using a clustered hub server in between
them, and there is a problem on one of the hub servers. The mail delivery will
failover to the running clustered hub and from there be routed to the
recipient’s server. An example of how this works is shown in Figure 95 on
page 180.
Advanced Domino Services for the AS/400 system
179
Enabled for all transfers in the Domain
Client
Key
Sending Mail Server
DNN = Network1
Server
Unavalible
Default routing path
Cluster Network
Cluster Failover path
Clustered Hubs
DNN = Network1, Network2
Receiving Mail Server
DNN = Network2
Client
Figure 95. Cluster mail failover
If you require any additional information on mail routing and cluster failover, refer
to the Domino Administration Help database (help\help5_admin.nsf).
180
Lotus Domino for AS/400 R5: Implementation
Chapter 7. Lotus Domino for AS/400 and SMTP
Important
We suggest you look on the Web site at http://notes.net/doc for the latest
version of the Release notes for Lotus Domino for AS/400 R5. Look for SMTP
within the Release notes.
We recommend that all customers apply the latest QMU for the release they
are running. To apply the latest QMU for your current release, go to the Web
site at http://www.as400.ibm.com/lotus_notes/qmulist.htm to obtain the
appropriate code.
This chapter describes the options for configuring Internet mail with Lotus
Domino for AS/400 Release 5. Simple Mail Transfer Protocol (SMTP) with its
complement Multipurpose Internet Mail Extensions (MIME) is the common mail
standard for the Internet and is also the mail protocol used in the coexistence of
Lotus Domino mail and OS/400-based e-mail.
Domino for AS/400 mail allows the exchanging of mail between:
• Notes users and other Notes users connected to the Domino for AS/400
server
• Notes users and OfficeVision for AS/400 (OV/400) users on the same or other
AS/400 systems
• Notes users and users of any SMTP/MIME based mail applications on or
connected to the AS/400 system through the Internet or intranet
Note
This book states in several places that you cannot have both Domino SMTP
and AS/400 SMTP active on the same AS/400 system at the same time. Until
early 2000, this was true.
Support is now available with PTFs for the ability to bind AS/400 SMTP to a
specific IP address. This means that it is now possible to support both SMTP
stacks simultaneously. See Lotus Domino for AS/400 Internet Mail and More ,
SG24-5990, for details on how to configure this support.
The following two options are available when configuring SMTP mail for Lotus
Domino for AS/400 Release 5. However, you cannot use both at the same time
on the same AS/400 system.
• Native Domino SMTP
This option is used to send mail between Lotus Notes users and the Internet
or intranet by using the native SMTP/MIME support in the Domino server and
not by using any of the SMTP support of the AS/400. For this option, you only
need to configure the SMTP options in the Domino server.
• AS/400 AnyMail integration
This option uses the AnyMail/400 Mail Server Framework (MSF) in
combination with the AS/400 SMTP support. This option is required if you
© Copyright IBM Corp. 1999, 2001
181
want to be able to send mail between Lotus Notes users and other AS/400
mail users, for example OfficeVision for AS/400 (OV/400) users, and the
Internet. To accomplish the integration between Domino and OS/400 mail, the
following two software components are involved:
– The SMTP/MIME support of the TCP/IP Connectivity Utilities licensed
program (5796-TC1) which is the AnyMail/400 Mail Server Framework. For
simplicity, we call this AS/400 SMTP support.
Support for TCP/IP on the AS/400 system is divided between OS/400 and
the TCP/IP Connectivity Utilities for AS/400 licensed program product
(5769-TC1). When you purchase OS/400, the ordering system
automatically places an order for the TCP/IP Utilities, which are shipped
with OS/400 at no additional charge. However, they must be installed
separately by using normal installation support.
– The Lotus Domino SMTP/MIME support.
Native Domino SMTP support on the AS/400 system uses the SMTP stack that is
provided with Domino Release 5, instead of the SMTP stack provided with
OS/400. This is the reason that you cannot have both AS/400 SMTP and Native
Domino SMTP running at the same time.
If you need to send mail to OfficeVision users on the same AS/400 system as
your Domino server, you must use the AnyMail Integration. If you need to send
mail to OfficeVision users on a different AS/400 system from your Domino server
(and not local OfficeVision users), you can use either type of support. Native
SMTP sends mail to these OfficeVision users as if they were users on the
Internet.
The main focus of this chapter is on installing and configuring SMTP on a Domino
Release 5 for AS/400 server. We show you the two methods for configuring SMTP
support. You select between Native Domino Release 5 SMTP support, and
AnyMail/400 Integration with Domino Release 5 and AS/400 SMTP support. For both
solutions, you must have the TCP/IP configuration on OS/400 set up correctly.
This is described in 2.4.1, “Configuring TCP/IP on your AS/400 system” on page
24. Finally, we explain how to specify addresses and send mail between these
different e-mail environments. Before we start, we would like to explain some of
the terms that we use.
Domino Directory
The Domino Public Address (Domino Names and Address book) has been
renamed the Domino Directory in Domino Release 5.
IMAP
Internet Message Access Protocol is a protocol for retrieving e-mail messages. It
is similar to POP3, but supports some additional features. IMAP uses SMTP for
communication between the e-mail client and the server.
MIME
To overcome the shortcomings of SMTP, a new architecture has been defined
that allows for a much greater variety of what can be contained in an electronic
message. The following items are included:
• Eight-bit text and lines longer than 1000 characters
• International code pages and character sets
• Binary and multimedia objects such as:
182
Lotus Domino for AS/400 R5: Implementation
– Fonts
– Images, audio, and video objects
MIME does not solely apply to electronic mail. Rather, it defines a way to
incorporate different objects in any electronic message. For instance, it is used
widely throughout the Internet today in browsing the World Wide Web.
In the remainder of the chapter, we refer to Domino SMTP/MIME as Domino
SMTP and SMTP/MIME as SMTP.
MSF
The AnyMail/400 Mail Server Framework (MSF) provided by OS/400. The primary
function of the MSF is to allow the distribution of electronic mail messages. The
Mail Server Framework is not a mail application, but rather, an open structure that
allows mail applications to be developed and run on the AS/400 system.
MTA
The acronym MTA stands for Message Transfer Agent. In the terminology used
for Lotus Notes, an agent is a program running under control of a Lotus Notes
server or client with no direct interactions with the users. It can be compared with
a batch program on the AS/400 system.
In releases of Domino prior to Release 5, this was a separate server add-in task
with a number of tasks started as a result. With Domino Release 5, message
transfer is done by the Domino Router task and there is no separate MTA task.
We still refer to the MTA when we discuss message transfer between different
SMTP based networks. When we discuss Domino using AnyMail, the SMTP is
the SMTP on OS/400 and MTA is the Router on the Domino server.
POP3
The Post Office Protocol (POP3) is an electronic mail protocol for retrieving
e-mail messages. POP3 allows mail for multiple users to be stored in a central
location until a request for delivery is made by an electronic mail program. POP3
uses SMTP for communication between the e-mail client and the server.
SMTP
The Simple Mail Transfer Protocol is an electronic mail protocol with both client
(sender) and server (receive) functions. SMTP is known as the Internet electronic
mail protocol. The objective is mail transmission in a reliable and efficient way.
7.1 Domino and AS/400 mail capabilities overview
Before looking in detail at the Domino for AS/400 mail integration, you should
have an understanding of the e-mail environment on the AS/400 system, as well
as Domino.
7.1.1 AS/400 mail capabilities
The traditional mail application on an AS/400 system is OfficeVision for AS/400
(OV/400) allowing users of 5250 and 3270 terminals to exchange mail (besides
other functions, such as word processing, maintaining calendars and others).
Exchange of mail with other systems was originally only accomplished through
Systems Network Architecture Distribution Services (SNADS). The format of the
Lotus Domino for AS/400 and SMTP
183
mail handled by OV/400 is based on the Document Content Architecture and
Document Interchange Architecture (DCA/DIA).
The implementation of the AnyMail/400 Mail Server Framework (MSF), since
OS/400 V3R1, allows OV/400 users to exchange mail with other e-mail
applications, for example, applications on the Internet using SMTP/MIME format.
Exit programs for AnyMail/400 convert the mail formats between DCA/DIA and
SMTP/MIME.
OS/400 also allows POP3 clients to connect to an AS/400 system to send and
receive Internet mail based on SMTP/MIME. POP3 clients can also exchange
mail with OV/400 on the same and other AS/400 systems through AnyMail/400.
Therefore, users of an AS/400 system can exchange mail in the following two
formats:
• DCA/DIA-based mail with other OfficeVision systems
This includes also OfficeVision for VM and OfficeVision for MVS as well as
other mail applications supporting DCA/DIA and SNADS.
• SMTP/MIME mail with any application supporting SMTP/MIME and POP3 or
IMAP clients
For more information on AS/400 mail functions, refer to AS/400 Electronic-Mail
Capabilities , SG24-4703.
7.1.2 Lotus Domino as a mail server
Domino Release 5 focuses on aligning with Internet standards, and allowing
users to be completely interoperable with the rest of the world. Domino Release 5
contains support for native MIME content and native SMTP routing, and
integrates the features that previously required a separate message transfer
agent (MTA). The native support means that conversions between Notes format
and Internet format are no longer required.
To allow messages to be more than just plain text, the Multipurpose Internet Mail
Extensions (MIME) standard extends the format of messages to allow for audio,
video, international character sets, and multi-part messages. Most Internet
messages are stored in MIME format. Now, with Domino Release 5, Notes
messages can be stored in MIME format. This means that users can send and
receive with no loss of fidelity. In addition, Domino Release 5 supports S/MIME
for sending encrypted Internet mail.
To transfer mail reliably and efficiently, the Simple Mail Transfer Protocol (SMTP)
defines mechanisms for relaying mail between networks on the Internet.
Previously, you would configure the SMTP MTA on a few dedicated Domino
servers to act as gateways for your Internet mail, converting Notes mail to
Internet mail, and vice versa. All Internet mail had to transfer through these
servers. With Domino Release 5, you no longer need to install a separate MTA.
All Domino servers now have native SMTP capabilities, so all servers can
transfer mail directly to and from the Internet. As mentioned previously,
conversions to and from MIME are no longer necessary since the Release 5
client can send and receive native MIME messages. Of course, the server can
still convert messages for pre-release 5 clients. Domino also supports Extended
SMTP (ESMTP) for delivery notifications for Internet messages, for example,
184
Lotus Domino for AS/400 R5: Implementation
reporting whether deliveries are successful, fail, or are delayed. In addition,
Domino Release 5 allows you to secure SMTP connections using TCP/IP or a
TCP/IP port secured with Secure Sockets Layer (SSL). You can require a name
and password either unencrypted over TCP/IP or encrypted over SSL. This is
part of the Domino stack and does not use the AS/400 SSL.
Domino Release 5 also supports native Internet addressing, based on the
Internet RFC821/822 standards for mail addresses. RFC821 specifies an
address of localpart@domain, while RFC822 adds a “phrase” portion to the
address that looks like “phrase” <local part@domain>. In Domino Release 5, the
phrase portion of the address contains the user's distinguished name since the
name is defined in the Person document in the Domino Directory or in the
Personal Address Book (for example:
“Alan Jones/Acme” <[email protected]>). To generate the Internet address
portion ([email protected]), Domino now includes a new Internet Address
field in each user's Person document. During user registration, Domino populates
the new Internet Address fields automatically. You can choose the format of the
user name, for example, FirstnameLastname, LastnameFirstname, and so on.
Then, when users send and receive messages, Domino automatically displays
the native Internet addresses.
Note
The RFC821 standards for mail addressing apply to both Native Domino SMTP
and Domino using AnyMail/400 MSF.
The following RFCs are supported:
•
•
•
•
•
•
RFC821 Simple Mail Transfer Protocol
RFC822 Standard for the Format of ARPA Internet Text Messages
RFC1521 MIME: Part I (message bodies)
RFC1522 MIME: Part II (message headers)
RFC974 Mail Routing and the Domain System
RFC1123 Requirements for Internet Hosts — Application and support
The contents of each RFC can be found on the Web. For example, the following
Web sites describe RFC821:
http://info.internet.isi.edu/in-notes/rfc/files/rfc821.txt
http://www.rfc-editor.org/
Finally, Domino Release 5 includes enhancements to the router so you can
perform the following tasks:
• Control who can route documents over a given size, and when
• Configure the router to obey database quotas
• Use anti-spam controls to prevent unwanted mail from being forwarded
through your domain
• Enjoy a greater amount of concurrency, with support for multiple sessions to
the same destination, multiple delivery threads, and synchronous mail delivery
agents
Lotus Domino for AS/400 and SMTP
185
Instead of using a Notes client workstation, users can also send and receive mail
through a Domino server using a POP3 or IMAP client, both Internet standards
for e-mail.
7.1.3 How mail routes in Domino
Clients interact with mail in different ways. All clients can compose, send, and
receive mail. Some clients, such as Web browsers, can only interact with mail on
the server and cannot store mail locally. Some clients, such as POP3 clients, can
only download mail from the server and work with it locally. Some clients, such as
Lotus Notes and IMAP clients, can download mail or work with it on the server
and can store mail locally.
You can use the following four types of clients with the Domino mail server:
•
•
•
•
Lotus Notes clients
IMAP clients, such as Microsoft Outlook Express
POP3 clients, such as Netscape Communicator or Microsoft Outlook Express
Web browsers, such as Netscape Navigator and Microsoft Internet Explorer
These types are explained in the following list:
• Lotus Notes clients: Users with Lotus Notes clients interact with a Domino
server over Notes protocols or Internet protocols. They can use, compose,
and retrieve mail either using Notes protocols or using POP3/IMAP and SMTP.
Notes clients access the Domino Directory using either Notes protocols or
Lightweight Directory Access Protocol (LDAP). Notes clients can create a
local replica of their mail file while maintaining a complete mail file on a
Domino server. Notes lets users work off-line and then connect to their server
to replicate changes to documents and send mail.
• IMAP clients: Users with IMAP clients can download mail to a local mail file or
interact with and manage mail directly on a Domino server that runs the IMAP
service. They use the IMAP protocol to read and manage mail, use SMTP to
send mail, and use LDAP to access the Domino Directory. Lotus Notes
Release 5 includes IMAP client functionality.
• POP3 clients: Users with POP3 clients can download mail to a local mail file
and interact with it there, as well as leave a copy of the mail in their file on the
Domino server. POP3 clients retrieve mail from a Domino server that runs the
POP3 service, use SMTP to send mail, and use LDAP to access the Domino
Directory. Lotus Notes Release 5 is a POP3 client.
• Web clients: Users with Web clients use HTTP to interact with mail on the
Domino server. Web clients do not have local mail files. Instead, all
mail-related tasks and actions are transmitted to the server over HTTP and
performed by the server. Lotus Notes Release 5 is a Web client.
Note
This explanation of mail routing is Domino mail routing that applies to all
platforms and is not specific to the AS/400 system. In the next two sections,
7.1.4, “Domino Release 5 native SMTP support” on page 188, and 7.1.5,
“AS/400 AnyMail integration” on page 188, we describe Domino mail routing as
it applies to the AS/400 system.
186
Lotus Domino for AS/400 R5: Implementation
Figure 96. How mail routes in Domino
These steps describe how mail is routed in a Domino mail system:
1. A user creates and addresses a mail message to a recipient.
2. The user sends the message.
3. The user's client software can:
• Use Notes protocols to deposit the message into the MAIL.BOX database
on the user's Domino mail server.
• Use SMTP to send the message to the user's Domino mail server, which
must be running the SMTP Listener task. The SMTP Listener task deposits
the message into MAIL.BOX (Lotus Notes, IMAP clients, POP3 clients).
• Use HTTP to send the message to the user's Domino mail server, which
must be running the HTTP task. The HTTP task deposits the message into
MAIL.BOX (Web clients).
4. The router finds the message in MAIL.BOX and determines where to send the
message for each recipient. The router calculates the next "hop" for the
message on the path to its recipients and uses the best protocol, either SMTP
or Notes routing, to transfer the message. It uses one of the following
methods:
• Using SMTP routing, the router connects to the destination server, which is
the recipient's mail server, a relay host, a smart host, or one of the servers
in the recipient's Internet domain, and transfers a copy of the message. A
smart host is a host to which SMTP-routed messages are sent when the
message recipient cannot be found in the local Internet domain directory.
Lotus Domino for AS/400 and SMTP
187
• Using Notes routing, the router moves the message to the MAIL.BOX
database on the server that is the next hop in the path to the recipient's
mail server. The router on that server moves the message to the next hop,
until the message is deposited in the MAIL.BOX database on the
recipient's home server.
5. The router on the recipient's server finds the message (in MAIL.BOX on the
Domino server) and delivers it to the recipient's mail file.
6. The recipient uses a client that supports Notes protocols, POP3, IMAP, or Web
access (HTTP) to read the message, which is stored in the recipient's mail file.
7.1.4 Domino Release 5 native SMTP support
Native Domino Release 5 SMTP support means that Lotus Domino for AS/400
uses the SMTP stack provided with Domino Release 5, instead of the SMTP
stack provided with OS/400. All functions, configuration and use of the SMTP
support in Domino for AS/400 are the same as for other platforms. See Figure 97.
users
Domino R5 Router
mail.box
Domino R5 SMTP
AS/400 - TCP/IP
Figure 97. View of Native Domino Release 5 SMTP support
Note: Domino Release 5 SMTP support provides some functions that are not
currently available within the SMTP support of the AS/400 operating system,
(OS/400). These include reverse host IP lookup, and allow or deny SMTP mail
based on the sender’s address or recipient’s address. A full list is found in the
Release Notes.
7.1.5 AS/400 AnyMail integration
AS/400 AnyMail Integration uses AnyMail/400 Mail Server Framework (MSF) in
combination with the AS/400 SMTP support. This means it uses the SMTP stack
provided with OS/400 instead of the Domino Release 5 SMTP stack, and has
MSF snap-in programs that allow Domino mail to interact with other AS/400 mail
applications. See Figure 98 for an overview.
188
Lotus Domino for AS/400 R5: Implementation
users
users
User
Constructed
Mail
Applications
temp. IFS
File Struct.
Inbound
Outbound
AS/400
Mail
Applications
Domino R5 Router
Outbound
Mail
Server
Framework
Inbound
mail.box
temp. IFS
File Struct.
AS/400 SMTP Support
AS/400 - TCP/IP
Figure 98. View of MSF with AS/400 SMTP Support and Domino Release 5
The AnyMail/400 Mail Server Framework is an open structure for electronic mail
distribution that is provided with OS/400. AnyMail/400 functions are a set of
mail-related functions that provide open and flexible interfaces to support mail on
the AS/400 system. The Mail Server Framework (MSF) is the distribution
framework. The primary function of the MSF is to allow the distribution of
electronic mail messages. The Mail Server Framework is not a mail application,
but rather an open structure that allows mail applications to be developed and run
on the AS/400 system.
On the AS/400 system, the MSF performs the following functions:
• Creates and queues MSF messages
• Distributes MSF message information by calling configured exit programs
An exit point is a specific point in a system function or program where control is
passed to one or more specified programs. An exit point passes control to an exit
program. The exit program can be written by the user or it can be a program that
is already on the system. An application program interface (API) is a functional
interface supplied by the operating system that allows an application program
written in a high-level language to use specific data or functions of the operating
system.
The mail server framework allows programs to be configured and accessed
through an API. A snap-in is a registered exit point program that is called from a
Lotus Domino for AS/400 and SMTP
189
mail server framework exit point. The user-written exit programs provide the mail
message processing required for each MSF message that is created.
The Mail Server Framework (MSF) message contains information that defines the
electronic mail message. The mail server framework does not process the
contents of a mail message. Instead, it determines which exit program is allowed
to work with the MSF message and it tracks the flow of the MSF message through
the framework. The framework also provides support for electronic mail
messages that arrive from other systems.
7.1.6 Combining the mail environments of Domino and OS/400
One common mail format, SMTP/MIME, is supported for AS/400 mail based
applications and Domino for AS/400. In Figure 99, we show that you can send
and receive mail from any SMTP based mail client, such as POP3 and IMAP, and
the Internet using only native Domino SMTP.
AS/400
Internet
Notes
DB
Any
POP3
or
IMAP4
Client
Notes
Client
Domino R5 for
AS/400
Token-Ring LAN
Notes
Client
Domino
Server
Notes
Client
Notes
Client
Figure 99. Native Domino SMTP mail environment
By using the AS/400 system SMTP stack, we can include all the AS/400
workstations and OfficeVision/400 users or any other AS/400 mail application.
This environment is represented in Figure 100.
190
Lotus Domino for AS/400 R5: Implementation
AS/400
OV/400
OV/400
Mail
POP3
Mailbox
Any
POP3
Client
SNADS
SMTP
MTA
Notes
DB
Any
POP3
or
IMAP4
Client
AS/400
Workstation
AnyMail
Other SNADS
Nodes
Domino for
AS/400 4.6
Internet
Notes
Client
Token-Ring LAN
Notes
Client
Domino
Server
Notes
Client
Notes
Client
Figure 100. Combining the mail environments of Domino and OS/400
Through SMTP/MIME and AnyMail/400, not only does the exchange of mail
between Domino for AS/400 and OV/400 become possible, but both the native
Domino SMTP and AS/400 SMTP support allow sending mail to and receiving
mail from any Internet-based mail application, as long as there is a connection to
the AS/400 system.
7.2 TCP/IP configuration for SMTP
With both options for mail configuration, Domino Release 5 SMTP and AS/400
AnyMail integration, you must configure TCP/IP for SMTP. Basic TCP/IP
configuration is discussed in 2.4.1, “Configuring TCP/IP on your AS/400 system”
on page 24.
7.2.1 Verifying or completing the TCP/IP configuration for SMTP
Even though TCP/IP is already working on your AS/400 system, the configuration
may not be complete to allow the SMTP server to work correctly. Some important
topics to look at are:
• Which SMTP domains should the SMTP server represent and accept
incoming mail for?
• Is there a Domain Name System (DNS) in place to allow name servers to
resolve host names to IP addresses?
7.2.1.1 Your mail server SMTP domain
Any SMTP mail address has the form username@ SMTPdomain . The part on the
left of the @ sign describes the user’s name, or rather the user’s mail box name
and is defined by the mail application being used. The SMTP domain name on
the right side of the @ sign must be a valid host name for the receiving system.
This means it must be possible to resolve this name to an IP address assigned to
a network interface at the receiving system.
Lotus Domino for AS/400 and SMTP
191
Note
The term SMTP domain is not at all related to a Notes or Domino domain, nor
is it the same as the TCP/IP domain, although the latter can be a part of the
SMTP domain name.
In the case of AS/400 SMTP support, this means it is not enough to define the
AS/400 TCP/IP host name and domain name, you also must make sure the
SMTP domain name is in the local hosts table and is associated with one of the
TCP/IP interfaces on the AS/400. For both Domino and AS/400 SMTP support,
the fully qualified Domino server name (for example acmehub.acme.com) should
be in the domain name system (DNS).
7.2.1.2 What are domains?
Unfortunately, the term domain is used multiple times with different meanings,
depending on the context. Throughout this book, and especially in this section,
make sure you understand exactly what domain we are talking about. The
following three different environments are where we talk about a domain name:
• SMTP domain: This is the partial SMTP address on the right of the @ sign
describing the IP host name of the computer where the SMTP user’s mail
application is running.
• TCP/IP domain: This is the right part of the fully qualified host name used to
identify the TCP/IP network. For example, if the full host name is
SYSTEM01.DOMLAND.ACME.COM, the domain name is
DOMLAND.ACME.COM.
• Lotus Notes or Domino domain: This term has absolutely nothing to do with
TCP/IP. A Notes Domain consists of one or more Domino servers that all
share or use a replica of the same Domino Directory. Therefore, each server
knows the home mail server for all users in the same domain. The Notes
domain name should also not be confused with the organization or the
organizational unit. When installing a new Domino server, the default for
domain name is identical to the organization name. However, they do not have
to be the same. In Notes terminology, the domain name is specified by a
preceding @ sign, while the organizational unit is preceded by a forward slash
(/). For example, WBL/ITSO@itsc_respop specifies a user WBL in the
organizational unit ITSO on the Notes domain itsc_respop.
7.2.1.3 Defining the TCP/IP host and domain name for the AS/400 system
The first step in setting up a correct TCP/IP configuration is to set the host name
and domain name for the AS/400. You can do so using the Configure TCP/IP
(CFGTCP) command, and then selecting option 12, or by using the Change
TCP/IP Domain (CHGTCPDMN) command and pressing F4. In either case, you
see the display, as shown in Figure 101.
192
Lotus Domino for AS/400 R5: Implementation
Change TCP/IP Domain (CHGTCPDMN)
Type choices, press Enter.
Host name . . . . . . . . . . .
system01
Domain name . . . . . . . . . .
domland.acme.com
Host name search priority . . .
*REMOTE
Internet address . . . . . . .
*REMOTE, *LOCAL, *SAME
'10.1.10.10'
'10.1.10.11'
Bottom
F3=Exit F4=Prompt F5=Refresh F10=Additional parameters F12=Cancel
F13=How to use this display
F24=More keys
Figure 101. Change TCP/IP Domain (CHGTCPDMN) display
Now, enter a local TCP/IP host name and the TCP/IP domain name. The
combination of these two names is referred to as the fully-qualified local host
name and is the name by which this host is known to the network. The host
name, whether by itself or fully-qualified, is sometimes referred to as the SMTP
domain .
If a Domain Name System (DNS) exists, you should also specify the IP
addresses of your name servers and whether the local host table should be
searched before the name servers tables.
Tip
The title of the last two parameters (Internet address) may be somewhat
misleading. It is not the Internet address for the AS/400 system. Rather, it is
the address of one or more name servers for the DNS. Pressing F1 for help
gives you the correct explanation.
7.2.1.4 Including the host name in the host table
The AS/400 SMTP server needs to know which of the mail it receives on port 25
is destined for which user on this system. The way it does this is by parsing the
recipient address of the incoming mail and looking at the part to the right of the @
sign, called the SMTP domain. A piece of mail is accepted if the SMTP domain
name can be resolved to any IP address that is assigned to a local TCP/IP
interface. For AS/400 SMTP support, this can only be done if this SMTP domain
name is registered in the local host table of the AS/400 system.
A part of the TCP/IP configuration often forgotten if local host tables on the clients
or Notes connection documents are being used, is to add the AS/400 TCP/IP host
name to the host table on the AS/400 system. This is required when using
AS/400 SMTP mail (*MSF).
To add a name to the local host name, you can either use the Configure TCP/IP
(CFGTCP) command and then option 10 followed by option 1, or type the Add
Lotus Domino for AS/400 and SMTP
193
TCP/IP Host Table Entry (ADDTCPHTE) command on any command line and
press F4. In either case, you see the display, as shown in Figure 102.
Add TCP/IP Host Table Entry (ADDTCPHTE)
Type choices, press Enter.
Internet address . . . . . . . .
Host names:
Name . . . . . . . . . . . . .
10.1.2.217
system01
+ for more values +
Text 'description' . . . . . . . ________________________
Bottom
F3=Exit F4=Prompt F5=Refresh F12=Cancel F13=How to use this display
F24=More keys
Figure 102. Add TCP/IP Host Table Entry (ADDTCPHTE) display
Make sure to enter the correct IP address, as well as the same host name as you
did with the Change TCP/IP Domain (CHGTCPDMN) command. If you want your
AS/400 system to represent more than one SMTP domain, you can enter up to
four names per IP address. Type a plus (+) sign into the small field and press
Enter. You can now add additional names. You should add the fully qualified
name of the AS/400 as well, that is both names shown in Figure 101 on page 193.
This is system01.domland.acme.com in Figure 103.
Specify More Values for Parameter HOSTNAME
Type choices, press Enter.
Host names:
Name . . . . . . . . . . . . . > SYSTEM01
Name . . . . . . . . . . . . . system01.domland.acme.com
Name . . . . . . . . . . . . . ___________________________
More...
F3=Exit F4=Prompt F5=Refresh F12=Cancel F13=How to use this display
F24=More keys
Figure 103. Fully qualified host name
194
Lotus Domino for AS/400 R5: Implementation
The Native Domino Router can also accept mail for more than one SMTP domain
by listing primary and alternate Internet domains in a Global Domain Document.
7.3 Native Domino Release 5 SMTP support
To use the native Domino SMTP support, you do not need to make any further
changes to the TCP/IP configuration other than what you have done to install and
setup Domino on your AS/400 system. See 2.4.1, “Configuring TCP/IP on your
AS/400 system” on page 24, and 7.2.1, “Verifying or completing the TCP/IP
configuration for SMTP” on page 191, on how to configure TCP/IP on your
AS/400 system.
7.3.1 Domino installation and configuration
Configuration of the SMTP support for Domino for AS/400 can be done
automatically during the server configuration. If you did not select the support
when you configured the server, you must update the Domino Configuration using
the Change Domino Server (CHGDOMSVR) command. We suggest that, after
you have configured the server, you verify your settings in the Domino Server
documents using the Domino Administrator.
Perform the following steps to configure native Domino SMTP if you did not select
the option when you configured your server:
1. Stop the AS/400 SMTP server.
2. Configure the Domino server for native SMTP.
3. Start the Domino server.
7.3.2 Stopping the AS/400 SMTP server
It is necessary to end the AS/400 SMTP server because the Domino Release 5
SMTP server and the AS/400 SMTP server cannot be running at the same time. If
you attempt to run both types of servers, error conditions occur. The error
conditions are as follows:
• If the AS/400 SMTP server is running, and the Domino SMTP server task is
started, the Domino console for the Domino server displays SMTP Listener
errors. The Domino SMTP server task attempts to listen again every 20
seconds, and results in the same error. The SMTP listener task must be set to
Enabled for native Domino SMTP support.
• By default, the SMTP server is started whenever you start TCP/IP (using the
Start TCP/IP (STRTCP) command) on the AS/400 system. However, the
default may have been changed. It is a good idea to verify the SMTP service
status. You can do so using the Work with TCP/IP Network Status (NETSTAT)
command. On any AS/400 command line, type NETSTAT *CNN and press Enter.
You see a display, as shown in Figure 104. After you have pressed F14 to
display the port numbers, you may see a Local Port column showing SMTP or
the number 25. Use option 5 to display details for this port. If the associated
user profile is QNOTES, Native Domino SMTP is running. If the user profile is
QTCP, AS/400 SMTP is running.
Lotus Domino for AS/400 and SMTP
195
Work with TCP/IP Connection Status
System:
Local internet address . . . . . . . . . . . : *ALL
SYSTEM01
Type options, press Enter.
4=End 5=Display details
Remote
Opt Address
*
*
*
*
*
*
*
*
*
*
*
Remote
Port
*
*
*
*
*
*
*
*
*
*
*
Local
Port
ftp-con >
telnet
smtp
domain
domain
bootps
tftp
www-http
pop3
119
143
Idle Time
013:54:54
002:07:03
013:54:34
013:54:54
013:54:54
000:01:07
013:54:39
013:54:50
013:54:37
004:37:16
004:37:25
State
Listen
Listen
Listen
Listen
*UDP
*UDP
*UDP
Listen
Listen
Listen
Listen
More...
F5=Refresh F11=Display byte counts F13=Sort by column
F14=Display port numbers F22=Display entire field F24=More keys
Figure 104. Work with TCIP/IP Connection Status display
If no application is listening to the SMTP port, it is not shown on the TCP/IP
Connection Status display. You stop the AS/400 SMTP server with the End
TCP/IP Server (ENDTCPSVR) command. On any AS/400 command line, type
ENDTCPSVR *SMTP and press Enter.
We recommend that you change the attributes of the AS/400 SMTP server to
prevent auto start of the server from occurring. To do this, use the Change SMTP
Attributes (CHGSMTPA) command, and specify the special value *NO on the Auto
start server (AUTOSTART) parameter. You can also change the attributes of the
SMTP server by selecting option 3 (Change SMTP attributes) from the Configure
TCP/IP SMTP menu or set through Operations Navigator, if you are using Client
Access Express.
To determine in advance which mail configuration is currently being used, Native
Domino SMTP or Domino using MSF, refer to 7.5.1, “Which mail environment is
used” on page 218.
If the Domino SMTP task is running, and the AS/400 SMTP server is started, the
AS/400 SMTP server fails to start and a job log from JOB QTSMTPSRVR is
generated. The errors listed in the job log appear, as shown in Figure 105.
196
Lotus Domino for AS/400 R5: Implementation
MSGID
TYPE
SEV
CPF1124
Information
00
Message . . . . : Job 025275/QTCP/QTSMTPSRVR started on 11/30/98 15:41:04 in subsystem QSYSWRK in
QSYS. Job entered system on 11/30/98 at 15:41:04.
CPI1125
Information
00
Message . . . . : Job 025275/QTCP/QTSMTPSRVR submitted.
Cause . . . . . : Job 025275/QTCP/QTSMTPSRVR submitted to job queue QSYSNOMAX in QSYS from job
025251/TFORREST/QPADEV0007. Job 025275/QTCP/QTSMTPSRVR was started using the Submit Job (SBMJOB)
command with the following job attributes: JOBPTY(5) OUTPTY(5) PRTTXT() RTGDTA(SMTPROUT)
SYSLIBL(QSYS QSYS2 QHLPSYS QUSRSYS) CURLIB(QTCP) INLLIBL() LOG(4 00 *SECLVL) LOGCLPGM(*NO)
INQMSGRPY(*RQD) OUTQ(/*DEV) PRTDEV(PRT01) HOLD(*NO) DATE(*SYSVAL) SWS(00000000) SRSYS/QTCP)
CCSID(500) SRTSEQ(*N/*HEX) LANGID(ENU) CNTRYID(US) ALWMLTTHD(*NO).
TCP2068
Information
20
Message . . . . : Queued outgoing distributions: 0 and queued incoming distributions: 0.
CPC1221
Completion
00
Message . . . . : Job 025276/QTCP/QTSMTPCLNT submitted to job queue QSYSNOMAX in library QSYS.
CPC1221
Completion
00
Message . . . . : Job 025277/QTCP/QTSMTPBRCL submitted to job queue QSYSNOMAX in library QSYS.
CPC1221
Completion
00
Message . . . . : Job 025278/QTCP/QTSMTPBRSR submitted to job queue QSYSNOMAX in library QSYS.
TCP2064
Diagnostic
30
Message . . . . : SMTP not able to send or receive mail due to TCPIP protocol problem.
Cause . . . . . : The SMTP function cannot communicate with TCPIP to send and receive mail. This
protocol layer is not communicating properly.
Recovery . . . : Check the job log associated with subsystem TCPIP to determine if the subsystem
is having a problem. Follow the recovery action recommended on the messages found in the job log.
If no messages exist, you may have to start the subsystem again to resynchronize the protocols.
To start SNADS, use command (STRSBS QSNADS). To start TCP/IP, use command (STRTCP).
C2M1601
Escape
30
Message . . . . : Signal SIGABRT raised (abnormal termination).
Cause . . . . . : The signal SIGABRT was raised to indicate an abnormal termination.
CEE9901
Escape
30
Message . . . . : Application error. *N unmonitored by *N at statement *N, instruction X’4000’.
Cause . . . . . : The application ended abnormally because an exception occurred and was not
handled. The name of the program to which the unhandled exception is sent is *N *N. The program
was stopped at the high-level language statement number(s) *N at the time the message was sent.
If more than one statement number is shown, the program is an optimized ILE program. Optimization
does not allow a single statement number to be determined. If *N is shown as a value, it means
the real value was not available.
Recovery . . . : See the low level messages previously listed to locate the cause of the
exception. Correct any errors, and then try the request again.
CPC1231
Completion
00
Message . . . . : ENDJOB started for job 025276/QTCP/QTSMTPCLNT.
Cause . . . . . : The End Job (ENDJOB) command is running for job 025276/QTCP/QTSMTPCLNT.
CPC1231
Completion
00
Message . . . . : ENDJOB started for job 025277/QTCP/QTSMTPBRCL.
Cause . . . . . : The End Job (ENDJOB) command is running for job 025277/QTCP/QTSMTPBRCL.
Figure 105. Job log from SMTPSRVR
7.3.3 Configuring Domino server for native SMTP
We show you how to configure the Domino server using both the AS/400 display
and the Internet browser. The Internet browser only allows you to create a new
server, either the first server in the organization or an additional server. To
change an existing server, you must use the Change Domino Server
(CHGDOMSVR) command from an AS/400 display or use Operations Navigator
(for R5.0.1 or later).
Lotus Domino for AS/400 and SMTP
197
Configuring a Domino server from an AS/400 display
Configure a Native Domino Release 5 SMTP server by running the Configure
Domino Server (CFGDOMSVR) command. If you have an existing Domino
server, you should use the Change Domino Server (CHGDOMSVR) command.
The options and displays for the two commands are similar. All possible
combinations of options for this command are not discussed at this time, only
those that relate to configuring a native Domino SMTP server. See 4.4,
“Configure Domino Server (CFGDOMSVR)” on page 108, and 4.5, “Change
Domino Server (CHGDOMSVR)” on page 109, for more information on all the
options for these commands.
Enter the value *SMTP in the Internet packages (MAIL) field, and then enter the
value *DOMINO (the default) on the SMTP services (SMTP) field. If you select *ALL
for the Internet mail packages, the *SMTP option is installed, as well as the other
mail options. All of the necessary forms and sub forms are created and updated
during the processing of the CFGDOMSVR or CHGDOMSVR command.
Configure Domino Server (CFGDOMSVR)
Type choices, press Enter.
Administrator:
Last name . . . . . . . . . . > Administrator
First name . . . . . . .
Middle initial . . . . .
Password . . . . . . . .
Minimum password length
Internet password . . .
Time zone . . . . . . . .
Daylight savings time . .
Web browsers . . . . . . .
.
.
.
.
.
.
.
.
.
.
.
.
.
.
.
.
. > Notes
.
. > password
. 8
. *NONE
. > CST
. *YES
. *NONE
Internet mail packages . . . . . *SMTP
+ for more values
SMTP services . . . . . . . . . > *DOMINO
F3=Exit F4=Prompt F5=Refresh
F13=How to use this display
Character value
0-31
GMT,EST,CST,MST,PST,CET ...
*YES, *NO
*NONE, *ALL, *HTTP, *IIOP
*NONE,*ALL,*IMAP,*POP3 ...
*DOMINO, *MSF
F10=Additional parameters
F24=More keys
More...
F12=Cancel
Figure 106. Enabling Native Domino SMTP services
Configure the server using an Internet browser
If you use an Internet browser to configure the server, you have to select the
following options:
• For Internet Mail Packages in page 3, Server Audience (as shown in Figure
107), if you selected First Server Setup in form 2, you must select at least
SMTP. This is the same for an additional server setup.
198
Lotus Domino for AS/400 R5: Implementation
Figure 107. Browser Setup — Server Audience page
• Select Domino for SMTP Services as shown in Figure 107.
Complete the installation, as described in 2.6.2, “Web-based setup” on page 58.
Starting the Domino server
Start the Domino SMTP server with the Start Domino Server (STRDOMSVR)
command and specify the name of the server for the Server Name (SERVER)
parameter. Issuing this command starts the server you have configured to handle
your SMTP mail. Refer to 4.12, “Start Domino Server (STRDOMSVR)” on page
128, for more information on this command.
7.3.4 Verifying the Domino Server documents
Connect to the server with the Domino Administrator. A Messaging Configuration
document is created (see Figure 108 on page 200). The Server document is
changed during the processing of the Configure Domino Server (CFGDOMSVR)
and Change Domino Server (CHGDOMSVR) commands when configuring native
Domino SMTP support. An entry for a variable SMTP_VERSION=0 is also added
to the NOTES.INI file of the server. Depending upon your requirements, you may
also need to define a Global Domain document. The Global Domain document
allows you to define additional SMTP domains for which the Domino server will
accept mail.
Lotus Domino for AS/400 and SMTP
199
Figure 108. Domino Administrator showing Configurations documents
7.3.4.1 Messaging Configuration document
All fields in the Configuration document are left to default except for those in the
following list:
• Under the Basics tab, the server name used in the Configure Domino Server
(CFGDOMSVR) or Change Domino Server (CHGDOMSVR) command is
placed in the Group or Server name field. In our example in Figure 109, the
server name is ACMEHUB/ACME.
Figure 109. Configuration document — Basics settings
200
Lotus Domino for AS/400 R5: Implementation
• Under the Router/SMTP tab, the SMTP used when sending messages outside
of the local internet domain field is set to Enabled.
Figure 110. Configuration document — Router/SMTP Basics setting
7.3.4.2 Server document
The fields set in the Server document are under the Basics tab. The Routing
tasks have SMTP Mail Routing added, and the SMTP Listener task is set to
Enabled. Entries for fields, such as the Fully qualified Internet host name, were
computed or retrieved during the configuration of the server. The initial data for
the Fully qualified Internet host name was retrieved from the Host name and
Domain name fields of the Change TCP/IP Domain (CHGTCPDMN) command.
You need to change this value to be your fully qualified Domino host name, as
shown in Figure 111 on page 202.
Lotus Domino for AS/400 and SMTP
201
Figure 111. Server document — Basics settings
7.3.5 Starting SMTP on the Domino server
You can start the SMTP/MIME on the Domino for AS/400 system after it is
installed and configured in the following two ways:
• Manually from a Domino console
• Automatically by enabling the listener task field in the Server document
Generally it is not necessary to start SMTP manually. SMTP starts when the
server start because of the Listener task in the Server document.
7.3.5.1 Starting SMTP manually
You can start SMTP by running load smtp command from either the Work with
Domino Console command line or a remote Domino console on a Notes client:
Press Enter. After a couple of seconds, press F5. You should see the completion
message, as shown in Figure 112.
202
Lotus Domino for AS/400 R5: Implementation
Work with Domino Console
Server: ACMEMAIL1
Previous subcommands and messages:
>
> load smtp
> load smtp
04/02/99 10:35:31
SMTP Server: Started
>
>
Enter a Domino subcommand.
===>
F3=Exit
F17=Top
F5=Refresh
F18=Bottom
F6=Print F9=Retrieve
F21=Command line
Figure 112. Loading SMTP
7.3.5.2 Starting the SMTP automatically with the server
If the Routing tasks field (see Figure 111 on page 202) has SMTP Mail Routing as
one of the options and the SMTP Listener field is set to Enabled in the Server
document of the Domino Directory, then the SMTP task starts automatically when
the Router task starts.
7.3.6 Verifying that the SMTP/MIME router is completely started
There are several ways to determine that all necessary SMTP tasks are active.
Use one of the following methods:
• Use the Domino console show tasks command (short form: sh ta). You see the
tasks, as shown in Figure 113 on page 204. When you are using native
Domino SMTP, there are two SMTP Server tasks. One is the Control task and
the other the port listener task.
• Use CL commands to see the same tasks as AS/400 jobs.
Lotus Domino for AS/400 and SMTP
203
Work with Domino Console
Server: ACMEMAIL1
Previous subcommands and messages:
SMTP Server
Listen for connect requests on TCP Port:25
SMTP Server
Control task
Cluster Replicator Idle
Cluster Directory
Idle
Event Monitor
Idle
Calendar Connector Idle
Schedule Manager
Idle
Admin Process
Idle
Agent Manager
Executive '1': Idle
Agent Manager
Idle
Stats
Idle
Indexer
Idle
Router
Idle
Replicator
Idle
HTTP Web Server
Listening on port(s) 80
Enter a Domino subcommand.
===>
F3=Exit
F17=Top
F5=Refresh
F18=Bottom
F6=Print F9=Retrieve
F21=Command line
Figure 113. SMTP and router tasks on the Domino server
The easiest way is use the Work with Domino Servers (WRKDOMSVR)
command. Type WRKDOMSVR on any AS/400 command line and press Enter.
You see a list of all servers defined to your system. Type 9 (Work Domino jobs)
next to the server having SMTP running and press Enter. You see a display, as
shown in Figure 114. When the AS/400 SMTP/MIME is operational, the ROUTER
and SMTP tasks must both be active:
Notice that, although there are two SMTP Server tasks in the Domino tasks list,
they both have the same name and are listed as a single SMTP job in the active
jobs list.
204
Lotus Domino for AS/400 R5: Implementation
Work with Active Jobs
CPU %: 14.0 Elapsed time: 00:00:00
AS25
03/26/99 10:25:41
Active jobs: 326
Type options, press Enter.
2=Change 3=Hold 4=End 5=Work with 6=Release 7=Display message
8=Work with spooled files 13=Disconnect ...
Opt Subsystem/Job User
__ DOMINO04
QSYS
__
ADMINP
QNOTES
__
AMGR
QNOTES
__
AMGR
QNOTES
__
EVENT
QNOTES
__
QNNINSTS
QNOTES
__
REPLICA
QNOTES
__
ROUTER
QNOTES
__
SCHED
QNOTES
__
SERVER
QNOTES
__
SMTP
QNOTES
__
STATS
QNOTES
__
UPDATE
QNOTES
Type CPU % Function
SBS
.0
BCI
.0
BCI
.0
BCI
.0
BCI
.0
BCH
.0 PGM-QNNINSTS
BCI
.0
BCI
.0
BCI
.0
BCI
.0
BCI
.0
BCI
.0
BCI
.0
Status
DEQW
SELW
SELW
SELW
SELW
EVTW
SELW
SELW
SELW
SELW
SELW
SELW
SELW
More...
Parameters or command
===> ______________________________________________________________
F3=Exit F5=Refresh F7=Find F10=Restart statistics
F11=Display elapsed data F12=Cancel F23=More options F24=More keys
Figure 114. Work with Domino jobs
Verify that all tasks listed in Figure 114 appear. You may have to press PgDn to
see all of the active jobs. The SMTP is not fully operational if one of the SMTP or
router jobs is missing.
7.4 Using Domino for AS/400 with AS/400 AnyMail integration
AS/400-based mail applications such as OfficeVision for OS/400 use the AS/400
SMTP support to convert from and to SMTP, therefore allowing direct mail
exchange with a Domino for AS/400 server on the same or other AS/400
systems.
If you need to use Domino in conjunction with other AS/400 mail applications, you
must configure the AS/400 SMTP server and integrate the AnyMail/400 MSF with
Domino Release 5.
The following tasks must be performed before you can use Domino for AS/400
mail integration:
1.
2.
3.
4.
5.
6.
7.
Start and verify the AS/400 SMTP server.
Change the distribution attributes (if you use OfficeVision/400).
Verify QSNADS subsystem is started.
Set up a Domino for AS/400 server with MSF.
Verify the Domino Server and Messaging Configuration documents.
Restart the AnyMail/400 Mail Server Framework.
Start the mail router on the Domino server.
Lotus Domino for AS/400 and SMTP
205
7.4.1 Starting and verifying the AS/400 SMTP server
By default, the SMTP server is started whenever you start TCP/IP (using the Start
TCP/IP (STRTCP) command). However, the default may have been changed or
the server may fail when attempting to start. Therefore it is a good idea to verify
that the SMTP is running. You can do so using the Work with TCP/IP Network
Status (NETSTAT) command. On any AS/400 command line, type NETSTAT *CNN
and press Enter.
You see a display, as one shown in Figure 115. When you press F14 to show the
port numbers, make sure you see a column with Local Port showing SMTP or the
number 25. If a Domino server is listening on port 25, you must end the server
before you can use AS/400 AnyMail Integration for SMTP.
Work with TCP/IP Connection Status
System:
Local internet address . . . . . . . . . . . : *ALL
SYSTEM01
Type options, press Enter.
4=End 5=Display details
Remote
Opt Address
*
*
*
*
*
*
*
*
*
*
*
Remote
Port
*
*
*
*
*
*
*
*
*
*
*
Local
Port
ftp-con >
telnet
smtp
domain
domain
bootps
tftp
www-http
pop3
119
143
Idle Time
013:54:54
002:07:03
013:54:34
013:54:54
013:54:54
000:01:07
013:54:39
013:54:50
013:54:37
004:37:16
004:37:25
State
Listen
Listen
Listen
Listen
*UDP
*UDP
*UDP
Listen
Listen
Listen
Listen
More...
F5=Refresh F11=Display byte counts F13=Sort by column
F14=Display port numbers F22=Display entire field F24=More keys
Figure 115. Work with TCIP/IP Connection Status display
If no application is listening to the SMTP port, try to start the SMTP server. You
can do this using the Start TCP/IP Server (STRTCPSVR) command. On any
AS/400 command line, type STRTCPSVR *SMTP and press Enter.
Check again if the SMTP server is listening to port 25. If it does not, display the
system operator message queue ( DSPMSG QSYSOPR) and look for error message
SMTP job QTSMTPSRVR ended abnormally.
If you find this message (TCP2061), position the cursor on the message and
press F1, and then F9. You see the job number of the job which failed, as shown
in Figure 116.
206
Lotus Domino for AS/400 R5: Implementation
Display Message Details
Message ID .
Date sent .
Message type
CCSID . . .
.
.
.
.
.
.
.
.
.
.
.
.
.
.
.
.
.
.
.
.
: TCP2061 Severity . . . . . . . :
: 05/27/98 Time sent . . . . . . :
: Diagnostic
: 65535
From job . . . . . . . . . . . :
User . . . . . . . . . . . . :
Number . . . . . . . . . . . :
QTSMTPSRVR
QTCP
048813
From program . . . . . . . . . :
QTMSSRCP
To message queue . . . . . . . :
Library . . . . . . . . . . :
QSYSOPR
QSYS
40
13:21:10
Bottom
Press Enter to continue.
F1=Help
F3=Exit
F12=Cancel
Figure 116. Display Message Details display
Copy the full job information (job name, user, number) to your clipboard or write it
down and press Enter three times to leave the message display. Now, on the
AS/400 command line, type WRKJOB and press F4. In the prompt display, paste or
type the full job name in the Job name field and *SPLF in the Option field, as
shown in Figure 117. Press Enter.
Work with Job (WRKJOB)
Type choices, press Enter.
Job name
User .
Number
Output .
Option .
.
.
.
.
.
.
.
.
.
.
.
.
.
.
.
. .
. .
. .
. .
. ..
.
.
.
.
.
.
.
.
.
.
.
.
.
.
.
. QTSMTPSRVR
.
QTCP
.
048813
. *
. > *SPLF
Name, *
Name
000000-999999
*, *PRINT
*SELECT, *STSA, *DFNA...
Bottom
F3=Exit F4=Prompt F5=Refresh F10=Additional parameters F12=Cancel
F13=How to use this display
F24=More keys
Figure 117. Work with Job (WRKJOB) display
You see the spooled files for the job. Type 5 (Display) next to the QPJOBLOG file
and press Enter. Search for any error messages. If you find the message ID
TCP2074, it is an indication that the system host name is not found on the name
server or in the local host table. You may also find different causes.
7.4.2 Changing the distribution attributes
On all AS/400 systems where OfficeVision/400 is used to send mail to Lotus
Domino for AS/400 users, you should use the Change Distribution Attributes
(CHGDSTA) command and specify “Keep all recipient addresses”. Type CHGDSTA
KEEPRCP(*ALL) on any AS/400 command line on each AS/400 system in your
Lotus Domino for AS/400 and SMTP
207
network where OfficeVision/400 is used to send notes to Domino users. Press
Enter.
7.4.3 Verifying the QSNADS subsystem is started
The QSNADS subsystem must be active to allow SNADS based mail
applications, such as OfficeVision or object distribution services, to receive mail
and objects. On an AS/400 system with OfficeVision installed and being used,
QSNADS probably automatically starts at every system start and is always
active. However, when trying to set up mail in a test environment, it might be
easily forgotten and the cause of unnecessary problem determination.
Therefore, it is a good idea to check that QSNADS is active. To do so you can use
the Work with Subsystems (WRKSBS) command. Type WRKSBS on any AS/400
command line and press Enter.
You see all active subsystems on your system. Notice that there may be more
and different subsystems on your system from those shown in Figure 118. The
QSNADS subsystem is shown in bold.
Work with Subsystems
System: SYSTEM01
Type options, press Enter.
4=End subsystem 5=Display subsystem description
8=Work with subsystem jobs
Opt
_
_
_
_
_
_
_
_
_
Subsystem
DOMINO08
QBATCH
QCMN
QCTL
QINTER
QSERVER
QSNADS
QSPL
QSYSWRK
Total
-----------Subsystem Pools-----------Storage (K) 1 2 3 4 5 6 7 8 9 10
0
2
0
2
0
2
0
2
0
2 4
0
2
0
2
0
2 3
0
2
Bottom
Parameters or command
===>
F3=Exit F5=Refresh F11=Display system data
F14=Work with system status
F12=Cancel
Figure 118. Work with Subsystems (WRKSBS) display
If the QSNADS is not active, start it. Type STRSBS QSNADS on any AS/400 command
line and press Enter.
7.4.4 Setting up a Domino for AS/400 server with AS/400 MSF
The SMTP/MIME is an integrated part of the server software, which is installed
automatically with the base part of Domino for AS/400. However, when you set up
a server, you must specify whether you want the MSF integration to be
configured.
208
Lotus Domino for AS/400 R5: Implementation
Note
If you set up multiple partitioned servers, all of them use the single AS/400
SMTP stack, if they are using AnyMail/400 MSF.
Minimal external user interface exists beyond configuration for the AnyMail/400
Mail Server Framework integration with Domino Release 5 and AS/400 SMTP
support.
Configuration using an AS/400 display
Configuration of the AnyMail/400 Mail Server Framework with Domino Release 5
and AS/400 SMTP support is the same as for releases before Release 5, and
begins with the Configure Domino Server (CFGDOMSVR) command. If you have
created a Domino server and would like to change the options to use the AS/400
MSF, you can change the server using the Change Domino Server
(CHGDOMSVR) command. For more information on these commands and their
options, refer to 4.4, “Configure Domino Server (CFGDOMSVR)” on page 108,
and 4.5, “Change Domino Server (CHGDOMSVR)” on page 109.
Type CFGDOMSVR or CHGDOMSVR on any AS/400 command line and press Enter. The
display in Figure 119 appears.
Configure Domino Server (CFGDOMSVR)
Type choices, press Enter.
Administrator:
Last name . . . . . . . . . . > Doe
First name . . . . . . .
Middle initial . . . . .
Password . . . . . . . .
Minimum password length
Internet password . . .
Time zone . . . . . . . .
Daylight savings time . .
Web browsers . . . . . . .
.
.
.
.
.
.
.
.
.
.
.
.
.
.
.
.
. > John
.
. > XXXXXXXXXXX
. 8
. *NONE
.
. *YES
. *NONE
Internet mail packages . . . . . *SMTP
+ for more values
SMTP services . . . . . . . . . > *MSF
Character value
0-31
GMT,EST,CST,MST,PST
*YES, *NO
*NONE, *ALL, *HTTP,
*NONE,*ALL,*IMAP,*P
*DOMINO, *MSF
More...
F3=Exit F4=Prompt F5=Refresh F10=Additional parameters F12=Cancel
F13=How to use this display
F24=More keys
Figure 119. Configure Domino server for AS/400 MSF
Change the Internet mail packages field to *SMTP. Because you are going to send
mail to the AS/400 SMTP server, you must enable the mail for SMTP. Select *MSF
for the SMTP Services field to disable the native Domino SMTP task and use the
AnyMail/400 MSF server.
Configuring the server using an Internet browser
If you use an Internet browser to configure the server, you must select the
following options:
Lotus Domino for AS/400 and SMTP
209
• Internet Mail Packages in page 3, Server Audience (as shown in Figure 120 ).
You must select at least SMTP. This looks the same for first and additional
server setup.
Figure 120. Browser setup — Server Audience page
• Select MSF for SMTP Services, as shown in Figure 120.
Complete the installation, as described in 2.6.2, “Web-based setup” on page 58.
Starting the AS/400 Domino server
Start the AS/400 SMTP server with the Start TCP/IP Server (STRTCPSVR) CL
command and specify *SMTP on the Server application (SERVER) parameter. It
may not be necessary to start the AS/400 SMTP server. The default for the
AS/400 SMTP server auto start job is set to *YES. It is important to notice that the
AS/400 SMTP server and the Domino Release 5 SMTP server task cannot be
running at the same time. If you attempt to run both types of servers, error
conditions occur. The following error conditions can occur:
• If the AS/400 SMTP server is running, and the Domino Release 5 SMTP
server task is started, the Domino console for the Domino server displays
SMTP Listener errors. The Domino SMTP server task attempts to listen again
every 20 seconds, and results in the same error. The SMTP listener task must
be enabled for Native Domino Release 5 SMTP support. The error messages
received on the Domino console are shown in Figure 121.
210
Lotus Domino for AS/400 R5: Implementation
Work with Domino Console
Server: ACME
Previous subcommands and messages:
port is in use on this system.
03/30/99 04:32:25
Suspending listen task for 20 seconds due to
errors
03/30/99 04:32:44
SMTP Server: Listener failure: The requested
port is in use on this system.
03/30/99 04:32:44
Suspending listen task for 20 seconds due to
errors
03/30/99 04:33:04
SMTP Server: Listener failure: The requested
port is in use on this system.
03/30/99 04:33:04
Suspending listen task for 20 seconds due to
errors
03/30/99 04:33:23
SMTP Server: Listener failure: The requested
port is in use on this system.
03/30/99 04:33:23
Suspending listen task for 20 seconds due to
errors
Enter a Domino subcommand.
===>
F3=Exit
F17=Top
F5=Refresh
F18=Bottom
network
TCP/IP
network
TCP/IP
network
TCP/IP
network
F6=Print F9=Retrieve
F21=Command line
Figure 121. Domino Console with SMTP listener errors
• If the Domino SMTP task is running, and the AS/400 SMTP server is started,
the AS/400 SMTP server fails to start and a job log from JOB QTSMTPSRVR
is generated. The errors listed in the job log appear, as shown in Figure 106
on page 198.
Make sure that the AnyMail/400 Mail Server Framework is running. You may use
the Work With Active Jobs (WRKACTJOB) command to display all active jobs on
your AS/400 system. Page down and look for at least one job with the name of
QMSF. If you do not see any jobs running with the name of QMSF, start the
AnyMail/400 Mail Server Framework with the Start Mail Server Framework
(STRMSF) command.
When you run the Configure Domino Server (CFGDOMSVR) command or create
a server using the browser and select *SMTP, some additional configuration is
done for you. The AS/400 implementation of the Lotus Domino SMTP/MIME
simplifies the setup process by automatically creating and configuring the
required documents in the Domino Directory. The following documents,
describing SMTP configuration parameters, are automatically created or changed
during configuration of the Domino for AS/400 server:
• Messaging Configurations document
• Changes to the Server document
• Global Domain document
An entry for a variable SMTP_VERSION=1 is also added to the NOTES.INI file of
the server.
Start the Domino SMTP server with the Start Domino Server (STRDOMSVR)
command and specify the name of the server in the Server Name (SERVER)
field. Running this command starts the server you have configured to handle your
Lotus Domino for AS/400 and SMTP
211
SMTP mail. Refer to 4.12, “Start Domino Server (STRDOMSVR)” on page 128,
for more information on this command.
Attention
After you have set up a Domino for AS/400 Server with MSF configured,
AS/400 SMTP support forwards all incoming SMTP mail to Domino (even if the
server is not active) if both of the following conditions are true:
• The SMTP domain (the name on the right of the @ sign) of the incoming
mail can be resolved to an IP address configured to an AS/400 interface.
• The SMTP mail box name (the name on the left of the @ sign) is
not found as an alias in the SMTP names table of AS/400 system
distribution directory (SDD) pointing to a local OV/400 or POP3 user.
If you do not want all incoming mail to be forwarded to Domino, you can create
a data area DOMINOSMTP in library QUSRNOTES. This changes the function
of the SMTP snap-ins in the AnyMail/400 Mail Server Framework so that they
only route SMTP addressed mail to Domino when the SMTP address is
configured in the system distribution directory and has a “Notes Domino”
message service level configured in the system distribution directory entry
found. To create this data area, enter the following command on any AS/400
command line:
CRTDTAARA QUSRNOTES/DOMINOSMTP TYPE(*CHAR) LEN(1)
TEXT('Prevents forwarding unknown local mail to Domino')
Note: In this case, you must add a directory entry for each Notes user who
should receive OV/400 or SMTP mail. The easiest way to do this is to use
Domino for AS/400 Directory Synchronization.
If you want to return to the original behavior, you must delete the data area.
Type DLTDTAARA DTAARA(QUSRNOTES/DOMINOSMTP) and press Enter.
7.4.5 Verifying the Domino Server documents
You should open the Messaging Configuration and the Server documents at least
once to verify the settings (without necessarily changing anything) using a
Domino Administration client before starting the SMTP/MIME task.
Provided the OS/400 TCP/IP and SMTP configuration was done correctly, no
manual changes are required to exchange mail between the Domino server and
OS/400 based mail (for example OfficeVision/400). Depending on your network
environment, there may be reasons to change some of the settings of the SMTP
configuration. For example, you may want to specify that:
• Incoming mail should be accepted for more than one SMTP domain.
• Outgoing mail should be restricted to specific SMTP domains.
7.4.5.1 The Messaging Configuration document
The Messaging Configuration document is shown in Figure 122. The name of the
Group or Server name is set to the name of your Domino for AS/400 server. The
default is kept for all other fields on the Basics sub tab.
212
Lotus Domino for AS/400 R5: Implementation
Figure 122. Messaging Configuration document — Basics tab
On the Router/SMTP sub tab, the SMTP used when sending messages outside of
the local internet domain option is set to Enabled, as shown in Figure 123. You
may change the contents of other fields.
Figure 123. Messaging Configuration document — Router/SMTP tab
Lotus Domino for AS/400 and SMTP
213
7.4.5.2 Server document
In addition to adding new documents to the Domino Server document as
described previously, the contents of the Basics section in the Server document
is modified with the configuration parameters for the SMTP/MIME.
The basics section of the Server document
The task name, SMTP Mail Routing, is added to the Routing tasks field. Refer to
Figure 124.
You can see that in the MSF configuration the Listener task is set to disabled
because the SMTP support comes from the AS/400 system. The initial data for
the Fully qualified Internet host name was retrieved from the Host name and
Domain name fields of the Change TCP/IP Domain (CHGTCPDMN) command.
You need to change this value to be your fully qualified Domino host name, as
shown in Figure 124.
Figure 124. Server document — Basics tab
7.4.5.3 Global Domain document
A global domain document called MTAGlobal is also created. This can be used to
define primary and alternate Internet domains. In Figure 125, SMTP mail will be
received for users such as [email protected], rather than [email protected].
214
Lotus Domino for AS/400 R5: Implementation
Figure 125. Global Domain document
7.4.6 Restarting the AnyMail/400 Mail Server Framework
After you set up a Domino server that includes SMTP/MIME, you must reset the
AnyMail function one time by stopping it and then restarting it.
Follow these steps:
1. Use the End Mail Server Framework (ENDMSF) command to stop the AnyMail
function. Type ENDMSF on an AS/400 command line and press Enter.
2. Use the Start Mail Server Framework (STRMSF) command to start the
AnyMail function again. Type STRMSF on any AS/400 command line and press
Enter.
3. It is a good idea to verify that the AnyMail function was actually started. Type
WRKUSRJOB QMSF, to display a list of jobs, and press Enter. Verify that there is at
least one job listed.
7.4.7 Starting the mail router on the Domino server
When you are using MSF on your AS/400 system, handling of the SMTP mail is
part of the mail Router task. As shown in Figure 124, mail routing in the Routing
tasks field of the Server document is expanded to route SMTP mail with the
SMTP Mail Routing option.
Do not start the SMTP task. SMTP mail routing is part of the Router task. If you
do enter the command load smtp, you get an error message that the SMTP
Listener is not enabled in the Server document.
Lotus Domino for AS/400 and SMTP
215
Work with Domino Console
Server: ACMEMAIL2
> load smtp
> load smtp
03/26/99 09:54:01
SMTP Server: Started
03/26/99 09:54:01
SMTP Server: Initialization failure:
SMTP Listener is not enabled in this server's server document
03/26/99 09:54:01
SMTP Server: Waiting for all tasks to
complete
03/26/99 09:54:01
SMTP Server: All tasks have completed
03/26/99 09:54:01
SMTP Server: Shutdown
Enter a Domino subcommand.
===>
F3=Exit
F17=Top
F5=Refresh
F18=Bottom
F6=Print F9=Retrieve
F21=Command line
Figure 126. SMTP load errors
Although the Router task is a task that should always be active, you can start the
router by using the load router command at the Domino console.
7.4.7.1 Starting the SMTP mail routing automatically with the server
SMTP mail routing starts automatically when the Message Router starts and the
Routing tasks field in the Server document has SMTP Mail Routing as one of the
options. The SMTP Listener Task must be set to Disabled.
Figure 127. Server document — Router Tasks
216
Lotus Domino for AS/400 R5: Implementation
7.4.7.2 Verifying that the SMTP/MIME router is completely started
There are several ways to confirm that all of the necessary SMTP tasks are
active:
• Use the Domino console show tasks (short form: sh ta) command to make
sure that the Router task is running.
• Use CL commands to see the same tasks as AS/400 jobs because they have
the same name as the Domino tasks listed previously.
The easiest way is to use the Work with Domino Servers (WRKDOMSVR)
command. Type WRKDOMSVR on any AS/400 command line and press Enter.
You see a list of all servers defined on your system. Type 9 (Work server jobs)
next to the server and press Enter. You see a display similar to the one in Figure
128. When the AnyMail Integration is operational, the Router job must be active.
Work with Active Jobs
CPU %:
36.1
Elapsed time:
03/26/99 10:39:07
Active jobs: 369
00:13:25
Type options, press Enter.
2=Change 3=Hold 4=End 5=Work with 6=Release 7=Display message
8=Work with spooled files 13=Disconnect ...
Opt Subsystem/Job
QNNINSTS
REPLICA
ROUTER
SCHED
SERVER
STATS
UPDATE
User
QNOTES
QNOTES
QNOTES
QNOTES
QNOTES
QNOTES
QNOTES
Type CPU % Function
BCH
.0 PGM-QNNINSTS
BCI
.3
BCI
.0
BCI
.1
BCI
.7
BCI
.0
BCI
.0
Status
EVTW
SELW
SELW
SELW
SELW
SELW
SELW
Bottom
Parameters or command
===>
F3=Exit F5=Refresh
F7=Find
F10=Restart statistics
F11=Display elapsed data F12=Cancel F23=More options F24=More keys
Figure 128. Work with Domino jobs
Verify that the necessary tasks appear. You may have to press PgDn to see all of
the active jobs.
7.4.8 Domino using MSF for multiple partitioned servers
You can send and receive SMTP mail through all partitioned Domino servers on
an AS/400 system. As long as all servers are in the same domain, it is easy to do.
Just make sure the Domino Directory can be replicated between the servers. It
does not matter at all on which server your mail file resides. However, you may
define in a Connection document which, if any, databases you want to allow to
replicate and whether you want mail routing to take place.
If the servers are in different Notes domains, you must perform some additional
configuration steps, such as create a Domain document and a Connection
document in each of the two Domino Directories, and cross certify the server IDs.
Lotus Domino for AS/400 and SMTP
217
If needed, you can set up the Connection document to only allow sending and
receiving mail but not to allow database access across domains.
The only drawback here is that you are not very flexible in what SMTP domain
(the right side of the @ sign in the address) can be used. For example, to send
SMTP mail to a user residing in the Domino domain, you can specify an address
such as:
[email protected]
Assuming the name of the other Domino domain is OrgA, to send mail to users,
use one of the following formats:
• [email protected] (the default)
• KellySchmotzer%[email protected]
• [email protected]
Decide on the format (for all users on all servers) when you set up the users.
If you have several partitioned servers on the same AS/400 system, with all of
them needing to use the mail integration, it may be a good idea to define one
partitioned server exclusively to do nothing else but run the mail routing. This
provides protection against failures of other server functions. A separate server
also allows you to run the mail router server under a lower priority or in different
storage pools from the other servers and traditional AS/400 applications.
7.5 Additional information and troubleshooting
The following sections provide some information on how to solve potential
problems.
7.5.1 Which mail environment is used
You can determine from two places what type of mail routing is used, native
Domino SMTP or Domino using MSF. The first area is to look at the tasks running
on Domino. Go to the Domino server console using the Work with Domino
Console (WRKDOMCSL) command. Display the tasks using the sh ta command.
If Native Domino SMTP is being used, you see the SMTP Command task and the
SMTP Listener task, as shown in Figure 129.
218
Lotus Domino for AS/400 R5: Implementation
Work with Domino Console
Server: ACMEMAIL1
Previous subcommands and messages:
SMTP Server
Listen for connect requests on TCP Port:25
SMTP Server
Control task
Cluster Replicator Idle
Cluster Directory
Idle
Event Monitor
Idle
Calendar Connector Idle
Schedule Manager
Idle
Admin Process
Idle
Agent Manager
Executive '1': Idle
Agent Manager
Idle
Stats
Idle
Indexer
Idle
Router
Idle
Replicator
Idle
HTTP Web Server
Listening on port(s) 80
Enter a Domino subcommand.
===>
F3=Exit
F17=Top
F5=Refresh
F18=Bottom
F6=Print F9=Retrieve
F21=Command line
Figure 129. Show the SMTP tasks on the Domino server
If the SMTP tasks are not in the list, the next step is to find out if SMTP is running
in OS/400. Exit the Domino console. Type NETSTAT *CNN and press Enter.
If the AS/400 SMTP is running, then it is listed under the Local Port column, as
shown in Figure 130.
Work with TCP/IP Connection Status
System:
Local internet address . . . . . . . . . . . : *ALL
SYSTEM01
Type options, press Enter.
4=End 5=Display details
Remote
Opt Address
*
*
*
*
*
*
*
*
*
*
*
Remote
Port
*
*
*
*
*
*
*
*
*
*
*
Local
Port
ftp-con >
telnet
smtp
domain
domain
bootps
tftp
www-http
pop3
119
143
Idle Time
013:54:54
002:07:03
013:54:34
013:54:54
013:54:54
000:01:07
013:54:39
013:54:50
013:54:37
004:37:16
004:37:25
State
Listen
Listen
Listen
Listen
*UDP
*UDP
*UDP
Listen
Listen
Listen
Listen
More...
F5=Refresh F11=Display byte counts F13=Sort by column
F14=Display port numbers F22=Display entire field F24=More keys
Figure 130. Work with TCP/IP Connection Status display
Lotus Domino for AS/400 and SMTP
219
Confirm that it is AS/400 SMTP by typing 5 in the option column. The associated
user profile is QTCP if it is AS/400 SMTP. It is QNOTES if it Domino.
The AS/400 SMTP should not be running if you are using Domino with native
SMTP. If neither the SMTP task in the Domino Server task list, nor the AS/400
TCP/IP SMTP server is running, it could mean that SMTP is not yet configured on
your AS/400 system.
One last place where you can look is in the Server document in the Domino
Directory database. If the Routing Tasks field has SMTP Mail Routing as one of
the options, SMTP mail is enabled on the Domino server (see Figure 131 on page
220). If the SMTP Listener field is Enabled, the Domino Server is setup for native
Domino SMTP.
The other difference is that when Domino SMTP is used, the NOTES.INI variable
SMTP_VERSION is set to 0 and for AnyMail Integration it is set to 1.
Figure 131. Server document
You can always run the Change Domino Server (CHGDOMSVR) command to
reconfigure the mail set up. Figure 131 shows a Server document immediately
after CFGDOMSVR has been run. The initial data for the Fully qualified Internet
host name was retrieved from the Host name and Domain name fields of the
Change TCP/IP Domain (CHGTCPDMN) command. You need to change this
value to be your fully qualified Domino host name, as shown in Figure 111 on
page 202, unless you want to use your AS/400 host name as part of your SMTP
name.
7.5.2 Where to look if native Domino SMTP does not start
The most likely error that you receive when you start your server is the SMTP
listener error, as shown in Figure 132.
220
Lotus Domino for AS/400 R5: Implementation
Work with Domino Console
Server: ACME
Previous subcommands and messages:
port is in use on this system.
03/30/99 04:32:25
Suspending listen task for 20 seconds due to
errors
03/30/99 04:32:44
SMTP Server: Listener failure: The requested
port is in use on this system.
03/30/99 04:32:44
Suspending listen task for 20 seconds due to
errors
03/30/99 04:33:04
SMTP Server: Listener failure: The requested
port is in use on this system.
03/30/99 04:33:04
Suspending listen task for 20 seconds due to
errors
03/30/99 04:33:23
SMTP Server: Listener failure: The requested
port is in use on this system.
03/30/99 04:33:23
Suspending listen task for 20 seconds due to
errors
Enter a Domino subcommand.
===>
F3=Exit
F17=Top
F5=Refresh
F18=Bottom
network
TCP/IP
network
TCP/IP
network
TCP/IP
network
F6=Print F9=Retrieve
F21=Command line
Figure 132. SMTP listener errors
This error occurs if both the Domino SMTP task and the OS/400 TCP/IP SMTP
server are running. End the SMTP server on the AS/400 system. Type ENDTCPSVR
*SMTP and press Enter.
After you have ended the SMTP server, the Domino SMTP task should run
without errors. If the errors continue, make sure that nothing is using port 25 of
the TCP/IP stack. To check this, type NETSTAT *CNN and press Enter. Press F14 to
show the port numbers.
Check that all the parameters in the Server documents are correct. These are
explained in 7.3, “Native Domino Release 5 SMTP support” on page 195. If you
have any further problems, look at the Administrator’s help because it is
extensive and explains most of the Domino mail concepts, setup, and
configuration.
7.5.3 Where to look if AS/400 SMTP does not start
The first area to look at is that the TCP/IP port 25 is used by the SMTP server.
Type NETSTAT *CNN and press Enter. See if the SMTP server is running. Press F14
to see the ports that are used.
The second step is to make sure that none of the Domino servers are using
SMTP. Open the console of each running Domino server using the Work Domino
Console (WRKDOMCSL) command and list the tasks that are running with the
show tasks command. If you see a SMTP task running, you can end it. Type
tell smtp quit and press Enter.
You must change the Domino Directory Server document for this server so that
the SMTP task does not start automatically. Open the Server document and
change the SMTP Listener field to Disabled (see Figure 133 on page 222).
Lotus Domino for AS/400 and SMTP
221
Figure 133. Server document for Domino using MSF
After you have stopped the SMTP task in Domino, start the AS/400 TCP/IP SMTP
server. Type STRTCPSVR *SMTP and press Enter.
Make sure that the task is started by looking at the TCP/IP Connection Status
display. Type NETSTAT *CNN and press Enter. You must also make sure that MSF is
started. Type STRMSF and press Enter.
Make sure that the parameters in the Server document are correct, as explained
in 7.4, “Using Domino for AS/400 with AS/400 AnyMail integration” on page 205.
If you have any further problems please look at the Administrator’s help because
it is extensive and explains most of the Domino mail concepts, set up, and
configuration.
7.5.4 Mail routing status in the administrator client
You can check the status of your mail routing using the Domino Administrator.
Select any of the servers in your domain and click the Messaging tab. From the
tasks pane, you can select a number of different views. The Mail Users view
shows all the users in the domain, sorted alphabetically by server, showing the
total number of users for each server and for the domain.
The Mailbox view shows the MAIL.BOX database. This database is the storing
and forwarding mail box. All incoming and outgoing mail that is not addressed to
the mail server is held here until it is routed to the correct mail server, whether
that is another Domino Domain, another non Domino mail server, or the Internet.
After you set up Notes mail, you can set up a shared mail database on each mail
server. A shared mail database is a space-saving feature that stores a single
copy of mail messages that are addressed to multiple recipients. When multiple
recipients whose mail files are on the same server receive a message, the shared
mail database stores the message content, while each recipient's mail file stores
the message header. Using a shared mail database is completely transparent to
users. When a recipient opens a message, a link between the mail file and the
222
Lotus Domino for AS/400 R5: Implementation
shared mail database causes the message to appear in its entirety. Users can
perform all the same tasks on a mail message stored in a shared mail database
as they would with the same message stored in their own mail files. The following
tasks can be performed:
•
•
•
•
•
•
Delete
Reply
Change the view or folder
Edit
Save
Re-send
Each user can edit, save, and re-send the original message, without affecting
how the message is presented to the other users
Using a shared mail database to store messages conserves disk space. To keep
the shared mail database small, after all recipients delete a message from their
mail files, the Object Collect task, which runs daily by default, purges the
message from the shared mail database.
Shared mail works for all messages, regardless of the mail client used to
compose the message. That means that users who use a POP3, IMAP, or Notes
mail client and who have a mail file on the Domino mail server, can all use shared
mail.
The administrator client now includes a number of graphical views that allow you
to quickly see the amount of mail that has a problem, and your mail setup. The
first is the Mail Routing Status view (Figure 134), which shows, using dials, the
amount of dead mail and mail waiting to be routed on the domain. This is not a
domain overview as you may be led to believe by the heading of the graphic.
Rather, it is an overview of the mail status on the server that you are
administrating.
Figure 134. Mail routing status
Lotus Domino for AS/400 and SMTP
223
Under the Mail Routing Topology view, you have two options. The first option is a
view of all the servers in the domain to which the server you are administering
has Default Mail Routing and Mail Connections. By clicking on the red striped
Mail Connection lines, you can open the Replication Connection documents. The
second view is a view by Named Networks, which shows an overview of the mail
servers connected to the different networks to which the server you are
administering is connected.
Figure 135. Mail Named Networks topology
To view these topologies, you must have the Maps Extractor task running on the
server. You can start this task from the administration client, or by running the
load maps command on the Domino console.
7.6 Sending mail between unlike mail applications
Now that you have successfully started the SMTP/MIME on your Domino for
AS/400 server and verified that AS/400 SMTP support is active (see Figure 115
on page 206), you can try to send mail in all required directions (to and from all
mail platforms). The remainder of this chapter can be ignored by anyone using
Native Domino SMTP.
Note
In this section, we do not distinguish between Native Domino SMTP and
Domino using Anymail Integration. Where we discuss OfficeVision/400, we
assume that you are using Domino with AnyMail Integration.
While testing, you can very easily get confused if you do not understand exactly
from which test user you want to send mail to. Make sure to set up a well defined
224
Lotus Domino for AS/400 R5: Implementation
test scenario with completely distinct names. Enroll those users only where
needed. For example, follow these guidelines:
• Do not enroll the same name in Lotus Notes and in OfficeVision/400 (this
never works).
• Do not create an AS/400 user profile for a Notes user (this works but is
confusing in a test environment).
• Try to summarize in a table what are the important configuration parameters
and what users you defined for testing and the values configured.
Bad Example: “I want to send mail from my Notes ID to my OfficeVision ID”
basically means trying something (almost) impossible and asking for confusion.
The important parameters of the examples we have given so far are summarized
in the following tables.
Table 17. OS/400 TCP/IP configuration
AS/400 System Name
SYSTEM01
AS/400 Host Name
SYSTEM01
TCP/IP Domain
domland.acme.com
The AS/400 system name is set through the Change Network Attributes
(CHGNETA) command. It does not have to be the same as the host name, but it
is certainly a good idea. The AS/400 system name shows on the upper right
corner of many AS/400 displays.
Table 18. Domino server configuration
Server Name
AcmeDS1
Notes Organization
OrgA
Notes Domain
OrgA
We set up a Notes user with Domino for AS/400 as the user’s home mail server
with the following parameters.
Table 19. Lotus Notes user
Common Name
Hans Neugebauer
Last Name
Neugebauer
First Name
Hans
Short Name
hneugeba
Full Name
Hans Neugebauer/OrgA
Internet Name
[email protected]
Table 20. OfficeVision/400 user
User profile
EBENDER
User ID
EBENDER
Address
SYSTEM01
Lotus Domino for AS/400 and SMTP
225
The following sections describe the addressing considerations you need to
understand to successfully send mail between these two different worlds of
electronic mail.
7.6.1 What is your Internet mail address?
Before trying to send mail, make sure to understand exactly from each user’s mail
applications point of view, what is the correct address to reach the user and
based on which configuration parameters the address is formed.
Each mail system, such as Lotus Notes or OfficeVision for AS/400, has its own
syntax and naming conventions to address mail users. Because we are using the
SMTP format for the mail between these unlike systems, we first must know each
user’s SMTP address, which is the Internet Mail address.
7.6.1.1 On the right of the @ sign: The SMTP Domain name
Any SMTP mail address always has the form username @ SMTPdomain. The part
on the left of the @ sign describes the user’s name, or better: the user’s mail box
name and is defined by the mail application being used.
The SMTP domain name on the right side of the @ sign must be a valid host
name on the AS/400 system. It must be possible to resolve this name to an IP
address assigned to a network interface on your AS/400 system. Notice that the
same SMTP domain name can be used for all mail applications running on your
AS/400 system (Domino, OV/400, POP3 server) because they all use AS/400
SMTP support.
Note
The term SMTP domain is not at all related to a Notes or Domino domain, nor
is it the same as the TCP/IP domain, although the TCP/IP domain can be a part
of the SMTP domain name.
However, you can define more than one SMTP domain name for which your
system accepts incoming mail (see 7.2.1.4, “Including the host name in the host
table” on page 193).
7.6.1.2 Automatically assigning an SMTP user name for a Notes user
For the user part of the SMTP address, you have the choice of automatically
assigning a name based on the current enrollment or to define an arbitrary name
on a user-by-user basis. Obviously, the method is different for Notes users and
users of OfficeVision for AS/400. We explain both concepts in the following
topics.
For receiving SMTP mail for a Notes user, actually any part of the user’s name,
as defined in the Person document, can be used as an SMTP user name (mail
box), as long as this is a unique name. For example, to reach Hans Neugebauer,
you could use any of the following on the left side of the @ sign:
•
•
•
•
•
226
[email protected]
[email protected]
[email protected]
[email protected]
HansNeugebauer/[email protected]
Lotus Domino for AS/400 R5: Implementation
However, if tomorrow a new employee with Hans as his first name is added to the
Domino Directory, any incoming mail using the address given in line 3 would be
returned as non-deliverable.
7.6.1.3 Manually assigning an SMTP user name for a Notes user
Beginning in Release 4.6 of the Domino server, in addition to assigning an SMTP
user name automatically based on the contents of the name fields in the Person
document, you can assign an arbitrary value as the user’s complete Internet mail
address. Consider this example:
[email protected]
The way to do so is to enter the full SMTP address, which includes the @ sign,
into the field short name in addition to the existing short name.
While you can assign a totally arbitrary SMTP user ID and/or SMTP domain to
some (or all) users, you must make sure that AS/400 SMTP, or Domino for
AS/400 SMTP accepts incoming mail for that domain. For AS/400 SMTP, this
means you have to define the SMTP domain name Dept0416.acme.com as an
alias host name.
In Release 5, there is an Internet address field in the Person document which is
the address shown in any sent mail. It is automatically generated when the user
is registered on the server. You can see there are several places from which the
Internet address can be retrieved.
Attention
Do not enter the user’s SMTP address into the Forwarding address field. This
field should only be used if the user’s mail should be forwarded to another
system. Specifying a local user’s SMTP address here, results in sending the
mail back and forth between AS/400 SMTP support and Domino until the hop
count exceeds its limit. The help text for the Forwarding address field (as
shown in Figure 136) may be somewhat misleading. Directory synchronization
does use the Forwarding address field.
Figure 136. Context help for forwarding address
Lotus Domino for AS/400 and SMTP
227
7.6.1.4 Assigning an SMTP user name for an OfficeVision/400 user
Users of OfficeVision for AS/400 have mail addresses consisting of two fields,
each having one to eight alphabetical characters or numbers and no spaces or
special signs. The fields are known as User ID and Address . In many cases,
AS/400 customers choose to use the same name for the User ID as for the
AS/400 user profile, but this is not necessarily the case. In many cases, the
Address is the same as the AS/400 system name. The pair User ID / Address can
be thought of as the key for the user’s entry in the system distribution directory
(SDD).
If the OfficeVision/400 user wants to receive SMTP-based mail (which includes
mail from users of Domino for AS/400), an address conforming to the SMTP
standards must be used instead. That is, an SMTP alias is assigned to the user’s
system distribution directory entry.
The same is true for a user of a POP3 client connecting to the OS/400 POP3
server. However, a POP3 user needs an SMTP address in any case, while
OfficeVision users can send and receive among themselves without ever having
an SMTP address assigned.
You can use the following two methods to assign an SMTP alias to a directory
entry:
• Automatically, based on the user’s User ID/Address and the AS/400 system’s
local host name
• Manually, using the Work with Names for SMTP (WRKNAMSMTP) command
or the Work with Directory Entries (WRKDIRE) command
Both methods are described in the following topics.
Default SMTP address for OS/400-based mail users
An SMTP address is automatically generated for each local directory entry using
a combination of user ID, Address and the AS/400 local host name. There are
two possible formats:
• UserID?Address@SMTP domain
• UserID@SMTP domain
The second version is possible only if the user’s address is the same as the
AS/400 system name. You can also change the SMTP configuration on your
AS/400 system to use a character other than the question mark (?) to delimit user
ID and address. To do so, use the Change SMTP Attributes (CHGSMTPA)
command to set the delimiter to one of the following characters:
? = . & $ # / + _ - * "
Note
You can use the Display Network Attributes (DSPNETA) command to find out
your AS/400 system name.
The SMTP domain must be the local host name of the AS/400 system, as defined
in the Change TCP/IP Domain (CHGTCPDMN) command or option 12 of the
Configure TCP/IP (CFGTCP) menu.
228
Lotus Domino for AS/400 R5: Implementation
Assigning an SMTP alias manually
You can also assign an arbitrary SMTP address to an AS/400 mail user in
addition to the automatically assigned one. The function to do so is called
Change name for SMTP. This function allows you to assign a full SMTP address
(SMTP user ID and SMTP domain) to each entry in the system distribution
directory.
Internally, the following two different implementations are possible:
• All the SMTP addresses are stored in a database file separate from the
system distribution directory. This is the implementation on every AS/400
system, unless you convert the SMTP names. For this default implementation,
the following facts apply:
- Each SMTP user ID can only be up to 24 characters long.
- There are system-wide SMTP names ( system alias table), as well as
personal entries, only used by a single AS/400 user ( personal alias table).
- The SMTP names can be maintained by one of the following methods:
• The Work with Names for SMTP (WRKNAMSMTP) command
• F19 (Change name for SMTP) when using option 1 or 2 of the Work with
Directory Entries menu.
Tips
– On most keyboards, this is Shift and F7.
– 7 PM equals 19:00 in a 24-hour time format.
• You cannot enter or change an SMTP name with the Add Directory
Entry (ADDDIRE) or Change Directory Entry (CHGDIRE) commands.
• Optionally, you can convert your SMTP alias table (using the Convert Names
SMTP (CVTNAMSMTP) command. See “Directory conversion” on page 236,
for more information. After doing so, the SMTP names are stored in
user-defined fields, directly with each entry in the system distribution directory.
In this case, the following facts are true:
- The SMTP user ID can be up to 64 characters long.
- The personal alias table cannot be used anymore.
- The SMTP names can be maintained by one of the following:
• F19 (Change name for SMTP) when using option 1 or 2 of the Work with
Directory Entries menu.
• The Add Directory Entry (ADDDIRE) or Change Directory Entry
(CHGDIRE) commands can be used to enter or change the user defined
fields containing the SMTP address.
• The Work with Names for SMTP (WRKNAMSMTP) command cannot
be used anymore.
In either case, the SMTP alias table allows you to assign a full SMTP address,
consisting of SMTP user ID and SMTP domain to each system distribution
directory entry representing a local mail user.
Lotus Domino for AS/400 and SMTP
229
Attention
If you use an SMTP domain name different from the local host name of the
AS/400 system, you must make sure AS/400 SMTP support accepts incoming
mail for that SMTP domain.
For example, assuming you have converted your SMTP names, you would assign
a more meaningful SMTP address to the person with user profile EBENDER by
using the Change Directory Entry (CHGDIRE) command:
CHGDIRE USRID(EBENDER SYSTEM01)
USRDFNFLD((SMTPAUSRID SMTP 'Erika Bender')
(SMTPDMN SMTP 'system01.acme.com'))
If you use option 2, and then F19 of the Work with Directory Entries (WRKDIRE)
command, it is easier to change the address because you do not have to
remember the names of the user defined fields (SMTPAUSRID and SMTPDMN).
However, the previous example has to be used if you want to write a CL program
to assign the address. Therefore, we used the example for reference.
7.6.2 Sending mail across the border
Now that you know what the SMTP addresses are to reach a user of Domino for
AS/400 (or any other Notes user in the same or connected Notes domain), as
well as those for the users of OS/400-based mail (POP3 or OfficeVision/400), we
can look at the reverse situation: how you can send mail from each of the two
mail applications to the other. That is how you can specify a foreign mail address.
Again, we look first at the Notes users, when sending mail to OV/400 users, and
then we describe the opposite direction.
7.6.2.1 Specifying SMTP addresses when sending mail from Notes
When a Notes user sends mail to another Notes user, the address to be specified
has the following format:
Common Name/Organizational Unit/Organization@Notes Domain
Organization and Organizational Unit can be omitted, as long the name of the
recipient is unique within the Domino Directory. Likewise, you can also use only
the short name, first or last name instead of the full common name, provided that
name is unique. The domain name (which may or may not be identical to the
organization) can also be omitted if the recipient is in the same Domino domain. It
can also be omitted if an entry for that user exists in the Domino Directory or
cascaded address book. Each name part can contain spaces.
Now, an SMTP address has the following general format:
UserId@SMTPDomain
If you want to send mail to an SMTP address, Notes must be able to identify the
address as a foreign mail address. The rule is that the address must contain an
@ sign and on the right side of the @ sign there must be at least one period (.).
For example, the address ErikaBender@SYSTEM01 would be a valid address in
the sense that it would be accepted by AS/400 SMTP support (because
SYSTEM01 is the AS/400 system’s local TCP/IP host name).
230
Lotus Domino for AS/400 R5: Implementation
However, the Domino mail router would search for a Notes domain called
SYSTEM01 rather than forwarding the mail to the SMTP router. Therefore, one of
the following period delimited SMTP addresses must be specified:
• [email protected]
• [email protected]
• [email protected]
There are several ways to specify a mail recipient’s address in Lotus Notes:
• Enter the mail address manually
• Use a stored address for recipients on foreign mailing systems
Entering the mail address manually
When sending mail from a Notes client, you can always enter an SMTP (Internet)
mail address instead or in addition to Notes mail addresses into the To:, cc:, or
bcc: fields, as shown in Figure 137.
Figure 137. Entering the mail address manually
Using a stored address for recipients on foreign mail systems
Typing in such a long address is not a problem when testing a new mail
connection, but it is certainly cumbersome and error prone if users have to do this
daily.
To make it easier for the senders of SMTP mail (or mail to other Notes domains),
you may store the recipient’s address in either the Domino Directory or in each
user’s personal address book.
Storing foreign mail users’ addresses in the Domino Directory
If many Notes users often send mail to a defined group of mail users not using
Notes (or not being in the same domain), you can make addressing mail much
easier by creating Person documents for the foreign mail users in the Domino
Directory.
A good example is where some people in your company use OfficeVision/400
mail, while others use Domino for AS/400. If you want to do so, you should not
register a Notes ID, but just add a new Person document to the Domino Directory.
Lotus Domino for AS/400 and SMTP
231
Enter the real name of the person to allow the Notes user to select the mail
recipient by their names, rather than mail addresses. Select “Other Internet Mail”
in the field “Mail system:” and the layout of the form under the column Mail
changes. As shown in Figure 138, the foreign user’s SMTP address must be
entered into the Forwarding address field.
Figure 138. Person document for foreign mail user
The SMTP address must have at least one period (.) at the right of the @ sign,
even if the recipient’s mail system would accept a partial SMTP domain name.
For example, from the standpoint of the receiving system (AS/400 SMTP
support), if the host name for the AS/400 system is SYSTEM01, it would accept
an incoming e-mail addressed to ebender@system01. However, from the sending
Domino mail router point of view, this address would be ambiguous because it
could as well be a Notes address where system01 specifies a Notes domain.
You must type in the full SMTP address for the recipient. In Figure 138, we used
the example of an OfficeVision/400 user as defined in 7.6, “Sending mail between
unlike mail applications” on page 224. Notice that you have a choice of address
formats as described in “Default SMTP address for OS/400-based mail users” on
page 228. We choose to use the system distribution directory user ID and
address at the left of @ separated by a question mark (?). The reason is that this
format is most likely to be a unique address and does not require an SMTP alias
to be defined in OS/400.
There must be at least one combination of the several name fields which can be
used to uniquely identify this Person document.
Note: The Person document you are creating here has a different purpose from
the one being created when you register a Notes user. Here, it is just a
convenient (and not mandatory) pointer to a mail recipient who is not a user in
this Notes domain.
The following rules are used to define an SMTP address:
• For a mail recipient outside of the Notes domain, you must specify that
person’s mail address in the Forwarding address field.
• For a Notes user to be able to receive foreign mail, you either use the
automatically assigned address (see 7.6.1.2, “Automatically assigning an
SMTP user name for a Notes user” on page 226) or specify the address in
Short name or Internet address field.
232
Lotus Domino for AS/400 R5: Implementation
Make sure not to confuse the two different roles the Person documents in the
Domino Directory can have. A Person document can be used for a local user or
for a foreign user.
Storing foreign mail users’ information into the Domino Directory makes the most
sense if you are able to set it up for many users at once, and if you are able to
automatically synchronize the information with the place where the users’
information is managed.
In the case of coexistence between OS/400 based mail users and Domino
for AS/400 users, this is exactly what Domino for AS/400 directory
synchronization can do for you. It automatically copies the information from the
AS/400 system distribution directory to a Domino Directory, either the Domino
Directory or another address book (based on the same template) which then can
be combined with the Domino Directory into a master address book.
Storing foreign mail users’ addresses in the Personal Address Books
If individual Notes users send mail frequently to other users who do not have a
Person document in the Domino Directory, the Notes users can also store the
recipient’s mail addresses in the personal, local address book.
Storing a foreign mail user’s address in a personal book is basically the same as
storing it in the Domino Directory, except for the following points:
• This entry is only available to a single mail sender.
• In Release 5, the Person documents in personal address books (based on the
template PERNAMES.NTF) are renamed Contacts .
To enter a business card in your personal address book, open your local address
book. It usually starts with your last name and ends with Address Book (on the
Notes Release 5 client, it is the second bookmark from the top). Then, click Add
Contact. You see the New Contact form as shown in Figure 139.
Figure 139. Enter new contact panel
To get assistance entering an SMTP address, click the button on the right of the
eMail address field. The Mail Address Assistant opens (Figure 140 on page 234).
Lotus Domino for AS/400 and SMTP
233
Figure 140. Mail Address Assistant
Click Internet Mail, and then OK. This opens the window shown in Figure 141.
Figure 141. Enter an internet mail address for a business card
Type in the full SMTP address for the recipient. In Figure 141, we used the
example of an OfficeVision/400 user, as defined in 7.6, “Sending mail between
unlike mail applications” on page 224. Notice that you have a choice of address
formats, as described in “Default SMTP address for OS/400-based mail users” on
page 228. We choose the format that has the system distribution directory user
ID and address at the left of @, separated by a question mark (?). The reason is
that this format is most likely to be a unique address and does not require an
SMTP alias to be defined in OS/400.
Note: Do not enter anything in the Internet mail gateway domain field, unless the
mail server is in a different Domino domain. In that case, you enter the name of
the Domino domain (this is neither the SMTP domain nor the TCP/IP domain),
where the server that is installed in the different Domino domain belongs.
Click OK to enter the mail address into the business card. Click Save and Close
to save the document, and then close the address book. At this point, Notes
users connected to the Domino for AS/400 server may send mail to and receive
mail from Internet mail users whose mail servers have a TCP/IP connection to the
AS/400 system.
However, if mail integration between OfficeVision/400 and Domino for AS/400 is
your main topic, you should understand how OfficeVision/400 users can send
mail to SMTP addresses (and therefore, to Domino for AS/400 users).
7.6.2.2 SMTP addresses when sending from OfficeVision/400
When sending mail, an OfficeVision/400 user can only address recipients by
specifying a pair of fields, the user ID and the address. Both fields being limited to
a maximum length of eight characters, there is no way to type an SMTP address
into those fields because those are typically much longer. Furthermore, and this
is the most important point, each of those “8 by 8” addresses must resolve to an
entry in the system distribution directory.
234
Lotus Domino for AS/400 R5: Implementation
There are several ways that an OfficeVision/400 user can send mail to an SMTP
address:
• Add a directory entry for each foreign mail user to the system distribution
directory and assign an SMTP alias to that entry.
• Add a generic directory entry for an entire SMTP. That is, the user ID has to be
*ANY. This is a very convenient way to define the addresses of many SMTP
addressees at once. However, the restriction is that the left side of the address
(SMTP user) can only be up to 8 alphabetic or numeric characters.
• Use ad hoc Internet addressing, a function of OfficeVision for AS/400 from
Version 4 Release 1.
Using ad hoc Internet addressing
Ad hoc Internet addressing can be used to send mail to infrequently used SMTP
addresses on the Internet or Notes users not in an address book being
synchronized with the AS/400 system distribution directory.
You can use ad hoc Internet addressing to send mail to any SMTP user in your
TCP/IP network or the entire Internet (if the system is connected), as well as
users on Domino for AS/400 (if the SMTP/MIME is active).
Obviously the disadvantage of this method is that you have to type in the full
(sometimes very long) address exactly, rather than just selecting a name from a
directory list. Also, there is no verification on the sending system as to whether
the address is correct.
Another not so obvious disadvantage is the fact that for incoming mail from an
SMTP address, the OV/400 user cannot use Reply to send a response. The
address has to be entered manually instead.
See OfficeVision for AS/400 Supplement , SH21-0915, or the New E-mail
Capabilities for AS/400 , SG24-4703, for more information on Internet addressing.
Storing foreign SMTP addressees in AS/400 SDD
The disadvantage of the first method (using system distribution directory entries
for SMTP addressees) is the end users normally do not have the authority to add
directory entries to the system distribution directory. However, if the administrator
is able to create and provide maintenance for those entries, this is the most
flexible and most convenient method. For SMTP addresses of Domino for AS/400
users, Directory Synchronization can be used to create and maintain those
entries.
Note
This is not restricted to users on Domino for AS/400, it also includes any users
on other servers in the Domino Directory or even a Master Directory covering
multiple Notes domains.
If you want to add a directory entry for an SMTP user to which you want to send
mail, you do not need to create an AS/400 user profile to be associated with that
entry, unless the person uses the OS/400 POP3 server (not the Domino POP3
server). The entry can be a “remote” entry, although it may sound strange that a
Domino for AS/400 user on the same AS/400 system is added as a “remote”
Lotus Domino for AS/400 and SMTP
235
system distribution directory entry. “Remote” just means a user is not of this
AS/400 system mail support. Again, we are talking here about the (optional) task
of creating an entry for the recipient of SMTP mail, rather than the mandatory
local entry of the sender using OV/400.
Note
You can also use a local system distribution directory entry. However, the
AS/400 user profile associated with this entry cannot use OfficeVision/400.
One important consideration is that, by default, you can only store an SMTP user
ID up to a length of 24 characters in the SMTP alias associated with the system
distribution directory entries. Because the Domino for AS/400 uses the common
name in the user part of the sender’s SMTP address (if you accept the default), a
length of 24 characters is most likely too short. We therefore recommend
converting the directory to allow SMTP user IDs with a length up to 64 characters.
Directory conversion
Shipped with the TCP/IP Utilities licensed program product on the AS/400
system, SMTP/MIME support defines its own system alias table and personal
alias table objects. This is a separate object from the system distribution
directory.
The purpose of the alias table is to assign SMTP addresses to entries for local or
remote mail users in the system distribution directory. The system alias table and
system distribution directory are linked by a common User ID/Address, although
not every entry in the system alias table has to appear in the system distribution
directory.
It is possible to convert the system distribution directory and system alias table so
that they are combined into the system distribution directory. This can be thought
of as a logical “join” on the User ID Address fields.
The result of the conversion is that the system distribution directory has three
new user-defined fields that contain the SMTP user name (field name
SMTPAUSRID), SMTP Domain (SMTPDMN), and the mail router name
(SMTPRTE) that used to be configured in the system alias tables. Also, as a
result of the conversion, the system alias tables, as well as the personal alias
tables function, are disabled for that AS/400 system.
Conversion has the following advantages:
• Longer SMTP user IDs are available (64 characters after converting, versus
24 characters before).
• All the e-mail addresses are in the same directory. There is less chance of a
problem that is caused when the alias table object or system distribution
directory is restored independently and some entries that should be in both
tables are not in one of the saved copies that was restored.
• SMTP aliases can be shadowed to other AS/400 systems as part of the
system distribution directory shadowing.
• Updating, changing, or removing an SMTP address can now be done with a
program using the following CL commands:
236
Lotus Domino for AS/400 R5: Implementation
- Change Directory Entry (CHGDIRE)
- Add Directory Entry (ADDDIRE)
- Remove Directory Entry (RMVDIRE)
Conversion has the following disadvantages:
• SMTP personal aliases are not converted and cannot be used any more. This
may only be an issue if using OfficeVision/400 or JustMail/400.
• The Work with Names for SMTP (WRKNAMSMTP) command can no longer
be used.
• The conversion is not reversible.
Converting SMTP names
A conversion function is available to merge SMTP Alias Table entries into the
system distribution directory.
To determine if the conversion has already been performed, run the Work with
Names for SMTP (WRKNAMSMTP) command. If you receive an error message
stating the WRKNAMSMTP command is disabled, the SMTP alias tables have
already been converted.
To convert, run the Convert Names SMTP ( CVTNAMSMTP) command to start the
conversion.
To verify that the conversion completed, use the Work Name SMTP
(WRKNAMSMTP) command. The message WRKNAMSMTP command disabled.
(TCP9610) should be displayed.
Adding a directory entry for Domino for AS/400 mail recipients
If you want to manually add a directory entry representing a Domino for AS/400
mail recipient, you can use either the Work with Directory Entries (WRKDIRE) or
the Add Directory Entry (ADDDIRE) command. See the following example:
ADDDIRE USRID(NGB DOMINO) SYSNAME('DOMINO')
USRD('Hans Neugebauer')
LSTNAM('Neugebauer') FSTNAM('Hans')
USRDFNFLD((SMTPAUSRID SMTP 'HansNeugebauer')(SMTPDMN SMTP
'SYSTEM01.DOMLAND.ACME.COM'))
MSFSRVLVL(*DOMINO) PREFADR(*SMTP)
We briefly discuss the important parameters in this context:
• USRID: This parameter consists of two mandatory parts called user ID and
address (NGB and DOMINO in our example). You can freely choose the
values for this parameter, provided that combination is unique within the
system distribution directory. It is a common standard to use the AS/400
system name as the address for local users. However, we chose the word
DOMINO as the address to easily distinguish Domino users from OfficeVision
and other OS/400-based mail users because a Domino user cannot use
OS/400-based mail.
• SYSNAME: For the system name, we purposely did not choose the AS/400
system name. Doing so would require an AS/400 user profile to be associated
with the directory entry, but to use solely Domino for AS/400, there is no need
to have an AS/400 user profile.
Lotus Domino for AS/400 and SMTP
237
• USRD: The description of the entry is mandatory, even though the value of
this parameter is not used in this context. For documentation purposes, it is a
good idea to enter the person’s name as shown in our example.
• LSTNAM, FSTNAM: An entry in the AS/400 system distribution directory does
not require the person’s real first and last name to be entered, but there are
good reasons to do so, as explained in the following list:
– If you are planning to use directory synchronization, you need a key field,
by default this is the first name and the last name.
– An OV/400 user sending mail can search the system distribution directory
for the recipient‘s real name.
– You may want to document the person to which each entry is actually
referring.
• USRDFNFLD: The two “user-defined” fields, SMTPAUSRID and SMTPDMN,
are used to store the SMTP address of the Notes user. These fields exist only
after converting the directory. If you do not convert the system distribution
directory, you cannot supply the SMTP address as part of the Add Directory
Entry (ADDDIRE) command and have to use option 1 and F19 of the Work
with Directory Entries (WRKDIRE) or the Work with Names for SMTP
(WRKNAMSMTP) command instead. Another consequence of this is that you
cannot write a CL program to associate an SMTP address with the system
distribution directory entries, unless you convert the system distribution
directory. The SMTP address must be unique. Otherwise, you receive an error
message (CPF89A4).
• MSFSRVLVL: The value *DOMINO for the mail service level indicates that
mail sent to this address goes directly to the Domino SMTP/MIME using a
snap-in in the AnyMail mail server framework (rather than sending it using the
Internet or intranet).
• PREFADR: The preferred address of *SMTP indicates that the SMTP address
must be used to reach this user, rather than the user ID/address pair or the
X.400 O/R address for example.
Instead of using the Add Directory Entry (ADDDIRE) command, you can also
use option 1 (Add) or option 2 (Change) of the Work with Directory Entries
(WRKDIRE) command. The displays are slightly different, but the contents of
the necessary parameters are the same as described previously. However,
these are the two differences with the user interface:
– The message service level and the preferred address are entered in the
form of numeric options, that is, option 4 and option 3 must be entered in
place of *DOMINO and *SMTP.
– Regardless of whether the directory was converted, you have to press F19
(Change name for SMTP) to enter the SMTP address.
In any case, as mentioned earlier, the easiest way to add the entries describing
Domino in the AS/400 system distribution directory is to use directory
synchronization. Use the description provided previously, to understand how
these entries should appear.
7.6.3 Notes with mixed address lists not sent to every recipient
If an OfficeVision/400 user sends the same piece of mail to a mixed list of
recipients, for example a POP3 client using the AS/400 POP3 server and a user
238
Lotus Domino for AS/400 R5: Implementation
of the Lotus Domino for AS/400 server, mail items may not be delivered to the
POP3 client. This applies for mixed distribution lists, as well as specifying the
individual addresses directly with the note.
In such a case, you see the error messages TCP9676 and CPFAF98 in the job
log of the QMSF job. The complete message text for TCP9676 is shown in Figure
142.
Additional Message Information
Message ID . . . . . . :
Message type . . . . . :
Date sent . . . . . . :
TCP9676
Diagnostic
09/23/98
Severity . . . . . . . :
40
Time sent . . . . . . :
13:21:39
Message . . . . : SMTP distribution not sent. Unable to parse data.
Cause . . . . . : SMTP message forwarding was stopped because bad data was
detected in NO EOH CRLFCRLF.
Recovery . . . : Resend the SMTP distribution.
Technical description . . . . . . . . : If a service call is required, the
following information should be forwarded: location ID = 1141.
Figure 142. Message TCP9676 in job OMSF
To avoid this problem, use the Change Distribution Attributes (CHGDSTA)
command and specify "Keep all recipients’ addresses". On any AS/400 command
line on each AS/400 system in your network where OfficeVision/400 is used to
send notes to Domino users, type:
CHGDSTA KEEPRCP(*ALL)
This was mentioned in 7.4.2, “Changing the distribution attributes” on page 207.
Note: Independent of this problem, it is always recommended to set the
KEEPRCP parameter to *ALL.
After the error TCP9676 appeared for the first time, it always appears again
because one or more corrupted messages remain in the queue. You can recover
from this situation by clearing the MSF buffers. At a time with low or no mail
traffic, type the following commands on any AS/400 command line:
ENDSBS QSNADS
ENDTCPSVR *SMTP
ENDMSF
STRMSF MSGOPT(*CLEAR)
STRTCPSVR *SMTP
STRSBS QSNADS
The option MSGOPT(*CLEAR) deletes all messages in the MSF queues. Ending the
QSNADS subsystem and the SMTP server before resetting MSF ensures you do
not lose any other mail in transition.
Note: The solution shown here only solves the problem when sending notes
(option 4 of the OfficeVision menu). If you send OfficeVision/400 messages
(option 3), you currently cannot use a mixed addressee list.
Lotus Domino for AS/400 and SMTP
239
240
Lotus Domino for AS/400 R5: Implementation
Chapter 8. Graphical user interface of Operations Navigator
This chapter describes how you prepare a Windows 95/98 or Windows NT
workstation and use Operations Navigator, together with Lotus Domino for
AS/400, to set up and manage single or multiple Domino for AS/400 servers on
one or more AS/400 systems.
AS/400 Operations Navigator is a powerful graphical user interface for Windows
95, Windows 98 and Windows NT clients that allows you to manage and
administer your AS/400 systems. It is fully integrated with the client desktop in the
Windows environment. Operations Navigator can be used to administer Domino
servers. This requires you to install the AS/400 Operations Navigator plug-in for
Lotus Domino for AS/400.
The Lotus Domino plug-in for Operations Navigator is a separately installed
sub-component of Operations Navigator that allows you to perform these tasks:
•
•
•
•
•
•
Create (set up) Domino servers on your AS/400 system.
Access the NOTES.INI files and other server properties.
Modify the NOTES.INI files of the Domino servers on your AS/400 system.
Start and stop Domino for AS/400 servers.
Access the Domino administration client.
Register Domino users.
The Operations Navigator for Domino plug-in is used with Operations Navigator
but it comes with the Domino code. It can be installed in the following two
different environments:
• Client Access for Windows 95/NT
• Client Access Express for Windows
Because the installation of the plug-in is different in the two environments, we
describe the two scenarios separately. To determine which section to use, refer to
Table 21.
Table 21. Installation scenarios for the Lotus Domino plug-in
Client Access version
Section to refer to
Client Access for Windows 95/NT V3R2
Section 8.1, “Client Access for Windows
95/NT V3R2” on page 242
Client Access Express for Windows
V4R4M0
Section 8.2, “Client Access Express for
Windows” on page 251
Notice that Client Access Express can be used on an AS/400 system running
V4R2 or later.
Before you can set up a workstation to create and manage Domino for AS/400
servers, you must install Domino for AS/400 on your AS/400 system. If you have
not yet installed Domino for AS/400, refer to 2.5, “Installing the Domino for
AS/400 product on your AS/400 system” on page 31, for information on how to
use the Load and Run (LODRUN) command to install the software. The LODRUN
command must be started from a 5250 terminal or a 5250 emulation window.
© Copyright IBM Corp. 1999, 2001
241
8.1 Client Access for Windows 95/NT V3R2
The following items are required for the Lotus Domino plug-in for Operations
Navigator and can be installed from a CD-ROM or a network server:
• Client Access for Windows 95/NT (5763-XD1).
• Base support for Operations Navigator. The plug-in for Domino must be
downloaded from a managing AS/400 system.
Use the following procedure to add Operations Navigator to your administration
workstation. Some of the panels you see in the following sections may differ
slightly from your own panels, depending on the Client Access release you have
currently installed. We used Client Access for Windows V3R2 to install the Lotus
Domino for AS/400 plug-in for Operations Navigator. The plug-in is supported on
Client Access for Windows 95/NT from V3R1M3 onwards.
8.1.1 Language requirements for using Operations Navigator
To use the Operations Navigator support of Domino for AS/400, make sure that
the national language version (NLV) of Client Access for AS/400 matches the NLV
of Domino for AS/400. The same Client Access NLV must be installed on both the
AS/400 host and the client workstation.
To determine if the NLV of Client Access on AS/400 matches the NLV of Domino
for AS/400, follow these steps:
1. Type DSPSFWRSC on any AS/400 command line and press Enter.
2. Press F11 to display the libraries and releases.
3. Verify that the value listed for the Feature of 5769LNT Option 1 with a Feature
Type *LNG matches the value listed for the Feature of the IBM licensed product
5763-XD1 with a Feature Type of *LNG.
Note: Secondary languages for 5763-XD1 must be installed from a separate
CD-ROM.
To determine the languages that are available on the client, use Windows
Explorer to view subdirectories of the Client Access installation. Find the Client
Access directory and verify there is a subdirectory MRIxxxx, where xxxx matches
the NLV of Domino for AS/400.
You must use the matching NLV on the client when you run Domino for AS/400.
To select a national language for the client, select Client Access Properties in
the IBM AS/400 Client Access program group, and then click the Language tab.
To install available secondary languages on the client, use Selective Setup in the
Accessories folder of the IBM AS400 Client Access program group.
8.1.2 Installing AS/400 Client Access for Windows 95/NT
Install and set up Client Access support on your AS/400 system and workstation.
For more information about Client Access, see one of the following publications:
• Getting Your AS/400 Working for You, SC41-5161
• Client Access for Windows 95/NT Setup, SC41-3512
You can access these books from the AS/400 Infocenter at
http://www.as400.ibm.com/infocenter or on the Infocenter CD.
242
Lotus Domino for AS/400 R5: Implementation
8.1.3 Installing the Lotus Domino for AS/400 plug-in
Operations Navigator must be extended with Domino for AS/400 support. This
additional support function is called a plug-in.
8.1.3.1 Selecting the correct managing system
For the following steps, it is important that the managing system for AS/400 Client
Access is the AS/400 system that has Domino for AS/400 installed. Therefore
you should first check to see if your Client Access workstation has a connection
defined to the AS/400 system which contains Domino for AS/400. If this system is
not your managing system, you can change this setting temporarily, and then
switch back to your original managing system.
To change the managing system, complete the following steps:
1. Double-click the IBM AS/400 Client Access icon to open the IBM AS/400
Client Access folder.
2. Double-click the AS/400 Connections icon (Figure 143).
Figure 143. Connections icon
3. Verify that the name of your AS/400 system (which must have Domino for
AS/400 installed) appears in list of defined connections. If it does not, click
Connection, and then New from the menu bar, and follow the instructions to
define a new connection.
4. Right-click the icon representing your AS/400 system, and click Connect. A
dialog appears, requesting a valid AS/400 user profile and password.
5. Close or minimize the AS400 Connections window and open the IBM AS/400
Client Access folder again.
6. Double-click the Client Access Properties icon (Figure 144).
Figure 144. Client Access Properties icon
7. Click the Service tab, as shown in Figure 145 on page 244.
Graphical user interface of Operations Navigator
243
Figure 145. Define the managing system for Client Access workstation
8. Select the name of your AS/400 system in the dialog box.
9. Click OK .
8.1.3.2 Installing the Lotus Domino for AS/400 plug-in
To install the plug-in, follow these steps:
1. Double-click the Accessories icon to open the Accessories folder.
2. Double-click the Selective Setup icon (Figure 146).
Figure 146. Selective service setup
The Selective Setup start dialog appears, as shown in Figure 147.
Figure 147. Selective Setup — Start
244
Lotus Domino for AS/400 R5: Implementation
3. Click Next.
4. In the Setup Options dialog (Figure 148), make sure you select Use the
managing system.
Figure 148. Selective Setup Options window
Important
The managing system must be an AS/400 system with Domino for AS/400
installed. The name of the managing system is shown in parentheses. If
the name of your AS/400 system is not shown here, you must cancel the
selective setup and select a managing system in the Client Access
Properties. Then, start again with 8.1.3.1, “Selecting the correct managing
system” on page 243.
5. Click Next. The messages Accessing managing system and Checking for
components available on managing system are shown. If you are not already
signed on to your AS/400 system, you see a dialog box asking for your AS/400
user profile and password to sign on to the AS/400 system.
6. In the Component Selection window, highlight AS/400 Operations Navigator.
Make sure a check mark is shown on the left, as shown in Figure 149 on page
246.
Graphical user interface of Operations Navigator
245
Figure 149. Component Selection dialog box
7. Click Details. Even if you already have Operations Navigator installed, you
must still click Details to add the sub-component (plug-in) for Lotus Domino.
Figure 150. Select Sub-components panel
8. In the Select Sub-components dialog box, select Lotus Domino, as shown in
Figure 150. Because the Network sub-component is a prerequisite for the
Lotus Domino plug-in, scroll through the list of the sub-components and check
whether Network is also indicated. If it is not, mark the check box.
9. Click Continue.
10.If you forgot to install the Network component beforehand or have not selected
it together with the Lotus Domino for AS/400 plug-in, an extra check is done at
this time. If the Network sub-component is not installed, you see a dialog box
asking you to add it, as shown in Figure 151. Click OK.
246
Lotus Domino for AS/400 R5: Implementation
Figure 151. Component Dependencies display
11.You are returned to the Select Sub-components dialog box. Click Continue.
12.You are returned to the Component Selection window. Click Next.
13.In the Start Copying Files window, click Next.
14.In the Install Completed window, you may deselect View the README file
and Add program folder shortcut to desktop options. Click Next.
15.From the Setup Complete window, you can click the check box in front of Yes,
I want to restart my computer now, then click Finish.
Note: You only need to restart your PC if you are installing Operations
Navigator for the first time. If you only added the plug-in, you do not have to
reboot.
8.1.4 Verifying Operations Navigator for Domino on your workstation
After you have installed the Domino plug-in for Operations Navigator, you can
verify that it was installed correctly. From your Windows 95 or Windows NT
desktop, perform the following steps:
1. Double-click the IBM AS/400 Client Access icon.
2. The IBM AS/400 Client Access folder opens. Double-click the AS400
Operations Navigator icon, as shown in Figure 152.
Figure 152. AS/400 Operations Navigator icon
3. If it is your first restart after installing the plug-in, you see the panel shown in
Figure 153 on page 248, prompting to scan the AS/400 system for you. This is
done for each AS/400 system you access for the first time after installing the
plug-in. During the scanning process, the AS/400 system is checked to see if it
is supported by each plug-in on the PC, including the Domino plug-in. Click
Scan Now.
Graphical user interface of Operations Navigator
247
Figure 153. Operations Navigator scan prompt
You see an AS400 Operations Navigator window, similar to the one shown in
Figure 154.
Figure 154. AS/400 Operations Navigator initial window
In the left panel of the window, you see the AS/400 systems hierarchy tree of
your AS/400 network with an icon at the top representing the entire AS/400
network, and one or more icons underneath each representing an AS/400
system.
4. Click the plus (+) sign in front of the icon representing your AS/400 system
(the one which has Domino for AS/400 installed). The tree under the icon
expands to show the major system components of this AS/400 system.
5. Click the plus (+) sign in front of the Network icon (Figure 155), underneath
your AS/400 system, to expand the network components of your AS/400
system.
248
Lotus Domino for AS/400 R5: Implementation
Figure 155. Operations Navigator Network icon
6. Click the plus (+) sign in front of the Servers icon to see the servers branch of
the tree.
7. Within the Servers branch of the hierarchy tree, you see an icon named
Domino, as shown in Figure 156.
Figure 156. AS/400 Operations Navigator with Domino icon
8. If you do not see an icon named Domino, follow these steps:
a. Right-click the icon for the AS/400 system where the Domino server is
installed. Here, it is AS25. Select Properties.
b. You see the AS25 Properties dialog box, as shown in Figure 157 on page
250. Click the Extensions tab. You should see Lotus Domino appear in the
lower half of the window, as a result of the scan we ran in step 3.
c. If Lotus Domino is not mentioned in the lower part, click Rescan. Then,
click OK.
Graphical user interface of Operations Navigator
249
Figure 157. Properties dialog box
9. Click the Domino icon. Depending on the speed of your connection and the
model and utilization of your AS/400 system, it may take from a few seconds
up to a minute until you see a response. In the meantime, you see the AS/400
icon, as shown in Figure 158.
Figure 158. Building the list of servers
10. If you have not yet configured any Domino for AS/400 servers, the right pane
of the window only shows the server *HTTPSETUP (Figure 159). This is the
server provided with Release 5 that supports Web configuration of Domino
servers. Otherwise, for example, if you have already set up one or more
250
Lotus Domino for AS/400 R5: Implementation
servers using the AS/400 5250 interface, you see each Domino server on your
AS/400 system represented by an icon along with its status (Stopped, Start
submitted, Starting, Started, Started and Active, Unknown).
Figure 159. List of Domino for AS/400 servers
At this point, you are ready to use Operations Navigator to configure and manage
Domino for AS/400 servers. Continue with 8.3, “Creating a new Domino for
AS/400 server” on page 262, for information on how to administer your Domino
servers from within Operations Navigator.
8.2 Client Access Express for Windows
Client Access Express for Windows V4R4M0 (5769XE1), a new client in the
Client Access Family, is available for use with V4R2 or later OS/400 releases. It
only supports TCP/IP.
Because the installation of the plug-in in Client Access Express for Windows is
different from the installation of the plug-in for Client Access for Windows 95/NT,
we describe it separately in this section.
You only need a Client Access Family license for Windows if you plan to use any
of the following functions:
• PC5250 Display and Printer Emulation
• PC5250 Fonts
• Data Transfer
Client Access Express and the base support for Operations Navigator can be
installed from a CD-ROM or a network server or an AS/400 NetServer share. The
plug-in for Domino must be installed from an AS/400 system, which is called the
source system.
Graphical user interface of Operations Navigator
251
The following sections describe how to add Operations Navigator and the Domino
plug-in to your Domino administration workstation.
8.2.1 Language requirements for using Operations Navigator
To use the Operations Navigator support of Domino for AS/400, make sure that
the national language version (NLV) of Client Access Express for AS/400
matches the NLV of Domino for AS/400. The same Client Access Express NLV
must be installed on both the AS/400 host and the client workstation.
To determine if the NLV of Client Access Express on AS/400 matches the NLV of
Domino for AS/400, follow these steps:
1. Type DSPSFWRSC on any AS/400 command line and press Enter.
2. Press F11 to display the libraries and releases.
3. Verify that the value listed for the Feature of 5769LNT option 1 with a Feature
Type *LNG matches the value listed for the Feature of the IBM licensed product
5763-XE1 with a Feature Type of *LNG.
Note: Secondary languages for 5763-XE1 must be installed from a separate
CD-ROM.
To determine the languages that are available on the client, use Windows
Explorer to view subdirectories of the Client Access Express installation. Find the
Client Access Express directory and verify that there is a subdirectory MRIxxxx,
where xxxx matches the NLV of Domino for AS/400.
You must use the matching NLV on the client when you run Domino for AS/400.
To select a national language for the client, select Client Access Properties in
the IBM AS/400 Client Access program group, and then click the Language tab.
To install available secondary languages on the client, click Selective Setup in
the Accessories folder of the IBM AS400 Client Access Express program group.
8.2.2 Installing Client Access Express for Windows
Install and set up Client Access Express support on your AS/400 system and
workstation. For more information about Client Access Express, see one of the
following publications:
• Getting Your AS/400 Working for You, SC41-5161
• AS/400 Client Access Express for Windows V4R4M0, SG24-5191
You can access these books from the AS/400 Infocenter at
http://www.as400.ibm.com/infocenter or on the Infocenter CD.
8.2.3 Installing the Lotus Domino for AS/400 plug-in
Operations Navigator must be extended with Domino for AS/400 support. This
additional support function is called a plug-in.
1. Double-click the IBM AS/400 Client Access Express icon to open the IBM
AS/400 Client Access Express folder.
2. Open Operations Navigator.
3. To complete the installation of the plug-in, AS/400 NetServer must be started.
This can be done from within Operations Navigator.
252
Lotus Domino for AS/400 R5: Implementation
4. Click the plus (+) sign in front of the AS/400 system you want to use to open
the hierarchical structure. AS/400 NetServer can be found under the option
Network —> Servers —> TCP/IP. Click the TCP/IP icon. The status of the
TCP/IP servers is retrieved and you see the display shown in Figure 160.
Figure 160. Operations Navigator servers
Look at the right window pane. Locate the line AS/400 NetServer and look at
the Status column. If you see Stopped, you can start your AS/400 NetServer
function from the display shown in Figure 160. To do so, right-click the AS/400
NetServer icon. A context-sensitive menu list appears. Select Start.
From V4R4, AS/400 NetServer can also be started with the CL command
STRTCPSVR SERVER(*NETSVR) and stopped with the command
ENDTCPSVR SERVER(*NETSVR).
Note
For AS/400 NetServer to work, TCP/IP must be configured and started on
the AS/400 system. If you do not know how to configure and start TCP/IP on
the AS/400 system , refer to OS/400 TCP/IP Configuration and Reference,
SC41-5420. In addition, the QSERVER subsystem must be active.
For more information about AS/400 NetServer, refer to the following
sources of information:
• Getting Your AS/400 Working for You, SC41-5161.
• AS/400 Client Access Express for Windows V4R4M0, SC24-5191
• AS/400 Client Access Express - Setup, SC41-5507
5. Before you continue, you may want to check the name of your AS/400
NetServer. To do so, while still in Operations Navigator, click Network —>
Graphical user interface of Operations Navigator
253
Servers —> TCP/IP, locate the line AS/400 NetServer. With your right mouse
button, click the icon and click Properties. The General tab shows you the
AS/400 NetServer name. In the example shown in Figure 161, the name is
Qas25.
Click OK to quit this display.
Figure 161. AS/400 NetServer Properties — General tab
To continue with the rest of the installation, open the tree structure File
Systems in the left window pane. Click File Shares. You should see a share
name QIBM in the right panel. It is created automatically. If you do not see a
share name, click the plus (+) sign in front of Integrated File System. Look for
QIBM in the list. Right-click the resource and select Sharing —> New Share.
Call the share QIBM. Click OK.
6. You may choose not to assign a network drive, in which case, go to step 9. If
you do decide to assign a network drive, you can assign your shared resource
in one of the following two ways. The preferred method is to assign it using
Windows Explorer. The reason is that you do not have to worry about your
network configuration or if your Windows and AS/400 passwords are the
same. For more information about AS/400 NetServer and this particular issue,
refer to AS/400 Client Access Express for Windows V4R4M0 , SG24-5191.
Windows Explorer
a. Open Windows Explorer.
b. Select Tools
—> Map Network Drive.
Figure 162. Map Network Drive dialog box
c. Select a drive letter
d. Indicate the path to the share. The first part represents your AS/400
NetServer name. The second part represents the share name. Click OK.
254
Lotus Domino for AS/400 R5: Implementation
e. If necessary, you are prompted to enter an AS/400 password for the drive
assignment. Continue with step 7 on page 255.
Operations Navigator
a. If you want to assign a network drive using Operations Navigator and you
are using Windows 95 or 98, you can do so only when your Windows and
AS/400 user IDs and passwords are the same. To do so, open Operations
Navigator and go down in the left pane until you see File Shares. File
Shares can be found under File Systems. Click the File Shares icon. All
the actual shares appear in the right pane. Right-click QIBM share and
select Map network drive.
Figure 163. Operations Navigator with file shares
b. You see a display like the example shown in Figure 164. You can select the
drive letter to be used for the share.
Figure 164. Map Network Drive dialog box
7. You are ready to load the plug-in. Go to the Client Access Express window.
Double-click the Selective Setup icon, as shown in Figure 165 on page 256.
Graphical user interface of Operations Navigator
255
Figure 165. Selective Setup Icon
The Selective Setup start dialog box appears.
Figure 166. Selective Setup start
8. Click Next.
9. In the Setup Options dialog box choose your source directory. This can be the
network drive you assigned. If you chose not to assign a network drive, you
can select \\QAS25\QIBM, where QAS25 represents the AS/400 NetServer
name of the AS400 system where Domino for AS/400 is installed. QIBM
represents your share name, as shown in figure Figure 167. As we mentioned
earlier, the share name is automatically created when you install Client Access
Express as a licensed program product.
Figure 167. Selective Setup Options
256
Lotus Domino for AS/400 R5: Implementation
Note
Using AS/400 NetServer, the default server name is the AS/400 system
name preceded by the letter Q. This is the reason why the network path
shows \\QAS25\QIBM.
10.Click Next. The Component Determination window is shown. Do not press any
button on this panel.
11.The Component Selection window is automatically displayed, as shown in
Figure 168.
Figure 168. Component Selection panel
12.In the Component Selection window, highlight Lotus Domino. Make sure a
check mark is shown on the left, as shown in Figure 168. You may have to use
Page Down to scroll through the list to find it.
13.Click Next.
14.If the Network sub-component, which is a prerequisite for the Lotus Domino
plug-in, is not installed yet and it was not chosen together with the Lotus
Domino plug-in, the installation process automatically installs it for you. You
see an information display. Click Next.
Graphical user interface of Operations Navigator
257
Figure 169. Component dependencies
15.In the Install Completed window, you may deselect View the README file and
Add program folder shortcut to desktop options. Click Next.
16.You receive the message, Congratulations! You have successfully installed
Client Access Express. Click Finish.
17.At this point, you might receive an extra window if your administrator has set
up some Add-in programs. If you do not want to install any of these programs,
click Next.
Figure 170. Install Additional Files and Programs panel
18.You receive the message Client Access Express setup is now complete. Click
Finish.
Note: If you are installing Operations Navigator for the first time, reboot your
workstation.
8.2.4 Verifying Operations Navigator for Domino on your workstation
After you have installed the Domino plug-in for Operations Navigator under
AS/400 Client Access Express for Windows, you can verify if it is installed
correctly. From your Windows 95/98 or Windows NT desktop, perform the
following steps:
258
Lotus Domino for AS/400 R5: Implementation
1. Double-click the AS400 Operations Navigator icon.
Figure 171. The Operations Navigator icon
You see an AS400 Operations Navigator window similar to the one shown in
Figure 177 on page 261.
2. Click the plus (+) sign to the left of the icon representing your AS/400 system
(the one which has Domino for AS/400 installed). If you do not have a
connection to this AS/400 system, you see a panel prompting for your
password.
If it is the first time you are starting Operations Navigator after installing the
plug-in, you are prompted to scan each AS/400 system you access for new
components. This is shown in Figure 172. Scanning occurs once for each
AS/400 system after adding a plug-in. During the scanning process, the
AS/400 system is checked to see if it is supported by each plug-in installed on
the PC, including the Domino plug-in.
Figure 172. Operations Navigator scanning dialog box
At the same time, a second window, "Welcome to AS/400 Operations
Navigator - Contents" dialog box appears. If you do not want to see this
window every time you start Operations Navigator, go to the bottom of the
panel and deselect the check box saying Show this Welcome again when I open
Operations Navigator, and click OK.
If, at any point in time, you want to re-call the Welcome window (Figure 173 on
page 260), press F1 (Help).
Graphical user interface of Operations Navigator
259
Figure 173. Welcome to AS/400 Operations Navigator — Contents
3. You return to the Operations Navigator window. In the left panel of the window,
you see the hierarchy tree of your AS/400 network with the My AS/400
connections icon representing the entire AS/400 network, and one or more
icons underneath for each AS/400 system.
4. The tree under the icon is expanded to show the major system components of
this AS/400 system.
If, at the moment, you do not have a connection to an AS/400 system, the
AS/400 signon dialog box appears. Enter your user ID and your password.
Figure 174. AS/400 dialog box
5. Click the plus (+) sign next to the Network icon underneath your AS/400
system to expand the Network components of your AS/400 system.
Figure 175. The Operations Navigator Network icon.
6. Within the Servers branch of the hierarchy tree, you see an icon named
Domino, as shown in Figure 177.
7. If you do not see an icon named Domino, follow these steps:
a. Right-click the AS/400 icon where the Domino server is installed. In this
example it is AS25. Select Properties.
b. You see the AS25 Properties dialog box shown in Figure 176. Click the
Plug-ins tab.
260
Lotus Domino for AS/400 R5: Implementation
c. If Lotus Domino is not mentioned in the bottom window, click Rescan, and
then click OK.
Figure 176. Domino server Properties panel
Figure 177. AS/400 Operations Navigator main window
8. Click the Domino icon. If you have already set up one or more servers using
the AS/400 command interface, you see each Domino server on your AS/400
system represented by an icon along with its status (Stopped, Starting,
Started, Started and Active, Unknown). If you have not set up a server yet,
you see the server *HTTPSETUP that is used for Web configuration.
Graphical user interface of Operations Navigator
261
Figure 178. List of Domino for AS/400 servers
At this point, you are ready to use Operations Navigator to configure and manage
Domino for AS/400 servers. The sections that follow show what you can do with
Operations Navigator.
8.3 Creating a new Domino for AS/400 server
Now we are ready to create a first or an additional Domino server. The
terminology for this process varies. While the similar task for other Domino
platforms is often called setup, it is called configurati on when you use an AS/400
CL command and create when you use the graphical user interface of Operations
Navigator, as described in the following sections.
When you create a Domino server using Operations Navigator, it starts the Web
interface. The starting point for creating a new server is the Domino icon in the
left pane of the Operations Navigator window (see Figure 177 on page 261).
To set up (configure, create) your Domino for AS/400 server, perform the
following steps:
1. Right-click the Domino icon. You see a pull-down menu.
2. Select New Domino Server. The Web browser starts for you at this point.
3. Because this is exactly the same process as explained in the installation
chapter, refer to 2.6.2, “Web-based setup” on page 58.
Notice that if you use an R5 plug-in to configure a server on a R4.6 system,
you invoke the original setup database interface. For more information about
the use of the plug-in in a mixed release environment, see also 8.10,
“Considerations for previous releases” on page 280.
262
Lotus Domino for AS/400 R5: Implementation
8.4 Deleting a Domino server
If you right-click a server icon and select Delete, you delete the server. This is the
equivalent of executing the Configure Domino Server (CFGDOMSVR) command
with the option *REMOVE. You are prompted to confirm that you mean to delete the
server. This is not the case when deleting the server from the green screen
interface.
Figure 179. Deleting a server definition with Operations Navigator
Note: The entire data directory is deleted when you delete a Domino server.
See also 5.3, “Removing a Lotus Domino for AS/400 server” on page 150, for
more information.
8.5 Starting and stopping Domino servers
After creating a Domino server through the graphical user interface of Operations
Navigator, you can also start or stop the server with the same interface. After you
click the Domino icon in the left pane, you see all your servers in the right pane of
the Operations Navigator window. To the right of each icon, you can see the
status of the server. Table 22 shows the possible status.
Table 22. Domino server status overview
Status
Meaning
Stopped
All server tasks are stopped. The server is not active.
Start submitted
The request to start the server tasks was submitted.
Starting
The primary server tasks are starting.
Started
The server is running.
Started and active
The server is running and can be accessed from a workstation.
If only the icons and names of each server appear, but not any status, you may
have selected the wrong view (large icons, small icons, or list). To switch to the
Details view, select View —> Details from the menu bar.
Graphical user interface of Operations Navigator
263
Note
Started can have different meanings:
• An AS/400 Domino server can be started but still not be fully operational.
For example, it can produce listener errors for the TCP/IP port.
• Operations Navigator, while building the list of servers and their status,
checks whether the server responds to a PING, which means it can be
considered as operational. If this is the case, the server status is shown as
Started and Active.
• If the server is started but cannot respond to a PING, it is still listed as
Started. This also means that, even if the server is fully operational, it may
still show up as Started only. This is the case if there is no way to
successfully ping the server because there is no DNS entry or local host file
entry on the PC for the additional server.
You can start or stop a server using one of the following methods:
• Right-click the icon, and then select Start, Stop, or Stop Immediately from
the pull-down menu.
Attention
You should only end the server immediately if the controlled server shutdown
fails. Data can be lost if the server processing is stopped abruptly. For more
information on ending a Domino server, refer to 4.10, “End Domino Server
(ENDDOMSVR)” on page 122.
• Click once on the icon and then the appropriate button on the tool bar:
– To start a server, click the button with the green arrow.
Figure 180. Start Server icon
– To stop a server in a controlled way, click the button with the red symbol.
Figure 181. Stop Server icon
8.6 Managing servers from a separate window
If you right click the Domino icon in the left hand side of the Operations Navigator
window, you see an option Open. Selecting this, displays a new window, similar
to Figure 182.
264
Lotus Domino for AS/400 R5: Implementation
Figure 182. Domino servers
From here, you can manage your servers.
You also see an option Create Shortcut. This creates the icon shown in Figure
183 on your desktop. This allows you to go directly to a window for managing your
servers without having to navigate through Operations Navigator.
Figure 183. Shortcut icon
8.7 Adding a Domino application
Release 5.0.1 provides an interface to the Add Domino Application
(ADDDOMAPP) command from Operations Navigator. To get to the panel shown
in Figure 184 on page 266, right-click the server name in the right hand pane of
the Operations Navigator window and select the option Add Application.
For more information about this command, see 4.2, “Add Domino Application
(ADDDOMAPP)” on page 105.
Graphical user interface of Operations Navigator
265
Figure 184. Add Domino Application panel
8.8 Administering a Domino server
Operations Navigator allows you to perform the following administrative tasks for
Domino for AS/400 servers:
• See several important configuration parameters (properties) in one place
• Display or change the Domino initialization file (NOTES.INI)
• Launch the Domino Administrator
The following section briefly describes these tasks.
8.8.1 Displaying the server properties
To display the server properties, do one of the following actions:
• Double-click the server icon.
• Right-click the server icon and choose Properties.
• Click the server icon once, and then click the button shown in Figure 185.
Figure 185. Properties display
Some situations may occur that do not allow you to display any or some of the
properties.
If you have the necessary authority, you are able to view all information, as
shown Figure 187. The following panels reflect Domino Release 5.0.1. This
release has been considerably enhanced to provide the function of the Change
Domino Server (CHGDOMSVR) command with a graphical interface. See 4.5,
“Change Domino Server (CHGDOMSVR)” on page 109, for details of the
parameter options.
Depending on the change you are trying to make, the server may have to be
stopped. You can tell this because the option is greyed out if you are not able to
make the change. Even if you are able to change a parameter when the server is
active, the server must be stopped and restarted for the changes to take effect.
266
Lotus Domino for AS/400 R5: Implementation
Most of the panel captures in the following sections were done with the server
stopped to make the displays legible for you.
8.8.1.1 Basics tab
The Basics tab shows information such as the server name and title. If the server
is not active, some of the information is displayed as Not available. You can see
that to change the subsystem name, the server must be stopped. Figure 186
shows you the Basics tab when the server is stopped.
Figure 186. Basics properties of Domino for AS/400 server
Figure 187 shows you the Basics tab when the server is started.
Figure 187. Basics properties when the server is active
8.8.1.2 Internet tab
The Internet tab, shown in Figure 188 on page 268, shows options relevant for
Internet access.
Graphical user interface of Operations Navigator
267
Figure 188. Internet properties
8.8.1.3 Mail tab
The Mail tab, shown in Figure 189, allows you to change the mail options.
Figure 189. Mail properties
8.8.1.4 Services tab
The Services tab, shown in Figure 190, allows you to change several NOTES.INI
options, as well as other service selections. You can change the two Log options
when the server is active.
268
Lotus Domino for AS/400 R5: Implementation
Figure 190. Services properties
8.8.1.5 Locale tab
The Locale tab, shown in Figure 191, allows you to change the time zone and the
collation sequence.
Figure 191. Locale properties
8.8.1.6 Network Configuration tab
The Network Configuration tab, shown in Figure 192 on page 270, provides
network information for the server. The values on this page are set in the Server
document in the Domino Directory. You can change the IP address of the Domino
server from this tab. The server must be inactive to change the address.
Graphical user interface of Operations Navigator
269
Figure 192. Network Configuration properties
8.8.1.7 Initialization File tab
This Initialization File tab, shown in Figure 193, displays a copy of the NOTES.INI
file that is used when you start this Domino server. The system creates this
initialization file automatically when you set up the server. It is used at server
startup time.
Figure 193. Initialization File — NOTES.INI
Click Edit to change the NOTES.INI file. You see the message display shown in
Figure 194. This panel warns you that you must pay attention when changing the
NOTES.INI file.
270
Lotus Domino for AS/400 R5: Implementation
Figure 194. Warning when trying to edit the NOTES.INI file
If you want to edit the NOTES.INI file, click Yes. The file is opened using a
specific editor. The title of the edit window is AS/400 Edit - [notes.ini].
Note
If your Domino Directory is defined as a share name using AS/400 NetServer,
you may try to edit the file from Windows Explorer. However, from Windows
Explorer, the file is normally opened automatically using Notepad. Notepad
does not result in a version of the NOTES.INI file that can be used by Domino.
You should open the file using WordPad instead.
Remember that you also can use the Edit File (EDTF) command to modify your
NOTES.INI file. For more information on the EDTF command, refer to 4.9, “Edit
File (EDTF)” on page 119.
8.8.2 Partial server properties displayed
There are some situations which result in some or all of the properties not being
displayed.
8.8.2.1 Server is not started
If the server is not started or active, you get the message shown in Figure 195.
Figure 195. Server not responding
In such a case, you can only see some of the properties. Click OK to continue.
You then see the server properties box. You are only able to change some of the
server properties when the server is not started.
8.8.2.2 Wrong user ID is active
If you attempt to look at the properties of your server when your workstation is
using a NOTES.INI file containing the name of a USER.ID who is not an
administrator for the server, you only have access to partial information. To
determine whether you can edit the .INI file of this server, the AS/400 user profile
is taken into account. This means that if you have, for example, *ALLOBJ
authority, you are able to edit the .INI file for a server from another organization
on the same AS/400 system as your server. You are also able to start and stop
the server.
Graphical user interface of Operations Navigator
271
8.8.2.3 Multiple organizations
You get the error message, Error: the server’s Address Book does not contain
any cross-certificates capable of authenticating you, if all of the following
conditions apply:
• You try to look at the properties of your server.
• Your NOTES.INI contains the name of a USER.ID who belongs to an
organization other than the one to which the server belongs.
• There is no cross-certification.
However, you can click OK and you still have access to partial information. To
determine whether you can edit the .INI file of this server, the AS/400 user profile
is taken into account. This means that if you have, for example *ALLOBJ
authority, you are able to edit the .INI file for a server from another organization
on the same AS/400 system as your server. You are also able to start and stop
the server.
Figure 196. AS/400 Operations Navigator authentication error
8.8.2.4 Your AS/400 user profile has no access to NOTES.INI
If your AS/400 user profile used to signon to the AS/400 system using the
Operations Navigator interface does not have *ALLOBJ authority or does not
have specific authorities to edit the NOTES.INI file, you see the panel shown in
Figure 197.
Figure 197. Edit the NOTES.INI file
8.8.3 Launching the Domino Administrator
To launch the Domino Administrator, do one of the following tasks:
• Right-click the server icon, and select Server Administration.
272
Lotus Domino for AS/400 R5: Implementation
• Click the left mouse button once, and then click the button shown in Figure
198.
Figure 198. Server Administration icon
If the Domino Administrator is not yet active, it is launched automatically. The first
time you launch it you get an extra help panel, called Temporary Splash. The
panel allows you to have a quick overview of the new administration client. If you
do not want to see the panel again when launching the administration client,
check the Don’t show this again box. You then see a display similar to the one
shown in Figure 199.
Figure 199. Domino Administrator
Click Administration on the task bar, to access administrative functions.
If the Domino Administrator is already active, nothing happens. You must look at
your Windows task bar and click the icon yourself.
8.9 Registering Domino users
Operations Navigator allows you to manage many components of the AS/400
system. This includes creating, changing, grouping, and deleting AS/400 users
(user profiles).
The Operations Navigator plug-in extension to manage Domino servers also
enhances your capability to manage users because you can register Domino user
IDs at the same time as you create a new AS/400 user profile, or you can create
a Domino user based on an existing AS/400 user profile.
Graphical user interface of Operations Navigator
273
In the next two sections, we show you how to register a Domino user based on an
existing AS/400 user profile and how to register a Domino user at the same time
as you create an AS/400 user profile.
8.9.1 Registering a Domino user based on an AS/400 user profile
Use the following steps to register a Domino user for an existing AS/400 user:
1. In the AS/400 Operations Navigator, click the plus (+) sign next to Users and
Groups in the left pane of the Navigator to expand this section.
2. If you are not currently signed on to the AS/400 system, you are prompted for
your password, as shown in Figure 200.
Figure 200. Signon to AS/400 panel
3. Expand the Users and Groups section.
4. Click All Users to view a list of all users.
Figure 201. Selecting an AS/400 user profile
To add an existing AS/400 user as a Domino user, double-click the user you
want to add. You can also right-click and select Properties.
This brings up the User Properties box, as shown in Figure 202, which allows
you to define an AS/400 group, as well as personal, security, and job
274
Lotus Domino for AS/400 R5: Implementation
information. When you are ready to add the user as a Domino server user,
proceed to the next step.
Figure 202. AS/400 user properties
5. Click Networks and the Networks dialog box appears.
Note
If you see a tab called Notes in front of Remote servers, it is not the correct
page to register a Domino user on the Domino for AS/400 server. This page
is shown if you have an Integrated Netfinity Server (INS) running Domino.
6. Click the Domino Registration tab (Figure 203).
Figure 203. Networks dialog
The registration automatically searches each of the servers for the name of
the user you selected based on the existing personal information. The
registrations display as they are found, one per line. In the list, the server
name appears on the left and the user’s registration name appears on the
right.
While the system is searching, you see a status of Retrieving status. You do
not need to wait until the system has searched all the Domino Directories. To
view the user’s registration on a specific server, select that server, then click
Graphical user interface of Operations Navigator
275
View or double-click the server name. To create an additional registration on
that server, select that server, then click Add.
You are prompted for the password of the Domino user which is used by the
Domino plug-in. Operations Navigator uses the USER.ID file that is found in
the NOTES.INI file at the time the Domino plug-in is started. This is the id you
are currently using if Notes is active or the ID which was active when you quit
the Notes client.
7. Select the server where you want to register the user.
8. Click Add. You see the Domino User Registration on ... dialog box (Figure
204). If your AS/400 user is added to the system directory and if at the same
time the detailed information for the directory entry is entered, the Domino
User Registration dialog box reflects the information found in the directory
entry. You can still change the information, if required.
If your user is not specified in the system distribution directory or if the
detailed information is not entered, the User Registration dialog box shows as
an empty panel. It does not show the AS/400 user profile name. The name you
indicate in the Domino User Registration dialog box is the user’s Domino user
name. This name is probably different from the AS/400 user profile which does
not allow both first and last names, and which is limited to 10 characters.
Figure 204. Domino User Registration on Acmeds1 — Basic tab
9. Click the Server tab (Figure 205). Here you must specify the location of the
CERT.ID. The CERT.ID, or at least a copy of it, can be stored on a diskette, on
your workstation or on a network drive. We entered E:\Acmeds1\cert.id
because we had a mapping for the Domino subdirectory to the E: drive. You
can either type the password in the Password field or just leave the password
empty. If you enter the field, the password is visible while you type it. If you do
not enter the password, you are prompted to enter it the when you click OK. If
you enter the password at this point, it is not visible.
276
Lotus Domino for AS/400 R5: Implementation
Figure 205. Domino User Registration on Acmeds1 — Basic tab
10.Click the Mail tab (Figure 206) to check the settings for the creation of the
user’s mail file. The mail file name is automatically composed. It consists of
the first character of the first name followed by the last name, up to a
maximum 8 characters. If you have other naming standards you can change
the name here. You can also decide to create the mail file now (therefore, the
Domino server must be active), or you can indicate that you want the mail file
created during setup of the workstation.
Figure 206. Domino User Registration on Acmeds1 — Mail tab
11.The Other tab (Figure 207) allows you to specify where to save the user ID
file. If you indicate Store User ID in Domino Directory, the ID is attached to the
Person document. During workstation setup you can then access it in the
Person document. Subsequently, it is copied to the user’s workstation and
deleted from the Person document. You can also store the user ID file on a
network drive or on the administrator’s local PC, or even a diskette.
Graphical user interface of Operations Navigator
277
Figure 207. Domino User Registration on Acmeds1 — Other tab
12.Click OK to complete the registration. Status messages display as the process
continues, which can take up to three minutes.
13.A confirmation message appears to let you know that the user ID file has been
created.
14.You are returned to the Network dialog box where you see the name of the
newly created Domino user appear (Figure 208).
Figure 208. Network dialog box after registration of a user
15. In the Networks dialog box, click OK. The main user dialog box is displayed.
8.9.2 Registering a new user on the AS/400 system and Domino
Registering a user at the same time on Domino and the AS/400 system can be
done using Operations Navigator. You can start by defining your AS/400 user.
Instead of running the Create User Profile (CRTUSRPRF) command from a green
screen interface, you launch it in the background using Operations Navigator.
In this section, we do not explain all the parameters you can specify while
creating a new AS/400 user. This information can be found in OS/400 Security Reference, SC41-5302. We only indicate the basic steps.
278
Lotus Domino for AS/400 R5: Implementation
Use the following steps to create a new AS/400 user. This user is also a Domino
user.
1. In Operations Navigator, click the plus (+) sign icon next to Users and Groups
in the left pane. The section is now expanded,
2. To create a new AS/400 user, right click All Users, and then, select New User.
You can also select the icon shown in Figure 209.
Figure 209. Create New User icon
3. The New User dialog box appears (Figure 210).
Figure 210. New User dialog box
The user name is the AS/400 user profile. Therefore, you cannot specify a
name which is longer than 10 characters. When creating an AS/400 user
profile, we strongly recommend that you choose a user name of eight
characters or less. User names longer than eight characters require special
handling for personal information and certain network options. If you create a
new user using Operations Navigator and the user profile name is longer than
eight characters, you receive the warning in Figure 211. You need to decide
whether to use a name over eight characters. Click Yes, No or Cancel.
Figure 211. Warning dialog box during AS/400 user creation
4. If you check the center box, Allow client applications to share this password, in
Figure 210, the password you enter for the AS/400 profile is used when
registering the Domino user. There is no synchronization of the passwords
Graphical user interface of Operations Navigator
279
after this, unless you choose to use the Domino for AS/400 Single Logon. See
Chapter 12, “Domino for AS/400 Single Logon” on page 349, for more
information.
Note: This option is greyed out if you are using this interface to register an
existing AS/400 system user in Domino.
The Groups, Capabilities and Jobs buttons relate to strictly AS/400
concepts.
5. At this point, you can add user data in the Personal tab. Any first or last name
you indicate here is retrieved by the system when registering the user as a
Domino user. However, it can still be modified at this moment.
6. To add the user as a Domino user, click Networks. The New User - Networks
dialog box appears. Click the Domino Registration tab.
7. From here on, the steps are exactly the same as described in 8.9, “Registering
Domino users” on page 273. Refer to this section for further information.
8. After you have registered the Domino user, click Add on the main menu to
create the AS/400 user profile.
8.10 Considerations for previous releases
The are some general considerations if you are working in a mixed environment
with clients and servers on different releases. Consider the following points:
• Use of the setup database: If you are running a client with Client Access
Express and the Domino plug-in against a 4.6.x server and you launch the
option to set up a first or an additional server, the setup database is used. It
does not run the Web-based setup. For information regarding the use of the
setup database in a R4.x implementation, refer to Lotus Domino for AS/400:
Installation, Customization and Administration, SG24-5181 .
• Copying of ID files: The plug-in under Client Access Express running against
a 4.6.2 or a 4.6.3 server does not copy the ID files to your workstation at the
end of the setup of a server. You must copy them manually. This is no longer
an issue in 4.6.4.
• Edit NOTES.INI: When using the plug-in under Client Access Express running
against a 4.6.2 or a 4.6.3 server, the user cannot edit NOTES.INI from within
Operations Navigator. However, it can be done using a share. This is no
longer an issue in 4.6.4.
280
Lotus Domino for AS/400 R5: Implementation
Chapter 9. Lotus Domino and the Internet
Since the availability of Lotus Notes Server R4.5, the Domino Internet application
server has been included as part of the server. With the growth of the Internet and
the advantages that Domino adds to the Notes Server, the server was renamed
the Lotus Domino Server (from Release 4.5).
Lotus Domino Release 5 now supports more features and allows for better
configuration and control of the Web services. This chapter describes
configuration of a new Domino Web server on the AS/400 system and how to set
up the following Domino Web features:
• Domino server administration using a Web browser
• Clustering Domino Web servers
• Additional Domino Web services:
– Virtual Domino Web servers
– Web server aliases
– URL mappings
9.1 Configuring a Domino Web server on the AS/400 system
Domino allows any Domino database to be readily available to Web browsers.
When a browser client requests information from a database on a Domino server
the information is quickly converted into HTML and sent to the browser client.
This allows for the information in the databases to be changed and published to
the Web site quickly and easily. Domino includes these Web server features:
• Conversion of Notes features into HTML. This conversion is governed by
HTML restrictions. HTML can also be defined directly on Notes forms.
• Database ACLs are able to control access by Web browsers, as well as
traditional Notes clients. Domino supports name and password authentication
and Secure Sockets Layer (SSL) security.
• Support for Java applets, JavaScript, and CGI.
• Static HTML files can be published using a Domino server.
• A subset of commands are available for Domino specific functions, for
example, opening a database, form, or view.
The Domino server HTTP task can be enabled when the server is created. If the
task was not enabled, it can be configured using the following options:
• Using the LOAD command ( LOAD HTTP) from the console.
This starts the HTTP task. If the server is restarted, this task does not
automatically start.
• Editing the SERVERTASKS entry in the NOTES.INI file:
ServerTasks=DECS,IMAP,NNTP,HTTP,Replica,Router,Update,Stats,Adminp...
This automatically starts the HTTP task every time the server is started.
• Using the Change Domino Server (CHGDOMSVR) command to add the HTTP
service to the Domino Server. This adds the task to the server tasks list.
• The first time that the HTTP task is loaded, a Domino Web Administration
database is created (refer to 9.2, “Domino server administration using a Web
© Copyright IBM Corp. 1999, 2001
281
browser” on page 285). Figure 212 shows the console display when the HTTP
task is started for the first time.
Work with Domino Console
Server: ACMEDS2
Previous subcommands and messages:
> Load HTTP
03/26/99 05:04:26
Creating Domino Web Administrator database...
03/26/99 05:04:32
Domino Web Administrator database created
03/26/99 05:04:37
HTTP Web Server started
Enter a Domino subcommand.
===>
F3=Exit
F17=Top
F5=Refresh
F18=Bottom
F6=Print F9=Retrieve
F21=Command line
Figure 212. Loading the HTTP task for the first time
Configuration for the HTTP task is done in each Server document in the Domino
Directory. To document all of the HTTP settings in this redbook would be a
duplication of what is already documented in the Domino Administration Help
(help\help5_admin.nsf) database. Therefore, you should refer to this document
for more information. As already mentioned, the Domino Administration Help
database is an extensive guide to all components of the Domino Server.
The following list of settings may need to be considered when setting up a
Domino Web server.
When editing a Domino Server document, click Ports —> Internet Ports tabs.
From here each of the Internet Ports (Web [HTTP], Directory [LDAP], News
[NNTP] and so on) can be enabled or disabled. Also, security for the
communication can be set, as shown in Figure 213.
282
Lotus Domino for AS/400 R5: Implementation
Figure 213. Internet protocol security
On the Web sub tab (in the middle of the page), check the following settings:
• SSL Settings: Security Sockets Layer (SSL) is a security protocol that allows
for secure transfer of data between the server and client.
You can use a third-party (for example, VeriSign) or a Domino Certificate
Authority (CA). Using a Domino CA, you avoid the expense that a third-party
CA charges to issue and renew client and server certificates. However this
may only be suitable for intranet certification.
• TCP/IP Port Number: This is the TCP/IP port that is used for HTTP
communication. The internationally standard port for HTTP is 80. This can be
changed to the required port number, depending on your requirements.
• TCP/IP Port Status: This determines if the HTTP task is automatically loaded
when the server starts. If the HTTP task is disabled, it does not run.
• Authentication Options: Domino uses the database ACL and the Domino
Directory to verify user’s access. If a user attempts to access a database from
a Web browser and the database does not allow for anonymous connections,
the user is challenged for a user ID and password. This is verified against the
database ACL and the Domino Directory. The Web browser only displays the
data to which the user has access.
In the Domino Server document, click Internet Protocols —> HTTP tab. This
allows you to configure the default home page, logging, agents and many
others values, as shown in Figure 214 on page 284. The Domino Web Engine
tab contains details on how the Web server performs tasks, for example,
conversion, Java, mapping, and so on.
A user’s Internet password is stored in the Internet Password field in the
Person document. This password is encrypted and is used for logging on to
Domino Internet services, for example, HTTP, IMAP, POP3, and so on.
Lotus Domino and the Internet
283
Figure 214. Web server configuration
On the HTTP sub tab, check the following settings:
• Host name: The host name or IP address for this Web server. You can enter
up to 32 individual names in this field. If the Host name is left blank, the full
qualified system host name is used.
• Bind to host name: Useful when running two or more partitioned servers on
one AS/400 system. This allows each Domino server to run the HTTP task on
a specific IP address or host name using the default HTTP port (80).
• Default home page and home URL: If you are running a Web site that uses
HTML files, the Default home page allows you to specify the file to open when
the site is requested by a Web browser. This is only used if the Home URL
field is blank.
When using a database as your Web site, the Home URL must be correctly
specified.
• Allow HTTP clients to browse databases: This allows Web browsers to view
all databases available on your system. There may be a security risk in
allowing this access.
• Logging files: The following two methods are used for logging HTTP activity:
– Log to text files
– Log to a database
A text file to store logging information is used because it allows for the logging
information to be updated quickly. The drawback is that each type of error is
stored in a different file.
Using a database to store logging information has the advantage of a single
store. The information and the database can be searched for errors, allowing
you to quickly find the problem.
284
Lotus Domino for AS/400 R5: Implementation
Note
When you configure your Domino server, by default, the Domino server uses
the same IP address as your AS/400 system. You can enter a different address
at the time you create the server by pressing F10 to display the TCP/IP
parameter.
If you want to create a partitioned server with a different IP address, you must
perform the following tasks:
1. Configure the second server with the CFGDOMSVR command. Make sure
you specify the correct TCP/IP address.
2. Select option 10 on the Configure TCP/IP (CFGTCP) menu to add a Host
table entry for this server.
3. Select option 1 on the Configure TCP/IP (CFGTCP) menu to add another
interface for the line that you are already using for the first server. However,
this time put in the address of the second server. Start the Interface using
option 9.
4. Start the second server.
If you now want both servers to be HTTP servers and for each to use port
80 on its respective IP address, you must perform the following additional
step.
5. Edit the Server documents and enter the Host name (or IP address) and
enable Bind to host name. This is in the Internet Protocol tab under the
HTTP sub-tab.
If you also use IBM HTTP Server for AS/400 as a Web server, you need to use
the BindSpecific On directive in the server configuration. The On value ensures
that the HTTP Server binds to the IP address specified in the HostName
directive only, instead of binding to all local IP addresses. See the HTTP
Server for AS/400 Webmaster’s Guide, GC41-5434, for more information on
configuring the HTTP server.
9.2 Domino server administration using a Web browser
Domino Web Administration allows the Domino administrator access to selected
functions of the Domino Administrator Client from a Web browser. This is very
useful for the administrator who is always on the move.
There are some functions that cannot be performed from a Web browser. The
following items are examples:
•
•
•
•
Move a database
Move a user
Trace network connections
Topology maps
From any client within the organization, the administrator can launch a Web
browser and access the server. There are many components of the server that
have been developed using Java Applets and JavaScript. Therefore, older
Lotus Domino and the Internet
285
browsers may not be usable for Web Administration. The following Release 5
Web templates work with JavaScript 1.1 compliant browsers:
• Netscape Navigator Release 3.x
• Netscape Communicator 4.x
• Microsoft Internet Explorer 4.x
Correct access must be given to administrators to allow the use of Web
administration. The following list shows required access control settings:
• Access to the Domino Web Administration database (Webadmin.nsf)
When the HTTP task is started for the first time the ACL is created using the
Administrators field of the Server document.
If you want to add a new Web administrator, the ACL must be edited and a
user added with Manager access, in addition to the following roles:
[ServerAdmin], [ServerMonitor], [DatabaseAdmin], [FileRead] and [FileModify]
• Web administration access settings in the Domino Directory (names.nsf)
Under the Security tab of the Server document, the access setting to allow
users to Administer the server from a browser can be set. Even if users are
granted manager access to the server and the Domino Web Administration
database, they cannot perform any Web administration tasks if their names
are not listed in this field.
Also, all agents that are used for Web administration are signed by Lotus
Notes Template Development/Lotus Notes. For agents to run successfully this
user need to be specified in the Run restricted LotusScript/Java agents field.
• Person document
To authenticate a Notes users on the Domino server, a Person document is
required in the Domino Directory. It is the same for Web browser. For the Web
browser to establish an authenticated session with the Domino Web server, a
Person document for the user is required. There is also an additional field in
the Person document for the user’s Internet password. Those people who are
Web users, and Web and Notes users, must have this field complete.
When a user requires both Notes and Web access, there is no synchronization
of the Notes and Web passwords.
If none of the configuration options used by the HTTP task is changed, when a
Domino server is displayed in a Web browser, the default Domino home page
is opened, as shown in Figure 215. This uses the Home URL setting in the
Server document.
286
Lotus Domino for AS/400 R5: Implementation
Figure 215. Default Domino home page
To open the Domino Web Administration database, append to the URL the
database name, for example:
http://acmeds1/webadmin.nsf
You are required to enter in a user name and password to access this database.
The user name must be a valid name that has been granted access to the
Domino Web Administration database and is in the Server document as an
authorized Web administrator. After the user is authenticated, the Domino Web
Administration database (Figure 216 on page 288) opens.
Lotus Domino and the Internet
287
Figure 216. Domino Web Administration page
Here are two example panels that show some of the functionality that is available
with a Web browser interface. Figure 217 shows the remote console and Figure
218 displays the message routing status.
Figure 217. Domino Web Administration — Remote Domino console
288
Lotus Domino for AS/400 R5: Implementation
Figure 218. Domino Web Administration — Message routing status
9.3 Clustering Domino Web servers
In Lotus Domino Release 5, there is an added service for clustering Domino Web
servers. The Internet Cluster Manager (ICM) allows for standard clustered
Domino servers to be clustered Web servers as well. This adds the benefit of
failover and workload balancing to Web browser clients when accessing Domino
Web servers. The requirement to run the ICM is a Domino Release 5 Enterprise
Server license.
The ICM supports the following Internet protocols:
• HTTP for standard communication
• HTTPS for secured communication
The ICM acts as an intermediary between HTTP clients and the Domino Web
servers in a cluster. Just as clustering in Domino checks all the servers in the
cluster for availability and workload, the ICM sends out probes to each of the Web
servers in the cluster. When a client requests information from the site, the ICM
uses the Cluster Directory database to determine which server is best able to
perform the request. The ICM redirects the client to the clustered server to
access the information.
9.3.1 ICM outside the cluster
We recommended you use this method when using an ICM. This allows you to
dedicate the server to running the ICM server. This method for configuring the
ICM increases the reliability of the server (a lower chance of interference from
other server tasks) and improves performance.
Lotus Domino and the Internet
289
Figure 219 shows an Web browser accessing an ICM outside the cluster. The
ICM redirects the request to any of the available clustered servers.
Web Browser
Client
ICM
Web Browser
Client
Key
ICM Server Polls
Client Request for data
Redirected Connection
Clustered Domino
Web Servers
Figure 219. Internet Cluster Manager — Outside the cluster
9.3.2 ICM inside the cluster
The ICM can also be configured on a server that is a member of the cluster. You
must be sure that the server running the ICM can also handle the additional
network traffic.
Figure 220 shows a Web browser accessing an ICM inside the cluster. The ICM
redirects the request to any of the available clustered servers including itself.
Web Browser
Client
ICM
Web Browser
Client
Key
ICM Server Polls
Client Request for data
Redirected Connection
Figure 220. Internet Cluster Manager — Inside the cluster
290
Lotus Domino for AS/400 R5: Implementation
Clustered Domino
Web Servers
9.3.3 Configuring the ICM
Configuration of the ICM is done by modifying the Internet Cluster Manager
section of the Server document. These configuration changes must be applied to
each server in the cluster so that URL’s are generated correctly.
An option is available to use the configuration stored in the ICM’s Server
document for any additional ICM servers, allowing you to store and maintain the
configuration from one location. This does not apply to the clustered Domino
servers. The setting must be set correctly for each server.
To configuration the ICM server, follow these steps:
1. Open in edit mode the Server document of the server that is to be the ICM.
2. Click Server Tasks
—> Internet Cluster Manager tab.
A detailed description of the ICM configuration options is listed in Table 23.
Table 23. ICM configuration options
Field name
Description
Cluster name
The name of the cluster the ICM services. If this field is blank, Domino
uses the name of the cluster that contains this server.
ICM Notes port
The name of the Notes port the ICM uses to communicate with Web
browser clients. If you leave this field blank, the ICM can use any
TCP/IP Notes port to communicate with Web browser clients. By
entering a port name, the ICM only uses that port.
Browse
databases in the
cluster
Lets HTTP clients view a list of the databases in a cluster. The URL
www.acme.com/?OpenServer displays a list of databases on the
clustered servers.
Get configuration
from
Lets you specify a different Server document to get configuration
information from. This field lets the clustered servers or other ICMs
share the configuration.
Obtain ICM
configuration from
The Get configuration from field is set to another Server document .
Enter the name of the server whose Server document contains the
configuration you want to use.
ICM host name
The Get configuration from field is set to this Server document
The fully qualified name of the host that clients should use to
communicate with the ICM. This can be the registered DNS name or
the IP address. For example: www.acme.com
The Domino Web server uses this field to create URLs that reference
the ICM. If this field is blank, the Web server cannot generate URLs
that refer to the ICM.
3. An example of the ICM configuration is shown in Figure 221 on page 292.
Lotus Domino and the Internet
291
Figure 221. Internet Cluster Manager Configuration
4. To save your changes, click Save and Close in the action bar of the Server
document.
9.4 Additional Domino Web services
In this section, some of the additional Web services for Domino are described.
These services are not specific to Domino for the AS/400 system and are not
explained here in great detail. For a more detailed description of the Domino Web
services, refer to the Domino Administration Help (help\help5_admin.nsf)
database.
9.4.1 Creating a virtual Web server
The creation of virtual servers is very useful for Internet Service Providers (ISPs).
It allows you to have multiple Web sites on a single Domino server. By creating
multiple Web sites on a single Domino server, there is a lower cost for hardware
and software.
Each virtual Web server can be configured with individual home pages, file
directories and error messages. The virtual server requires a unique IP address.
This allows the browser client to access your Web server. The Domino data
directory is shared by all the virtual servers defined on the system. It is
recommended to create sub-directories for each virtual server to ensure that
there is no confusion.
There is no restriction on the number of servers that can be set up on the Domino
server. The restrictions are based on the hardware and operating system being
used. Check your hardware and operating system documentation for more
information.
To configure a virtual server, use a Virtual Server document in the Domino
Directory. The virtual server is created as a result of this document.
292
Lotus Domino for AS/400 R5: Implementation
To set up a virtual server, follow these steps:
1. From the Domino Administrator, click the Configuration tab.
2. In the tasks pane, expand the Server option and click All Server Documents.
3. In the results pane, select the server that will host the new Virtual Web server.
4. From the action buttons, click Web
—> Create Virtual Server.
5. From the list, select Virtual Server. Complete all the details for the new virtual
server.
6. From the Domino server console, restart your HTTP task to enable the
changes. Type tell http restart and press Enter.
9.4.2 Creating a Web server alias
This is very similar to a virtual Web server. An alias maps multiple DNS names to
a single IP address. This allows users to enter different URLs to access a Web
site. A practical example is if a company changes its name. An alias is also
known as a virtual host.
To configure a Web server alias, use a Virtual Host document in the Domino
Directory. The virtual host is created as a result of this document.
To set up a virtual host, follow these steps:
1. From the Domino Administrator, click the Configuration tab.
2. In the tasks pane, expand the Server option and click All Server Documents.
3. In the results pane, select the server that will host the new virtual host and
open the Server document.
4. From the action buttons, click Web
—> Create Virtual Server.
5. From the list, select Virtual Host. Complete all the details for the new virtual
server.
6. From the Domino server console, restart your HTTP task to enable the
changes. Type tell http restart and press Enter.
9.4.3 Creating URL mappings
URL mappings allow you to control URL and directory mapping. There are three
types of mapping. These mappings are described in the following list:
• URL to directory: Controls the mapping of a URL to a directory. It allows the
administrator to move files or rename directories on the server, but the URL
used remains the same. The directory mapping is hidden from the users.
• URL to URL: Can be used to map URLs from other servers or to create alias
mappings for very long URLs. The URL mapping is hidden from users. This
allows you to change the server, although the users bookmarks can remain
the same.
• URL redirect to URL: Very similar to the URL to URL mapping. The only
difference is the redirected URL is displayed in the Web browser.
To configure a URL mapping, use a URL Mapping/Redirection document in the
Domino Directory. The URL Mapping/Redirection is created as a result of a
change in this document.
Lotus Domino and the Internet
293
To redirect or remap a URL or directory, follow these steps:
1. From the Domino Administrator, click the Configuration tab.
2. In the tasks pane, expand the Server option and click All Server Documents.
3. In the results pane, select the server that will use the new URL
Mapping/Redirection document.
4. From the action buttons, click Web
—> Create URL Mapping/Redirection.
5. On the Basics tab, select the type of mapping to use. Complete all the details
for the new URL Mapping / Redirection.
6. From the Domino server console, restart your HTTP task to enable the
changes. Type tell http restart and press Enter.
294
Lotus Domino for AS/400 R5: Implementation
Chapter 10. Backup and recovery
The Domino server often contains important business information that may not
exist elsewhere in your organization. For example, your users may rely on e-mail
for important communications that are not documented anywhere else. Similarly,
an online customer service application may contain records that do not exist in
hard copy.
To protect the data from disasters (such as a site loss or hardware loss) and from
human error, such as accidentally deleting a critical database, develop a good
strategy for regularly backing up the information on your Domino server. Make a
plan to back up the following items:
• Objects that change infrequently, such as programs and configuration data for
the Domino for AS/400 software product
• Objects that change regularly, such as your Domino databases
Domino for AS/400 takes advantage of the AS/400 single-level storage
architecture. Domino databases and programs are spread across all the AS/400
disk units, along with other AS/400 objects. OS/400 automatically manages the
allocation of disk space so that you do not have to decide which databases to
store on a particular disk drive.
To back up information on the AS/400 system, you back up logically (by library or
directory), not physically (by disk unit). To plan a backup strategy, you must
understand the logical location of your Domino for AS/400 databases and
programs.
Note: For more information about planning an entire backup strategy including
other applications for your AS/400 system, see OS/400 Backup and Recovery,
SC41-5304. It comes with your OS/400 software and is also available in the
softcopy library and on the Web.
10.1 What is the integrated file system?
Domino for AS/400 stores all Notes databases as stream files in a directory
structure within the integrated file system (IFS). The IFS is a part of OS/400 that
supports stream input/output and storage management similar to personal
computer and UNIX operating systems, while providing an integrated structure
over all information stored in the AS/400 system.
The following items are the primary features of the integrated file system:
• Support for storing, in stream files, information that can contain long
continuous strings of data. For example, these strings of data may be the text
of a document or the picture elements in a picture. The stream file support is
designed for efficient use in client/server applications.
• A hierarchical directory structure that allows objects to be organized like fruit
on the branches of a tree. An object is accessed by specifying the path
through the directories to locate the object.
• A common interface that allows users and applications to access not only the
stream files, but also database files, documents, and other objects stored in
the AS/400 system.
© Copyright IBM Corp. 1999, 2001
295
10.2 Backing up Domino for AS/400 objects
When considering saving and restoring for a Domino for AS/400 server, you need
to distinguish the following two different areas of information:
• Programs and configuration data enabling the server to function properly
• Notes databases containing the actual user data
While it is easy to understand that the user data needs saving frequently, the
need to have recent backup copies of the product data is sometimes overlooked.
Even though programs and configuration data change very infrequently, it is still
possible that administrators make mistakes or that software failures corrupt
information.
Even though a total loss of the entire disk storage is very unlikely, it can still
happen due to external disasters (fire, flood, and so forth). While AS/400 disk
units can be highly protected against loss of data through hardware failures by
using RAID-5 or mirroring, there is no 100% guarantee that even multiple disk
units may not fail at the same time, a very unlikely, but not totally impossible,
case.
The most likely and common cause of data loss, however, is still user errors.
10.2.1 AS/400 libraries and IFS directories for Domino for AS/400
AS/400 libraries contain the following items:
• Programs for the Domino for AS/400 server product
• Programs your Domino developers can copy to their workstations
• Customization information, such as subsystem descriptions
Table 24 shows the Domino libraries.
Table 24. AS/400 libraries associated with Domino for AS/400
AS/400 Library
Content
QNOTES
Domino for AS/400 product
QNOTESINT
Directory synchronization
QNOTESAPI
C APIs
QNOTESCPP
C++ APIs
QNOTESHTST
HiTest APIs
QNOTESLSKT
LotusScript extensions
QUSRNOTES
Customization information (such as subsystem descriptions)
Directories in the AS/400 integrated file system contain product information,
customization files, and databases. Table 25 shows the Domino directories.
296
Lotus Domino for AS/400 R5: Implementation
Table 25. IFS paths associated with Domino for AS/400
IFS Path
Content
/QIBM/ProdData/Lotus/Notes
Product information
/QIBM/UserData/Lotus/Notes
Customization information
Specified when you set up the server (for
example, /LOTUS/DOMINO/SERVERNAME).
Directory for databases on the server
10.2.2 Saving the entire AS/400 system
After you install the Domino for AS/400 software product, including its optional
features, you should save a copy of the product. You should also save a copy of
the product periodically, for example, when you update to a new release or apply
fixes. The two options in this section are available for backing up the libraries and
directories that contain the relatively static information for your Domino for
AS/400 server. If your AS/400 system is already running other applications, you
probably already use one of these options.
Note: The procedure described in this section requires that all AS/400
applications, including all Domino servers, must be ended. To avoid corrupted
Notes databases, you should end all Domino servers in a controlled manner
before saving the system. To do this, on an AS/400 command line, type:
ENDDOMSVR SERVER(Myserver) OPTION(*CTLD)
Press Enter. Repeat this for each server that is currently active. The advantage of
using this command is that it can also be coded as part of a CL program that ends
the server automatically without operator intervention. See also the example in
Figure 222 on page 298.
A convenient way to end all Lotus Domino for AS/400 servers manually is with the
Work with Domino Servers (WRKDOMSVR) command, which was introduced
with Release 4.6.2 of the product.
Attention
Do not restart the Domino server until the full backup of your AS/400 system is
complete.
Before you continue saving the entire AS/400 system, you should make sure no
jobs related to Lotus Domino for AS/400 are active. An easy way to verify this is
to use the Work with User Jobs (WRKUSRJOB) command. On any AS/400
command line, type WRKUSRJOB USER(QNOTES) STATUS(*ACTIVE) and press Enter. You
see all active jobs running under the QNOTES user profile. Press F5 repeatedly
until no jobs are shown.
To back up your entire AS/400 system, including your Domino programs, product
files, and databases, you can use the SAVE menu, by performing the following
steps:
1. Type GO SAVE on any AS/400 command line and press Enter.
2. Press Page Down (PgDn) to see the second page of the menu.
3. Select option 21 (Save the entire system).
Backup and recovery
297
4. If your job is not running under the controlling subsystem, you receive an
information message that tells you to transfer your job.
SAVE
Save
System: ASM01
Select one of the following:
Save System and User Data
20. Define save system and user data defaults
21. Entire system
22. System data only
23. All user data
Save Document Library Objects
30. All documents, folders, and mail
31. New and changed documents, new folders, all mail
32. Documents and folders
33. Mail only
34. Calendars
Selection or command
More...
===> ____________________________________________________________________________
_________________________________________________________________________________
F3=Exit
F4=Prompt
F9=Retrieve
F12=Cancel
F13=Information Assistant
F16=AS/400 Main Menu
Figure 222. Save menu on the AS/400 system
To back up only product libraries and directories that contain information for
AS/400 licensed programs, including Domino for AS/400, perform the following
steps:
1. Type GO SAVE on any AS/400 command line and press Enter.
2. Press Page Down (PgDn) to see the second page of the menu.
3. Select option 22 (Save system data only).
Option 22 of the SAVE menu includes saving all QNOTESxx libraries, as well as
the /QIBM/ProdData/Lotus/Notes directory.
10.2.3 Saving Domino databases
Develop a plan to back up all Domino databases, including users’ mail databases
and system databases, such as the Domino Directory.
When you configure a Domino server, you specify the data directory for that
server, such as /LOTUS/DOMINO/SERVERNAME. By default, all the databases
for the server are in that path. Your Domino administrators may have the authority
to place a Domino database in another path (by using an integrated file system
command). Typically, users cannot create Domino databases in any location
except the default path for the server.
If you are responsible for backing up a Domino for AS/400 server, you should
develop a backup strategy that matches your policy for where information is
stored.
298
Lotus Domino for AS/400 R5: Implementation
10.2.3.1 Saving a specified location of Domino databases
Use a combination of policies and security to keep all Domino databases within
the default directory (path) for the Domino server. With this approach, you only
back up the data directory and the directory that contains customization
information (/QIBM/UserData/Lotus/Notes).
The following procedure is an example of the steps to back up the data directory
for your Domino for AS/400 server and the directory with customization
information. Substitute the name of your tape device for tap01 and the name of
your Domino server data directory for /lotus/domino/servername.
1. Start an AS/400 session with a user profile that has *JOBCTL and *SAVSYS
special authorities.
2. To ensure that you get a complete copy of your server, you must stop the
server before you start the backup operation. On any AS/400 command line,
type ENDDOMSVR SERVER( servername), where servername is the actual name of
your Domino server. Press Enter.
Attention
Do not restart the Domino server until the save is complete.
3. If you are using directory synchronization, stop the directory synchronization
jobs. On any AS/400 command line, type:
call qnotesint/qnndiend
Press Enter.
4. To back up the directories, use the Save Object (SAV) command. Substitute
your directory name for /lotus/domino/servername. Type the following
command on any AS/400 command line and press Enter:
SAV DEV('/qsys.lib/tap01.devd') OBJ(('/lotus/domino/servername/*')
('/QIBM/UserData/Lotus/Notes/*'))
Note: If you already use option 21 or option 23 from the SAVE menu regularly,
you do not need to back up your Domino server separately.
Tip
Notice that this is not the same as the Save Objects (SAVOBJ) command.
SAVOBJ can only be used to save OS/400 library objects that are in the
QSYS.LIB file system. When using the SAV command, you may have to use
F9 to see all of the additional parameters you want to use.
5. If you are using directory synchronization, back up the AS/400 system
distribution directory files (so they are at the same level on your backup tapes
as the Domino Directory). Type the following command on any AS/400
command line and press Enter.
SAVOBJ OBJ(qaok*) LIB(qusrsys) OBJTYPE(*file) DEV(tap01)
6. If you are using directory synchronization, restart the directory synchronization
job after your backup procedure is complete. On an AS/400 command line,
type:
call qnotesint/qnndistj
Backup and recovery
299
Press Enter.
10.2.3.2 Saving all stream file directories
With this approach, you assume that Domino databases may exist anywhere in
the integrated file system (in either the root directory or the /QOpenSys
directory). Therefore, you must back up the entire root directory and /QOpenSys
directory. Use any of the following methods:
• Save your entire system (option 21 from the Save menu).
• Save all user data (option 23 from the Save menu).
• Use the Save Object (SAV) command to back up everything except the
QSYS.LIB and QDLS file systems, and directories that contain static program
product information. Substitute your tape device name for tap01 . Type the
following command on any AS/400 command line and press Enter.
SAV DEV('/QSYS.LIB/TAP01.DEVD') OBJ(('/*')
('QSYS.LIB' *OMIT) ('/QDLS.LIB' *OMIT)
('/QIBM/PRODDATA' *OMIT)
('QOPENSYS/QIBM/PRODDATA' *OMIT)) UPDHIST(*YES)
When you use option 21 or 23 from the Save menu, the system automatically
stops all activity (goes to a restricted state). When you use commands
(instead of the Save menu) to back up your server information, you must stop
the server before you back up. This ensures that the databases are in a known
state for the backup operation. You can use the End Domino Server
(ENDDOMSVR) command to stop the server. If you use directory
synchronization, you should also stop the directory synchronization job before
you back up using commands. See the instructions in the previous section.
10.2.3.3 Saving only Domino mail databases
This section describes specifically how to back up mail from your Domino for
AS/400 server. If you already have a strategy for backing up all the user
information from your Domino server, you probably do not need a separate
procedure for backing up only mail. However, you may discover that your backup
interval for your entire server is not frequent enough for e-mail because mail is so
volatile.
Your Domino server stores mail in the following databases:
• The MAIL.BOX database on each server contains mail for the server to route
to individual user mailboxes or to another server.
• Each Lotus Notes user has an individual mail database. The name of the mail
database is typically the user ID with the .NSF extension. (The Domino
administrator has the option to use different names for mail databases.) For
example, the mail database for user GNELSON is GNELSON.NSF. Typically,
all the individual mail databases are in a dedicated subdirectory, such as
/LOTUS/DOMINO/SERVERNAME/MAIL.
To back up mail, follow these steps:
1. Start an AS/400 session with a user profile that has *JOBCTL and *SAVSYS
special authorities.
2. On any AS/400 command line, type:
ENDDOMSVR SERVER(servername)
300
Lotus Domino for AS/400 R5: Implementation
Here servername is the actual name of your Domino server. Press Enter to
stop the Domino server.
Note: To back up a database, the AS/400 system must be able to lock the
database so that no changes occur during the backup operation. To
successfully back up Notes mail, you must stop the Domino for AS/400 server
that contains the mail databases.
Attention
Do not restart the Domino server until the save is complete.
3. Mount the appropriate backup tape in the tape device.
4. Use the Save Object (SAV) command to back up the mail databases.
Substitute your server directory name for /lotus/domino/servername.
Substitute your tape device name for tap01 . Type the following command on
any AS/400 command line and press Enter:
SAV DEV('/qsys.lib/tap01.devd')
OBJ('/lotus/domino/servername/mail/*.nsf')
Examples of backing up mail from your Domino server
This section contains examples of using the Save Object (SAV) command to back
up mail from your Domino server. Substitute your server directory name for
/lotus/domino/servername. Substitute your tape device name for tap01.
• To back up a specific database, such as the MAIL.BOX database, use the
following command:
SAV DEV('/qsys.lib/tap01.devd')
OBJ('/lotus/domino/servername/mail/mail.box')
• To back up all the files of a specific type in the MAIL subdirectory, use the
following command:
SAV DEV('/qsys.lib/tap01.devd')
OBJ('/lotus/domino/servername/mail/*.nsf')
• To back up a specific user’s mail database, such as GNELSON’s mail
database, use the following command:
SAV DEV('/qsys.lib/tap01.devd')
OBJ('/lotus/domino/servername/mail/gnelson.nsf')
10.2.3.4 Saving specific databases
You may want to back up a specific Domino database to tape for the following
reasons:
• To create a backup copy before you make programming changes or test a new
agent
• To create an archive copy at the end of an accounting period
To back up a specific database or group of databases from your Domino for
AS/400 server, follow these steps:
1. Start an AS/400 session with a user profile that has *JOBCTL and *SAVSYS
special authorities.
2. Ensure that no one is using the database. You want a copy at a known point
when no changes are occurring to the database.
Backup and recovery
301
3. Mount a tape for the backup operation.
4. Use the Save Object (SAV) command for the database. For example, to back
up a database called CUSTINF.NSF in the /lotus/domino/servername
directory, use the following command. Substitute your tape device name for
tap01.
SAV DEV('/qsys.lib/tap01.devd')
OBJ('/lotus/domino/servername/custinf.nsf')
10.2.4 Incremental backup
AS/400 provides the capability to back up only objects that have changed since a
specific date and time or since the last backup operation. This type of backup
capability is sometimes called an incremental backup. You may find a
combination of a complete backup and an incremental backup particularly useful
if your Domino server has many databases that do not change very often.
10.2.4.1 Strategies for incremental backup
This section describes the two most common strategies for incremental backups.
Backing up changes since the last full backup
With this strategy, you back up everything that has changed since you last
backed up all the databases from your Domino server. For example, assume that
you back up your entire server on Saturday night. On Sunday night, you would
back up everything that has changed since Saturday night. On Monday night, you
would back up everything that has changed since Saturday night. On Tuesday
night, you would back up everything that has changed since Saturday night. And
so on.
The advantage of this strategy is that it makes recovery simple. When you need
to recover, you only need your tapes from your full backup and your tapes from
your most recent incremental backup. The disadvantage to this strategy is that
your backups grow larger (both in media usage and duration) each day until your
next complete backup.
Backing up changes since the last incremental backup
With this strategy, you back up only objects that have changed since the most
recent backup. For example, assume that you back up your entire server on
Saturday night. On Sunday night, you would back up everything that has changed
since Saturday night. On Monday night, you back up everything that has changed
since Sunday night. On Tuesday night, you back up everything that has changed
since Monday night. And so on.
The advantage to this strategy is that the size of your incremental backup is
smaller (both in media usage and duration). The disadvantage is that recovery is
more complex. When you need to recover, you must use your tapes from your full
backup and your tapes from each incremental backup.
10.2.4.2 Backing up changed objects from the server
This section provides examples for backing up changed objects from your
Domino server. Substitute your server directory name for
/lotus/domino/servername. Substitute your tape device name for tap01.
302
Lotus Domino for AS/400 R5: Implementation
Backing up changes since the last full backup
To perform a nightly incremental backup of all changes that have occurred since
that last full backup, follow these steps:
1. On Saturday evening, perform a complete backup (for example, by using
option 23 from the Save menu). Make sure that you specify UPDHST(*YES) on
the SAV command so that the system updates the object information with the
time and day of the most recent backup.
2. On Sunday evening, use the following command:
SAV DEV('/qsys.lib/tap01.devd') OBJ('/lotus/domino/servername/*’)
CHGPERIOD(*lastsave) updhst(*yes)
3. On Monday evening, use the following command:
SAV DEV('/qsys.lib/tap01.devd') OBJ('/lotus/domino/servername/*’)
CHGPERIOD(*lastsave) updhst(*yes)
Continue using the same command every night until your next full backup.
Backing up changes since the last incremental backup
To perform a nightly incremental backup of what has changed since the previous
incremental backup, you must adjust the CHGPERIOD parameter each night.
The following steps are an example:
1. On Saturday evening at 8 PM, perform a complete backup (for example, by
selecting option 23 from the Save menu). Make sure that you specify
UPDHST(*YES) on the SAV command so that the system updates the object
information with the time and day of the most recent backup.
2. On Sunday evening, May 9 at 10 PM, use the following command:
SAV DEV('/qsys.lib/tap01.devd') OBJ('/lotus/domino/servername/*’)
CHGPERIOD('05/08/99' 200000) updhst(*yes)
3. On Monday evening, May 9 at 9 PM, use the following command:
SAV DEV('/qsys.lib/tap01.devd') OBJ('/lotus/domino/servername/*’)
CHGPERIOD('05/09/99' 220000) updhst(*yes)
4. On Tuesday evening, May 9 at 8 PM, use the following command:
SAV DEV('/qsys.lib/tap01.devd') OBJ('/lotus/domino/servername/*’)
CHGPERIOD('05/10/99' 210000) updhst(*yes)
5. Each evening, run the SAV command. Alter the Change Period parameter to
the time and date of the previous backup.
10.2.5 Reducing the downtime of your servers
To reduce the downtime of your servers during backups, you can use one of the
following methods:
• Use clustered servers: The AS/400 system can support clustered servers on
the same system. Therefore, you can bring down one of the servers, while
another server takes over serving the clients. Then, save the first server
databases. If all databases are being clustered, you only need to save
databases from one server. More information about clustering can be found in
6.2, “Clustering Domino servers” on page 172, and in Domino Systems
Administration documentation.
• Use a backup server: This is how IBM Rochester has implemented backup.
In our case, we set up a Domino partitioned server on each AS/400 system
Backup and recovery
303
specifically for backup. Twice a day, all user data is replicated to this backup
partition from the live Domino server partitions on the AS/400 system. Nightly,
we bring down this specific partition and back it up using Backup and
Recovery Media Services for OS/400 (BRMS), 5769-BR1. The administration
team are the only users who have access to these backup servers. Unlike the
clustering approach, this does not provide failover. However, this provides
online hot backup, which is accessible on demand, if needed. We also
maintain up to thirty days of backup on offline media.
• Use Save files: If you have sufficient storage space on disk, you can save the
contents of your IFS directories to a save file. This can be much faster than
saving directly to tape. After saving to the save file, you can start the server
again and the actual save-to-tape process can be started now or even at a
later time.
To create a save file, you use the Create Save File (CRTSAVF) command.
Assume you want to create a save file called DOMINOSAVF in library
NIGHTSAVES. You would use the following command:
CRTSAVF SAVF(NIGHTSAVES/DOMINOSAVF) TEXT('Domino Backup')
Then, you would save all Domino databases in directory /Notes/AcmeDS1
using the following command:
SAV DEV('/QSYS.lib/NIGHTSAVES.lib/DOMINOSAVF.file')
OBJ(('/Notes/AcmeDS1/*')) CLEAR(*ALL) DTACPR(*YES)
Note: To specify the name and library for the save file, a different syntax has
to be used for the SAV command from the CRTSAVF command (and all other
commands dealing with save files). The reason is that the Save Object (SAV)
command uses IFS object naming conventions.
The CLEAR(*ALL) parameter ensures that the current content of the Save file is
overwritten. This means that you can use the same Save file every night.
The DTACPR(*YES) parameter specifies that data compression should be used.
This needs more processor resources and may take more time, but the
amount of disk storage needed is much less.
10.2.6 Avoiding object locks when saving Notes databases
To back up a database, the AS/400 system must be able to lock the database so
that no changes occur during the backup operation. To successfully back up
Notes mail, do one of the following before you use the Save Object (SAV)
command:
• Stop activity on the database file by using the Domino console drop all and
dbcache flush commands. However, with this method, any attempted mail
delivery during the backup operation results in the mail being returned to the
user with a message that the server is busy or in use.
This method works best for individual saves of databases. If someone
reconnects and opens the database before the save is started, your backup
fails and a message is sent, indicating that the file is in use.
• Stop the Domino for AS/400 server that contains the mail databases. Use the
End Domino Server (ENDDOMSVR) command to stop the server.
You can automate the process by writing a CL program that uses the QWDRSBSD
API to check (in a loop) when there are no active jobs in the Domino subsystem,
before you start the SAV command. Information about the API is in OS/400 Work
304
Lotus Domino for AS/400 R5: Implementation
Management APIs, SC41-5878. The following example show a sample program
using the QWDRSBSD API.
0001.00
0002.00
0003.00
0004.00
0005.00
0006.00
0007.00
0008.00
0009.00
0010.00
0011.00
0012.00
0013.00
0014.00
0015.00
0016.00
0017.00
0018.00
0019.00
0020.00
0021.00
0022.00
0023.00
0024.00
0025.00
0026.00
0027.00
0028.00
0029.00
0030.00
0031.00
0032.00
0033.00
0034.00
0035.00
0036.00
0037.00
0038.00
0039.00
0040.00
0041.00
0042.00
0043.00
0044.00
0045.00
0046.00
0047.00
0048.00
0049.00
0050.00
0051.00
0052.00
0053.00
/*
/*
/*
/*
/*
/*
/*
/*
/*
PGM
DCL
DCL
DCL
DCL
DCL
DCL
DCL
DCL
DCL
DCL
DCL
DCL
DCL
CL Pgm SAVDOMSVR
*/
*/
End a Domino Server, wait till all tasks ended, save the Data Directory, */
and start the server again.
*/
*/
See System API Reference System API Reference OS/400 Work Management APIs*/
SC41-5878 for a description of the QWDRSBSD API.
*/
*/
Wilfried Blankertz 07/27/1999 */
&DOMSVR
&SBSNAM
&SBSLIB
&SAVF
&DOMDTADIR
&SBSD
&RCVVAR
&RCVLENBIN
&CurActJob
&HexZero
&FMTNAM
&ERRCDE
&Count
*CHAR LEN(10) VALUE('ACMEDS1
')
*CHAR LEN(10) VALUE('ACMEDS1
')
*CHAR LEN(10) VALUE('QUSRNOTES ')
*CHAR LEN(256) VALUE('/QSYS.LIB/WBL.LIB/DOMSAVF.FILE')
*CHAR LEN(256) VALUE('LOTUS/DOMINO/ACMEDS1/*')
*CHAR LEN(20)
*CHAR LEN(256)
*CHAR LEN(4) VALUE(X'00000100')
*CHAR LEN(4)
/* Number of currently active jobs
*CHAR LEN(4) VALUE(X'00000000') /* Hex zero
*CHAR LEN(8) VALUE('SBSI0100')
*CHAR LEN(4) VALUE(X'00000000') /* Return errors as excp.msgs
*DEC (3 0)
0
/* Number of loops
*/
*/
*/
*/
CHGJOB LOGCLPGM(*YES)
SBMDOMCMD CMD('Broadcast "Server' *BCAT &DOMSVR *BCAT 'will end in 10 Minutes +
for backup"') SERVER(&DOMSVR)
DLYJOB DLY(600)
ENDDOMSVR &DOMSVR *CNTRLD
CHGVAR &SBSD (&SBSNAM *CAT &SBSLIB)
Loop:
CALL QWDRSBSD PARM(&RCVVAR &RCVLENBIN &FMTNAM &SBSD &ERRCDE)
CHGVAR &CurActJob %SST(&RCVVAR 73 4)
IF (&CurActJob = &HexZero) Goto Save
/* No more active jobs in SBS
IF (&Count > 40)
Goto EndImmed /* Already 20 minutes - give up
/* and force the server to end
CHGVAR &Count (&Count +1)
DLYJOB
DLY(30)
/* Wait 1/2 minute
GOTO Loop
EndImmed:
/* We waited 20 minutes to end controlled
ENDDOMSVR &DOMSVR *IMMED
/* and bring down the server the hard way
SNDMSG
MSG('Domino Server did not end controlled after 20 minutes ->
Ended with *Immed now.') TOUSR(*SYSOPR)
DLYJOB
DLY(60)
/* Wait 1 minute
*/
*/
*/
*/
*/
*/
+
*/
Save:
SAV
DEV(&SAVF) OBJ((&DOMDTADIR)) +
OUTPUT(*PRINT) INFTYPE(*ERR) CLEAR(*ALL) DTACPR(*YES)
STRDOMSVR &DOMSVR
DSPJOBLOG OUTPUT(*PRINT)
ENDPGM
If you are running directory synchronization you may see a job running in
QSYSWRK called QNNDILCK. This job must be ended before you back up your
system. R5.0.1 has been modified so that when you start directory
synchronization by saving an enabled configuration, QNNDILCK becomes active
for up to five minutes, and then ends automatically. If you are running an earlier
release, you can end the job by using the following AS/400 command:
CALL QNOTESINT/QNNDIEND *ALL
See 11.3.1, “Directory synchronization configuration tips” on page 319, for more
information on this job.
Backup and recovery
305
Attention
With R4.6.2 and R4.6.3 servers it is very important not to end the Domino
subsystem using the End Subsystem (ENDSBS) as part of your backup
procedure. It may cause the server to restart immediately after the End Domino
Server (ENDDOMSVR) command has been run. In this case you must check
that all jobs have in fact ended before performing the backup and so you must
build in an appropriate delay into the ENDDOMSVR. Refer to the Web version
of Lotus Domino for AS/400: Installation, Customization and Administration ,
SG24-5181, for an example. The example contains a line using the DLCOBJ
command. This line is incorrect and should be ignored. The problem with the
ENDSBS command has been corrected with R4.6.4 and R5.0.
10.3 Restoring Domino for AS/400 objects
Domino for AS/400 programs and product files reside in libraries in the QSYS.LIB
file system on your AS/400 system. Domino databases reside in the integrated
file system in a directory path that you specify when you configure your server.
Your backup strategy for Domino for AS/400 should include backing up both the
libraries (infrequently) and the database directories (frequently).
You may need to recover Domino for a variety of reasons, for example:
• User or operator error, such as deleting a database or running a month-end
procedure twice
• Damage to your server, such as fire or flood
• Hardware problems, such as a disk failure
Note: The AS/400 system provides disk protection options (mirrored protection
and device parity protection) to increase availability and to ensure that failures of
a single disk unit do not cause loss of data. You can find out more about disk
protection in OS/400 Backup and Recovery, SC41-5304.
Sometimes, you must recover your entire server. Other times, you must restore a
specific directory or a single database. The following topics provide general
information about recovery steps for Domino for AS/400:
•
•
•
•
Restoring
Restoring
Restoring
Restoring
an entire Domino server
Domino mail
Domino databases
changed objects to a Domino server
For complete procedures and considerations, see OS/400 Backup and Recovery,
SC41-5304, and the Domino documentation.
10.3.1 Restoring the entire Domino for AS/400 server
If you are faced with a system disaster, such as a site loss or the failure of an
unprotected disk unit, you must restore your entire AS/400 system from a backup.
Because the AS/400 system is a highly integrated system, you must recover
objects in the correct sequence to rebuild the proper links between objects.
OS/400 Backup and Recovery, SC41-5304, provides complete instructions for
performing a full system recovery.
306
Lotus Domino for AS/400 R5: Implementation
If you are faced with a problem that requires recovering only your Domino for
AS/400 server, not your entire AS/400 system, you can use the Restore Object
(RST) command to reload your Domino directories from tape. The following steps
show an example:
1. Sign on your AS/400 system using a user profile that has *SAVSYS and
*JOBCTL special authority.
2. To make sure that none is using the server that you plan to recover, stop the
server. Use the End Domino Server ( ENDDOMSVR) command.
3. If you use directory synchronization, stop the directory synchronization
function, type call qnotesint/qnndiend on any AS/400 command line and press
Enter.
4. Mount the tape that has the most recent backup copy of the directories for the
server.
5. Use the appropriate restore (RST) command for your Domino directory. For
example, if your Domino data directory is /lotus/domino/servername and your
tape device is tap01, use the following command:
RST DEV('qsys.lib/tap01.devd') OBJ('/lotus/domino/servername/*')
6. If you use directory synchronization, you should also restore the AS/400
system distribution directory from a backup created at the same time that your
Domino Directory was saved.
This process restores the physical contents of the data directory for your server
to your AS/400 disk storage. Consult the Domino documentation for any special
recovery activities that you may need to perform after you have restored the
directories.
10.3.2 Restoring the AS/400 system distribution directory
If you use directory synchronization between your Domino Directory and your
AS/400 system distribution directory, special considerations apply during
recovery. If possible, you should restore both the Domino Directory and the
AS/400 system distribution directory from backup tapes that were created at the
same time. If you cannot recover them both from a matching backup, you must
use the populate capability of directory synchronization to ensure that they
match.
To restore the AS/400 system distribution directory, follow these steps:
1. Stop the directory synchronization function, using the following command:
call qnotesint/qnndiend
2. Use the following restore command:
RSTOBJ OBJ(qaok*) SAVLIB(qusrsys) OBJTYPE(*file) DEV(tap01)
3. When your recovery is complete, use the following command to restart
directory synchronization:
call qnotesint/qnndistj
For more information on directory synchronization, see 11.1, “What is directory
synchronization” on page 313.
Backup and recovery
307
10.3.3 Restoring Domino mail
If you must reload one or more mail databases from your backup tapes, use the
Restore Object (RST) command. The following procedure is an example of the
steps to follow:
1. Start an AS/400 session with a user profile that has *SAVSYS and *JOBCTL
special authorities.
2. Stop the server that contains the mail databases that you want to recover. For
example, use the End Domino Server (ENDDOMSVR) command.
3. Mount the tape that has the most recent backup of the mail databases.
4. Use the appropriate Restore Object (RST) command for the mail databases
that you want to recover. For example, to restore all the databases to the MAIL
subdirectory from device TAP01, use the following command.
RST DEV('/qsys.lib/tap01.devd') OBJ('/lotus/domino/servername/mail/*')
Examples
The name of a user’s mail database is usually the user ID (short name) with the
.NSF extension. The Domino administrator has the option to use different names
for mail database files.
• To recover a specific user’s mail database, such as the mail database for user
GNELSON, use the RST command and specify the database name:
RST DEV('/qsys.lib/tap01.devd')
OBJ('/lotus/domino/servername/mail/gnelson.nsf')
• You can specify more than one file on the RST command. To restore mail
databases for GNELSON, LSMITH, and JPETERS, use the following
command:
RST DEV('/qsys.lib/tap01.devd')
OBJ(('/lotus/domino/servername/mail/gnelson.nsf')
('/lotus/domino/servername/mail/lsmith.nsf')
('/lotus/domino/servername/mail/jpeters.nsf'))
Notes about the examples
• In this example, we do not end the server. However, you cannot restore a
database that is in use by a Notes user. All users must close the database
before you can restore a backup copy.
• All of the examples assume that the directory for your Domino server is
/lotus/domino/servername.
• Substitute the name of your AS/400 tape device for tap01.
10.3.4 Restoring Domino databases
You may need to recover a specific Domino database or a group of databases.
Use the Restore Object (RST) command. Following is an example of the steps for
recovering all the files to the HRDPT subdirectory:
1. Sign on your AS/400 system using a user profile that has *SAVSYS and
*JOBCTL special authorities.
2. Stop the server that contains the databases that you want to recover. Use the
End Domino Server ( ENDDOMSVR) command. You can restore a database when
308
Lotus Domino for AS/400 R5: Implementation
the server is running. However, you must make sure that no one is using the
database. Stopping the server is the best way to ensure that no one is using
the database.
3. Mount the tape that has the most recent backup of the databases.
4. Use the appropriate Restore Object (RST) command for the mail files that you
want to recover. For example, to recover all the files to the HRDPT
subdirectory from device TAP01, use the following command:
RST DEV('/qsys.lib/tap01.devd')
OBJ('/lotus/domino/servername/hrdpt/*.nsf')
10.3.5 Restoring changed objects to a Domino for AS/400 server
To reduce the length of your backup window, your backup strategy may include
backing up only changed objects from your Domino server during the business
week. When you need to use these backup tapes to recover, you must decide on
your recovery sequence and determine the location of the most recent copy of
each database.
Examples
The following examples are of different recovery scenarios and an overview of
the recovery steps for each. Substitute your server directory for
/lotus/domino/servername. Substitute your tape device name for tap01.
10.3.5.1 Restoring changed Domino objects from cumulative backup
Assume that your strategy for backing up changed objects is cumulative (each
night you back up everything that changed since the last complete backup). To
recover your entire Domino data directory, complete the following steps:
1. Start an AS/400 session with a user profile that has *JOBCTL and *SAVSYS
special authorities.
2. To ensure that no one is using the databases, stop the Domino server. For
example, use the End Domino Server ( ENDDOMSVR) command.
3. Locate the tapes from your most recent complete backup. Mount the correct
tape in the tape unit.
4. To recover the entire Domino data directory, use the Restore Object (RST)
command. For example, use the following command:
RST DEV('/qsys.lib/tap01.devd') OBJ('/lotus/domino/servername/*')
5. Locate and mount your most recent backup tapes (from backing up changed
objects).
6. To recover all the changed objects on the tape (everything that has changed
since your full backup), use the following command:
RST DEV('/qsys.lib/tap01.devd') OBJ('/lotus/domino/servername/*')
10.3.5.2 Restoring changed Domino objects from a nightly backup
Assume that your strategy for backing up changed objects is nightly (each night
you back up only objects that have changed since the previous night). To recover
your entire Domino directory, do the following:
1. Start an AS/400 session with a user profile that has *JOBCTL and *SAVSYS
special authorities.
Backup and recovery
309
2. To ensure that no one is using the databases, stop the Domino server. For
example, use the End Domino Server ( ENDDOMSVR) command.
3. Locate the tapes from your most recent complete backup. Mount the correct
tape in the tape unit.
4. To recover the entire Domino database directory, use the Restore Object
(RST) command. For example, use the following command:
RST DEV('/qsys.lib/tap01.devd') OBJ('/lotus/domino/servername/*')
5. Locate and mount your first backup tapes (from backing up changed objects).
For example, if you back up everything on Saturday night, locate your backup
tapes from Sunday night.
6. To recover all the changed objects on the tape (everything that has changed
since the previous night), use the following command:
RST DEV('/qsys.lib/tap01.devd') OBJ('/lotus/domino/servername/*')
Substitute your Domino data directory for /lotus/domino/servername and your
tape device name for tap01.
7. Repeat steps 5 and 6 for each nightly backup tape until your directory is
current. For example, if you are recovering on Thursday, you must use the
tapes for Monday, Tuesday, and Wednesday nights.
10.3.5.3 Restoring a specific database from an incremental backup
To recover a specific database named HRINFO to the HRDPT subdirectory
(folder), perform the following steps:
1. Start an AS/400 session with a user profile that has *JOBCTL and *SAVSYS
special authorities.
2. To ensure that no one is using the database, stop the Domino server. For
example, use the End Domino Server (ENDDOMSVR) command.
3. Locate the most recent tape that has the database. Perform one of the
following tasks:
• Consult the log that the system creates during the save operation.
• Use the Display Tape ( DSPTAP) command to display the contents of the tape.
4. Mount the tape in the tape unit.
5. To recover the database, use the following command:
RST DEV('/qsys.lib/tap01.devd')
OBJ('/lotus/domino/servername/hrdpt/hrinfo.nsf')
Substitute your tape device name for tap01 .
10.3.5.4 Restoring changed objects to a specific subdirectory
To recover all the Domino databases to the CUSTSVC subdirectory, use the
same approach that you use to recover the entire server. Follow these steps:
1. Sign on your AS/400 system using a user profile that has *JOBCTL and
*SAVSYS special authorities.
2. To ensure that no one is using the databases, stop the Domino server; for
example, use the End Domino Server ( ENDDOMSVR) command.
3. Locate the tapes from your most recent complete backup. Mount the correct
tape in the tape unit.
310
Lotus Domino for AS/400 R5: Implementation
4. To recover the entire directory from the tapes from your last full backup, use
the Restore Object (RST) command. For example, to recover objects in the
CUSTSVC subdirectory from the TAP01 device, use the following command:
RST DEV('/qsys.lib/tap01.devd')
OBJ('/lotus/domino/servername/custsvc/*')
5. If your incremental backup tapes are cumulative, mount your most recent
incremental backup tape. Use the same command (step 4) to recover the
changes.
Otherwise, if your backup tapes are nightly, repeat this step for each
incremental backup tape. Start with the oldest tape and work forward, using
the RST command from step 4.
Backup and recovery
311
312
Lotus Domino for AS/400 R5: Implementation
Chapter 11. Directory synchronization
After giving a short overview of purpose and concepts, this chapter describes the
configuration and usage of the Domino for AS/400 directory synchronization,
which comes as part of the AS/400 integration option of Domino for AS/400.
You may not want to use directory synchronization unless you want to exchange
mail between OfficeVision users and Domino users and, therefore, use AnyMail
integration for your SMTP mail.
Notice that when you install your Domino for AS/400 code software option 1,
OS/400 adds the autostart job entry named QNNDISTJ to the subsystem
QSYSWRK. If you will not be using directory synchronization, you can remove
the QNNDISTJ autostart job entry by entering the following command on any
AS/400 command line:
rmvadje sbsd(qsyswrk) job(qnndistj)
11.1 What is directory synchronization
The Domino server, as well as OS/400-based mail applications, such as
OfficeVision for AS/400, object distribution services and the POP3 server, use a
directory to maintain information about users of that mail application.
These directories contain information such as the first name, last name,
department, phone number, address, company, and electronic mail address of an
individual. In addition to containing information about users of your system or
server, these directories also contain information about users on other systems or
servers. This makes it easier to send mail to those people without having to
remember the exact mail address.
On the AS/400 system, the information about all users of the OS/400-based mail
applications is kept in a single directory called the system distribution directory.
Domino servers keep the user information in the Domino Directory. In addition to
information about users, the Domino Directory also contains important
configuration information for one or more Domino servers.
Earlier releases of Domino referred to the Domino Directory as the Name and
Address Book or Public Address Book. The term Address Book is still used when
referring to a particular database that is found on a Notes client, but not in the
context of a Domino server.
Note: The configuration settings that are stored in the Domino Directory, such as
Server, Connection, Domain, and other documents, are not part of the data that is
handled by directory synchronization.
11.1.1 Why the same information is stored in multiple directories
Domino for AS/400 directory synchronization provides the capability to
automatically synchronize user information in a Domino Directory with the user
information in the AS/400 system distribution directory. By taking advantage of
directory synchronization, you can avoid manually updating information for the
same user in two places.
© Copyright IBM Corp. 1999, 2001
313
The reason why it can be useful to store information about the same users on
more than one system is that you not only have the (mandatory) information
about people sending and receiving mail on the same system. It is also beneficial
to have information about the people to whom the users are s ending mail. That is,
when composing an e-mail, the sender can search for the recipient’s common
first and last name, rather than needing to memorize an artificial mailing address.
Also, the address can be verified on the sender’s system, rather than on the
recipient’s system or application.
11.1.2 Concept of directory synchronization
You can think of directory synchronization as a form of replication that performs
these tasks:
• Updates a Domino directory with the changes being applied to the AS/400
system distribution directory.
• Updates the system distribution directory based on changes being made in the
Domino Directory.
• Updates both directories, depending on the way that you configure it.
The Domino directory being updated can be the Domino Directory for the domain
or any other directory database based on the same pubnames.ntf template.
Directory synchronization is also similar to directory shadowing, which allows you
to synchronize the system distribution directories on two AS/400 systems. Notice
that directory synchronization only updates the directory information. It does not
affect information stored in the AS/400 user profile or the Notes user ID file, such
as the password or object authorities.
To determine whether directory synchronization is right for you, consider how you
plan to use each directory. Here are some points to consider:
• Many AS/400 system functions use the AS/400 system distribution directory.
You may have more entries in the directory than you realize. For example,
Client Access and AS/400 OfficeVision users always must be included in the
system distribution directory. Use the Work Directory Entry ( WRKDIRE) command
to check the list of entries in the system distribution directory.
• Your AS/400 system distribution directory may already include entries for
people in other locations with whom you exchange electronic mail. By
synchronizing directories, you make it easy for your Domino users to also
send mail to those people.
• The Domino Directory on your Domino server may contain a large amount of
information. Perhaps it was replicated from another Domino server. Directory
synchronization can make this information available to AS/400 users.
• Lotus Calendar Connection for OfficeVision (LCCOV) uses directory
synchronization as part of its calendar management.
• With Domino R5, you have the choice of using native Domino SMTP support
or AnyMail/400 and MailServer Framework. If your requirements allow the
native Domino SMTP support to be selected, it may not make much sense to
be using directory synchronization because your AS/400 users are probably
not participating in the e-mail strategy. See Chapter 7, “Lotus Domino for
AS/400 and SMTP” on page 181, for more details.
314
Lotus Domino for AS/400 R5: Implementation
Domino for AS/400 directory synchronization is a powerful function that can help
simplify the management of user directory information. However, as with any
powerful tool, be sure that you take the time to understand its capabilities, and to
plan carefully so that the integrity of your directories is maintained. Be sure to
consider how you are already using other similar functions. For example, you
may already be using one or more of the following capabilities:
• Shadowing AS/400 system distribution directories between multiple AS/400
systems
• Replicating the Domino Directory between Domino servers
• Shadowing the AS/400 system distribution directory to a Notes or Domino
server on an AS/400 Integrated Netfinity Server
For more information about managing the AS/400 system distribution directory,
see SNA Distribution Services , SC41-5410. Information on the Domino Directory
can be found in many places of the Domino 5 Administration Help
(help\help5_admin.nsf) database.
You can set up directory synchronization through the Directory Sync
Configuration (NNDIRSYC.NSF) database on the Domino server. Messages
related to directory synchronization are written to the Directory Synchronization
Log (NNDILOG.NSF) database. If you have more than one Domino server on
your AS/400 (partitioned servers), each server has its own NNDIRSYC.NSF and
NNDILOG.NSF. However, directory synchronization can be active on only one
Domino server on the same AS/400 system at the same time.
If you are upgrading from R4.6 to R5 Domino code, you must refresh your
database designs for these two databases. See the Note box in 5.2.4, “Replacing
the database design” on page 144, for more information.
To use directory synchronization, you should understand several terms and
concepts. The following sections describes the most important of these.
11.1.2.1 Domino Directory
The Domino Directory plays a central role in the configuration, maintenance and
management of Domino servers. A Domino Directory is the control and
administration center for a group of Domino servers (a domain). Each Domino
server must have a replica of the Domino Directory for the domain installed in its
data directory. This directory contains documents that provide information
needed by the Domino servers. For example, the Domino Directory must contain
a Person document for each user in the Domino domain, and it may contain
information about other people that you want to send mail to or simply work with.
Each Person document contains a group of fields with specific information about
the user, such as last name, first name, middle initial, telephone number, postal
mailing address, and e-mail address.
11.1.2.2 AS/400 system distribution directory
The AS/400 system distribution directory is similar to Domino’s Directory, in the
sense that it contains entries to describe people using the AS/400 mail
capabilities (excluding Domino), as well as information about mail recipients on
other systems (including Domino for AS/400). For example, an AS/400 directory
entry contains fields for the user’s last name, first name, middle initial, telephone
number, postal mailing address, and information on routing e-mail. An entry in the
Directory synchronization
315
AS/400 distribution directory is required to use AS/400 e-mail capabilities. Only
one system distribution directory exists on any AS/400 system.
11.1.2.3 Field mappings
Because the fields in the Domino Directory contain the same type of user
information as the fields in the AS/400 system distribution directory, you can
define relationships (mappings) between specific fields in the Domino Directory
and the AS/400 directory. Each field mapping is a link between a specific field in
the Domino Directory and a specific field in the AS/400 directory. During directory
synchronization, the field mappings determine which information from the source
directory goes into which field in the target directory.
The directory synchronization function provides default field mappings which
include the most commonly used fields, such as name, address, telephone, and
company. You can remove mappings, specify additional mappings, or change the
default mappings.
You can also specify more than one mapping to a particular target field. If the first
mapping does not contain a value, directory synchronization continues
processing the mappings in the order listed until one of the mappings produces a
value. You can also create a mapping that inserts a specified character string
(rather than the value of a field) into a target field. For example, you might create
a mapping to insert the character string "xxx" in the department name field of the
Domino Directory entry if the same field in the system distribution directory is
empty.
11.1.2.4 Key mappings
You must designate at least one field mapping as a key mapping. When you
specify that a particular field mapping is a key mapping, the mapping target field
is used by directory synchronization as a key field to distinguish one target
directory entry from another. In the default set of field mappings, last name and
first name are used as key mappings. If you have more than one person in your
system distribution directory or Domino Directory with the same first name and
last name, use additional key mappings to distinguish between them. For
example, you could add a key mapping for department name. Be sure that you
have enough key mappings to clearly distinguish all entries. You can specify up to
ten key mappings with unique target fields.
Fields that are used as the target of key mappings should always be filled in when
a directory entry is created. If any key mapping field in an entry is empty, that
entry is ignored during directory synchronization. Remember that a directory
entry may be created directly by you, or it may be created by directory
synchronization as a result of an addition to the other directory. To help make
sure that a target field for a key mapping is not left empty, you can provide
multiple field mappings for the same target field, as described earlier. When you
provide multiple mappings to the same key field, you must designate all of the
mappings to that field as key mappings. You can create as many key mappings
as you like using the same target field, but there can only be ten unique fields that
are the target of a key mapping.
316
Lotus Domino for AS/400 R5: Implementation
11.2 Prerequisites for directory synchronization
The design of directory synchronization configuration is based on the following
requirements and assumptions:
• To use directory synchronization, product option 1 (AS/400 Integration) and
product option 6 (HiTest C API) of the Domino for AS/400 software must be
selected when installing the software using the Load and Run (LODRUN)
command. For details on installing the Domino for AS/400 options, see 2.5,
“Installing the Domino for AS/400 product on your AS/400 system” on page 31.
• To use the directory synchronization configuration database, you must have a
Win32 workstation (such as Windows 95 or NT) with Notes 4.5 or higher, or an
OS/2 client with Notes 4.5.3 or higher. If you use a VGA display, you should
use more than 16 colors.
• The Domino Directory being synchronized must be in the Domino data
directory on the Domino server.
• The default Domino Directory is NAMES.NSF, but any other Domino directory
using the same template (PUBNAMES.NTF) can be synchronized.
• Only one configuration for each Domino Directory can exist.
• Only one configuration for each AS/400 system can be enabled.
Configurations may exist for other Domino Directories, but those
configurations must be disabled.
• If you have more than one Domino server (partitioned servers) on your AS/400
system, each server has its own NNDIRSYC.NSF and NNDILOG.NSF.
Directory synchronization only synchronizes one Domino Directory with the
AS/400 system distribution directory. If the Domino administrator wants
synchronization with other directories (also on other Domino servers on the
same AS/400 system) to take place, they can use replication (or selective
replication) to synchronize with these other directories.
• If you ever change the AS/400 user ID delimiter, the AS/400 host name, or the
AS/400 domain name, or change some Domino SMTP configuration values, you
must edit and save the enabled directory synchronization configuration
document. If you want these changes to take effect immediately for all AS/400
directory and Domino Directory entries, select Yes to populate directories
when editing the enabled directory synchronization configuration document.
11.3 Configuring directory synchronization
Configuration of directory synchronization is done using a Notes client interface.
A Notes database called Directory Sync Configuration (NNDIRSYC.NSF) is
shipped with the function. The Domino administrator must configure directory
synchronization between the AS/400 system distribution directory and a specified
Domino Directory on the Domino server, by opening that database and filling in
several Notes forms.
The dialog in this chapter reflects the use of an R5 Notes client. You can perform
the same functions with an R4.5 or higher client. The database looks the same
although it is contained in an R4 workspace and you use the database icon to
open the database.
Directory synchronization
317
Figure 223. Directory Synchronization Configuration Main menu
The following three types of documents (see Figure 223) are in the Directory
Synchronization Configuration database:
• Configuration documents: Describe the Domino Directory being
synchronized, the type of synchronization desired, which directory entries
should be synchronized, and whether entries in one directory should be used
to populate the other directory.
• Field mapping documents: Describe how information is mapped from the
fields in one of the directories to fields in the other directory.
• Field documents: Describe the fields that can be synchronized in the AS/400
system distribution directory and in the Person documents of the Domino
Directory.
The directory synchronization function runs as a stand-alone application. It does
not end when you shut down the Domino server. You start it and end it with calls
to AS/400 commands or by loading appropriate Domino server tasks. Once the
function is running, you can enable, disable or suspend individual configurations.
Only one configuration can be enabled at one time. There is more information
about this in the next two sections.
318
Lotus Domino for AS/400 R5: Implementation
The directory synchronization function does co-exist with the following functions:
• Domino replication
• Directory shadowing between multiple AS/400 systems
• Directory synchronization of Domino running on the Integrated Netfinity Server
(the former Integrated PC Server (IPCS) and File Server Input Output
Processor (FSIOP))
However, in such an environment, it is the administrator’s responsibility to ensure
that no endless loops occur. See 11.7.1, “Never-ending updates” on page 345, for
more information about this.
11.3.1 Directory synchronization configuration tips
The following items should be considered before you create or change a directory
synchronization configuration:
• We recommend that you make backup copies of the Domino Directory and the
AS/400 directory before using directory synchronization in a production
environment. Here is an example of using the AS/400 Save Object (SAVOBJ)
command to back up the system distribution directory to a tape device called
TAP01:
SAVOBJ OBJ(qaok*) LIB(qusrsys) DEV(tap01) OBJTYPE(*file)
Here is an example of using the AS/400 SAV command to back up the Domino
Directory to a tape device called TAP01:
SAV DEV('/qsys.lib/tap01.devd') obj('/notes/data/names.nsf')
To create a copy of an existing Domino Directory, select File
—> New Copy.
—> Database
In the Copy Database dialog box, specify the name of the Domino server and
the name of the copy. Remember, the Domino Directory must be in the
Domino data directory (or a sub directory) on the Domino server, and must
have the same format as the standard Domino Directory. It must be based on
the Domino Directory (pubnames.ntf) template.
It is a good idea to first test directory synchronization with a copy of the
Domino Directory. After verifying that all of the entries as well as those that
you want to be synchronized are shown in the target directory, you are ready
to use directory synchronization in a production environment. Then, you can
edit the test configuration, change its status to disabled, create a new
configuration for the Domino Directory, and enable that one.
• Disable a directory synchronization configuration before changing key fields in
the configuration. This is to make sure that you clear the internal links
(pointers) which were set for the fields between system distribution directory
and Domino Directory during population. For more information about
population, see 11.3.2.3, “Populate directories” on page 321. Edit the
configuration first and change its status to Disabled. Then edit the
configuration again and change the key fields.
• Do not replicate the Directory Sync Configuration database with the aim of
working on a local replica. When you change a configuration, you must open
the database on the Domino for AS/400 server.
• Directory synchronization is a stand-alone application. Synchronization
continues even when you shut down the Domino server.
Directory synchronization
319
You can stop the directory synchronization jobs (QNNDI*) running in the
QSYSWRK subsystem by using the following AS/400 command:
CALL QNOTESINT/QNNDIEND
Alternatively, you can type load qnndiend on the Domino console command
line.
It may take four to five minutes to end the jobs.
You can start the jobs by running the following command:
CALL QNOTESINT/QNNDISTJ
Alternatively, you can type load qnndistj on the Domino console command
line.
The QNNDILCK job must be ended before you back up your system. R5.0.1
has been modified so that when you start directory synchronization by saving
an enabled configuration, QNNDILCK becomes active for up to five minutes
and then ends automatically. If you are running an earlier release, you can end
the job by using the following AS/400 command:
CALL QNOTESINT/QNNDIEND *ALL
You must ensure that only one directory synchronization is enabled for an
AS/400 system. This is very important because confusing results or possible
looping could otherwise result.
• Do not use the Set Secure command to password-protect the server console.
If you do, the directory synchronization jobs fail. If the server console is
password-protected, use the Set Secure command to remove password
protection, and then restart the directory synchronization jobs.
11.3.2 Directory synchronization concepts
When you set up directory synchronization by creating a configuration in the
Directory Sync Configuration (NNDIRSYC.NSF) database on the Domino server,
you must specify several options that are used during directory synchronization.
11.3.2.1 Synchronization type
As shown in Figure 224, the synchronization can be either one way
(unidirectional) or two way (bidirectional). With unidirectional synchronization,
you specify whether the AS/400 directory is used to update the Domino Directory,
or the Domino Directory is used to update the AS/400 directory. With bidirectional
synchronization, both the AS/400 directory and the Domino Directory are used to
update each other.
Figure 224. Types and status values for directory synchronization
320
Lotus Domino for AS/400 R5: Implementation
11.3.2.2 Synchronization status
While the configuration is enabled, directory synchronization actions occur as
defined in the configuration (Figure 225). You can only have one configuration
enabled on your AS/400 at a time.
data
SDD
link
PAB
Domino Directory
Figure 225. Configuration enabled
When the configuration is disabled or suspended, directory synchronization does
not occur for this configuration. A suspended configuration (Figure 226) retains
internal links (pointers) between the entries in the AS/400 directory and the
Domino address book. These links retain previous synchronization information
for an entry and improve the startup performance if you later change the status to
enabled.
SDD
PAB
Domino Directory
link
Figure 226. Configuration suspended
A disabled configuration (Figure 227) does not retain those internal links. For
more information about internal links, see 11.3.2.3, “Populate directories” on
page 321.
SDD
C
f 227.
Figure
Domino
PAB Directory
Configuration disabled
Because the internal links are not cleared for a suspended configuration, entries
that have those links are reserved for use only by that configuration. If you create
another configuration that uses a different Domino Directory to update the
AS/400 directory, the reserved entries are not used in directory synchronization.
Therefore, if the other Domino Directory has an entry that maps to a reserved
entry in the AS/400 directory, directory synchronization creates a second entry in
the AS/400 directory.
11.3.2.3 Populate directories
When you first set up a configuration for directory synchronization, the AS/400
directory and Domino Directory probably contain different entries. However, you
probably want them to have the same entries when you begin directory
synchronization. Therefore, you should populate the AS/400 directory with entries
from the Domino Directory, or populate the Domino Directory with entries from the
AS/400 directory. For bidirectional synchronization, you should do both.
Directory synchronization
321
Entry
Name
Entry
Name
Entry
Name
Entry
Name
.....
.....
SDD
Domino
Directory
Figure 228. Internal links between fields
During population, internal links (pointers) are set between the fields of the
system distribution directory and the fields of the Domino Directory, as shown in
Figure 228. In this way, the entries point to each other, and subsequent
synchronizations for that entry are faster and are not affected by conflicting
additions to either directory. When directories are not populated, a
synchronization event requires a one-to-one search of the target directory to find
the corresponding entry, rather than direct access to the entry using the pointer.
After running a population, the configuration defaults to Populate No.
If a connection is disabled, the internal links are cleared. If you enable
synchronization again without running population, from now on the internal links
are set when entries are changed. However, to reflect all of the changes that
were performed while synchronization was stopped, it is necessary to run
population again. This also sets the internal links for unchanged entries, resulting
in faster synchronization.
If a connection is suspended, the internal links are not cleared. However, to
reflect all changes that were made to the directories while directory
synchronization function was suspended, it is necessary to run populate again.
On the population panel you can specify a date and time for population to occur.
When the configuration has been saved, the Work with Job Schedule Entries
(WRKJOBSCDE) command on the AS/400 system can be used to both verify and
to change the population job start date and time.
If you choose to populate directories for bidirectional synchronization, you must
select either the AS/400 directory or the Domino Directory to be the master
directory, as shown in Figure 229. The directory synchronization function first
uses the entries in the master directory to populate the secondary directory, and
then uses the entries in the secondary directory to populate the master directory.
322
Lotus Domino for AS/400 R5: Implementation
Figure 229. Population information for directory synchronization
11.3.2.4 Field mappings
Field mappings describe relationships between system distribution directory
fields (for example, USRID, USRADDR, LSTNAM, FSTNAM, etc.) and Domino
Directory fields (for example, Lastname, Firstname, MailAddress, and so on), as
shown in Figure 230.
A default set of common field mappings is shipped with the product (for example,
name, address, telephone, company). You can change the existing mappings,
add other mappings to the default set, or delete mappings from this set. The field
mappings in each configuration must have at least one key field.
A key field is used to identify (find) directory entries in the other directory. It
allows directory synchronization to distinguish one AS/400 directory entry or
Domino Person document from another. In the default field mappings, the last
name field is a key field. However, be sure that you have enough key mappings to
clearly distinguish all entries. For example, you may need to add a key mapping
for the middle initial to distinguish entries that have the same first and last name.
Only those user entries that produce a value in the key fields are mapped. A
value must exist in every key field so that the directory entry is synchronized with
the other directory.
Figure 230. Default field mappings for directory synchronization
Directory synchronization
323
You can have a maximum of ten key mappings to different fields. However, you
can have additional mappings to any of those ten key fields.
Note: There is no verification done on configured mappings. For instance, the
user may specify a mapping from system distribution directory field LSTNAM to
Domino Directory field LastName, and a mapping from Domino Directory field
LastName to system distribution directory field FSTNAM. This may or may not be
what the user intended. Either way, no verification is done to restrict the user from
doing this.
11.3.2.5 Synchronizing all AS/400 users or selected users
You can choose to synchronize all user entries or specific user entries that meet
some selection criteria. Only user entries that satisfy the selection criteria are
mapped during synchronization. For example, you may want to synchronize only
users who have specific names, or users who are in a particular department.
11.4 Directory synchronization configuration steps
Access to create or modify documents in this Directory Sync Configuration
(NNDIRSYC.NSF) database should be limited to Domino administrators only. The
access control list (ACL) of this database should be modified to reflect this
restriction. If you do not change the ACL, the default access is manager.
The following sections contain a step-by-step description of the necessary tasks
to configure directory synchronization.
Follow these steps:
1. Open the directory synchronization configuration database:
a. Select File
—> Database —> Open.
b. Select or type in the name of your Domino for AS/400 server.
c. Type NNDIRSYC.NSF in the Filename section or select the database named
Directory Sync Configuration, as shown in Figure 231 .
Figure 231. Opening the Directory Sync Configuration (NNDIRSYC.NSF) database
d. Click Open.
2. If you are opening this database for the first time, you see the “About this
Database” document. After reading it, close it by pressing the Esc key.
324
Lotus Domino for AS/400 R5: Implementation
Note
The “About this Database” document opens automatically only when you
open the database for the very first time. If you want to read the document
again at a later time, click Help, and then About this database. There is
also useful information in the Using this database document, which can be
reached from the Help pull down.
When opening the Directory Sync Configuration database, you must always
start with the Directory Synchronization Configuration Main Menu (as shown in
Figure 223 on page 318), the navigator for this database. It allows you to
easily go to any of the important configuration functions or even to open the
directory that is being synchronized.
3. In the Directory Synchronization Configuration Main Menu (as shown in Figure
Figure 223 on page 318), click Configurations.
4. To create a new configuration click, New Configuration. You see the (initially
empty) Configurations\By Status view which shows all configuration
documents defining directory synchronization, as shown in Figure 232. You
may want to change the size of the left pane (navigator pane) if you cannot
completely see the navigator.
Figure 232. Initial look of Directory Sync Configuration view
5. Specify the file name of the Domino Directory to be synchronized, as shown in
Figure 233 on page 326. For example, if you create a test directory named
TESTSYNC.NSF, specify that name. If you create the test directory in a
subfolder, make sure to specify the full path (for example,
WBL/TESTSYNC.NSF).
Directory synchronization
325
Note: The name of the database must be eight characters or less, followed by
the characters .NSF.
Figure 233. New configuration for directory synchronization
6. Select the Synchronization Type by clicking one of the following radio buttons:
• Bidirectional
• AS/400-to-Domino
• Domino-to-AS/400
7. Select the Synchronization Status of Enabled, Disabled, or Suspended.
Synchronization does not occur unless you select the Enabled status. You
can change the status now, or after you have saved the configuration by
editing the document again.
8. Click Next and the Population Information form appears, as shown in Figure
234.
326
Lotus Domino for AS/400 R5: Implementation
Figure 234. Population information
9. Select Yes for Populate Directories if any of the following conditions are true:
• You chose AS/400-to-Domino synchronization and you want the Domino
Directory to contain all of the selected entries that are in the AS/400
directory. "Selected" refers to the selection criteria defined later in step 25
on page 331.
• You chose Domino-to-AS/400 synchronization and you want the AS/400
directory to contain all of the selected entries (Person documents) that are
in the Domino Directory.
• You chose bidirectional synchronization and you want both the AS/400
directory and the Domino Directory to contain the same entries.
If you choose to populate directories, you must provide this additional
information:
• For bidirectional synchronization, select either the AS/400 system
distribution directory or the Domino Directory to be the master directory.
The master directory is used first to populate the other directory.
• Choose when the populate operation should be done (either immediately or
on a specific day and time). Because this is a long running operation, you
may want to do this when your system has low usage.
10.Click Next.
11.If you choose Domino-to-AS/400 synchronization (unidirectional) only (see
Figure 233), continue with step 34. Notice that the panel shown is very similar
to the one shown in Figure 235 on page 328. However, it is not the same, and
actually defines the opposite direction of synchronization).
Directory synchronization
327
Figure 235. AS/400-to-Domino directory synchronization configuration
12.You see the AS/400-to-Domino Directory Synchronization Configuration form,
as shown in Figure 235.
13.If you want to change the field or key mappings, click Edit field mappings.
Tip
You may see an error message, Cannot execute the specified command. Click
OK and continue.
After clicking the Edit field mappings, you see the view called Field
mappings\AS/400-to-Domino (Figure 236). It shows you which fields are
mapped for synchronization from AS/400 to Domino.
Note: The field mappings are defined separately for each synchronization
direction (AS/400-to-Domino and Domino-to-AS/400). To edit the field
mappings for Domino to AS/400, see step 35 on page 334.
328
Lotus Domino for AS/400 R5: Implementation
Figure 236. Viewing field mappings for AS/400 to Domino synchronization
You can change existing mappings, remove existing mappings, or insert new
mappings. Directory synchronization processes the mappings in the order in
which they are listed. Therefore, if you choose to add a mapping, you must
specify whether it should be inserted before or after an existing mapping.
To create a new AS/400-to-Domino field mapping definition, follow these
steps:
14.Click a field mapping definition where you want to add a definition to highlight
it.
15.Click either Insert New Mapping Before or Insert New Mapping After at the
top of the panel, as shown in Figure 237.
Figure 237. Insert new mapping before or after the selected mapping
You see the form shown in Figure 238 on page 330.
Directory synchronization
329
Figure 238. Adding AS/400 fields for field mapping
16.Click Add AS/400 Fields to display the AS/400 fields.
17.Select an AS/400 field. This field is the source for the mapping. Click Add.
Figure 239. List of AS/400 Directory Fields panel
18.You may select multiple fields, and then click OK.
19.Click Find to display the Domino fields, as shown in Figure 240.
20.Select a Domino field. This field is the target for the mapping.
330
Lotus Domino for AS/400 R5: Implementation
Figure 240. Domino Address Book fields
21.Click OK.
22.From the Mapping AS/400 Directory Fields to Domino Directory Fields form
shown in Figure 238, click Save.
23.Click Close.
Note: To remove a field mapping, you must change the access control list for
the Directory Sync database to allow deletions.
There may exist one or more field mapping documents for the same target
field. When more than one field mapping exists for the same target field, it is
sometimes called alternate mapping. Additional field mapping for the same
target field is used to provide a “backup” mapping to a field if the first mapping
does not provide a value. Directory synchronization function processes the
mappings in the order listed and uses the first mapping that produces a value.
24.From the window shown in Figure 236 on page 329, click Return to go back to
the AS/400-to-Domino Directory Synchronization Configuration form (Figure
235 on page 328).
25.By clicking one of the two radio buttons, you can choose whether you want to
do one of the following tasks:
• Synchronize all users (not recommended)
• Define criteria for synchronizing specific users (recommended)
26.Click Next.
If you choose to synchronize all entries (not recommended), continue with
step 32 on page 333.
27.If you choose to define criteria for synchronizing AS/400 users, the form in
Figure 241 on page 332 appears.
Directory synchronization
331
Figure 241. Selection criteria for synchronization AS/400 users to Domino
Notice that the form shown in Figure 241 only appears if you select Define
criteria for synchronizing AS/400 users, in Figure 235 on page 328.
28.You do not need to remember all of the field names of the AS/400 system
distribution directory. Instead of entering the field name, you can click Find
and select the field (Figure 242). Then, click OK.
Figure 242. Selecting AS/400 directory fields
We have selected all entries where the address field contains the AS/400
systems name SYSTEM01, as shown in Figure 243.
29.A pull-down dialog allows you to select the comparison operator. In our
example, we select Equal.
332
Lotus Domino for AS/400 R5: Implementation
Figure 243. Choosing the logical operator for the selection criteria
30.Type the comparison value (SYSTEM01). The comparison values are not
case-sensitive.
31.You may add up to two more comparison conditions by clicking AND or OR. If
you do so, an additional line of input fields appears. Clicking AND or OR again
brings up the third line to define a comparison condition.
32.If you chose AS/400-to-Domino synchronization (unidirectional) only (see
Figure 233 on page 326), continue with step 46 on page 336.
33.Clicking Next brings you to the Domino-to-AS/400 Directory Synchronization
Configuration panel (Figure 244 on page 334).
Note: The Domino-to-AS/400 Directory Synchronization Configuration form
looks very similar to the AS/400-to-Domino Directory Synchronization
Configuration panel, as shown in Figure 235 on page 328. Make sure not to
confuse these two panels or the ones following them. The first set of
configuration parameters was related to one direction (AS/400-to-Domino).
We are now defining the opposite direction.
Directory synchronization
333
Figure 244. Domino-to-AS/400 Directory Synchronization Configuration
34.If you chose bidirectional or only Domino-to-AS/400 synchronization, you must
provide similar information for the opposite direction.
35.If you do not want to change the field mappings for the Domino-to-AS/400
synchronization, go to step 43
36.Click the Edit field mappings button. The window in Figure 245 shows which
fields are mapped for Domino-to-AS/400 synchronization.
334
Lotus Domino for AS/400 R5: Implementation
Figure 245. Viewing field mappings for Domino-to-AS/400 synchronization
To create a new AS/400-to-Domino field mapping definition, follow these
steps:
37.Click a field mapping definition (where you want to add a definition) to
highlight it.
38.Click either Insert New Mapping Before or Insert New Mapping After. You
see the form shown in Figure 246 on page 336.
Directory synchronization
335
Figure 246. Mapping Domino fields to an AS/400 field
39.Proceed, as described in the sections following Figure 238 on page 330,
except define the mapping from Domino fields to AS/400 fields, rather than
vice versa.
40.After adding the field names, click Save, and then Close.
41.From the window shown in Figure 245 on page 335 (Field
Mappings\Domino-to-AS/400), press F9 to refresh the view.
42.Click Return to go back to the Domino-to-AS/400 Directory Synchronization
Configuration form (Figure 244 on page 334).
43.In the Domino-to-AS/400 Directory Synchronization Configuration form, you
can choose whether you want to synchronize all Person documents in the
Domino address (default) or if you want to define criteria for synchronizing the
Domino users. Click the appropriate radio button.
44.Click Next.
45.If you did not click the Define criteria for synchronizing the Domino users
radio button, continue with step 48.
46.You should see the Selection Criteria for Synchronizing Domino Users to
AS/400 form . To define selection criteria, follow the description given after
Figure 241 on page 332, except that the basis for the comparison is now one
or more fields of the Domino Directory, rather than the AS/400 system
distribution directory.
47.When you have finished defining the selection criteria, click Next.
48.You should see the Mail Related Information form (Figure 247). Specify
whether mail addressing information should be automatically synchronized.
336
Lotus Domino for AS/400 R5: Implementation
When you choose to maintain mail information, directory synchronization attempts to keep
mail information synchronized between the AS/400 directory and Domino Directory
entries. How this is accomplished depends upon what type of directory synchronization is
enabled (unidirectional versus bidirectional) and whether population is configured.
If you choose to maintain mail information, you may need to provide the following
additional information:
• For bidirectional synchronization, select either the AS/400 system distribution directory
or the Domino Directory as the master mail directory.
When an AS/400 system distribution directory entry and a Domino Directory entry are
synchronized for the first time, the information in the master mail directory replaces the
mail information in the other directory.
Note: When changes are made to either of the directory entries at a later time, the
changed information replaces the mail information in the synchronized directory entry,
regardless of which directory is the master mail directory.
• For bidirectional synchronization or AS/400-to-Domino unidirectional synchronization
with the populate option, specify how to handle existing AS/400 SMTP addresses.
If you choose to map existing AS/400 SMTP addresses during the populate operation,
an existing SMTP address in an AS/400 directory entry is inserted after any existing
values in the ShortName field of the corresponding entry in the Domino Directory. After
the populate operation is completed, existing SMTP addresses are not mapped in
subsequent populate operations.
Figure 247. Mail Related Information
Directory synchronization
337
If you want to map existing AS/400 SMTP addresses during a bidirectional
populate operation, it is best to select the AS/400 system distribution
directory as the master directory. If you do not specify the AS/400 directory,
directory synchronization displays a warning and allows you to change the
master directory to the AS/400 directory.
For bidirectional synchronization or Domino-to-AS/400 unidirectional
synchronization, specify how to handle unknown SMTP addresses in a
Domino entry.
If bidirectional synchronization or Domino-to-AS/400 synchronization is
configured, you must indicate whether to maintain or reset the existing
AS/400 SMTP information of an AS/400 directory entry. You must do this if
the SMTP address of the synchronized Domino Directory entry cannot be
determined by the internal code of directory synchronization which is called
to obtain the Domino SMTP address. If you choose to maintain the existing
AS/400 SMTP information, none of the AS/400 directory entry mail
information is changed if the SMTP address of the synchronized Domino
address book entry cannot be determined. The AS/400 directory entry mail
information fields that remain unchanged are the Mail service level
(MSFSRVLVL), Preferred address (PREFADR), SMTP user ID
(SMTPUSRID), and SMTP domain (SMTPDMN). However, if you choose to
reset these fields and the SMTP address of the Domino Directory entry is
unknown, MSFSRVLVL and PREFADR are reset to the system defaults
and SMTPUSRID and SMTPDMN are set to blank for the synchronized
AS/400 directory entry.
Note: If an system distribution directory entry is set to Lotus Domino, and
directory synchronization creates a new Domino Directory entry from it, a
Person document is created. However, it is not enough to define a true
Notes user. It is still necessary to register the Notes user ID before it can
be successfully used by a person.
If you ever change the AS/400 SMTP user ID delimiter, the AS/400 host
name, the AS/400 domain name, or some Domino SMTP configuration
values, you must edit and save the enabled directory synchronization
configuration document. If you want these changes to take effect
immediately for all AS/400 directory and Domino Directory entries, select
Yes to Populate Directories when editing the enabled directory
synchronization configuration document.
49.Click Next and you see the Advanced Information form, as shown in Figure
248.
338
Lotus Domino for AS/400 R5: Implementation
Figure 248. Advanced Information form
50.On the Advanced Information display, you can specify any advanced options
you need. This display is intended to be used to activate further functional
enhancements for directory synchronization, which will ship in the future
without the need to replace the entire configuration database.
If you type in anything which is not supported, the text is ignored.
Since R4.6.3, you may choose to enter NAMESTYLE=LCCOV in this field. Directory
synchronization creates the system distribution directory and Domino
Directory entries in a different format from the default. This option is required
for support for Lotus Calendar Connector for OS/400 (LCCOV, 5733-LC1).
More information can be found in the documentation for that product.
As shipped, directory synchronization creates system distribution directory
entries for Notes users by taking the first five characters of the last name and
appending three digits for the user ID and using the AS/400 serial number for
the address giving an entry, such as MIDDL001 S123456.
If you select the option designed for LCCOV, the system distribution directory
entry for a Notes user consists of the shortname for the user ID and the mail
domain for the address, such as JMIDDLE ACME. Although this may seem more
appealing, it does have a drawback in that it does not handle duplicate names
as well as the original style because it relies on unique shortnames.
Notice that if either the shortname or domain is more than 8 characters in
length, the original naming style is used.
The Forwarding address for Domino Directory entries for OfficeVision users is
either taken from the SMTP address in the system distribution directory if it
exists or is constructed from the user ID and address, such as
[email protected]. If you are using LCCOV, the Internet address is
Directory synchronization
339
the same as for the original form but has @ and the address from the system
distribution directory appended, such as [email protected]@ACMEDS1.
If you have elected to use the LCCOV version, but do not want existing entries
converted, you can specify CONVERTLCCOV=NO in the Advanced Options field, as
well as NAMESTYLE=LCCOV.
51.Click Save and Close.
52.If this is a new configuration for that server, and you did not change the field
mappings earlier, the Create Field Mappings window (Figure 249) is shown.
Figure 249. Create Field Mapping window
53.Click Yes. This adds the standard field mappings of the starter set to your new
configuration.
11.5 Creating new directory fields for the directory fields list
You may also want to add new fields or literal fields to the list of predefined
AS/400 or Domino fields. Click the Create AS/400 Directory Field or the Create
Domino Directory Field button in the Mapping AS/400 Directory Fields to
Domino Directory Field form (Figure 238 on page 330), or the Mapping Domino
Directory Fields to AS/400 Directory Field form (Figure 246 on page 336). You
can also do this by clicking the Directory Fields button in the Directory
Synchronization Main Menu.
Important
When adding a field, no verification to see if the field really exists in the system
distribution directory or Domino Directory occurs. A non-existing field causes
the synchronization to fail. Therefore, be sure that the fields really exist before
you enable the synchronization.
When you add a user-defined AS/400 system distribution directory field, you also
need to specify the product ID of the user-defined field in the system distribution
directory. Notice that the term user-defined may be somewhat misleading, in the
sense that some IBM products also create “user-defined” fields, for example,
when you convert the SMTP names. That is, after performing the Convert SMTP
Names (CVTNAMSMTP) command, you have the new user-defined fields
SMTPAUSRID, SMTPDMN, and SMTPRTE (all with product ID SMTP) in the
system distribution directory.
For IBM-defined fields (those fields that are always defined for the system
distribution directory), the product ID is already set to *IBM.
There is no real difference between adding a Domino-defined or a user-defined
field. However, for user defined fields, you can add predefined properties that are
340
Lotus Domino for AS/400 R5: Implementation
included in a blank field in the Domino Directory. It can also be used to keep track
of the fields that were added by the user.
Literal fields must be enclosed in double quotes (for example, “@”), as shown in
Figure 250.
Figure 250. Fields view for AS/400 fields
11.5.1 Fields in the system distribution directory and Domino Directory
The directory synchronization functions map fields between the AS/400 system
distribution directory and the fields in a Domino Directory. If you want to change
the default mapping, you must know which fields are defined in the system
distribution directory and the Domino Directory.
11.5.1.1 IBM-defined fields in the system distribution directory
To locate all IBM-defined fields contained in the system distribution directory, you
can use the Change Directory Entry (CHGDIRE) command. Follow these steps:
1. Type CHGDIRE on any AS/400 command line and press F4 (prompt).
2. Press F9 (All Parameters).
3. Press F11 (Keywords).
You see the field names in the center of your display along with a description on
the left and the input fields on the right. Press PgDn to see the next set of fields.
If you receive the error message, Parameter USRID required, press PgDn a second
time. The purpose here is not to enter any information. You are using the
command prompter to see which field names are available.
Directory synchronization
341
11.5.1.2 User-defined fields in the system distribution directory
For a quick path to view all user-defined AS/400 fields, use the Change System
Directory Attributes (CHGSYSDIRA) command:
1. Type CHGSYSDIRA on any AS/400 command line and press F4 (prompt).
2. Page down (press PgDn one or more times) to the User-defined fields.
11.5.1.3 Fields in the Domino Directory
The following procedure is a safe way to locate all of the fields that are contained
in the Domino Directory:
1. Select the Domino Directory by clicking on it from your bookmark or select File
—> Database —> Open from the menu bar.
—> Database —> Design Synopsis.
3. In the Design Synopsis window, select Database —> Forms.
2. Select File
4. To obtain a list of the Persons fields only, deselect all of the forms in the Forms
window except Person.
5. Click OK.
11.6 Enabling, disabling, or suspending directory synchronization
Domino for AS/400 directory synchronization is fully managed through the
Directory Sync Configuration (NNDIRSYC.NSF) database. This includes
enabling, disabling, and suspending this function. The following sections describe
how to do so.
11.6.1 Enabling directory synchronization
Before you can enable directory synchronization, you must configure it as
described in the previous topics (see 11.4, “Directory synchronization
configuration steps” on page 324). Enabling and disabling directory
synchronization is done by changing the synchronization status field to “Enable”
in the configuration document.
1. From your client, select File —> Database —> Open from the menu bar or
select the Directory Sync Configuration database from a bookmark and
proceed with step 5.
2. Select or type in the name of the Domino for AS/400 server.
3. Select Directory Sync Configuration database (NNDIRSYC.NSF).
4. Click Open.
5. Click Configurations.
6. Select the configuration document that you want to enable and click
Edit Configuration.
7. Change the status of the configuration to Enabled.
8. Click Save and Close.
Note: If you enable directory synchronization and choose to populate the
directories, the first synchronization can take a while. Expect each directory entry
to take two to four seconds to be processed. The time depends on the amount of
data and the synchronization type.
342
Lotus Domino for AS/400 R5: Implementation
If you have selected LCCOV naming, it is possible that some system distribution
directory entries may be renamed during population. You should schedule the
populate during a time when your system is in a restricted state so that the
renaming of system distribution directory entries succeeds. You should always
check the directory synchronization log after a populate operation and take action
on any errors.
It is possible to check the progress and the result of the synchronization directly
from the configurations menu. To do so, check the Directory Synchronization Log
(NNDILOG.NSF) database by clicking Logging Entries. This database contains
messages related to directory synchronization.
To view the contents of the Domino directory which is being synchronized, click
View Domino Directory. This is only possible when a configuration is enabled.
The directory synchronization function runs as a stand-alone application. A
shutdown of the server does not end directory synchronization. For more
information about the different types of status, see 11.3.2.2, “Synchronization
status” on page 321.
11.6.2 Disabling or suspending directory synchronization
Directory synchronization is ended if you disable or suspend the directory
synchronization configuration. Follow these steps:
1. Open the directory synchronization configuration database from the Notes
client:
a.
b.
c.
d.
Select File —> Database —> Open.
Select the Domino server.
Select Directory Sync Configuration (NNDIRSYC.NSF).
Click Open.
You can also select the database from a bookmark if you have previously
opened the database.
2. Click Configurations.
3. Select the configuration document for the configuration that you want to end
and click Edit Configuration.
4. Change the status of the configuration to Disabled or Suspended.
5. Click Save and Close.
Directory synchronization may take up to five minutes to end.
AS/400 environment
In some cases, you may want to stop or start the AS/400 synchronization jobs.
When you stop the synchronization jobs, all directory changes are saved and are
synchronized when you restart the jobs. This is useful if you want to temporarily
stop synchronization during a period of heavy system workload, but still want
changes reflected in the other directory at a later time. In addition, if a Domino
server error occurs, the directory synchronization jobs may not restart
automatically even if the configuration is still enabled.
You can stop the directory synchronization jobs (QNNDIxxx) that are running in
the QSYSWRK subsystem by running the following AS/400 command:
CALL QNOTESINT/QNNDIEND
Directory synchronization
343
Alternatively, you can enter the following Domino command on the Domino
console command line:
load qnndiend
The program QNNDIEND does not end the job QNNDILCK. At R5.0.1,
QNNDILCK should end automatically within five minutes of it starting after saving
an enabled configuration. If you are at an earlier release, you must end this job to
back up your system, using the following command:
CALL QNOTESINT/QNNDIEND *ALL
You can restart the jobs by running the following command:
CALL QNOTESINT/QNNDISTJ
A user profile that has *JOBCTL special authority is required to either stop or
start the directory synchronization jobs.
11.6.3 What happens after enabling directory synchronization
When you specify a status of Enabled in a directory synchronization configuration
document and then save the configuration document, the following events occur:
For AS/400-to-Domino unidirectional synchronization
• When any entry that satisfies the selection criteria is added to, deleted from,
or changed in the AS/400 system distribution directory, the corresponding
entry is immediately changed in the Domino Directory. The key mapping fields
in the configuration document define the corresponding entry in the Domino
Directory.
• If you select Yes for the Populate Directories option, entries from the AS/400
system distribution directory that satisfy the selection criteria, and that have a
value in every key field, are copied to the Domino Directory as new or
changed Person documents. This population operation occurs at the specified
day and time.
• A synchronization of user fields occurs if an entry in the Domino Directory has
the same key field values as the entry in the AS/400 directory. Otherwise, a
new entry is added first, and then the population occurs.
Note: Creating a Person document in the Domino Directory does not register this
person as a Notes user and does not create a user ID file. If you want an AS/400
user to become a Notes user, you must still register that person as a Notes user.
For Domino-to-AS/400 unidirectional synchronization
• When any entry that satisfies the selection criteria is added to, deleted from,
or changed in the Domino Directory, the corresponding entry is immediately
added to, deleted from or changed in the AS/400 system distribution directory.
The key mapping fields in the configuration document define the
corresponding entry in the AS/400 system distribution directory.
• If you select Yes for the Populate Directories option, entries from the Domino
Directory that satisfy the selection criteria and have a value in every key field
are copied to the AS/400 system distribution directory as new or changed
entries. The population operation occurs at the specified day and time.
• A synchronization of user fields occurs if an entry on the AS/400 directory has
the same key field values as the entry in the Domino directory. This process
344
Lotus Domino for AS/400 R5: Implementation
does not create a user profile on the AS/400. If a Notes user must also access
AS/400 applications (other than Domino for AS/400), an AS/400 administrator
must register a user with the Create User Profile (CRTUSRPRF) command.
For bi-directional synchronization
• When any entry that satisfies the selection criteria is added to, deleted from,
or changed in either the AS/400 system distribution directory or the Domino
Directory, the corresponding entry is immediately added to, deleted from, or
changed in the other directory. The key mapping fields in the configuration
document define the corresponding entries in the AS/400 system distribution
directory and the Domino Directory.
• If you select Yes for the Populate Directories option, entries from the master
directory that satisfy the selection criteria are copied to the secondary
directory as new or changed entries. Next, entries from the secondary
directory that satisfy the selection criteria are copied to the master directory as
new or changed entries. These population operations occur at the specified
day and time.
11.7 Coexistence of directory synchronization, replication, and shadowing
Domino for AS/400 directory synchronization is one of several functions that
synchronizes information with the system distribution directory and the Domino
Directory. In an environment consisting of one or more Domino servers and one
or more AS/400 systems, you probably use a combination of the following
functions:
• Domino/Notes replication synchronizes the content of the Domino Directory
(or any other Notes database) on different Domino servers and Notes clients.
• AS/400 directory shadowing allows you to synchronize entries in the AS/400
system distribution directories on two or more AS/400 systems. For
information about directory shadowing, refer to AS/400 Advanced Series SNA
Distribution Services , SC41-5410.
• OS/400 Integration of Lotus Notes directory shadowing applies changes to
entries of the AS/400 system distribution directory to the Domino address
book on a server running on the Integrated Netfinity Server. For information
about OS/400 Integration of Lotus Notes directory shadowing, refer to AS/400
Advanced Series OS/400 Integration of Lotus Notes , SC41-5431.
You can use all of the functions mentioned above in combination with directory
synchronization. Be aware however, that in certain environments,
synchronization loops may be created, resulting in performing updates for an
indefinite period of time. It is the responsibility of the system administrator to
avoid those loops when setting up the different synchronization functions. The
following section shows one example of how such an indefinite loop may occur
and what you can do to avoid it.
11.7.1 Never-ending updates
A simple example of a synchronization loop can be seen for the following
situation: Two AS/400 systems, SYSTEM01 and SYSTEM02 are using AS/400
directory shadowing to synchronize their system distribution directories. On each
AS/400 system, you also have a Domino for AS/400 server running, each using
directory synchronization to maintain the Domino Directory and the AS/400
Directory synchronization
345
system distribution directory, as well as replication to propagate changes to the
Domino Directory.
A further assumption with this scenario is that synchronization, shadowing and
replication operate on the entire directory, that is propagating local entries, as
well as entries describing users of other systems. To keep the scenario simple, all
types of synchronization are only performed in the direction indicated in Figure
251.
1. Change
Directory Entry
(CHGDIRE)
System02
System01
AS/400 System
Distribution
Directory
5. OS/400 Directory
Shadowing
2. Domino for AS/400 Directory
Synchronization
AS/400 System
Distribution
Directory
4. Domino for AS/400 Directory
Synchronization
Domino for AS/400
Domino
Domino
Public
Address
Directory
Book
(PAB)
3. Domino
Replication
Domino
Domino
Public
Address
Directory
Book
(PAB)
Figure 251. Loop situation for directory
An endless loop can be initiated by changing an entry in the directory of
SYSTEM01. The following process occurs:
1. An AS/400 user changes a directory entry using the Change Directory Entry
(CHGDIRE) command.
2. The changed entry is synchronized with a Person document in the Domino
Directory.
3. The Person document is replicated to the Domino for AS/400 server on
SYSTEM02.
4. Directory synchronization updates the corresponding entry in the system
distribution directory on SYSTEM02.
346
Lotus Domino for AS/400 R5: Implementation
5. OS/400 directory shadowing changes the same entry in system distribution
directory on SYSTEM01.
6. Directory synchronization on SYSTEM01 does not recognize that the change
performed in the previous step originated on the same system, and therefore,
updates the Person document in the Domino Directory with the same values.
7. The process continues indefinitely by starting over with step 3.
To avoid the possibility of endless updates, make sure not to set up your network
in a closed loop. For example, disabling directory synchronization in SYSTEM02
solves the problem in the above scenario.
11.8 Questions and answers
Question: What happens if there are two different user entries with the same key
fields in each of the directories (one in the Domino Directory, one in the system
distribution directory) before you enable configuration?
Answer:
• For unidirectional synchronization, synchronization occurs and the fields from
the source directory are copied to the fields of the entry in the target directory.
• For bidirectional synchronization, the master directory copies its entries to the
other directory first. The additional entries from the second directory are then
copied to the master directory.
Question: What happens if you delete a key field value in a directory entry after
population?
Answer: Because the key field no longer produces a value, the change is not
reflected in the other directory. A value must exist in every key field for
synchronization with the other directory.
11.9 Problem determination
The following list shows four places to check for synchronization problems:
• The Notes database for directory synchronization logging information
(NNDILOG.NSF), which is located on the Domino Server.
Select File —> Database —> Open. Select the server and specify
NNDILOG.NSF in the Filename section.
• The spooled files of AS/400 user QNOTES. The directory synchronization jobs
and programs run under the QNOTES user profile. The synchronization jobs
are named QNNDI2SD and QNNDI2NA.
On any AS/400 command line, type WRKSPLF QNOTES and press Enter. Look for
spooled files of User Data type QNNDI2SD or QNNDI2NA.
• The OS/400 message queue QNNDIMSG is used to log messages from the
OS/400 directory synchronization programs.
On any AS/400 command line, type DSPMSG QNNDIMSG and press Enter.
• The OS/400 message queue QSYSOPR may be checked for severe errors.
On any AS/400 command line, type DSPMSG QSYSOPR and press Enter.
Directory synchronization
347
During normal processing, all messages are logged only in the Notes Logging
database (NNDILOG.NSF). For severe errors, messages are logged in
NNDILOG.NSF and in the OS/400 message queue QSYSOPR. The OS/400
message queue QNNDIMSG is an intermediary for logging to the Notes
Database NNDILOG.NSF. The OS/400 directory synchronization programs log
messages to QNNDIMSG. A batch job transfers these messages to the Notes
database NNDILOG.NSF and then deletes the messages from QNNDIMSG
afterwards. If, for some reason, the batch job cannot process the messages from
the message queue (batch jobs end, and so on), the messages remain on the
message queue. In errors where jobs end, messages are logged to the Notes
databases NNDILOG.NSF and QSYSOPR.
348
Lotus Domino for AS/400 R5: Implementation
Chapter 12. Domino for AS/400 Single Logon
This chapter describes how to install and use Domino for AS/400 Single Logon.
Domino for AS/400 Single Logon allows you to use a single password for your
Windows session, Client Access connections, and your Lotus Notes client. After
you have installed it, you can change your password from Lotus Notes. Domino
for AS/400 Single Logon ensures that the change is propagated to the other
functions.
12.1 Requirements
Domino for AS/400 Single Logon runs on any Intel platform running one of the
following products:
• Microsoft Windows 95
• Microsoft Windows 98
• Microsoft Windows NT V3.51 or later
You can also optionally use IBM Client Access for Windows 95/NT V3R2M0, or
IBM Client Access Express for Windows V4R4M0 or later. Lotus Notes R4.6.2 or
later is required for the Notes client.
The installation database, NNSLINST.NSF is on the Lotus Domino for AS/400
CD. The Web site at http://www.as400.ibm.com/lotus_notes/SingleLogon also has
this database. To ensure you have the latest version, we suggest that you
download it from the Web. You can also find a document with questions and
answers on this Web site.
It is not necessary for the Windows user ID to be the same as the Client Access
and Notes IDs. It is the passwords that are set to be the same. The Client Access
ID is taken from the Default Profile for the connection.
12.2 Installation
This section describes using Domino for AS/400 Single Logon on a Windows 95
platform using Client Access 95/NT.
To install Domino for AS/400 Single Logon on your workstation, perform the
following steps:
1. Change your Lotus Notes password to match your Windows password
a. File
—> Tools —> User ID, as shown in Figure 252 on page 350.
You are prompted for your password.
© Copyright IBM Corp. 1999, 2001
349
Figure 252. Change user profile
b. You see the window shown in Figure 253. Click Set Password. You are
prompted for your password again.
Figure 253. User ID window
3. When you see the window in Figure 254, enter your new password.
350
Lotus Domino for AS/400 R5: Implementation
Figure 254. Set Password window
d. Enter your password again to confirm your password.
2. Set your AS/400 password to be the same as your Windows password. You
can do this by using the Change Password command (CHGPWD) on the
AS/400 system or by selecting the Passwords icon in the Control Panel of
Windows.
Notice that you are changing the password for the default user for your
connection.
3. If you are currently using caching of passwords under Client Access 95/NT,
you must turn it off.
Click Start —> Settings —> Control Panel —> Password Properties —>
Client Access and deselect the Windows 95 password cached Enabled
field, as shown in Figure 255.
Figure 255. Password caching
4. Switch to your Notes client. Select File —> Database —> Open and look for
Domino for AS/400 Single Logon on your server. Alternatively if you
downloaded it from the Web, it may be in your local data directory.
5. You see instructions for installing and using Domino for AS/400 Single Logon.
We suggest that you print these instructions for later reference. If you are
already using Windows NT and the Lotus Notes Single Logon option, you
need to uninstall it.
Domino for AS/400 Single Logon
351
6. At the bottom of the document is a file, slsetup.exe, that you detach and run.
Running this program installs Domino for AS/400 Single Logon.
7. You are prompted for the location to install the software. You must restart your
PC for the changes to take effect.
Installing Domino for AS/400 Single Logon adds a registry key Volatile in the
path HKEY_CURRENT_USERS\Software\IBM\Lotus\Domino for AS/400\Single Logon\
Volatile where the Notes client password is cached. It also adds a line in your
NOTES.INI, EXTMGR_ADDINS=slextmgr.dll.
12.3 Using Domino for AS/400 Single Logon
You are ready to use Domino for AS/400 Single Logon. When you boot the PC,
the password you enter for the Windows password is used for your AS/400
connections and your Notes signon. You receive notification of successful and
unsuccessful AS/400 connections. You can now use Operations Navigator
connections or Map Network Drives without being prompted for a password.
You may think that there is a security issue with Domino because you soon
discover that you are never prompted for a Domino password, even when you
close and reopen the application. F5 can be used to clear the Private User
Information. The next time you try to access anything in Notes, you are prompted
for the password. If you are not prompted for the password, download the latest
copy of the Domino for AS/400 Single Logon code from the Web.
You also must make sure that the QPWDEXPITV system value, which determines
the number of days between required password changes on the AS/400, is higher
than the setting used in the Person document in Domino so that you are not
prompted to change the AS/400 password in isolation.
From now on, you should only change your Lotus Notes Client password through
File —>Tools —> Users —> Properties, as shown in Figure 252 on page 350
and Figure 253 on page 350.
The difference is that the prompt to change your password now appears as
shown in Figure 256. You can see that it is a different prompt compared with
when you changed the Domino password before installing the software. The
password you enter here is used to change the AS/400 passwords, as well as the
Windows and Domino passwords. Domino for AS/400 Single Logon takes care of
propagating the password change to Windows and OS/400.
Figure 256. Domino for AS/400 Single Logon — Change Windows Password
You receive the confirmation message, as shown in Figure 257, that the
passwords will be changed.
352
Lotus Domino for AS/400 R5: Implementation
Figure 257. Confirmation of password change
Then, you see confirmation that your Windows password has been changed.
Make sure, before you use this tool, that you are aware of any password
restrictions on your AS/400 systems so that you use a password that is valid on
all your systems and applications. If the current password for the AS/400 system
is different from the current Notes password, you are advised of this fact, as
shown in Figure 258.
Figure 258. Change AS/400 password fails panel
You are prompted for the old AS/400 password, as shown in Figure 259, so that
Single Logon can still make the necessary change.
Figure 259. Old password prompt
Notice that any changes to the password for AS/400 connections takes effect the
next time you log on to Windows.
12.4 Resynchronizing passwords
Single Logon prompts for the AS/400 password if it is not synchronized with
Windows. Therefore, it is not necessary to synchronize AS/400 passwords.
Volatile is a registry entry that holds password cache for the Lotus Notes client on
the system. Delete the value of volatile by selecting Start —>Run —> Regedit.
Expand the path HKEY_CURRENT_USERS\Software\IBM\Lotus\Domino for
AS/400\Single Logon\Volatile. Right-click Volatile and select Delete, as shown
in Figure 260 on page 354 and delete it.
Domino for AS/400 Single Logon
353
Figure 260. Deleting Volatile
If your passwords get out of synchronization, you can correct this as shown in the
following steps:
1.
2.
3.
4.
5.
6.
Comment out EXTMGR_ADDINS=slextmgr.dll from your NOTES.INI file.
Restart your Notes client.
Change your Notes password to match your Windows password.
Uncomment EXTMGR_ADDINS=slextmgr.dll from your NOTES.INI file.
Delete the Volatile.
Restart your workstation.
Note
Sometimes when testing, we found that the Notes client would start up, and
then close. Generally, it was when we forgot our various passwords. We found
commenting out the EXTMGR_ADDINS=slextmgr.dll statement was the easiest way
to resolve this while we were resynchronizing the passwords.
Alternatively, you can follow these steps:
1. Change the Windows password to match the Lotus Notes password. Select
Control Panel —> Passwords.
2. Delete the Volatile.
3. Restart your workstation. The value of Volatile is reset from the Windows
password you enter.
12.5 Removing Domino for AS/400 Single Logon
You remove Domino for AS/400 Single Logon by using Add/Remove Program in
your Windows Control Panel. You must restart Windows after removing Domino
for AS/400 Single Logon.
12.6 Considerations for Client Access Express
Domino Single Logon can be used with Client Access Express but the concept of
password caching is different. Single Logon changes the AS/400 password, but
you are prompted for the password when you want to use Operations Navigator.
354
Lotus Domino for AS/400 R5: Implementation
We found the only way around this was to change the setting in the Connection
tab (Figure 261) of the Properties for the AS/400 system to use the Windows user
and password or to use the default user and prompt, as needed. Do not forget
that Client Access Express uses AS/400 NetServer, rather than Client Access, for
providing Network drives.
Figure 261. Properties — Connection page
Domino for AS/400 Single Logon
355
356
Lotus Domino for AS/400 R5: Implementation
Chapter 13. Dial-up connectivity
In many cases, you may want to connect a client or another server to your
Domino for AS/400 server when there is no local area network (LAN) connection
between the two systems. A solution for this is to use Remote Network Services
connections.
After providing some information on Domino and Notes Remote Network
Services support, this chapter describes different methods of connecting two
servers and how to connect a client to a Domino server. Specifically, we cover
how to perform the following tasks:
• Configure Remote Network Services. This includes the prerequisites and
configuration for the following connections:
– AS/400 to receive calls and dial-out to remote systems
– Windows NT to receive calls and dial-up remote systems
– Windows 98/95 to dial-up remote systems
• Configure Domino and Notes to use the Remote Network Services.
• Configure the AS/400 as a second server to a Windows NT server, where the
only means of connection is using dial-up.
• Configure SLIP for client dial-up to an AS/400 system.
• Troubleshoot your configuration.
• Use a 7857-017 modem.
The following publications are useful references when setting up communications
on your AS/400 system:
•
•
•
•
•
•
•
iSeries Handbook , GA19-5486
iSeries and AS/400e System Builder, SG24-2155
Getting Your AS/400 Working for You, SC41-5161
OS/400 TCP/IP Configuration and Reference , SC41-5420
Communications Configuration, SC41-5401
AS/400 Client Access for Windows 95/NT - Setup, SC41-3512
Client Access Express for Windows - Setup, SC41-5507
13.1 How Lotus Domino Dial-Up works
The following two scenarios are common with Domino and Notes Dial-Up:
• Notes Direct Dial-up connections
• Remote Network Services connections
When you use a Notes Direct Dial-up connection, the Domino Server or Notes
Client connects to a Domino Server directly, using the X.PC protocol. The X.PC
protocol is installed as part of the Domino server and Notes Client. The Lotus
Domino server for the AS/400 does not support Notes Direct Dial-up (X.PC).
Using Notes Direct Dial-up allows for a connection to a single server. This can be
expanded to any server on the destination network by allowing for Domino
Pass-through on the destination server. This is secure and cost effective, but may
cause slower response times.
© Copyright IBM Corp. 1999, 2001
357
Domino servers and Notes Clients also support connections using Remote
Network Services. However, the configuration and availability of these services is
dependent on the operating system. Domino and Notes platforms that support
Remote Network Services are:
Domino Server
Notes Client
Windows NT, OS/400
Windows NT/98/95, Macintosh OS
With Domino and Notes supporting a wide range of protocols, a remote network
connection does not work if the two sides are using different protocols. The
following list shows the operating systems and the remote network protocols
supported over dial-up connections:
Windows NT/98/95
OS/400
Macintosh OS
PPP and SLIP
PPP and SLIP
PPP and Apple Remote Network
The protocols mentioned in the previous list are used as a connection base
between the two systems. This allows for transferring the network protocols (for
example TCP/IP, IPX/SPX) over the remote connection. With the growth of the
Internet, the most common protocol used over remote network connections is
TCP/IP. Depending on the platform, the protocols supported over the dial-up
connection may differ. The AS/400 does not support IPX/SPX over a dial-up
connection.
13.1.1 Serial Line Internet Protocol (SLIP)
Serial Line Internet Protocol (SLIP) is the result of early attempts to connect two
systems using TCP/IP over an asynchronous line. SLIP is a simple protocol for
transmission of IP datagrams over serial lines, described in Request for
Comment (RFC) 1055. Information on RFCs can be viewed from the following
Web sites:
• http://info.internet.isi.edu/in-notes/rfc/files/rfc1055.txt
• http://www.rfc-editor.org
SLIP has several deficiencies that are discussed in this RFC. Some of these
deficiencies are as follows:
•
•
•
•
No
No
No
No
standardized mechanism for hosts to communicate addressing information
support for network protocols other than TCP/IP
support for system authentication
support for packet error detection, error correction, or compression
Despite these deficiencies, SLIP is still used today. It is provided as part of
OS/400 and other platforms, including Windows NT. IBM does not encourage use
of SLIP. However, its support for an asynchronous line type allows the use of
some of the older adapters and I/O processors with serial ports.
We describe how to configure SLIP for client connectivity in 13.9, “Configuring a
SLIP connection profile on the AS/400 system” on page 407.
13.1.2 Point-to-Point Protocol (PPP)
Point-to-Point Protocol (PPP) addresses all of the SLIP deficiencies listed
previously, provides enhanced security, is more efficient, supports higher line
speeds, and is easier to configure. One goal of PPP is to allow inter-operability
358
Lotus Domino for AS/400 R5: Implementation
among the remote access software of different manufacturers. Another goal is to
allow the same physical communication line to be used by multiple network
communication protocols.
13.2 Prerequisites for Remote Network Services on the AS/400
For Remote Network Services to work on the AS/400 system, the following
requirements must be considered:
• Operating system version OS/400 Release 4 Version 2 (V4R2) or later. PPP
was not supported in earlier releases.
• Operations Navigator under AS/400 Client Access for Windows 95/NT or
Client Access Express for Windows.
For the creation of connection profiles, the Operations Navigator Network
function must also be installed.
• SLIP connection profiles can be configured using the green screen interface or
Operations Navigator.
PPP connection profiles can only be configured using Operations Navigator.
• SLIP and PPP connections must be established using either switched line or
direct leased line mode.
If you are using OS/400 Release 4 Version 3 (V4R3) or later, there is the
additional option of Dial-on-Demand connections. This is only available for
PPP connection profiles.
• The correct communication ports and adapters must be installed on the
AS/400 system.
The type of adapter that can be installed depends on the model of AS/400
system you have. To find out more about AS/400 hardware requirements, refer
to the iSeries Handbook, GA19-5486. More information on AS/400 support for
Point-to-Point TCP/IP can be found in AS/400e series TCP/IP Configuration
and Reference, SC41-5420. Depending on the model of your AS/400 system,
the following is a list of supported I/O adapters at the time this redbook was
written:
•
•
•
•
•
•
2699
2720
2721
2750
2751
2761
-
Two-line WAN IOA
PCI WAN/Twinaxial IOA
PCI Two-line WAN IOA
PCI ISDN BRI U IOA (2-wire interface)
PCI ISDN BRI S/T IOA (4-wire interface)
8 port analog modem IOA
Go to AS/400 Infocenter at http://www.as400.ibm.com/infocenter for updated
information.
Note
A PPP line description supports SLIP, as well as PPP connections, and
requires specific hardware.
• Each connection profile requires a line description. The connection profile
defines the method, protocol, type and other configuration settings to be used
Dial-up connectivity
359
when connecting to the remote system. Only one connection profile can be
active for each line description.
The line description activates the modem and ensures that communication
can take place over this line with the supplied configuration. If a line
description has activated a modem, no other line descriptions can be active to
the same hardware.
Lotus Domino Release 5 is able to initiate push-pull mail routing. This is useful
when you only have a single line.
13.3 AS/400 Remote Network Services configuration
This section guides you through the AS/400 configuration needed to allow a
remote PPP or SLIP client to connect to your AS/400 system. All configuration is
done using OS/400 V4R3 and Operations Navigator under AS/400 Client Access.
For more information on setting up and using AS/400 Client Access, refer to
Chapter 8, “Graphical user interface of Operations Navigator” on page 241.
Note
The examples configured in this section were done using OS/400 V4R3 and
Operations Navigator V3R2. The examples described in this section work on
OS/400 V4R2 or later.
Before configuring your AS/400 system for dial-up connectivity, ensure that all of
the prerequisites have been met. The appropriate modems and modem cables
are also required. If you have not yet made an investment in new modem
hardware, it may be possible to use the Electronic Customer Support (ECS)
modem on your AS/400 system for testing purposes.
Note
AS/400 PPP can be set up to use the ECS modem in either synchronous or
asynchronous mode. Modems that operate only in asynchronous mode are
more common on PC workstations. Because both mode and speed of the
modem must match on the dialing and answering systems, we discuss how to
change an AS/400 ECS modem to operate in asynchronous mode.
The IBM 7852-400 modem, which comes with the newer technology of many
AS/400 systems, has physical dip switches. To enable asynchronous mode, set
all switches, except number 12, to the factory defaults. Switch #12 controls
whether the synchronous or the asynchronous mode is used. This switch
should be down for asynchronous mode.
Depending on the country where you ordered your AS/400 system, you may
get different modems. Refer to the user's manual for the modem on how to
switch your modem to asynchronous mode.
After you have determined that your AS/400 system has the ability to establish a
remote connection with another system, you must provide your AS/400 system
with the information that allows it to do this. This is done by creating a connection
profile.
360
Lotus Domino for AS/400 R5: Implementation
SLIP connection profiles can be created using a green screen session or by using
Operations Navigator. However, PPP connection profiles can only be configured
by using Operations Navigator. No additional license fees are required to use
Operations Navigator. It also offers convenient access to Domino administration
from the same interface (automatically invoking the appropriate function of a
Notes Client under the covers) and the capability to edit the NOTES.INI
configuration file of the Domino for AS/400 server.
13.3.1 Configuring an answer connection profile (Operations Navigator)
This section describes creating a connection profile using PPP and Switched
Line-Answer. To setup this connection on the AS/400 system using Operations
Navigator, perform the following steps:
1. From the Windows NT/98/95 desktop, start Operations Navigator (if not
already running).
After the application has launched, you see an Explorer-like display. On the
left side of the display is a hierarchical tree that depicts the AS/400 network.
To expand and view the options for a particular AS/400 system, click the plus
(+) sign next to the item.
The right side shows the options that can be configured for the selected item.
2. In the hierarchical tree of Operations Navigator, expand (click the plus (+)
sign) the AS/400 system on which the connection profile will be created.
3. Expand the Network and Point-to-Point to display the Point-to-Point options.
Figure 262. Operations Navigator — Point-to-Point
Under the Point-to-Point option in Figure 262, additional modem definitions
and configuration profiles can be created.
4. Click Connection Profiles. There may already be profiles created on this
system. From the Connection Profile view, the protocol, status, and type can
Dial-up connectivity
361
be quickly viewed. For more detailed information on the connection profile,
right-click the profile and select Properties.
Note
From the Connection Profile view, you can right-click the profile name to
start, stop, or delete the profile.
5. Each connection profile requires a line description. The line description
connects to the modem. After the line description is connected to the modem,
no other connection profiles or line descriptions can access that modem.
6. To create a new connection profile, right-click Connection Profile in the
hierarchical tree and select New Profile. This opens the New Point-to-Point
Properties panel.
Figure 263. Creating a new connection profile
7. Click the General tab and enter a profile name and description, as shown in
Figure 264.
362
Lotus Domino for AS/400 R5: Implementation
Figure 264. New Point-to-Point Profile Properties — General tab
8. Select the type of connection. We recommend that you use PPP, rather than
SLIP.
9. For this to be an answer connection profile, the mode of connection can be
one of the following types:
• Switched line-answer
Allows for remote connections using a standard phone line. This line is only
used for incoming connections.
• Dial-on-demand (answer enabled dedicated peer)
Allows for remote connections using a standard phone line. This line is
used for outgoing and incoming connections.
Note
Dial-on-demand is only available in OS/400 V4R3 and later. This function
is very useful for a automatic dial-up to the remote network or when there
is requirement for incoming and outgoing connection to use the same
connection profile.
We were not able to keep the connection up when configuring AS/400 to
Windows NT connections using Dial-on-demand (answer enabled...).
• Leased line terminator
Allows for remote connections using a dedicated line. This line is dedicated
to incoming connections.
The selection is dependent on the type of line and the function you want the
profile to perform. We used Switched Line-Answer.
10.Click the Connection tab. Depending on which mode option is selected on the
General tab, the remaining tabs are different.
Dial-up connectivity
363
11.Figure 265 shows the options on the Connection tab with the mode of
Switched Line-Answer.
Figure 265. New Point-to-Point Profile — Connection tab
12.Check the Override line inactivity timeout box to force a disconnection if
there is no activity over the line. This setting overrides the inactivity timeout in
the line description. This value should be set high. This ensures that the client
times out first.
13.There are two choices on the Line option:
• Line name: This uses a single line for the connection profile.
• Line pool: This is a list of lines that are available to the connection profile.
When the profile is started, the first available line is activated. If there are
no available lines, the profile is not started.
Note
Creation of a Line pool is only available in OS/400 V4R3 and later.
Select Line name and enter a name for your line, then click New. If there is a
line created already, it can be selected from the pull-down list.
If you select an existing line description from the drop-down list, click Open
instead. Refer to the next few steps to validate existing line properties instead
of entering them for the first time
Note
There may be settings that are greyed-out when editing line description
properties. These can only be changed by creating a new line description.
14.After the New Line Properties panel is open, enter in a description for the new
line, as shown in Figure 266.
364
Lotus Domino for AS/400 R5: Implementation
Figure 266. New Line Properties — General tab
Select the hardware resource to be used by this line description. The Interface
type must be RS232/V.24.
Note
Two or more line descriptions can reference the same hardware resource.
However, only one can be active at any point in time.
The Framing type is based on the type of modem being used. Both the client
and server must use the same framing type to be able to establish the
connection.
Note
The PPP protocol supports either synchronous or asynchronous framing,
depending on your modem type and setup.
If you want to keep the line active during a longer idle time period, you may
specify a higher inactivity timeout. The default value is 15 seconds.
15.Click the Connection tab and accept the default values.
16.Click the Link tab and specify the maximum line speed supported by your
hardware, as shown in Figure 267 on page 366.
Dial-up connectivity
365
Figure 267. New Line Properties — Link tab
17.Click the Limits tab and accept the default values.
18.Click the Modem tab and select the appropriate modem from the Name
pull-down box, as shown in Figure 268.
If you are using an IBM 7857-017 modem, a customized modem information
entry may need to be created. Refer to 13.11, “Special considerations with the
7857-017 modem” on page 418, for details.
Figure 268. New Line Properties — Modem tab
366
Lotus Domino for AS/400 R5: Implementation
19.Click the Security and Additional Parameters tabs and accept the default
values on each page.
20.Click OK to save and close the New Line Properties panel. This returns you to
the Point-to-Point Properties.
21. On the Point-to-Point Profiles Properties, click TCP/IP Settings (Figure 269).
Figure 269. New Point-to-Point Profile — TCP/IP Settings tab
Fill in the necessary information, as shown in Figure 269. The following list
provides a description of each item:
• Local IP address: Using the Switch Line-Answer mode the only option
available is to specify an IP address. The local IP address can be selected
from the pull-down list or a new IP address can be entered. This IP address
is used to reference the local system by the remote dial-up client.
• Remote IP address: There are three options available, each with its own
advantages:
– Dynamically assign: The IP address is assigned by a remote system.
The IP address must be set in the configuration of the remote system.
This method is hard to control.
– IP address: The specified IP address is assigned to the remote system
once connected. This is the recommended method of setting up remote
connections. If the remote system is configured with an IP address, both
of these addresses must match.
– Route specified : Allows you to specify an unique remote IP address,
depending on the user dialing in. If selected, use the Routing button on
this panel.
We recommend you select IP address and specify an address for the
calling system or client.
• Allow IP forwarding: This allows Internet Protocol (IP) datagrams not
destined for this AS/400 system to pass through this system onto a
Dial-up connectivity
367
connected network. There may be security reasons why you would not
want to allow IP forwarding.
• Request TCP/IP header compression (VJ): Compression usually
improves performance, particularly for interactive traffic or slow serial lines.
Enable Request TCP/IP header compression (VJ).
22.Click the Authentication tab (Figure 270) and enable Remote system
authentication. This is not required, but adds an additional level of security
when a remote system tries to connect to your server.
With this connection profile being used for Switched Line-Answer, there is no
requirement for Local system identification.
Figure 270. New Point-to-Point Profile — Authentication tab
The following list provides a description of the Authentication panel:
• Remote system identification: There are two security standards for
authentication and identification:
– Challenge Handshake Authentication Protocol (CHAP) : CHAP uses an
encrypted exchange of the password to prevent anyone attempting to
find out your password. It is recommended that you use CHAP, instead
of PAP, whenever possible.
– Password Authentication Protocol (PAP) : PAP first attempts to negotiate
using CHAP with the remote system. However, if the remote system
rejects this, the communication switches to PAP. PAP requires that the
user name and password be sent in clear text form.
The validation list allows you to define a user list, which allows only the
users in the list access to your system. You can select from an existing
Validation List or create a new one.
• Local system identification: Not required for this connection profile.
23.Click OK to finish the creation of a new Point-to-Point profile.
368
Lotus Domino for AS/400 R5: Implementation
13.3.2 Configuring a dial-up connection profile (Operations Navigator)
Note
The AS/400 system, since V4R3, has supported Dial-on-Demand. This means
that, if an application requires communication between two hosts, and the
configuration has been defined appropriately, the server will initiate dial-up to
the second server. Domino supports a similar concept of using Connection
documents and the X.PC protocol or Remote LAN Services to enable timed
dial-up replication between servers.
Lotus Domino for AS/400 does not support X.PC and is unable to take
advantage of the iSeries support for Dial-on-Demand. For timed replication
between dial-up services, another method needs to be used to initiate the
dial-up prior to the scheduled replication. This way, when the replication time is
reached, the servers are considered to be LAN connected, and the replication
can take place. Some people have found ways around this limitation by using
routers that can initiate the dial-up. An alternative approach is to use a small
Windows server sitting between the AS/400 system and the dial-up network
that can initiate the connection.
One particular reason why people want this type of support is for dial-up to
Internet Service Providers (ISPs) to send and receive Internet mail on a
periodic basis rather than being permanently connected.
This section describes creating a connection profile using PPP and Switched
Line-Dial. To setup this connection on the AS/400 system using Operations
Navigator, perform the following steps:
1. From the Windows NT/98/95 desktop, start Operations Navigator (if not
already running).
After the application is launched, you see an Explorer-like display. On the left
side of the display is a hierarchical tree that depicts that AS/400 network. To
expand and view the contents of a server, click the plus (+) sign next to the
item. The right side shows the options that can be configured for the selected
item.
2. In the hierarchical tree of Operations Navigator, expand (click the plus (+)
sign) the AS/400 system on which the connection profile will be created.
3. Expand Network, and then Point-to-Point to display the Point-to-Point
options.
Dial-up connectivity
369
Figure 271. Operations Navigator — Point-to-Point option
In Figure 271, under the Point-to-Point option, additional modem definitions
and configuration profiles can be created.
4. Click Connection Profiles. There may already be profiles created on this
system. From the Connection Profile view, the protocol, status and type can be
quickly viewed. For more detailed information on the connection profile,
right-click the profile and select Properties.
Note
From the Connection Profile view, you can right-click the profile name to
start, stop or delete the profile.
5. Each connection profile requires a line description. The line description
connects to the modem. After the line description is connected to the modem,
no other connection profiles or line descriptions can access that modem.
6. To create a new connection profile, right-click Connection Profile in the
hierarchical tree and select New Profile. This opens the New Point-to-Point
Properties panel.
370
Lotus Domino for AS/400 R5: Implementation
Figure 272. Creating a new connection profile
7. Click the General tab and enter a profile name and description, as shown in
Figure 273.
Figure 273. New Point-to-Point Profile — General tab
8. Select the type of connection. It is recommended that you use PPP, rather
than SLIP.
9. For this to be a dial connection profile, the mode of connection can be one of
the following types:
• Switched Line-Dial: Allows for remote connections using a standard
phone line. This line is only used for outbound connections.
Dial-up connectivity
371
• Dial-on-demand (dial only): Allows for remote connections using a
standard phone line. This line is only used for outbound connections. If
there is a request for access to the remote system (for example, a PING or
Domino connect), the system automatically dials up.
• Dial-on-demand (answer enabled dedicated peer): Allows for remote
connections using a standard phone line. This line is used for outgoing and
incoming connections. If there is a request for access to the remote system
(for example, a PING or Domino connect), the system automatically dials
up.
Note
Dial-on-demand is only available in OS/400 V4R3 and later. This function
is very useful for a automatic dial-up to the remote network or when there
is requirement for incoming and outgoing connection to use the same
connection profile.
We were not able to keep the connection up when configuring AS/400 to
Windows NT connections using Dial-on-Demand (answer enabled...).
See the note at the beginning of this section regarding no support for
Dial-on-Demand by Domino for AS/400.
• Leased line terminator: Allows for remote connections using a dedicated
line. This line is dedicated to outbound connections only.
The selection is dependent on the type of line and the function you want the
profile to perform. We use Switched Line-Dial.
10.Click Connection. Depending on which mode option is selected on the
General tab, the options on the remaining tabs are different.
11.Figure 274 shows the options on the Connection tab when the mode is
Switched Line-Dial.
Figure 274. New Point-to-Point Profile — Connection tab
372
Lotus Domino for AS/400 R5: Implementation
12.The Remote phone numbers shows the phone numbers of the remote systems
to which you want to connect.
If additional numbers are required to reach an outside phone line, then ensure
you include them in the remote phone numbers. You may require a pause
before the number can be dialed. Using a comma ( , ) within the remote phone
number indicates a one second delay before proceeding, for example:
• 9,,1507555-3762
• 0,,0112711233-1374
Note
Up to three phone numbers can be added. These could be used for:
• Multiple numbers used to connect to the remote system
• A single PPP profile used to access multiple remote systems
13.Check the Override line inactivity timeout to force a disconnection if there is
no activity over the line. This setting overrides the inactivity timeout in the line
description. This value should be set low to ensure that the client times out
before the server.
14.There are two choices on the Line option:
• Line name: This uses a single line for the connection profile.
• Line pool: This is a list of lines that are available to the connection profile.
When the profile is started, the first available line is activated. If there are
no available lines, the profile is not started.
Note
Creation of a Line pool is only available in OS/400 V4R3 and later.
Select Line name and enter a name for your line, and then click New. If there
is a line created already, it can be selected from the pull-down list.
If you select an existing line description from the drop-down list, click Open
instead. Refer to the next few steps to validate existing line properties instead
of entering them for the first time.
Note
There may be settings that are greyed-out when editing Line Description
Properties. These can only be changed by creating a new line description.
15.After the New Line Properties panel is open, enter in a description for the new
line, as shown in Figure 275 on page 374.
Dial-up connectivity
373
Figure 275. New Line Properties — General tab
Select the hardware resource to be used by this line description. The Interface
type must be RS232/V.24.
Note
Two or more line descriptions can reference the same hardware resource.
However, only one can be active at any point in time.
The Framing type is based on the type of modem being used. Both the client
and server must use the same framing type to establish the connection.
Note
The PPP protocol supports either synchronous or asynchronous framing,
depending on your modem type and setup.
If you want to keep the line active during a longer idle time period, you may
specify a higher inactivity timeout. The default value is 15 seconds.
16.Click the Connection tab and accept the default values.
17.Click the Link tab and specify the maximum line speed supported by your
hardware, as shown in Figure 276.
374
Lotus Domino for AS/400 R5: Implementation
Figure 276. New Line Properties — Link tab
18.Click the Limits tab and accept the default values.
19.Click the Modem tab and select the appropriate modem from the Name
pull-down box, as shown in Figure 277.
If you are using an IBM 7857-017 modem, a customized modem information
entry may need to be created. Refer to 13.11, “Special considerations with the
7857-017 modem” on page 418, for details.
Figure 277. New Line Properties — Modem tab
Dial-up connectivity
375
20.Click the Security and Additional Parameters tabs and accept the default
values for each page.
21.Click OK to save and close the New Line Properties panel. This returns you to
the Point-to-Point Profile Properties panel.
22.Click TCP/IP Settings (Figure 278).
Figure 278. New Point-to-Point Profile — TCP/IP Settings tab
Fill in the necessary information, as shown in Figure 278. The following list
provides a description of each item:
• Local IP address: There are two options available each with its own
advantages:
– IP address : The local IP address can be selected from the pull-down list
or a new IP address can be entered. If the address is incorrect, there
may be problems communicating with the remote system.
– Dynamically assign: The local IP address is assigned by a remote
system.
Select Dynamically assign.
• Remote IP address: There are two options available, each with its own
advantages:
– Dynamically assign: The remote IP address is assigned by a remote
system.
– IP address: The remote IP address specified is the address that is used
to reference the remote system.
Select Dynamically assign.
• Request TCP/IP header compression (VJ): Compression usually
improves performance, particularly for interactive traffic or slow serial lines.
Enable Request TCP/IP header compression (VJ).
376
Lotus Domino for AS/400 R5: Implementation
23.Click the Authentication tab (Figure 279) and select Enable local system
identification, if the remote system requires a user ID and password.
With this connection profile being used for Switched Line-Dial, there is no
requirement for Remote system authentication.
Figure 279. New Point-to-Point Profile — Authentication tab
The following list provides a description of the Authentication panel:
• Local System Authentication: There are two security standard for
authentication:
– Challenge Handshake Authentication Protocol (CHAP) : CHAP uses a
encrypted exchange of the password to prevent anyone attempting to
find out your password. It is recommended that you use CHAP, instead
of PAP, whenever possible.
– Password Authentication Protocol (PAP) : PAP first attempts to negotiate
using CHAP with the remote system. However, if the remote system
rejects this, the communication switches to PAP. PAP requires that the
user name and password be sent in clear text form.
The user ID and password specified must be given dialin access on the
remote system. Confirm that the user name and password are correct
with the remote systems administrator.
Select CHAP and enter a valid user name and password.
• Require remote system identification: Not required for this connection
profile.
24.Click OK to finish the creation of a new Point-to-Point profile.
13.3.3 Starting the new connection profile
This section describes starting the connection profiles that were just created.
1. From Operations Navigator, expand the AS/400 system on which the
connection profiles have been created.
Dial-up connectivity
377
2. Expand Network —> Point-to-Point
—> Connection Profiles.
3. Figure 280 shows a list of all connection profiles created on the system.
Figure 280. Starting the connection profile
4. As shown in Figure 280, right-click the connection profile to be started, and
then click Start.
Note
From the Connection Profile view, you can right-click the profile name to
start, stop, delete, or edit the profile properties.
5. Start all required connection profiles.
• Switched Line-Answer connections must be started at all times. After
starting, the connection profile changes to a Ring-Wait state.
• When starting a Switched Line-Dial connection, it starts a dial-up
connection to the remote system. This is useful as a test.
• Dial-on-demand connection mode must be started at all times. This
connection starts a connection to the remote system automatically when
there is a request to access the remote system, for example, a PING of the
remote system.
Remember, only one connection can be activated on a single line at any
point time.
13.4 Prerequisites for Remote Access Service on Windows
Before the Remote Access Service (also known as Dial-up Networking) can be
set up on Windows NT/98/95, a modem definition must be added.
378
Lotus Domino for AS/400 R5: Implementation
To add a modem definition, follow these steps:
1. From the Windows desktop, double-click My Computer
—> Modems.
—> Control Panel
2. Check the modems defined on the system. Ensure the modem to be used by
Dial-up Networking is defined.
If the modem is defined on the system, continue with the next section.
Depending on the platform being used, refer to:
• 13.5, “Windows NT Dial-Up Networking” on page 381
• 13.6, “Windows 98/95 Dial-Up Networking” on page 391
If the modem is not defined, click Add.
Figure 281. Modem configuration
3. You are prompted with the Install New Modem dialog. Accept the defaults and
click Next.
Figure 282. Install New Modem page
4. The operating system attempts to determine the type of modem connected to
your system (Figure 283 on page 380).
Dial-up connectivity
379
Figure 283. Checking for connected modems
5. After the modem is detected and a suitable type chosen, you are requested to
confirm the settings (Figure 284).
Figure 284. Confirming the detected modem settings
6. If the modem type is incorrect (Figure 284), you can select the correct type
from the modem list, as shown in Figure 285. Click Change.
Figure 285. Selecting a modem from a list
Select the correct type from the list. Click Next.
380
Lotus Domino for AS/400 R5: Implementation
Note
If there is no listing for the type of modem you are using, there may be a
driver diskette supplied with the modem. Other modem types may be
compatible with the modem. For information on support, read the
documentation supplied with your modem.
IBM 7852-400, which may be your ECS modem, is compatible with the
MultiTech MultiModem MT2834BL.
7. Click Next to confirm the modem type and port.
8. Click Finish to complete the installation. The modem is now installed on your
system. You may be required to restart your system for changes to take effect.
9. After the modem is installed, check your dialing properties (Figure 286) to
ensure that your configuration (check your country, area code, dial prefix and
so on) is correct.
Figure 286. Modem Properties — Completed installation
10.To exit Modem Properties, click Close.
13.5 Windows NT Dial-Up Networking
Although the functionality of a Remote Network Services for Windows NT is
similar to the Dial-Up Networking for Windows 98/95, the configuration is
completely different. This section describes the configuration of Remote Access
Services for Windows NT Workstation or Server. This applies to both dial-up and
answering.
Before any configuration changes can be made to the system, ensure that you
are logged on using an administrative user ID. To configure a remote Windows NT
Workstation or Server, you must ensure that all of the required components are
configured on your system. You may require the Windows NT CD-ROM.
Dial-up connectivity
381
To activate these functions, follow these steps:
1. Add modem support for Windows, as explained in 13.4, “Prerequisites for
Remote Access Service on Windows” on page 378.
2. Add Remote Access Services for Windows NT.
3. Configure the Remote Access Service (dial-out and receive connections).
4. Grant users dialin access.
5. Configure Windows NT Dial-Up connection.
These steps are described in detail in the following sections.
13.5.1 Adding Remote Access Service for Windows NT
Remote Access Service (also refers to as Dial-Up Networking) is an optional part
of Windows NT Workstation or Server. When it is enabled, you are able to
connect to other computers by using a modem.
To enable Dial-Up Networking, follow these steps:
1. From the Windows NT desktop, double-click My Computer —> Control
Panel —> Networking.
2. Click the Services tab (Figure 287).
Figure 287. Network properties — Services tab
3. Check for the Remote Access Service (RAS). If this service does not exist,
click Add. The Select Network Service dialog (Figure 288) appears.
If RAS is already added to the system, continue with the next section.
382
Lotus Domino for AS/400 R5: Implementation
Figure 288. Installing new network services
From the list of available services, select Remote Access Service. Click OK.
The RAS programs are now installed on you system.
4. After the programs are installed, the properties for RAS opens and
automatically attempts to add a RAS device.
13.5.2 Configuring the Remote Access Service
If RAS is already setup on your system, click Properties. This allows you to edit
the properties for this service. See Figure 289.
Figure 289. Remote Access Service Properties
To configure RAS, follow these steps:
1. To add a new port for the RAS, click Add.
2. This allows you to add a RAS device. Select the modem from the list, as
shown in Figure 290.
Figure 290. Remote Access Services — Modem
Dial-up connectivity
383
There is also the option to install a new Modem or X.25 Pad from this dialog.
Click OK to continue with the configuration.
3. The selected modem is added to the list of active RAS modems. Select the
newly added modem and click Configure.
The Configure Port Usage dialog (Figure 291) allows for the modem to be
configured in three ways. Select the appropriate type.
This example is configured for Dial out and Receive calls option. Click OK.
Figure 291. Remote Access Services — Communications port
4. Ensure that the correct modem is still selected. Click Network to configure the
network configuration for this modem. The Network Configuration panel
(Figure 292) appears.
Figure 292. Remote Access Services — Protocol support
The following list provides a description of the main items on the Network
Configuration panel:
• Dial-out Protocols: This allows for the configuration of the protocols to be
used for dial-out purposes. This does not have to be the same as the
receive protocols. A more detailed configuration is done in 13.5.4,
“Configuring a Windows NT dial-up connection” on page 388. For better
line performance, only select the protocols that will be used by this
connection.
For dial-up to the AS/400 system, select TCP/IP only.
384
Lotus Domino for AS/400 R5: Implementation
• Server Settings: This allows for the configuration of the protocols to be
used for receiving calls. For better line performance, only select the
protocols that will be used by this connection.
To receive calls from the AS/400 system, select TCP/IP only.
• Encryption settings: We recommend you use the Require encrypted
authentication setting. This allows secure transfer of your password when
connected. This method of connection is supported by the AS/400 system.
5. TCP/IP settings can also be changed from this dialog. Click Configure next to
TCP/IP (Figure 292) in the Server Settings.
Figure 293. Remote Access Services — Protocol support
The following list provides a description of the main items on the RAS Server
TCP/IP Configuration panel:
• Allow remote TCP/IP clients to access: Allows you to control the access
of remote clients to your local network.
• Use DHCP to assign remote TCP/IP client addresses: If there is a
Dynamic Host Configuration Protocol (DHCP) server on your network and
you select this option, the Remote Access Service uses IP addresses from
the range of address configured on the DHCP server. An available address
is assigned to the client after the user ID and password are verified.
• Use static address pool: This allows you to specify the IP address range
used when a remote client dials up. The Remote Access Service is its own
DHCP. An available address is assigned to the client after the user ID and
password are verified.
If an IP address range is specified, you must ensure that it does not conflict
with any existing IP address and that the range is valid.
• Allow remote clients to request a predetermined IP address: If the
client has an IP address configured in the connection setting, the client is
still able to connect with this address. If the configuration is incorrect on the
client (for example, wrong subnet mask), the client is not able to
communicate with the remote system.
Click OK to close the RAS server TCP/IP Configuration panel.
6. Click OK to close the Network Configuration panel.
Dial-up connectivity
385
7. The modem is now configured and uses TCP/IP when dialing up and receiving
calls. Click Continue to close the RAS Properties panel.
8. Click OK to close the Network Configuration panel. When prompted to restart
the system, click Yes.
9. After the system is restarted, Dial-Up Networking is automatically enabled.
13.5.3 Granting users dialin access
As an additional security level, the Windows NT system requires that the user
profiles be granted dialin access before the user is able to remotely access the
system.
There are two methods you can use to allow users dialin access:
• Using Remote Access Manager
1. From the Windows Task bar, click Start —> Programs —>
Administration —> Remote Access Administration.
2. Figure 294 shows a list of your servers. From here, you can start or stop
RAS, view the status of lines, and check the users logged into RAS. From
this panel, you can also access other RAS servers on your network.
Figure 294. Remote Access Administration panel
3. From the menu, click Users —> Access. This displays all the users
defined in Windows NT and their dialin access, as shown in Figure 295.
Figure 295. Remote Access Permissions panel
To allow a user dialin access, ensure that the Grant dialin permissions is
checked. The Call Back options are not used in this scenario because they
386
Lotus Domino for AS/400 R5: Implementation
are not supported on the AS/400 system. Click OK to return to the Remote
Access Administration panel.
• Using User Manager
1. From the Windows Task bar, click Start Programs
—> User Manager for Domain.
—> Administration
2. From the User Manager panel (Figure 296), you can create new users and
groups and define what access the user is granted.
Figure 296. User Manager panel
3. If you create a new user (from the menu, click User —> New User) or
double-click a user profile. The user profile details can be entered and
changed.
Click Dialin on the User Properties display to change the dialin access for
this user, as shown in Figure 297.
Figure 297. User dialin permissions panel
Dial-up connectivity
387
13.5.4 Configuring a Windows NT dial-up connection
Now that you have set up a Remote Access Service, you must define the
connection to the specific system with which you want to communicate. Follow
these steps:
1. From the Windows desktop, double-click the icons, My Computer
Dial-Up Networking
—>
2. If there are no connections defined on your system, a new connection is
automatically created.
If prompted with a warning, click OK.
3. In the New Phonebook Entry dialog (Figure 298), enter a name for the
connection you are creating.
Figure 298. Creating a new phonebook entry
If you are comfortable with Windows NT connections, select I know all about
phonebook entries.... This allows for an advanced configuration.
We use the setup wizard to create the connection. Click Next.
4. In the Server dialog, select the options that apply to the type of connection
being created.
Figure 299. Creating a new phonebook entry — Server type
388
Lotus Domino for AS/400 R5: Implementation
The following list provides details about each of the options in Figure 299:
• I am calling the Internet.: Defines a connection that only uses TCP/IP.
• Send my plain text password if that’s the only way to connect.: Allows
the password to be sent in plain text if all other methods fail.
• The non-Windows NT server I am calling expects...: Opens a terminal
session, once connected, for the entered user ID and password.
For calling the AS/400 system, only select the first option. Click Next.
5. Enter the phone number of the modem attached to the remote system, as
shown in Figure 300. Click Next.
Figure 300. Creating a new phonebook entry — Phone details
Alternative phone numbers for the remote system can be entered at this time.
Click Next.
6. To create the connection with the settings specified, click Finish. The basic
configuration created works when connecting to a remote system. There are
additional configuration options that improve security and may improve
performance.
7. From the Dial-Up Networking dialog, select the newly created connection from
the Phonebook list.
8. Click More —> Edit Entry Properties (Figure 301). This allows you to
configure all the advanced settings for the phonebook entry.
Figure 301. Dial-Up Networking dialog
Dial-up connectivity
389
9. Click the Basic tab (Figure 302). You can change the name, description,
phone number and other properties. If you enter the wrong number or want to
use a different modem, it can be changed from here.
Figure 302. New Phonebook Entry — Basic tab
10.Click the Server tab. Generally, accept the defaults. Disable all unused ports
(NetBEUI and IPX/SPX) to improve the performance of the connection, as
shown in Figure 303. We recommend that you use PPP instead of SLIP.
Figure 303. New Phonebook Entry — Server tab
TCP/IP settings can also be changed from this dialog. This allows for the IP
address, DNS, and other settings to be entered. It is recommended that these
be assigned by the remote system.
11.Click the Security tab (Figure 304). We recommend that you select Accept
only encrypted authentication. This allows secure transfer of your password
once connected.
390
Lotus Domino for AS/400 R5: Implementation
Figure 304. Phonebook Entry — Security tab
12.Click the Script and X.25 tabs and accept the default settings on each page.
13.Click OK to apply changes to the phonebook entry.
13.6 Windows 98/95 Dial-Up Networking
Although the use of TCP/IP Dial-Up is not limited to the Windows platform, this
example is based on Windows 95. The following steps are the same for a
Windows 98 configuration (there may be slight differences in the displays).
To configure a Windows 98/95 workstation for Dial-Up Networking, you must
ensure that all the required components are configured. You may require the
Windows 98 or 95 CD-ROM.
To activate these functions, follow these steps:
1. Add modem support for Windows as explained in 13.3.3, “Starting the new
connection profile” on page 377.
2. Add Dial-Up Networking for Windows.
3. Add Dial-Up Adapter support.
4. Check the Dial-Up adapter and configure TCP/IP.
5. Configure Windows Dial-Up connection.
These steps are described in detail in the following sections.
13.6.1 Adding Dial-Up Networking for Windows
Dial-Up Networking is an optional part of Windows, which enables you to connect
to other computers by using a modem.
To add Dial-Up Networking for Windows, follow these steps:
1. From the Windows desktop, double-click the icons, My Computer
Control Panel —> Add/Remove Programs.
—>
2. Click the Windows Setup tab.
Dial-up connectivity
391
Ensure that the Communications check box is marked. If Communications is
checked, but with a grey background, click Details to ensure that Dial-Up
Networking is checked, as shown in Figure 305.
Figure 305. Add/Remove Programs — Communication
3. Click OK to close the Communication panel.
4. Click OK to close the Add/Remove Program Properties panel.
5. If you added Dial-Up Networking, it is now installed on your system.
6. You are not required to reboot the workstation at this point. The rest of the
configuration can be completed before the reboot is required.
13.6.2 Adding Dial-Up Adapter support
After activating the support for Dial-Up Networking, you now must enable the
software driver for a Dial-Up Adapter. Follow the these steps:
1. From the Windows Desktop, double-click the icons, My Computer
Control Panel —> Network.
—>
You see the Network Configuration panel, as shown in Figure 306. This
contains all the network configuration information for this workstation. If there
is a Dial-Up Adapter defined in the list of network components, continue from
13.6.3, “Checking the Dial-Up Adapter and configuring TCP/IP” on page 393.
392
Lotus Domino for AS/400 R5: Implementation
Figure 306. Network configuration
2. Click Add. You see the Select Network Component Type dialog box.
3. In the Select Network Component Type dialog box, select Adapter and click
Add.
4. From the Manufacturers list, select Microsoft. Under the Network Adapters
list, select Dial-Up Adapter, as shown in Figure 307.
Figure 307. Add a new network adapter
5. Click OK to return to the Network Configuration panel.
13.6.3 Checking the Dial-Up Adapter and configuring TCP/IP
To check the Dial-Up Adapter and configure TCP/IP, follow these steps:
1. The Dial-Up Adapter must be bound to the correct protocols. From the
Network panel, click the Configuration tab (Figure 308 on page 394). Select
Dial-Up Adapter and click Properties.
Dial-up connectivity
393
Figure 308. Network — Configuration tab
2. Click the Bindings tab (Figure 309). Make sure that TCP/IP is selected and
click OK.
Figure 309. Dial-Up Adapter — Bindings tab
3. After the adapter is bound to the protocol, the properties for TCP/IP must be
configured. From the Network Configuration panel, select the TCPIP —>
Dial-Up Adapter. Click Properties.
394
Lotus Domino for AS/400 R5: Implementation
Figure 310. Network — Configuration tab
4. Set the IP Address and Subnet Mask to be used for the dial connection from
this particular workstation. If you Specify an IP address in the TCP/IP
Properties panel (Figure 311), this must match the setting in Remote IP
address specified in the TCP/IP Settings. Refer to 13.3.1, “Configuring an
answer connection profile (Operations Navigator)” on page 361, for more
details.
We recommend that the setting be left as the default, Obtain an IP address
Automatically, as shown in Figure 311. This uses the Remote IP address
specified in the connection profile and makes dial-up connections easier to
maintain. Click OK.
Figure 311. TCP/IP Properties — IP Address tab
5. Click OK to confirm all the changes in the Network Configuration panel. We
recommend that you reboot the workstation at this point.
Dial-up connectivity
395
13.6.4 Configuring a Windows 98/95 dial-up connection
Now that you have set up a Dial-Up Networking, you must define the connection
to the specific system with which you want to communicate.
Follow these steps:
1. From the Windows desktop, double-click the icons, My Computer
Dial-Up Networking —> Make New Connection
—>
In the Make New Connection dialog (Figure 312), enter a name for the
connection you are creating. Click Next.
Figure 312. Creating new remote connection
2. Enter the phone number of the modem attached to the remote system.
Confirm that the country and area code are correct, as shown in Figure 313.
Click Next.
Figure 313. Creating a new remote connection — Phone details
3. To create the connection with the specified settings, click Finish. The basic
configuration works when connecting to a remote system. There are additional
configuration options that improve security and may improve performance.
From the Dial-Up Networking folder, right- click the newly created connection,
as shown in Figure 314. Click Properties.
396
Lotus Domino for AS/400 R5: Implementation
Figure 314. Dial-Up Networking
4. Click the General tab (Figure 315). The country, area code, and phone
number can be edited. The modem used and the configuration of that modem
can also be edited from this dialog.
Figure 315. Connection Properties — General tab
Click Configure if you want to change the port or speed of the modem. Click
OK to return to the Connection Properties dialog.
5. From the Connection Properties dialog, click Server Types (Figure 316 on
page 398). We recommend that you use PPP, instead of SLIP.
We recommend that you enable Require Encrypted Password. This allows
secure transfer of your password once connected. Also disable all unused
ports (NetBEUI and IPX/SPX) to improve performance.
Dial-up connectivity
397
Figure 316. Connection Properties — Server Types tab
6. TCP/IP settings can also be changed from this dialog. This allows for the IP
Address, DNS, and other settings to be entered. We recommend that these be
assigned by the remote system. These settings override the settings in the
Network Properties.
7. Click OK to apply changes to the Connection Properties.
13.7 Configuring Domino to use Remote Network Services
As explained earlier in this chapter, the Lotus Domino server and Notes client
support the following two methods of remote dial-up:
• Notes Direct Dial-Up connections
• Remote Network Services connections
This allows server-to-server or client-to-server communication using a dial-up
connection. The prerequisites and configuration of the following connections are
described in the following sections:
• Server to Server connection using Remote Network Services
• Client to Server connection using Remote Network Services
13.7.1 Prerequisites for server-to-server connections
For the proper configuration of a server-to-server connection, the following
prerequisite tasks must be checked before the configuration of Domino for remote
connection:
1. Verify the hardware:
• Phone line or leased line to used for the dial-up connection.
• Depending on the model of your AS/400 system, the following is a list of
supported I/O adapters:
– 2699
– 2720
– 2721
– 2750
398
—
—
—
—
Two-line WAN IOA
PCI WAN/Twinaxial IOA
PCI Two-line WAN IOA
PCI ISDN BRI U IOA (2-wire interface)
Lotus Domino for AS/400 R5: Implementation
– 2751 — PCI ISDN BRI S/T IOA (4-wire interface)
– 2761 — 8 port analog modem IOA
• Correct modem for the type of adapter, line, and connection.
• All required cables or connectors.
2. Verify the configuration:
• Ensure that the correct connection profiles and line descriptions are
created. For more information, refer to the following sections:
– Section 13.2, “Prerequisites for Remote Network Services on the
AS/400” on page 359
– Section 13.3, “AS/400 Remote Network Services configuration” on page
360
• Lotus Domino server is configured and running correctly.
• The prerequisite for creating a server-to-server connection on Windows NT
is very similar. For more information on the configuration under Windows
NT, refer to:
– Section 13.4, “Prerequisites for Remote Access Service on Windows”
on page 378
– Section 13.5, “Windows NT Dial-Up Networking” on page 381
13.7.2 Creating a server-to-server connection
After all the prerequisites are met, proceed with the setup of Domino Dial-up
using the following steps:
1. From the Windows NT/98/95 desktop, launch the Domino Administrator (if
not already running).
2. Select the server, on which the new Connection document will be created,
from the Bookmarks, as shown in Figure 317.
Figure 317. Domino Administrator — Bookmarks
3. The server that is selected should be the server that will use the Connection
document. If it is not, the Domino Directory must be replicated before the
Connection document becomes active.
4. After the server is selected, click the Configuration tab.
5. On the tasks pane, select and expand Server and click Connections.
Figure 318 on page 400 shows the Connection view in the results pane. All
Connection documents for the domain are displayed in this view.
Dial-up connectivity
399
Figure 318. Server connections
6. Click Add Connection to create a new connection. Figure 319 shows the new
Connection document.
Figure 319. New Server Connection document — Basics tab
Figure 319 shows the Basics tab of a new Connection document. Table 26
describes the available fields in the Basics tab.
Table 26. New Connection document — Basics
400
Field Name
Description
Connection type
Specifies the type of connection for which this document is used.
LAN, Dial-Up, SMTP are a few examples.
This connection is used for Remote Network connection. Select
Network Dial-Up from the options list.
Source server
and domain
The server that initiates the connection. The full hierarchical name
must be specified.
The domain to which the server belongs is not a required field. We
recommend that you use it.
Use the LAN port
The Domino network port that is used to communicate through, for
example, TCPIP.
Lotus Domino for AS/400 R5: Implementation
Field Name
Description
Usage priority
Allows you to control the usage of the Connection document when
trying to connect to the destination server.
If you select Normal priority, the Connection document is used
when a LAN connection cannot be established.
By selecting a Low priority, the Connection document is not used,
even if a LAN connection cannot be established. It is useful to keep
the dial-up connection time down.
Leave this set to the default (Normal ).
Destination
server and
domain
The server to be connected to. The full hierarchical name must be
specified.
The domain to which the server belongs is not a required field. We
recommend that you use it.
Optional network
address
This allows you to specify an address for the destination of the
destination server that could be different from the DNS or setting in
the Server document. This address overrides all others.
7. On the Network Dialup tab. Complete all the details required for the network
dial-up connection, as shown in Figure 320.
Figure 320. New Server Connection document — Network Dialup tab
8. Select the service type that applies to your system. When configuring dial-up
on the AS/400 system, select the type Microsoft Dial-Up Networking.
Click Edit Configuration to complete all the details for the dial-up networking.
Figure 320 shows the Network Dialup tab of a new Connection document.
Table 27 describes the available fields.
Table 27. New Connection document — Network Dialup
Field Name
Description
Dial-Up
Networking name
The name specified must be the same as the dial-up connection
profile. Refer to 13.3.2, “Configuring a dial-up connection profile
(Operations Navigator)” on page 369, for more information on
creating a dial-up connection profile.
Login name and
Password
Enter the user name and password that has been supplied to you
by the administrator of the remote network. The user profile
requires dialin access to the remote network.
Dial-up connectivity
401
Field Name
Description
Phone number
Enter the phone number of the remote system. Enter in the
complete number, including use of an outside line, country code,
area code, and so on.
Area code,
Country code and
Dial-back phone
number
Only apply to Windows NT servers.
Include the Area and County code in the phone number field.
Dial-back is not supported by the AS/400 system.
9. Click the Replication/Mail Routing tab. Complete all the details required for
the network dial-up connection, as shown in Figure 321.
Figure 321. New Server Connection document — Replication/Mail Routing tab
These setting are specific to your requirements. Refer to the Domino 5
Administration Help (help\help5_admin.nsf) database for more information.
10.Click the Schedule tab. Complete all the details required for the network
dial-up connection, as shown in Figure 322.
Figure 322. New Server Connection document — Schedule tab
These setting are specific to your requirements. Refer to the Domino 5
Administration Help (help\help5_admin.nsf) database for more information.
11.Click the Comment and Administration tabs. On each page, allow for
comments and defining the document administrators. Changes on these tabs
are not required.
12.Click Save and Close. The document is now saved in the Domino Directory.
The connection can be used to connect to the remote system.
402
Lotus Domino for AS/400 R5: Implementation
13.7.3 Prerequisites for client-to-server connections
For the proper configuration of a client to server connection, the following
prerequisite tasks must be verified before any configuration of Notes is done.
1. Verify the hardware:
• Phone line or leased line to used for the dial-up connection
• Correct modem for the type of line and connection
• All required cables or connectors
2. Verify the configuration:
• Ensure that Dial-Up Networking is configured correctly on the workstation. For
more information, refer to 13.4, “Prerequisites for Remote Access Service on
Windows” on page 378.
Depending on your workstation platform, also refer to the following sections:
– Section 13.5, “Windows NT Dial-Up Networking” on page 381
– Section 13.6, “Windows 98/95 Dial-Up Networking” on page 391
• Lotus Notes client is configured and running correctly.
13.7.4 Creating a Notes client-to-server connection
If all the prerequisites have been met, you can proceed with the setup of Notes
Dial-Up. Follow these steps:
1. From the Windows NT/98/95 desktop, launch the Lotus Notes Client (if it is
not already running).
2. Open the user’s personal address book by clicking one of the icons shown in
Figure 323.
- or -
Figure 323. Opening the Personal Address Book
3. After the address book is opened, switch to the address book configuration by
clicking the configuration icon in the lower left corner, as shown in Figure 324.
Figure 324. Switch to address book configuration
4. Open the Connections view. As shown in Figure 325 on page 404, the
connections view shows all Connection documents used by this client.
Dial-up connectivity
403
Figure 325. Personal Address Book — Connection view
5. Click Add Connection on the action bar to create a new connection. The
Server Connection display (Figure 326) appears.
Figure 326. New Connection document — Basics tab
Figure 326 shows a new Connection document. This document is slightly
different from the server Connection document, but performs a very similar
function. Table 28 explains the available fields.
Table 28. New Connection document — Basics
404
Field Name
Description
Connection type
Specifies the type of connection for which this document is used.
LAN, Dial-Up, and Passthru are a few examples.
This connection is used for Remote Network connection. Select
Network Dial up from the options list.
Use LAN port
The Notes network port that is used to communicate through, for
example, TCPIP.
Server name
The server that is to be connected. The full hierarchical name must
be specified.
Lotus Domino for AS/400 R5: Implementation
6. On the Network Dialup tab (Figure 327), complete all the details required for
the connection.
Figure 327. New Connection document — Network Dialup tab
Select the service type that applies to your system. Select the type Microsoft
Dial-Up Networking.
Click Edit Configuration to complete all the details for Dial-Up Networking.
Figure 327 shows the Network Dial-Up tab of a new Connection document.
Table 29 explains the available fields.
Table 29. New Connection document — Network Dialup
Field Name
Description
Dial-Up
Networking name
The name specified must be the same as the dial-up connection
profile. Depending on the workstation operating system, refer to the
following sections:
•Section 13.5.4, “Configuring a Windows NT dial-up connection”
on page 388
•Section 13.6.4, “Configuring a Windows 98/95 dial-up
connection” on page 396
Login name and
Password
Enter the user name and password that has been supplied to you
by the administrator of the remote network. The user profile
requires dialin access to the remote network.
Phone Number
Enter the phone number of the remote system.
Area code and
Country code
Specify the correct Area and Country codes. These fields can be
left blank if they do not apply in your environment.
Dial-back phone
number
Confirm with your administrator, if this is to be used.
Dial-back is not supported by the AS/400 system.
7. Click the Advanced tab. Complete all the details required for the connection,
as shown in Figure 328 on page 406.
Dial-up connectivity
405
Figure 328. New Connection document — Advanced tab
The Advanced tab allows you to configure additional connection options. Table
30 describes the available fields.
Table 30. New Connection document — Advanced tab
Field Name
Description
Only from
Location
Allows you to restrict the use of this Connection document by
location. This connection is only active if the current location is
listed in this field.
An asterisk (*) activates the connection for all locations.
Only for user
Allows you to restrict the use of this Connection document by user
ID. This connection is only active if the current logged on user is
listed in this field.
An asterisk (*) activates the connection for all users.
Usage priority
Allows you to control the usage of the Connection document when
trying to connect to the destination server.
Set the Usage priority to Low if you only want the Connection
document used after attempting to connect over the LAN. It is useful
to keep the dial-up connection time down.
Leave this set to the default (Normal ).
Destination
server address
This allows you to specify an address for the destination of the
destination server that could be different from the DNS or Server
document. This address overrides all others.
These setting are specific to your requirements. Refer to the Domino
Administration Help (help\help5_admin.nsf) database for more information.
8. No changes are required on the Comment tab. A comment can be added, if
required.
9. Click Save and Close. The document is now saved in the Personal Address
Book. The connection can be used to connect to the remote system.
13.8 Remote Domino server to an existing organization
This section describes the method of connecting a Domino server on the AS/400
server to an existing Domino server using a dial-up connection. The process
refers to earlier sections as configuration examples.
406
Lotus Domino for AS/400 R5: Implementation
1. Before starting with any remote connection configuration verify the remote
connection prerequisites for an AS/400 system. This is described in 13.2,
“Prerequisites for Remote Network Services on the AS/400” on page 359.
2. After all the prerequisites are met, the connection profile and line description
must be created on your system. Refer to 13.3.2, “Configuring a dial-up
connection profile (Operations Navigator)” on page 369, for a description on
how to create a PPP dial-up connection profile. The only configuration
difference would be to use a large timeout. This allows the Configure Domino
Server (CFGDOMSVR) command to run.
After the connection is created, start the connection, as described in 13.3.3,
“Starting the new connection profile” on page 377. This is useful to test if the
configuration of the connection is correct.
After the dial-up connection is activated, PING the server on the remote server
to check that an IP connection can be made to the system, for example:
PING ’10.1.1.3'
If you are running OS/400 V4R3 or later and chose to use a Dial-on-Demand
connection, this requires a PING of the remote system to test if the connection
profile works. Use a 30 second timeout to ensure that the dial-up connection
can be established before the timeout, for example:
PING RMTSYS('10.1.1.3') WAITTIME(30)
3. Use the Configure Domino Server (CFGDOMSVR) command to define an
additional Domino server. This is described in Chapter 3, “Adding a Domino
server to an existing organization” on page 87.
Note
To reduce connection time, there is the option to have a replica copy of the
Domino Directory (for example, supplied on a CD-ROM) put in the data
directory before the Domino server configuration is started.
This requires that the RPLCFG parameter to be set to *NO. For example:
CFGDOMSVR SERVER('AcmeDS2/Acme') OPTION(*ADD)
DTADIR('/lotus/domino/acmeds2') NABSVR(AcmeDS1) RPLCFG(*NO)
4. The remote connection must be active for the duration of the Domino server
configuration. This ensures a successful Domino server configuration.
13.9 Configuring a SLIP connection profile on the AS/400 system
The configuration of a SLIP connection profile differs, depending on whether you
use an asynchronous line description or a PPP line description. The following
sections describe the configuration for each line type.
13.9.1 SLIP with an asynchronous line description
These are the parameters that should be used for an asynchronous line that is
attached to a modem:
CRTLINASC LIND(ASCDOM) RSRCNAME(CMN01) CNN(*SWTPP)
LINESPEED(19200) SWTCNN(*DIAL) AUTOANS(*NO) AUTODIAL(*YES)
DIALCMD(*OTHER) INACTTMR(*NOMAX) MAXBUFFER(1500)
Dial-up connectivity
407
Tip
As an alternative to typing the entire command syntax, you can type CRTLINASC
on an AS/400 command line and press F4 to request parameter prompting.
Then, you can request help information by positioning the cursor on any
parameter and pressing F1.
In our example, ASCDOM is the name of the line description to be created and
CMN01 is the resource name referring to a hardware resource on your AS/400
system. The resource name can be identified by using the Work with Hardware
Resources (WRKHDWRSC) command.
To set up the AS/400 SLIP configuration, use the Work with Point-to-Point TCP/IP
(WRKTCPPTP) command to define a point-to-point connection profile of type
answer. Type WRKTCPPTP on any AS/400 command line and press Enter. The
display shown in Figure 329 appears.
Work with Point-to-Point TCP/IP
Type option, press Enter.
1=Add
2=Change 3=Copy 4=Remove
9=Start 10=End
12=Work with line status
Opt Name
1
WIN95DOM
Mode
*ANS
Type
Status
5=Display details
14=Work with job
Line
Line
Description Type
6=Print
Job
Name
(No configuration profiles)
F8=Work with modems
F11=Display text
Bottom
F9=Command line F10=Local interface status
F12=Cancel F14=Work with active jobs F24=More keys
Figure 329. Work with Point-to-Point TCP/IP (WRKTCPPTP) display
Type 1 (Add) in the Opt column, enter a name for the new configuration profile (in
our example, it is WIN95DOM), and then type *ANS for Mode. Press Enter. You
see the display shown in Figure 330.
408
Lotus Domino for AS/400 R5: Implementation
Add TCP/IP Point-to-Point *ANS Profile
System:
Name:
Text
SYSTEM01
WIN95DOM
Type choices, press Enter.
TCP/IP information:
Protocol type . . . . . .
Local interface address .
Remote IP address . . . .
Maximum transmission unit
Allow proxy ARP . . . . .
Add default route . . . .
.
.
.
.
.
.
Physical line information:
Line description . . . .
Line type . . . . . . . .
Autocreate controller and
Remote location name .
. . . . .
. . . . :
device
. . . . .
F2=Change modem information
F3=Exit
.
.
.
.
.
.
.
.
.
.
.
.
.
.
.
.
.
.
:
.
.
.
.
.
*SLIP
10.1.2.5
10.1.2.200
1006
N
N
ASCDOM
*ASYNC
Y
F4=List
Address, F4 for list
Address
576-1006
Y=Yes, N=No
Y=Yes, N=No
Name
Y=Yes, N=No
Name
F9=Command line
More...
F12=Cancel
Figure 330. Add TCP/IP Point-to-Point *ANS profile (Part 1 of 3)
Enter the parameters according to the descriptions on the following pages.
13.9.1.1 TCP/IP information
Table 31 describes the TCP/IP information fields.
Table 31. TCP/IP information
Description
Local interface address : The IP address of the Domino for AS/400 server you contact
with this SLIP connection.
This value is the local IP address to use as the gateway address for the remote clients.
It is used as a next hop value for a route or default route to the AS/400 system. Use F4
to get a list of already-defined local addresses, or enter a new address. If an
already-defined local address is chosen, then it can be used for Proxy ARP on behalf of
the remote system dialing in. The Allow Proxy ARP flag has to be set to “Y” for this to
occur.
Remote IP address : The address the remote client uses for this SLIP connection.
This is the address that the remote client should use as its local interface address. It is
the IP address used to allow the remote system and the local AS/400 system to
communicate. If the local IP address chosen already exists and is being used for Proxy
ARP, then the remote IP address that you choose must be defined on the same subnet
as the local IP address defined by its subnet mask.
Maximum transmission unit: Should be set to 1006. The MAXBUFFER parameter of
the Create Asynchronous Line Description (CRTLINASC) command can be used to
specify the maximum size of the line inbound and outbound data buffers. The default for
the MAXBUFFER parameter is 896 bytes. The value specified for the SLIP Maximum
Transmission Unit (MTU) must be less than or equal to the value of MAXBUFFER. In this
example, we use 1500 bytes for MAXBUFFER.
Dial-up connectivity
409
Description
Allow proxy ARP : The default is N. Set to Y if proxy ARP is used. This field can only be
set to “Y” if the Local interface address defined is a true local interface that is already
defined and the Remote IP address is defined to be on the same subnet as the local
address.
Note
Proxy ARP is a technique that allows one machine, the proxy agent, to answer
ARP requests that are actually destined for a different machine. Proxy ARP is
useful with SLIP because it allows a remote SLIP client to logically appear to
be part of a local network (or on the same subnet).
13.9.2 Physical line information
Table 32 describes the physical line information fields.
Table 32. Physical line information
Description
Line description : The name of the asynchronous line description created earlier. A valid
line description must be entered here. Only lines of type *ASYNC are supported.
Autocreate controller and device : Y is usually a desirable option. Then TCP/IP creates
the appropriate controller and device for the session. When the session is completed,
the automatically created controller and device are deleted.
Press Page Down to see the second panel of the *ANS profile configuration.
Figure 331 shows the display after we filled in the specific parameters for our
environment.
Add TCP/IP Point-to-Point *ANS Profile
System: ASM01
Name:
Text
WIN95DOM
Type choices, press Enter.
Modem information:
Use a modem . . . . . . . . . . . .
Modem information name
Script source information:
Use connection dialog script . .
Member . . . . . . . . . . . .
File . . . . . . . . . . . . .
Library . . . . . . . . . . .
ASCII character set identifier
.
.
.
.
Y
Y=Yes, N=No
F4 for list
Y
ANS400
QATOCPPSCR
QUSRSYS
00819
Y=Yes, N=No
Name
Name
Name
1-65533, *DFT
More...
F2=Change modem information
F12=Cancel
F3=Exit
F4=List
F9=Command line
Figure 331. Add TCP/IP Point-to-Point *ANS Profile (Part 2 of 3)
410
Lotus Domino for AS/400 R5: Implementation
13.9.3 Modem information
Table 33 describes the modem information fields.
Table 33. Modem information
Description
Use a modem : We selected Y (Yes).
Modem information name : When you add a new profile, the Modem information name
field is initially blank. If you specify a Y in the Use a modem field, you must enter a valid
value for Modem information name. Press F4 to display a selection list of predefined
modem strings.
Note: If you are using an IBM 7857-017 modem, the default modem information may
need to be modified, depending upon the country setting. See 13.11, “Special
considerations with the 7857-017 modem” on page 418, for details.
13.9.4 Script source information
For this example, we used a script because we wanted an exchange of user ID,
password, and IP addresses.
Table 34. Script source information
Description
Use connection dialog script : We specified Y (Yes).
Member/file/library : This is the location of the connection script to use to allow remote
systems to dial into the AS/400 system. This script is used by the server. The remote
system that dials in must have a compatible script. See 13.9.6, “Creating and changing
connection scripts” on page 413, for information on how to use customized scripts.
ASCII character set identifier : The ASCII CCSID is used to translate ASCII to EBCDIC
and EBCDIC to ASCII connection script data.
Press Page Down again to see the third configuration display. Figure 332 shows
the parameters changed to our specific environment.
Add TCP/IP Point-to-Point *ANS Profile
System: ASM01
Name:
Text
WIN95DOM
Type choices, press Enter.
Local system security:
Allow IP datagram forwarding . . .
System access authorization list
N
DOMSLIP
Y=Yes, N=No
*NONE, Name
Bottom
F2=Changemodeminformation F3=Exit F4=List F9=Commandline F12=Cancel
Figure 332. Add TCP/IP Point-to-Point *ANS Profile (Part 3 of 3)
Dial-up connectivity
411
13.9.5 Local system security information
Table 35 describes the local system security fields.
Table 35. Local system security information
Description
Allow IP datagram forwarding : When a remote client connects to the AS/400 system,
this value determines whether the TCP/IP stack allows IP datagrams originating from the
remote host to be forwarded on to IP addresses other than the local IP address defined
for the AS/400 system for this connection.
Note: If IP datagram Forwarding is set OFF at the system level through the IPDTGFWD
parameter on the CHGTCPA command, then the value for IP datagram forwarding on any
of the SLIP profiles has no effect because IP datagram forwarding is not allowed for any
TCP/IP interface.
System Access Authorization List: If an authorization list is specified, only the user
profiles specified in the authorization list are allowed to connect to this AS/400 system
from a remote system. The value *NONE means that when a client is trying to connect to
the AS/400 system, no user ID or password must be specified.
If there is no authorization list (if you specified *NONE), it only means that there is no
connection security. If the client does pass a user ID and password, these values are
ignored and the connection is allowed. However, there is still application level security
such as Telnet USERID and password or, as in our case, a Notes ID that is needed. If
the user wants to validate that the remote client is allowed to connect, then a valid system
authorization list name can be entered here.
The authorization list is created by using option 1 of the Work with Authorization Lists
(WRKAUTL) command. Then, you add one or more AS/400 user profile names that
should be authorized to connect to the list using option 2 (Edit) and then F6 (add new
user).
The AS/400 user profiles may already exist. If not, you can create them using the Create
User Profile (CRTUSRPRF) command before you add their names to the authorization
list. The password included with the connection dialog must match the password
specified for the AS/400 user profile.
In our example, we created an authorization list with the name DOMSLIP, and added the
user profile name DOMUSER to it. The authorization list must be created before referring
to it here. Press Enter to submit the command.
Note: You are allowed to set Use connection script to N and System access
authorization list to a value other than *NONE. Providing the name of an (existing)
authorization list forces Use connection script to Y. An informational message is
sent to explain why this change was made.
Note
Alternatively, AS/400 authorization lists can be created using the Create
Authorization List (CRTAUTL) command. User profile entries can be added to
the authorization list using the Add Authorization List Entry (ADDAUTLE)
command.
412
Lotus Domino for AS/400 R5: Implementation
13.9.6 Creating and changing connection scripts
You cannot change the content of the default connection script file QATOCPPSCR
in library QUSRSYS. If you want to use a modified script, you must first create
your own connection script file. Do this by copying the default file using the Copy
File (CPYF) command, as shown in the following example:
CPYF FROMFILE(QUSRSYS/QATOCPPSCR) TOFILE(lib/file) FROMMBR(*ALL)
TOMBR(*FROMMBR) MBROPT(*ADD) CRTFILE(*YES)
In the previous example, lib/file represents your own new file. Now you can
modify the copy of the script file. Figure 333 shows an example of a script file.
*************************************************************************
*SERVER CONNECTION SCRIPT EXAMPLE WITH LOGIN AND PASSWORD / WIN95
(PROMPT)
& Userid:
(USERID)
& Password?
(PASSWORD)
& InternetLR/E>
(PROMPT)
& (IPGATE) IS AS/400 IP ADDRESS.
& (IPADDR) IS IP ADDRESS OF SYSTEM CALLING AS/400.
* END OF SERVER CONNECTION SCRIPT EXAMPLE
*************************************************************************
Figure 333. Example AS/400 Server Script for a Windows 95 Connection
Please refer to the latest version of TCP/IP Configuration and Reference,
SC41-3420, for detailed script information.
13.9.7 SLIP with a PPP line description
To use a PPP line description, your AS/400 system must have one of the I/O
adapters described in 13.2, “Prerequisites for Remote Network Services on the
AS/400” on page 359.
To establish a SLIP connection over a PPP line type with another system, you
must provide your AS/400 system with the information that allows it to do this.
This information is stored in a connection profile . You must use Operations
Navigator to create a connection profile.
Note: If your AS/400 system supports PPP line descriptions, we highly
recommend using the PPP protocol instead of SLIP. The only environment in
which SLIP would be used, instead of a PPP line description, is where the client
system accesses multiple systems, some of which support only SLIP. If you do
have such an environment, follow the procedure in the next section to set up SLIP
using a PPP line description.
13.9.7.1 Configuring the SLIP connection profile on the AS/400 system
To open a connection to the AS/400 system using Operations Navigator, perform
the following steps:
1. From the Windows 95 or Windows NT desktop, start Operations Navigator.
2. Click the plus ( +) sign next to the icon showing the name of your AS/400
system.
3. Click the plus ( +) sign next to the Network icon.
Dial-up connectivity
413
4. Click the plus (+) sign next to the Point-to-Point icon.
5. Click the Connection Profiles icon to open the list of connection profiles.
6. To check for existing Point-to-Point profiles, look for icons with the Protocol
type SLIP and a connection type of Switched Line-Answer. If PPP line profiles
exist, you can view them. Right-click the individual names and select
Properties from the resulting context menu.
Note: If asynchronous line profiles exist, you can only start, stop, or delete
these Point-to-Point profiles. Right-click the individual names and select Start,
Stop, or Delete from the resulting context menu.
7. To create a new SLIP connection profile, right-click Connection Profiles to
open a context menu. Click New Profile to access the General page of the
New Point-to-Point Profile Properties dialog box.
Although there are some differences, outlined here, the procedure to follow is
similar to Configuring the PPP Connection Profile on the AS/400 System,
described in 13.3.1, “Configuring an answer connection profile (Operations
Navigator)” on page 361.
8. Click the plus (+) sign next to the icon showing the name of your AS/400
system in the main tree of Operations Navigator.
9. Click the plus (+) sign next to the Network icon.
10.Click the plus (+) sign next to the icon named Point-to-Point icon.
11.Right-click Connection Profiles to open a context menu.
12.Click New Profile to access the General page. In our example, we specify the
following values:
•
•
•
•
Profile Name: WIN95SLIP
Description: SLIP Connection for Domino clients
Type: SLIP
Mode: Switched Line-Answer
13.Click the Connection tab. Enter the following information.
• Line Name: Select an existing PPP line description from the pull-down list
or specify a name for a new line description.
• Maximum transmission units: Specify 1006 bytes.
If you specified a line name to create a new line description, click New and
continue with step 14. If you selected an existing PPP line description and
clicked Open, skip to step 15.
14.Follow this step only if you clicked the New button to create a new line
description. From the New Line Properties, click the General tab and select
one of the listed hardware resources.
The Interface type must be: RS232/V.24, and the Framing must be
Asynchronous.
15.Click the Link tab and specify the appropriate line speed.
Click the Modem tab and select the appropriate modem type from the
pull-down box. If you are using an IBM 7857-017 modem, a customized
modem information entry may need to be created first, using a 5250 interface.
16.Click OK to save the line description and return to the connection profile
properties.
414
Lotus Domino for AS/400 R5: Implementation
17.Click the TCP/IP Settings tab. Enter the following information:
• Local IP address: Select the IP address, which is 10.1.2.3 in our example.
• Remote IP address: Select the IP address, which is 10.1.2.200 in our
example.
18.Click the Script tab. Specify script information, if desired. For more details
about scripts on the AS/400 system, please refer to 13.9.6, “Creating and
changing connection scripts” on page 413.
19.Click the Authentication tab.
• Remote system authentication: If desired, select the Require remote
system identification box.
• Validation list name: Specify a new one, or select one from the pull-down
list.
20.Click OK to finish the SLIP profile configuration.
13.10 Troubleshooting
If Domino attempts to start the *DIAL PPP profile and is unsuccessful, you should
see error messages on the Domino console beginning with the prefix RAS400. If no
messages appear on the Domino console, it is possible that the program to start
the session is not being called. Make sure that you are running the latest
Quarterly Maintenance Update (QMU) of Domino for AS/400 R4.6.2 or later.
If you receive a Domino console message, Unable to Start Connection, there are
a few places to check for information about what is wrong. First, display the
QSYSOPR message queue and look for any messages relating to the
communications hardware interface. Next, look for job logs in the list of spooled
output files logged for the QNOTES user. To do this, type WRKSPLF QNOTES on any
AS/400 command line and press Enter.
Display any job logs that are listed. If you see the message, Not authorized to
command STRTCPPTP in library *LIBL, double check that you have PTF SF46406
installed and that you are running the latest Quarterly Maintenance Update
(QMU) of Domino for AS/400 R4.6.2.
Problem determination specifically related to the PPP profile is available using
the Work with Point-to-Point TCP/IP (WRKTCPPTP) command. Type WRKTCPPTP on
any AS/400 command line and press Enter.
You see the Work with Point-to-Point TCP/IP list display, as shown in Figure 334
on page 416.
Dial-up connectivity
415
Work with Point-to-Point TCP/IP
Type option, press Enter.
1=Add
2=Change 3=Copy 4=Remove
9=Start 10=End
12=Work with line status
Opt Name
IN
PPPDOMANS
SAKAIPPP
OUT
PPPDOMSVR
5=Display details
14=Work with job
6=Print
Mode
Type
Status
Line
Line
Description Type
Job
Name
*ANS
*ANS
*ANS
*DIAL
*DIAL
*PPP
*PPP
*PPP
*PPP
*PPP
INACTIVE
INACTIVE
INACTIVE
INACTIVE
OUTQ
IN
PPPDOMASC
SAKAIPPP
OUT
PPPDOMASC
QTPPDIAL09
F8=Work with modems
F11=Display text
*PPP
*PPP
*PPP
*PPP
*PPP
Bottom
F9=Command line F10=Local interface status
F12=Cancel F14=Work with active jobs F24=More keys
Figure 334. Work with Point-to-Point TCP/IP list display
If the status is OUTQ, there are job logs or other print output in the output queue for
the most recent job that started a Point-to-Point session. Unless the status of the
profile is INACTIVE, type 14 next to your *DIAL profile and press Enter to work with
that job. The Work with Job display appears, as shown in Figure 335.
Work with Job
Job:
QTPPDIAL09
User:
QTCP
Number:
System:
160833
SYSTEM01
Select one of the following:
1.
2.
3.
4.
10.
11.
12.
13.
14.
15.
16.
Display job status attributes
Display job definition attributes
Display job run attributes, if active
Work with spooled files
Display job log, if active or on job queue
Display call stack, if active
Work with locks, if active
Display library list, if active
Display open files, if active
Display file overrides, if active
Display commitment control status, if active
More...
Selection or command
===>
F3=Exit
F4=Prompt
F9=Retrieve
F12=Cancel
Figure 335. Work with Job menu
Then, select option 4 and press Enter to work with spooled files. Type 5 next to
each file to display the detailed messages for each file. If the profile is not in OUTQ
status, you may also use option 10 and then press F10 to see the job log
information of the job controlling the active point-to-point session.
416
Lotus Domino for AS/400 R5: Implementation
It depends on the QTOCPPJOBD job description whether the job log is written to
a spooled file. Depending on that, you see the status OUTQ or INACTIVE after the
connection was ended. If you need to perform problem determination, it is very
helpful to keep the job log in a spooled file for analysis. If the status always
returns to INACTIVE, and therefore, you do not find any job log, you can use the
Change Job Description (CHGJOBD) command. On any AS/400 command line,
type CHGJOBD JOBD(QTOCPPJOBD) LOG(4 00 *SECLVL) and press Enter.
Conversely, you may disable the capability of printing job logs in a stable
environment. Type CHGJOBD JOBD(QTOCPPJOBD) LOG(4 00 *NOLIST) on any AS/400
command line and press Enter. However, if you do so, you may not be able to
determine the cause of problems after the connection has ended.
The job log is not the only useful spooled file produced by the connection job. A
spooled file with the same name as the connection profile (in our example,
PPPDOMSVR) is written to the default system printer. If the connection was
successfully started and ended, this spooled file disappears. However, in the
case of problems or while the connection is active, it may provide some good
information. Figure 336 shows an example of the PPP connection log.
Display Spooled File
File . . . . . : PPPDOMSVR
Page/Line 1/6
Control . . . . .
Columns
1 - 78
Find . . . . . .
*...+....1....+....2....+....3....+....4....+....5....+....6....+....7....+...
21:51:35.930 === Attempting modem reset.
21:51:35.931 ==> AT&FS0=0
21:51:35.934 === Reading modem response.
21:51:36.699 <== AT&FS0=0
21:51:36.699 ... OK
21:51:36.708 === Attempting modem initialization.
21:51:36.708 ==> AT&SF1&D2&C1X4V1Q0S7=70$BA0$MB33600&S1
21:51:36.723 === Reading modem response.
21:51:37.427 <== AT&SF1&D2&C1X4V1Q0S7=70$BA0$MB33600&S1
21:51:37.427 ... OK
21:51:37.431 === Attempting modem dial/answer.
21:51:37.436 ==> ATDT56390
21:51:37.985 <== ATDT56390
21:51:37.987 === Reading modem response.
21:52:07.877 <== CONNECT 28800 LAPM COMPRESSED
21:52:07.881 === Establishing point-to-point connection for profile PPPDOMSVR.
More...
F3=Exit F12=Cancel F19=Left F20=Right F24=More keys
Figure 336. PPP connection log
A PPP connection always requires a PPP line description, while SLIP connection
can use either a PPP or an asynchronous line description. A PPP line description
can only be used in combination with a PPP capable communication adapter. For
information about required hardware, see 13.2, “Prerequisites for Remote
Network Services on the AS/400” on page 359. An alternative to a direct
connection between client and server is the use of an external dial concentrator
to funnel multiple dial connections to one direct AS/400 LAN adapter. These
devices may offer additional value in terms of routing capabilities and enhanced
security options.
Two examples of supported dial concentrators are the IBM 2210 Nways
Multiprotocol Router and the Digi PortServer II. When setting up such a device,
Dial-up connectivity
417
two separate connections must be configured, one between the client
workstations and the dial concentrator, and the other between the dial
concentrator and the AS/400 system.
For more information about dial concentrator configuration, please refer to the
documentation provided with the specific device.
13.11 Special considerations with the 7857-017 modem
The IBM 7857-017 modem can be switched to the asynchronous mode by using
the following steps to enable one of the selectable factory configurations:
1. On the front panel of the modem, press the down arrow button until the
Configuration Options D12 display appears.
2. Press the right arrow button until Select Factory appears, and then press
Enter.
3. Press the up arrow button until Option 4 appears, and then press Enter.
This sets the modem to factory Option 4, which is the asynchronous
configuration for this particular model. To reset the IBM 7857-017 to the
synchronous mode of operation after testing is completed, follow the previous
steps again, but this time, select factory Option 3.
If you use the 7857-017 modem, the AS/400 default modem information may
need to be modified, depending upon the country setting. The range of valid
carrier time-out settings in register S7 varies by country. For example, the valid
range for the US is 41 to 50.
The default modem answer setting for the 7857-017 in some versions of OS/400
incorrectly attempts to change register S7 to 30. Therefore, if your country setting
is US or any other country in which 30 is not a valid selection for that parameter,
you may need to change the settings, as described in the following section.
13.11.1 Creating customized modem information (Operations Navigator)
To create the customized modem information using Operations Navigator,
perform the following steps:
1. From the Windows NT/98/95 desktop, start Operations Navigator (if not
already running).
2. In the hierarchical tree of Operations Navigator, expand (click the plus (+)
sign) the AS/400 system on which the new modem will be created.
3. Expand Network —> Point-to-Point —> Modem to display a list of all
modem descriptions available on the system.
4. From the list of modems, right-click IBM 7857-017 modem description and
select New Modem Based On, as shown in Figure 337.
418
Lotus Domino for AS/400 R5: Implementation
Figure 337. Creating a new modem description
This opens a New Modem Description dialog.
5. In this New Modem Description dialog, specify a unique new value for the
Modem Information Name field. For example, User-Defined 7857-017.
Change the value of the Answer Command field to ATS0=2, as shown in
Figure 338.
Figure 338. New modem description
6. Click OK to create this new modem description.
13.11.2 Creating customized modem information (5250 interface)
To create the customized modem information using a 5250 interface, perform the
following steps:
Dial-up connectivity
419
1. Start the Work with Point-to-Point TCP/IP (WRKTCPTP) command. Type
WRKTCPPTP on any AS/400 command line and press Enter.
2. Press F8 (Work with modems).
Work with Point-to-Point TCP/IP Modem Information
Type option, press Enter.
1=Add 2=Change 3=Copy
4=Remove
5=Display
6=Print
Opt Name
Source
$generic hayes
3Com/US Robotics Courier I ISDN/V.Everything, V.35 230.4Kbps
GVC 28800
Hayes 14400 Accura
Hayes 28800 Accura
IBM 9600 7855
IBM 28800 7852-010
IBM 28800 7852-013
IBM 7852-400
IBM 7852-400 (2609 or 2612 EIA 232/V.24 adapter)
IBM 7857-017
MaxTech 28800
F3=Exit
F5=Refresh
F9=Command line
F12=Cancel
DEFAULTS
DEFAULTS
DEFAULTS
DEFAULTS
DEFAULTS
DEFAULTS
DEFAULTS
DEFAULTS
DEFAULTS
DEFAULTS
DEFAULTS
DEFAULTS
More...
F17=Position to
Figure 339. Work with Point-to-Point TCP/IP Modem Information display
3. In the Opt column next to the entry for IBM 7857-017, type 3 (Copy) and press
Enter.
4. In the Copy Modem Information display, specify a unique new value for the
New Name field (Figure 340), for example, User-Defined 7857-017. Press
Enter.
Copy Modem Information
To copy modem information,
type New Name, press Enter.
Name of source:
IBM 7857-017
New Name
User-Defined 7857-017
F3=Exit
F9=Command line
F12=Cancel
Figure 340. Copy Modem Information display
420
Lotus Domino for AS/400 R5: Implementation
5. The resulting display contains a copy of the modem string settings from the
IBM 7857-017 entry.
Change the value of the Modem answer command field to ATS0=2, as shown in
Figure 341. Press Enter to save your new modem setting entry.
Copy TCP/IP Point-to-Point Modem Information
Modem information name:
User-Defined IBM 7857-017
Type changes, press Enter.
Modem initialization string
AT&SF1&D2&C1X4V1Q0S7=70$BA0$MB33600&S1
Modem reset string
AT&F
Modem dial command
ATDT
Modem answer command
ATS0=2
F3=Exit
F9=Command line
F12=Cancel
Figure 341. Copy Modem Information display
Dial-up connectivity
421
422
Lotus Domino for AS/400 R5: Implementation
Chapter 14.
Migration from other Domino platforms
This chapter provides guidelines for migrating one or more Domino servers
running on other platforms, to a Domino for AS/400 server.
14.1 Overview
There are a number of reasons why you may want to migrate to Domino for
AS/400 from other platforms, such as Windows NT or OS/2, or the
implementation of Lotus Domino on the IBM Integrated Netfinity Server. These
reasons include:
• Higher reliability and availability of an AS/400 system compared to a PC
server
• Consolidation of smaller capacity servers to a single highly scalable
environment
• Enhanced integration with AS/400 services and DB2 for AS/400 data
• Announced lack of future support for Domino on your existing server
implementation
• Low total cost of ownership
Because there are as many issues and approaches to migration as there are
motivations and unique environments, this chapter is not meant to be a step by
step cookbook. Rather, it is a set of tips and techniques to assist you in planning
and to educate you about common issues and pitfalls based on experience.
The AS/400 implementation of Lotus Domino on an AS/400 Integrated Netfinity
Server is officially called OS/400 Integration of Lotus Notes. OS/400 V4R3 is the
last AS/400 operating system release to support this implementation. This
specific Integrated Netfinity Server platform offers some unique integration and
functions in comparison to an outboard OS/2 Domino server or a Domino server
installed on the new Integrated Netfinity Server with Windows NT. This
uniqueness provides special migration challenges, which are discussed in this
chapter separately from the general migration considerations.
Note: In this chapter, the phrase Integrated Netfinity Server implementation
refers to OS/400 Integration of Lotus Notes, rather than a Domino server installed
on an Integrated Netfinity Server with Windows NT.
14.1.1 General approaches to Domino server migration
Two possible approaches to meet the objective of migrating a Domino server are
server transplantation and server consolidation. The experience on which these
guidelines are based comes from the IBM Rochester Information Services
migration, business partner experience, migration services engagements, and
laboratory testing in the ITSO.
Server transplantation means moving a Domino server from one platform to
another while keeping the same Domino identity and IP address. The Domino
identity includes the full hierarchical name and encryption keys of the server as
stored in its ID file. The primary advantage of this method is that nothing is
© Copyright IBM Corp. 1999, 2001
423
changed within the Domino configurations, and no modifications are required to
the Notes clients accessing the server.
A disadvantage is that since two servers with the same identity and IP address
cannot both be active at the same time in the same network, a server outage for
some period of time is necessary.
Server consolidation means changing the Domino and network identity of at least
one server in the move from one platform to another, often merging the workload
of two or more servers into one. An advantage of this method, even in migrating
just one server, is that the original and the new server can both remain
concurrently active for a limited period of time.
A major disadvantage is that it involves changing user information in the Domino
Directory (formerly called Public Address Book) and changing database icons
and location documents on the users' workstations to reflect the server change.
Also, a different Domino identity means a different encryption key. Therefore,
locally encrypted mail files require special handling in order for the new server to
be granted appropriate access.
Special considerations beyond the basic migration process may be involved if any
of the following components are a part of your environment:
• Migration from a server with Domino Release 4.5 or earlier
• Migration of the SMTP/MIME MTA
• Use of connection documents for replication or mail routing on the Integrated
Netfinity Server
• Functions unique to the Integrated Netfinity Server implementation of Domino
• Domino applications dependent on interfaces or functions specific to a
particular operating system
Guidelines to address some of these considerations are covered in this chapter.
In cases where details are beyond the scope of this book, references to more
information are provided.
14.1.2 Domino release issues
The migration (transplantation and consolidation) processes outlined in this
chapter assume that the Domino release of the Domino for AS/400 Server is
broadly compatible with the Domino release of the server being migrated. In other
words, the processes do not address release upgrade issues.
Should there be a need to change releases in conjunction with a transplantation
or consolidation, then the processes must either be modified for release
difference issues, or an additional process can be added (before or after the
migration) to upgrade the release.
Adding an additional process has the advantage of allowing one to sequentially
use two fully documented and tested processes to do the migration/upgrade,
compared to possibly using an untested method.
For example, to transplant a server running Domino R4.6 to a Domino for AS/400
server running Domino R5.0, you can use either of the following two fully
documented methods:
424
Lotus Domino for AS/400 R5: Implementation
• Upgrade the source server to Domino R5, using the normal upgrade process
for the source platform (described in that platform’s documentation). Then, use
the transplantation process described in this chapter to transplant the source
server, now running Domino R5, to a Domino for AS/400 server running
Domino R5.
• Use the transplantation process described in this chapter to transplant the
source server running Domino R4.6, to a Domino for AS/400 server running
Domino R4.6. Then, upgrade the Domino for AS/400 server from R4.6 to R5.
This process is described in 5.2, “Upgrading to Lotus Domino for AS/400 R5”
on page 138.
It is advisable not to run the migration and upgrade processes back-to-back, but
to allow a few days of normal operation in between to ensure that the first process
has successfully completed.
The migration outlines in the following sections are applicable to both R4-to-R4
migrations and R5-to-R5 migrations. However, except where indicated, the
processes are written using Domino R5 commands and terminology. Where there
are major release dependent differences in the processes, they are highlighted.
14.1.3 Platform issues
The examples are based on migrating from Domino running on Windows NT, but
the migration principles are applicable to all platforms. There are specific issues
unique to Domino running on the Integrated Netfinity Server and these are
addressed in a separate section.
14.2 Server transplantation process outline
In most cases, the server transplantation method is the best way to do the
migration with minimal user disruption. It may be used as an initial step even
when consolidation of multiple servers is the final goal. The overall process is as
follows:
1. Identify the Domino files to be transplanted.
There are special issues in relation to full text indexing, database migration
and compatibility.
2. Create the Domino directory structure on the AS/400 system.
Create the Domino data directory and subdirectory structure for the new
Domino for AS/400 server. Copy the SERVER.ID file into the data directory.
3. Configure the Domino for AS/400 server.
It is configured as an additional server, but has the same name and IP address
as the transplanted server. Because it is transplanting an existing server, it is
already registered in the Domino Directory and uses the server ID file for the
transplanted server.
4. Edit the NOTES.INI file.
On Domino R4.6, you must edit the NOTES.INI file if you want to bind the
server to a unique IP address.
5. Bring down the original Domino server.
Migration from other Domino platforms
425
Schedule an outage for the original Domino server that is long enough to
transfer databases to be migrated.
6. Copy files to the Domino for AS/400 server.
7. Change ownership of subdirectories and files.
Change ownership of subdirectories and files to the QNOTES user profile and
change the public authorities.
8. Transfer the TCP/IP address to the Domino for AS/400 server.
This ensures that the server change is transparent to end users.
9. Start the Domino for AS/400 server.
This procedure is not the only way to successfully migrate a Domino server.
However, in most cases, it has been found to be one of the most secure and
convenient methods.
Note
The process assumes that, in addition to the server being transplanted, there is
at least one other server in the domain that is active during the step to create
the Domino for AS/400 server (14.2.3, “Configuring the Domino for AS/400
server” on page 432). This is required so that the new Domino for AS/400
server can obtain the Domino Directory used in the domain. Should the
transplanted server be the only server in the domain, then rather than
modifying this procedure, the procedure can still be used by performing the
following additional steps:
1. Before you start the migration, create a Domino for AS/400 server that is an
additional server in the domain of the server being transplanted. Use a
temporary server name and IP address for this server (the process to do
this is outlined in Chapter 6, “Advanced Domino Services for the AS/400
system” on page 159). This only takes a few minutes and results in this
server obtaining a copy of the Domino Directory for the domain.
2. Start this temporary server.
3. Use the name of this server for the Get Domino Directory from parameter of
the Configure Domino Server (CFGDOMSVR) command in 14.2.3,
“Configuring the Domino for AS/400 server” on page 432.
4. When the Domino for AS/400 server that transplants the original server is
set up, you can end and remove the temporary server.
The following topics describe each of the migration tasks.
14.2.1 Identifying the Domino files to be transplanted
First, you must determine which databases and files will be transplanted at this
time. This task may sound simple at first, but it requires careful planning.
You should not copy the entire contents of the Domino data directory without
some consideration. In addition to containing Domino databases, the Domino
data directory also contains files specific to the existing operating system
implementation and release of Domino, for example, modem files, documentation
and configuration databases, and database templates. In most cases, you want
426
Lotus Domino for AS/400 R5: Implementation
documentation and configuration files specific to Domino for AS/400 in your new
environment.
In other cases, you may want to carry over some of the original files. For example,
if database templates have been customized, you will want to copy those as well.
In general, the issue of templates is particularly important if your applications are
based on design templates from an earlier release of Domino. If any of your
databases automatically inherit the design from the templates, you should either
copy the original templates along with the databases or turn off the automatic
inheritance. Otherwise, a template for the current Domino release (4.6.x or 5) with
the same name may render design changes that may potentially cause problems
for client workstations running an earlier release of Lotus Notes.
14.2.1.1 Do not transplant full text indexes
For each Domino database set up for full text indexing, the data directory also
contains up to nine subdirectories with files for the indexes, each of those
containing several files. Although you will want the indexes in the new
environment, it is much easier to create the indexes from scratch after the
transplantation than to copy the full text index files. This is especially true if you
use FTP to transfer the database. Because the content of each subdirectory to be
transplanted must be created and copied individually, not copying the full indexes
may substantially reduce the number of manual steps to be performed.
Directories containing full text indexes can easily be identified by an extension of
.FT. For example, if the name of your Domino database is EUTALK.NSF, then the
Domino data directory contains a subdirectory called EUTALK.FT.
14.2.1.2 Testing the Domino applications before migrating
Any applications that you plan to migrate should be tested with Domino for
AS/400 prior to actual migration. This testing may be accomplished by setting up
a server using an IP address which is not registered on the DNS name server
with the Domino server name as the IP host name. The administrator or other
persons who test the application then adds the IP address to their client HOSTS
file to access the test server without connecting to the existing production
environment. Before starting the test, you should disable all replication or mail
routing in the Connection documents on the test server.
To migrate Domino applications for testing purposes, you should use the
consolidation method, as described in 14.3, “Server consolidation process
outline” on page 443, even though you may use the transplantation method for
the actual migration of the production environment after completing the tests and
deleting the test server. The reason is that you need to keep your production
system active during the testing phase.
14.2.1.3 Compatibility of Domino applications
Generally, Domino applications are designed to be cross platform. If the
application is a standard Domino application, it usually runs unchanged on the
AS/400 platform. However, because there are exceptions to every rule, testing is
necessary. Here are the general guidelines for cross-platform portability without
modification:
• The application has been created using only the tools that come as part of
Domino, which means no Visual Basic, C, or C++, or outside influencing
wrappers.
Migration from other Domino platforms
427
• The application consists only of Domino databases (NSF files), which, means
no external operating system related DLLs.
• The application is independent of the services of a specific operating system.
Some of the exceptions requiring minor modification are addressed in the article
"Porting Domino Applications to AS/400", May 1998, Wellesley Information
Systems Business Partner Special Report. The Web site at
http://www.eview.com/eview/view.nsf/pages/as400dev has this publication
available.
The special cases explained in the article include:
• Difference in path delimiter when accessing databases on the server. This
means the AS/400 syntax (as well as UNIX) uses a forward slash (/), while PC
operating systems use a back slash (\).
Note
Domino for AS/400 tries to accommodate this difference as much as
possible by accepting either of the two slash types in most cases. However,
when retrieving a path name, forward slashes are delivered. If an
application specifically checks for a backslash, it must be modified.
• Differences in the use of LotusScript:Data Object (LS:DO) instructions.
• Unsupported LotusScript instructions.
• Differences in C, C++, and HiTest C APIs.
Applications significantly integrated with the services of a particular operating
system will most likely require a significant amount of modification. You may
choose to keep those specific applications running on their existing platform.
Note
Some Lotus companion products that run with Domino are written specifically
to the services of a specific operating system and do require development
effort to port to the AS/400 platform. Some of these, such as DOMINO.DOC,
are now available on the AS/400 system.
14.2.2 Creating the Domino directory structure on the AS/400 system
In this task, you create the Domino data directory and required subdirectories,
and then copy the server ID file to the created data directory.
428
Lotus Domino for AS/400 R5: Implementation
Notes
• Although the syntax for the following commands and directory names are
shown in uppercase, you can use uppercase or lowercase because they are
not case sensitive.
• The path delimiter for the AS/400 integrated file system is a forward slash,
not a backslash.
• The examples assume your are able to use the recommended naming
convention. If not, adjust to suit your convention.
• You can also use MKDIR or its shortened version MD, in place of the
CRTDIR command. They are aliases of the same command.
14.2.2.1 Creating the Domino data directory and subdirectories
Although it is not absolutely necessary to create the Domino data directory first
(because the Domino for AS/400 server configuration process can create it for
you), you may choose to do so for more control over what is adopted from the
existing environment.
In a transplantation scenario, you must use the existing server ID file of the
Domino server you are transplanting. This means that you must copy this ID file
from your existing environment to a location accessible to the Domino for AS/400
configuration process. The simplest solution is to pre-create the Domino data
directory, and then copy the server ID file into this directory.
Unless there is a naming conflict, you should use the recommended AS/400
naming convention for Domino data directories (adopted in R5). The directory is
/LOTUS/DOMINO/SERVER_NAME, where SERVER_NAME is the name of the
Domino server.
You should also create subdirectories in the Domino data directory with the same
names as the subdirectories on the existing server for those subdirectories that
are to be transplanted.
The following steps are used to create the directory structure in the root of the
AS/400 integrated file system. The example uses
/LOTUS/DOMINO/SERVER_NAME for the Domino data directory, where
SERVER_NAME is the name of the Domino server. It is assumed that the higher
level directories, namely LOTUS and DOMINO, do not already exist. If they do,
skip the steps to create these directories.
Migration from other Domino platforms
429
Note
You can use the OS/400 Work with Object Links (WRKLNK) command to check
if these higher level directories exist. Type WRKLNK on an AS/400 command line
and press Enter. See if LOTUS is listed as an object link of type DIR (directory).
If it is, then you do not need to create that directory. Type 5 (Next level) in the
Opt column to the left of the name LOTUS and press Enter. See if DOMINO is
listed as an object link of type DIR. If it is, you do not need to create that
directory. Type 5 (Next level) in the Opt column to the left of the name DOMINO
and press Enter. If DOMINO contains an object with the same name as the
Domino server, then you have a name conflict and must decide whether to
rename that object (link) or use a different name for the Domino data directory.
If either LOTUS or DOMINO is listed as an object link, but is not of type DIR
(for example, of type STMF - Stream File), then you also have a naming
conflict and must decide whether to rename the object link or use a different
path for the Domino data directory.
1. Go to an AS/400 command line.
2. If the LOTUS directory does not already exist, type:
CRTDIR ’/LOTUS’
Press Enter.
3. If the DOMINO directory does not already exist, type:
CRTDIR ’/LOTUS/DOMINO’
Press Enter.
4. Type
CRTDIR '/LOTUS/DOMINO/SERVER_NAME'
Here SERVER_NAME is the name of your Domino server. Press Enter.
5. Create any subdirectories you may have in your existing environment. For
example, mail databases are usually in a subdirectory called mail. To create a
directory for it, type:
CRTDIR '/LOTUS/DOMINO/SERVER_NAME/MAIL'
Press Enter.
6. Ensure that all directories and subdirectories are owned by QNOTES. To
change the ownership of a directory, type:
CHGOWN OBJ(’/LOTUS’) NEWOWN(QNOTES)
14.2.2.2 Copying the server ID file to the newly created Domino data
directory
There are several ways to copy the server ID file to the AS/400 Domino data
directory. If the transplanted server is on a Windows NT system, you could, for
example, use Network Neighborhood in combination with either AS/400 Client
Access or AS/400 NetServer support to map the Domino data directory as a
network drive to the Windows NT system. Then, use one of the several ways of
copying files between directories on Windows NT (for instance, drag and drop).
You could also use FTP. As FTP is common to most platforms, the following
example uses FTP in a Windows NT environment.
430
Lotus Domino for AS/400 R5: Implementation
1. On the Domino NT workstation, bring up an MS-DOS window. Click Start
Programs —> MS-DOS Prompt.
—>
2. From the MS-DOS Prompt window, change to the drive that contains the
server ID file, if not already on that drive. Type d:, where d is the drive letter
and press Enter.
3. From the MS-DOS Prompt window, change to the directory that contains the
server ID file. This is normally the Domino data directory and on Windows NT
systems, for Domino R5, is usually called \LOTUS\DOMINO\DATA. The
example assumes \LOTUS\DOMINO\DATA. Type:
CD \LOTUS\DOMINO\DATA
Press Enter.
Note
On Windows NT systems, for Domino R4.6, the Domino data directory is
usually called \LOTUS\NOTES\DATA or \NOTES\DATA.
4. FTP to the AS/400 system on which the Domino server will run. Type:
FTP AS400_SYSTEM_NAME
Press Enter.
5. Enter your AS/400 user ID and password when prompted. Press Enter after
each entry.
6. Change to binary format. Type BINARY and press Enter.
7. Change to the AS/400 Domino data directory. Type:
CD /LOTUS/DOMINO/SERVER_NAME
Press Enter.
Note
The line CD / is very important. It not only changes the current directory to
the root of the IFS (from whatever is specified as the home directory in your
AS/400 user profile), it also switches to name format 1. This is necessary to
access any IFS directories other than QSYS.LIB
This happens only when you mention an object name (in this case, the
Domino data directory /LOTUS/DOMINO/SERVER_NAME) for the very first
time during an FTP session to AS/400 system and the object name starts
with a slash (/). Typing anything different causes FTP to remain in name
format 0, which means you can only refer to objects in QSYS.LIB. If you do
not see the message 250-NAMEFMT set to 1, you can manually switch to
name format 1 by entering the following command:
quote site namefmt 1
8. Copy the server ID file (normally called SERVER.ID) to the AS/400 Domino
data directory. Type PUT SERVER.ID and press Enter.
9. Exit FTP and then MS-DOS. Type quit and press Enter.
Migration from other Domino platforms
431
14.2.3 Configuring the Domino for AS/400 server
For these examples, we assume that the server to be transplanted is called
Dom01 and both its Organization and Domain names are called Acme.
Follow these steps:
1. On an AS/400 command line, type CFGDOMSVR and press F4 (Prompt).
2. In the Server name field, type the full hierarchical name of the server (as
shown in Figure 342). The full hierarchical name is required if the Option value
*ADD is used. Type *ADD in the Option field and press Enter.
Configure Domino Server (CFGDOMSVR)
Type choices, press Enter.
Server name . . . . . . . . . . Dom01/Acme__________________________________
________________________________________________________________________________
________________________________________________________________________________
____________________________________________________
Option . . . . . . . . . . . . . *ADD___
*FIRST, *ADD, *REMOVE
F3=Exit F4=Prompt F5=Refresh
F13=How to use this display
F10=Additional parameters
F24=More keys
Bottom
F12=Cancel
Figure 342. CFGDOMSVR (Part 1 of 5)
3. In the Data directory field, type the full path to the Domino data directory on
the AS/400 system. Ensure that you start the path with a forward slash (/), as
shown in Figure 343. Fill in the appropriate values for Time zone and Daylight
savings time fields. In the Get Domino Directory from field, type the name of
an additional (not the one being transplanted) Domino server in the domain,
from where the new Domino server can get the Domino Directory. This server
must be active when this command is run. Press Page Down to proceed.
Configure Domino Server (CFGDOMSVR)
Type choices, press Enter.
Server name . . . . . . . . . . > 'Dom01/Acme'________________________________
________________________________________________________________________________
________________________________________________________________________________
____________________________________________________
Option . . . . . . . . . . . . . > *ADD___
*FIRST, *ADD, *REMOVE
Data directory . . . . . . . . . /lotus/domino/dom01_________________________
______
Time zone . . . . . . . . . . . CST___
GMT,EST,CST,MST,PST,CET ...
Daylight savings time . . . . . *NO_
*YES, *NO
Get Domino Directory from . . . Dom02_______________________________________
________________________________________________________________________________
________________________________________________________________________________
____________________________________________________
More...
F3=Exit F4=Prompt F5=Refresh F10=Additional parameters F12=Cancel
F13=How to use this display
F24=More keys
Figure 343. CFGDOMSVR (Part 2 of 5)
432
Lotus Domino for AS/400 R5: Implementation
4. In the Additional server ID: ID file field, type the to path and the name of the
server ID file, as shown in Figure 344. This is the ID file that was copied using
FTP in 14.2.2.2, “Copying the server ID file to the newly created Domino data
directory” on page 430. If this server ID file is password protected, enter the
password in the ID file’s password field. For the other parameters, ensure you
include all the services that are included on the server being transplanted.
Even if you are not going to migrate your SMTP/MIME MTA, but are going to
use Native Domino SMTP, type *NONE for the Internet mail packages field and
*DOMINO for the SMTP services field. You will reconfigure SMTP support later
(see 14.4, “Migrating SMTP support” on page 446). If there already is another
Domino server on this AS/400 system, or if you plan to add another, ensure
that *PARTITION is included for the Advanced services field.
Configure Domino Server (CFGDOMSVR)
Type choices, press Enter.
Additional server ID:
ID file . . . . . . . . . . .
______
ID file's password . . . . . .
Web browsers . . . . . . . . . .
Internet mail packages . . . . .
+ for more values
SMTP services . . . . . . . . .
Directory services . . . . . . .
News readers . . . .
Connection services
Advanced services .
+ for
. . . . . .
. . . . . .
. . . . . .
more values
F3=Exit F4=Prompt F5=Refresh
F13=How to use this display
/lotus/domino/dom01/server.id_______________
________________________________
*NONE
*NONE, *ALL, *HTTP, *IIOP
_____
*NONE_____
*NONE,*ALL,*IMAP,*POP3 ...
__________
*DOMINO
*DOMINO, *MSF
*NONE__
*NONE, *ALL, *SYSDIR, *LDAP
_______
*NONE
*NONE, *NNTP
*NONE
*DECS, *NONE
*PARTITION
*NONE, *ALL, *PARTITION...
__________
Bottom
F10=Additional parameters F12=Cancel
F24=More keys
Figure 344. CFGDOMSVR (Part 3 of 5)
Note: If you are migrating from R4 to R4, then you are probably migrating your
SMTP/MIME MTA. If you are migrating R5 to R5, then you are probably using
Domino SMTP in both cases.
Note
Although, at this stage, you could add services to the AS/400 Domino
server that are not included in the server being transplanted, for simplicity,
we recommend that you only include those services that are already there.
After the transplantation is complete, it is quite easy to add these other
services using the Change Domino Server (CHGDOMSVR) command.
Press F10 (Additional parameters) and use Page Down to see the additional
parameters.
Migration from other Domino platforms
433
Configure Domino Server (CFGDOMSVR)
Type choices, press Enter.
Additional Parameters
Replace configuration . .
Domain name . . . . . . .
Network name . . . . . . .
Country code . . . . . . .
Certifier ID . . . . . . .
______
Administrator ID . . . . .
______
Server ID . . . . . . . .
______
Start server . . . . . . .
Log replication events . .
Log client session events
F3=Exit F4=Prompt
F24=More keys
.
.
.
.
.
.
.
.
.
.
.
.
.
.
.
*YES
*YES, *NO
*ORG____________________________
NETWORK1________________________
*BLANK
*GEN________________________________________
. . .
*GEN________________________________________
. . .
*GEN________________________________________
. . .
. . .
. . .
*NO_
*YES
*YES
F5=Refresh
F12=Cancel
*YES, *NO
*YES, *NO
*YES, *NO
More...
F13=How to use this display
Figure 345. CFGDOMSVR (Part 4 of 5)
5. If the Domino domain name differs from the Organization name (in our
example, it does not), enter the domain name in the Domain name field. If the
network name is not NETWORK1, enter the correct name in the Network
name field. Press Page Down.
Configure Domino Server (CFGDOMSVR)
Type choices, press Enter.
TCP/IP port options:
Encrypt network data . . . . .
Internet address . . . . . . .
Subsystem and object names . . .
Collation . . . . . . . . . . .
Copy Administrator ID file . . .
Additional services . . . . . .
+ for more values
F3=Exit F4=Prompt
F24=More keys
F5=Refresh
*NOENCRYPT
*ENCRYPT, *NOENCRYPT
'10.1.2.17'______
dom01_____
Name, *GEN
*STD______
*STD,CS,DA-DK-AA,DE,E2-ES ...
*ALL___
*DOMDIR, *DTADIR, *ALL
*NONE_____
*NONE,*ICM
__________
Bottom
F12=Cancel F13=How to use this display
Figure 346. CFGDOMSVR (Part 5 of 5)
6. Because this new server has the same IP address as the server being
transplanted, type that IP address in the Internet address field. Instead of
having a system generated name (such as DOMINOxx, where xx is allocated
by the system) as the name of the partition in which this server runs, you can
allocate your own preferred name by specifying a value for the Subsystem and
object names field. In the example, the server name is used. This support is
available at R4.6.5 or higher and R.5.
434
Lotus Domino for AS/400 R5: Implementation
Note
If running the R4.6 version of the CFGDOMSVR command, you do not have
an Internet address parameter. You must perform the tasks in 14.2.4,
“Editing the NOTES.INI file” on page 435. If running the R5 version of the
command and you leave the Internet address set to the default *SYSTEM, you
also must follow that section.
If running the R4.6 version of the CFGDOMSVR command, you do not have
the Subsystem and object names parameter and must accept system
generated subsystem names. Your SMTP option is also different.
Press Enter to start the setup of the server.
This command takes approximately 10 minutes to complete. Messages are
shown on the display as various configuration tasks are completed.
7. When you see the message Press ENTER to end terminal session, press Enter.
14.2.4 Editing the NOTES.INI file
You must do these tasks if you have configured a Domino R4 server or if you have
configured a Domino R5 server and did not specify a specific IP address for the
TCP/IP port options - Internet address parameter of the Configure Domino Server
(CFGDOMSVR) command (you used the default, *SYSTEM).
If you are running Domino R5 or Domino R4.6.4 or higher, you can change this
value with the Change Domino Server (CHGDOMSVR) command. However, we
describe changing the NOTES.INI file manually to cover earlier releases.
In this step, you must edit the NOTES.INI file which is stored in the Domino data
directory. On systems running Domino R5, the easiest way to edit the NOTES.INI
file is to run the Work with Domino Servers (WRKDOMSVR) command, and then
type 13 (Edit NOTES.INI) in the Opt field to the left of the Domino server name.
This automatically runs the Edit File (EDTF) command against the NOTES.INI
file. On systems running Domino R4.6, you may need to run the Edit File (EDTF)
command from a command line The EDTF command is available through PTFs.
Refer to 4.9, “Edit File (EDTF)” on page 119. Alternatively, you can map a
network drive to the Domino data directory and use the Microsoft WordPad editor
to edit the NOTES.INI file.
14.2.4.1 Binding to the IP address
Note
The default for the TCP/IP port options - Internet address parameter is *SYSTEM.
If you use the default, instead of specifying the IP address, no
TCPIP_TcpIpAddress line is added to the NOTES.INI file. The Domino server
listens on the standard port 1352 of all IP addresses defined to the AS/400
system. If using R4.6.3 or earlier, you must manually edit the NOTES.INI file to
bind the server to a specific IP address.
Migration from other Domino platforms
435
This binding is accomplished by adding the following line to the NOTES.INI file
(prior to the server being started):
TCPIP_TcpIpAddress=0,w.x.y.z:1352
Here w.x.y.z is the IP address.
If there are partitioned Domino servers on the AS/400 system and they are not
bound to individual IP addresses, then when the first one of these servers is
started, it listens on port 1352 of all IP interfaces defined to the AS/400 system.
This allocates port 1352 of each of the IP addresses to that server. If another
partitioned server is subsequently started, it cannot open any TCP/IP
communication. The server runs, but Notes clients and other Domino servers are
not able to access it.
If you are not using Domino partitioning, it is not mandatory to bind the (one)
Domino server to its IP address. We still recommend you do it so that problems
are not encountered should you change to a partitioned Domino environment in
the future.
Note
There is an alternative method of handling the IP addressing of partitioned
servers called port mapping. Port mapping is more complex than using
individual IP addresses and is not considered in this chapter. However, if port
mapping is used on the transplanted server system, it is necessary to modify
this transplant procedure to allow for the differences. Port mapping is described
in more detail in 6.1.1.2, “All servers use the same IP address (port mapping)”
on page 162.
14.2.4.2 Removing directory synchronization task
On systems running Domino R4.6, the Configure Domino Server (CFGDOMSVR)
command adds a line to the NOTES.INI file that is needed should directory
synchronization be configured. This line is NSF_HOOKS=QNNDIHK.
If the server configured in 14.2.3, “Configuring the Domino for AS/400 server” on
page 432, is a Domino R4.6 server and directory synchronization is not required,
remove this line from the NOTES.INI file.
On systems running Domino R5, the CFGDOMSVR command has a parameter
that controls whether this line is added to the NOTES.INI file. This is the Directory
services (DIRSRV) parameter. The line is added to the NOTES.INI file if DIRSRV
has the value *ALL or *SYSDIR. Directory Services must still be configured, this
parameter affects mainly the NOTES.INI entry. If directory synchronization is not
required on an Domino R5 server, it is assumed that the parameter was set
accordingly when the CFGDOMSVR command was run, or you can remove this
line manually.
14.2.5 Bringing down the original Domino server
With the server transplantation method, the original Domino server must be down
for a period of time to copy the Domino data files and transfer the network identity.
This avoids updating of files (particularly volatile mail files) while the transfer is
taking place. After the TCP/IP network identity has been moved to the AS/400
436
Lotus Domino for AS/400 R5: Implementation
system, both servers cannot be concurrently active with the same address in the
same network. Type ENDDOMSVR SERVER_NAME on any command line and press Enter
to end the server
14.2.6 Copying files to the Domino for AS/400 server
The next step is to actually copy the mail and other Domino databases and files to
be transplanted. The target is the Domino data directory and subdirectories that
you created in 14.2.2, “Creating the Domino directory structure on the AS/400
system” on page 428. This can be done using FTP or the Network Neighborhood
capability provided by AS/400 Client Access or AS/400 NetServer.
Note
Since this book was first published, some customers have found code page
problems after having used mapped network drives to copy the files. Therefore,
we recommend that you use FTP.
FTP is usually the desired method for optimum performance when copying large
amounts of data. However, FTP does not allow you to copy the contents of all
subdirectories with a single put command. Therefore, a put command is
necessary for each subdirectory, which may be cumbersome and error prone if
the server has a complicated subdirectory structure. In such an environment it is
very helpful that multiple FTP commands can be queued up in batch using a
source file.
The following procedure shows how to copy the contents of a complete
subdirectory using FTP. In the example, the mail files are copied. However, the
procedure is applicable to the contents of any subdirectory by changing to the
correct subdirectories on both the source (NT in this case) and target (AS/400)
systems:
Note
Using FTP is similar on most platforms. The main differences relate to naming
conventions. However, if the source system is an Integrated PC Server running
the OS/400 Integration of Lotus Notes product, special considerations are
required to run the FTP commands, because the Integrated Netfinity Server
does not have its own console when used with Integrated Domino. These are
described in 14.5.8, “Using FTP to copy files from an Integrated Netfinity
Server” on page 456.
1. On the Domino NT server, click Start
—> Programs —> MS-DOS Prompt.
2. From the MS-DOS Prompt window, change to the drive that contains the
Domino data directory, if not already on that drive. Type d:, where d is the
drive letter, and press Enter.
3. From the MS-DOS Prompt window, change the directory to the directory on
which the mail files are kept. On Windows NT systems, for Domino R5, this is
usually called \LOTUS\DOMINO\DATA\MAIL. This is assumed in this example.
Type:
CD \lotus\domino\data\mail
Migration from other Domino platforms
437
Press Enter.
Note
On Windows NT systems, for Domino R4.6, the mail directory is usually
called \LOTUS\NOTES\DATA\MAIL or \NOTES\DATA\MAIL.
4. FTP to the AS/400 system on which the Domino server runs. Type:
ftp AS400_SYSTEM_NAME
Press Enter.
5. Enter your AS/400 user ID and password when prompted. Press Enter after
each entry.
6. Change to binary format. Type binary and press Enter.
7. Change to the mail directory on the AS/400 Domino server. Type:
cd /lotus/domino/server_name/mail
Press Enter.
8. FTP the Domino mail files to the AS/400 mail directory. Type mput *.nsf and
press Enter.
9. Verify the mail files were successfully copied to the AS/400 IFS subdirectory.
Type dir and press Enter.
10.Exit FTP. Type quit and press Enter.
11.Exit the MS-DOS prompt window. Type exit and press Enter.
Tip
If you want to copy the contents of other subdirectories, you can do so before
you end the FTP session (before you type quit). Within the FTP session, you
can use the LCD (Local Change Directory) command to change the directory
on the local NT system and the CD (Change Directory) command to change
the directory on the AS/400 system. For example, to copy all the .NSF
databases from the MYAPPS subdirectory of the Domino data directory, you
use the following commands (after creating the subdirectory MYAPPS):
lcd \lotus\domino\data\myapps
cd /lotus/domino/server_name/myapps
mput *.nsf
438
Lotus Domino for AS/400 R5: Implementation
Tip
If you want to copy all files in a subdirectory, not just .NSF files, use the
asterisk ( * ) wildcard instead of the .NSF extension in the MPUT command.
For example, type:
mput *.*
If you need to replace the destination files, include the replace parameter in the
MPUT command. For example, type:
mput *.* (replace
To copy an individual file, use PUT instead of MPUT. For example, type:
put myapp.nsf
14.2.7 Changing ownership of subdirectories and files
For Domino for AS/400 to access Domino databases and manage access by
users, the newly created directory structure and copied files must be owned by
the QNOTES user profile. Therefore, you must change the ownership of these
directories and files.
To change the ownership of a directory, you use the Change Owner (CHGOWN)
command. To change the ownership of the Domino data directory (in our
example, it is called /LOTUS/DOMINO/SERVER_NAME), on an AS/400
command line, type:
CHGOWN '/LOTUS/DOMINO/SERVER_NAME' QNOTES
Press Enter.
To change the ownership of all the files and databases in the Domino data
directory, use a wildcard for the file names. On an AS/400 command line, type:
CHGOWN '/LOTUS/DOMINO/SERVER_NAME/*' QNOTES
Press Enter.
Repeat the previous two commands for all subdirectories created under the
Domino data directory and the files copied to them.
Tip
Press F9 (Retrieve) to retrieve on the command line the last run command.
This is very useful if you only want to make minor changes to the command
parameters (as in the previous example). You can directly amend the command
on the command line or press F4 (Prompt) to change the parameters using
prompt assistance.
Changing ownership sets the appropriate authorities for the QNOTES user profile
at the same time. However, to ensure data security and integrity, you should
change the public data authority for these directories and files to *EXCLUDE. To do
this, you use the Change Authority (CHGAUT) command. For example, type:
Migration from other Domino platforms
439
CHGAUT '/LOTUS/DOMINO/SERVER_NAME' USER(*PUBLIC) DTAAUT(*EXCLUDE)
OBJAUT(*NONE)
CHGAUT '/LOTUS/DOMINO/SERVER_NAME/*' USER(*PUBLIC) DTAAUT(*EXCLUDE)
OBJAUT(*NONE)
Press Enter. A message appears at the bottom of the display indicating Object
Changed.
As in the case of changing ownership, you must run the Change Authority
(CHGAUT) command for each of the subdirectories and the files copied to them.
14.2.8 Transferring the TCP/IP address to the Domino for AS/400 server
The purpose of a server transplantation is to move a server to another piece of
hardware without affecting the end user. Because we recreated the identical
Domino server on the AS/400 system, we must also have our end users access
this server the exact same way. The most common way to get to a Domino server
is by name. During a transplantation both the server name and the IP connection
to that Domino server name must remain the same. This can be done by either
using the same IP address as the original Domino server or by changing the entry
of that Domino server in the DNS. For these examples, we are assume that we
want to use the same IP address.
To use the same TCP/IP address, you must change (or disable) the IP address on
the transplanted system, and then configure and activate the IP address as a new
TCP/IP interface on the AS/400 system.
Note
If you have a large TCP/IP network with several subnetworks connected
through routers or bridges, it may be necessary to flush the ARP table on the
router before the router recognizes the new MAC address as owning the IP
address.
14.2.8.1 Changing or disabling the TCP/IP address on the transplanted
system
Note
If the transplanted system is an Integrated Netfinity Server running the OS/400
Integration of Lotus Notes product, refer to 14.5.9, “Changing the TCP/IP
address on the Integrated Netfinity Server” on page 461, for special
instructions on changing or disabling the TCP/IP address on that platform. The
following instructions assume the transplanted system is a Windows NT
If the Domino server on the original system is active, go to that server console
and type quit, and then press Enter. It is not active if these steps are followed
without interruption:
1. On the Windows NT Task bar, click Start
—> Settings —> Control Panel.
2. Double-click Networks.
3. Click Protocols
440
—> TCP/IP Protocol —> Advanced.
Lotus Domino for AS/400 R5: Implementation
4. Select the IP address that is being moved to the AS/400 system.
5. If there are multiple IP addresses on the Windows NT system, click Remove to
delete the selected address. If this is the only IP address and you want to use
the Windows NT system for other purposes (still running TCP/IP), click Edit
and change the address to something different.
6. Click OK
—> Apply —> OK —> OK.
Reboot the Windows NT system. Make sure that you can no longer PING it using
the original IP address.
14.2.8.2 Configuring and activating TCP/IP interface on the AS/400
system
The following steps describe how you configure and activate a TCP/IP interface:
1. Sign on to the AS/400 system with a user profile that has at least all object
(*ALLOBJ), security administrator (*SECADM) and input/output configuration
(*IOSYSCFG) special authorities.
2. You can use the Configure TCP/IP (CFGTCP) command to show a menu allowing
you to perform all configuration tasks related to TCP/IP. On any AS/400
command line, type CFGTCP and press Enter.
The Configure TCP/IP menu is displayed (see Figure 1 on page 25).
3. Select option 1 (Work with TCP/IP interfaces) to add a TCP/IP interface to
your TCP/IP configuration. This associates one or more IP addresses with an
existing line description representing a physical network interface.
The Work with TCP/IP Interfaces appears, as shown in Figure 347.
Work with TCP/IP Interfaces
System:
Type options, press Enter.
1=Add 2=Change 4=Remove
Opt
1_
__
__
Internet
Address
10.1.2.17______
10.1.2.3
127.0.0.1
F3=Exit
F12=Cancel
5=Display
9=Start
10=End
Subnet
Mask
Line
Line
Description Type
255.255.255.0
255.0.0.0
TRNLINE
*LOOPBACK
F5=Refresh
F17=Top
F6=Print list
F18=Bottom
AS01
*TRLAN
*NONE
Bottom
F11=Display interface status
Figure 347. Work with TCP/IP Interfaces display
4. To add a TCP/IP interface, type 1 (Add) in the Opt column and the IP address
to be used in the Internet Address column, as shown in Figure 347, and press
Enter. The Add TCP/IP Interface (ADDTCPIFC ) command is launched for you.
You see the display shown in Figure 348 on page 442.
Migration from other Domino platforms
441
Add TCP/IP Interface (ADDTCPIFC)
Type choices, press Enter.
Internet address . . . . . . . . > '10.1.2.17'______
Line description . . . . . . . . TRNLINE___
Name, *LOOPBACK, *VIRTUALIP
Subnet mask . . . . . . . . . . 255.255.255.0____
Associated local interface . . . *NONE____________
Type of service . . . . . . . . *NORMAL___
*MINDELAY, *MAXTHRPUT...
Maximum transmission unit . . . *LIND______ 576-16388, *LIND
Autostart . . . . . . . . . . . *YES
*YES, *NO
PVC logical channel identifier
___
001-FFF
+ for more values ___
X.25 idle circuit timeout . . . 60____
1-600
X.25 maximum virtual circuits . 64____
0-64
X.25 DDN interface . . . . . . . *NO_
*YES, *NO
TRLAN bit sequencing . . . . . . *MSB
*MSB, *LSB
F3=Exit F4=Prompt
F24=More keys
F5=Refresh
F12=Cancel
Bottom
F13=How to use this display
Figure 348. Add TCP/IP Interface (ADDTCPIFC) display
5. Enter the name the line description and the subnet mask for your new
interface, as shown in Figure 348. Contact your network administrator if you
need more information about the values for your TCP/IP configuration.
6. Press Enter to add the new interface and to return to the Work with TCP/IP
Interfaces display.
7. Type 9 (Start) in Opt column to the left of the newly added interface, and then
press Enter to start the interface.
8. Press F11 (Display interface status) to see the interface status. Press F5
(Refresh) several times until the status changes to ACTIVE. This should take
just a few seconds.
9. Press Enter to return to the Configure TCP/IP menu.
10.You may want to add the Domino server name to the host table on your
AS/400 system if it is not in a DNS.
14.2.9 Starting the Domino for AS/400 server
The Domino for AS/400 server is now in a position to transparently take over the
role of the transplanted server on the Windows NT system.
If the Domino server on the Windows NT system is to be used for other purposes,
the IP address of that server must be changed before that server is restarted. If it
is not to be used for other purposes, the Domino software can be removed after
you are sure that the AS/400 server is running satisfactorily.
Start the Domino for AS/400 server. On a AS/400 command line, type:
STRDOMSVR SERVER_NAME
Here SERVER_NAME is the name of the Domino server. Press Enter.
442
Lotus Domino for AS/400 R5: Implementation
After you run the Start Domino Server command, you can monitor the Domino
console messages by running the Work with Domino Console (WRKDOMSCL)
command. Type:
WRKDOMCSL SERVER_NAME
Press Enter. These commands are also available from the Work with Domino
Servers (WRKDOMSVR) display.
14.3 Server consolidation process outline
The server consolidation method offers the benefits of minimized down time
during the migration and, as the name suggests, offers the potential for a smaller
number of servers at the completion of the process. It involves a new server
identity, as well as the associated administrative challenges of managing the
impact on users.
Note: The name server consolidation method is used to denote migration to a
server with a different identity from the original. A true consolidation of multiple
servers involves using either the server transplantation or server consolidation
process to migrate the first of the identified servers to Domino for AS/400.
Migration from the other existing servers to that same server can be
accomplished using the server consolidation process outlined here, except for
step 2, because the target Domino for AS/400 server already exists at that point.
The planning and copying phases are identical to the server transplantation
process. Beyond that, there are significant differences in the procedure and user
impact. The overall process is as follows:
1. Identify the Domino files to be migrated.
2. Configure the Domino for AS/400 server. This server has a different name and
IP address from the existing servers.
3. Copy files to the Domino for AS/400 server.
4. Change ownership of subdirectories and files.
5. Start the Domino for AS/400 server.
6. Consider handling of databases with local encryption.
7. Manage synchronization of old and new files. Use server-to-server replication
to keep the old and the new files synchronized until complete cutover to the
new server has taken place.
8. Update the Domino Directory to reflect mail server changes.
9. Make the required changes to the Notes client workstations. Modify Location
documents to reflect a home mail server change. Database icons must be
modified to reflect an application server change.
The following topics describe each of these tasks.
14.3.1 Identifying the Domino files to be migrated
This topic is identical to 14.2.1, “Identifying the Domino files to be transplanted”
on page 426, except that, in this case, you do not need to transfer the server ID
file.
Migration from other Domino platforms
443
14.3.2 Configuring the Domino for AS/400 server
Unlike in the transplantation method, this Domino for AS/400 server has its own
unique identity (server name and IP address).
You must first configure TCP/IP to establish and activate a new TCP/IP interface
on the AS/400 system with a unique IP address. If there is no Domino for AS/400
server configured on your AS/400 system, you can also use an existing TCP/IP
interface. For details about configuring an AS/400 TCP/IP interface, please refer
to 2.4.1, “Configuring TCP/IP on your AS/400 system” on page 24.
Then, you configure a Domino for AS/400 server as a new and additional Domino
server in your organization. This process begins with registering the new server
in the Public Address Book of your existing Domino domain. It is completed by
configuring the Domino for AS/400 server using the Configure Domino Server
(CFGDOMSVR) command with the *ADD option. Details of this entire process can
be found in Chapter 3, “Adding a Domino server to an existing organization” on
page 87.
You must either create the Domino data directory manually before running the
Configure Domino Server command or you can let the Configure Domino Server
command create the directory for you. This depends on how you decide to handle
the server ID file created during the registration of the Domino for AS/400 server.
The Configure Domino Server command also creates the standard Domino
subdirectories, such as mail. If you need to duplicate any other existing
subdirectories on the Domino for AS/400 server, you must manually create those
subdirectories. Refer to 14.2.2, “Creating the Domino directory structure on the
AS/400 system” on page 428, for additional information.
14.3.3 Copying files to the Domino for AS/400 server
This step is similar to the transplantation topic in 14.2.6, “Copying files to the
Domino for AS/400 server” on page 437, with the following two exceptions:
• The Domino Directory (or Public Address Book under Domino R4.6) does not
need to be copied because a replica is created automatically during the
configuration of an additional server.
• The ID files do not need to be copied. The ID file for the new server is created
during the process of registering the new server. You must be careful that this
ID file is not overwritten during the copy process by an existing server ID.
Technically, replication can be used to copy all other files as well because the
servers have different Domino and network identities. IBM Rochester used FTP
for their migration because they found it much faster and more straightforward for
bulk copying mail files for selected users or large numbers of users.
One trade-off for the speed benefit of using FTP versus replication is that to FTP
open files from the existing Domino server while it is still active, a trick may be
required. In the IBM Rochester migration, a Domino console dbcache flush
command, followed by a drop all, was used to temporarily close all databases
and copy as many files as possible without taking the Domino server down for
any length of time.
With this technique, the IT support of IBM Rochester was able to accomplish their
goal with minor side effects, as opposed to a server outage. For example, if a
user interacted with the server at the exact moment the drop all command was
444
Lotus Domino for AS/400 R5: Implementation
run, they might receive an error message. If they immediately retried the function,
it would be successful. Users not actively communicating with the server at that
moment may have experienced a little bit longer connect time the next time they
accessed the server. However, it will be a simpler task if you can end the server
first.
14.3.4 Changing ownership of subdirectories and files
This topic is identical to the transplantation topic in 14.2.7, “Changing ownership
of subdirectories and files” on page 439.
14.3.5 Starting the Domino for AS/400 server
To start the Domino for AS/400 server, use the Start Domino Server
(STRDOMSVR) command, option 1 of the Work With Domino Servers
(WRKDOMSVR) display, or Operations Navigator.
14.3.6 Considering handling of databases with local encryption
In most cases, if the LocalDomainServers group is identified in a database
access control list (ACL), and if the new server has been added to that group in
the Domino Directory, the new server should be able to access the copied
databases. An exception to this rule is databases with local encryption specified
on the server, for example, for some mail databases. Such databases would have
been encrypted with an encryption key unique to the original server, and the new
server would be denied access to them.
The FIXUP command can be used from the new Domino server console to
identify any mail files in this situation. If FIXUP identifies that the new Domino
server does not have access to specific databases, you can manually create a
new replica of each of those databases on the new server, using a Lotus Notes
client interface. Through the replication process, Notes allows this encryption key
to be rebuilt. You can then verify that all the mail data has been successfully
copied and is accessible by the new Domino server.
14.3.7 Managing synchronization of old and new files
The final step in data migration is to periodically replicate the existing Domino
server with the new Domino server to keep the data synchronized until after
cutover. After updating the Domino Directory (discussed in the next section) to
reflect the change in mail servers, one final replication of the old and new Domino
servers completes the process. From a data perspective, this process provides
uninterrupted service to the user community.
14.3.8 Updating the Domino Directory to reflect mail server changes
When the location of a user’s mail database is moved from one Domino server to
another (one with a different Domino identity), changes must be made to the
Domino Directory, which the Domino mail router references to deliver the mail.
Person documents in the Domino Directory must be modified to change the mail
server and, if necessary, the mail file path for each user being migrated.
If you are migrating all users from a given server, this can be done with a simple
agent. In the case of a pilot group of users migrating from different servers, a
manual approach may be more straightforward.
Migration from other Domino platforms
445
14.3.9 Making required changes to Notes client workstations
When the location of a user's mail database is moved from one Domino server to
another (one with a different Domino identity), changes are also required on user
workstations. The user's location document, which defines how the user's mail is
sent and received, must be modified to reflect the home mail server change.
When an application database moves from one server to another, icons on the
users' desktops must be modified to reflect the new location. This may be done by
adding a new database icon and removing the original.
These modifications can be accomplished without visiting each desktop or asking
the users to perform manual tasks. In the IBM Rochester migration, the updates
were handled in conjunction with end user communication by sending a series of
memos. Each e-mail notification contained some information and instructions, but
more importantly, contained a button with code behind it that would automatically
make the appropriate client workstation changes.
For example, if the migration process takes place over a calendar week, a memo
is sent on Wednesday including an announcement of the imminent migration:
who, what, where, when, and why. A button in this memo is set up to add icons for
primary databases on the new Domino server, such as the Domino Directory. This
also offers the benefit of load balancing by adding larger databases to user
desktops well in advance of the Monday morning peak load that typically follows a
migration.
On Friday morning, after updating the Domino Directory documents for each
migrated user, a second memo is sent to the affected users. This memo includes
a button and some detailed instructions. The button causes their location
document in their personal address book to be updated, and add an icon to their
workspace for the new mail database. The instructions explain how to manually
replicate their new mail database with the old one, in case they have been
manipulating their old mail file after the Domino Directory changes were made
and the final replication was performed.
Over the weekend, a third and final note is sent to the users to simply
congratulate them on making the move. More importantly, by sending this final
note, you can quickly identify if any users are experiencing mail routing problems.
14.4 Migrating SMTP support
Important
We suggest you look on the Web site at http://notes.net/doc for the latest
version of the Release notes for Lotus Domino for AS/400 R5. Look for SMTP
within the Release notes.
We recommend that all customers apply the latest QMU for the release they
are running. To apply the latest QMU for your current release, go to the Web
site at http://www.as400.ibm.com/lotus_notes/qmulist.htm to obtain the
appropriate code.
446
Lotus Domino for AS/400 R5: Implementation
This section covers considerations for migrating existing Domino SMTP support
to Domino for AS/400. Although the guidelines explained here apply largely to
migration from a Windows NT server, they may be helpful in the migration of the
SMTP/MIME from other Domino servers.
There is one important difference between R4.6 Domino SMTP/MIME MTA
running on the AS/400 system and a Domino SMTP/MIME MTA running on other
systems. The Domino SMTP/MTA running on the AS/400 system does not
communicate with the TCP/IP network. Rather, it sends and receives mail
through the OS/400 SMTP support and AnyMail/400, and the AS/400 Mail Server
Framework.
The R5 AnyMail/400 (MSF) Integration on the AS/400 system continues to use
the AS/400 SMTP support for Domino SMTP mail. Domino Native SMTP support
is similar to that which is available on other platforms.
Important
Before attempting to migrate the SMTP/MIME configuration from any other
server, you should read and understand the explanations about the AS/400
implementation of SMTP in Chapter 7, “Lotus Domino for AS/400 and SMTP”
on page 181. Especially important is the fact that the SMTP server on the
AS/400 is configured correctly.
The general approach is to delete configuration documents generated by the
original SMTP/MIME configuration process, and allow them to be reconfigured by
Domino for AS/400. You begin by following the basic migration process, either the
server transplantation method or server consolidation method. As described
earlier in this chapter, the migration procedure essentially involves copying your
Domino files from the original platform to a data directory on the AS/400 system,
changing ownership, and configuring the new Domino for AS/400 server.
When you run the Configure Domino Server (CFGDOMSVR) command, you
should first run it without specifying the SMTP parameter, as described in the
previous sections. Then, as the rest of the process outlines, delete the
SMTP/MIME configuration information you brought over in the Domino Directory
from the original platform before letting Domino for AS/400 configure it.
Otherwise, you have duplicate configuration documents and it may be difficult to
tell which one is correct.
Important
If you are migrating from R5 on NT, you must make a decision as to which mail
configuration you require. If you must communicate with other AS/400 based
mail applications, you need Domino for the AS/400 with MSF. If you are only
using Domino as your mail platform, you should use Native Domino SMTP. For
more information, please refer to Chapter 7, “Lotus Domino for AS/400 and
SMTP” on page 181.
If you are migrating from R4.5 or R4.6.x on NT to R4.6.x on the AS/400 system,
you must use MSF.
Migration from other Domino platforms
447
The detailed steps in the process are as follows:
1. Start the new Domino for AS/400 server.
2. Open the Domino Directory that you have migrated from the original platform.
To do this, double-click the database icon from your Notes client desktop or
click File —> Database —> Open from the menu bar.
3. If you are migrating from R5, follow these steps:
a. Delete the Messaging Configuration document created by the SMTP/MIME
configuration process.
b. Open and edit the Server document for the Domino server. If you find these
items, make the following modifications:
i. Remove SMTP Mail Routing from the Routing Tasks field.
ii. Disable the SMTP Listener field.
Save your changes.
4. If you are migrating from R4 SMTP/MTA, follow these steps:
a. Delete the Global Domain Document created by the original SMTP/MIME
MTA configuration process. You may prefer to rename it so that you still
have the information for reference.
The name of the global domain is probably MTAGlobal unless it was
renamed.
b. Delete the Foreign SMTP Domain Document created by the original
SMTP/MIME MTA configuration process.
The name of the foreign SMTP domain document is *.*.
c. Delete the SMTP connection document created by the SMTP/MIME MTA
configuration process.
This connection document specifies the Domino server name as the source
server and All Internet Hosts as the destination server.
d. Open and edit the Server document for the Domino server and if you find
these items make the following modifications:
In the Internet Message Transfer Agent (SMTP MTA) section, blank out the
contents of the following fields: Global Domain name, Fully Qualified
Internet Host Name, and MTA Work Path.
e. Save your changes.
5. End the Domino for AS/400 server.
Change the Domino for AS/400 server configuration using the Change Domino
Server (CHGDOMSVR) command to add support for the SMTP/MIME. This
involves specifying *SMTP in the Internet Mail Packages parameter and *DOMINO
or *MSF for the SMTP services parameter. This allows Domino for AS/400 to
configure the SMTP/MIME by recreating the documents and fields you deleted
or blanked out (see Figure 349).
448
Lotus Domino for AS/400 R5: Implementation
Change Domino Server (CHGDOMSVR)
Type choices, press Enter.
Server name . . . . . . . . . . > acmemail1
Additional server ID:
ID file's password .
Time zone . . . . . .
Daylight savings time
Web browsers . . . . .
.
.
.
.
.
.
.
.
.
.
.
.
.
.
.
.
.
.
.
.
*NONE
EST
*NO
*HTTP
*SAME, GMT, EST, CST, MST ...
*SAME, *YES, *NO
*SAME, *NONE, *ALL, *IIOP...
Internet mail packages . . . . .
+ for more values
SMTP services . . . . . . . . .
Directory services . . . . . . .
*SMTP
*SAME,*NONE,*ALL,*IMAP ...
*DOMINO
*NONE
*SAME, *DOMINO, *MSF
*SAME, *NONE, *ALL, *LDAP...
News readers . . . . . . . . . .
*NONE
*SAME, *NONE, *NNTP
F3=Exit F4=Prompt
F24=More keys
F12=Cancel
F5=Refresh
More...
F13=How to use this display
Figure 349. Change Domino Server for mail migration
If you are migrating Domino R4, you must reconfigure your server using
RPLCFG(*NO) to configure the SMTP/MIME MTA.
6. If you are using MSF, end and restart AS/400 Mail Server Framework
(ENDMSF and STRMSF) to reset the AnyMail function.
Make sure that the SMTP TCP/IP task is running. You can check this by
looking at the TCP/IP Connection status with the NETSTAT *CNN command.
7. Restart the Domino for AS/400 server.
8. It is important to verify the information in the new configuration documents. In
the Server document, make sure in the Routing Tasks field that SMTP Mail
Routing is one of the options. If you are using R5 and Native Domino SMTP,
the SMTP Listener field must be enabled. Check also that a Messaging
Configuration document has been created and that the Group or Server name
field contains your server name.
9. Make changes to the SMTP/MIME MTA configuration documents, if
necessary.
In some cases, you may be required to make changes to the automatically
generated configuration. One of these is if the SMTP domain name used to
address mail to your users is different from the AS/400 local host and domain,
and your OS/400 SMTP environment is set up to use the default SMTP mail
behavior.
With Domino for AS/400, the AS/400 local host and domain, as defined in
option 12 of the Configure TCP/IP (CFGTCP) menu, is what is configured by
default for the fully qualified Internet host name in the Server document. The
name used in your existing Domino environment may in fact be different. For
example, the default fully qualified Internet host name for the Windows NT
SMTP/MIME configuration is the TCP/IP host name and TCP/IP domain name
Migration from other Domino platforms
449
of the Windows NT server. The TCP/IP host name of the Windows NT server
is unique and different from the AS/400 local host name.
If you want to continue to receive mail using the same SMTP mail addressing
as before, you may need to create a Global Domain document where you can
define alternative or additional Internet domain names. For more information
about configuring AS/400 SMTP mail behavior and changes, which may be
required to SMTP/MIME MTA configuration documents, please refer to
Chapter 7, “Lotus Domino for AS/400 and SMTP” on page 181.
10.If you changed any values in the previous step, end the Domino for AS/400
server and restart it.
11.If you are using the R4 SMTP/MIME MTA, ensure that SMTPMTA is included
in the server tasks to be started automatically when the server starts. To start
it manually, type LOAD SMTPMTA at the Domino console. At R5, the selected
SMTP support automatically starts when the server starts.
14.5 Migrating from an Integrated Netfinity Server
In this section, the Domino Directory is referred to by its previous name, Public
Address Book. Domino Directory is the R5 terminology and is not applicable to
the Integrated Netfinity Server implementation of Domino, which only supported
Domino R4. Because the described transplantation and consolidation methods
apply only when moving to the same release of Domino on the target AS/400
system, transplantation and consolidation of Integrated Netfinity Domino servers
imply that the target release is also R4 on the AS/400 system. Therefore, the
Public Address Book is also the appropriate term on the target Domino for
AS/400 server.
There are some unique and additional considerations when migrating from the
Domino implementation on an Integrated Netfinity Server (OS/400 Integration of
Lotus Notes). One is that special installation procedures are required for this
Domino implementation due to the fact that an Integrated Netfinity Server does
not have a direct workstation interface to its operating system. The other is that
the Integrated Netfinity Server implementation of Domino offers some unique
integration features that have been implemented differently with Domino for
AS/400.
The primary considerations are related to:
•
•
•
•
•
•
Add Notes User (ADDNTSUSR) command
Differences in default port names
Dial-up connectivity (X.PC versus PPP/SLIP)
Directory shadowing versus directory synchronization
Database integration (DataProp versus NotesPump)
Backup and recovery (ADSM versus BRMS or OS/400 IFS backup/recovery
tools)
• Capability to submit Domino commands from a CL program
• Using FTP to Copy Files from an Integrated Netfinity Server
• Changing the TCP/IP Address on the Integrated Netfinity Server
The following topics describe each of the issues and offer suggestions for ways to
address them.
450
Lotus Domino for AS/400 R5: Implementation
14.5.1 Add Notes User command
The Add Notes User (ADDNTSUSR) command is unique to the Integrated
Netfinity Server implementation of Domino. It provides a method of registering
Lotus Notes users from an AS/400 interface, interactive, or batch.
Domino for AS/400 offers the Operations Navigator interface for both Domino and
AS/400 administration. Notes user registration is available directly from a Notes
client through the administrator interface (or, if using R5 clients, the Domino
Administrator client), a Web browser, or an Operations Navigator front end to the
administration functions of the R4 Notes client (or R5 Domino Administrator
client). The ADDNTSUSR command or an equivalent has not been implemented
with Domino for AS/400.
With the Integrated Netfinity Server implementation, before you can add Notes
users with the ADDNTSUSR command, the AS/400 system distribution directory
entries must exist for users to be registered. Those entries are automatically
modified specifically for the Integrated Netfinity Server implementation of
Domino. This is particularly important if the SMTP/MIME MTA is in use on the
Integrated Netfinity Server. When mail integration is installed on the Integrated
Netfinity Server, the behavior of the ADDNTSUSR command is changed to add
specific user-defined fields to the system distribution directory entries.
If you have Notes users who were registered using the ADDNTSUSR command
and you now want to migrate them to Domino for AS/400, some AS/400 system
distribution directory entry changes must be made to allow those users to
successfully receive SMTP mail. These changes can be made interactively using
the Work with Directory Entries (WRKDIRE) command.
Alternatively, they can be made in batch from a CL program using the Change
Directory Entries (CHGDIRE) command. Your CL program needs to read through
the system distribution directory to identify which user entries must be modified,
and then use CHGDIRE to modify each appropriate entry.
The following changes are required:
• Change the Mail Service Level from 9=other to 4=Lotus Domino.
• Edit the user-defined fields to blank out the contents of all the fields for which
the first part of the name begins with QYN and the second part of the name is
QNOTES.
If you want to change a directory entry interactively from an AS/400 interface,
type WRKDIRE on any AS/400 command line and press Enter. Type 2 in the Opt
column next to the entry to be changed and press Enter. You see the Change
Directory Entry display, as shown in Figure 350 on page 452.
Migration from other Domino platforms
451
Change Directory Entry
User ID/Address . . . . :
WBLANKER NTSIPCS
Type changes, press Enter.
Description . . .
System name/Group
User profile . .
Network user ID .
.
.
.
.
.
.
.
.
.
.
.
.
Wilfried Blankertz on IPCS Notes
NTSIPCS
F4 for list
F4 for list
WBLANKER NTSIPCS
Name:
Last . .
First . .
Middle .
Preferred
Full . .
.
.
.
.
.
.
.
.
.
.
.
.
.
.
.
Blankertz
Wilfried
.
.
.
.
.
.
.
.
.
.
.
.
.
.
.
Blankertz, Wilfried
More...
F3=Exit F4=Prompt F5=Refresh F12=Cancel F18=Display location details
F19=Change name for SMTP F20=Specify user-defined fields F24=More keys
Figure 350. Change Directory Entry display
Press Page Down several times until you see the display shown in Figure 351.
Change Directory Entry
User ID/Address . . . . :
WBLANKER NTSIPCS
Type changes, press Enter.
Mail service level . .
9
For choice 9=Other mail service:
Field name . . . . QYNMMAILTY QNOTES
Preferred address . . .
3
Address type . . . .
For choice 9=Other preferred address:
Field name . . . .
1=User index
2=System message store
4=Lotus Domino
9=Other mail service
F4 for list
1=User ID/Address
2=O/R name
3=SMTP name
9=Other preferred address
F4 for list
F4 for list
More...
F3=Exit F4=Prompt F5=Refresh F12=Cancel F18=Display location details
F19=Change name for SMTP F20=Specify user-defined fields F24=More keys
Figure 351. Change mail service level
You must change the Mail service level field to a 4, and then press F20 (usually
Shift + F8) to see the user-defined fields. Remove the contents of all fields with a
name starting with QYN and a second qualifier of QNOTES. Page forward to find
these fields. An example is shown in Figure 352.
452
Lotus Domino for AS/400 R5: Implementation
Specify User-Defined Fields
Type choices, press Enter.
QYNMHOME
QNOTES
_____________________________________________________________________
_____________________________________________________________________
_____________________________________________________________________
_____________________________________________________________________
_____________________________________________________________________
_____________________________________________________________________
QYNMMAILTY QNOTES Notes
_____________________________________________________________________
_____________________________________________________________________
_____________________________________________________________________
_____________________________________________________________________
_____________________________________________________________________
_____________________________________________________________________
More...
F3=Exit
F5=Refresh
F12=Cancel
Figure 352. Specify User-Defined Fields display
If you want to write a CL program to change multiple directory entries, you can
use the Change Directory Entry (CHGDIRE) command, as shown in the following
example:
CHGDIRE USRID(&USERID &ADDRESS)+
USRDFNFLD((QYNMSHORT QNOTES *NONE)+
(QYNMNTSDMN QNOTES *NONE)+
(QYNMHOME QNOTES *NONE)+
(QYNMSVR QNOTES *NONE)+
(QYNMMAILTY QNOTES *NONE)+
(QYNMFADDR QNOTES *NONE)+
(QYNMORGU QNOTES *NONE))+
MSFSRVLVL(*DOMINO)
Note: There may also be generic *ANY entries in your system distribution
directory, directing all mail with a certain SNADS address or SMTP domain to the
SMTP/MIME MTA on the Integrated Netfinity Server. If this is the case, those
must be removed or changed in the same manner as the individual entries, as
described previously.
14.5.2 Differences in default port names
Default Domino port names are not the same between the Integrated Netfinity
Server implementation of Domino and Domino for AS/400. For example, the
default Domino port for the TCP/IP protocol is called FSNOTES_TCPIP on the
Integrated Netfinity Server, and TCPIP in Domino for AS/400 and other platforms.
If you use the server transplantation method of migration, manual configuration
changes to any existing connection documents in the Public Address Book are
most likely required. As a result of the migration process described in this
chapter, the port FSNOTES_TCPIP is enabled in the Server document and
possibly referenced in connection documents because the NAMES.NSF was
copied from the Integrated Netfinity Server. However, the NOTES.INI file of the
Domino for AS/400 server only defines the port TCPIP. This may result in a
Migration from other Domino platforms
453
conflict. The following three methods are potential alternatives to resolve this
situation:
• Disable the Domino port called FSNOTES_TCPIP and modify your connection
documents to use the port TCPIP instead.
• Assign unique network addresses to the two Domino ports. You can either use
unique IP addresses or a port mapping scenario in which the server acts as its
own port mapper. The technique is comparable to the one used in setting up
partitioned servers, as described in 6.1, “Multiple Domino servers on a single
AS/400 system” on page 159.
• Disable the Domino port called TCPIP.
Attention
We do not recommend the third option. The port named TCPIP may have
other implications because it is the default name used by Domino for
AS/400.
14.5.3 Dial-up connectivity
There are varied protocols for dial-up connectivity to Domino on different
platforms. Virtually all of the platforms support TCP/IP. On some Domino
platforms, a proprietary protocol called X.PC is also supported for dial-up
connectivity from client workstations.
The Integrated Netfinity Server implementation of Domino supports X.PC on its
own modem port (exclusive to the Pentium version). It can also take advantage of
the TCP/IP dial support (PPP and SLIP) provided with OS/400.
Domino for AS/400 supports the TCP/IP protocol exclusively and uses the
AS/400 native communications hardware and software. Dial-up connectivity to
Domino for AS/400 is available using PPP or SLIP.
Therefore, if you are using X.PC with the communications hardware of the
Integrated Netfinity Server, migration of your dial-up connectivity environment to
TCP/IP dial is a consideration. For details on Domino for AS/400 dial-up
connectivity alternatives and configuration, please refer to Chapter 13., “Dial-up
connectivity” on page 357.
14.5.4 Directory shadowing versus directory synchronization
The Integrated Netfinity Server implementation of Domino supports one-way
directory shadowing from the AS/400 system distribution directory to the Domino
Address Book. Domino for AS/400 provides flexible and comprehensive
bidirectional directory synchronization that is available even if the Domino server
itself is not running. You will want to take advantage of the additional power and
integration available with this feature. For more details on Domino for AS/400
directory synchronization and its configuration, please refer to Chapter 11,
“Directory synchronization” on page 313.
One consideration is that if you have Lotus Notes users registered using the Add
Notes User (ADDNTSUSR) command, the same modifications required for mail
integration apply when directory synchronization is used. Refer to 14.5.1, “Add
Notes User command” on page 451.
454
Lotus Domino for AS/400 R5: Implementation
14.5.5 Database integration
With Domino on the Integrated Netfinity Server, integration with DB2 for AS/400
data is accomplished using the companion product DataPropagator/400, which
must be purchased separately. DB2 for AS/400 Integration for the Integrated
Netfinity Server allows data which resides on the AS/400 system to be imported
or shadowed to Lotus Domino databases. User authorities to the DB2/400 tables
can also be shadowed to the Domino database and translated into ACL settings.
Updates of shadowed data can be applied to DB2 for AS/400 tables only through
a user written AS/400 exit program.
Domino for AS/400 significantly enhances the flexibility of real time bidirectional
data access. Refer to 1.3.2, “Database integration” on page 10, for examples of
Domino for AS/400 data integration.
Therefore, much function and flexibility is available with Domino for AS/400. If you
are using database integration today with Domino on an Integrated Netfinity
Server, one or more of these integration tools must be incorporated into your
migration plans. You need to be aware that DataPropagator/400 is not used with
Domino for AS/400 for database integration. For bulk data shadowing, the
supplemental product NotesPump (now called Lotus Enterprise Integrator (LEI))
may be appropriate for your environment.
14.5.6 Backup and recovery
The Integrated Netfinity Server implementation of Domino offers granular backup
and recovery utilizing the optional product Adstar Distributed Storage Manager
(ADSM).
With Domino for AS/400, Domino databases and files are stored as separate
stream file objects in the integrated file system (IFS). The network server storage
space is a single object representing the entire (virtual) disk attached to the
Integrated Netfinity Server.
A primary advantage of the IFS implementation of Domino for AS/400 is the
ability to integrate Domino backup into your usual AS/400 backup procedures.
This could include incorporating the appropriate Save Object (SAV) and Restore
Object (RST) commands into your strategies for full or incremental backup and
recovery. For more details about Domino for AS/400 backup and recovery,
please refer to Chapter 10, “Backup and recovery” on page 295.
Note: For installations that have large amounts of data or require unattended
backup, the Backup and Recovery Management Services (BRMS) software and a
tape library system provide a good solution.
Some considerations to think about in moving from the ADSM backup and
recovery method to native AS/400 IFS backup and recovery tools include
approaches for backup of active files and recovery at the document level. For
example, some Domino databases, such as the Domino Directory, are always
open whenever the Domino server is running. High availability requires minimal
Domino server down time for routine maintenance, such as backup.
If you require 24x7 availability, you may choose to replicate to a partition, which
can be taken offline for backup, while your primary Domino server remains
available. This is the approach used in production by the internal IS department
Migration from other Domino platforms
455
at IBM Rochester. Another alternative is to use the Domino clustering capability
available with the advanced services of the Domino Enterprise Server license.
Domino for AS/400 security is relevant in a backup and recovery strategy. The
Domino for AS/400 security implementation takes advantage of a combination of
AS/400 security and Domino security. AS/400 security protects Domino
databases from access outside of the control of Domino by setting public
authority for all Domino objects to *EXCLUDE.
14.5.6.1 Document-level restore
One advantage of the ADSM implementation on the Integrated Netfinity Server is
the possibility to restore single documents, for example, if one or more
documents were accidentally deleted by a user. The backup and recovery
function for Domino for AS/400 does not provide such a possibility. However, you
may restore the complete Domino database to a different IFS directory, and then
copy the required documents using a Notes workstation.
Application programming interfaces (APIs), as well as more complete backup and
restore solutions to allow more flexible and granular backup and recovery, are
planned for a future release of Domino for AS/400.
14.5.7 Capability to submit Domino commands from a CL program
One benefit of the Submit Network Server Command (SBMNWSCMD) command
for the Integrated Netfinity Server is the capability to submit commands to the
Domino console using a batch interface. If you are using this feature to provide
access to Domino commands from a CL program, please notice that this
capability is not available with Domino for AS/400 R4.6.2 or earlier versions.
However, Domino for AS/400 provides programmatic access to Domino resources
from AS/400 application programs using application programming interfaces
(APIs). Later versions of Domino for AS/400 include the Submit Domino
Command (SBMDOMCMD) command.
14.5.8 Using FTP to copy files from an Integrated Netfinity Server
Here is the general process for setting up the FTP environment:
1. Verify your FTP user ID and password on the Integrated Netfinity Server by
accessing the TRUSERS (trusted users) file. Look for the file
E:\MPTN\ETC\TRUSERS.
If you have not configured FTP on your Integrated Netfinity Server, this file
does not yet exist. However, a sample file, called TRUSERS.SMP, is provided.
This sample TRUSERS file has a user ID ( admin) and password ( adminpwd)
already configured, which can be used to log on the first time.
You can create the TRUSERS file on the E: drive from this sample file. Type
the following command on any AS/400 command line and press Enter:
SBMNWSCMD CMD('COPY F:\FSNOTES\ADMIN\TRUSERS.SMP E:\MPTN\ETC\TRUSERS')
SERVER(NWSD_name) SVRTYPE(*BASE)
456
Lotus Domino for AS/400 R5: Implementation
Note
If your Integrated Netfinity Server resides on a different AS/400 system, it
may be on a release older than V4R2. Notice that in V3R2 or V3R7 the file
TRUSERS.SMP was provided in a different directory. Therefore, the correct
command in this case would be:
SBMNWSCMD 'COPY D:\MPTN\BIN\TRUSERS.SMP E:\MPTN\ETC\TRUSERS'
NWSD_name SVRTYPE(*BASE)
2. Start the FTP server on the Integrated Netfinity server. On an AS/400
command line, type:
SBMNWSCMD CMD('XFTPD ON') SERVER(NWSD_name)SVRTYPE(*BASE)
Here NWSD_name is the name of your network server description. Press
Enter.
Note
You do not receive any confirmation message. However, if you do not see
any error messages, it indicates that FTP has been started on the
Integrated Netfinity Server. You can verify that FTP is active by using the
following command:
SBMNWSCMD 'netstat -s' NWSD_name SVRTYPE(*BASE)
3. Connect to the Integrated Netfinity server to transfer your data. On the AS/400
command line, type:
FTP IP_Address
Press Enter.
Note
The IP_Address should be the internal bus port TCP/IP Address of your
Integrated Netfinity Server for best performance.
To find out the IP address of the internal bus port, you can use the Display
Network Server Description (DSPNWSD) command. Type:
DSPNWSD NWSD_name
Here NWSD_name is the network server description name of your
Integrated Netfinity Server.
4. An AS/400 File Transfer Protocol display appears. In response to the prompts,
enter the FTP user ID and password you obtained in step 1. FTP indicates the
user is logged in and prompts you for an FTP subcommand.
5. Change the mode of transfer to binary. On the AS/400 FTP command line,
type binary (or the short form bin).
Press Enter. FTP sends a confirmation message 200 Type set to I
(Image/Binary).
6. Toggle off passive data connection transfer mode because the Integrated
Netfinity Server does not support it. If you do not change the transfer mode,
Migration from other Domino platforms
457
you see an error message, for example, Error 425 can't open data connection.
On the AS/400 FTP command line, type sendpa and press Enter. FTP sends a
confirmation, SENDPASV is off .
7. Change the name format to 1. This allows us to work with the entire AS/400
integrated file system (IFS) (the root file system instead of the library file
system (QSYS.LIB), which is only a subset). On the AS/400 FTP command
line, type na 1 and press Enter. FTP sends a confirmation, Client NAMEFMT
is 1.
8. Working from your identified list of files to be migrated, use the appropriate
FTP commands to copy individual files, multiple files of the same type from a
particular directory, or all files from a particular directory.
Note
In the examples used in the transplantation and consolidation processes,
the FTP command was run from the source system (the Windows NT
system). Therefore, the PUT and MPUT commands were used to copy the
files from the source to the target system. Because the FTP command is run
from the AS/400 system, the target system, the following examples use the
GET and MGET commands to copy the files from the source to the target
system.
Tip
Use LCD (Local Change Directory) to change directory on the local
(AS/400) system. Use CD (Change Directory) to change directory on the
original system, which may be an Integrated Netfinity Server. Use GET for
individual files and MGET for multiple files.
More specific examples with command syntax are included in the following
list:
• To copy all files from a particular subdirectory of this Domino data directory
(in our example, from the mail subdirectory with the option to replace
existing files of the same name in the target directory), type the following
commands on the AS/400 FTP command line:
LCD /lotus/domino/server_name/mail
CD k:\notes\data\mail
MGET *.* (replace
• To copy multiple files of the same type (for example, with extension NSF)
from a user subdirectory of this Domino data directory, type the following
commands on the AS/400 FTP command line:
LCD /lotus/domino/server_name/johndoe
CD k:\notes\data\johndoe
MGET *.nsf
9. Repeat the previous step for each subdirectory you must copy.
10.When you are finished copying files, quit FTP. On the AS/400 FTP command
line, type QUIT and press Enter.
458
Lotus Domino for AS/400 R5: Implementation
11.Verify that you have copied all the files to be migrated, plus the certifier ID,
server ID, and administrator user ID to the Domino data directory on the
AS/400 system.
Automating the file transfer with a CL program
If you need to transfer many subdirectories, you may want to automate the copy
process by writing a CL program. While one easily may combine all CL
commands to create the directory structure into a CL program, as shown in lines
2.00 through 5.00 of Figure 353, it is not obvious how to automate the FTP
process. The trick is to create a separate source file member containing all FTP
subcommands in the sequence they need to be entered. In our example, we
named the member FTPINPUT and added it to the standard source file for CL
programs QCLSRC.
Columns . . . :
1 71
Browse
STEPHEN/QCLSRC
SEU==>
MIGRATE
FMT ** ...+... 1 ...+... 2 ...+... 3 ...+... 4 ...+... 5 ...+... 6 ...+... 7
*************** Beginning of data *************************************
0001.00 PGM
0002.00 CRTDIR '/LOTUS/DOMINO/ACMEDS1/MYDIR' DTAAUT(*EXCLUDE) OBJAUT(*NONE)
0003.00 CRTDIR '/LOTUS/DOMINO/ACMEDS1/MAIL' DTAAUT(*EXCLUDE) OBJAUT(*NONE)
0004.00 CHGOWN '/LOTUS/DOMINO/ACMEDS1/MYDIR' NEWOWN(QNOTES)
0005.00 CHGOWN '/LOTUS/DOMINO/ACMEDS1/MAIL' NEWOWN(QNOTES)
0006.00
0007.00 SBMNWSCMD 'XFTPD ON' SERVER(IPCS1) SVRTYPE(*BASE) CMDTYPE(*OS2)
0008.00
0009.00 OVRDBF FILE(INPUT) TOFILE(*LIBL/QCLSRC) MBR(FTPINPUT)
0010.00 OVRDBF FILE(OUTPUT) TOFILE(*LIBL/QCLSRC) MBR(FTPOUTPUT)
0011.00 FTP
RMTSYS('10.1.2.60')
0012.00
0013.00 SBMNWSCMD 'XFTPD OFF' SERVER(IPCS1) SVRTYPE(*BASE) CMDTYPE(*OS2)
0014.00 ENDPGM
****************** End of data ****************************************
F3=Exit F5=Refresh
F16=Repeat find
F9=Retrieve F10=Cursor
F24=More keys
F11=Toggle
F12=Cancel
Figure 353. CL program to automate data transfer through FTP
Before coding the FTP command, you must use an Override with Data Base File
(OVRDBF) command to redirect the standard input file (by default, the keyboard)
to the source file member FTPINPUT (line 9.00 in Figure 353). Figure 354 on
page 460 shows the content of the file member.
Migration from other Domino platforms
459
Columns . . . :
1 71
Edit
STEPHEN/QCLSRC
SEU==>
FTPINPUT
FMT ** ...+... 1 ...+... 2 ...+... 3 ...+... 4 ...+... 5 ...+... 6 ...+... 7
*************** Beginning of data *************************************
0001.00 admin adminpwd
0002.00 CD /
0003.00 bin
0004.00 sendpa
0005.00 NA 1
0006.00 LCD /LOTUS/DOMINO/ACMEDS1/MYDIR
0007.00 cd k:\notes\data\mydir
0008.00 MGET *.* (replace
0009.00 LCD /LOTUS/DOMINO/ACMEDS1/MAIL
0010.00 cd k:\notes\data\mail
0011.00 MGET *.* (replace
0012.00 QUIT
****************** End of data ****************************************
F3=Exit F4=Prompt
F16=Repeat find
F5=Refresh F9=Retrieve
F17=Repeat change
F10=Cursor F11=Toggle
F24=More keys
Figure 354. Input file for FTP utility
The standard output is redirected to member FTPOUTPUT in line 10.00 of Figure
353 on page 459. The content of this member can be used for debug and control
purposes after transferring the data. An example is shown in Figure 355.
Columns . . . :
1 71
Browse
STEPHEN/QCLSRC
SEU==>
FTPOUTPUT
FMT ** ...+... 1 ...+... 2 ...+... 3 ...+... 4 ...+... 5 ...+... 6 ...+... 7
0017.00 SENDPASV is off.
0018.00 Enter an FTP subcommand.
0019.00 > NA 1
0020.00 202 SITE not necessary; you may proceed.
0021.00 Client NAMEFMT is 1.
0022.00 Enter an FTP subcommand.
0023.00 > LCD LCD /LOTUS/DOMINO/ACMEDS1/MYDIR
0024.00 Local working directory is LCD /LOTUS/DOMINO/ACMEDS1/MYDIR
0025.00 Enter an FTP subcommand.
0026.00 > cd k:\notes\data\mydir
0027.00 250 CWD command successful.
0028.00 Enter an FTP subcommand.
0029.00 > MGET *.* (replace
0030.00 200 Type set to A.
0031.00 200 PORT command successful.
0032.00 150 Opening ASCII mode data connection for *.*.
0033.00 226 Transfer complete.
F3=Exit F5=Refresh
F16=Repeat find
F9=Retrieve F10=Cursor
F24=More keys
Figure 355. FTP log redirected to source file member
460
Lotus Domino for AS/400 R5: Implementation
F11=Toggle
F12=Cancel
Note
The transfer speed may vary substantially, depending on the systems.
Therefore, you should test the transfer to estimate the time needed.
Remember, neither the old or the new Domino server is available to users
during this period of time.
14.5.9 Changing the TCP/IP address on the Integrated Netfinity Server
Before adding the original server IP address as a new AS/400 TCP/IP interface,
you must end the TCP/IP interface of the Integrated Netfinity Server. This is done
using option 1 of the Work with TCP/IP Network Status (NETSTAT) menu. You
also must vary off the Integrated Netfinity Server using option 2 in the Work with
Configuration Status (WRKCFGSTS) display or the Vary Configuration (VRYCFG)
command.
Changing the network identity of the Integrated Netfinity Server involves
changing its IP address in the TCP/IP configuration. You can change its network
identity in one of the following ways:
• Change the external IP address on the existing network server description.
• Create a new network server description for the Integrated Netfinity Server
with a new name and a new external IP address.
The method you choose is primarily determined by whether the Integrated
Netfinity Server also supports applications or interfaces which rely on the original
network server description name.
Many customers may want to change the name of the network server description
for the Integrated Netfinity Server for administrative convenience and clarity. For
example, you have a Domino installation on your Integrated Netfinity Server
whose network server description is named DOMINO1 because it was primarily
or solely intended as a Domino server. After you migrate to Domino for AS/400,
your Integrated Netfinity Server is likely to be no longer used for Domino. It may
be used as a firewall or LAN adapter or for other network applications.
Therefore, keeping the original network server description name (for example,
DOMINO1) is no longer appropriate and may in fact be confusing. In many cases,
the potential confusion may be further complicated by the fact that the Domino
server name may be the same as the network server description name.
Therefore, we expect most organizations will prefer to simply create a new
network server description for their Integrated Netfinity Server with a new name
(for example, IPCS1), and then create a new line descriptions for the new network
server description.
Migration from other Domino platforms
461
Note
If you do not plan to use the Integrated Netfinity Server for other Network
Server implementations, such as a firewall or a LAN server, you may also use it
as a normal LAN adapter for your AS/400 applications. If you decide to do so,
you still must follow the instructions provided in the following section to move
the IP address from the Integrated Netfinity Server to an AS/400 IP interface,
even if you plan to use the same physical adapter.
The following section shows how to create a new network server description. If
you prefer to use the existing network server description, go to 14.5.9.2, “Using
the same network server description” on page 464.
14.5.9.1 Creating a network server description with a new name
To create a new network server description for the Integrated Netfinity Server with
a new name and external IP address, follow these steps:
1. On an AS/400 command line, type WRKNWSD and press Enter.
The Work with Network Server Descriptions display appears, as shown in
Figure 356.
Work with Network Server Descriptions
System:
Type options, press Enter.
1=Create 2=Change 3=Copy
9=Retrieve Source...
Opt
3
4=Delete
5=Display
SYSTEM01
6=Print
Network
Server
Text
DOMINO1
NTJAREK
NTSIPCS
IPCS with Lotus Domino
BACK Office Workshop residency TEST
Domino Intro Hands-On Lab
Bottom
Parameters or command
===>
F3=Exit F4=Prompt F5=Refresh F12=Cancel
F23=More options
F24=More keys
F17=Position to
Figure 356. Work with Network Server Descriptions display
2. Find the Network Server name that matches your Integrated Netfinity Server.
(In our example, it is DOMINO1). Tab down to the corresponding field under
the Opt column and type 3 to copy the description. Press Enter. The Create
Network Server Description (CRTNWSD) display appears, as shown in Figure
357.
462
Lotus Domino for AS/400 R5: Implementation
Create Network Server Desc (CRTNWSD)
Type choices, press Enter.
Network server description
Resource name . . . . . .
Network server type . . .
Online at IPL . . . . . .
Vary on wait . . . . . . .
Language version . . . . .
Country code . . . . . . .
Code page . . . . . . . .
NetBIOS description . . .
Server message queue . . .
Library . . . . . . . .
Configuration file . . . .
Library . . . . . . . .
Start NetBIOS . . . . . .
Start TCP/IP . . . . . . .
F3=Exit F4=Prompt
F24=More keys
.
.
.
.
.
.
.
.
.
.
.
.
.
.
.
.
.
.
.
.
.
.
.
.
.
.
.
.
.
.
.
.
.
.
.
.
.
.
.
.
.
.
.
.
.
>
>
>
>
>
>
>
>
>
IPCS1
CC07
*BASE
*NO
*NOWAIT
2924
1
850
QNTBIBM
*JOBLOG
Name
Name
Character value...
*YES, *NO
*NOWAIT, 1-15 minutes
*PRIMARY, 2963, 2966, 2980...
*LNGVER, 001, 002, 031, 033...
*LNGVER, 437, 850, 852, 857...
Name, QNTBIBM
Name, *JOBLOG, *NONE
Name, *LIBL, *CURLIB
Name, *NONE
Name, *LIBL, *CURLIB
*YES, *NO
*NO, *YES
> *NONE
> *YES
> *YES
F5=Refresh
F12=Cancel
More...
F13=How to use this display
Figure 357. Create Network Server Description (CRTNWSD) (Part 1 of 2)
3. Type in a new name for your Integrated Netfinity Server. In our example, the
new name for the Integrated Netfinity Server is IPCS1.
Page down and a second command display appears, as shown in Figure 358.
Create Network Server Desc (CRTNWSD)
Type choices, press Enter.
TCP/IP port configuration:
Port . . . . . . . . . . .
Internet address . . . . .
Subnet mask . . . . . . .
Maximum transmission unit
.
.
.
.
.
.
.
.
>
>
>
>
1
*NONE, *INTERNAL, 1, 2, 3
'10.5.67.73
'
'255.255.255.192'
1500
Number
Port . . . . . . . .
Internet address . .
Subnet mask . . . .
Maximum transmission
. . .
. . .
. . .
unit
.
.
.
.
.
.
.
.
>
>
>
>
2
*INTERNAL, 1, 2, 3
'10.5.67.74
'
'255.255.255.0 '
1500
Number
Port . . . . . . . .
Internet address . .
Subnet mask . . . .
Maximum transmission
. . .
. . .
. . .
unit
.
.
.
.
.
.
.
.
>
>
>
>
*INTERNAL
*INTERNAL, 1, 2, 3
'192.168.7.2
'
'255.255.255.0 '
15400
Number
F3=Exit F4=Prompt
F24=More keys
F5=Refresh
F12=Cancel
More...
F13=How to use this display
Figure 358. Create Network Server Description (CRTNWSD) (Part 2 of 2)
4. If an Internet address is defined for port 1, type in a new Internet address for
TCP/IP port 1. In our example, the original address was 10.5.67.71. We
changed it to 10.5.67.73. The IP address must be unique within your network
and conform to your subnet mask. For a larger network, you may need to
Migration from other Domino platforms
463
consult your network administrator to obtain an appropriate new IP address for
your installation.
If an Internet address is defined for port 2, type in a new Internet address for
TCP/IP port 2. In our example, the original address was 10.5.67.72. We
changed it to 10.5.67.74.
Note
An Integrated Netfinity Server configured for Domino always has one
internal port (showing *INTERNAL in the Port parameter), and one or two
external ports.
There is no need to change the internal IP address. Depending on the future
usage of the Integrated Netfinity Server, the internal port may or may not be
needed. For example, if the Integrated Netfinity Server is used to implement
a firewall, the internal port must be used. If the Integrated Netfinity Server is
used as a LAN adapter for AS/400 applications, the internal port is no
longer needed.
If the Domino server uses both external ports, you must change each port,
as in our example. If only one port is used, it is port 1 in most cases.
However, it can be port 2. A reason for using two ports would be one port
connects to a Token Ring, the other one to an Ethernet, or you may have a
4 MB and a 16 MB Token Ring.
Press Enter. A message appears indicating Operation in progress, please
wait.
5. The Work with Network Server Descriptions display reappears. A message at
the bottom of the display should confirm your action. In our example, the
message states, Network Server Description IPCS1 created.
6. Vary on the Integrated Netfinity Server again, using either the Vary
Configuration (VRYCFG) command, or option 8 in the Work with Network
Server Descriptions menu, and then option 1 in the Work with Configuration
Status display.
14.5.9.2 Using the same network server description
Alternatively, if you have implemented interfaces or applications which rely on the
original name for the network server description (for example, DOMINO1), you
may choose to simply assign a new IP address to the existing network server
description. We expect this scenario to be relatively rare because any such
interfaces or applications also requires the original IP address.
However, if this situation does apply to you, follow these steps to change the
external IP address for your existing network server description:
1. On an AS/400 command line, type WRKNWSD and press Enter. The Work with
Network Server Descriptions display appears.
2. Find the network server name that matches your Integrated Netfinity Server. In
our example, it is DOMINO1. Tab down to the corresponding field under the
Opt column and type 2 to change the description and press Enter.
The Change Network Server Description (CHGNWSD) display appears, as
shown in Figure 359.
464
Lotus Domino for AS/400 R5: Implementation
Change Network Server Desc (CHGNWSD)
Type choices, press Enter.
Network server description
Resource name . . . . . .
Network server type . . .
Online at IPL . . . . . .
Vary on wait . . . . . . .
Language version . . . . .
Country code . . . . . . .
Code page . . . . . . . .
NetBIOS description . . .
Server message queue . . .
Library . . . . . . . .
Configuration file . . . .
Library . . . . . . . .
Start NetBIOS . . . . . .
Start TCP/IP . . . . . . .
F3=Exit F4=Prompt
F24=More keys
.
.
.
.
.
.
.
.
.
.
.
.
.
.
.
.
.
.
.
.
.
.
.
.
.
.
.
.
.
.
.
.
.
.
.
.
.
.
.
.
.
.
.
.
.
>
>
>
>
>
>
>
>
>
>
DOMINO1
CC07
*BASE
*NO
*NOWAIT
2924
1
850
QNTBIBM
*JOBLOG
Name
Name
Character value...
*YES, *NO
*NOWAIT, 1-15 minutes
*PRIMARY, 2963, 2966, 2980...
*LNGVER, 001, 002, 031, 033...
*LNGVER, 437, 850, 852, 857...
Name, QNTBIBM
Name, *JOBLOG, *NONE
Name, *LIBL, *CURLIB
Name, *NONE
Name, *LIBL, *CURLIB
*YES, *NO
*NO, *YES
> *NONE
> *YES
> *YES
F5=Refresh
F12=Cancel
More...
F13=How to use this display
Figure 359. Change Network Server Description (CHGNWSD) (Part 1 of 2)
3. Page down. A second display appears, as shown in Figure 360.
Change Network Server Desc (CRTNWSD)
Type choices, press Enter.
TCP/IP port configuration:
Port . . . . . . . . . . .
Internet address . . . . .
Subnet mask . . . . . . .
Maximum transmission unit
.
.
.
.
.
.
.
.
>
>
>
>
1
*NONE, *INTERNAL, 1, 2, 3
'10.5.67.73
'
'255.255.255.192'
1500
Number
Port . . . . . . . .
Internet address . .
Subnet mask . . . .
Maximum transmission
. . .
. . .
. . .
unit
.
.
.
.
.
.
.
.
>
>
>
>
2
*INTERNAL, 1, 2, 3
'10.5.67.74
'
'255.255.255.0 '
1500
Number
Port . . . . . . . .
Internet address . .
Subnet mask . . . .
Maximum transmission
. . .
. . .
. . .
unit
.
.
.
.
.
.
.
.
>
>
>
>
*INTERNAL
*INTERNAL, 1, 2, 3
'192.168.7.2
'
'255.255.255.0 '
15400
Number
F3=Exit F4=Prompt
F24=More keys
F5=Refresh
F12=Cancel
More...
F13=How to use this display
Figure 360. Change Network Server Description (CHGNWSD) (Part 2 of 2)
4. If an Internet address is defined for port 1, type in a new Internet address for
TCP/IP port 1. In our example, the original Port 1 address was 10.5.67.71. We
changed it to 10.5.67.73. The IP address must be unique within your network
and conform to your subnet mask. For a larger network, you may need to
consult your network administrator to obtain an appropriate new IP address for
your installation.
Migration from other Domino platforms
465
If an Internet address is defined for port 2, type in a new Internet address for
TCP/IP port 2. In our example, the original address was 10.5.67.72. We
changed it to 10.5.67.74.
Note
An Integrated Netfinity Server configured for Domino always has one
internal port (showing *INTERNAL in the Port parameter), and one or two
external ports.
There is no need to change the internal IP address. Depending on the future
usage of the Integrated Netfinity Server, the internal port may or may not be
needed. For example, if the Integrated Netfinity Server is used to implement
a firewall, the internal port must be used. If the Integrated Netfinity Server is
used as a LAN adapter for AS/400 applications, the internal port is no
longer needed.
If the Domino server uses both external ports, you must change each port,
as in our example. If only one port is used, it is port 1 in most cases.
However, it can be port 2. A reason for using two ports would be one port
connects to a Token Ring, the other one to an Ethernet, or you may have a 4
MB and a 16 MB Token Ring.
Press Enter. A message appears on your display indicating Operation in
progress, please wait.
5. The Work with Network Server Descriptions display reappears. A message
appears at the bottom of your display confirming your change. In our example,
the message states, Network Server Description DOMINO1 changed.
6. Vary on the Integrated Netfinity Server again by using the Vary Configuration
( VRYCFG) command.
14.6 General considerations when migrating your Domino infrastructure
The primary focus of this chapter has been migration from one Domino server
platform to another, specifically migration to the Domino for AS/400 platform.
Special considerations are involved when migrating from one major release of
Lotus Notes and Domino to another. Migration for any mission-critical system
requires careful planning. Therefore, many of the steps required are also typical
steps for migrating any mission-critical system to a major new release. When
migrating from one release to another, the recommended order for migration is:
1. Servers
2. Clients
3. Applications
Please refer to the Lotus product documentation for detailed release migration
information.
Many migration scenarios also involve coexistence between the old and the new
environments for some period of time. However, if you require this, you must use
the consolidation method, which is described in 14.3, “Server consolidation
process outline” on page 443, rather than the transplantation method, which is
described in 14.2, “Server transplantation process outline” on page 425.
466
Lotus Domino for AS/400 R5: Implementation
Whether actual coexistence is involved, comprehensive testing using a test
environment prior to production migration is highly recommended. In any
migration process, careful, detailed planning, and the well-managed execution of
that plan is critical to the success of the migration.
Migration from other Domino platforms
467
468
Lotus Domino for AS/400 R5: Implementation
Appendix A. Copying ID files using FTP
This appendix gives an example of using FTP to copy the ID files from the
Domino data directory to the client administration workstation.
Domino uses ID files to secure the access of the client to the servers. Every
Domino server and Notes user must have an ID. An ID is a unique binary file that
identifies a legal Domino server and Notes user. IDs are created at the time of
user or server registration. An ID file contains the following information:
• The hierarchical name of the owner.
• A license number that indicates that the owner uses a legal Lotus Notes
license and specifies whether the owner can run the North American or
International edition of Domino or Notes. You cannot change a license number
associated with an ID.
• A public key and a private key.
• At least one certificate from a certifier ID. A certificate is an electronic stamp
added to a user ID or server ID. This stamp is generated using the private key
of a certifier ID and verifies that the name of the owner of the ID is correctly
associated with a specific public key.
• (Optional) One or more encryption keys, created and distributed by users that
allow users to encrypt and decrypt fields in a document.
If the owner of an ID creates a password for it, the password generates a key that
encrypts most of the data on the ID.
When the first server is configured, three ID files are created and stored in the
specified data directory. The names of those ID files are:
• CERT.ID
• USER.ID
• SERVER.ID
The CERT.ID file contains the organization certifier ID and is the base to create
IDs for any users, servers, or certifiers for organizational units within the same
organization. Therefore, you need access to the cert.id file from a Notes client
(functioning as an administration client) whenever you want to register additional
users or servers.
The USER.ID file is the administrator’s ID file. After having configured the first
server of an organization, the administrator is the only user registered in the
Domino Directory.
To register additional users or servers to perform administration functions, or test
the server functions from a Notes client, the CERT.ID and USER.ID files must be
copied from the AS/400 integrated file system (IFS) to the administrator’s client
workstation.
If the workstation already has a Notes Client installed, take care not to overwrite
any ID files already stored there. The user ID files are typically named user.id and
are stored in the \Notes\Data directory. Either copy the files to another directory
(for example, \Notes\Data\ServerName ) or rename the files with unique names,
for example, ADMIN.ID.
© Copyright IBM Corp. 1999, 2001
469
The server.id is used to identify the server. It should be kept in the data directory
assigned to that server.
Using FTP to copy the ID files to the administrator workstation
Installing and Managing Domino for AS/400, which comes with the software, has
an example of using FTP to copy the ID files. Figure 361 shows the same
example as seen from the administrator’s workstation. In bold text are the
commands and values entered. The normal text is the system output.
C:\WINDOWS>cd \
C:\>md notes\idfiles
C:\>md notes\idfiles\server1
C:\>cd notes\idfiles\server1
C:\notes\idfiles\server1>ftp system01
Connected to system01.
220-QTCP at SYSTEM01.
220 Connection will close if idle more than 5 minutes.
User (system01:(none)): myas4usr
331 Enter password.
Password:
230 MYAS4USR logged on.
ftp> bin
200 Representation type is binary IMAGE.
ftp> cd /
250-NAMEFMT set to 1.
250 Current directory changed to /.
ftp> cd /notes/data
250 Current directory changed to /notes/data.
ftp> get cert.id
200 PORT subcommand request successful.
150 Retrieving file /notes/data/cert.id
250 File transfer completed successfully.
2113 bytes received in 0.22 seconds (9.60 Kbytes/sec)
ftp> get user.id
200 PORT subcommand request successful.
150 Retrieving file /notes/data/user.id
250 File transfer completed successfully.
2423 bytes received in 0.16 seconds (15.14 Kbytes/sec)
ftp> quit
Figure 361. Example for using FTP to transfer ID files
470
Lotus Domino for AS/400 R5: Implementation
Note
The line cd / is very important. It not only changes the current directory to the
root of the IFS (from whatever is specified as the home directory in your
AS/400 user profile), it also switches to name format 1. This is necessary to
access any IFS directories other than QSYS.LIB. This happens only when you
mention an object name (in this case, the root directory /) for the very first time
during an FTP session to AS/400 and the object name starts with a slash (/).
Typing anything different causes FTP to remain in name format 0, which means
you can only refer to objects in QSYS.LIB. If you do not see the message
250-NAMEFMT set to 1., you can manually switch to name format 1 by entering
the following command:
quote site namefmt 1
Copying ID files using FTP
471
472
Lotus Domino for AS/400 R5: Implementation
Appendix B. Domino Administrator
The Domino administration client in Release 5 looks considerably different from
the Server Administration interface of earlier releases. We often refer to the
Domino Administrator or an administration client in this book and to the different
parts of the client interface.
Figure 362 shows the new client with the appropriate name for each pane written
on it. By clicking on one of the Domain bookmarks you open the Server pane. In
this figure, we have pinned the server pane down using the Pin Bookmarks
Window menu option that you get when you click the small square icon in the top
left corner of the Server pane.
B
o
o
k
m
a
r
k
s
Server
Pane
Tools
Pane
Task
Pane
Results
Pane
Figure 362. Domino Administrator
You can close the Tools pane by clicking the twisty on the Tools button in the top
right of the window at the top of the Tools pane. You can size each pane by
dragging the vertical bars left and right.
By expanding some of the options in the server pane, you can see information
about the Domino release levels and platforms as shown in Figure 363 on page
474.
© Copyright IBM Corp. 1999, 2001
473
Figure 363. Release and operating system information
474
Lotus Domino for AS/400 R5: Implementation
Appendix C. Using Facsimile Support for AS/400
This appendix provides information about how to use Facsimile Support for
AS/400 in combination with Lotus Domino for AS/400. It also explains the two
different ways in which you can fax data from a Lotus Notes client and shows you
how to route received faxes to Lotus Notes mail.
Notice, if you are using Domino SMTP for your mail and you want to use
Facsimile Support/400 for faxing Domino documents, you must fax from Client
Access/400 (see C.3, “Faxing from Client Access/400” on page 483). The option
to use the AnyMail/400 Mail Server Framework is not available to you.
C.1 Setting up Facsimile Support
To use Facsimile Support for AS/400 with Lotus Domino, complete the following
steps:
1. Install Lotus Domino on the AS/400 system.
2. Configure Lotus Domino on the AS/400 system.
3. Install and configure Lotus Notes on the PC workstation.
4. Start Lotus Domino on the AS/400 system.
5. Start the QMSF subsystem on the AS/400 system. For this step to work, you
may need to end the QMSF subsystem and then restart it.
C.1.1 Installing and configuring Facsimile Support for AS/400
Before using the Facsimile Support for AS/400 product, you need to install,
configure, and customize the product to meet the needs of your business. The
following steps explain how to install and prepare the Facsimile Support for
AS/400 product.
For information on installing and configuring Facsimile Support for AS/400 and
associated hardware, including the 7852-400 modem, see Facsimile Support for
AS/400 Installation Guide, SC41-0654. For more information on individual
commands used in Facsimile Support for AS/400, see Facsimile Support for
AS/400 Programmer’s Guide and Reference , SC41-0656.
1. Use the Restore Licensed Program (RSTLICPGM) command to install the
Facsimile Support for AS/400 licensed product (5798-TBY) on your AS/400
system.
If you have an AS/400 9401 Model 150, the Facsimile Support for AS/400
product is pre-installed.
2. Define each fax controller to the AS/400 system. To do so, complete the
following steps:
a. Use the Create Fax Description ( CRTFAXD) command to create a description
that identifies the fax controller on the AS/400 system. You must specify
the LINKTYPE parameter using one of these values: *LAN, *TDLC, *FAX, or
*ASYNC.
© Copyright IBM Corp. 1999, 2001
475
b. Use the Add Fax Card ( ADDFAXCRD) command to separately define each
telephone line that is attached to the fax controller. Depending on whether
you have an external fax controller or an internal fax controller, you must
provide the following information relating to that specific controller.
• For external fax controllers: Provide information that defines each fax
controller and fax card that is located in the controller.
• For internal fax controllers: Provide information that defines the
controller and ports that are associated with the controller. This includes
the 7852-400 modem. Install the necessary hardware and software.
3. Use the Create Fax Profile ( CRTFAXPRF) command to create the necessary fax
profiles for AS/400 users who use the Facsimile Support for AS/400 product.
4. Use the Configure Fax Services ( CFGFAXSRV) command to configure the
enhanced services portion of the Facsimile Support for AS/400 product.
Enhanced services allows you to customize your fax operating environment.
See Facsimile Support for AS/400 User’s Guide, SC41-0655, for more
information about Enhanced Services. To use the CFGFAXSRV command, the
user must be set up as a Fax Administrator.
5. Use the Start Fax Support ( STRFAXSPT) command to start the Facsimile Support
for AS/400 product.
6. Use the Create Fax Master List Entr y ( CRTFAXMLE) command to add entries to
the fax master list. Include all destinations to and from which you plan to send
and receive faxes.
7. Use the C reate Fax Distribution List (CRTFAXDST) command to create fax
distribution lists. Fax distribution lists contain entries from the Fax Master List
and allow you to send faxes to specific groups of users.
8. Set up your AS/400 for integrating the Facsimile Support for AS/400 product
with the AnyMail/400 Mail Server Framework product. For more information on
how to set up system directory entries for faxing, see the example in the topic
"Setting Up Your System Distribution Directory Entry" in the AnyMail/400 Mail
Server Framework Development Guide, GG24-4449.
C.1.2 Using the AnyMail/400 Mail Server Framework
Before using the AnyMail/400 Mail Server Framework product, you need to add
fields to the system directory attributes that are used by the AnyMail/400 Mail
Server Framework product. Facsimile Support for AS/400 requires these
user-defined fields. Use the Change Fax System Directory Attributes
(CHGFAXSDA) command to add these fields. For details on this command, see
Facsimile Support for AS/400 Programmer’s Guide and Reference, SC41-0656.
C.1.3 Setting up your system distribution directory entry
The system distribution directory is similar to an address book. Electronic mail
support uses the system distribution directory on the AS/400 system. If you use
the system distribution directory, add a directory entry for each fax recipient for
whom you want to use this function. The system distribution directory entries
associate the mail addresses with the fax-telephone numbers, master-list entries,
or distribution lists. The contents of the user-defined fields in the directory entry
should match the fax master list or fax distribution list entries that you have
already created using the Facsimile Support for AS/400 Enhanced Services. Give
476
Lotus Domino for AS/400 R5: Implementation
each entry a unique user ID and address. For example, you can assign a user ID
with an address of FAX to represent the person or company who uses the fax.
The displays in this section provide examples of how to add a system distribution
directory entry for a fax machine in the Accounts Receivable department for ABC
Office Furniture Company. The user who receives the faxes is Scott Jones, who
works in the Accounts Receivable department. In this example, we use the
information in the Fax Master List, so we do not specify a fax telephone number.
The Fax Master List Entry in our example is shown in Table 36.
Table 36. Fax master list entry
Destination
Identifier
Entry
ABC Office Furniture Co.
9876
Accounts Receivable
To add an entry, use the Work With Directory Entries (WRKDIRE) command. After
you press Enter, a display similar to the one in Figure 364 appears.
Work with Directory Entries
Type options, press Enter.
1=Add
2=Change 4=Remove 5=Display details 6=Print details
7=Rename 8=Assign different ID to description 9=Add another description
Opt User ID
AAA
ACCOUNTS
DSCHROED
FAXDLE
FAXGCS
FAXMLE
FAXMLE2
FAXTELN
HOCKEY
IZZY
KLUCK
KPS
F3=Exit
F12=Cancel
Address
Description
FAX
FAX
SYSASD2V
FAX
FAX
FAX
FAX
FAX
FAX
SYSASD2V
SYSASD2V
SYSASD2V
fafadfa
ACME Accounts Receivable
Dennis Schroeder
Bad dist list
Fax to Grand Central
Grand Central 57574
Team Office 57574
Phone number 57574
Test DST\\Entry
D49M, Izzy POP3 ID
kluck directory entry
Kevin Stamschror
More...
F5=Refresh F9=Work with nicknames F11=Sort by description
F13=Work with departments F17=Position to F24=More keys
Figure 364. Work with Directory Entries display
Type 1 (Add) in the Opt column on the Work With Directory Entries display and
press Enter. The Add Directory Entry display appears, as shown in Figure 365 on
page 478.
Using Facsimile Support for AS/400
477
Add Directory Entry
Type choices, press Enter.
User ID/Address .
Description . . .
System name/Group
User profile . .
Network user ID .
.
.
.
.
.
.
.
.
.
.
.
.
.
.
.
ACCTS
FAX
Scott Jones at ABC Accounts Receivable
FAX
________
F4 for list
__________
F4 for list
_______________________________________________
Name:
Last . .
First . .
Middle .
Preferred
Full . .
.
.
.
.
.
.
.
.
.
.
.
.
.
.
.
________________________________________
____________________
____________________
____________________
__________________________________________________
.
.
.
.
.
.
.
.
.
.
.
.
.
.
.
Department . . . . . .
Job title . . . . . . .
Company . . . . . . . .
__________
F4 for list
________________________________________
__________________________________________________
More...
F3=Exit F4=Prompt F5=Refresh F12=Cancel F18=Display location details
F19=Add name for SMTP F20=Specify user-defined fields
Figure 365. Add Directory Entry display (Part 1 of 4)
Complete the required fields on the Add Directory Entry display, as described in
the remainder of this section. All of the fields for the Add Directory Entry displays
are shown. Depending on your own needs, you may also choose to enter the
optional information:
• User ID and Address: Enter the user ID and address for this entry. In our
example, the user ID is ACCTS at address FAX. A fax machine resides at this
address, for use by the Accounts Receivable department at ABC Office
Furniture Company.
• Description: Enter a description of the user for whom you are adding this
entry. In our example, this is Scott Jones at ABC Accounts Receivable.
• System Name and Group: For a fax entry, enter FAX as the system name. Do
not enter the actual system name. Do not use the Group field. Press Enter,
and the message, System name and group not found. Press enter to confirm,
appears. This is not an error. Ignore this message and press Page Down to
continue.
• Fax Telephone Number: Enter the fax telephone number for the fax recipient.
If you are using a fax distribution list or a fax master list entry, you do not need
to enter the Fax telephone number field. Instead, complete the information in
the user-defined fields. In the example shown in Figure 366, we use a fax
master list entry. Therefore, leave the fax telephone number field blank.
478
Lotus Domino for AS/400 R5: Implementation
Add Directory Entry
Type choices, press Enter.
Telephone numbers . . .
FAX telephone number
Location . . . . . . .
F4 for list
Building . . . . . . .
Office . . . . . . . .
Mailing address . . . .
More...
F3=Exit F4=Prompt F5=Refresh F12=Cancel F18=Display location details
F19=Add name for SMTP F20=Specify user-defined fields
Figure 366. Add Directory Entry display (Part 2 of 4)
To view the parameters in the third display, as shown in Figure 367, press Page
Down.
Add Directory Entry
Type choices, press Enter.
Indirect user . . . . .
For choice Y=Yes:
Print private mail
N
Y=Yes, N=No
N
Y=Yes, N=No
Print cover page . . .
Mail notification . . .
Y
1
Y=Yes, N=No
1=Specific types of mail
2=All mail
3=No mail
For choice 1=Specific types of mail:
Priority, private,
important mail
Y
Messages . . . . . Y
Y=Yes, N=No
Y=Yes, N=No
Text . . . . . . . . .
More...
F3=Exit F4=Prompt F5=Refresh F12=Cancel F18=Display location details
F19=Add name for SMTP F20=Specify user-defined fields
Figure 367. Add Directory Entry display (Part 3 of 4)
To view the parameters in the fourth display, as shown in Figure 368 on page 480,
press Page Down.
Using Facsimile Support for AS/400
479
Type choices, press Enter.
Mail service level . .
9
1=User index
2=System message store
4=Lotus Domino
9=Other mail service
For choice 9=Other mail service:
Field name . . . .
Preferred address . . .
F4 for list
9
1=User ID/Address
2=O/R name
3=SMTP name
9=Other preferred address
F4 for list
Address type . . . . FAXDESTA
For choice 9=Other preferred address:
Field name . . . . QFAXDEST
QFAX
F4 for list
More...
F3=Exit F4=Prompt F5=Refresh F12=Cancel F18=Display location details
F19=Add name for SMTP F20=Specify user-defined fields
Figure 368. Add Directory Entry display (Part 4 of 4)
• Mail Service Level: Type 9 (Other mail service). Specify the field name for the
mail service level QFAXSRVLVL QFAX.
• Preferred Address: This is the address that represents the system
distribution directory entry. Type 9 (Other preferred address) and enter the
field name. The field name that you specify must be consistent with the
information that you specify in the user-defined fields. The address must be of
one of the following types:
– FAXTELNB: A fax telephone number
– FAXDESTA: A fax master list entry
– FAXDISTA: A fax distribution list
The field name consists of two values: a field name and a product ID.
Complete the field name as follows:
• For a fax telephone number, type: FAXTELNBR *IBM
• For a fax master list entry, type: QFAXDEST QFAX
• For a fax distribution list, type: QFAXDIST QFAX
The field name matches the address type that you specified. A corresponding
product ID is also required. Table 37 shows the relationship between these
values.
Table 37. Correspondence between Field Name and Product
Preferred
Address
Field Name
Product ID
FAXTELNB
FAXTELNBR
*IBM
FAXDEST
QFAXDEST
QFAX
FAXDIST
QFAXDIST
QFAX
In our example, we specify FAXDESTA because we are using a fax master list
entry.
480
Lotus Domino for AS/400 R5: Implementation
You must specify these fields if you are using a fax master list entry or a fax
distribution list. To enter the user-defined fields, press F20. You can use F24
(More keys) to view more function keys. The Specify User-Designed Fields
display appears, as shown in Figure 369.
Specify User-Defined Fields
Type choices, press Enter.
QDLTID
QDOMINO
_______________________________________________________________________________
_______________________________________________________________________________
_______________________________________________________________________________
_______________________________________________________________________________
_______________________________________________________________________________
_______________________________________________________________________________
QFAXDEST
QFAX
ABC office Furniture Co\9876\Accounts Receivable
_________________________________________________________________________________
_________________________________________________________________________________
_______________
F3=Exit
F5=Refresh
F12=Cancel
Figure 369. User-Defined Fields display
The Specify User-Defined Fields display allows users to access entries in the fax
master list and fax distribution lists that you have already set up through the
Facsimile Support for AS/400 product. This simplifies the task of finding the
recipient when more than one person uses the fax machine. It allows you to tie
the entry to a Facsimile Support for AS/400 master list entry to allow for a
customized cover page.
The information for the User-defined fields must be consistent with the field name
and ID that you previously entered for the Preferred address field. If you enter a
fax telephone number (FAXTELNB) for the preferred address, Facsimile Support
for AS/400 does not use the user-defined fields.
• Field Name: The value that you enter for the Field name depends on the
information that you specified for the Preferred address field. The following
values are valid for the Field name:
– To use a fax distribution list, type QFAXDIST. You must also specify the
preferred address of FAXDISTA.
– To use a fax master list entry, type QFAXDEST. You must also specify a
preferred address of FAXDESTA.
• Product ID: Type QFAX.
• Value: Use this field to specify the fax distribution list or the fax master list
entry. Enter the value as it appears on the fax distribution list or the fax master
list, in the following format:
DESTINATION\IDENTIFIER\ENTRY
For our example, we enter:
ABC OFFICE FURNITURE CO\9876\ACCOUNTS RECEIVABLE
Using Facsimile Support for AS/400
481
You must specify the destination, identifier, and entry. If you omit one of these
values, you must specify the corresponding delimiter (\). For example, to omit
the identifier, specify the entry as follows:
ABC OFFICE FURNITURE CO\\ACCOUNTS RECEIVABLE
To omit the identifier and entry for a simple destination, specify the entry as
follows:
ABC OFFICE FURNITURE CO\\
C.1.4 Defining an address for Simple Mail Transfer Protocol
Press F19 to add the name for SMTP. In our example, we are creating an ACCTS
FAX entry. Depending on whether you converted the format of the SMTP names
in your system distribution directory (SDD), one of two different looking panels
appears.
If you did not convert the SDD on your AS/400 system, the Add Name for SMTP
display appears, as shown in Figure 370.
Add Name for SMTP
System:
SERVERA
Type choices, press Enter.
User ID . . . . . . . . :
Address . . . . . . . . :
ACCTS
FAX
SMTP user ID . . . . . . accts___________________
SMTP domain . . . . . . . test.name.ibm.com________________________________
________________________________________________________________________________
________________________________________________________________________________
_______________________________________________
SMTP route . . . . . . . _________________________________________________
________________________________________________________________________________
________________________________________________________________________________
_______________________________________________
F3=Exit
F4=Prompt
F12=Cancel
Figure 370. Add Name for SMTP (if SDD was not converted)
If you converted the SDD on your AS/400 system using the Convert SMTP
Names (CVTNAMSMTP) command, the Specify User-Defined Fields prompt
appears, as shown in Figure 371.
482
Lotus Domino for AS/400 R5: Implementation
Specify User-Defined Fields
Type choices, press Enter.
SMTPAUSRID SMTP
accts
_______________________________________________________________________________
_______________________________________________________________________________
_______________________________________________________________________________
______________________________________________________________________________
________________________________________________________________________________
______________________________________________________________________________
SMTPDMN
SMTP
test.name.ibm.com
_______________________________________________________________________________
______________________________________________________________________________
More...
F3=Exit
F5=Refresh
F12=Cancel
Figure 371. Add Name for SMTP (if SDD was converted)
Note: While the SMTP user ID (accts, in our example) can be an arbitrary, yet
unique name, the SMTP domain ( test.name.ibm.com) is not a random name. It
must resolve (using DNS or local hosts table) to an IP address of one of the
interfaces on your AS/400 system, most likely the AS/400 fully qualified TCP/IP
host name.
For more information about SMTP and the CVTNAMSMTP command, see
OS/400 TCP/IP Configuration and Reference, SC41-5420, or the redbook AS/400
Electronic-Mail Capabilities , SG24-4703.
C.2 Faxing from Lotus Notes
Now that you have created your directory entry, you can mail from Lotus Notes to
that system directory entry. To mail, type information in the To field, as shown in
this example:
[email protected]
When the mail item gets to the AS/400 system, the AnyMail snap-ins determine
that the directory entry has an address type of FAX. The mail item is faxed to the
fax telephone number, the fax master list entry, or the fax distribution list that is
specified in the system directory entry.
C.3 Faxing from Client Access/400
Another option that you can use to fax from your Lotus Notes workstation is to
install the Client Access/400 AFP Print driver and configure a printer as an IBM
AFP Facsimile Support for AS/400 device. When printing from Lotus Notes, a
dialog prompts you for fax destination information. The information in this section
describes how this option works.
Notice, if you are using Domino SMTP for your Domino SMTP mail, this is
currently the only option you have for using Facsimile Support/400 with Domino
for AS/400.
Using Facsimile Support for AS/400
483
C.3.1 Prerequisites
Complete the following steps before you configure the PC workstation to fax PC
output:
1. Install Windows NT or the Windows 95 Operating System on the PC
workstation.
2. Install Client Access/400 for Windows 95/NT or Client Access Express for
Windows on the PC workstation and select the AFP Printer driver to be
installed.
3. Install the latest service pack for the Client Access product you are using.
4. Establish a session with the AS/400 system on the PC workstation.
C.3.2 Configuring the PC workstation to fax PC output
To configure the PC Workstation to fax PC output, complete the following steps:
1. From the Windows desktop, select Start
—> Settings —> Printers.
2. From the Printers window, double-click Add Printer.
3. The Add Printer Wizard appears. To begin installing your printer, click Next.
4. Select Network Printer and click Next.
5. From the Add Printer Wizard window, click Browse.
6. In the Browse for Printer window, double-click the AS/400 system through
which you want to fax.
7. A list of printers appears. Double-click QFQFS4PRTD.
8. If a message appears, click OK. If no message appears, go to the next step.
9. In the Printer window, a name appears in the format: \\xxxx\qfqfs4prtd, where
the xxxx is the system name to which you are connecting.
10. The Add Printer Wizard window appears. Under the Manufacturers heading,
select IBM. Under the Printers heading, select IBM AFP Facsimile
Support/400 and click Next.
11. On the Add Printer Wizard window, click Next.
Return to the Printers window and verify that the IBM AFP Facsimile
Support/400 printer is added. Be patient because this may take some time.
Close this window. You can now fax Lotus Notes output.
C.4 Routing received faxes to Domino for AS/400
The comments about routing mail to Domino users in the following sections only
apply if you are using AnyMail/400 Integration for your Domino mail option.
You can use Enhanced Services routing to route faxes that are received through
Facsimile Support for AS/400 to Domino for AS/400. If you have the necessary
hardware, you can use the Transmitting Subscriber Identifier (TSI) or routing
tones received from the Dual Tone Multi-Frequency (DTMF) or Direct Inboard Dial
(DID) fax modems to route information. The information that follows explains how
to set up this kind of routing.
484
Lotus Domino for AS/400 R5: Implementation
The first step in setting up the routing is to create a directory entry where the fax
data can be sent. The displays in this section provide an example of how to add a
system distribution directory entry for the user PKENNEDY.
To add an entry, use the Work With Directory Entries (WRKDIRE) command. Type
WRKDIRE on a command line and press Enter. A display appears like the example
in Figure 372.
Work with Directory Entries
Type options, press Enter.
1=Add
2=Change 4=Remove 5=Display details 6=Print details
7=Rename 8=Assign different ID to description 9=Add another description
Opt User ID
_
_
_
_
_
_
_
_
_
_
_
AAA
ACCOUNTS
DSCHROED
FAXDLE
FAXGCS
FAXMLE
FAXMLE2
FAXTELN
HOCKEY
IZZY
KLUCK
KPS
F3=Exit
F12=Cancel
Address
Description
FAX
FAX
NAME
FAX
FAX
FAX
FAX
FAX
FAX
NAME
NAME
NAME
fafadfa
ACME Accounts Receivable
Dennis Schroeder
Bad dist list
Fax to Grand Central
Grand Central 57574
Team Office 57574
Phone number 57574
Test DST\\Entry
D49M, Izzy POP3 ID
kluck directory entry
Kevin Stamschror
More...
F5=Refresh F9=Work with nicknames F11=Sort by description
F13=Work with departments F17=Position to F24=More keys
Figure 372. Create a directory entry to route the fax data
Type 1 (Add) on the Work With Directory Entries display and press Enter. The Add
Directory Entry display appears, as shown in Figure 373 on page 486. You must
complete all required fields on the Add Directory Entry display, as they are
described in this section. All fields for the Add Directory Entry display are not
shown. Depending upon your needs, you may choose to enter optional
information.
Using Facsimile Support for AS/400
485
Add Directory Entry
Type choices, press Enter.
User ID/Address .
Description . . .
System name/Group
User profile . .
Network user ID .
.
.
.
.
.
.
.
.
.
.
.
.
.
.
.
PKENNEDY NAMEXXX
Pat Kennedy
SYSTEMA
F4 for list
__________
F4 for list
_______________________________________________
Name:
Last . .
First . .
Middle .
Preferred
Full . .
.
.
.
.
.
.
.
.
.
.
.
.
.
.
.
________________________________________
____________________
____________________
____________________
__________________________________________________
.
.
.
.
.
.
.
.
.
.
.
.
.
.
.
Department . . . . . .
Job title . . . . . . .
Company . . . . . . . .
__________
F4 for list
________________________________________
__________________________________________________
More...
F3=Exit F4=Prompt F5=Refresh F12=Cancel F18=Display location details
F19=Add name for SMTP F20=Specify user-defined fields
Figure 373. Completed Add Directory Entry display (Part 1 of 2)
• User ID/Address: Enter the user ID and address for this entry. In our
example, the user ID is PKENNEDY at Address SYSTEMA (where SYSTEMA
is the name of the AS/400 system).
• Description: Enter a description for the user for whom you are adding this
entry. In this example, this is Pat Kennedy.
• System Name/Group: Enter the system name and group in the same format
as you entered the User ID and Address.
• Network User ID: Enter the network user ID in the same format as you
entered the user ID and address. When you press Enter, the message, System
name and group not found. Press enter to confirm, appears.
This is not an error. Ignore this message and press Page Down three times to
continue. A display similar to the one in Figure 374 appears.
486
Lotus Domino for AS/400 R5: Implementation
Add Directory Entry
Type choices, press Enter.
Mail service level . .
4
1=User index
2=System message store
4=Lotus Domino
9=Other mail service
For choice 9=Other mail service:
Field name . . . . __________ _______
Preferred address . . .
3
Address type . . . . ________
For choice 9=Other preferred address:
Field name . . . . __________ _______
F4 for list
1=User ID/Address
2=O/R name
3=SMTP name
9=Other preferred address
F4 for list
F4 for list
More...
F3=Exit F4=Prompt F5=Refresh F12=Cancel F18=Display location details
F19=Add name for SMTP F20=Specify user-defined fields
Figure 374. Completed Add Directory Entry display (Part 2 of 2)
• Mail Service Level: Type 4 (Lotus Domino).
• Preferred Address: Type 3 (SMTP Name) and press F19 to enter the
information for the SMTP Name, as shown in Figure 375.
Add Name for SMTP
System:
SYSTEMA
Type choices, press Enter.
User ID . . . . . . . . :
Address . . . . . . . . :
PKENNEDY
NAMEXXX
SMTP user ID . . . . . . pkennedy________________
SMTP domain . . . . . . . test.name.ibm.com________________________________
________________________________________________________________________________
________________________________________________________________________________
_______________________________________________
SMTP route . . . . . . . _________________________________________________
________________________________________________________________________________
________________________________________________________________________________
_______________________________________________
F3=Exit
F4=Prompt
F12=Cancel
Figure 375. Add Name for SMTP display
• SMTP User ID: Enter the name for the SMTP user ID for the system
distribution directory entry that you are creating.
Using Facsimile Support for AS/400
487
• SMTP Domain: Enter the correct information that pertains to your system. For
more information about the SMTP domain, see TCP/IP Configuration and
Reference, SC41-5420.
Press Enter to add the system distribution directory entry. You may need to
press Enter more than once to complete the process.
Now that the system distribution directory entry has been created, you can
customize your Facsimile Support for AS/400 to route faxes by tone, Transmitting
Subscriber Identifier (TSI), or both.
C.4.1 Routing using received tones
To route using tone, you need to configure the Facsimile Support for AS/400
Enhanced Services. Create a routing entry for each tone value that you want
routed. You can do this by modifying the fax profiles that you created earlier, or by
creating new fax profiles. For example, we modify the existing PKENNEDY Fax
Profile.
To do so, type GO FAX at the command line. The Facsimile Support for AS/400
main menu appears. Select option 2 (Fax Profiles) and press Enter. The Fax
Profiles menu appears, as shown in Figure 376.
FAXPRF
Fax Profiles
System:
SYSTEMA
Select one of the following:
1. Work with Fax Profiles
2. Create Fax Profile
3. Edit Fax Profile
Selection or command
===> _________________________________________________________________________
______________________________________________________________________________
F3=Exit F4=Prompt F9=Retrieve
F16=System main menu
F12=Cancel
F13=Information Assistant
Figure 376. Fax Profiles menu
Select option 1 to Work with Fax Profiles and press Enter. The Work with Fax
Profiles display appears. Locate the Fax Profile that you want to modify, or press
F6 to create a new fax profile. In this example, we modify the PKENNEDY profile
that has already been created. Type 2 (Edit) next to the profile that you want to
edit and press Enter. The Edit Fax Profile display appears, as shown in Figure
377.
488
Lotus Domino for AS/400 R5: Implementation
Edit Fax Profile
Type choices, press Enter.
Profile Information:
Profile name . . .
Description . . .
Administrator . .
Environment . . .
Routing code . . .
.
.
.
.
.
.
.
.
.
.
.
.
.
.
.
.
.
.
.
.
.
.
.
.
.
.
.
.
.
.
.
.
.
.
.
PKENNEDY
Pam Kennedy
1
2
4567
1=Yes, 2=No
1=Basic, 2=Enhanced
Cover Page Information:
Create cover page . . . . . . . 1
1=Yes, 2=No
Fax title . . . . . . . . . . . ________________________________________
From lines . . . . . . . . . . . Pam Kennedy
________________________________________
________________________________________
Comment line . . . . . . . . . . ________________________________________
Printer file . . . . . . . . . . . QPFFCVP
Library . . . . . . . . . . . .
QFAX
F3=Exit
F9=Authority
QPFFCVP, Name
QFAX, *CURLIB, Name
F12=Cancel
More...
Figure 377. Edit Fax Profile display
On the Edit Fax Profile display, input or modify the Routing code field. In our
example, we input a routing code of 4567. Press Enter to make the change. You
return to the Work With Fax Profiles display. Select option 8 (Routing entries) and
press Enter. The Work with Routing Entries display appears, as shown in Figure
378.
Work with Routing Entries
Fax profile . . . . . . . . : PKENNEDY
Routing code . . . . . . . . : 4567
Type option, press Enter.
2=Edit entry 4=Remove entry
Opt
Routing Type
Description
(No additional information found)
Bottom
F3=Exit
F5=Refresh
F6=Create
F12=Cancel
Figure 378. Work with Routing Entries display
Press F6 to create a routing entry. The Select Routing Entry display appears, as
shown in Figure 379 on page 490.
Using Facsimile Support for AS/400
489
Work with Routing Entries
Select Routing Entry Type
Select one of the following:
1)
2)
3)
4)
5)
Print received fax
File received fax
Send notification
Send fax as a document
Run user receive program
Selection:
F3=Exit
F12=Cancel
Bottom
F3=Exit
F5=Refresh
F6=Create
F12=Cancel
Figure 379. Select Routing Entry Type display
From the Select Routing Entry Type display, you can create as many routing
entries as required. To mail a received fax to Lotus Notes, you must create at
least two routing entries. For the first routing entry, select option 2 (File received
fax) and press Enter. The File Received Fax display appears, as shown in Figure
380.
Note: This display reflects V4R2 Facsimile Support/400 options.
File Received Fax
Fax profile . . . . . . . . .: PKENNEDY
Routing Code . . . . . . . .: 4567
Type choices, press Enter.
Document . . . . . . . . *GENERATE
Folder . . . . . . . . . RCVFAX
Name, *GENERATE
Document type
Paper size .
Mapping value
Delete fax .
*RFTDCA, *MODCA, *RFTDCAFAX, *MODCAFAX
*LETTER, *LEGAL, *A4, *B4
*POSITION, *CENTER, *SCALE
1=Yes, 2=No
F3=Exit
. . . . . . *RFTDCAFAX
. . . . . . *LETTER
. . . . . . *POSITION
.. . . . . 2
F12=Cancel
Figure 380. File Received Fax display
You can change any of the parameters for your environment. For this example,
select the default parameters by pressing Enter. The Work with Routing Entries
display with the entry created appears, as shown in Figure 381.
490
Lotus Domino for AS/400 R5: Implementation
Work with Routing Entries
Fax profile . . . . . . . . : PKENNEDY
Routing code . . . . . . . . : 4567
Type option, press Enter.
2=Edit entry 4=Remove entry
Opt
Routing Type
Description
__
*TONE-FILED
File received fax as *GENERATE in RCVFAX
Bottom
F3=Exit F5=Refresh F6=Create F12=Cancel
Routing entry type *TONE-FILED has been created.
Figure 381. Work Routing Entries display for changing parameters
Press F6 to create a second routing entry. The Select Routing Entry Type display
appears, as shown in Figure 382.
Work with Routing Entries
Select Routing Entry Type
Select one of the following:
1)
2)
3)
4)
5)
Print received fax
File received fax
Send notification
Send fax as a document
Run user receive program
Selection:
F3=Exit
4
F12=Cancel
Bottom
F3=Exit
F5=Refresh
F6=Create
F12=Cancel
Figure 382. Select Routing Entry Type display
Select option 4 (Send fax as a document) and press Enter. The Send Document
display appears, as shown in Figure 383 on page 492.
Using Facsimile Support for AS/400
491
Send Document
Document . . . . :
Folder . . . . . :
*LASTFILED
*LASTFILED
Type distribution list or addresses, then press Enter.
Distribution list . . . . . . . ________ ________ F4 for list
----Addressees---User ID
Address
PKENNEDY
SYSTEMA
________
________
________
________
________
________
________
________
________
________
________
________
________
________
Description
More...
F3=Exit F4=Prompt F5=Refresh F12=Cancel
(C) COPYRIGHT IBM CORP. 1995, 1998.
Figure 383. Send Document display
• User ID: Enter the name of the system distribution directory entry that you
created earlier. In our example, the user is PKENNEDY.
• Address: Enter the name of the address. In our example, this is SYSTEMA.
Press Enter to create the routing entry. The entry is created and you can return to
the Work With Routing Entries display. Add additional routing entries, or press
F21 to return to the Work with Fax Profiles display.
Now, when a fax is received with a tone value of 4567, it is filed as a document in
a folder. The document is mailed to Lotus Notes user PKENNEDY.
Note: For this to happen, you must use the Configure Fax Services
(CFGFAXSRV) command and set the Start fax routing parameter to *YES. Refer to
Facsimile Support for AS/400 Programmer’s Guide, SC41-0656, for more
information about the CFGFAXSRV command. Also, make sure you start both
Facsimile Support and Enhanced Services with the STRFAXSPT command.
C.4.2 Routing using the transmitting subscriber identifier (TSI)
In addition to routing by tone (as described in the previous section), you can use
the Transmitting Subscriber Identifier (TSI) to route information.
Most fax machines are configured to send some kind of identification along as
part of the fax transmission. The identification may be the fax telephone number
or the company name. With Facsimile Support for AS/400, you can route faxes
based on the TSI value.
You can route a received fax to Lotus Notes mail by configuring routing entries in
Enhanced Services. This section explains how to create routing entries for the
TSI value. You also must create a system distribution directory entry. Earlier in
this chapter, we created a system distribution directory entry called PKENNEDY.
492
Lotus Domino for AS/400 R5: Implementation
We refer to that system distribution directory entry in this section. If you have not
created a system distribution directory entry, you must create it now.
To route using TSI, configure the Facsimile Support for AS/400 Enhanced
Services. You also must create routing entries. To do this, use the Work With TSI
Routing (WRKTSIRTG) command. Type WRKTSIRTG on a command line and press
Enter. The Work With TSI Routing display appears, as shown in Figure 384.
Work with TSI Routing
Position to . . . . . _____________________________
Type option, press Enter.
1=Work with entries 2=Edit TSI Code
Opt
Destination Name
TSI Code
__
__
__
__
__
__
__
__
__
__
__
AA
ABC OFFICE FURNITURE CO
ABC OFFICE FURNITURE CO
ABILIENE CHRISTIAN
ACE
ACE2
ADAMS STATE
ADELPHI
ADRIAN
AKRON
ALBANY
FAX TEAM 123
555555
5071237890
5071234567
More...
F3=Exit F5=Refresh
F12=Cancel
F10=Display Messages
F11=View 2
Figure 384. Work with TSI Routing display
Edit the TSI Code for the Master List Entry from which you receive faxes. In our
example, we edit the TSI code for the Master List Entry ALBANY. Type 2 (Edit TSI
code) in the Opt column next to ALBANY and press Enter. The Edit TSI Code
display appears, as shown in Figure 385.
Edit TSI Code
Destination information:
Name . . . . . . . . .
Identifier . . . . . .
Entry . . . . . . . .
Contact . . . . . . .
Telephone . . . . . .
Fax number . . . . . .
.
.
.
.
.
.
.
.
.
.
.
.
:
:
:
:
:
:
ALBANY
GREAT DANES
*DEFAULT
57577
To change TSI Code, change New TSI Code and press Enter.
Current TSI Code
New TSI Code
5079871234
5079871234
F3=Exit
F12=Cancel
Figure 385. Edit TSI Code display
Using Facsimile Support for AS/400
493
In our example, we enter a TSI code of 5079871234. An entry could be “Albany
Office” if that is the TSI from the sending fax machine. After inputting the TSI
code, press Enter. You return to the Work with TSI Routing display, as shown in
Figure 386.
Work with TSI Routing
Position to . . . . . _____________________________
Type option, press Enter.
1=Work with entries 2=Edit TSI Code
Opt
Destination Name
TSI Code
__
__
__
__
__
__
__
__
__
__
__
AA
ABC OFFICE FURNITURE CO
ABC OFFICE FURNITURE CO
ABILIENE CHRISTIAN
ACE
ACE2
ADAMS STATE
ADELPHI
ADRIAN
AKRON
ALBANY
FAX TEAM 123
555555
5071237890
5071234567
5079871234
More...
F3=Exit F5=Refresh
F12=Cancel
F10=Display Messages
F11=View 2
Figure 386. Work with TSI Routing display
Now that the TSI code is updated, you can create your routing entries. Type 1
(Work with entries) in the Opt column next to ALBANY and press Enter. The Work
with Routing Entries display appears, as shown in Figure 387.
Work with Routing Entries
Destination . . . . . . . . : ALBANY
Identifier/Entry . . . . . . : GREAT DANES/*DEFAULT
TSI code . . . . . . . . . . : 5079871234
Type option, press Enter.
2=Edit entry 4=Remove entry
Opt
Routing Type
Description
(No additional information found)
Bottom
F3=Exit
F5=Refresh
F6=Create
F12=Cancel
Figure 387. Work with Routing Entries display
Press F6 to create a routing entry. Follow the procedure described in the previous
section. You can create as many routing entries as you need. For the routing
code to mail a received fax to Lotus Notes, create at least two routing entries.
494
Lotus Domino for AS/400 R5: Implementation
One for File Received Fax and one for Send Fax. When a fax is received from
5079871234, it is filed as a document in a folder. That document is then mailed to
the Lotus Notes user PKENNEDY.
Note: For this to happen, you must use the Configure Fax Services
(CFGFAXSRV) command and set the Start fax routing parameter to *YES. Refer to
the Facsimile Support for AS/400 Programmer’s Guide, SC41-0656, for more
information about the CFGFAXSRV command. Also, make sure you start both
Facsimile Support and Enhanced Services with the STRFAXSPT command.
C.5 File to TIFF Class-F for viewing in Lotus Notes
In V4R4 of Facsimile Support/400 for OS/400 V4R4, Enhanced Services
incorporates a new option for received tone and TSI routing to allow you to file
the fax in *TIFF format. A fax filed in this way, and then distributed with Send
Distribution (SNDDST) command to a Lotus Notes user, can be viewed with the
Lotus Notes viewer.
If you file a fax using the shipped V4R2 Facsimile Support for AS/400 File Fax
(FILFAX) command (for OS/400 V4R2 and V4R3), and then route the document
to a Lotus Notes user through Domino for AS/400 using the Send Document
(SNDDOC) or Send Distribution (SNDDST) command, the fax is shown as an
attachment in Lotus Notes.
The only way to view a fax that is routed this way is to detach the attachment and
use the Client Access/400 AFP Workbench Viewer.
This also applies if you followed the directions in C.4.1, “Routing using received
tones” on page 488, or C.4.2, “Routing using the transmitting subscriber identifier
(TSI)” on page 492, for automatic routing.
There is a way to view the fax with Lotus Notes viewer, rather than the AFP
Workbench Viewer. You must load and apply Facsimile Support for AS/400
(5798-TBY) PTF SF49013.
Note: If you load and apply PTF SF49013 and use the command shown in the
example, faxes cannot be routed by Facsimile Support for AS/400 to Lotus Notes.
Automatic routing of received faxes can be accomplished, as described in C.4.1,
“Routing using received tones” on page 488, and C.4.2, “Routing using the
transmitting subscriber identifier (TSI)” on page 492. If you use the QFFTIFFC
program, you must route the faxes to Lotus Notes yourself using the Send
Document (SNDDOC) or Send Distribution (SNDDST) commands.
After PTF SF49013 is loaded and applied, you can file a received fax using a
command, as shown in the following example. This files the received fax as a
TIFF Class-F format from an AS/400 command line.
CALL QFAX/QFFTIFFC
parm('/QSYS.LIB/QUSRSYS.LIB/QAFFRCV.FILE/F123456789.MBR'
’/QDLS/ACCOUNTS/TIFFDOC1' 't')
The parameters must be entered as shown in the previous example. Substitute
values as appropriate for your received faxes. Using the previous example,
parameter values are defined as follows:
Using Facsimile Support for AS/400
495
QAFFRCV.FILE
Facsimile Support for AS/400 receive file name.
F123456789.MBR
The file member containing the received fax you want to
store as a TIFF Class-F document.
ACCOUNTS
Folder to store document.
TIFFDOC1
Document name (must be unique and no more than 8
characters).
t
Use t to file the fax as TIFF Class-F to be viewed by the
Lotus Notes viewer and most other viewing software. (You
can also use Use f to file the fax as TIFF Class-F and be
viewed by specialized viewing software such as System
Application Program (SAP) AL viewer.)
After you have filed the received fax in a TIFF Class-F format, you can use the
SNDDOC or SNDDST command to route the document to Lotus Notes/Domino.
Your Lotus Notes viewer can be used to view the fax (the fax shows up as an
attachment in your viewer).
The program QFAX/QFFTIFFC, shown previously, can also be incorporated into
an application.
496
Lotus Domino for AS/400 R5: Implementation
Appendix D. LPAR and clustering
This appendix describes logical partitioning and clustering, two V4R4 features of
OS/400. We are describing them here because both terms partitioning and
clustering are also used in Domino but are used in a different sense. Our purpose
is to avoid any confusion by clarifying what is meant by these terms within
OS/400.
D.1 Logical partitioning
Logical partitions are the distribution of resources (processors, memory, and I/O
devices) within a single AS/400 system, making it operate as if it is two or more
independent systems. Beginning with Version 4 Release 4 Modification 0
(V4R4M0) of IBM Operating System/400 (OS/400), many n-way AS/400e models
(6xx, Sxx, and 7xx) support logical partitions. For more information, see Slicing
the AS/400 with Logical Partitioning, SG24-5439.
Each logical partition operates as an independent logical system. They share a
few physical system attributes (system serial number, system model, and
processor feature code). All other system attributes may vary among logical
partitions. Each partition has dedicated hardware (processor, memory, and I/O
devices).
Unique software resources exist and operate on hardware that is assigned to
each partition. These software resources include separate copies of the Licensed
Internal Code, OS/400, and licensed program products. Additionally, language
feature codes, security, user data, most system values, software release, and
program temporary fixes (PTFs) remain unique for each logical partition.
Logical partitions can only exchange information by using standard
communication mechanisms. They communicate over real, local area network
(LAN), hardware wide area network (WAN), OptiConnect, or utilize the new virtual
hardware (OptiConnect) provided with logical partitions.
Software license behavior varies by software product. Each solution provider has
its own licensing strategy. IBM software products, licensed by the processor
group, can be used in any partition. All you need is one license for the AS/400.
You can then install the product on any partition you choose. For products that
have user-based pricing, each logical partition only counts its users.
Logical partitions fall into two categories, primary or secondary. Each logically
partitioned system has a single primary partition and one or more secondary
partitions.
D.2 Primary partition
The primary partition is a fully functional logical system with additional
responsibility in a multi–partition environment. All partition management function
is integrated into the Licensed Internal Code of the primary partition. These
functions include:
• Logical partition configuration management, such as adding and removing
resources, and creating and deleting partitions
© Copyright IBM Corp. 1999, 2001
497
• Virtual operation panel for secondary partitions, such as setting IPL modes
and source, initiating power up or down, and forcing service functions like
main storage dump
• Virtual service processor for secondary partitions, such as initializing the
logical system, performing main storage dump, and shutting down a logical
system
• Certain maintenance functions and support functions, such as interfacing with
the system power
• Control network, performing concurrent maintenance, and performing
hardware service for common resources
The primary partition is the only partition prior to performing any configuration
changes on a system. This partition has all resources assigned to it.
In a multiple partition system, the primary partition starts first. The primary
partition continues to own certain system resources (system operation panel, the
service processor, and system key lock).
The primary partition can start (IPL) secondary partitions once these system
resources have been validated. If a hardware failure (processor, main storage
card, or system bus) occurs, you can find system error log entries in the primary
partition product activity log.
The primary partition must remain active for the secondary partitions to be active.
It is the critical function provider to all secondary partitions. The OS/400
command Power Down System (PWRDWNSYS), main storage dump, and
operation panel functions 3, 8, and 22 all impact secondary partitions, causing
immediate power down and possibly resulting in subsequent abnormal initial
program loads (IPLs).
You must use care when deciding whether to allow significant work in the primary
partition. Due to the significance of the primary partition you may want to restrict
it to simple partition management tasks. The functions of the secondary partitions
in the system drive this decision.
Regardless of the role the primary partition serves, it can function as a hub for
external communications or electronic customer support for the whole system.
D.3 Secondary partitions
Secondary partitions are logical systems that are created from the hardware
resources that are assigned to them. A new system has no secondary partitions.
A physical system may have zero or more secondary partitions.
Secondary partitions are independent of each other. While each secondary
partition maintains a dependency on the primary, it otherwise operates as a
stand-alone system. An operator can perform the following functions on a
secondary partition:
•
•
•
•
498
Install the partition
IPL
Power on or off
Dump main storage
Lotus Domino for AS/400 R5: Implementation
• Apply fixes
• Perform system backups
Performing any of these actions does not affect other logical partitions.
D.4 LPAR and Domino
An AS/400 system running LPAR can host a different version of Domino in each
partition because each partition is viewed as a separate AS/400 system.
Remember, the Domino programs reside in the QSYS library in a library
QNOTES. There is now one QSYS library in each AS/400 system. There is no
interdependence between these libraries. They can each run the same version of
Domino or one can be used for a test library for upgrades. In turn, each of these
AS/400 systems can run multiple partitioned Domino servers.
D.5 Clustering
An AS/400 cluster is a collection or group of one or more systems that work
together as a single system.
The aim of AS/400 clustering is to offer a continuous availability solution for those
customers who need it. To implement AS/400 clustering involves a large number
of considerations and the probable involvement of a High Availability Specialist
Business Partner to provide a software package with the required replication
functions and cluster management capabilities. In the event of a system failure,
the failover can be automatic or may be set to a manual switch over.
Domino clustering provides similar automatic failover support for the Domino
server part of an AS/400 system. However, the software to provide this function is
integrated into the Domino server.
In AS/400 clustering, the term replication is used. It is defined here as making a
copy of something in real time and is done through the use of journaling.
Replication in the traditional Domino sense generally refers to scheduled
replication, whereas Domino clustering involves event driven replication.
Another word that is used differently in the context of AS/400 clustering is a
partition. A cluster partition occurs in an AS/400 cluster whenever contact is lost
between one or more nodes in the cluster and a failure of the lost nodes cannot
be confirmed.
See the Infocenter at http://www.as400.ibm.com/infocenter for more information.
LPAR and clustering
499
500
Lotus Domino for AS/400 R5: Implementation
Appendix E. Special notices
This publication is intended to help you deploy Lotus Domino for AS/400 Release
5. The information in this publication is not intended as the specification of any
programming interfaces that are provided by IBM AS/400 software, including
OS/400 or Lotus Domino. See the PUBLICATIONS section of the IBM
Programming Announcement for AS/400 software, including OS/400, for more
information about what publications are considered to be product documentation.
References in this publication to IBM products, programs or services do not imply
that IBM intends to make these available in all countries in which IBM operates.
Any reference to an IBM product, program, or service is not intended to state or
imply that only IBM's product, program, or service may be used. Any functionally
equivalent program that does not infringe any of IBM's intellectual property rights
may be used instead of the IBM product, program or service.
Information in this book was developed in conjunction with use of the equipment
specified, and is limited in application to those specific hardware and software
products and levels.
IBM may have patents or pending patent applications covering subject matter in
this document. The furnishing of this document does not give you any license to
these patents. You can send license inquiries, in writing, to the IBM Director of
Licensing, IBM Corporation, 500 Columbus Avenue, Thornwood, NY 10594 USA.
Licensees of this program who wish to have information about it for the purpose
of enabling: (i) the exchange of information between independently created
programs and other programs (including this one) and (ii) the mutual use of the
information which has been exchanged, should contact IBM Corporation, Dept.
600A, Mail Drop 1329, Somers, NY 10589 USA.
Such information may be available, subject to appropriate terms and conditions,
including in some cases, payment of a fee.
The information contained in this document has not been submitted to any formal
IBM test and is distributed AS IS. The use of this information or the
implementation of any of these techniques is a customer responsibility and
depends on the customer's ability to evaluate and integrate them into the
customer's operational environment. While each item may have been reviewed
by IBM for accuracy in a specific situation, there is no guarantee that the same or
similar results will be obtained elsewhere. Customers attempting to adapt these
techniques to their own environments do so at their own risk.
Any pointers in this publication to external Web sites are provided for
convenience only and do not in any manner serve as an endorsement of these
Web sites.
The following terms are trademarks of the International Business Machines
Corporation in the United States and/or other countries:
â
AS/400
ES/9000
IBM
MQ
Network Station
â
© Copyright IBM Corp. 1999, 2001
eNetwork
GDDM
IMS
MQSeries
OS/400
â
501
Operating System/400
OS/390
S/390
System/390
WebSphere
400
OS/2
RS/6000
SP
VisualAge
XT
Redbooks
Redbooks Logo
The following terms are trademarks of the Lotus Development Corporation in the
United States and/or other countries:
Lotus
Lotus Notes
NotesPump
LotusScript
Domino
Notes
Lotus Enterprise Integrator
The following terms are trademarks of other companies:
Tivoli, Manage. Anything. Anywhere.,The Power To Manage., Anything.
Anywhere.,TME, NetView, Cross-Site, Tivoli Ready, Tivoli Certified, Planet Tivoli,
and Tivoli Enterprise are trademarks or registered trademarks of Tivoli Systems
Inc., an IBM company, in the United States, other countries, or both. In Denmark,
Tivoli is a trademark licensed from Kjøbenhavns Sommer - Tivoli A/S.
C-bus is a trademark of Corollary, Inc. in the United States and/or other countries.
Java and all Java-based trademarks and logos are trademarks or registered
trademarks of Sun Microsystems, Inc. in the United States and/or other countries.
Microsoft, Windows, Windows NT, and the Windows logo are trademarks of
Microsoft Corporation in the United States and/or other countries.
PC Direct is a trademark of Ziff Communications Company in the United States
and/or other countries and is used by IBM Corporation under license.
ActionMedia, LANDesk, MMX, Pentium and ProShare are trademarks of Intel
Corporation in the United States and/or other countries.
UNIX is a registered trademark in the United States and other countries licensed
exclusively through The Open Group.
SET, SET Secure Electronic Transaction, and the SET Logo are trademarks owned
by SET Secure Electronic Transaction LLC.
Other company, product, and service names may be trademarks or service marks
of others.
502
Lotus Domino for AS/400 R5: Implementation
Appendix F. Related publications
The publications listed in this section are considered particularly suitable for a
more detailed discussion of the topics covered in this redbook.
F.1 International Technical Support Organization publications
For information on ordering these ITSO publications see “How to get IBM
Redbooks” on page 505.
• iSeries Handbook , GA19-5486
• AnyMail/400 Mail Server Framework Development Guide, GG24-4449
• iSeries and AS/400e System Builder V4R4, SG24-2155
• AS/400 Electronic-Mail Capabilities , SG24-4703
• Lotus Domino for AS/400: Installation, Customization and Administration ,
SG24-5181
• AS/400 Client Access Express for Windows V4R4 , SG24-5191
• Lotus Domino for AS/400: Integration with Enterprise Applications ,
SG24-5345
• Slicing the AS/400 with Logical Partitioning, SG24-5439
• Lotus Domino for AS/400 Internet Mail and More, SG24-5990
F.2 Redbooks on CD-ROMs
Redbooks are also available on the following CD-ROMs. Click the CD-ROMs
button at http://www.redbooks.ibm.com/ for information about all the CD-ROMs
offered, updates and formats.
CD-ROM Title
System/390 Redbooks Collection
Networking and Systems Management Redbooks Collection
Transaction Processing and Data Management Redbooks Collection
Lotus Redbooks Collection
Tivoli Redbooks Collection
AS/400 Redbooks Collection
Netfinity Hardware and Software Redbooks Collection
RS/6000 Redbooks Collection (BkMgr Format)
RS/6000 Redbooks Collection (PDF Format)
Application Development Redbooks Collection
IBM Enterprise Storage and Systems Management Solutions
Collection Kit
Number
SK2T-2177
SK2T-6022
SK2T-8038
SK2T-8039
SK2T-8044
SK2T-2849
SK2T-8046
SK2T-8040
SK2T-8043
SK2T-8037
SK3T-3694
F.3 Other publications
These publications are also relevant as further information sources:
F.3.1 IBM publications
• HTTP Server for AS/400 Webmaster’s Guide, GC41-5434
Currently available in softcopy only. Go to the Web site at:
http://publib.boulder.ibm.com/html/as400/infocenter.html
© Copyright IBM Corp. 1999, 2001
503
Select Online library. Select a language and click GO. Select a release.
Select Search or view. Type GC41-5434 and click Find.
• Facsimile Support for AS/400 Installation Guide, SC41-0654
• Facsimile Support for AS/400 User’s Guide, SC41-0655
• Facsimile Support for AS/400 Programmer’s Guide, SC41-0656
• TCP/IP Configuration and Reference V3R7, SC40-3420
• AS/400 Client Access for Windows 95/NT - Setup, SC41-3512
• AS/400 National Language Support, SC41-5101
• Getting Your AS/400 Working for You, SC41-5161
• AS/400 Security - Basic, SC41-5301
• OS/400 Security - Reference, SC41-5302
• OS/400 Backup and Recovery, SC41-5304
• OS/400 Work Management, SC41-5306
• Communications Configuration , SC41-5401
• SNA Distribution Services, SC41-5410
• TCP/IP Fastpath Setup, SC41-5430
• AS/400 Advanced Series OS/400 Integration of Lotus Notes, SC41-5431.
• OS/400 TCP/IP Configuration and Reference V4R4 , SC41-5420
• Client Access Express for Windows - Setup, SC41-5507
• AS/400 International Application Development, SC41-5603
• Integrated File System Introduction, SC41-5711
Currently available in softcopy only. Go to the Web site at:
http://publib.boulder.ibm.com/html/as400/infocenter.html
Select Online library. Select a language and click GO. Select a release.
Select Search or view. Type SC41-5711 and click Find.
• OS/400 CL Programming, SC41-5721
• OS/400 Work Management APIs, SC41-5878
Currently available in softcopy only from the Web site at:
http://publib.boulder.ibm.com/html/as400/infocenter.html
Select Online library. Select a language and click GO. Select a release.
Select Search or view. Type SC41-5878 and click Find.
• Inside the AS/400, SR28-5910
F.3.2 Non-IBM publications
• Heidelberg, Jelan (Editor) . Lotus Domino for AS/400: Bringing the Best Together
for Business. AS/400 Press (1999). ISBN 0-966-33752-2.
• Tipton, Bob. Domino for AS/400: Uniting Two Hall of Fame Technologies.
Whittman-Hart Inc. (1999).
Go to the Web site at http://www.as400.ibm.com/conslt/tipton.htm for a copy
of this white paper.
504
Lotus Domino for AS/400 R5: Implementation
How to get IBM Redbooks
This section explains how both customers and IBM employees can find out about IBM Redbooks, redpieces, and
CD-ROMs. A form for ordering books and CD-ROMs by fax or e-mail is also provided.
• Redbooks Web Site ibm.com/redbooks
Search for, view, download, or order hardcopy/CD-ROM Redbooks from the Redbooks Web site. Also read
redpieces and download additional materials (code samples or diskette/CD-ROM images) from this Redbooks
site.
Redpieces are Redbooks in progress; not all Redbooks become redpieces and sometimes just a few chapters will
be published this way. The intent is to get the information out much quicker than the formal publishing process
allows.
• E-mail Orders
Send orders by e-mail including information from the IBM Redbooks fax order form to:
In United States or Canada
Outside North America
e-mail address
[email protected]
Contact information is in the “How to Order” section at this site:
http://www.elink.ibmlink.ibm.com/pbl/pbl
• Telephone Orders
United States (toll free)
Canada (toll free)
Outside North America
1-800-879-2755
1-800-IBM-4YOU
Country coordinator phone number is in the “How to Order” section at
this site:
http://www.elink.ibmlink.ibm.com/pbl/pbl
• Fax Orders
United States (toll free)
Canada
Outside North America
1-800-445-9269
1-403-267-4455
Fax phone number is in the “How to Order” section at this site:
http://www.elink.ibmlink.ibm.com/pbl/pbl
This information was current at the time of publication, but is continually subject to change. The latest information
may be found at the Redbooks Web site.
IBM Intranet for Employees
IBM employees may register for information on workshops, residencies, and Redbooks by accessing the IBM
Intranet Web site at http://w3.itso.ibm.com/ and clicking the ITSO Mailing List button. Look in the Materials
repository for workshops, presentations, papers, and Web pages developed and written by the ITSO technical
professionals; click the Additional Materials button. Employees may access MyNews at http://w3.ibm.com/ for
redbook, residency, and workshop announcements.
© Copyright IBM Corp. 1999, 2001
505
IBM Redbooks fax order form
Please send me the following:
Title
Order Number
First name
Last name
Company
Address
City
Postal code
Country
Telephone number
Telefax number
VAT number
Card issued to
Signature
Invoice to customer number
Credit card number
Credit card expiration date
We accept American Express, Diners, Eurocard, Master Card, and Visa. Payment by credit card not
available in all countries. Signature mandatory for credit card payment.
506
Lotus Domino for AS/400 R5: Implementation
Quantity
Index
Symbols
automatic startup of server 76
availability 6
*HTTPSETUP server 58
B
Numerics
24-hour clock 41
5250 interface 419
5798-TBY 475
64 GB databases 138
7857-017 modem 418
A
access control 286
access to NOTES.INI 272
Add Domino Application (ADDDOMAPP) command 105
Add Environment Variable (ADDENVVAR) command 107
Add Notes User (ADDNTSUSR) command 451
adding a Domino application 265
additional server
parameters 96
setting up on AS/400 95
starting 101
additional server in existing Domino domain 95
administration client 469
administration client (Domino) 473
Administration Request database 144
administration using a Web browser 285
administration workstation 82
setup 82
software 23
administrator functions 23
adminp Domino console command 144
advanced Domino services 159
advanced services
billing 8
clustering prerequisites 174
loopback 170
port mapping 162
setting up a new cluster 175
alternative mapping 331
answer connection profile 361
AnyMail/400 Mail Server Framework 476
application development 12
AS/400 Client Access for Windows 95/NT 242
AS/400 Directory Synchronization 23
AS/400 job identification 77
AS/400 libraries 296
AS/400 NetServer 252
AS/400 Operations Navigator 23
AS/400 setup phase 101
AS/400 system
architecture 12
concepts 13
saving 297
AS/400 system distribution directory 307, 315
AS/400 user profile has no access to NOTES.INI 272
asynchronous line description 407
© Copyright IBM Corp. 1999, 2001
backing up 295
a specific Domino database 301
Domino databases 298
incrementally 302
Integrated PC Server 455
mail 300
product libraries and directories 298
the entire AS/400 system 297
backup 11, 295, 455
backup server 303
basic server administration 135
Basics tab 267
batch installation
local 135
remote 136
billing 8
binding to the correct address 166
C
certifier ID 89
CFGDOMSVR (Configure Domino Server) command 44
Change Domino Server (CHGDOMSVR) command 109
changed objects 309
CL (control language) 18
Client Access Express 251
Domino for AS/400 Single Logon 354
Client Access Express for Windows 252
Client Access for Windows 95/NT 149
Client Access for Windows 95/NT V3R2 242
Client Access/400 faxing 483
client support 3
Client-Access Express for Windows 95/98/NT 149
client-to-server connection 403
cluster 8
administrator 174
ICM inside 290
ICM outside 289
Cluster Directory Database 174
Cluster Directory Manager (CLDBDIR) 174
Cluster Manager 174
Cluster Replicator (CLREPL) 174
clustered Free Time database 178
clustered server 8, 303
clustering 289, 497, 499
clustered Free Time database 178
Domino servers 172
Domino Web servers 289
mail routing failover 179
prerequisites 174
setting up a new cluster 175
supported features 178
code installation 139
code page conversion 42
507
collector task 147
command
ADDDOMAPP (Add Domino Application) 105
ADDENVVAR (Add Environment Variable) 107
ADDNTSUSR (Add Notes User) 451
CFGDOMSVR (Configure Domino Server) 44, 108
CHGDOMSVR (Change Domino Server) 109
DLTLICPGM (Delete Licensed Program) 151
DSPDOMCSL (Display Domino Console) 114
DSPF (Display File) 115
DSPSFWRSC (Display Software Resources) 242,
252
DSPSTMF (Display Stream File) 117
EDTF (Edit File) 119
ENDDOMSVR (End Domino Server) 122
ENDTCPSVR (End TCP/IP Server) 253
LODRUN (Load and Run) 32, 105, 241
Lotus Domino for AS/400 103
RST (Restore Object) 307
RSTLICPGM (Restore Licensed Program) 18, 105
RSTOBJ (Restore Object) 307
SBMDOMCMD (Submit Domino Command) 123
STRDOMSVR (Start Domino Server) 74, 128
STRTCP (Start TCP/IP) 27
STRTCPSVR (Start TCP/IP Server) 253
Work with Domino Servers (WRKDOMSVR) 74
WRKDIRE (Work with Directory Entry) 314
WRKDOMCSL (Work with Domino Console) 78, 129
WRKDOMSVR (Work with Domino Servers) 72, 130
compacting databases 147
configuration process
AS/400 setup phase 101
file copy phase 100
Configure Domino Server (CFGDOMSVR) command 44,
108
configuring a TCP/IP interface 24
connection scripts 413
connection to the Domino server 94
continuous data synchronization 173
control language (CL) 18
convert mail conversion utility 146
customized modem information 418, 419
D
database
compact 147
design 144
integration 10, 455
integration of Domino and DB2/400 6, 455
size 6, 138
date format 40
date separator 41
daylight saving 49, 67
default port names 453
Delete Licensed Program (DLTLICPGM) command 151
dialin access 386
Dial-on-Demand 369
Dial-Up Adapter 392, 393
dial-up connection profile 369
dial-up connectivity 357, 454
508
Lotus Domino for AS/400 R5: Implementation
AS/400 configuration 360
AS/400 dial-up profile 369
connection profile 361, 370
Domino configuration 398
Domino server remote to an existing organization 406
Domino server to server connection 399
how Domino uses dial-up 357
line description 362, 370
Notes client to server connection 403
PPP 358
Windows 98/95 dial-up configuration 391
windows modem definition 378
Windows NT answer configuration 386
Windows NT configuration 381
Windows NT dial-up configuration 388
Windows NT remote access services 382
different server names 29
directory field list 340
directory fields 340
directory shadowing 314, 454
directory synchronization 145, 313, 436, 454
coexistence with replication and shadowing 345
concepts 320
configuration 317
configuration steps 324
configuration tips 319
disabled 321
disabling 343
disabling or suspending 343
enabled 321
enabling 342, 344
prerequisites 317
software 23
suspended 321
suspending 343
Display Domino Console (DSPDOMCSL) command 114
Display File (DSPF) command 115
display server properties 266
Display Software Resource (DSPSFWRSC) command
242, 252
Display Stream File (DSPSTMF) command 117
distribution directory 307
DNS (Domain Name System) 30
domain
Domino 192
Lotus Notes 192
SMTP 191, 192
TCP/IP 192
Domain Name System (DNS) 30
Domino
configuring an additional server 95
domain 87
history with AS/400 system 4
LPAR 499
organization 87
Domino administration client 473
Domino Administrator 272, 473
Domino and AS/400 users 9
Domino application 265
Domino commands from a CL program 456
Domino connectivity, SLIP 358
Domino console 78
Domino console command
adminp 144
updall 147
Domino database 298
restoring 308
saving a specified location 299
saving all stream file directories 299
Domino Directory 144, 315, 341
Domino directory structure on the AS/400 system 428
Domino domain 192
Domino for AS/400
administering and using 8
Advanced Services 7
application development 12
backing up objects 296
configuring the server 432
creating a new server 262
installing and setting up 17
installing on AS/400 31
prerequisites 18
restoring 306
restoring objects 306
solution 5
TCP/IP address 440
users 9
Domino for AS/400 Single Logon 349
Client Access Express 354
installation 349
removing 354
resynchronizing passwords 353
using 352
Domino fro AS/400
routing received faxes to 484
Domino icon 261
Domino infrastructure migration 466
Domino mail 308
Domino native SMTP 188
Domino partitioned server 166
Domino plug-in 247
Domino R5 6
Domino release issues 424
Domino server
adding to existing organization 87
administering 266
bringing down the original server 436
CFGDOMSVR command 43
clustering 8
console code page conversion 42
consolidating 424, 443
copying files between 437, 456
copying ID files to the client 469
deleting 263
ending 76
ending controlled 264
ending immediately 264
first server setup Domino server 43
installing 31
Integrated Netfinity Server 450
management tasks 72
migrating 423
migration 423
moving 151
multiple on one AS/400 159
naming 28
partitioning 7
registering an additional one 88
remote, to an existing organization 406
selecting 263
starting 74, 263
starting and stopping 263
starting automatically 76
status 261
stopping 263
transplanting 423, 425
verifying the connection 94
Domino server cluster 172
advantages 173
components 173
prerequisites for setting up 174
setting up 175
supported features 178
Domino server job log 154
Domino services 159
Domino user registration 273
Domino users who need DB2/400 access 9
Domino Web Administration database 286
Domino Web server
clustering 289
configuration 281
Domino Web services 292
Domino-only users 9
double-byte database file name 43
double-byte language 42
double-byte system 42
double-byte user profile 42
downtime, reducing 303
E
Edit File (EDTF) 119
End TCP/IP Server (ENDTCPSVR) 253
ENDDOMSVR (End Domino Server) 122
ending
all Domino servers 297
Domino server 76
Domino subsystem 77
TCP/IP server 253
environment variables
AS400_DOMSVR_RESTART 134, 157
FaultRecovery 134
NOTES_AS400_CONSOLE_ENTRIES 134
NOTES_AS400_STSDEBUG 134, 157
PATH 134
F
Facsimile Support for AS/400 475
installation and configuration 475
failover support 173
509
Fax Master List Entry 477
fax PC output 484
faxing
Client Access/400 483
Lotus Notes 483
field mappings 316, 323, 334
file copy phase 100
file shares, QIBM 254
File Transfer Protocol (FTP) 456
first server
setup 43
what happens 71
starting 143
Free Time database 178
FTP (File Transfer Protocol) 437, 456, 469
FTP in batch 459
fully qualified Internet host name 220
G
integration
database 10
Domino and DB2/400 databases 6, 455
Notes mail and OS/400-based mail 10
Internet 281
Internet Cluster Manager (ICM) 289
Internet host name, fully qualified 220
Internet mail addressing 185
Internet Message Access Protocol (IMAP) 190, 223
Internet solution 2
Internet tab 267
intranet solution 2
J
Java 22, 281, 285
job
priority 153
QNNDILCK 305, 320, 344
QNNINSTS 78
graphical user interface of Operations Navigator 241
K
H
hardware prerequisites for Domino 19
hierarchy of microprocessors 12
HOSTS file 30
HOSTS file configuration 30
HTML 281
I
IBM 7857-017 modem 418
ICM (Internet Cluster Manager) 289
ICM configuration 291
ICM inside the cluster 290
ICM outside the cluster 289
ID file
attaching to Server document 92
copying to administrator workstation 470
copying using FTP 469
for additional server 92
storing on disk 93
write protected 94
IFS (integrated file system) 14, 295
IFS directory 296
IMAP 182, 223
Internet Message Access Protocol 190
IMAP (Internet Message Access Protocol) 182, 223
improved performance 173
incremental backup 302
strategies 302
Initialization File tab 270
installation
additional domino server 87
local batch 135
process (LODRUN) 31
remote batch 136
server registration 88
integrated file system (IFS) 14, 295
stream files 295
Integrated Netfinity Server 450
510
Lotus Domino for AS/400 R5: Implementation
key field 323
key mapping 316
L
layered machine architecture 12
Load and Run (LODRUN) command 32 , 105, 241
local batch installation 135
local encryption 445
local system security information 412
locale 38
Locale tab 269
LODRUN 37
logical partitioning 497
loopback interface 170
Lotus Domino 281
Lotus Domino Dial-Up 357
Lotus Domino for AS/400
alternative installation methods 135
commands 103
installing the plug-in 243, 252
overview 1
removing the server 150
removing the software from the AS/400 151
upgrading to R5 138
Lotus Domino plug-in 241
scanning 259
Lotus Notes
domain 192
faxing 483
history with AS/400 system 4
object backup and recovery 11
LPAR 499
M
mail
addressing 185
database file 144
server 184
mail conversion utility 145
mail integration 10
mail routing failover 179
mail server 184
Mail Server Framework 189
Mail tab 268
management tasks, Domino server 72
managing system 243
map network drive 254
migrating
Domino infrastructure 466
Domino server 423
from other Domino platforms 423
SMTP 147, 447
migrating SMTP support 446
MIME (Multipurpose Internet Mail Extensions) 182
modem information 411
moving a Domino server 151
MSF (Mail Service Framework) 183
MTA (Message Transfer Agent) 183, 448
multi-homed host 29
multi-homing 29
multi-hosting 30
multiple Domino servers on one AS/400 159
multiple organizations 272
Multipurpose Internet Mail Extensions (MIME) 181
N
names
different on Domino and AS/400 29
same on Domino and AS/400 29
names.nsf 286
naming the Domino server 28
national language
24-hour clock 41
considerations 38
date format 40
double-byte languages 42
locale 38
secondary language 41
time format 40
version 242, 252
native Domino SMTP 188
network 22
component 246, 257
server description 462, 464
Network Configuration tab 269
never-ending updates 345
new directory fields 340
new user registration 278
NNDILOG.NSF 315
NNDIRSYC.NSF 315
no access to NOTES.INI 272
Notes
administrator functions 23
client workstation 446
clients 3
Notes client-to-server connection 403
Notes database object locks 304
Notes mail integration 10
Notes server dump tool 154
Notes workstations 22
NOTES.INI file 119, 147, 161, 162, 163, 435
O
object backup 296
object locks 304
object ownership 439
object restore 306
object-based design 12
OfficeVision for AS/400 190
Operations Navigator
answer connection profile 361
customized modem information 418
dial-up connection profile 369
graphical user interface 241
language requirements 242, 252
verifying Domino plug-in 247, 258
Operations Navigator plug-in 149
optional software 22
OS/400 13
OS/400 V4R2 20
OS/400 V4R3 21
OS/400 V4R4 21
OS/400-based mail integration 10
overview 1
P
partial server properties displayed 271
partition 7
partitioned server 7, 159, 170
performance tuning 152
Person document 286
physical line information 410
platform issues 425
plug-in 241
plug-in for Lotus Domino for AS/400 243, 247, 252
Point-to-Point Protocol (PPP) 358
POP3 183, 190
port mapper 166
port mapping 162
PPP (Point-to-Point Protocol) 358
PPP line description 413
pre-installation tasks 24
prerequisites
hardware for Domino 19
software 19
previous release considerations 280
primary partition 497
problem determination 154, 347
program temporary fix (PTF) 20, 139
protocol 22
PTF (program temporary fix) 20, 139
Q
QIBM share name 254
QNNDILCK job 305, 320, 344
QNNINSTS job 78
511
Quarterly Maintenance Update (QMU) 20
QWDRSBSD API sample program 305
R
R5 upgrade 138
rebuilding views 147
received faxes 484
received tone 488
recovery 11 , 295, 455
reducing the downtime 303
registration
Domino user 273
new user 278
registration server 88, 89
reliability 6
Remote Access Service
configuring 383
for Windows NT 382
prerequisites on Windows 378
remote batch installation 136
Remote LAN Services 369
Remote Network Services 359
configuration 360
for Domino 398
remove
licensed program 151
single server 150
removing the Domino software from the AS/400 151
removing the Lotus Domino for AS/400 server 150
replace design 144
reporter task 147
restore
AS/400 system distribution directory 307
changed objects 309
Domino databases 308
entire Domino for AS/400 server 306
mail 308
Restore Licensed Program (RSTLICPGM) command 18,
105
Restore Object (RST) command 307
Restore Object (RSTOBJ) command 307
resynchronizing passwords 353
RFC821/822 185
routing received faxes 484
S
same server names 29
save file 304
save object
Save Object (SAV) command 299
Save Object (SAVOBJ) command 299
saving Domino databases 298
saving the AS/400 297
scalability 5
script source information 411
SDD (system distribution directory) 313
secondary language 41
secondary partition 498
Secure Sockets Layer (SSL) 185
512
Lotus Domino for AS/400 R5: Implementation
security 15
selecting a Domino server 263
Serial Line Internet Protocol (SLIP) 358
server
backup and recovery 295
cluster 8
is not started 271
listening to all IP addresses 168
mail 184
registration 88
removal 150
restarts 156
server administration 135
server consolidation 424
process outline 443
server ID file 92, 93
server management 72
from a separate window 264
server properties 266
Basics tab 267
Initialization File tab 270
Internet tab 267
Locale tab 269
Mail tab 268
Network Configuration tab 269
Services tab 268
server transplantation 423, 425
server-to-server connection 398
Services tab 268
setup
administration workstation 82
Configure Domino Server (CFGDOMSVR) command
44
first server 43
green screen method 44
Web-based 58
what happens during 71
share name 256
Simple Mail Transfer Protocol 181, 482
single-level storage 12
SLIP
asynchronous line description 407
connection profile 407
with a PPP line description 413
SMTP 183, 482
domain 191, 192
migration 147, 447
native Domino 188
SMTP support 446
SMTP/MIME MTA 147, 448
SMTP_VERSION 220
software
administration workstation 23
directory synchronization 23
Domino optional parts 33
optional 22
prerequisites 19
removal 151
SSL (Secure Socket Layer) 185
Start Domino Server (STRDOMSVR) 74
Start TCP/IP (STRTCP) 27
Start TCP/IP Server (STRTCPSVR) 253
starting
Domino server 74, 263
TCP/IP server 253
stopping a Domino server 263
stream file 295
Submit Domino Command (SBMDOMCMD) command
123
subsystem (ending) 77
symbolic link 37
system distribution directory 476
system distribution directory (SDD) 313, 315, 341
system tuning 152
Welcome panel 259
Windows 98/95 dial-up connection 396
Windows 98/95 Dial-Up Networking 391
Windows NT 447
Windows NT dial-up connection 388
Windows NT Dial-Up Networking 381
Work with Directory Entries (WRKDIRE) command 314
Work with Domino Console (WRKDOMCSL) command 78
Work with Domino Servers (WRKDOMSVR) command
72, 74
workload balancing 173
write protected ID file 94
WRKDOMCSL 129
wrong user ID is active 271
T
X
TCP/IP
binding 435
configuring 441
configuring the interface 24
domain 192
HTTP port 283
Integrated Netfinity Server 461
interface 441
TCP/IP address 440, 461
TCP/IP configuration 24
TCP/IP Connectivity Utilities for AS/400 19
TCP/IP port unable to connect to IP addresses 169
TIFF Class-F 495
time format 40
time separator 41
tone 488
transmitting subscriber identifier (TSI) 492
troubleshooting 150, 415
TSI (transmitting subscriber identifier) 492
tuning performance 152
X.PC 369
U
unique IP address for each server 160
updall Domino console command 147
upgrading
to Domino R5 138
to Lotus Domino for AS/400 R5 138
URL mapping 293
user dialin access 386
user profile special authorities 32, 60
V
view rebuilding 147
views 147
virtual Web server 292
W
Web administration access settings 286
Web browser administration 285
Web server alias 293
Webadmin.nsf 286
Web-based setup 58
513
514
Lotus Domino for AS/400 R5: Implementation
IBM Redbooks review
Your feedback is valued by the Redbook authors. In particular we are interested in situations where a Redbook
"made the difference" in a task or problem you encountered. Using one of the following methods, please review the
Redbook, addressing value, subject matter, structure, depth and quality as appropriate.
• Use the online Contact us review redbook form found at ibm.com/redbooks
• Fax this form to: USA International Access Code + 1 845 432 8264
• Send your comments in an Internet note to [email protected]
Document Number
Redbook Title
SG24-5592-01
Lotus Domino for AS/400 R5: Implementation
Review
What other subjects would you
like to see IBM Redbooks
address?
Please rate your overall
satisfaction:
O Very Good
Please identify yourself as
belonging to one of the following
groups:
O Customer
O Business Partner
O Solution Developer
O IBM, Lotus or Tivoli Employee
O None of the above
O Good
O Average
O Poor
Your email address:
The data you provide here may be
used to provide you with information
from IBM or our business partners
about our products, services or
activities.
O Please do not use the information collected here for future marketing or
promotional contacts or other communications beyond the scope of this
transaction.
Questions about IBM’s privacy
policy?
The following link explains how we protect your personal information.
ibm.com/privacy/yourprivacy/
© Copyright IBM Corp. 1999, 2001
515
Lotus Dominofor AS/400 R5:
Implementation
(1.0” spine)
0.875”<->1.498”
460 <-> 788 pages
®
Lotus Domino for
AS/400 R5
Implementation
Learn about Domino
R5, Lotus’ newest
generation of Internet
products
Implement and
administer Domino R5
on the AS/400 system
Benefit from the
functions and
flexibility that Lotus
Domino offers
Domino R5 is Lotus' new generation of Internet products. This
IBM Redbook helps you implement and administer this exciting
new release on the AS/400 with Lotus Domino for AS/400. This
redbook is written for technical specialists and programmers,
who are IBM customers and business partners. It also serves as
an education tool for the general IBM and Lotus community. By
reading this redbook, you are sure to obtain a solid technical
understanding of how to deploy Domino for AS/400. Use this
redbook to take full advantage of the function and flexibility of
Lotus Domino, together with the reliability and security of the
AS/400 platform for your Domino server.
INTERNATIONAL
TECHNICAL
SUPPORT
ORGANIZATION
The Domino Server Family is an integrated messaging and Web
application software platform for companies that need to improve
customer responsiveness and streamline business processes.
For those organizations that need to deliver secure, interactive
Web applications, and a rock solid infrastructure for messaging
and collaboration, Domino servers are the proven choice.
IBM Redbooks are developed
by the IBM International
Technical Support
Organization. Experts from
IBM, Customers and Partners
from around the world create
timely technical information
based on realistic scenarios.
Specific recommendations
are provided to help you
implement IT solutions more
effectively in your
environment.
BUILDING TECHNICAL
INFORMATION BASED ON
PRACTICAL EXPERIENCE
For more information:
ibm.com/redbooks
SG24-5592-01
ISBN 073842224X