1
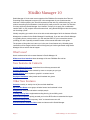
Studio Manager 10
New Features Guide
Janet Tokerud & Scout Tomyris
December 1, 2009
Studio Manager 10
Studio Manager 10 is the most recent upgrade of the FileMaker Pro template from Tokerud
Consulting Group designed to support you in the management of your creative services
business. It follows people, jobs, time and expenses so that with only a little data entry, you can
produce everything from estimates to invoices quickly, easily and all in one place. Our intention
is to keep improving Studio Manager. Your intention, we hope, is to apply your considerable
creative skills to your projects while at the same time, using Studio Manager to take the mystery
out of making a profit.
Virtually everything you need to know to be able to take advantage of all of the features of Studio
Manager are contained in the Studio Manager 9 User Manual. If you are new to Studio Manager
or upgrading from a previous version, you will need that PDF. For your convenience we are
providing you with a specially annotated version of the manual that refers to this guide.
The purpose of this guide is to instruct you in the use of new features only. Ultimately these
instructions will be merged with the manual. We figured you’d rather get started using Studio
Manager 10 than wait for that to happen.
What’s new?
Here’s a reference list to the newest features in Studio Manager 10:
Widescreen User Interface: takes advantage of the new FileMaker Pro tool bar
New Features in Contacts
Contact Address Summary: streamlined view with easy access to edit
Contacts Quick Find: locate contacts by name or company as you type
Contact Picture: place a photo or graphic in a contact record
Employee Dashboard: today’s tasks and timesheet at a glance
Other New Features
Calendar: monthly or weekly view of jobs and task deadlines
Slip Task Due Dates: move groups of tasks forward and backward in time
Assignments: links jobs and tasks to multiple people
Tracking Time by Task: supplements tracking time by job and billing code
Easy Invoice Graphics: quickly personal your invoice PDFs without customized the layout
Enhanced Billing Control: temporary “hold” to choose items not to bill
Communications Related to Jobs: create and store email in Studio Manager
Page 2
Studio Manager 10 New Features
Using this guide
This New Features guide includes page references to the Studio Manager 9 User Manual when
that is relevant. If you have the Studio Manager 9 manual that has been annotated for use with
Studio Manager 10, then on the pages referenced by this manual, you will find notations that
cross-reference with this guide. We appreciate your choice to purchase or upgrade to Studio
Manager 10 before we have had the chance to integrate the new features and screenshots into
our manuals.
Tooltips
More tooltips have been added to Studio Manager 10. To see a tooltip, essentially instructions
for use or additional information about using a field or button, simply place the point of the arrow
cursor over the field, label or button. If it has a tooltip, then in less than a second a yellow box
will appear with the explanation. If it disappears before you can read it all, just move the cursor
away a little and then move it back to reopen the tooltip. There are only a few tooltips on most
screens. We are really counting on you reading the User Manual along with this New Features
guide in order to learn all the ins and outs of Studio Manager 10.
Reminder
When creating new records in Contacts it is important that you use the New Prospect, New
Client, new Vendor and New Employee buttons located on the corresponding tabs. Failure to do
so will result in what appears to be bizarre behavior as Studio Manager quickly refreshes the
screen (you see a blink) and then takes you to the first record in the existing category. This will
confuse you to no end, so we cannot emphasize enough using the buttons we provide rather
than the keyboard shortcut or FileMaker Pro menu choice for new record.
Page 3
Studio Manager 10 New Features
New Features in Contacts
Widescreen User Interface
If you have used a previous version of Studio Manager, you will immediately notice that our
screens are now wider and less deep than previously. This basic change in the graphical user
interface was done for two reasons:
1) FileMaker Pro 10, the underlying software application on which Studio Manager runs,
changed the look of the database by moving the Status Bar from the left to the top of the
window. The aspect ratio used in older versions no longer fit completely on the screen of our
laptops. We made Studio Manager screens about an inch less deep to accommodate.
2) The current trend is toward the use of larger monitors with higher resolution. Given that, we
widened the screens even more than an inch, so there is more horizontal width than ever,
while at the same time remaining narrow enough so that the whole screen will fit on a 13”
display (like what you might have on a laptop or what an administrative employee might
have on their desktop).
Contact Address Summary
Each entry screen in
Contacts features both
Summary and Edit tabs that
work in a similar fashion to
our inspiration:” Apple’s
Address Book. Only the
contact data that has been
entered appears on the
Summary. Your view of each
contact’s basic info is clean
and uncluttered. When it is
necessary to enter or edit
data, simply click on the Edit
button to access all of the
fully editable fields.
Prior to Studio Manager 10,
only the edit view appeared
in this portion of the window
and there were no tabs. [When viewing screenshots of Contacts (and the main Jobs entry
screen) in the Studio Manager 9 manuals, please keep this in mind.]
Page 4
Studio Manager 10 New Features
Contacts Quick Find
FileMaker 10 has script triggers that have allowed us to make Studio Manager 10 more
responsive. A great example is found in Contacts on the Table View screen where you are able to
filter your Contacts by company or name.
As in the above example, if you type “jo” into the Filter by Name field, instantly the list shrinks to
show only those people whose names begin with that letter combination. Works the same way
for Company. Only works for these two fields. The more letters you type, the fewer names or
companies you find. To get there, click on Table View under Commands in the button bar.
This quick and easy method creates a true found set for you without your having to to bother
with running an official find. In order to view your found set, just click on the Entry Screen button
(lower left) and choose the appropriate entry screen or list view.
These features are brand new,
so you won’t read any reference
to them in the user manual.
Contact
Picture
Most of us have come to expect
that a contacts database will
allow us to insert a photo into
the contact record. Because
Studio Manager is based on
FileMaker Pro, you can place
images in almost any graphics format into a container field. Since doing so is quite optional, we
added this picture box on the Admin subtab of the main Contacts tab. Click into the picture field
and choose Picture... from the Insert menu. A low resolution graphic is preferable [Why junk up
your database with huge hi res photos?] You may also copy and paste. You might place a logo
for a vendor – get creative. Images will be reduced to fit while maintaining aspect ratio. To
remove a picture just click on it and delete using the keyboard. Inserting a new image will
replace a previous one.
Page 5
Studio Manager 10 New Features
Employee Dashboard
When you launch SM10, you choose your name from a list of all current staff [User Manual, p5
“Opening...”]. By doing this, you are telling Studio Manager your identity.
Immediately after this you are taken to your record in Contacts where you can see at a glance
Today’s Timesheet and Today’s Tasks. Think of this as your Employee Dashboard. The
average creative employee may only need to update the data on this screen. You can enter your
time here if you like rather than opening the Timesheets module. [See Studio Manager 9 User
Manual: pages 18-19 for more, especially instructions for using the Tasks subtabs.]
Also new to this screen is the round green button (actually a tiny clock) at the right end of each
row of outstanding tasks. Click the button once and the job, default billing code and task gets
entered into today’s timesheet. All you have to type in are the hours and an optional description.
If need be, you can also change the Billing Code. By taking advantage of the features on the
Employee Dashboard, data entry can be reduced to a few seconds per line.
Page 6
Studio Manager 10 New Features
The mini timesheet
As you can see, the mini timesheet on the employee dashboard is called mini for a reason; there
isn’t room for a lot of detail.
For more options, click the underlined link button Today’s Timesheet in the menu bar on the
right. This will open Timesheets, the original, full-width view with all pertinent options.
Regardless of where the data is entered or changed, it appears in both places. [See the section
on Timesheets beginning on p56 of the user manual.]
Prior to Studio Manager 10, you had to use the full Timesheets form for all time entry. The mini
timesheet was added to make entering time easier and faster. Note that the mini timesheet
displays today’s entries only. Enter a new line in the mini timesheet by clicking the green clock
icon in today’s tasks (if tasks have been assigned).
If you prefer, you can also make a new timesheet entry manually by clicking on the round “plus”
button in the mini timesheet. Be aware however that this means you have to select and enter a
Job ID along with Billing Code, Description and Hours.
See the section on Job Assignments for more about assigning tasks.
Another way to enter a new line in today’s timesheet from the Jobs portal in Contacts. Click on
the Jobs tab (next to the Tasks tab) and you will see the green clock button. This works just like
using the green clock icon on the Tasks tab as described above with the exception that no task
is assigned. If you don’t use the job assignments feature, then you might prefer this method.
[See “What’s That?” on page 21 below for additional information.]
Page 7
Studio Manager 10 New Features
Why so many options?
Studio Manager 10 tracks multiple users working on multiple jobs at different billing rates based
on type of work. Each line in a timesheet needs to include the Job ID (to identify the job), a
Billing Code (to set the rate) and optionally, a Task number (to identify the task). This way
management can track hours by job, employee, billing code and task. Reports and screens
summarize and itemize this data. Accurate and timely billing helps cash flow. Management and
coordination of jobs in progress improves. More accurate estimates lead to more profitable jobs.
This infrastructure underneath your creative work keeps business details routine and orderly.
Less time is spent improvising (like digging up lost information at the last minute).
Setting Some Employee Defaults
Assign a unique Employee ID (their initials) and a Default Billing Code for each person
whose time will be tracked. For consistency, make the code 2 or 3 letters. Do this on the Admin
tab on the Employee Dashboard. It is actually quite common for one person to use one
Billing Code more than any other on their timesheet. That’s the one to set as a default. Do
this to save on the time required for data entry. The default can be changed at any time.
[See page 18 in the User Manual for Studio Manager 9 for more about entering data for
employees.]
Page 8
Studio Manager 10 New Features
The Deadlines Calendar
Studio Manager 10 has a calendar view now. Task deadlines are displayed on a calendar for
each month as well as in a week view. You can filter that calendar by person responsible, job or
client. The square for today’s date has a blue tint. Late tasks turn red automatically.
To see tasks on a calendar, all you need to do is assign due dates and then view the calendar.
To get to the Calendar, just click on the icon button that looks like a little calendar
from your Employee Dashboard, from a client record in Contacts or from Jobs.
To filter the calendar view by person, job or client, select the Employee ID (Who),
Job ID or Client ID from the pop-down lists at the top right on the calendar. There is a
convenient Print Calendar option in the button bar.
The Job Schedule found in previous
versions of Studio Manager is still there.
[See page 35 in the User Manual.]
Compare that to this calendar to see
which you prefer. While the 2 and 4
week schedules can be started on the
week of your choice, the calendar view
is always for the month or week you
have chosen. Since most folks are
accustomed to using a wall calendar or
software that offers you month and
week views, we added this, using only
the scripting and layout tools within
FileMaker. The result is a calendar that
works fast and that can be customized.
Hover over a task to see the task
name in full along with the Job, who is
assigned and their roles. The yellow info
box is an example of a Tooltip.
Page 9
Studio Manager 10 New Features
The calendar screen for job deadlines shows you what you want to see in a format that
your brain has been trained to like.
An interactive screen lets you view what you want without running a report. It helps you think
and problem solve while browsing through the relevant data. You can click into a task to move
dates around to optimize work distribution and scheduling. Unlike fancy, dedicated calendar
programs, you cannot just drag tasks from one day to another – you change the due date on the
Task Detail screen. Click on the little icon to the right of the date and choose a new one.
Our approach is what
is called Decision
Support. It respects the
power of the human
brain. In the early days
of computing, the
machine was glorified
and humans were
handmaidens to the
machine. When
computers cost
astronomical sums, that
made some sense. But
the tables have turned
and humans are back
on top. The machine is
here to serve us, to
augment our ultrapowerful human
capabilities. Studio
Manager doesn’t try to
figure out the best
scheduling. It just
provides all the visual
support, responsiveness
and ease of use we can think of so that you can use your street smarts and sense of who is
overworked and what can wait, to problem-solve.
Click on a task in the calendar to bring up a compact window that you can edit.
When you are done editing, buttons along the bottom of the window allow you to:
1. Close to save changes and return to the Calendar
2. Go to the full Tasks entry screen or
3. Go to the Job that the task is for.
Page 10
Studio Manager 10 New Features
Sometimes you need to focus in on a certain week.
When that happens, just click the thin sidebar on the left of
a week to drill down into that week for a closer look with
lots of room to view more tasks per day with longer task
names.
The Week View
Now you’ve got room to see at a glance two lines of text
for each task. You can still hover over a task to see more
information. This Tooltip can be modified to show
additional (or fewer) fields like task description or task
notes.
Just like with the calendar month view, you can click a
task to pop-up a compact edit window to make adjustments to deadlines or task
assignments.
We’ve put in 12 rows for up to twelve deadlines for any given weekday including weekends in
thinner columns for special situations.
The buttons at the top left let you return to the month view with a single click or look at last
week, next week or go directly to this week. You’ll be able to zip around to your heart’s content.
This is not an idle luxury or entertainment. Being able to move as fast as you think is vital to take
full advantage of your brainpower.
Page 11
Studio Manager 10 New Features
Slip Task Due Dates
In the dynamic world of creative services, things change all the time. This feature allows you to
move the Due Date (deadline) of dependent groups of tasks for a particular job, forward or
backward in time to allow for some creative project planning.
On the Tasks tab in Jobs, start by clicking on the task where you want the slipping to begin.
Then click on the yellow button with the obvious name: Slip Dependent Tasks. Up pops a dialog
box with a couple of fields that are way to wide because all you are going to do is to enter a
number. To push tasks farther into the future, enter a positive number. If you would like to have
these tasks completed sooner than originally specified, then make it a negative number by
simply typing a minus before the digit.
Most tasks must be complete prior to the beginning of subsequent tasks. In most cases you will
have marked these tasks as dependent. Sometimes a task, like a client meeting, will be
scheduled for a particular day but may not be dependent upon other tasks. If this is the case, do
not mark the dependent checkbox.
To slip just those tasks that are
dependent, enter the number of days
in the first field, labeled Days, in the
dialog box. Click OK and all incomplete tasks that
are marked as dependent will slide the number of
days you request, skipping weekends and holidays. The list of holidays can be edited on the
Holiday List tab in Billing Codes.
To slip all tasks, even those not marked as dependent, enter just the letter ”y” into the Slip All
field, then click OK. You may want to do this when an entire project is postponed or morphed
into a rush job. [This is a brand new feature in Studio Manager 10.]
Page 12
Studio Manager 10 New Features
Job Assignments
When you set up a new job, take the time to assign the people you need to perform that
job. By doing so, you save time for everyone working on the job as now Studio Manager can
shorten job lists to only those relevant to the current user when entering time (or to the traffic
manager assigning people to tasks). [Assigning people to jobs and tasks is a brand new feature
in Studio Manager 10.]
How to Assign People to a Job
We didn’t implement job assignments until we could think of a way to make it dead simple. FIrst,
we’ll describe what it is like to assign people to a job, then we will cover the brief one-time setup you’ll need to do to get Job Assignments going and flowing.
Once the job is created, you’ll see a blank tab in the upper right quadrant of your Jobs
screen where people go. Click the plus sign to go to the assignment screen for a minute. We
created a dedicated screen to make the process as easy as possible.
[This is a brand new feature, so there is no page to reference in the Studio Manager 9 User
Manual.]
Page 13
Studio Manager 10 New Features
The Job Assignment Screen
Click the right-pointing arrow in the Assign column in the portal on the left side (People
Available) to assign someone to this job. As you assign people, they move from left to right. If
you make a mistake and assign someone you don’t want, use the left-pointing arrow on the right
side (People Assigned) to remove them from this job.
While you are having fun, select the role you want each person to play on this job. That’s
pretty easy because in the set-up we describe below, you’ll assign each employee or freelancer
a default role which will come in automatically. All you have to do is make exceptions as needed.
In the example above we have a very small shop and we’ve already assigned three people by
clicking the Assign arrow for the people we wanted.
When done, just click the Back to Entry Screen button. Making job assignments takes a few
seconds in most cases. The power of this step however is huge. This enables Studio Manager to
show a custom list of jobs for each employee.
How do you set this up on day one?
1. Go to File menu, chose Manage and then Value Lists. Locate CT Job Roles (you may have
to scroll down). Double-click or highlight the line and click the Edit... button. Change the list
of job roles to match the roles in your shop. Make sure that each role is on a separate
line. Cut and paste to put them in alphabetical order. Only use abbreviations that are familiar
to everyone. Click OK to close the edit window and OK again to close Manage Value Lists.
2. On the Employee tab in Contacts, on the Admin tab in the upper right quadrant of the
screen, select the default role you want for each regular employee or freelancer.
Remember, you can always change their role on a job by job basis, so this is just their
primary role.
Page 14
Studio Manager 10 New Features
Tracking Time by Task
We’ve added time tracking by task on a custom basis for some of our customers. This version
of Studio Manager is heavy on the task management side of creative services operations.
Yes, creative services groups need to deliver great design, have wonderful people and provide
brilliant marketing strategy. But, they also need to execute. That means all this great stuff is
delivered on time and on budget. And, that’s where Studio Manager 10 will help you out so you
can do more and better of the fun stuff. That is what information infrastructure is for – to make
life easier and better!
While you are assigning people to
tasks, you have the opportunity to put
in a duration for how long you expect
a task to take (you being traffic
manager or slave driver whichever title
fits best). That’s called the budgeted
hours column on the tasks tab. If you fill
that in, the employee will see remaining
hours on his or her task list.
The remaining hours number is accurate if your employee’s time entries include what task they
were working on, in addition to the billing code. Now we don’t want to add work to your hardworking employees and freelancers – unless we can take work away elsewhere to make up for it.
So, we decided to let employees click on their task and job lists to auto-fill in the drudge part of
their time entries so all that is left is description and time. This happens when they use the Mini
Timesheet on the Employee Dashboard. We wanted to allow for individual differences and
preferences, so we did not junk up the tried-and-true timesheets table and full-sized entry
screen. There you will find a little pop-down list of tasks for the person and the job they’ve just
selected. So, it’s not hard at all to select the proper task for the time used.
Page 15
Studio Manager 10 New Features
Invoice Graphics
One of the most important “reports” that you generate from Studio Manager is the invoice.
This is the document that requests payment from your clients and specifies when you are to be
paid. Producing invoices promptly, accurately and personalized to your business is critical to
maintaining a profitable cash flow.
You have always been able to add custom graphics to Studio Manager forms by inserting them
via the Layout mode. Now, for the first time, you are able to quickly add custom logo, logotype
and text without needing the skill to adjust layouts.
Here’s how it works. Sometimes you want to produce a PDF of an invoice that contains graphic
images like your logo to send via email or for in-house purposes. Sometimes you want to print
an invoice onto your letterhead so that you can mail or give it to your client on paper. Each time
you go to print an invoice, Studio Manager gives you the option to print to Paper or to PDF or to
Edit. When you select Paper, no graphics are printed and it is expected that you will print onto
your letterhead. Edit takes you to a screen where you can see the invoice with or without
graphics and where you can edit the wording, should you choose.
When you select PDF, the graphics
appear. In the print dialog box you can
choose to save the PDF or to mail the
PDF. If you choose Mail PDF then your
PDF is sent directly to your email
application and attached with a generic
name. We recommend that you choose
to save the PDF so that you can give it a
meaningful name and store it where you
like to store invoice PDFs. Once this is
done you can send the PDF via email by
creating a new email and attaching the
PDF just created, or you can choose
Print Invoice again only this time go
directly to email. Both methods work to
attach the PDF to an email but you will
have a more useful document if you
save and name the PDF first. Either way
it is up to you to fill in the standard email
fields like To and Subject.
Page 16
Studio Manager 10 New Features
Here’s what you do. These instructions apply if would like to insert your own graphics into your
invoice using this quick and easy method. Please note that using this method is optional and not
very flexible. Graphics automatically fit in the upper left corner of the field and crop to fit if they
are too tall or wide. Although
lacking the control that a
graphic designer might want,
these fields offer an easy way
for the folks who do the billing
to personalize invoices.
Open the Invoices module and
click on the More Info tab.
Then click on the Invoice
Graphics subtab. Here you
see 2 different container fields.
You cannot type into either
field. The larger one
(zg_Invoice_Logo) appears in
the upper left area of the
invoice and is intended for
your logo. Since this is for a
PDF, please use a low
resolution version of your logo,
perhaps one that has been
optimized for the web. Prepare
by sizing this graphic to the
physical dimensions you
desire and by cropping it so
that the graphic does not
contain margins. You will have the best results if the background is white or transparent.
Although you can paste in a graphic, it works better if you choose Picture... from the Insert
menu.
The 2nd container field is labeled zg_Invoice_Footer_Graphic and is intended for a graphic of
your company name, address, email, phone, etc. Again, you will have best results if you create
this block of type, colorize and size it as you wish and crop it tight before placing it using the
Insert:Picture menu.
Page 17
Studio Manager 10 New Features
Enhanced Billing Control
This applies to you if you bill based on actual job costs. This is a feature request from several
of our customers.
Sometimes it is prudent for you to invoice a client for some, but not all, time and expenses.
In Studio Manager 10 you can specify which items to exclude before creating the invoice.
Temporarily put items on hold or designate them as unbillable before you throw the switch and
have Studio Manager create a still editable bill for you from actual time and expenses. As usual
time is billed at your billing rates and expenses are marked up to cover the risk you take when
buying things on behalf of your client.
Items that have already been invoiced are automatically
marked as Billed and show up in green. Items with a
billing status of Hold turn orange and Unbillable items turn
red. Items that have yet to be billed are black.
Start by reviewing the services (time) and expenses for the
job you wish to bill from the Job Costs tab in Jobs. You only
need to adjust the Billing Status to mark a line as Hold or
Unbillable. When that status changes, and you want to bill it,
just delete the status so that it becomes blank. Simple as
that. Easy as pie.
Page 18
Studio Manager 10 New Features
Job-related Communications
In Studio Manager 10 it’s easy to produce and capture as data the email communications
that you send to other staff and to your customers. No more searching through your email
program for messages about a particular job. Just use the “mail” button on your Employee
Dashboard or on the Summary subtab of any entry screen in Contacts. The capacity to send
email is built into FileMaker Pro 10 and Server 10. This makes it easier than ever for you to
create and send email right from Studio Manager. Having a record of all correspondence about a
particular job, person or company enables you or a manager to quickly group and review those
messages right along with any notes that you may have entered.
Look for this button...
Recall that once you have logged in, Studio Manager remembers
who you are. Any email you send is marked as coming from you.
Email to another Employee
On the Employee Dashboard, in the User subtab, you will see the names of other
employees. Studio Manager 10 comes with places for up to 9 names (this can be customized to
add more if needed). Click on the name of the employee to whom you wish to send a message.
Then click the blue mail button. Up pops a modal window that is dated today and addressed to
them. Enter a Subject that summarizes the content of your message.
Choose a JobID from either list. The list on the left only shows those JobIDs to which they have
been assigned. This is usually a much shorter list than all active jobs, which is what you get on
the right. This step is key to linking this email to a particular job.
Add the JobID to the Subject line from
one of the buttons at the top of the
window. You can append the JobID to
either the beginning of the subject, or
at the end. [Note: Create a company
standard, like at the start of the subject,
so that you can sort and locate all
email for a job easily.]
Email to a Prospect
In Contacts click on the Marketing tab
and find the Prospect to whom you
wish to send an email. Click the blue
mail icon on the Summary tab.
Page 19
Studio Manager 10 New Features
Email to a Client
Works just like email to a Prospect only this one is going to someone who is already a customer
and who has been given the Category of Client, so use that tab.
Email to a Vendor
Works the same. If there is not an appropriate JobID then just leave that blank. The message will
still be linked to you and to the vendor.
Email to any Contact
Use the round blue mail icon/button to send an email to anyone in Contacts who has an email
address.
Important things to keep in mind
Studio Manager knows who you are and will allow you to send an email to anyone in Contacts
and keep track of it all. But the software does not know which computer you are using, yours or
someone else’s. If for some reason you sit down at someone else’s computer and Studio
Manager is already open, Re-Login (command+0 on a Mac). Re-login as yourself.
When setting up Studio Manager we recommend sending to an E-Mail Client (like Apple Mail)
rather than using the SMTP option in FileMaker or FileMaker Server. The set-up for this is done
in via the Manage Scripts function.
[Refer to page 31 of the Installation and Setup Manual for more information on using
ScriptMaker, called Manage Scripts in the Scripts menu in FileMaker Pro 10.]
Email Signature
Each employee can enter a default Signature that will
appear on each email sent. From the Employee
Dashboard, just click on the Email Signature tab. This
works just like defining a signature in your email program.
In order to edit the text, click once on the signature to
select the field, then click the Edit label. As with all
underscored labels in Studio Manager, this label doubles
as a button. If you click it accidentally, you are given a
way to back out.
Page 20
Studio Manager 10 New Features
What’s that?
There is an arrow icon floating on each line on the Jobs tab for Employees. The line must contain
data in order for the arrow to show. It's in the Job Status column. It's an orphan button that
returns an error message if you click on it. Rather than do that, you might just want to go into
Layout mode and delete it.
In the next update, there will be buttons in this portal to take you to Job Assignments and to
Jobs. For now, the arrow button on the left end of each line takes you to Job Assignments. From
there click on the JobID link label to open that Job record.
Page 21
Studio Manager 10 New Features