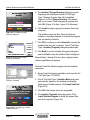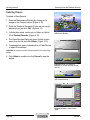
1
All The Right Type 3 version 3.5
July, 2001
Copyright by Ingenuity Works Inc.
Direct all correspondence to:
www.ingenuityworks.com
US Office:
1123 Fir Avenue
Blaine, WA
98230-9702
Canada Office:
3738 North Fraser Way,
Suite 101
Burnaby, BC,
V5J 5K8
#2004H
School Edition
ISBN 1-55030-004-0
#2006H
Lab Pack Edition
ISBN 1-55030-005-9
#2008H
Site/Network License Edition
ISBN 1-55030-006-7
Macintosh is a registered trademark of Apple Computer Inc.
Windows is a registered trademark of Microsoft Corporation
Software program and documentation made in Canada.
User Manual Written by Jude Edwards (Ingenuity Works) and Art Ney (Ingenuity Works)
Edited by Morgan Reid (Ingenuity Works)
IW#1310
Contents
Software Licensing Agreement.................................................................... 3
Introduction to All The Right Type 3 ............................................................ 5
1.1 Welcome to All The Right Type 3 .................................................................................... 5
1.2 Your Role as Teacher ....................................................................................................... 6
1.3 Understanding the Learning Sequence ......................................................................... 7
1.4 About This Manual ........................................................................................................... 8
System Requirements and Installations ..................................................... 9
2.1 Minimum System Requirements ..................................................................................... 9
2.2 Installation Overview ..................................................................................................... 10
2.3 Single Installation .......................................................................................................... 12
2.4 Lab Pack Installation ..................................................................................................... 13
2.5 Network Installation ....................................................................................................... 16
2.6 Setting Access Rights and Permissions ..................................................................... 24
A Tour of All The Right Type 3 ................................................................... 25
3.1 Starting the Program ..................................................................................................... 25
3.2 Signing On ...................................................................................................................... 26
3.3 Campus Orientation ....................................................................................................... 30
Getting Started ............................................................................................ 38
4.1 Teacher’s Password ....................................................................................................... 38
4.2 Classes and Student Names ......................................................................................... 39
4.3 Custom Drillfiles ............................................................................................................. 60
Ongoing Operation ..................................................................................... 69
5.1 Security ........................................................................................................................... 69
5.2 Student Records (for Teachers) .................................................................................... 72
5.3 Understanding The Learning Sequence ...................................................................... 75
5.4 Reviews ........................................................................................................................... 82
5.5 Large Font ....................................................................................................................... 83
5.6 Changing the Default Word-Processor ........................................................................ 83
5.7 Floppy Disks-Centralizing Student Records ............................................................... 84
5.8 Skill Building Puzzles .................................................................................................... 85
5.9 Backing Up the Database .............................................................................................. 87
5.10 Creating Custom Student Reports-Exporting Student Records ............................. 88
ATRT Administration Utility ........................................................................ 89
6.1 Single and Lab Pack Admin Utility ............................................................................... 90
6.2 Network Admin Utility .................................................................................................... 92
Technical Support ....................................................................................... 94
Page 2
Contents
Software Licensing Agreement
• NOTICE: YOU MUST READ THIS AGREEMENT BEFORE ANY USE OF THE PRODUCT•
For School Edition and Lab Pack users
This package contains licensed product. The product is licensed to you by Ingenuity Works
Inc., (not sold to you). You may only use the product in accordance with the terms and
conditions of this written agreement. If you use the product you are bound by the terms and
conditions of this written agreement. If, after reading this agreement you do not agree to its
terms, you must return the product unused, and in its original package to Ingenuity Works Inc.
along with the original invoice. You will be provided with a full refund.
As you read this agreement, remember that the words ‘You’ or ‘Your’ refer to the person who
initially obtained the product from Ingenuity Works Inc. or its dealer. In the case where the
product has been transferred in accordance with this agreement, then the words, ‘You’ and
‘Your’ refer to the transferee.
LICENSE. Ingenuity Works Inc. hereby agrees to grant you a non-exclusive license to use
the computer program and the accompanying documentation (the ‘Product’) in the
accompanying package, subject to the terms and restrictions set forth in this Agreement.
COPYRIGHT. The Product is copyrighted. You may not copy or reproduce any part of the
Product except for backup use according to the terms herein. You may however copy the
Posture Diagram (.pdf file on CD-ROM) and the Hand Position Chart (.pdf file on CD-ROM)
for your own use or as part of a course of instruction. In the event of any conflict with the
terms of a Copyright Act, Ingenuity Works Inc.’s Software Licensing Agreement shall prevail.
RESTRICTIONS ON USE AND TRANSFER. If you have licensed a School (Single) Edition,
you may install the program on one computer. If you have licensed a Lab Pack, you may
install the program on five computers. You may physically transfer the computer program
from one computer to another, provided that the Product is used by only one person in
connection with only one computer at a time. You may not distribute copies of the Product to
others. You may transfer the license granted under this Agreement together with the original
and a backup copy of the computer program provided that you provide this Notice and
Agreement to the transferee and bring it to the transferee’s attention. The Product may not be
modified or translated without written permission from Ingenuity Works Inc.
YOU MAY NOT USE, COPY, MODIFY OR TRANSFER THE PRODUCT, OR ANY COPY,
MODIFICATION OR MERGED PORTION THEREOF, IN WHOLE OR IN PART, EXCEPT AS
EXPRESSLY PROVIDED FOR IN THIS AGREEMENT.
• CONTINUED ON NEXT PAGE •
License Agreement
Page 3
Software Licensing Agreement (Continued)
NO WARRANTY OF PERFORMANCE. INGENUITY WORKS INC. DOES NOT AND
CANNOT WARRANT THE PERFORMANCE OR RESULTS THAT MAY BE OBTAINED BY
USING THE PRODUCT. ACCORDINGLY, THE PRODUCT IS LICENSED “AS IS” WITHOUT
WARRANTY AS TO ITS PERFORMANCE, MERCHANTABILITY OR FITNESS FOR ANY
PARTICULAR PURPOSE. THE ENTIRE RISK AS TO THE RESULTS AND PERFORMANCE
OF THE PRODUCT IS ASSUMED BY YOU.
LIMITED WARRANTY FOR CD-ROMS. To the original licensee only, Ingenuity Works Inc.
warrants the CD-ROM on which the computer program part of the Product is recorded and
the documentation part of the Product to be free from defects in material and faulty
workmanship under normal use and service for a period of up to one year from date of
purchase. If a defect in the CD-ROM or in the documentation should appear, the CD-ROM
and the documentation may be returned to Ingenuity Works Inc. at the address noted.
Ingenuity Works Inc. will replace the CD-ROM and documentation without charge to you. In
order to issue replacements, Ingenuity Works Inc. must be in receipt of the damaged goods.
LIMITATION OF LIABILITY. Neither Ingenuity Works Inc. nor anyone else who has been
involved in the creation, production or delivery of the product shall be liable for any direct,
incidental or consequential damages, such as, but not limited to, loss of anticipated profits or
benefits resulting from the use of the product or arising out of any breach of any warranty.
TERM. The license granted under this agreement is effective until terminated. You may
terminate it at any time by destroying the product together with all copies, modifications and
merged portions thereof in any form. It will also terminate if you fail to comply with any term or
condition of this Agreement. You agree upon such termination to destroy the Product together
with all copies, modifications and merged portions thereof in any form.
YOUR USE OF THIS PRODUCT ACKNOWLEDGES THAT YOU HAVE READ THIS
SOFTWARE LICENSE AGREEMENT AND AGREE TO ITS TERMS. YOU FURTHER
AGREE THAT THE AGREEMENT IS THE COMPLETE AND EXCLUSIVE STATEMENT OF
THE AGREEMENT BETWEEN US AND SUPERSEDES ANY PROPOSAL OR PRIOR
AGREEMENT, ORAL OR WRITTEN, AND ANY OTHER COMMUNICATIONS BETWEEN US
RELATING TO THE SUBJECT MATTER OF THIS AGREEMENT.
FINALLY. YOU AGREE THAT YOU HAVE BEEN AFFORDED A FULL OPPORTUNITY TO
RECEIVE A REFUND BEFORE USE OF THE PRODUCT, AND THAT THE
CONSIDERATION PAID FOR USE OF THE PRODUCT SHALL ONLY BECOME FINAL
UPON YOUR COMMENCING USE OF THE PRODUCT.
Page 4
License Agreement
Introduction to All The Right Type
Section 1
Introduction to All The Right Type 3
Welcome to All The Right Type
Note: As an update to version 3, All The
Right Type 3.5 provides enhanced
efficiency and stability, particularly in
networked environments.
1.1 Welcome to All The Right Type 3
This program is specifically designed for classroom use.
All The Right Type 3 teaches keyboarding (typing) in a
logical and straightforward way. The program contains all
the features that classroom teachers require to help
students learn proper keyboarding techniques.
All The Right Type 3 has improved on the PC version of
All the Right Type 2.0.2a and the Mac version 2.0.3 by
introducing several additional features. The new program
offers:
✔ Cross-platform capabilities to meet the challenge of
mixed platform environments (i.e. Macintosh and
Windows operating systems)
✔ New programming to meet the challenge of newer,
faster computers
✔ Ability to network from most server operating
systems such as NT, Linux, Mac OS 8.5 and later
✔ Student-level and teacher-level security option
✔ Teacher-access to the Maintenance Building while
students are logged on to their lessons
✔ Typing exercises displayed in large size fonts for
students with special needs
✔ New module to teach students how to use the
numeric keypad
✔ New feature to teach and improve students’ mouse
skills
✔ Modern graphical interface designed to hold
students’ attention
✔ Ability to export student records to a text file,
enabling teachers to create custom reports in other
application programs
Section 1
Page 5
Your Role as Teacher
Introduction to All The Right Type 3
1.2 Your Role as Teacher
It is important to read the section “Understanding the
Learning Sequence” in Section 5.3 in this manual. It
explains the three-step learning sequence used by All The
Right Type 3 to present each lesson and how tests are
taken after every third lesson.
Teachers play a vital role in helping students learn. By
using All The Right Type 3 in the classroom, teachers are
needed to assist students in:
✔ Developing correct posture for keyboarding
✔ Correct finger placement
✔ Proper key reaches
✔ Offering encouragement
✔ Using All The Right Type 3 to get the best out of the
students
Page 6
Section 1
Introduction to All The Right Type
1.3 Understanding the Learning Sequence
It is important for the students and teachers to understand
the recommended learning sequence.
If the teacher has selected the Sequence option, when
students sign-on they must enter the building that is
flashing. The drill they select will be the first lesson in the
lesson list shown in gray print. The red lessons are
completed lessons.
Understanding the Learning Sequence
Note: In the Standard Drillfile that comes
with All The Right Type, Test 1 has 3
parts (a,b and c). Tests 2 through 6 have
six parts each per test (a,b,c,d,e and f).
Please read sections 3.3 and 5.3 in this
manual for more information on Drillfiles
and the Learning Sequence.
The order of entering the learning buildings is Learning
Lab, Practice Pavilion then Skill Builder. Students
complete one lesson in each of these buildings and repeat
this cycle three times. When three lessons (in each of the
learning buildings) are complete, students can enter the
Test Center to begin the first test.
When Test 1 is complete, the Learning Lab again flashes
to direct students to enter this building and start the cycle
over with the next lessons.
Section 1
Page 7
About This Manual
Introduction to All The Right Type 3
1.4 About This Manual
Page 8
•
Section 2 contains all the technical requirements and
detailed installation instructions to get the program
running with your system. Network installers will be
most interested in this section.
•
Section 3 has been designed for evaluators and
teachers with limited time. It enables them to evaluate
only the main features of All The Right Type 3.5.
•
Section 4 Documents the steps necessary to
configure your database files prior to students starting
their classes. This section is provided especially for
instructors getting ready for their classes.
•
Section 5 provides detail and instructions for all other
aspects of ATRT. Instructors and occasionally network
installers will find this section useful.
•
Section 6 contains instructions for operating the ATRT
Administration Utility. This section tends to have a
more technical approach.
•
Section 7 is the place to look if you cannot resolve
problems by reading the other sections.
Section 1
System Requirements and Installations
Minimum System Requirements
Section 2
System Requirements and Installations
2.1 Minimum System Requirements
Student and Teacher Workstations
PC
❑ PC with Pentium 75 MHz processor (133 MHz
recommended)
❑ 32MB RAM (64MB recommended)
❑ Super VGA graphics monitor
❑ 256 color display (high-colour 16-bit
recommended)
❑ 640 X 480 resolution display or better
❑ CD-ROM drive
❑ Sound Blaster Compatible sound card
❑ Windows 95, 98, Me, 2000 or NT4.0 and later
Macintosh
❑ OS 8.6 and later
❑ Power Macintosh with a 66 MHz processor
(Recommended 133 MHz)
❑ 16 MB free RAM
❑ 256 color display (thousands recommended)
❑ 640 X 480 resolution display or better
❑ CD-ROM drive
Database Server (for Network/Site License Edition only)
❑ Mac OS 8.6 or higher, or Windows 95 or
higher (NT, 2000 recommended)
❑ Fixed IP address
❑ ATRT Database Server Application always
running
❑ Sufficient free RAM for the number of
students: 4MB for up to100 students, 8MB for up
to 400 students, 16MB for up to 1000 students
Section 2
Page 9
System Requirements and Installations
Installation Overview
The School Edition can be installed on
one computer only.
2.2 Installation Overview
The Lab Pack Edition can be installed
on up to 5 computers, but does not allow
for shared access to data files across a
network.
There are three types of Installation available on the CDROM: Single, Lab Pack, and Network. While the choice
you make is largely dependent on the Edition of All The
Right Type you have purchased, there are some other
factors to be considered.
The Network/Site License Edition
allows for installation on any number of
computers within the same building.
Shared network access is allowed.
There are 3 types of files which can be installed onto your
computer(s) in varying combinations:
•
the Database,
•
the Teacher program files (which allows data file
maintenance and class/student reporting in addition
to all student functions),
•
the Student program files (which allows students to
perform lessons, tests, and review their own results).
If you have purchased a Single User Edition, you can
install on one computer only. The installation is very
simple, and will automatically install all the files you need
in one step. Please go to the Single Install section. This
installation will give you the Teacher program files and a
database.
If you have purchased a Lab Pack Edition, you can install
on up to 5 computers. Your license allows any combination
of Teachers program files and Students program files on
those 5 computers. Perhaps the most common
combination is to install the Teacher program files on one
computer, and the Student program files on 4 others. Each
computer will have it’s own copy of the database. In this
configuration, the Teacher can create a database of
student names, and then copy the database to all the
other computers. Then, at the end of each lesson students
can export their results to diskette for import into the
teachers computer for convenience. You may also want to
install the Student program files on the same computer
where the Teachers program is installed, so that a student
can use this computer during class without seeing the
teacher’s maintenance functions on the menu.
Page 10
Section 2
System Requirements and Installations
Installation Overview
If centralized data gathering is not important, it might prove
easier to have the Teacher program files installed on all 5
computers, allowing for file maintenance on any computer.
With Lab Pack installations, it is usually important that
students always use the same computer each time they
come to class.
For those schools with a Network/Site License Edition,
there are even more options. In most cases, the best
advantage of the program is the centralized network
database. In this setup, the Database files are installed
onto a central file server for shared access from all
computers. The Teachers program files are then installed
on a small number of teachers’ computers, and the
Student program files are installed on all the students’
computers. All computers have access to one data file on
the server, and centralized records are always available for
the teacher. Follow the instructions in the Network
Installation section if this is the type of installation you
want. There are cases, however, where a network
installation is either not viable, or not desirable. In these
situations, an installation as described in the Lab Pack
section or even a series of many Single installations is
sometimes desired. Please follow the Lab Pack or Single
Install instructions in these cases.
Section 2
Page 11
System Requirements and Installations
Single Installation
2.3 Single Installation
Note: If you have licensed a School Edition it may only be
installed on one computer.
1. Insert the All The Right Type 3 CD-ROM.
Figure 2.1 All The Right Type 3 (Main)
Installer dialog box.
2. The All The Right Type 3 Installer (Main) dialog box
automatically opens on the desktop and displays
three types of Installer buttons.Click Install Single.
(Figure 2.1)
3. Click OK if you accept the License agreement.
4. The Installer (Change Directory) dialog box opens
showing the default path where All The Right Type 3
program files will be located. (Figure 2.2) To change
the path, Click Change Directory. Make the changes
as required and click OK. (Figure 2.3a Mac; Figure
2.3b Windows)
5. Click Install.
Figure 2.2 The Installer (Change
Directory) dialog box.
The installer begins the copying process. When the
program is finished installing, a dialog box opens
indicating the files were successfully installed.
6. Click OK to continue (or click Uninstall to remove the
All The Right Type 3 files).
7. The Installer (Main) dialog box opens. Click Exit to
leave the program.
Figure 2.3a Choosing the Install
Directory—Macintosh.
8. Remove the CD-ROM. There will now be an All the
Right Type 3 icon on your desktop to use to start the
program.
If the Installer (Main) dialog box does not automatically open on the
desktop:
Windows Users:
• On the desktop click Start and select Run from the drop-down menu.
• Type D:\Installer.exe (where ‘D:’ is the CD-ROM drive). The ATRT 3
Installer (Main) dialog box should open.
Figure 2.3b Choosing the Install
Directory—Windows.
Mac Users:
• Double-click the ATRT v3 CD-ROM icon to open the CD-ROM folder.
• Double-click on the Installer icon to open the Installer (Main) dialog box.
Page 12
Section 2
System Requirements and Installations
Lab Pack Installation
2.4 Lab Pack Installation
If the Installer (Main) dialog box does not
automatically open on the desktop:
Note: A Lab Pack licensee may only install the program on
up to five computers. Student access to a central database
is not allowed.
Windows Users:
First we'll install the Teacher program files and database.
1. Insert the All The Right Type 3 CD-ROM.
2. The All The Right Type 3 Installer (Main) dialog box
automatically opens on the desktop and displays
three types of Installer buttons. Click Install Lab
Pack. (Figure 2.4)
3. Click OK if you accept the License agreement.
4. The Installer (Program) dialog box opens. Click
Install Teacher Program to install the appropriate files
to the teacher's computer. (Figure 2.5)
• On the desktop click Start and select
Run from the drop-down menu.
• Type D:\Installer.exe (where ‘D:’
represents the CD-ROM drive on the
computer being used for the install). The
All The Right Type 3 Installer (Main)
dialog box should open on the desktop.
Mac Users:
If the Installer does not automatically
open on the desktop:
• Double-click the ATRT v3 CD-ROM
icon to open the CD-ROM folder.
• Double-click on the Installer icon to
open the Installer (Main) dialog box.
Figure 2.4 All The Right Type 3 (Main)
Installer dialog box.
Figure 2.5 The Installer (Program) dialog
box.
Section 2
Page 13
System Requirements and Installations
Lab Pack Installation
5. The Installer (Change Directory) dialog box opens
displaying the default path where All The Right
Type 3 Teacher Program files will be linstalled.
(Figure 2.6) Click Change Directory if the default
path is not correct. Make changes as required and
click OK. (Figure 2.7a Mac; Figure 2.7b Windows)
6. Click Install to begin copying the teacher files to the
computer.
Figure 2.6 The Installer (Change
Directory) dialog box.
The installer copies the files. When the files are
installed, a message displays to indicate the program
was successfully installed.
7. Click OK to continue (or click Uninstall to remove the
installed files from the computer). The All The Right
Type 3 Installer (Program) dialog box remains open.
8. Click Back to exit the Installer (Program) dialog box
and click Exit to leave the Installer (Main) dialog box.
Figure 2.7a Choosing the Install
Directory—Macintosh.
Repeat Steps 1 through 8 for any other computer where
teacher capabilities are required.
Next we'll install the Student program onto the students'
computers.
1. Move to the first student workstation and insert the All
The Right Type 3 CD-ROM.
Figure 2.7b Choosing the Install
Directory—Windows.
2. The All The Right Type 3 Installer (Main) dialog box
automatically opens on the desktop and displays
three types of Installer buttons. Click Install Lab Pack.
(Figure 2.8)
3. Click OK if the license terms are acceptable.
4. The Installer (Program) dialog box opens. Click
Install Student Program to install the student files
onto this computer. (Figure 2.5)
Figure 2.8 All The Right Type 3 (Main)
Installer dialog box.
Page 14
Section 2
System Requirements and Installations
Lab Pack Installation
5. The Installer (Change Directory) dialog box opens
showing the default path where All The Right Type 3
Teacher Program files will be located. (Figure 2.9)
Click on Change Directory if the default path is not
where the files are to be installed. Click OK when the
path is complete. (Figure 2.10a Mac; Figure 2.10b
Windows)
6. Click Install.
The appropriate files copy to the student workstation
and on completion a message displays indicating the
Student Program has successfully installed.
7. Click OK to continue (or Uninstall to remove the
files).
Figure 2.9 The Installer (Change
Directory) dialog box.
Note: If you are installing into a folder
that already contained a previous version
of ATRT3, the database will be updated
to version 3.5 format.
8. Click Back to exit the Installer (Program) dialog box
and click Exit to leave the Installer (Main) dialog box.
Repeat Steps 1 through 8 for each student
workstation.
Figure 2.10a Choosing the Install
Directory—Macintosh.
Figure 2.10b Choosing the Install
Directory—Windows.
Section 2
Page 15
System Requirements and Installations
Network Installation
Note to users updating from previous
versions of All The Right Type 3: The
Network/Site License edition of ATRT 3.5
uses an entirely new database module.
Please pay particular attention to the new
specifications and instructions.
2.5 Network Installation
If the Installer (Main) dialog box does not
automatically open on the desktop:
Communication between the Student / Teacher programs
and the database is not via a path/file name, but rather via
the IP address of the database server computer. For this
reason, the student and teacher users do not need any
access rights to the folder containing the data files.
Windows Users:
• On the desktop click Start and select
Run from the drop-down menu.
• Type D:\Installer.exe (where ‘D:’
represents the CD-ROM drive on the
computer being used for the install). The
All The Right Type 3 Installer (Main)
dialog box should open on the desktop.
Mac Users:
• Double-click the ATRT v3 CD-ROM
icon to open the CD-ROM folder.
• Double-click on the Installer icon to
open the Installer (Main) dialog box.
Page 16
The database must be installed on a computer with a fixed
IP address on your Local or Wide Area Network. There is a
database server program which must always be running
on the server in order for the student and teacher
workstations to be able to access the data.
The Network/Site License allows for the installation of the
program on as many computers as you wish, provided
they are all within the same building. All The Right Type 3
allows for the support of any number of schools attached
to a single database server. You must obtain a separate
Network/Site License for each school to be attached to the
database. If you are in doubt, please contact Ingenuity
Works.
Section 2
System Requirements and Installations
Installing Database
Preparing for the installation of the database server
• You must know the IP address of the computer
•
You must know the School name(s) for all schools
to be using this installation of the ATRT database.
•
Ensure that the computer meets the minimum
System Requirements specified in Section 2.1.
Network Installation
Note: This procedure must be performed
at the server (or the workstation
designated to act as the database server
for ATRT). The installation of the
database cannot be done over the
network. You must have physical access
to the database server.
Note to Linux Users: If you are installing
on a Linux server, please contact
Technical Support at Ingenuity Works, Inc
for detailed instructions.
1. Ensure that you are signed onto the database server
as an Administrator with full access rights. Disable
any desktop security system which might be running.
2
Insert the new all The Right Type 3 CD-ROM into the
CD-ROM drive of the database server.
3. The All the Right Type 3 Installer (Main) dialog box
automatically opens on the desktop and displays
three types of Installer buttons. Click Install
Network. (Figure 2.11)
4. Click OK if you accept the license agreement
Figure 2.11 All The Right Type 3 (Main)
Installer dialog box.
5. Enter your Site License password and click Next. (If
you are installing All The Right Type Version 3.5 as
an update to a previous version, you will have this
password from a sticker on your original All The Right
Type 3 CD-ROM jewel case. If this is a new
installation, you will have the sticker on the jewel
case that came in this package.)
6. The Installer (Program) dialog box opens. Click
Install Database.(Figure 2.12)
Section 2
Figure 2.12 The Installer (Program)
dialog box.
Page 17
System Requirements and Installations
Network Installation
7. The Installer (Change Directory) dialog box opens,
displaying the default path where All The Right
Type 3 Database files will be installed. (Figure 2.13)
Click Change Directory if the default path is not
correct. Remember that the students and teacher
should NOT have any access rights to the folder you
choose. Click OK. (Figure 2.14a Mac; Figure 2.14b
Windows)
Figure 2.13 The Installer (Change
Directory) dialog box.
Note: If you are installing into a folder
that already contained a previous version
of ATRT3, the database will be updated
to version 3.5 format.
8. A dialog box displays allowing you to build a list of all
the schools which will be using this database
installation. Add schools by typing the school name
and clicking Add. The program will create a subfolder for each school you name, and a blank
database will be created in each sub-folder. Make
EXACT note of the names you assign. You will need
the information later. (Figure 2.15)
9. Click INSTALL to start the file copy process. The
appropriate files copy to the server, and on
completion a message displays indicating the
database has been sucessfully installed.
Figure 2.14a Choosing the Install
Directory—Macintosh.
10. Click OK to continue, or Uninstall to remove the
files.
Take a moment to read ahead to the next section
Installing Teacher Program. If you want to install a
"template" copy of the teacher program on the server,
go to the next section. Otherwise, proceed to step 11.
Figure 2.14b Choosing the Install
Directory—Windows.
11. Click Back to exit the Installer (Programs) dialog
box and click Exit to leave the Installer (Main) dialog
box.
Figure 2.15 Build a list of all the schools
which will be using this database.
Page 18
Section 2
System Requirements and Installations
Installing Teacher Program
1. Ensure that you are signed onto the computer as an
Administrator with full access rights. Disable any
desktop security system which might be running.
Network Installation
Note: This procedure can be installed at
the server, or at the teachers
workstation(s). The installation does not
make changes to Windows Registry, nor
to Mac Preferences. Read the Tips in the
margin for more information.
2. If the Installer is not already running, insert the All
The Right Type 3 CD-ROM into the CD-ROM drive of
the computer, and when the Installer (Main) dialog
box appears, click Install Network. (Figure 2.16)
3. Click OK to accept the license agreement
4. Enter your Site License password and click Next. (If
you are installing All The Right Type Version 3.5 as
an update, your password is on your original All The
Right Type 3 CD-ROM case. If this is a new
installation, your password is on the CD-ROM case
that came in this package.)
Figure 2.16 All The Right Type 3 (Main)
Installer dialog box.
5. The Installer (Program) dialog box opens. Click
Install Teacher Program. (Figure 2.17)
Tip: You can save time during network installation by copying the
program folders, including preferences, from the server machine to the
workstations. When you install the Teacher and Student Programs, the
server machine creates preference files, called teacher.iw and
student.iw. that record the database location.
Here's the shortcut (for both teacher and student workstations):
1. After installing the Database, Teacher, and Student Programs on the
server, but before running the Teacher and Student programs, copy the
ATRT Teacher Program folder from the server to every teacher
workstation. 2. Copy the ATRT Student Program folder from the server to
every student workstation. 3. If it is not already running, activate the
Database program on the server.
When the programs run for the first time, users will not have to type in
the IP address of the server. Users will be asked to select a School
Name when they first run the program.
If a user selects the wrong school during the first run of the program, you
can correct a preferences file by deleting it from the Windows folder
(Windows) or System:Preferences folder (Mac). Replace it with a good
one from another workstation.
You can also edit the files before sending them out. You can type the
school name, matching one of those in the Database folder, into the first
line of the teacher.iw and student.iw files. Users will not need to choose
a school name when they first run the program. Use Simpletext (Mac)
orNotepad (Windows) to edit preference files. You can also change the
port setting from its default of 3738. Example files are on the CD-ROM.
Section 2
Figure 2.17 The Installer (Program)
dialog box.
Note: If you are installing Version 3.5 as
an update, you will find the password on a
sticker on your All The Right Type 3 CDROM case. If this is a new installation, you
will have the sticker on the CD-ROMcase
that came in this package.
Tip: If you will be installing the Teacher
Program on more than one teacher
workstation, you may want to place this
installation into a ‘template’ folder on the
server, and copy to each teacher
workstation. By doing this, you avoid
visiting each workstation with the
CD-ROM. (More details on this page.)
Page 19
System Requirements and Installations
Network Installation
6. The Installer (Change Directory) dialog box opens,
displaying the default path where All The Right
Type 3 Teachers Program files will be installed.
(Figure 2.18) Click Change Directory if the default
path is not correct. The folder name you choose
should give some indication that it contains the
teacher version of the program. Click OK. (Figure
2.19a Mac; Figure 2.19b Windows)
Figure 2.13 The Installer (Change
Directory) dialog box.
7.Click Install to start the file copy process.
Figure 2.19a Choosing the Install
Directory—Macintosh.
Figure 2.19b Choosing the Install
Directory—Windows.
Page 20
Section 2
System Requirements and Installations
Installing Student Program
1. Ensure that you are signed onto the computer as an
Administrator with full access rights. Disable any
desktop security system which might be running.
Network Installation
Note: This procedure can be installed at
the server, or at the teachers
workstation(s) or students workstations.
The installation does not make changes
to Windows Registry, nor to Mac
Preferences.
2. If the Installer is not already running, insert the All
The Right Type 3 Version 3.5 CD-ROM into the
CD-ROM drive of the database server, and when the
Installer (Main) dialog box appears, click Install
Network. (Figure 2.20)
3. Click OK to accept the license agreement
4. Enter your Site License password and click Next. (If
you are installing All The Right Type Version 3.5 as
an update, your password is on your original All The
Right Type 3 CD-ROM case. If this is a new
installation, your password is on the CD-ROM case
that came in this package.)
Figure 2.20 All The Right Type 3 (Main)
Installer dialog box.
5. The Installer (Program) dialog box opens,Click
Install Student Program. (Figure 2.21)
Figure 2.21 The Installer (Program)
dialog box.
Tip: You will almost certainly be installing the Student Program on more
than one student workstation, so you may want to place this installation
into a ‘template’ folder on the server, which you should copy to each
student workstation. By doing this, you avoid visiting each workstation
with the CD-ROM.
Section 2
Page 21
System Requirements and Installations
Network Installation
6. The Installer (Change Directory) dialog box opens,
displaying the default path where All The Right Type
3 Students Program files will be installed. (Figure
2.22) Click Change Directory if the default path is
not correct. The folder name you choose should give
some indication that it contains the student version
of the program. Click OK. (Figure 2.23a Mac; Figure
2.23b Windows)
Figure 2.22 The Installer (Change
Directory) dialog box.
7. Click Install to start the file copy process.
Figure 2.23a Choosing the Install
Directory—Macintosh.
Tip: You can save time during network installation by copying the
program folders, including preferences, from the server machine to the
workstations. When you install the Teacher and Student Programs, the
server machine creates preference files, called teacher.iw and
student.iw. that record the database location.
Here's the shortcut (for both teacher and student workstations):
Figure 2.23b Choosing the Install
Directory—Windows.
1. After installing the Database, Teacher, and Student Programs on the
server, but before running the Teacher and Student programs, copy the
ATRT Teacher Program folder from the server to every teacher
workstation. 2. Copy the ATRT Student Program folder from the server to
every student workstation. 3. If it is not already running, activate the
Database program on the server.
When the programs run for the first time, users will not have to type in
the IP address of the server. Users will be asked to select a School
Name when they first run the program.
Tip: You may want to copy the Student
Program folder from the server to each
student workstation. By doing this, you
avoid visiting each workstation with the
CD-ROM. More details on this page.
(More details on this page.)
Page 22
If a user selects the wrong school during the first run of the program, you
can correct a preferences file by deleting it from the Windows folder
(Windows) or System:Preferences folder (Mac). Replace it with a good
one from another workstation.
You can also edit the files before sending them out. You can type the
school name into the first line of the teacher.iw and student.iw files. The
school name must match those in the Database folder. Users will not
need to choose a school name when they first run the program. Use
Simpletext on Macs and Notepad on Windows to edit the preferences
files. You can also change the port setting from its default of 3738.
Section 2
System Requirements and Installations
Starting the Database Server
All The Right Type 3 requires that the Database Server
program that you installed earlier on your server be
running at all times.
The program (application) file is called ATRTSERV and it
will be found in the directory in which you placed the
database. Using whichever operating system facilities you
wish, launch this application on the database server
computer.
Linking Workstations to the Database Server
When the installation is complete, start All The Right Type
3 on all student and teacher workstations prior to their first
signing-on. This is a required step only for the first time
the program is launched in order to set the link to the
Database server. In a large class and if the class is
advanced enough, instructions could be provided to the
students to allow them to set the path on the first launch.To
do this:
1. Double-click on the All The Right Type 3 icon at each
of the student and teacher workstations, to launch
the program.
2. The Enter IP Address dialog box opens requiring a
linkto the Database server to be entered. Enter the IP
address of the database server and click OK.
3. The School Selection dialog box opens. Highlight
the school name and click Select.
4. The progress bar on the All The Right Type 3 Start Up
screen fills in, indicating that the data is being
downloaded. When it is complete, a message
displays on the Start Up screen to "Click anywhere to
continue". Click anywhere on the screen to enter the
campus.
Section 2
Network Installation
Note: If the server machine is shut down
for any reason, the database server
application ATRTSERV must be
restarted. Configuring your server
computer's startup to automatically
relaunch the ATRTSERV application is
recommended.
Tip: For convenience, you may wish to
configure the program to be automatically
started whenever the computer is started.
On a Windows PC, place a shortcut to
the program in the Startup folder on your
Start menu. On a Mac, place an alias to
the program in the Startup Items folder,
and enable Startup Items in your Control
Panel.
It is also recommended that an icon be
placed on the desktop of the computer
for easy startup should the program ever
be shut down.
Note to users updating from previous
versions of All The Right Type 3: The
Network/Site License edition of ATRT 3.5
uses an entirely new database module.
Please pay particular attention to the new
specifications and instructions.
Tip: Another option for setting the
database paths on the workstations
would require more advanced students. If
there are numerous student workstations
to be set up, teachers may wait until the
first class launches the program and
provide instructions on how to enter the
path for the initial running of All The Right
Type 3.
Page 23
System Requirements and Installations
Setting Access Rights and Permissions
2.6 Setting Access Rights and Permissions
Single and Lab Pack Installations
During normal operation, the student and teacher
workstations all require read/write access to their own
Database folders.
Network Installations
With the new database server application used in All The
Right Type 3, it is no longer necessary for students or
teachers to have any access rights to the database
directory on the server. In fact, for security, it would be
best to ensure that they do not have any rights nor any
path mapped to the database.
The user/administrator account that is used to run the
Database Server program needs full read/write access to
the entire database directory, and all sub-directories.
During Installation
There are several desktop security systems in common
use in schools: Fortres, DeepFreeze, and others. It is
most often necessary to disable any desktop security
systems you might have running in order to complete the
installation.
Additionally, during installation, and during the first run of
the program, the user computers must have read/write
access to the Windows directory (Preferences folder on
Macs). This is to allow the program to create the
Student.iw and Teacher.iw files. Once those two files have
been created, it should not be necessary to have anything
beyond read-only access to these files.
Page 24
Section 2
A Tour of All The Right Type
Starting the Program
Section 3
A Tour of All The Right Type 3
Introduction
All The Right Type 3 is an interactive program designed to
teach keyboarding. It consists of two modules:
a) Learning buildings for students called the Learning
Lab, Practice Pavilion, Skill Builder and the Testing
Center. There is also the Records Library where
students can review their scores, and a Word
Processing Plaza for practicing with a word
processing program.
Figure 3.1 When the All The Right Type 3
‘Start-up’ screen is finished loading files,
click anywhere to continue.
b) Maintenance Building for teachers is used to
manage the student records and set the Options for
classes and students. Only the Teacher's program
has the Maintenance Building.
All The Right Type 3 comes with a default "drillfile" (a set of
lessons, skill builders and tests) called the ATRT Standard
Drillfile.
Figure 3.2 The Teacher's Campus.
3.1 Starting the Program
Start the program on the teachers computer by
double-clicking on the All The Right Type 3 icon
on the desktop. The shortcut/alias icon was
automatically created during installation.
When the All The Right Type 3 Start-up screen is finished
loading files, click anywhere to continue. (Figure 3.1)
The campus is the first screen that displays. The manual
section Campus Orientation describes the Campus
Buildings and their functions.(Figure 3.2)
Section 3
Page 25
Signing On Teachers Program
A Tour of All The Right Type
3.2 Signing On
Teachers Program
The Teacher's Program provides four possible ways to
sign on.
As a (Student) Guest
Figure 3.3 Accessing the File menu from
the Campus screen.
Generally students choose the appropriate student name
from the class records and open it to sign-on. All The Right
Type 3 loads and configures the proper options for the
students and keeps progress records automatically
updated in the system.
If the teacher or student does not want records to be kept
from one session to another or if student records have not
been set up, users can sign-on as a Student Guest.
To sign on as a Guest:
1. In the campus, click File from the menubar (top of
screen) and select Sign-On from the drop down
menu. (Figure 3.3)
Figure 3.4 There are two types of ‘Guest’
– ‘Student’ and ‘Evaluator’
Note: Records for Guests are maintained
for the current session only. They are
cleared out when the leaving the
campus. User record functions are
enabled in licensed copies of All The
Right Type.
Page 26
2. Click Guest. There are two types of Guest – Student
and Evaluator. (Figure 3.4)
3. Students select Student Guest which presents the
available drillfiles, including ATRT standard and any
custom drillfiles added by teachers. The program
uses only the default student options that teachers
have selected in the Maintenance Building (Option
screens).
Section 3
A Tour of All The Right Type
Signing On Teachers Program
As a Teacher Evaluator
Before continuing, or while assessing the program prior to
purchase, teachers may want to sign on to All The Right
Type 3 as a Teacher Evaluator Guest to discover how the
program behaves when various student options are
changed.
To do this:
1. In the campus, click File from the menubar (top of
screen) and select Sign-On from the drop down
menu. (Figure 3.5)
2. Click Guest. There are two types of Guest – Student
and Evaluator. (Figure 3.6)
Figure 3.5 Accessing the File menu from
the Campus screen.
3. Teachers select Evaluator. As an evaluator, teachers
become aquainted with all aspects of All The Right
Type 3 by trying out the student options. This is done
without running the separate Maintenance Building
program that is normally used to assign these
options to students. Students are not affected by
changes made here.
4. A dialog box will appear describing the Evaluator
mode. Click Edit to proceed to setup your desired
option.
Figure 3.6 To sign on as a teacher
evaluatorchoose Evaluator.
5. The Options dialog box will appear, allowing the user
to change any of the settings. Click OK when you
have made the desired adjustments
This mode provides teachers with a way to try all lessons
and to change any options without affecting the program
students are using. Try changing the various options and
seeing the effect it has on the student lessons. When
signed on as and Evaluator, you can always select
Options from the top menubar.
Section 3
Page 27
Signing On Teachers Program
A Tour of All The Right Type
As a Teacher
It is not normally necessary for the teacher to actually Sign
on as Teacher as the Teachers Program will always start
with the Teacher already signed in. If, however, the
program has been signed in as Guest or Student, there
will be a Sign on as Teacher caption on the Title Bar. Just
click on that caption to return to Teacher sign on status.
Teachers Signing-On to Student Records
Figure 3.7 Accessing the File menu from
the Campus screen.
Teachers can sign-on to student records from the teachers
campus using the same procedure as the students
although there is not usually any need to do this. A student
is not able to sign-on to a lesson until the teacher has
exited from his/her student record.
To sign on :
1. From the campus, click File from the menubar (top of
screen) and select Sign-On from the drop down
menu. (Figure 3.7)
The Maintenance Building is the management utility
provided to teachers to view and print student progress
and to set options that control how the program reacts. It
is not displayed while signed in as a student.
Page 28
Section 3
A Tour of All The Right Type
Campus Orientation
Student Program
The Student Program provides the same capability to sign
on as a Guest or Evaluator, but most commonly students
will sign on using their own name records.
Students Signing-On to Student Records
Once Student Records have been created by teachers,
students can sign-on to the lesson and start having their
progress recorded.
Figure 3.8 Select the appropriate class
name from the Sign-On dialog box.
To sign-on to the students campus:
1. Select the appropriate class name from the Sign-On
dialog box and click Open. (Figure 3.7)
2. Select the student name from the Student Selection
dialog box and click Select. Students names display
in the top menubar both in the campus and during
the lesson.
3. The Learning Lab building flashes to indicate to
students that this is the building to enter for the first
lesson. (This occurs when the Sequence option is
selected.)
Note: If teachers have entered a
message into the Class Option or
Student Option dialog box, the message
displays to students before they begin
their lessons.
Class 1A-Mr. Kim
Figure 3.9 Select the student name from
the Student Selection dialog box.
Section 3
Page 29
Campus Orientation
A Tour of All The Right Type
Maintenance Building
Teachers can set up student records, create custom
lessons, skill builders and tests, and control program
options to suit individual teaching preferences.
Word Processing Plaza
This option links you to a favorite word
processing program.
Practice Pavilion
Uses the same drill
material as Learning
Lab but with a speed
goal. The method of
practice can be set by
the teacher to standard
lines and reports or an
animated race using the
‘Game’ option.
Learning Lab
Teaches proper posture and
hand position. New keys are
taught with the focus on correct
finger reach without
measuring speed.
Records Library
Students can
view and print the
progress of their
work at any time.
Each building has
recorded results
of completed
lessons.
Skill Building
Students improve skills with a series
of graduated drills containing words,
sentences and short paragraphs.
Testing Centre
Tests are marked in accordance with
the standards used by leading typing
authorities. Testing method, goals
and time can be controlled by the
teacher.
Figure 3.8 Teachers’ Campus Overview
3.3 Campus Orientation
Start the program on the teachers computer by doubleclicking on the All The Right Type 3 icon on the desktop.
The shortcut/alias icon was automatically created when
the installation was performed.
When the All The Right Type 3 Start-up screen is finished
loading files, it indicates to “click anywhere to continue”.
The campus is the first screen that displays and by running
the mouse over the buildings the names of the buildings
become visible.
Page 30
Section 3
A Tour of All The Right Type
Campus Orientation
Maintenance Building
The Maintenance Building is only present on the Teacher's
Campus, and users running the Student program should
never see this building. The presence of this building is the
major distinguishing feature between the two programs.
Class and Student Records
A database is a collection of records, in this case storing
Student Records and individual program options for each
student. Student Records contain the student name, class
name, options selected, progress records and scores.
There is no limit (other than hard drive space) to the
number of Student Records that can be created.
All The Right Type has the Student Records organized
within Classes. The Teacher can create a record for each
Class, and associate default options with the Class record.
Then, as Student records are created within each class,
they will take on the default class option. Of course, these
options can be over-ridden for individual students as
desired.
The Maintenance Building is the utility teachers use to:
Manage student records by:
• Creating and naming student records
• Importing lists of student names
• Customizing and setting student options
Evaluate student results by:
• Monitoring progress for Learning Lab, Practice
Pavilion, Skill Builders and Tests
• Printing results either graphically or in text format
• Presenting Award Certificates
• Monitoring progress through the entire course
Section 3
Page 31
Campus Orientation
A Tour of All The Right Type
Drillfiles
A Drillfile is a set of Lessons, Skill Builders and Tests for
use with All The Right Type 3. Think of drillfiles simply as
typing exercises for each specific building. There is no limit
(other than hard drive space) to the number of custom
drillfiles that can be created and stored.
When working with Drillfiles, teachers use the
Maintenance Building utility to:
• Create a custom drillfile (Lessons, Skill Builders, and
Tests)
• Edit the custom material
• Cut and paste drills from another source (such as a
word processor)
• Print the custom lessons, skill builders and tests
Page 32
Section 3
A Tour of All The Right Type
Campus Orientation
Learning Lab - for New Key Lessons
In the Learning Lab, students learn proper posture, hand
positioning and mouse control. The first time students
enter the Learning Lab, the Posture Review and Hand
Position Review tutorials automatically play. When these
Reviews are complete, lesson 1 from the Learning Lab
lessons begins.
When students enter the Learning Lab again, the Review
tutorials do not play, but they are available optionally.
Students can select the appropriate button on the Learning
Lab dialog box and run either one as required. It is
important that students review these segments at the
beginning of the first few lessons.
Figure 3.9 In the Learning Lab, students
learn proper posture, hand positioning
and mouse control.
1. Click on the Learning Lab building on the Campus.
2. Select the first lesson and click Select. The first
lesson students choose is the first lesson shown in
gray print. (Red lines indicate that the lessons have
been completed.)
Students follow the instructions at the bottom of the screen,
working their way through the lesson. If an error is made in
the sections “Lets learn new keys”, the program displays
the correct reach and finger positions and pauses until the
correct character is typed. These lessons are not timed.
When the lesson is completed, a fireworks display appears
on the screen. Students can check their results by clicking
Show Results from the menu bar.
Results are recorded in the Records Library.
Figure 3.10 When the lesson is
completed in the Learning Lab, a
fireworks display appears on the screen.
Note: The Keypad Review can be run at
any time. It provides a tutorial for learning
numbers on the keypad. Results are not
recorded for these lessons.
Note: The Mouse Review is a way to
teach students dexterity and accuracy
when using the mouse. It provides a fun
way to practice mouse skills. Results are
not recorded.
Section 3
Page 33
A Tour of All The Right Type
Campus Orientation
Practice Pavilion - for Developing Speed and
Reinforcement
The Practice Pavilion uses the same drill material as
Learning Lab, but with a speed goal. The presentation
method is preset by teachers (in the Options screens) to
be Standard lines, (the default) or an animated Game.
1. Click on Practice Pavilion building on the Campus.
Figure 3.11 Students practice their skills
in the practice Pavilion.
2. Select the first lesson in gray print and this should
also be the same lesson number as completed in the
Learning Lab. Click Select.
3. Students click on any of the pre-selected speed
buttons or click Set my own speed and enter a WPM
speed. Click OK. (Figure 3.11)
4. When a lesson is complete in the Practice Pavilion, a
Congratulations screen displays. Click Show
Results from the menu bar and a Results Report is
displayed on the screen. (Figure 3.12)
Figure 3.12 When a lesson is complete
in the Practice Pavilion, a
‘Congratulations’ screen displays.
5. Click Error Details to review the lesson just typed to
see where the errors occurred. This helps students
understand where they need more practice. (Figure
3.13)
Results are recorded in the Records Library when a lesson
is completed.
Figure 3.13 Error Details helps students
understand where they need more
practice.
Page 34
Section 3
A Tour of All The Right Type
Campus Orientation
Skill Building - for Building Skills
In the Skill Builder building, students build speed and
accuracy with a series of graduated drills containing three
sections—isolated words, sentences, and a short
paragraph.
1. Click on the Skill Building on the Campus.
2. Select the next lesson, which will be the first line in
gray print. (Figures 3.14) (Lesson lines printed in red
are completed lessons.) It will be the same lesson
number that was completed in the Learning Lab and
the Practice Pavilion. (Figure 3.15)
Figure 3.14 Selecting a Skill Builder
lesson.
3. Upon completion of the “Isolated Words” section, an
Isolated Words-Results Report displays to allow
students to review speed and accuracy
accomplished in this lesson. Select Next Section.
4. The “Sentences” section displays an exercise and
when students have completed this section, clicking
Next Section starts the “Paragraph” section.
When all three sections are complete, the first 2 portions of
a puzzle are uncovered revealing a small portion of a
picture. As each of the Skill Builder lessons are completed
2 more portions are uncovered until the last lesson
completed reveals the entire picture. (Figure 3.16)
Figure 3.15 Students develop skills in
the Skill Building.
Results of the Skill builder lessons are recorded in the
Records Library.
Figure 3.16 As students complete the
skill builder lessons, the puzzle picture is
gradually revealed.
Section 3
Page 35
A Tour of All The Right Type
Campus Orientation
Testing Center - for Testing Progress
Tests are marked in accordance with rules used by leading
typing authorities. Testing methods, goals and time limits
can be configured by teachers. See Section 4-Getting
Ready for Class-Options and Their Implications. Notice
that test lesson 1 has only three tests to complete, but all
subsequent lessons have six tests each.
1. Click on the Testing Center building on the Campus.
Figure 3.17 Select the first lesson in gray
print in the lesson list.
2. Select the first lesson in gray print in the lesson list.
(The lessons in red and blue indicate completed
lessons.) Click Select. (Figure 3.17)
If Speed Goal mode and a goal value were selected by the
teacher on the Options screen, the program displays this
goal in a message box when the test is selected. It should
be noted that the goal, if selected, is just a goal. The
program will not treat it as a minimum threshold.
Figure 3.18 Testing in progress. The test
and practice environments are similar, so
students can focus on demonstrating
their ability.
Important: In the Testing Center,
students take tests after three lessons
are complete in all three of the learning
buildings. (Learning buildings are the
Learning Lab, Practice Pavilion and Skill
Builder.)
When OK is clicked to start the selected lesson, the
program calculates the one-minute mark and highlights the
target word. This is the word the students need to be at to
accomplish meeting the words per minute goal in the 1
minute time period. There is a warning sound when the
time is up. Students need to finish the test, even after the
warning sound, to have scores recorded. (Figure 3.18)
Results of Tests are recorded in the Records Library.
Important: The time does not begin until
the first letter of the exercise is typed.
This gives students time to get ready.
Page 36
Section 3
A Tour of All The Right Type
Word-Processing Plaza
1. Click on the Word-Processing Plaza.
A blank word-processing document opens on screen.
Students can learn to use a word-processing document as
an additional skill or teachers can prepare exercises as
added practice. This is an optional building and not part of
the learning sequence.
Progress and scores are not recorded for the WordProcessing Plaza.
If you want to change the default word processor setting,
refer to Section 5.6– Ongoing Operation–Changing the
Default Word-Processor, for details on how to change the
default setting to access another word processor
application.
Campus Orientation
Note: By default, the Word-Processing
Plaza uses the built-in Macintosh wordprocessor SimpleText, and WordPad is
used for Windows. (Windows NT
systems default to NotePad.)
Tip: It is recommended to use the default
word-processors.
Tip: If changing the default wordprocessor, it is recommended that
teachers agree on one word-processor
application to use for all classes.
Otherwise, each teacher will need to reset this each time, prior to the class
starting the lesson.
Records Library - for Reports
Click on the Records Library.
Students can examine their own progress records at any
time by clicking on the Records Library. (Figure 3.19)
If students have signed-on by selecting their class and
student name, all lessons they have complete in the
Learning Lab, Practice Pavilion, Skill Builder and Test
Center are available for review or print.
Figure 3.19 Students can examine their
own progress records at any time by
clicking on the Records Library.
When they sign-on as a Student Guest, the results for the
current session only will be recorded. Once they sign off
the marks are cleared out.
By default, reports display in text format. Students can also
view the reports in a bar graph format by clicking
Graphics. (Figure 3.20)
Students move through the different pages of the report by
clicking Next and Previous and they print their record by
clicking Print.
Figure 3.20 Students can also view the
reports in a bar graph format by clicking
Graphics.
Section 3
Page 37
Getting Started
Section 4
Getting Started
This section is intended primarily for the teacher(s)
responsible for preparing All The Right Type 3 for use by
students. We will cover most of the functions that must be
considered before students start using the program.
Throughout this section, it is assumed that the user is
already signed on to the Teachers Program.
Teacher’s Password
Note: To access the Maintenance
Building it is recommended that teachers
be assigned a password. This is to
prevent students from accessing the
Maintenance Building and potentially
deleting records or drills.
4.1 Teacher’s Password
To create the Teacher’s password:
1. Enter the Maintenance Building by clicking on its
image on the Campus screen (Figure 4.1)
2. A Teacher Password dialog box opens. Click
Change. (Figure 4.2)
3. If a password has not yet been created, use the Tab
key to by-pass the Old Password and to move to the
next field.
4. In the New Password field, type a password. This
password will apply to all teachers entering the
Maintenance Building.
Figure 4.1 To add students, start in the
Maintenance Building.
Tip: Launching All The Right Type 3 on
the teacher's computer will display the
teacher's campus. The Maintenance
Building is included as one of the
buildings on the screen whereas on the
students’ campus, the Maintenance
Building is not displayed.
5. Press the Tab key again to move to the Confirm
Password field and re-type the new password. This
confirms that it was typed in correctly the first time.
6. Click OK.
Figure 4.2 Enter your teacher's
password. If you are not using one yet,
click OK.
Page 38
Section 4
Getting Started
Tip: In the teachers' campus, teachers
can enter the buildings and try the
features to discover how the program is
organized. Options set here do not
affect the students. Marks are recorded
only for the current session and when
the program is exited the recorded
marks are removed.
Classes and Student Names
4.2 Classes and Student Names
All The Right Type 3 stores records in a hierarchical
database of Student Names stored within Classes. The
first step in setting up your system for use is to create the
list of Classes, and then record the individual Student
Names within those Classes.
Whenever a new Class is created, you have the option to
establish the default options that will be used by Students
within that class. The Class Options (and Student Options)
control the way lessons are presented to students.
Before creating classes, teachers should be aware of the
options and their effects.
Figure 4.3 The Class Options dialog box.
Section 4
Page 39
Getting Started
Classes and Student Names
Options and Their Implications
Class Name
Class names must be unique and can be a maximum of
30 characters long. It is helpful to give the class names a
meaningful name. An example would be Mr. Jones class
1A-Grd 5.
Student Name
Student Names must be unique within each class but a
student name can be repeated in any number of classes.
The name entered is displayed at the top of the program at
all times while the student is signed on.
Import Student Names
If you have a list of student names that you want to import
into a Class, use this button to import a list of student
names in text format.
Drillfile
Drillfile option specifies which drillfile students use when
they run All The Right Type 3. The default built-in drillfile is
called ATRT Standard Drillfile. Additional drillfiles which are
entered by teachers are called custom drillfiles. (See
Section 4.3 – Adding Custom Drillfiles.) To change the
drillfile, click on Drillfile and select a new one from the list
of available drillfiles.
Lesson Error Threshold
Lesson Error Threshold sets the accuracy needed to
automatically proceed to the next line by activating the
default button to be Next Line. Pressing the Enter/Return
key will display the next line to be typed in the current
lesson. Depending on the percentage of errors set, this
number of errors is accepted before changing the Redo
button becomes the default (this line). This option controls
the Learning Lab and Practice Pavilion in All The Right
Type 3.
Page 40
Section 4
Getting Started
Classes and Student Names
Penalty
Penalty option specifies the WPM deducted for each error
in a Skill Builder or Test. You may select an error penalty
between 1 and 10. For beginning students, we
recommend leaving the error penalty at ‘1’. Words Per
Minute (WPM) are calculated as follows:
WPM =
(keystrokes/5) + (errors x penalty)
Time in minutes
Lesson Error Event
Lesson Error Event option controls whether a sound or a
title bar flash will occur when a student makes an error in
the Learning Lab. The continual beeps may be disruptive
to some classes. Some students may feel uncomfortable if
everyone knows when they are making mistakes. To
substitute the beeping sounds, select Caption Flash.
Keyboard Style
Keyboard Style option sets the type of keyboard being
used at the workstation. The choices are Mini, Standard or
Ergonomic.
Practice Mode
Practice Mode refers to the way drills are presented in the
Practice Pavilion. The teacher sets whether a student will
use the Standard method or the animated Games
exercises. This depends on the age and motivation level of
students.
Standard mode - Students are presented with text lines to
type until the drill is completed. The students select the
speed-goal while the teachers can control the accuracy
needed to proceed automatically to the next line by setting
the penalty in the Options screen.
Game mode - Unlike games in other keyboarding
programs, the Games mode does not distract students
with falling letters or random letters popping up on the
screen. Nonetheless it is highly motivating and helps
increase the attention span of students.
Section 4
Page 41
Getting Started
Test Mode
Test Mode refers to the method of testing in the Testing
Center. There are two options. For each of these options
the teacher can preset the Speed Goal (words per minute)
or the Timed Writing time limit. The teacher can also allow
the students to make the choice by specifying User
Prompt.
Speed Goal mode requires that students complete all the
text presented in the test. It is recommended that the
teacher choose User Prompt. This permits students to set
their own speed goal. The tests are automatically and
accurately marked. Failure to meet a goal will not stop the
student from completing the test … the goal is only used
as a way to provide positive encouragement for the
attainment of the goal.
Classes and Student Names
Tip: It is recommended that the
Backspace option be unselected so
students can concentrate on their typing
speed and not be slowed down by the
backspace corrections.
Tip: Speed Goal mode is the preferred
method of doing tests.
Tip: Most people are most comfortable
with the Word Wrap option enabled. Once
the end of a line is reached, Word Wrap
moves the cursor to the next line
automatically, just as word processors do.
Timed Writing mode requires that students type for a
specific period of time. This system was designed for a
time when there were rooms full of typewriters and there
were few computers. The only way to mark fairly was to
stop everyone at the same time, collect papers and mark
them manually. Some teachers prefer this more traditional
system.
Word Wrap
If Word Wrap is selected, text is automatically wrapped at
the end of a line in the Skill Builder and Testing Center.
The text functions the same as a word processor, moving
the student to the next line automatically. Some teachers
may prefer to simulate the old fashioned typewriters which
required the carriage having to be pulled back between
each line.
Backspace Key
If Backspace Key is selected it will allow users to correct
errors using the Backspace key. If not selected
corrections will not be allowed.
Page 42
Section 4
Getting Started
Tip: It is recommended that one space
after a period be used. This is the
standard.
The story behind one or two spaces
after a period:
There was a time when you could identify
a professionally typed page by simply
checking to see if it had two spaces after
periods. Mechanical typewriters allotted
the same space for every letter, whether
it was a wide m or a narrow i. The period,
being narrow, looked out of place if only
one space was typed at ends of
sentences, therefore typing tests
recommended two spaces.
On today's computers unless a
monospaced font is used, such as
Courier to replicate the look of
mechanical typewritten work, the
characters are proportional. This means
the letter m takes up more space than
the letter I. With proportionally spaced
letters, one space after a period is now
the accepted rule.
Classes and Student Names
Display Lines
If Display Lines is not selected, the drill material will not be
displayed on the screen during a Skill Builder or Test. A
printed copy of the drill material will need to be provided to
each student to complete the test.
Use WAM
If Use WAM is selected, the program will replace the WPM
(Words Per Minute) abbreviation with WAM (Words a
Minute) on printed reports and on screen messages.
Sequence
If the Sequence option is selected students will be allowed
to enter the buildings only in order of the Flashing
buildings. The program will not allow students to enter
buildings at random.
Password
If the Password option is selected, a password will be
required when the students sign on to any student name. If
it is not checked students can sign on to any of the student
records.
Space After Period: One/Two
Space After Period option determines the number of
spaces between sentences in the built-in ATRT Standard
drill material. This is for sentences that are not at the end
of a paragraph. Here students should be pressing the
Enter/Return key.
Messages to Students
In the Class Options dialog box, this field is for teachers
wanting to type a message that will display to all students
in a specific class. The message appears when students
sign on to All The Right Type 3.
Messages can be entered that will display to specific
students only. These are entered into the Student Option
dialog box.
Section 4
Page 43
Getting Started
Classes and Student Names
Creating Classes
1. Enter the Maintenance Building by clicking on its
image on the Campus screen (Figure 4.4)
2. Enter the Teachers Password (If you are not using a
password yet, just click OK). (Figure 4.5)
3. A dialog box opens, asking you to Select an Option.
Click Student Records. (Figure 4.6)
Figure 4.4 To add students, start in the
Maintenance Building.
4. A Class Records box displays. Click Add. (Figure
4.7)
5. The Class Options dialog box opens. Type a class
name. (Figure 4.8)
Tip: It is best to create a name that easily identifies a class such as Mr.
Smith, Period 1A so students can locate their names faster.
Figure 4.5 Enter your teacher's
password. If you are not using one yet,
click OK.
Figure 4.6 When entering student
names. click Student Records.
Figure 4.8 The Class Options dialog box. Type in a class
name, Click Save.
Figure 4.7 The Class Records dialog box
displays. Click Add.
Page 44
Section 4
Getting Started
Tip: It is best to create a name that easily
identifies a class such as ‘Mr. Smith,
Period 1A in order that students can
locate their names faster.
Note: For a discussion of the Class
Options, see Options and Their
Implications at the beginning of Section
4.2, or click Help.
Note: The default options are
recommended for setting up your actual
classes and student names.
Creating Class and Student Records
6. Most schools use the suggested options, however all
options can be changed. Whatever values you set on
this screen will be used as the default values for
each student added into this Class.
7. Click Save.
8. The class name that was just entered will be listed in
the Class Records dialog box (Figure 4.9).
Creating Class and Student Records
(for non-networked computers)
Teachers create Student Records on their computer for
all students.
1. Copy the database file (data.v12) to a floppy disk and
go to each individual student workstation.
Figure 4.9 The Class Records dialog
box.
Section 4
2. Using the standard method for Windows or Macintosh
computers, copy the data.v12 file to each student
workstation’s hard drive into the Database folder. It
will overwrite the existing file. The student database
is now copied to each of the workstations and can be
used to sign-on.
Page 45
Getting Started
Creating Class and Student Records
Deleting Classes
To delete a Class Record:
1. Enter the Maintenance Building by clicking on its
image on the Campus screen (Figure 4.10)
2. Enter the Teacher’s Password (If you are not using a
password yet, just click OK). (Figure 4.11)
3. A dialog box opens, asking you to Select an Option.
Click Student Records. (Figure 4.12)
Figure 4.10 To add students, start in the
Maintenance Building.
4. The Class Records Dialog bo opens. Select a class
name from the list and click Delete. (Figure 4.13)
5. A message box opens indicating that a Class Record
is about to be deleted.
Important: All progress records and student marks for this class will be
deleted.
6. Click Delete to continue or click Cancel to stop the
delete.
Figure 4.11 Enter your teacher's
password. If you are not using one yet,
click OK.
Figure 4.12To access Class Records,
click Student Records.
Figure 4.13 Select a class name to
delete.
Page 46
Section 4
Getting Started
Copying Classes
Copying Classes
There may be a group of student names that teachers
want to copy to another class record. To do this:
1. Enter the Maintenance Building by clicking on its
image on the Campus screen (Figure 4.14)
Figure 4.14 Start in the Maintenance
Building.
2. Enter the Teachers Password (If you are not using a
password yet, just click OK). (Figure 4.15)
3
A dialog box opens, asking you to Select an Option.
Click Student Records. (Figure 4.16)
4. The Class Records dialog box opens. Select a class
name with the student names to be copied. Click
Copy. (Figure 4.17)
5. The Class Options dialog box opens with the class
names from the selected class listed. Enter a new
Class Name. (Figure 4.18)
6. Click Save.
Figure 4.15 Enter your teacher's
password. If you are not using one yet,
click OK.
7. The original class is duplicated under the new name.
Figure 4.16 When entering student
names. click Student Records.
Figure 4.17 Select a class, Click Copy.
Section 4
Figure 4.18 Copying a class. Enter a new Class
Name and click Save.
Page 47
Getting Started
Creating Student Records
Creating Student Records
Adding students one at a time
This section describes how to add individual students to
your class.
To add students to a class, you need an existing class. If
you need to create a new class, first go to Creating
Classes.
Figure 4.19 Start in the Maintenance
Building.
To Add a Student to a Class
1 Enter the Maintenance Building by clicking on its
image on the Campus screen. (Figure 4.19)
2 Type in the Teachers Password (If you are not using a
password yet, just click OK). (Figure 4.20)
3 A dialog box opens, asking you to Select an Option.
Click Student Records. (Figure 4.21)
4 The Class Records dialog opens. Select your class
by name and click Open.(Figure 4.22)
5 The Class Name/Student Name dialog box opens
with the Class Name at the top and the Student
Name section in the lower window. (Figure 4.23)
Figure 4.20 Enter your teacher's
password. If you are not using one yet,
click OK.
6 Click Add.
Figure 4.21 When entering student
names. click Student Records.
Figure 4.23 Click Add to add students
to a class.
Page 48
Figure 4.22 Select a class, Click Copy.
Section 4
Getting Started
Creating Student Records
7 The Student Options dialog box opens. Type the
Student Name into the appropriate field. (Figure 4.24)
8 Click OK. The student name entered is now listed in
the Class Name dialog box. (Figure 4.25)
9 To return to the Campus, click File on the menubar
and select Return to Campus from the drop-down
menu. Or click Exit or Cancel to back out of each
screen.
Figure 4.24 Type a student name and
click OK. If you are adding more
students, Click Multi-Add.
Options
The options control the way the All The Right Type 3
lessons are presented to students. See Section 4.2Getting Started-Options and Their Implications, or click
Help.
Figure 4.25 The student name you
added appears in the list.
Tip: If you have a group of students to be
added to the same class, see Using
Multi-Add to Speed Entry in the
following section.
Section 4
Page 49
Getting Started
Creating Student Records
Using Multi-Add to speed entry
Where a large list of student names need to be added, All
The Right Type 3 provides a capability to quickly enter all
the names, with reduced waiting for processing.
1. Enter the Maintenance Building by clicking on its
image on the Campus screen (Figure 4.26)
2. Enter the Teachers Password (If you are not using a
password yet, just click OK). (Figure 4.27)
Figure 4.26 To add students, start in the
Maintenance Building.
3 A dialog box opens, asking you to Select an Option.
Click Student Records. (Figure 4.28)
4. A Class Records box displays. The class names that
have been entered will be listed in the Class Records
dialog box. Select the class name for the students to
be added, and click Open. (Figure 4.29)
Figure 4.27 Enter your teacher's
password. If you are not using one yet,
click OK.
Figure 4.28 To access Class Records,
click Student Records.
Figure 4.29 Select a class name to
delete.
Page 50
Section 4
Getting Started
Creating Student Records
5. The Class Name/Student Name dialog box appears
with the class name at the top and an empty Student
Name section. Click Add. (Figure 4.30)
6. The Student Options dialog box opens. Type the first
student name into the appropriate field. Click MultiAdd.(Figure 4.31)
Figure 4.30 Click Add to add students to
a class.
7. You will now be ready to add another student name.
Continue typing names and after each student name
is added click Multi-Add. When all names are
entered, click OK.
8. There will be a short delay while the program
processes your list of names. All the names entered
will then appear under Student Names in the Class
Name/Student Name dialog box.
9. Click Exit to back out of each screen to get back to
the campus or click Return on the menubar and
select Return to Campus from the drop-down menu.
Figure 4.31 Type a student name and
click OK. If you are adding more
students, Click Multi-Add. When all
names have been added, Click OK.
Section 4
Page 51
Getting Started
Creating Student Records
Importing student lists from a text file
If teachers have an existing list of student names stored in
another document, it is possible to import all the names at
one time. The document must be in text format and should
be formatted with each student’s name on a separate line
followed by a carriage return <enter key>.
Example class files in the correct format for importing are
included on the All The Right Type 3 CD-ROM. The files
are called <mac_Import_Ex_Class.txt> and
<pc_Import_Ex_Class.txt> You can open a copy of one of
these files and follow its example to format your own class
files for importing.
Student name lists throughout All The Right Type 3 will be
sorted alphabetically by the names you provide, so to sort
by the students’ given name (first name), record names
with the students’ given name (first name) first, followed by
the surname (family name). If you prefer, though, names
can be entered with the surname first, in which case, lists
will be sorted by the students’ family names. Names can
include a limited amount of other information (such as
student numbers) if necessary. A maximum of 30
characters is allowed for each student name.
Each Class must be imported from a separate text file, and
the text files should not contain any extra records, such as
blank lines or ‘comment’ lines, as these extra lines will
result in extra student name records being created in the
Class list.
Figure 4.32 To add students, start in the
Maintenance Building.
Figure 4.33 Enter your teacher's
password. If you are not using one yet,
click OK.
Figure 4.34 To access Class Records,
click Student Records.
To import the student names:
1. Enter the Maintenance Building by clicking on its
image on the Campus screen (Figure 4.32)
2. Enter the Teachers Password (If you are not using a
password yet, just click OK). (Figure 4.33)
3
A dialog box opens, asking you to Select an Option.
Click Student Records. (Figure 4.34)
4. The Class Records dialog box opens. Click Add.
(Figure 4.35)
Page 52
Figure 4.35 Click Add.
Section 4
Getting Started
Creating Student Records
5. In the Class Options dialog box, enter a class name.
6. Click Import Student Name and a Windows or Mac
dialog box opens to browse to the student name
document. Select your text file and click Open
(Windows: Figure 4.36, Macintosh, Figure 4.37).
Figure 4.36 Browse to the text file
containing the class list and click Open.
7. There will be a short delay while the program
processes your list of names. All the names entered
will then appear under Student Names in the Class
Name/Student Name dialog box (Figure 4.38).
8. Click Save.
Figure 4.37 Browse to the text file
containing the class list and click Open.
Figure 4.38 Importing a class list. Click Import Student Name
to browse to the text file containing your class list.
Section 4
Page 53
Getting Started
Creating Student Records
Deleting Student Records
To delete an individual student record:
1. Enter the Maintenance Building by clicking on its
image on the Campus screen (Figure 4.39)
2. Enter the Teachers Password (If you are not using a
password yet, just click OK). (Figure 4.40)
3
A dialog box opens, asking you to Select an Option.
Click Student Records. (Figure 4.41)
Figure 4.39 To add students, start in the
Maintenance Building.
4. The Class Records dialog box opens. Select a class
name from the list and click Open (Figure 4.42).
Figure 4.40 Enter your teacher's
password. If you are not using one yet,
click OK.
Figure 4.41To access Class Records,
click Student Records.
Figure 4.42 Select a class name to
delete, and click Open.
Page 54
Section 4
Getting Started
Creating Student Records
5. The Class Name/Student Name dialog box opens.
Select a Student Name(s) from the list of students
and click Delete (Figure 4.43).
6. A message box opens indicating that a Student
Record is about to be deleted and to advise that all
progress records and student marks will be deleted.
7. Click Delete to continue or click Cancel to stop the
delete process.
Figure 4.43 Select a Student Name(s)
from the list of students and click Delete.
Changing Class Options
It is sometimes desirable to change all of the options for
every member of the class so that all students will be set
the same.
To change all options globally for an entire class of
students:
1. Enter the Maintenance Building by clicking on its
image on the Campus screen (Figure 4.44)
Figure 4.44 To add students, start in the
Maintenance Building.
2. Enter the Teachers Password (If you are not using a
password yet, just click OK). (Figure 4.45)
3
A dialog box opens, asking you to Select an Option.
Click Student Records. (Figure 4.46)
Figure 4.45 Enter your teacher's
password. If you are not using one yet,
click OK.
Figure 4.46 To access Class Records,
click Student Records.
Section 4
Page 55
Getting Started
Creating Student Records
4. The Class Records dialog box opens. Select a Class
Name from the list and click Edit (Figure 4.47).
5. The Class Options dialog box opens. Make changes
as needed and click Save (Figure 4.48).
Figure 4.47 Select a class name to
delete.
Note: Changes made here are ‘global’
and automatically change the options for
all students in the selected class. See
Section 4-Getting Ready for ClassOptions and Their Implications.
Important: By using this function, all
options for all students in the class will be
set to the values on the Class Options
screen.
Figure 4.48 Changing Class Options. Make Changes as
needed and click Save.
Page 56
Section 4
Getting Started
Creating Student Records
Changing Student Options
To change the options for a single student within a
class:
1. Enter the Maintenance Building by clicking on its
image on the Campus screen (Figure 4.49)
Figure 4.49 To change options, start in
the Maintenance Building.
2. Enter the Teachers Password (If you are not using a
password yet, just click OK). (Figure 4.50)
3 A dialog box opens, asking you to Select an Option.
Click Student Records. (Figure 4.51)
4. In the Class Records dialog box select a class name
from the list and click Open (Figure 4.52).
Figure 4.50 Enter your teacher's
password. If you are not using one yet,
click OK.
Figure 4.51 To access Class Records,
click Student Records.
Figure 4.52 Select a class name to
delete.
Section 4
Page 57
Getting Started
Creating Student Records
5. Select a student name from the Class Name/
Student Names dialog box and click Edit (Figure
4.53).
6. The Student Options dialog box opens. Make
changes as needed and click Save (Figure 4.54).
Figure 4.53 Select a student name from
the Class Name dialog box and click
Edit.
Figure 4.54 The Student Options dialog
box. Make changes as needed and click
Save.
Note: The changes made here will affect
only the selected students.
Page 58
Section 4
Getting Started
Creating Student Records
Moving Student Names
If students are to be moved to another class, teachers can
easily move the student name(s) accordingly. To do so:
1. Enter the Maintenance Building by clicking on its
image on the Campus screen.
2. Enter the Teacher’s Password (If you are not using a
password yet, just click OK).
Figure 4.55 Select a class name to move
students to or from.
3. A dialog box opens, asking you to Select an Option.
Click Student Records.
4. In the Class Records dialog box select one of the
class names that the students are being moved from
or to, and click Open. (Figure 4.55)
Class 1A-Mr. Kim
5. Click Move from the Class Name/Student Names
dialog box. (Figure 4.56)
6. In the Transfer Class dialog box, class and student
names will display in the left column. (Figure 4.57)
7. At the top of the right column, select the destination
class name. The destination class list displays.
Figure 4.56 Click Move from the class
Name dialog box.
8. Select student name(s) from one of the two columns
(selected names will turn red) and click on the > or
the < button to move the highlighted students over.
9. Click Close when done.
Figure 4.57 The Transfer Class dialog box provides a way to move
students from one class to another.
Section 4
Page 59
Getting Started
4.3 Custom Drillfiles
Teachers can create custom drillfiles for use with All The
Right Type 3. A drillfile is a collection of lessons, skill
building exercises and/or tests.
Using the Sequence Option
The Sequence option is a valuable tool for guiding
students through the process of learning skills. Drillfiles
that are used with the Sequence option turned on must
conform to specific structure. The ATRT Standard Drillfile
follows the structure for Sequencing.
You can create Custom Drillfiles with the structure to
enable Sequencing. If you want students to follow the
Learning Sequence with your custom drillfiles, the custom
drillfiles must conform to the structure described in this
section.
Custom Drillfiles
Note: The All The Right Type 3 Standard
drillfile that is included with the program
cannot be edited. It can be opened,
copied and saved with a new file name.
This new drillfile can then be edited as
required. All The Right Type 3 uses
drillfiles located in the Databases folder.
Note: There is no limit other than hard
drive space, to the number of drillfiles
that can be created.
Note: If the lessons are not in Sets of
3,3,3,1, then the Sequence option will be
turned off automatically by the program.
You may fill in any combination of
isolated words, sentences or paragraphs
but in order for sequence to work there
must be 3 Skill Building exercises.
NOTE: If the custom Drillfiles do not follow the rules for
Sequencing, the Sequence option will be automatically
turned off.
The rules for Sequenced Custom Drillfiles require that a
set of Learning Lab, Practice Pavilion, and Skill Builder
Exercises be matched to tests in specific ways. Exercises
and tests must be set in specific ratios. In addition,
exercises and tests should be labelled carefully to keep
them organized and working together.
First, there must be three Learning Lab Exercises, three
Practice Pavilion Exercises, and three Skill Builder
Exercises. This 3:3:3 set of exercises is the exercise
sequence. Keep in mind that the exercises you create
through the Lesson(Practice) mode are used as both
Learning lab Exercises and as Practice Pavilion Exercises.
Then, a minimum of one test and a maximum of twenty-six
tests can be set to follow the exercise sequence in that
drillfile. ATRT automatically labels the first test 1a. When
the first test has been entered, you can enter more tests to
work in sequence as part of the same custom drillfile. To
do so, override the automatic labelling for the second and
subsequent tests by typing 1b, 1c, 1c, ... 1z as you create
each test. In this way, the digit 1 associates the test with
Page 60
Section 4
Getting Started
Custom Drillfiles
Important: There are a small number of
non alphabetical characters that are not
accepted in drillfiles. A warning will
appear if any of these are entered.
Summary:
Sequenced Custom Drillfiles must follow
the structure 3:3:3:1a-1z
Minimum of one test (1a) to a maximum
of 26 tests (1a-1z) for each drillfile.
Maximum of nine custom drillfiles. Tests
for the second drillfile should be labelled
2a-2z.
the custom drillfile, and allows sequencing to remain on
while students complete all the tests in the 1a-1z set.
A Custom Drillfile that does not comply to these rules will
still work, but Sequencing will not be allowed. For
example, if three Lesson(Practice) exercises are created,
but only two Skill Builders, you will not be able to activate
Sequencing for that drillfile. When Sequencing is off,
students are not guided through the sequence of flashing
buildings.
There are limits on the number of custom drillfiles. If all
custom drillfiles were structured for sequencing, (in the
3:3:3:1a-1z ratio), and all custom drillfiles used twenty-six
tests, then a maximum of nine custom drillfiles could be
created, for a total of 234 tests labelled 1a, 1b, 1c,...1z,
2a..2z, and so on through to 9z. The numerical digit keeps
the tests with their own drillfile. The letter following allows
you to add additional tests to the same drillfile while using
Sequencing.
For example:
Learning Lab
Practice Pavilion
Skill Builder
Test
1 - Jones LL1 lesson
2 - Jones LL2 lesson
3 - Jones LL3 lesson
1- Jones PP1 lesson
2- Jones PP2 lesson
3- Jones PP3 lesson
1- Jones SB1 lesson
2- Jones SB2 lesson
3- Jones SB3 lesson
1a - Test
1b - Test
1c - Test
1d - Test
1e - Test
4 - Smith LL1 lesson
5 - Smith LL2 lesson
6 - Smith LL3 lesson
4- Smith PP1 lesson
5- Smith PP2 lesson
6- Smith PP3 lesson
4- Smith SB1 lesson
5- Smith SB2 lesson
6- Smith SB3 lesson
2a - Test
Table 4.1 Above shows two sets of custom drillfiles, created by Mr. Jones and Mrs. Smith. Mr. Jones has
five tests for students to complete in his set. Mrs. Smith, however, chose to add one test.
Section 4
Page 61
Getting Started
Custom Drillfiles
Creating Custom Drillfiles
To create a custom drillfile:
1. Enter the Maintenance Building by clicking on its
image on the Campus screen
Figure 4.58 To access Class Records,
click Student Records.
2. Enter the Teachers Password (If you are not using a
password yet, just click OK).
3. A dialog box opens, asking you to Select an Option.
Click Drillfiles.(Figure 4.58)
4. The Drillfiles dialog box opens. Click Add.
5. New Drillfile dialog box opens. Enter a unique name
for this drillfile. An example might be Mrs.Jones-Gr5
The name can be 1 - 30 characters long.
(Figure 4.59)
Figure 4.59 Enter a unique name for
your new drillfile.
6. Click Save to continue.
7. In the Drillfiles dialog box select the new drillfile
name and click Edit. The file name entered is now
recorded on the Drillfile Maintenance screen.
8. To create a new Lesson, click Lesson. Type the text
for the custom drillfile. Each line will stop at 40
characters and the <enter> or <return> key will be
required to continue to the next line. Lessons are
used in the Learning Lab and Practice Pavilion.
Figure 4.60 Select the new drillfile name
and click Edit.
9. To enter a new Skill Builder, click on Skill Builder
and then select the type of Skill Builder being
entered. There are three choices: Isolated Words,
Sentences, or Paragraph. Select one and enter the
appropriate text. The words at the end of the line will
automatically wrap.
10. To enter a new Test, click on Test and type in the
text. The words at the end of the line will
automatically wrap.
11. Click on Save.
The Drillfile is now ready for student use.
Page 62
Section 4
Getting Started
Important: The document being copied
must conform to the Drill Rules (see
above) or they will cause error
messages.
Note: Lessons must be given a number
from 1 to 27, and a name up to 30
characters long.
Note: Skill Builders must be given a
number from 1 to 27, and a name up to
30 characters long.
Note: Tests must be given a numberletter label, with a digit from 1 to 9 in the
first position, and a letter from a-z in the
second position, as well as a name up to
30 characters long.
Custom Drillfiles
Drillfile Rules
• There are maximum lines and maximum characters
that can be added to a custom drillfile. These are
shown on the dialog boxes for each Lesson, ‘Skill
Builder, or Test being created.
• Lesson exercises are limited to 20 lines with a
maximum of 40 characters per line. The Enter key
must be pressed at the end of each line. There can
be 800 characters total. The exercise can contain no
blank lines in the text added. The program will
automatically remove all blank lines when saving.
• Skill Builder exercises + (Isolated Words) are limited
to 6 lines of words and 240 characters total. Words
will wrap to the next line.
• Skill Builder exercises + (Sentences) and
(Paragraph) are limited to 6 lines of sentences or
240 characters total. Words will wrap to the next line.
• Test exercises are limited to 50 lines or 2000
characters.
Creating Custom Drillfiles from a Word Processor
Document
If specific text is already saved in a word processor file,
teachers can use this text as a custom drillfile. The
document must be in text format and conform to the drillfile
maximum character rules listed above.
To copy text:
1. Open the document in the application in which it was
created.
2. Copy the text to the clipboard. (Ctrl-C on Windows,
Command-C on Mac)
3. Open the Maintenance drill file dialog box to where
the text will be copied.
4. Paste it into the appropriate Drillfile Maintenance
field. (Ctrl-V on Windows, Command-V on Mac)
Section 4
Page 63
Getting Started
Custom Drillfiles
Using Custom Drillfiles
Students and Evaluators can choose any Drillfile when
they sign on as a Guest.
When students sign on using their student records, a
drillfile is automatically selected. Teachers will already
have selected the drillfile in the Class Options or Student
Options dialog box. (See Section 4.2 – Classes and
Student Records). When students sign on and use the
specified drillfile it is marked and recorded in the same
way as the ATRT 3 Standard drillfile.
Note: Student Records are protected
when changing drillfiles. Previous
versions of All the Right Type required
special measures to protect student
records when changing drill files in midsession. All the Right Type 3 allows
students to change drill files in midsession while still preserving records for
the abandoned drill file. A student may
return to the abandoned drill file any time
and resume the previous session with
the record intact.
Student Record Considerations
A student can only be set to use one drillfile at any one
time. If the teacher switches a student from one drillfile to
another, the student’s results will be retained on file for
both drillfiles. Reports, however, will only show the results
for the drillfile the student is current set to use.
Tip: There is no procedure required to
protect student records when changing
drill files. Records are protected
automatically when changing drill files.
Page 64
Section 4
Getting Started
Custom Drillfiles
Editing Drillfiles
Note: If major changes are made to a drillfile, significant confusion can
result for students who are already using that drillfile. For this reason, it
is not recommended that you make major changes except between
school terms. Minor changes should not cause any difficulty.
Teachers can edit lessons, skill builders and tests of a
custom drillfile.
To do this:
Figure 4.61 To add students, start in the
Maintenance Building.
1. Enter the Maintenance Building by clicking on its
image on the Campus screen (Figure 4.61)
2. Enter the Teachers Password (If you are not using a
password yet, just click OK). (Figure 4.62)
3 A dialog box opens, asking you to Select an Option.
Click Drillfiles. (Figure 4.63)
4. In the Drillfile dialog box, select the drillfile name to
be edited and click Edit. (Figure 4.64)
Figure 4.62 Enter your teacher's
password. If you are not using one yet,
click OK.
5. The Drillfile Maintenance dialog box opens. Click on
the type of drill to be changed, (Lesson, Skill Builder
or Test) and select the exercise from the list that
displays in the list. (Figure 4.65)
6. Click Edit to display the text and make the changes
as needed.
7. Click Save to continue.
Figure 4.63 To access Class Records,
click Student Records.
Note: If Skill Builder is selected, click on
the type of Skill Builder from the Skill
Builder Maintenance dialog box (Isolated
Word, Sentences or Paragraph).
Figure 4.64 Click Edit in the Drillfiles
dialog box.
Section 4
Figure 4.65 Select the type of drill name
to be changed, and select the exercise
from the list, then click Edit
Page 65
Getting Started
Custom Drillfiles
Deleting Custom Drillfiles
Important: If a custom drillfile is selected for deletion, associated
student scores and records are also deleted. Make a hard copy of the
scores you want to save and then proceed to delete the drillfile.
To delete a custom drillfile:
1. Enter the Maintenance Building by clicking on its
image on the Campus screen (Figure 4.66)
2. Enter the Teachers Password (If you are not using a
password yet, just click OK). (Figure 4.67)
Figure 4.66 To add students, start in the
Maintenance Building.
3. A dialog box opens, asking you to Select an Option.
Click Drillfiles. (Figure 4.68)
4. In the Drillfiles dialog box, select the drillfile name to
be deleted and click Delete to remove the entire
drillfile and all lessons. (Figure 4.69)
5. A message will appear to confirm that you want to
delete the drillfile, scores and student records. Click
Delete.
Copying Custom Drillfiles
To create a new drillfile, it is often much easier to start by
copying any existing drillfile.
Figure 4.67 Enter your teacher's
password. If you are not using one yet,
click OK.
1. Enter the Maintenance Building by clicking on its
image on the Campus screen (Figure 4.66)
2. Enter the Teachers Password (If you are not using a
password yet, just click OK). (Figure 4.67)
3
A dialog box opens, asking you to Select an Option.
Click Drillfiles. (Figure 4.68
Figure 4.68 To access Class Records,
click Student Records.
4. In the Drillfiles dialog box, select the drillfile name to
be copied and click Copy. (Figure 4.69)
Figure 4.69 The Drillfiles dialog box.
Page 66
Section 4
Getting Started
Custom Drillfiles
5. A New Drillfile dialog box will display. Enter a unique
name for this drillfile. An example might be Mrs.
Jones-Gr5 The name can be 1 - 30 characters long.
Click Save. (Figure 4.70)
Figure 4.70 Enter a unique, meaningful
name for the new Drillfile and click Save.
6. There will be a short delay while the program
processes your new drillfile. The new name entered
will then appear in the Drillfiles dialog box.
Note: Exercises exist within Drillfiles. You
can delete an Exercise without deleting
the whole Drillfile.
Note: If major changes are made to a
drillfile, significant confusion can result for
students who are already using that
drillfile. For this reason, it is not
recommended that you make major
changes except between school terms.
Minor changes should not cause any
difficulty.
Section 4
Page 67
Getting Started
Custom Drillfiles
Deleting a Custom Drillfile Exercise
To select a specific exercise within a custom drillfile to
delete:
1. Enter the Maintenance Building by clicking on its
image on the Campus screen
2. Enter the Teachers Password (If you are not using a
password yet, just click OK). (Figure 4.71)
3. A dialog box opens, asking you to Select an Option.
Click Drillfiles. (Figure 4.72)
4. In the Drillfiles dialog box, select the drillfile from
which exercises are to be deleted and click Edit.
(Figure 4.73)
5. Click on the type of drill to be edited (Lesson, Skill
Builder or Test).
Figure 4.71 Enter your teacher's
password. If you are not using one yet,
click OK.
Figure 4.72 To access Class Records,
click Student Records.
6. Select the exercise name from the list that appears in
the Drillfile Maintenance dialog box. (Figure 4.74)
7. Click Delete. A message displays indicating that you
will also delete any reference to this lesson, including
student scores.
8. Click Delete.
9. Click Save to continue.
Figure 4.73 The Drillfiles dialog box.
Figure 4.74 Select the drillfile name from
which exercises are to be deleted and
click Edit.
Page 68
Section 4
Ongoing Operation
Security
SectIon 5
Ongoing Operation
5.1 Security
All The Right Type 3 provides security on several levels to
protect the integrity of the records. Of course, as always,
the best security system is a good backup. For
instructions on backing up your data files, see Section 5.9
– Backing Up the Database.
Security on Non-networked Computers
On non-networked computers, the best way to deal with
security is to prevent access to the Maintenance Building.
We recommend not installing the Teacher Program on
student workstations. Have students hand in their Student
Record files to the teacher on floppy disks. The Teachers
Program (which is the only one which contains the
Maintenance Building) should only be installed on the
teachers computer. See the discussion of Lab Pack
installation in Section 2.4 – Installation.
We also recommend the use of the built-in Teacher's
password system to set the Teacher's password. See the
discussions of teacher's passwords in this section.
If you are running on a single workstation, or a series of
stand-alone workstations, backup should be performed on
each workstation on a regular basis. If you are running in a
Lab-Pack type of installation, the backup of the teachers
workstation is the most important, as a copy of the
database from that workstation can always be used to
refresh a damaged database on a student's workstation.
For instructions on backing up your data files, see Section
5.9 – Backing Up the Database.
Section 5
Page 69
Ongoing Operation
Security
Security on Networked Computers
Networked computers present special security concerns.
As the networked version of All The Right Type uses TCP/
IP for communication between student workstations and
the database (via the database server application running
on the server), is it not necessary for students or teachers
to have any access rights to the actual database files. We
strongly recommend that NO rights be given to the
database folder, except for the administrator ID that runs
the database server.
Figure 5.1 The Teacher Password dialog
box.
Ideally, no student should ever be able to gain physical
access to the computer running as the database server. If
this cannot be prevented, we recommend using keyboard
locking mechanisms of the operating system to stop any
student tampering.
It is also important to ensure that students are not given
access to the Maintenance Building. The best way to
ensure this is to install only the student program on
student workstations. Further, by using a Teachers
password on the teachers workstation, access can be
further controlled in situations where students might be
able to gain physical access to the teacher's workstation.
Figure 5.2 Changing the Teacher
Password.
As no data is stored on student workstations, backup is not
necessary at the student workstation level. However, as all
data for a great number of students is stored in the one
central database, backup of that data is more important
than ever. For instructions on backing up your data files,
see Section 5.9 – Backing Up the Database.
Setting/Changing Teachers Password
To set the password for all teachers in order to limit entry
into the Maintenance Center:
1. Enter the Maintenance Building by clicking on its
image on the Campus screen.
2. A Teacher Password dialog box opens. Click
Change. (Figure 5.1)
3. The Change Teacher Password dialog box opens.
Enter the Current Password. (Figure 5.2)
Page 70
Section 5
Ongoing Operation
Security
If one has not yet been created press the Tab key to move
forward to the next field.
4. Enter a New Password.
5. Enter the Password again to confirm in the
Confirmed Password field.
6. Click OK.
Setting Student Passwords
1. Enter the Maintenance Building by clicking on its
image on the Campus screen
2. Enter the Teachers Password (If you are not using a
password yet, just click OK). (Figure 5.2, previous
page)
Figure 5.3 Setting Student Passwords.
3. A dialog box opens, asking you to Select an Option.
Click Student Records.
4. The Class Records dialog box opens. Select a class
name and click Open.
5. The Class Name/Student Names dialog box opens.
Select a student name and click Edit.
6. Turn the Password Option on by clicking on the
Password box, so there is an x in the box. (Figure
5.3)
7. Type a Student Password for this student and click
OK.
Section 5
Page 71
Ongoing Operation
Student Records for Teachers
5.2 Student Records (for Teachers)
Teachers can view and print records for entire classes or
for individual students.
Viewing and Printing Class Records
Teachers can see how an entire class is performing in any
of the buildings for any lesson. To view results in a specific
building:
Figure 5.4 Click on any of the Results
buttons to see how the class is
performing.
1. Enter the Maintenance Building by clicking on its
image on the Campus screen
2. Enter the Teachers Password (If you are not using a
password yet, just click OK).
3 A dialog box opens, asking you to Select an Option.
Click Student Records.
4. The Class Records dialog box opens. Select a class
name and click on one of the Results buttons—
Learning Lab Results, Practice Pavilion Results,
Skill Building Results, or Test Results. (Figure
5.4)
Figure 5.5 Teachers can view or print
results for a class.
5. Select the lesson to be reviewed and click OK.
6. A report will be displayed on-screen in text format for
the student requested. Click Print to print a copy or
click Graphic to see the results in a bar chart format.
(Figures 5.6 and 5.6)
7. Repeat this process to view reports for the other
learning buildings (Learning Lab, Practice Pavilion
and Skill Building) by selecting the appropriate button
from the Class Records dialog box.
Figure 5.5 The Graphic button creates a
bar chart of class progress.
8. Click Exit to return to the Learning Lab Results
dialog box and click Cancel to return to the Class
Name dialog box or select another lesson to review.
9. To back out of the dialog boxes click Cancel or select
Return to Campus to go directly to the campus.
Page 72
Section 5
Ongoing Operation
Student Records for Teachers
Viewing and Printing Student Records
1. Enter the Maintenance Building by clicking on its
image on the Campus screen
2. Enter the Teachers Password (If you are not using a
password yet, just click OK).
3. A dialog box opens, asking you to Select an Option.
Click Student Records.
4. The Class Records dialog box opens. Select a class
name and click Open.
Figure 5.7 Individual Student Records in
text format.
5. The Class Name/Student Names dialog box opens.
Select a student name and click Student Record
Result.
6. A report will be displayed on-screen in text format for
the student requested. Select Print to print a copy or,
click Graphic to see the results on a bar graph.
(Figures 5.7 and 5.8)
7. Click Exit to back out of the reports screen. Click
Cancel to back out of each screen or click Return on
the menubar and select Return to Campus.
Award Certificates
Award Certificates may be printed for a class, or for a
student, or for a selected group. Blank background or
framed design styles are available.
Figure 5.8 Clicking Graphic in the
Results screen produces a bar graph of
student results.
Tip: Teachers can select a list of award
recipients from the class list. Follow the
Create Awards procedure as described in
the manual, but use the list windows to
Add Students to Print.
To display or print an Award Certificate:
1. Enter the Maintenance Building by clicking on its
image on the Campus screen
2. Enter the Teachers Password (If you are not using a
password yet, just click OK).
3. A dialog box opens, asking you to Select an Option.
Click Student Records.
4. The Class Records dialog box opens. Select a class
name and click Open.
Section 5
Page 73
Ongoing Operation
Student Records for Teachers
5. The Class Name/Student Names dialog box opens.
Select a student name and click Create Awards.
6. The Awards dialog box opens. Select recipients from
the upper window and click Add for each. Awards will
print for all students in the lower list.
Figure 5.9 Creating Award Certificates.
7. Select the Frame Style: Classic, Key, or None.
(Figure 5.9)
8. Enter the information into the Date, Title of the Award,
Person Signing the Award and Additional Text fields.
9. Click OK to preview the document on screen.
10. Click Print to print awards for the list of students.
Deleting a Student Lesson
You might need to remove the record of a particular lesson
for a student. Perhaps a student scored an unrealistically
high WPM score, but with too many errors. In such cases,
it can be difficult for the student to attain a higher WPM
score to cause an update of the records.
Figure 5.10 Deleting a lesson from a
student's record.
1. Enter the Maintenance Building.
2. Enter the Teachers Password (If you are not using a
password yet, just click OK).
Tip: If you want a preview of an award,
hold down CTRL-K when you click Print.
The image will print to the screen. (Mac
and Windows)
3. A dialog box opens, asking you to Select an Option.
Click Student Records.
4. The Class Records dialog box opens. Select a class
name and click Open.
5. The Class Name/Student Names dialog box opens.
Select a student name and click Student Record
Result.
6. Click Delete in the Student Records dialog box.
7. The Delete Records dialog box opens. Select the drillfile,
building and lesson to be removed. (Figure 5.10)
8. Click Delete. The lesson is now removed records.
Click Exit to leave this screen.
Page 74
Section 5
Ongoing Operation
5.3 Understanding The Learning Sequence
It is important for the students and teachers to understand
the recommended learning sequence.
Understanding The Learning Sequence
Note: In the ATRT Standard drillfile, test
1 has 3 parts (a, b, and c). Tests 2
through 6 have six parts each per test (a,
b, c, d, e, and f).
If the Sequence option is turned on in the Student Options
Dialog Box, when students sign-on and enter the campus
they will have to enter the building that is flashing. In this
building, the drill they select will be the first lesson in the
lesson list shown in gray print. The red lessons are
completed lessons.
The order of entering the buildings is Learning Lab,
Practice Pavilion then Skill Building. Students complete
one lesson in each of these buildings and repeat this cycle
three times. When three lessons (in each of the learning
buildings) are complete, students can enter the Test
Center to begin the first test.
Once Test 1 is complete, the Learning Lab again flashes to
direct students to enter this building and start the cycle over.
The All The Right Type 3 Campus Buildings
Figure 5.11 The Learning Lab menu.
Note: The first time students enter the
Learning Lab, the Posture Review and
Hand Position Review play automatically.
Later, students can select these reviews
any time from the Learning Lab menu.
Learning Lab
In the Learning Lab, the goal is to practice correct posture,
hand and finger positions and the proper finger reaches
used in keyboarding. Time is not an issue for lessons in
the Learning Lab. It is important for the teacher to
encourage students to work carefully, ensuring they
always use the correct finger placement and posture
techniques. Progress in the Learning Lab is based only on
accuracy, not on typing speed.
The first time students enter the Learning Lab, the Posture
Review and Hand Position Review tutorials automatically
play. The first lesson in the list of lessons begins after
these 1-2 minute reviews.
When students enter the Learning Lab the second time
these tutorials do not come up but are available, optionally,
by selecting the appropriate button on the Learning Lab
menu. (Figure 5.11)
Section 5
Page 75
Ongoing Operation
Tip: It is important that students review
this segment at the beginning of the first
few lessons. Instruct students to
periodically look at the Posture Review
and the Hand Position Review to ensure
that they are sitting properly and holding
their hands in the correct fashion.
Note: The Number Keypad Review can
be included at any time in the course.
This feature provides a tutorial for
learning numbers on the keypad.
Note: The Mouse Review teaches
students dexterity and accuracy using the
mouse. It provides a fun way to practice
mouse skills.
Understanding The Learning Sequence
Students follow the instructions at the bottom of the
screen, working their way through the lesson. If an error is
made in the Lets Learn New Keys section, the program
shows the correct reach and finger movement and pauses
until the correct character is typed. (Figure 5.12)
See Section 5.4—Reviews for information on all the
Reviews available in All the Right Type 3.
When a lesson is completed, the student sees a fireworks
display. (Figure 5.13)
Certain Class Options and Student Options affect certain
buildings. The options that affect the Learning Lab are:
-Lesson Error Effect
-Lesson Error Threshold
-Space after period
Figure 5.12 A Learning Lab exercise in
progress.
Figure 5.13 When a lesson is completed,
the student sees a fireworks display.
Page 76
Section 5
Ongoing Operation
Understanding The Learning Sequence
Practice Pavilion
When students enter the Practice Pavilion, the next lesson
in the recommended learning sequence is the first lesson
in gray print. The red lessons indicate completed lessons.
(Figure 5.14)
Students select the same lesson number as completed in
the Learning Lab and click OK. They can choose one of
the optional speed buttons, or choose their own speed.
The Practice Pavilion uses the same drill material as the
Learning Lab but with a speed goal. There are two
methods of practice that can be preset by teachers, but
regardless of the mode selected, the same exercises are
presented to the students, and scores are kept in the
same way.
a) Standard Mode prompts students for a minimum
speed goal that will automatically highlight Next Line
as the default if the goal is met. Students can press
the enter key to automatically continue to the next
line. If they type less than this speed the Redo button
becomes the default when the enter/return key is
pressed. (Figure 5.15)
Figure 5.14 Entering the Practice
Pavilion.
Figure 5.15 Setting the Practice Pavillion
speed goal.
Standard Mode displays regular lines of text to be
typed. The practice lines appear one at a time. After
each line students get an on-screen results report
showing their speed and number of errors for the
line. (Figure 5.16)
Figure 5.16 Working in the Practice
Pavillion in Standard Mode.
Note: All the Right Type 3 plans to have
other games available on our website in
the near future.
Check http://www.ingenuityworks.com.
Section 5
Page 77
Understanding The Learning Sequence
Ongoing Operation
b) Game Mode will display a menu of four possible
games for the student to play. There are no falling
letters or random letters popping on the screen to
distract the students. These games are highly
motivating and help increase attention span.
Figure 5.17 Space Race, One of the
learning games in the Practice Pavilion.
Figure 5.18 When a lesson is complete
in the Practice Pavilion, a
‘Congratulations’ screen displays.
Figure 5.19 Error Details shows students
where they need more practice.
• The Racing Sculls game displays two sculls, the
upper one representing the student. Text appears in
a panel on-screen, and is eaten up as the student
types. There is a visual indicator of the student and
the opponent's relative positions at the bottom of the
screen.
• In the Space Race game, two racing spaceships
appear on-screen, and again, the upper one
represents the student. Text appears just ahead of
the student's spaceship and is eaten up as the
student types. (Figure 5.17)
• The Space Crisis game shows a space ship in
urgent need of repair. Only by typing the words
displayed on the panel within time limits can the
student save the ship from crashing into the surface
of a planet. By meeting the challenge, the student
will pilot the ship safely back into space.
• Finally, the Cargo Loader Challenge shows a
remote cargo loading station. Data is scanned from
the parcels moving along the conveyor, and by
typing the data in time, the student prevents the
cargo from being 'zapped' on it's way to the cargo
hold of the space ship. If the student gets all the
packages loaded into the hold, the cargo carrier lifts
off.
As students complete the lessons, a Congratulations
screen displays and an option is available to Show
Results. A Results Report is displayed on the screen. Click
Details to see what has been typed. (Figures 5.18, 5.19)
Completed lessons are recorded in the Records Library.
Certain Class Options and Student Options affect certain
buildings. The options that affect the Practice Pavilion are:
•
•
•
•
Page 78
Practice Mode (Standard or Game)
Backspace Key
Space after period
Penalty
Section 5
Ongoing Operation
Understanding The Learning Sequence
Skill Building
The goal in the Skill Building is to build speed and
accuracy.
Each Skill Building consists of three sections: Isolated
Words, Sentences and Paragraphs. Students choose their
own speed goal and work through the material. (Figure
5.20)
Students select the first lesson in gray print from the list of
lessons. Completed lessons are shown in red. Typing
exercises are presented in two or three lines, with the
student's work appearing below the first line. As each line
is completed, the lines scroll up. (Figure 5.21)
Figure 5.20 Entering the Skill Building.
Students are first presented with Isolated Words
containing the letters being learned. Upon completion of
the Isolated Words section, an on-screen report appears.
Students can check speed and errors and proceed to the
Next Section.
The Sentences section appears and finally the Paragraph
section displays.
The results of the Skill Building lessons showing words per
minute and errors, are recorded in the Records Library
building.
Figure 5.21 Working in the Skill Building.
When the first lesson is completed, the first 2 portions of a
puzzle are uncovered. When the final Skill Building lesson
is finished, the last 2 portions are uncovered revealing the
picture. (Figure 5.22)
Class Options and Student Options that affect the Skill
Building are:
-Penalty
-Word Wrap
-Backspace Key
-Display Lines
-Space after period
Section 5
Figure 5.22 Parts of the puzzle are
revealed as the Skill Builder lessons are
completed.
Page 79
Ongoing Operation
Note: The Speed Goal will only be used
as a goal, to provide positive feedback to
the student when the goal is met. It is
not treated as a minimum speed that
must be attained before progressing to
the next lesson or test.
Understanding The Learning Sequence
Testing Center
All the Right Type 3 has built-in tests that come with the
program referred to as the ATRT Standard drillfile. When
using this drillfile, the Testing Center runs a selection of
tests to be used after three lessons are completed in all
three of the Learning Lab, Practice Pavilion and Skill
Building.
Students select the first lesson in gray print from the list of
lessons. (Figure 5.23) The lessons in red are completed
lessons. Notice that for Test 1 there are three sections (a,
b, and c) to complete, but the remaining Lessons each
have six sections (a-f).
Tests are presented in two or three lines, with the student's
work appearing below the first line. As each line os
completed, the lines scroll up. (Figure 5.24)
Figure 5.23 Entering the Center.
If Speed Goal mode and a goal of 10 WPM were selected
on the Options screen, the program reminds the students
of that goal when they begin the lesson. When the test first
displays, the program calculates where students should be
in exactly one minute. A sound occurs at that time to give
warning that the time is up. Students should finish the test,
even if they get the warning sound.
Results of Tests are recorded in the Recordfile and can be
viewed in the Records Library.
Class Options and Student Options that control the Testing
Center are:
Figure 5.24 A test in progress.
Page 80
-Test Mode Speed Goal (Standard or Timed Writing)
-Penalty
-Word Wrap
-Backspace Key
-Display lines
-Space after period
Section 5
Ongoing Operation
Word-Processing Plaza
The Word-Processing Plaza, opens a blank document
from a word processing application. The default application
for Windows is WordPad, for Macintosh it is SimpleText
and for Windows NT the default is NotePad.
Understanding The Learning Sequence
Important: Teachers should agree on a
default word processor to be used for all
classes. See S≠ection 5.6-Ongoing
Operation-Changing the Default Word
Processor.
When students click on the Word-Processing Plaza, All
The Right Type 3 opens the default word processor.
unless the teacher previously chose a different one.
Records Library
The Records Library contains students' progress data.
Signed-on students who have their Student Records set
up can obtain their records by clicking on the Records
Library. The records are viewable in a text or graphics
format. Students can also print a record at any time.
If teachers wish to see the student or class progress, the
records and marks can be obtained through the
Maintenance Building in the teacher's program. See
Section 5.2-Ongoing Operation-Student Records
(Teachers)
Figure 5.25 Students can examine their
own progress records at any time by
clicking on the Records Library. Clicking
Graphics displays a bar graph of the
record.
Viewing and Printing Student Records (Students)
Students can review their own results and progress in any
building:
1. Students Sign-On to their student records.
2. Click the Records Library.
A report opens on screen allowing students to review their
marks from any building. It also shows which lessons they
have completed.
Figure 5.26 Students can also view the
reports in a bar graph format by clicking
Graphics.
On initial entry, the display will show the Learning Lab and
the Practice Pavilion in text mode. (Figure 5.25) By
clicking Next, the student can view the Skill Building and
Testing Center. There is also a Graphic button to view the
results as a bar graph (Figure 5.26), and a Print button to
print the results.
Section 5
Page 81
Reviews
Ongoing Operation
5.4 Reviews
Reviews are optional and provide either review or extra
practice, depending on the level of the students. No
results are retained in the student records for any of the
reviews. (Figure 5.27)
Figure 5.27 Students access optional
Reviews in the Learning Lab.
Hand Position Review
The Hand Position Review automatically runs the first time
students enter the Learning Lab. After this, it becomes an
optional review as needed. It is recommended that
students run this program frequently during the first
several lessons as confirmation that they are using the
correct technique.(Figure 5.28)
To start the review, enter the Learning Lab and click on
Hand Position Review on the dialog box that displays.
Figure 5.28 The Hand Position Review.
Posture Review
The Posture Review automatically runs the first time
students enter the Learning Lab. After this, it becomes an
optional review as needed. It is recommended that
students run this program frequently during the first
several lessons as confirmation that they are using the
correct technique. (Figure 5.29)
To start the review, enter the Learning Lab and click on
Posture Review on the dialog box that displays.
Figure 5.29 The Posture Review.
Mouse Review
The Mouse Review is an optional lesson for students who
have not used a mouse previously or are not at ease using
one. It is designed as a game. There are 3 levels of mouse
exercises available but if a student can achieve a comfort
level at the first or second levels of the program, it will be
sufficient. (Figure 5.30)
To start the review, enter the Learning Lab and click on
Mouse Review on the dialog box that displays.
Figure 5.30 The Mouse Review.
Page 82
Section 5
Ongoing Operation
Large Font
Number Keypad Review
The Keypad Review is an optional lesson for students to
learn the proper technique for using the keypad. When the
program is started, it will run through a short graphical
display of how to position the fingers on the Home Row
keys. (Figure 5.31)
There are 4 lessons available for developing skill using a
keypad. Students follow instructions on the screen and
type what is displayed.
Figure 5.31 The Number Keypad Review.
5.5 Large Font
In each building of the campus, there is an option where
students can choose to use the large font.
In the Learning Lab in the section Now, Lets Practice
there is dialog box that opens allowing students to select
the large font. (Figure 5.32)
In the Skill Building, Practice Pavilion and Test Center,
the large font selection button is at the bottom left of
each of the screens. (Figure 5.33)
Figure 5.32 Students can choose to use
the large font.
5.6 Changing the Default Word-Processor
To change the Default Word-Processor:
1. Enter the teacher campus, click on File in the top
menubar and select Select Word-Processing from
the drop-down menu.
2. A dialog box appears to allow teachers to browse to
the preferred Word Processing application.
3. When the selection is made and saved the selected
Word Processor application will be the default until
another one is selected by another teacher.
Section 5
Figure 5.33 The large font selection
button is at the bottom left of each
screen.
Important: Teachers should agree on the
Word-Processor to use as the default.
We recommend leaving the default as is.
(Windows defaults to WordPad,
Macintosh defaults to SimpleText and
Windows NT defaults to NotePad.) Once
changed, the new word processor will
continue to be the default for all classes
until changed to another.
Page 83
Ongoing Operation
Floppy Disks Centralizing Student
5.7 Floppy Disks-Centralizing Student
Records
If All the Right Type 3 is installed on a non-networked
system where there is not a centralized database of
records and drill material, teachers may want to use floppy
disks to move record files to one database.
When All The Right Type 3 is launched it looks for the
database folder that contains the Student Records. If the
program was installed using the Lab Pack installation,
there will be a database on each of the teachers and
students computers. See Section 2.3—Installation for a
discussion of the various installation methods.
To have the records centralized on one computer:
1. Teachers create Student Records on their computer
for all students as normal.
2. Copy the data.v12 file to a floppy disk and go to each
individual student workstation. Using the standard
method for Windows or Macintosh computers, copy
the data.v12 file to each workstations hard drive. The
data.v12 file belongs in the Database folder within
the All The Right Type program folder.
3. Students use the program as they normally would,
except at the end of the class they will save their
results on the floppy disk. Students do this by clicking
File on the menubar and selecting Export Student
Records from the drop-down menu.
4. On the Mac, the save program will ask the student
for a name for the file. They will accept the default
filename (studentname.v12) and save to the 'floppy
disk'. (Studentname being the name that the student
has signed on as).
Page 84
Section 5
Ongoing Operation
5. On the PC, the program will save automatically to
the floppy disk with the filename (studentname.v12).
(Studentname being the name that the student has
signed on as).
6. Students hand the floppy disks back to the teacher at
the end of the class.
7. Teachers click File on the menubar and click Import
Student Records from the drop-down menu.
8. The Student Record (studentname.v12) is copied to
the centralized database on the teachers computer.
The file (studentname.v12), is changed to
studentname.bak on the floppy disk to indicate that
the file has been imported to the centralized
database. At any time, the teacher may delete the
filenames ending with .bak, to free up space on the
floppy diskette.
5.8 Skill Building Puzzles
Skill Building Puzzles
Important: Mac users should not change
the filename. If it is changed, it must end
with the .v12 extension.
Important: New picture(s) should be
added to the folder at the beginning of
the term before the students have started
their first Skill Builder lesson. If the
pictures are added after this, the students
will have already been assigned one of
the three built-in pictures.
Tip: Puzzles are randomly assigned by
the program when students start the first
Skill Builder lesson. If a picture is
replaced, using the same file name as
the one students are currently assigned,
the new picture will be substituted for the
old one and will show the same number
of pieces as the old picture at the time of
replacement.
At the end of a Skill Building lesson, two portions of a
picture puzzle are revealed. The pictures are randomly
assigned when a student first enters the Skill Building
building. All The Right Type 3 has three built-in pictures
included with the program.
Adding Skill Building Puzzles
You can add your own picture puzzles. The pictures must
be in .jpg or .bmp formats. They must be 72 dpi and 640 x
480 resolution. The pictures must be 256 colors.
To add a custom picture:
1. Copy a picture to the clipboard or desktop.
2. Copy or move it into the Puzzles directory/folder
within the All The Right Type v3 directory/folder.
When All The Right Type 3 chooses a picture, it will
choose randomly from one of the pictures found in the
Puzzles directory folder.
Section 5
Page 85
Skill Building Puzzles
Ongoing Operation
Important: If a picture is removed, make
sure it is at the beginning of a term.
Removing a picture while it is assigned to
a student will generate an error message.
Important: The contents of the Puzzles
directory/folder should only be changed
at the beginning or end of the year or
semester.
Viewing Skill Building Puzzles
To examine pictures from the puzzle database:
1. Select a picture file from the Puzzles directory/folder,
located in the All The Right Type v3 directory/folder.
2. Make a copy on the desktop and double-click on the
icon to open it.
Removing Skill Building Puzzles
To remove a picture from the Puzzle database:
1. Select the picture from the Puzzles directory/folder,
located in the All The Right Type v3 directory/folder.
2. Drag the picture to the desktop.
3. The picture can then be dragged to trash or moved
into another directory/folder for future use.
Page 86
Section 5
Ongoing Operation
Backing Up the Database
5.9 Backing Up the Database
The best security is a good back up. Student Records
should be backed up regularly. Files can be damaged by
power failures, system crashes, improperly configured
desktop security programs or by improper exits from the
program (turning the power off without exiting the
program).
There is no built-in backup facility within All The Right
Type 3. Rather, it is assumed that the files will be backed
up by your own normal backup programs and procedures.
For Single and Lab-Pack installations, all of the data
records are kept in a file called data.v12 located in the
Database folder within the All The Right Type 3 program
folder.
In network installations, the records are kept in a series of
files on the server. The required files are all named with
".dat" extensions. The files are located in a folder (or series
of folders) named after the school(s) installed. These
folders are all located within the Database folder on the
server.
Section 5
Page 87
Ongoing Operation
Creating Custom Student Reports
5.10 Creating Custom Student ReportsExporting Student Records
The teacher can create custom reports by using the Export
Student Records feature now included with All The Right
Type 3.
1. Enter the Maintenance Building by clicking on its
image on the Campus screen.
Figure 5.34 Exporting Student Records
to a text file.
2. Enter the Teachers Password (if you are not using a
password yet, just click OK).
3. A dialog box opens, asking you to Select an Option.
Click Student Records.
4. A Class Records dialog displays. Select the class to
be exported, and click Export to Text File. (Figure
5.34)
Figure 5.35a (Mac) Selecting a
destination for the exported student
records text file.
5. A dialog box displays to allow you to name the file
and point to where you want to save it. (Figure 5.35a
Mac, Figure 5.35b Windows)
6. Once data is exported, the teacher can create custom
documents in Excel, Word, etc. In most spreadsheet
programs, open the text file from within the
spreadsheet application. Field names are provided in
the first line of the exported file to describe the data
contained in the file.
Figure 5.35b (Windows) Selecting a
destination for the exported student
records text file.
Page 88
Section 5
ATRT Administration Utility
Section 6
ATRT Administration Utility
All The Right Type 3 has special utility program on the CDROM which some users may have occasion to use from
time to time. Generally, the functions performed by the
ATRT Admin Utility are only required in unusual cases, and
would normally be performed by a person with some
technical background. Most often users only use the ATRT
Admin Utility under the direction of Ingenuity Works,
although it should not be thought of as something to be
feared.
The single and lab pack installations of All The Right Type
3 use a database module known as ‘v12’, and there is one
version of the ATRT Admin Utility for this database. See
section 6.1 - Single and Lab Pack Admin Utility
Network installations use another database module known
as ‘minidb’, and there is a separate version of the ATRT
Admin Utility for these installations. See section 6.2 Network Admin Utility
Section 6
Page 89
ATRT Administration Utility
Single and Lab Pack Admin Utility
6.1 Single and Lab Pack Admin Utility
To launch the ATRT Admin Utility:
1. Insert the All The Right Type 3 CD-ROM
2. The All The Right Type 3 installer (main) dialog box
will probably open. If it does, click exit to close it
3. Locate the program ATRT Admin Utility program on
your CD-ROM using whatever operating system tool
you are most comfortable with. Look for a folder
named <administration utility - v12>. Within that
folder, the program file is called <admin.exe>
(WIndows) or Administration Utility (Mac). Launch it.
4. The program will start by prompting for the location
of the <data.v12> file to be opened. You should be
able to find yours in the database folder within the all
the right type program folder on your hard drive.
5. Next, the program will examine the file you have
located. If it determines that it needs to be converted
to current format, it will prompt accordingly. Allow the
conversion to proceed. One of the conversion steps
is a backup. Allow the backup to proceed, and then
the conversion will happen.
6. The final check the program makes is to determine if
the database has been registered. If it hasn’t you will
be prompted to begin registration. We recommend
completing the registration, even if you don’t intend
to file the information online with our servers. To
register without sending information to us, fill in the
blanks on the registration screen, and click print. In
this way, your database will have school information
recorded internally, so that it can be identified easily
if you ever need to send it to us for analysis. If you
decide to send your information to us, just click send
after completing the registration screen. We will then
have your school information on file should you ever
need to call us for technical support.
Page 90
Section 6
ATRT Administration Utility
Single and Lab Pack Admin Utility
Functions available:
• File - Open - allows you to open the data.v12 file if
you have closed the file
• File - Close - closes the data.v12 file you have been
working with
• File - Import From Database - allows you to import
the records contained in another data.v12 file into
the file you already have open. This will append all
of the records from the incoming file into the open
file. Duplicates can result.
• File - Export To Database - allows the export of all
of the records within the open file into a new
database. You will end up with two identical
databases.
• File - Export To Text - will export all of the records
within the open file to a text file. The text file can
then be imported into other programs (spreadsheets,
word processing documents, etc)
• Tools - Repair Database - this function will attempt
to repair a damaged database file. While such
occurrences are very rare, they can happen in cases
of power loss, etc. This function requires that the
database be closed before starting.
• Tools - Optimize Database - this function performs
a ‘pack’ operation on the database, re-writing the
entire file without any records that may have been
deleted. This procedure is rarely needed, but can be
run if data access seems to be slowing.
Section 6
Page 91
Network Admin Utility
ATRT Administration Utility
6.2 Network Admin Utility
To launch the ATRT Admin Utility:
1. Insert the All The Right Type 3 CD-ROM
2. The All The Right Type 3 Installer (main) dialog box
will probably open. If it does, click Exit to close it
3. Locate the program ATRT Admin Utility program on
your CD-ROM using whatever operating system tool
you are most comfortable with. Look for a folder
named <administration utility - minidb>. Within
that folder, the program file is called <admin.exe>
(WIndows) or Administration Utility (Mac). Launch it.
4. The program will start by prompting for the IP
address of the database server. Enter it, and click
ok.
5. Then the school selection dialog box opens. Select
the school to be worked on, and click select.
6. The final check the program makes is to determine if
the database has been registered. If it hasn’t, you will
be prompted to begin registration. We recommend
completing the registration, even if you don’t intend
to file the information online with our servers.
To register without sending information to us, fill in
the blanks on the registration screen, and click print.
In this way, your database will have school
information recorded internally, so that it can be
identified easily if you ever need to send it to us for
analysis. If you decide to send your information to
us, just click send after completing the registration
screen. We will then have your school information on
file should you ever need to call us for technical
support.
Page 92
Section 6
ATRT Administration Utility
Functions available:
• File - Open - allows you to open a minidb database
Network Admin Utility
Warning: Reset Database erases all
class and student records.
if you have closed the file connection
• File - Close - closes the minidb database you have
been working with
• File - Export To Text - will export all of the records
within the open file to a text file. The text file can
then be imported into other programs (spreadsheets,
word processing documents, etc)
• Tools - Repair Database v3.01 to 3.03c - this
function will attempt to repair a damaged v12
database file from an older version of All The Right
Type 3. While such occurrences are very rare, they
can happen in cases of power loss, etc. This
function requires that the minidb database be closed
before starting.
• Tools - Reset Database - this function is provided
to allow the user to erase all records in the
database. This might be desirable at the end of the
school year.
Section 6
Page 93
Section 7—Technical Support
Section 7
Technical Support
To obtain Customer Support from Ingenuity Works Inc.
please complete and mail or fax the Registration Card
enclosed.
Check the Support section of our website at http://
www.ingenuityworks.com to find posted problems reported
to us by our customers. It may save you time if a Technical
Support person is not available immediately to answer
your questions.
If you cannot find a solution in the manual or on the
website, you can call Tech Support at:
Phone: 1-800-665-0667 Ext. 1312
E-mail to: [email protected]
Page 94
Section 7
Section 7—Technical Support
Please be ready with the following information whether you are contacting us by phone or email:
Information Required:
(Example answers only)
Product Name:
Product Edition:
Product Version:
All The Right Type 3
School Single
Version 3.01
Estimated age of Computer:
Computer Type:
Operating System:
1998
PC
Windows 2000
RAM:
Free Hard Drive Space:
Video Card:
Sound Card:
32mb
850mb
ATI Rage Pro
Creative Lab Sound Blaster Live
Do you update your drivers and applications from the Website on a regular
basis to download all the patches and updates available for problems?
Section 7
Page 95
Section 7—Technical Support
If you have the Network version please make note of the
server operating system you are using and the
workstations.
To find this information:
Windows users:
1 Right-click My Computer.
2 Select Properties from the drop-down menu.
3 Click on the General tab.
4 Write the information under System and under
Computer headings. (This provides us with the
Operating System, the processor and the RAM.)
5 Click on the Device Manager tab.
6 Make note if there are any yellow exclamation marks
or question marks on any lines.
7 Click on the ‘+’ sign to the left of Display Adapter.
8 Write the information that is displayed under this
heading after clicking on the ‘+’. (This provides us
with the Video Card.)
10 Click on the ‘+’ sign to the left of Sound, Video and
Game Controls.
11 Write the information that is displayed under this
heading (ignore Gameport Joystick) (This provides
us with the Sound Card.)
13 Click on the Performance tab.
14 Write down
System Resources:
(eg: 86%)
File System:
(eg: 32 bit)
And note if there is a line that says ‘Your system is
configured for optimal performance”.
Page 96
Section 7
Section 7—Technical Support
Macintosh Users
1 Click on Finder and then select the Apple (top left
corner).
2 Click on About This Computer.
3 Write down
Operating System:
(eg. Mac OS 8.6)
Built-in memory:
(eg. 64Mb)
Virtual memory:
(eg. 65 Mb)
Largest Unused Block:
(eg. 32.5 Mb)
Click once on the All The Right Type 3 application icon,
select File and click on Get Info.
Click on the arrow in the top box and select Memory.
Record the Memory setting.
Platform Changes
In some cases, a classroom may switch from Macintosh
computers to PCs or visa versa. The steps to do this are:
1. Create a backup copy of your database. (See
Section 4-Advanced Features/Creating a Backup.)
2. On the new server, follow the steps to performing an
‘install’ per Section 1 - Getting Started.
3. Drag the Databases directory/folder found in the All
The Right Type v3.0 folder from the old system and
move it into the All The Right Type 3 folder on the
new system replacing its Database folder.
4. The original database (student records) has now
been installed on the new machine.
Section 7
Page 97
Section 7—Technical Support
Troubleshooting
PROBLEM: While installing I get “…disk related error (36) has occurred.”
1. Your disk drive may be out of alignment. Try
installing on a different CD-ROM drive if you have
another computer available. If it works on one drive,
but not on the other then you know that your drive
needs servicing.
2. The installer disk may be damaged or defective. You
should first look at the surface for finger marks, dirt
or scratches and try to clean and repair the disk.
On a Macintosh system there is a disk repair utility
called ‘Disk First Aid’ or you may have a utility
such as Norton installed.
On a Windows system there is a repair utility
called ‘Scan Disk’ or you may have a utility such
as Norton installed.
If you can’t find your copy of ‘Disk First Aid’ or the
utility was unable to repair the disk, see warranty
information at the end of this section.
PROBLEM: There is no sound.
There is very little sound in All The Right Type 3.
There are warning sounds when you type an
incorrect letter and warning sounds on the ‘Timed
Writing’.
• If anything is plugged into the external headphone
jack on the back of the machine, the internal
speaker is automatically disconnected.
• The system “Sound’ may be set to zero volume/
mute.
• It is possible that another application is running in
the background and it has taken the sound channel.
Try quitting the other application and re-launching All
The Right Type 3.
Page 98
Section 7
Section 7—Technical Support
PROBLEM: When I type a line and leave a character out
or a word out of the sentence, the Results screen does not
automatically display when I finish the line.
This is not a bug. It is in the design of the program.
You will need to either press the space bar to
make up to 40 characters on that line or press the
‘Enter’ key to make it return to the next line
immediately. The results report will then display.
PROBLEM: When I type an error at the end of a line,
sometimes the program will let me type past the line
without changing to the new line.
This is not a bug. It is in the design of the program.
You will need to either press the ‘Enter’ key to
move to the next line or type several characters to
make up to 40 characters on that line. It will then
move down.
PROBLEM: I cannot remember the Teachers’ Password
to enter the Maintenance Building.
The teachers’ password is stored in a file called
Teacher.iw in the Windows directory on PC
platforms, preferences folder on MAC platforms.
To remove the current password, open the file
Teacher.iw. The password is on the second line of
the document. Note: the password is encrypted.
Delete the complete line with the encrytped
password (DO NOT DELETE THE PATHNAME
ON THE FIRST LINE). Save and close the file.
The next time that the Maintenance Building is
accessed, a message will display indicating the
password has not yet been set up. You can enter a
new one.
Section 7
Page 99
Section 7—Technical Support
PROBLEM: Students cannot remember their
passwords.
The students’ passwords are stored in the Student
Options dialog box. Enter the Maintenance
Building, select Student Records, select a class
name and click Open, select the student name.
The password is listed there.
PROBLEM: When I click on the Word Processing Plaza,
nothing happens.
Clicking on the word Processing Plaza normally
brings up the word processor loaded into your
system. If none is present on your system, this
building will be inactive.
PROBLEM: When I start the Program I get an error
message: “Please check the path name for the database.”
You need to check the location of the folder called
Databases and either change the path or mount/
map the correct server or drive on your desktop.
PROBLEM: Sequence does not work on my Custom
Drills:
Verify that you have sets of 3 lessons created and
the Skill Builder building has the 3 sections of
lessons created including 'isolated words',
'sentences' and 'paragraphs'.
Page 100
Section 7
Index
A
Access Rights and Permissions 24
Network 24
Setting 24
Single and Lab Pack 24
Adding Skill Builder Puzzles 85
Adding students 48
Adding students one at a time 48
Importing student lists 52
Using Multi-Add 50
Administration Utility 89, 90, 92
Network 92
Functions available 93
Single and Lab Pack 90
Functions available 91
All The Right Type 3 25
Getting Started 38
Starting the Program 25
Tour 25
Award Certificates 73
B
Backing Up the Database 87
Backspace Key 42
C
Campus 30
Orientation 30
Campus Buildings 75
Learning Lab 75
Practice Pavilion 77
Campus Orientation 30
Learning Lab 33
Maintenance Building 31
Practice Pavilion 34
Records Library 37
Skill Building 35
Testing Center 36
Word-Processing Plaza 37
Index
Cargo Loader Challenge 78
Certificates 73
Changing Student Options 57
Changing the Default Word-Processor 83
Class and Student Records 31
Class Name 40
Class Records 72
Viewing and Printing 72
Classes and Student Names 39
Copying Classes 47
Creating Class and Student Records 45
Creating Classes 44
Creating Custom Drillfiles from a Word
Processor D 63
Creating Student Records 48
Custom Drillfiles 60
Custom Student Reports 88
D
Database 87
Backing Up 87
Database Server 23
Linking Workstations to 23
Starting 23
Default Word-Processor 83
Changing 83
Deleting a Custom Drillfile Exercise 68
Deleting a Student Lesson 74
Deleting Classes 46
Deleting Student Records 54
Display Lines 43
Drillfile 40
Custom 60
Student Record Considerations 64
Rules 63
Drillfile Rules 63
Drillfiles 32, 60, 62, 64
Copying Custom 66
Creating Custom 62
Creating Custom from a Word Processor
D 63
Page 101
Deleting a Custom Drillfile Exercise 68
Deleting Custom 66
Editing 65
Orientation 32
using in Maintenance Building 32
E
Editing Drillfiles 65
Exporting Student Records 88
F
features 5
Floppy Disks 84
Font 83
Large 83
G
Game Mode 78
Game mode 41
Games 78
Cargo Loader Challenge 78
Racing Sculls 78
Space Crisis 78
Space Race 78
Getting Started 38
Classes and Student Names 39
Copying Classes 47
Creating Class and Student Records 45
Creating Classes 44
Creating Student Records 48
Deleting Classes 46
Options and Their Implications 40
Teacher’s Password 38
H
Hand Position Review 82
Page 102
I
Import Student Names 40
Importing student lists 52
Installation Overview 10
Lab Pack Edition 10
Network/Site License Edition 11
K
Keyboard Style 41
L
Lab Pack Installation 13
Large Font 83
Learning Lab 33, 75
Learning Sequence 7, 75
order of 7
Understanding 75
Lesson 74
Deleting 74
Lesson Error Event 41
Lesson Error Threshold 40
M
Maintenance Building 31
Class and Student Records 31
used for... 31
Messages to Students 43
Mouse Review 82
Moving Student Names 59
Multi-Add 50
N
Network Admin Utility 92
Network Installation 16
Installing Database 17
Installing Student Program 21
Installing Teacher Program 19
Starting the Database Server 23
Number Keypad Review 83
Index
O
P
Ongoing Operation 69
Security 69
On Networked Computers 70
On Non-networked Computers 69
Options 55, 57
Changing Class 55
Changing Student 57
Options and Their Implications 40
Backspace Key 42
Class Name 40
Display Lines 43
Drillfile 40
Import Student Names 40
Keyboard Style 41
Lesson Error Event 41
Lesson Error Threshold 40
Messages to Students 43
Password 43
Penalty 41
Practice Mode 41
Sequence 43
Space After Period: One/Two 43
Student Name 40
Test Mode 42
Use WAM 43
Word Wrap 42
Orientation 30
Campus 30
Class and Student Records 31
Learning Lab 33
Practice Pavilion 34
Records Library 37
Skill Building 35
Testing Center 36
Word-Processing Plaza 37
Password 43, 70, 71
Penalty 41
picture 85
Posture Review 82
Practice Mode 41
Game mode 41
Standard mode 41
Practice Pavilion 34, 77
Puzzles 85
picture 85
Skill Builder 85
Index
R
Racing Sculls 78
Records 81
Records Library 37, 81
Removing Skill Builder Puzzles 86
Reports 88
Exporting 88
Reviews 82
Hand Position Review 82
Mouse Review 82
Number Keypad Review 83
Posture Review 82
S
Section 1 5
Security 69
Password 70
Sequence 43
Sequence Option 60
example 61
Signing On 26
Student Program 29
Page 103
Students Signing-On to Student Records
29
Teachers Program 26
As a (Student) Guest 26
As a Teacher 28
As a Teacher Evaluator 27
Teachers Signing-On to Student Records
28
Single Installation 12
Skill Builder Puzzles 85
Adding 85
picture 85
Removing 86
Viewing 86
Skill Building 35, 79
Space After Period: One/Two 43
Space Crisis 78
Space Race 78
Speed Goal mode 42
Standard Mode 77
Standard mode 41
Starting the Program 25
Student Lesson 74
Deleting 74
Student Name 40
Student Names 59
Moving 59
Student Passwords 71
Setting 71
Student Program 29
Student Records 54, 72, 73, 81, 84, 88
Centralizing 84
Deleting 54
Exporting 88
Floppy Disks 84
for Teachers 72
Viewing and Printing 73, 81
Student Reports 88
Exporting 88
Students 29
Signing-On to Student Records 29
System Requirements 9
Page 104
Database Server 9
Macintosh 9
PC 9
T
Teachers Password 70
Setting/Changing 70
Teacher’s Password 38
Teachers Program 26
Technical Support 94
Test Mode 42
Speed Goal mode 42
Timed Writing mode 42
Testing Center 36, 80
Timed Writing mode 42
Tour of All The Right Type 3 25
Troubleshooting 98
U
Use WAM 43
V
Viewing and Printing Class Records 72
Viewing Skill Builder Puzzles 86
W
Word Wrap 42
Word-Processing Plaza 37, 81
Word-Processor 83
Changing the Default 83
Index