1
Installation and Configuration Guide
Oracle AutoVue 20.2.2, Desktop Deployment
September 2013
Copyright © 1999, 2013, Oracle and/or its affiliates. All rights reserved.
Portions of this software Copyright 1996-2007 Glyph & Cog, LLC.
Portions of this software Copyright Unisearch Ltd, Australia.
Portions of this software are owned by Siemens PLM © 1986-2012. All rights reserved.
This software uses ACIS® software by Spatial Technology Inc. ACIS® Copyright © 1994-2008 Spatial Technology Inc. All rights
reserved.
Oracle is a registered trademark of Oracle Corporation and/or its affiliates. Other names may be trademarks of their respective
owners.
This software and related documentation are provided under a license agreement containing restrictions on use and disclosure and
are protected by intellectual property laws. Except as expressly permitted in your license agreement or allowed by law, you may
not use, copy, reproduce, translate, broadcast, modify, license, transmit, distribute, exhibit, perform, publish or display any part, in
any form, or by any means. Reverse engineering, disassembly, or decompilation of this software, unless required by law for
interoperability, is prohibited.
The information contained herein is subject to change without notice and is not warranted to be error-free. If you find any errors,
please report them to us in writing.
If this software or related documentation is delivered to the U.S. Government or anyone licensing it on behalf of the U.S. Government, the following notice is applicable:
U.S. GOVERNMENT RIGHTS
Programs, software, databases, and related documentation and technical data delivered to U.S. Government customers are "commercial computer software" or "commercial technical data" pursuant to the applicable Federal Acquisition Regulation and agencyspecific supplemental regulations. As such, the use, duplication, disclosure, modification, and adaptation shall be subject to the
restrictions and license terms set forth in the applicable Government contract, and, to the extent applicable by the terms of the Government contract, the additional rights set forth in FAR 52.227-19, Commercial Computer Software License (December 2007).
Oracle USA, Inc., 500 Oracle Parkway, Redwood City, CA 94065.
This software is developed for general use in a variety of information management applications. It is not developed or intended for
use in any inherently dangerous applications, including applications which may create a risk of personal injury. If you use this software in dangerous applications, then you shall be responsible to take all appropriate fail-safe, backup, redundancy and other measures to ensure the safe use of this software. Oracle Corporation and its affiliates disclaim any liability for any damages caused by
use of this software in dangerous applications.
This software and documentation may provide access to or information on content, products and services from third parties. Oracle
Corporation and its affiliates are not responsible for and expressly disclaim all warranties of any kind with respect to third party
content, products and services. Oracle Corporation and its affiliates will not be responsible for any loss, costs, or damages incurred
due to your access to or use of third party content, products or services.
September 2013
Installation and Configuration Guide
3
CONTENTS
PREFACE.......................................................................................................................................4
Audience .................................................................................................................................................. 4
Related Documents................................................................................................................................. 4
Conventions............................................................................................................................................. 4
INTRODUCTION .........................................................................................................................5
UPGRADING AUTOVUE............................................................................................................6
Markups ............................................................................................................................................ 6
SYSTEM REQUIREMENTS .......................................................................................................8
Hardware Requirements ....................................................................................................................... 8
AUTOVUE INSTALLATION......................................................................................................9
Planning................................................................................................................................................... 9
Pre-requisites .......................................................................................................................................... 9
Installing AutoVue ................................................................................................................................. 9
Starting AutoVue.................................................................................................................................. 11
File Associations ................................................................................................................................... 11
Symbol Markup Entities on Multiple AutoVue Instances................................................................ 12
COMMAND-LINE OPTIONS FOR AUTOVUE.....................................................................13
CONFIGURING AUTOVUE .....................................................................................................14
Changing the Locale of AutoVue ........................................................................................................ 16
COMMAND-LINE PARAMETERS .........................................................................................17
Setting the -PARAM Flag .................................................................................................................... 17
CONFIGURING MEMORY SETTINGS .................................................................................19
Configuring log4j.................................................................................................................................. 19
NON-INTERACTIVE INSTALLATIONS ...............................................................................20
Installation ............................................................................................................................................ 20
Uninstallation........................................................................................................................................ 20
DEBUGGING AUTOVUE..........................................................................................................21
Logging for AutoVue............................................................................................................................ 21
Logger Information......................................................................................................................... 21
CUSTOMIZING THE GUI ........................................................................................................23
Choosing the GUI File.......................................................................................................................... 23
Modifying the GUI File ........................................................................................................................ 23
Structure and Syntax of GUI Files ................................................................................................. 23
GUI Configuration Syntax.............................................................................................................. 24
APPENDIX A: SAMPLES AND API EXAMPLES INCLUDED WITH AUTOVUE .........29
API Examples ....................................................................................................................................... 29
Sample Files .......................................................................................................................................... 29
Adding Custom Tools Menu to AutoVue ........................................................................................... 29
FEEDBACK .................................................................................................................................31
General AutoVue Information ............................................................................................................ 31
Oracle Customer Support.................................................................................................................... 31
My Oracle Support AutoVue Community ......................................................................................... 31
Sales Inquiries....................................................................................................................................... 31
Installation and Configuration Guide
4
Preface
The Oracle AutoVue Installation and Configuration Guide describes how to install and configure Oracle AutoVue
Desktop Deployment. For the most up-to-date version of this document, go to the AutoVue Documentation Web site
on the Oracle Technology Network at http://www.oracle.com/technetwork/documentation/
autovue-091442.html.
Audience
The Oracle AutoVue Installation and Configuration Manual is directed at any user of Oracle AutoVue Desktop
Deployment.
Related Documents
For more information, see the following documents in the Oracle AutoVue documentation library:
•
•
•
•
•
•
•
User’s Manual
AutoVue Viewing Configuration Guide
Migration Guide
Release Notes
Acknowledgments
Supported Formats List
Product Variations - Feature Matrix
Conventions
The following text conventions are used in this document:
Convention
Meaning
boldface
Boldface type indicates graphical user interface elements associated with an action, or
terms defined in the text.
italic
Italic type indicates book titles, emphasis, or placeholder variables for which you
supply particular values.
monospace
Monospace type indicates commands within a paragraph, URLs, code in examples,
text that appears on the screen, or text that you enter.
[root directory]\[sub
directory]
In Windows and Linux OSes, directory hierarchy is written with backward slashes (\)
and forward slashes (/), respectively. In this document, unless mentioned otherwise,
directory hierarchy for Windows and Linux OSes are written with the backward slash.
<angular brackets>
Indicates required entries but are not to be included in the entered information.
{curly braces}
Indicates mandatory information.
[square brackets]
Indicates optional syntactical elements.
|
Indicates an either-or type of choice.
...
Indicates that information may be repeated.
Installation and Configuration Guide
5
Introduction
AutoVue is Oracle’s suite of Enterprise Visualization solutions, which are designed to view, digitally annotate and
collaborate on any digital information from any system. AutoVue delivers visualization capabilities for many
document types, including business documents such as Office and Graphics, as well as technical document types such
as 2-D/3-D Computer Aided Design (CAD) and Electronic Design Automation (EDA).
AutoVue Desktop Deployment is a solution for users that want to run AutoVue locally as a personal productivity tool
on their individual desktops.
For current users of AutoVue Desktop Version that plan to move to AutoVue Desktop Deployment, a migration guide
is available to plan and assist with the migration. Contact your Oracle Customer Support representative to obtain a
copy of the migration guide.
This document provides instructions for installing and configuring AutoVue Desktop Deployment. In the remainder
of this document, AutoVue Desktop Deployment will be referred to as AutoVue.
Installation and Configuration Guide
6
Upgrading AutoVue
If you are upgrading from AutoVue 20.1.x/20.2.x, you do not need to run the uninstaller before you install AutoVue
20.2.2. You can just run the installer for AutoVue 20.2.2. The installer detects if AutoVue 20.1.x/20.2.x is installed on
your machine. If it is installed, the installer backs up required data, uninstalls version 20.1.x/20.2.x and then installs
20.2.2 to the same location. Below is a list of configuration settings that are migrated:
• User INI file, default.ini and allusers.ini files
• If you have Oracle AutoVue 20.1.x/20.2.x installed previously, the installer upgrades the previous configuration
settings from allusers.ini and autovue.properties when you install the new version.
• Customized GUI files (located in the <AutoVue Installation Directory>\bin\Profiles directory)
• Global user settings from the allusers.ini file and default user settings from the default.ini file (located in the
<AutoVue Installation Directory>\bin directory)
• Custom logging settings from the log4j.xml file (located in the <AutoVue Installation Directory>\bin directory)
• Custom markup symbol libraries (located in the <AutoVue Installation Directory>\bin\Symbols directory)
• Markup files (located in the <AutoVue Installation Directory>\bin\Markups directory)
Markups
Markups are stored in an avred folder at the location of the base file. Alternatively, you can changed the location of
markups by setting option autovue.markups.local.directory. When upgrading from version 20.1.x/20.2.x, the installer
will set option autovue.markups.directory to reflect the directory where the 20.1.x/20.2.x markups were saved (for
example, <AutoVue installation directory>\bin\Markups). AutoVue will only read markups from this location. When
you modify or resave these markups, they will be saved with the current version behavior (that is, they are saved
either into the avred folder or at the location specified by autovue.markups.local.directory).
Note: Do not modify option autovue.markups.directory.
Installation and Configuration Guide
7
Installation and Configuration Guide
8
System Requirements
Oracle AutoVue Desktop Deployment is certified on the following platforms:
•
•
•
•
Windows XP—32-bit and 64-bit
Windows Vista—32-bit and 64-bit (AutoVue running in 32-bit mode)
Windows 7—32-bit and 64-bit (AutoVue running in 32-bit mode)
Windows 8—32-bit and 64-bit (AutoVue running in 32-bit mode)
Hardware Requirements
The recommended requirements for a machine running AutoVue Desktop Deployment is as follows:
•
2 GB of RAM
Note: AutoVue is a 32-bit application. Generally, 32-bit processes are limited to 2 GB of RAM. However, the
AutoVue Desktop Deployment executable is large address aware. This means that if AutoVue is running on a 64bit OS that has 4 GB of RAM, AutoVue can use up to 4 GB of RAM. If AutoVue is running on a 32-bit machine
that is booted up with the 3 GB switch, and the machine has 3 GB of RAM, AutoVue can use up to 3 GB of
RAM.
•
•
•
•
•
2 GHz dual-core CPU
Display driver that supports OpenGL and has dedicated memory (required for 3D support).
400 MB of disk space for installation.
6 GB of free disk space:
• 4 GB needed for storing cached files
• Remainder needed by AutoVue to store temporary files (at the %TEMP% path).
If streaming file generation is enabled, you must ensure that the disk space specified by autovue.cache.size is
available to AutoVue.
Refer to section Configuring AutoVue for more information on streaming files.
Installation and Configuration Guide
9
AutoVue Installation
Planning
AutoVue, by default, installs at C:\Oracle\AutoVue Desktop Deployment. AutoVue must have write permissions to
the installation path in order to start up successfully since it stores markup symbols, markups, profiles, and cache data
in sub-folders at the installation path. On Operating Systems that have User Access Control (UAC) enabled, ensure
that AutoVue is installed in a directory where the user has write permissions.
If UAC is enabled on the system, the installer notifies you that UAC is enabled and reminds you to install into a
location where the user has write permissions.
Pre-requisites
•
•
•
The installer for AutoVue also installs the AutoVue Document Converter print driver. Ensure that the print
spooler service is enabled and that you have permissions to install print drivers on the machine where you will
install AutoVue.
The machine that is running AutoVue must have a color depth of at least 16-bits. If the machine has a lower color
depth, you may run into discrepancies in color or filling when viewing, printing or converting from AutoVue.
AutoVue stores temporary files at the user’s %TEMP% directory. These files are generated by AutoVue while
processing files and are generally removed once the processing is complete. Ensure that the user running
AutoVue has a temporary directory defined and is able to write to the temporary directory.
Installing AutoVue
Note: If you want to install AutoVue in non-interactive mode, refer to Non-Interactive Installations.
Important:
•
•
•
•
Shutdown all applications (including AutoVue) before you run the installer for the AutoVue Desktop
Deployment.
Make sure the AutoVue installer is run as an Administrator. If User Access Control (UAC) is enabled, select Yes
for the prompt that asks you if you want to run as Administrator. If UAC is disabled, right-click the installer, and
then select Run as Administrator.
When upgrading, if the installer prompts you to reboot the machine before or after the uninstallation, you must
reboot the machine in order to get a successful installation.
When upgrading your installation of AutoVue, do not cancel the installation process once it has begun.
Cancelling the installation may leave your current installation of AutoVue unusable.
To install AutoVue, do the following:
1
Download the Oracle AutoVue Media Pack and extract its contents.
2
Close all applications before you start the installation for AutoVue.
3
Run the AutoVue installer executable InstallDesktopDeployment.exe that is located in folder
DesktopDeployment.
4
Select a language from the installation dialog and then click OK.
5
Click Next to begin installation.
6
If the installer detects version of 20.1.x/20.2.x installed on the machine, it prompts if you want to upgrade your
installation.
If you choose to not upgrade, the installer will exit. You must backup required data manually, uninstall 20.1.x/
Installation and Configuration Guide
20.2.x and then re-run the installer.
If you choose to upgrade, the installation will continue. It will install to the same location as 20.1.x/20.2.x.
7
Specify the installation directory and then click Next.
Example: C:\Oracle\AutoVue Desktop Deployment
8
Select an installation set and then click Next:
Installation Set
Description
Standard
Installs the most common AutoVue features. Note that this set does not install the sample drawing
files or API examples.
Custom
You can select the features to install. Select this installation set to install the sample drawing files
and API examples.
If you selected the Custom install set continue to step 9, otherwise proceed to step 10.
9
Select which of the following features to install and then click Next:
Option
Description
Program Files
Installs Oracle AutoVue. The option is selected by default.
Administration Documentation
Installs Oracle AutoVue system administration documentation. The option is
selected by default.
User Documentation
Installs AutoVue end-user documentation. The option is selected by default.
Sample Files
Installs drawing sample files.
API Examples
Installs examples of how Oracle AutoVue features can be added to third-party
applications using APIs.
10 Select one of the following locations to create shortcuts and then click Next.
Options
Description
In a new Program Group
Creates a shortcut in the Program group of the Start menu. For example, Oracle
AutoVue. This is the default option.
In an existing Program Group
Adds a shortcut to an existing Program group. For example, Accessories.
In the Start Menu
Adds a shortcut in the Start menu.
On the Desktop
Adds a shortcut on the Desktop.
In the Quick Launch Bar
Adds a shortcut to the Quick Launch bar.
Other
Adds a shortcut to the specified location.
Don’t create icons
Shortcuts are not created.
To create icons for all users of AutoVue, select Create Icons for All Users.
11 Review the pre-installation summary and then click Install.
12 Click Done to quit the installer.
10
Installation and Configuration Guide
11
AutoVue is installed in the specified directory. Start AutoVue to verify that your installation went through
successfully. Refer to section Starting AutoVue for more information.
Note: If there are any warnings or errors, refer to the installation log file, install.log, located in the <AutoVue
Installation Folder> directory.
Starting AutoVue
To verify your AutoVue installation start up AutoVue by doing one of the following:
•
•
From the program shortcuts, select Oracle AutoVue Desktop Deployment and then Start AutoVue.
or
Run autovue.exe located in the <AutoVue Installation Directory>\bin directory.
AutoVue loads and the AutoVue icon
appears in the system tray.
Note: On machines that have firewall enabled, a pop-up appears asking if you want to block or unblock the program.
AutoVue will work fine no matter what option you choose.
If you close the AutoVue window, it continues to run in the background. To close AutoVue completely, right-click the
AutoVue icon
in the system tray and select Close.
Note: If AutoVue does not load, enable logging and contact Oracle Customer Support. For information on enabling
logging, refer to section Logging for AutoVue.
File Associations
You can associate AutoVue with certain file types so that when you double-click on a file of this type, it opens in
AutoVue.
Below are the ways to associate file types with AutoVue:
1
From Windows explorer:
- When you double-click on a file that is not associated with another application, you will be prompted with the
Open With dialog where you can specify the application with which to open the file. Select AutoVue Desktop
Deployment from the list of programs and then select Always use the selected program to open this kind of
file.
- If a file type is associated with an application, right click on the file and select Open With and then select
AutoVue Desktop Deployment from the list of programs. Select the Always use the selected program to open
this kind of file checkbox.
2
Programmatically:
You can create a batch file to associate file types with AutoVue. Create a batch file with following content:
@assoc .ext=AVFile
@ftype AVFile=”%~dp0autovue.exe” “%1”
Replace .ext with the file extension that you want to associate with AutoVue. Repeat this line for all extensions
that you want to associate with AutoVue.
For example:
@assoc .dwg=AVFile
@assoc .dgn=AVFile
@assoc .pdf=AVFile
@ftype AVFile=”%~dp0autovue.exe” “%1”
Run this batch file to associate the specified file extensions with AutoVue.
Installation and Configuration Guide
12
Symbol Markup Entities on Multiple AutoVue
Instances
If you are using Symbol markup entities, it is recommended to avoid sharing the Symbols folder between different
AutoVue instances as this may lead to reliability and stability issues. It is good practice to replicate the Symbols
folder across all AutoVue instances at regular intervals. You should plan the replication for a time when AutoVue is
not in use to ensure that Symbols are not being used.
Installation and Configuration Guide
13
Command-Line Options for AutoVue
AutoVue supports the following command line options:
•
•
You can specify an alternative configuration file for AutoVue, by specifying the -config parameter.
Syntax: autovue.exe -config <fullpath to config file>
For example:
autovue.exe -config "C:\users\avuser\appdata\autovue\autovue.properties"
You can specify a filename to load when starting AutoVue by specifying the full path to the file on the command
line.
For example:
autovue.exe C:\samples\2D\AutoCAD.dwg
Note: You can specify multiple files as command line options. AutoVue opens the specified files in new child
windows.
Note: By default, the file opens in a new window. To change this behavior, you must set NEWWINDOW
parameter to FALSE in autovue.properties. Refer to section Configuring AutoVue for more information.
For example:
autovue.exe C:\samples\2D\AutoCAD.dwg C:\samples\3D\Solidworks.sldprt
Installation and Configuration Guide
14
Configuring AutoVue
You can configure AutoVue by modifying autovue.properties located in the <AutoVue Installation Directory>\bin
directory. Configuration parameters include configuring the maximum memory available to AutoVue, location of
markups, cache and profiles, GUI file to use on startup, new window behavior, and so on. Changes to
autovue.properties will take effect when AutoVue is restarted. Refer to the following table for the list of
configuration parameters:
For Example: C:\Program Files\Oracle\AutoVue Desktop Deployment\bin
The following table lists the parameters that can be configured.
Property
Description
Default
Specify the INI file where AutoVue stores information on the file
formats supported by AutoVue. We recommend that you do not
change this option value.
Note: AutoVue also saves certain memory management settings
in this file. We recommend that you do not modify these options
or the file (VueCore.ini).
VueCore.ini
autovue.users.directory =
file path
Contains the directory in which user information is stored
(initialization files and GUI files). The user must have write
permissions to the folder.
AutoVue creates an <username>.ini file for every user that
accesses AutoVue. This file is stored at the location specified by
the autovue.users.directory parameter.
<AutoVue installation
directory>\bin\Profiles
autovue.users.defaultini =
file name
AutoVue provides a way to force certain INI settings to the user
INI the first time the user accesses AutoVue. This is done by
setting the required options in the default.ini file or in the file
specified by autovue.users.defaultini parameter. This file should
be located at <AutoVue Installation Directory>\bin directory.
default.ini
autovue.users.allusersini =
file name
AutoVue provides a way to force INI settings to the user profile
every time a user accesses AutoVue. This is done by setting
required options in allusers.ini (or the files specified by
autovue.users.allusersini). This file should be at <AutoVue
Installation Directory>\bin directory.
allusers.ini
Main Options
autovue.inifile = file name
User Profiles Options
Proxy Options
autovue.http.proxyhost
autovue.ftp.proxyhost
Startup Options
If a file requires resources from the Internet, AutoVue must
connect to the Internet to retrieve the required resources. If the
machine that AutoVue is installed on uses a proxy server to
connect to the Internet, you must set the proxy setting to allow the
request to go through.
For example:
autovue.http.proxyhost=my.proxyserver.com:8
0
autovue.ftp.proxyhost=
my.proxyserver.com:80
Installation and Configuration Guide
15
autovue.classpath
Specifies the classpath needed for AutoVue to startup
successfully.
We recommend that you do not change this parameter.
autovue.jre
Specifies the path to the java executable used by AutoVue.
We recommend that you do not change this value.
<AutoVue installation
directory>\jre\bin\java.exe
autovue.jre.path
Specifies the path to the JRE used by AutoVue.
We recommend that you do not change this value.
<AutoVue installation
directory>\jre
autovue.cmdline
Specifies the command line parameters for AutoVue. You can
modify memory settings for AutoVue, modify the log4j
configuration and specify additional commands here using the Param flag. Do not modify other values.
Refer to section Command-Line Parameters for more
information.
autovue.splash=full path of
PNG/JPEG
Specify the splash screen to display while AutoVue starts up.
If the full path of the PNG or JPEG is not specified, the splash
screen does not display.
autovue.help.file.<languag
e> = file path
Entry specifies the file path to the English (en)/French (fr)/
German (de)/Japanese (ja) Help file.
<AutoVue installation
directory>\html\help\<lan
guage>\AutoVueOnlineH
elp.html
For example:
<AutoVue installation
directory>\html\help\en\A
utoVueOnlineHelp.html
autovue.markup.nativegui.t
ype = [0|1|2|3|4|7]
Add Author, Date, and Markup Info columns to the Markup Files
dialog box.
0: Name column displays
1: Enable Author
2: Enable Date
4: Enable Markup Info
Note: These are ORed flags. For example: Enter 7 to enable all
three columns.
0
autovue.markups.local.dire
ctory = file path
In version 20.1, markup files are saved with the name <base file
name>.<end-user specified extension>.
By default, AutoVue Desktop Deployment saves markups in the
avred directory at the base file location. If the user does not have
permission to write into the base file location, they can export the
markup into an alternate directory.
Alternatively, user can set this property
autovue.markups.local.directory to a location where all markup
files should be stored.
Note: If you change the markup save location, you will need to
import or open and then save the markups from the old location
so that they are saved at the new location.
No default value; markups
are stored at: <Base file
location>\avred
autovue.markups.symbols.
directory=file path
Specifies the directory where AutoVue stores all symbol libraries
and symbol files.
<AutoVue Installation
Directory>\bin\Symbols.
Markup Options
Installation and Configuration Guide
16
Streaming File Options
autovue.metacache.enable
=[TRUE|FALSE]
Specifies whether to generate streaming files.
When set to TRUE, streaming files are stored in the location
specified by the autovue.cache.directory parameter.
Note: Streaming file generation is not supported for PDF
FALSE
Portfolio files.
autovue.metacache.pdf.ena
ble=[TRUE|FALSE]
Set to TRUE to enable generation of streaming files for PDF
documents.
Note: Option autovue.metache.enable must be set to TRUE for
this option to take effect.
FALSE
Note: The following options take effect set if autovue.metcache.enable=TRUE.
autovue.cache.directory =
file path
Specifies in which directory the cached files should be saved. A
central cache information file named cache.map is stored in the
same directory. The user must have write permissions to the
folder.
<AutoVue installation
folder>\bin\Cache
autovue.cache.size = int
Specifies, in Megabytes, the maximum size of the file cache.
If not specified, or if value specified is less than 50 MB, the
default value of 4GB is used.
4096
autovue.cache.maxnumfile
s=integer
Specifies the maximum number of files allowed in the cache
directory.
64000
autovue.cache.maxlifetime
=integer
Specifies the maximum number of days a file is kept in the
AutoVue cache directory.
30 (days)
autovue.rmi.port = port
value
By default, RMI port is not used. If you enable streaming file
generation (autovue.metacache.enable=true), AutoVue uses the
RMI port specified by this parameter. You may need to change
this parameter in situations where another application uses the
same port or if company policy restricts the range of ports you
can use.
1299
docserver.cmdline
Specifies the command line parameters for AutoVue's streaming
file generator. We recommend that you do not change these files
(other than log4j configuration)
Changing the Locale of AutoVue
AutoVue supports the following languages for the user interface:
•
•
•
•
•
•
•
•
English (EN)
French (FR)
German (DE)
Japanese (JA)
Traditional Chinese (TW)
Simplified Chinese (ZH)
Korean (KO)
Swedish (SV)
On startup, AutoVue detects if the language of the OS is one of its supported locales and automatically switches the
user interface to the locale of the operating system. When the OS language is not supported by AutoVue, the AutoVue
user interface defaults to English.
Installation and Configuration Guide
17
It is possible to force the AutoVue user interface to a supported language by specifying the LOCALE parameter. See
section Command-Line Parameters for the structure and syntax. In cases where the operating system locale and
AutoVue locale are different, you might notice that some dialogs or buttons in AutoVue use the locale from the OS.
This is because AutoVue relies on the OS for UI items such as, Open, Close, OK, Cancel,.... You can set the Java
parameter user.locale=<locale> to ensure that these items also appear in the right locale.
This option must be set in the autovue.cmdline property in autovue.properties.
You can also set the Java parameter user.country=<country> for country-specific localization.
Command-Line Parameters
You can configure AutoVue by modifying certain settings in autovue.cmdline property in autovue.properties.
Setting the -PARAM Flag
You can specify command line parameters to AutoVue by setting the -Param flag in the autovue.cmdline
property in autovue.properties.
Syntax:
-PARAM <name>=<value>
Follow are a list of parameters than can be configured.
Name
Type
FILENAME
Note: When specifying a local file, ensure that the filepath is preceded by an upload:// protocol.
For example: upload://c:\samples\2d\acad.dwg
EXTRABUNDLES
Value
http://host/file
Specify a HTTP URL for file open.
ftp://host/file
or...
ftp://<user>:<password>@
<ftpserver>/file
Specify a FTP URL for file open.
name of the bundle file
If you are adding custom actions to AutoVue, you can
specify the name of the custom resources file using this
parameter. Names of the custom resource files are
expected to follow: filename_XX.properties, where XX
is a two-character representation of a language.
When specifying the custom resources using this
parameter, do not specify the language and the
extension.
For example:
<PARAM NAME=”EXTRABUNDLES”
VALUE=”CustomActions”>
Installation and Configuration Guide
18
Name
Type
Value
GUIFILE
String
The Graphical User Interface (GUI) definition file used.
GUI files are stored in subdirectories of the root
directory specified in the autovue.users.directory
parameter of the autovue.properties file. The
specification can also specify a local file using the
“file://” convention.
Default for the autovue.users.directory parameter is
<bin dir>\Profiles.
Refer to appendix Customizing the GUI for more
information.
HEAVYWEIGHT
[TRUE|FALSE|AUTO]
Specify if you would like to use JOGL’s heavyweight or
lightweight widget to render 3D Models. When
heavyweight is on, AutoVue uses hardware acceleration
to render 3D.
Default is AUTO and AutoVue uses heavyweight
rendering on all clients except MAC clients.
LOCALE
[DE|EN|FR|JA|KO|TW|ZH|SV]
The Locale to be used in the user interface, specified as
an ISO639 two-letter code.
Using this parameter, you can force the applet GUI to be
displayed in one of the supported languages. If not set,
the Locale is determined using the client system
properties.
Syntax: -PARAM LOCALE=”FR”
See section Changing the Locale of AutoVuefor
additional configuration that maybe necessary for
forcing AutoVue user interface to a specific LOCALE.
NEWWINDOW
[TRUE|FALSE]
Specifies whether to launch a new window when
running an additional instance of AutoVue.
If set to TRUE, a new window is launched without
replacing the existing AutoVue window when there is
already an instance of AutoVue running.
If set to FALSE, a new window is not launched when
there is already an instance of AutoVue running.
Note: If you set NEWWINDOW to FALSE and you
specify 2 or more files to open in the command line for
AutoVue, AutoVue will open these files in separate
windows.
Installation and Configuration Guide
19
Configuring Memory Settings
The maximum memory available to the Java component of the Desktop Deployment is determined by the -Xmx flag
in the autovue.cmdline property. By default, this is set to 256MB. If you encounter a situation where AutoVue
indicates that it is running low on Java Virtual Memory (JVM), you must set the maximum memory to a higher value.
It is recommended that you increase the maximum memory for the Java component to 512MB.
AutoVue Desktop Deployment has both Java and native components. The -Xmx flag only controls the memory
available to the Java components. It is recommended that you do not set the memory for the Java component to a very
large value as it results in less memory for the native components. The native components use the remaining memory
on the machine after the specified Java memory used by the Desktop Deployment.
You can tell the JVM how to allocate/deallocate heap memory with the -XX:MinHeapFreeRatio and
-XXMaxHeapFreeRatio options. By setting these options to a reasonably small value (for example,
XX:MinHeapFreeRatio=10 and -XXMaxHeapFreeRatio=10) the memory allocated is reduced and the
unused memory may be utilized elsewhere. Ultimately, it is up to the garbage collection settings of the JVM whether
or not to use these options. As a result, these options are not critical and removing them does not cause the Desktop
Deployment to stop working, the Desktop Deployment may just use more memory.
For more information on these options, refer to the documentation at http://java.sun.com/docs/hotspot/gc1.4.2/.
Configuring log4j
The log4j configuration file to use is specified by the -Dlog4j.configuration parameter in
autovue.cmdline. By default, this the file is <AutoVue Installation directory>\bin\log4j.xml. Refer to section
Debugging AutoVue for more information.
Installation and Configuration Guide
20
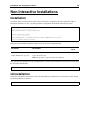
Non-Interactive Installations
Installation
To install AutoVue in non-interactive mode, you need to specify a configuration file that contains the required
installation parameters. To do so, you must generate the configuration file manually following this syntax.
#Specify Installation Directory
#-----------------------------USER_INSTALL_DIR=C:\\Oracle\\AutoVue
#Select Shortcut Folder
#---------------------USER_SHORTCUTS=C:\\Documents and Settings\\Administrator\\Start
Menu\\Programs\\Oracle AutoVue
Following are the installation parameters that you can specify in the configuration file:
Parameter
Description
USER_INSTALL_DIR={file path}
Specify the path where you want to install AutoVue.
USER_SHORTCUTS={file path}
Specify the shortcut path.
Note: This parameter is only for Windows OS installations.
Default
Value
After you specify the parameters for the configuration file, you can run the installation in non-interactive mode. Enter
the following command lines:
InstallDesktopDeployment.exe -i silent -f <full path to configuration file>
Uninstallation
If AutoVue is installed in non-interactive mode, the uninstallation is automatically in non-interactive mode. Simply
invoke the uninstaller for AutoVue:
<AutoVue Installation Folder>\uninstall\uninstall.exe
Installation and Configuration Guide
21
Debugging AutoVue
Logging for AutoVue
AutoVue uses the log4j package to generate debug information. The configuration file log4j.xml (located in the
<AutoVue Install Root>\bin directory) makes it possible to display debugging information for AutoVue. Log files are
created in the <AutoVue Install Directory>\bin\logs folder by default. In situations where trouble-shooting
information is necessary, an Oracle Global Customer Support representative will ask you to update the log4j.xml and
enable logging for AutoVue.
Note: By default, logging is enabled at the WARN level. Any warning messages generated while you use AutoVue
are written to the log4j output file.
For additional information regarding log4j, go to Apache’s log4j documentation.
The following section describes the classes for which you can enable debugging information.
Logger Information
The following descriptions explain what kind of logger information will be seen for each class specified:
Class
Description
com.cimmetry.jvueserver.con
figuration
Displays reports on loading errors of AutoVue’s configuration.
com.cimmetry.jvueserver.eve
nt
Displays information concerning posting and handling of different AutoVue
events (opened and closed sessions, opened and closed documents, and so on).
com.cimmetry.jvueserver.cac
he
Displays information concerning the AutoVue cache. Reports messages and
errors related to loading the cache, locking, saving, deleting cached files as well
as searching for archive and XRef files.
log4j.category.com.cimmetry
.connection
Displays information concerning downloading files from the network.
com.cimmetry.jvueserver.doc
ument
Displays document-related information (open, information, properties, and so
on).
com.cimmetry.jvueserver.doc
ument.native
Displays messages and error reporting for document related native code
execution.
com.cimmetry.jvueserver.str
eamingfile
Displays information concerning generation and usage of streaming files.
com.cimmetry.jvueserver.sym
bols
Displays mapping between the stamp library name in the UI and the actual SMB
file name on the AutoVue server.
com.cimmetry.frontend
Displays all messages and errors reported from the AutoVue client.
You can specify what kind of information to output by setting the classes to one of the following information levels:
Information Level
Description
INFO
Displays informative messages such as session information, document open requests.
WARN
Displays warning messages. This is the default value.
Installation and Configuration Guide
Information Level
Description
ERROR
Displays errors or exceptions.
OFF
Turn logging off.
22
Installation and Configuration Guide
23
Customizing the GUI
Choosing the GUI File
AutoVue provides you the option of customizing your graphical user interface (GUI). By default, the GUI
specification is not set and AutoVue uses an internal GUI file for the menus and toolbars. The GUI file that AutoVue
generates is the same as the default.gui file located in the <AutoVue Installation Folder>\bin directory.
If you wish to have a customized GUI for AutoVue, you must create a custom GUI file and specify this custom file
using the -param GUIFILE command line parameter. GUI files are placed at the location specified by
autovue.users.directory. By default, the location is <AutoVue Installation Directory>\bin\Profiles.
Modifying the GUI File
The GUI definition file describes which controls are added to which context (such as MenuBar, ToolBar, and so on).
If you are customizing your GUI file for the first time, it is recommended that you make a backup of the default.gui
file and modify the controls in this file to meet your needs. The deafult.gui is located in the <AutoVue Installation
Directory>\bin folder.
If you have a previous version of AutoVue and you used a customized GUI in this previous version, we recommend
that you use the diff utility to perform a comparison between the previous version's default.gui and your customized
GUI. The delta between the two GUI files should be manually applied to the current version GUI.
Note: If you use the previous version’s customized GUI with the new version of AutoVue, you might run into
situations where some or all of the GUI elements fail to load.
Note: It is recommended to hide GUI items by changing PERM_READ to PERM_HIDE instead of removing them
from the GUI file.
Structure and Syntax of GUI Files
AutoVue supports five modes: View, Compare, Markup, Collaboration, and Print Preview. A GUI file defines the
graphical interface for each mode. Menu bars, toolbars, status bar and Right Mouse Button (RMB) menus are defined
in this file. For some of these objects, location (north, south, west, east) may be specified. Toolbars are located in
north, west or east. The status bar is always located at the bottom of the component (south).
Note: Popup menus may be added to menu bars. Menu items, popup menus or separators may be added to popup
menus. Toolbars only accept buttons. Buttons or panes may be defined for the status bar. The RMB popup is
processed as any other popup menu.
The following table lists each GUI file for each mode:
2D
EDA
3D
View
VIEW
ECADVIEW
SMVIEW
Markup
MARKUP
ECADMARKUP
MARKUP3D
Collaboration
COLLABORATION
ECADCOLLABORAT
ION
COLLABORATION3
D
Compare
COMPARE
COMPARE
COMPARE3D
Print Preview
PRINTPREVIEW
PRINTPREVIEW
PRINTPREVIEW
Installation and Configuration Guide
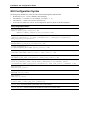
GUI Configuration Syntax
The most generic definition of a GUI file can be described through the symbols below:
•
•
•
•
Words with CAPITAL LETTERS should be entered literally.
The character ‘|’ is used as “or” (for example, a|b means a or b)
The character ‘*’ means “zero or more occurrences of.”
A GUI file can contain one or more “GUI configuration” blocks as shown in the following table:
GUI Configuration Blocks
GUI_configuration =
BEGIN UI VIEW UI_mode_configuration END
{BEGIN UI COMPARE | MARKUP UI_mode_configuration END}
*UI_mode_configuration =
{menu_bar_configuration | {toolbar_configuration}* | status_bar_configuration |
RMB_popup_menu_configuration}
menu_bar_configuration =
MENUBAR BEGIN {popup_menu_configuration}* END
toolbar_configuration =
TOOLBAR NORTH|WEST|EAST BEGIN {button_control }* END
status_bar_configuration =
STATUSBAR SOUTH BEGIN {button_control | pane_control } * END
RMB_popup_menu_configuration =
RMB BEGIN {popup_menu_configuration | menu_item_control }* END
popup_menu_configuration =
POPUP IDS_{FILE|EDIT |VIEW |OPTIONS |HELP | MANIPULATE |TOOLS |ANALYSIS |MODIFY
|COLLABORATION} BEGIN {popup_menu_configuration | menu_item_control | SEPARATOR }* END
button_control =
BUTTON action_control`
menu_item_control =
MENUITEM action_control
pane_control =
PANE action_control
action_control =
control_name, control_key_list, permissions
control_name: For list of available control names refer to Control Names.
control_key_list: For the control key list for different controls refer to Control Names.
24
Installation and Configuration Guide
25
GUI Configuration Blocks
permissions: All action names need “PERM_READ”.
These are the exceptions to this rule:
VueActionFilePrint needs: PERM_READ|PERM_HEADERS|PERM_WATERMARK
VueActionOptionsBars needs: PERM_NONE
VueActionHelp needs: PERM_NONE
Example:
To define a very basic user interface that only allows users, through menu items, to open or print a file and get the file
information without changing watermark/headers/footers:
BEGIN UI VIEW
MENUBAR BEGIN
POPUP IDS_FILE BEGIN
MENUITEM VueActionFileOpen, , PERM_READ
MENUITEM VueActionFileProperties, , PERM_READ
MENUITEM VueActionFilePrint, , PERM_READ
END
END
END
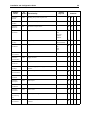
Control Names
The following table lists available Control Names and their functionality.
Control
Key List
VueAction
FileOpen
VC
When INI option EnableUniversalFileChooser is
set to 0, invokes open URL dialog. When option is
set to 1, the universal file chooser dialog (that
supports URLs, local files, server:// protocol and
DMS files) appears. Default for
EnableUniversalFileChooser is 1.
VueAction
FileMarkup
V
Switch to Markup mode
VueAction
FileCompare
V
Switch to compare mode
VueAction
FileOverlays
V
Select and modify overlays
VueAction
FileProperties
VCM
(M:
status
bar only)
Show file properties
RMB
Contexts
Status Bar
Functionality
Toolbar
UI*
Modes
Popup Menu
Control
Name
Installation and Configuration Guide
Control
Name
26
Control
Key List
UI*
Modes
Functionality
VueAction
FilePrint
VCM
Modify print options and print a file
VueAction
FileMRU
V
List most recently used documents
VueAction
EditSearch
VM
Do search or repeat search
VueAction
ViewZoom
VCM
Apply zoom
In/
Out/
Previous/
FullRes/
FitBoth/
VueAction
ViewFlip
VCM
Apply flip
Vertical/
Horizontal/Both
VueAction
ViewRotate
VCM
Apply rotation
0/
90/
180/
270
VueAction
ViewContrast
VCM
Apply contrast
VueAction
ViewAntiAlias
VCM
Apply anti alias
VueAction
ViewInvert
VCM
Apply invert
VueAction
ViewPage
VCM
Go to next page, previouse page or select page
number.
VueAction
ViewViewPoint
VC
Select view point
VueAction
ViewXrefs
VCM
Select Xrefs
VueAction
ViewLayers
VCM
Select layers
VueAction
ViewBlocks
VCM
Select blocks
VueAction
ViewViews
VCM
Select views
VueAction
ViewDrawing
Info
VCM
Get entity’s drawing information
VueAction
ViewMeasure
VCM
Measure distance, cumulative distance, area, or
calibrate
Contexts
Installation and Configuration Guide
Control
Name
27
UI*
Modes
Functionality
Control
Key List
VueAction
ViewSpecialVi
ewModes
VCM
Show special view modes
VueAction
ToolsDrawing
Info
VCM
Get drawing information for one entity, some
entities or a block
VueAction
OptionsBars
VCM
Hide or show toolbars or status bar
VueAction
ViewDrawing
Info
VCM
Get entity’s drawing information
Pan and Zoom
Window/
MagnifyWindow
/
MagnifyGlass
Contexts
Note: The letters in the UI* Modes column indicate:
V
- View
C
- Compare
M
- Markup
The columns indicate:
•
•
Control Name: Column shows the list of available control names.
UI modes: Column specify in which modes can be used that control safely.
Example: VueActionFileOpen can be added to View and Compare Modes, except for Markup mode.
•
Functionality: Column specifies which functionalities are provided when this control is added to a context.
Example: Adding VueActionFileMarkup to any context enables you to switch to Markup mode.
•
Control key list: Column provides the optional functionalities that can be added to a context.
• If for a control name there is no entry in this list, this means that by default all the controls providing the
functionality listed in the functionality column are provided. For example, for VueActionFileOverlays,
there is no entry in the control key list and adding it to a popup menu will provide both select and modify
functionalities for overlays. The entry will look like this:
MENUITEM VueActionFileOverlays, , PERM_READ
•
If there is a list of strings separated by ‘/’, you can specify which functionalities you want added. If you
don’t specify any of them, by default all functionalities will be added. For example the following entry adds
two buttons to the toolbar: one for Zoom In and one for Zoom Out.:
BUTTON VueActionViewZoom, In/Out, PERM_READ
Whereas the following entry:
BUTTON VueActionViewZoom, , PERM_READ
is interpreted as:
BUTTON VueActionViewZoom, In/Out/Previous/
FullRes/FitBoth, PERM_READ
Installation and Configuration Guide
•
28
Contexts: Column provides the contexts to which you can add the control to.
Example: You can have the entry in a popup menu of the menu bar, but not in an RMB configuration. (If
have such an entry, it will be ignored.):
MENUITEM VueActionFileOpen, , PERM_READ
you
Installation and Configuration Guide
29
Appendix A: Samples and API Examples
Included with AutoVue
During the installation process, if you select Custom installation, AutoVue provides you options to install samples
and API examples. This chapter provides an overview of the samples and API that are installed with AutoVue.
API Examples
The following API Examples are installed at <AutoVue Install Root>\examples if you do a Custom installation and
choose to install API examples.
•
•
•
VBSample
This is the Desktop Deployment ActiveX example. This example is located in folder <AutoVue Install
Root>\examples\VBExample.
CustomActionTools
This example demonstrates how you can add custom Tools menu actions to AutoVue. For more information, see
section Adding Custom Tools Menu to AutoVue.
VueActionSample
This provides an example of how to implement hotspots using the VueAction. For more information
onVueAction, refer to the AutoVue API Programmer’s Guide and to the VueBean JavaDocs.
To use this sample:
- Hotspots.txt contains some hotspot definitions. You can use these definitions to test this sample or you can
create your own definitions.
- PartCatalogueAction.java and PartListAction.java demonstrate how to write custom actions.
- A custom gui file is the customized gui for the custom actions. Copy this file to <AutoVue Installation
Directory>\bin\Profiles.
- Update the Java code as needed and compile the code
- Bundle all the class files into VueActionSample.jar
- Add this VueActionSample.jar to AutoVue’s classpath (autovue.classpath in autovue.properties)
- Add following to the AutoVue commandline (autovue.cmdline in autovue.properties):
-param GUIFILE=custom.gui -param EXTRABUNDLES=/PartCatalogueAction
Note: The “Hotspots” section of the Autovue API Programmer's Guide provides information on how to
implement AutoVue’s hotspots API using JavaScript.
Sample Files
When you choose to install sample files during the AutoVue installation process, the following samples are installed:
•
Sample 2D, 3D, EDA, Office and Graphics file are installed at <AutoVue Install Root>\html\samples
Adding Custom Tools Menu to AutoVue
You can add custom Tools menu items to AutoVue so that batch files can be triggered from the menu items. AutoVue
provides some example code that demonstrates how to build custom Tools menu items. The example code is installed
when you do a Custom installation of AutoVue and select the API Examples checkbox during installation. The steps
for adding custom Tools menu are below. Note that this requires familiarity with programming in Java.
1
Copy your batch files to <AutoVue Installation Directory>\bin.
Installation and Configuration Guide
2
30
Edit <AutoVue Installation Directory>\examples\CustomActionTools\CustomActionTools.java and edit the
following lines:
private static final String resources[]={“TOOL1”,”TOOL2”};
private static final String[] subActions={“tool1”,”tool2”};
private static final String batchfiles[]={“batch1.bat”,”batch2.bat”};
where
resources is the list of strings that will show up in the Tools menu. The first string should correspond to the first
batch file, the second string to the second batch file, and so on.
subActions is a list of strings that is used to associate a particular Tool menu item to a batch file.
batchfiles is the list of batch files.
3
Compile the Java code.
4
Copy the generated CustomActionTools.class to <AutoVue Installation Directory>\bin.
5
Make a copy <AutoVue Installation Directory>\bin\default.gui to a file called tools.gui. Copy this GUI file to
<AutoVue Installation Directory>\bin\Profiles.
6
Edit tools.gui and add the new CustomActionTools to an existing or new menu:
MENUITEM CustomActionTools, , PERM_READ
7
If you are referencing new resources, you will need to update file CustomResources_en.properties with the new
resources.
8
You can translate the custom resources. The translations should be named CustomResources_xx.properties,
where xx represents the two-letter language code.
9
Copy the resource files to <AutoVue Installation Directory>bin.
10 Add the following to the autovue.cmdline property in autovue.properties:
-param GUIFILE=tools.gui -param EXTRABUNDLES=/CustomResources
When you startup AutoVue, you should see new Tools menu items corresponding to your definition in
CustomActionTools.java.
Installation and Configuration Guide
Feedback
If you have any questions or require support for AutoVue please contact your system administrator.
If at any time you have questions or concerns regarding AutoVue, please contact us.
General AutoVue Information
Web Site:
http://www.oracle.com/us/products/applications/autovue/index.html
Blog:
http://blogs.oracle.com/enterprisevisualization/
Oracle Customer Support
Web Site:
http://www.oracle.com/support/index.html
My Oracle Support AutoVue Community
Web Site:
https://communities.oracle.com/portal/server.pt
Sales Inquiries
E-mail:
[email protected]
31