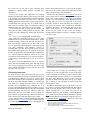
1
Cover
ATPM
9.03 / March 2003
Volume 9, Number 3
About This Particular Macintosh: About the personal computing experience™
ATPM 9.03 / March 2003
1
Cover
Cover Art
Copyright © 2003 by Grant Osborne1
We need new cover art each month. Write to us!2
Robert Madill
Belinda Wagner
Edward Goss
Tom Iovino
Daniel Chvatik
Editorial Staff
Publisher/Editor-in-Chief
Managing Editor
Associate Editor/Reviews
Copy Editors
Web Editor
Publicity Manager
Webmaster
Beta Testers
Michael Tsai
Christopher Turner
Paul Fatula
Raena Armitage
Johann Campbell
Ellyn Ritterskamp
Brooke Smith
Vacant
Lee Bennett
Vacant
Michael Tsai
The Staff
Contributors
Johann Campbell
Paul Fatula
Matthew Glidden
Jens Grabenstein
Tom Iovino
Matt Johnson
Robert Paul Leitao
Robert C. Lewis
Kirk McElhearn
Grant Osborne
Ellyn Ritterskamp
Sylvester Roque
Charles Ross
Gregory Tetrault
Evan Trent
Macintosh users like you
Contributing Editors
How To Ken Gruberman
Robert C. Lewis
Sylvester Roque
Charles Ross
Vacant
Interviews Vacant
Legacy Corner Chris Lawson
Music David Ozab
Networking Matthew Glidden
Opinion Ellyn Ritterskamp
Mike Shields
Vacant
Reviews Eric Blair
Kirk McElhearn
Brooke Smith
Gregory Tetrault
Vacant
Technical Evan Trent
Welcome Robert Paul Leitao
Kim Peacock
Subscriptions
Sign up for free subscriptions using the
Web form3 or by e-mail4.
Where to Find ATPM
Online and downloadable issues are
available at http://www.atpm.com.
Chinese translations are available
at http://www.maczin.com.
ATPM is a product of ATPM, Inc.
© 1995–2003, All Rights Reserved
ISSN: 1093-2909
Production Tools
Acrobat
Apache
AppleScript
BBEdit
CVL
CVS
DropDMG
FileMaker Pro
FrameMaker+SGML
iCab
ImageReady
Artwork & Design
Graphics Director
Graphic Design Consultant
Layout and Design
Cartoonist
Blue Apple Icon Designs
Other Art
Grant Osborne
Jamal Ghandour
Michael Tsai
Matt Johnson
Mark Robinson
RD Novo
Emeritus
RD Novo
1.
2.
mailto:[email protected]
[email protected]
ATPM 9.03 / March 2003
3.
4.
2
http://www.atpm.com/subscribe/
[email protected]
Cover
Mailsmith
Mesh
Mojo Mail
MySQL
Perl
rsync
Snapz Pro X
ssh
StuffIt
The Fonts
Cheltenham
Frutiger
Isla Bella
Marydale
Minion
Reprints
Articles and original art cannot be reproduced without the
express permission of ATPM, unless otherwise noted. You
may, however, print copies of ATPM provided that it is not
modified in any way. Authors may be contacted through
ATPM’s editorial staff, or at their e-mail addresses, when
provided.
Legal Stuff
About This Particular Macintosh may be uploaded to any
online area or included on a CD-ROM compilation, so long
as the file remains intact and unaltered, but all other rights
are reserved. All information contained in this issue is correct
to the best of our knowledge. The opinions expressed in
ATPM are not necessarily those of this particular Macintosh.
Product and company names and logos may be registered
trademarks of their respective companies. Thank you for
reading this far, and we hope that the rest of the magazine is
more interesting than this.
Thanks for reading ATPM.
ATPM 9.03 / March 2003
3
Cover
Sponsors
Sponsors
About This Particular Macintosh has been free since 1995, and
we intend to keep it that way. Our editors and staff are
volunteers with “real” jobs who believe in the Macintosh way
of computing. We don’t make a profit, nor do we plan to. As
such, we rely on advertisers and readers like you to help us
pay for our Web site and other expenses.
We’ve partnered with CafePress.com to bring you highquality ATPM merchandise1. For each item you buy, $1 goes
towards keeping the atpm.com server running. You can also
help support ATPM by buying from online retailers using the
following links: Amazon.com2, ClubMac3, MacMall4, and
MacWarehouse5. If you’re going to buy from them anyway,
why not help us at the same time?
We also accept direct contributions using PayPal6 and
Amazon’s Honor System7. We suggest $10 for students and
$20 for individuals, but we greatly appreciate contributions of
any size.
Finally, we are accepting inquiries from interested sponsors
and advertisers. We have a variety of programs available to
tailor to your needs. Please contact us at
[email protected] for more information.
1.
2.
3.
4.
5.
6.
7.
http://www.cafeshops.com/cp/store.aspx?s=atpm
http://www.amazon.com/exec/obidos/redirect-home/aboutthisparticu
http://www.qksrv.net/click-297078-167536
http://www.qksrv.net/click-297078-5837831
http://service.bfast.com/bfast/
click?bfmid=1391718&siteid=39932824&bfpage=macwarehouse
http://www.paypal.com/xclick/[email protected]
http://s1.amazon.com/exec/varzea/pay/T18F4IYZD196OK
ATPM 9.03 / March 2003
4
Sponsors
Welcome
Welcome
by Robert Paul Leitao, [email protected]
Welcome to the March issue of About This Particular
Macintosh! The harsh winter weather will soon give way to
the vibrant colors and new life of spring. Speaking of new life,
at the end of February while speaking a technology
symposium, Apple’s Chief Financial Officer, Fred Anderson,
disclosed that the company is seeking to grow market share.
OK, so that’s not news. But the usually under spoken
executive at One Infinite Loop stated that the company’s
revenue goal is $8 billion. That’s an ambitious growth plan for
a company with current annual revenue of less than $6
billion.
rack-mount servers are negligible when compared to the
company’s much larger competitors, Apple’s foray into the
server market gives the company’s business customers a
reason to consider Macs not only for the back office, but for
the front office as well. Don’t be surprised to see more Macs
on office desks in the coming months. The Xserve may be
Apple’s least acknowledged product, but is one of the
company’s more strategically important ones for 2003.
We invite you back in the rainy days of April for another
look at the latest happenings in the world of Macintosh
computing.
The XPress Way to New Sales
How does Apple expect to grow market share? According to
Mr. Anderson more and more Mac OS X software is moving
toward commercial release. Recently a developer release of a
Mac OS X native QuarkXPress 6 was seeded to major Quark
customers and third-party developers. XPress is the only
prominent desktop publishing product for the Mac that does
not currently have a native Mac OS X version in the market.
Will signs of a forthcoming release of QuarkXPress 6 prompt
designers and content creators to consider the jump to OS X
and the purchase of new Mac hardware? We’ll know more at
the next change of seasons when spring gives way to the hot
days of summer. Until then most Apple watchers don’t
anticipate a big change in Apple’s Power Mac line-up or a big
bump in sales.
Our March issue includes:
Apple Cider: A Year Apart
After a year-long hiatus, pent-up Mac musings bring Tom
Iovino back to the pages of ATPM.
The Candy Apple: Not Ready for the Leap
In which Ellyn avoids playing leapfrog with OS X.
About This Particular Web Site
This month’s ATPW will show you where to find a pet and
where to send a picture of your pet’s favorite toy. It also
introduces an unusual online dictionary, a site devoted to the
world’s alphabets, and a place to peruse the world’s various
religious texts.
Old Macs Turned Green
In other news that isn’t about the weather but does impact the
environment, Apple has just announced that a Macintosh
recycling plan is now available for the company’s customers.
The cost per unit is $30, but the company states the program
will divert 80% to 90% of a recycled Macintosh from entering
already overloaded landfills.
Roll Your Own: The Object of Programming—Part 2
Chuck Ross serves up part two of his series on Object
Oriented Programming, delving into yet more AppleScript
objects and handlers as the example project grows in scope.
RAIDing the Office
The Macintosh has a nice market niche in education, in
homes, and in the content creation and scientific industries.
But the Mac has not been considered a mainline office
computer for many years. One reason for the lack of interest
in Macs by IT professionals and office administrators has
been the lack of Macintosh servers. Apple addressed this
problem with the release of the Xserve, a competitively priced
and powerful rack-mount server product.
Apple has continued to develop its server line and has
recently released an Xserve RAID. Sales of Apple’s server
products have continued to grow. While sales of Macintosh
ATPM 9.03 / March 2003
What’s Under The Hood: Got Vinyl? Converting LPs
to CDs—Part 1
Bob Lewis begins a series on transferring your LP collection
to CD, using your Mac as the go-between.
The User Strikes Back: The 2003 “Stuff You Can’t
Live Without” Awards
It’s awards time again—the Grammys, Oscars, and now…the
Grubies! Ken Gruberman looks at all the products he could
not live without, a surprising number of which are now OS
X–only, and tells why they deserve the coveted prize.
5
Welcome
How To: A Custom Pair of Boots: Building Customized Boot CDs
Things go wrong sometimes, even on a Mac. For those of you
who would like a tool to help you out at such times, Sylvester
Rogue explains how to make your own boot CD.
Cartoon: Cortland
Dongles, deferred payments, and splash screens. Learn how
they all fit into Cortland’s world this month.
Desktop Pictures: California
Jens Grabenstein offers another set of gorgeous desktops, this
time from his June 2002 two-week road trip in California.
Beginning in San Francisco, Jens’ shots capture the cultural
and natural multiplicity of the state.
Review: Black & White: Platinum Pack
Matthew Glidden takes you to Creature Island in his review of
Black and White: Platinum Pack. In this take off from the
original Black and White, some missionaries introduce you
and your creature to an island without gods, but with more
creatures for you to learn to control.
Review: ContentBarrier 1.3.3
Intego’s Content Barrier gets put through the paces by
Gregory Tetrault. The program offers relatively good security
and filtering options, but of course no filtering program is
perfect, and Content Barrier does sometimes fail to block
access to sites you’d rather keep your children away from.
Review: iView MediaPro 1.5.6
If you have lots of media files to organize and display, iView
MediaPro can help. Gregory Tetrault describes the program’s
many features, all aimed at making it easier for you to work
with images, text, movies, and other digital media.
Review: Mac OS X: The Missing Manual, 2nd Edition
(book)
There is now a second edition of Mac OS X: The Missing
Manual. Johann Campbell takes a look at what’s changed
from the first edition: more than a hundred pages longer than
its predecessor, this tome has been completely reorganized to
cover OS X version 10.2 in great depth.
Review: Unix Power Tools, 3rd Edition (book)
With Mac OS X being based on Unix, you’re going to have to
be something of a Unix geek if you want to be a real OS X
power user. Kirk McElhearn reviews Unix Power Tools, an
1,100 page behemoth of a book meant for users who are
comfortable with the basics and looking for more.
ATPM 9.03 / March 2003
6
Welcome
E-Mail
E-Mail
TiBook Durability1
I “adopted” the first generation G4 PowerBook from my
parents in fall 2001. They bought it when it first came out in
spring 2001. I’ve put it to the test from the very beginning
(maybe abused would be a better description). I’ve dropped it
from desk height a few times, dragged it across desks, put it
through airport x-ray machines more than a thousand times
(I commute), and I’ve only recently bought a laptop case for
it. I just stuffed it in a backpack before. I used it for
everything from designing with AutoCAD 2K2 on Virtual
PC, to playing DVDs on an external monitor and sound
system, to compiling hundreds of pages of data in Microsoft
Excel. I’ve only had one problem when the hard drive kept
skipping, but that went away after 10 minutes. As you can
imagine, the outer case is pretty scratched up, but everything
else works fine. The LCD doesn’t even have the keyboard
marks everyone talks of. I guess we only hear of the problem
computers and not enough of the good ones!
—Kevin
manager to use the printer port for MIDI communication. This
may work, but it may not. It’s a pretty flukey setup to be perfectly
honest. But some users are able to get things working.
The problem is that while USB MIDI adapters exist, Apple MIDI
is not USB-savvy and the only way to use these adapters is with
Free MIDI or OMS or some other third-party MIDI solution. In
order to use one of those MIDI software solutions, your
application must support Free MIDI, OMS, etc. If it is Apple MIDI
aware only, you’re out of luck. —Evan Trent
Age—Followup2
I’d like to suggest to Marius Pope—and any other seniors in
the same situation—that he check out his local Macintosh
user group for classes in OS X. No book is as good as a handson course, and the support and encouragement of other Mac
users.
MacsWest, the MUG here in Sun City West, AZ has been
teaching OS X to seniors for almost a year now. It is more
difficult for those of us who know the old Mac OS inside and
out than it is for the first-time computer owners. But
everyone gets there!
—Melanie Schoenfeld
Miracle Piano via USB
Are there any options to successfully use my old Mac Miracle
Piano software with my newer iMac (running OS9.x or OS
X)? If the software did run okay under OS 9.x, I don’t think it
is designed to use the USB ports. So, if I understand this
correctly, I would have to use a general MIDI keyboard, get
an adaptor to convert it to serial, and then use a serial to USB
converter to get the signal into the USB port of the iMac
(since the iMac doesn’t have any serial ports). If I did all that,
would it work?
—Mitchell Fox
Desktop Pictures3
This is a fantastic site. It has the best photos on the Internet.
Great variety and professional photography. Thank you for
making these available for free!
—Rafael van Jonson
Roll Your Own4
I appreciate the work you’re doing here. I’m not a
programmer, but I am developing some automation for our
prepress dept. I’m having difficulty getting my brain wrapped
around Object Oriented Programming. Your approach is
good for someone like me. If anything, I’m impatient and
can’t wait until the next installment.
—Mike Helbert
This is a problem—it can be difficult to get vintage MIDI apps to
work on newer Macs which lack serial ports. The best solution is to
use an old serial port MIDI adapter, and then use a Keyspan serial
port to USB adapter. Because Apple MIDI does not support USB
and it also does not support the Comm Toolbox (i.e. it only lets
you pick between Printer and Modem port, no other ports will
show up in a pop-up menu, etc.) you will have to tell the Keyspan
to use Printer Port emulation and then set the Apple MIDI
1.
2.
3.
4.
http://www.atpm.com/7.08/tibook.shtml
http://www.atpm.com/9.02/e-mail.shtml
http://www.atpm.com/Back/desktop-pictures.shtml
http://www.atpm.com/9.02/roll.shtml
Copyright © 2003 the ATPM Staff, [email protected]. We’d love to hear your thoughts about our publication. We always
welcome your comments, criticisms, suggestions, and praise. Or, if you have an opinion or announcement about the
Macintosh platform in general, that’s OK too. Send your e-mail to [email protected]. All mail becomes the property of
ATPM.
ATPM 9.03 / March 2003
7
E-Mail
Apple Cider: A Year Apart
Apple Cider: Random Squeezings From a Mac User
by Tom Iovino, [email protected]
A Year Apart
Doo-be Doo-be Doooo.
When last we left off1, Tom Iovino was listening to Frank
Sinatra, getting ready to hang ’em up as Opinion Editor and
head off into the sunset…
…and, for the past year (can it be a year already?), I have
done exactly as I had promised in my last column. I’ve been
spending more time with my family. I’ve been taking time out
to watch some old movies I’ve always wanted to see. I’ve even
worked
hard
on
perfecting
my
favorite
hobby—woodworking2. Some of my projects look so good,
in fact, that I have moved a couple of them into the living area
of my home and actually showed them off to guests. (Would
you look at how I cut that board? I mean, it almost looks like I
meant to do it that way!)
While I have been working away at relaxing, I think I might
have some type of underlying problem. This retirement thing
hasn’t all been what it’s cracked up to be.
After all, writing Apple Cider for as long as I had, it is
difficult to short circuit the reflexes I had built throughout the
years. For instance, whenever I hear the word Apple used on
television, I stop what I’m doing and take a listen to hear
what’s being said about the company. I still find myself
looking at computers being used in commercials and hope
that they are Macs. And, whenever I go to a store that sells
software, I’m always on the hunt for Mac titles.
So, in an effort to give release to the pent-up musings,
rantings, and ravings that beg to be heard, I offer the
following for your consideration:
operating system’s architecture, making the program a
winner for the Mac. Besides, if it can automatically block
pop-up ads, that makes it worth a look.
This Flat-Out Rocks
Let’s hear it for the iMac! Great performance, a crisp flatscreen monitor, and a sleek design have made the consumer
Mac a great value for people trying to get into computing.
Now this is what computers were supposed to look like in the
new Millennium—at least that’s what they thought back in
the late 60s and early 70s. It’s also funny to see all of the PC
clones out there that try to look like the iMac. After all, wasn’t
the iMac criticized early on for being too gimmicky?
Dot-Coms Are Still Down
How many of us can remember those heady days when a dotcom just had to mention that it was going to issue stock and
people would line up to get their share? The trend has
continued, and, in some respects, even gotten worse. AOL
Time Warner has taken its share of lumps in the media
recently with—surprise!—the AOL component of the
company dragging down the corporation’s established media
divisions. Now, I hate to think of people getting what they
deserve, but in some respects, the dot-com bust is paying
back some folks in spades.
I’ll offer my own example. In 1998 and 1999, I was writing
for a company that was building a large Internet community
for parents. My community co-host and I were working long
hours and expending a lot of energy to build an enthusiastic
group of participants. Our message boards were busy and
our chat rooms were packed. So, what happened? Well, just a
few weeks before the company went public, they went on a
firing spree, canning even little old me, so their bottom line
would look even better for investors. OK, that’s business. But,
when I asked for a letter of recommendation that I could tuck
into my portfolio, I was told, “absolutely not.” How’s that for a
kick to the shins?
And, when their stock hit Wall Street, it shot up to nearly
$140 a share. I was pretty angry at the time, because all of
those staffers who remained on staff were given stock
options, and I’m sure they made money hand over fist.
Recently, I checked the company’s stock performance, and
I have to admit that it was hard to suppress a grin. After all,
their stock is now trading at 68 cents a share. How the mighty
have fallen.
It’s a Jungle Out There
And the best way to navigate through the deep underbrush of
the Internet seems to be taking a Safari. Apple’s new Web
browser offers quite a bit of promising good news. By
speeding downloads and processing JavaScript faster than
the competition, Apple seems to be going in a different
direction than browsers have gone in the past. After all, the
more nifty features that are added to Web pages, the larger the
browser programs have become as they are called upon to
handle more tasks. By starting out from scratch, a number of
new efficiencies can be designed into the program. And, with
Safari running native on OS X, it takes advantage of the
1.
2.
http://www.atpm.com/8.03/cider.shtml
http://www.atpm.com/6.03/cider.shtml
ATPM 9.03 / March 2003
8
Apple Cider: A Year Apart
School’s In
It may seem hard to believe, but my oldest son, Dominic1, is
getting ready to attend his first year of kindergarten. I still
have to shake my head after writing those words; I can’t
believe that the first five years of his life have passed so
quickly! Here in Pinellas County, Florida, we have a new
system for choosing the school children will attend. Back in
1972, the county was placed under court-ordered bussing to
integrate the school system. In 2000, a federal judge
overturned the ruling based on the fact that the schools had
achieved a unitary status, meaning that children of all racial
and cultural backgrounds had fair representation in schools
across the county. So now, instead of sending my son down
the street to the closest school, we need to choose five schools
in our area, and the School Board will assign him a school
from that list.
This new plan meant that my wife and I had to visit about
ten schools we were interested in sending our son to. The
choices were tough, with energetic teachers, great facilities,
and fun activities found at each school. For me, one factor
that stood out was that certain schools had a greater emphasis
on technology and computers—specifically Macintosh.
While all schools had their share of Macs in the classrooms,
two of the ten had fully-stocked computer labs complete with
rows of brand new eMacs. So, when the time came to make
my decision, my list had these two schools right at the top.
Now, all I have to do is get the results back, and, of course,
buy my son a lunch box!
I’m sure you must be wondering how a computer can help
with woodworking. It’s really easy—before I buy a stick of
wood or make one cut, I have to draw out my plans. And, I
can do that2 on the Mac. Then, I can turn to a program that
shows me how to get the most out of each board or sheet of
plywood, saving lots of time, money and aggravation in the
shop. After all, with each sheet of cabinet grade plywood
costing somewhere about $40, you don’t want to make too
many mistakes!
Before I sign off for this year’s edition of Apple Cider, I want
to let all of you know that part of me really misses putting my
thoughts before you every month. Then, on the other hand,
there is the part of me that enjoys the time I have to work in
the shop, hang out with my wife, or wrestle with my sons.
And, when I weigh the two, I can say that I enjoy the time
doing the latter more than the former.
But, when the muse moves me, you can count on seeing
more Cider!
Maybe Sinatra has something to do with it?
New Ways to Spend Time—and Money
As I had stated earlier, I have spent a lot of time woodworking
out in the garage. There’s nothing quite like the sound of a
table saw slicing through a board, or a router cutting a
decorative edge into a piece of molding. That’s the problem.
Over the past year, I have added quite a few tools to the shop,
including a brand new RIDGID table saw. And, let me tell
you, those tools and accessories aren’t cheap. But, even with
all of the new-fangled toys, I turn to my trusty Mac to get me
started.
1.
http://www.atpm.com/4.05/page6.shtml
2.
http://www.apple.com/appleworks/
Copyright © 2003 Tom Iovino, [email protected].
ATPM 9.03 / March 2003
9
Apple Cider: A Year Apart
Candy Apple: Not Ready for the Leap
The Candy Apple
by Ellyn Ritterskamp, [email protected]
Not Ready for the Leap
Someone said Apple is planning to open a retail store in my
mid-sized city soon. I couldn’t find the news report to
confirm this, so I spent probably an hour (spread out over a
couple of days) looking for other verification. I never did
confirm it. I know my friend didn’t make it up; he read it in
our local newspaper, which is very reliable. But I was
frustrated not to be able to find quick confirmation on the
Web.
Finally, I stopped looking and thought, “So what? I’ve
survived all this time without an Apple store here. Why do I
need one anyway?” I really don’t need one; I’m content to
make purchases via catalog or online. If there were a store
here in town, I’d just go in and buy a bunch of stuff I don’t
need anyway.
This investigation began when I asked a friend if he wanted
me to get him an iPod when I visit the Apple store in Orlando
next month. That’s when he said, “Oh, that reminds me.
There’s going to be one of those stores here soon.” But if we
just got the news, it’s probably some months away, so I guess
I’ll go ahead and get him that iPod now.
So now I’m thinking, what would I buy if I could get my
hands on the stuff and see it in a store right down the street?
One of those 20-inch monitors, for sure. Yummy. Probably
some iPod accessories: a leather case, the wired remote. Yeah.
But to think about new software or even hardware, I’d have
to make The Leap. You know the leap I’m talking about. The
leap to OS X. Every time I reach this point in my head, I run
away screaming.
I actually tried OS X for a few months, on an earlygeneration iBook. It was cute and fun to play with. Since it
was a machine new to me, I didn’t have to reconfigure
anything or reallocate anything or do anything complicated
that I didn’t understand. See, I’m not what I think of as a
power user. I use hot keys and keep my files and folders pretty
well organized, and I use a Mac a lot at work. I’m not ignorant
about stuff, but I’m limited to only understanding things that
I use in real life. I can sometimes help out other folks if their
questions are no harder than a three on the one to ten scale,
but beyond that I make way for the real power users. I keep
meaning to learn AppleScript, and there’s tons of stuff I wish I
understood better.
I ended up only keeping that iBook a short time before
passing it along to a friend who needed one. My experience
with OS X was short and sweet. If I had to make The Leap
now, I’d need to allocate a couple of days just for the
psychological preparation for making such a big change.
Then half a day for the switch itself (this presumes I’ve
purchased a new machine and have to transfer files), and then
a couple of weeks of getting used to the interface and
monkeying with it to get it the way I want it.
But it just seems like the long-term adjustment would take
a really long time. I’d compare it to breaking up with
someone in a romantic relationship: the longer it lasted, the
longer it takes to get over it. Gosh, at this point I’ve been
using this OS, or one like it, for so long that I might need
therapy to help get me over the loss.
Change is often good. If we never changed we’d never grow.
But sometimes it really is tough to make ourselves do it.
I think right now I’m gonna stay safely on my side of the OS
fence, with 9.1 chugging along happily. It ain’t broke; I ain’t
gonna try to fix it. Since I’m standing still, I can’t really say
Onward. But I will anyway.
Onward.
Copyright © 2003 Ellyn Ritterskamp, [email protected].
ATPM 9.03 / March 2003
10
Candy Apple: Not Ready for the Leap
Web Sites
About This Particular Web Site
by Paul Fatula, [email protected]
Hyperdictionary1
When a dictionary defines a word, it uses words, which it also
in turn has to define. Hyperdictionary provides definitions as
you would expect, but it also redefines the role of a dictionary
by linking every word of the definition to its own definition.
Those who enjoy randomly perusing the dictionary need no
longer do so alphabetically. The “top searches” link reveals
that the most searched for word is, unsurprisingly,
“definitions.”
Internet Sacred Text Archive3
Sacred texts of the world’s major and lesser-known religions
are usually pretty easy to find on the Web. What I like about
this site is that it’s not about promoting any particular belief
system; rather, it makes everything available, without
judgement, letting you explore, deliberately or randomly, a
rather surprising variety of religious texts.
The Chew-Toy Diaries4
If you have a pet, and your pet has a favorite toy, Mandy wants
to see it. So far she’s only posted a picture of her ferret’s
“Doorknob Bear,” but I for one envision a Web site loaded
with pictures of beat-up catnip mice, half-gone bones, rubber
balls, and crumbled up pieces of tissue paper.
Petfinder2
This site is all about helping you find the pet of your dreams.
It allows you to do a search for the type of pet you want,
searching by breed, age, size, gender, and—most
importantly—location, so you can find an animal available
for adoption close to where you live. It’s also possible to see a
list of nearby animal shelters so you can go to meet the
animals they have available for adoption. The site’s library
offers extensive information about pet care.
1.
2.
Omniglot5
Some time ago, browsing in my favorite bookstore, I found a
book that showed illustrations of all the world’s various
alphabetic systems, with descriptions and history. This site
doesn’t go that far, but it does show you what a great number
of different alphabets look like, and provide transliterations
and fonts. The writing systems are indexed by type, and can
also be listed alphabetically.
3.
4.
5.
http://www.hyperdictionary.com
http://www.petfinder.org
http://www.sacred-texts.com/index.htm
http://crafty_gurl.tripod.com/thechewtoydiaries/
http://www.omniglot.com/index.htm
Copyright © 2003 Paul Fatula, [email protected].
ATPM 9.03 / March 2003
11
Web Sites
Roll Your Own: The Object of Programming
Roll Your Own
by Charles Ross, [email protected]
The Object of Programming—Part 2
Welcome back to Roll Your Own, the column where we learn
together how to program Macintosh computers using the
AppleScript language included with every system. Last
month1 we learned about objects, and began building a
simple object to store and manipulate angles. This month
we’re going to continue on our object journey, improving our
Angle object, and using it to build another object called a
TrigAngle.
Before we dive into objects again, I’d like to announce that
from now on I’m going to make the source code of our
examples available on my Web site. Personally, when I learn
new programming topics, I always type in the example code.
I find that it helps me learn the concepts much more quickly.
However, if you learn just as well from reading the source
code and experimenting on your own, feel free to download
the source code from my homepage2. You may read this
before I actually get a chance to set up the files, but hey, if you
want to see pictures of my kids, stop on by.
As a refresher, here’s the source code for the latest version
of our Angle object. The changes we will make to this object
are based entirely on the work we did last month, so if you
haven’t read the previous article, do so before continuing.
1.
http://www.atpm.com/9.02/roll.shtml
2.
----on
Demonstration of AppleScript's object oriented techniques
using an Angle as the sample object.
Written by Charles E. Ross, 12/26/02
Version 1.0v4
MakeAngle(theSize, theUnits)
-- Declare a script object called Angle.
script Angle
-- Angle has one property, the measurement of the angle in degrees.
-- The size of the angle in other units is derived from the degrees.
-- Initialize the size to the value of theSize.
property degrees : theSize
-- Sets the degrees property to the value passed to it.
on SetDegrees(theSize)
set degrees to theSize
end SetDegrees
-- Returns the value of the degrees property.
on GetDegrees()
return degrees
end GetDegrees
-- Sets the size of the angle by converting from radians,
-- since the internal structure of the angle is stored
-- in degrees.
on SetRadians(theSize)
set degrees to theSize * 180 / pi
end SetRadians
-- Returns the size of the angle in radians by converting
-- from degrees.
on GetRadians()
return degrees * pi / 180
end GetRadians
-- Sets the size of the angle by converting from radians
-- divided by pi, since the internal structure of the angle
-- is stored in degrees.
on SetRadiansByPi(theSize)
set degrees to theSize * 180
end SetRadiansByPi
-- Returns the size of the angle in radians divided
-- by pi by converting from degrees.
on GetRadiansByPi()
return degrees / 180
end GetRadiansByPi
-- Sets the size of the angle by converting from gradians,
-- since the internal structure of the angle is stored
-- in degrees.
on SetGradians(theSize)
set degrees to theSize * 9 / 10
ATPM 9.03 / March 2003
12
http://homepage.mac.com/chivalry
Roll Your Own: The Object of Programming
end SetGradians
-- Returns the size of the angle in gradians by converting
-- from degrees.
on GetGradians()
return degrees * 10 / 9
end GetGradians
-- Ensures that the angle is between 0 and 360 degrees.
on NormalizeSize()
-- If the angle is negative, add 360 to it until
-- it is positive.
repeat until degrees ≥ 0
set degrees to degrees + 360
end repeat
-- Perform a modulus operation on degrees to ensure that
-- the size is less than 360.
set degrees to degrees mod 360
end NormalizeSize
end script
-- If theSize is not a number, produce an error message and code.
if class of theSize is not in {real, integer} then
error "Invalid size" number 101
-- If theUnits is not a valid unit, produce an error message
-- and code.
else if theUnits is not in ¬
{"degrees", "radians", "gradians", "radians by pi"} then
error "Invalid units" number 102
-- If theUnits is degrees, just normalize the size.
else if theUnits is "degrees" then
tell Angle to NormalizeSize()
-- If theUnits is radians, set the angle size using the
-- SetRadians() handler.
else if theUnits is "radians" then
tell Angle to SetRadians(theSize)
-- If theUnits is gradians, set the angle size using the
-- SetGradians() handler.
else if theUnits is "gradians" then
tell Angle to SetGradians(theSize)
-- Otherwise the units must be radians by pi, so
-- set the angle size using the SetRadiansByPi()
-- handler.
else
tell Angle to SetRadiansByPi(theSize)
end if -- class of theSize is not in {real, integer} then
return Angle
end MakeAngle
Another useful feature of an angle object would be the ability
to do arithmetic on angles, such as adding and subtracting
angles. So we’ll add four new methods: AddAngle(),
----on
SubtractFromAngle(), MultiplyBy(),
and
these new handlers will return a new
calling code.
DivideBy().
Angle
Each of
object to the
Demonstration of AppleScript's object oriented techniques
using an Angle as the sample object.
Written by Charles E. Ross, 12/26/02
Version 1.0v5
MakeAngle(theSize, theUnits)
-- Declare a script object called Angle.
script Angle
-- Angle has one property, the measurement of the angle in degrees.
-- The size of the angle in other units is derived from the degrees.
-- Initialize the size to the value of theSize.
property degrees : theSize
-- Sets the degrees property to the value passed to it.
on SetDegrees(theSize)
set degrees to theSize
end SetDegrees
-- Returns the value of the degrees property.
on GetDegrees()
return degrees
end GetDegrees
-- Sets the size of the angle by converting from radians,
-- since the internal structure of the angle is stored
-- in degrees.
on SetRadians(theSize)
set degrees to theSize * 180 / pi
end SetRadians
ATPM 9.03 / March 2003
13
Roll Your Own: The Object of Programming
-- Returns the size of the angle in radians by converting
-- from degrees.
on GetRadians()
return degrees * pi / 180
end GetRadians
-- Sets the size of the angle by converting from radians
-- divided by pi, since the internal structure of the angle
-- is stored in degrees.
on SetRadiansByPi(theSize)
set degrees to theSize * 180
end SetRadiansByPi
-- Returns the size of the angle in radians divided
-- by pi by converting from degrees.
on GetRadiansByPi()
return degrees / 180
end GetRadiansByPi
-- Sets the size of the angle by converting from gradians,
-- since the internal structure of the angle is stored
-- in degrees.
on SetGradians(theSize)
set degrees to theSize * 9 / 10
end SetGradians
-- Returns the size of the angle in gradians by converting
-- from degrees.
on GetGradians()
return degrees * 10 / 9
end GetGradians
-- Ensures that the angle is between 0 and 360 degrees.
on NormalizeSize()
-- If the angle is negative, add 360 to it until
-- it is positive.
repeat until degrees ≥ 0
set degrees to degrees + 360
end repeat
-- Perform a modulus operation on degrees to ensure that
-- the size is less than 360.
set degrees to degrees mod 360
end NormalizeSize
-- Takes another angle as an argument and returns a new angle
-- whose size is equal to the current angle plus the other angle.
on AddAngle(otherAngle)
-- Create the new angle, setting the size of the new angle
-- to the sum of the sizes of the current angle and the angle
-- passed as a parameter.
return MakeAngle(degrees + (GetDegrees() of otherAngle), ¬
"degrees")
end AddAngle
-- Returns a new angle whose size is equal to the size of another
-- angle minus the size of the current angle.
on SubtractFromAngle(otherAngle)
-- Create the new angle, setting the size of the new angle
-- to the difference between the angle passed as a parameter
-- and the current angle.
return MakeAngle((GetDegrees() of otherAngle) - degrees, ¬
"degrees")
end SubtractFromAngle
-- Multiplies the size of the current angle by the provided factor
-- and returns a new angle of that size.
on MultiplyBy(factor)
-- Create the new angle, setting the size of the new angle
-- to the product of the size of the current angle multiplied
-- by the factor provided.
return MakeAngle(degrees * factor, "degrees")
end MultiplyBy
-- Divides the size of the current angle by the provided quotient.
on DivideBy(quotient)
-- Create the new angle, seeting the size of the new angle
-- to the ratio of the size of the current angle divided by
-- the quotient provided.
return MakeAngle(degrees / quotient, "degrees")
end DivideBy
end script
-- If theSize is not a number, produce an error message and code.
if class of theSize is not in {real, integer} then
error "Invalid size" number 101
-- If theUnits is not a valid unit, produce an error message
-- and code.
else if theUnits is not in ¬
{"degrees", "radians", "gradians", "radians by pi"} then
error "Invalid units" number 102
-- If theUnits is degrees, just normalize the size.
ATPM 9.03 / March 2003
14
Roll Your Own: The Object of Programming
else if theUnits is "degrees" then
tell Angle to NormalizeSize()
-- If theUnits is radians, set the angle size using the
-- SetRadians() handler.
else if theUnits is "radians" then
tell Angle to SetRadians(theSize)
-- If theUnits is gradians, set the angle size using the
-- SetGradians() handler.
else if theUnits is "gradians" then
tell Angle to SetGradians(theSize)
-- Otherwise the units must be radians by pi, so
-- set the angle size using the SetRadiansByPi()
-- handler.
else
tell Angle to SetRadiansByPi(theSize)
end if -- class of theSize is not in {real, integer} then
return Angle
end MakeAngle
on run
set firstAngle to MakeAngle(300, "degrees")
set secondAngle to MakeAngle(90, "degrees")
display dialog "firstAngle + secondAngle = " & ¬
GetDegrees() of (firstAngle's AddAngle(secondAngle))
display dialog "secondAngle - firstAngle = " & ¬
GetDegrees() of (firstAngle's SubtractFromAngle(secondAngle))
display dialog "firstAngle - secondAngle = " & ¬
GetDegrees() of (secondAngle's SubtractFromAngle(firstAngle))
display dialog "firstAngle * 3 = " & ¬
GetDegrees() of (firstAngle's MultiplyBy(3))
display dialog "secondAngle / 9 = " & ¬
GetDegrees() of (secondAngle's DivideBy(9))
end run
Of note with these new changes are how the passed object is
referenced (just as if we were referencing it from anywhere
except within the object itself), and the fact that we are
returning an object. Once we’ve run these handlers we return
an Angle object to the calling portion. The calling portion of
the program can then store this object in a variable, or, as
we’re doing, simply use the size in other commands. If the
returned object isn’t stored in a variable, then it is unavailable
after the current command, and would need to be recalculated if there were a need for it again.
That’s as far as we’re going to take the Angle object. But we
are going to continue using it in its current form and create
another object that will inherit the properties and methods of
the Angle object.
Yet another advantage of object oriented programming is
the concept of inheritance, where a new object can inherit all
of the properties and handlers of an existing object, can
modify them as needed, or even overwrite them completely.
----on
The Angle object that we’ve created here would be fine in
many circumstances, but any mathematical application is
going to want more. Some of the calculations on angles that
would be useful in such cases are the trigonometric
functions, such as sine, cosine, and tangent. AppleScript
doesn’t include these functions, although there are a number
of scripting additions that do. We haven’t really covered
scripting additions, but you can think of them as extensions
to the AppleScript language. Truthfully, my first inclination
was to simply put these handlers into our Angle object, but
then I thought that creating a new TrigAngle object would be
a great way to demonstrate the concept of inheritance.
An object can have a special property called the parent.
When a child object has a parent object, all of the properties,
handlers, and any other code within the parent object are
part of the child object. Our first version of the TrigAngle
object is below.
Demonstration of AppleScript's object oriented techniques
using an Angle as the sample object.
Written by Charles E. Ross, 12/26/02
Version 1.0v6
MakeAngle(theSize, theUnits)
-- Declare a script object called Angle.
script Angle
-- Angle has one property, the measurement of the angle in degrees.
-- The size of the angle in other units is derived from the degrees.
-- Initialize the size to the value of theSize.
property degrees : theSize
-- Sets the degrees property to the value passed to it.
on SetDegrees(theSize)
set degrees to theSize
end SetDegrees
ATPM 9.03 / March 2003
15
Roll Your Own: The Object of Programming
-- Returns the value of the degrees property.
on GetDegrees()
return degrees
end GetDegrees
-- Sets the size of the angle by converting from radians,
-- since the internal structure of the angle is stored
-- in degrees.
on SetRadians(theSize)
set degrees to theSize * 180 / pi
end SetRadians
-- Returns the size of the angle in radians by converting
-- from degrees.
on GetRadians()
return degrees * pi / 180
end GetRadians
-- Sets the size of the angle by converting from radians
-- divided by pi, since the internal structure of the angle
-- is stored in degrees.
on SetRadiansByPi(theSize)
set degrees to theSize * 180
end SetRadiansByPi
-- Returns the size of the angle in radians divided
-- by pi by converting from degrees.
on GetRadiansByPi()
return degrees / 180
end GetRadiansByPi
-- Sets the size of the angle by converting from gradians,
-- since the internal structure of the angle is stored
-- in degrees.
on SetGradians(theSize)
set degrees to theSize * 9 / 10
end SetGradians
-- Returns the size of the angle in gradians by converting
-- from degrees.
on GetGradians()
return degrees * 10 / 9
end GetGradians
-- Ensures that the angle is between 0 and 360 degrees.
on NormalizeSize()
-- If the angle is negative, add 360 to it until
-- it is positive.
repeat until degrees ≥ 0
set degrees to degrees + 360
end repeat
-- Perform a modulus operation on degrees to ensure that
-- the size is less than 360.
set degrees to degrees mod 360
end NormalizeSize
-- Takes another angle as an argument and returns a new angle
-- whose size is equal to the current angle plus the other angle.
on AddAngle(otherAngle)
-- Create the new angle, setting the size of the new angle
-- to the sum of the sizes of the current angle and the angle
-- passed as a parameter.
return MakeAngle(degrees + (GetDegrees() of otherAngle), ¬
"degrees")
end AddAngle
-- Returns a new angle whose size is equal to the size of another
-- angle minus the size of the current angle.
on SubtractFromAngle(otherAngle)
-- Create the new angle, setting the size of the new angle
-- to the difference between the angle passed as a parameter
-- and the current angle.
return MakeAngle((GetDegrees() of otherAngle) - degrees, ¬
"degrees")
end SubtractFromAngle
-- Multiplies the size of the current angle by the provided factor
-- and returns a new angle of that size.
on MultiplyBy(factor)
-- Create the new angle, setting the size of the new angle
-- to the product of the size of the current angle multiplied
-- by the factor provided.
return MakeAngle(degrees * factor, "degrees")
end MultiplyBy
-- Divides the size of the current angle by the provided quotient.
on DivideBy(quotient)
-- Create the new angle, seeting the size of the new angle
-- to the ratio of the size of the current angle divided by
-- the quotient provided.
return MakeAngle(degrees / quotient, "degrees")
end DivideBy
ATPM 9.03 / March 2003
16
Roll Your Own: The Object of Programming
end script
-- If theSize is not a number, produce an error message and code.
if class of theSize is not in {real, integer} then
error "Invalid size" number 101
-- If theUnits is not a valid unit, produce an error message
-- and code.
else if theUnits is not in ¬
{"degrees", "radians", "gradians", "radians by pi"} then
error "Invalid units" number 102
-- If theUnits is degrees, just normalize the size.
else if theUnits is "degrees" then
tell Angle to NormalizeSize()
-- If theUnits is radians, set the angle size using the
-- SetRadians() handler.
else if theUnits is "radians" then
tell Angle to SetRadians(theSize)
-- If theUnits is gradians, set the angle size using the
-- SetGradians() handler.
else if theUnits is "gradians" then
tell Angle to SetGradians(theSize)
-- Otherwise the units must be radians by pi, so
-- set the angle size using the SetRadiansByPi()
-- handler.
else
tell Angle to SetRadiansByPi(theSize)
end if -- class of theSize is not in {real, integer} then
return Angle
end MakeAngle
on MakeTrigAngle(theSize, theUnits)
set Angle to MakeAngle(theSize, theUnits)
script TrigAngle
property parent : Angle
end script
end MakeTrigAngle
on run
GetRadiansByPi() of MakeTrigAngle(270, "degrees")
end run
At this point, the properties and handlers of the TrigAngle
object are exactly the same as those of the Angle object. This is
a case where the order of code makes a big difference. You’ll
notice that in our MakeAngle() handler, all of the code that is
run in the handler appears after the code for the script object.
In this case the set Angle to MakeAngle(theSize, theUnits)
----on
line appears before the script object code. This is because we
need an initiated object before we can say that it is the parent
of our new object.
At this time, our TrigAngle object would behave exactly like
our Angle object. We can call handlers such as SetDegrees() or
AddAngle() just as if we were using an Angle object instead.
That’s not very useful, so let’s add some new features to our
TrigAngle object.
Demonstration of AppleScript's object oriented techniques
using an Angle as the sample object.
Written by Charles E. Ross, 12/26/02
Version 1.0v7
MakeAngle(theSize, theUnits)
-- Declare a script object called Angle.
script Angle
-- Angle has one property, the measurement of the angle in degrees.
-- The size of the angle in other units is derived from the degrees.
-- Initialize the size to the value of theSize.
property degrees : theSize
-- Sets the degrees property to the value passed to it.
on SetDegrees(theSize)
set degrees to theSize
end SetDegrees
-- Returns the value of the degrees property.
on GetDegrees()
return degrees
end GetDegrees
-- Sets the size of the angle by converting from radians,
-- since the internal structure of the angle is stored
-- in degrees.
on SetRadians(theSize)
set degrees to theSize * 180 / pi
ATPM 9.03 / March 2003
17
Roll Your Own: The Object of Programming
end SetRadians
-- Returns the size of the angle in radians by converting
-- from degrees.
on GetRadians()
return degrees * pi / 180
end GetRadians
-- Sets the size of the angle by converting from radians
-- divided by pi, since the internal structure of the angle
-- is stored in degrees.
on SetRadiansByPi(theSize)
set degrees to theSize * 180
end SetRadiansByPi
-- Returns the size of the angle in radians divided
-- by pi by converting from degrees.
on GetRadiansByPi()
return degrees / 180
end GetRadiansByPi
-- Sets the size of the angle by converting from gradians,
-- since the internal structure of the angle is stored
-- in degrees.
on SetGradians(theSize)
set degrees to theSize * 9 / 10
end SetGradians
-- Returns the size of the angle in gradians by converting
-- from degrees.
on GetGradians()
return degrees * 10 / 9
end GetGradians
-- Ensures that the angle is between 0 and 360 degrees.
on NormalizeSize()
-- If the angle is negative, add 360 to it until
-- it is positive.
repeat until degrees ≥ 0
set degrees to degrees + 360
end repeat
-- Perform a modulus operation on degrees to ensure that
-- the size is less than 360.
set degrees to degrees mod 360
end NormalizeSize
-- Takes another angle as an argument and returns a new angle
-- whose size is equal to the current angle plus the other angle.
on AddAngle(otherAngle)
-- Create the new angle, setting the size of the new angle
-- to the sum of the sizes of the current angle and the angle
-- passed as a parameter.
return MakeAngle(degrees + (GetDegrees() of otherAngle), ¬
"degrees")
end AddAngle
-- Returns a new angle whose size is equal to the size of another
-- angle minus the size of the current angle.
on SubtractFromAngle(otherAngle)
-- Create the new angle, setting the size of the new angle
-- to the difference between the angle passed as a parameter
-- and the current angle.
return MakeAngle((GetDegrees() of otherAngle) - degrees, ¬
"degrees")
end SubtractFromAngle
-- Multiplies the size of the current angle by the provided factor
-- and returns a new angle of that size.
on MultiplyBy(factor)
-- Create the new angle, setting the size of the new angle
-- to the product of the size of the current angle multiplied
-- by the factor provided.
return MakeAngle(degrees * factor, "degrees")
end MultiplyBy
-- Divides the size of the current angle by the provided quotient.
on DivideBy(quotient)
-- Create the new angle, seeting the size of the new angle
-- to the ratio of the size of the current angle divided by
-- the quotient provided.
return MakeAngle(degrees / quotient, "degrees")
end DivideBy
end script
-- If theSize is not a number, produce an error message and code.
if class of theSize is not in {real, integer} then
error "Invalid size" number 101
-- If theUnits is not a valid unit, produce an error message
-- and code.
else if theUnits is not in ¬
{"degrees", "radians", "gradians", "radians by pi"} then
error "Invalid units" number 102
ATPM 9.03 / March 2003
18
Roll Your Own: The Object of Programming
-- If theUnits is degrees, just normalize the size.
else if theUnits is "degrees" then
tell Angle to NormalizeSize()
-- If theUnits is radians, set the angle size using the
-- SetRadians() handler.
else if theUnits is "radians" then
tell Angle to SetRadians(theSize)
-- If theUnits is gradians, set the angle size using the
-- SetGradians() handler.
else if theUnits is "gradians" then
tell Angle to SetGradians(theSize)
-- Otherwise the units must be radians by pi, so
-- set the angle size using the SetRadiansByPi()
-- handler.
else
tell Angle to SetRadiansByPi(theSize)
end if -- class of theSize is not in {real, integer} then
return Angle
end MakeAngle
on MakeTrigAngle(theSize, theUnits)
set Angle to MakeAngle(theSize, theUnits)
script TrigAngle
property parent : Angle
on Factorial(x)
if x is 0 then
return 1
else
return x * (Factorial(x - 1))
end if
end Factorial
on Cosine()
set convergingValue to 0
repeat with n from 0 to 9
set convergingValue to convergingValue + ¬
((-1) ^ n) * (GetRadians() ^ (2 * n)) / ¬
(Factorial(2 * n))
end repeat
return convergingValue
end Cosine
on Sine()
return (1 - (Cosine() ^ 2)) ^ (1 / 2)
end Sine
on Tangent()
return Sine() / (Cosine())
end Tangent
on Cosecant()
return 1 / (Sine())
end Cosecant
on Secant()
return 1 / (Cosine())
end Secant
on Cotangent()
return 1 / (Tangent())
end Cotangent
end script
end MakeTrigAngle
Now we have a more useful example of inheritance. While
our TrigAngle object can do everything our Angle object can,
it also has the ability to return the trigonometric functions of
the angle.
When one object inherits from another, it can also alter the
handlers in the parent object. Our TrigAngle object would
serve our needs better if it stored the size of the angle in
radians rather than in degrees since the trigonometric
functions deal with radians. But storing the size of the angle
in radians would necessitate changing how some of the
original Angle code needs to work. After all, the algorithms
for computing the trigonometric functions use angles
measured in radians, but since our angle stores its
measurement in degrees, each time we compute one of the
ATPM 9.03 / March 2003
trigonometric functions, we have to convert the degrees to
radians. By storing the size of the angle in radians and
changing how some of the inherited handlers behave, we can
glean a bit more speed from our object.
When an object inherits from a parent object, every
handler called to the child object will behave as it would in
the parent object unless we redefine it in the child object. We
redefine such a handler by simply declaring it again and
defining in the new handler code the new behavior of the
handler. However, we can still access the functionality of the
parent object by using the continue statement, which will call
the parent object’s version of the handler and execute its
code.
Below is the code for our refined TrigAngle object.
19
Roll Your Own: The Object of Programming
----on
Demonstration of AppleScript's object oriented techniques
using an Angle as the sample object.
Written by Charles E. Ross, 12/26/02
Version 1.0v8
MakeAngle(theSize, theUnits)
-- Declare a script object called Angle.
script Angle
-- Angle has one property, the measurement of the angle in degrees.
-- The size of the angle in other units is derived from the degrees.
-- Initialize the size to the value of theSize.
property degrees : theSize
-- Sets the degrees property to the value passed to it.
on SetDegrees(theSize)
set degrees to theSize
end SetDegrees
-- Returns the value of the degrees property.
on GetDegrees()
return degrees
end GetDegrees
-- Sets the size of the angle by converting from radians,
-- since the internal structure of the angle is stored
-- in degrees.
on SetRadians(theSize)
set degrees to theSize * 180 / pi
end SetRadians
-- Returns the size of the angle in radians by converting
-- from degrees.
on GetRadians()
return degrees * pi / 180
end GetRadians
-- Sets the size of the angle by converting from radians
-- divided by pi, since the internal structure of the angle
-- is stored in degrees.
on SetRadiansByPi(theSize)
set degrees to theSize * 180
end SetRadiansByPi
-- Returns the size of the angle in radians divided
-- by pi by converting from degrees.
on GetRadiansByPi()
return degrees / 180
end GetRadiansByPi
-- Sets the size of the angle by converting from gradians,
-- since the internal structure of the angle is stored
-- in degrees.
on SetGradians(theSize)
set degrees to theSize * 9 / 10
end SetGradians
-- Returns the size of the angle in gradians by converting
-- from degrees.
on GetGradians()
return degrees * 10 / 9
end GetGradians
-- Ensures that the angle is between 0 and 360 degrees.
on NormalizeSize()
-- If the angle is negative, add 360 to it until
-- it is positive.
repeat until degrees ≥ 0
set degrees to degrees + 360
end repeat
-- Perform a modulus operation on degrees to ensure that
-- the size is less than 360.
set degrees to degrees mod 360
end NormalizeSize
-- Takes another angle as an argument and returns a new angle
-- whose size is equal to the current angle plus the other angle.
on AddAngle(otherAngle)
-- Create the new angle, setting the size of the new angle
-- to the sum of the sizes of the current angle and the angle
-- passed as a parameter.
return MakeAngle(degrees + (GetDegrees() of otherAngle), ¬
"degrees")
end AddAngle
-- Returns a new angle whose size is equal to the size of another
-- angle minus the size of the current angle.
on SubtractFromAngle(otherAngle)
-- Create the new angle, setting the size of the new angle
-- to the difference between the angle passed as a parameter
-- and the current angle.
return MakeAngle((GetDegrees() of otherAngle) - degrees, ¬
"degrees")
end SubtractFromAngle
ATPM 9.03 / March 2003
20
Roll Your Own: The Object of Programming
-- Multiplies the size of the current angle by the provided factor
-- and returns a new angle of that size.
on MultiplyBy(factor)
-- Create the new angle, setting the size of the new angle
-- to the product of the size of the current angle multiplied
-- by the factor provided.
return MakeAngle(degrees * factor, "degrees")
end MultiplyBy
-- Divides the size of the current angle by the provided quotient.
on DivideBy(quotient)
-- Create the new angle, seeting the size of the new angle
-- to the ratio of the size of the current angle divided by
-- the quotient provided.
return MakeAngle(degrees / quotient, "degrees")
end DivideBy
end script
-- If theSize is not a number, produce an error message and code.
if class of theSize is not in {real, integer} then
error "Invalid size" number 101
-- If theUnits is not a valid unit, produce an error message
-- and code.
else if theUnits is not in ¬
{"degrees", "radians", "gradians", "radians by pi"} then
error "Invalid units" number 102
-- If theUnits is degrees, just normalize the size.
else if theUnits is "degrees" then
tell Angle to NormalizeSize()
-- If theUnits is radians, set the angle size using the
-- SetRadians() handler.
else if theUnits is "radians" then
tell Angle to SetRadians(theSize)
-- If theUnits is gradians, set the angle size using the
-- SetGradians() handler.
else if theUnits is "gradians" then
tell Angle to SetGradians(theSize)
-- Otherwise the units must be radians by pi, so
-- set the angle size using the SetRadiansByPi()
-- handler.
else
tell Angle to SetRadiansByPi(theSize)
end if -- class of theSize is not in {real, integer} then
return Angle
end MakeAngle
on MakeTrigAngle(theSize, theUnits)
-- Initiate an Angle object storing it in a variable by the same name.
set Angle to MakeAngle(theSize, theUnits)
script TrigAngle
-- TrigAngle is a child of Angle.
property parent : Angle
-- TrigAngle should store the size in radians.
property radians : GetRadians()
-- The Factorial() handler is used to calculate the cosine
-- (there therefore the other trig functions).
on Factorial(x)
if x is 0 then
return 1
else
return x * (Factorial(x - 1))
end if
end Factorial
-- Uses a converging series to calculate the cosine
-- of the angle.
on Cosine()
set convergingValue to 0
repeat with n from 0 to 9
set convergingValue to convergingValue + ¬
((-1) ^ n) * (radians ^ (2 * n)) / ¬
(Factorial(2 * n))
end repeat
return convergingValue
end Cosine
-- Calculates the sine of the angle by deriving it from
-- the cosine.
on Sine()
return (1 - (Cosine() ^ 2)) ^ (1 / 2)
end Sine
-- Calculates the tangent of the angle by deriving it
-- from the sine and cosine.
on Tangent()
return Sine() / (Cosine())
ATPM 9.03 / March 2003
21
Roll Your Own: The Object of Programming
end Tangent
-- Calculates the cosecant of the angle by deriving it
-- from the sine.
on Cosecant()
return 1 / (Sine())
end Cosecant
-- Calculates the secant of the angle by deriving it
-- from the cosine.
on Secant()
return 1 / (Cosine())
end Secant
-- Calculates the cotangent of the angle by deriving it
-- from the tangent.
on Cotangent()
return 1 / (Tangent())
end Cotangent
-- Sets the degrees property of the angle and the internal
-- radians property by calling the parent SetDegrees()
-- handler.
on SetDegrees(theSize)
continue SetDegrees(theSize)
set radians to GetRadians()
end SetDegrees
-- Sets the degrees property of the angle and the internal
-- radians property by calling the parent SetRadians()
-- handler.
on SetRadians(theSize)
continue SetRadians(theSize)
set radians to GetRadians()
end SetRadians
-- Sets the degrees property of the angle and the internal
-- radians property by calling the parent SetGradians()
-- handler.
on SetGradians(theSize)
continue SetGradians(theSize)
set radians to GetRadians()
end SetGradians
-- Sets the degrees property of the angle and the internal
-- radians property by calling the parent SetRadiansByPi()
-- handler.
on SetRadiansByPi(theSize)
continue SetRadiansByPi(theSize)
set radians to GetRadians()
end SetRadiansByPi
on NormalizeSize()
-- This handler completely overrides the parent handler.
-- If the angle is negative, add 2*pi to it until
-- it is positive.
repeat until degrees ≥ 0
set degrees to degrees + (2 * pi)
end repeat
-- Perform a modulus operation on degrees to ensure that
-- the size is less than 2*pi.
set degrees to degrees mod (2 * pi)
end NormalizeSize
end script
tell TrigAngle to set radians to GetRadians() of Angle
end MakeTrigAngle
For the handlers in our original Angle object that set the size
of the angle, we still want to have the functionality run, still
setting the size as before. But now that we have a radians
property, we also want to make sure that when the size of the
angle changes, this value is updated. So our redefined
handlers for setting the size of a TrigAngle will simply call the
parent version of themselves and then manually set the
radians property by using the GetRadians() handler (which
we do not alter).
So what happens when we create a TrigAngle object and
send a SetDegrees() message to it? Consider the following
code fragment which does exactly that:
ATPM 9.03 / March 2003
set myTrig to MakeTrigAngle(pi / 2, "radians")
tell myTrig to SetDegrees(270)
The first line creates a new TrigAngle object, sets its size to π/2
radians (90 degrees), and stores it in the myTrig variable.
When MakeTrigAngle() is called, the first thing it does is create
a new Angle object by calling MakeAngle(). Then we have the
code for the TrigAngle object, which, since we are executing
the handler it is in, creates an instance of it of the same name
(TrigAngle). Since TrigAngle has a radians property, we use
the GetRadians() handler to set the value of this property.
Remember, this handler is defined in the Angle object from
which TrigAngle inherits. At this point, TrigAngle has a value
22
Roll Your Own: The Object of Programming
of 90 in its degrees property and a value of π/2 in its radians
property. Finally, we return the TrigAngle object to the calling
code.
The next line of our program snippet calls myTrig’s
SetDegrees() handler, passing it a value of 270. Since
TrigAngle has defined its own SetDegrees() handler, this is
what gets executed, not the one defined in the Angle object.
However, the first statement in TrigAngle’s SetDegrees()
handler is a continue statement which does execute the
version in the Angle object. Once we have set the degrees
property, we can use the GetRadians() handler to set the
radians property.
On the other hand, the NormalizeSize() handler should
completely replace the handler parent handler of the same
name. Normalizing now entails that the size of the angle is
between 0 and 2π rather than 0 and 360 (because there are 2π
radians in a circle), so there’s no need or desire to use the
continue statement to call the parent handler.
Inheritance allows you to move from the simple to the
complex with objects, specifying only the behavior that is
changing for each level. We could have included everything
our TrigAngle object does in our original Angle object.
However, a general rule when creating objects is to build code
only for what you need for each object and when you need to
expand on that code, create a new object that inherits from
the first. This keeps the code in each object as simple and as
useful as possible.
This month, I have two exercises for you. First of all, some
angles don’t have defined tangents, cotangents, cosecants and
secants. Sines and cosines can be zero, and when this is the
case the trigonometric functions that divide by them aren’t
defined. Edit the TrigAngle object so that appropriate error
messages are generated when these cases arise.
Your second task is to create a new object representing a
list, but with sorting, adding and removing methods. Each
method will return a new list rather than alter the list that the
method belongs to. So, each of the lines in the following code
snippet would return the appropriate list.
set sortedList to orignalList's Sort()
set addedList to orignalList's AddItem(newItem)
set removedList to originalList's RemoveItem(theItem)
Beginning next month, we’re going to work on putting
everything we’ve learned together into a complete program
built entirely with AppleScript. We’ll go from a definition of
what the program will do to a complete application that will
perform the specified task. Until next month, happy
programming!
Copyright © 2003 Charles Ross, [email protected]. Charles Ross is an independent developer and author. He’s written articles
for ISO FileMaker Magazine and is currently writing a book on creating applications with AppleScript Studio.
ATPM 9.03 / March 2003
23
Roll Your Own: The Object of Programming
What’s Under the Hood: Got Vinyl?
What’s Under the Hood
by Robert C. Lewis, [email protected]
Got Vinyl? Converting LPs to CDs—Part 1
This type of degradation is due to noise that is inherent in any
analog signal. No matter how well you shield the analog
cables, they will still pick up random electrical noise as the
signal is passed from one end to another.
When sound is converted into a digital format, it is
converted into a series of numeric values by an Analog to
Digital Converter, or ADC. Since there is a large amount of
information found in sound, the computer takes “snapshots”
or samples of the incoming signal at regular intervals. The
number of samples per second is called the sample rate.
If you are of the pre-CD generation, odds are that you still
have a collection of vinyl albums, from 78s and 45s to LPs,
lying around your home. You probably have many albums
that have not made it to a CD. Wouldn’t it be nice if you could
transfer your valuable album collection to CDs? New music
CDs cost $12 and up; you can use your Mac to record, filter,
and then burn a CD for a fraction of the cost. Just bear in
mind that the quality of the recording will not be the quality
of a store-bought CD. However, it can sound as good as the
original album and it beats searching for a copy of a CD you’ll
never find.
Although you can record audio onto your Mac using the
microphone input, the quality of the sound will not be of CD
quality. If you have ever hooked a microphone up to your
Mac, think about what your voice and other sounds were like
as they came out of your speakers. There is tremendous
distortion and signal loss as sound passes from the input
device through the microphone input.
The only way around this problem is by the use of a PCI
sound card, or sound input devices that plug into your USB
port. At this point, there are no devices designed to utilize the
FireWire ports on your Mac. Before I get ahead of myself, let’s
take a moment and look at some key terms you will need to
understand if you want to make a CD-quality transfer of your
precious vinyl.
Sample Rate
The sample rate2 has a direct effect on the audio quality and
the size of the file. The greater the sample rate, the higher the
quality of the digitized sound. Since raising the sample rate
increases the number of “snapshots” per second, this in turn
increases the size of the resulting file. The sample rate is
measured in kilohertz (kHz). Professional audio and audio
CDs use 44.1 kHz. Although you could set an audio program
to a sample rate higher than 44.1 kHz, when it comes to
saving your project the sample rate must be re-adjusted to
44.1 kHz, or your CD will not play in regular CD players.
Bits Per Sample
The number of bits per sample is the complement to
sampling. As we all know, a bit is represented by a binary
code of a zero or a one. The binary coding of an audio signal
produces a series of numbers called bits that are organized in
a very specific way. All complex sounds contain a great deal of
information at any sample interval. Audio CDs operate at 16
bits of data per sample. That adds up to a possible 65,536
values that the signal can take at that sample. Although you
can sample at 24 or 32 bits, 16 bits is enough to describe even
the most complex sounds.
The advantage of recording at a higher rate is that you are
able to spread out the data and get a higher resolution of your
recording. This in turn improves the quality of the transfer.
Sound
Sound is produced when particles (or molecules) vibrate. If
you have ever looked at a woofer on a speaker, you can see
this as the woofer moves in and out. Try holding your hand in
front of the woofer or a sub woofer and you will feel the air
pulse with the rhythm of the sound being generated.
Analog to Digital
As I just said, sound is a series of periodic vibrations1. A
phonograph takes these vibrations and converts them to
electrical impulses. These impulses are an analog signal. Due
to this transition between mediums there is always some loss
or degradation in the sound quality. An analogy to this is
making copies of a non-digital (i.e. VHS) home video. If you
take the original and make a copy of it, you would see losses
in picture and sound. Now if you take the copy and make a
copy of the copy, the degradation becomes very severe. The
picture becomes muddy and the sound is muted in quality.
1.
AIFF
AIFF stands for Audio Interchange File Format. It was
developed by Apple as a standard file format for saving sound
files of any type. After you make the initial transfer of your
LPs into your Mac, you will save your file as an AIFF. AIFF
sounds can also be played on PCs.
http://www.atpm.com/6.02/digitalaudio.shtml
ATPM 9.03 / March 2003
2.
24
http://www.atpm.com/6.03/digitalaudio.shtml
What’s Under the Hood: Got Vinyl?
Gain
Gain is similar to the volume of a recording on your stereo.
Whereas the changing of the volume level by your stereo is
temporary, changing the gain on your recording is
permanent. When you adjust the gain of an audio file, you are
changing the actual volume of the file. In an ideal recording,
the gain should be such that you hear a large dynamic range
while keeping your signal-to-noise ratio in check. Increasing
the gain will also make noise embedded in your transfer more
pronounced.
thing you might want to think about doing is replacing your
needle if it is worn. A newer needle will improve the quality of
the sound transmitted from the turntable.
Most home entertainment centers that are built today do
not have phono jacks except on high-end units. This means
that you will have to find another way to boost the signal or
you will need a hearing aid to hear your albums.
As I just mentioned, one way to go is to buy a turntable
with a built-in pre-amp. The advantage of this is the fact that
everything is in one package. You can tell if your turntable has
a built-in pre-amp by checking to see if it has a ground wire.
If it does, then your turntable does not have a built-in preamp, and you will have to buy one separately. These units can
cost anywhere from $25 to $100 and up. If you do decide to
replace your turntable, then I recommend that you get a
turntable with the pre-amp built in.
By doing my homework I was left with the choice between a
Stanton2 and a Technics3 turntable. Although both
companies make good products, I found that Stanton was the
clear leader. As I have learned in the past, don’t let the
manufacturers’ name guide you to the right product. The top
of the line Technics turntable ($750) did not have half the
features of the one I got from Stanton ($450).
Filters
Filters are special types of software designed to remove
frequencies in your recording. An analogy would be the plugins that are so widely used in Photoshop to adjust
photographs. Some of the most common filters you will need
to make CD-quality disks are: Pop, Rumble, Hum, Noise,
Equalization, and Normalization. Depending on the
program you use, these names may vary but they will still do
the same thing.
We’ll discuss these terms further when we get around to
editing our audio recording. Now, let’s move away from the
science lesson and move on to the type of hardware you will
need.
Step One: The Turntable
As with any journey, we must start with that all-important
first step. Having a good turntable is probably the most
important factor in converting your LPs to CDs. Using a
nickel-and-dime turntable will produce poor results when
you digitize the sound into your Mac. I had a very good
Techniques Turntable that I bought back in 1977. Sadly, the
belt on it broke and I made the mistake of not replacing it for
several years. When I did have it replaced, the motor had
gone bad.
As I soon discovered, buying a turntable is easy; but buying
the right turntable is like finding a needle in a haystack. I went
to Best Buy, Circuit City, Tweeters, and Fry’s. Finally, the
people in a music pawn shop I went to directed me to the
Guitar Center1. As I soon discovered, this is where most party
DJs go for their tools of the trade. As luck also had it, they
were having their end-of-year clearance sale.
Jessica (one of the very helpful people at Guitar Center) was
very versed on what I would need for a replacement
turntable. The first thing I learned was that I needed a
turntable with a built-in pre-amp. On older receivers, there
used to be phonograph jacks for the right and left channels
(plus a ground). Built into the receiver was a pre-amp that
would boost the signal that could be used by the stereo. If you
already have a setup like this, then you can move onto the
next step to moving your sounds into your Mac. The only
Stanton STR8-80
Try to set your price range to around $150 to $250. Check
to see what type of head and needle cartridge comes with the
turntable. If the cartridge head is not removable, and looks
cheap, look on. Some more expensive turntables ($300 and
up) even offer digital output. If you can find a good deal on a
digital turntable, grab it. That is exactly what happened to
me.
As I said earlier, Guitar Center was having their end-ofyear clearance sale and I wound up walking away with a $450
Stanton STR8–80 turntable for $200 (currently going for
2.
3.
1.
http://www.guitarcenter.com/index_java.shtml
ATPM 9.03 / March 2003
25
http://www.stantonmagnetics.com
http://www.prodcat.panasonic.com/shop/newdesign/
productList.asp?CategoryID=3062
What’s Under the Hood: Got Vinyl?
$220). It has every bell and whistle I could ask for on a
turntable. If you are in need of a new turntable, I highly
recommend this model. With that out of the way, we are
ready to look at how to import your audio onto your Mac.
completely captured by this card. I must admit that I got
lucky at getting this card for $125 since it has now gone up to
$180 at Guitar Center.
Step 2: The Right Connection
Now that you have selected the turntable you are going to use,
the next step is deciding the best way to connect it to your
Mac. In essence, there are two ways: direct and indirect. Let’s
look at the direct way first.
If you have a turntable with a built-in or separate pre-amp
set up, then hooking it up to your Mac is a no-brainer. All you
need is a set of cables with RCA jacks to go from your
turntable to a sound card or USB device. We will talk about
these different devices in just a couple of paragraphs. If you
got lucky and have digital output from your turntable, the
same applies except you will use a digital coaxial cable.
If your turntable does not have a pre-amp, you are probably
hooked up to your stereo or home entertainment center that
has one for your turntable already. Under no circumstances
should you use the headphone jack as an output to your Mac.
Using the headphone jack will not send a pure signal to your
Mac. The volume, bass, and treble controls will affect the
signal coming out of the headphone jack. If, after making
your recording, you wish to make changes in the bass and
treble frequencies of your music, you can do that with an
equalizer software filter.
In most cases, your receiver should have a set of RCA
output plugs on the back. If you have a tape deck, you can use
the output jacks from it as well. Then all you have to do is run
a set of RCA cables from your receiver to your Mac.
Audiophile 2496
Unless you plan to go beyond mastering your albums to
CD, do not buy a card that goes beyond your needs. If you are
going to use RCA plugs, then you do not need a card that
supports digital output. There are many cards available for
less than $125. Just make sure you do your homework before
you put your money down on any audio card. M-Audio does
make cards that are designed for those who plan to use only
RCA plugs as their connection.
If you own an iMac, iBook, or PowerBook, then the use of a
PCI card is not an option. It is also worth bearing in mind
that the microphone jack no longer comes built-into current
Mac models. If you own one of the newer models without a
microphone jack, your only alternative is to use USB input
devices. No FireWire devices are available at present.
Griffin Technology offers a great device called the iMic2
($35) that plugs right into your USB port. The device works
in both OS 9 and OS X and does not need any drivers. You
may need to rearrange your USB devices because the iMic
Step 3: Plug Me In
If you have followed my instructions up to this point, you
probably are holding onto a set of RCA or digital cords. The
next step is deciding what you will do with those cables. If
you own a tower Mac, then one way to go is with a PCI sound
card. I must recommend that you go to a store that is best
suited for such a purchase (i.e. an audio store). Once again, I
found Guitar Center an ideal place to go. People who do
audio work for a living go there for their needs. Thanks to
their knowledgeable staff I was able to make the right
purchase without breaking the bank.
I wound up buying the Audiophile 2496 PCI card1 by MAudio. This card allows me to hook my turntable directly to
my Mac by either RCA or digital cords. It offers data paths
that are bit-for-bit accurate and supports up to 24-bit/96 kHz
performance. It also has a total harmonic distortion of
0.002% and a frequency response of 22 Hz to 22 kHz. What
this all means is that whatever your turntable puts out will be
1.
http://m-audio.com/products/m-audio/audiophile.php
ATPM 9.03 / March 2003
2.
26
http://www.griffintechnology.com/products/imic/index.html
What’s Under the Hood: Got Vinyl?
tends to work best when plugged directly into your Mac.
Control of the iMic is done within your Sound preferences
pane. Again, no special software is needed.
The iMic also comes with software called Final Vinyl that is
hardware-specific and is expressly made for the transfer of
LPs to CD. A spokesman from Griffin Technology informed
me that Final Vinyl has the ability to boost the signal from
your turntable in case you lack a pre-amp.
No matter what device you go with, make sure you read
what’s on the box. Does it support OS X? What software
comes with it? Although my Audiophile 2496 did boast OS
X–native support, the CD sampler of utilities that came with
it was all for OS 9. I talked to M-Audio about this, and they
have created a new disk with OS X utilities.
I also recommend that, whatever device you do buy for
your Mac, you should go directly to the company’s site and
check to see if they have a newer driver for your unit. Even as
I write this article, M-Audio is in the process of writing a new
driver for my sound card.
Wrap Up (for Now)
This concludes the hardware portion of transferring LPs to
CD. Now you have a full month to get your equipment in
order in preparation for part two of this article. Next month
we’ll discuss how to use your Mac as a recorder and the
different types of software available. Then we’ll discuss how
to remove the pops, hisses, and other unwanted noises with
the use of software filters; how to make a play list; and then
how to transfer to CD.
iMic
Although the iMic can sample at 24-bit, Apple’s audio
manager is limited to 16-bit sampling. Because the iMic stays
outside your Mac, it eliminates transient noise that is
produced by the power source, hard drive, CPU, and other
components found in your Mac. The iMic is not perfect, but
is a good entry-level way to import your LPs into your Mac.
Copyright © 2003 Robert C. Lewis, [email protected]. Robert is a Mac consultant.
ATPM 9.03 / March 2003
27
What’s Under the Hood: Got Vinyl?
User Strikes Back: Product Awards
The User Strikes Back
by Ken Gruberman, [email protected]
The 2003 “Stuff You Can’t Live Without” Awards
when pundits in the Mac press proclaimed it was. While it’s
true that I was once known as the first person to live on the
“bleeding edge,” time and frequent blood loss cured me of
that. While open to new and exciting ideas, I became more
conservative about implementing them on a permanent basis
or recommending them to others. To illustrate, it took 18
months after the introduction of OS 9—when OS 9.0.4 was
introduced to be specific—before I recommended OS 9 as a
viable platform to others. When OS X went public my gut
feeling was, based on my experience with 9, that it would take
at least two years before it was ready for the big time. And
guess what? I was right. The deciding factor was the release of
OS X 10.2 “Jaguar” in August of 2002.
Jaguar was the big turning point for me: finally, a version of
OS X that not only was fast and stable, but worth using. To
me, it signaled the new operating system had finally “arrived,”
no matter what others had said before. More importantly, it is
the version of OS X that has made me switch to it; I now
spend more time in it than OS 9, and my wife lives in it all the
time. (The only reason I still use 9 is that I use proprietary
music software for my business that still cannot run in either
OS X or Classic. Once this is resolved, which could be soon,
I’ll be X all the way.)
Since I have a desktop G4, I installed two additional hard
drives: one for backups and another just for OS X. My
systems are completely independent of each other, in case
there is some kind of major catastrophe. So far, there hasn’t
been. And as time goes by, I find myself becoming
increasingly comfortable with the system and enjoying it
more as well. The eye-candy factor alone is worth it—going
back to 9 now seems so “blah.” Not to mention the ultracoolness of being able to do anything you want at any time.
Want to listen to iTunes while installing software? No
problem! It still knocks me out that I can click out of Open
and Save dialogs to look up something if I need to, or that
dropping a menu no longer freezes up the system until I let
go. And that’s just the tip of the X coolness iceberg.
Yes, it’s different. Yes, there is study and learning to do in
order to really master the new OS. Yes, there are things that
take getting used to. (Command-Shift-N for a new folder?
Whose idea was that?) But I believe the time invested is worth
it, and finally, almost everything I use or want is now (or soon
will be) OS X–native. And for the few hold-outs that won’t
work at all…well, that’s the thing about using a computer. If
you stick with it long enough, you find yourself migrating
away from the old and into the new.
I’m sure all of you use your Macintosh every day, just as I do.
We have lots of software on our drives and hardware to run it,
but there is always a core or base level: the stuff we can’t live
without. It may be a stalwart word processing program, an
indispensable utility, or a time-honored and addictive
game…but whatever it is, using the Mac just wouldn’t be the
same if it weren’t around.
Please keep in mind that these awards are very
subjective—they are simply my opinion on what I find
valuable and rewarding in my daily life. They are truly the
things I can’t live without, or they are things that made me say
“cool!” (and sometimes other things I can’t repeat in polite
company). While it’s true I have access to a wide range of
hardware and software, it still comprises a small fraction of
what is out there. In reality, there is no way I could check out
everything in every field: even professional reviewers can’t
make that claim. As much as I admire, for example, 3D
animation tools and scientific analysis software, there is no
way I’m going to know anything about them. Yet.
Another well-known outfit gives out similar awards at the
beginning of each year: they’re called the Macworld “Eddy”
awards, and are usually announced during the San Francisco
Macworld Expo. Since some of my picks coincide with theirs,
I’ll be using the Eddys1 as a guide, but also adding some of
my own categories while eliminating some of theirs—even
the Macworld staff missed out on some really great stuff!
A Switcher in More Ways Than One
Apple’s “Switch” ad campaign continues to be one of the most
successful ever waged by the company. The ads exhort
Windows users to make the “switch” to the Mac platform. The
irony of the ad campaign is that switching also has meaning
to people who already use the Mac…but have not yet adopted
OS X. People, up until recently, like me.
I’ll admit it: OS X did not thrill me when it was released.
Quite frankly, its Unix underpinnings and radical departure
from the way the Mac OS has traditionally worked scared the
bejeebers out of me. Not to mention the depression that set in
when I realized virtually everything I’d learned about how a
Macintosh works over the last 15 years was about to go out
the window; I’d be starting over with everyone else.
It took me awhile to get over my bruised ego and natural
aversion to change before I’d even tinker with OS X. And even
then, I didn’t think it was ready for prime-time, especially
1.
http://www.macworld.com/2002/12/features/eddy/
ATPM 9.03 / March 2003
28
User Strikes Back: Product Awards
Here’s the thing to remember, however, when it comes to X:
do not concentrate on what software no longer works with it,
but rather on what new software there is that can do things
you never thought you could do before, or do in new ways.
Many of my award recipients are such items. In other words,
just as with computers in general, always face forward and
look ahead—don’t dwell on the past. In that spirit, here’s our
first award:
The Most Important Software Release of 2002: Apple’s Mac
OS X 10.2
I’m not mentioning another obvious candidate for this
award, Apple’s iApps such as iPhoto, iMovie, etc., for a
reason. Since they come with Jaguar when you purchase it, I
kind of regard them as part of Jaguar. Increasingly, you need
Jaguar just to run them.
As a side note, Apple released an OS X 10.2.4 update in
mid-February, making Jaguar even leaner and meaner. Some
people over at MacInTouch1 have reported problems with the
update, but I experienced none. As with all Apple system
software updates, install with caution (always make a backup
first) and do some reading at sites like MacInTouch or
MacFixIt before going ahead with it. And remember that OS
X is still a work very much in progress, so expect frequent
updates such as these and check for them often.
JPEGs at 72 dpi into 240 dpi TIFFs. I rely on it to open any
graphic I may encounter (which it always does), and also
often use its Slide Show feature.
Macworld gave its award for “Best Consumer Graphics
Software” to Photoshop Elements 2—which I agree
with—but they don’t consider shareware entries when
judging. I, on the other hand, see no difference between
commercial software and shareware, and often feel shareware
titles are superior. Therefore…
The Best Graphic Programs for the Money: Adobe
Photoshop Elements 2 and GraphicConverter (both work
under OS 9 and X)
Say “Cheesy Poofs!”
Speaking of digital photos, the aforementioned Canon
PowerShot Digital ELPH 230 is mind-boggling. My wife and
I have used a Kodak DC220 for the past few years, but
Daphne wanted to get something as powerful but smaller.
She’s a real estate agent and needs a camera good enough to
take high-quality, competent photographs of properties for
use in flyers and Web advertising, but she also wants to use
the camera for personal reasons. The Canon met all of her
criteria and exceeded them: it has a resolution of 3.1
megapixels—a significant difference from our older Kodak at
1.5 megapixels—and fits in the palm of her hand. The camera
is literally so small that she can stuff it in her purse with no
problem, yet it’s as fully featured as any digital camera I’ve
seen for under $1000. Actually, way under $1000: we paid
around $400 for it. Best of all, it takes a good ol’ reliable
Compact Flash card instead of some ridiculous new card
format like the one Olympus recently foisted on an
unsuspecting public.
Best Compact Digital Camera (Under $1,000): Canon
PowerShot Digital ELPH 230
Get the Picture?
Two years ago, I wrote that Adobe Photoshop Elements was
one of the best software titles of the year due to its value, ease
of use, and powerful features. I’m happy to say the best gets
better with the release of Adobe Photoshop Elements 2. In
addition to making it OS X-native, Adobe threw in even more
fun features while keeping the price at $89, and the upgrade
price at $59.
Elements 2 has a bevy of automated routines to alleviate the
drudgery of working with loads of digital photos. The “batch
rename” feature is worth the price all by itself. In addition,
improved Web albums, uploads to Shutterfly, and one-click
picture fixing make Elements 2 a standout. Apple’s recent
release of iPhoto 2 takes the freeware program a bit closer to
Elements’ territory, but it still can’t hold a candle to the power
of Adobe’s consumer version of Photoshop.
I use Elements 2 virtually every time I deal with photos
from our Canon PowerShot 230, and I smile while using it. I
also still rely on one of the best shareware programs ever
released:
Thorsten
Lemke’s
wildly
successful
GraphicConverter2. GraphicConverter 4.5.2—still $30, or
$15 for an upgrade from an older version—has so many
features that there is not enough room to list them all. I use
GC every month in the course of editing our user group’s
newsletter: I use a Batch routine to convert folders full of
1.
2.
Serious Playtime
Last year, I had the joy of being hooked on Ambrosia’s PopPop3, and felt it was the best game of 2002. Now I’m hooked
on a new generation of games—many for OS X only—from
some new, independent game makers.
Macworld gave awards to (no surprise here) Warcraft III4
and other games like it. In other words, “first person shooter,”
“slash and hack,” and other kinds of action/strategy games. I,
however, gravitate toward puzzle games with heavy addictive
qualities. The infamous Tetris comes to mind as a classic
example of this kind of game. I also enjoy action games such
as Pangea’s Cro-Mag Rally5 and OttoMatic6, because they are
fun (and funny), have great 3D wrap-around action, and
don’t involve death and mayhem. If I want that kind of thing,
all I have to do is get on any Los Angeles area freeway!
3.
4.
5.
6.
http://www.macintouch.com/mosxreader10.1.4pt01.html
http://lemkesoft.com/us_gcabout.html
ATPM 9.03 / March 2003
29
http://www.AmbrosiaSW.com/games/pop-pop/
http://www.blizzard.com/war3/
http://www.pangeasoft.net/cromag/index.html
http://www.pangeasoft.net/otto/index.html
User Strikes Back: Product Awards
Two of the best new game companies are PopCap Games1
and DracoSoft2. Both specialize in these kind of puzzle/
action games, with standouts being PopCap’s Bejewelled
Deluxe and Draco’s Wordsmith, an amalgam of Scrabble,
Boggle, and Perquackey. But my current favorite super-timewaster is Super Nisqually3 from the GameHouse. All these
games have stellar graphics, sophisticated soundtracks, and
compelling game play; there’s just something about Nisqually
that makes me want to play it hour after hour. I haven’t had
this kind of rush since Snood4 came out! (Will there ever be
an OS X version of Snood? Please?)
and greatest every week or so, you can appreciate these
prices. If you’re an Apple .Mac member, you can find many of
these games on your iDisk, some in demo form and others
already paid for. Enjoy!
Best Obsessive Macintosh Game: Super Nisqually 1.0.3 by
GameHouse (OS X–only)
Also, if you love games, here’s something to look forward
to: the return of Cliff Johnson to the Macintosh gaming
world. After 15 years, Cliff is about to release the highlyanticipated sequel to The Fool’s Errand, one of the greatest
games every made for any computing platform. In its heyday,
the unassuming game that ran on a Mac Plus captivated
people across every segment of society. Fans of the game
ranged from Stephen Sondheim to the Rand Institute, which
once halted research for an entire week to solve it.
Cliff ’s long-awaited sequel is called “The Fool And His
Money,” and will be released on Halloween. You can check his
progress and see screen shots by going to his amazingly
bizarre Web site5. If the urge comes over you, go ahead and
pay for the game now by pre-ordering it: you won’t be sorry.
Bets are that the game will be inhabiting this spot next year.
Big CD Keep on Burnin’
If you want a second CD burner to complement a built-in
unit as I did, or you need a CD burner because your Mac
didn’t come with one, you can’t do better than Yamaha. My
first burner was a Yamaha and I have stayed with them over
the years, even when other companies brought out faster
machines. The company will always catch up to competitors
with faster machines (eventually), but what they bring to the
table no one else can match—namely, a deep history in the
worlds of both data and music.
Wordsmith
CRW-F1 CD-RW
Of course, the best thing about all these games are the
prices: most are between $10 and $15. If you have kids who
are hooked on PlayStation 2 games, and must have the latest
Yamaha CD burners have a wealth of features not found in
other drives. The current leader is the CRW-F1, available in
both internal ATA, SCSI, and external FireWire models. The
units can actually burn graphics and text onto the data
portion of a CD—they call this their CDT@26 system—and
also feature Audio Master Quality and support for CD Text.
At 44x burn and read speeds, and 24x re-write speeds, they’re
almost the fastest ones you can buy, but they still get the job
1.
2.
3.
4.
5.
6.
Super Nisqually
http://www.popcap.com/macmain.php
http://www.dracosoft.net
http://www.gamehouse.com/nisqually/
http://www.atpm.com/3.07/page16.shtml
ATPM 9.03 / March 2003
30
http://fools-errand.com
http://www.yamaha.co.jp/english/product/computer/extra/products/crwf1
User Strikes Back: Product Awards
done. Trust me on this: 44x is quite satisfying when
compared to Apple’s anemic built-ins, especially their
SuperDrives.
Don’t get me wrong, I like SuperDrives…for burning
DVDs. It’s just that they’re kind of pokey when you use them
to do anything else. I figured I’d made a sizable investment
getting the fastest Mac there was (at the time) so why was I
saddling myself with a burner that records at speeds that were
considered fast three years ago? Also, if you make copies of
CDs (from one to another), using a second burner is almost
imperative unless you only do this every once in awhile.
At about $220, you can’t go wrong with the Yamaha, and
once again, the editors of Macworld felt the same way. (The
ice-blue case with pulsating blue activity light doesn’t hurt
either.)
Best Storage Product: Yamaha CRW-F1 CD-RW drive
One quick word on bundled software: for a short time,
Yamaha executives lost their minds and decided to bundle
NeroMax burning software from NeroSoft with their CDRWs. The German company had no idea what a Mac
was—or, apparently, what English was—and simply ported
over their infamously bad Windows software. I
recommended at the time anyone getting a Nero CD with
their Yamaha simply pitch it into the trash can and instead
purchase a copy of Roxio’s Toast Titanium, also a 2003 winner
of a “Stuff You Can’t Live Without” award. (As far as I’m
concerned, it’s been winning one every year since its release,
so I’m leaving a detailed description of it out for this goround.)
I’m glad to tell you that Yamaha has come to its corporate
senses and started bundling Toast again. Although it’s the
“lite” version, everything you need is there. The store-bought
version simply adds ancillary software that may not be that
necessary to a lot of people.
iTunes 3 keeps raising the bar for a one-stop audio shop. But
there are two other audio-oriented titles which come to mind
that are unique in their powers and abilities.
The first one is Rogue Amoeba’s Audio Hijack2. (Don’t you
just love some of these company names? That’s what happens
when you’re working with just a few gonzo programmers
instead of corporate committees.) Audio Hijack does exactly
what the name says: it lets you swipe audio from sources
previously “locked off ” from such things. For example, you
can capture live Internet audio streams from RealAudio,
QuickTime, and more to your hard disk. And you can also
capture audio directly off of commercially made DVD
movies. (Yes, this is legal, as long as you’re not turning it
around and either selling it somehow or sharing it with the
rest of the world.)
Audio Hijack
Audio Hijack does its magic by controlling the target
software for you. The program tells you right on the main
screen to not launch the software you want to use, but rather
to tell Audio Hijack what that software is so it can launch it
first. Once Audio Hijack has control over the software in
question, the magic can begin. After that, it’s just a simple
case of clicking to start capturing the audio stream, and
clicking again to stop it.
In addition, Audio Hijack gives you the ability to process
the sounds you capture with many different DSP (digital
signal processing) modules. Best of all, you don’t have to
capture anything just to use them; they work all by
themselves! Right now, I’m listening to Sarah Brightman’s
Eden3 CD. It’s mounted on my desktop, and iTunes is playing
it…but Audio Hijack is processing the sound before it gets to
my Harman-Kardon SoundSticks4. (Oh yes, how about an
The Sound of Innovation
I’ve saved the best for last: software that does not fit in any
known category. These would be programs that fill a niche no
one had been able to fill before, or better yet, created a whole
niche all for themselves. More often than not, these programs
are OS X–only, which definitely qualifies as a trend in my
book. What is so exciting about these titles is how wholeheartedly their programmers have embraced OS X. A
properly coded and designed X-native program is just a joy
beyond words. Phil Schiller, Apple’s Senior VP of Worldwide
Product Marketing, may have once referred to Microsoft
Office for OS X as the “poster child” for how to design the
perfect X-native program, but I beg to differ with him. If you
want to know how it’s really done right, look no further.
Some of the most fun you can have with OS X is with audio.
Felt Tip Software’s Sound Studio1 for OS 9 and X brings fullbore audio editing to the masses, and of course Apple’s own
1.
2.
3.
4.
http://www.felttip.com/products/soundstudio/
ATPM 9.03 / March 2003
31
http://www.rogueamoeba.com/audiohijack/
http://www.amazon.com/exec/obidos/ASIN/B00000IL1K/aboutthisparticu
http://www.harman-multimedia.com/
shop_detail.html?cart=HK1_104641021227192&sku=SS&id1=1
User Strikes Back: Product Awards
award for them as well? I truly couldn’t live without ’em.) I’ve
turned off the iTunes equalizer in favor of the one supplied by
Audio Hijack. The sound is smoother, stronger, more
defined, and more satisfying. In short, I never knew my
SoundSticks could sound like this!
stuff to choose from, by recognizable artists and newcomers
alike, at affordable prices. The site is well organized, and the
MP3s you download from them sound crisp and clean.
Pickup
There’s only one problem: the site depends on third-party
software to interface with your Web browser…and it’s
Windows-only.
I guess Mr. Vissering felt the way I did when I first
encountered the site—severely frustrated—and decided to
do something about it. Pickup is now listed on eMusic as the
preferred (and only) Mac client that works with eMusic’s
proprietary EMP/RMP file format.
What I like so much about Pickup isn’t just the fact that I
can now get stuff off of eMusic, but rather the way in which it
is done. When it comes to helping the user set up the
software, Pickup’s “Configuration Manager” is a model for
everyone who writes software to emulate. In lesser hands, the
job of telling Pickup how to interface with eMusic and a Web
browser, as well as then setting up the browser itself to
understand eMusic commands so that Pickup is
automatically launched, would be a nightmare. But Pickup
takes you gently by the hand and leads you, step by illustrated
step, through the process. Each screen carefully explains what
you need to know, then tells you exactly what to do.
All that effort for what becomes, in effect, a totally
transparent product; when Pickup is working with eMusic,
you never even have to see it. On top of all that, Pickup is free.
Once again, shareware—or in this case freeware—comes to
the rescue.
Best Software That Fills a Need No One Else Thought of:
Pickup 1.4
Audio Hijack DSPs
Audio Hijack also brings back the always-fun “Karaoke”
feature once found in SoundJam but never ported to iTunes;
it also has Timers, analysis tools, and so much more. For $16,
this is one power-packed piece of software.
Best Audio Processing Software: Rogue Amoeba’s Audio
Hijack (OS X–only)
My second choice for invaluable audio software is Eerko
Vissering’s Pickup 1.41. If there was ever an example of
software created to fill a gaping hole, this is it. One of the best
Web sites for downloading music legally is eMusic.com.
Unlike the major labels, these guys got it right: lots of good
1.
http://members.home.nl/vissering/indexfree.html
ATPM 9.03 / March 2003
32
User Strikes Back: Product Awards
If the Label Fits, Stick It
Another product that did what no one else could do (right,
anyway) is Discus1 from Magic Mouse Software.
Discus is another example of software that’s elegant,
powerful, and affordable. At $39.95 retail, it works well, does
what it’s supposed to do, and beats the pants off of any other
labeling software out there.
labels is no longer a luxury but a necessity. Then, a few
months ago, I read that Discus was the first (and probably
only) CD labeling product to go OS X–native. I decided to
give it another try by downloading the demo4; within 10
minutes I was so entranced I gladly paid them $39 for the full
version, which arrived only two days later. The CD is
crammed with thousands of patterns, templates, and
graphics for all types of labels besides the one that goes on
top of the CD: I can now create labels for CDs and DVDs,
mini-CD’s, business card CDs, index cards, folding booklets,
and tray inserts…even the outer wrapper for DVD “keep
cases”!
Using the product is very reminiscent of the original
KidPix—Magic Mouse also makes “Flying Colors” which is a
KidPix clone that is actually better than the current version of
the once-great program—but it’s not toy. I’d like to think of it
as an object lesson for programmers: how to make something
really easy to use, yet with features and flexibility galore, and
still keep the program size down to a dull roar.
Basically, you create a label in 3 easy steps:
1. Click on the template you want—in this case, a CD label.
2. Select a background from hundreds available, or import
your own graphic, then adjust the opacity and/or size.
3. Add further graphics on top, if desired, and then add the
text. (There’s also a thorough painting environment for those
who are inclined to create their own graphics.) Discus
automatically centers, curves, bends, and otherwise
manipulates text to fit on areas of the CD label with no hassles
whatsoever.
Discus Main Window
Like fax software before it, competent, well-written CD
labeling software seems to have eluded the grasp of
programmers up until now. One problem could be that most
CD labeling software is included with popular CD labeling
products, usually as an after-thought. Or maybe CD labeling
software just isn’t taken seriously by the people who create
and sell it. All I know is not a month goes by where I don’t
hear complaints about crappy CD labeling software such as
CD Stomper2 or Click ’n Design 3D3 not printing, crashing
all the time, or just acting up. (And now, as it turns out, CD
Stomper is no longer supported for the Mac.)
I used to think things were better on the PC side, but I
found they have just as many complaints as we do: the stuff
simply doesn’t work. I was resigned to the old stand-by
method of using provided templates for Illustrator and
PageMaker to create labels for my CDs when something
unexpected happened: I discovered Discus. It’s insanely easy
to use, lots of fun to play with, and prints perfectly every
time.
A “lite” version of Discus has been bundled with versions of
Toast CD burning software for several years now, but I never
paid attention to it. I think I tried it once in 1998: I looked at
its opening screen, said “that’s cute,” and quit the program.
In the intervening years, CD burning has gone from a
“geekier than thou” activity to something all of us do several
times a day. Producing eye-catching, artistic, and informative
1.
2.
3.
Discus Help Window
Finally, save and print! And printing is a joy as well. One of
my favorite things about Discus is that it’s smart enough to
know that label sheets usually contain more than one label
per sheet. To print your label on more than one label at a
time, you simply click the checkbox on the blank label in
question to turn it on or off. Turning the checkbox “on”
http://www.magicmouse.com/_discus.html
http://www.atpm.com/5.10/cdstomper.shtml
http://www.atpm.com/8.04/clickndesign.shtml
ATPM 9.03 / March 2003
4.
33
http://www.magicmouse.com/_discus_downloads.html
User Strikes Back: Product Awards
makes your design magically appear on the 2nd (or 3rd or
whatever) label. No messy drag-and-drop required, no
“clone” tool that never works…just simple and easy. Not to
mention cost-effective by not wasting unused labels. (In case
you haven’t noticed, CD labels are expensive!)
Not only does Discus contain templates for labeling
products from literally dozens of manufacturers, but it also
correctly prints on a large variety of laser and inkjet printers.
The very first time I tried creating a CD label, I was able to
print it out on my HP 990 inkjet and it fit and printed
perfectly. What a relief.
I’d always suspected the UPC symbols found on all the
things we buy these days could be put to good use, and I was
right. The only problem has been how to identify what the
UPC stands for. When you buy a CD at Tower Records, for
example, the clerk scans the barcode and it’s instantly
matched against the store’s in-house database. The Internet
now provides us with the world’s biggest database for the
general public, and ReaderWare has put it to good use.
ReaderWare Adding a CD
To get CDs, DVDs, and books into the ReaderWare
database, all you have to do is get a barcode scanner of your
own and click! All the info you ever needed will magically
appear on everything you scan in.
Getting a USB-based barcode scanner2, just like the ones
you see in stores, couldn’t have been easier, thanks to the
Web. I picked up a nifty Peninsula reader for about $50.
Another nice thing about the USB barcode readers is that,
thanks to OS X, there is no need for software drivers—you
just plug it in and it works.
The process of entering books, CDs, and DVDs is
stunningly simple: get a pile of whatever you want looked up
and scan each item’s barcode. This can be done in any text
editor, or directly in ReaderWare. (Making a long list of UPC
code numbers is the easier way to do this.) Once you make a
list of UPC numbers, you then load them into ReaderWare
and tell it to go fetch. The software lets you access dozens of
Web-based informational sites, from Tower and Amazon to
the Library of Congress; you can also merge the results from
several sources into one record. After processing, you’ll have
every scrap of information possible about the CD (or book or
DVD) in question automatically entered into the database,
including album or cover art if any.
Discus Import Menu
As if that wasn’t enough, Discus can easily import track
name information from iTunes, Toast, Jam, or even another
Discus file. This is a great convenience feature.
Best Software That “Got It Right”: Magic Mouse Discus
Multimedia Labeling software
Yo-ho-ho, It’s a Scanning Life for Me
My last award also goes to a product that filled a need of
mine—a yearning, aching, crying need—that has long gone
unfulfilled.
As a longtime collector of just about anything that’s round
and spins, I have amassed over the years a sizeable media
collection. I have literally thousands of records, as well as
several thousand CDs and Laserdiscs. I also have several
hundred DVDs, not to mention a couple of thousand books
of every description. The task of cataloging this collection is a
mammoth undertaking, and is something I’ve intended to do
since my first Mac Plus. Here I am 15 years later, with not
much to show for myself.
At one time we were contemplating hiring someone just to
do the endless data entry required to create a truly
comprehensive database with everything I’d want to know
about each and every entry. Needless to say, that didn’t
happen either.
Finally, the confluence of OS X, the Internet, and an
enterprising Bay-area programmer gave me the answer:
ReaderWare1.
ReaderWare Barcodes
1.
http://www.readerware.com
ATPM 9.03 / March 2003
2.
34
http://www.barcodereaders.com
User Strikes Back: Product Awards
If that wasn’t enough, you can even drag and drop Web
pages into ReaderWare! If, for example, you’re purchasing
something on Amazon, you can, at the same time, drag each
item’s Web page into ReaderWare and all the information will
be transferred into the master database. As you might expect,
you can create numerous reports and perform many kinds of
searches. This, truly, is what the Internet was invented for.
ReaderWare costs $45 for the standard version that handles
books, or $75 in a bundle that has the book, CD, and DVD/
Video versions.
ReaderWare Web Acquire
Best Use of the Internet by 3rd Party Software: ReaderWare
(OS X–only)
ReaderWare Auto-Catalog
Copyright © 2003 Ken Gruberman, [email protected]. Ken Gruberman is a member of the Apple Consultants
Network and has been writing about the Macintosh since 1989. He has edited The MacValley Voice, the award-winning
newsletter of the MacValley Users Group in Southern California, for 11 years and wrote for MacUser magazine for 7 years.
Ken lives in Chatsworth, CA.
ATPM 9.03 / March 2003
35
User Strikes Back: Product Awards
How To: Building Customized Boot CDs
How To
by Sylvester Roque, [email protected]
A Custom Pair of Boots: Building Customized Boot CDs
Okay, I confess. I like to tinker with my Mac. Unfortunately,
sometimes things go wrong. I have never really ruined any
significant hardware, unless you count one Apple IIGS logic
board, but I have damaged system files and hard drive
structures more times than I care to count.
Because I had become so good at making a complete mess
of my Mac, I had to be at least decent at cleaning up the mess
that I had made. Sometime in between System 7.1 and Mac
OS 9.2, I started creating emergency CDs that contained the
system software needed to boot the computer, and utilities
that I used frequently to repair it. This was a real time saver; it
meant I could boot from one CD and run several utilities,
rather than restarting from multiple CDs to run the same
utilities. There are also times when booting from a utility CD
is a necessity, especially when a utility cannot make repairs to
the boot partition or drive. In order to do that, you must boot
from either another hard drive, or a utility CD.
With the advent of OS X, that process came to a complete
standstill. Suddenly the techniques for creating an OS 9
emergency CD did not work; creating an OS X emergency
CD required an understanding of Unix commands and files
as well as Mac files. I must admit, I was not that
knowledgeable. What was a guy like me to do? Well, when I
don’t know the answer, I try to find people who do.
The good news is that smarter Mac users than I have come
to the rescue. There is indeed a way to create an OS X
emergency CD that is capable of booting the system. So, let’s
roll up our sleeves, gather our tools, and get to work.
•
For an OS 9 CD, you need an OS 9 installer CD, a CD burning
program capable of creating a bootable OS 9 CD, and
installers for any utilities you wish to use.
Getting Started
The directions included with the current version of BootCD
are sparse, but they are accurate and easy to understand.
Most users will have little difficulty understanding these
directions. Here is what you must do to create a bootable OS
X CD.
Launch BootCD and choose a name for your CD. Enter this
name into the Volume Name field in the dialog box. (Don’t
start it with a period.) For the purposes of this article, mine
was called Emergency Boot CD. In the same dialog box, set
the size of the CD and the size of the RAM Disk. If you are
using a 700 MB CD, change the size to 700 MB.
The RAM Disk size is set to 10 MB by default. According to
the program’s author, most users should find this sufficient.
Increasing the size of the RAM Disk may not improve boot
speed, and if increased too far may decrease boot speed by
leaving less memory available for program use, forcing it to
access the CD more often.
Click the “Create Bootable CD Image” option. You must
enter an administrator account username and password
(yours, if you are the only user) or the program will not
proceed. The next screen is a standard OS X Save dialog.
Choose a location for the Emergency CD image file that has
at least as much free space as the CD you are creating: I find it
convenient to place the file on the desktop.
BootCD will now begin to create the image file. According
to the program’s documentation, this process often takes
between eight and fifteen minutes. On my iBook SE running
10.2.3 it took about 18 minutes.
Gather the Tools
This task will not work without the right tools at hand. It is
time for a trip to the virtual toolbox.
For an OS X CD:
•
•
1.
Japanese, and Spanish. The file that I download
contained directions written in both English and
French.
You need a CD burner that is fully supported by Disk
Copy. This could be very important. The first time I
tried to complete this process I used a burner that was
supposed to be compatible with Disk Copy. The disk
was never successfully burned with that burner but
burned easily with another burner.
Disk Copy, Disk Utility, and the BSD subsystem must
be installed. If you have removed any of these items
from your Mac OS X installation, reinstall them
before attempting to create your emergency CD.
BootCD1 creates the bootable OS X CD. Version 0.5.3
(current at press time) requires OS X 10.2 or later, but
a previous version supports other versions of OS X.
The current version will work with “Old World ROM”
machines such as the beige G3. The program is
localized in Dutch, English, French, German,
http://www.charlessoft.com/BootCD.dmg
ATPM 9.03 / March 2003
36
How To: Building Customized Boot CDs
Next, a standard Open dialog box will appear that allows
you to choose which utilities you want on your CD. Once you
choose an application, BootCD takes a moment to add that
program to the disk image. Continue choosing applications
until you have all the applications you need.
During this stage in the process, choose utilities that are
“self-contained” and do not litter the hard drive with
additional files. If a program has files in several locations on
the hard drive, this is not the time to add that program. Do
not include System Preferences, Terminal, Disk Utility, or
Console. BootCD includes these programs in the disk image
by default.
While you are still choosing applications, you can find out
how much space remains on your new CD by returning to the
Finder, clicking on the icon of the mounted volume, and
choosing “Get Info” from the File menu. You may then return
to BootCD to continue adding applications.
When you have finished choosing applications, click
Cancel and BootCD will complete the imaging process. An
alert will inform you that you have a bootable CD. It is now
safe to quit BootCD and unmount the disk image volume.
Open Disk Copy and choose “Burn Image” from the File
Menu. In the Open File dialog that appears, locate and open
the image file that BootCD created. It will take approximately
15–20 minutes to burn the CD depending on the speed of
your CD burner. With any luck, you should have a bootable
OS X CD.
Give It the Boot
Booting from your emergency CD is about as easy as it gets.
Insert the CD into your internal drive, restart the computer,
and hold down the “C” key on your keyboard until you hear
enough drive activity to convince you that the machine is
booting from the CD.
It may take quite some time for the machine to boot from
your CD. My iBook takes about fifteen minutes to boot from
my current Emergency CD. This does not appear to be due to
a flaw in the BootCD program, but is a function of the
process needed to boot from the CD. The same iBook takes
four to five minutes to boot from the Drive 10 CD as well.
At some point during the boot process, you must enter a
user name and password. For the current version of BootCD,
the username is root and the password is set to bootcd. Both
words must be typed in lowercase.
Installing Applications That Are Not Self-Contained
Some applications have critical files that are stored in more
than one place on the hard drive. Some of these programs
will work from a boot CD and others will not. If the program
must write files back to the hard drive during operation, it
may not work correctly from a CD.
Here is a short procedure that you can try. I cannot
guarantee that this process will make your chosen “scattered”
utility work, but at least the program will be on the CD so you
can test it. This only works with utilities which, upon
installation, let you choose the destination volume.
Locate the disk image created by BootCD and mount its
volume by double-clicking on the disk image. Wait for the
volume to appear on the desktop.
Insert the installer CD for the program that you want to
add. Double-click the installer and let it run. When asked to
choose where the program will be installed, choose the
mounted volume of your emergency CD, not the disk image.
If there are any additional drivers (apart from the included
USB and FireWire drivers) that are essential in
troubleshooting your system, this is the time to add them.
Bootable CD Success!
This is the first process I have seen that yields a bootable
CD containing the Finder, Dock, and basic utilities included
as part of a standard OS X install. The screenshot shows my
iBook successfully booted from a custom CD. At the time this
screenshot was taken I had tested all of the applications
shown in the Dock except for Network Utility. Safari was the
only program that refused to work.
The only problem I have encountered is that sometimes
self-contained “package” programs appear in the Dock as
folder icons instead of program icons. Hovering over such an
icon will show the name of the program. If this happens when
Burn Baby Burn
Now that you have finished adding programs to the disk
image, it is time to do some burning. Unmount the volume by
dragging it to the Trash, which should change to an Eject
symbol. Do not drag the image file to the Trash.
We are almost ready to burn the CD at this point but there
are a few things to keep in mind. Do not use the Finder to
prepare the image for burning. This process appears to be
most successful when using Disk Copy to complete the burn;
try Toast if Disk Copy is unsuccessful.
ATPM 9.03 / March 2003
37
How To: Building Customized Boot CDs
you boot from your new CD, go ahead and click on the
program’s folder icon in the Dock; it will probably still open
and run normally.
additional utilities or device drivers that you will need to
troubleshoot the system. Use the same procedure that you
used when the program was first installed.
Once you are finished installing, it is almost time to start
burning again. Before you do though, open the System Folder
on your mounted image volume. Open the Startup Items
folder and remove the aliases for AirPort Setup Assistant and
any other programs that you do not want launched
automatically. Close any open windows.
Return to Toast and choose “Other” from the Toast menu.
Choose “Mac Volume” from the pop-up menu that appears.
When the window changes to “Mac Volume,” click the Select
button.
In the dialog box that appears, choose the mounted disk
image that you just created. I called my CD Emergency 9 CD.
Make sure that you also check the “Bootable” option.
Make Mine a Size 9 Boot
Creating a truly effective emergency kit may require running
utilities that must run under OS 9. In fact, the current
versions of DiskWarrior1 and Norton SystemWorks2 require
booting into OS 9. Using either of these utilities will require
an OS 9 emergency CD. This phase of the project was
completed using Toast Titanium 5.23, but it should work with
other programs that are capable of burning a bootable CD.
The general idea will be the same, but the specific steps in
burning the CD will vary depending upon which program
you choose to use.
The help file in Toast describes how to use an existing OS 9
System Folder as a basis for a bootable CD. I chose to start
from scratch and use a fresh OS 9 installation. This way there
are fewer opportunities for extension conflicts or damaged
system files to cause a problem. If you choose to start with a
fresh install, boot the system directly into OS 9. Some of the
update installers for OS 9 may not run properly from Classic.
This process will assume that we are going to start with a
fresh install.
You can complete this part of the process by burning the
CD either from a separate hard drive partition, or from a disk
image created within Toast. For either process you will need a
few more megabytes of free hard drive space than the size of
the CD you want to create. I prefer to use a hard drive
partition, as this permits me to test the installation without
first burning the CD. If you are burning from a hard drive
rather than a Toast disk image, empty the drive partition,
erase it if possible, and skip to installing OS 9.
Launch Toast and choose “Create Temporary Partition”
from the Utilities menu. In the dialog box that appears, name
your emergency CD, choose how large the CD will be, and
choose the location for the temporary file.
From inside Toast, go to the Utilities Menu and choose
“Mount Image.” Locate the image file that you just created
and wait for the image to mount.
Install OS 9 on the mounted disk image or on the hard
drive partition that you are using. When the installation is
complete, install any OS 9 updates that you need, then any
1.
2.
3.
Make the CD Bootable
Now, you are ready to record. Click “Record” and follow the
usual burning process. Be sure to choose “Write Disc” rather
than “Write Session” when given the opportunity.
When recording is complete, try to boot from the OS 9 CD
that you just created. Now is the time to find out whether the
CD works. Do not wait until you really need it.
•••
This process, especially the OS X aspect, is still in its infancy.
If it does not work, try again. I have been watching BootCD
for some time now and it continues to improve. I hope that
you find this process as helpful as I have.
http://www.atpm.com/6.07/updates.shtml
http://www.atpm.com/7.01/systemworks.shtml
http://www.atpm.com/7.07/toast.shtml
Copyright © 2003 Sylvester Roque, [email protected]. Sylvester Roque is a long-time Mac user who currently works as a
speech-language therapist in the public school system. His hobbies include finding new uses for old Macs and listening to
great blues.
ATPM 9.03 / March 2003
38
How To: Building Customized Boot CDs
Cartoon: Cortland
Cartoon: Cortland
by Matt Johnson, [email protected]
ATPM 9.03 / March 2003
39
Cartoon: Cortland
ATPM 9.03 / March 2003
40
Cartoon: Cortland
Copyright © 2003 Matt Johnson, [email protected].
ATPM 9.03 / March 2003
41
Cartoon: Cortland
Desktop Pictures: California
Extras: Desktop Pictures
California
California1
The pictures presented here are courtesy of Jens
Grabenstein2. They were taken in June 2002 on a two-week
road trip through California starting from San Francisco.
The images reflect the cultural and natural diversity of this
beautiful state.
Mac OS X 10.0.x
Switch to the Finder. Choose “Preferences…” from the
“Finder” menu. Click on the “Select Picture…” button on the
right. In the Open Panel, select the desktop picture you want
to use. The panel defaults to your “~/Library/Desktop
Pictures” folder. Close the “Finder Preferences” window when
you are done.
Previous Months’ Desktop Pictures
Pictures from previous months are listed in the desktop
pictures archives3.
Mac OS 8.5–9.x
Contributing Your Own Desktop Pictures
If you have a picture, whether a small series or just one
fabulous or funny shot, feel free to send it to
[email protected] and we’ll consider publishing it in next
month’s issue. Have a regular print but no scanner? Don’t
worry. E-mail us, and we tell you where to send it so we can
scan it for you. Note that we cannot return the original print,
so send us a copy.
Go to the Appearance control panel. Click on the “Desktop”
tab at the top of the window. Press the “Place Picture...”
button in the bottom right corner, then select the desired
image. By default, it will show you the images in the “Desktop
Pictures” subfolder of your “Appearance” folder in the System
Folder, however you can select images from anywhere on
your hard disk.
After you select the desired image file and press “Choose,” a
preview will appear in the Appearance window. The “Position
Automatically” selection is usually fine. You can play with the
settings to see if you like the others better. You will see the
result in the little preview screen.
Once you are satisfied with the selection, click on “Set
Desktop” in the lower right corner of the window. That’s it!
Should you ever want to get rid of it, just go to the desktop
settings again and press “Remove Picture.”
Placing Desktop Pictures
Mac OS 8.0 and 8.1
Mac OS X 10.1.x and 10.2.x
Go to the “Desktop Patterns” control panel. Click on
“Desktop Pictures” in the list on the left of the window, and
follow steps similar to the ones above.
Downloading all the Pictures at Once
iCab and Interarchy (formerly Anarchie) can download an
entire set of desktop pictures at once. In iCab, use the
Download command to download “Get all files in same
path.” In Interarchy, use HTTP Mirror feature.
Choose “System Preferences…” from the Apple menu and
click the Desktop button. With the popup menu, select the
desktop pictures folder you want to use.
You can also use the pictures with Mac OS X’s built-in
screen saver. Choose “System Preferences…” from the Apple
menu. Click the Screen Saver (10.1.x) or Screen Effects
(10.2.x) button. Then click on Custom Slide Show in the list
of screen savers. If you put the ATPM pictures in your
Pictures folder, you’re all set. Otherwise, click Configure to
tell the screen saver which pictures to use.
1.
2.
3.
Random Desktop Pictures
If you drag a folder of pictures onto the miniature desktop in
the Appearance or Desktop Pictures control panel, your Mac
will choose one from the folder at random when it starts up.
DeskPicture
An alternative to Mac OS’s Appearance control panel is Pierce
Software’s DeskPicture, reviewed4 in issue 5.10 and available
for download5.
http://www.atpm.com/9.03/california/
mailto:[email protected]
http://www.atpm.com/Back/desktop-pictures.shtml
ATPM 9.03 / March 2003
4.
5.
42
http://www.atpm.com/5.10/roundup.shtml
http://www.peircesw.com/DeskPicture.html
Desktop Pictures: California
Review: Black & White: Platinum Pack
Review: Black & White: Platinum Pack
by Matthew Glidden, [email protected]
Developer: Lionhead Studios Ltd., published by Feral Interactive Ltd. and Graphic Simulations, distributed by
MacPlay1.
Price: $49.99
Requirements: 333 MHz Mac with Mac OS 9.1 or Mac OS X 10.1.3, 128 MB of RAM, 1.5 GB disk space, 8 MB 3D
accelerator with OpenGL 1.2, 4x CD-ROM.
Recommended: Mac OS 9.2.2 or Mac OS X 10.2, 500 MHz, 256 MB of RAM, 32 MB 3D accelerator with OpenGL.
Trial: None
Overview
The Black & White Platinum Pack contains the original Black
& White and its immediate offspring, the expansion game
Creature Isle. Real-time strategy with a twist, Black & White
challenges you to build and expand a godly empire. The
“twist” is a creature, your creature, a minion who learns and
grows, eventually becoming your primary force in the
surrounding lands. The colors “black” and “white” indicate
your ability to choose between styles of play. Teach your
creature to love the inhabitants or terrorize them. Either will
build belief, your source of power in the game’s land. You
eventually face off against other gods and creatures, seeking
to prove your superiority.
The original Black & White starts with an infant creature
and a single city of believers. Through a series of tutorial
exercises, you learn how to interact with each by performing
miracles and finishing tasks. Neighboring gods and periodic
trials test your creature’s education and combat skills. With
sufficient education and power, the creature can dominate the
entire land and its population.
Black & White supports network and Internet play, pitting
your creature and empire skills against other human players.
Game play is functionally the same for both, but multi-player
games have specific, competitive goals.
ATPM reviewed2 the original Black & White in issue 8.05.
Since I largely agree with its content, this review focuses on
the Creature Isle expansion in single-player mode.
Creature Isle requires the original Black & White game, so
install it (and play it) first. You don’t need to finish Black &
White to play Creature Isle, but it helps. Take your creature
from Black & White into Creature Isle, or start an expansion
game and use the provided monkey creature.
Game Play
Black & White breaks no real ground in world building. You
assemble resources and build cities, balancing conservation,
expansion, and defense. Your followers’ belief gives you
power to build additional homes and other buildings, which
increase the population and its belief. Miracles use belief
power to create raw materials or change the landscape.
Eventually, your empire expands to cities and the cycle begins
again. Your home Tower tracks acquired game knowledge
and tasks performed, serving as a reference and refuge.
There are two notable innovations in Black & White. First
is your interaction with the creature. It learns what you
choose to teach it, by example and reinforcement. With
proper care, it will control your village and conquer
neighboring lands. Second is your option to walk the path of
aggression or the way of compassion. Terror and providence
are both legitimate methods of exercising your power and
instructing your creature. Teaching your creature to defend
itself and overcome challenges is the key to playing—and
enjoying—Black & White.
Creature Isle starts on an island without gods, inhabited by
several tribes. Missionaries from your original tribe land on
its shores and convert an Egyptian city that becomes your
home. The island is also home to a band of masterless
creatures called the Brotherhood. The head of the
Installation
The Black & White installer creates a single folder in the
Applications folder. The game and all the data files go there.
MacPlay publishes updates for Black & White, available from
their site or through a site like VersionTracker. As of this
article, 1.1.9 is the latest update.
2.
http://www.atpm.com/8.05/bw.shtml
1.
http://www.macplay.com/games/bundle_bw_bwci.shtml
ATPM 9.03 / March 2003
43
Review: Black & White: Platinum Pack
Brotherhood, Rufus, talks to your creature and announces a
series of trials to earn membership. (They don’t give Rufus’
last name, but I suspect it’s “Exposition.”)
Brotherhood’s home. Complete the trials and conquer the
island to meet Eve, an enigmatic member of the
Brotherhood.
Play Control
Those who played Myth will recognize Black & White’s play
control. You see the three-dimensional landscape from
overhead as a god might. Move from place to place and
change perspective with the mouse, but keep the other hand
on the keyboard shortcuts. The on-screen hand is a
proxy—your “hand of god”—interacting with objects and
performing miracles. Use leashes to guide or instruct your
creature in correct behavior. Erect new city buildings by
gathering supplies and designating town workers. (“I must
build a soccer field. God told me to.”)
My creature meets with Rufus for the first time.
Along the way, your creature acquires its own pet to
instruct. The pet, a chicken named Tyke (not Tyson?), follows
your creature around, mimicking its actions and learning
what it knows. This teaching-the-teacher task shifts the focus
somewhat, making you more directly active in helping your
creature pass along its knowledge appropriately. This twopronged approach to creatures is interesting, but ultimately
can be as frustrating as satisfying. (“Come ON!” I wanted to
shout a couple of times. “The MONKEY gets it, why don’t
YOU?”)
My “bad” spirit advisor tells me that Shadrin, the town leader, wants to ask a
favor.
Though better for people with multi-button mice, play
control is cumbersome at best. You can pause the game
frequently to make specific decisions without the pressure of
time, but you quickly lose game flow. The concept of mouse
“gestures” helps for casting miracles, but there’s still a lot
going on. It’s hard to feel “in control” of your creatures and
followers. I expect this isn’t a problem for experienced realtime strategists, but it kept me from enjoying the game. Most
new tasks felt like pulling one of my creature’s teeth.
In short, why am I doing all this work? Shouldn’t my
creature be The Man, or at least The Monkey? There’s too
much reliance on human interaction to get your creatures
working properly with the trials and villagers. It works in
Myth because your creatures run largely on automatic.
My creature gets his own pet chicken.
The Brotherhood trials require the most “work,” as you
essentially make decisions for your creature or otherwise best
another animal at its chosen game. Finish a trial and you can
switch to that animal (or fight it) at the Dojo, the
ATPM 9.03 / March 2003
44
Review: Black & White: Platinum Pack
Tips
You can “cheat” at many trials to make them easier—but is it
cheating when you’re a god? In the bowling trial, for example,
keep a stash of rocks near (but not too near) the trial logo.
When your creature bowls, grab a rock and drop it on pins to
knock them down. When the other creature bowls, drop a
rock in front of his ball to knock it away. Look for similar
opportunities to use miracles or other abilities to outfox the
trial designers. The trials are like a collection of party games.
Don’t take them too seriously, but definitely finish them as
soon as practical to expand your roster of creatures.
Creature Isle suffers from getting cute with the original idea,
teaching a computer how to behave like a civilized (or
spiteful) creature.
Bugs
The first time I played Creature Isle, there was no video but I
could hear the introduction playing in the background. After
installing the 1.1.9 update, the video worked properly.
Summary
The ATPM review of the original Black & White rated it
“Okay.” Creature Isle plays Jeff Daniels to its Jim Carrey and
gets an “Okayer.” Leaning on direct human interaction, given
its sluggish interface, wasn’t a great idea. Hopefully Black &
White 2 will improve the latter or eschew the former.
Black & White aficionados will probably enjoy Creature
Isle’s variety of available creatures and added challenge of
teaching your creature to teach. Casual players may think, “I
should just play the first game again and try being bad this
time.”
My creature teaches Tyke how to use the Village Store.
Settings
There are many video and audio settings, and the video
resolution and details settings impact game play most. My
slower 450 MHz CPU and built-in 3D card meant that
800x600 was the maximum video setting. Anything higher
would have slowed play to a crawl when I moved around the
city. Players with faster CPUs and better 3D graphics cards
can exploit much higher settings.
Copyright © 2003 Matthew Glidden, [email protected]. Reviewing in ATPM is open to anyone. If you’re interested, write
to us at [email protected].
ATPM 9.03 / March 2003
45
Review: Black & White: Platinum Pack
Review: ContentBarrier 1.3.3
Review: ContentBarrier 1.3.3
by Gregory Tetrault, [email protected]
Developer: Intego1
Price: $40
Requirements: Mac OS 8.6 or Mac OS X 10.1.1, PowerPC-based Mac, 800x600 display.
Trial: Fully-featured (30 days)
Overview
ContentBarrier uses a combination of keywords and site lists
to restrict access to defined categories of Web sites or Web
features. ContentBarrier can be used in home, school, or
corporate environments.
Password needed box and choose a password. Once you have
set up the first user, the main ContentBarrier window
appears.
Installation, Setup, and Initial Use
To install, just launch the ContentBarrier Installer. It installs
the ContentBarrier Control Panel and Control Strip Module.
Warning: ContentBarrier installs resources into your System
file. A restart is required before ContentBarrier can be used.
Dialog window for setting up the first user.
ContentBarrier files included with download.
When you launch ContentBarrier (from the Control Panels
folder or the Control Strip), a new user dialog box appears.
(If you installed the demo version, a special window
appears first.) I recommend creating an account for yourself
before setting up other users. If you are not using Apple’s
Keychain security features, then you should check the
1.
ContentBarrier main window.
ContentBarrier provides two methods for limiting Internet
content: restricted sites and filtering. If you select Restrict to
Special Sites, then Web browsing is limited to sites that you
list. If you select Use selected Filters, then Web browsing is
http://www.intego.com/contentbarrier/home.html
ATPM 9.03 / March 2003
46
Review: ContentBarrier 1.3.3
limited based on the pre-built filters you choose or custom
filters you create. Groups of filters can be stored as Filter Sets.
Pre-built filter sets include All allowed, All forbidden,
Default, and Child. You can select a different filter set for each
user. The list of pre-built filters is quite extensive.
You can also restrict Internet access times for each user.
Click on the Internet Access tab to bring up a surfing
schedule. Click and drag across the pink and red grid to
select hours for each day of the week. Internet access hours
appear as green rectangles.
When you first launch an Internet application,
ContentBarrier displays a login window. You choose your
user name from the pop-up menu, then enter your password
(if required) and click on the Login button.
Testing Web Surfing Under ContentBarrier
I conducted a series of tests with Internet Explorer and the
default ContentBarrier filter set. I entered the URL for what
would certainly be a blocked site: www.hardcoresex.com. The
browser window for that site appeared with childinappropriate graphics. I was able to view the free tour and
the sign-up pages. Interestingly, when I went to Google and
searched for “hardcoresex,” the search was blocked by
ContentBarrier.
I tried going directly to other adult sexual content sites
such
as
www.teensex.com,
www.lolitasex.com,
www.sexaddicted.com, and www.xxxquirer.com. The first
three sites were blocked, but the fourth, a nude celebrity site,
was viewable.
I performed an experiment regarding profanity. I did a
Google search for “profanity dictionary.” The list of hits (over
11,000) was not blocked by ContentBarrier. I clicked on the
link for “Roger’s Profanisaurus” and was able to view the Web
site and its definition pages. I then searched for “George
Carlin” (who has a comedy routine about words you cannot
say on network television). The search results were blocked.
A similar search on “Eddie Murphy” was not blocked,
although some of the listed Web sites that contained profanity
were blocked.
Grid for restricting hours of Internet use.
Additional options can be accessed by clicking on the
Settings button. You can assign an administrative password
for ContentBarrier. You also can choose options related to
Web site logging. You can record what filters were activated,
what sites were blocked, or all Web sites visited. You also can
choose to receive hourly activity log e-mails or e-mail
notifications of “predatory” activity. Clicking on the Special
Sites tab allows you to enter Web sites that are always allowed
or always forbidden. The Special Applications tab displays a
window for listing Internet-related applications that will not
be monitored by ContentBarrier, such as e-mail applications.
A site that defined profane terms was not blocked.
My next concern was whether ContentBarrier would block
Web sites that provide useful information. I used the default
filters that included Sex/Porn/Adult Content. I entered the
search term “breast cancer support group” into Google.
ContentBarrier did not block the search. I went to the first 10
Web sites listed and all were unblocked. I then tried an
AltaVista search using the phrase “avoid* sexual* transmi*
disease*” (asterisk is a wild-card character). ContentBarrier
ATPM 9.03 / March 2003
47
Review: ContentBarrier 1.3.3
blocked the completed search page, even though the listed
sites were providing health information. It also blocked truly
legitimate pages related to sexually transmitted diseases.
I am concerned about the extensive System file
modifications made by ContentBarrier. Installation of
ContentBarrier results in substantial modifications to the
System file. ContentBarrier continually modifies the System
file to write log information. ContentBarrier will not work if
the System file is locked. Uninstalling ContentBarrier
removes most (but not all) of the System file modifications.
Site for book about avoiding sexually transmitted diseases was blocked.
Omitted Features
The most significant omission is that ContentBarrier cannot
import lists of acceptable or banned Web sites. You must enter
these manually, one at a time. The same is true of custom
filters. However, Intego indicates that once you create a list of
acceptable or banned sites and custom filters for one
Macintosh, you can transfer those to other computers by
using the Export Settings menu choice.
This site was blocked by ContentBarrier.
Documentation
ContentBarrier has a 79-page online user manual in Adobe
Acrobat format. The manual covers all the relevant topics, but
it contains no hyperlinks (not even within the table of
contents), bookmarks, or index.
Attempting to Bypass ContentBarrier
ContentBarrier cannot be bypassed as easily as Kids
GoGoGo. One method for bypassing ContentBarrier is to
start up with its Control Panel removed or disabled. This is
hard to do if Multiple User security has been properly
established. A second method is to start up from a drive or
disk that does not contain ContentBarrier.
The log file is not accessible for editing except within
ContentBarrier. A log file does appear in the ContentBarrier
preference folder (or on the root level of the hard drive), but
this tiny file does not contain the list of visited or blocked
Web sites. The actual log file is written into the System file.
Technical Support
Intego offers only e-mail1 or Web form2 support. Intego took
over nine days to respond to a question I sent using their Web
form.
Summary
ContentBarrier is a reasonably effective solution for filtering
Internet content and restricting Internet use. It works best
when Multiple Users and Apple’s security (Keychain Access)
features are activated. It has better security and more filtering
options than Kids GoGoGo3, although the latter’s content
filtering seemed slightly better.
Problems and Bugs
The only bug I encountered was when I attempted to update
version 1.3.2 to 1.3.3. I received an error message.
1.
2.
3.
Updating did not work on the Demo version and could not complete the
update.
mailto:[email protected]
http://www.intego.com/support/home.html
http://www.atpm.com/8.12/kids-gogogo.shtml
Copyright © 2003 Gregory Tetrault, [email protected]. Reviewing in ATPM is open to anyone. If you’re interested, write
to us at [email protected].
ATPM 9.03 / March 2003
48
Review: ContentBarrier 1.3.3
Review: iView MediaPro 1.5.6
Review: iView MediaPro 1.5.6
by Gregory Tetrault, [email protected]
Developer: iView Multimedia Ltd.1
Price: $90; $45 (upgrade for owners of iView Multimedia, Media, or Roxio Toast)
Requirements: Mac OS 8.6 with CarbonLib 1.0.4 or Mac OS X 10.1, QuickTime 5, AppleScript 1.8.
Recommended: Latest versions of QuickTime and CarbonLib 1.4
Trial: Fully-featured (45 launches)
Overview
iView MediaPro helps you organize and display a variety of
file types: images, movies, sounds, fonts, illustrations, text
files, and HTML pages. Files can be labeled, categorized,
voice annotated, renamed, copied, or moved individually or
in batches.
or a full-sized image (or font sample); and a status bar on the
bottom with a pop-up menu containing choices relevant to
the current view.
Installation
The download version is a disk image file that contains the
iView MediaPro folder. Just drag that folder to the desired
location on a hard drive.
Window with a tree diagram of the locations of all files in a catalog.
Information about the items in a catalog are divided into
five groups: File, Media, Device, Photo, and In Sets. File
information includes the type of file (image, movie, font,
sound, etc.), its size, the application used to create it, its
Macintosh file type (PICT, text, MooV, etc.), encoding
(Photo—JPEG, TrueType, MP3, etc.), and creation,
modification, and archived dates. Media information
includes encoding (again), image dimensions, resolution, bit
depth, compression ratio, color space (RGB or CMYK), color
profile, and number of pages. For text files, it includes the
number of paragraphs and characters. Device information
only applies to images and includes maker, model, software,
and format. Photo lists the EXIF version, FlashPix version,
capture date, and a long list of camera-specific information
such as shutter speed, aperture, focal length, lens, flash mode,
etc. The In Sets category displays which set the file belongs to
within the catalog. iView MediaPro creates sets automatically
based on the name of your files’ enclosing folders. Sets can be
Catalog window in thumbnail view.
Using iView MediaPro
An iView MediaPro catalog holds related images or files. You
create a new blank catalog by selecting New from the File
menu. You create a filled catalog by selecting Import Media
from the File menu. The two submenus let you import
individual files or entire folders of files or (if you use OS X)
images stored in a digital camera. The main iView MediaPro
catalog window has three views (selected via tabs): Content,
Thumbnail, and Media. All three views contain tabs and a
toolbar at the top (these can be hidden); information on the
selected file(s) on the left side (which also can be hidden); a
viewing area to the right that contains a file list, thumbnails,
1.
http://iview-multimedia.com/products/index.html
ATPM 9.03 / March 2003
49
Review: iView MediaPro 1.5.6
displayed in a tree diagram format. Besides these predefined
fields, iView MediaPro allows you to add up to 16 custom
fields. You can also add text or voice annotations to files.
As with any good cataloging application, iView MediaPro
lets you organize, sort, and select files using a variety of
methods and criteria. You can select a subset of images, for
example, and perform batch operations on the subset. These
operations can include creating labels, adding or changing
file information such as keywords, playing a slide show,
rotating images, and so on.
Layout Dialog Box
You can further customize iView MediaPro by selecting
Preferences… from the Edit menu. The Preferences window
has five tabs: General, Helpers, Scratch, Images, and Fonts.
General preferences control file handling and format
information options. Helpers lists applications used to view,
play, or decode catalog items. You can add applications to this
list, which allows you to assign files to different applications
than the ones that created them. Scratch displays the location
of iView MediaPro’s hard disk scratch file. The default
location is the drive containing the System Folder. Images
controls rendering options and color conversion choices. It
also displays your ColorSync version. Fonts has settings for
adjusting the display of fonts in thumbnail and media views.
You can change the text snippet used during font display.
(The default is “De Gustibus Non Disputand,” or “There
should be no dispute about taste.”)
Adding information to a batch of files
The layout of the catalog can be customized using the
Windows menu and the Layout… Edit menu choice. You can
hide the toolbar or information areas, change the
background color behind thumbnails and images, change the
font and color of the file labels, choose which information
fields will be displayed, etc.
Windows menu for changing catalog window appearance.
ATPM 9.03 / March 2003
50
Review: iView MediaPro 1.5.6
iView MediaPro also includes image modification tools.
The JPEG rotate tool is on the toolbar and in the Action
menu. You can rotate images by 90 or 180 degrees. iView
MediaPro also contains a somewhat misnamed Calibrator
palette. This palette is active only in Media view. The tools
(from left to right) are for cropping; adjusting sharpness,
brightness, and contrast; adjusting hue, saturation, and
lightness; color correcting (balance); and inverting image
colors (negative to positives). You have the option of
overwriting the original file, making a backup before
overwriting the original file, or creating a new file that is
added to your catalog along with the original.
Import Options… (Edit menu) lets you select which types
of files you will import into a catalog. You can import a folder
containing many different file types and have iView
MediaPro only import image files. iView MediaPro can
handle an incredible number of file types: any image, sound,
or movie format compatible with QuickTime; most RAW
image format; PhotoCD, startup screen, picture clipping;
images created in Canvas, Freehand, CorelDRAW, or
Illustrator; EPS, Windows Metafile, AppleWorks, or
PowerCADD; desktop publishing files in QuarkXPress, PDF,
InDesign, or PageMaker formats; PostScript and TrueType
fonts (new and old formats); text (text files, AppleWorks,
clippings, or FileMaker Pro); and HTML documents.
Calibrator palette for images.
The Make menu in iView MediaPro contains numerous
useful functions. The slide show features are extensive. For
each slide you can control duration and transition type.
Captions can be shown beneath each image. You also can link
sounds to one or more images, and you can play voice
annotations with the images. Still images can be made into a
QuickTime movie. The Movie Presentation… dialog box lets
you globally adjust the size of the movie, duration of still
Some of the many formats iView MediaPro can handle.
iView MediaPro can help with other aspects of file
management. It offers version control for each catalog: the
original files are backed up into a designated folder (one per
catalog). A log file tracks file additions or removals from the
catalog. Version Control also tracks file changes and stores
each version. This feature is especially useful in a workgroup
environment. Users can add comments to changed versions,
and Version Control records the identity of each user who
edited a file.
ATPM 9.03 / March 2003
51
Review: iView MediaPro 1.5.6
images, etc. Alternatively, you can set up a slide show and
export it as a QuickTime movie (with all timings and
transitions intact).
Images can be saved as an HTML (Web) gallery. The
program creates an index page with thumbnail images and
media pages for the full-sized images. You can adjust
thumbnail and image sizes, bit depths, and JPEG quality.
Window showing setup options for creating an HTML gallery.
iView MediaPro’s Make menu selections.
ATPM 9.03 / March 2003
iView MediaPro can create contact sheets that can be saved,
edited, or printed. The Contact Sheet… menu choice displays
a window that lets you set the dimensions of the sheets, the
layout of the images, and the resolution, format (JPEG, PICT,
PNG, BMP, TIFF, TGA, SGI, Photoshop, MacPaint, or
QuickTime Image), and quality of the images. You also can
print catalog thumbnails directly from iView MediaPro
without making contact sheets.
iView MediaPro can convert images, movies, and sounds
between different formats. It uses QuickTime or other thirdparty applications for these conversions. The big advantage
of using iView MediaPro is that it can perform batch
conversions. You can also save conversion options for reuse
with other sets of files.
The Make menu has options related to backup and
archiving of catalog files to hard drives, removable magnetooptical media, or CD-ROMs. CD-ROM archiving works with
Toast and Apple’s Disc Burner. You can export text
information from your catalog using the Text Table… feature.
Files can be saved as comma- or tab-delimited text. The
resultant files can be imported into database programs or
used as merge files with Microsoft Word or other word
processors.
AppleScript is fully supported by iView MediaPro. It comes
with 22 scripts organized into 6 groups in the AppleScript
menu. AppleScripts are useful for certain types of batch tasks
such as file renaming and automatic caption creation. You
52
Review: iView MediaPro 1.5.6
Technical Support
The iView Web site has tutorials1 and a support area2
containing frequently asked questions, a user forum, and a
query submission form. There is no telephone, fax, or live
chat room support. I did not test the speed or accuracy of
replies to support queries.
can add scripts by placing them into the Plug-ins:Scripts
folder. You also can control iView MediaPro with applets or
AppleScripts written within other applications.
Alternatives
I gave QPict a Very Nice rating in my review3 last July. QPict
is not as full-featured or as polished as iView MediaPro, but it
also costs less ($35).
Image Viewer 6.1.24 is another $35 shareware image
cataloging application. I have not used this application. It has
a 4 (out of 5) cow rating on Tucows.
Photo Mechanic5 is a more expensive ($150) image
cataloging application. See my review in ATPM next month.
iPhoto6 is OS X–only and free. It is clumsier than iView,
much slower7, and does not let you choose8 your own
filenames or folder structure for storing the images. It is
generally not as featured as iView MediaPro, but it has the
advantage of direct integration with various Apple services.
AppleScript menu with annotation scripts.
Problems, Bugs, and Omissions
I experienced numerous application crashes (with Type 2 and
3 errors) and a few full system crashes while reviewing iView
MediaPro. Some crashes were random, while others were
reproducible. An example of the latter is a full system crash
that occurs if you press the Home key while iView MediaPro
is importing a folder of images. After iView MediaPro
crashed with a Type 2 or 3 error, restarting was necessary to
run the application. (Note: The iView MediaPro may be more
stable under OS X. There are known conflicts in OS 9 with
Logitech Optical wheel mouse driver and OSA menu.
However, I was not running either extension.)
Summary
I became increasingly impressed with iView MediaPro while
evaluating it for this review. The program has a wealth of
features, yet it is easy to use because of its excellent interface. I
have only two complaints about iView MediaPro: a
propensity to crash and a somewhat skimpy manual. Even
with those problems, I give MediaPro a “Very Nice” rating.
Documentation
The application comes with a 66-page user manual and an
18-page quick start guide. Both are available as PDF files in
the downloaded version. The PDF user manual has
bookmark links. Neither PDF manual has an index, and
neither has links in the table of contents or within the
documents. A printed copy of the user manual comes with
the boxed (CD-ROM) version. The user manual adequately
describes most features of iView MediaPro. Its AppleScript
section is very skimpy, however.
1.
2.
3.
4.
5.
6.
7.
8.
http://www.iview-multimedia.com/tutorials/index.html
http://iview-multimedia.com/support/support.html
http://www.atpm.com/8.07/qpict.shtml
http://www.imageviewer.com
http://www.camerabits.com/PM3.html
http://www.apple.com/iphoto/
http://www.oreillynet.com/cs/user/view/cs_msg/14160
http://www.oreillynet.com/cs/user/view/cs_msg/14170
Copyright © 2003 Gregory Tetrault, [email protected]. Reviewing in ATPM is open to anyone. If you’re interested, write
to us at [email protected].
ATPM 9.03 / March 2003
53
Review: iView MediaPro 1.5.6
Review: Mac OS X: The Missing Manual
Review: Mac OS X: The Missing Manual, 2nd Edition
(book)
by Johann Campbell, [email protected]
Author: David Pogue, published by Pogue Press/O’Reilly & Assoc.1
Price: $29.95
Trial: Sample Chapter2
I first reviewed3 Mac OS X: The Missing Manual exactly a year
ago, in which time Mac OS X has changed considerably. The
inevitable release of version 10.2, code-named Jaguar,
brought a much-hyped myriad of changes, additions, and
improvements to the operating system, and has prompted a
much-needed update to its counterpart in the Missing
Manual series. This review will only cover changes made in
this edition.
The first noticeable change to this book is its thickness. The
second edition adds more than a hundred pages to the first,
and Pogue claims that not a single page has been left
unchanged in the overhaul. Most of the screen shots have
been updated to reflect the subtle interface changes in 10.2,
and all the confirmed errata submitted by readers of the first
edition are no longer present.
More importantly, the book is now much less involved in
explaining the differences between OS X and its predecessor,
OS 9. Bearing in mind a lot of new Mac users are former
Windows users, Pogue has aptly chosen to refrain as much as
possible from mentioning Mac OS 9 outside its own chapter.
Additionally, the useful “Where’d It Go?” appendix has been
split into two appendices, one covering Mac OS 9 features
and the other covering Windows features.
Certain chapters have been slightly reorganized to reflect
changes to 10.2 itself. System Preference panes are now
explained in alphabetical order rather than by category, and
the distinction between Terminal and the Unix that lies
underneath OS X’s graphical user interface is now made
much clearer. New sub-chapters have been created for the
new Find function and Menulets, and my favorite
chapter—Hacking Mac OS X—has happily been expanded.
The section which has seen the most changes is Part Five:
Mac OS X Online. A whole new chapter covers Sherlock 3,
iChat, and iCal, and .Mac (née iTools) is explained in full,
along with Mail’s new spam filter and the new personal
firewall. Finally, this book no longer takes you through Mac
OS X menu by menu: that appendix has disappeared. In its
place is a much-requested (and much more useful) “master
list” of keystroke combinations.
There are a number of related titles available from O’Reilly
worthy of mention if you find yourself wanting to learn more,
which weren’t around when the first edition was published.
Pogue has written a separate Missing Manual for switchers
from the Windows world, as well as a short book containing
hundreds of tips and tricks. Those who want to learn more
about the Unix aspect of OS X should look at Dave Taylor and
Brian Jepson’s Learning Unix for Mac OS X, also from
O’Reilly.
Mac OS X: The Missing Manual could only have improved,
and this new edition does by no means disappoint. The
second edition is current as of version 10.2.1, and new
editions will surely surface as OS X progresses through
version 10.2.3 and beyond. If you already own the first
edition, there is not a lot you will discover in the second,
providing you actively follow OS X–centric Web sites such as
the excellent MacOSXHints.com4. If on the other hand you
have not yet bought this book, seriously consider it. It’s still
the best starting point to OS X there is.
3.
4.
http://www.atpm.com/8.03/manual.shtml
http://www.macosxhints.com
Copyright © 2003 Johann Campbell, [email protected]. Reviewing in ATPM is open to anyone. If you’re interested, write
to us at [email protected].
1.
2.
http://www.oreilly.com/catalog/macosxmm2/
http://www.oreilly.com/catalog/macosxmm2/chapter/ch02.pdf
ATPM 9.03 / March 2003
54
Review: Mac OS X: The Missing Manual
Review: Unix Power Tools
Review: Unix Power Tools, 3rd Edition (book)
by Kirk McElhearn, [email protected]
Author: Powers, Peek, O’Reilly, Loukides; published by O’Reilly1
Price: $69.95
Trial: Sample Chapter2
This book is not an introduction to Unix. It’s not a tutorial
about using Unix. It is more like a Unix encyclopedia; the
ultimate bathroom book about Unix. With its many
hundreds of tips, this is the book to buy once you are
comfortable with the basics. You’ll learn about shell shortcuts,
using grep and find, editing files, working with processes,
shell scripting, and managing your system. While not
everything is applicable to Mac OS X, the vast majority of
what this book contains is still relevant.
While some of the articles in the book are explanatory,
walking readers through the basics of a given command or
concept, the majority are short and sweet—the kind of tips
that are useful and helpful. In more than 1,100 pages, this
book covers such a vast range of material that we Mac users
may find it daunting were it not for the indexer, Ellen
Troutman-Zaig, who deserves kudos for her excellent job of
providing a “user’s manual” to this book. Without her
extremely detailed 80-page index the book would be nothing
more than a compendium; by using it, readers can find what
they need in a flash.
If you’re the type of user who uses a Mac to surf the Web
and send e-mail, this book is obviously not for you. But if
you’re the type who used to use ResEdit under previous
versions of Mac OS, this is the toolkit that will give you a
wealth of useful tips and explanations. It’s a bit expensive, but
if you want to use the Unix underpinnings of Mac OS X, the
time you save will more than pay for this excellent book.
As we all know, Mac OS X is built atop a version of Unix.
While the Aqua interface hides this so well that most Mac
users will never need to look under the hood, those of us who
do will find a whole new world of computing. Sure, many
Mac users have Unix or Linux experience, but the majority
for the first time are looking at an operating system very
different from Mac OS 9.
Unix is made up of a kernel which handles the essentials,
onto which are grafted hundreds, even thousands of tools.
Unix users tend to prefer the term tool, because these simple
programs are usually only designed to do one thing, but to do
it well. While some of these tools are complex and powerful
(sed, awk, grep, the different shells), others are simple and,
with just a couple of commands, can do some extraordinary
things.
According to the book’s back cover, “With the popularity of
Linux and the advent of Mac OS X, Unix has metamorphosed
into something new and exciting.” This is indeed true. Not
only are there several books about Unix for Mac OS X
(including my own3, due in September 2003), but the
number of Unix users moving over to OS X is astonishing.
With Mac OS X, we really do have the ease-of-use of an
excellent GUI combined with the power and flexibility of
Unix.
Quoting the book, “With Unix no longer perceived as a
difficult operating system, more and more users are
discovering its advantages for the first time.” In fact, I think
there’s no surprise that O’Reilly chose to update this classic
book now, just as OS X is gaining a foothold in the market.
3.
http://www.mcelhearn.com/unix.html
Copyright © 2003 Kirk McElhearn, [email protected]. Reviewing in ATPM is open to anyone. If you’re interested, write
to us at [email protected].
1.
2.
http://www.oreilly.com/catalog/upt3/
http://www.oreilly.com/catalog/upt3/chapter/index.html
ATPM 9.03 / March 2003
55
Review: Unix Power Tools
Frequently Asked Questions
FAQ: Frequently Asked Questions
What Are Some Tips for Viewing PDFs?
What Is ATPM?
About This Particular Macintosh (ATPM) is, among other
things, a monthly Internet magazine or “e-zine.” ATPM was
created to celebrate the personal computing experience. For
us this means the most personal of all personal
computers—the Apple Macintosh. About This Particular
Macintosh is intended to be about your Macintosh, our
Macintoshes, and the creative, personal ideas and
experiences of everyone who uses a Mac. We hope that we
will continue to be faithful to our mission.
•
•
•
Are You Looking for New Staff Members?
We currently need several Contributing Editors and a Copy
Editor. Please contact us1 if you’re interested.
•
How Can I Subscribe to ATPM?
Visit the subscriptions page2.
•
Which Format Is Best for Me?
The Online Webzine edition is for people who want
to view ATPM in their Web browser, while
connected to the Internet. It provides sharp text,
lots of navigation options, and live links to ATPM
back issues and other Web pages. You can use Sherlock to
search3 all of the online issues at once.
The Offline Webzine is a HTML version of ATPM
that is formatted for viewing offline and made
available in a StuffIt archive to reduce file size. The
graphics, content, and navigation elements are the
same as with the Online Webzine, but you can view it without
being connected to the Internet. It requires a Web browser.
The Print PDF edition is saved in Adobe Acrobat
format. It has a two-column layout with smaller
text and higher-resolution graphics that are
optimized for printing. It may be viewed online in a
browser, or downloaded and viewed in Adobe’s free Acrobat
Reader on Macintosh or Windows. PDFs may be magnified
to any size and searched with ease.
The Screen PDF edition is also saved in Adobe
Acrobat format. It’s a one-column layout with larger
text that’s optimized for reading on-screen. It may
be viewed online in a browser, or downloaded and
viewed in Adobe’s free Acrobat Reader on Macintosh or
Windows. PDFs may be magnified to any size and searched
with ease.
1.
2.
3.
•
•
•
Why Are Some Links Double-Underlined?
In the PDF editions of ATPM, links that are doubleunderlined lead to other pages in the same PDF. Links that
are single-underlined will open in your Web browser.
What If I Get Errors Decoding ATPM?
ATPM and MacFixIt readers have reported problems
decoding MacBinary files using early versions of StuffIt
Expander 5.x. If you encounter problems decoding ATPM,
we recommend upgrading to StuffIt Expander 5.1.4 or later5.
How Can I Submit Cover Art?
We enjoy the opportunity to display new, original cover art
every month. We’re also very proud of the people who have
come forward to offer us cover art for each issue. If you’re a
Macintosh artist and interested in preparing a cover for
ATPM, please e-mail us. The way the process works is pretty
simple. As soon as we have a topic or theme for the upcoming
[email protected]
http://www.atpm.com/subscribe
http://www.atpm.com/search
ATPM 9.03 / March 2003
You can download4 Adobe Acrobat Reader for free. If
you have a Power Macintosh, Acrobat Reader 5 has
better quality and performance. ATPM is also
compatible with Acrobat Reader 3, for those with
680x0 Macs.
You can zoom the PDF to full window width and
scroll through articles simply by single-clicking
anywhere in the article text (except underlined links).
You can quickly navigate between articles using the
bookmarks pane at the left of the main viewing
window.
For best results on small screens, be sure to hide the
bookmarks pane; that way you’ll be able to see the
entire page width at 100%.
Try turning Font Smoothing on and off in Acrobat
Reader’s preferences to see which setting you prefer.
All blue-underlined links are clickable. Links to
external Web sites are reproduced in footnotes at the
bottoms of pages, in case you are reading from a
printed copy.
You can hold down option while hovering over a link
to see where it will lead.
For best results, turn off Acrobat’s “Fit to Page” option
before printing.
4.
5.
56
http://www.adobe.com/prodindex/acrobat/readstep.html
http://www.aladdinsys.com/expander/index.html
Frequently Asked Questions
What is Your Rating Scale?
ATPM uses the following ratings (in order from best to
worst): Excellent, Very Nice, Good, Okay, Rotten.
issue we let you know about it. Then, it’s up to you. We do not
pay for cover art but we are an international publication with
a broad readership and we give appropriate credit alongside
your work. There’s space for an e-mail address and a Web
page URL, too. Write to [email protected] for more
information.
Will You Review My Product?
If you or your company has a product that you’d like to see
reviewed, send a copy our way. We’re always looking for
interesting pieces of software to try out. Contact
[email protected] for shipping information. You can send
press releases to [email protected].
How Can I Send a Letter to the Editor?
Got a comment about an article that you read in ATPM? Is
there something you’d like us to write about in a future issue?
We’d love to hear from you. Send your e-mail to
[email protected]. We often publish the e-mail that comes
our way.
Can I Sponsor ATPM?
About This Particular Macintosh is free, and we intend to
keep it this way. Our editors and staff are volunteers with
“real” jobs who believe in the Macintosh way of computing.
We don’t make a profit, nor do we plan to. As such, we rely on
advertisers to help us pay for our Web site and other
expenses. Please consider supporting ATPM by advertising
in our issues and on our web site. Contact
[email protected] for more information.
Do You Answer Technical Support Questions?
Of course. E-mail our Help Department at [email protected].
How Can I Contribute to ATPM?
There are several sections of ATPM to which readers
frequently contribute:
Where Can I Find Back Issues of ATPM?
Back issues2 of ATPM, dating since April 1995, are available
in DOCMaker stand-alone format. In addition, all issues
since ATPM 2.05 (May 1996) are available in HTML format.
You can search3 all of our back issues.
Segments: Slices from the Macintosh Life
This is one of our most successful spaces and one of our
favorite places. We think of it as kind of the ATPM “guest
room.” This is where we will publish that sentimental
Macintosh story that you promised yourself you would one
day write. It’s that special place in ATPM that’s specifically
designated for your stories. We’d really like to hear from you.
Several Segments contributors have gone on to become
ATPM columnists. Send your stuff to [email protected].
What If My Question Isn’t Answered Above?
We hope by now that you’ve found what you’re looking for
(We can’t imagine there’s something else about ATPM that
you’d like to know.). But just in case you’ve read this far (We
appreciate your tenacity.) and still haven’t found that little
piece of information about ATPM that you came here to find,
please feel free to e-mail us at (You guessed it.)
[email protected].
Hardware and Software Reviews
ATPM publishes hardware and software reviews. However,
we do things in a rather unique way. Techno-jargon can be
useful to engineers but is not always a help to most Mac users.
We like reviews that inform our readers about how a
particular piece of hardware or software will help their
Macintosh lives. We want them to know what works, how it
may help them in their work, and how enthusiastic they are
about recommending it to others. If you have a new piece of
hardware or software that you’d like to review, contact our
reviews editor at [email protected] for more information.
Shareware Reviews
Most of us have been there; we find that special piece of
shareware that significantly improves the quality our
Macintosh life and we wonder why the entire world hasn’t
heard about it. Now here’s the chance to tell them! Simply let
us know by writing up a short review for our shareware
section. Send your reviews to [email protected].
Which Products Have You Reviewed?
Check our reviews index1 for the complete list.
ATPM 9.03 / March 2003
1.
2.
3.
57
http://www.atpm.com/reviews
http://www.atpm.com/Back/
http://www.atpm.com/search
Frequently Asked Questions