1
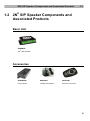
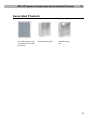
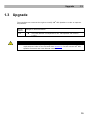
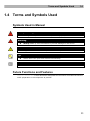
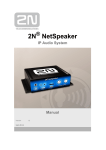
® 2N SIP Speaker Public Address Paging Configuration Manual Version Firmware 1.15.1 1.15.x www.2n.cz The 2N TELEKOMUNIKACE a.s. joint-stock company is a Czech manufacturer and supplier of telecommunications equipment. The product family developed by 2N TELEKOMUNIKACE a.s. includes GSM gateways, private branch exchanges (PBX), and door and lift communicators. 2N TELEKOMUNIKACE a.s. has been ranked among the Czech top companies for years and represented a symbol of stability and prosperity on the telecommunications market for almost two decades. At present, we export our products into over 120 countries worldwide and have exclusive distributors on all continents. 2N® is a registered trademark of 2N TELEKOMUNIKACE a.s.. Any product and/or other names mentioned herein are registered trademarks and/or trademarks or brands protected by law. 2N TELEKOMUNIKACE administers the FAQ database to help you quickly find information and to answer your questions about 2N products and services. On faq.2n.cz you can find information regarding products adjustment and instructions for optimum use and procedures „What to do if...“. Declaration of Conformity 2N TELEKOMUNIKACE a.s. hereby declares that the 2N® SIP Speaker product complies with all basic requirements and other relevant provisions of the 1999/5/EC directive. For the full wording of the Declaration of Conformity see the CD-ROM enclosed and at www.2n.cz. The 2N TELEKOMUNIKACE Company is a holder of the ISO 9001:2008 certificate. All development, production and distribution processes of the company are managed by this standard and guarantee a high quality and advanced technical level of and a professional approach to all of our products. Contents 1. Product Overview............................................................... 5 1.1 Product Description ....................................................................................................... 6 Basic Properties ............................................................................................................... 6 Advantages of Use ........................................................................................................... 6 Basic Features.................................................................................................................. 7 Optional Accessories ........................................................................................................ 7 1.2 2N SIP Speaker Components and Associated Products .......................................... 8 Basic Unit ......................................................................................................................... 8 Accessories ...................................................................................................................... 8 Associated Products ......................................................................................................... 9 1.3 Upgrade ......................................................................................................................... 10 1.4 Terms and Symbols Used ........................................................................................... 11 Symbols Used in Manual ................................................................................................ 11 Future Functions and Features ...................................................................................... 11 ® 2. Description and Installation ............................................ 12 2.1 Product Description ..................................................................................................... 13 2N® SIP Speaker Front and Back Panels ..................................................................... 14 2.2 Before You Start ........................................................................................................... 15 Product Completeness Check ........................................................................................ 15 Installation Conditions .................................................................................................... 15 2.3 Mounting ....................................................................................................................... 16 Surface Mounting ........................................................................................................... 16 2.4 Electric Installation ...................................................................................................... 17 Electric Installation Step by Step .................................................................................... 17 Loudspeaker Connection ............................................................................................... 17 Headset/External Amplifier Connection ......................................................................... 18 Microphone/Line Connection.......................................................................................... 18 Digital Output Connection .............................................................................................. 18 Digital Input Connection ................................................................................................. 19 LAN Connection ............................................................................................................. 19 Power Supply Connection .............................................................................................. 20 3. 2N® SIP Speaker Configuration ...................................... 21 3.1 Default Reset................................................................................................................. 22 Factory Default ............................................................................................................... 22 Factory Default Reset ..................................................................................................... 22 3.2 Configuration ................................................................................................................ 24 ® Description of 2N Helios IP Network Scanner .............................................................. 24 Login ............................................................................................................................... 25 Language Selection ........................................................................................................ 25 Information...................................................................................................................... 26 Telephone Directory ....................................................................................................... 28 Scheduler ....................................................................................................................... 29 Switch ............................................................................................................................. 32 Network .......................................................................................................................... 34 Date and Time ................................................................................................................ 35 SIP Settings .................................................................................................................... 37 Administration Web Server ............................................................................................. 39 Audio .............................................................................................................................. 40 Audio Codecs ................................................................................................................. 42 Streaming ....................................................................................................................... 43 Auto Update.................................................................................................................... 46 System Log..................................................................................................................... 47 Multicast ......................................................................................................................... 48 Miscellaneous ................................................................................................................. 49 Tools ............................................................................................................................... 52 Configuration .................................................................................................................. 53 Firmware......................................................................................................................... 54 User Sounds ................................................................................................................... 55 Network Trace ................................................................................................................ 57 Licence ........................................................................................................................... 57 4. Function and Use ............................................................. 59 4.1 Basic Functions ............................................................................................................ 60 ® 2N SIP Speaker Button Control .................................................................................... 60 ® 2N SIP Speaker Remote Control.................................................................................. 60 ® 2N SIP Speaker Status Signalling ................................................................................ 61 Operational Status Signalling ......................................................................................... 61 5. Technical Parameters ...................................................... 65 5.1 Technical Parameters .................................................................................................. 66 Mechanical and Electrical Parameters ........................................................................... 66 6. Supplementary Information ............................................ 69 6.1 List of Abbreviations .................................................................................................... 70 6.2 List of Figures ............................................................................................................... 71 6.3 List of Tables ................................................................................................................ 73 1 1. Product Overview In this section, we introduce the 2N® SIP Speaker product, outline its application options and highlight the advantages following from its use. The section also includes safety precautions. Here is what you can find in this section: Product Description Associated Products Upgrade Terms and Symbols Used 5 Product Description 1.1 1.1 Product Description Basic Properties 2N® SIP Speaker is a versatile sound transmission system for IP networks. It is designed as a universal VoIP telephone with an audio output/input, button and switched circuit connection option. It finds a variety of applications - in schools, hospitals, office buildings, hotels, production halls, shopping centres, bus terminals, airports and so on. You can monitor the events in the 2N® SIP Speaker area using an integrated streaming server. 2N® SIP Speaker is a stand-alone SIP-based sound decoder and converter with an amplifier. 2N® SIP Speaker communicates with the other audio system components via the SIP Proxy or directly via a specified address. Press the attached button to set up a call to up to three predefined numbers or addresses, with calls being transferred automatically at no answer. Configure the button function using an integrated calendar to make sure that the called subscriber is always accessed. You can make use of a lot of convenient VoIP services thanks to the integrated SIP such as call forwarding at no answer (to another worksite, recording machine or mobile phone) and call transfer (from the secretary to the required person, e.g.). 2N® SIP Speaker is equipped with a switch for you to control the electric door lock from any telephone (by tone-entering the password). You can manage your 2N® SIP Speaker unit via a configuration web interface, by pushing the unit buttons or with a remote controller. Advantages of Use Operable in the Ethernet network Ethernet-based power supply – PoE SIP Integrated administration web server 1 programmable button Streamed audio support Integrated calendar with programmable DAY/NIGHT/WEEKEND modes Applicable as standard VoIP telephone/communicator DTMF detection according to RFC2833, in-band and SIP-INFO 6 Product Description 1.1 Basic Features 10/100Base-TX LAN interface 12V DC / 1.8A or PoE 802.3af supply Integrated 30W STEREO/MONO amplifier Line/headset output Colour LED operational status signalling Universal galvanically isolated output Universal galvanically isolated digital input Two volume control buttons Infrared remote control Optional Accessories 12V DC/2A Supply Adapter Universal power supply adapter for 2N® SIP Speaker. With it, you can make the best of the integrated amplifier power. 802.3af PoE Injector Universal PoE injector for the 2N® SIP Speaker power supply. Useful for places where 12V power supply is unavailable or a 12V adapter cannot be used. Remote Control Infrared remote control for comfortable volume or channel adjustment. 7 2N® SIP Speaker Components and Associated Products 1.2 1.2 2N® SIP Speaker Components and Associated Products Basic Unit 914401E 2N® SIP Speaker Accessories 91378100 914102E 914103E PoE Injector 12VDC/2A Adapter Remote Controller 8 2N® SIP Speaker Components and Associated Products 1.2 Associated Products 2N® SIP Speaker with Loudspeaker for Soffit Mounting Flush Mounting Box Wall Mounting Box 9 Upgrade 1.3 1.3 Upgrade The manufacturer reserves the right to modify 2N® SIP Speaker in order to improve its qualities. Manual Version Changes in Documentation 1.0.0 The User Manual corresponds to 2N® SIP Speaker FW version 1.15.0 Caution The manufacturer keeps improving the firmware according to the clients’ requirements. Refer to the 2N web sites www.2n.cz for the current 2N® SIP Speaker firmware and User Manual versions. 10 Terms and Symbols Used 1.4 1.4 Terms and Symbols Used Symbols Used in Manual Safety Warning Always abide by this information to prevent injury of persons. Warning Always abide by this information to prevent damage to the device. Caution Important information for system functionality. Tip Useful advice for quick and efficient functionality. Note Routines or advice for efficient use of the device. Future Functions and Features The grey-marked text in this document designates the functions and features that are under preparation or development at present. 11 2 2. Description and Installation In this section, we describe the 2N® SIP Speaker product and its installation. Here is what you can find in this section: Product Description Before You Start Mounting Product Description 2.1 2.1 Product Description 2N® SIP Speaker is an Ethernet audio converter designed for public sound distribution. It is connected to and communicates with the SIP Proxy server via telephone calls. This guarantees compatibility with all SIP-based systems. The main principle of the 2N® SIP Speaker operation is to convert an audio signal between the Ethernet and audio interfaces. Therefore, 2N ® SIP Speaker is equipped with an integrated 2x10W amplifier for direct loudspeaker connection. You can control 2N® SIP Speaker with two buttons on the front panel or using an infrared remote controller. 2N® SIP Speaker is equipped with a digital input and output, which extend the converter options and may be helpful in special applications. Use an integrated web interface for 2N® SIP Speaker configuration. Apply the 2N® Helios IP Network Scanner to search all the 2N® SIP Speaker units connected. 13 Product Description 2.1 2N® SIP Speaker Front and Back Panels Figure 2.1 2N® SIP Speaker Front and Back Panel Connectors and Controls 1. 12V DC/2A power supply adapter connector 2. Alternative power supply connection terminals 3. Alternative power supply connection terminals + 4. Passive output relay with galvanic isolation for external 24V/1A AC/DC load switching 5. Digital input with galvanic isolation for external sensor/button, etc. connection 6. 10/100BASE-TX LAN RJ-45 connector 7. Integrated amplifier output terminals for 1 or 2 loudspeakers 8. Headset/line output for standard earphones/external amplifier 9. – and + volume control buttons 10. Microphone input 11. Power up LED indicator 12. Operational status LED indicators 13. RESET button 14. Infrared signal receiver for remote control and signal reception LED 14 Before You Start 2.2 2.2 Before You Start Product Completeness Check Before installing this product, check whether the product delivery includes: 1 2N® SIP Speaker 2 wall-mounting L-profiles 4 6mm dowels 4 3.5x35mm screws 4 self-adhesive device feet 1 5-pin terminal block 1 4-pin terminal block Quick User Manual User Manual and Software CD-ROM Certificate of Warranty Installation Conditions 2N® SIP Speaker is to be connected to the LAN. 2N® SIP Speaker is designed for indoor use. 2N® SIP Speaker may not be operated in damp environments. 15 Mounting 2.3 2.3 Mounting If you intend to use your 2N® SIP Speaker unit in various interiors, please stick the four feet included in the delivery onto the bottom side of the device to avoid scratching of the underlying surface. Surface Mounting Use the included L-profiles to mount your 2N® SIP Speaker unit on a wall or another solid surface. Insert the L-profiles in the sides of the assembly and fit them with four screws to keep the device in place. You can use the dowels and screws included in the delivery for wall mounting. Follow the instructions below while drilling the mounting holes. Figure 2.2 Mounting Holes 16 Electric Installation 2.4 2.4 Electric Installation Electric Installation Step by Step It is very easy to connect 2N® SIP Speaker electrically. Follow the steps below to avoid equipment damage or electrical injury: Connect the microphone, loudspeaker, headset or external amplifier. Connect the digital input and output. Connect the UTP cable. Connect a 12V power supply (unless PoE is used). Caution Be sure to connect the 2N® SIP Speaker power supply as the last step. The same applies to PoE supply from the LAN. Loudspeaker Connection 2N® SIP Speaker is equipped with a power amplifier for 1 (MONO) or 2 (STEREO) loudspeakers. The loudspeakers to be used must have the nominal impedance of 4-8Ω each. Refer to the table below for possible configurations and related maximum power outputs (sinus, THD < 1%): Loudspeaker(s) 12V/2A Two 4Ω STEREO 2 x 10W 2 x 9W 1 x 18W 1 x 12W Two 8Ω STEREO One 4Ω MONO One 8Ω MONO PoE 2 x 5W 2 x 5W 1 x 10W 1 x 10W Use the 2N® SIP Speaker back panel terminals marked L + and L – for the left channel and R + and R – for the right channel. Use the R + and L - or L + and R – terminals for the MONO mode. Figure 2.3 Loudspeaker Connection 17 Electric Installation 2.4 Headset/External Amplifier Connection 2N® SIP Speaker is equipped with a headset/external amplifier output. The 3.5mm jack is available on the front panel. Figure 2.4 Audio Output Connection Microphone/Line Connection 2N® SIP Speaker is equipped with a microphone/external supply output. The 3.5mm jack is available on the front panel. Figure 2.5 Audio Input Connection Digital Output Connection 2N® SIP Speaker is equipped with a passive output relay switch for light signalling/external amplifier/alarm activation. The output is available on terminals marked LOGIC OUT and allows for switching of up to 24V/1A AC/DC loads. By default, the output is in the NO (normally open) state. Figure 2.6 Digital Output Connection Warning Do not exceed the upper voltage and current limits to avoid irreversible damage of the equipment. 18 Electric Installation 2.4 Digital Input Connection 2N® SIP Speaker is equipped with a digital input for an optional button, movement sensor or other applications. This input is available on the LOGIC IN terminal. Up to 5 to 24V DC voltage can be applied to the input against the ground terminal marked DC IN -. Figure 2.7 Digital Input Connection Warning Do not exceed the maximum voltage values (24V) applied to the LOGIC IN input to avoid irreversible damage of the equipment. LAN Connection 2N® SIP Speaker can be connected to a standard local area network using a LAN interface via the RJ-45 connector on the back panel. Always use CAT-5d or higher class cables for reliability reasons. Figure 2.8 LAN Connection The LAN interface is equipped with the Auto MDIX function for automatic straight/ cross-over cable detection. The LAN interface can also be used for the 2N® SIP Speaker power supply through active network elements or injectors meeting the IEEE 802.3af standard. Note With PoE, the integrated amplifier power output is limited to 5W stereo / 10W mono. To utilise the maximum power output of the amplifier, feed 2N® SIP Speaker from a 12V DC/1.8A external power supply. 19 Electric Installation 2.4 Power Supply Connection 2N® SIP Speaker can be fed using active network elements or PoE injectors via the LAN interface. In case this option is unavailable, use a 12V DC/2A (Part No. 914102E) power supply or another power supply on condition that you keep the nominal values included in the Mechanical and Electrical Parameters subsection. Connect the 12V DC power supply either to the back panel supply connector marked DC IN, or terminals marked DC IN + and DC IN –. Figure 2.9 Power Supply Connection Warning If you use an adapter other than the recommended one, do not exceed the nominal supply voltage value of 12V. Also make sure that the supply voltage polarity is correct. Exceeding nominal values and/or incorrect connection may lead to irreversible damage of the equipment. 20 3 ® 3. 2N SIP Speaker Configuration In this section, the 2N® SIP Speaker configuration is described. Here is what you can find in this section: Default Reset Parameter Settings Firmware Upgrade Default Reset 3.1 3.1 Default Reset Factory Default The following factory default parameters are available: Parameter Default DHCP Off IP address 192.168.1.100 Mask 255.255.255.0 Default gateway 192.168.1.1 User name Admin Password 2n Factory Default Reset In some cases, it may be useful to reset the 2N® SIP Speaker factory default values using the RESET button on the back panel. Do so, for example, if 2N® SIP Speaker ceases to respond due to, for example, incorrect LAN settings, LAN configuration changes, forgotten password and so on. Factory Default Reset with Static IP Address 1. Use a thin rigid tool (toothpick or paperclip) to press the RESET button on the front panel. Do not disconnect the device from the power supply while resetting. Figure 3.1 Reset with Static IP Address 2. Keep the RESET button pressed until the RDY/ACT LED stops flashing red (for approx. 7s). 3. Now release the RESET button. 22 Default Reset 3.1 Factory Default Reset with DHCP Client ON 1. Use a thin rigid tool (toothpick or paperclip) to press the RESET button on the front panel and push the - volume button at the same. Do not disconnect the device from the power supply while resetting. Figure 3.2 Reset with DHCP ON 2. Keep the RESET and - volume buttons pressed until the RDY/ACT LED stops flashing red (for approx. 7s). 3. Now release both the buttons. 23 Configuration 3.2 3.2 Configuration 2N® SIP Speaker is configured through an integrated administration web server. Connect 2N® SIP Speaker to the IP network and make sure that 2N® SIP Speaker is powered. Description of 2N® Helios IP Network Scanner The purpose of this application is to find the dynamic IP address of 2N ® SIP Speaker in the local IP network. The application is available on the installation CD, which is part of the 2N® SIP Speaker package. Microsoft NET Framework 2.0 is required for installation. 1. Run the 2N® Helios IP Toolkit installer. 2. The installation wizard will guide you through the installation. Figure 3.3 2N® Helios IP Network Scanner Installation Wizard 3. After installing the 2N® Helios IP Network Scanner application, run the application using the Start menu of the Microsoft Windows operating system. 4. Upon launch, the application starts searching the LAN automatically for all 2N® SIP Speakers with an assigned or statically set IP address. The devices are then listed in a table. 24 Configuration Figure 3.4 5. 3.2 2N® Helios IP Network Scanner Window Select the 2N® SIP Speaker to be configured. Click on it with the right-hand mouse button and select Browse... to open the web browser window, log in to 2N® SIP Speaker and start configuring as described in the Login subsection below. Login In the web browser enter the IP address of 2N® SIP Speaker. Subsequently, a login screen will be displayed. The default login username and password are as follows: Username: Admin Password: 2n If the login screen does not appear, an incorrect IP address was entered into the web browser or the 2N® SIP Speaker administration web server was turned off. If you are not sure of the IP address of 2N® SIP Speaker, use the 2N® Helios IP Network Scanner application as described in the Description of 2N® Helios IP Network Scanner subsection. Find how to switch on the administration web server in the Administration Web Server Switch-On subsection. Please check the IP address entered, or, if applicable, check the way the IP address was obtained as described at the beginning of subsection 3.1 Default Reset. Language Selection You can select the language using the tag menu in the right-hand upper corner as shown in Figure 3.5. Figure 3.5 Language Selection 25 Configuration 3.2 Information In this subsection find the basic information on the respective 2N ® SIP Speaker system. Figure 3.6 Basic Information Product name – the product name Software version – the current 2N® SIP Speaker firmware version. For firmware update refer to the Firmware subsection. Bootloader version – the bootloader version. Hardware version – the 2N® SIP Speaker hardware version. Serial number – the product serial number. MAC address – the Ethernet interface address. Uptime – the period of time since the last restart. Registration status – - the current 2N® SIP Speaker-to-SIP proxy registration status: In progress – registration in progress. Registered – 2N® SIP Speaker is registered to the SIP proxy. Not registered – 2N® SIP Speaker is not registered to the SIP proxy. Registration at – the IP address or domain name of SIP proxy to which 2N® SIP Speaker is registered. 26 Configuration 3.2 Registration time – registration date and time. Call state – the current call status: - Inactive – system inactive; - Call set-up – call being set up; - Ringing – ringing at VoIP phone; - Incoming – VoIP phone-to-2N® SIP Speaker call being setup; - Outgoing – 2N® SIP Speaker -to-VoIP phone call being setup. Opponent – displays the SIP address called from 2N® SIP Speaker. Call duration – the current call duration. Audio codec – the audio codec used for the current call. DHCP status – displays whether the obtaining of the IP address from the DHCP server is on. IP address – the current IP address of 2N® SIP Speaker. Net mask – the current subnet mask. Default gateway – the current default network gateway. Primary DNS – the current primary Domain Name Server. Secondary DNS – the current secondary Domain Name Server. Ethernet frames transmitted – the count of Ethernet frames transmitted. Ethernet frames received – the count of Ethernet frames received. Ethernet frames dropped – the count of Ethernet frames dropped due to damage. UDP packet transmitted – the count of UDP packets transmitted. UDP packet received – the count of UDP packets received. UDP packet dropped – the count of UDP packets dropped due to damage. TCP packet transmitted – the count of TCP packets transmitted. TCP packet received – the count of TCP packets received. TCP packet dropped – the count of TCP packets dropped due to damage. 27 Configuration 3.2 Telephone Directory Set the telephone directory in the Basic settings –> Telephone directory menu. The telephone directory position corresponds to the button that can be connected to 2N® SIP Speaker. Push the button to call to up to three defined telephone numbers. Figure 3.7 Telephone Directory General Settings Position enabled Here select whether the selected telephone directory position shall be enabled or disabled. Remember to enable a position to call to its number. Position name Enter the name of the person to be assigned to a selected telephone directory position. This parameter is optional and helps you search the telephone directory more easily. 28 Configuration 3.2 Telephone Numbers Here define up to three telephone numbers to be called one after another when a quick dialling button or keypad is used. Numbers 1, 2 and 3 Enter the telephone number to which the call is to be routed. If the call is not answered by the station with the telephone number specified under Number 1, it will be forwarded automatically to the telephone number specified under Number 2 and so on. 2N® SIP Speaker also allows for direct calling in the format sip:user_id@domain:port, e.g.: sip:[email protected]:5062 or sip:name@yourcompany. Time schedule Assign a time schedule to a telephone number for validity management. Refer to the Scheduler subsection for details on time schedule settings. User Activation and Deactivation Here set the user activation and deactivation codes. The user may activate or deactivate 2N® SIP Speaker using the user telephone or numeric keypad. If just one code is set, or both the codes are the same, the current user status will be switched after code entering. You can verify the selected status by a sound signalling. Together with the scheduler settings, the user activation and deactivation define whether a call will be established for the given telephone. User Door Switch Codes Write the user code for 2N® SIP Speaker unlocking. Each user may be assigned one unique codes for switch 1 opening. If the codes are identical with other codes already entered in 2N® SIP Speaker, the following mark will appear with the respective codes: Scheduler The scheduler helps you set conditioned calling to user numbers. In case a user is not present, 2N® SIP Speaker need not set up a call to his or her telephone number but can automatically call other telephone numbers in the directory. Each user number can be assigned a scheduler – profile. A total of two profiles can be shared by the users. There are two possible ways of profile validity condition setting: time setting in the Time schedule, or manual setting of the profile activation and deactivation codes. For you to use both the functions at the same time, the two conditions must be met at the same time. 29 Configuration Figure 3.8 3.2 Scheduler Set-up General Settings Profile name Enter the scheduler profile name. This parameter is optional and helps you search the list of profiles more easily. Profile Time Schedule Set the presence of a user in a week period. A profile is active if the current time matches the set parameters. To use this function properly, make sure that the current time data have been set properly on the device (see the Date and Time subsection). Profile Activation and Deactivation Set the manual user activation and deactivation codes. To activate or deactivate a profile, use the DTMF code from the user telephone. If just one code is set, or both the codes are the same, the current user status will be switched over after code entering. You can verify the selected status by a sound signalling. If no code is set, the function is inactive and the profile status depends on the time schedule. 30 Configuration 3.2 User Active if… Set at what user and profile status the telephone directory numbers will be called. The settings are applicable only if the time schedule is set for the given telephone number in the directory. Profile active only (user independent) A telephone directory number is called only if the profile is active. Example of use: you want to call the reception desk during working hours. Profile & user active A telephone directory number is called only if the profile and the user are active. Example of use: you want to call the secretary‘s office during working hours and the secretary‘s presence. Profile active & user inactive A telephone directory number is called only if the profile is active and the user is inactive. Example of use: you want to call the reception desk during working hours when the secretary is absent. Profile or user active A telephone directory number is called if the profile or the user is active. Example of use: you want to call the stock release department during working hours or when the personnel are present. Profile active or user inactive A telephone directory number is called if the profile is active or the user is inactive. Example of use: you want to call a technician’s cellular phone during lunch time or the technician’s absence. 31 Configuration 3.2 Switch This menu helps you set the opening codes and modes for switch 1 to 2N® SIP Speaker. Figure 3.9 Switch Settings Switch settings Switch enabled Enable or disable switch control globally. If disabled, the switch cannot be opened with any of the codes entered (including the user switch codes) or activated by a call or speed dialling button. Time profile Assign a time schedule to the switch code for global management. If the assigned time schedule is not active, the switch cannot be opened with a switch code or activated by a call or speed dialling button. Refer to the Scheduler subsection for details on time schedule settings. Switch mode Select either the mono-stable and bi-stable switch mode. The switch is automatically switched off after a predefined switch-on time in the mono-stable mode. The first activation opens and the second activation closes the switch in the bi-stable mode. 32 Configuration 3.2 Switch-on duration Set the switch-on time in the mono-stable mode. The time interval set here is not applied to the bi-stable mode. Sound signalling Set the sound signalling type during switch-on status. Select one of the following: Short tone, Long tone (during the whole switch-on time), or a User sound, refer to Subs. User Sounds. Output relay This option helps you assign a switching relay to the switch: Basic switch Activate by call Set switch activation by an incoming/outgoing call. The switch is active during the whole call in the bi-stable switch mode. The switch is activated by the call start and deactivated after a predefined switch-on time in the mono-stable mode. Quick dial button Assign one of the speed (quick) dial buttons to the switch. Push this speed dial button to activate the switch. Once assigned to a switch, this button cannot be used for dialling. External command Switch-on command Set the command to be sent to an external device (WEB relay, e.g.) via the HTTP protocol (GET request) whenever the switch is activated. The required format is http://ip_address/path. Example: http://192.168.1.50/relay1=on. Switch-off command Set the command to be sent to an external device (WEB relay, e.g.) via the HTTP protocol (GET request) whenever the switch is deactivated. The required format is http://ip_address/path. Example: http://192.168.1.50/relay1=off. Switch Codes A list of the universal switch codes to be entered using a telephone set. The count of these global switch codes is 2. 33 Configuration 3.2 Time profile Assign a time schedule to the switch code for validity management. Refer to the Scheduler subsection for details on time schedule settings. Switch code options Enable ON/OFF mode You are recommended to enable different activation/deactivation codes while setting the bi-stable switch mode. Use this parameter to set a mode where odd code (1) is used for switch activation and even code (2) for switch deactivation. If this mode is OFF (default setting), then you can use any code to turn the switch into the opposite state (ON/OFF). This does not apply to the mono-stable switch mode where the activation time is prolonged. Network This menu is used for setting the 2N® SIP Speaker network parameters. A change of any of these parameters will not show until the next 2N® SIP Speaker restart. By default, obtaining the IP address from the DHCP server is switched off in 2N® SIP Speaker (DHCP client disabled). To find the IP address of your 2N® SIP Speaker, use the 2N® Helios IP Network Scanner program included on the CD. DHCP Settings DHCP client enabled Switch on the function of obtaining the IP address from the DHCP server. Static Settings For Windows OS users: find the network parameters by entering ipconfig –all in the command line. Static IP address Set the static IP address assigned by your local network administrator. Network mask Set the network mask. Default gateway Set the default network gateway. Primary DNS Set the IP address of the primary Domain Name Server used in your LAN. 34 Configuration 3.2 Secondary DNS Set the IP address of the secondary Domain Name Server used in your LAN. NAT Settings These settings are applicable only if 2N® SIP Speaker is operated in a LAN and assigned no public IP address. External IP address Set the public IP address for your router to which 2N® SIP Speaker is connected. If 2N® SIP Speaker’s IP address is public, leave this field blank. Figure 3.10 Network Parameter Setting Date and Time This menu helps you set the time zone and time synchronisation using the NTP server. For manual data and time setting refer to the Tools subsection. 35 Configuration 3.2 Time Zone Time zone Set the time offset at the place of installation relative to the GMT – Greenwich Mean Time. This setting is intended for switching on/off the daylight saving time in spring and autumn. TZ rule If 2N® SIP Speaker is installed in a location not included in the Time zone parameter, specify the time shift offset and daylight saving time switch on/off manually here. Remember to set the Time zone to the Use TZ rule below function. Figure 3.11 Date and Time Settings Time Synchronisation Use NTP server Enable or disable the 2N® SIP Speaker synchronisation using the NTP (Network Time Protocol) server. NTP server address Set the IP address of the NTP server for 2N® SIP Speaker time synchronisation. 36 Configuration 3.2 SIP Settings In order to set up calls from 2N® SIP Speaker, define your VoIP network parameters. To do this use the Advanced settings –> SIP settings menu. Remember to restart 2N® SIP Speaker after setting the SIP parameters. Figure 3.12 SIP Settings User Settings Display name Set the name to be displayed to the called party. The name will also be displayed in the right-hand upper corner of the web interface and used for 2N® SIP Speaker identification in the 2N® Helios IP Network Scanner application. User ID Set the user ID for registration. Domain Enter the domain name or IP address of the server to be used for calling. Use authorisation ID Set whether 2N® SIP Speaker should use the authorisation ID or user ID only for authorisation. 37 Configuration 3.2 Auth ID Enter the authorisation ID to be used for authorisation if the Use authorisation ID parameter is set to Yes. Password Enter the password to be used for authorisation during registration and calling. Other Settings Local SIP port Set the communication port to be used for SIP signalling by 2N® SIP Speaker. The change of this parameter will not show until the next 2N® SIP Speaker restart. The default value is 5060. Send KeepAlive packets Set whether or not 2N® SIP Speaker should periodically query about the state of the called station using the SIP OPTIONS requests during a call. Use this option to detect a disconnected or defective station. Initial RTP port Set the initial port for the range of 60 RTP ports to be used for audio transfers. The default value is 5000 (i.e. the range of 5060-5059). RTP Timeout Set the time limit for receiving audio stream RTP packets during a call. When the limit is exceeded, the call is terminated by 2N® SIP Speaker. Set 0 to disable this limitation. SIP Proxy Settings Proxy address Set the IP address of the SIP proxy used by 2N® SIP Speaker for calling. Proxy port Set the SIP signalling port to the SIP proxy. SIP Proxy Registration Register Helios IP Set whether 2N® SIP Speaker should register with the SIP proxy. Registration expires Set the minimum time for 2N® SIP Speaker registration attempts. Registrar address Set the registrar IP address. 38 Configuration 3.2 Registrar port Set the registrar communication port. Administration Web Server This menu helps you configure the administration web server. Web Server Settings Web server You can disable the administration web server launching. The change of this parameter will not show until the next 2N® SIP Speaker restart. To enable the web server, follow the instructions mentioned in the Factory Default Reset subsection. Web server port Set the web server communication port. The change of this parameter will not show until the next 2N® SIP Speaker restart Web server language Set the default language after login to the web server. Figure 3.13 Web Server Configuration 39 Configuration 3.2 Access Passwords Admin password Set the administrator password for 2N® SIP Speaker configuration through the administration web server. Enter the new password into both of the Admin password and Confirm password fields. Audio This menu is used for the 2N® SIP Speaker audio settings. Figure 3.14 Audio Parameter Settings Speaker Settings Master volume Set the global loudspeaker volume. This parameter controls the volume of the calls and all acoustic signalling. Audio volume Adjust the loudspeaker volume for a call. 40 Configuration 3.2 Warning volume Set the volume of the 2N® SIP Speaker signal tones that announce status changes. Key beep volume Set the volume of the tone generated whenever a key is pushed. Switch open volume Set the volume of the unlocking signalling tone. Call tones Set the volume of the dialling, ringing and busy tones if generated by 2N® SIP Speaker. Ringing Set the volume of the incoming call signalling tone – ringing tone. Incoming calls are signalled when the automatic incoming call receiving function is off, see the Miscellaneous subsection. Microphone Settings Sensitivity Set the microphone sensitivity. AGC (Automatic Gain Control) Set whether the Automatic Gain Control function should be used. Noise reduction Set the mode for noise reduction arising primarily during echo cancellation. Adaptive Volume Adaptive mode Enable the adaptive volume control mode where the loudspeaker volume is adjusted automatically according to the current ambient noise. Minimum volume Set the minimum volume value in the adaptive mode to avoid drop below the defined limit. Maximum volume Set the maximum volume value in the adaptive mode to avoid increase above the defined limit. Volume correction Turn up/down the loudspeaker in the adaptive mode in case the default adaptive mode settings fail to meet the local conditions. 41 Configuration 3.2 Audio Codecs This tag is used for configuration of priorities of the use of audio codecs. Preferred Audio Codecs Set the audio codecs for 2N® SIP Speaker telephone call set-ups. Select G.711 (PCMA or PCMU), L16, or G.729. Audio codec priorities are determined by the sequence: the first codec in the sequence has the highest priority. Codec G.729 is available with a licence key only. Transmission Quality Settings Jitter compensation Set the buffer length to compensate jitter caused by variable delays between incoming RTP packets. A longer buffer mans a better transmission quality yet a higher transmission delay. QoS DSCP for audio Set the priority of the audio transmitting packets in the network. The value is copied into the ToS (Type of Service) field in the IP packet header. Caution Wrong settings may deteriorate the transfer quality. Do not change this parameter if you are not sure. The change in transfer quality will show only in case the network components support this service. 42 Configuration Figure 3.15 3.2 Audio Codec Settings DTMF Receiving and Sending Defines how DTMF signalling should be received and sent. Check the opponent‘s parameters for correct settings. 6. Receive as audio / Send as tones – transmits the DTMF signals in the audio channel. This setting is unsuitable for cases where the audio channel is comprised using high-compression codecs such as GSM codecs. 7. Receive as RTP / Send as RTP – transmits DTMF signalling as special RTP packets according to the RFC2833 recommendation. 8. Receive as SIP INFO / Send as SIP INFO – transmits DTMF signalling using the SIP INFO packets as recommended in RFC2976. To send DTMF signalling during a call use the 0 to 9, * and # keys. You can also disable this function, enable for outgoing calls only, or enable for incoming and outgoing calls by setting the Send during call parameter. Streaming This menu allows the user to enable audio streaming into your LAN without affecting the other functions of 2N® SIP Speaker. This function may be used for security purposes. An RTSP supporting receiver is required for acceptance of audio streaming. 43 Configuration 3.2 For this purpose, it is possible to download the VLC Media player software free of charge. For the VLC media player configuration see below. RTSP Server RTP server Enable and disable audio streaming. Allow IP address Specify the allowed IP address of the stream-receiving user. If the value is not entered, you can require the stream from any IP address. Enable audio stream Set whether the audio channel is part of the stream transmitted. Caution 2N® SIP Speaker enables to send a single stream at a time. When a stream request comes from another IP address, the current stream is discontinued and the stream is distributed to the IP address that sent the request. Figure 3.16 Audio Streaming Setting 44 Configuration 3.2 VLC Set-Up for Streaming Audio from 2N® SIP Speaker 1. Install the VLC Media player application (version 1.1.11 in this manual). 2. After installation and start, the window will be displayed as shown in the figure below. Figure 3.17 VLC Media Player Main Window 3. In the main menu select the source for playing the audio, Media->Open Network 4. In the network card select the RTSP protocol and insert the IP address of the 2N® SIP Speaker device that is sending the audio streaming (rtsp://192.168.22.67 in this case). Figure 3.18 RTSP Stream IP Address Setting 45 Configuration 5. 3.2 After the confirmation button OK is pushed, the audio player window will appear. Figure 3.19 Streaming Audio Receiving Auto Update 2N® SIP Speaker allows both for manual and automatic updates of configuration and firmware. The automatic update is done through a TFTP server. Figure 3.20 Auto Update Settings 46 Configuration 3.2 Automatic Update TFTP server address The IP address of the TFTP server where the firmware and configuration are located that are to be automatically uploaded to 2N® SIP Speaker. Update firmware Enable/disable automatic firmware downloading from the TFTP server. Update time Set a period for automatic firmware downloading attempts from the TFTP server. 2N® SIP Speaker periodically (at a predefined time once a day) checks the TFTP server for a later firmware version. Having found one, 2N® SIP Speaker updates the firmware and restarts automatically. With this parameter you can choose the most convenient time of a day for updating (when 2N® SIP Speaker is not very busy). File prefix Specify the TFTP firmware directory path or file prefix. 2N® SIP Speaker expects the firmware file to be named Xss_app.bin, where X is the prefix specified in this parameter. Update configuration Enable or disable automatic configuration downloading from the TFTP server. Update period Set the time interval after which 2N® SIP Speaker gets connected to the TFTP server for configuration file downloading. File prefix Specify the TFTP configuration directory path or file prefix. 2N® SIP Speaker expects the configuration file to be named Xss_config.ini, where X is the prefix specified in this parameter. System Log This menu is used for configuration of system and log message sending. This service is useful for solving 2N® SIP Speaker errors if any and contacting the 2N TELEKOMUNIKACE a.s. Technical Support. Normally, it is not necessary to configure this menu. To receive syslog messages, a syslog server has to be installed in your PC. 47 Configuration Figure 3.21 3.2 System Log Logging enable Enable or disable sending of system and log reports and storing them on the syslog server. Trace level Set the level of detail of the reports. Syslog server The IP address of the server on which the system log application is running. Multicast 2N® SIP Speaker is able to receive the LAN-transmitted audio stream on the set multicast IP address and port and play it on the background. The audio stream must be in the RTP / UDP format and use codec G.711 (PCMU). The received audio stream 48 Configuration 3.2 is played even during an active call where the two sound sources are mixed together. Figure 3.22 Multicast Multicast Receiver Settings Multicast address Multicast IP address from which 2N® Helios IP receives the audio stream. Port Port via which the audio stream is received. Volume Volume of the audio stream received. Miscellaneous Here set the additional parameters of 2N® SIP Speaker that were not included in the above-described menus. 49 Configuration Figure 3.23 3.2 Miscellaneous Settings Outgoing Calls Ring time limit Set the call set-up and ringing time limits for outgoing calls. If the calls are routed through the GSM gateways of Part Nos. 505004, 505214 or 505612 to the GSM network, it is advisable to set a time value longer than 20 s. Call time limit Set the maximum call duration. When the call end is approaching, 2N® SIP Speaker starts generating tones signalling the end of the call. The call will automatically be terminated 10s after this signal. To prolong the call, send a DTMF code (push #, e.g.) on your phone. Dial cycles limit Set the maximum count of telephone directory searching attempts. The function is useful whenever the substitute is defined and in the case of deadlock. 50 Configuration 3.2 Incoming Calls Automatic answer Defines how 2N® SIP Speaker should behave when a call is coming. If the Automatic answer is disabled, 2N® SIP Speaker signals an incoming calls by ringing and the external subscriber can answer or reject the call by pushing * or # respectively. If the Automatic answer is enabled, 2N® SIP Speaker receives the call automatically and processes as selected in the Activation mode and Activation code parameters. Activation mode If the Automatic answer is enabled, incoming calls are received automatically by 2N® SIP Speaker. 2N® SIP Speaker enables you to receive up to 3 incoming calls at the same time. You can control 2N® SIP Speaker through incoming calls using tone dialling from your telephone keypad (activate or deactivate users or profiles, e.g.). A single incoming call may only be connected with the 2N® SIP Speaker microphone, loudspeaker and camera. Use the Activation mode parameter to define whether the incoming call should be connected automatically, or the activation code should be required for connection (see below). Activation code Set the activation code necessary for interconnecting the incoming call audio if the Automatic answer is enabled and the Activation code is set to Manual. Keyboard Settings Same button function Assign a function to the call-establishing quick dialling button when re-pushed. None – re-pushing the quick dialling button does not affect the set up or active call. Hang-up – re-pushing the quick dialling button ends the set-up or active call. Dial next – re-pushing the quick dialling button allows you to skip an attempt to set up a call and proceed to the next telephone number in the directory for another set-up. Flash – re-pushing the quick dialling button sends the FLASH signal into the active call. Legacy switch code Set whether the first code in the switch 1 list may be entered from a VoIP phone valid without an * confirmation. 51 Configuration 3.2 Other Settings DHCP on/off by buttons Set whether a quick dialling button combination may switch to obtaining the IP address from the DHCP server upon the 2N® SIP Speaker restart as described in the Factory Default Reset subsection. Enable switch control by HTTP Enable switch control by HTTP requests sent to 2N® SIP Speaker. Select ON, OFF or change over upon the following HTTP (GET) request: http://sip_speaker_address/enu/lockstate.xml.p?lockXstate=Y, where X is the switch number (1) and Y is 0 for switch off, 1 for switch on and 2 for change over. Tools This menu helps you set the 2N® SIP Speaker date and time manually and reboot the device. Figure 3.24 Tools 52 Configuration 3.2 Local Date and Time Setting Used for date and time setting in case the NTP synchronisation is disabled (see the Date and Time subsection). Push the button to synchronise the 2N® SIP Speaker time with your PC time. Reboot device Used for device restarting in case of changes of some configuration parameters, namely network settings, administration web interface settings and some SIP configuration parameters. Configuration This menu is used for configuration downloading, uploading and resetting. Figure 3.25 Configuration Setting 53 Configuration 3.2 Download configuration from device Used for downloading configuration from 2N® SIP Speaker. To save the configuration, push . Use the checkboxes to select the configuration parts to be downloaded. Upload configuration to device Used for uploading configuration to 2N® SIP Speaker. Use the Browse button to select the configuration file and push to upload it to 2N® SIP Speaker. Use the checkboxes to select the configuration parts to be uploaded. For copying the configuration file from another 2N® SIP Speaker device, disable the network and SIP setting downloading to avoid network collision and use of one and the same SIP configuration. For automatic configuration update refer to the Auto Update subsection. Resetting of all parameters Resets all 2N® SIP Speaker parameters to default values. Caution This selection does not apply to the network settings to avoid network collision and disabling the option to configure using the administration web server. To reset the network settings to default values use the procedure described in the Factory Default Reset with Static IP Address and Factory Default Reset with DHCP Client ON subsections. Firmware This menu is used for manual firmware updating. Manual Firmware Update Used for manual firmware updating using the configuration web interface. Use the Browse button to select the new firmware file and push to upload it to 2N® SIP Speaker. For automatic update refer to the Auto Update subsection. 54 Configuration Figure 3.26 3.2 Firmware User Sounds This menu helps create customised signalling of 2N® SIP Speaker states by replacing the default tone signalling with user sound files. User Sound Upload Used for handling user sound files within 2N® SIP Speaker. Push the Browse button to select a sound file and then push to upload the file into 2N® SIP Speaker. The user sound format is an 8bit or 16bit .WAV file with 8kHz sampling frequency. Push remove the file uploaded. Push to to play and verify the recorded sound on your PC. 55 Configuration Figure 3.27 3.2 User sounds The following user sounds can be used: Hang-up by remote party – here replace the disconnect tone signalling that the called station has hung up. Busy tone – replace the standard busy tone. Invalid input – replace the invalid switch password sound. Invalid position – replace the speed dial button sound signalling a nonprogrammed telephone directory position. Switch activation – replace the switch activation sound. Ringing – replace the standard incoming ringing tone when the Automatic call answering function is off, refer to the Miscellaneous subsection. 56 Configuration 3.2 Network Trace This menu helps capture incoming and outgoing packets on the 2N® SIP Speaker network interface. The file with the captured data can be downloaded and analysed, using, e.g., Wireshark (www.wireshark.org). Push the Start button to launch capturing and the Stop button to terminate capturing. The captured packets are stored in the ring buffer of the size of 4MB. Whenever the buffer is filled up, the oldest packets are deleted automatically. Figure 3.28 Network trace Licence This menu is used for entering licence keys. Licence keys upgrade the 2N® SIP Speaker functionality. Contact your local distributor for the licence key to your 2N® SIP Speaker. 57 Configuration 3.2 Licence Licence type Displays the type of licence currently saved in 2N® SIP Speaker. The available features of your licence are displayed in the Available features subsection. Licence expiry 2N® SIP Speaker are available with the Basic licence. You can activate the Professional licence for a limited operating time (800 hours) to test all the system capacities. Click on the Start evaluation mode for 800 hours to enable the Professional licence. The licence will expire in 800 hours and can only be run once. Your Basic functions will be restored after its expiry. Note: Each restart shortens the temporary licence validity by one hour. Licence key Enter the licence key received from your distributor in this field. Figure 3.29 Licence Available Features Provides details on the 2N® SIP Speaker features following from the applicable licence. 58 Configuration 4 4. 3.2 Function and Use This section provides the basic and extended functions of the 2N® SIP Speaker product. Here is what you can find in this section: 2N® SIP Speaker Button Control 2N® SIP Speaker Remote Control 2N® SIP Speaker LED and Acoustic Status Signalling 59 Basic Functions 4.1 4.1 Basic Functions 2N® SIP Speaker Button Control 2N® SIP Speaker is equipped with two buttons on the front panel. Figure 4.1 Volume Buttons Use these buttons to adjust the 2N® SIP Speaker volume. 2N® SIP Speaker Remote Control 2N® SIP Speaker is equipped with an infrared remote control receiver. Figure 4.2 Remote Control Receiver Use the remote controller (Part No. 914103E) for volume adjustment. Tip The remote controller is not part of the standard delivery. Order it under Part No. 914103E. Be sure to set the remote controller into the 2N ® SIP Speaker compatible mode before the first use or after every battery replacement. Follow the steps below: Remote Controller Setting 1. Press and hold the MAGIC button until the controller flashes twice. 2. Press the following buttons sequentially: once the left button, once the right button, twice the middle button and once the left button. 60 Basic Functions 4.1 2N® SIP Speaker Status Signalling 2N® SIP Speaker is equipped with colour LEDs on the front panel, which indicate operational statuses. Figure 4.3 Status LEDs Refer to the table below for the list of available operational statuses: POWER Status OFF Device powered off. Green (permanent light) Power on, device in operation. RDY/ACT Status OFF Normal operational status. Green (fast flashing) Call in progress. Red (slow flashing) After power up – start of the device, if default values are set - device deletes configuration. Red (permanent light) Device error. Remote Control Status OFF Normal operational status. Red (one flash) Infrared remote control signal received. Table 4.1 List of Statuses Operational Status Signalling 2N® SIP Speaker signals acoustically changes of and transitions between variable operational statuses. There are different tone combinations for each status change. Refer to Table 3.1 for the list of signals. 61 Basic Functions Tones 4.1 Meaning User activated. Used when the user activation code is entered. The activation code is used for user (telephone directory position) activation. Refer to the Telephony Directory subsection for activation code settings. User deactivated. Used when the user deactivation code is entered. The deactivation code is used for user (telephone directory position) deactivation. An inactive user cannot be called, but the call may be forwarded to the user substitute if predefined. Refer to the Telephony Directory subsection for deactivation code settings. Calendar activated. Used for calendar activation. Use this function, for example, to enable user group ringing in an office. Refer to the Scheduler subsection for activation code settings. Calendar deactivated. Used for calendar deactivation. Use this function, for example, to disable user group ringing in an office and forward the call(s) to a predefined telephone number (reception desk or user mobile phones). Refer to the Scheduler subsection for deactivation code settings. Call prolongation confirmation signalling. The maximum call duration is set in 2N® SIP Speaker for security reasons; refer to Miscellaneous subsection. Internal application launched. Upon 2N® SIP Speaker power up or restart, the 2N® SIP Speaker internal application is launched. A successful launch is signalled by this tone combination. Connected to LAN, IP address received. When the internal application has been launched, 2N® SIP Speaker logs into the LAN. A successful login is signalled by this tone combination. Disconnected from LAN, IP address lost. This tone combination signals that the UTP cable has been disconnected from 2N® SIP Speaker. Invalid telephone number or invalid switch activation code. 2N® SIP Speaker allows you to store an extension number or enter the switch opening code. If the number/code is invalid, this tone combination is used. Default reset of network parameters. Enter the default reset code for the network parameters within a 30-second timeout after power up. Refer to Factory Default Reset with Static IP Address and Factory Default Reset with DHCP Client ONfor details. Call end advance signalling. You can set a call time limit in 2N® SIP Speaker to avoid call blocking. Push a button on your VoIP telephone to prolong the call. 62 Basic Functions 4.1 Connected call when calling from a telephone to 2N® SIP Speaker. When calling from your VoIP telephone to 2N® SIP Speaker, you get a short call connection tone. Table 4.2 List of Tone Signals 63 5 5. Technical Parameters This section describes the technical parameters of the 2N® SIP Speaker product. 65 Technical Parameters 5.1 5.1 Technical Parameters Mechanical and Electrical Parameters Parameter Value Dimensions 105 x 34 x 86 mm Dimensions (incl. L-profiles) 130 x 34 x 86 mm Weight 300 g External power supply 12V DC / 1.8A LAN supply PoE IEEE 802.3af Status signalling 3 RG LEDs on front panel Local control 3 buttons on front panel Remote control 1 infrared sensor on front panel LAN connection RJ-45 connector on back panel, 10/100BASETX with Auto-MDIX function Power amplifier output 4 terminals on back panel, STEREO/MONO with auto detection Loudspeaker impedance 4-16Ω Amplifier power output Loudspeaker 12V/2A PoE 2 x 4Ω STEREO 2 x 10 W 2 x 9W 1 x 18W 1 x 12W 2 x 5W 2 x 5W 1 x 10W 1 x 10W 2 x 8Ω STEREO 4Ω MONO 8Ω MONO Frequency range 20Hz – 20kHz (+/- 0.5dB) Harmonic distortion 0.05% @ 1kHz Signal-to-noise ratio 91dB Headset/Line output STEREO 3.5mm jack on front panel Microphone/Line input STEREO 3.5mm jack on front panel 66 Technical Parameters Parameter Value Digital output 24V 1A AC/DC passive output relay, galvanically isolated Digital input 5 to 24V DC digital input, galvanically isolated Audiocodecs G.711 (PCMA, PCMU), G.729 (Annex A, B), L16 5.1 67 6 6. Supplementary Information This section provides supplementary information on the 2N® SIP Speaker product. Here is what you can find in this section: Applicable Directives, Laws and Regulations List of Figures Troubleshooting List of Abbreviations 69 List of Abbreviations 6.1 6.1 List of Abbreviations FW (Firmware) Software responsible for system function. HW (Hardware) For this purpose, hardware means an electronic device, circuit, board, component, etc.. LAN (Local Area Network) PC (Personal Computer) IBM PC compatible personal computer. SW (Software) 70 List of Figures 6.2 6.2 List of Figures Figure 2.1 ® 2N SIP Speaker Front and Back Panel.......................................................................14 Figure 2.2 Mounting Holes ..............................................................................................................16 Figure 2.3 Loudspeaker Connection ...............................................................................................17 Figure 2.4 Audio Output Connection ...............................................................................................18 Figure 2.5 Audio Input Connection .................................................................................................18 Figure 2.6 Digital Output Connection ..............................................................................................18 Figure 2.7 Digital Input Connection .................................................................................................19 Figure 2.8 LAN Connection .............................................................................................................19 Figure 2.9 Power Supply Connection .............................................................................................20 Figure 3.1 Reset with Static IP Address .........................................................................................22 Figure 3.2 Reset with DHCP ON ....................................................................................................23 ® Figure 3.3 2N Helios IP Network Scanner Installation Wizard ......................................................24 ® Figure 3.4 2N Helios IP Network Scanner Window.......................................................................25 Figure 3.5 Language Selection .......................................................................................................25 Figure 3.6 Basic Information ...........................................................................................................26 Figure 3.7 Telephone Directory ......................................................................................................28 Figure 3.8 Scheduler Set-up ...........................................................................................................30 Figure 3.9 Switch Settings ..............................................................................................................32 Figure 3.10 Network Parameter Setting ..........................................................................................35 Figure 3.11 Date and Time Settings ...............................................................................................36 Figure 3.12 SIP Settings .................................................................................................................37 Figure 3.13 Web Server Configuration ...........................................................................................39 Figure 3.14 Audio Parameter Settings ............................................................................................40 Figure 3.15 Audio Codec Settings ..................................................................................................43 Figure 3.16 Audio Streaming Setting ..............................................................................................44 Figure 3.17 VLC Media Player Main Window .................................................................................45 71 List of Figures 6.2 Figure 3.18 RTSP Stream IP Address Setting ................................................................................45 Figure 3.19 Streaming Audio Receiving .........................................................................................46 Figure 3.20 Auto Update Settings ...................................................................................................46 Figure 3.21 System Log ..................................................................................................................48 Figure 3.22 Multicast .......................................................................................................................49 Figure 3.23 Miscellaneous Settings ................................................................................................50 Figure 3.24 Tools ............................................................................................................................52 Figure 3.25 Configuration Setting ...................................................................................................53 Figure 3.26 Firmware ......................................................................................................................55 Figure 3.27 User sounds .................................................................................................................56 Figure 3.28 Network trace ...............................................................................................................57 Figure 3.29 Licence .........................................................................................................................58 Figure 4.1 Volume Buttons..............................................................................................................60 Figure 4.2 Remote Control Receiver ..............................................................................................60 Figure 4.3 Status LEDs ...................................................................................................................61 72 List of Tables 6.3 6.3 List of Tables Table 4.1 List of Statuses..............................................................................................................61 Table 4.2 List of Tone Signals ......................................................................................................63 73 2N TELEKOMUNIKACE a.s. Modřanská 621, 143 01 Prague 4, Czech Republic Tel.: +420 261 301 111, Fax: +420 261 301 999 E-mail: [email protected] Web: www.2n.cz