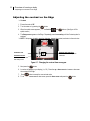
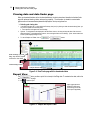
1
3M Personal Safety Division 3M™ The Edge eg5 Personal Noise Dosimeter TheMODEL EDGE eg5 Intrinsic Safety eg5 User Manual (Intrinsic Safety) i TM 3M The Edge eg5 Model Noise Dosimeter User Warnings, Safety Markings, and Standard information Warnings concerning safe operation WARNING: To prevent ignition of flammable or combustible atmospheres, no user serviceable parts inside. Repair and battery replacement must be done by authorized service personnel only. WARNING: To reduce the risk of ignition of a flammable or explosive atmosphere, substitution of components may impair intrinsic safety. WARNING: EdgeDock1 and EdgeDock5 are not intrinsically safe and therefore cannot be used in a flammable or combustible atmosphere. Standards ANSI S1.25 Personal Noise Dosimeters IEC61252 Personal Sound Exposure Meters RoHS compliant Intrinsic safety: IEC 60079-0:2004 and IEC 60079-11:2006 Safety Markings Manufacturer Equipment/model Quest Technologies, a 3M company eg5 Dosimeter Code Ex ia I/IIC 143ºC IP65 Ambient temp. range: -10ºC<Tamb<+50ºC Ex ia I/IIC T4 IP65 Ambient temp. range: -10ºC<Tamb<+40ºC (Alternate Code) Certificate number Maximum charge input voltage Temperature Operating Storage Humidity Range IECEx SIM 08.0012 Um=5.6V +14 ºF to + 122 ºF (-10 ºC to + 50 ºC) for 143ºC I.S. rating. +14 ºF to + 104 ºF (-10 ºC to + 40 ºC) for T4 I.S. rating. -13 ºF to + 140 ºF (-25 ºC to + 60 ºC). 0 to 95% Non-Condensing 3M Quest Service Contacting 3M Quest Should your 3M Quest Technologies equipment need to be returned for repair or for recalibration, please contact the service department at the following number or access the online form via the website. For technical issues, please contact Technical Support. Service Department and Technical Support: 1 (800) 245-0779. Office hours are 8:00 a.m. to 5:00 p.m. United States Central. E-mail at [email protected] Internet at www.3M.com/detection or www.questtechnologies.com International customers Contact your local, factory-authorized distributor from whom the product was purchased. You can obtain the name and contact information of your local factory-authorized distributor from Quest by using the e-mail or telephone information listed above. (Part Number: 053-670 RevA. 10/08) ii SIRA Certification: EC Type-Examination Certificate Equipment intended for use in Potentially Explosive Atmospheres Directive 94/9/EC Safety Markings Manufacturer Equipment/model Certificate number Compliance with safety markings Markings Quest Technologies, a 3M company eg5 Dosimeter Sira 09ATEX2269 EN 60079 – 0:2006; EN 60079-11:2007; EN60079-26-2007 I/II M1/1G EX AI I/IIC 143ºC Ma/Ga (-10ºC<Ta<+50ºC) EX AI I/IIC T4 Ma/Ga (-10ºC<Ta<+40ºC) iii Edge Dosimeter battery care best practices. The Edge dosimeter incorporates a Lithium Polymer battery as a power source that with proper care should give years of operational service. (Three years is typical.) Proper care includes these best practices: After use, it is best to charge the Edge in an EdgeDock charger prior to storage for a prolonged period. A prolonged period is considered to be 2 or more months. If the Edge is to be stored for an even longer period, it is best to take the Edge out of storage and re-charge the dosimeter every 2-3 months. Charge the Edge in an EdgeDock before attempting to turn it on if the Edge has not been used for a prolonged period or was stored in a lobat condition. It is best not to store the Edge for any period of time in lobat condition. If not using the dosimeter it is best to keep the dosimeter in a powered up EdgeDock. iv Table of Contents Table of Contents Table of Contents Chapter 1: Introduction ........................................................................................................... 1 Dosimetry ............................................................................................................................................ 1 Overview ............................................................................................................................................. 1 Noise dosimeter ................................................................................................................................ 2 Range of sound ................................................................................................................................ 3 What do the standards say? ............................................................................................................. 3 Applications of the Edge ................................................................................................................... 4 Noise assessment steps ................................................................................................................... 5 eg5 Overview .................................................................................................................................... 6 Virtual dosimeters 6 Chapter 2 : Getting started .................................................................................................... 7 Checking the equipment ..................................................................................................................... 7 Turning on ........................................................................................................................................... 8 LED indicator .................................................................................................................................... 9 Navigating 9 Turning off ........................................................................................................................................... 9 Display and keypad ........................................................................................................................... 10 Diagram .......................................................................................................................................... 10 3MTMDetection Mangement Software (DMS) .................................................................................... 11 Loading ........................................................................................................................................... 11 Docking station functionality.............................................................................................................. 11 Docking station components .......................................................................................................... 12 EdgeDock1 or EdgeDock5 ............................................................................................................. 12 Powering EdgeDock1 or EdgeDock5 ............................................................................................. 13 Charging your dosimeter ................................................................................................................ 14 Mounting the docking station to a wall ............................................................................................ 15 Storing the dosimeter ..................................................................................................................... 15 v Table of Contents Chapter 3:Setting-up the Edge via DMS .......................................................................... 16 Noise studies..................................................................................................................................... 16 Understanding what data is stored.................................................................................................... 17 Summary data ................................................................................................................................ 17 Time history………………………………………………………………………………………………………..17 Logging ........................................................................................................................................... 18 Views on the Edge ............................................................................................................................ 18 Definitions of data log values and views ......................................................................................... 18 Edge Measurement descriptors/variants ........................................................................................ 20 Docking ............................................................................................................................................. 21 Communicating & downloading data .............................................................................................. 21 Customizing set-up parameters in DMS ........................................................................................... 22 Dosimeter setting ............................................................................................................................ 23 General Edge Parameters……………………………………………………………………………………….23 Display setting ................................................................................................................................ 24 Security setting ............................................................................................................................... 25 Auto Run setting ............................................................................................................................. 25 Firmware update ............................................................................................................................. 26 Saving and sending configurations ................................................................................................. 27 Chapter 4: Running and Operating .................................................................................. 28 Overview of running a study.............................................................................................................. 28 Positioning the Edge on your shirt .................................................................................................. 29 Checking battery power .................................................................................................................. 30 Calibrating ...................................................................................................................................... 31 Resetting the dosimeter .................................................................................................................. 32 Adjusting the contrast on the Edge ................................................................................................. 33 Running studies ................................................................................................................................ 34 Starting a run .................................................................................................................................. 34 Stopping a study ............................................................................................................................... 35 vi Table of Contents Indicators/Icons on the display ....................................................................................................... 35 Chapter 5: Viewing measurements on the display .................................................... 35 Locking or securing your dosimeter during run............................................................................... 35 Locking or Securing ........................................................................................................................ 36 Unlocking ........................................................................................................................................ 36 Viewing your studies in DMS ......................................................................................................... 37 Downloading data ........................................................................................................................... 37 Viewing data and data finder page ................................................................................................. 39 Report View .................................................................................................................................... 39 Panel Layout View(charts/graphs) .................................................................................................. 40 Quick tips with panels (charts/graphs) 40 Chapter 6: Technical Support ............................................................................................. 41 Setting up and Viewing C-A measurements ................................................................................... 41 LED indicator: disable/enable ........................................................................................................ 42 Replacing microphone and windscreen ............................................................................................ 42 Attaching/Detaching ....................................................................................................................... 42 Hard Hat Attachment Kit ................................................................................................................... 43 Appendix A: Specifications ................................................................................................ 44 3M Service ........................................................................................................................................ 51 Contacting 3M ................................................................................................................................ 51 International customers .................................................................................................................. 51 Warranty............................................................................................................................................ 51 Appendix B: Glossary of Terms ........................................................................................ 52 Appendix C: Measurement Equations………………………………………………………..79 Index…………………………………………………………………………………………………………81 vii Table of Contents List of Figures Figure 1-1: Sample Edge Dosimeter…………………………………………………………………………………………………..….……1 Figure 1-2: Illustration of how the dosimeter operates and processes................................................................................................. 2 Figure 1-3: Parameter setup screen for eg5......................................................................................................................................... 6 Figure 2-1: Identifying your equipment ................................................................................................................................................. 7 Figure 2-2: Powered on with measurement view displayed ................................................................................................................. 8 Figure 2-3: Edge Keypad ..................................................................................................................................................................... 10 Figure 2-4: EdgeDock1 ........................................................................................................................................................................ 11 Figure 2-5: Attaching the charger adapter with the plug adapter ....................................................................................................... 12 Figure 2-6: Attaching charger adapter to EdgeDock1 ......................................................................................................................... 13 Figure 3-1: Edge Setup and Download options in DMS ..................................................................................................................... 16 Figure 3-2: Sample summary data from DMS reporting..................................................................................................................... 17 Figure 3-4: Communicating - connecting a docked Edge to a pc ....................................................................................................... 21 Figure 3-5: New Hardware wizard for Edge Dock .............................................................................................................................. 22 Figure 3-6: Dosimeter screen .............................................................................................................................................................. 23 Figure 3-7: Edge display screen .......................................................................................................................................................... 24 Figure 3-8: Edge security setting ......................................................................................................................................................... 25 Figure 3-9: Edge auto run screen ....................................................................................................................................................... 25 Figure 3-10: Edge firmware update screen ........................................................................................................................................ 26 Figure 3-11: Saving and sending Edge setups................................................................................................................................... 27 Figure 4-1: Quick help list for running a study .................................................................................................................................... 28 Figure 4-2: Attaching the Edge on your shoulder ............................................................................................................................... 29 Figure 4-3: Battery indicators ............................................................................................................................................................... 30 Figure 4-4: Calibrating ........................................................................................................................................................................ 31 Figure 4-5: Splash screen ................................................................................................................................................................... 32 Figure 4-6: Resetting the Edge from the keypad ................................................................................................................................ 32 Figure 4-7: Changing the contrast from the keypad ........................................................................................................................... 33 Figure 4-8: Display screen while running ........................................................................................................................................... 34 Figure 4-9: Locking/Securing run........................................................................................................................................................ 36 Figure 5-1: Communicating between your pc and the Edge .............................................................................................................. 37 Figure 5-2: DMS start screen .............................................................................................................................................................. 37 Figure 5-3: Downloading in DMS with the Edge .................................................................................................................................. 38 Figure 5-4: Data Finder page with the downloaded data ................................................................................................................... 39 Figure 5-5: Sample data report in DMS .............................................................................................................................................. 39 Figure 5-6: Panel layout view (viewing the data in charts and graphs) .............................................................................................. 40 Figure 6-1: C-A measurement set-up ................................................................................................................................................. 41 Figure 6-2: Microphone and windscreen assembly ............................................................................................................................ 42 List of Tables Table 1-2: Table 2-2: Table 3-1: Table 3-2: Dosimeter fields explained for the Edge ........................................................................................................................... 24 EdgeDock1 and EdgeDock5 components ........................................................................................................................ 12 Dosimeter parameters and definitions (continued) ........................................................................................................... 20 Dosimeter measurement descriptors/variants................................................................................................................... 20 viii This page left blank intentionally CHAPTER 1 1: 1 Dosimetry Introduction Dosimetry Measuring noise in the workplace is an important element of hearing conservation programs and noise reduction programs. With a noise dosimeter, you can assess and determine a worker’s daily exposure to noise levels. This information can be used to ensure compliance with regulatory bodies or to ensure if hearing conservation programs are needed. Figure 1-1: Sample measurement display Overview To get you started quickly with the Edge, the first chapter is dedicated to introducing basic noise dosimetry terms and information. The subsequent chapters will guide you through setting up the dosimeter, running studies, and assessing your results with easy to follow steps and illustrations. 2 Overview Noise dosimeter Noise dosimeter What is a noise dosimeter and how does it compute measurements? Essentially, a noise dosimeter is composed of the following: a microphone with a preamplifier, a weighted network, fast or slow response time, an internal clock, calculator, and memory to store logged data. The illustration below is a diagram of a basic noise dosimeter. The microphone will, when exposed to a sound pressure, generate an electrical signal. The signal will be increased by a preamplifier, and then is regulated to an applicable level by the range control (dB range). The signal then goes through a filter set or weighting system. The next circuit is the response circuit, which controls the dampening of the readout. The response choices are typically Slow or Fast. Finally, the results will display on the dosimeter screen. For computation and storage, the clock tracks the sampling time. Dosimeters record how long sound levels exceeded a set upper limit. The calculator computes an LAVG, a dose, a TWA, and other data. The memory stores all times, calculations, and measurements. For post-processing, DMS is used to view and analyze your measurement results with the option to view and/or print reports. C A Mic & Preamp Clock Range control (70-140dB) Calculator Apply filters (A or C weighting) File storage system Fast/Slow Response Measurement results on the Edge DMS – Manage setup and create graphs, charts and reports Figure 1-2: Illustration of how the dosimeter operates and processes 3 Overview Range of sound Range of sound Sound pressure is measured in decibels, or tenths of a Bel. Sound pressure level is indicated as dB SPL. Since the human ear can detect sounds with an extensive range of amplitude, a decibel scale is used to simplify the measurement results. For example, the ratio between the threshold of hearing and threshold of pain in the human ear if measured in true energy is 10,000,000 times! The same range using the dB scale is 0 - 140 dB referenced to 20 µPa (Micropascals). The quietest sound that humans can hear has an amplitude of approximately 0 dB. Prolonged exposure to sound pressure levels exceeding 85 dB can cause permanent damage to the ear. Sound levels in excess of 130 dB are more than the human ear can safely withstand and can result in serious pain and permanent damage. What do the standards say? Many organizations have studied and analyzed the effects of high sound exposure on hearing. As a result, standards were developed to regulate personal noise exposure. In the United States, the Occupational Safety and Health Administration (OSHA), the Mine and Safety and Health Administration (MSHA), and the American Conference of Governmental Industrial Hygienists (ACGIH) have all created regulations and limitations on total permissible noise exposure. International standards are specified by the health and safety regulations such as the European Union (EU) Directive 2003/10/EC. Additionally, the International Electrotechnical Commission (IEC) IEC-61252 has specific guidelines and regulations to monitor noise in the workplace. To access these copyrighted standards, please refer to the following: OSHA - http://www.osha.gov MSHA- http://www.msha.gov NIOSH - http://www.cdc.gov/niosh/topics/noise ACGIH - http://www.cdc.gov/niosh/topics/noise IEC - http://www.iec.ch 4 Overview Applications of the Edge Applications of the Edge The Edge has a cable-free, mounted microphone that converts sound pressure into an electrical signal. This signal is conditioned, monitored, and integrated over time in order to provide a host of automatically calculated values that can be used in occupational and environmental noise assessments. Programmable parameters permit the Edge to serve many applications. The Edge can be used in the following applications: Time history: manufacturing As a personal noise dosimeter - Used to measure a worker's daily exposure to noise levels. This information can be used to ensure compliance with OSHA, MSHA, ACGIH, IEC, or your own customized parameter settings to determine if your workers are over-exposed to noise. As a time-history monitor- Used to provide a worker's minute-by-minute noise exposure levels. This data can help you identify major contributors to the average daily noise exposure. As a survey monitor Throughout a plant/facility – used to oversee noise levels throughout an entire facility. You can identify machines and equipment which produce harmful noise levels. Specific areas in a plant/facility- used to identify key areas as “noisy” and implement noise control options. Employees may be exposed to unacceptable noise levels. As a peak dosimeter- Used to detect the highest level of instantaneous sound pressure. Peak Measurement: 121.20 dB 5 Overview Noise assessment steps Noise assessment steps 1. Perform a task-based work flow analysis of unacceptable “noisy” areas and list regulations/codes you will follow. Observe facility/areas and jot down areas of concern. Check with standards and noise ordinance regulations in your region/city. See Chapter 1 for basic information on dosimetry and standards. 2. Setting-up your dosimeter parameters for your noise studies. Customize measurement setup (i.e., criterion level, threshold, weighting, exchange rate, etc.) See Chapter 2 for getting started with your dosimeter. See Chapter 3 for customizing your set-up parameters. See Chapter 6 for Noise study scenarios. 3. Running your studies. Calibrate dosimeter. Attach the dosimeter. Run, observe, and stop your studies. Understand display indicators. See Chapter 4 “Running and operating the Edge”. 4. View your results via 3MTM Detection Management Software (DMS). Working with Charts and Graphs. Organizing and saving your studies. See Chapter 5 to view measurements with DMS. 5. Develop corrective actions. Engineering: redesign tools, implement changes in workstation. Administrative: job sharing/rotations, redefinition of job functions, reduce duration operating tool/equipment, and/or implement medical surveillance. 6 Overview eg5 Overview eg5 Overview The “eg5” model is an intrinsically safe instrument featuring simultaneous C and A weighted measurements. The instrument will also calculate C-A. The “eg5” model features two virtual dosimeters with data logging. Once the parameters are set and saved in the dosimeter, you can monitor two different dosimeters by a single press of the Enter button. This will toggle you between the two dosimeters. Edge 5-bay charger A – eg5 docked B – eg4 & eg3 docked A Selecting Model type eg3 & 4 or eg5 B Figure 1-3: Parameter setup screen for eg5 NOTE on Edge 5-bay charger: If you are using a 5-bay charger, you may have various models docked at once as indicated in Figure 1-3. The models selectable in the 5-bay charger section is dependent on if you selected the eg3 & eg4 or eg5 models. DMS will display a green circle with a checkmark indicating a docked, powered on Edge with the serial name. DMS will also display a checkbox in front of applicable models that are selectable for setup parameters. (See Customizing set-up parameters” for more details.) Virtual dosimeters You can monitor and log noise studies by enabling two different parameter settings in one dosimeter, also referred to as “virtual dosimeters”. For instance, you may want to set one dosimeter to log using the OSHA HC (Occupational Safety and Health Administration - Hearing Conversation) parameters and also monitor noise with the OSHA PEL (Occupational Safety and Health Administration – Permissible Exposure Level) settings. A few scenarios of virtual dosimeters include: Industrial noise control, hearing conservation compliance, work site assessments, personal noise verification, and military applications. CHAPTER 7 2 Checking the equipment eg5 Overview Getting started This chapter is designed to guide you through basic information you will need to begin logging your studies. Checking the equipment If your instrument was sent to you in a storage case, you will want to remove all the packaging and acquaint yourself with the following equipment so you can quickly get started with your noise studies. NOTE: Depending on the accessories you selected, the dosimeter may have the following components. For the docking stations, you will either have an EdgeDock1 or an EdgeDock5. (For more information on parts/accessories, please refer to www.3m.com/detection.) USB cable- connects EdgeDock to the PC Edge 5 microphone and windscreen attached mounting clasps attached EdgeDock1 DMS software Optional feature EdgeDock5 Extra windscreen for microphone Figure 2-1: Identifying your equipment **Universal charger adapter (Power supply cord for the docking station) 8 Turning on eg5 Overview Turning on 1. To turn on the Edge, press the on/off and enter button. The Edge splash screen (see Figure 2-3 for an example, page 10) will appear indicating the model (i.e. “eg5”) and firmware version. The screen will be in the measurement view. LED Indicator Battery indicator icon If icon is fully shaded, this indicates full battery power (approx.35+ hours) View Displays measurement values, battery information, and calibration information Figure 2-2: Powered on with measurement view displayed 9 Turning off LED indicator LED indicator There is a three-color LED indicator on the Edge, located to the right of the 3M logo. Table 2-1 explains when and why the LED indicator color will appear. NOTE: The LED indicator can be disabled via DMS (see section, “Explanation of setting LED in DMS”.) LED indicator Red Amber Green Explanation A flashing red LED indicates the dose has exceeded the alarm level. A flashing amber LED indicates the dosimeter is stopped and has not exceeded the dose alarm level. A flashing green LED indicates the dosimeter is running and has not exceeded the dose alarm level. Table 2-1: LED indicators explained Navigating Once the dosimeter is “Powered-On”, press the up/down measurement values and battery run time. arrows to navigate through the Turning off 1. Press and hold the on/off and enter button. A “3, 2, and 1” countdown will appear as the dosimeter is powered off. NOTE: To halt the power off mode, simply release the on/off enter button. 10 Display and keypad Diagram Display and keypad The keypad is used to run and stop your studies, view your measurement values, and power on and off the dosimeter. Diagram The following diagram explains the features on the display and keypad. Windscreen and microphone LED indicator Red – indicates dose exceeded the alarm level Amber – dosimeter stopped Green – dosimeter measuring Display (Splash screen shown) View data and various indicators Up Arrow Used to scroll through display/screen views On/Off and Enter Used to power On/Off the meter. Used to switch between (toggle) dosimeter one and dosimeter two measurements and settings. Run and Stop Used to activate meter when running or logging measurements. Used to Stop your noise study. Down arrow Used to scroll through display/screen views Figure 2-3: Edge Keypad 11 Detection Mangement Software (DMS) Loading 3MTMDetection Mangement Software (DMS) 3MTM Detection Management Software (DMS) is a software application designed by 3M that runs under the Windows operating system. You can use DMS for a variety of functions related to the Edge dosimeter and with many other 3M instruments. DMS has the ability to customize your set-up parameters, display data, manipulate data, and create reports. Loading To load DMS software, follow the instructions on the back of the CD or download a trial version from www.3m.com/dms. It will automatically load the drivers for the EdgeDock1 and/or EdgeDock5. If loading from 3M Internet site, please follow the directions online. www.3m.com/dms or access the 3M Detection Solutions home page at www.3m.com/detection. Docking station functionality Depending on the kit you purchased, you may have an EdgeDock1 and/or an EdgeDock5. Both are designed similarly with the same LED indicators. The main difference with the EdgeDock5 is that it has five bays for docking, charging, and/or managing the dosimeters. If desired, the EdgeDock5 will charge all docked instruments at one time. The docking station serves a dual-purpose role. (See Table 2-2 for an explanation of LEDs and components.) 1. It is used to charge the battery on the dosimeter(s). 2. It is used to communicate between the software (DMS) and the dosimeter (i.e., import, export settings and measurement files). Charging Indicator Power Indicator Charge contacts Power connector USB connector Figure 2-4: EdgeDock1 12 Docking station functionality Docking station components Docking station components The table below explains the EdgeDock1 or EdgeDock5 LED indicators, power connector, USB connector, and contact pins. Docking station components Charging indicator Power indicator Explanation Identifies if the dosimeter is “charging” or “fully charged”. A red blinking LED indicates the dosimeter is charging. A solid green LED equates to a fully charged dosimeter. An amber LED indicates the docking station is powered on. Power connector Attach the power connector cable to the docking station in order to charge the dosimeter(s). USB connector Attach the USB connector to communicate with the dosimeter(s). Charge Contacts Placing the dosimeter (s) onto the charge contacts allows charging and communication. Table 2-2: EdgeDock1 and EdgeDock5 components EdgeDock1 or EdgeDock5 The EdgeDock1 and EdgeDock5 are powered by a 12-volt charger adapter. Figure 2-5 illustrates the assembly of the charger adapter and the plug adapter. It slides into place by guiding it down the back cavity (opening) of the power supply. NOTE: the example is a typical adapter which may be different than the one you are using. Mechanically, it will function similarly. A. Charger adapter B. Slide plug adapter into the crevices of base Figure 2-5: Attaching the charger adapter with the plug adapter 13 Docking station functionality Powering EdgeDock1 or EdgeDock5 Powering EdgeDock1 or EdgeDock5 Powering EdgeDock1 or EdgeDock5 1. Assemble the charger adapter and plug adapter as illustrated in Figure 2-5. (It will be the same process for an EdgeDock5.) 2. Plug the charger adapter directly into the wall (electrical wall plate). 3. Plug the opposite end into the power connector (or jack) of the EdgeDock1. NOTE: an amber, solid light will appear indicating power to the charger. EdgeDock1 LED indicator Amber light indicates “ON”. Charger adapter cord Figure 2-6: Attaching charger adapter to EdgeDock1 14 Docking station functionality Charging your dosimeter Charging your dosimeter The number of hours you have used your dosimeter from your last charge will impact your total charge time. For example, if the battery clock indicator (see “Checking the battery power” for more information) displays 20 hours remaining on the battery and you wish to charge the battery, the approximate charging time is 2 hours. NOTE: To charge a fully discharged battery, it would take approximately 3 to 3.5 hours. 1. How to charge Plug in the power adapter to the EdgeDock. (See power adapter below.) The EdgeDock’s lower LED will appear solid when powered on. Hook Contacts Dosimeter LED dock Docking station LED 2. Slide the Edge (see 1) downward onto the Hook of the EdgeDock until it clicks. It will be fully seated. (See 2 in Figure below). NOTE: The top LED will appear as red flashing or solid green when fully charged. 1. Backside of Edge: The open cavity & contacts slides into the “Hook” of EdgeDock. The contacts will align to each other. 2. Example of the Edge Charging Power adapter Dosimeter Charge status’(Upper LED): Flashing Red LED when charging Solid Green LED when fully charged EdgeDock station status (Lower LED) Flashing Red when charging Solid Green LED when fully charged. Amber LED indicates dock is powered on but Edge is not docked. Figure 2-7: Docking the Edge on the EdgeDock 15 Docking station functionality Mounting the docking station to a wall Mounting the docking station to a wall The docking station is equipped with two single screw slots in case you wish to mount the docking station to the wall. The figure below displays the backside of the single bay dock. Screw slots Used to mount to a wall Figure 2-8: Backside of EdgeDock1 Storing the dosimeter To preserve the life of the battery, it is suggested that the dosimeter is turned off when you are storing the dosimeter. Additionally, if the dosimeter is docked and stored on the docking station when it is powered off, it will still draw a small amount of battery power from the dosimeter. Thus, it is recommended to store the dosimeter(s) separately from the docking station. CHAPTER 16 Chapter 3: 3 Noise studies Storing the dosimeter Setting-up the Edge via DMS Noise studies The eg5 model comes equipped with two customizable user setups. You have the option to customize the parameters for threshold values, exchange rate values, filtering, C-A measuring, an upper limit value, and a criterion level. This chapter explains data storage, the pre-set views on the dosimeter, and how to customize the parameters and display of your Edge via DMS. It concludes with an explanation of downloading data from the dosimeter to the software. Family: noise dosimeters Setup: Select to access the acoustic family Edge model Download panel Figure 3-1: Edge Setup and Download options in DMS 17 Understanding what data is stored Summary data Understanding what data is stored When you are running noise dosimetry studies, there are two types of data stored on the dosimeter which include the summary data and time history (or Logged) data. Summary data Summary data represents values that occurred over the entire run of the study. For an average value, such as Lavg, it represents the average decibel value over the entire run time. Peak and Max values are the highest measurements that occurred throughout the run time. NOTE: To view C-A measurement results, this is a selectable parameter from the edit panel icon. Please see Setting up and Viewing C-A measurements. Figure 3-2: Sample summary data from DMS reporting Time history Time history data is also referred as “logged data” which plots measurement values in minute by minute intervals. Time History data represents values that occurred over the most recent time period, which is the logging interval. For example, if the log interval is 1 minute, then the Peak value is the highest Peak value for that 1 minute, and the Lavg value is the average dB value for that 1 minute. Figure 3-3: Sample time history data (or logged data) chart 18 Views on the Edge Logging Logging eg5 model only logs at one minute intervals and includes the following measurements: • Meter 2 logs Lavg/Leq Meter 1 logs Lavg/Leq Meter 3 logs Lavg/Leq Lc-a (if enabled) • Lcpk and Lmax If the dosimeter runs for one hour, then it will log 60 Lavg/Leq results, and 60 Lmax/Lcpk levels. In DMS, you can customize the logged data chart results by checking Lavg/Leq, Lcpk, and/or Lmax measurement values. Views on the Edge The Edge is a user-friendly and customizable dosimeter. With a simple click of a checkbox in DMS, you can select the appropriate measurement values or views to appear or not appear on the display of your dosimeter. The following table briefly identifies the displayed data values and views with a brief definition. (See the glossary for additional information of these terms.) Definitions of data log values and views To set up the Edge and work with noise-level data, you will want to have a good understanding of the terms listed in Table 3-1. NOTE: The following table is based on A-weighted, slow measurements. Thus, if you choose A or Cweighted with Fast or Slow response the measurement values will change on the display (i.e., you selected sound pressure level with C-weighting with Fast response, it will display as LCF.) For further details, please see Table 3-2. Views on Explanation the EDGE LAS Sound pressure level - is the basic measure of noise loudness, expressed in decibels. (In DMS this is noted as “SPL”) LASMX Maximum sound level- is the highest sound level recorded during a measurement interval with a particular response setting (Slow or Fast) and weighting (A or C). LMax is the highest value that is included in LAvg or dose calculations. Under OSHA regulations, unprotected workers may not be exposed to maximum sound levels greater than 115dB, measured with a Slow response rate. LCPK Peak Level - is the highest instantaneous sound pressure level recorded during a measurement interval. Unlike the maximum level, the peak is detected independently of dosimeter settings for response rate or weighting. Under OSHA regulations, unprotected workers may not be exposed to peak sound levels greater than 140dB. LASMN Minimum sound level - The lowest sampled sound level during the measurement interval allowing for the unit’s Response Time setting (Fast or Slow). LAVG Average sound level - (in dB) computed for a chosen time duration, based on a 4, 5, or 6dB exchange rate. LAVG with a 3dB exchange rate is referred to as LEQ (equivalent sound level). All sound levels at or above the threshold level are averaged into the calculations relating to noise exposure. LAVG is typically calculated with no threshold, with a threshold of 80dB or with a threshold of 90dB. Table 3-1: Dosimeter views and definitions 19 Views on the Edge Definitions of data log values and views Views on the Edge LTWA Explanation Time-weighted average - is the sound level (in dB) that is accumulated for any time period but with its average level computed over an 8-hour period. TWA is usually measured with A-weighting, Slow response, and a 5dB exchange rate. All sound levels at or above the threshold level (cutoff level) are averaged into the calculations relating to noise exposure. TWA is calculated with no cutoff, with cutoff 1 (typically 80dB), or with cutoff 2 (typically 90dB). If the time period is less than 8 hours, the TWA will be less than the LAvg. If the time period is more than 8 hours, the TWA will be more than the LAvg. LAE Sound Exposure Level (SEL) – The sound exposure level averages the sampled sound over a one second period. Assuming the sampled run time to be greater than one second, SEL is the equivalent one-second noise that would be equal in energy to the noise that was sampled. SEL is typically measured using a 3dB exchange rate without a threshold. (LAE is not used by OSHA.) Dose Dose - Related to the Criterion Level, a dose reading of 100% is the maximum allowable exposure to accumulated noise. For OSHA, 100% dose occurs for an average sound level of 90 dB over an 8 hour period (or any equivalent exposure). (Please see Glossary of Terms for more details). Projected Dose (Pdose) UL Projected Dose – this is similar to Dose. However, instead of an 8 hour period, a specific hour is entered. (See dose for more information.) Upper Limit - is the amount of time that the sound level exceeds a preset level (the Upper Limit). It is the result of subtracting an A-weighted LAVG from a simultaneously collected Cweighted LAVG. This value is used to determine the following equation: Estimated Exposure (dBA) = Workplace Noise Level (dBA) – (NRR- LC-AAVG) Typically, noise is not constant. Using a response of Slow or Fast simply smoothes the noise fluctuation and makes the sound level easier to work with. Slow – 1 second (1,000 milliseconds) Fast – 0.125 second (125 milliseconds) LC-AAVG Time Response (Fast, Slow) RT Run Time - The overall time of your noise study. Weighting (A, C) A and C weighting are types of frequency filters that cover the frequency range of human hearing (20Hz to 20 kHz). “A” weighting - The “A” weighted filter attempts to make the dosimeter respond closer to the way the human ear hears. It attenuates the frequencies below several hundred hertz as well as the high frequencies above six thousand hertz. “A” weighted measurements are often reported as dBA. “C” weighting provides a fairly flat frequency response with only slight attenuation of the very high and very low frequencies. “C” weighting is intended to represent how the ear perceives sound at high decibel levels and is often used as a “flat” response when LINEAR is not available. “C” weighted measurements are often reported as dBC. Table 3-1: Dosimeter parameters and definitions (continued) 20 Views on the Edge Edge Measurement descriptors/variants Views on the Edge Explanation Memory storage symbol – eg5: The eg5 model displays the total memory storage remaining in hours and minutes. For example, if it displays the memory symbol 100:50 this represents 100 hours and 50 minutes of memory storage remaining on the dosimeter. Calendar symbol– The calendar symbol and calendar field displays the day-month-year Battery power clock symbol – The battery power clock symbol identifies the number of hours and minutes of battery time remaining on the dosimeter. (Note: refer to page iii to view battery care and best practices.) Table 3-1: Dosimeter parameters and definitions (continued) Edge Measurement descriptors/variants The following is an explanation of the Edge descriptors and equivalents for Lmax, Lmin, and Lcpk. Descriptors LASMX Variants LAPK Peak Level - is the highest instantaneous sound pressure level recorded during a measurement interval. Unlike the maximum level, the peak is detected independently of dosimeter settings for response rate or weighting. Under OSHA regulations, unprotected workers may not be exposed to peak sound levels greater than 140dB. LASMN Minimum sound level - The lowest sampled sound level during the measurement interval allowing for the unit’s Response Time setting (Fast or Slow). Maximum sound level- is the highest sound level recorded during a measurement interval with a particular response setting (Slow or Fast) and weighting (A or C). LMAX is the highest value that is included in LAVG or dose calculations. Under OSHA regulations, unprotected workers may not be exposed to maximum sound levels greater than 115dB, measured with a Slow response rate. Table 3-2: Dosimeter measurement descriptors/variants 21 Docking Communicating & downloading data Docking Communicating & downloading data By using your docking station, USB cable, software, and your dosimeter, you can quickly communicate between the software and the dosimeter. There are two methods for communicating which are: Send setup data: Enables you to configure your set-up parameters in Detection Management Software (DMS) and download these parameters to the Edge. Retrieve data: you have the capability to retrieve the data from the dosimeter into DMS in order to view and analyze your studies in DMS’s charts, graphs, and reporting functionality. How to connect your dosimeter to the computer 1. Dock the dosimeter on the EdgeDock1 (or 5) and turn on the dosimeter by pressing the on/off enter button. NOTE: See charging your dosimeter for more information. 2. Plug the USB cable into the computer. (See “A” in Figure 3-4). 3. Plug the opposite end into the docking station (See “B” and “C”). NOTE: The docking station will be powered through the computer; thus, you do not need to plug in the charger adapter. If you wish to charge the dosimeter, plug in the charger adapter. C A B Figure 3-4: Communicating - connecting a docked Edge to a pc 22 Customizing set-up parameters in DMS 4. For first time use of a docking station, Welcome to the found new hardware wizard will appear (see Figure 2-8). Select No and press Next through the remaining wizard. At the end of the wizard, press Finish. This will install the hardware components associated with your EdgeDock1 and/or EdgeDock5. NOTE: If you have more than one EdgeDock1 or EdgeDock5, this wizard will appear for each new dock which is connected to your pc. Figure 3-5: New Hardware wizard for Edge Dock Customizing set-up parameters in DMS Customizing and saving set-ups are performed via DMS. The following sections discuss each of the setup screens and explain how to save and send the parameters to the dosimeter(s). NOTE: The following DMS settings apply to the eg5 model. If you are also using other models (eg3/eg4) and have them docked in a 5-bay charger, they will appear in the “Edge Bay Charger” tree section, but no checkbox will appear unless you first select the eg3/eg4 models radio buttons. The checkbox denotes that the models are selectable when setup changes are applied and the “send setup to instruments” or “get identity” buttons are selected. 23 Customizing set-up parameters in DMS Dosimeter setting Dosimeter setting The Edge general settings are used to setup the instrument with basic parameters. The eg5 model features three dosimeters in one with three customized, user-defined settings. Please refer to the General Edge parameters table below for details. With the Edge 5, you have the option of setting up at least three virtual dosimeters. 1. Click on the Dosimeter tab from the Edge’s Instrument Configuration panel (see 1). To change the general settings, follow one (or all) of the selection options below. Click on the arrow Click on the Click in the print settings checkbox to activate/enable the print settings feature. and select an option. arrows and select a numeric value or type in a value. 2. To set the general features, save and send to the Edge (for more details see “Saving and sending configurations”. 1 Dosimeter settings explained in the general setup table Figure 3-6: Dosimeter screen General Edge Parameters General setup fields for the Edge Heartbeat enable Response C-A enable Projected Time Peak Weighting Name Field *Note: refer to Glossary for more detailed information. When enabled (or checked), the LED will flash green while running and flash amber when stopped. Either Slow Time Response or Fast Time Response is applied to the measurements. (Typically Slow time response is used in the US market while Fast is used in the EU communities.) When enabled (or checked), C minus A will be calculated. A selectable time parameter via the up/down arrows or type in a value. The projected time value is used to make projected dose calculation for the dose measurement. Select either A, C or Z for the peak frequency weighting. 24 Customizing set-up parameters in DMS Display setting Dose indicator LED When enabled (or checked), the LED will flash red when the dose value exceeds the designated entered value. (Optional field) A setup name may be entered into the Meter 1 and/or Meter 2 fields. When set, it appears on the top of Edge’s display (example setup names: OHSHA, MSHA, EU directive). When the checkbox is selected and a value is entered for meter 1 and/or meter 2, the threshold is used to calculate Lavg, TWA, and Dose measurements. Select a UL dB level by the up/down arrows or by typing in a value. (Note: The upper limit (UL) is a measurement setting in which the user selects a specific decibel level. The UL value records the amount of time that the Sound level is at or greater than the entered level.) Select either A or C RMS Weighting. (Note: The RMS (root mean square) are the results from the Edge with the response time and weighting settings taken into account.) Select a Criterion level via the up/down arrow or by typing in a value. (Note: Criterion level is the average SPL that will result in 100% dose over the criterion time and is typically set by a regulatory agency such as OSHA, EU directive.) Enter in (or select with up/down arrows) 3, 4, or 5 dB. ER refers to how sound energy is averaged over time. (OSHA uses a 5 dB doubling rate while most of the world uses 3 dB.) Setup name Threshold enable Upper Limit RMS Weighting Criterion Level Exchange Rate Table 1-2: Dosimeter fields explained for the Edge Display setting The display screen is used to customize the parameters which will appear on your Edge. It is organized by two columns, the “Display position” and the “Item to Display” and includes a “Set selected Items” selection/drop down box. The display position indicates the order of the parameter (or item) which will appear on the display, while the “Item to display” designates the measurement or parameter. The example/figure below displays the SPL, Max, Min, Lavg, TWA, Dose, UL, RT, and battery time remaining parameters to appear on the display. (Note: There are up to 18 selectable parameters. Off indicates no item will appear.) 1. Click on the Display tab from the Edge’s Instrument Configuration panel (see 1). To customize the display, click on either the Display position (see 1) or the Item to Display field (see 2). The field will be shaded in blue when selected. 2. Click on the drop down box of the Set Selected Item (see 3) and select a parameter (see 4). 3. Repeat these steps as needed to select each position. NOTE: “OFF” indicates that no item/parameter is selected. 4. To set the display features, save and send to the Edge (for more details see “Saving and sending configurations”. 1 2 3 Figure 3-7: Edge display screen 4 25 Customizing set-up parameters in DMS Security setting Security setting The security setting is a type of “locking” feature (or secure run feature) that enables you to password protect the instrument to prevent users from inadvertently terminating a study. Initially, this feature is set through the software and turned on once in run mode by pressing run/stop key three consecutive times. (To unlock, press run/stop key three consecutive times and then press power key.) To set this feature, please follow the steps below. 1. Click on the Security tab from the Edge’s Instrument Configuration panel (see 1). To enable, click on the Enabled check box. (Ensure the specific Edge is selected and communicating to the software. See “Communicating and downloading” for more information.) 2. Next, select either Not Displayed (see 2) or Displayed (see 3). Press Set Configuration to send the changes to the selected instrument. 3. To set the security settings, save and send to the Edge (for more details see “Saving and sending configurations”. 1 2 3 Figure 3-8: Edge security setting Auto Run setting With the Edge auto run setting, you can program up to two auto start and auto stop configurations when start date and duration parameters are enabled. This is useful if you wish to pre-set the instruments to run and stop for a specific time period, such as a week long study. See steps below to enable. 1. Click on the Auto Run tab from the Edge’s Instrument Configuration panel (see 1) and click in the Enable checkbox (see 2). 2. To program Date 1, click in the Enabled checkbox and select a Start Date (by using the calendar icon or type in a date). Select the Duration, by either typing in the time (designated in hours, minutes, and seconds) or using the up/down arrows (see 3). (Repeat this step to setup a second Auto run mode. See 4.) 3. To set Auto Run setting, save and send to the Edge (for more details see “Saving and sending configurations”. 1 2 3 4 Figure 3-9: Edge auto run screen 26 Customizing set-up parameters in DMS Firmware update Firmware update Edge firmware updates are performed in DMS when the instruments are docked, communicating, and the update key is selected. Please follow the steps below prior to updating your Edge(s). Note: this feature enables you to update all of your docked Edges (when powered on and not in run mode). 1. Click on the Firmware tab from the Instrument Configuration panel (see 1) and ensure to dock the Edge (or Edges) . Please read steps under “Firmware Update” prior to updating (see 2). Press 2. Press the button to refresh the docked instruments (if necessary). button and please wait until the software states that it is Done. (Example of the message: 3. To set, save and send to the Edge (for more details see “Saving and sending configurations”. 1 2 Figure 3-10: Edge firmware update screen ). 27 Customizing set-up parameters in DMS Saving and sending configurations Saving and sending configurations With the Edge, there are saved setup profiles used to quickly access and apply to The Edge(s). Below explains how to save configuration settings in DMS and how to send to the instrument. Note: if you wish to only send the setup, please skip to step 3. Please refer to this section as you setup your instrument. 1. To save the Edge configuration in the software, click on a name in the Configuration Profile Management panel (See 1). (Note: The name will be shaded a light gray when selected.) To create a new profile name, click and type in a profile name. Click Save. (It will save under the configuration profile management panel). 2. Click on the button (see 2) and type in a Name. Click Ok. Note: This saves the configuration file in the software. Or click button and rename the setting by typing in a name. Click Ok. 3. To send to the instrument, select the (see 3). 2 1 Setups: Click on the tabs to setup/view: Dosimeter, Display, Security, Auto Run, and Firmware Update 3 4 Figure 3-11: Saving and sending Edge setups 28 Overview of running a study CHAPTER 4 Running and operating As explained in Chapter 3, the view of your display is customizable via DMS. NOTE: The subsequent sections show examples of views which you may have disabled on your dosimeter. (Please refer to Chapter 3, “Setting up the Edge via DMS”.) Overview of running a study The list below is a brief overview of the steps for running a study. Quick Help List: typical dosimetry session 1. Turn the dosimeter on and check your battery power. 2. Reset the dosimeter. o This will clear out all of the data history before your study begins to ensure you have sufficient memory space on the Edge. 3. Set-up your study parameters via DMS. 4. Calibrate the dosimeter. 5. Attach the dosimeter for your personal noise study. 6. Press the Run/Stop button to start the study. 7. When you are ready to end your study, press the Run/Stop button to stop the study. 8. Review your results either on the meter or download to DMS for further analysis (graphs/charts, saving and printing). Figure 4-1: Quick help list for running a study 29 Overview of running a study Positioning the Edge on your shirt Positioning the Edge on your shirt Depending on what accessories you ordered with the Edge, you may have either clips on the top and bottom of the dosimeter or some other type of mounting device. (Please refer to Appendix A, “Contacting 3M”). How to attach the dosimeter 1. Clip the dosimeter on your shirt and ensure the microphone is positioned as high on your shoulder as possible and away from your neck. a. If the noise seems to come from one direction, place it on the shoulder closet to the noise source. b. During monitoring, keep clothing from coming into contact with the windscreen to avoid contaminating your results. Positioning Figure 4-2: Attaching the Edge on your shoulder 30 Overview of running a study Checking battery power Checking battery power Typically, the life of the battery is approximately 40 hours nominal without LED activated (see Appendix A for specific specifications). It is recommended to perform a daily download of the measured data while simultaneously charging the battery for maximum efficiency. A quick recharge with the EdgeDock ranges from 2 to 4 hours when half of the battery power is expended. Note: refer to page iii to view battery care and best practices. There are two battery identifiers on the dosimeter which are the battery indicator icon and the battery power clock (see Figure 4-3). Checking battery power 1. The battery indicator icon (located at the top right of your screen) gives an approximation of battery life and is always present. If the battery indicator is half shaded, this illustrates you have approximately 17 hours of battery life remaining. If lobat appears, less than 8 hours of run time is available. 2. Additionally, there is a battery time remaining measurement which identifies the number of hours and minutes remaining on the dosimeter. 3. To view, press the up/down arrows dosimeter. . This will navigate your through the views of the NOTE: The battery time remaining measurement can be disabled from the view of the meter. See Chapter 3 for explanation on changing the display Battery indicator icon When fully shaded, this indicates full battery life. Battery time remaining Figure 4-3: Battery indicators 31 Overview of running a study Calibrating Calibrating It is recommended to calibrate your dosimeter before you run your study(ies) and after your study(ies) to ensure highly accurate measurement results. The steps below address how to calibrate for either a pre or post calibration. Calibrating the dosimeter 1. 2. 3. Remove the windscreen from the dosimeter by unscrewing it. (See Figure 6-1 for an illustration.) Ensure the Edge is turned on and in the stop mode. (See “Turning on” and “Turning Off”.) Slide the Edge into the mouth of the calibrator. NOTE: ensure the adapter ring is inserted into the mouth of the calibrator before you slide the Edge into the cavity. 4. Turn on the calibrator and ensure parameters are set to 114 dB and 1000 Hz. (See calibration manual for operation details.) “CAL” flashes Figure 4-4: Calibrating 5. 6. “CAL” will flash on the display when detected. Press the button to trigger the calibration display. 7. To match the values on the calibration display, press repeatedly the up or down arrow in order to select the exact output on the calibrator (i.e., 114 dB). 8. When you have selected the appropriate dB level, press the 9. A shaded bar will appear loading your calibration information. Then a summary calibration screen will appear indicating the db level with date and time displayed. 10. To return to the measurement view screen, press the button. button. 11. To end the calibration steps, turn off the calibrator. Detach the dosimeter from the calibrator. 32 Overview of running a study Resetting the dosimeter Resetting the dosimeter The Edge can be reset through the dosimeter keypad or via DMS. The steps below outline how to reset your dosimeter. Reset 1. 2. 3. Ensure the meter is Off. Turn the meter on by pressing the button. When the splash screen appears, press and hold the disappears. and buttons until the splash Edge Splash screen eg5 Figure 4-5: Splash screen 4. The Setup menu appears on the Edge. Press the up or down arrow to select the reset icon (symbol). NOTE: Setup menu is used to reset the dosimeter, change the contrast, and return to the main view. Arrows and enter key Indicates the valid keys are selected Reset icon Checkmark icon Is the selection to exit the setup menu Figure 4-6: Resetting the Edge from the keypad 5. Press and hold the 6. A 3, 2, 1 countdown will appear, and then a shaded bar will appear indicating the dosimeter is being reset. button. 7. Press the down arrow until the checkmark icon is selected (denoted by the arrows). Then, press the button to return to the measurement view screen. 33 Overview of running a study Adjusting the contrast on the Edge Adjusting the contrast on the Edge Contrast 1. Ensure the meter is Off. 2. Turn the meter on by pressing the button. 3. When the splash screen appears, press and hold the splash screen.) and buttons. (See figure 4-5 for 4. The Setup menu appears on the Edge. Repeatedly press the arrow key until the Contrast symbol is selected. NOTE: Setup menu is used to reset the dosimeter, change the contrast, and return to the main view. Arrows and enter key Indicates the valid keys are selected Contrast icon Checkmark icon Is the selection to exit the setup menu Figure 4-7: Changing the contrast from the keypad 5. Next press the button. 6. A number will appear on your display (i.e., 50). Press the up or down arrow to increase or decrease the contrast of the Edge. 7. Press button to accept the new contrast value. 8. To return to the measurement view screen, press the down arrow and press the button. 34 Running studies Starting a run Running studies With a couple pushes on the keypad buttons, you will be running and viewing your study (ies). Following your study (ies), you can load the data/files into DMS to manipulate, analyze, save, and create reports (See Chapter 5 for viewing your logged data in DMS). Starting a run How to run a noise study 1. If your dosimeter is turned off, press the 2. Press and hold the button to power on. button. A 3, 2, 1 countdown will appear. 3. When running, the following will appear: A run indicator will appear on the top-right side. The LED indicator will flash green (unless you disabled this in DMS.) Flashing green LED indicates running Battery indicator Measurements Use up/down arrow to move through values. Views are customizable via DMS setup Run indicator Appears when running Figure 4-8: Display screen while running 35 Stopping a study Indicators/Icons on the display Stopping a study While the dosimeter is running, you can end the study by pressing and holding the stop button. How to stop a noise study 1. While running, press and hold the button. a. A 3, 2, 1 countdown will appear. b. The stop indicator will be shown in the display. Indicators/Icons on the display The Edge is equipped to notify you of operational/status updates. These indicators (or alert notices) are located on the top right-hand side of the screen. Table 2-2 explains the function of each indicator. Indicator Icon Explanation Stop – indicates the dosimeter is currently in the stop status (opposed to run). Run - indicates the dosimeter is currently logging a study. Battery charge status – When completely shaded in black, this indicates full battery power. If half shaded, this represents ½ battery power OL Overload –will appear whenever the input signal exceeds the range of the dosimeter. Table 4-1: Indicators (i.e., run, stop, battery, and OL) Viewing measurements on the display The up/down arrows on the keypad of the dosimeter enable you to move through the various measurements. For specific information on the views of the Edge, please see “Views on the Edge”.) Viewing measurements 1. Press the or arrow. This will move you through the views on the display. NOTE: If you enabled only one measurement to appear on the display, when you press the up/down arrows it will not show any other measurement values. Locking or securing your dosimeter during run As explained previously under DMS set-up parameters, the security or lock feature is designed to lock the meter during run to ensure the study will not be stopped unless the lock feature is disabled. (Setting this feature is programmed via DMS. Please see “Security: setting secure/lock feature” for more details.) 36 Viewing measurements on the display Locking or Securing Locking or Securing How to lock or secure 1. Turn the dosimeter on and press the button to begin logging your study. 2. To enable the lock, press button three consecutive times within one second intervals. The Lock screen will appear. Key indicator Indicates dosimeter is locked while running. Padlock icon Secure all Figure 4-9: Locking/Securing run NOTE: If lock/secure run does not activate, please check that locking is set-up on your dosimeter. Please see “How to set-up secure/lock” for further details. Unlocking How to unlock 1. To unlock, press button. button 3 consecutive times, within one second intervals, and then press the a. If the padlock icon and the key indicator were on the screen, these will vanish and the measurement view will appear along with the run indicator. b. If you enabled the lock feature (with the key indicator showing and the measurement view showing), then the key indicator will disappear. 2. To stop your study, press the button and the 3, 2, 1 will display as it ends the study. 3. To download and view your results in DMS, please see Chapter 5.) CHAPTER 37 5 Viewing measurements on the display Downloading data Viewing your studies in DMS The focus of this chapter is to discuss how to view your studies via Detection Management Software. The first section explains how to retrieve your studies from the dosimeter, and the subsequent sections will then walk you through viewing, organizing, and customizing your studies. NOTE: You have the option of six different languages in DMS including: English, German, French, Spanish, Italian, and Portuguese. Downloading data Loading your studies entails communicating, downloading the sessions/studies (files) and viewing the files in the data finder page, charts and graphs, or report views. Downloading 1. Ensure DMS is downloaded. Follow the install directions on the CD or visit the website. 2. Dock the dosimeter and connect it to your pc using the USB cable (see, “Communicating and downloading data”). ––– Figure 5-1: Communicating between your pc and the Edge 3. Power on the Edge by pressing the 4. In DMS’ start screen, choose Download Figure 5-2: DMS start screen button. . 38 Viewing measurements on the display Downloading data 5. Select Noise Dosimetry (see 1), Edge (see 2), and Edge 5 (see 3). Select the docked Edge (s) to download (see 4). 6. Click button. In the status field, it will state download is successful. Then, a clear the memory prompt will appear. Click yes to clear the memory or click no if you wish to save the data on the dosimeter. 7. The sessions (files) will load and post to the Data Finder page under Family: Noise Dosimetry heading. Noise Dosimetry Edge 1 4 2 Download button Edge Dock 5 example Click in Edge checkboxes to download specific dosimeters 3 Edge 5 Optional: click to view files (sessions/studies) after download Figure 5-2: Downloading in DMS Figure 5-3: Downloading in DMS with the Edge 39 Viewing measurements on the display Viewing data and data finder page Viewing data and data finder page When you download the data via the the download feature, the data is stored and viewable via the data finder page with advanced charting, tables, and reporting capability. The information is viewable in customizable graphs and/or with measurements/parameters displayed on the top navigational bar. Selecting and viewing data 1. In the Data Find page (see 1), select the Noise Dosimetry data (see 2) by clicking on either the session/study (Note: you may need to expand to see the study data.) Once selected, it will appear with a blue shading. 2. Optional: To reorganize the data displayed in the data finder columns, click drag and drop the titles of the columns in different positions To shrink/expand the columns, click and drag the black column divider(s). (Note: these methods are similar to positioning/expanding in Excel.) 3. To view in Graphs and Tables, click on or buttons. 1 Data headings (optional: drag, drop and/or expand columns to view data) 2 Selected Edge data Analyze button Quick Report button Figure 5-4: Data Finder page with the downloaded data Report View The button provides a quick link to view/print the Edge data. To customize the data, refer to the next session, panel view page. Click to print the report. Edge, logged data chart displayed in DMS report (scroll through to view the online report if applicable). Figure 5-5: Sample data report in DMS 40 Viewing measurements on the display Panel Layout View(charts/graphs) Panel Layout View(charts/graphs) When you are in the data finder page (see above), select either the Analyze button or double-click on a session/study to view the data in charts and graphs as displayed in Figure 5-6. The measurements and parameters will be displayed in charts and graphs which may be customized for analysis and/or reporting purposes. 1. In the panel layout view page, it is divided into Work Items (see 1), Add panel (see 2), Arrange Panels (see 3) and data panels (see 4). Work items (1) – select either the session or study (in order to view appropriate measurement/parameter data). Add panel (2) – double-click on a chart/table type and it will appear as a panel on your screen. Arrange panels (3) – displays the order of the sessions/studies displayed in the panel section of your screen. Data Panels (4) – used to view your measurement and/or parameters from your study. Note: use the menu bar icons and/or configure icon to customize parameters. 4 1 4 2 3 4 Configure Active cursor Figure 5-6: Panel layout view (viewing the data in charts and graphs) Quick tips with panels (charts/graphs) To stretch the graph, click on one the corner’s edge of a chart or table and drag the mouse. The graph will expand and widened (depending on how you drag your mouse). To move the graph, click drag and drop to the appropriate panel position. To change ranges, when clicking on either the x-axis or y-axis, click and drag the mouse until the appropriate range is selected. (Note: it will span the numbers up or down depending on how you drag the mouse.) To add labels, click on the add labels icon. Right-click and select edit text to add note/label on the chart. Type in text and press the Enter key (on your keyboard). To move the label, left-click and hold to drag to appropriate location on graph. To customize chart colors, click on the icon and using the properties box, select different colors as needed. To customize x or y axis font type, click on these or icons. To export data to .xls file, click on the export icon. To save a layout, right-click outside the tables/graphs area as displayed below. Click Remember Setting. CHAPTER 41 6 Technical Support Technical Support Setting up and Viewing C-A measurements With the eg5 model, you have the option of enabling c-a measurement and viewing the values in tables and charts (also called “panels”). For your setup parameters, c-a is selected via the Setup button of DMS’s dosimeter screen. A quick checkmark of C minus A activates this measurement and is viewable on the display if it is turned on in the Display screen (refer to “Dosimeter setup” or “Customizing your views” for more information.) Your setup parameters should look similar to the figure below. C minus A Activated via checkmark Figure 6-1: C-A measurement set-up 42 Technical Support LED indicator: disable/enable Some users may prefer to turn off the LED indicator. To disable this feature, open DMS, select setup button from start screen and then select the Edge (ensuring it is setup to communicate). Under the Setup Dosimeter tab, uncheck the Dose Indicator Alarm enable: Will disable the flashing red LED when the threshold entered exceeds the designated value during run mode. (If checked, red LED will flash.) Heartbeat enable: Will disable the flashing green LED when the dosimeter is running. (If checked, a green LED will flash.) NOTE: For more information, see section on Dosimeter Settings. Replacing microphone and windscreen Attaching/Detaching The Edge features a field replaceable microphone and a screw-on removable windscreen. NOTE: If you ordered an Edge kit, extra windscreen(s) will be included in your case. Attaching/Detaching the windscreen and microphone 1. First, unscrew the windscreen by turning the red ring (not the foam!) in a counterclockwise direction. 2. If you are replacing the windscreen, screw on a new windscreen in a clockwise direction until it fits firmly. 3. To unscrew the microphone, turn the microphone in a counterclockwise direction until it is removed. 4. To attach a new microphone, screw the microphone on clockwise until it fits tightly. The following diagram illustrates how to assemble these two devices. Microphone (see procedure 2) Windscreen (see procedure 1) Figure 6-2: Microphone and windscreen assembly 43 Hard Hat Attachment Kit Attaching/Detaching Hard Hat Attachment Kit The following instructions explain how to assemble and attach the hard hat kit to a standard hard hat. A B Hard Hat Attachment kit A. Epaulette mount B. Hard hat mount Using a 3/32” hex wrench, twist the top shoulder bolt counterclockwise to loosen and remove the bolt and the clip. Also, remove the bottom clip with the hex wrench. Once the bottom clip is removed, place the shoulder bolt back into its place and tighten back up with the hex wrench. Shoulder bolt Hex wrench Place the epaulette mount (see “A” above) into the top bracket of the Edge. Then slide the bolt into place and tighten with a hex wrench. Then, the epaulette mount snaps onto the bottom shoulder bolt. Shoulder bolt Epaulette Slide the two prongs of the hard hat mount (see “B” above) underneath the epaulette mount (see “A above) until it clicks into place. Hard hat mount attachment (The two prongs slide into the bottom cavity.) 4. Taking the Edge with the assembled hard hat attachments, slide into the side of hard hat. It will fit snuggly into the hard hat opening. Slide the two-sided prongs into the hard-hat opening. 44 APPENDIX Appendix A A SPECIFICATIONS **All specifications subject to change Standards ANSI S1.25 Personal Noise Dosimeters IEC61252 Personal Sound Exposure Meters RoHS compliant Intrinsic safety: EN 60079-0:2006, EN 60079-11:2007, EN 60079-26:2007 IECEx certification number: SIM 08.0012 ATEX Directive 94/9/EC for use in Potentially Explosive Atmosphere certification number: Sira 09ATEX2269 CSA International (US and Canada) certificate number: 2283414 MSHA Approval number: 18-A100008-0 Safety Markings Manufacturer Quest Technologies a 3M company Equipment/model eg5 Dosimeter Code Ex ia I/IIC 143ºC IP65 Ambient temp. range: -10ºC<Tamb<+50ºC (Alternate Code) Ex ia I/IIC T4 IP65 Ambient temp. range: -10ºC<Tamb<+40ºC Certificate number IECEx SIM 08.0012 Maximum charge input voltage Um=5.6V Mechanical characteristics Housing Plastic case with black, gray check background and red outlined buttons. Size 3.5” long x 2.1” wide x .75” thick (without microphone) (88 mm long x 53 mm wide x 19 mm thick) Weight 2.5 oz (71 g), less mounting device 45 Appendix A Power/Electrical characteristics Life Up to 40 hours of continuous operation at normal operation without LED activated under reference to environmental conditions when full capacity batteries are installed. It is recommended to charge the battery frequently for maximum efficiency. Type Lithium Polymer (Flat cell) Memory capacity 120 hours Environmental effects The typical time interval needed to stabilize after changes in environmental conditions is 5 minutes for each 10 ºC change. Temperature Operating +14 ºF to + 122 ºF (-10 ºC to + 50 ºC) for 143ºC I.S. rating. +14 ºF to + 104 ºF (-10 ºC to + 40 ºC) for T4 I.S. rating. Storage -13 ºF to + 140 ºF (-25 ºC to + 60 ºC). Humidity Range 0 to 95% Non-Condensing User Interface Display Size: 128 X 64 graphic Keypad 4 keys Up arrow, down arrow, run/stop, on/off enter. 46 Appendix A EdgeDock1 and EdgeDock5 EdgeDock1 and EdgeDock5 are powered by a 12-volt charger adapter with international plug adapters. The backside of the Edge slides into the hook of the EdgeDock1 or EdgeDock5 with the mounting clasps rotating to a 90 degree angle (which will rest on a table/work area). Additionally, the EdgeDock1 (or EdgeDock5) are equipped with two single screw slots for wall mounting purposes. Physical attributes of EdgeDock1 and EdgeDock5 LED amber indicator Indicates EdgeDock1 or EdgeDock5 is “powered on”. (Lower of the 2 shown led’s). LED Red indicator and LED Green indicator Signifies status of charging. Flashing red indicates charging. Solid green indicates charging is complete. Size of EdgeDock1 2.75” x 2.75” x 2.2” (6.99 cm x 6.99 cm x 5.6 cm) 2.75” 2.75” 2.75” Size of EdgeDock5 12.75” x 2.2” x 2.75” (32.29 cm x 5.08 cm x 6.99 cm) 2.75” 12.75” 2.2” 47 Appendix A Measurements Types Displayed Data and status indicators SPL, Average value (LAVG or Leq), Maximum value (LMX), Minimum value (LMN), Peak Value (LCPK), Exposure, Run Time, TWA, UL Time, LC-A Measurement parameters Dosimeters Up to three dosimeters at once (eg5), each with its own assignable profile (via DMS only). RMS Range 70 to 140 dB RMS Weighting A or C weighting RMS Time Response Fast or Slow Exchange Rate (ER) 3 dB, 4 dB, or 5 dB Peak Range 110 dB to 143 dB Peak Weighting Criterion Levels A, C or Z weighting 70 to 90 dB in 1 dB increments Threshold 70 to 90 db in 1 dB increments Upper Limit (UL) 70 to 140 dB in 1 dB increments 48 Appendix A Calibration Pre-calibration When performed, valid prior to the start of the study. Post-calibration When performed, valid for the previous study. Storage Calibrations for a study are stored in the related study file. Calibrator requirement Calibrations should be performed at 114 dB at 1kHz. Communications The Edge communicates via the EdgeDock1 and/or the EdgeDock5. Communications is supported via USB cable from the docking station to the PC. Special functions Security Key sequence protection through the keypad when running. Auto-Run May be programmed via DMS. Logging Data logging which includes LAVG/Leq, LMX, LCPK 49 Appendix A Edge Block Diagram Analog Board 50 Appendix A Edge Block Diagram (continued) 51 Appendix A 3M Service 3M Service Contacting 3M Should your 3M equipment need to be returned for repair or for recalibration, please contact the service department at the following number or access the online form via the website. For technical issues, please contact Technical Support. Service Department and Technical Support: 1 (800) 245-0779. Fax: 1 (262) 567-4047. Office hours are 8:00 a.m. to 5:00 p.m. United States Central. E-mail: [email protected] Internet: www.3M.com/detection International customers Contact your local, factory-authorized distributor from whom the product was purchased. You can obtain the name and contact information of your local factory-authorized distributor from 3M by using the e-mail, telephone, or fax information given under “Contacting 3M” above. Warranty 3M warrants our instruments to be free from defects in materials and workmanship for one year under normal conditions of use and service. For United States customers, we will replace or repair (our option) defective instruments at no charge, excluding batteries, abuse, misuse, alterations, physical damage, or instruments previously repaired by other than 3M. Microphones, sensors, printers, and chart recorders may have shorter or longer warranty periods. This warranty states our total obligation in place of any other warranties expresses or implied. Our warranty does not include any liability or obligation directly resulting from any defective instrument or product or any associated damages, injuries, or property loss, including loss of use or measurement data. For warranty outside the United States, a minimum of one year warranty, applies subject to the same limitation and exceptions as above with service provided or arranged through the authorized 3M distributor or our 3M European Service Laboratory. Foreign purchases should contact the local 3authorized sales agent for details. APPENDIX 52 Appendix B Glossary of Terms B Background Noise, effects of Background noise can cause considerable error in measurement when its level is high relative to the level of a noise source of interest. If you can make measurements both with and without the contribution of a noise source of interest, you can mathematically subtract the background noise from the combined measurement, yielding the level of the noise source of interest alone. The accuracy of this determination improves as the difference between the two measurements increases. To remove background noise 1. Obtain a measurement that includes the contribution of the noise source of interest (the combined measurement). 2. Make a second measurement under exactly the same conditions as in Step 1 but without the presence of the noise source of interest (the background noise measurement). 3. Determine the decibel difference between these two measurements. 4. Find that difference on the x-axis of the figure below. 5. Find the point on the curve directly above this difference. 6. Read the corresponding value on the y-axis for that point (the correction value). 7. Subtract the correction value from the combined measurement. Example: Measurements with and without the noise source of interest are 91 dB and 90 dB, respectively. For a difference of 1 dB, the background noise correction value is 7 dB. Therefore the level for the noise source of interest without the noisy background is 84 dB. 53 Appendix B C-A Relative Response (dB) The C-A measurement is an LAVG that enhances the low- frequency components of the sound signal. It is the result of subtracting an A-weighted LAVG from a simultaneously collected C-weighted LAVG and is sometimes used as the NRR (noise reduction rating) factor to determine if hearing protection devices are adequate for usage in the field. Frequency (Hz) Figure B-1: C-A weighting response curve Combining Noise sources Because sound levels are measured in decibels they cannot be simply added together. A sound level of 90dB plus 90dB does not yield 180dB but rather 93dB. The procedure for mathematically determining a combined level of sound from independent measurements made for two noise sources is given below. 1. Make independent measurements for both noise sources, where each exists without the presence of the other. 2. Determine the decibel difference between these two measurements. 3. Find that difference on the x-axis of the figure below. 4. Find the point on the curve directly above this difference. 5. Read the corresponding value on the y-axis for that point (the Amount to Add). 6. Add this value to the larger of the two measurements. Example: Independent measurements for the two noise sources yielded levels of 90 dB and 91 dB. For a difference of 1 dB, the correction factor taken from the curve below is 2.5 dB. Therefore the combined level when these two sound sources are present in the measurement area at the same time 93.5 dB. Appendix B 54 Crest Factor Crest Factor is the ratio of the instantaneous peak value of a wave to its RMS value. This is a performance specification of a meter’s ability to process signals that have peaks that are substantially higher than their RMS averages. Criterion Level (CL) Criterion level is the average SPL that will result in a 100% dose over the Criterion time, usually 8 hours. The Criterion Level is typically set by a regulating agency, such as OSHA, and is not usually applicable for community noise monitoring. Examples: OSHA mandates the Criterion Level (maximum allowable accumulated noise exposure) to be 90 dB for 8 hours. For an 8-hour sample, an average level (LAVG) of 90 dB will result in 100% dose. For the OSHA HEARING CONSERVATION AMENDMENT, the “action level” is 85 dB for 8 hours. This would result in a 50% dose reading. Note that the Criterion Level has not changed. (If the Criterion Level were changed to 85 dB then an 8-hour average of 85 dB would result in 100% dose.) Criterion Time The time over which the Criterion Level is established, generally 8 hours. Decibel (dB) Sound Level Meters use the decibel as the unit of measure known as Sound Pressure Level (SPL). SPL uses the ratio between a reference level of 20 microPascals (.00002 Pascals) and the level being measured. SPL = 20 log (measured level/reference level). Example: the SPL for 1 Pascal is 20 log (1 Pascal/.00002 Pascal) = 94dB 20 microPascals (.00002 Pascals) is considered the average threshold of hearing. A whisper is about 20 dB. A normal conversation is typically from 60 to 70 dB, and a noisy factory from 90 to 100 dB. Loud thunder is approximately 110 dB, and 120 dB borders on the threshold of pain. Dose Related to the Criterion Level, a dose reading of 100% is the maximum allowable exposure to accumulated noise. For OSHA, 100% dose occurs for an average sound level of 90 dB over an 8 hour period (or any equivalent exposure). By using a TWA reading rather than the average sound level, the time period is no longer explicitly needed. A TWA of 90 dB is the equivalent of 100% dose. The dose will double (halve) every time the TWA increases (decreases) by the Exchange Rate. Example: OSHA uses an Exchange Rate of 5 dB. Suppose the TWA is 100 dB. The dose would double for each 5 dB increase over the Criterion Level of 90 dB. The resulting dose is therefore 400%. If the TWA was instead equal to 80 dB then the dose would halve for each 5 dB below the Criterion Level. The resulting dose would be 25%. When taking noise samples less that the full workday, dose is an easy number to work with because it is linear with respect to time. Example: If a 0.5-hour sample results in 9% dose and the workday is 7.5 hours long, then the dose for the full workday would be a 135% dose (7.5 / 0.5 x 9%). This is computed making the assumption that the sampled noise will continue at the same levels for the full 7.5-hour workday. 55 Appendix B Exchange Rate (ER – also known as the Doubling Rate) Exchange rate refers to how the sound energy is averaged over time. (Also, referred to as Doubling Rate.) Using the decibel scale, every time the sound energy doubles, the measured level increases by 3dB. This is the 3dB exchange rate that most of the world uses. For every increase of 3dB in the time weighted average, the measured DOSE would double. Some organizations such as OSHA in the U.S. have argued that the human ear self compensates for changing noise levels and they felt that the 3dB exchange rate should be changed to more closely match the response of the human ear. OSHA currently uses a 5dB exchange rate, which would mean that the reported DOSE would double with every 5dB increase in the time weighted average. The exchange rate affects the integrated reading LAVG, DOSE, and TWA but does not affect the instantaneous sound level. Field Calibration (vs. Factory Calibration), pre-calibration, post-calibration To be sure the dosimeter is functioning within specified tolerance limits, it should be returned to the factory annually for a factory recalibration. To verify that the dosimeter is measuring properly during normal use, field calibrations should be performed. Pre-calibration is performed prior to any data being recorded by the dosimeter. During a pre-calibration, the dosimeter level may be adjusted to match the calibrator output level. Post-calibration is a simple verification that the instrument has remained in calibration throughout the measurement period. Free field setting (microphone) Measurements made in an area without sound reflections, diffractions and absorptions caused by nearby objects (including the operator). Sound waves are free to spread out continuously, like ripples on a pond, without reflection. When making free field measurements with a dosimeter set up for use as a sound level meter, the microphone is typically pointed directly at the sound source. Hearing Conservation (HC) The Occupational Safety and Health Administration (OSHA) and Mine Safety and Health Administration (MSHA) provide regulatory standards for hearing conservation programs. In addition, the American Conference of Governmental Industrial Hygienists (ACGIH) provides industrial standards for hearing conservation programs. http://www.osha.gov/ , http://www.msha.gov/ , http://www.acgih.org/home.htm Hertz (Hz) Unit of vibration frequency in cycles per second. Lavg (Average Level) Lavg is the average sound level measured over the run time. This becomes a bit confusing when thresholds are used. Any sound below the threshold is not included in this average. Remember that sound is measured in the logarithmic scale of decibels therefore the average cannot be computed by simply .adding the levels and dividing by the number of samples. When averaging decibels, short durations of high levels can significantly contribute to the average level. Example: Assume the threshold is set to 80 dB and the Exchange Rate is 5 dB (the settings of OSHA’s Hearing Conservation Amendment). Consider taking a one-hour noise measurement in an office where the A-weighted sound level was typically between 50 dB and 70 dB. If the sound level never exceeded the 80 dB threshold during the one hour period, then the Lavg would not indicate any reading at all. If 80 dB was exceeded for only a few seconds due to a telephone ringing near the instrument, then only those seconds will contribute to the Lavg resulting in a level perhaps around 40 dB (notably lower than the actual levels in the environment). Lep,d Daily personal noise exposure level. Leq (Equivalent Level) The true equivalent sound level measured over the run time. The term LEQ is functionally the same as LAVG except that it is only used when the Exchange Rate is set to 3 dB and the threshold is set to none. 56 Appendix B Logging (Also called Data Logging.) Certain measurements, such as average level (Lavg) and maximum level (max), can be recorded by the dosimeter at regular intervals. For example: A dosimeter is set to log Lavg and max at one minute logging intervals. If the dosimeter runs for one hour, then it would log 60 Lavg results and 60 max levels. You would be able to see the average and maximum levels for each minute of the one hour run time. Maximum Level (Lmax) The highest sampled sound level during the instrument’s run time allowing for the unit’s Response Time setting (Fast or Slow). Measurement Range The decibel range within which the unit’s measurements are valid. Minimum Level (Lmin) The lowest sampled sound level during the instrument’s run time allowing for the unit’s Response Time setting (Fast or Slow). Noise Floor In a “Perfectly Quiet” room, the electrical noise produced by the microphone is approximately 35 dB on A-weighting and 45 dB on C-weighting. These levels are known as the Noise Floor of the instrument. The Noise Floor can cause inaccurate measurements at low measurement levels. Measurements must always be at least 5 dB above the Noise Floor to be valid. Therefore, the lowest valid measurements of the dosimeter are approximately 40 dB on A-Weighting and 50 dB on CWeighting. Peak Level Peak is the highest instantaneous sound level that the microphone detects. Unlike the Max Level, the peak is detected independently of the unit’s Response Time setting (Fast or Slow). Example: The peak circuitry is very sensitive. Test this by simply blowing across the microphone. You will notice that the peak reading may be 120 dB or greater. When taking a longterm noise sample (such as a typical 8-hour workday sample for OSHA compliance), the peak level is often very high. Because brushing the microphone over a shirt collar or accidentally bumping it can cause such a high reading, the user must be careful of placing too much emphasis on the reading. PEL (Permissible Exposure Level) The A-weighted sound level at which exposure for a Criterion Time, typically eight hours, accumulates a 100% noise dose. Projected Time The variable amount of time used to make a projected dose calculation from an actual dose measurement. Random incidence (microphone) This only applies to Class/Type 1 microphones. Measurements made in an area where sound waves are coming from all directions, including reflections and diffractions. When the dosimeter is being used as a sound level meter in an area where reflections and diffractions from nearby objects are present, use the Random Incidence Corrector with the microphone, and angle the microphone at approximately 70 degrees. Most personal noise dosimetry applications do not require the random incidence corrector, since they are not measured with a Class/Type 1 microphone. 57 Appendix B Response Time The response determines how quickly the unit responds to fluctuating noise. Fast has a time constant of 125 milliseconds. Slow has a time constant of 1 second. Example: Typically, noise is not constant. If you were to try to read the sound level without a response time, the readings would fluctuate so much that determining the actual level would be extremely difficult. Using a response of slow or fast simply smoothes the noise fluctuation and makes the sound level easier to work with. While the terms slow and fast have very specific meanings (time constraints), they work very much as you would expect. The fast response would result in a more fluctuating sound level reading than would the slow response. The OSHA regulations require the slow response. RMS (Root Mean Square) The RMS voltage of a signal is computed by squaring the instantaneous voltage, integrating over the desired time, and taking the square root. Simply put, the RMS values are the results from the dosimeter with the response time and weighting settings taken into account. SEL/Lxe (Sound Exposure Level) The sound exposure level averages the sampled sound over a one second period. Assuming the sampled run time to be greater than one second, SEL is the equivalent one-second noise that would be equal in energy to the noise that was sampled. SEL is typically measured using a 3dB exchange rate without a threshold. SEL is not used by OSHA. Example: Suppose you wanted to measure in a location next to railroad tracks, which also happened to be in the takeoff path of an airport. A train passes by taking 10 minutes with an average sound level of 82dB. A jet passes overhead taking 45 seconds with an average level of 96dB. Which of these events results in more sound energy? You can answer the question by comparing their SEL readings, which compress each event into an equivalent one-second occurrence. SEL for the train = 109.7dB, SEL for the jet = 112.5dB. Threshold The threshold affects the Lavg, TWA, and Dose measurements. All sound below the threshold is considered nonexistent noise for the averaging and integrating functions. The threshold does not affect measurements in the sound level mode. OSHA uses two different thresholds. The original Occupational Noise Exposure Standard (1971) used a 90dB threshold and called for engineering controls to reduce the noise levels if the eight-hour TWA was greater than 90dB. The Hearing Conservation Amendment (1983) uses an 80dB threshold and calls for a hearing conservation program to be put in place if the eight-hour TWA exceeds 85dB (50% dose). The Hearing Conservation Amendment is the more stringent of the two rulings and is what most US industrial users are concerned with. Example: With an 80dB threshold, suppose you placed a 79dB calibrator on the unit for a period of time. Because all of the noise is below the threshold, there would be no average (you can think of it as an average of 0dB). If the calibrator were 80dB instead, then the average would be 80dB. On histogram printouts, typically 1 minute (or other specified increment) averages are printed. Because real noise fluctuates, it is quite possible to have an average level below the threshold. This also applies for the overall Lavg. TWA (Time Weighted Average) The time weighted average always averages the sampled sound over an 8-hour period. TWA starts at zero and grows. The TWA is less than the Lavg for a duration of less than eight hours, exactly equal to the Lavg at eight hours, and grows higher than Lavg after eight hours. TWA represents a constant sound level lasting eight hours that would result in the equivalent sound energy as the noise that was sampled. Example: Think of TWA as having a large 8-hour container that stores sound energy. If you run a dosimeter for 2 hours, your Lavg is the average level for those 2 hours - consider this a smaller 2-hour container filled with sound energy. For TWA, take the smaller 2-hour container and pour that energy into the larger 8 hour TWA container. The TWA level will be lower. Again, TWA is ALWAYS based on the 8-hour container. When measuring using OSHA’s guidelines, TWA is the proper number to report provided that the full work shift was measured. Example: If the work shift is 6.5 hours long, 58 Appendix B then measure for the entire 6.5 hours. TWA is the correct level to report to OSHA. It does not have to be modified. Weighting (A, C, Z, etc.) “A”, “B”, “C”, “Z” and LINEAR are the standard weighting networks available. These are frequency filters that cover the frequency range of human hearing (20Hz to 20 kHz). “A” weighting is the most commonly used filter in both industrial noise applications (OSHA) and community noise regulations. “A” weighted measurements are often reported as dBA. The “A” weighted filter attempts to make the dosimeter respond closer to the way the human ear hears. It attenuates the frequencies below several hundred hertz as well as the high frequencies above six thousand hertz. “B” weighting is similar to “A” weighting but with less attenuation. The “B” weighting is very seldom, if ever, used. The “C” weighting provides a fairly flat frequency response with only slight attenuation of the very high and very low frequencies. “C” weighting is intended to represent how the ear perceives sound at high decibel levels and is often used as a “flat” response when LINEAR is not available. “C” weighted measurements are often reported as dBC. “Z” is zero weighting, with no weighting across the frequency range of human hearing. LINEAR is thought of as having a flat frequency response curve over the entire measurement frequency range. LINEAR is most commonly found on upper model sound level meters and is typically used when performing octave band filter analysis. Upper Limit (UL) A type of measurement parameter setting in which the user selects a certain decibel level. The dosimeter will then record the amount of time that the sound level was at or greater than the preset level. This time is then recorded as “UL Time” Windscreen A windscreen is a covering for the microphone that reduces disturbances caused by wind and direct contact with other surfaces. The windscreen is placed over the microphone when taking measurements to help prevent false high readings due to wind blowing across the microphone or objects (hair, clothing, etc.) brushing against the microphone. The windscreen will also help protect the microphone from dust and debris. APPENDIX 59 Appendix C Appendix C Measurement equations C 60 Appendix C Variables used in equations 61 INDEX Index INDEX A Attaching the Edge ....................................................................... 29 B Background Noise, effects of Defined .......................................................................... 52 Battery Checking ....................................................................... 30 Battery charge status .......................................................... 35 Battery indicator icon .......................................................... 30 C c-a defined .......................................................................... 53 c-a measurement Setting up ...................................................................... 41 Calibrate your meter............................................................ 31 Calibration Defined .......................................................................... 55 Charging Battery ........................................................................... 11 Combining Noise sources Defined .......................................................................... 53 Communicating Edge Dock..................................................................... 11 Crest Factor Defined .......................................................................... 54 Criterion Level (CL) Defined .......................................................................... 54 Criterion Time Defined .......................................................................... 54 D Decibel (dB) Defined .......................................................................... 54 Docking station.................................................................... 21 Components .................................................................. 12 Dose Defined .......................................................................... 54 Dose % Indicator LED........................................................... 9 Doubling Rate Defined .......................................................................... 55 Download ............................................................................ 21 DMS Heartbeat enabled ........................................................ 42 Threshold enabled ........................................................ 42 Viewing and Downloading………………………………..37 E Edge Positioning ..................................................................... 29 Edge Dock New hardware wizard.................................................. 22 EdgeDock1 .......................................................................... 37 EdgeDock1 and EdgeDock5 ............................................... 21 eg46 eg5 Memory storage ............................................................ 20 model explained .............................................................. 6 Exchange Rate Defined .......................................................................... 55 Export data .......................................................................... 21 F Free field setting (microphone) Defined .......................................................................... 55 H Hearing Conservation Defined .......................................................................... 55 Heartbeat ............................................................................. 42 Hertz Defined .......................................................................... 55 L Lavg Defined .......................................................................... 55 LED indicator Flashing amber light ........................................................ 9 Flashing green light ......................................................... 9 setting in QSP-II .............................................................. 9 Lep,d Defined .......................................................................... 55 Leq Defined .......................................................................... 55 Lmin Defined .......................................................................... 56 Load your studies ............................................................. 37 Loading your studies ........................................................... 37 Locking ................................................................................ 36 About ............................................................................. 35 Logging ................................................................................ 48 Defined .......................................................................... 56 62 Index M Maximum Level Defined .......................................................................... 56 Measurement Range Defined .......................................................................... 56 Memory storage symbol................................................... 20 Mount the docking station ................................................... 15 N Noise Floor Defined .......................................................................... 56 O Options menu ................................................................ 32, 33 Overload .............................................................................. 35 P Peak Level Defined .......................................................................... 56 PEL Defined .......................................................................... 56 Power Turn off ............................................................................ 9 Turn on ............................................................................ 8 Projected Time Defined .......................................................................... 56 R Random incidence (microphone) Defined .......................................................................... 56 Reset ................................................................................... 32 Reset the meter................................................................... 32 Response Time Defined .......................................................................... 57 Retrieve data ....................................................................... 21 RMS Defined .......................................................................... 57 Run indicator ....................................................................... 34 Run mode ............................................................................ 35 Running a study Overview ....................................................................... 28 Running studies steps ............................................................................. 34 S Securing run mode............................................................ 36 SEL Defined .......................................................................... 57 Sound pressure ..................................................................... 3 Splash screen ...................................................................... 8 Standards .............................................................................. 3 Stop a noise study ............................................................ 35 Stop mode ........................................................................... 35 Symbol Battery power clock ....................................................... 20 Calendar ........................................................................ 20 memory storage ............................................................ 20 T Threshold Defined .......................................................................... 57 Threshold enabled............................................................... 42 TWA Defined .......................................................................... 57 U unlock mode ........................................................................ 36 Unlocking ........................................................................... 36 Upper Limit (UL) .................................................................. 58 USB cable...................................................................... 21, 37 V Views ................................................................................... 18 W Weighting (A, C, Z, etc.) Defined .......................................................................... 58 Windscreen Defined .......................................................................... 58 About Us 3M Detection Solutions is a world class manufacturer of rugged, reliable instrumentation and software systems that help monitor and evaluate occupational and environmental health and safety hazards, including noise dosimetry, sound level monitoring, heat stress, indoor air quality and select toxic/combustible gases. The 3M Detection brand of instrumentation is used by safety and industrial hygiene professionals to help comply with applicable occupational standards and regulations. About 3M Personal Safety 3M offers a comprehensive, diverse portfolio of Personal Safety solutions providing respiratory protection, hearing protection, fall protection, reflective materials for high visibility, protective clothing, protective eyewear, head and face protection, welding helmets, and other adjacent products and solutions such as tactical safety equipment, detection, monitoring equipment, active communications equipment and compliance management. In 2012, 3M celebrated 40 years of safety leadership – recognizing the company’s respiratory and hearing protection solutions introduced in 1972. Visit www.3M.com/PPESafety or http://m.3m.com/PPESafety for details. 3M Personal Safety Division 3M Detection Solutions 1060 Corporate Center Drive Occonomowoc, WI 53066 ISO 9001 Registered Company ISO 17025 Accredited Calibration Lab Customer Service: 262-567-9157 Toll Free: 800-245-0779 www.3M.com/detection 3M is a trademark of 3M Company used under license in Canada. Please recycle. Printed in USA. © 2013 3M Company. All rights reserved. 053-669, Rev.H 01/13