1
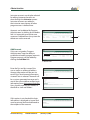
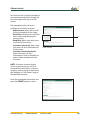
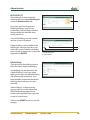
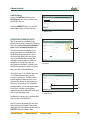
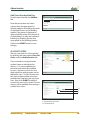
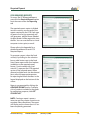
Administration
The Administration tab includes menu
items that are program-level settings.
A
A. Administration Tab
Program Details
The program details can be viewed by
selecting the menu option Program
Details under the Administration tab.
This area presents general information
about your program. This information
is view-only for users of the system. If
errors exist please contact the ICCB for
correction.
B
B. Program Details Option in the Drop-down
Navigation
Program Accounts
The program accounts can be viewed
by selecting the menu option Program
Accounts under the Administration tab.
C
C. Program Accounts Option in Drop-down
Navigation
Account List
Each of the program accounts is listed
for viewing under Program Accounts
and can be displayed for editing by
clicking on the link provided on name
that is listed.
www.iccbdaisi.org
FY08 User Manual
D
D. View/Edit Details Link
(January 1, 2007)
102
Administration
Instructor accounts can also be selected
for editing, however, the edits are
done through the Instructor screens.
Instructor accounts are added in
the instructor area whereas all other
program access is defined here.
Accounts can be deleted by Program
Administrators by clicking on the delete
link. It is important to note that once
someone is deleted from the system the
delete can not be reversed.
E
E. Delete Link
Add Account
Only users assigned as Program
Administrators have the ability to
establish and modify program accounts.
Program accounts can be added by
clicking the Add New link.
F
F. Add New Link
Enter the first and last name of the
user as well as a valid email address.
Account information will be sent via
email if the “Send account information
via email” box is selected. The email will
be a system-generated message and is
sent to the user to deliver account login
information from [email protected].
Users should watch for this address in
their Bulk or Junk mail folders.
G
G. Send Email Selection
If this option is not checked, the login
information is displayed on screen and
must be printed and hand-delivered to
the recipient of the account.
www.iccbdaisi.org
FY08 User Manual
(January 1, 2007)
103
Administration
New accounts are assigned a temporary
password and are forced to change the
password upon initial sign-in to the
system.
The appropriate roles and access
privileges must also be assigned.
• Administrator: allows access to all
of the functionality of the system.
• Data Entry: allows access to all data
entry areas except the program
accounts area.
• Read Only: allows view-only access
to all areas of the system.
• Instructor (view only): allows viewonly access to class information for
the instructor.
• Instructor (enter attendance):
allows view access to class
information as well as the ability to
enter student attendance for the
instructor.
H
H. Role Selection
Note: Instructor accounts display
on this screen, but are not set up or
removed from this display. Instructor
accounts must be set up or removed in
the “Add New” or “Edit Details” page of
the specified instructor.
Enter the appropriate information and
press the SUBMIT button to save it.
www.iccbdaisi.org
FY08 User Manual
(January 1, 2007)
104
Administration
Building List
The building list can be viewed by
selecting the menu option Building List
under the Administration tab.
Every class must be assigned to a
building. Buildings must first be
established in the building list before
being available for selection when
setting up classes.
I
I. Building List Option in Drop-down Navigation
A list of all buildings that are entered
into the system is displayed.
Delete building is only available if the
building has not been used for a class
within the system. To delete a building,
place a check in the box next to location
type and click DELETE.
J
K
J. Edit Building Link
K. Delete Button
Edit Building
Click the link on the building name to
edit information about the building.
One building may be selected as the
Default Building. In this case, when
adding a new class, the default building
will automatically be entered. Users
have the ability to override the default
building when entering a new class
manually.
If the building is a subcontracting
agency, select yes in the subcontract
field. Subcontracting agencies are
entities receiving funds from a grantee
as part of a consortium.
Click on the SUBMIT button to save the
changes.
www.iccbdaisi.org
FY08 User Manual
(January 1, 2007)
105
Administration
Add Building
Select the Add New link from the
Building List sub-menu to add a new
building to the list.
L
Click the SUBMIT button to save the
information once its been entered.
L. Add New Link
Given/Unscheduled Days
The Given and Unscheduled Days
default area can be viewed by selecting
the menu option Given/Unscheduled
Days under the Administration tab.
This area provides the ability to set
up given and/or unscheduled days
in advance for the program. Users
also have the ability to enter given
and unscheduled days during the
attendance entry process, with the
exception of Given Days that are
designated as Holidays. Holidays are
limited and program-wide; as a result
they must be established here.
Given days are 1) 13 holidays per year,
2) staff development days, and 3)
emergency closings. Holidays allow
each program to determine its own
closure days based on the holidays it
observes. A maximum of 13 holidays
are allowed for use by a program each
Fiscal Year. Holidays are programspecific and are not allowed to be used
with single buildings only.
M
M. Given/Unscheduled Option in Drop-down
Navigation
N
O
N. Delete Checkbox
O. Delete Button
In addition to given days, unscheduled
days are also recorded here.
The first screen displayed lists the days
that have been assigned. Click on the
check box next to a date and click on the
DELETE button to delete a date.
www.iccbdaisi.org
FY08 User Manual
(January 1, 2007)
106
Administration
Add Given/Unscheduled Day
To add a new date click the Add New
link.
Enter the correct date and select
a reason from the drop-down list.
Holidays apply to all buildings, but each
of the other choices can be building
specific. If the option is displayed to
select a building select All to choose all
of the buildings or select the individual
buildings by checking the box that
corresponds to the building location.
Click on the SUBMIT button to save
changes.
P
P. Add New Link
Class Exit Codes
The class exit codes list can be viewed
by selecting the menu option Class Exit
Codes under the Administration tab.
Q
Class exit codes are assigned when
students leave an individual class.
Reasons 1-12 are pre-defined class
exit codes and cannot be modified
by users. However, custom class exit
codes specific to each program can be
defined by users. To add a custom class
exit, enter a code number in the area
provided and a reason in the text input
area. Next, click SUBMIT to add the
custom class exit to the system. The new
reasons will be available when exiting a
student from a class.
Q. Class Exit Codes Option in Drop-down Navigation
R
S
T
R. Add Custom Exit Button
S. Custom Reason Text Field
T. Custom Exit Code
www.iccbdaisi.org
FY08 User Manual
(January 1, 2007)
107
Administration
As custom exit reasons are entered, they
are displayed in the column on the right
side of the screen. Clicking on the box
next to the reason and then clicking on
DELETE will remove the reason from
the list. A reason can only be deleted if it
has not been used for a student. If it has
been used, the checkbox will be grayed
out and delete will not be allowed.
U
U. Custom Exits List
Utilities
The Utilities provided under the
Administration tab are used to control
system-wide settings. To access the
utilities area, select the menu option
Utilities under the Administration tab.
V
V. Utilities Option in Drop-down Navigation
Set Fiscal Year
The system contains information for
more than one fiscal year. The system
will automatically operate in the current
fiscal year. However, if there is ever a
need to modify or enter data from a
previous fiscal year, users will need to
set the system back to the fiscal year
prior to make the change. To set the
system fiscal year, select the appropriate
fiscal year from the drop-down area and
click GO to save the change.
W
W. Set Fiscal Year Link
Note: The fiscal year modification is
only set for the current login session.
When the user logs out or the session
times out, the fiscal year will reset to the
current fiscal year.
www.iccbdaisi.org
FY08 User Manual
(January 1, 2007)
108
Administration
Instructor Custom Fields Setup
Up to twenty custom fields can be
defined to store instructor data. The text
that is typed into the fields is what will
display as the field name on the screens
for data entry. Click the SUBMIT button
to save the changes.
Note: The text labels appear on the
bottom of the screen as they will look in
the system.
X
X. Instructor Custom Fields Link
Student Custom Fields Setup
Up to twenty custom fields can be
defined to store student data. The text
that is typed into the fields is what will
display as the field name on the screens
for data entry. Click the SUBMIT button
to save the changes.
Note: The text labels appear on the
bottom of the screen as they will look in
the system.
www.iccbdaisi.org
FY08 User Manual
Y
Y. Student Custom Fields Link
(January 1, 2007)
109
Required Reports
Several reports will be made available
through this section of the system. As
reports are available they will be listed
in the drop-down menu under the
Reporting tab.
A
A. Reporting Tab
Error Check
The Error Check allows you to check the
validity of program data and search for
errors or warnings during the selected
fiscal year. To access the Error Check,
select the Error Check option under the
Reporting tab.
B
B. Error Check Option in Drop-down Navigation
Select the funding source (All or
Restricted/ICCB Funds Only) and the
activity (All or 7.5 hours of attendance)
and then select whether you want to
display all errors and warnings, just
errors, or just warnings. Click on SUBMIT
to process your request.
Any errors and/or warnings will be
displayed for review and correction.
Errors must be corrected in order for the
students (and units) to be included in
the required reports. Warnings should
be corrected, whenever possible, but do
not necessarily exclude students from
the required reports.
There is an update link provided for
each error message. Clicking on the link
will take you to the appropriate area to
correct the error.
Correct the error and submit the
changes. Then re-run the error check to
confirm the error has been corrected.
www.iccbdaisi.org
FY08 User Manual
(January 1, 2007)
110
Required Reports
ICCB Required Reports
To access the ICCB Required Reports
area, click the Required Reports option
from the menu under the Reporting
tab.
B
The required reports center is divided
into four sections, one for each of the
reports required by the ICCB. Each type
of report must be run separately and
will generate a .pdf file format. Adobe®
Acrobat Reader will be required to view
the files. You can save the files to a local
computer to view, print, or email.
Please refer to the Appendix for a
detailed breakdown of each ICCB
Required Report.
B. Required Reports Option in Drop-down Navigation
To generate a report, select the fund
source(s) by clicking on the selection
box or radio button next to the fund
listed. Some reports offer fund options
in addition to the required report
format. Funds marked with a red
asterisk (*) represent the ICCB required
version of the selected report. When
allowed, multiple funds can be selected.
Next, select the appropriate quarter
for reporting based on the dates in the
legend displayed on the bottom of the
screen.
Reports are generated by clicking the
GENERATE REPORT button. To display
a list of students included in the report
for verification purposes, click GET
STUDENT LIST.
Note: Creating a report is process
intensive and may require some time to
complete. Please be patient. The report
will display on the screen when it is has
been completely generated.
www.iccbdaisi.org
FY08 User Manual
(January 1, 2007)
111
Required Reports
Report Submission Schedule
The schedule for submitting signed reports to the ICCB is as follows:
Program Status Report
(Required Funds: Restricted Funds – 3405, 3410, 4800, 4805, 4815)
October 30th
January 30th
April 30th
July 30th
Enrollment Report
(Required Funds: 3405, 3410, 4800, 4805)
January 30th
July 30th
NRS Performance Report
(Required Funds: All Funds – 3405, 3410, 4800, 4805, 4815, 4900, 4910)
October 30th
January 30th
April 30th
July 30th
Public Assistance Master List Report (Quarterly)
(Required Funds: 3410 only)
October 30th
January 30th
April 30th
July 30th
Public Assistance Master List Report (Full Year)
(Required Funds: 3410 only)
July 30th
www.iccbdaisi.org
FY08 User Manual
(January 1, 2007)
112
Custom Reports
Custom Reports–Coming Soon
Query Feature–Coming Soon
Export Capabilities–Coming Soon
www.iccbdaisi.org
FY08 User Manual
(January 1, 2007)
113